Thanks all. I got the base sand color on it yesterday. Decals today and I hope to have some more pics up soon.
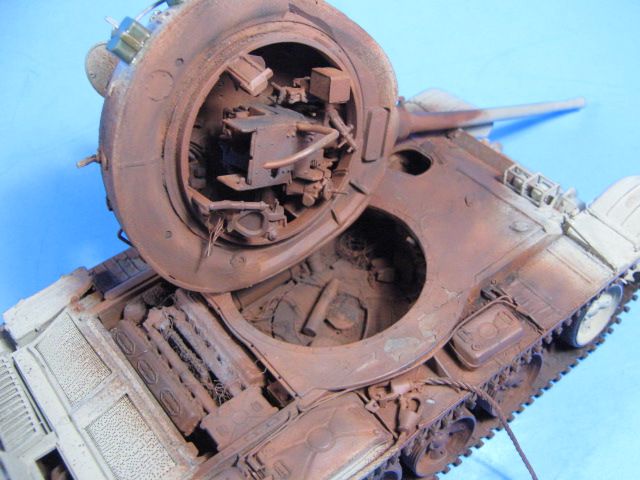
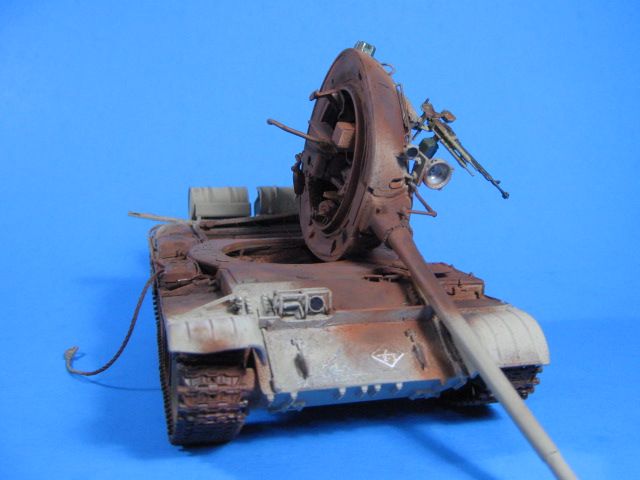
Looks good, what was the location / source of the blast which bent that frame behind the engine?I would have damage below it, to show the force. And, is the large hole the entrance or exit for the sabot round? Might be small going in, and big on the way out.
Sabot was small in, small out
The frame that is all bent up attaches to the engine deck that has separated from the hull. I am depicting that when the engine deck came off, it bent the vent frame as it flew off backwards.
Yup, I’m not visibly depicting an exit hole. It could have come out anywhere along the lower hull, covered by the road wheels, tracks, etc…
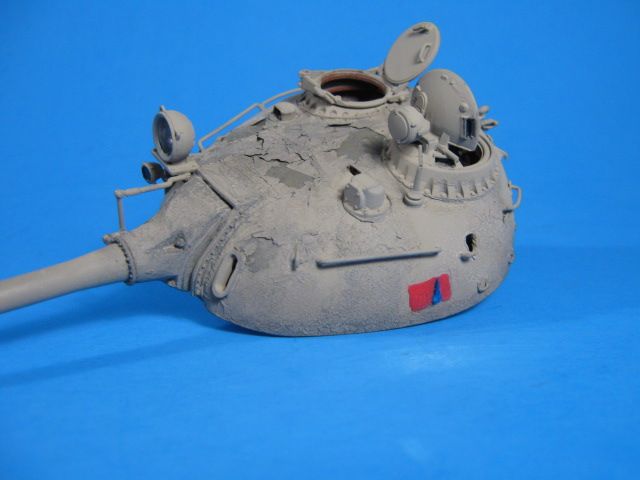
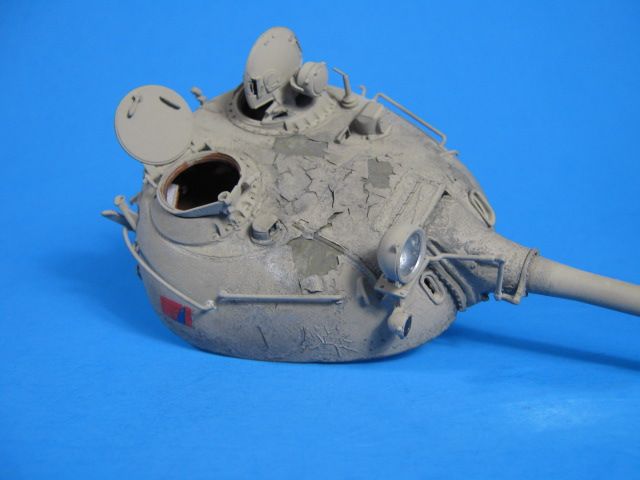
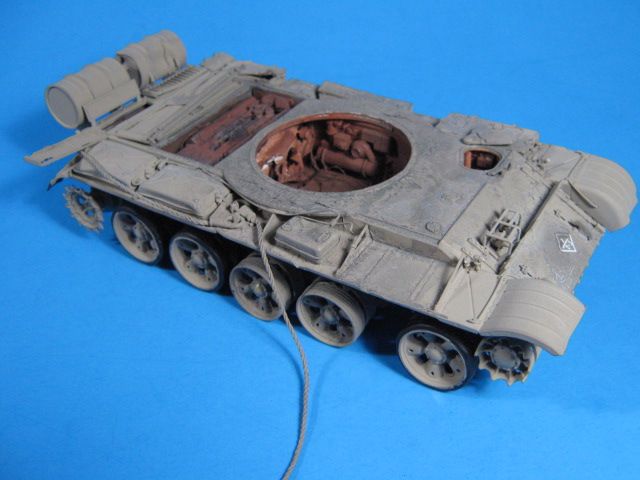
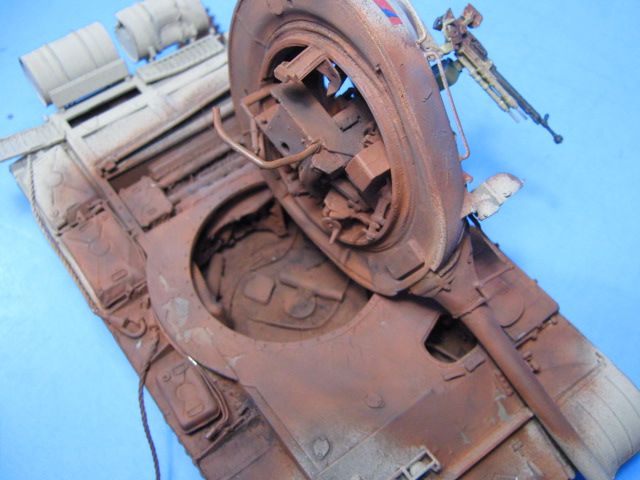
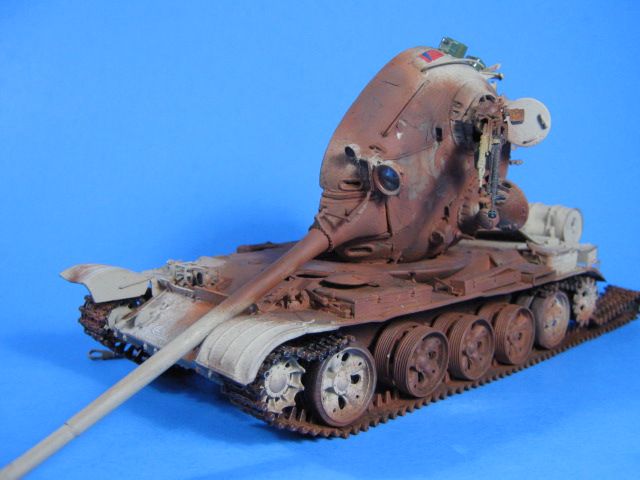
Not a lot of progress on it right now. I have painted the base sandy color on it and added markings. I have decided that since this year is the 30th anniversary of Operation Desert Storm, this will be an Iraqi T55 in from Sadam Hussain’s Republican Guard and have marked it accordingly. The Republican Guard red/blue “flag” has been painted on the turret sides and the hull rear. There is also a generic unit numbers on the front and rear of the hull. These may not be totally accurate, but it doesn’t represent any particular tank, so it is a representation of what they had.
I have also started distressing the paint by applying some of my nasty, dirty lacquer thinner brush cleaner over it. This blisters and peels the paint, just as fire will do. Once the rest of the rusty/burned weathering is applied, it should look pretty close to reality.
Here it is so far.

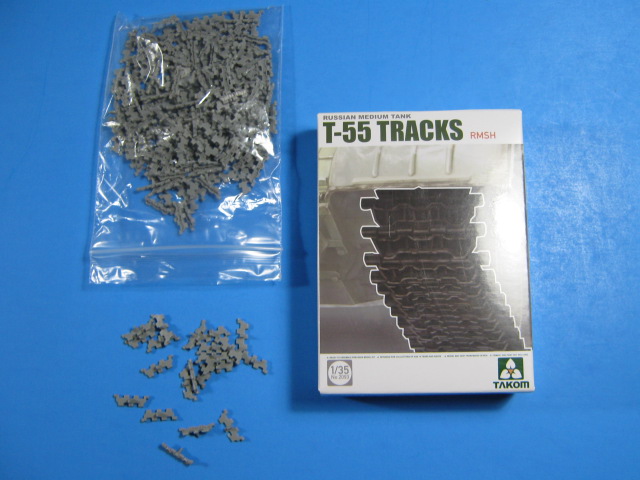
I am pretty much at a standstill though. I decided I didn’t want to mess with cutting off and cleaning up the MiniArt indi-link tracks on this one. So I am waiting to get a set of Tamiya vinyl tracks for it.
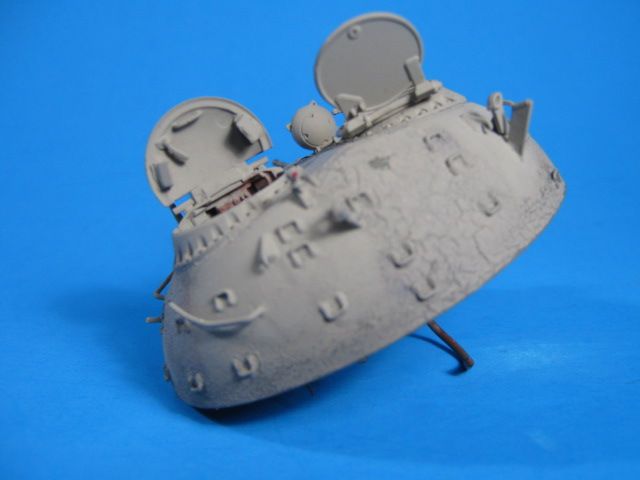
I have been trying to decide how to display it though. I have seen the below pic and thought it may be interesting like it.
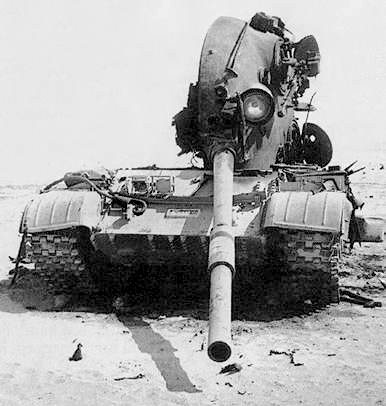
Another option is to have it either flat on it’s top like a turtle, or upside down like an overturned turtle. I think either of these ways hides a lot of the details.
What do you guys think? Thoughts? Opinions?
4 Likes
Wow coming along nicely Gino. I was gonna ask you how you got that peeled paint effect on the turret. Looks great!
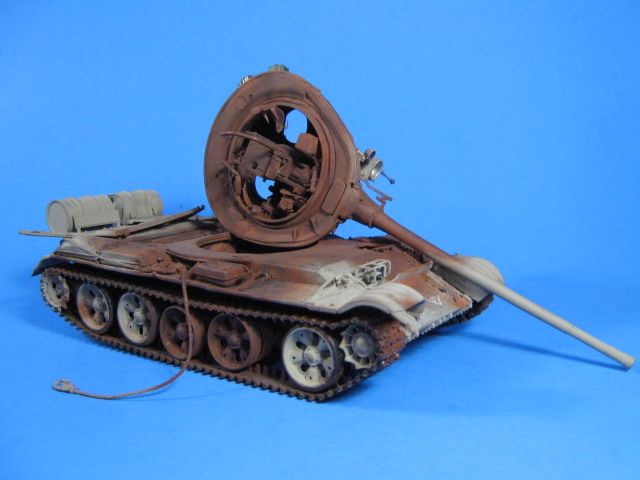
My personal favorite is the tank with the turret on its side, perched on the tank still.
Rich
I like the last pic best because you can see almost all the turret details on both top and bottom
Oh I do like the distressed paint effect! That is an excellent touch! I’ll add my vote to the turret on its side on top of the hull to show off the most detail. Although I do vaguely recall seeing one photo of one that came down barrel first into the sand and looked like some sort of lollipop… I’ll see if I can find the photo of that…
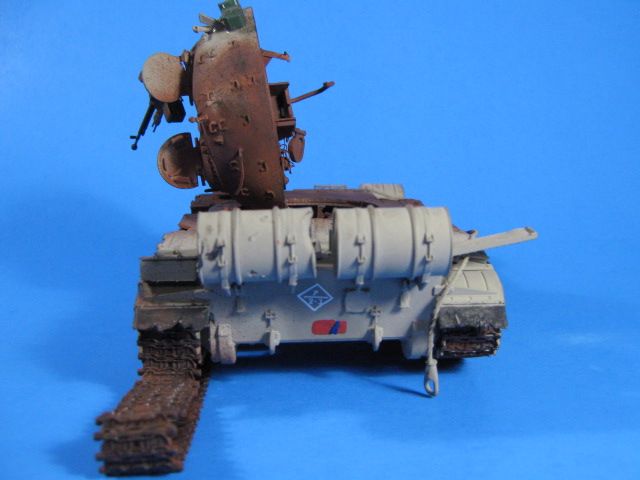
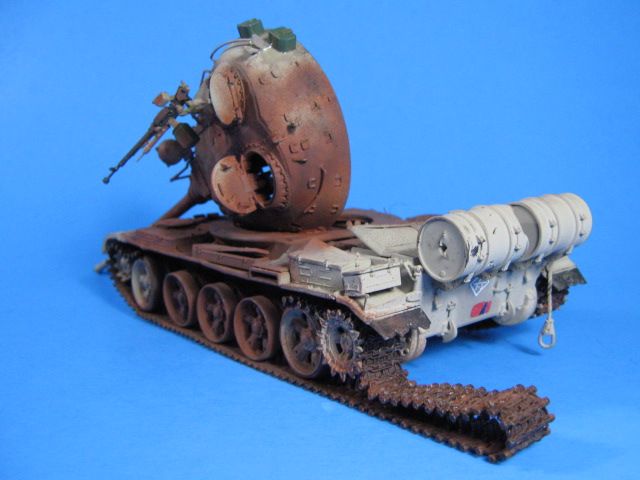
Thanks for the input guys. I really like the one below and think I will go with it. It will show all the added details I put in it well. I’ll keep you posted.
2 Likes
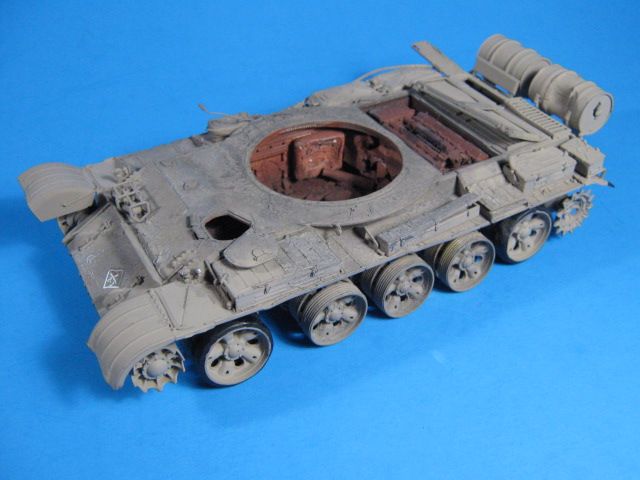
So after a respite, the build continues. I was waiting for rubber band tracks because I didn’t want to deal with the Mini-Art indi-links I had. I got the rubber band tracks and decided they weren’t what I wanted. I looked and found an awesome set of Takom T55 tracks that are ind-links, but each link is separate and there are no sprue attachment points. They are all ready to go, just glue them together.
Here are the Takom tracks.
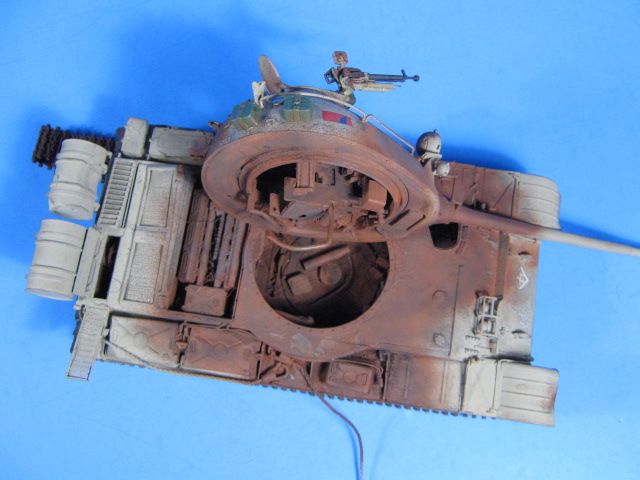
So I added them to the hull after assembling and painting them black as a base coat. I decided to do the left side run as a thrown track trailing off behind it.
Here it is, all burned up. I started by painting the burned area a dark rust color. Next I applied different chalk pastel in a few rusty colors, some black for soot, and some dark grey for variation. I did this liberally with lots of pastels to replicate flaked, burned, rusty metal. I think it is pretty successful.
I am thinking about putting it on a base with a couple Soldiers taking a picture in front of it, maybe with a M2A2 Bradley. We shall see.
15 Likes
I can only repeat what the others already said a lot. This is amazing work! To build a used, dirty tank is difficult enough, but to build a destroyed tank with an eye for all the details is the next level. Or maybe the next after the next …
Happy modelling!
Torsten
Cracking job. That is a bona fide burnt out wreck  like the split track, and it really is a great overall finish. All the hard work paid off. I think a neat little base will pop it up to the next level.
Along with the blown turret, the thrown track and draped cable create very nicely balanced focal points to your build. Excellent work!
—mike
This is awesome. I’m learning a lot watching your build…
I’m working on a miniart T-54 from Iran-Iraq for the forgotten wars campaign. I’m already wanting to do an interior kit for one. This is inspiring me with some ideas…
Looks great Gino. Everything looks spot on. I may have to get a set of those tracks too. They look great and seem to go together easy- right up my alley.
Thanks all. I am very satisfied with how it turned out. I’ll keep you posted on what I decide to do for a base.
Very nice!
Ken
Yeah that would be a cool idea to have a Bradley passing by or stopped with troops checking it over
That looks real good! Those Takom tracks are an excellent choice.
Enjoying your project, excellent subject, and so many variations depending on a million differing physical interactions. You have chosen a subject that has lots of reference material out there, good choice.