Richard,
Fantastic progress. While I can’t see the white motor mounts, the start to the fire wall looks great as does those modified headers.
Joel
Richard,
Fantastic progress. While I can’t see the white motor mounts, the start to the fire wall looks great as does those modified headers.
Joel
Sorry for the quality of the engine photo, I will post another latter.

Folks, I must apologise for my absence lately, I have started a new job and it’s been a hectic couple of weeks with training and meeting the client base.
It’s been about 3 weeks since my last progress summary, and in that time we’ve had out first completion and a new player joined the game. Congrats to David (Dixon66) on the first finished build for this Group Build with a lovely GT40, and welcome to Stephen (phantom_phanatic) with what I think is our first Sci-Fi crossover building the Blade Runner Police Car from Fujimi.
We are now 2 months in to our 6 month time frame, and here’s where we sit.
Dixon66 (David) - 2005 Ford GT - 1/25 Polar Lights kit - COMPLETED
Aussiereg (Damian) - 1957 Chev Nomad -1/24 Monogram Kit - Sub assemblies and body painted, clear parts, drive train and engine installed.
rv1963 (Robert) - 60’s Pontiac rebuild
Szmann (Gabriel) - VW Beetle Mk1, Suzuki Jimny, Mercedes 300SL Gullwing
Joel_W (Joel) - Shelby 427 Cobra - 1/24 Monogram Kit - Body painted, rolling chassis painted and dry-fit. Interior paint and detail under way
md72 (Mark - Ferrari Testarossa - 1/24 Monogram kit - Engine painted, detailed and test fitted.
Stickframe (Nick) - Ferrari, Porsche 959
Cosimodo (Michael) - 1915 LGOC London Bus - 1/35 MiniArt Kit
PasiAhopelto (Pasi) - '69 Ford Mustang - 1/25 Revell kit - Opened for inspection
Dixon66 (David) - Mad Max 1973 XB Ford GT Coupe
Hwa-Rang (Jesper) - The Persuaders Ferrari Dino 246GT - Body prepped for primer, engine assembled
SpeedyJ (Robert) - Mercedes Benz 170V Cabriolet B - 1/35 MiniArt Kit
tinbanger (Richard) - Model A Delivery Van (1931) - 1/16 MiniArt Kit - Gone all Frankenstein on us with a chopped top and parts from a funny car. Test fitting components and sub-assemblies.
IronHide (Arnel) -
North4003
Phantom_phanatic (Stephen) – Blade Runner Police Car – 1/24 Fujimi kit - Opened for inspection
If anybody has changed or firmed up their proposed builds, or spotted anything wrong in the list, please let me know.
Cheers, D
Richard,
No problem what’s so ever. As long as the engine mounts correctly and in the correct alignment in your next pictures, that’s what really counts.
Joel
D,
Congratulations on the new position. I sure hope that they know just how lucky they are to have landed you for their organization.
As for my Cobra, the interior is complete. Just haven’t had much time to take some pictures and do a quick update. Family issues have taken center front stage big time of late.
Joel
Joel
Thanks for adding me Damian.
I’m thinking of finishing the model as Deckard’s. Currently researching the finish, which appears to be a dark bronze rather than the bright red that the restored car currently wears. I’ve found some stills to back it up. Ertl also produced a small scale die-cast model as a movie tie-in range which is also in the same colour. I would assume that Ertl had access to the car or at least photos, so should be very close to the original colour. When my LHS reopens, I’m going in to check out what colours they have. Hopefully they’ll have something close.
I might add a simple LED circuit to light up the headlights and dash.
Tiny bits of Progress. I was afraid that the hollow seats and exhaust wouldn’t look right so I closed them up.
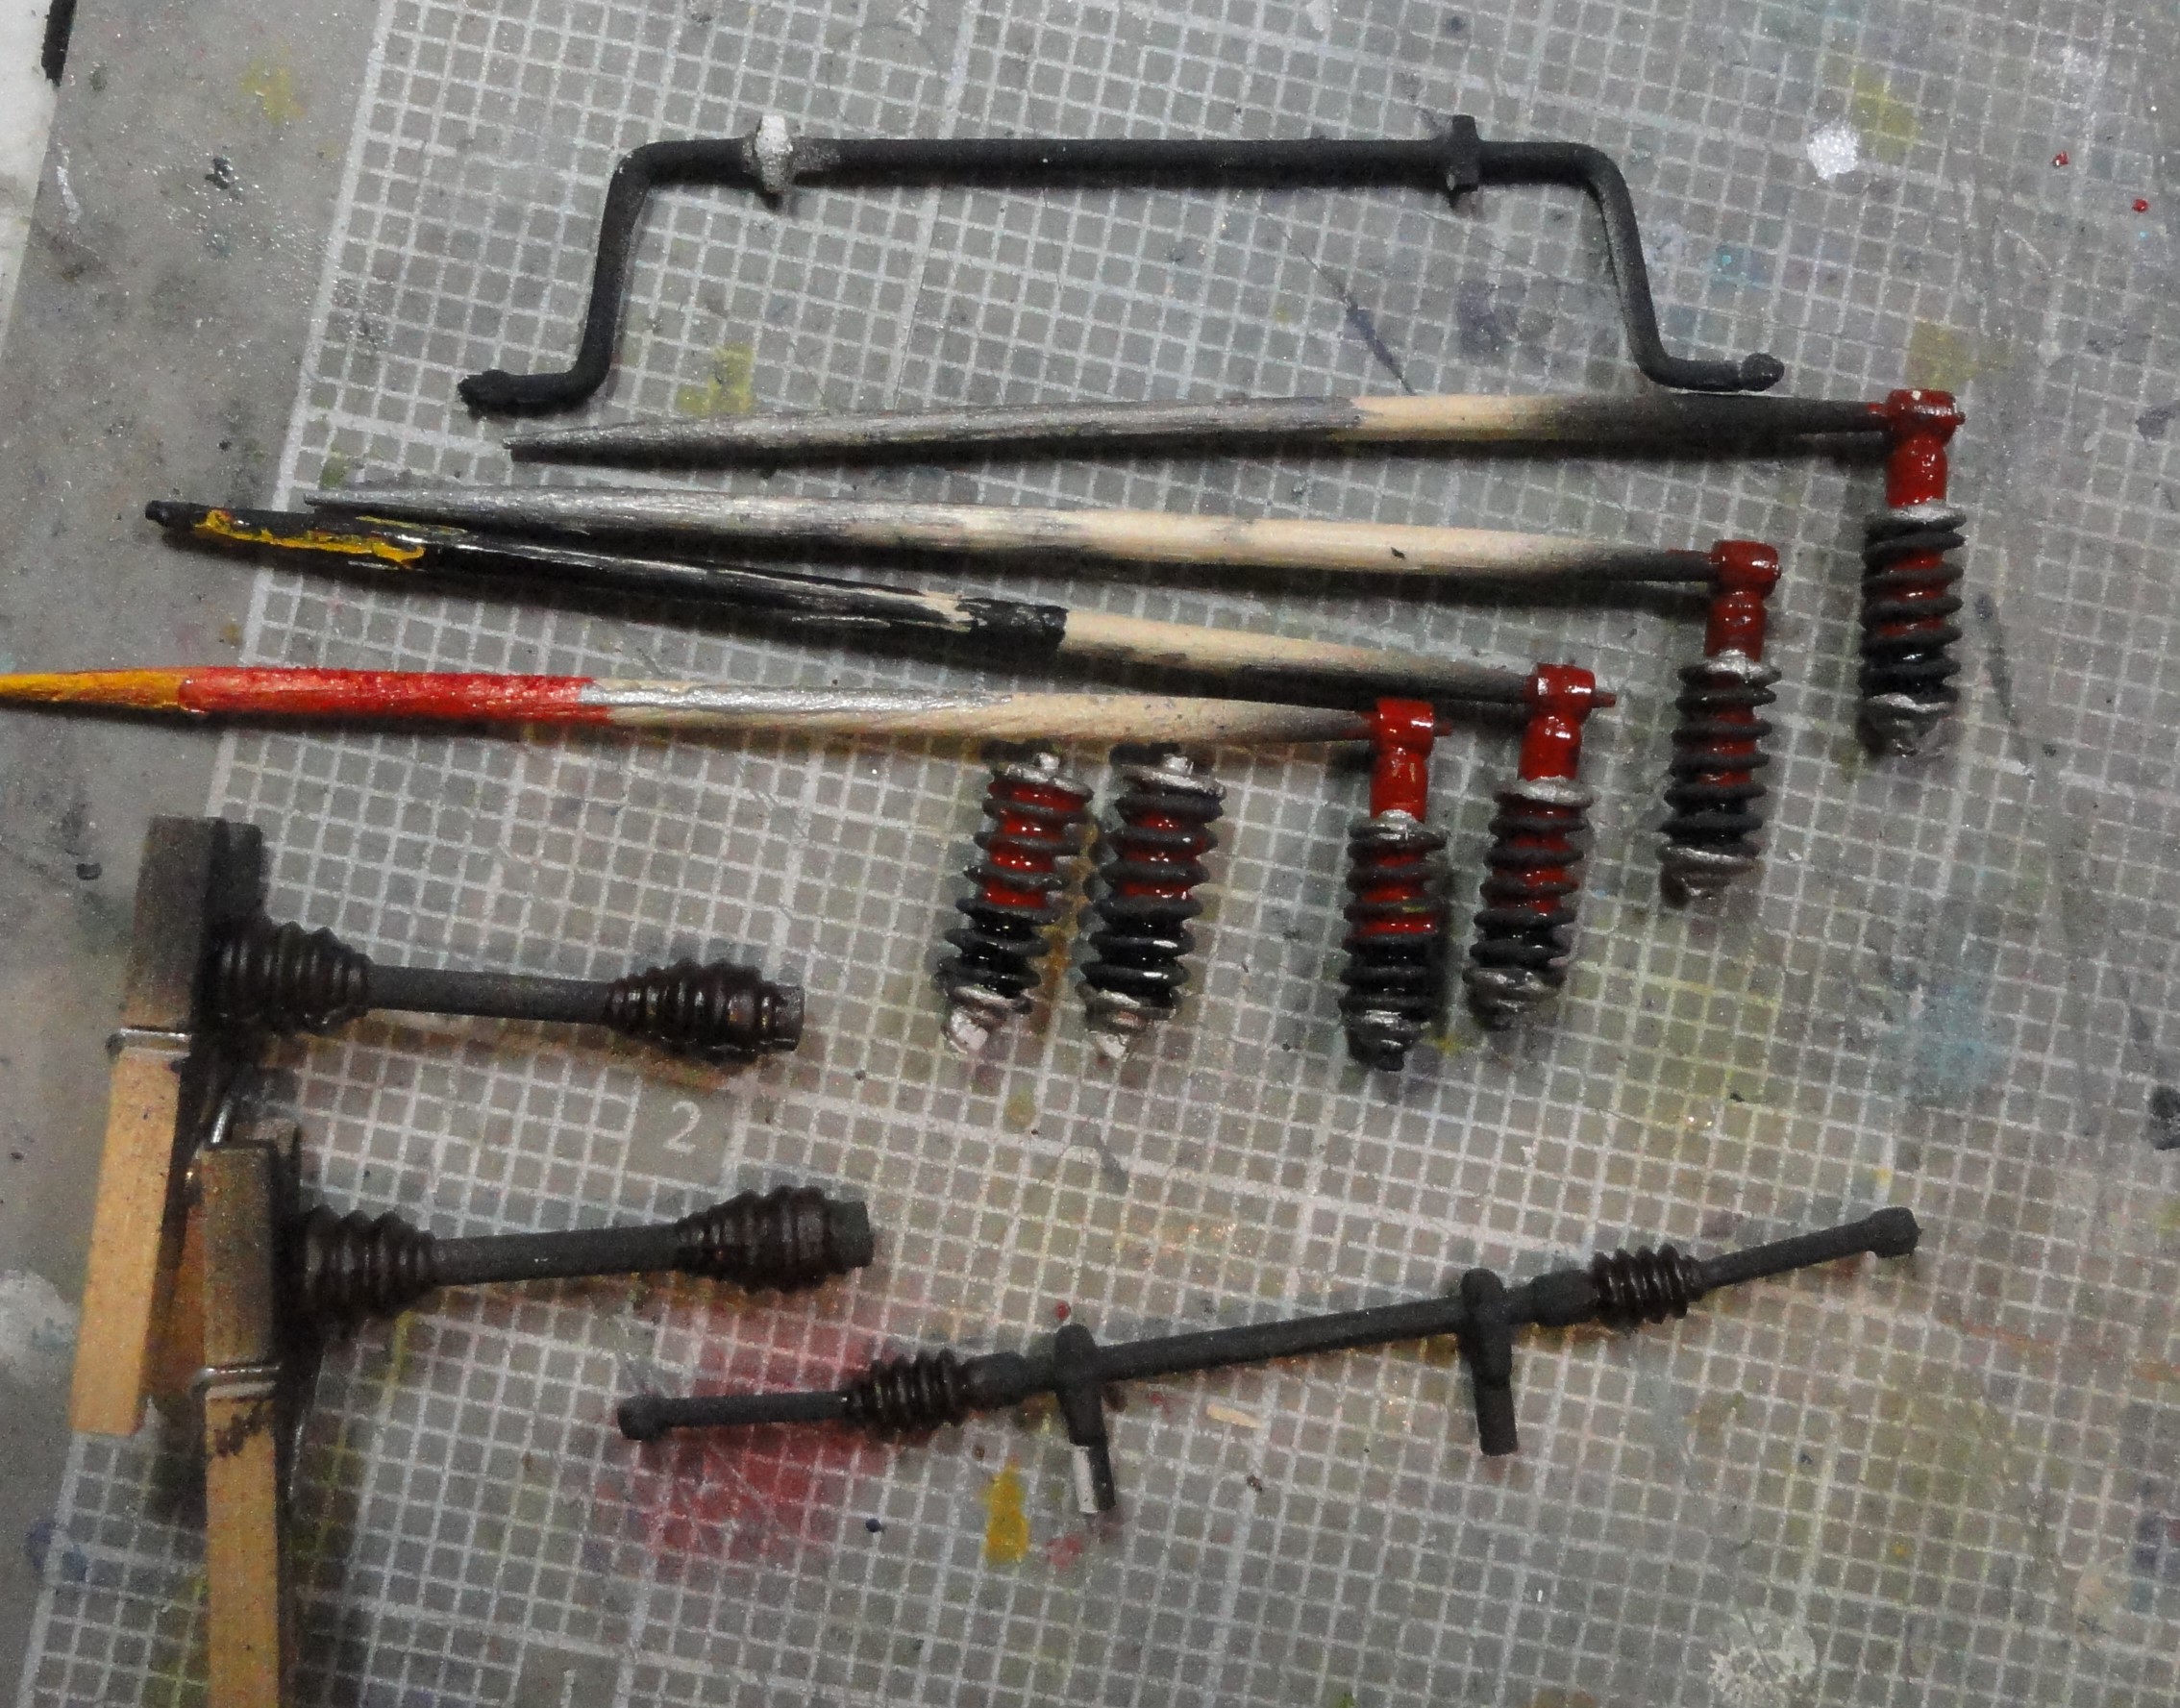
Next bit of assembly is going to be the suspension.I’ve tried to prepare the bits. Still need to touch up the basic black edges. I tried to hint at the shock absorbers inside the springs with some red and black. And hint at rubber boots using, oddly enough, Testors Rubber.
Well I was going to add photos, but the Internet is behaving badly. Maybe later.
Mark,
No progress is to small. Every step counts towards reaching the checked flag at the finish line.
Joel
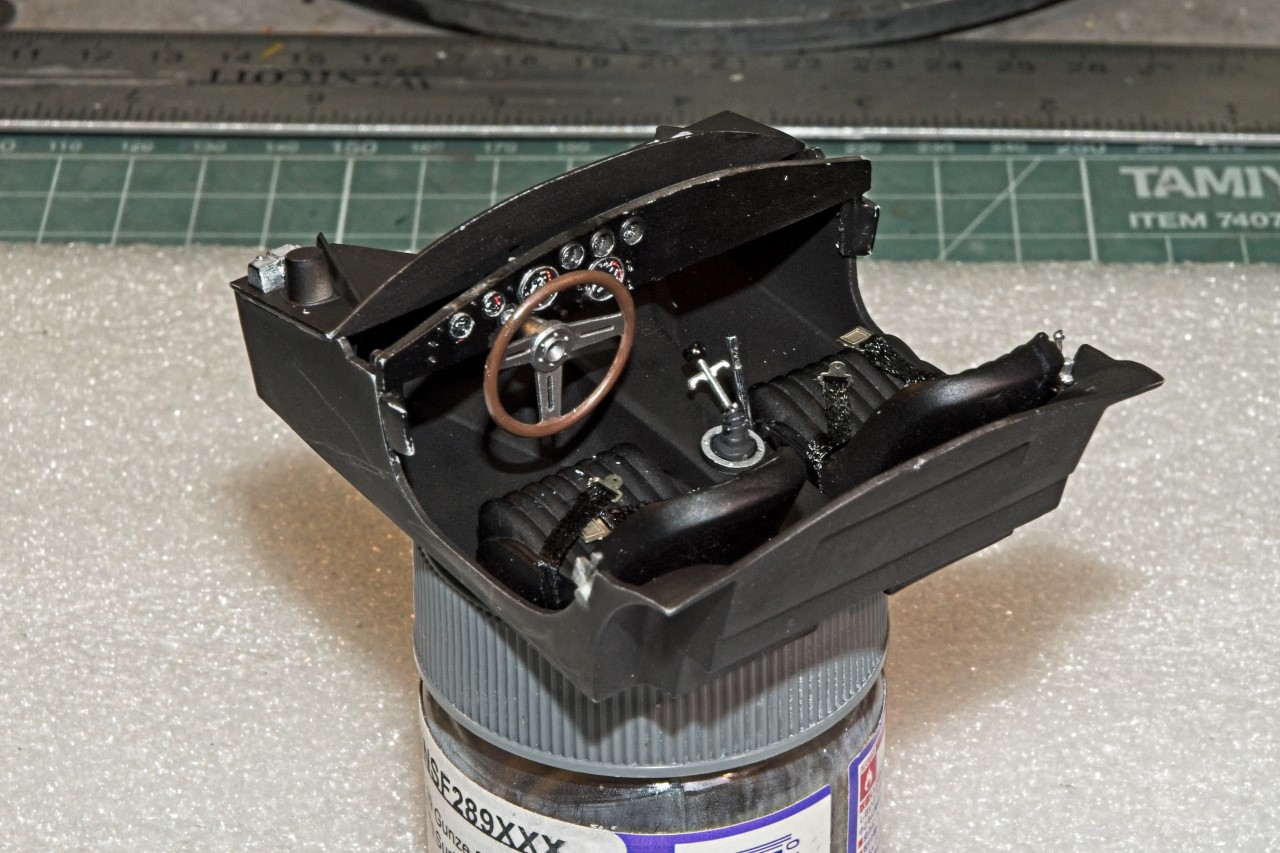
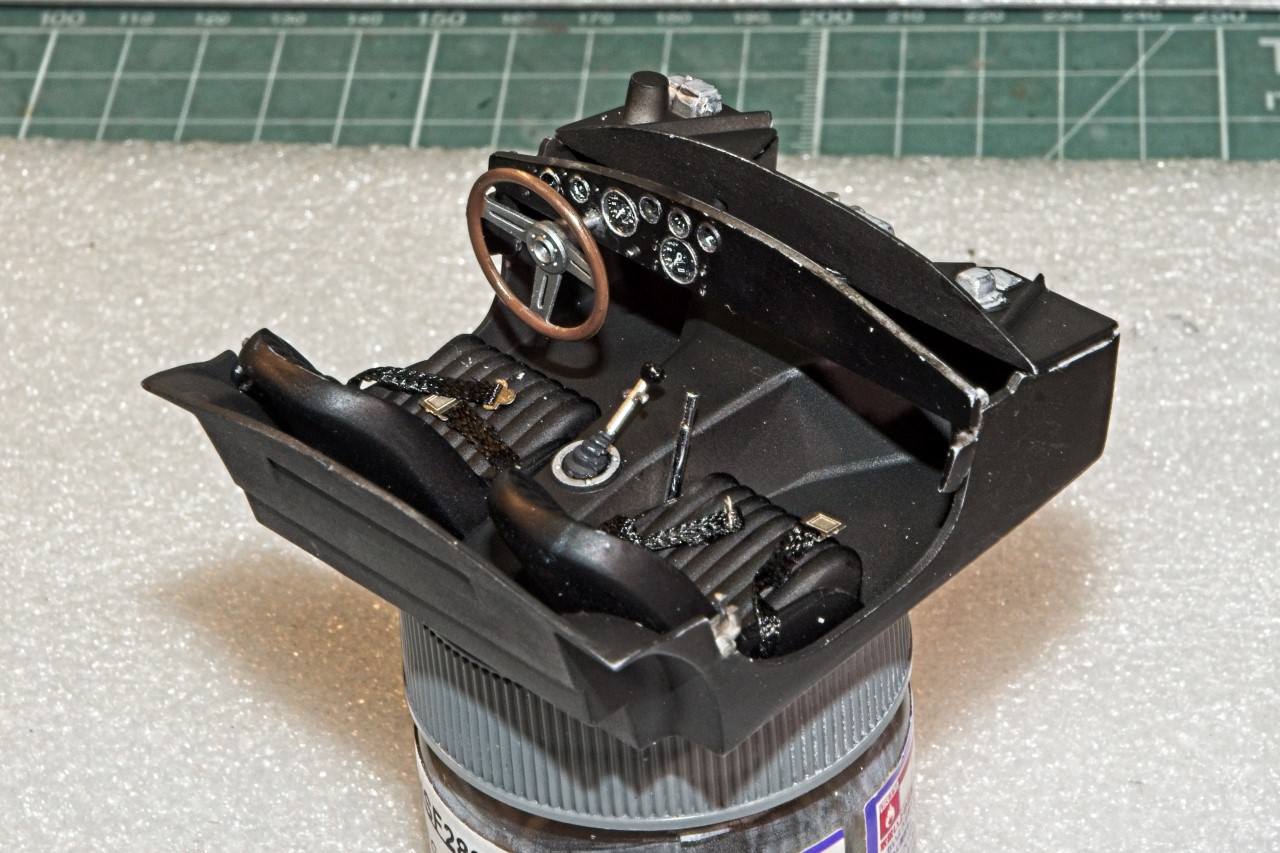
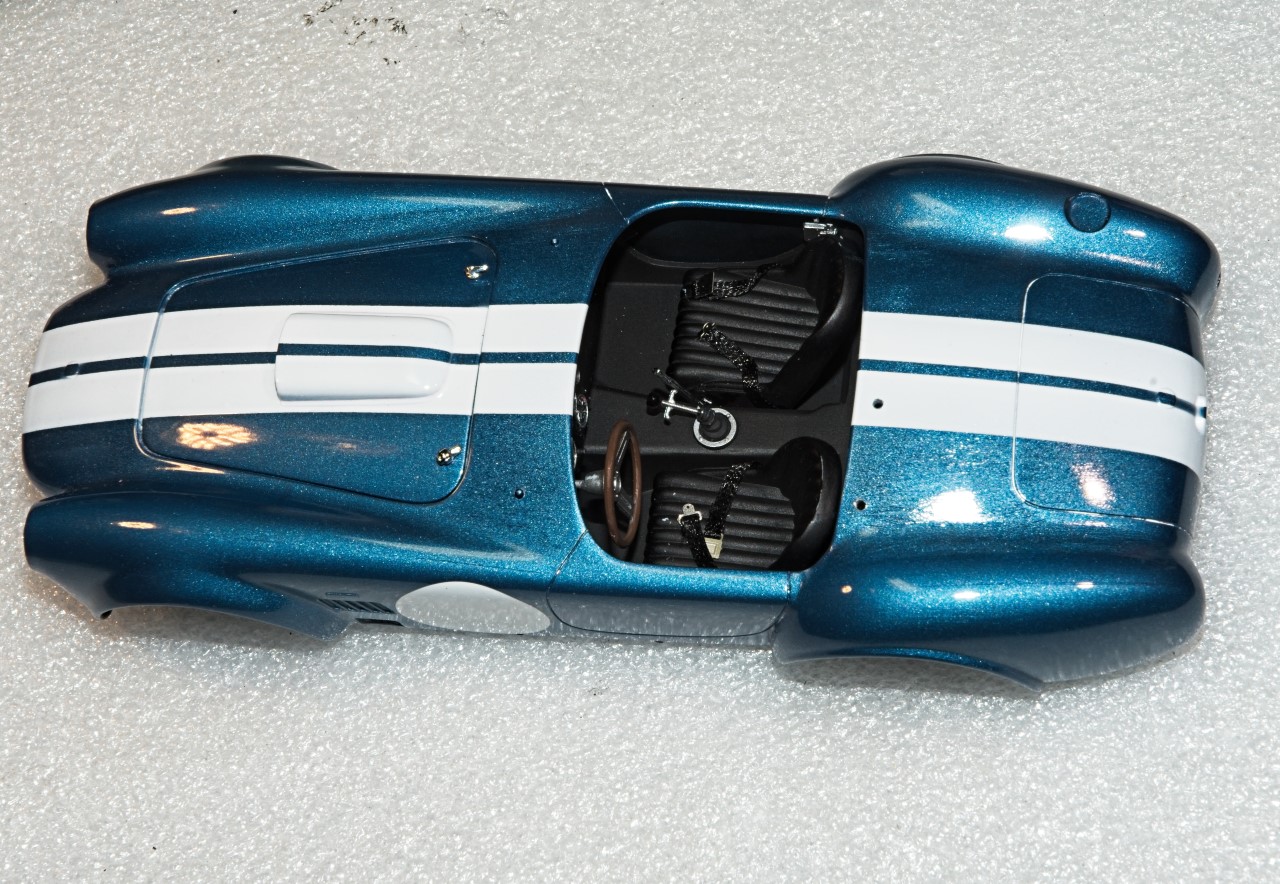
Finally, time for another Cobra update. My focus switched over to the interior, which in the Cobra isn’t much, and as bare basic as Shelby could get it. After all, the car was designed for the track, not the street, and every pound saved meant a quicker, faster, car.
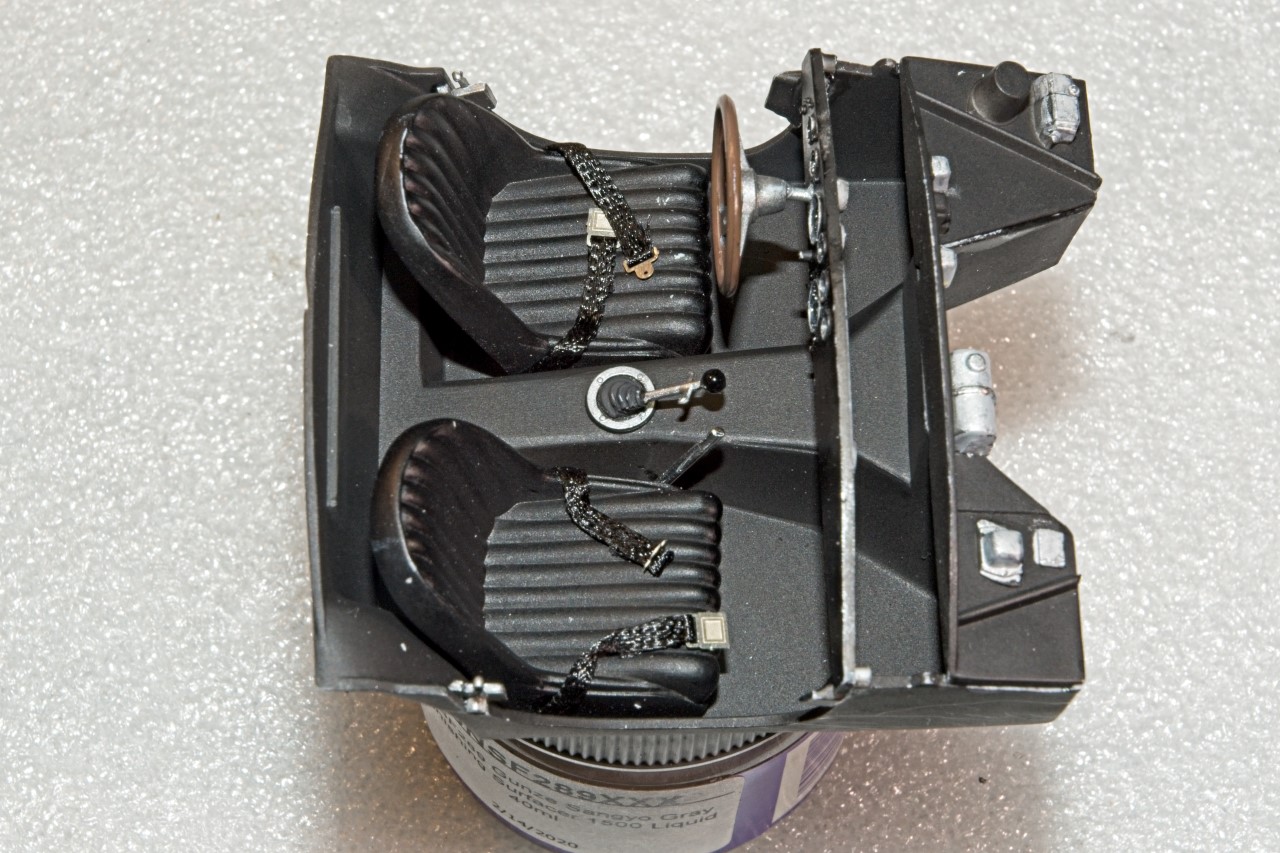
Basically, the entire interior is Matt Black with the Dash the typical semi gloss Black that many of the British sport cars had back in the 60s such as my MGB. The steering wheel was aluminum with a wood rim and that was carried over to the Cobras. Seats were basic black leather, and the seatbelts were also plain Jane Black.
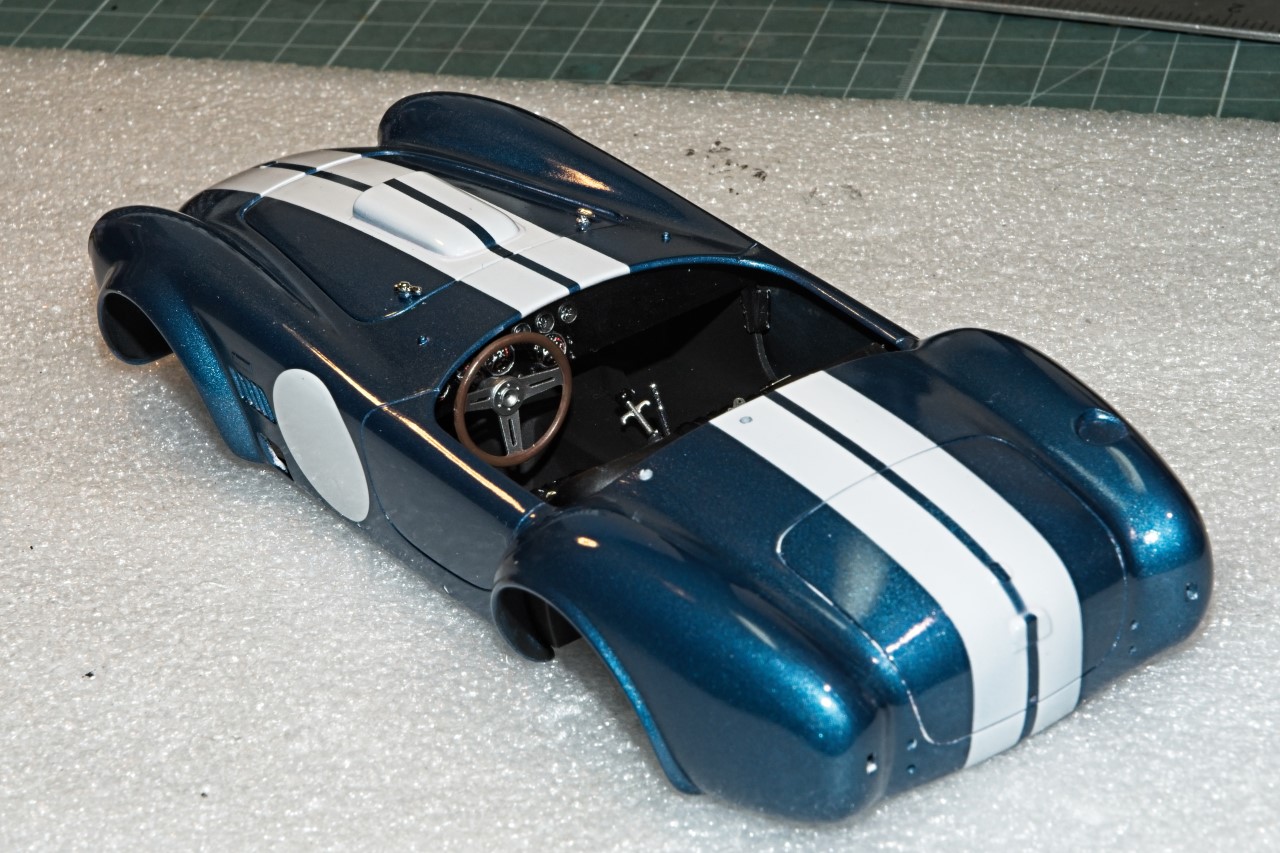
Then I dry fitted the interior into the body just to make sure it fit. I still need to check the fit of the chassis with the interior tub in just to make sure that there’s no surprises lurking down the road.
Joel
LOL, someone posted a 1:1 Cobra cockpit on my FB feed this AM. Almost identical to your model, only difference was a small fire extinguisher mounted on the console between the seats and aft of the gear shift. 
Mark,
The rules for quite some time both SCCA, FIA, WEC calls for a fire extinguisher system or a hand held unit for production based cars. But back in the 1960s we raced without any.
My model build reflects the actual Essex #98 car from that era.
Guess it was up to the car owner. Honestly, I didn’t have one installed in my MGB either.
Joel, she just looks right. Great color combinations done properly. Great work as always.
David,
Thanks so much for your thumbs up. It really means quite a lot to me.
Joel
Let’s try this again with a better connection.
Tiny bits of Progress. I was afraid that the hollow seats and exhaust wouldn’t look right so I closed them up.
Mark,
Very nicely done on those pesky hollow seats. At least yours could be covered with sheet plastic just like D’s. On the Cobra I had to use Sculpt epoxy as I had both a convex curve back and the seat bottom stuck out past the back of the seat.
Those shocks look great. Time very well spent. I usually paint and detail mine the same exact way, but I’ve come up with what I think is a better solution. I paint the shock 1st the proper color and let it completely dry. Then using 1 or 2 mm Tamiya tape ( or cut your own tape to the proper width), I mask the shock just by wrapping the tape between the spirals of the spring. Then I air brush the springs the proper color. I’ve tested this out just once and I ended up with the best shock/spring I’ve ever painted. The really big plus is that you now can paint the sides of the spirals not just the top, and there’s no running paint onto the shock.
Joel
I’m perfectly happy to take the blame if this is the result! Very nice work Mark, it’s the extra effort on these little areas that make a big difference in the end. Great stuff!
@Joel_W, there’s a tip that I will definitely be using, sounds like a really good solution.
Cheers, D
D,
Tamiya has 1,2, & 3 mm tape in their line now. I’ve just ordered all 3 of them.
I’ve always struggled with the coil over springs. I’d paint the shock body, then manage to get more paint of the wrong color on them from run off trying to do the sides of the springs. Back and forth time and time again till I used the “Good enough theory”. I didn’t come up with this idea but saw it used once as a solution, tested it out, and it works perfectly. It does take a lot more prep time, but it’s definitely worth it as you can now air brush the springs for a better overall final look.
Joel
Joel, nice work on the Cobra. The finish is beautiful!
Mark, the shocks look really good.
I’m hoping to get a bit of work started on mine over the weekend.
Still struggling to pin down the colour. The best on set photo I found is this.
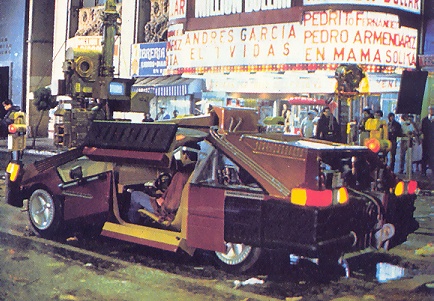
The closest I have found is Humbrols 171 Antique Bronze. A couple of others I have are too green in hue. There’s a few more I need to try before I commit. It’s also possible there could be two paints on the car. The roof looks a different colour than the stripe and sides.
I think a little research on contemporary car colours might be a good idea. Bronze seems to have been popular back in the late 70’s and early 80’s and I’d assume that the prop builders would have used a commercially available paint. With any luck, someone like Halfords makes the right shade.
Phantom-Phanatic,
Thanks for your thumbs up on the Cobras color coat, it’s always much appreciated.
as for your color choices, don’t drive yourself nuts. Just get it as close as you can. Believe me, none of us will ever know if it’s right or wrong. 
Joel
I’m trying not to believe me. Just driving me crazy trying to work it out and find a paint that looks right. The film is so dark you can’t get a good idea of the colour from the screen. All I can tell is that it is definitely not the solid red the restored car has been painted!
I like the two tone finish, makes a much more interesting colour scheme.