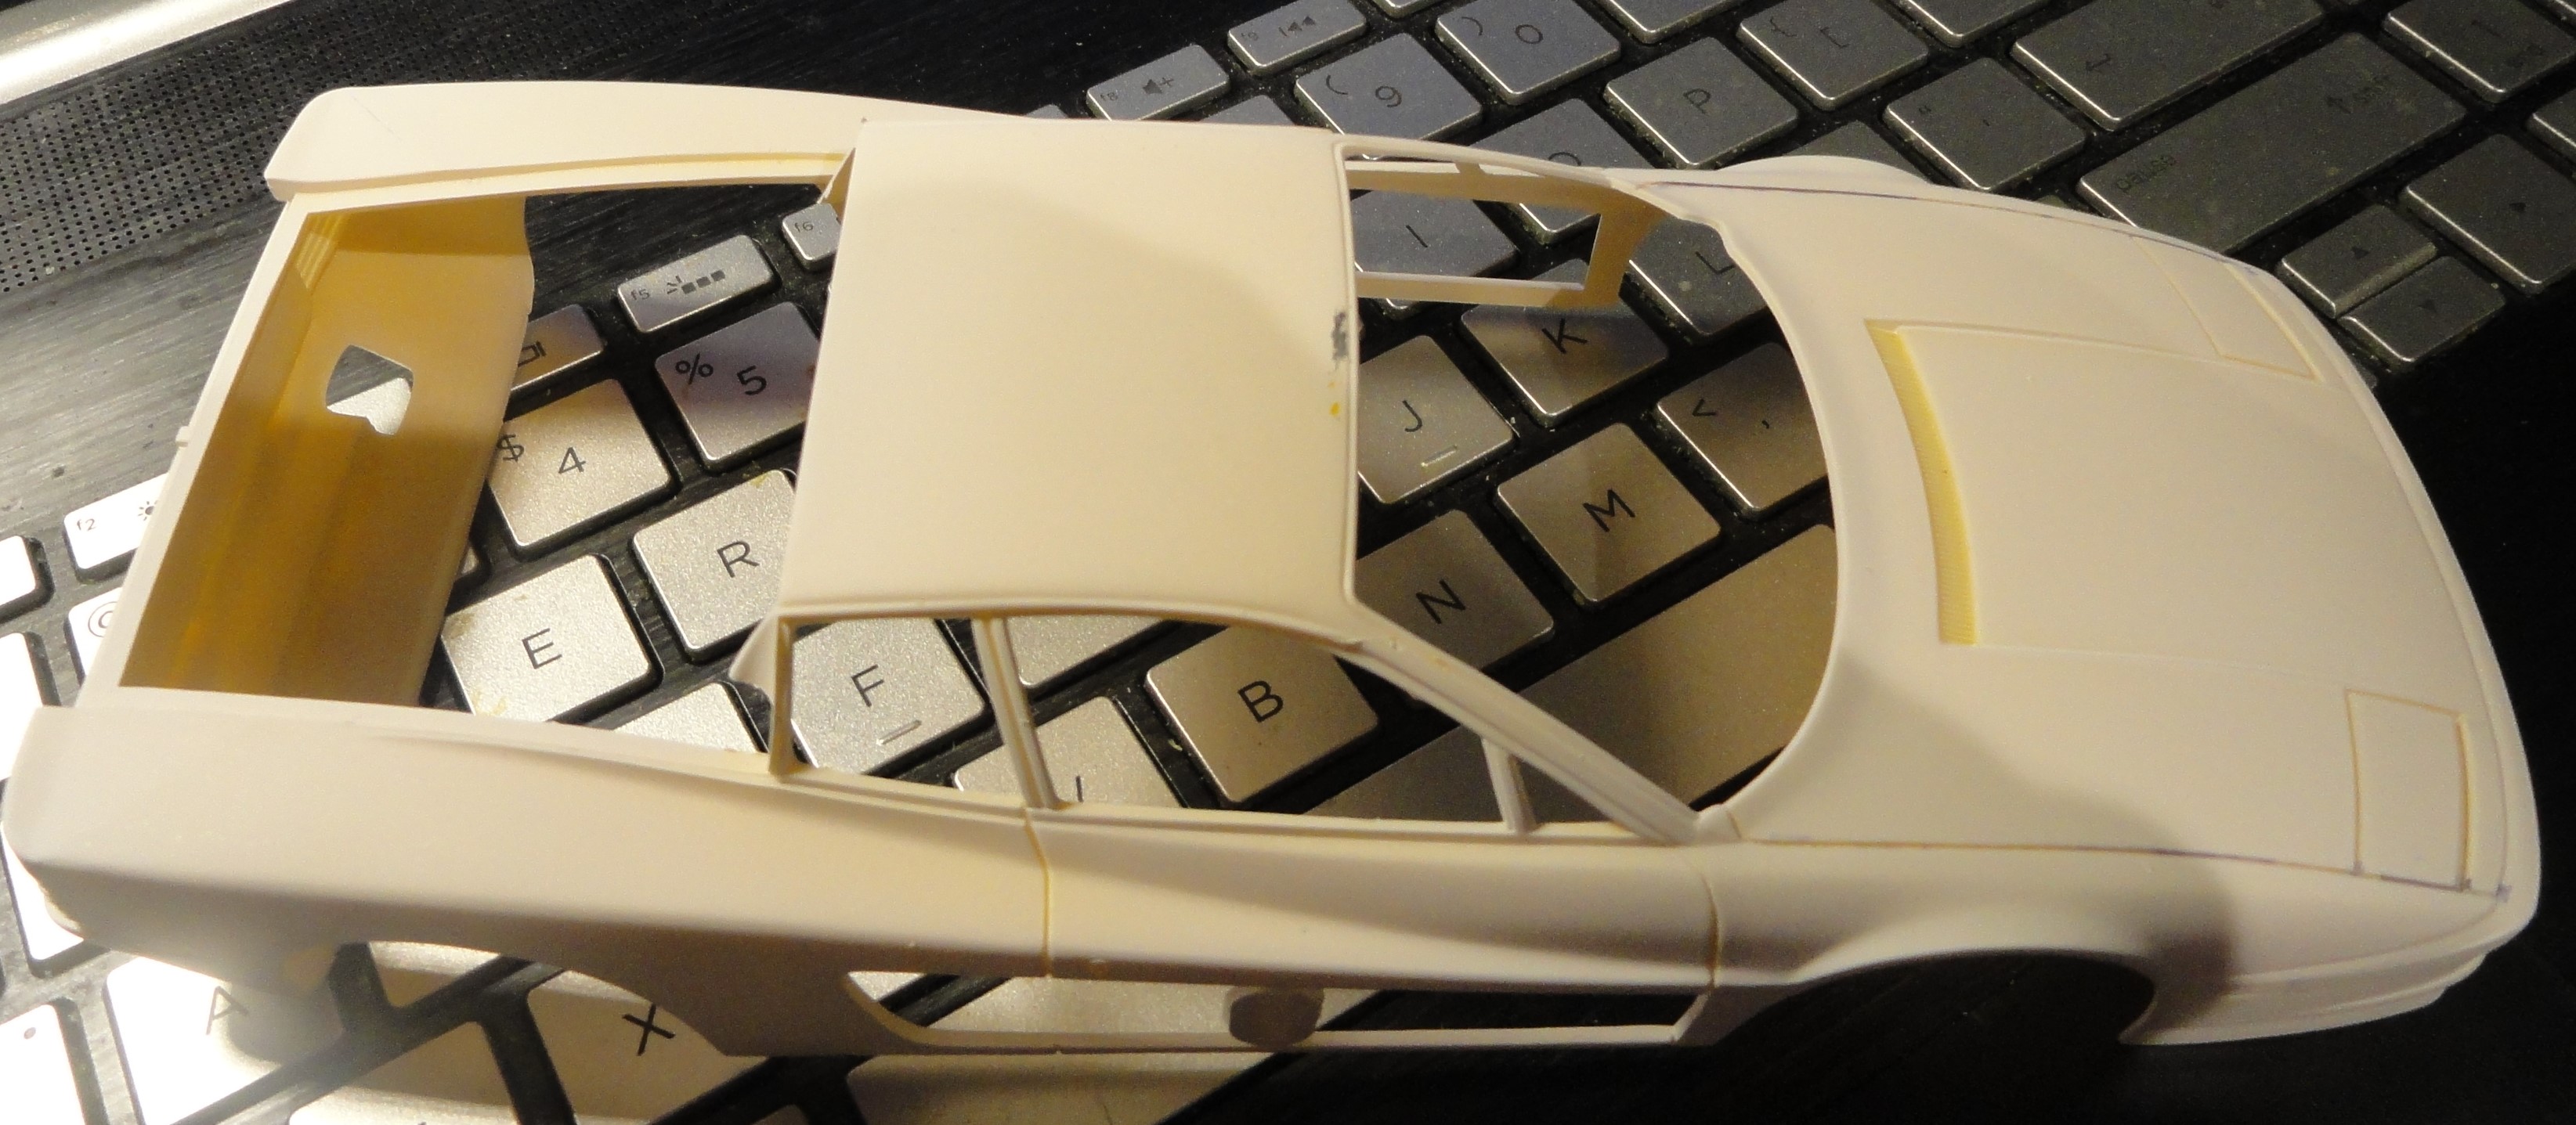
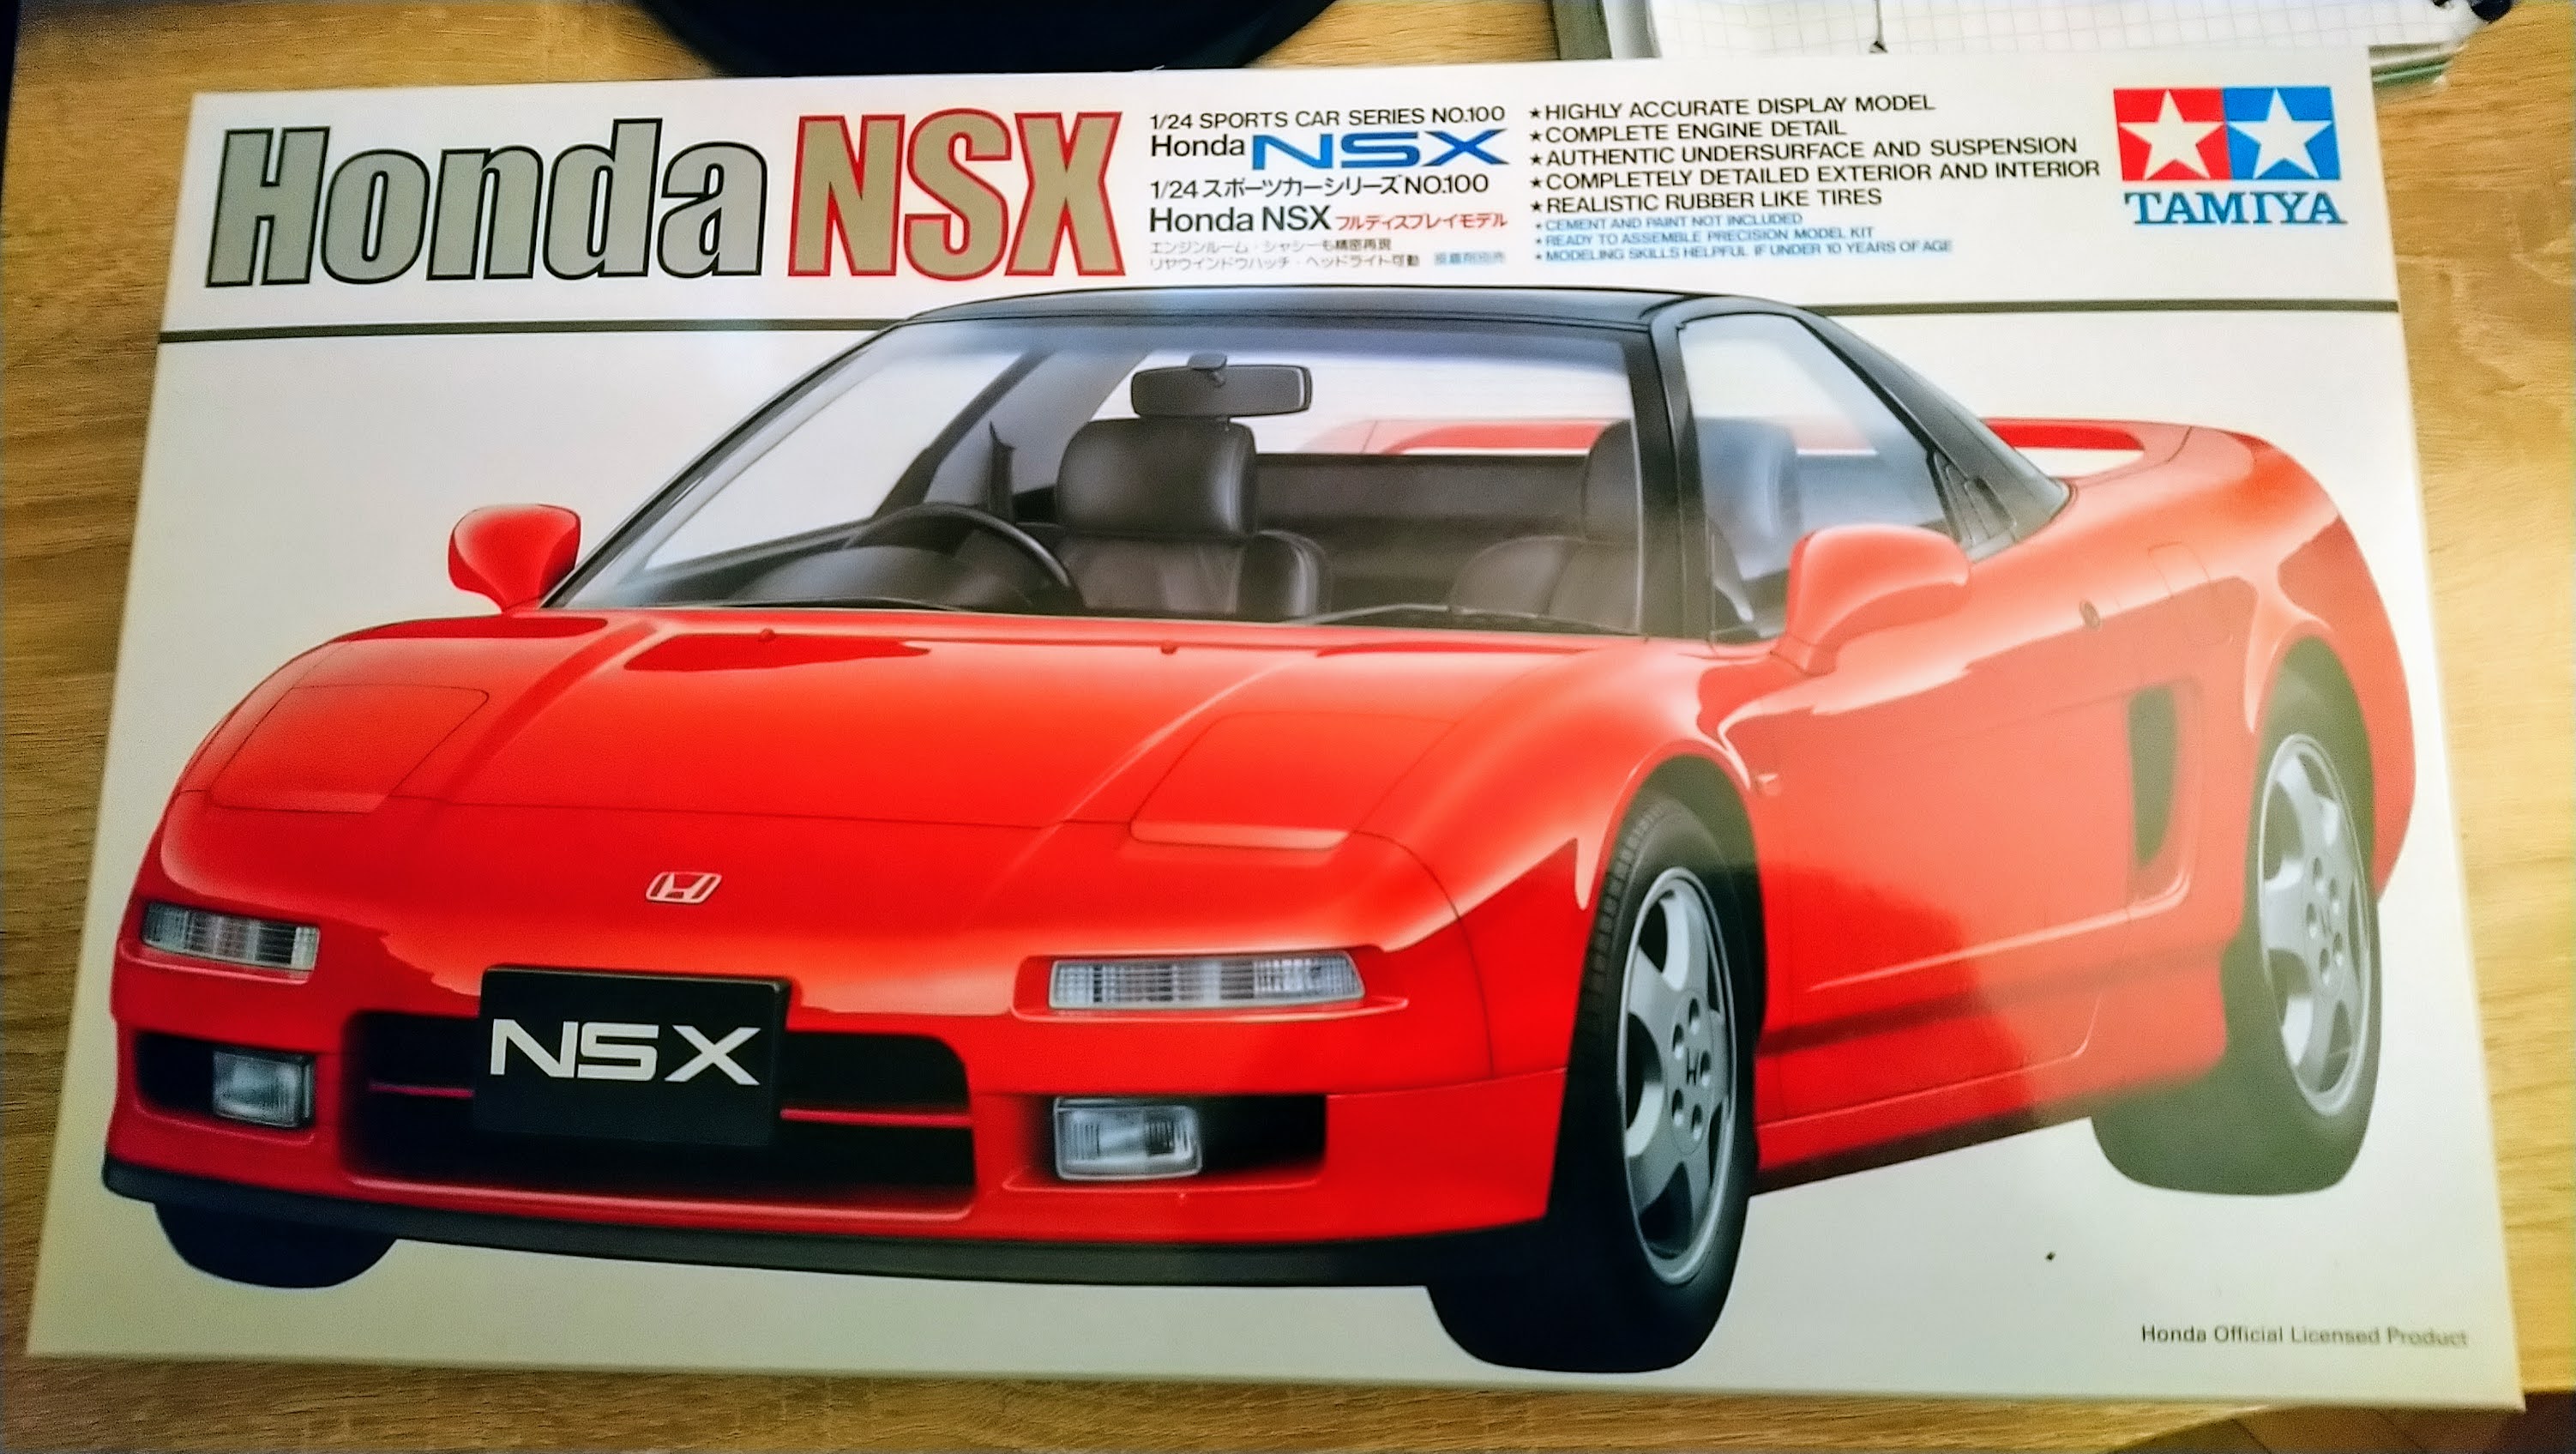
Hello all, here’s my entry: old but gold Tamiya’s Honda NSX. Classic kit, classic OOB build. Planned paint - black metalic.
Bartosz
Hello all, here’s my entry: old but gold Tamiya’s Honda NSX. Classic kit, classic OOB build. Planned paint - black metalic.
Bartosz
Bartosz,
Welcome to KitMaker Network and specifically the AutoModeler forum, you’re going to really like it here. We’re always appreciative that you took the time to join us.
And naturally, thanks for enlisting in our current GB, it’s going to be quite a lot of fun. Excellent choice of subject as the Honda NSX is certainly a car worth dreaming about.
Joel
OK, so I’m doing this backwards, original over here and copy over to the other site.
 Now where the hell did Jim hide my waving smiley?
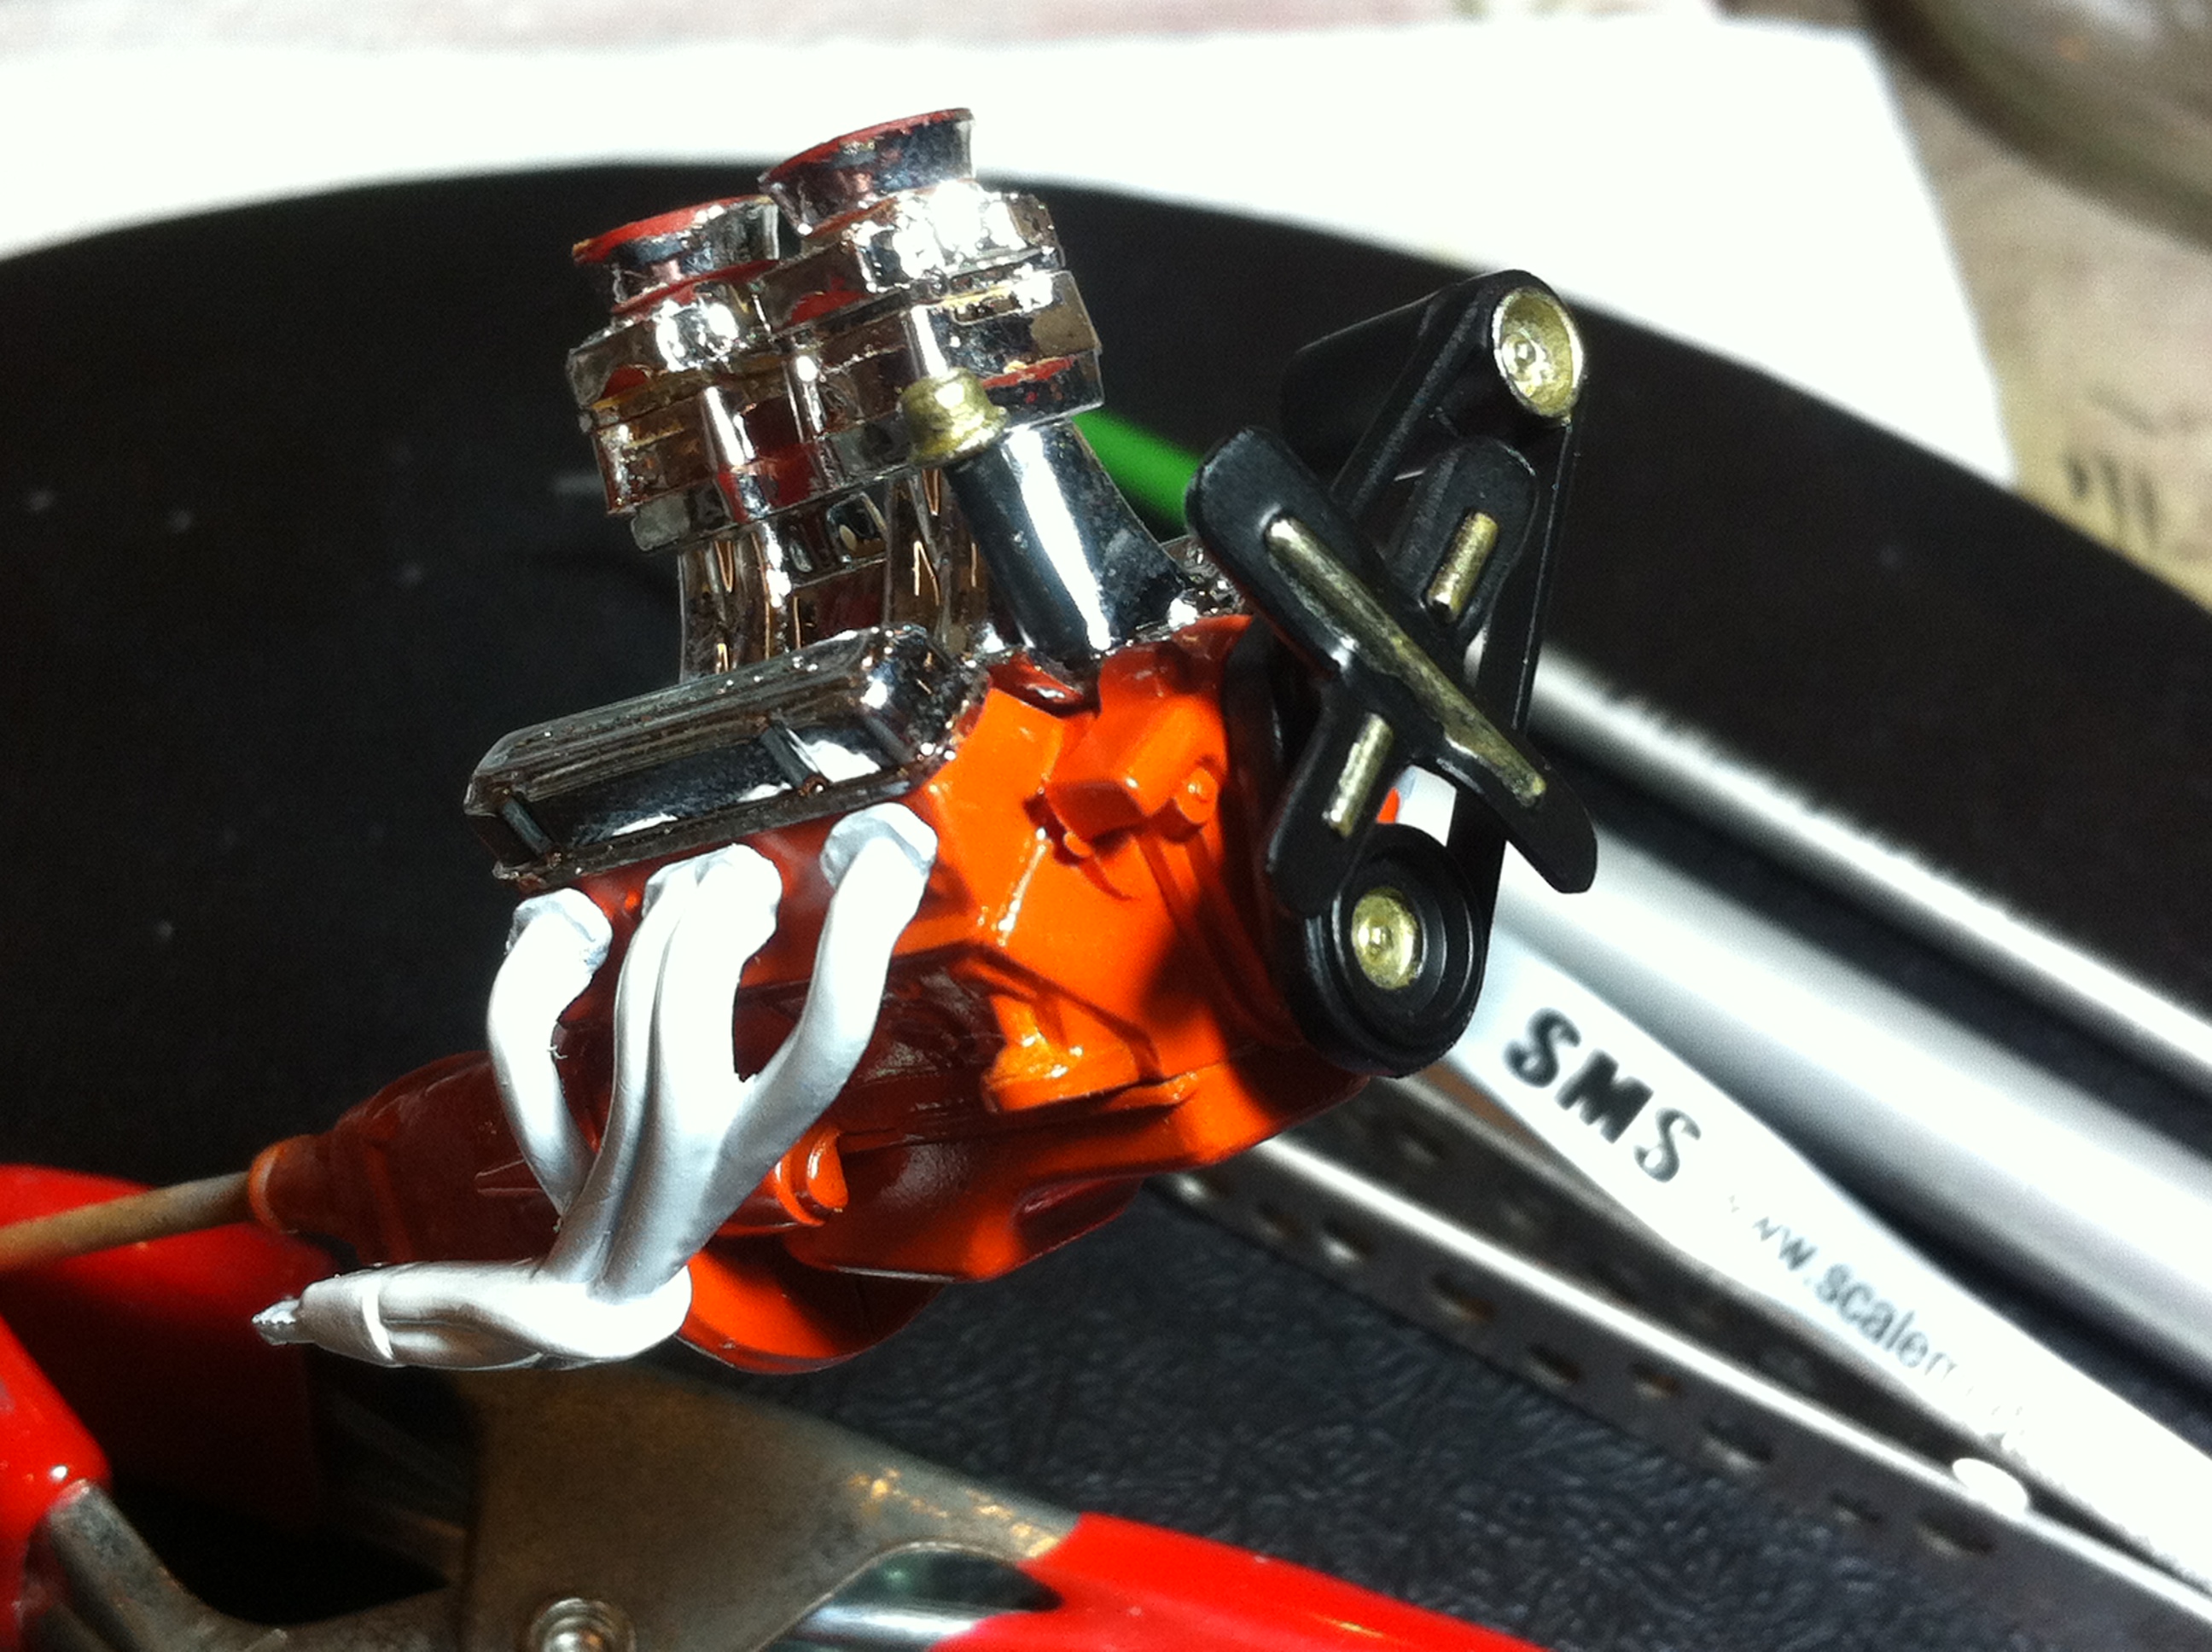
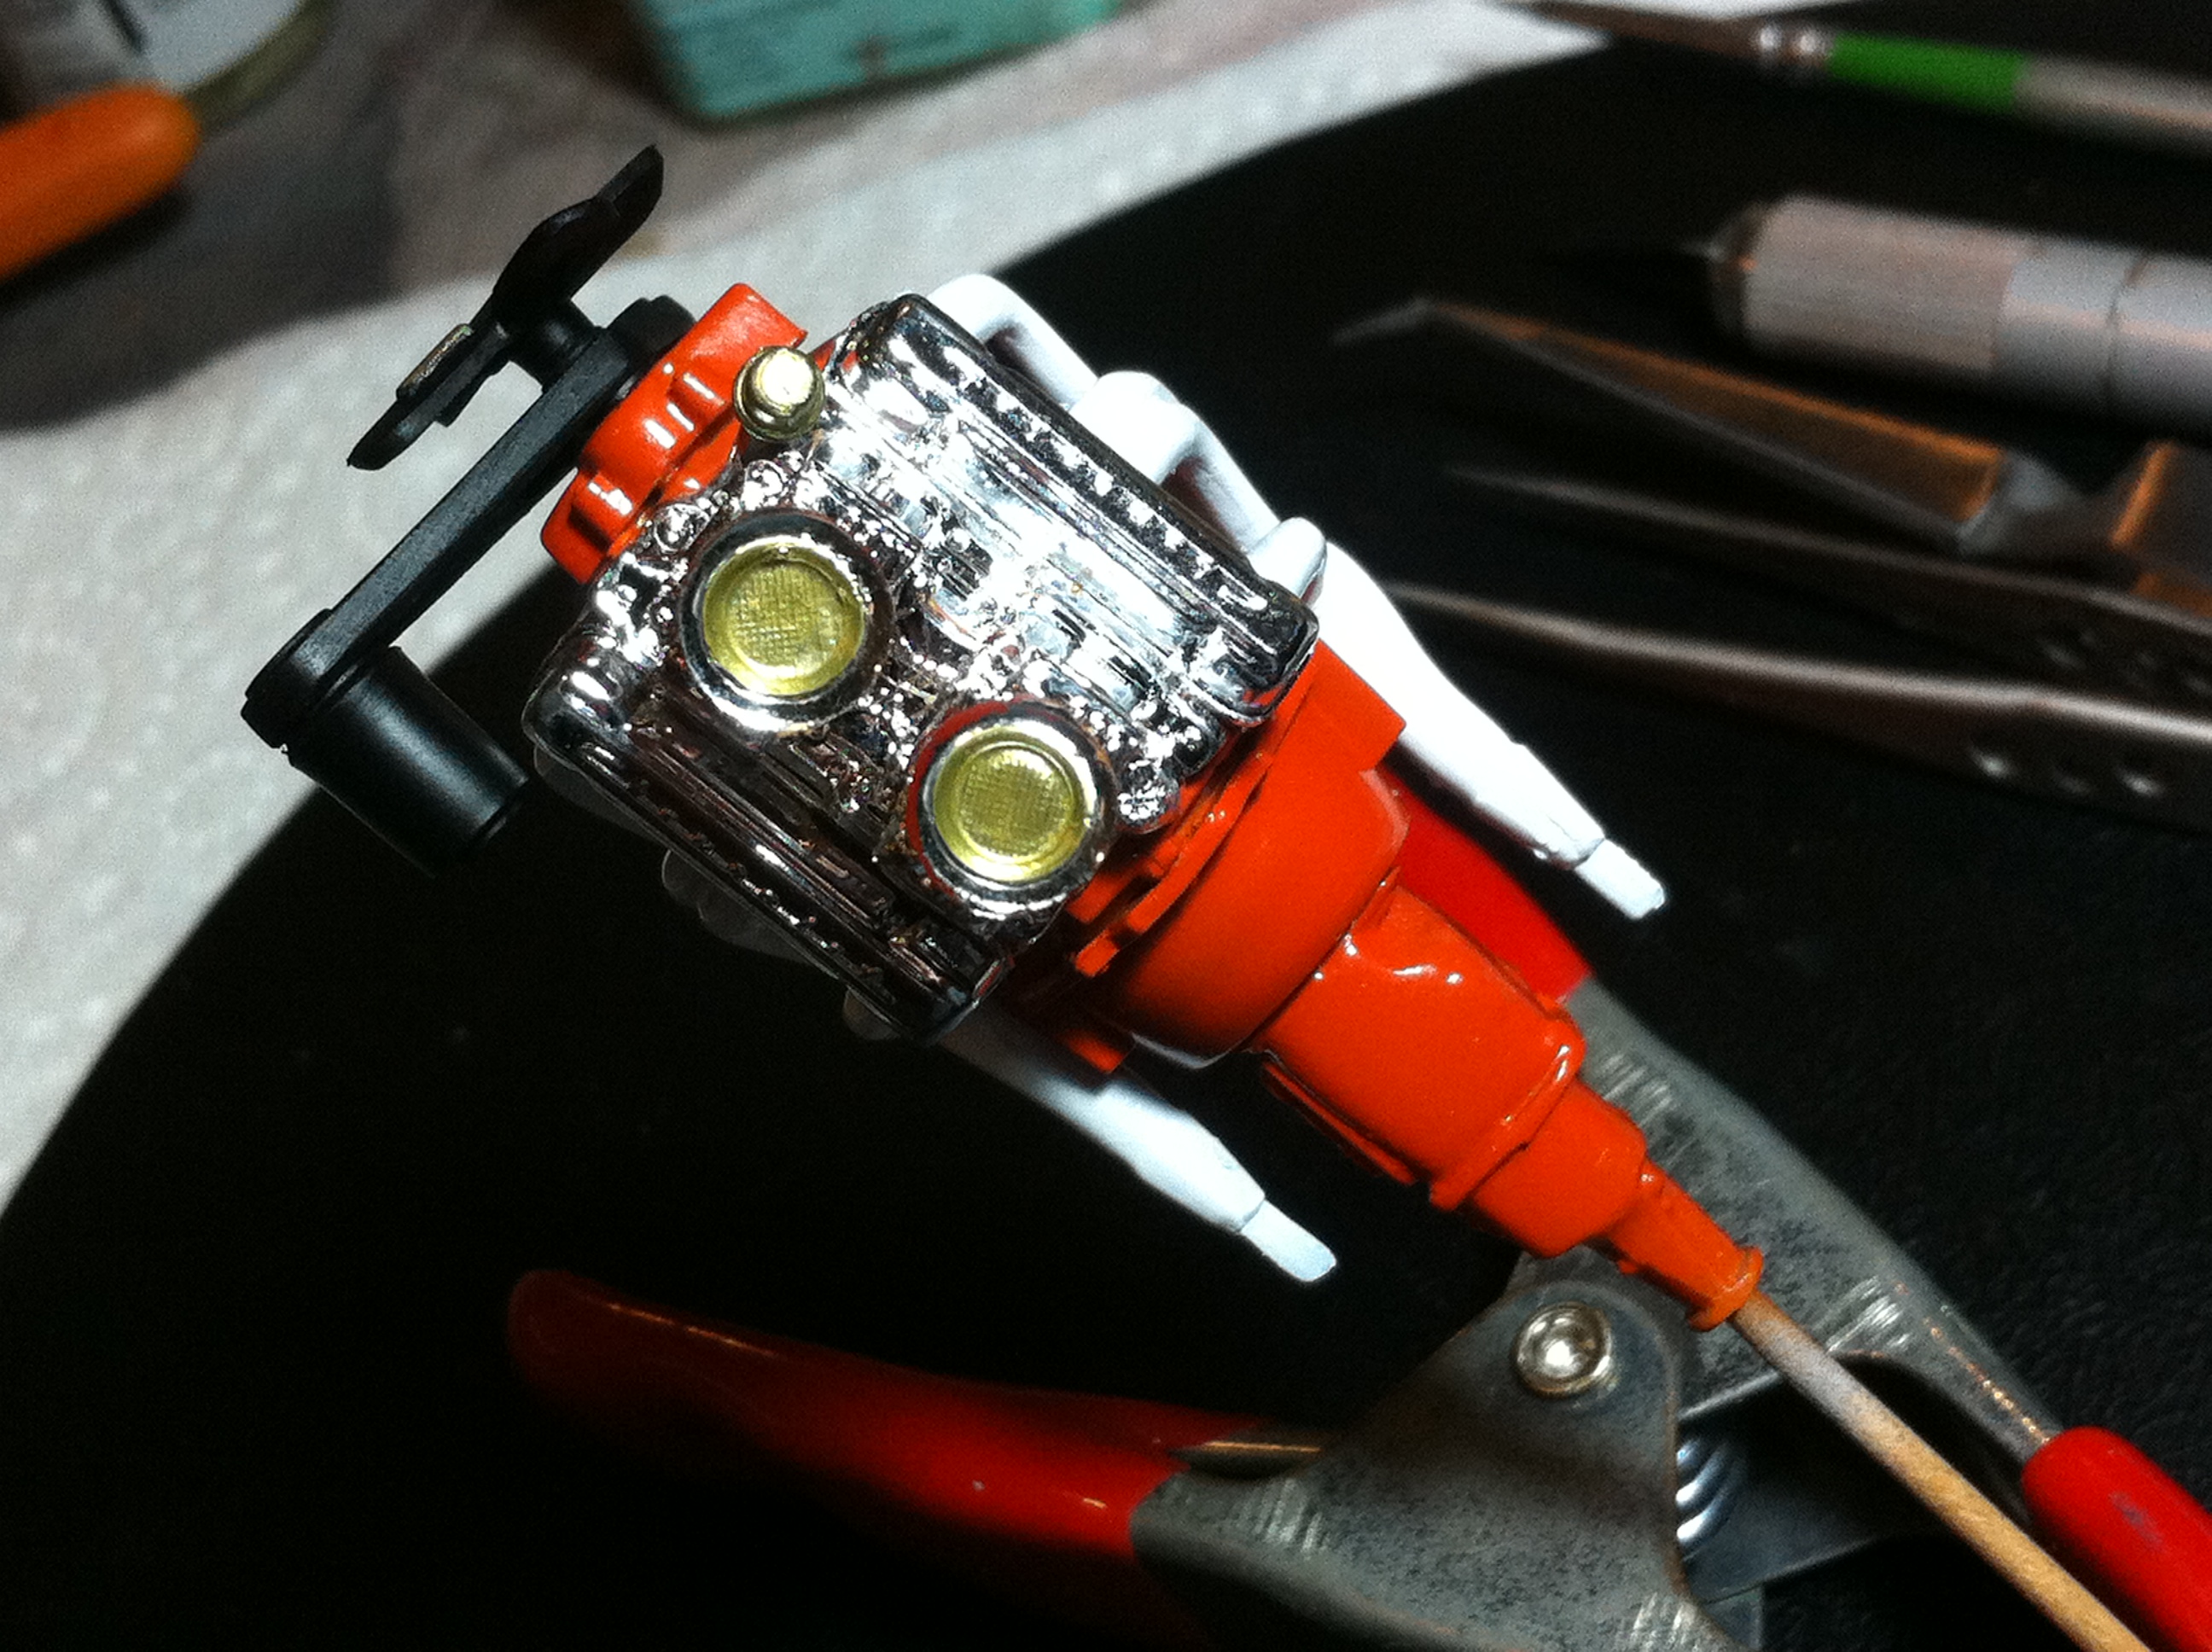
Some assembly time on the Nomad, I have the engine together with some gold hand-painted bling to set some pieces apart from the chrome. I will go over them again to get the finish more consistent.
A quick test fit shows that the engine sits nicely in the chassis rails, and the end of the headers lines up neatly with the front of the mufflers, but there will be some work tidying that area up as the end of the headers is quite a lot smaller than the connection piece to the mufflers.
I am also in two minds whether to carve off the distributor and wire this one up. I found this image amongst my tons of reference files and I like the way they’ve routed the ignition wires through what looks like a set of tubes off the side of the rocker cover.
Cheers, D
Mark,
It really doesn’t matter which way you go, as both sites are completely functional. If your post contains pictures, and you’ve posted on the beta site 1st as you have more options available to you. The old tried and true method of 3rd party host works on both sites. On the Beta site you can upload directly from your computer or the web and click upload, or actually drag & drop. I haven’t done it any other way except by my 3rd party host as yet so I don’t know how resizing works other then what you upload is what you get.
As for copying and pasting from the old site to the Beta site I didn’t need to remove the either of the image coding for the pictures to show up. I haven’t tried going from the Beta site to the old site as the pictures have a different code line that I’m assuming needs to be converted back to the old coding 1st. Since you did it that way, did you need to change the coding?
Hard to believe that you went through an entire can of white primer and the body shell still didn’t fully cover. I would have gone the old tried and true way and hit it with gray primer 1st as a base, then the less opaque white primer. For any parts that will be air brushed with Metallizers, the base coat from Gray to Gloss Black depends on the actual Metallizer, so you didn’t need to prime them white.
Joel
D,
The Chevy V8 is really looking quite good. The Gold does a great job of highlighting and adding that extra interest. A Tamiya Black panel wash will really add all that much more to make those parts part.
I always vote to do the basic ignition wiring on an engine. As for the wire route it’s either over or under the headers, and since GM engines nearly always have the distributor at the back end of the engine, the up and over is the best way to accomplish that. What’s really interesting to me is that the plugs are straight into the cylinder heads, but at a angle facing forward. That does allow a nice loop around 180 degrees back towards the distributor.
Joel
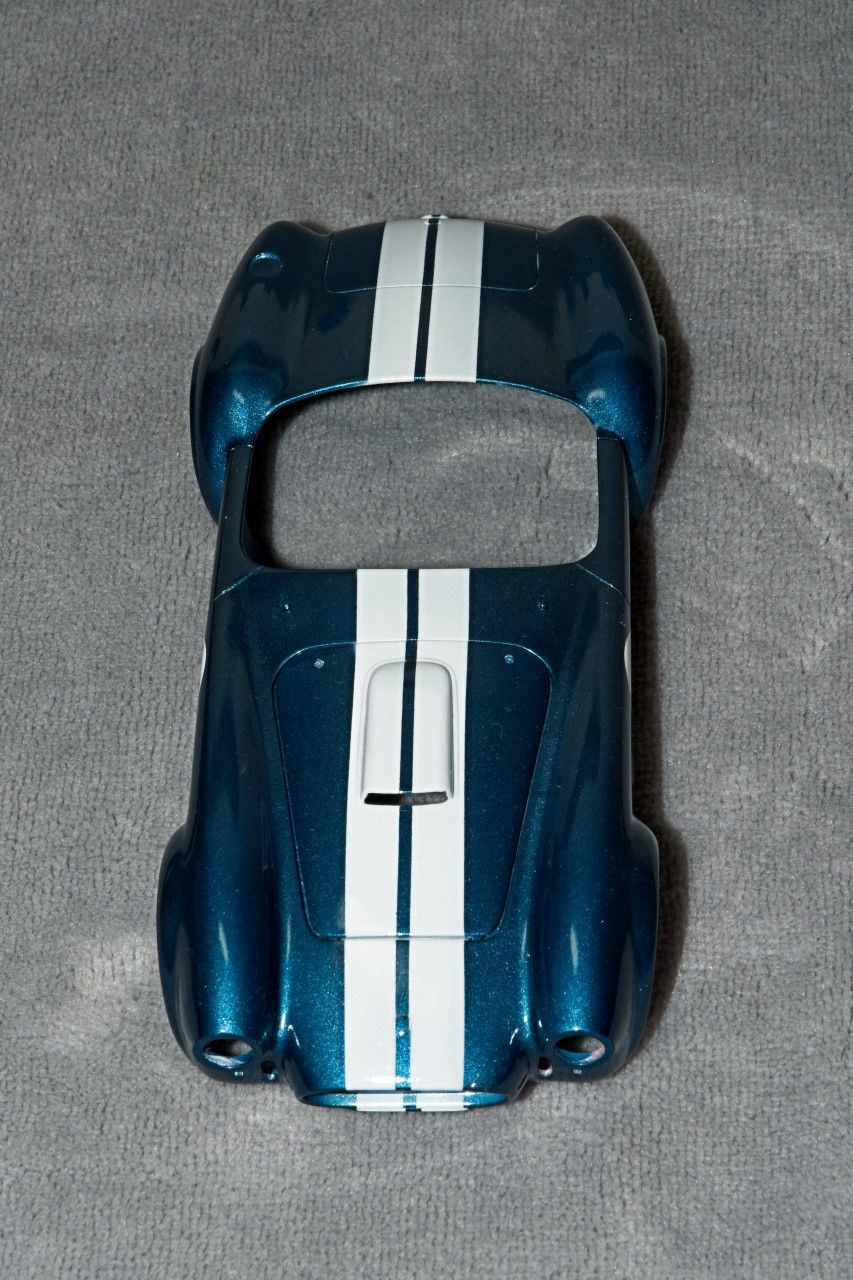
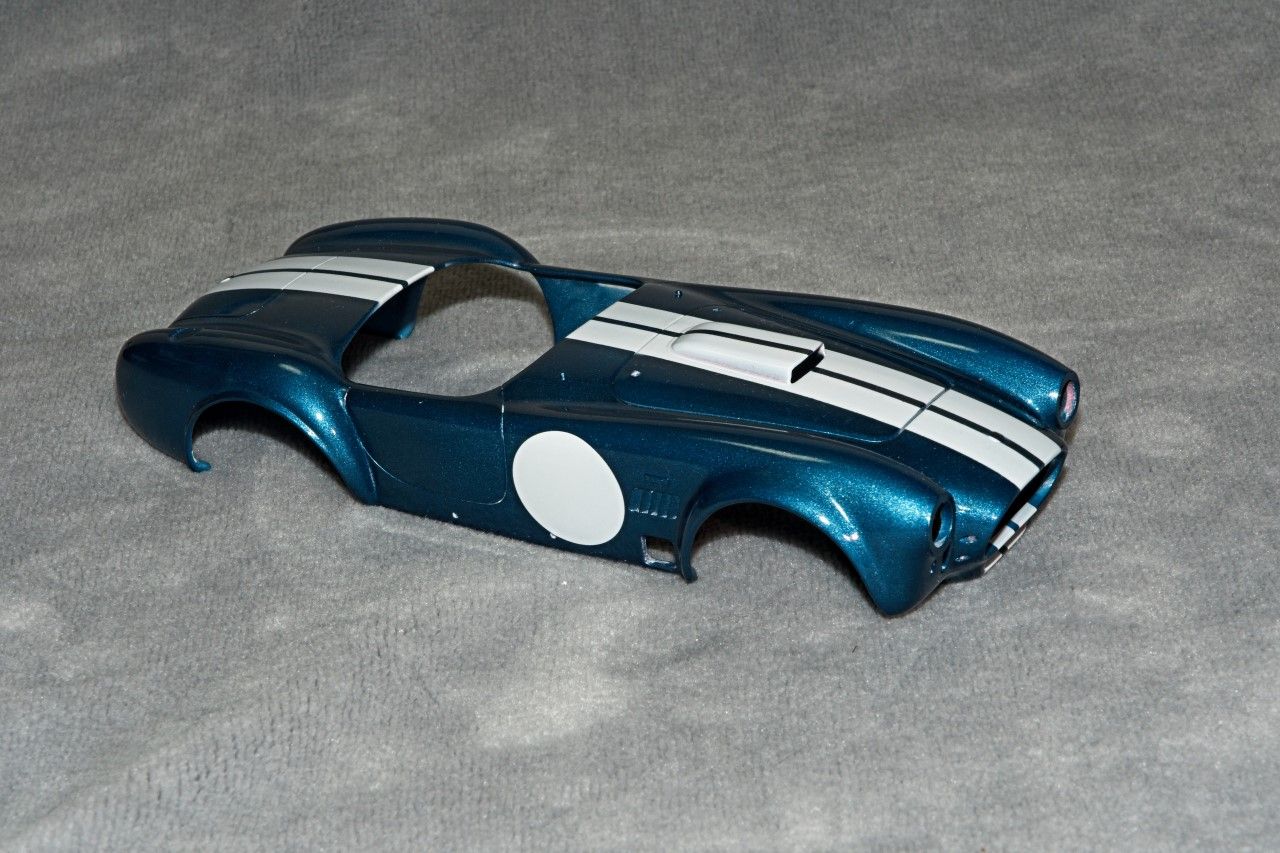
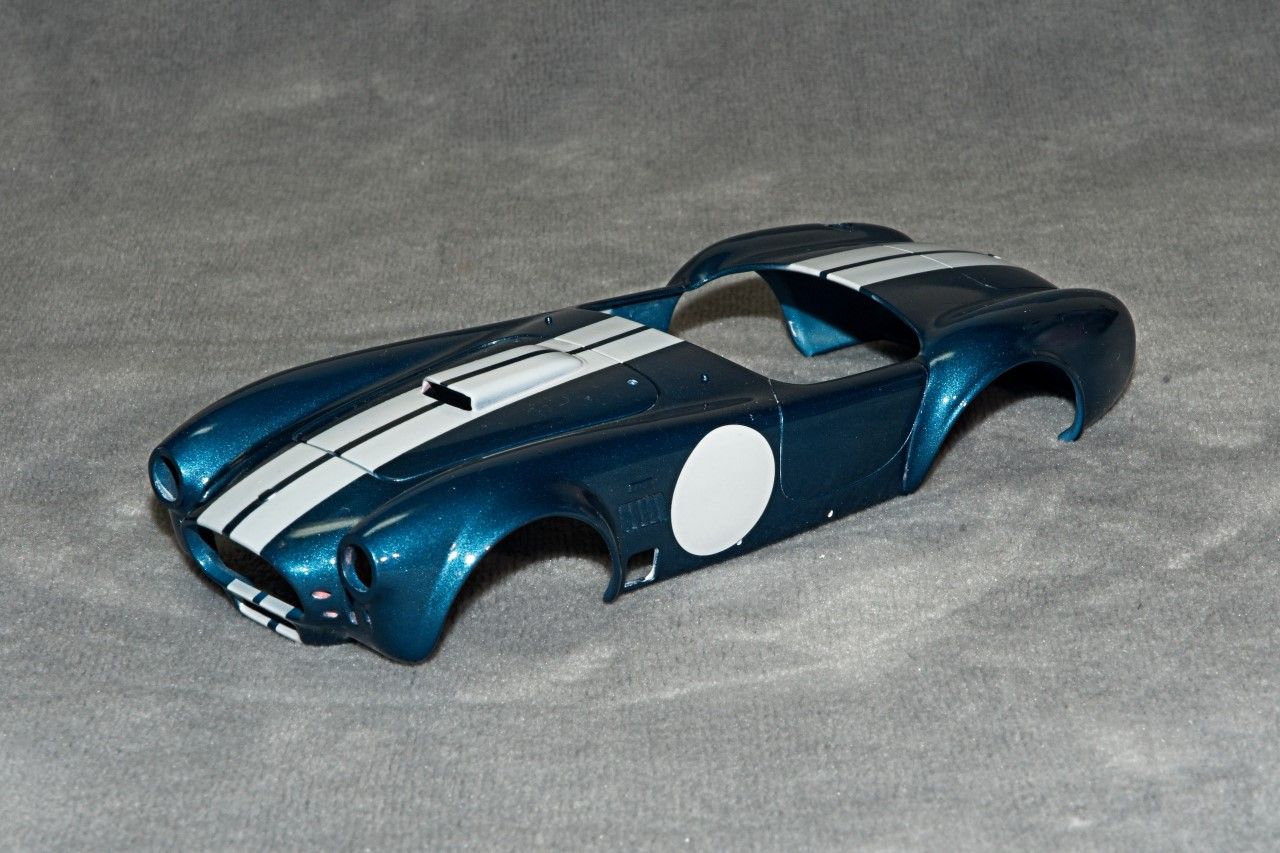
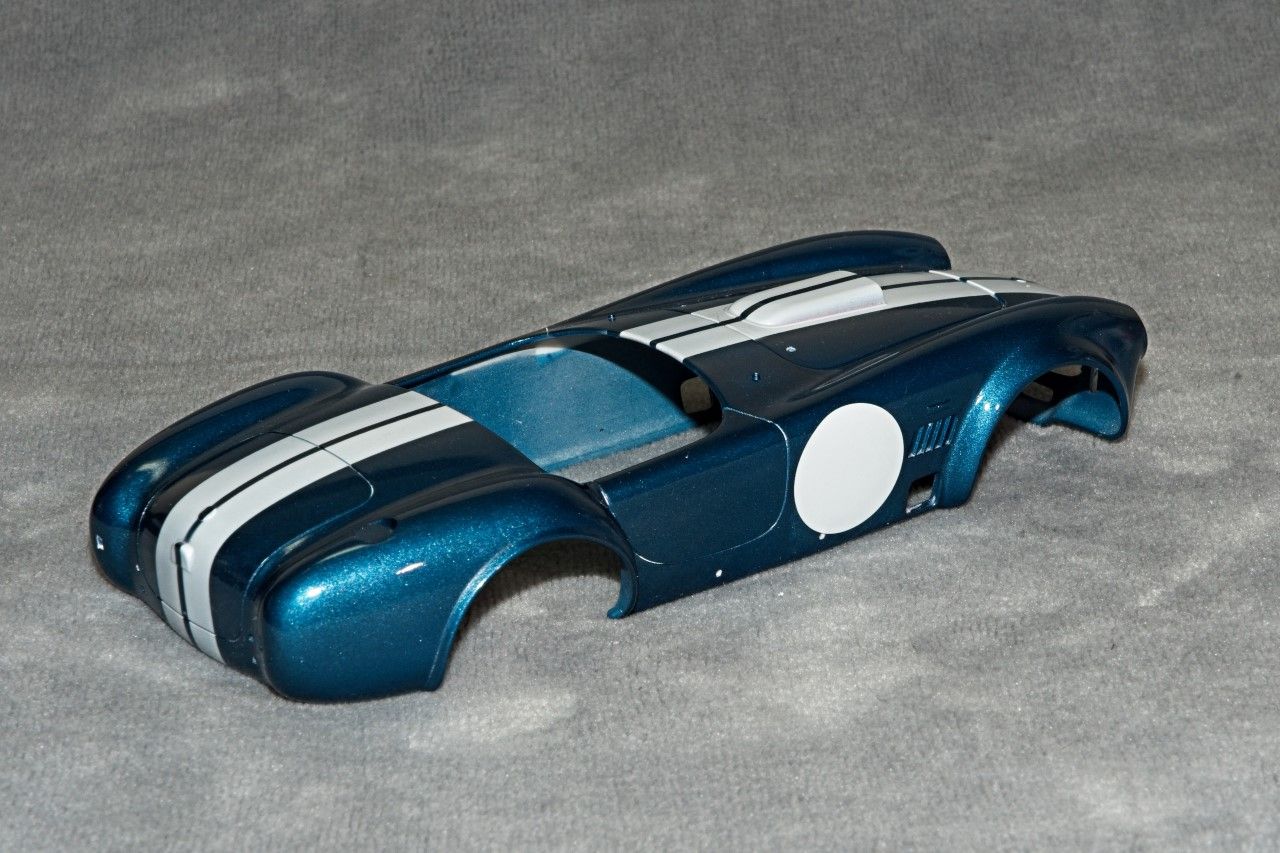
I finished the basic body shell with my usual wet rub with just 8,000 then 12,000 emery cloth. Then the Gravity trio of polishes, followed by the Gravity liquid wax. I’ve gotta say that this time I’m more then happy with the final results. No orange peel, the metallic Ford Guardsman Blue has just the right amount of metallic shine, and the Mr. Color Clear Gloss Lacquer laid down perfectly.
You’ll also notice that I added from my spare decals two blank white number circles. At every time trial and solo event I entered with my MGB, side panel numbers were required. My usual racing number was a Black 53, but sometimes I was assigned a different number, hence the empty circles. as the numbers were always applied after registration.
Joel
I hate you Joel! you’re half blind, and that body looks like you just spent a couple of hours with the power buffer on painted steel.
My grandkids are quarter midget drivers. Their car numbers are race based, i.e. position number one gets 1, position two gets 2, position ten gets 0. Different numbers for the next race. Some of their buddies are USAC drivers on other tracks. Most of these kids have a number and a letter (usually their first initial) painted on their car.
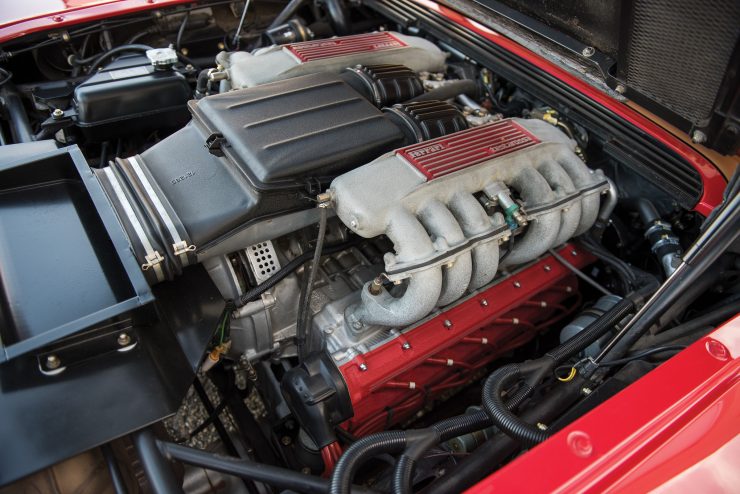
OK, now for serious questions about mu Ferrari. The engine is a flat 12 with 6 cylinders on each side. On the real car, the 6 spark plug wires leave the header and route to a distributor(?) on the end of the header and don’t seem to route to any other part of the engine. On the model, there are 6 pins where the spark plugs ought to be. I can try to cut those flush and drill for wires, but the blob at the end of the header looks way too small for the 6 wires. Any hints for dressing this up to look right. Clearly I need to have red wires, any clues on the size I should be using?
Mark
Mark,
Believe me the finish was just a lucky break. Last paint and finish job if you remember was only so so.
Interesting how they assign numbers for the various jr classes. I always picked 53 as I figured that no one would ever want a number that high. Besides, it was my football number in school. Didn’t wear my jersey much as I somehow always got injured.
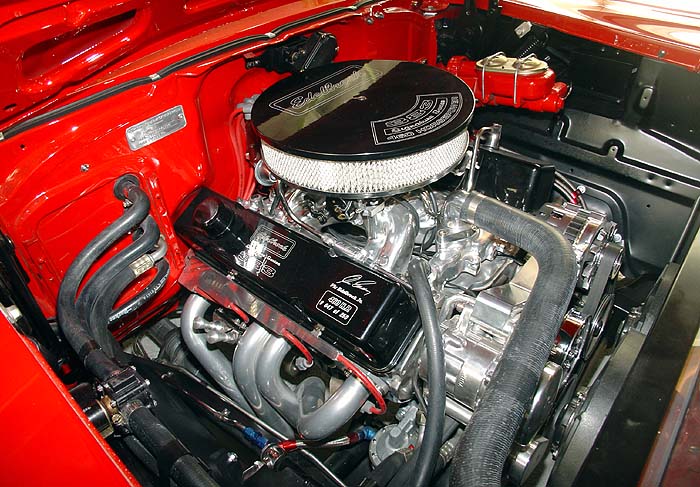
As far as the ignition wiring on a Ferrari Testarosa, I had to google a picture to be sure. In the picture below there’s the 6 led plug wires on each side that feed directly into a separate distributor for each bank. The 7th wire goes to the ignition coil where ever that may be.
Hope that this helps some.
Joel
You got that right Mark! That finish looks wonderful Joel, great work!
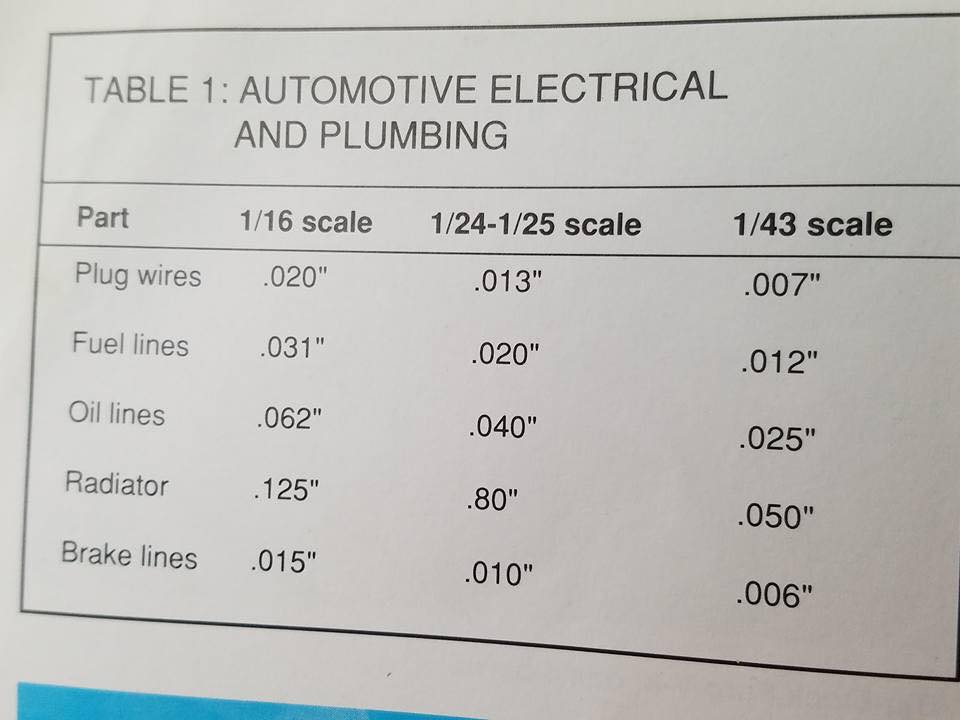
Carve off the “blob” that represents the distributor and replace it with a short length of tube or a piece of sprue drilled out to fit the wires. In real life the distributor is obviously larger than the diameter of the 6 wires together and from what I see most kits undersize it. I use the following table as a sizing guide for wiring and tubing, hope it helps.
Cheers, D
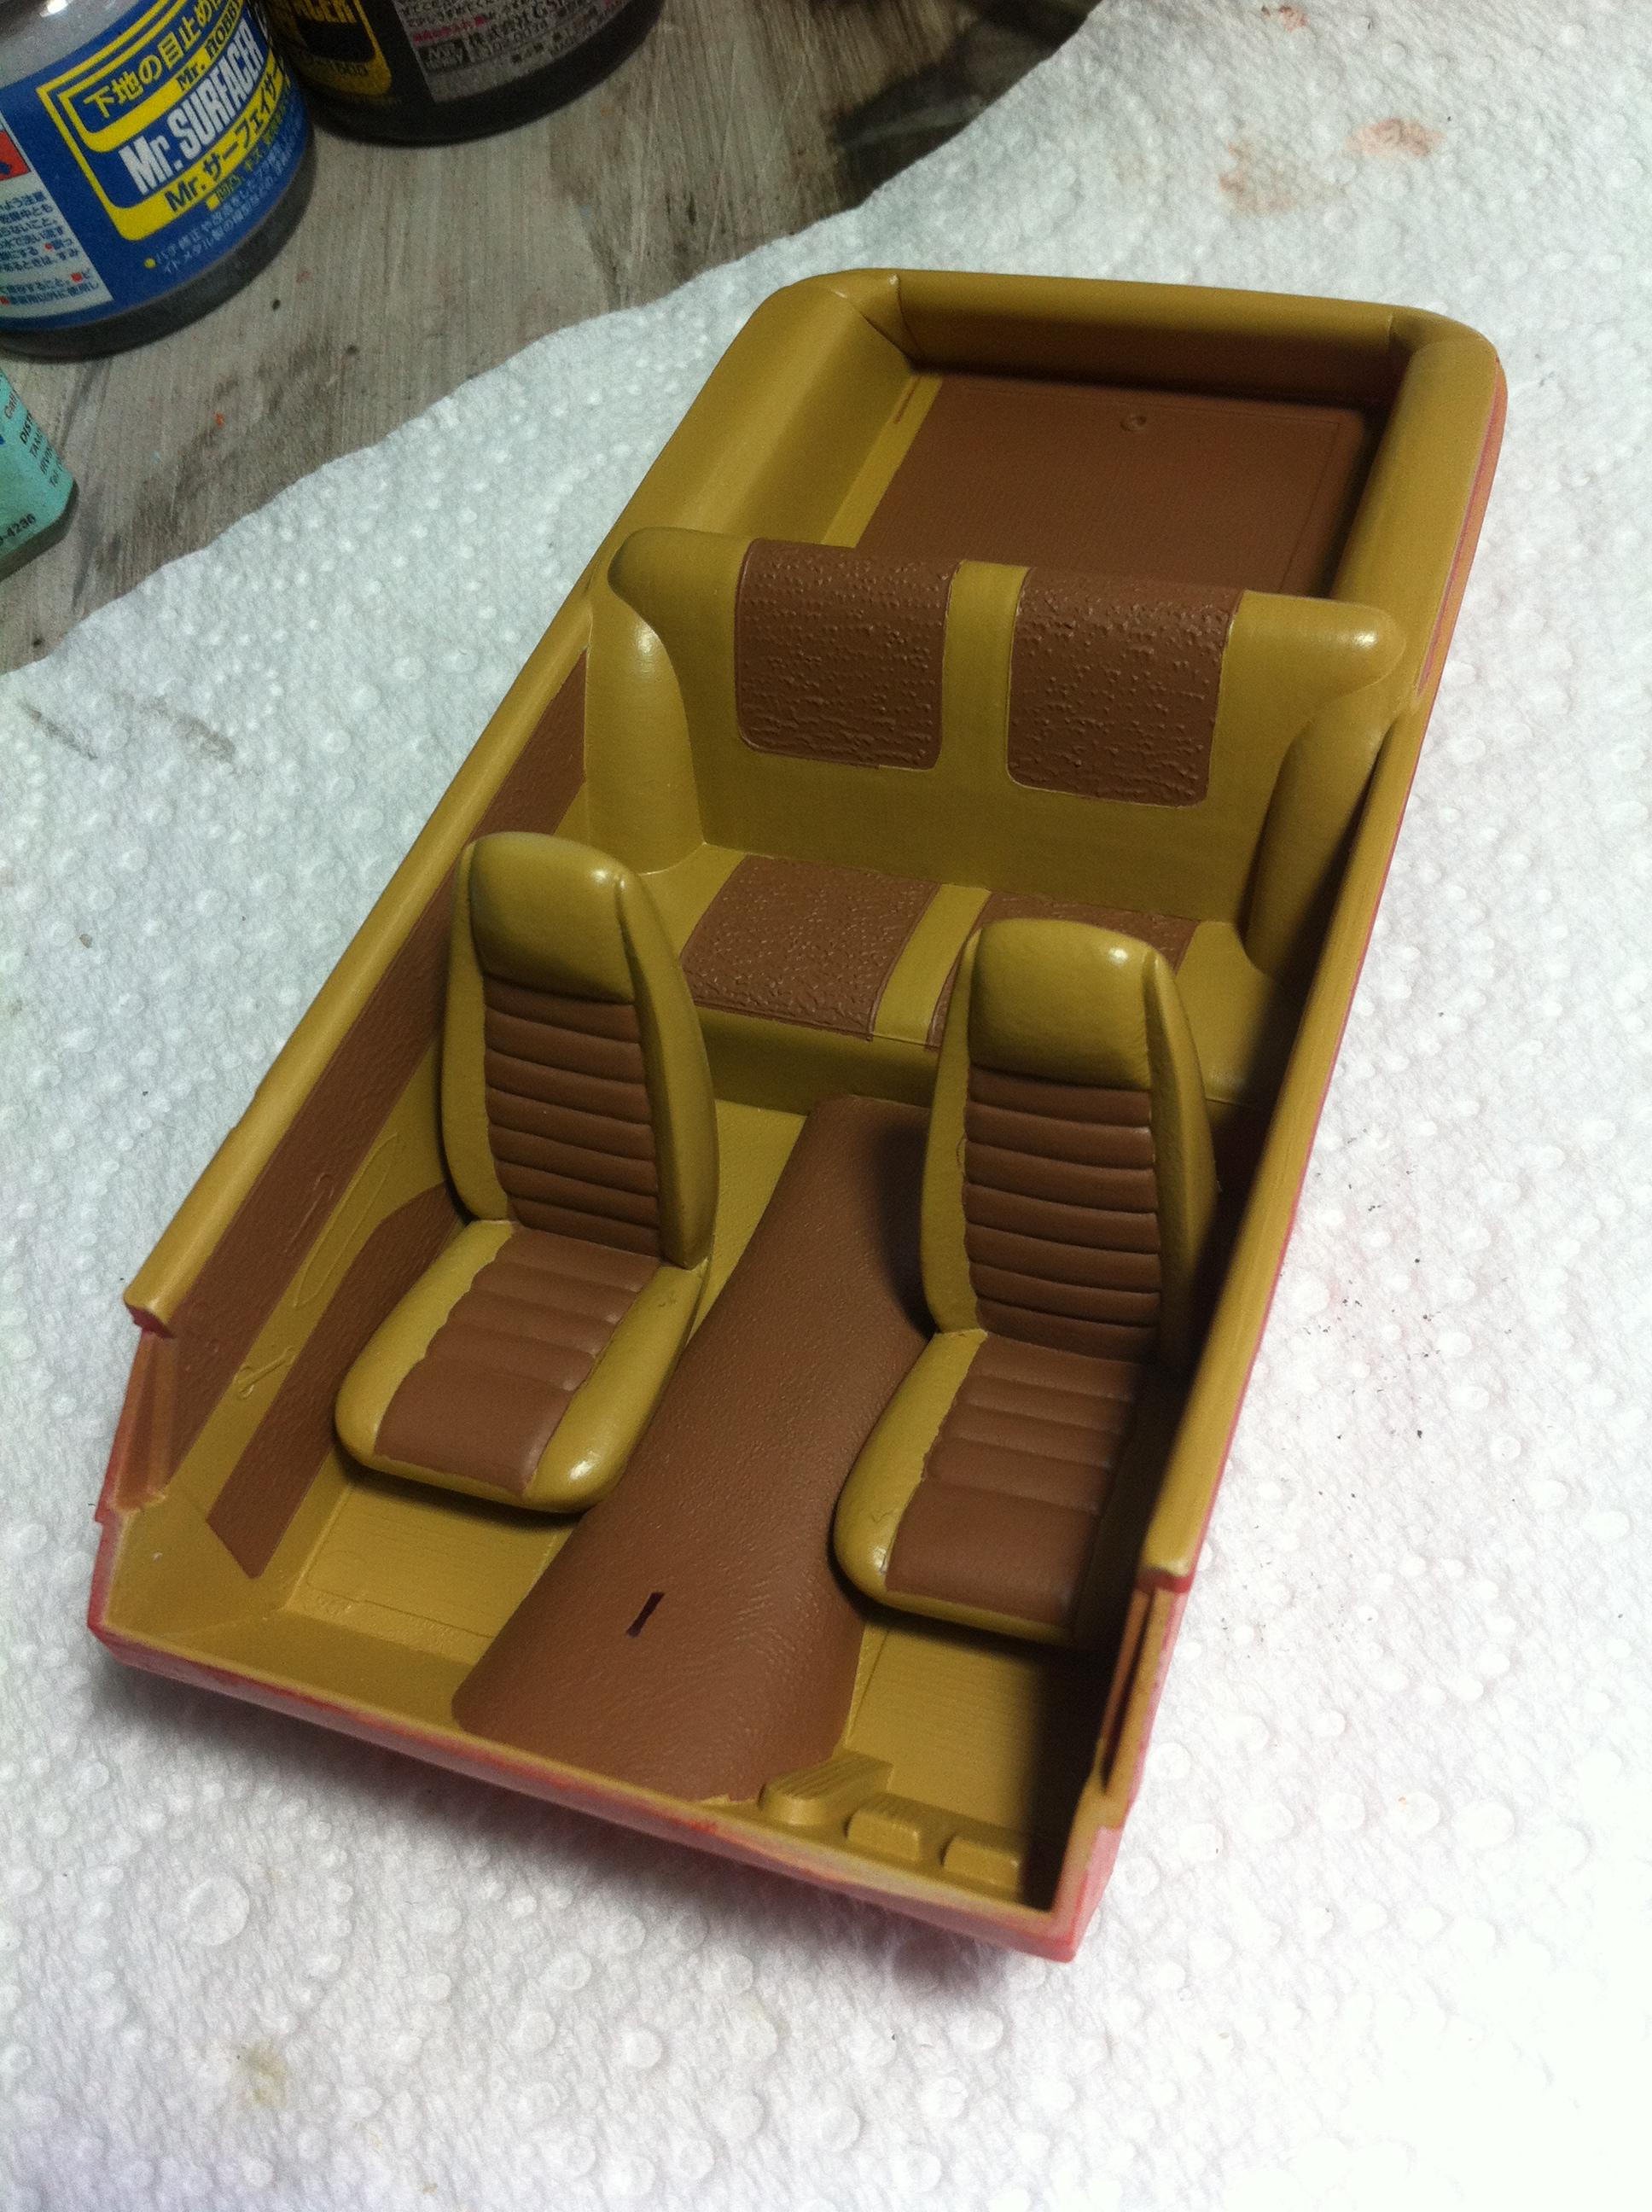
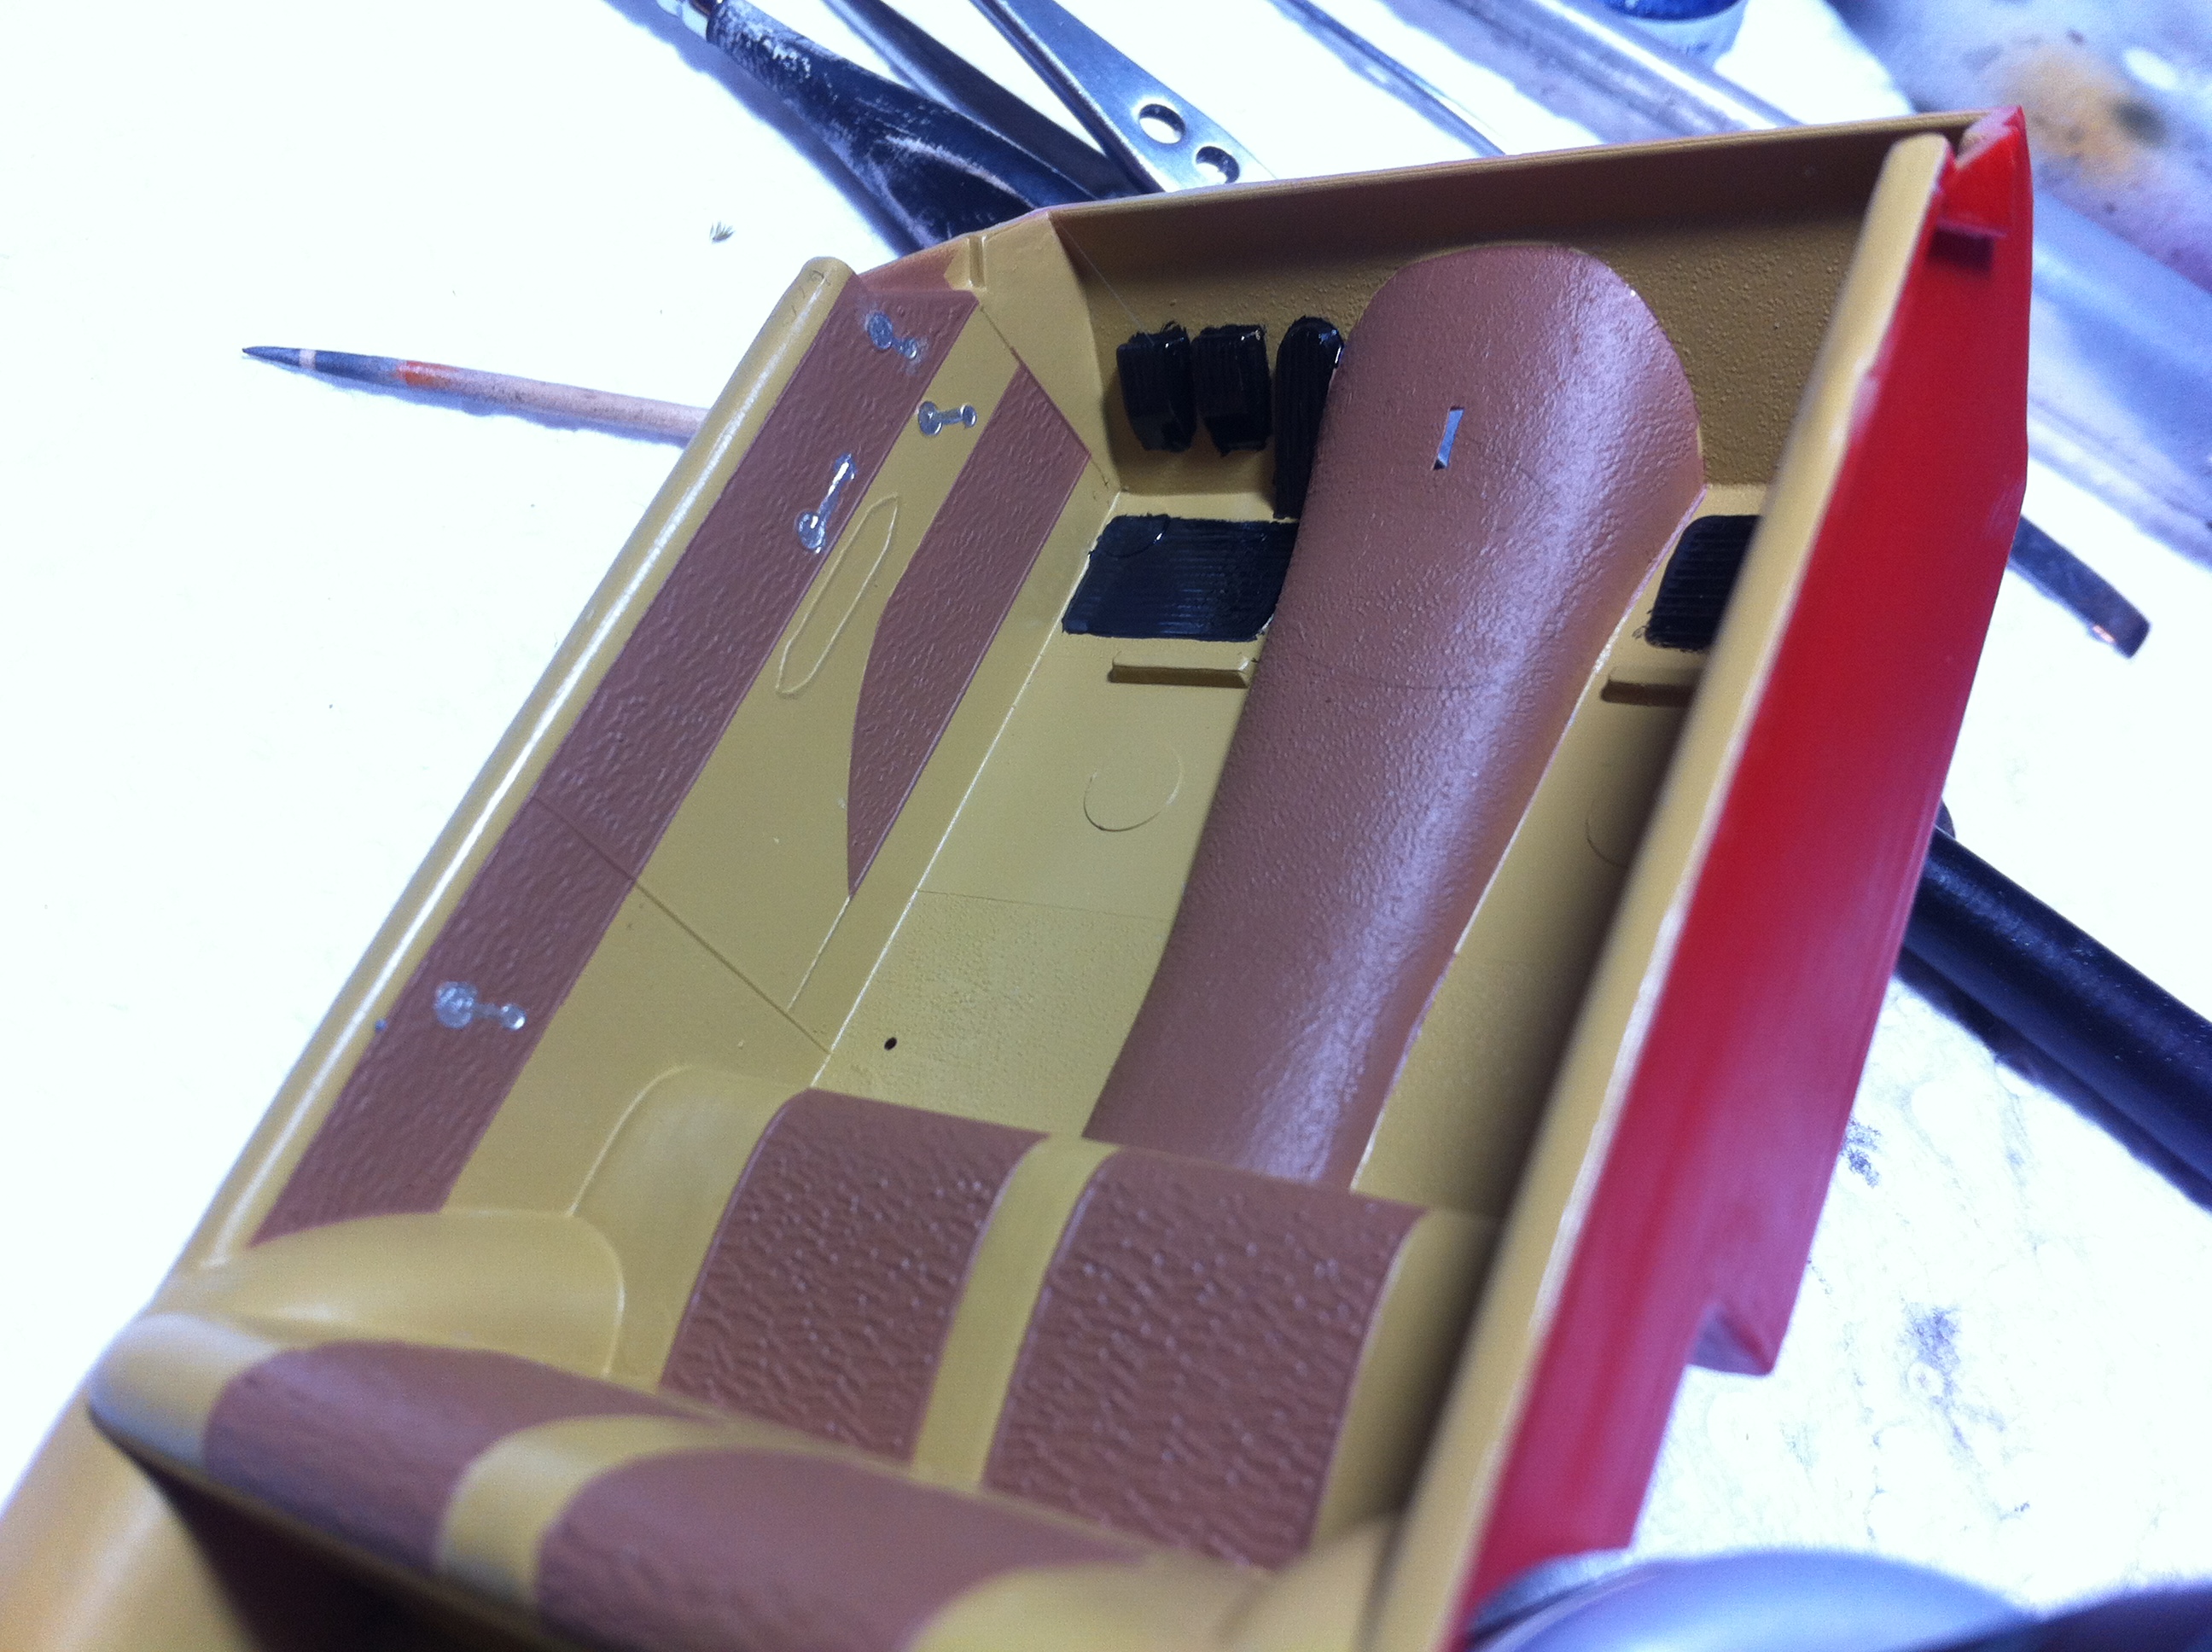
The joys of detailing the interior, an hour of masking for about 3 minutes of airbrushing, then tear it all off again!
Cheers, D
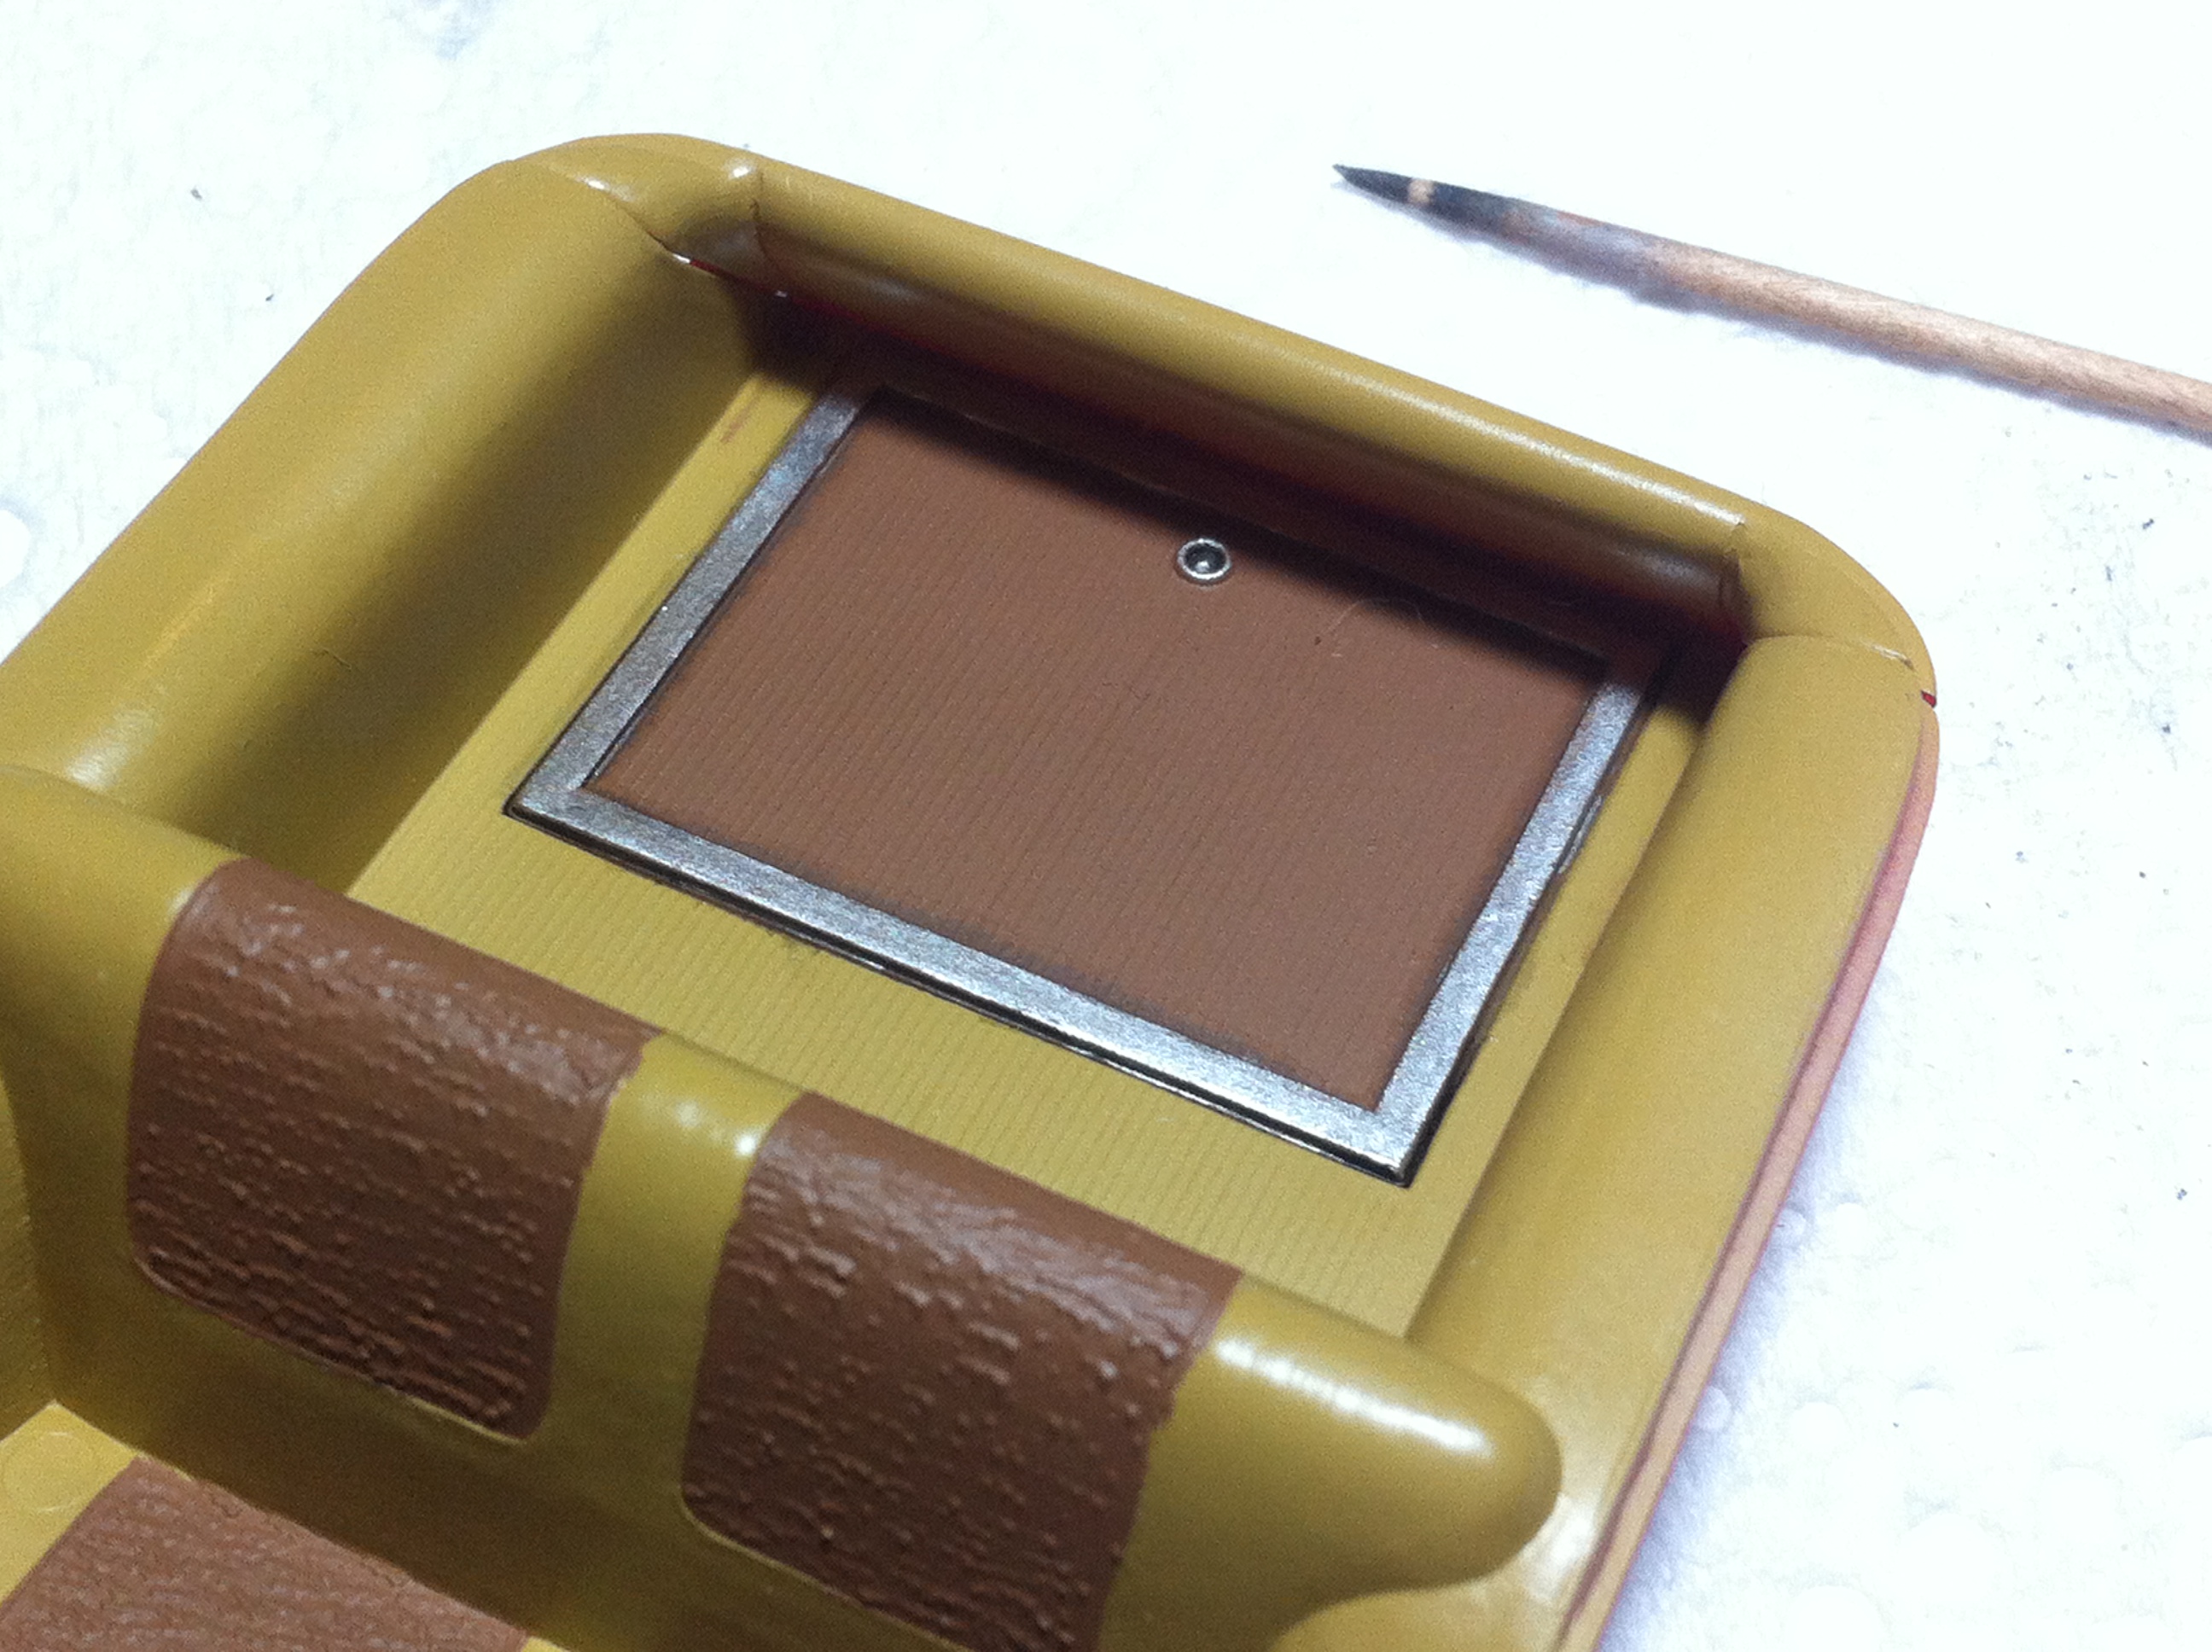
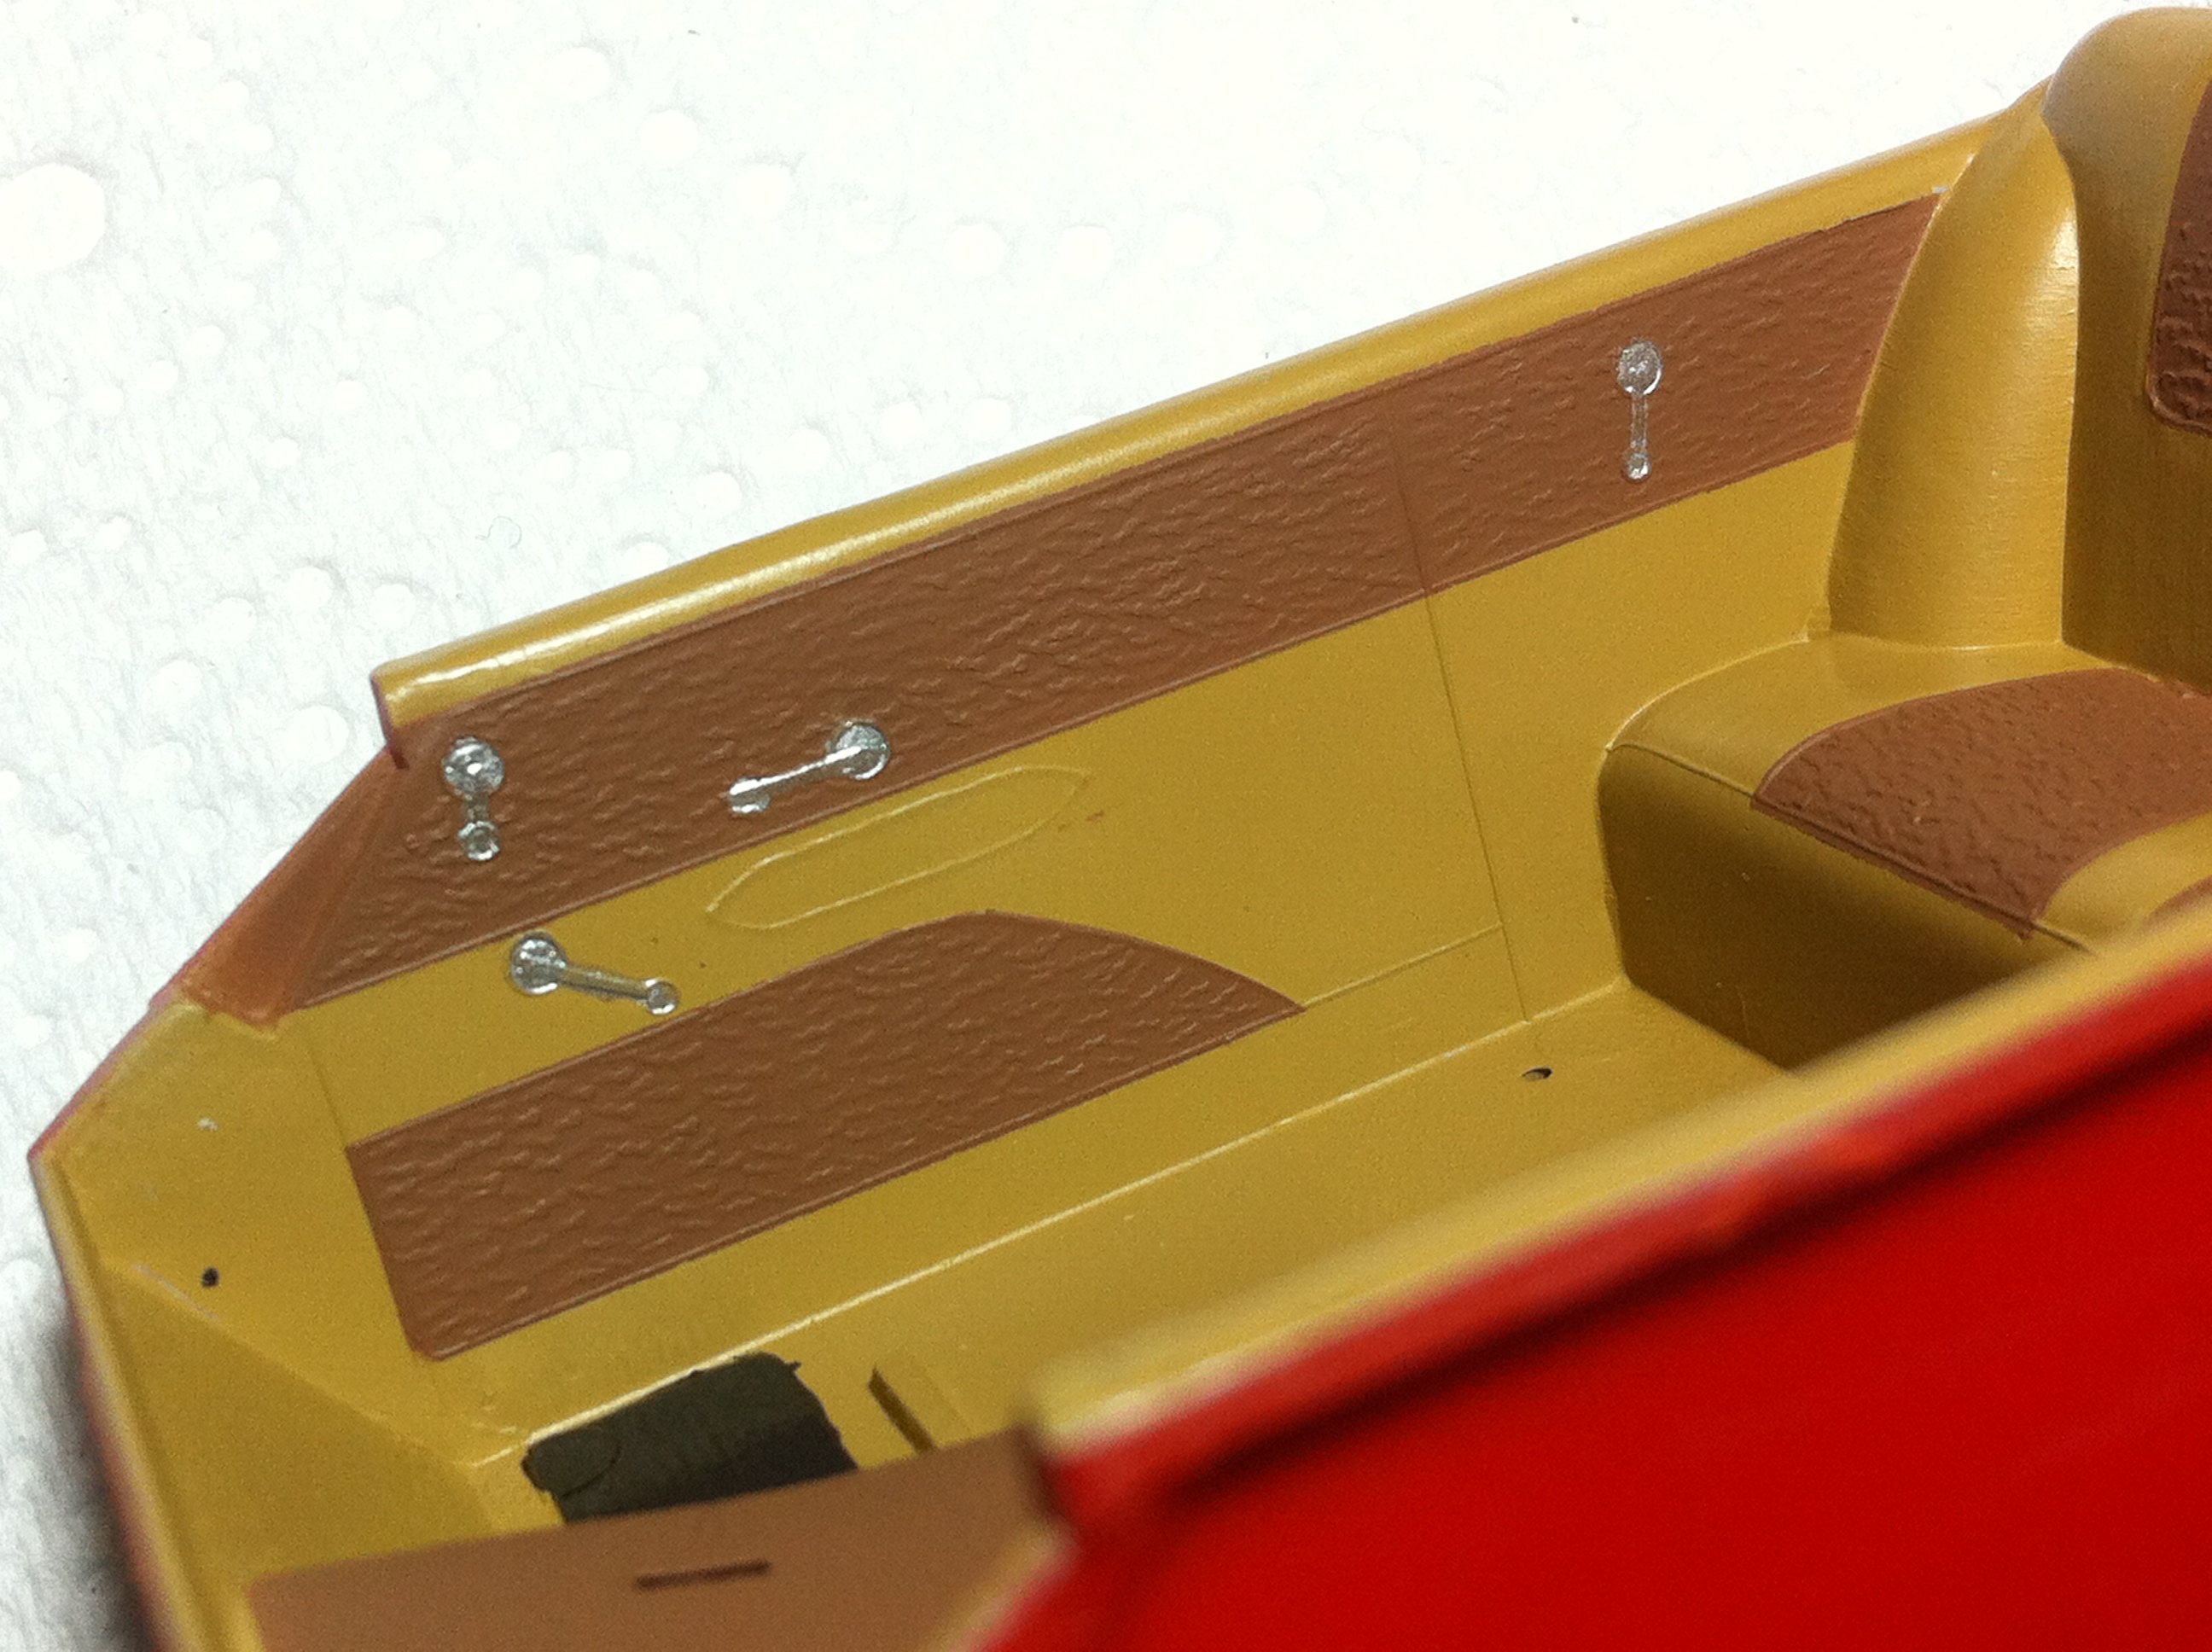
Some hand painting tonight, I did the chrome trim around the access door with Vallejo Metal Colour Chrome, then a touch of Tamiya Black PLW (which will get a second shot for depth).
I painted the door handles with the same Chrome (they are just lightly moulded on the door panels), and the floor mats and pedals with Tamiya Black Enamel.
I’m not happy with the armrest being just a painted shape, so I will carve some sprue into shape and paint it up then CA it in place. I can build up the profile of the handles with another drop of Chrome paint and they will look fine once the kit is assembled.
Cheers, D
Michael,
Thanks for checking out the Cobra paint job. Thrilled that you liked what you saw.
My parents weren’t exactly thrilled with those white number circles on my Red MGB which was also my road car, so Dad issued another parental edict: Those circles came off when I wasn’t heading off to a time trail or solo event over the weekend. Needless to say, I spent a near fortune on circles and numbers back in the day.
Joel
D,
The effort masking was more then worth it. Believe me, I’ve been there, don’t that, and felt the same way., The duel white stripes on the Cobra took forever. Full primer to color coat was like 30 min with two full AB cleanings.
The final results are just simply amazing. This is one fantastic interior for sure.
Joel
Here’s a free standing view of the engine. I seriously doubt I’ll manage to wire it that nicely.
Testarosa engine
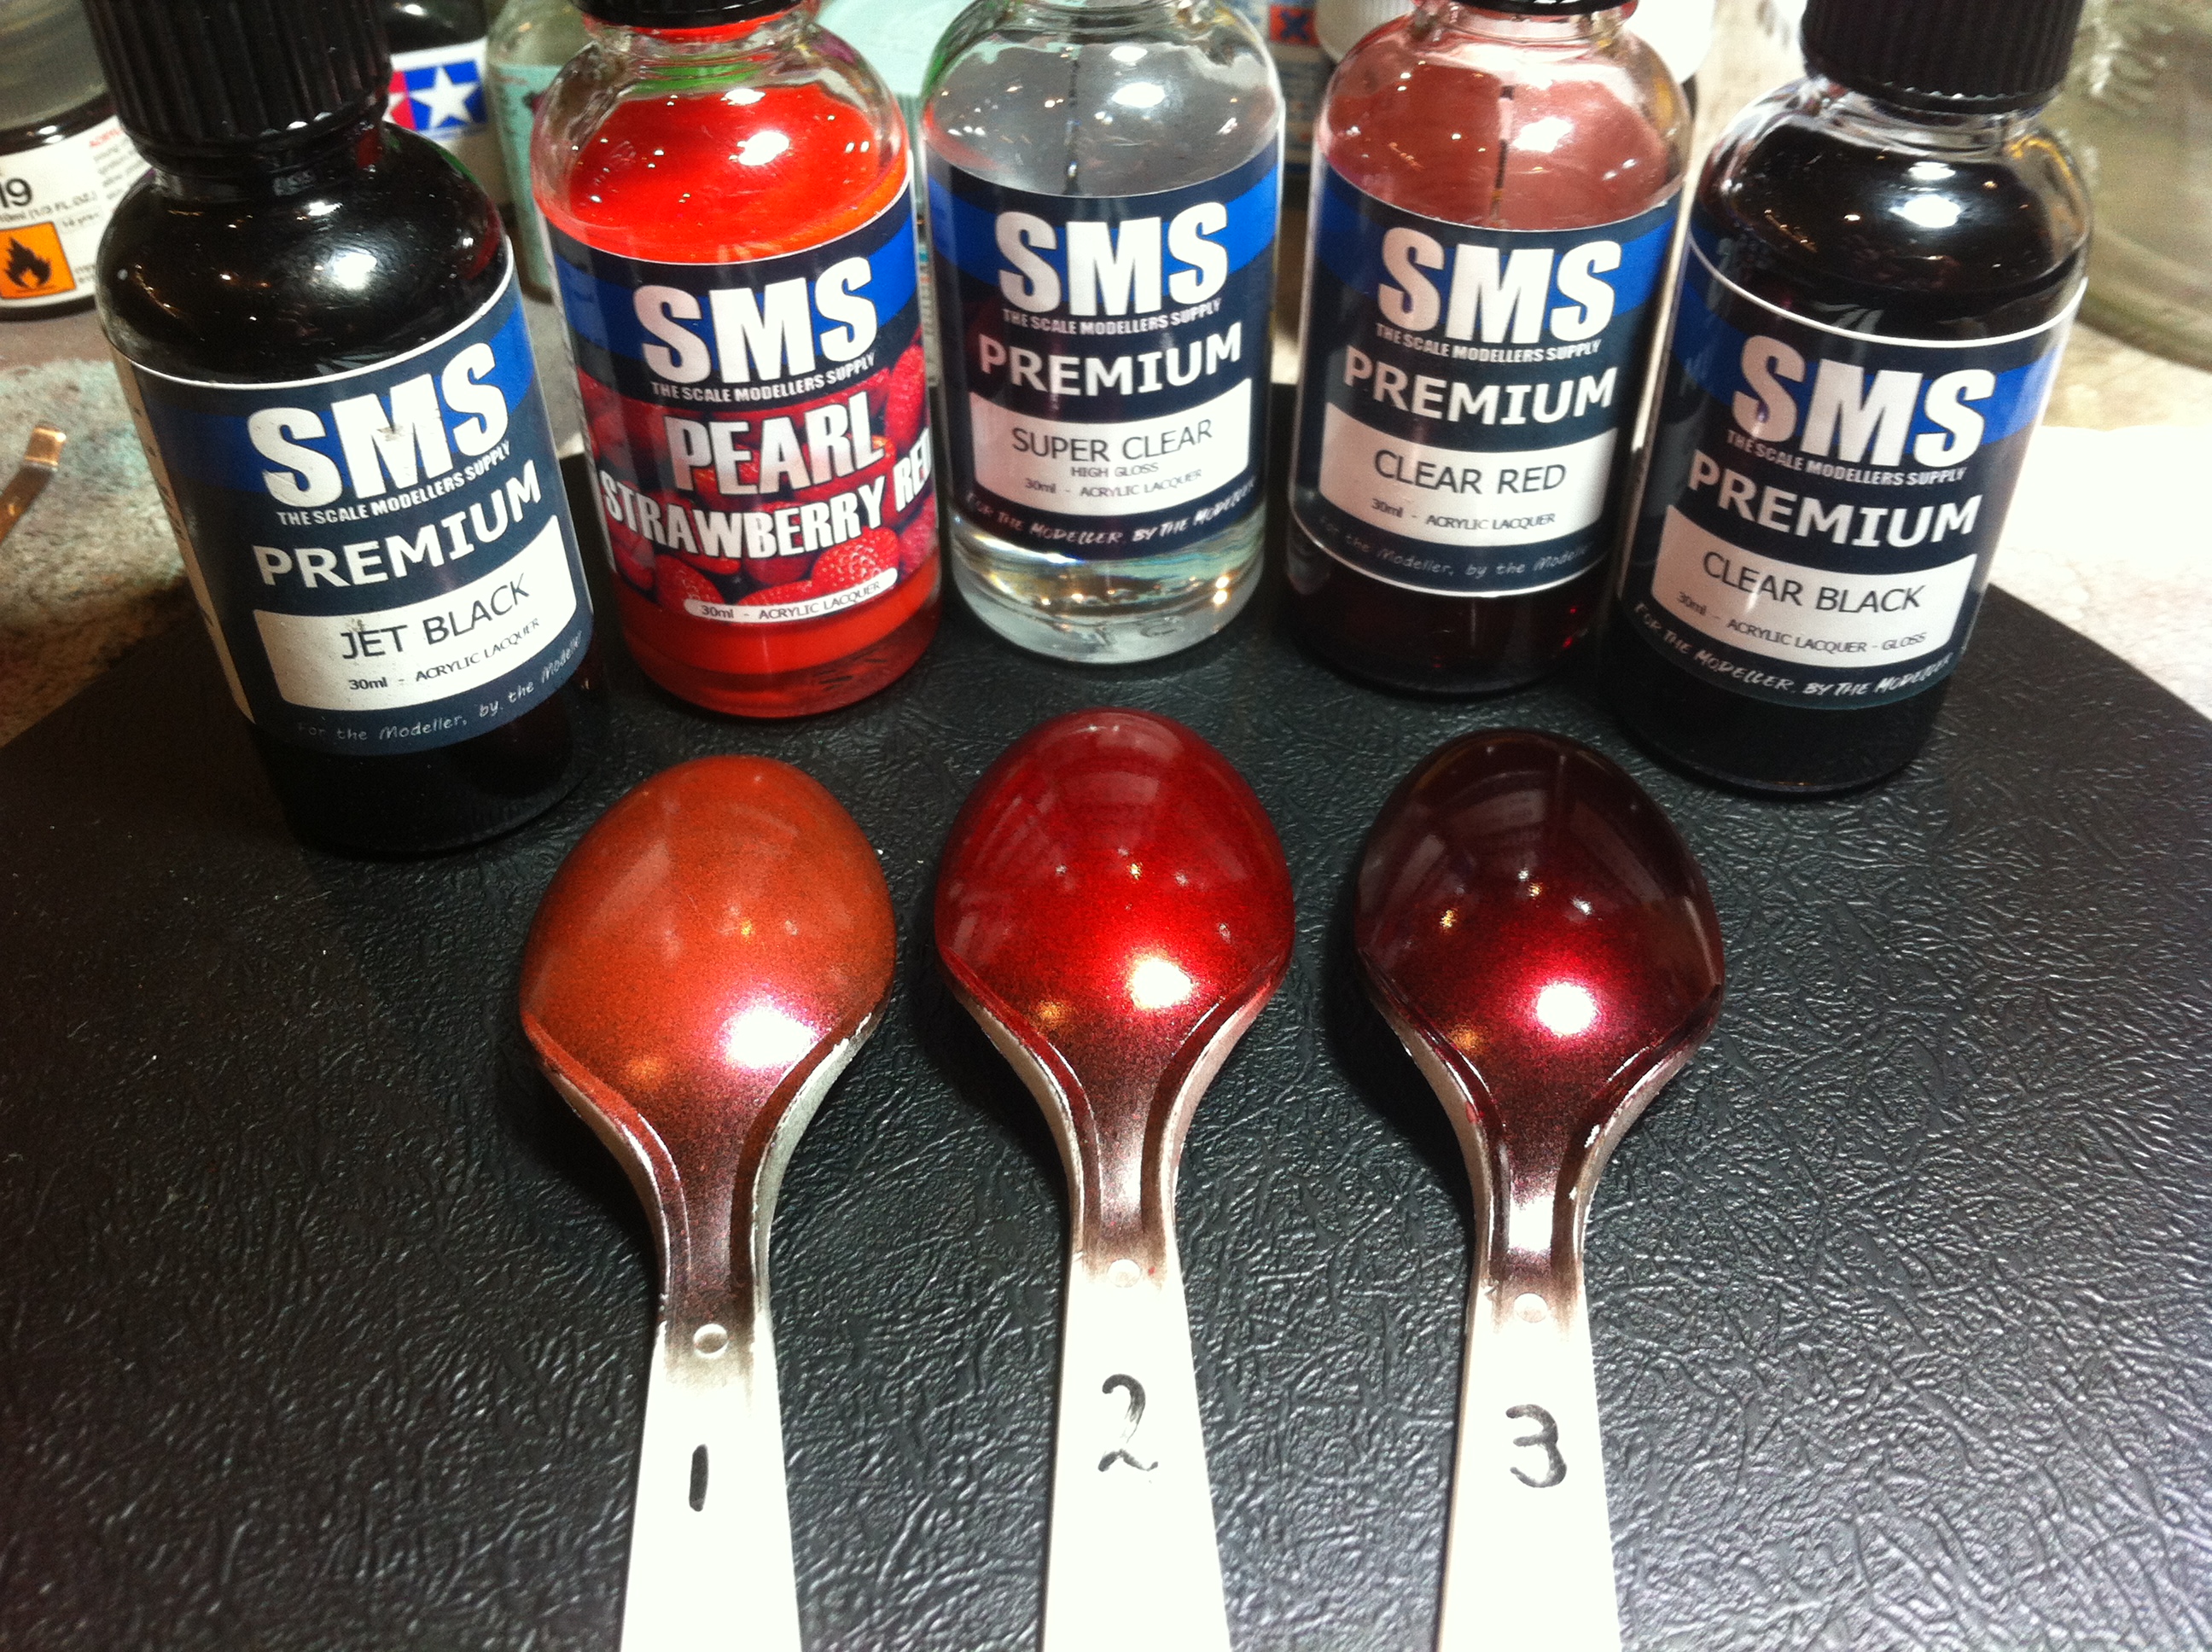
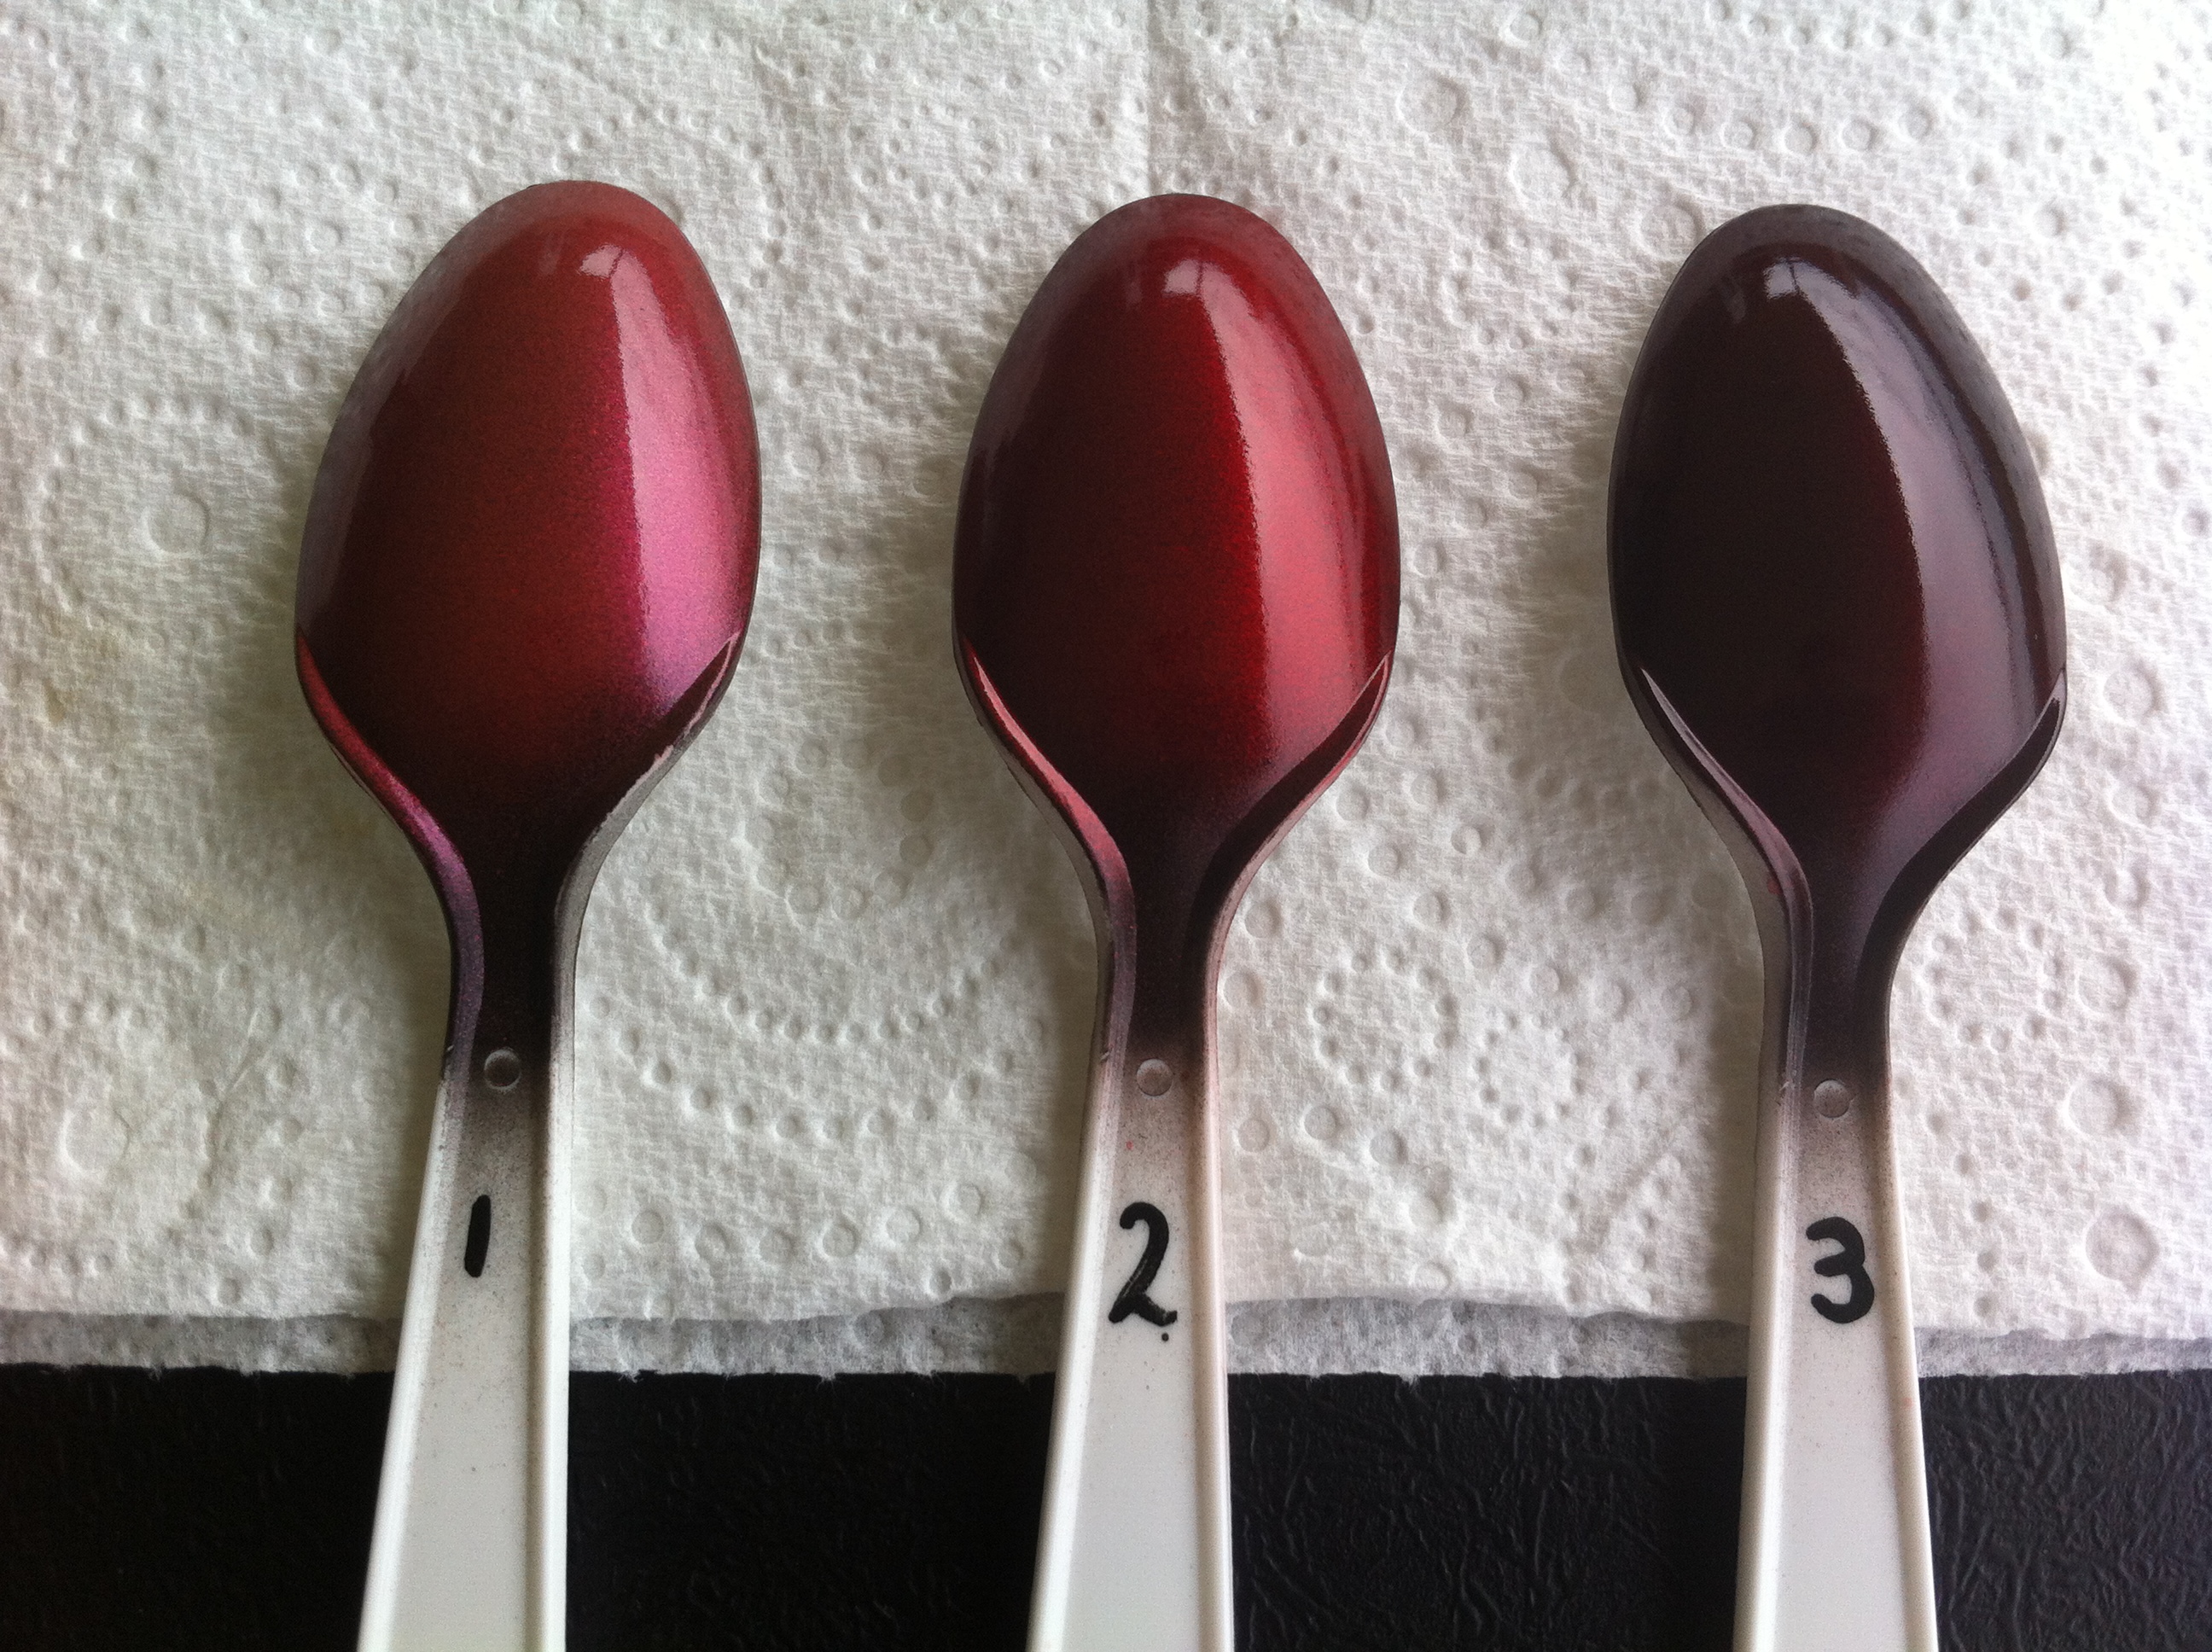
Playing around with colours for the Nomad, it’s difficult to capture the true look as the pearl paint changes so much in different light!
Close up under an incandescent globe.
Outside under soft natural light.
Cheers, D
D,
To make the decision even harder on which color to vote for, everyone’s monitor/Graphics card/Drivers are different. And unless the Monitor system is color corrected/calibrated, there’s a really good chance that we’re not seeing what you’re seeing.
With that being said (my monitor is indeed color calibrated), I really like in pic#1 spoon 3, in pic#2 spoon 2, and in pic#3 spoon 2.
Joel
Much better night at the spray booth. Got my Patriot 105 AB tuned up and blew some Alclad primer through it on the Ferrari. Much better than the rattle can the other night.
Mark
Mark,
Looking forward to seeing your Ferrari in Alcad primer.
Joel