Huge, huge difference Bert! Uuuuuge! The running gear look so much better now. In this case, despite the time, it was/will be worth it. Something like turning a “sow’s ear into a silk purse.” ![]()
Mike
Huge, huge difference Bert! Uuuuuge! The running gear look so much better now. In this case, despite the time, it was/will be worth it. Something like turning a “sow’s ear into a silk purse.” ![]()
Mike
Great little kit, that 102. I enjoyed building mine. I honestly think there will be another in my future.
Mike
Thanks, Michael. I was sweating a little, but I was able to save it.
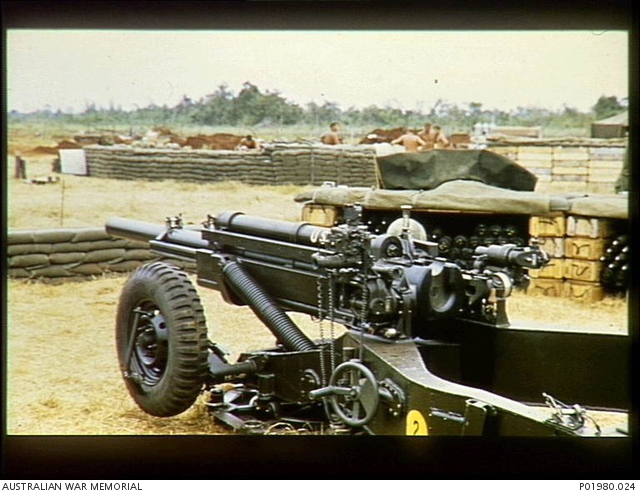
Now I’m thinking of incorporating it into a Fire Support Base diorama.
I’m kind of playing around with a few ideas. I have an M151A1 kit that I’m planning to build for another group build that I might throw into the mix (placed my Grenada Invasion Gun Jeep build to measure the sizing).
Adding drums and ammo crates to build it up and see how it looks like.
I presume the fuel drums will be for firefighting, not for fuel, being that close to ammo!
Kind of like:
Johnny
you should modify the exhaust flaps which are in the diving position. The standard position is locked open i.e. flipped upward.
Olivier
Ah ok, I get that now. The instructions were not that specific. It just says open or closed. I thought that the covers were on free hinges that opened on exhaust pressure … not that they were locked open. I still have the open ones so will remove the closed and fit the correct ones. Thanks Olivier ![]()
Definitely not fuel drums. I was thinking along the lines of part of the revetment, but a single open top drum painted in dull red would be a good place for storing fire extinguishers and the like next to the ammo.
Most of the imagery I’ve seen doesn’t show heavy fortifications around the gun, but an area designated for the ammunition made of empty crates, tarps, sandbags, and pallets to keep the ammo somewhat away from the mud.

You’re partly right. When fording or crossing rivers under water, the exhaust cover pin is unlocked so the cover is free to open under the pressure.
Olivier
Just had a massive catch up on this one John and it has proved very helpful for work on my Meng AMX-30, the body and turret of which are just about complete, and I now need to do the tracks which to be honest I’ve avoided for a while after my experience with the Miniart T55 (tracks not too bad but tedious) and a more recent Italeri M24 Chaffee (nightmare links!). I guess I need to take a deep breath and just get on with the AMX-30 tracks!
You have done a grand job on the AUF1. I still can’t stop myself thinking the turret and gun on that thing are way too big for the hull and chassis!
Cheers Terry … The links are proving to be not to bad once I get into the swing of doing them… I will get the other run done tonight and then they can be put to one side …
After I change the exhaust ends over …![]()
Both track runs are done. I’m doing 80 per side but only connecting 79 and having the pins at each end ready for the last link.
You are left with about 20 -25 spare links give or take…
I think your tracks alone are more parts than this kit in total… 270 according to the box…
Nearly finished…
Haha … 240 fun filled track link parts ![]() … The last run went a lot faster… Only took 35 to 40 minutes to do it… Once they are fitted, I will do the extra thin tip that Pete at petbat suggested …
… The last run went a lot faster… Only took 35 to 40 minutes to do it… Once they are fitted, I will do the extra thin tip that Pete at petbat suggested …
Yours is looking very very good Bert … your extras have really lifted up a few levels mate. ![]()
Most of the forward upper hull parts are on now …
Also the etch foot step is done.
And got pretty much most of the turret parts done… … Probably about 20% of it to go until turret is complete.
Easy decision. The Stryker MGS is not artillery. It is a direct-fire gun, like a tank.
Bingo!
The A-222 Bereg is the only choice.
Coming together very nicely John. It is a massive turret.
yeah, it is … looks totally out of sync with the hull for size … but I suppose if it works …
I started the build putting together things that had to assembled before the rest of the kit could be started on the 42 cm Howitzer.