Perfect timing and excellent advice from @Uncle-Heavy who has again put me on the right road! I’ve managed to extract the reel from the boot without major damage, and got the wire off it. Now to find something more suitable. Thanks Robin!
3 Likes
Whenever I take some electric stuff (earphones, chargers, whatever) to be recycled I get some of the cables/wires first. Now I have a stash of various wire sizes.
The itsy bitsy tiny loudspeakers in the earplugs/earphones that the kids keep breaking contain a treasure of extremely thin copper wire, thinner than human hair.
The best of it is that it is already on a little spool.
One electronics cable I found, don’t remember where, had some of the wires shielded by being wound with a narrow strip of copper foil (think 1/72 safety belts).
Cut open all electronics and wires before you recycle them.
6 Likes
Amazon has loads of different sizes in wire spools … I recently restocked and am using it now on a build. Also, look out for florist wire, it varies between .2 to .4mm but would easily work as well.
4 Likes
Ta guys. I’ve got a small stash from electronics that have been thrown out but had to buy wire for these reels as there’s a fair length needed.
And I’ve dusted the underside ready for the top side bigger pieces to go on; windshield, canopy, hood and boot.

7 Likes
Some of the additional pieces; the poles that are attached to the right rear side of the vehicle and are used to place/untangle cable in hard to reach places. The kit version is pretty basic so I added a clip and the hooks that go on the ends of the poles. Reference photo too for comparison.


And a phone handset scratch built that will sit with the field phone box and Morse keypad.

7 Likes
That is really well done, I congratulate you on your skills. Thank you for sharing.
2 Likes
Aha I get it now, an early prototype of the equally inspired Mossad cell-phone design.
(Belatedly) I always used the thinnest-gauge fuse wire, if only because it was easily sourced & fairly cheap.
Fascinating build, great results from a dog of a kit & excellent meticulousnessness attention to detail. I have every confidence you’ll prevail over the bigger pieces too ![]()
4 Likes
So a few items now put on but more to come.
Cable reel installed on rear deck. It is a bit tight but the folded canopy is a bit big. Only other solution would be to make a canopy but not sure I’m capable of that. I made some ‘feet’ for the reel (from a piece of small plastic cable tie) in line with reference photos. I’ll put a bit more colour on them next. The cable will hook into the field phone and the other end of the cable will be out the back of the vehicle as notionally being unreeled.
Windscreen and bonnets are on. Still a bit to do then touch ups.

Other additions are being painted up and tidied pre installation.

10 Likes
Still going on the smaller items. A few more bits added.

Including a Morse key to go with the phone.

11 Likes
Very impressive, although I keep being distracted by the dreaded white-line around the (strangely frosted) windscreens. I had the same problem but as you know I’d had run out of patience by then & didn’t care…

Whatever I don’t think it’s realistic on the assumption there was presumably a black rubber seal (?) I don’t know if you’ve cemented them in already or if they’re just wedged, either way it might be worth trying an oil-based semi-dilute black wash applied with your finest-pointed brush to the corners (from the inside), capillary action should make it travel round the sides. (Strange, just noticed yours is a two-panel windscreen,?)
3 Likes
Will try that. Ta. The clear plastic is a real weakness of mine.
Related but different, I’m working on the side windows which had clear plastic rather than glass. I’ll try to replicate that effect but it’s not going well thus far.
Yep the driver’s windscreen could open right up. Maybe to get a rapid hair dry effect whilst driving?
3 Likes
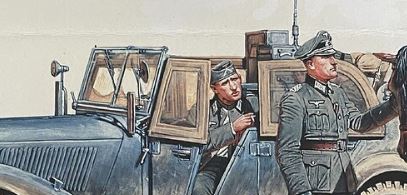
Yes I think you’re right about the ventilation option. In this photo of Heydrich’s death-ride he’d pushed out his side of the screen to get some wind-in-the-runes action…

2 Likes
For window seal representations, I always go around the “cuts” of the clear part with a fine felt-tipped black pen and, where applicable, treat the window frame likewise before applying the vehicle paint.


HTH, Peter
5 Likes
The “windows” on envelopes containing invoices et.c. might be an option.
They are extremely thin and very slightly “frosted”.
They are usually made of styrene but use some other glue since styrene glue will almost always cause them to shrivel.
2 Likes
What, those things I always Return to Sender? Alternatively having just done an audit of domestic polythenes, that of zip-lock sandwich bags might be handier being slightly stiffer. PVA glue’s about the only thing to hold ‘em in place.
3 Likes
Thanks team! All useful suggestions that I’ll try.
I think I’ll take the windshield off and re set the windscreens as I’m not happy with them not being well set into the frames.
For the side windows, I’ve had a go at using ziplock bag plastic with mixed results. The look is spot on but cutting to size is not as easy as I thought. There isn’t a two part window frame to seal the plastic into position. This means the plastic has to fit exactly and be glued in place around the frame of what is the inside of the window frame (they’re made to be seen in place on the vehicle, not from both sides as I’m doing).
Also, once glued, the glue can be seen on the inside edges of the frame so I may work up a basic inner frame to hide the glue and help seal the plastic in.
In other news the boot fits and is in place.
1 Like
The envelope windows are easier to cut with scissors than the polythene from the zip-loc bags.
Would paint glue them solidly enough?
Windshield:
Just a thought …
0.010 inch black styrene sheet: Evergreen Polystyrene Sheet -0.010'' Black
Cut narrow strips and glue to the edges of the windscreen. Trim off excess once the glue has set or the solvent evaporated.
Residual frosting of the clear part can be polished out if needed (Micro Mesh polishing kit)
Micro-Mesh® Hobby Kit - Micro Surface
I used about a little finger finger-nail sized bit of each pad to restore all the clear parts on an
Airfix 1/72 Catalina. Finished off with Future floor polish. The end result was better than the original parts.
Protecting with floor polish BEFORE glueing usually prevents frosting, floor polish will also glue the clear parts in place.
2 Likes
Oooh nice suggestions! I’ll have another bash at it tomorrow. Long weekend with Australia Day public holiday so a good time to be working on a model.
1 Like
Good luck!
1 Like
Just checking I’m understanding correctly – as per your post #7…
The side windows have a wide border of ? canvas ? – is this border not provided (in plastic) in the kit? If it is I don’t follow why a square of polythene can’t be glued to the inside and then a very thin frame glued over it (of e.g. PVA’d tissue paper) to conceal the join/glue.
I get the problem of glue-bleed though – maybe instead of PVA you could try a contact adhesive very sparingly applied to both surfaces as far away from being visible as you can. When dry & being pressed together at least it wouldn’t bleed into view…although of course you’d only have one shot at positioning it correctly.
I’ll recuse myself of anything more to do with the windscreen, apart from endorsing Peter’s & Robin’s suggestions.
Happy Oz Day – are you going to the drone show(s)? I’ve heard the mass bat migrations across the lake around show-time could cause havoc ![]()
2 Likes