Introduction:
As I mentioned in my introduction thread, I am new to the hobby. Yes, I did build a couple of sets as a kid/teenager, but nothing comparable to what anyone here in the forum builds. So I consider myself a total beginner.
I’ve already purchased a lot of tools and accessories to start building some kits. Now it’s time to discover what really helps me - and what was just wasted money.
In this thread, I will try to take you with me on my journey of building and painting my very first scale modeling kit! I can’t say how frequently I will post here or how long it will take me to finish the build, so bear with me and feel free to comment, help, and critique me!
.
Model Choice
I already purchased a hand full of kits before I did any research at all. I knew from what I had read that Tamiya is a good company, especially for beginners. I didn’t put much thought into the sets I bought - I simply picked up what I could find at my local shop for a reasonable price.
Looking back, I would consider that my first two learnings are:
1. Tamiya is not always equal to Tamiya
I now know (after reading and researching) that not every Tamiya kit is great, and not every kit meets the same standards. Sometimes there are newer manufacturers that may even offer better beginner-friendly builds of the same vehicle.
2. Purchasing with purpose
Even though I’m a beginner, I want to build a story around the model I’m working on. I want to do proper research about what I want to achieve.
If I build for example a Panther tank, I want to learn more about the tank and its history. I want to understand the details of the vehicle that I want to represent - what the differences are between versions, and how close my model kit is to the real deal.
Is there anything I want to add to make it more realistic? Can I maybe find photos of a real tank that I want to replicate? Or do I want to build a factory-fresh display model? Will I use it in a diorama? In what context? Do I want to build this tank in all different versions? Or in all known camouflage patterns?
All these questions - and more - came into my head once I started building this kit. Questions I don’t have answers to for this particular build. And I think that’s okay - I’m learning. Along my journey this tank might even end up in the trash bin anyway… although I’ll probably keep it as my “first model build.” and as a reminder how it started ![]()
.
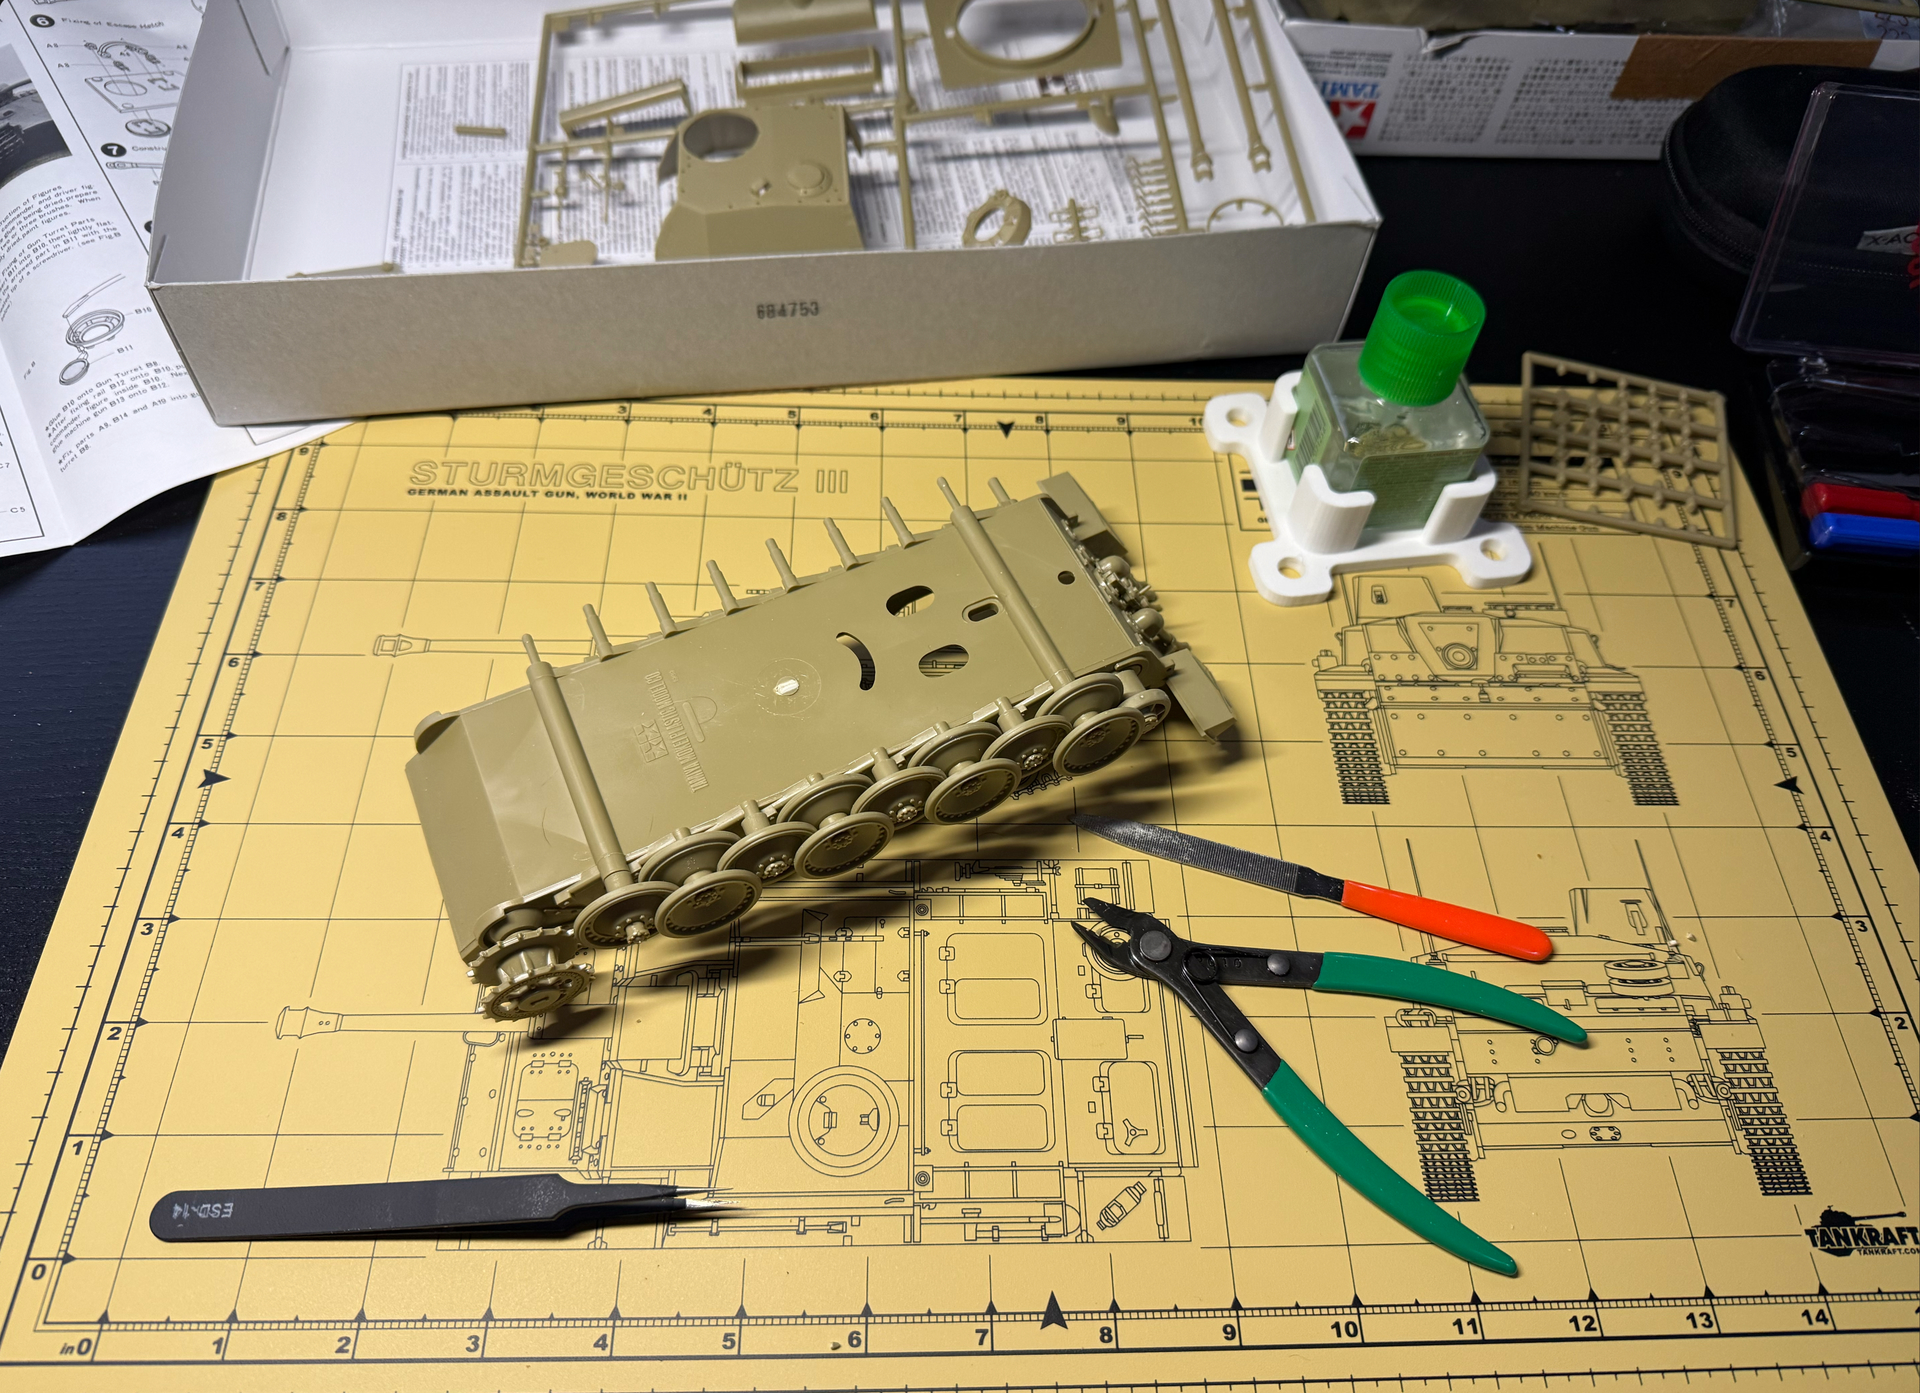
The Build (so far)
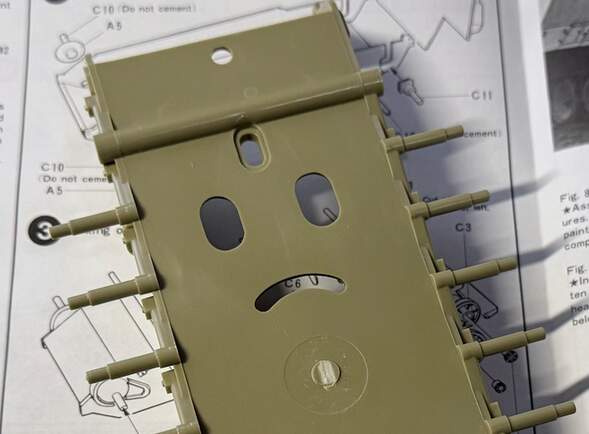
I don’t know why, but when I opened the box I immediately felt like I was looking at a really old model kit. And my research later confirmed that feeling - this kit has been on the market since 1968. Over the years they’ve added new parts and changed the boxing, but the core kit is still the same.It is kinda funny that the hull looks pretty scared to me ![]()
For me as a total beginner, the kit looked okay, and I am a bit surprised that the part count isn’t very high. The instruction manual is kind of funny, because it has one single sentence in German: “Erst lesen dann bauen” (read before assembly) - but that’s the only German in the entire manual. So it was apparently important enough to tell the builder in German to read the instructions first… but then the instructions themselves are only in English.
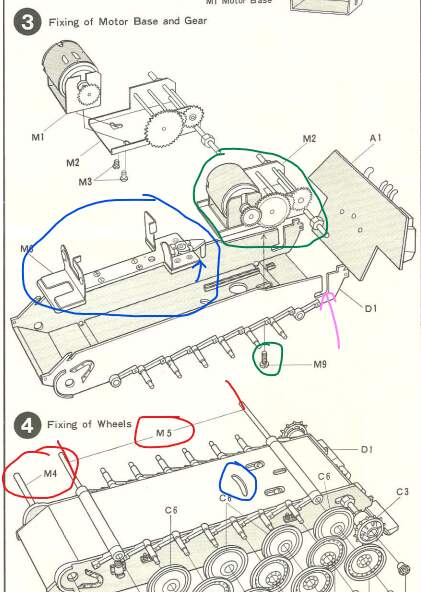
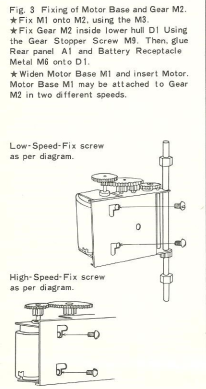
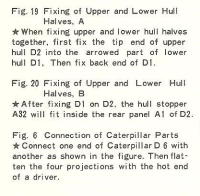
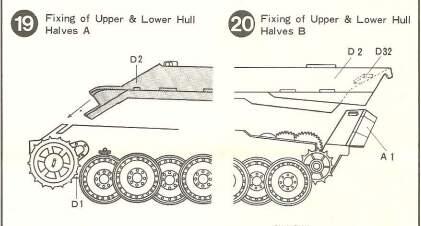
The manual itself is okay, but I wouldn’t call it good. For example, in step 3 they reference part D1, but I couldn’t find “D1” anywhere. I assumed D1 was the lower hull, but the hull didn’t have a number on it. Later I discovered that on page 2, on the left side under section D, “1. Lower hull” is mentioned. In my opinion that’s just bad labeling. I know what a hull is, but someone new to the hobby with little or no military background might not know that right away.
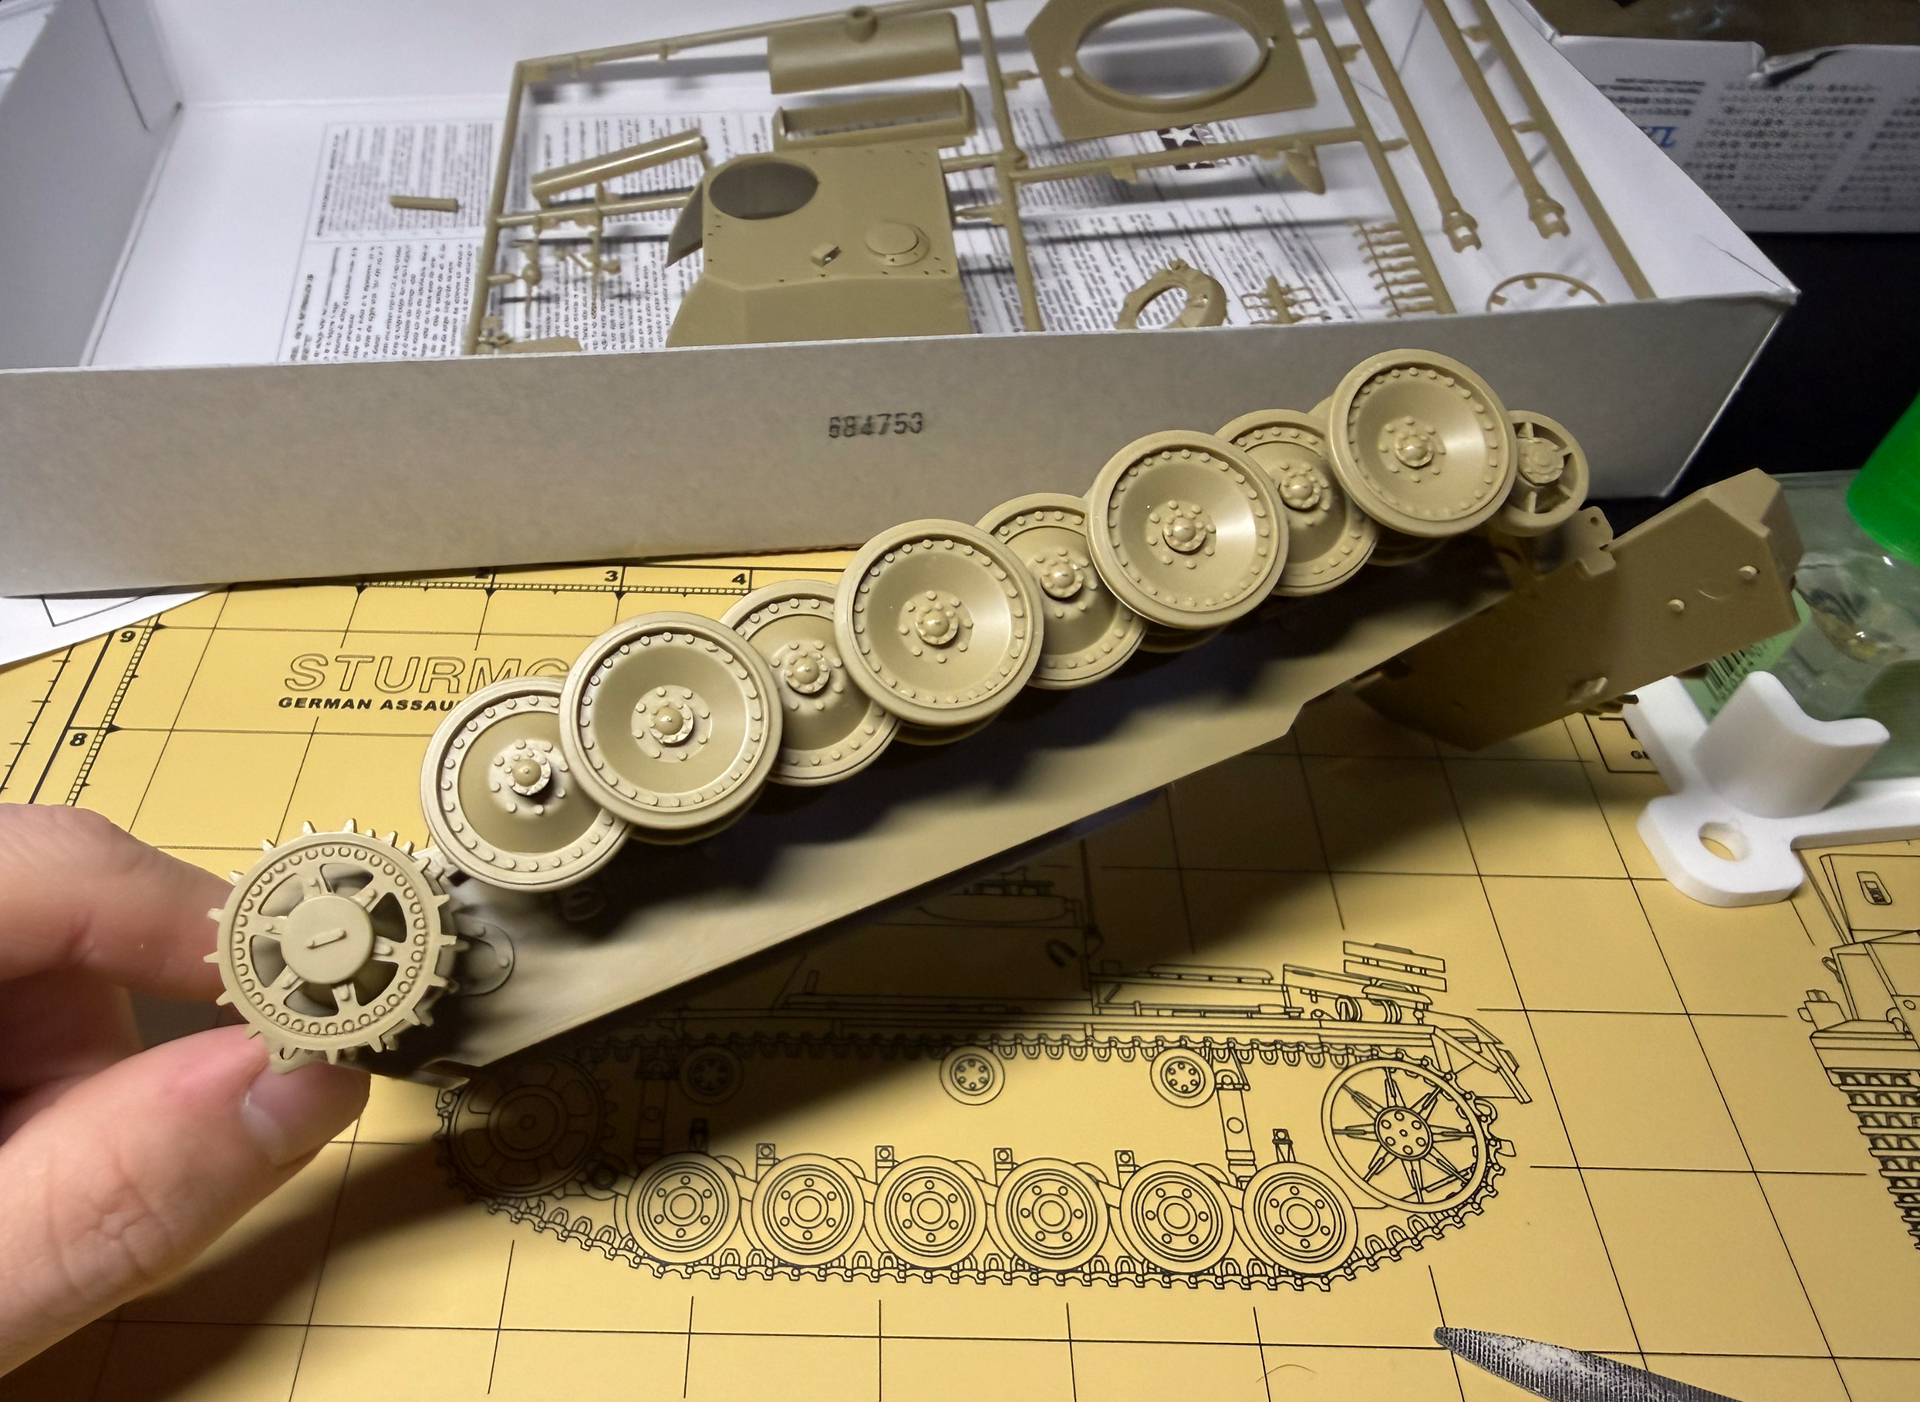
Another thing that confused me was step 4, where the idler wheel has all the pins cut off. Why? Why didn’t they just mold it without the pins in the first place? Did they not know at the time that the pins were wrong? From my newbie perspective, that mold could only be used for this specific tank anyway, right? (Since it’s attached to this sprue.)
I stopped today at step 4. The build to this point has been pretty straightforward and not difficult. I’m not sure yet why the wheels need to be moveable, but I simply followed what the instructions said.
So far, the overall quality is okay. The parts are fairly clean and the fit is decent. I personally think there is a lot of room for improvement - even though this is my first kit and I don’t have anything else to compare it to yet.
Please share your thoughts with me and do not hesitate with feedback on my build or building process!
P.S. This text was written before I went for my one week vacation. I came back last night and will hopefully find some time this week to continue building.