I used some AK Gauzy intermediate recently after Vallejo acrylics based on a tutorial, then dark wash, then Vallejo matt varnish… yet to me the end result was still too glossy.
Certainly, also try to apply your gloss in a thinner lighter coat, I’d say for the areas with decals you could go heavier. For your final matt coate do the same, multiple light layers so a) you don’t flood the details and b) several thinner coats just ,at dull it to your liking. You won’t have any negative reactions between layers, everything ought to be compatible. Allow ample time between coats too.
I don’t use the glossy substrate approach…I use thined white glue under my decals that holds them in place and turn very clear when sprayed with acrylic over-coat to protect paint and the decals. Been working for me for years now.
I didn’t say prevent but limit the possibility. In theory, the gloss would provide a flatter surface and that flatter surface would prevent/limit the silvering. Depending on the weathering afterwards glossing the whole model can be beneficial vs just for the decal area.
The satin is not overly glossy but enough to make decaling easy and it will help the wash flow nicely into any recessed details. If, after the wash you still find it too glossy then a light coat of Matt varnish should tone it down.
Lots of variables to fixing but most times using MicroSol decal solutions (red bottle) can be used to address silvering. This can soften the decal to make it super soft, so caution when using. Ensure it’s in place where you want it and don’t touch while it’s working. Other possibilities is with a sharp blade cutting the decal so it flow in and out of the panel lines or lay down over the top of a panel line. Sometimes if raised high enough, trimming around say a bolt etc and paint the detail to match the decal.
Wow… Reading all this, All I just want to do now is hug my remaining bottle of Pledge Future Shine. Oh the decades using that stuff . Oh well. I have 600+ kits in my stash and I am 1 month older then Sputnik (age math test). Like I have to worry too much about the long future (pun) of this beloved hobby
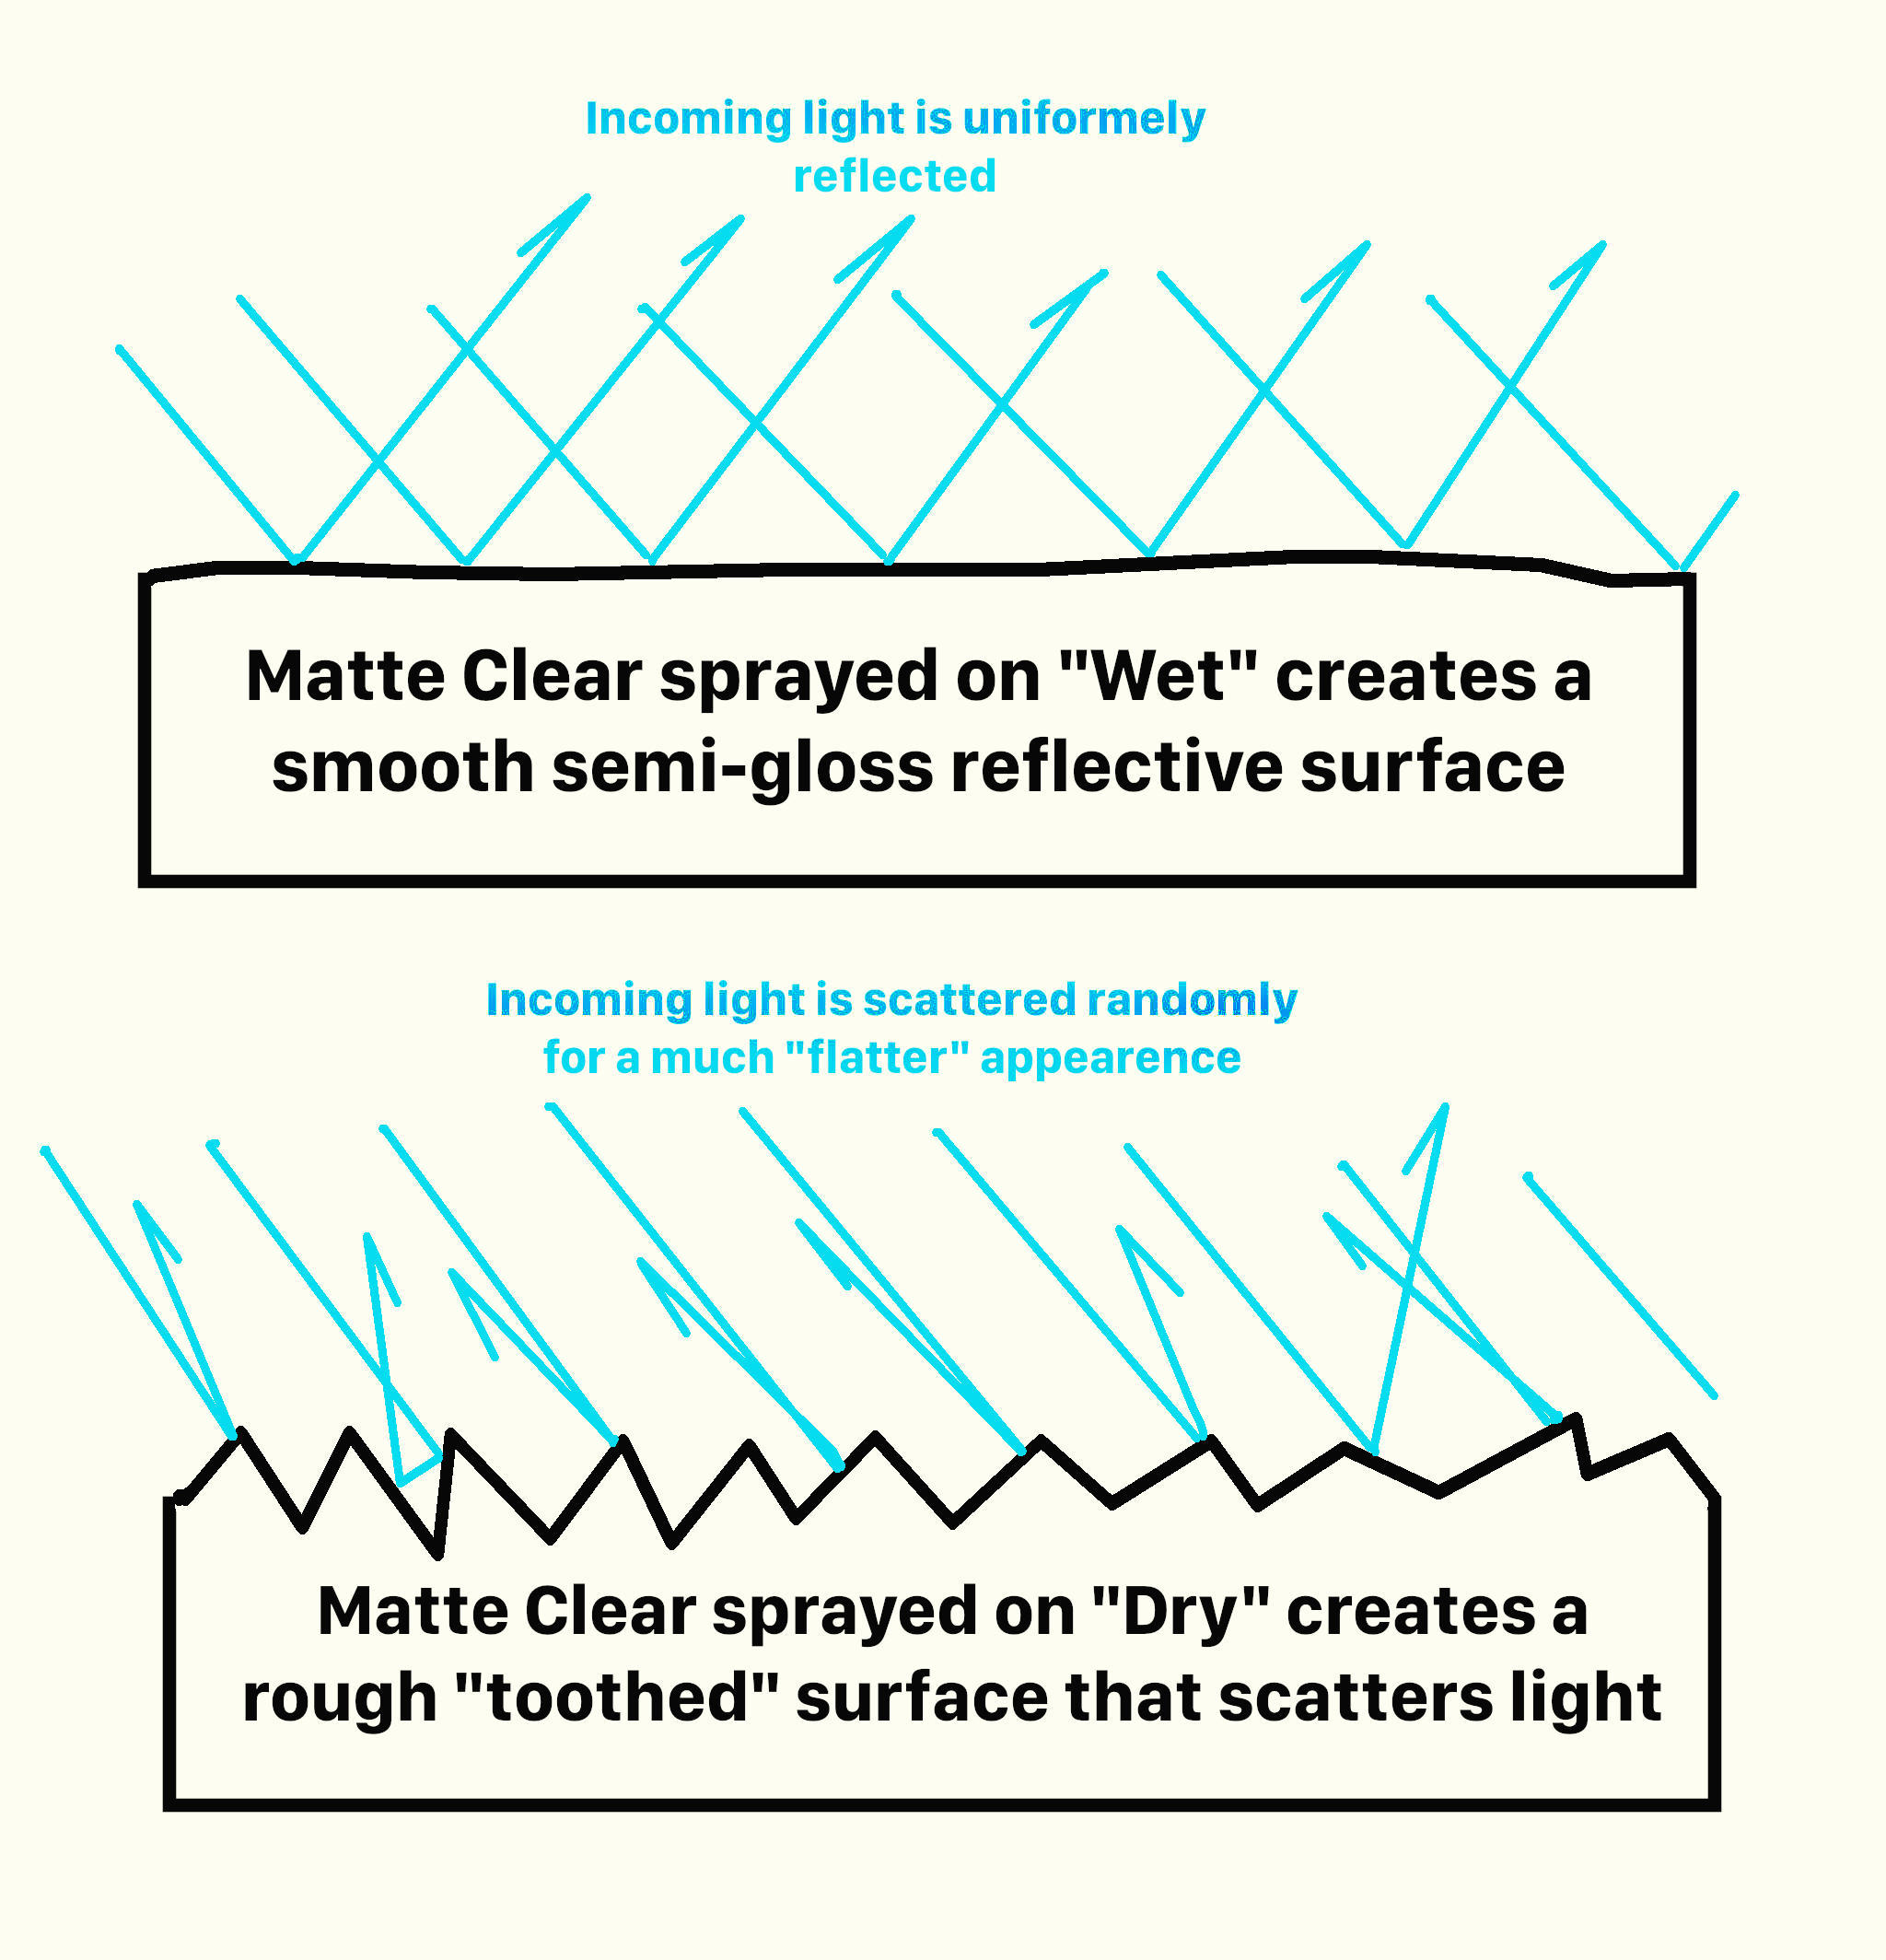
Could you perhaps be spraying your flat coat on too “wet”? If so this will cause the matte clear to flow out smoothly which will still create a semi-gloss surface.
I would suggest holding the spray can / air brush further from the model so that the clear coat falls almost dry onto the surface creating a microscopically rough surface that will scatter any reflected light and give you a much “flater” surface.
No Micro-Sol for me. I bought a BIG bottle of Future and use it for nothing but setting decals!
Brush on wet Future in the desired area. Apply wet (with water) decal. As the decal starts to set apply a second coat of Future to entomb the decal. (This will hide the edge of the decal film.)
When all is dry, spray with your favorite matte clear topcoat (for armor anyway) to kill the shine of the Floor Polish. Keep your spray gun well away from the model so the matte clear falls almost dry onto the model surface creating a rough, non-reflective surface for the flatest, flat you have ever seen.
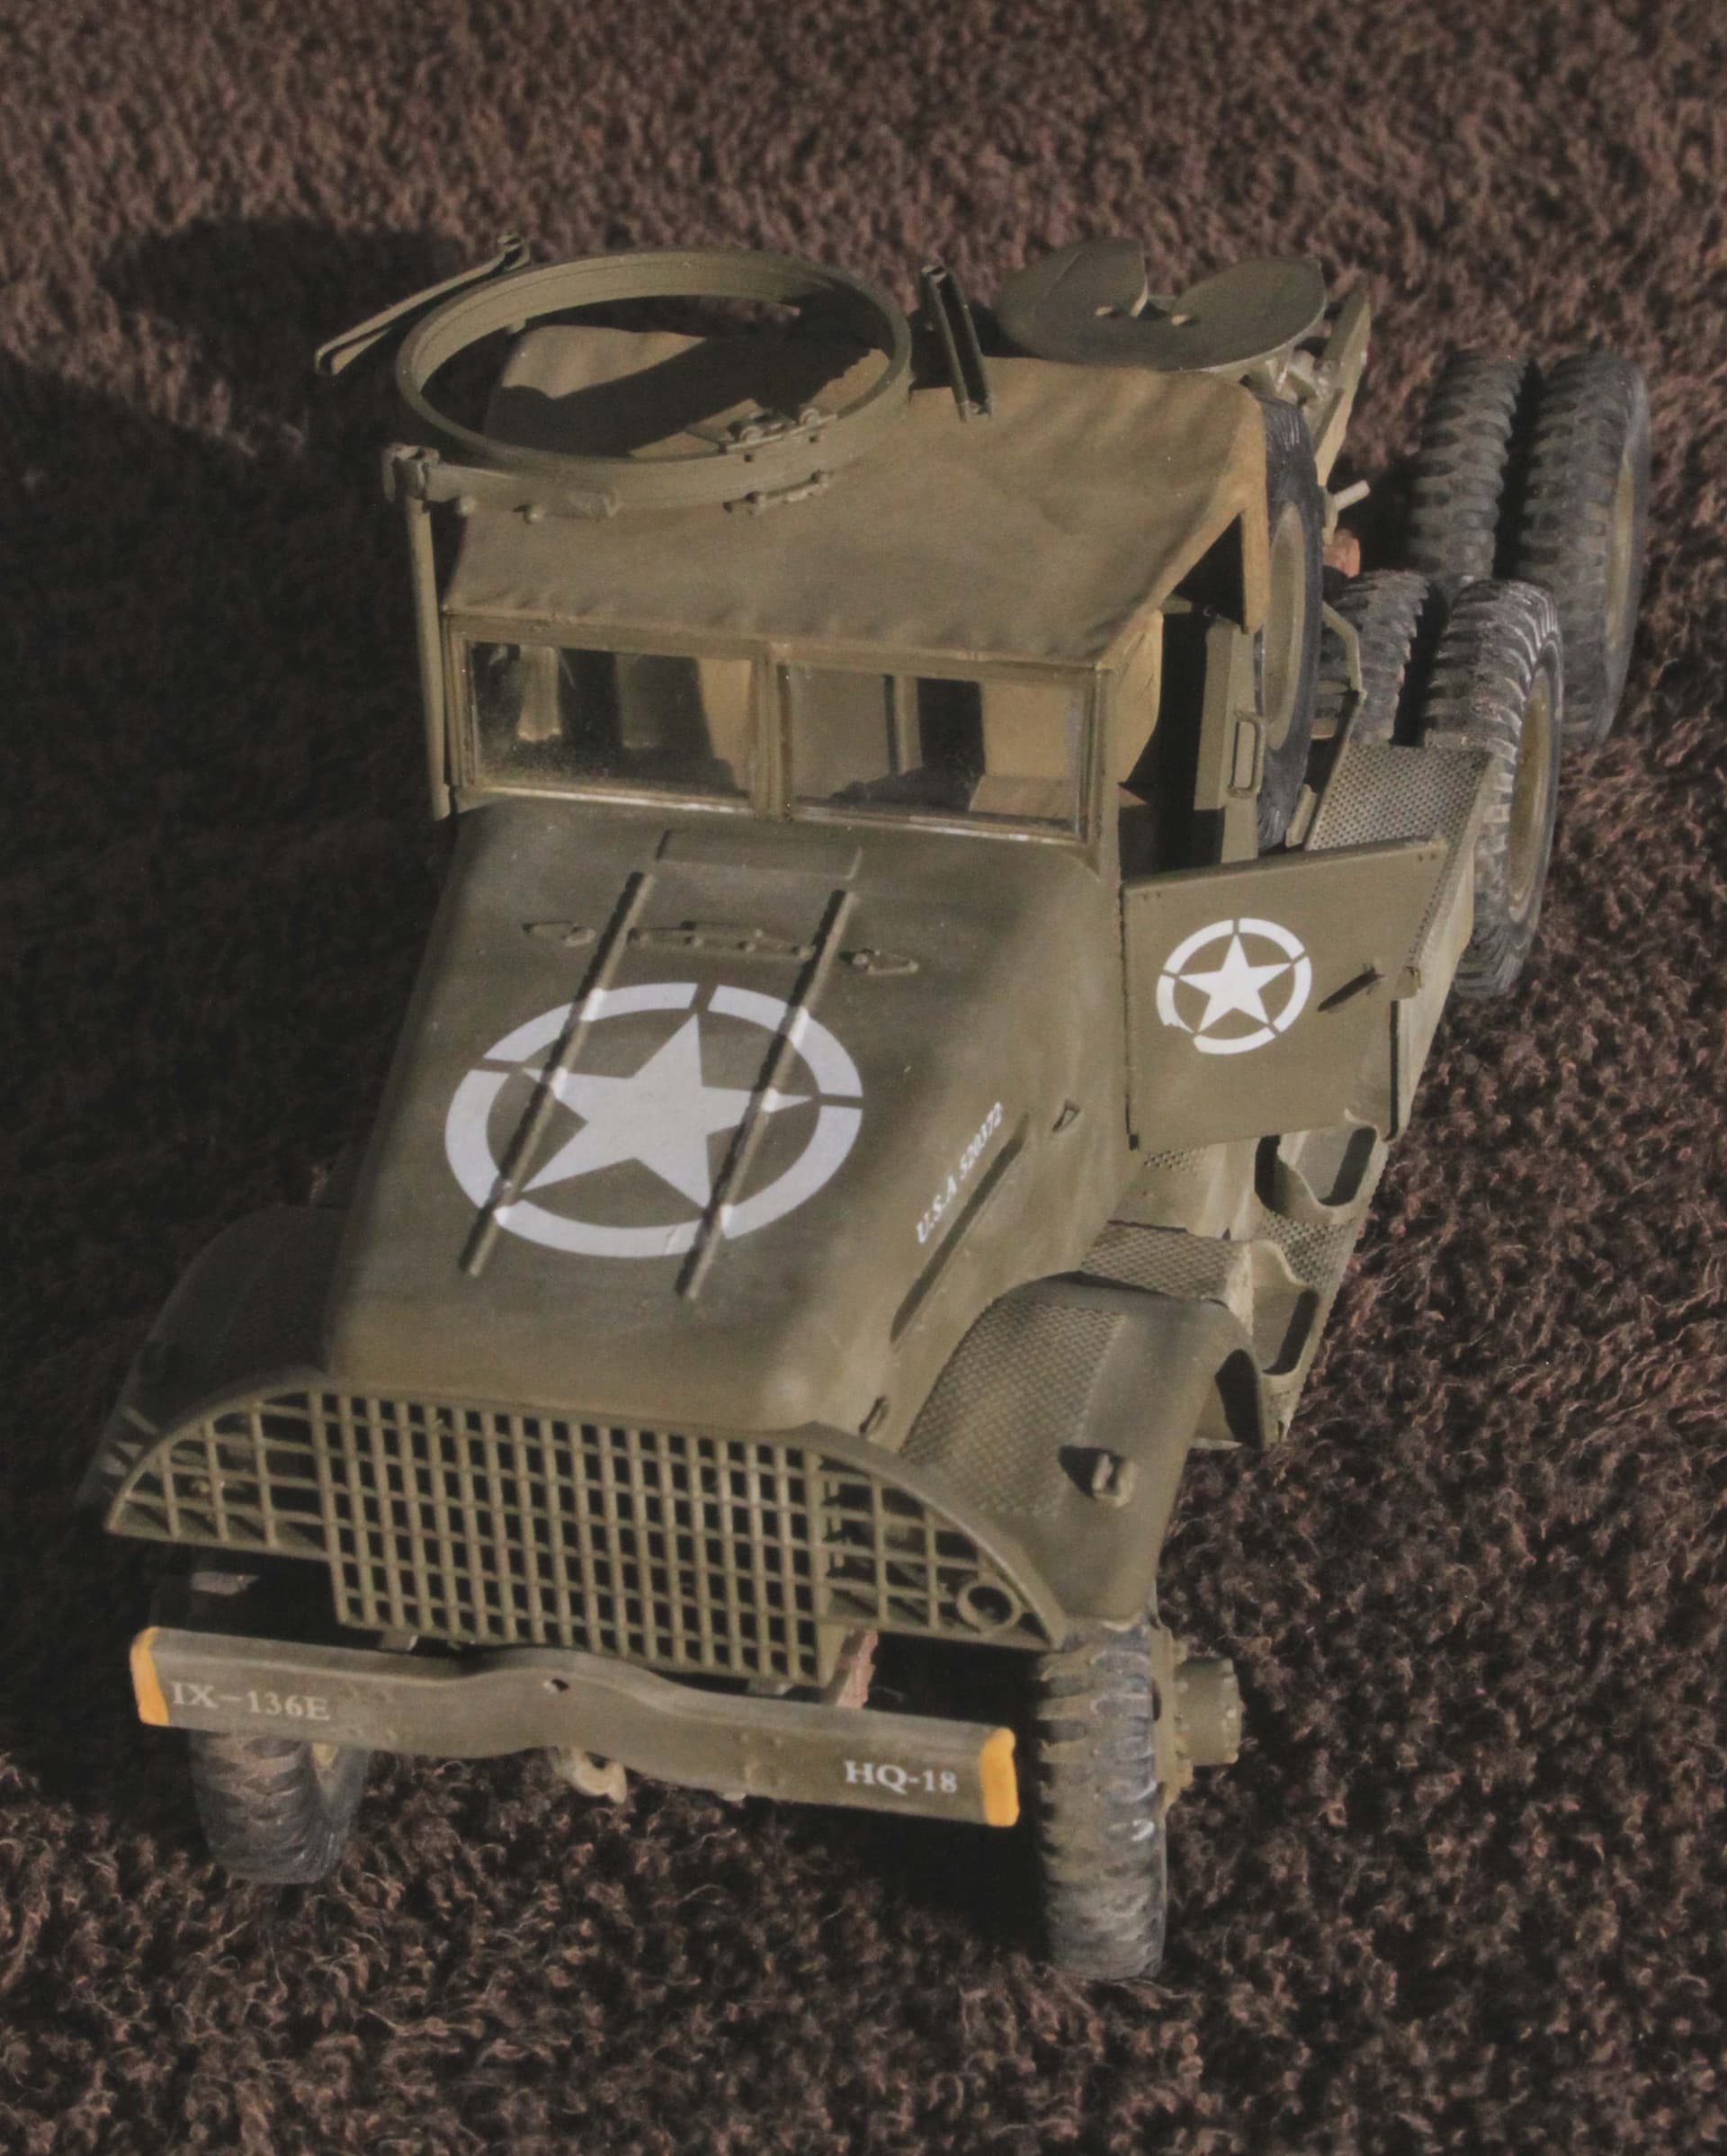
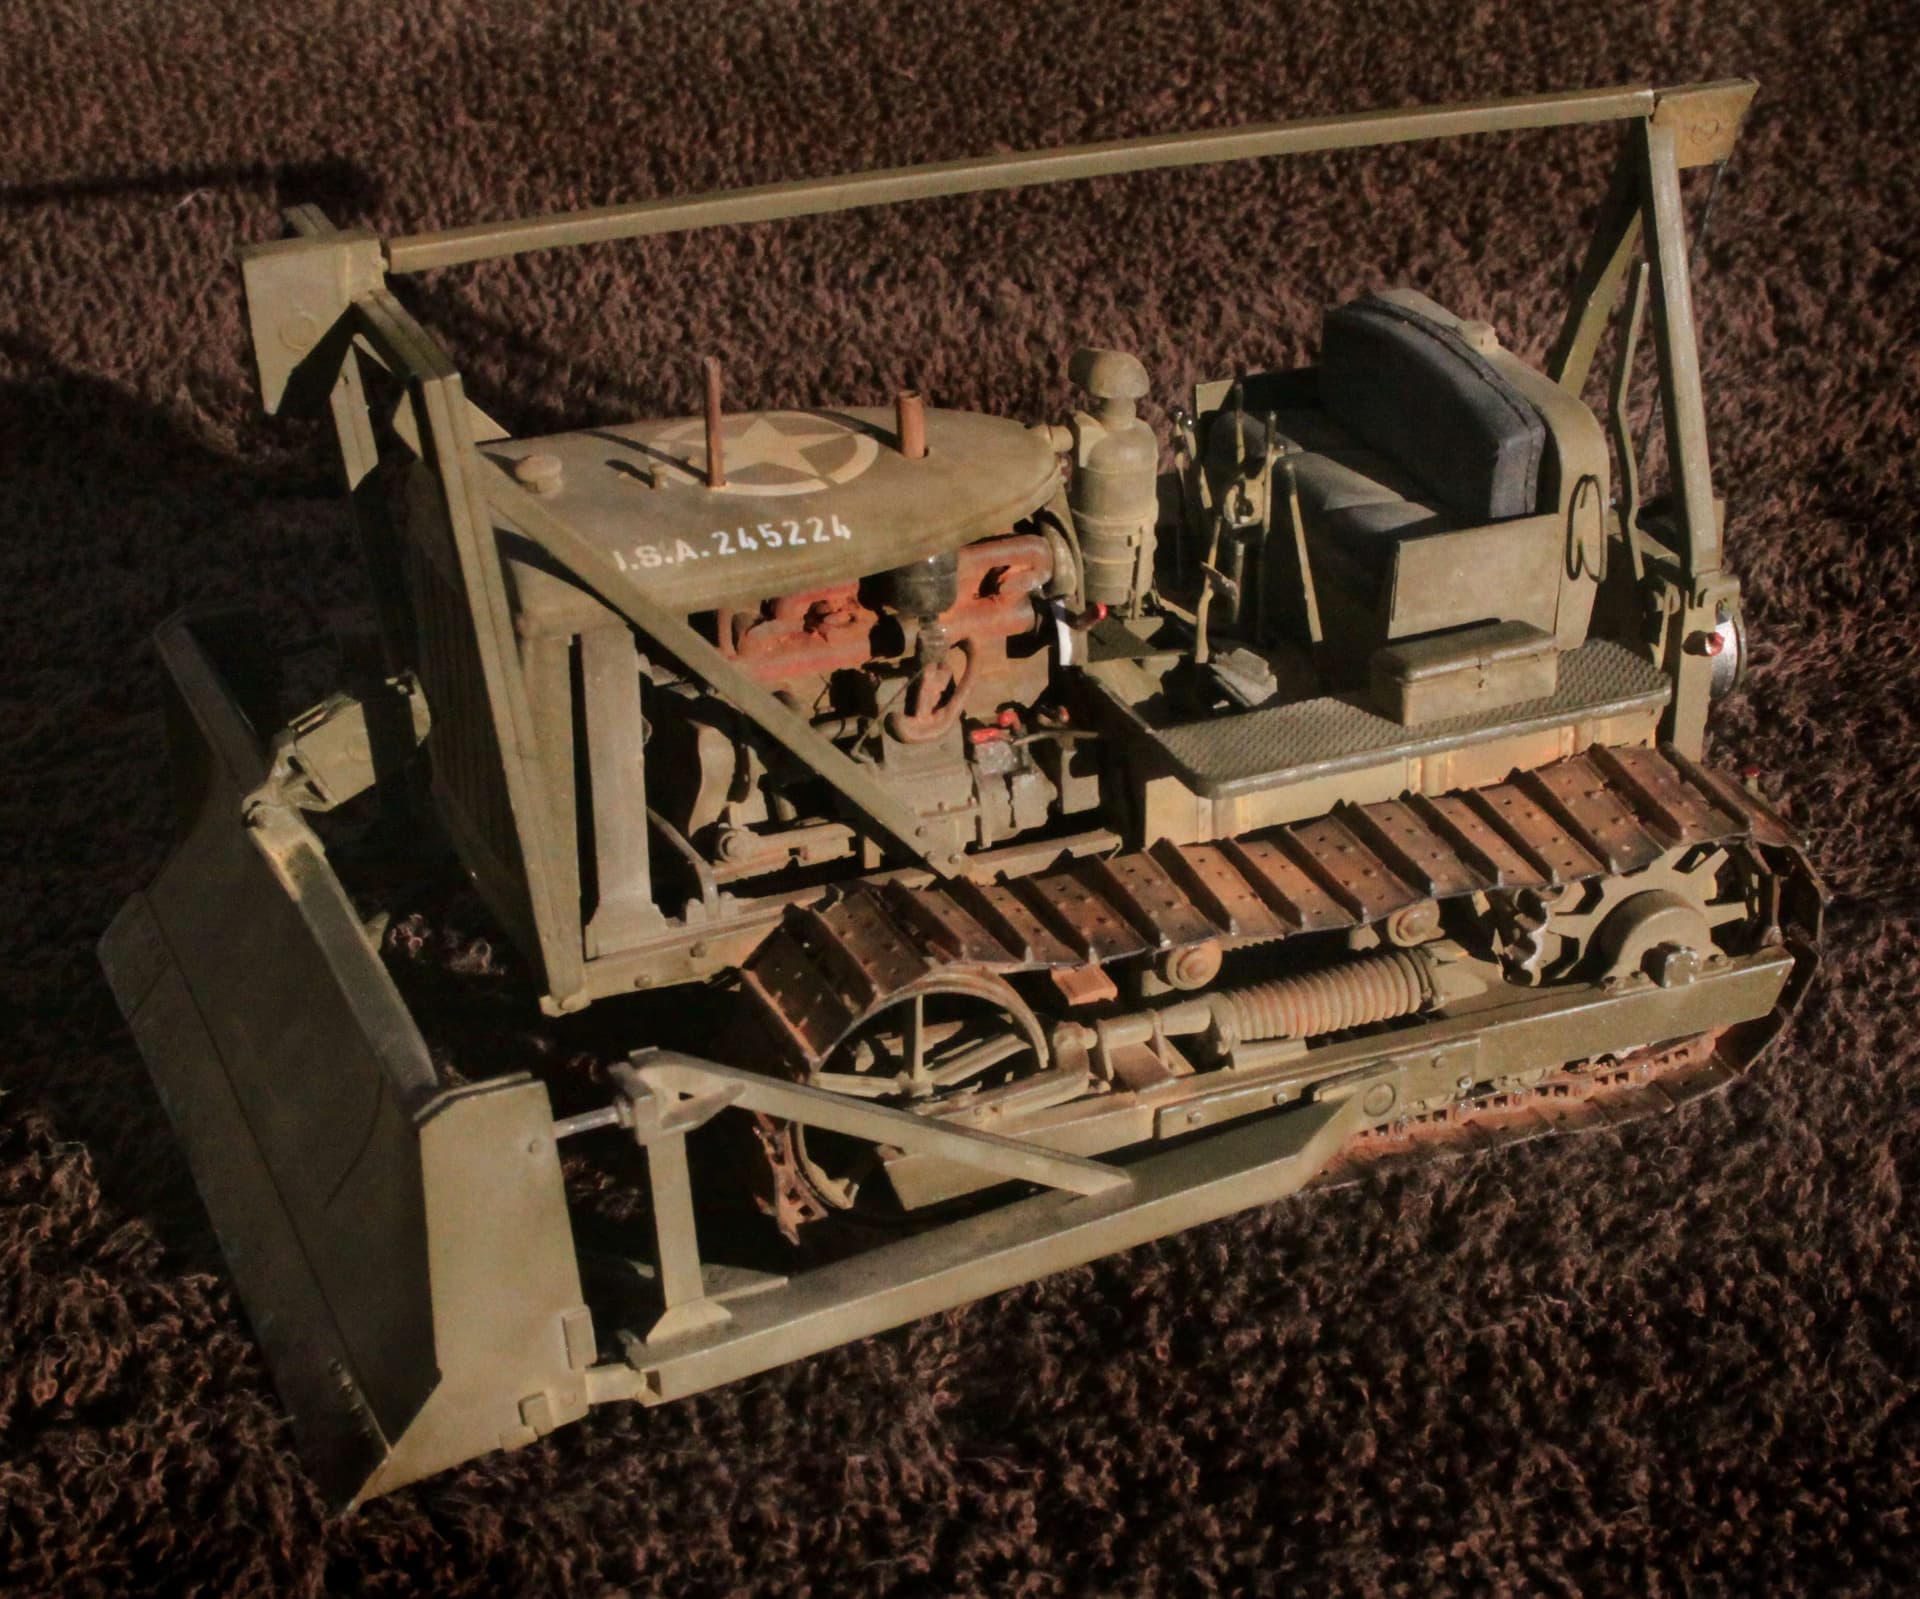
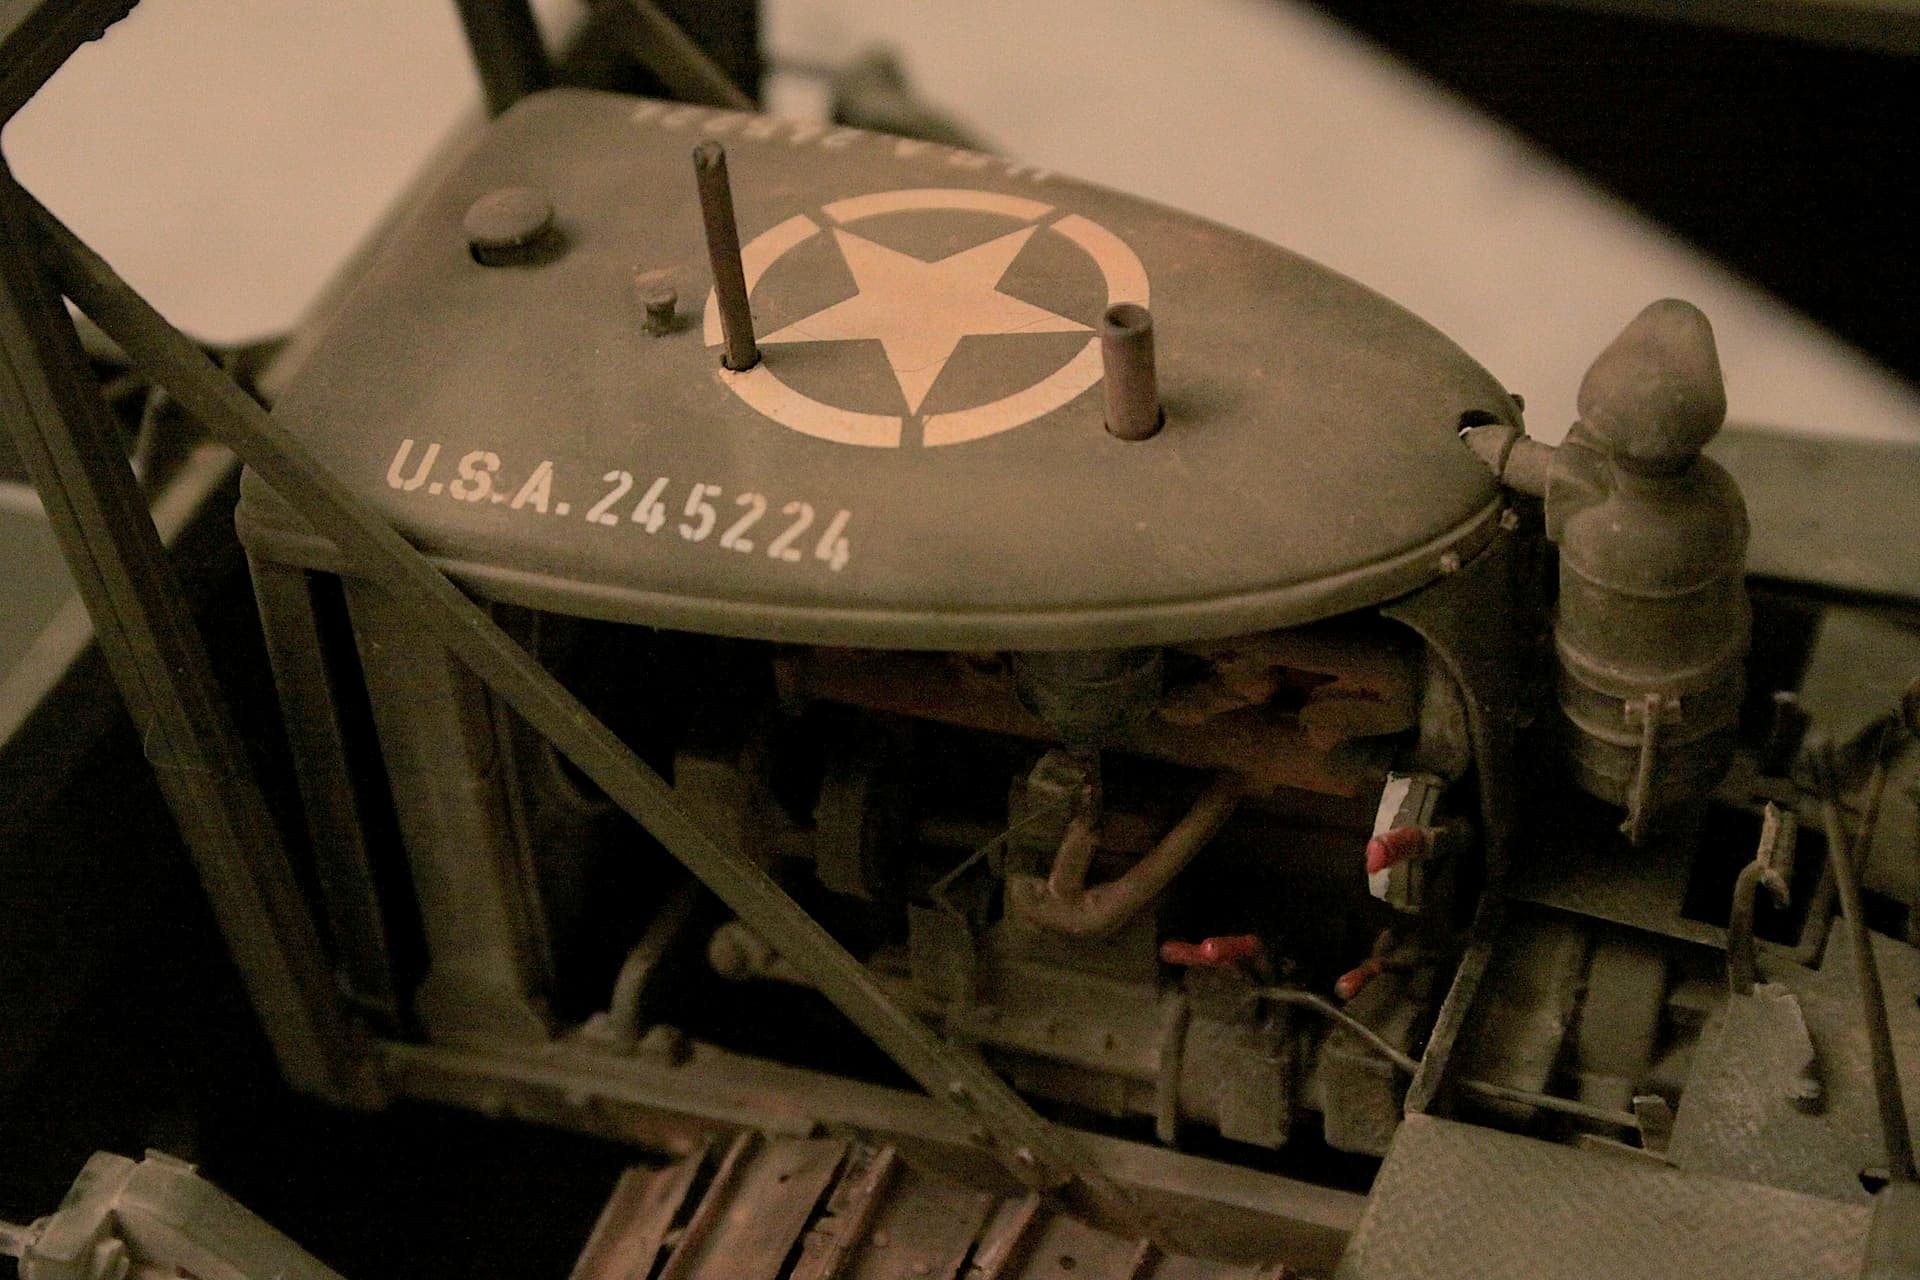
Apologies if I am posting these photos too often / too widely but I honestly think I am on to something here. (Thanks to both my Dad - a car painter who was always getting the gun too far from the surface and killing the gloss shine. And to Monte Kelch a Championship model builder out of Cincinnati who taught me these Future tricks many, MANY years ago.)
CF - I regularly apply Future in just the area of the decal (with a brush) then when dry I go over the entire model with matte clear to kill the shire. (Again the matte clear is applied VERY dry to the surface for the “flatest,” flat you can get.
I really appreciate all your suggestions! And will look into each one. It appears I have been given multiple hallways to go down in within the labyrinth of this hobby with each hallway having an individual usher
I think this speaks to the fact that this might be a personal experience thing; know your options and see what works best for you over time through trial and error. At least the general human now theoretically lives longer than before!
Many years ago I ruined an otherwise nice Pibber boat model because in the last step the big number decals on the bow silvered over. That is when Monte Kelch stepped in and set me straight with this technique.
I do it my way, without solvents, softeners or other special decal chemicals
Use Future or some other clear acrylic laquer and airbrush from some distance to get a satin finish (the “lacquer” hits the model half dried). Let it dry/harden. This will darken the matte paint so that the rest of the decal work doesn’t show up as darker spots.
Plonk a decal in luke warm water, wash of all the decal “glue” from the decal.
Use a brush to place a small puddle of the clear “lacquer” in the spot where the decal should go. Remove decal from the water, dry it lightly on some lint free cotton (pieces of old shirt for instance). Place the decal in the puddle and adjust the position before pressing it down.
Use lint free cloth to soak up the excess from the puddle. The “lacquer” that remains under the decal will act as glue as well as fill out any porosities and prevent silvering. Brush some of the clear “laquer” over the decal to seal the edges.
Give the whole model another “satin” coat and continue with any weathering process of your choice.
Lot of good commentary and as with most things, there’s more than one way to get satisfying results. Out of ~1,000+ decals applied, I’ve had two decals silver.
Here’s my approach for what its worth.
Airbrush Floquil Crystal Cote (enamel gloss coat), over the entire model. That’s allowed to cure for at least 24+ hours.
One drop of Kodak Photo-Flo (water wetter) in small container of “soft” decal water.
Micro-Set, apply decal, Micro-Sol applied as needed.
After decals set and have dried, lightly wash decals and allow to dry.
Airbrush Floquil Crystal Cote (enamel gloss coat), over the entire model. Apply heavier on decals to “bury” decal film edge. This helps hide decal film and seal decal. If the film edge isn’t sealed and under additional gloss coat it can be prone to highlight as additional weathering is applied.
Lightly airbrush quality acrylic flat. My pet favorite remains the ancient Pactra Acrylic Flat. Hit with blow dryer if needed and apply second light coat as needed.