The Reaper is finished! Really nice to get this one done at last. I am happy with how it turned out.


The Reaper is finished! Really nice to get this one done at last. I am happy with how it turned out.
Nice to see so many projects getting done!’
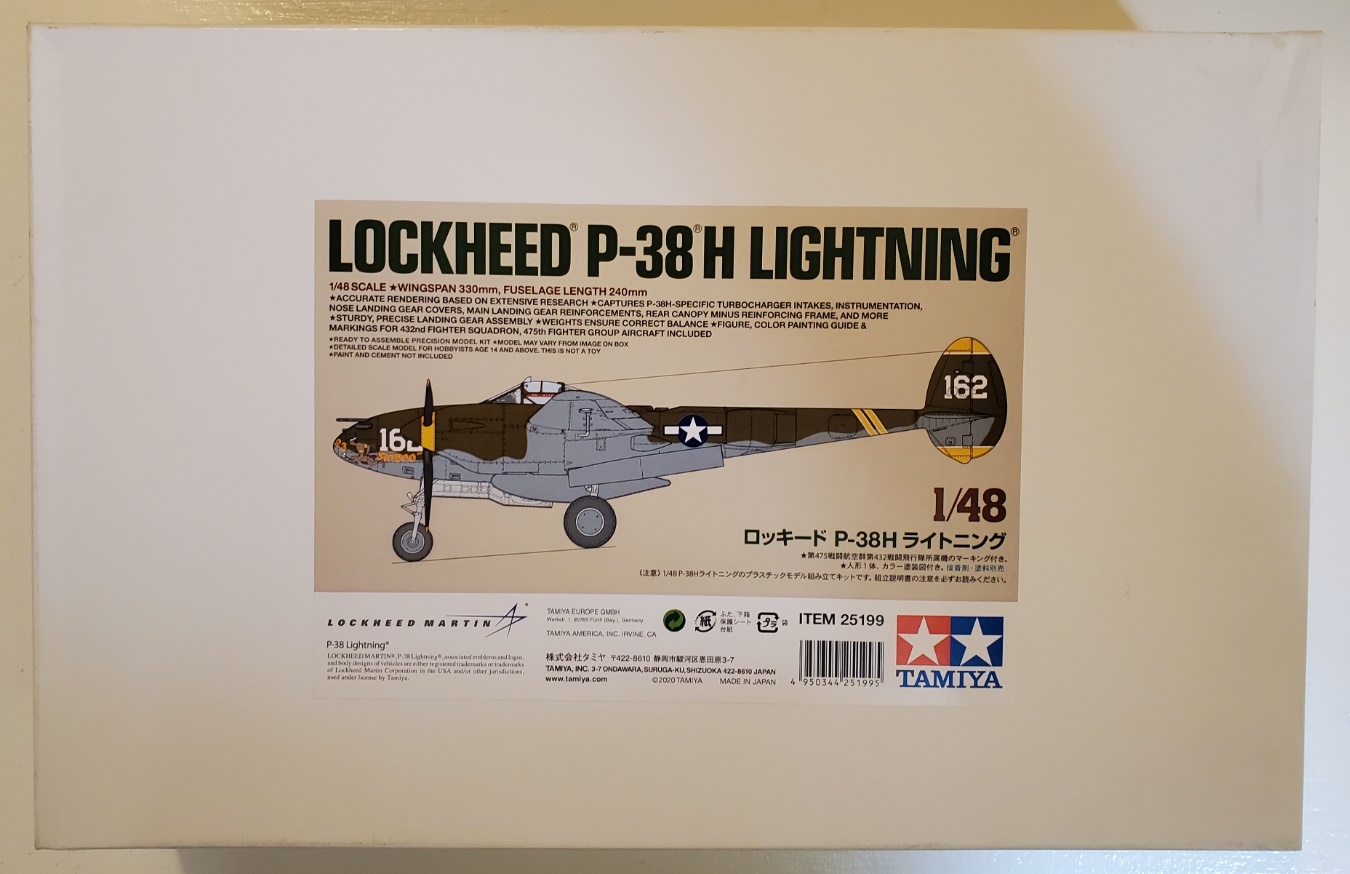
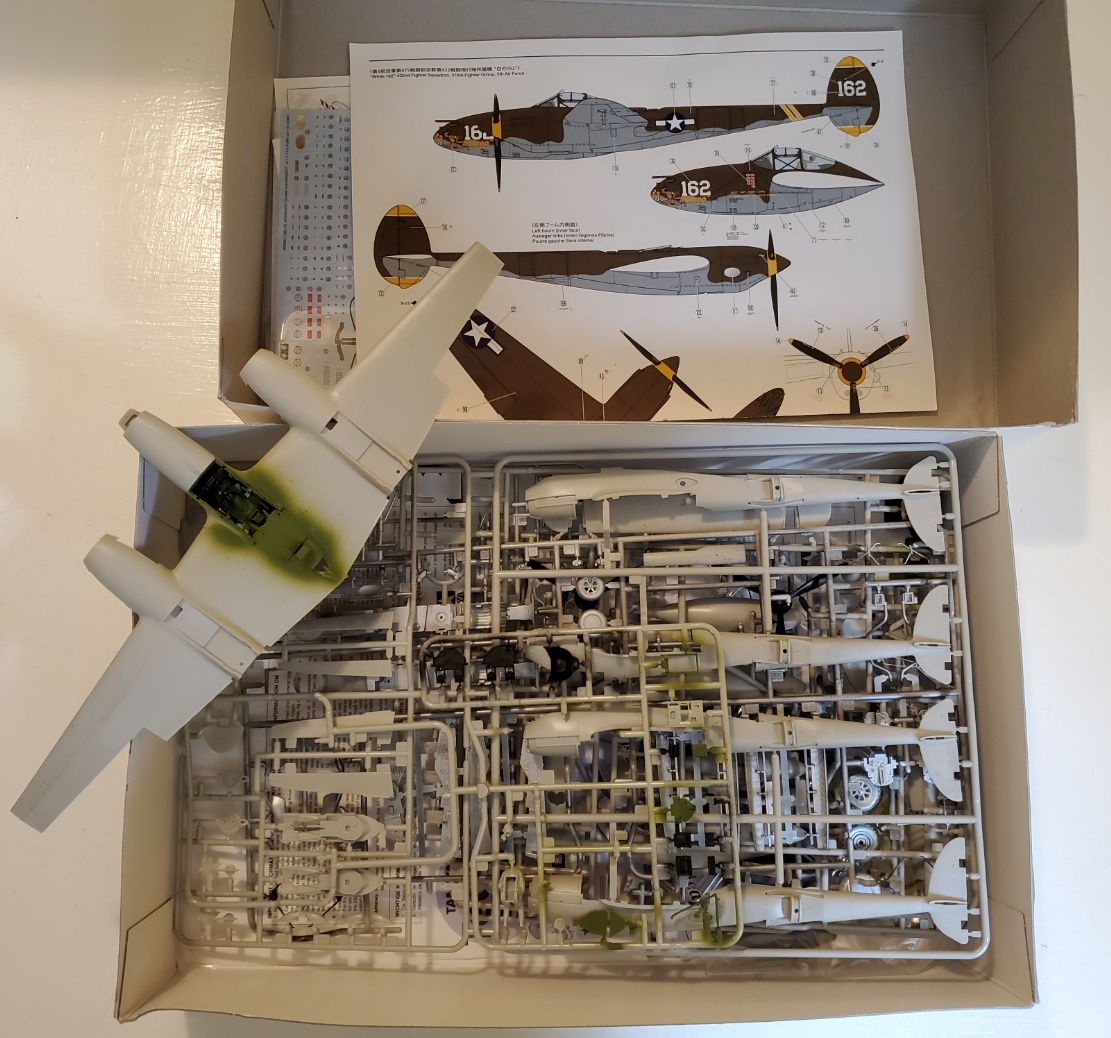
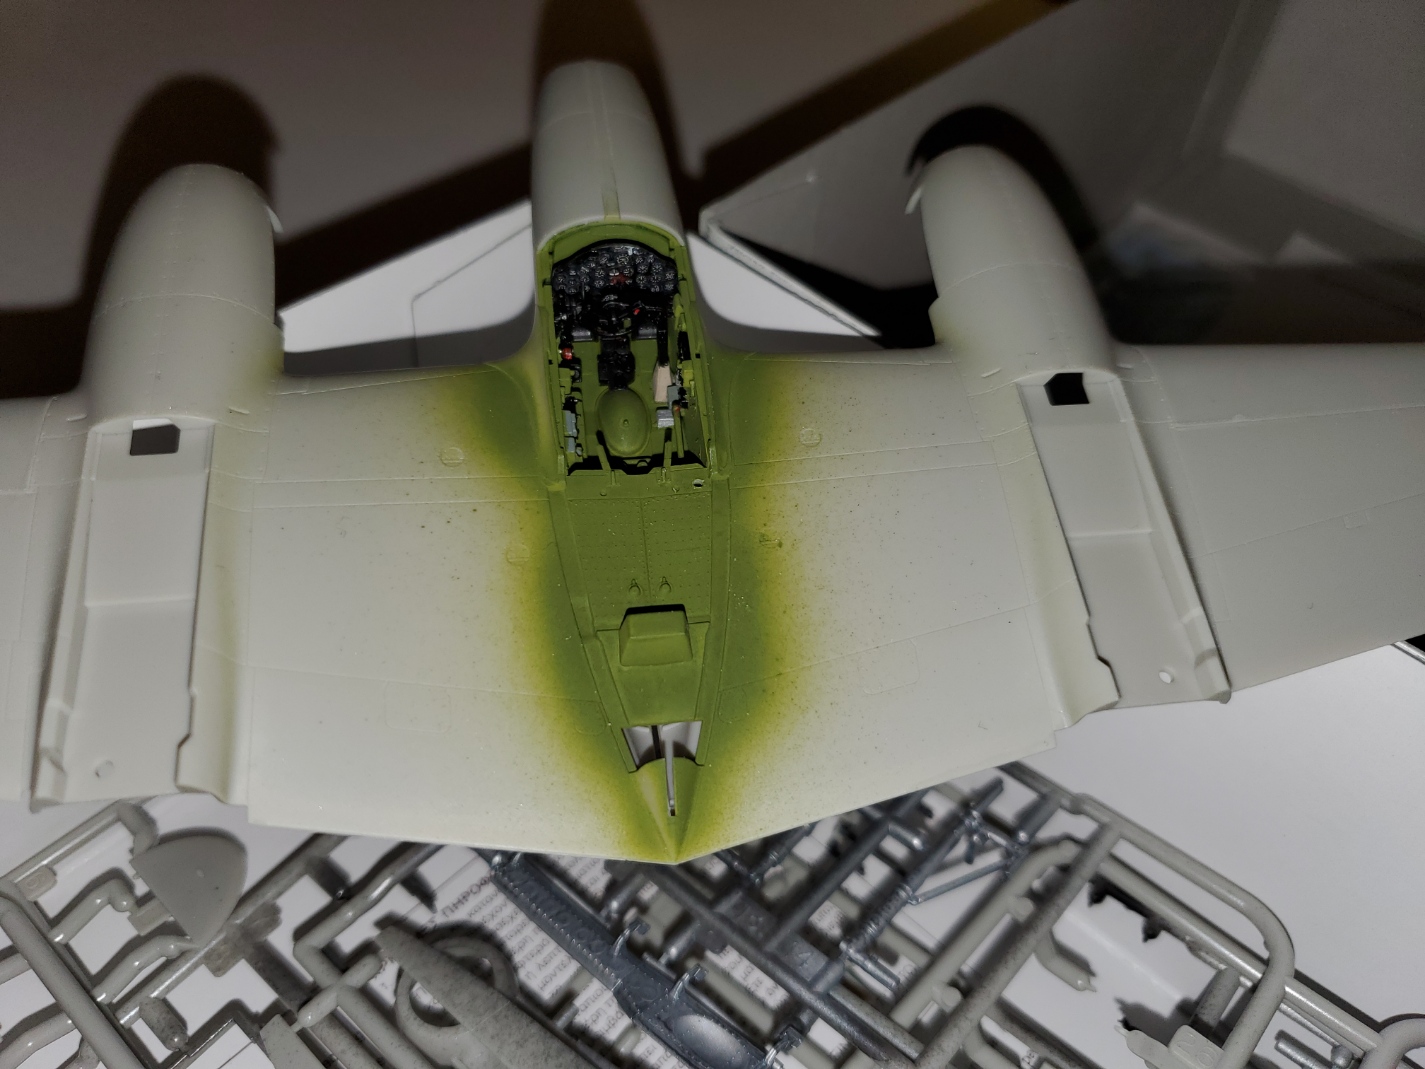
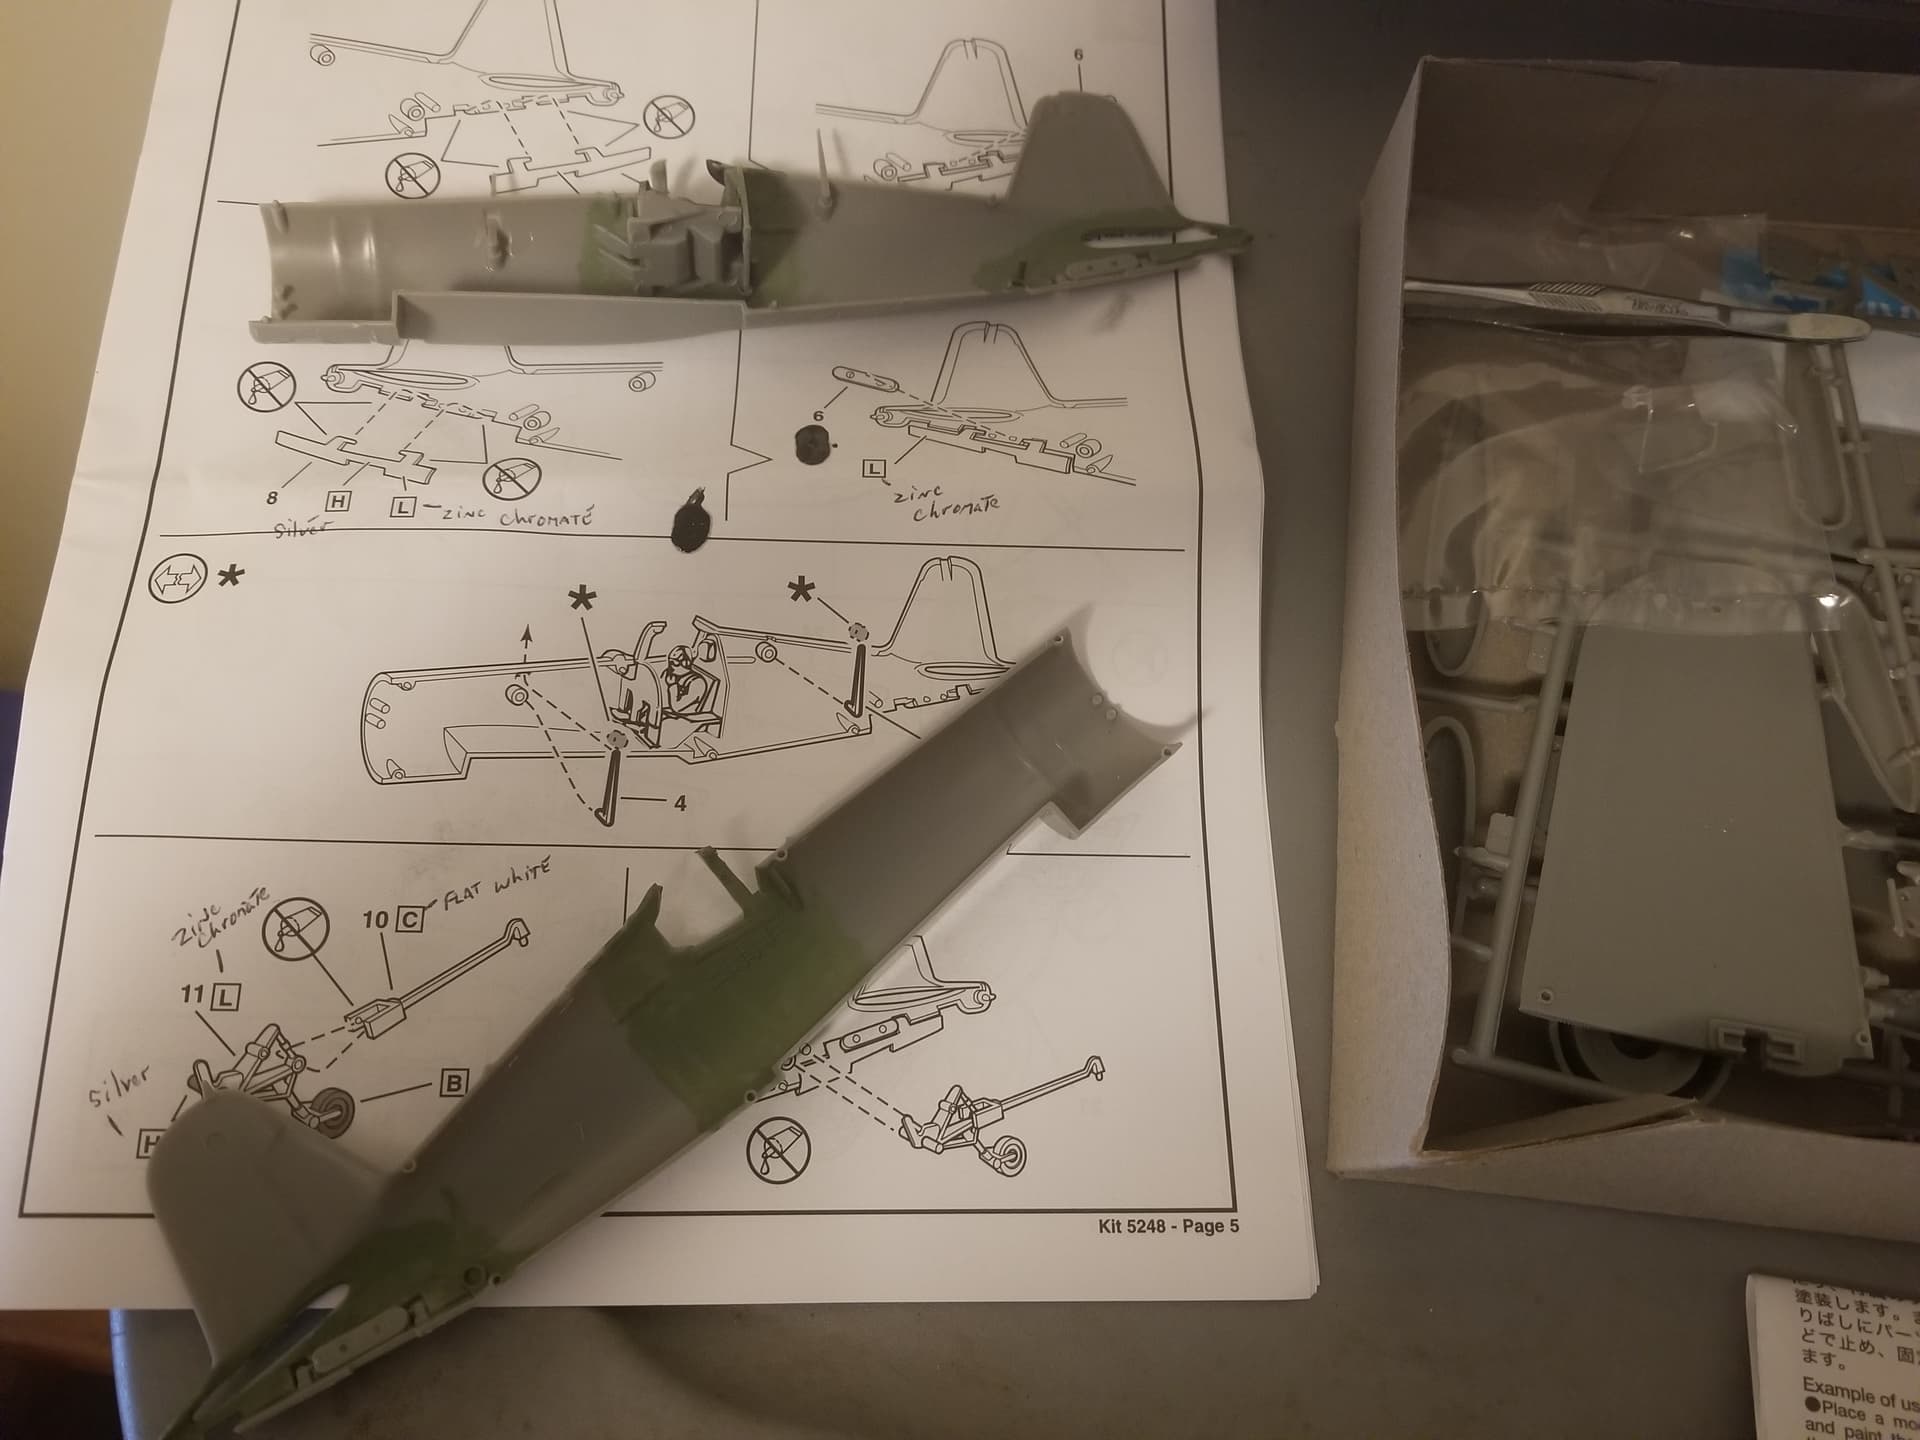
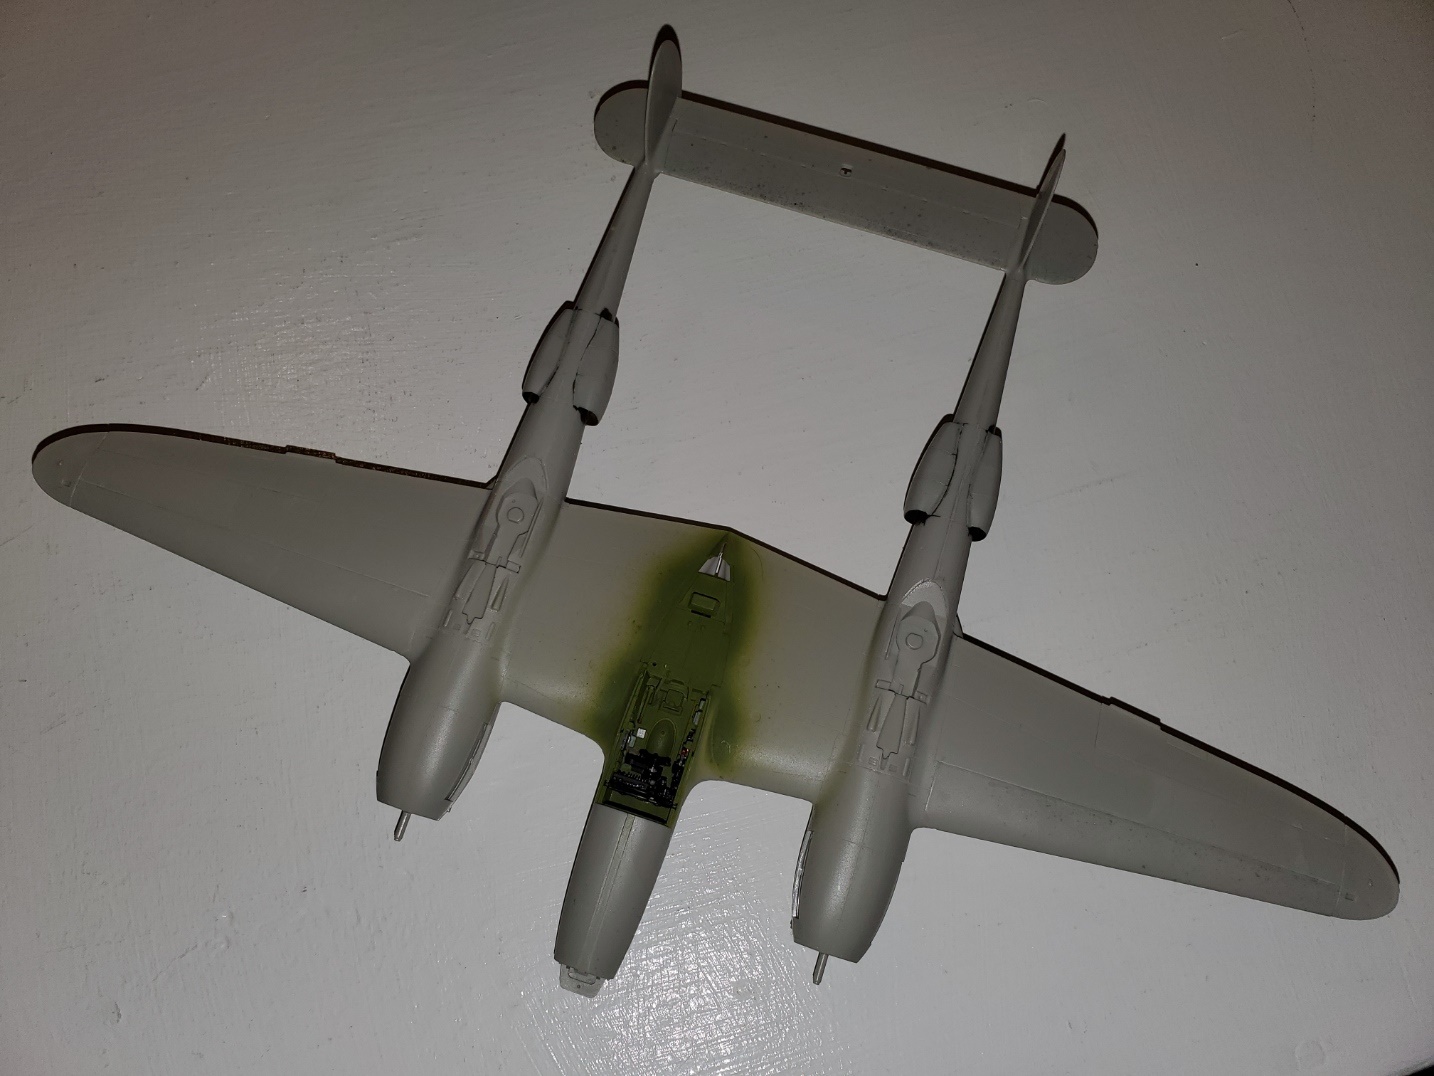
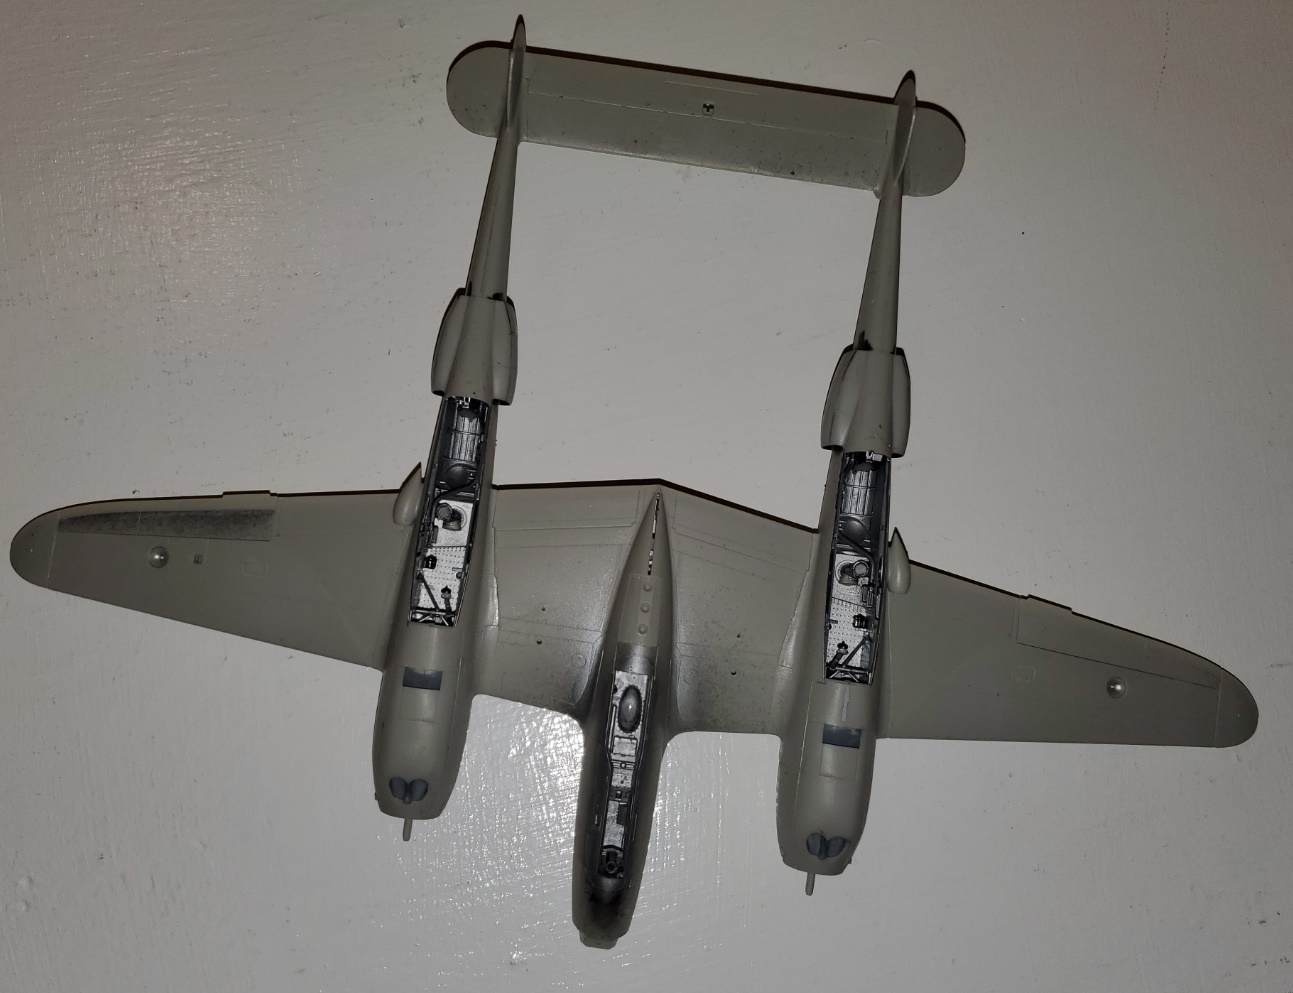
I know I have a ton of other things I should be working on, but I’ve been Jonesin’ on the P-38 lately and wonder if I should try to finish this one off?
I honestly don’t know why I ever stopped working on it, it’s such a lovely kit!
Michael ![]()
![]()
It is an incredibly nice kit.
Do it Michael! One can never have too many P-38’s on their shelf!
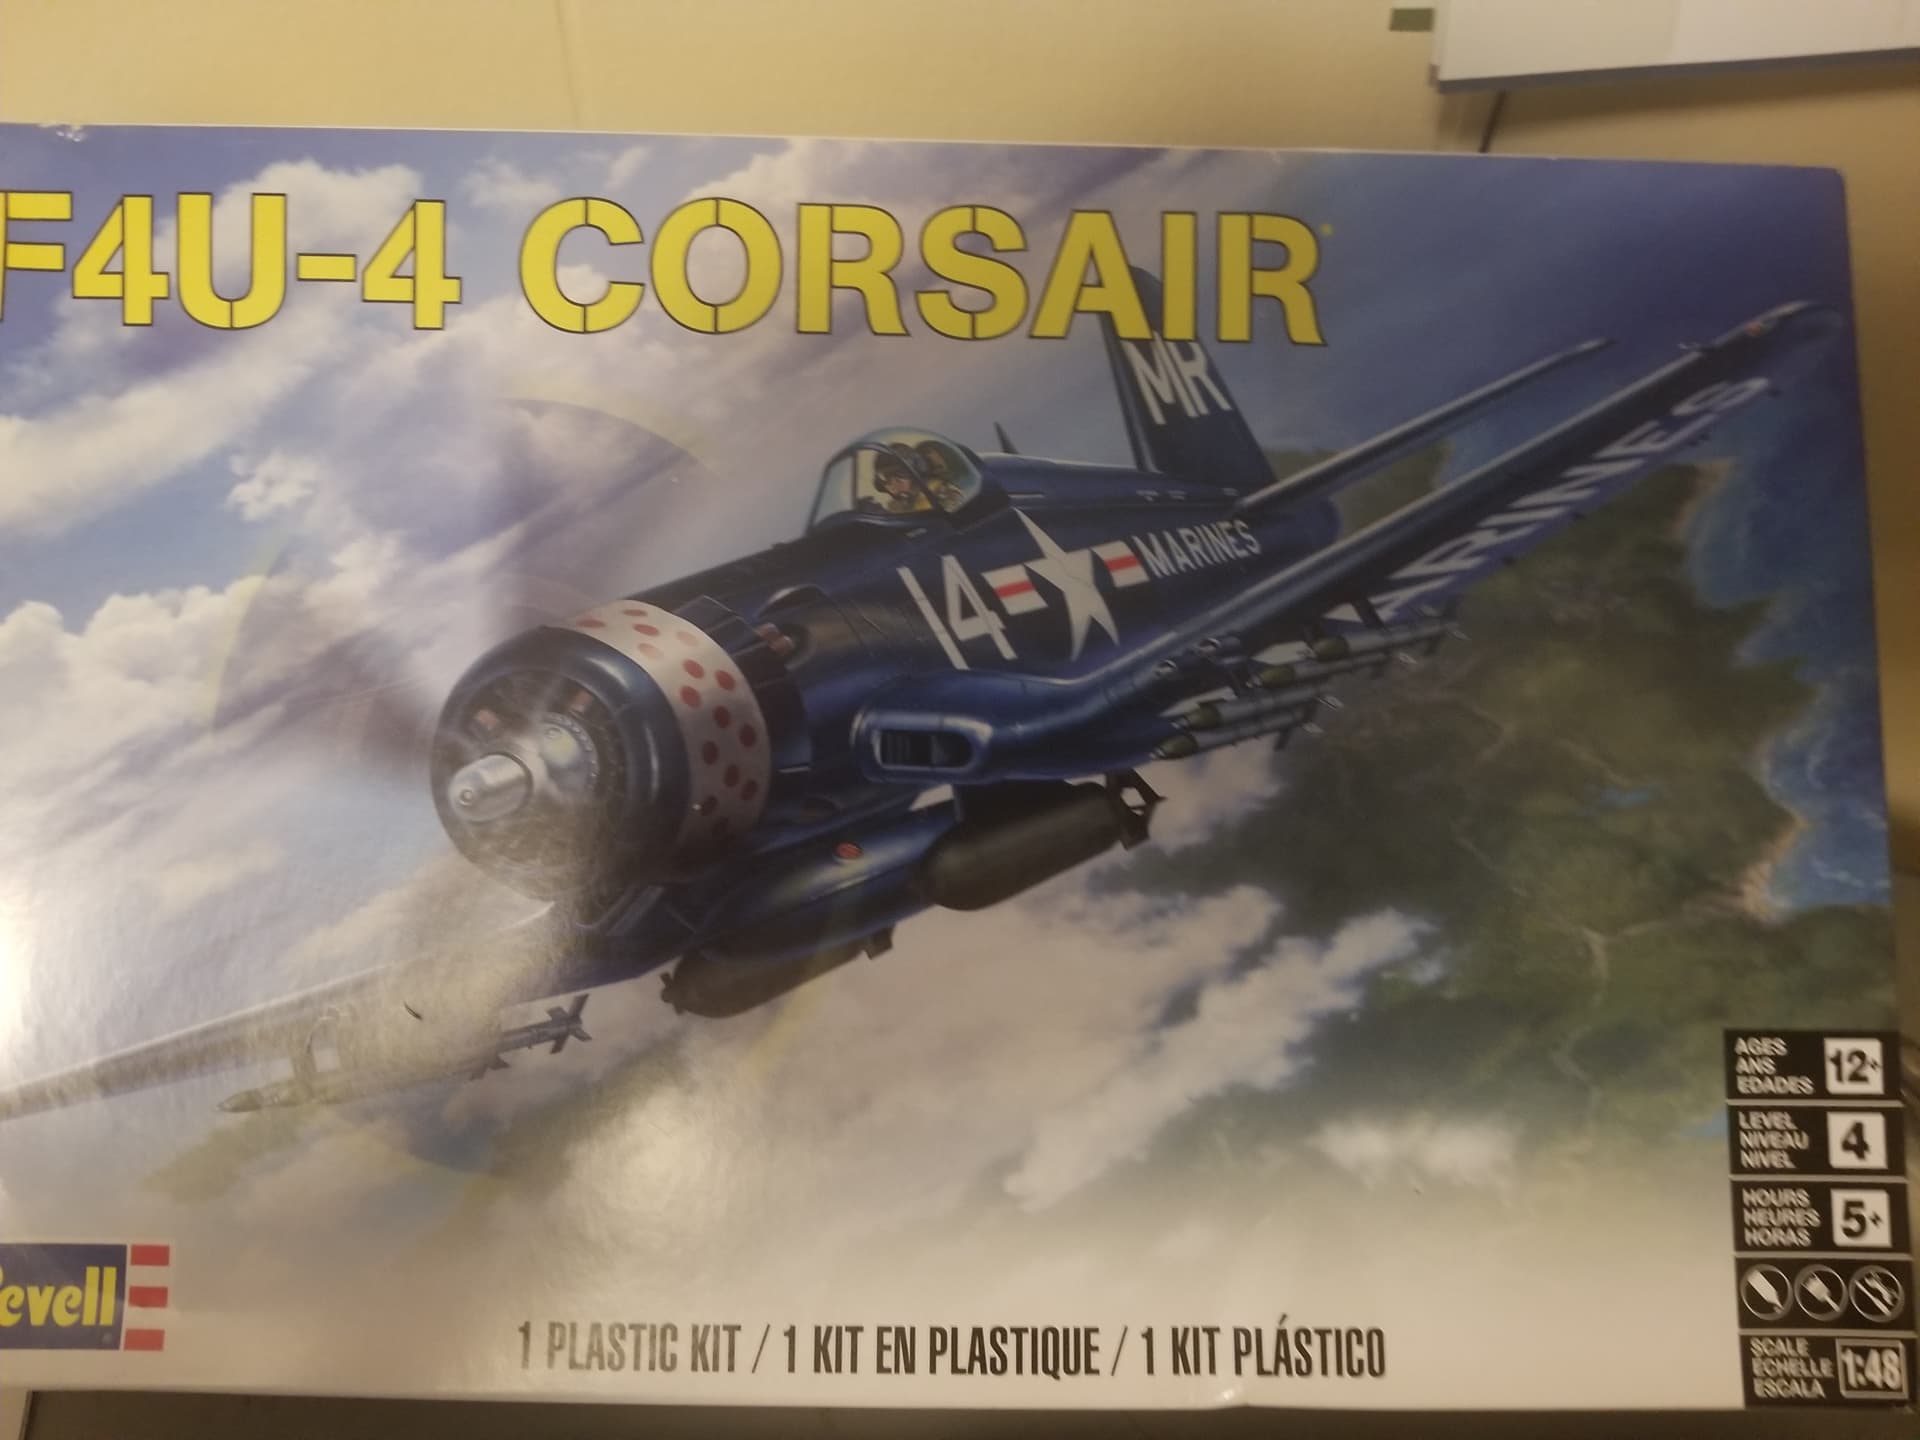
Hello all, I am Gonna Jump in on this one I just found a Korean war era Corsair that I never even finished. And I have some time while slowly packing the house to get it finished sooo
just found the decal sheet and it will be finished in VMF-214 markings. wow I haven’t done this in a while I’m going to have to get back into the swing of things and knock some rust off.
TinyDog01
TinyDog01, Great choice! Built it as a kid, had a blast, hope you do too!
I may change horses for my entry. The front runner is the Airfix Spitfire I tried to do for the Spitfire campaign. I’ll probably get another Sea Harrier kit and start fresh.
Well Gary, I was kind of hoping to see your Harrier. Either way, best wishes on finishing whatever bird you decide to do!
hello all well the corsair is packed along with most of the house SOOO hopefully within a few months i may have it out and finished got to love unexpected household moves across country
Tinydog01
Tiny, best of luck with the move, I know I really dislike it a lot! Hope to see you in September, and then a vintage F4U!!
So, I highly doubt I’ll be able to finish this kit, not pulling the plug yet but sheesh this moving stuff boxes everywhere. But I shall follow with interest…
TinyDog
Hi Everyone,
TinyDog, don’t worry about it, the fact that you’re trying is more than enough! Apparently, I neglected to give an honorable mention to Erine for completing the Reaper, Way to stick with it, and do a bang-up job! I also think it’s fantastic that we’re getting more folks participating this year. Yay team!
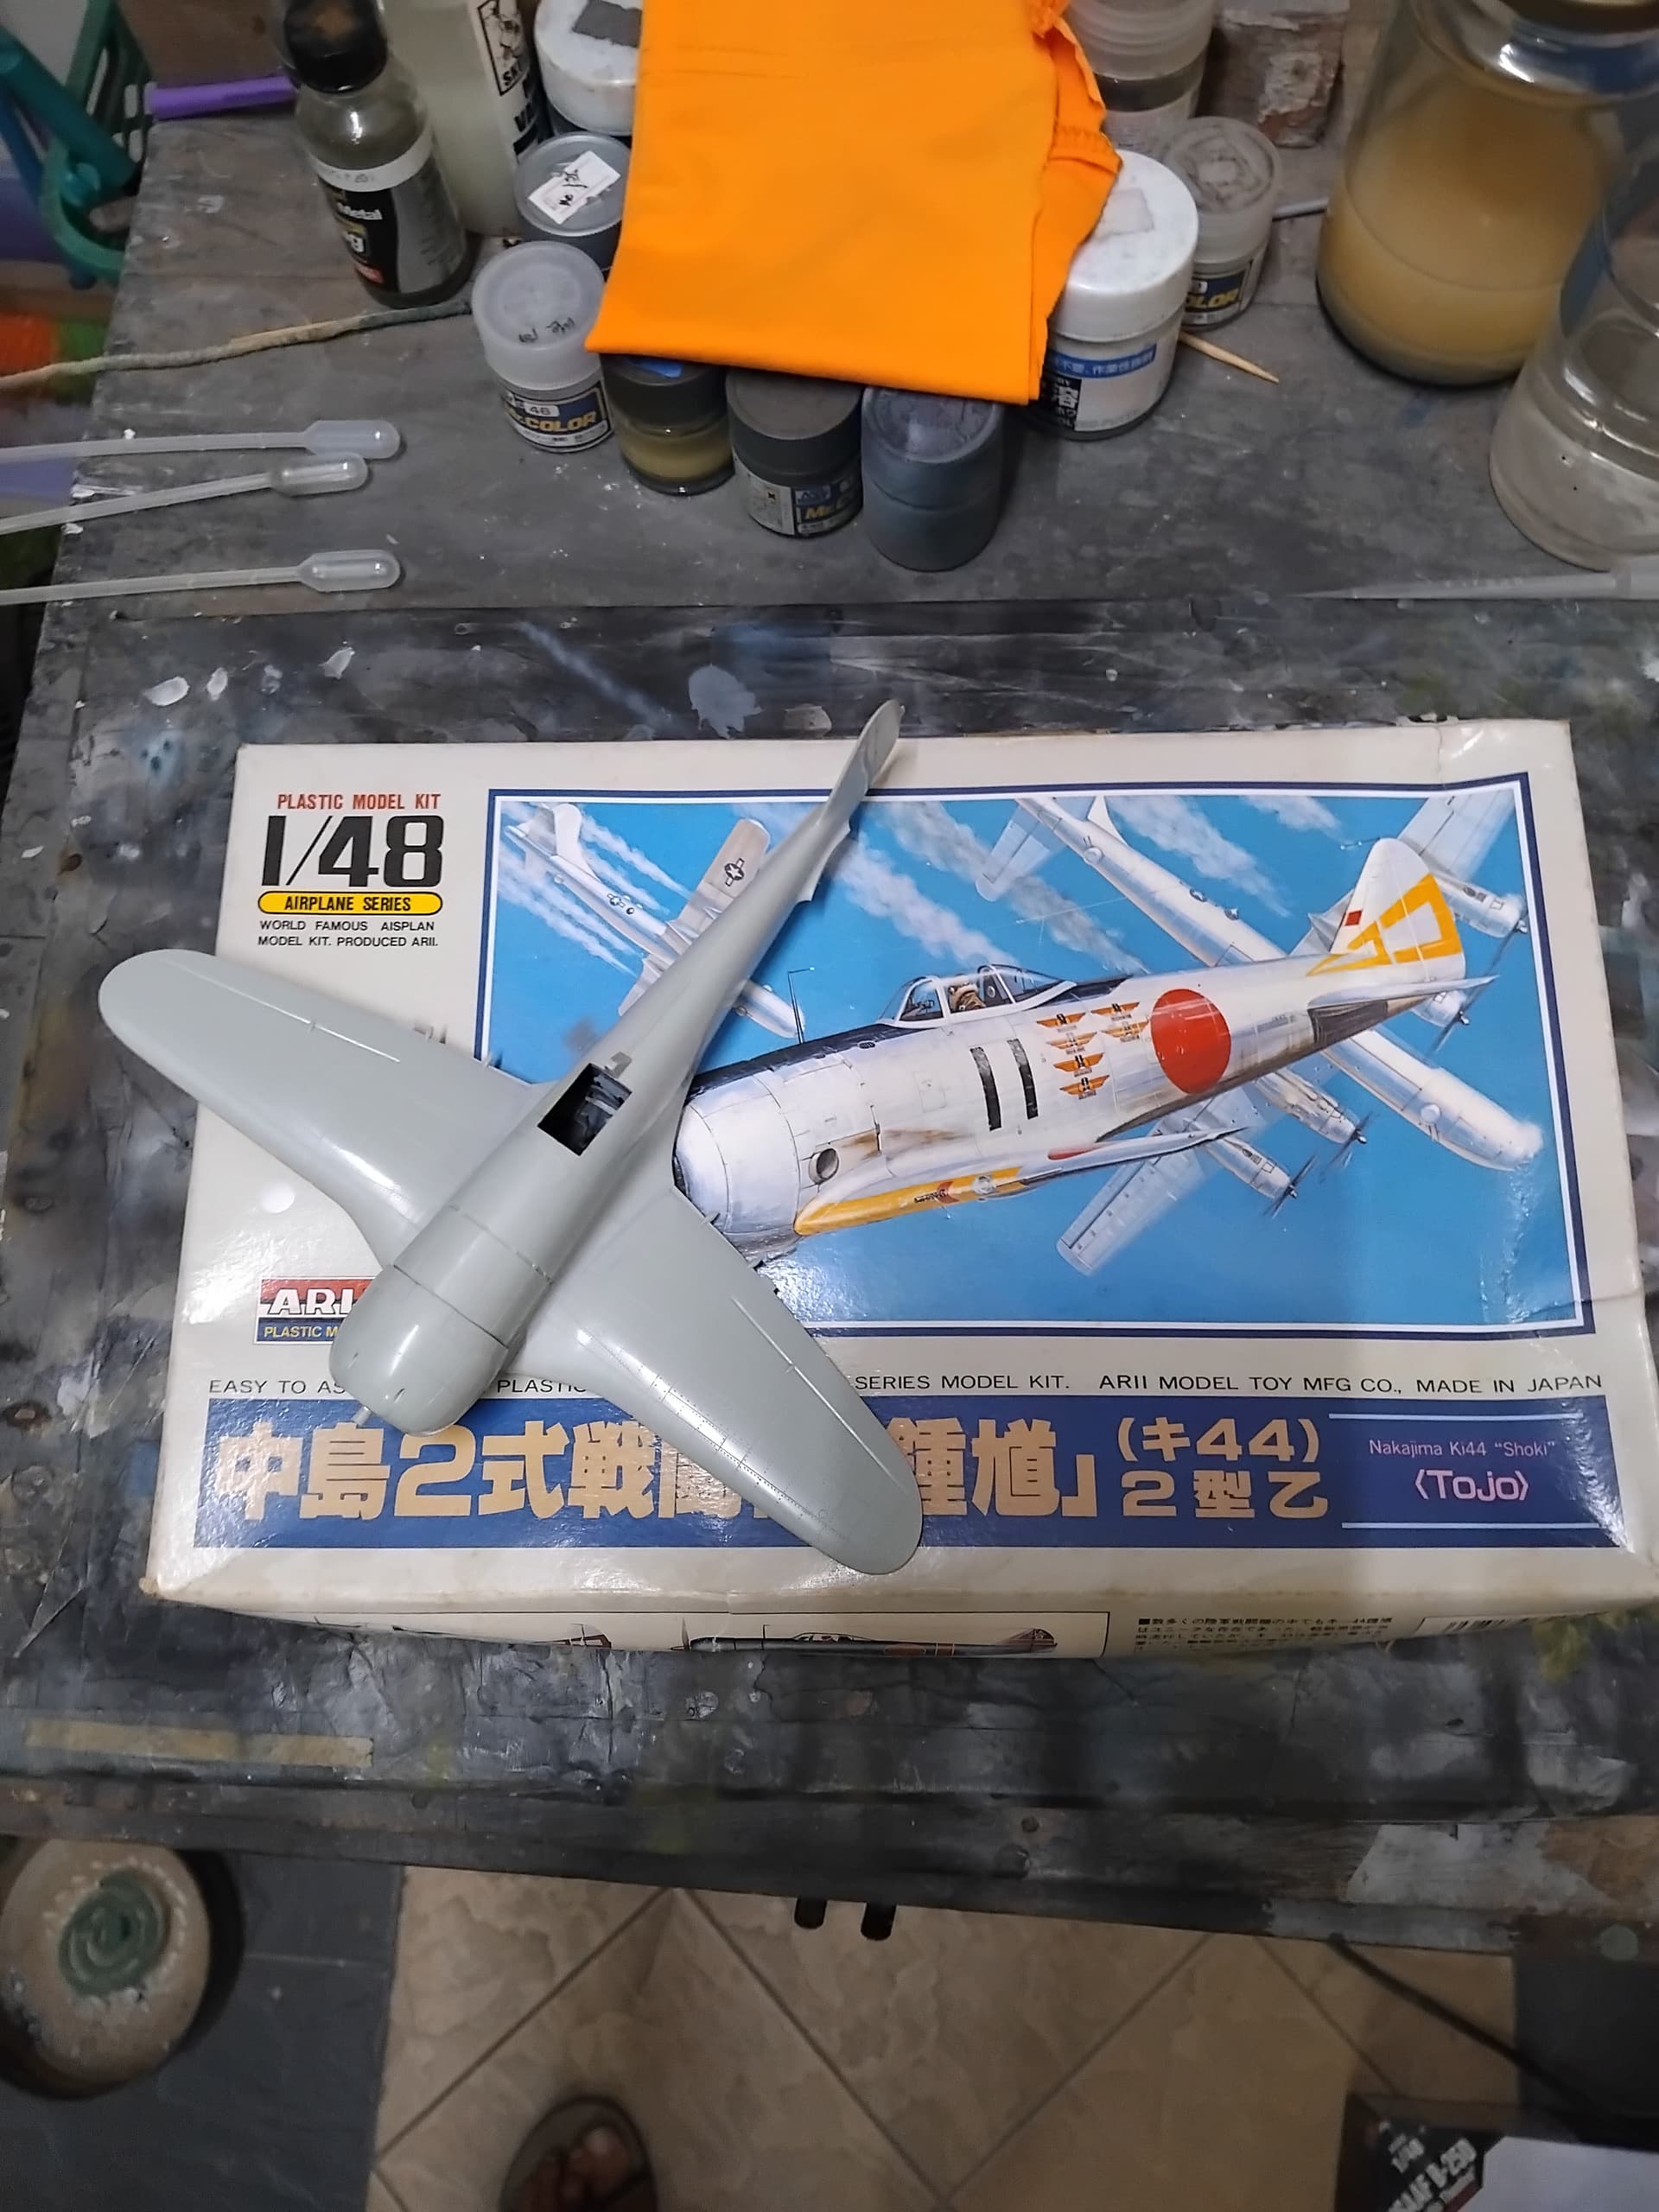
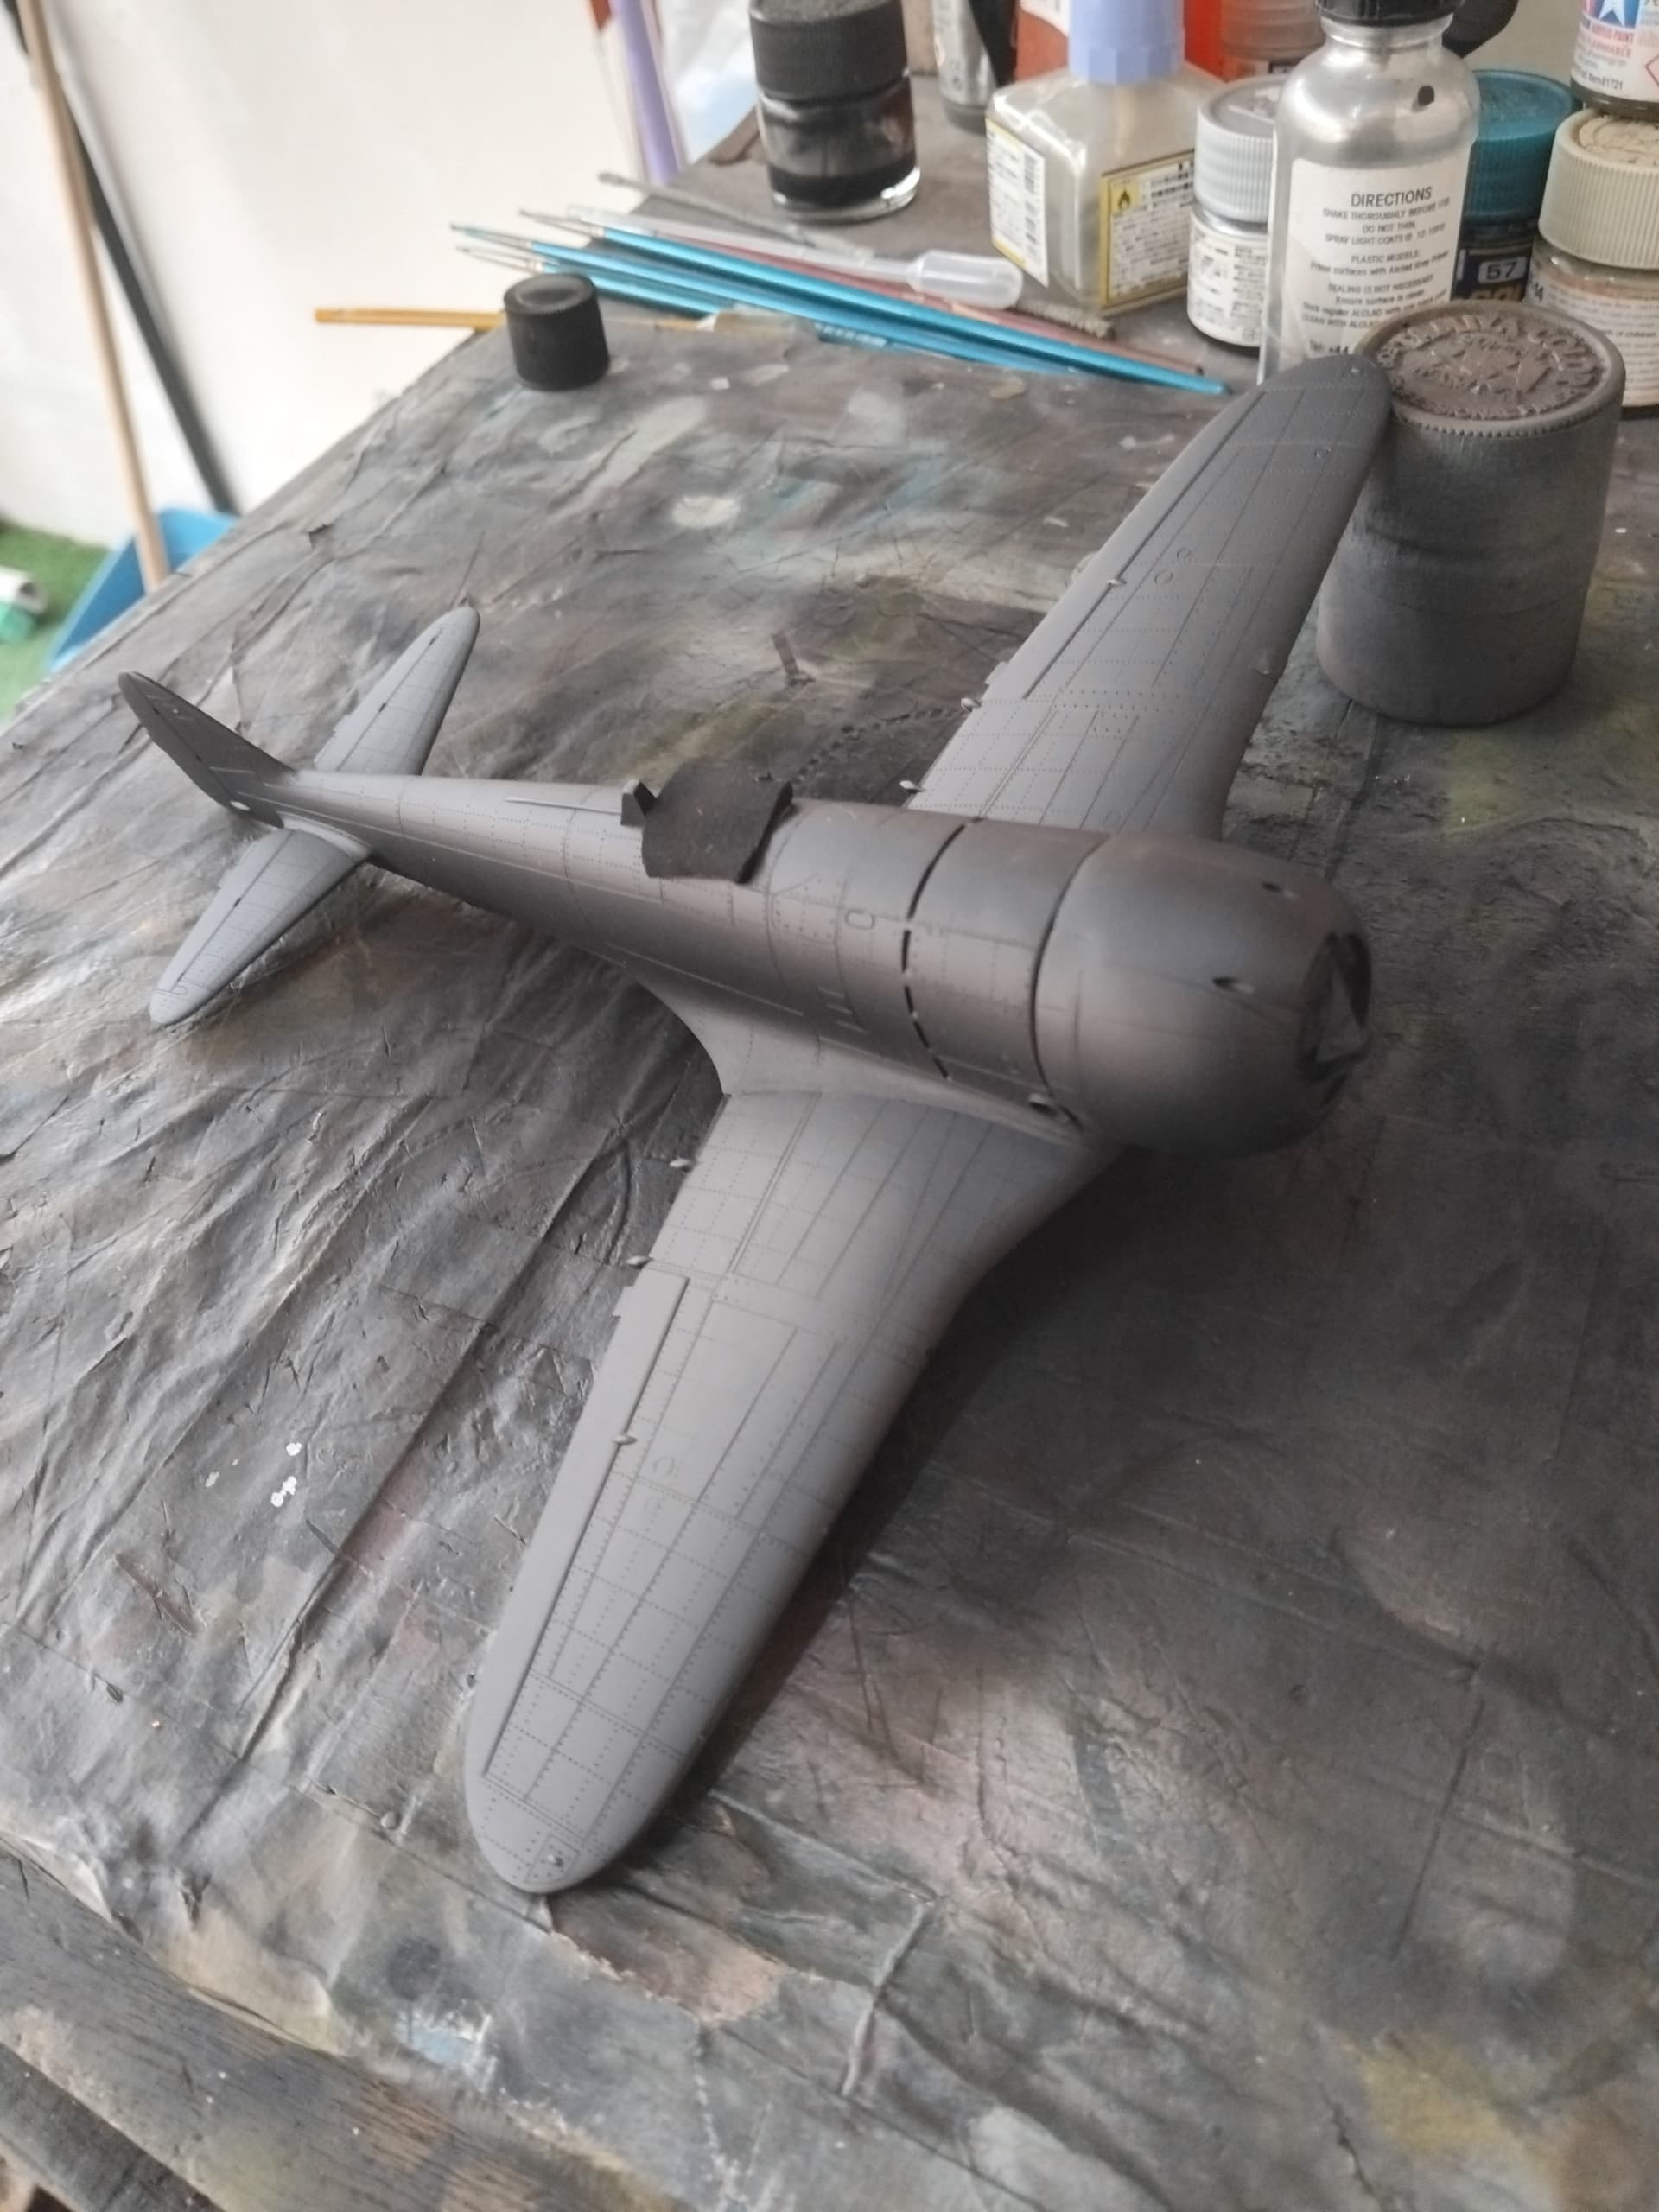
Some of you may recall our “Land of the Rising Sun” campaign from last year. I went a bit bonkers during that campaign, and didn’t finish all that I’d set out to get done. Which is why we have this campaign. I began Otaki’s/Arri’s Ki-44 Shoki (allied code name Tojo).
A quick background about the kit is in order, given that there’s certainly a little mystery behind the Otaki brand. This kit was molded by the Otaki company in 1974, and for the day it was considered state of the art. Certainly, at the level of Tamyia and Hasegawa at the time. Otaki as a business couldn’t compete, and in the early 80’s was rebranded (sold) to a new company named Arii. There are also rumors of the Otaki CEO taking his own life due to the failure of the company.
My example of this kit was a reboxing of the Otaki kit, done in 1986. Overall, for the timeframe, it’s a pretty good looking kit! Here’s a quick background as to how I got to where the build is currently at, just in case anyone is looking for an alternative to the Hasegawa kit.
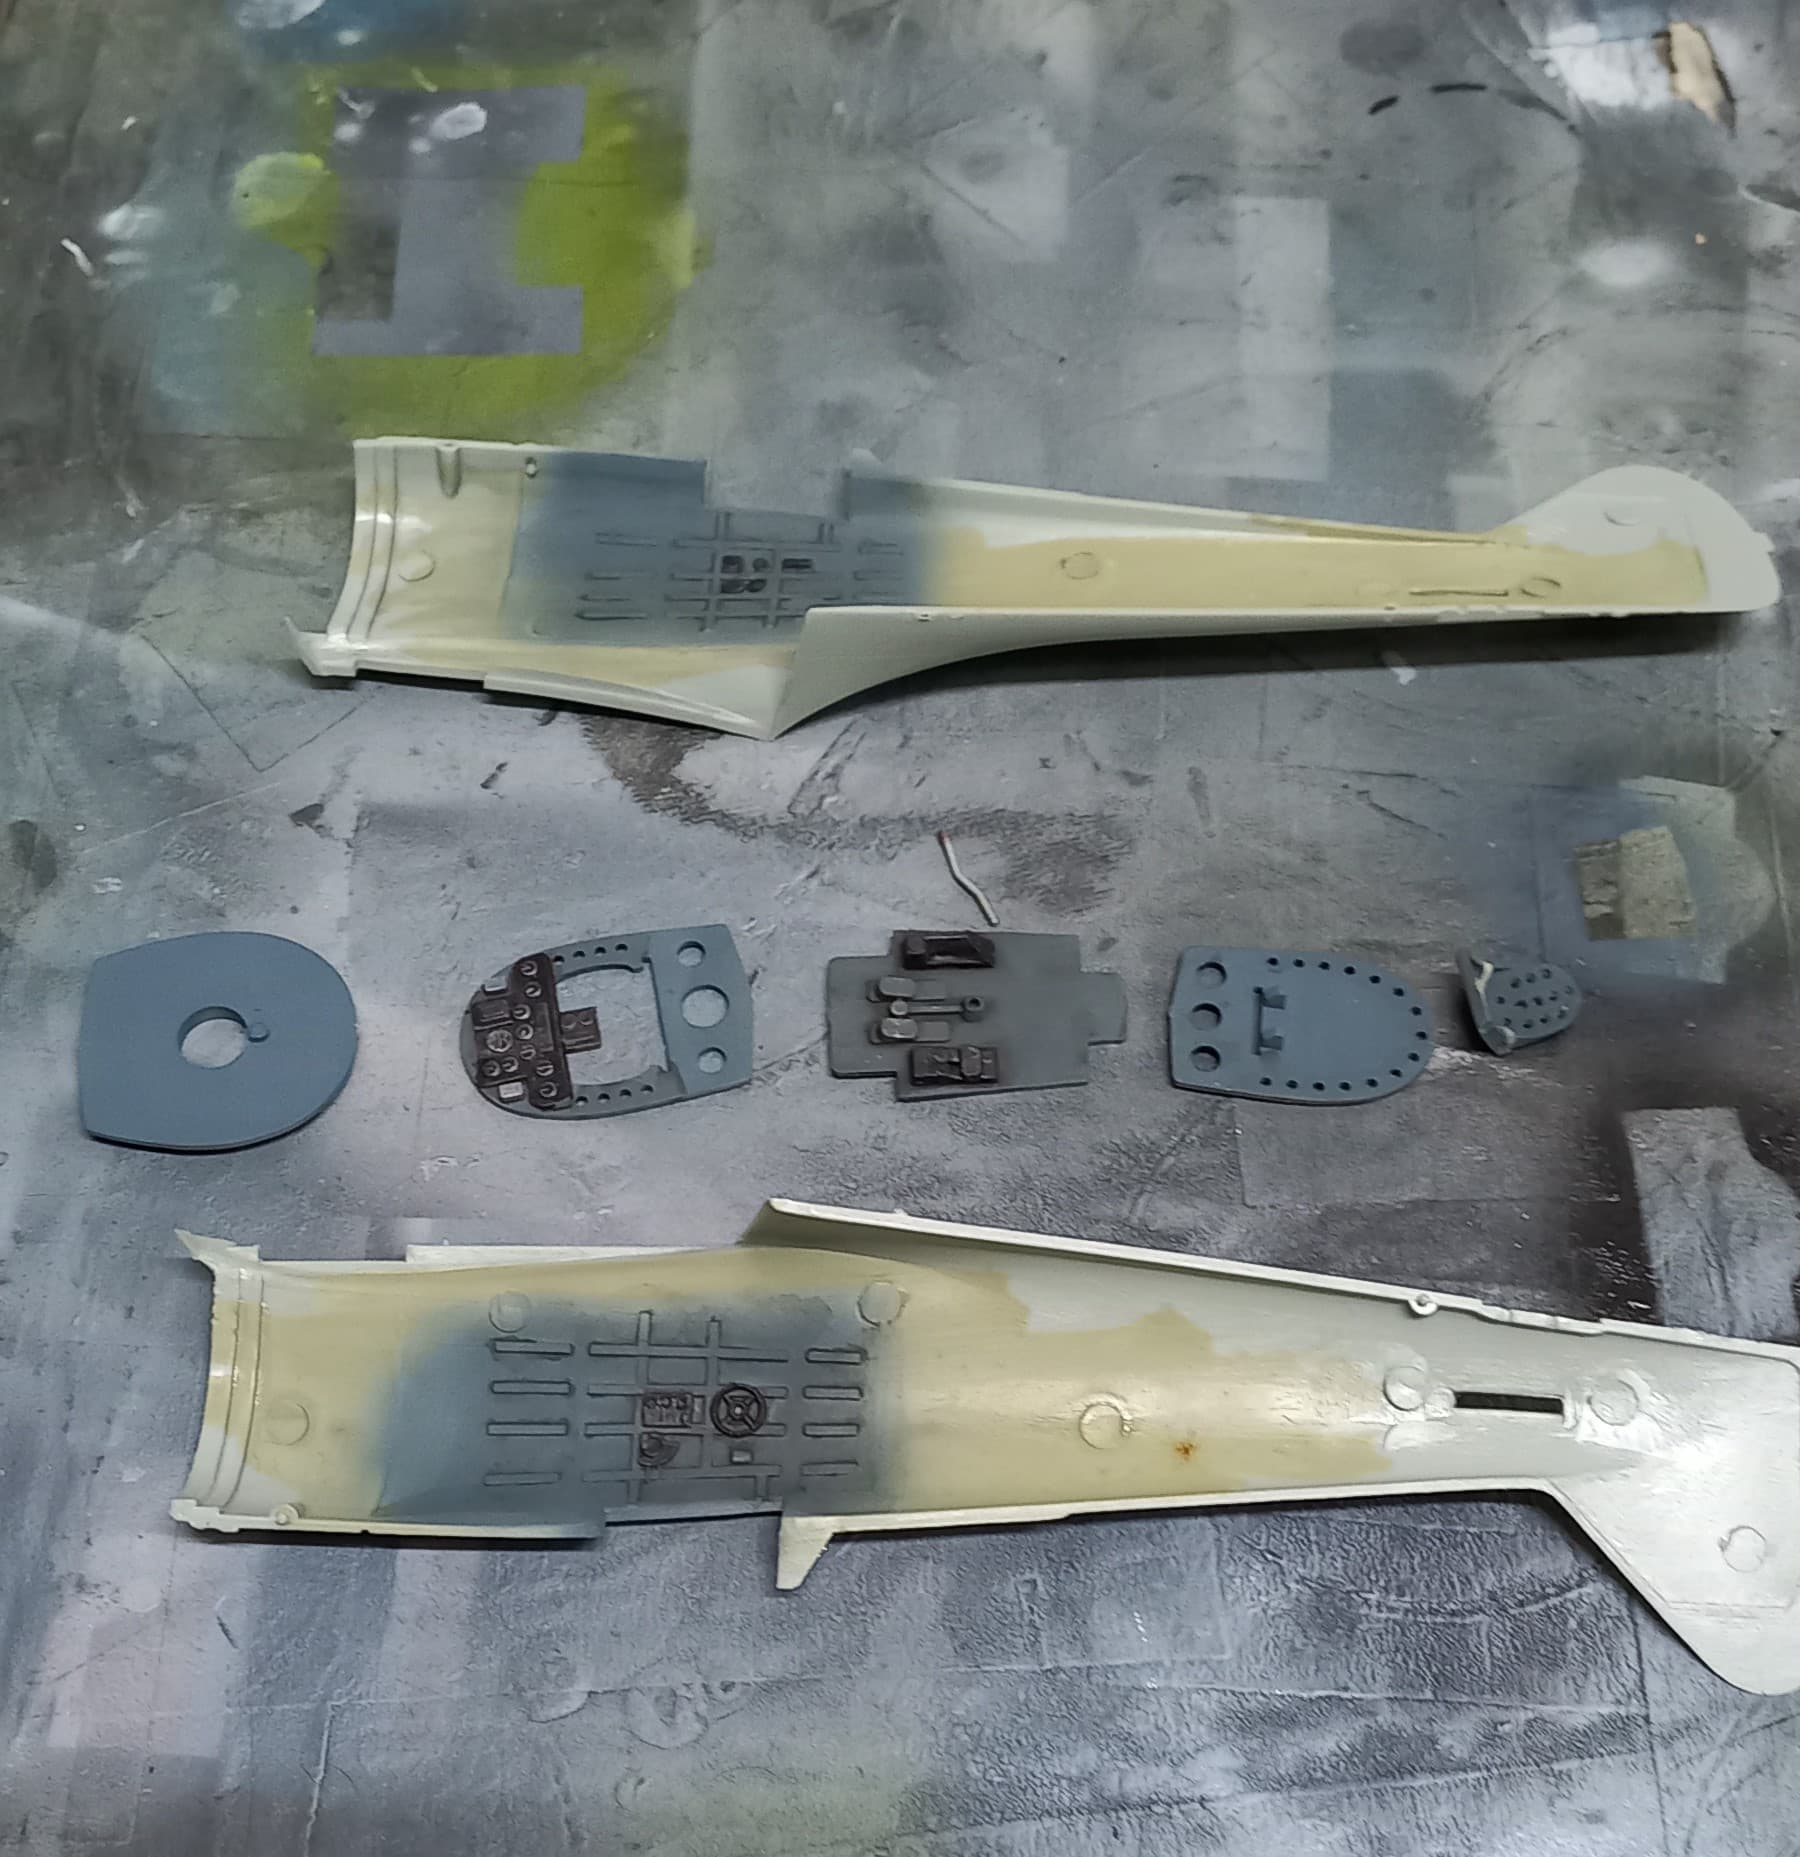
With a low parts count, it lends itself to an “easier” build, and for the most part it does. The cockpit certainly lacks the detail that is found in the Hasegawa kit, however, once closed up, most detail is lost on either kit. I proceeded with giving the interior the IJA’s grey/blue interior color, something that most modelers miss.
Fit on the fuselage is quite nice.
The cowling had a little wonky fit, that was taken care of with a sanding stick and some filler.
The wings went on with no issue, just a little filler at the wing join, and that brings us up to where the kit stayed till now.
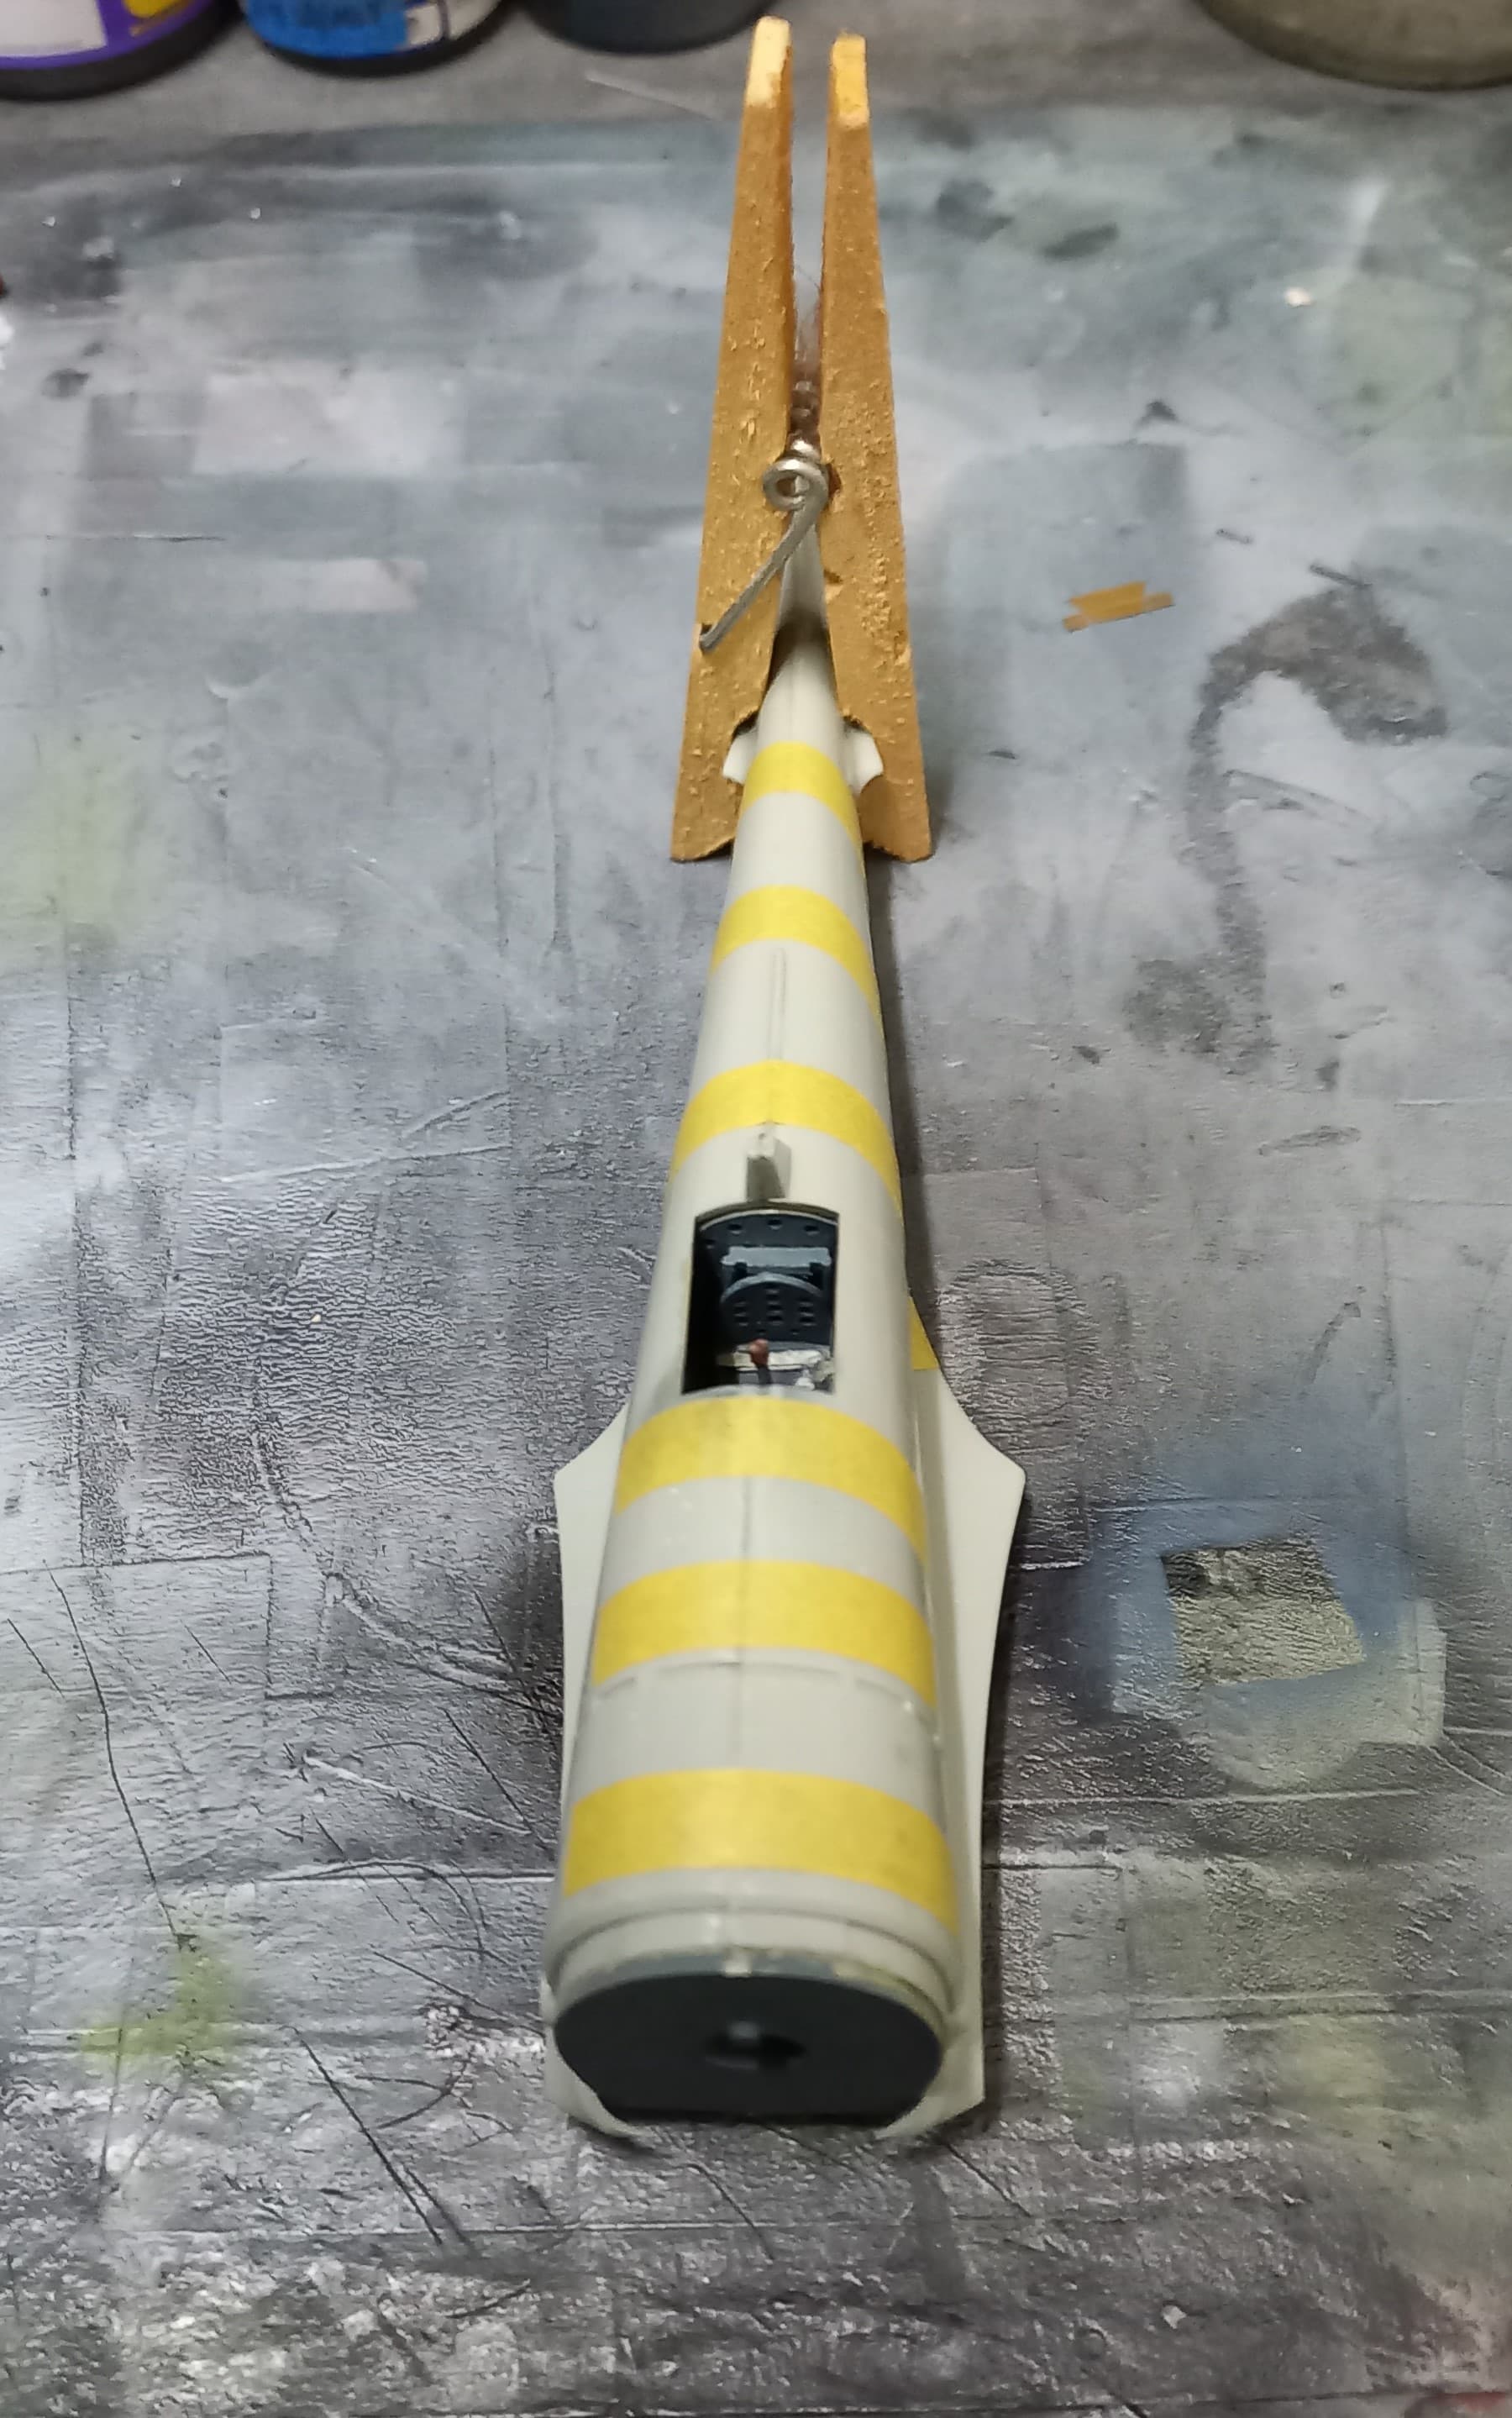
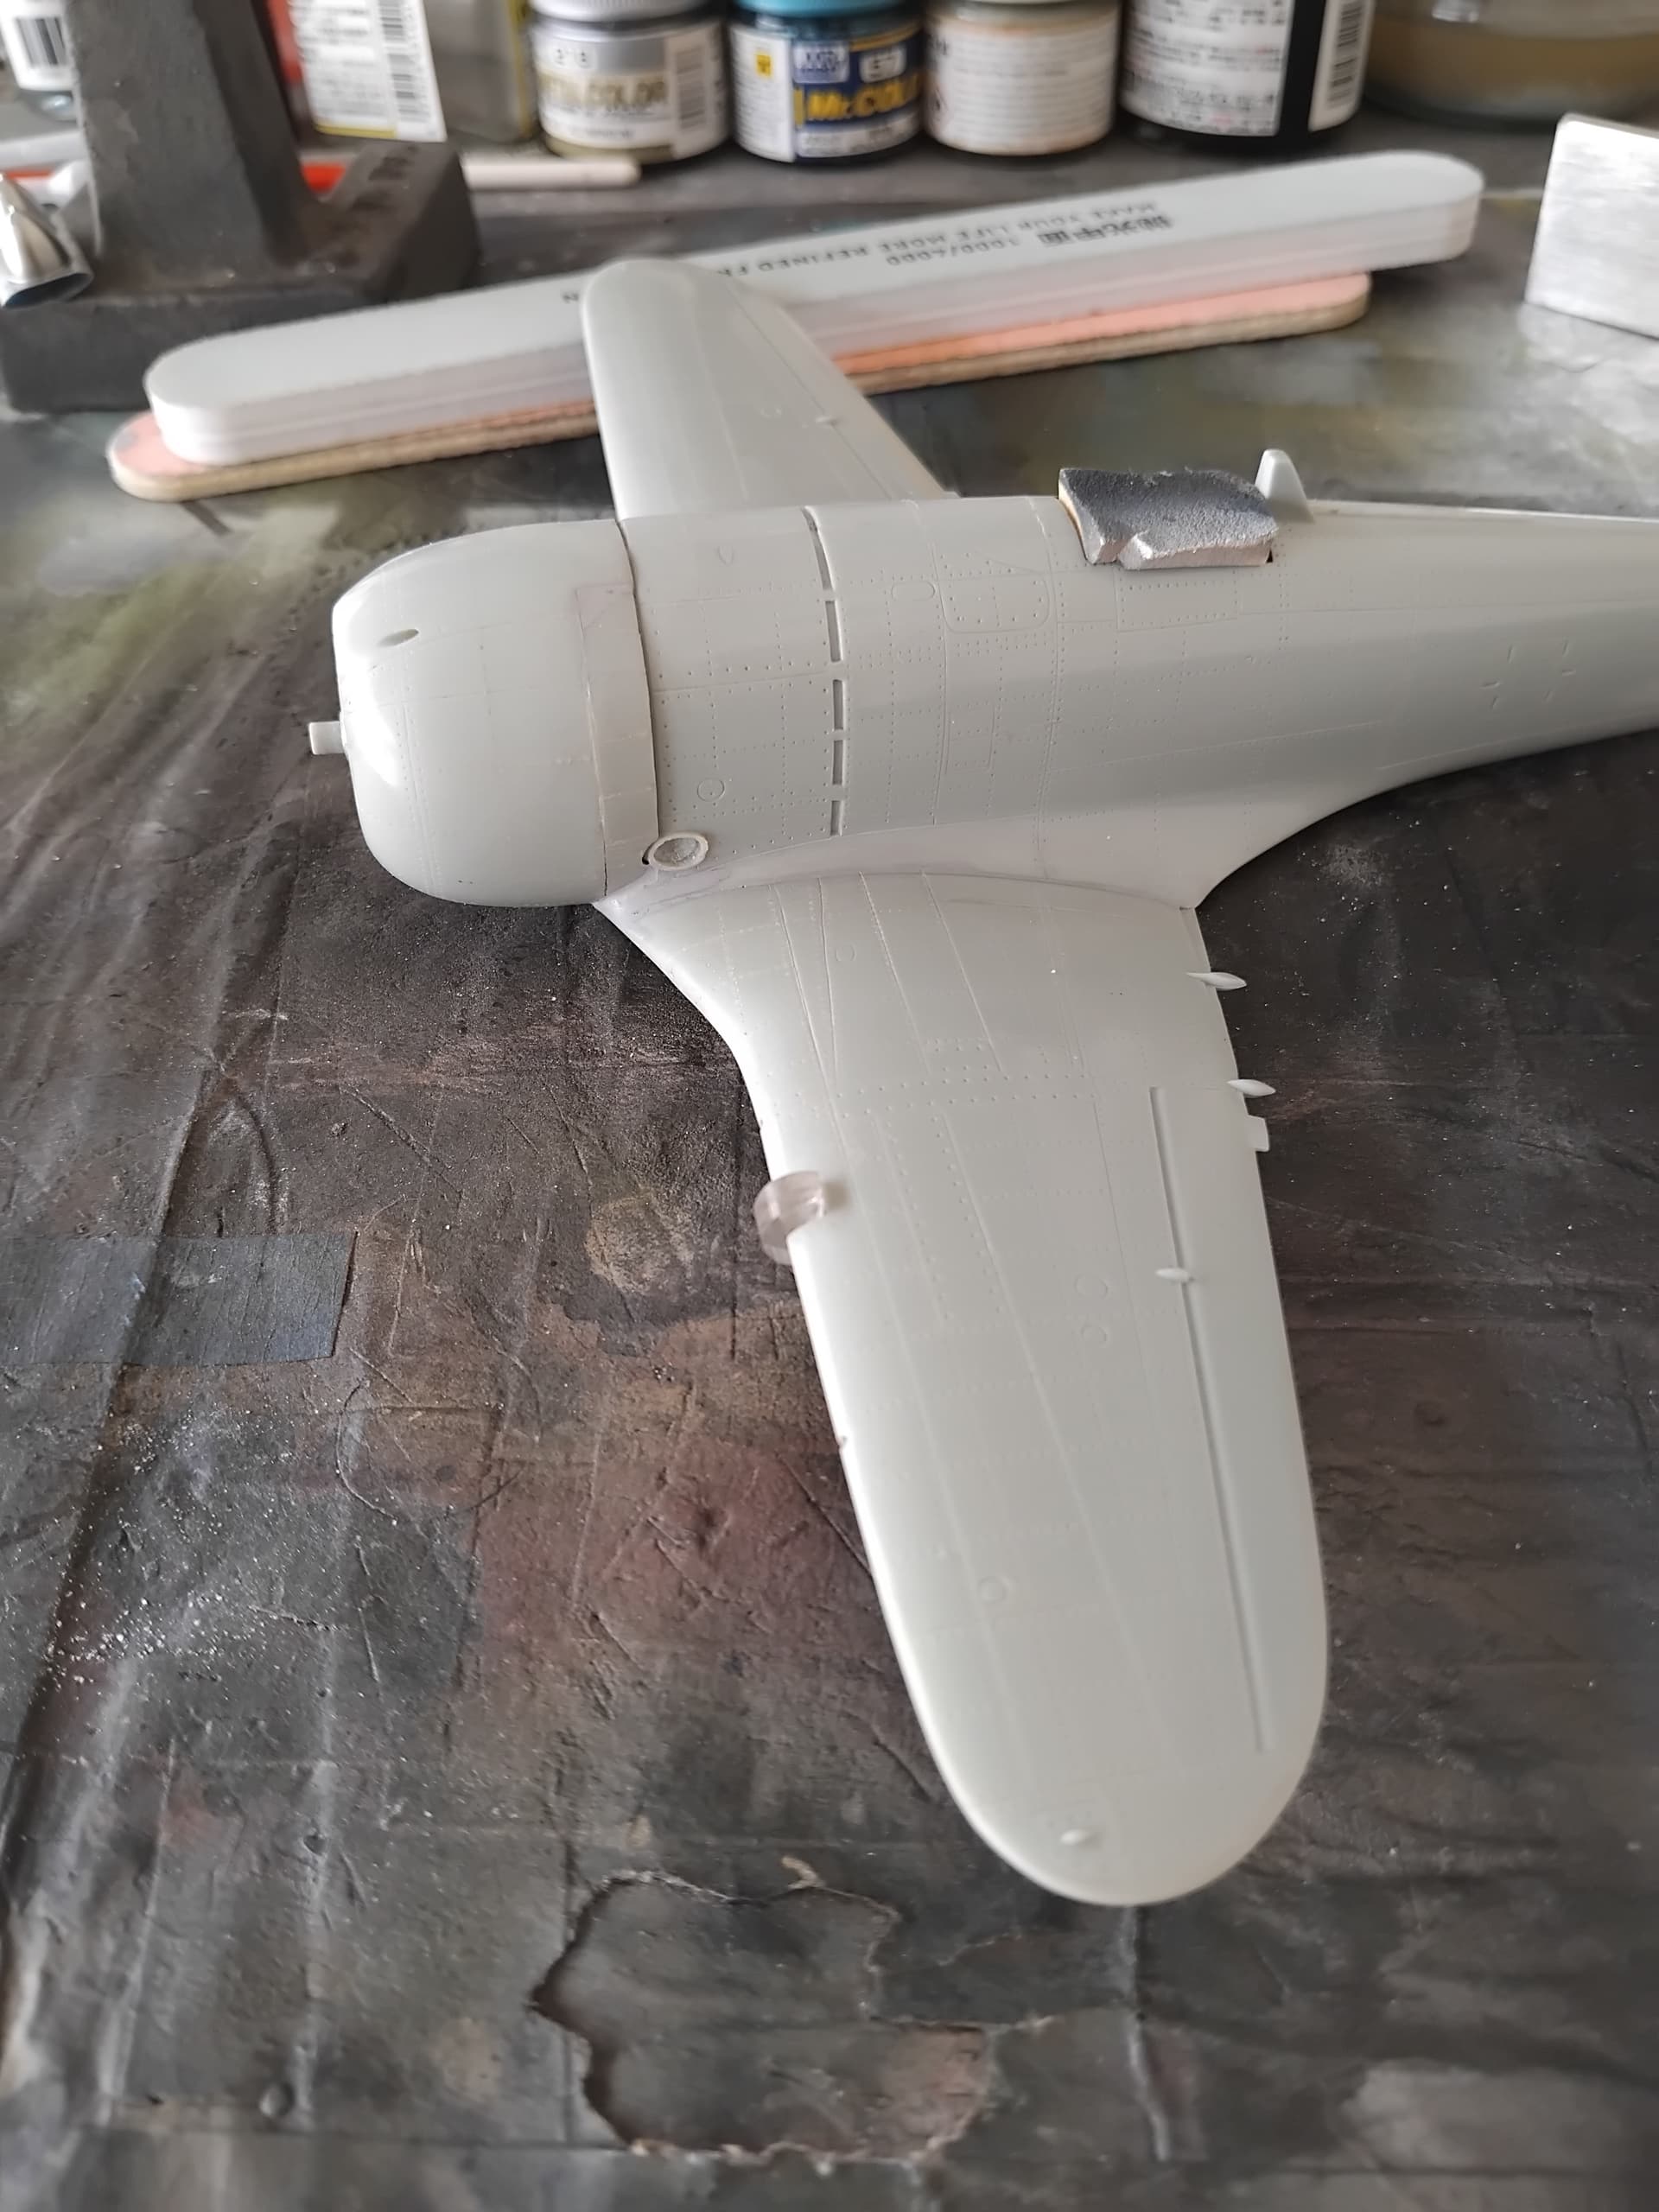
Once back out of the box, I focused on that which put it back on the self. The tires are plain horrible, with two pin marks each. These were sanded down, and any hole was filled with superglue and sanded smooth.
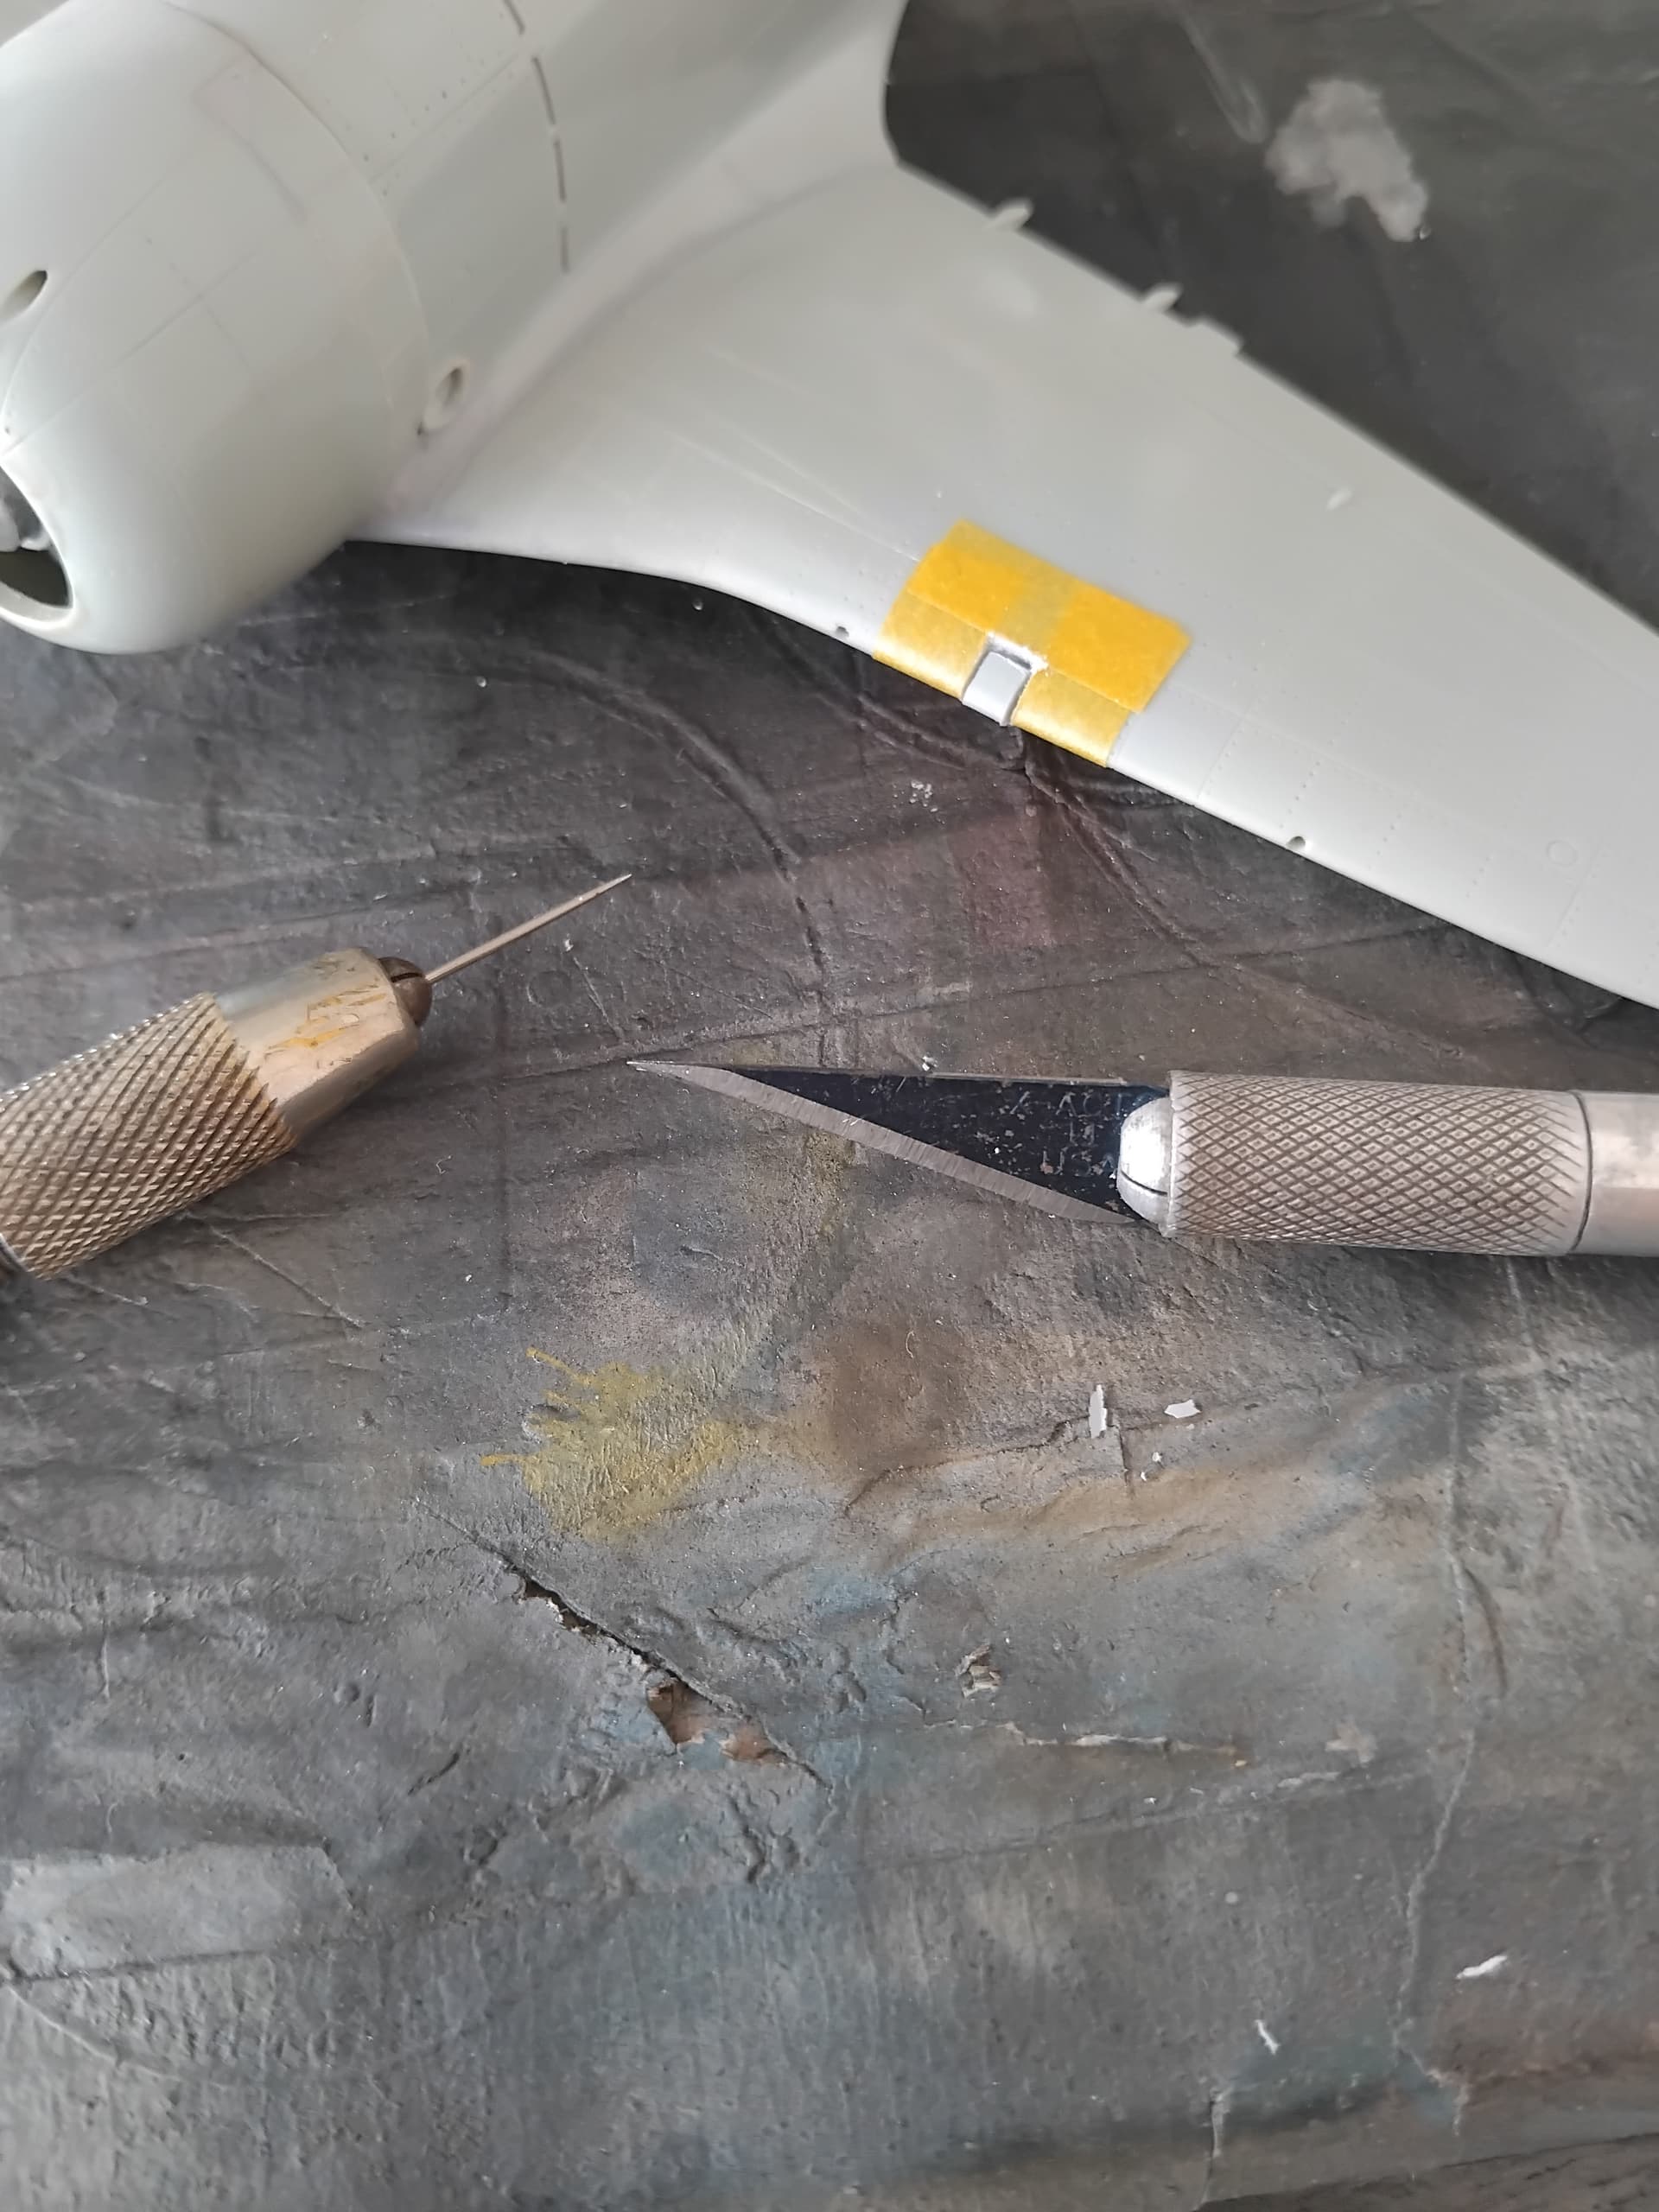
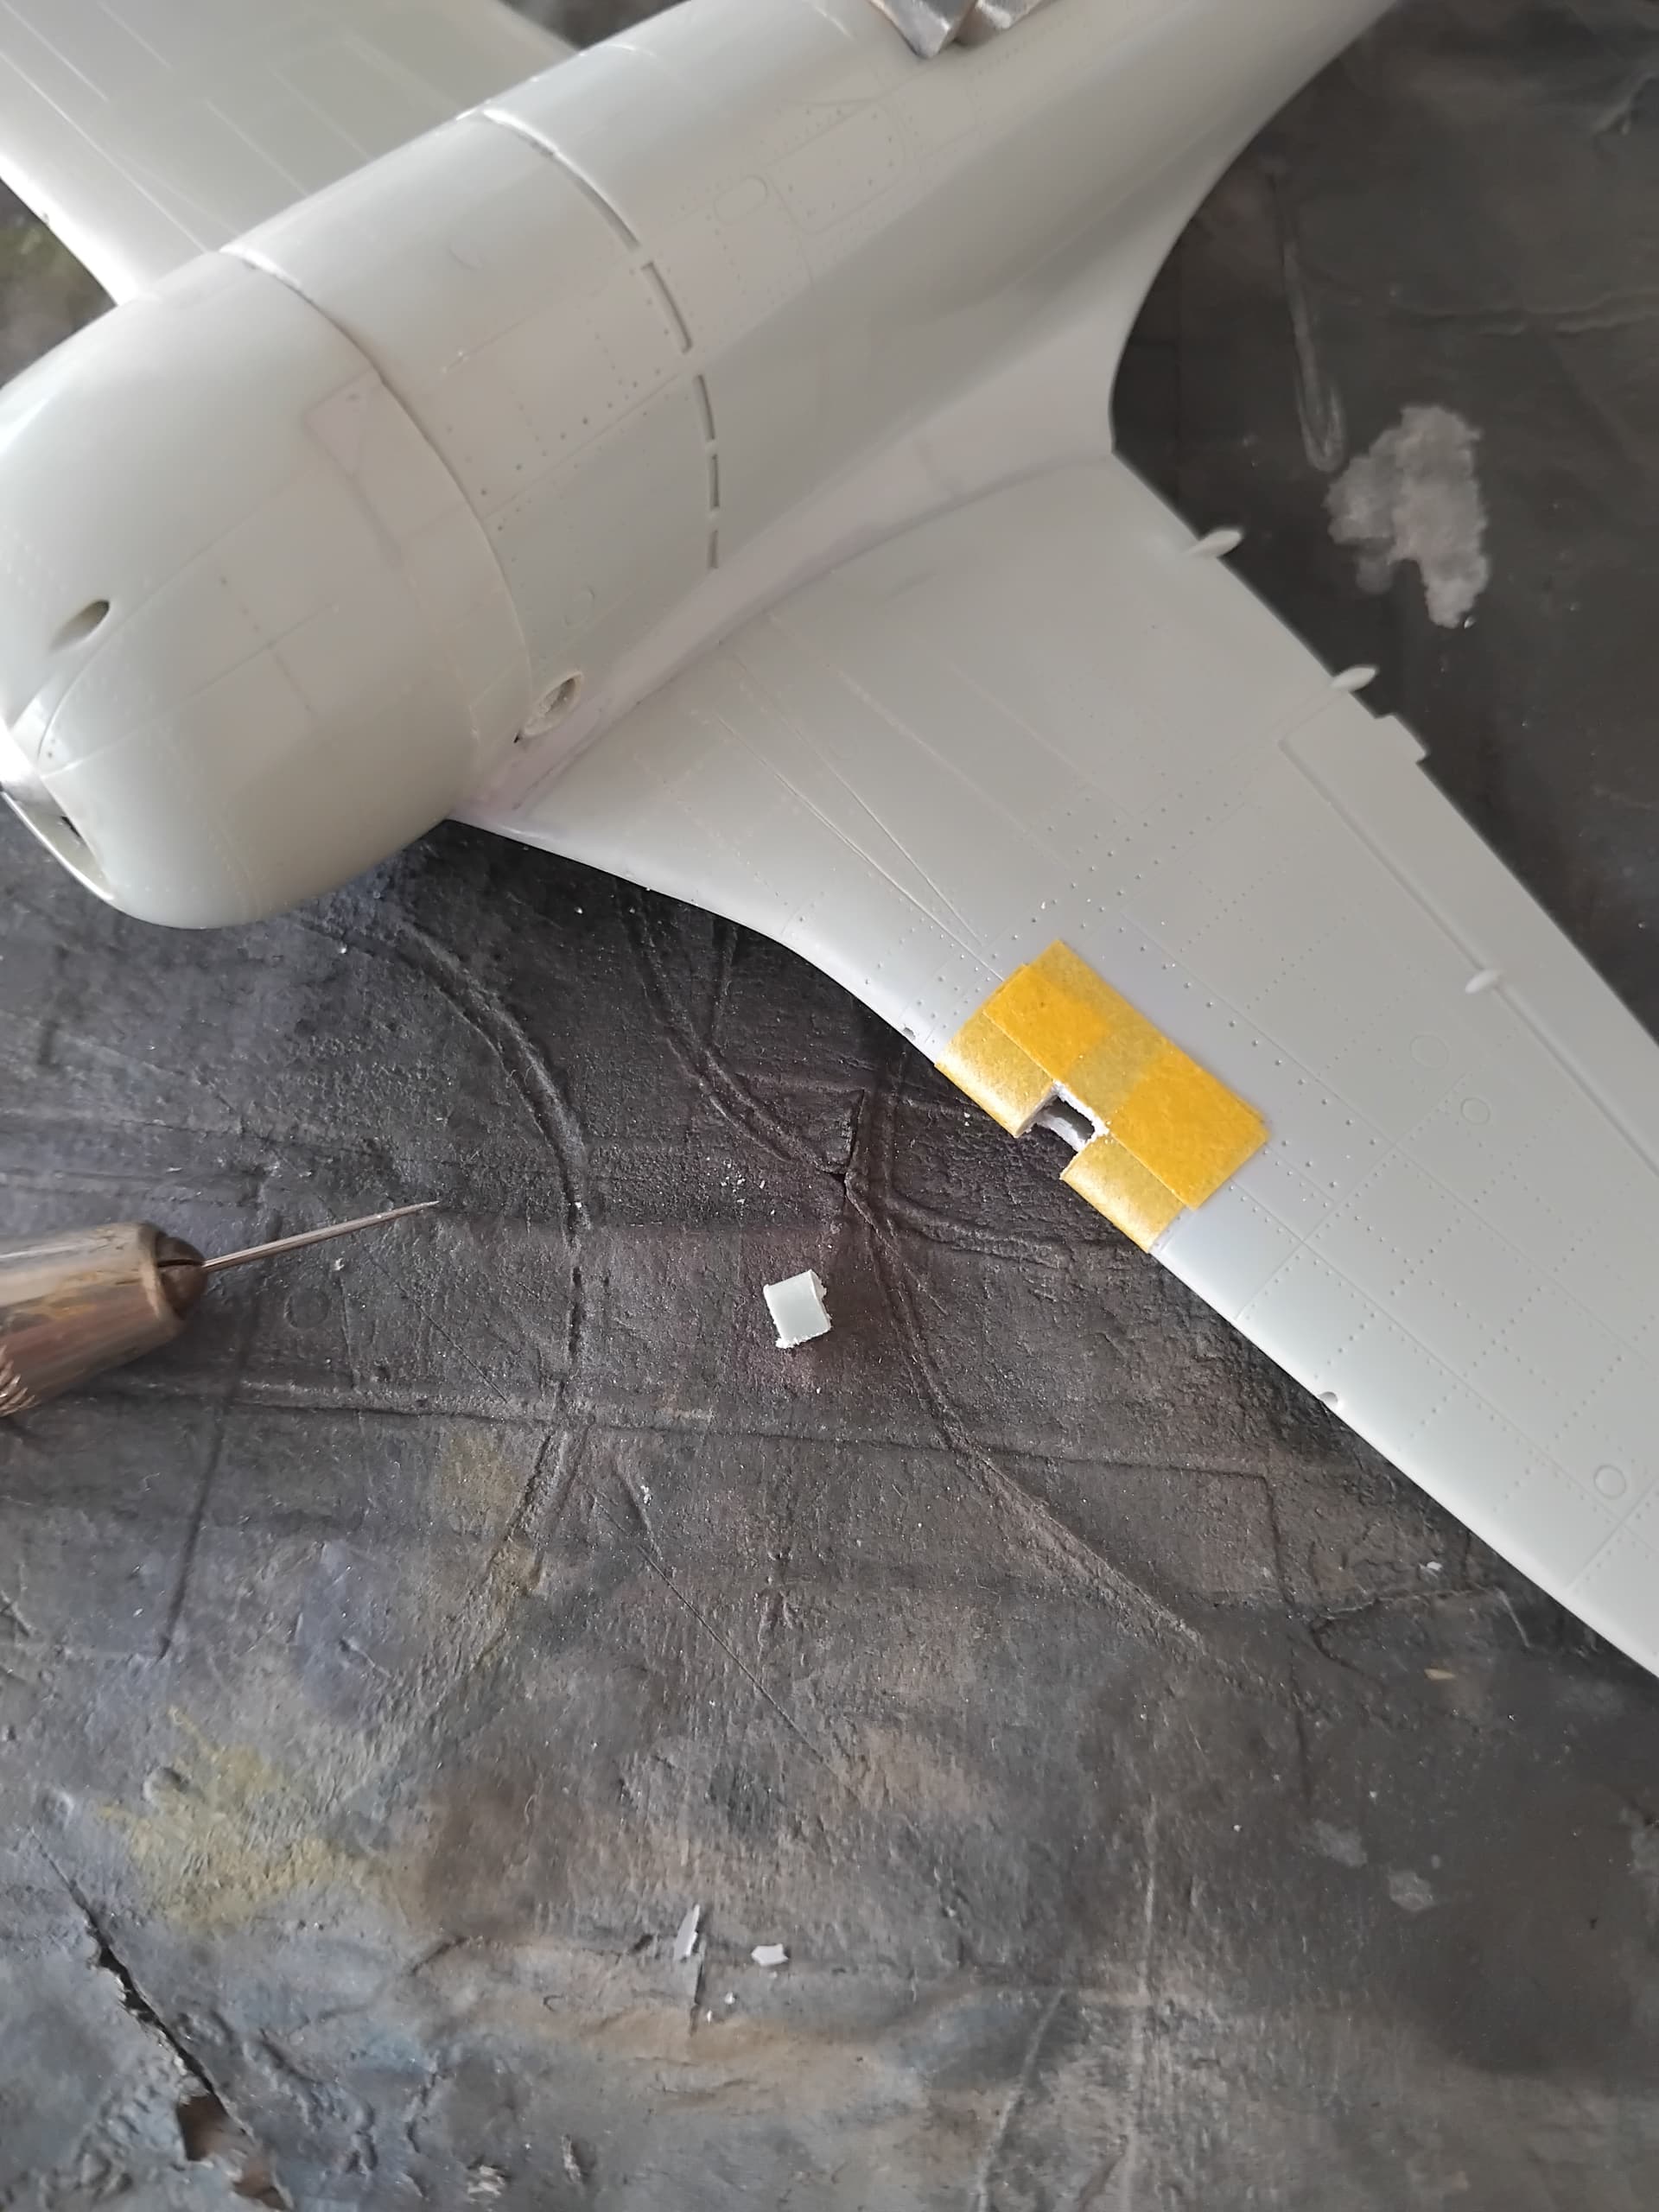
The other glaring thing that I wanted to rectify was the landing light. The kit has one that is to be represented via painting the area silver. I felt that replacing this area with some acrylic would look much better. The first thing done was to mark off the area using washi tape.
Next, the landing light area was carefully cut out using a razor saw and a new #11 blade.
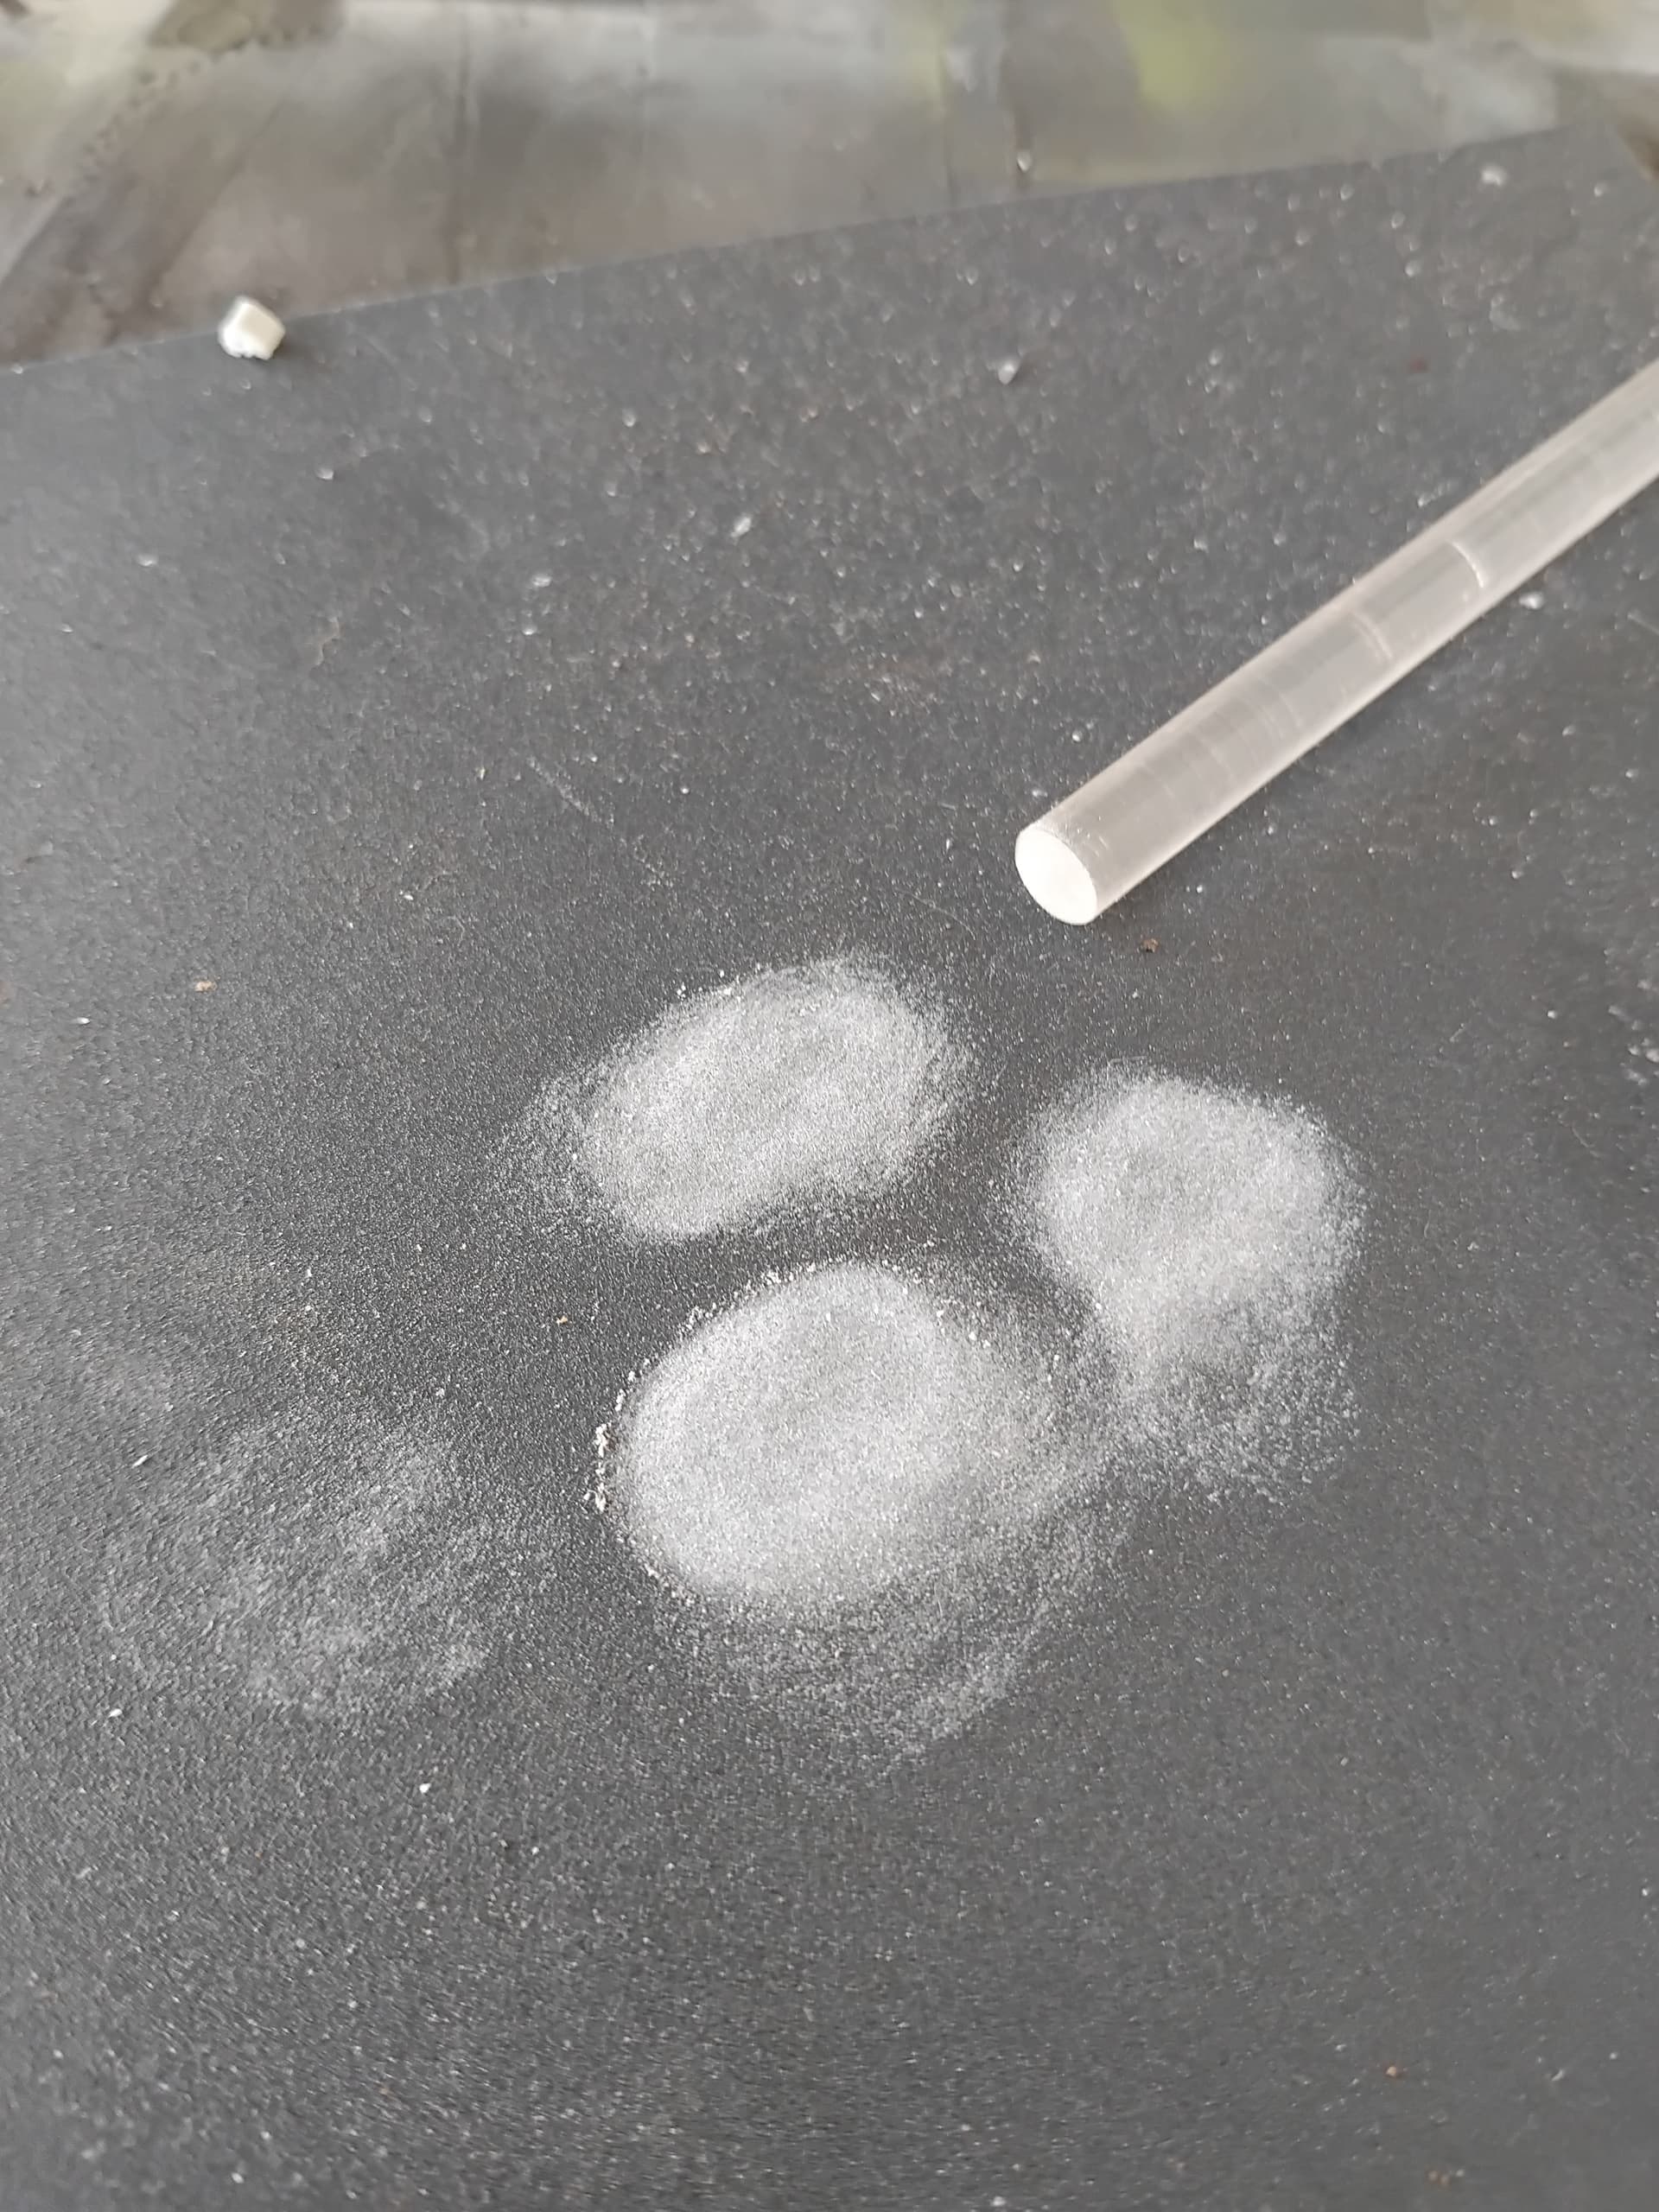
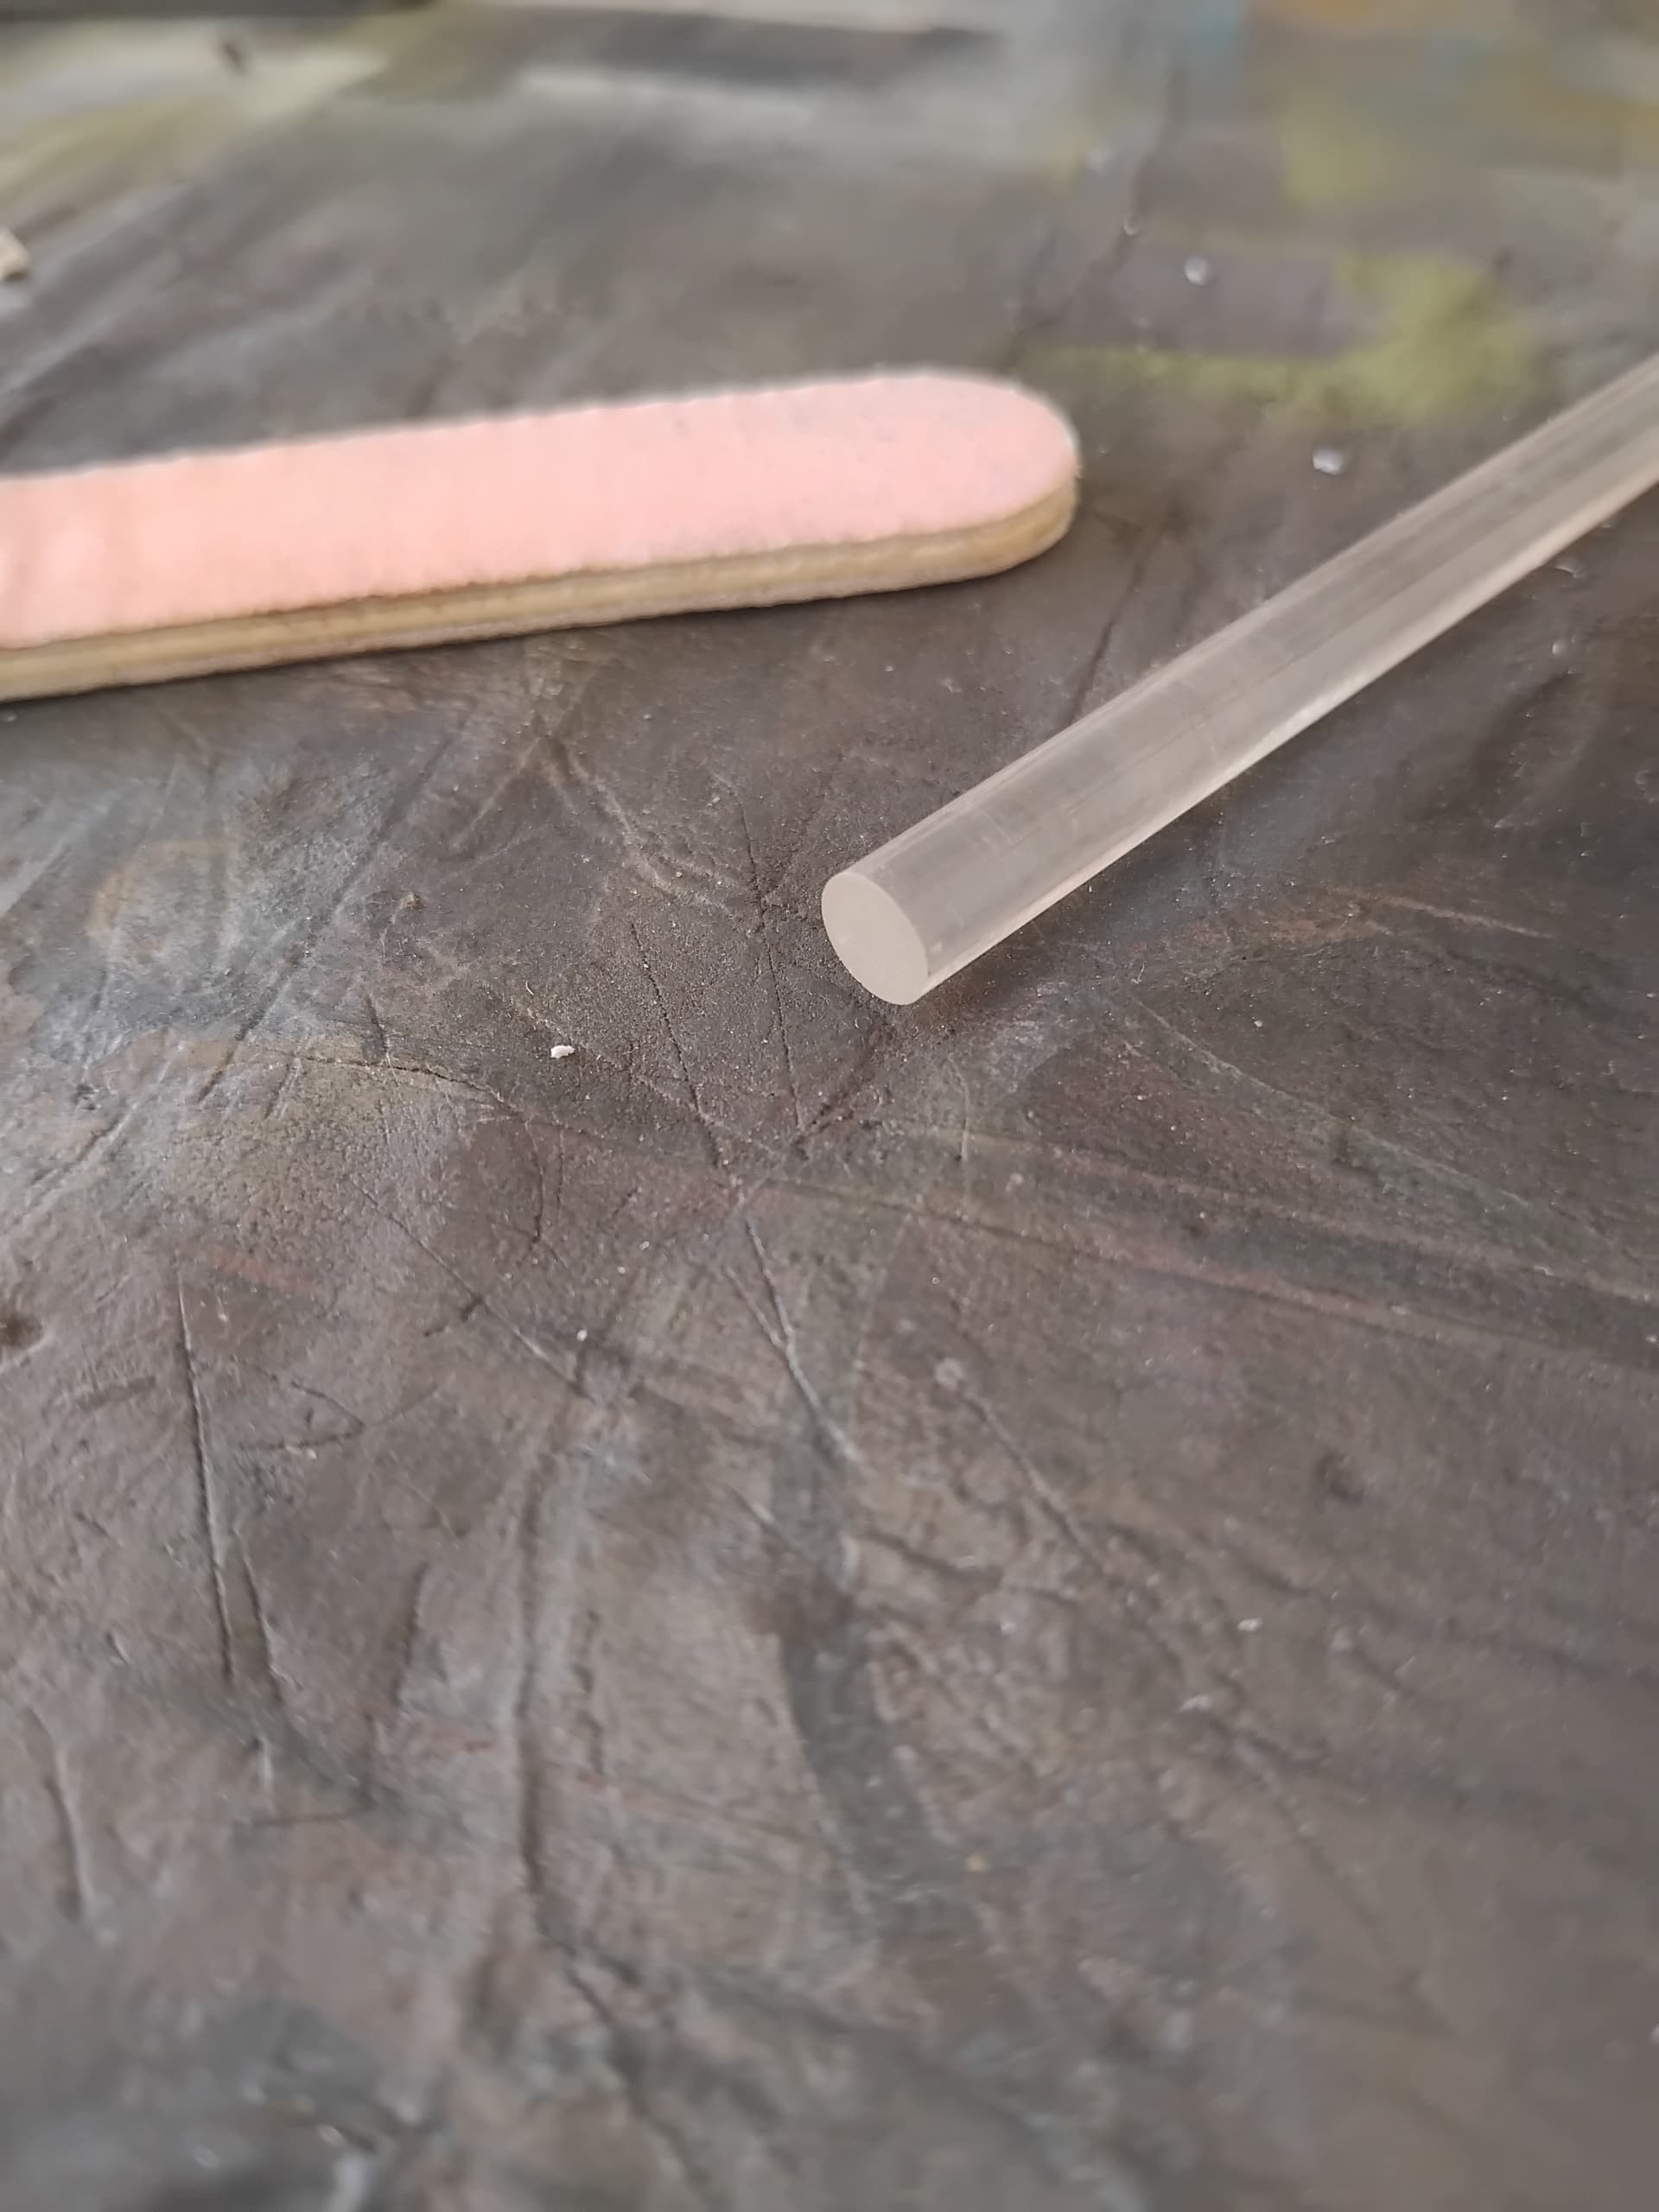
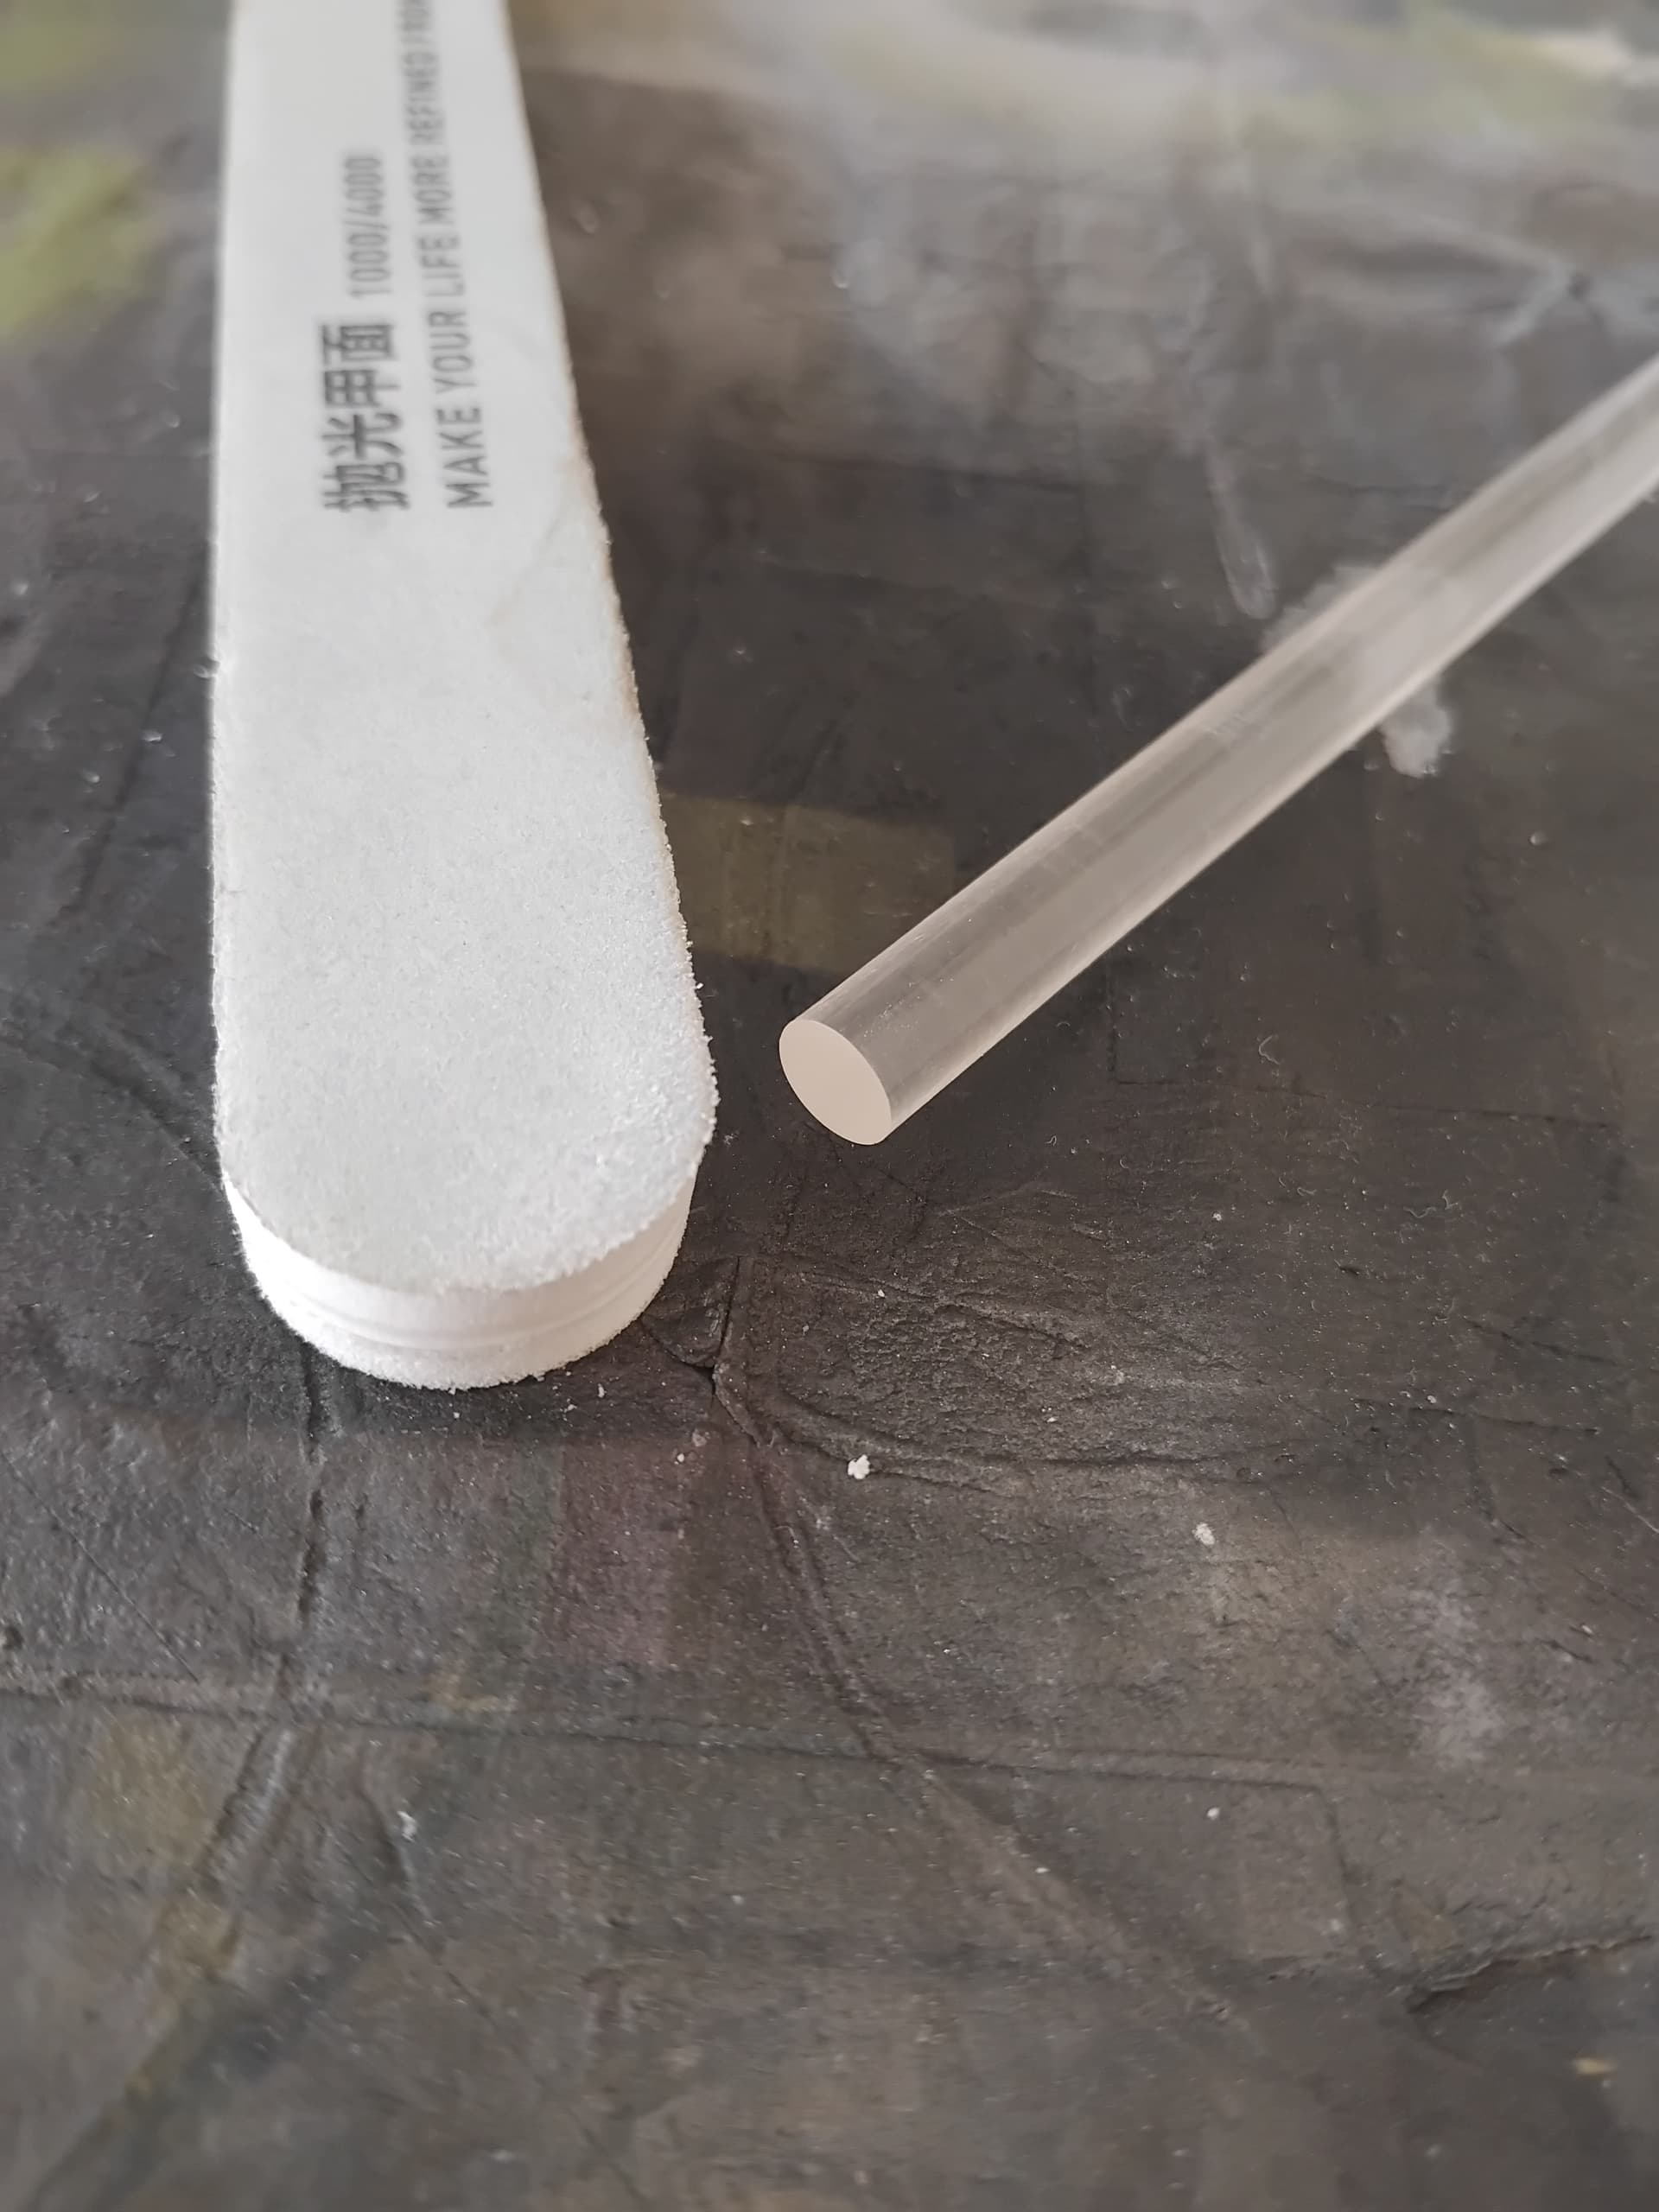
I chose 1/4" clear acrylic rod as the base for the new light, this is easy to obtain and also can be used to make the rod for flying models on a base. The end was polished out, beginning with 320, then 600, 800 and finally a cuticle nail polisher. the whole process is less than 10 minutes, with the primary focus of keeping the end of the rod perpendicular to the sanding surface.
The next step is to measure the width needed to replace the light and cutting the rod slightly wider. The rough end is then sanded as above until it fits snuggly into the wing.
I next proceeded to cut the acrylic part such that I’d get a flat area to represent the back of the landing light, this was polished out as above, a bit more test fitting was performed.
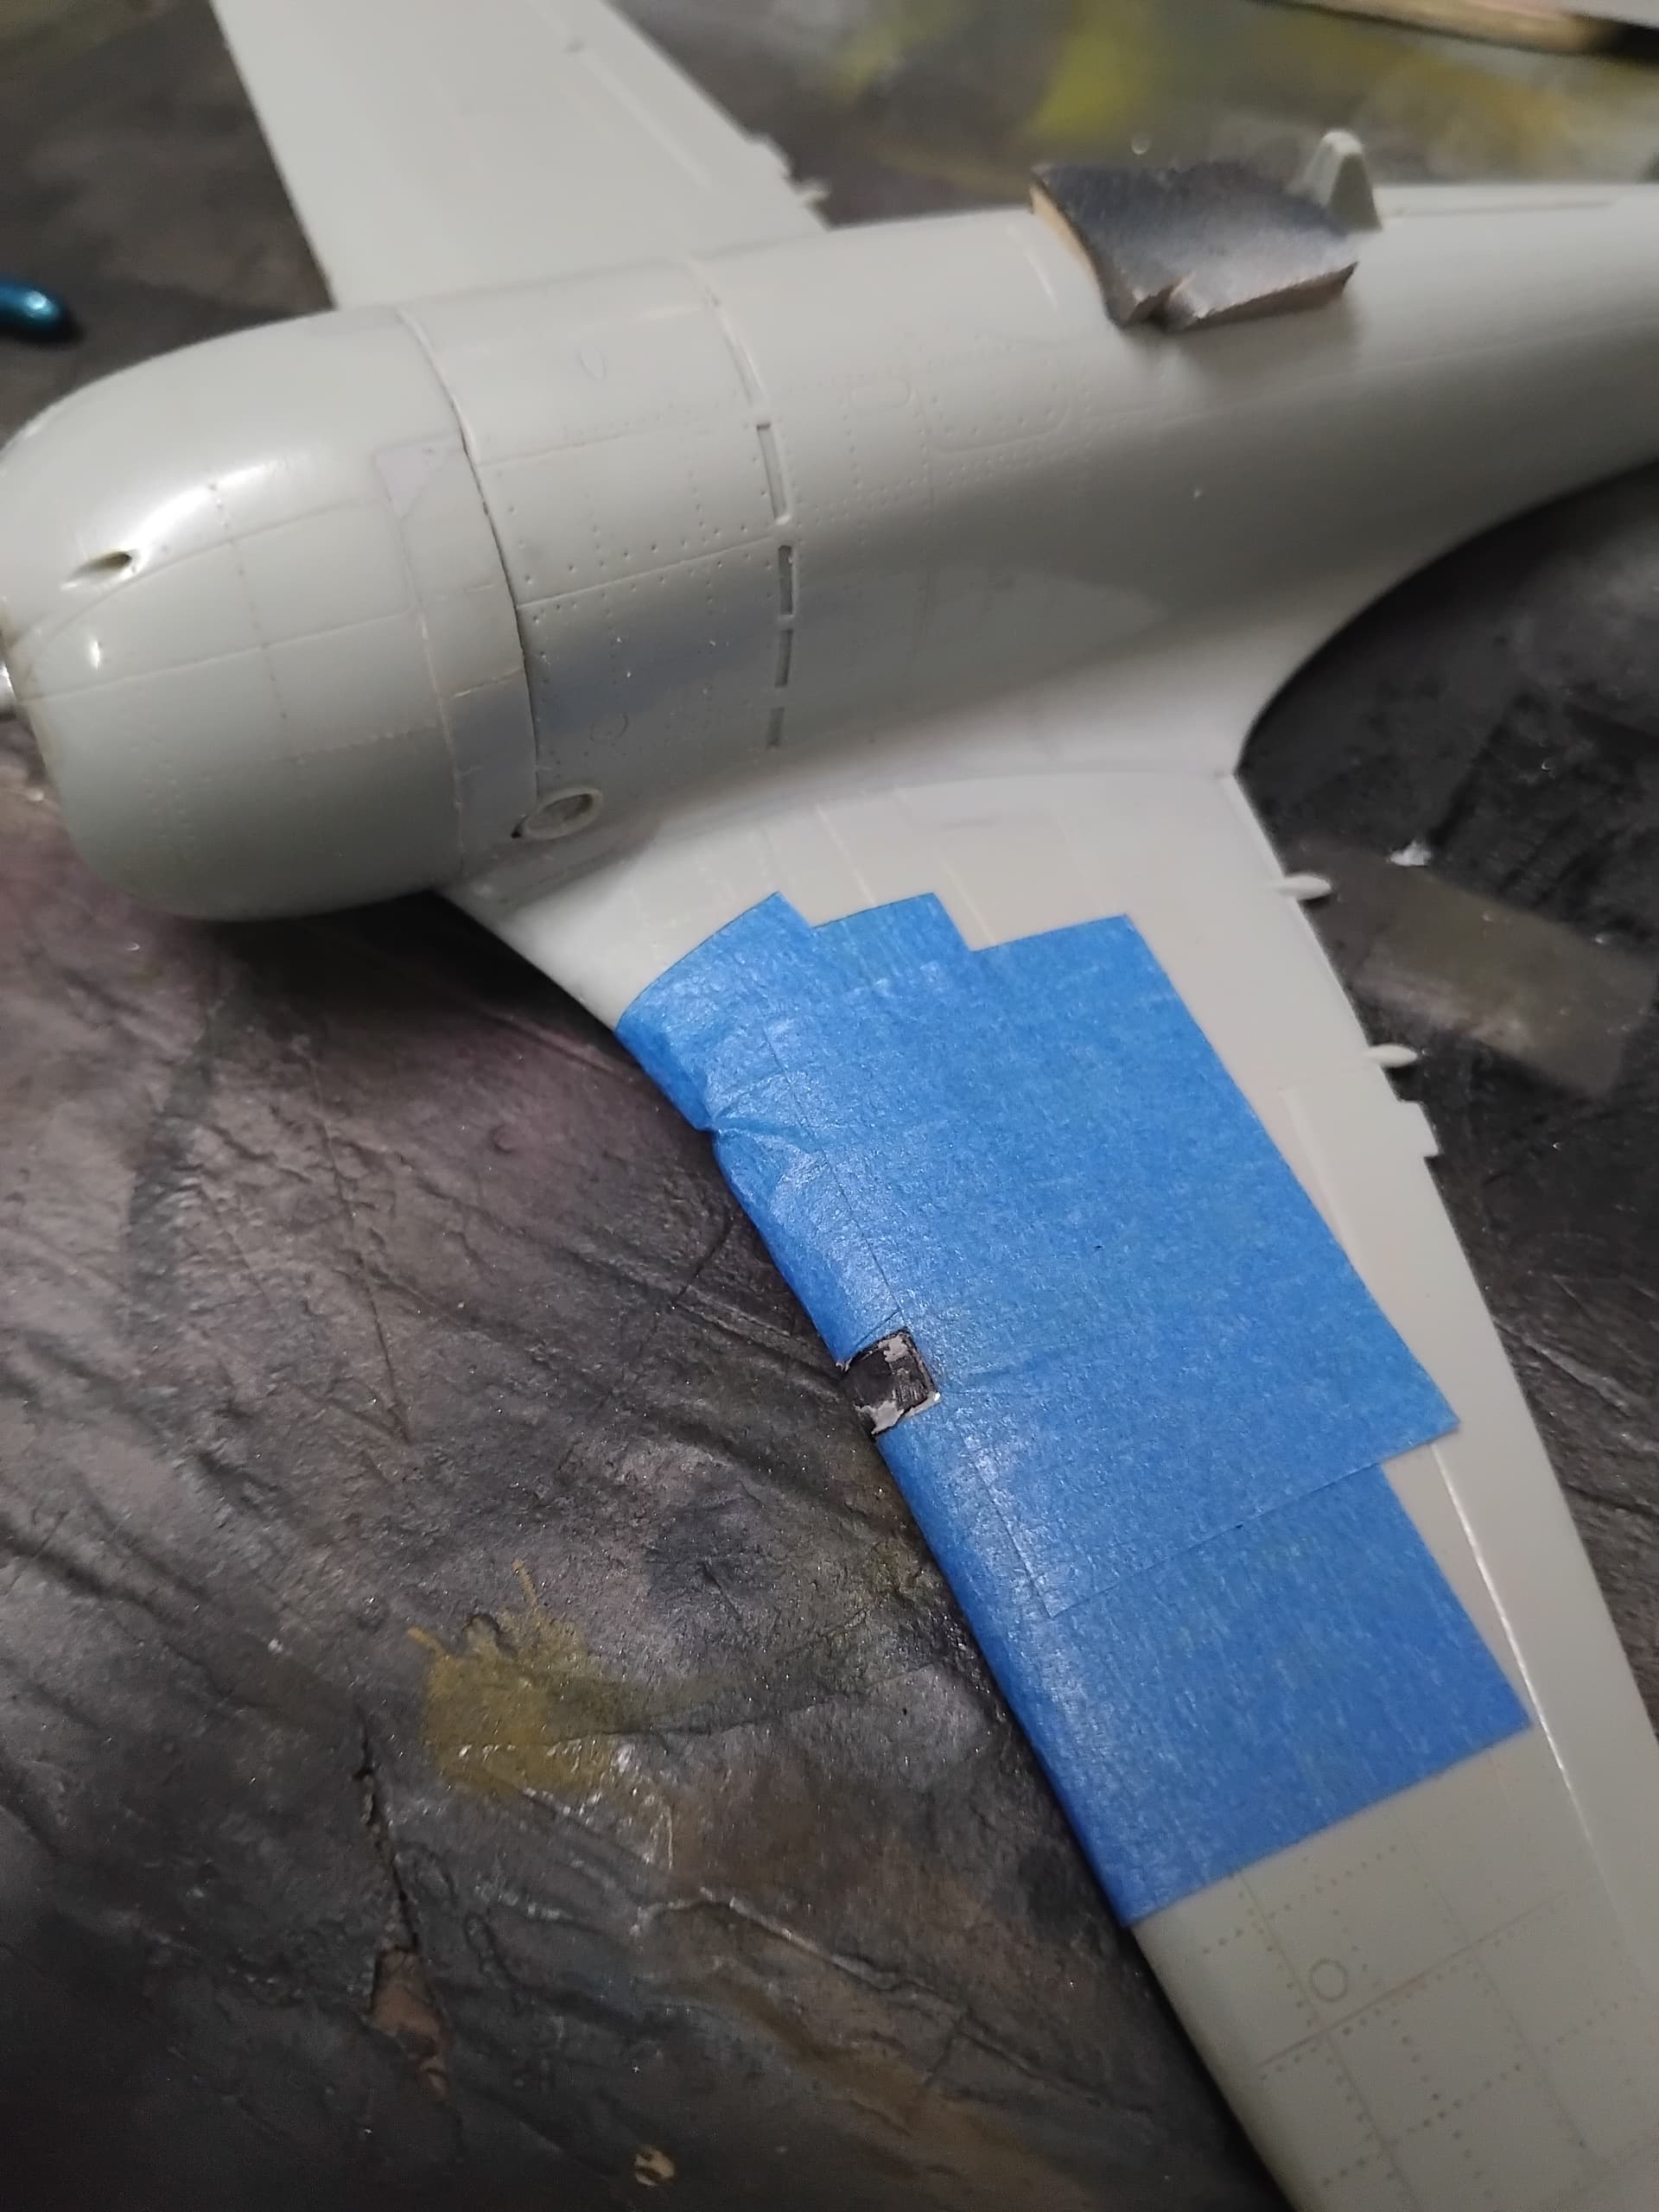
With things looking pretty good the rear part of the light and ends of the acrylic that would be inside the wings were painted black, then a small hole, that would represent the light, was drilled and the inside of it painted silver. The whole acrylic part was then superglued into the wing, with the surrounding area taped off so that the landing light could be ground and sanded flush with the wings.
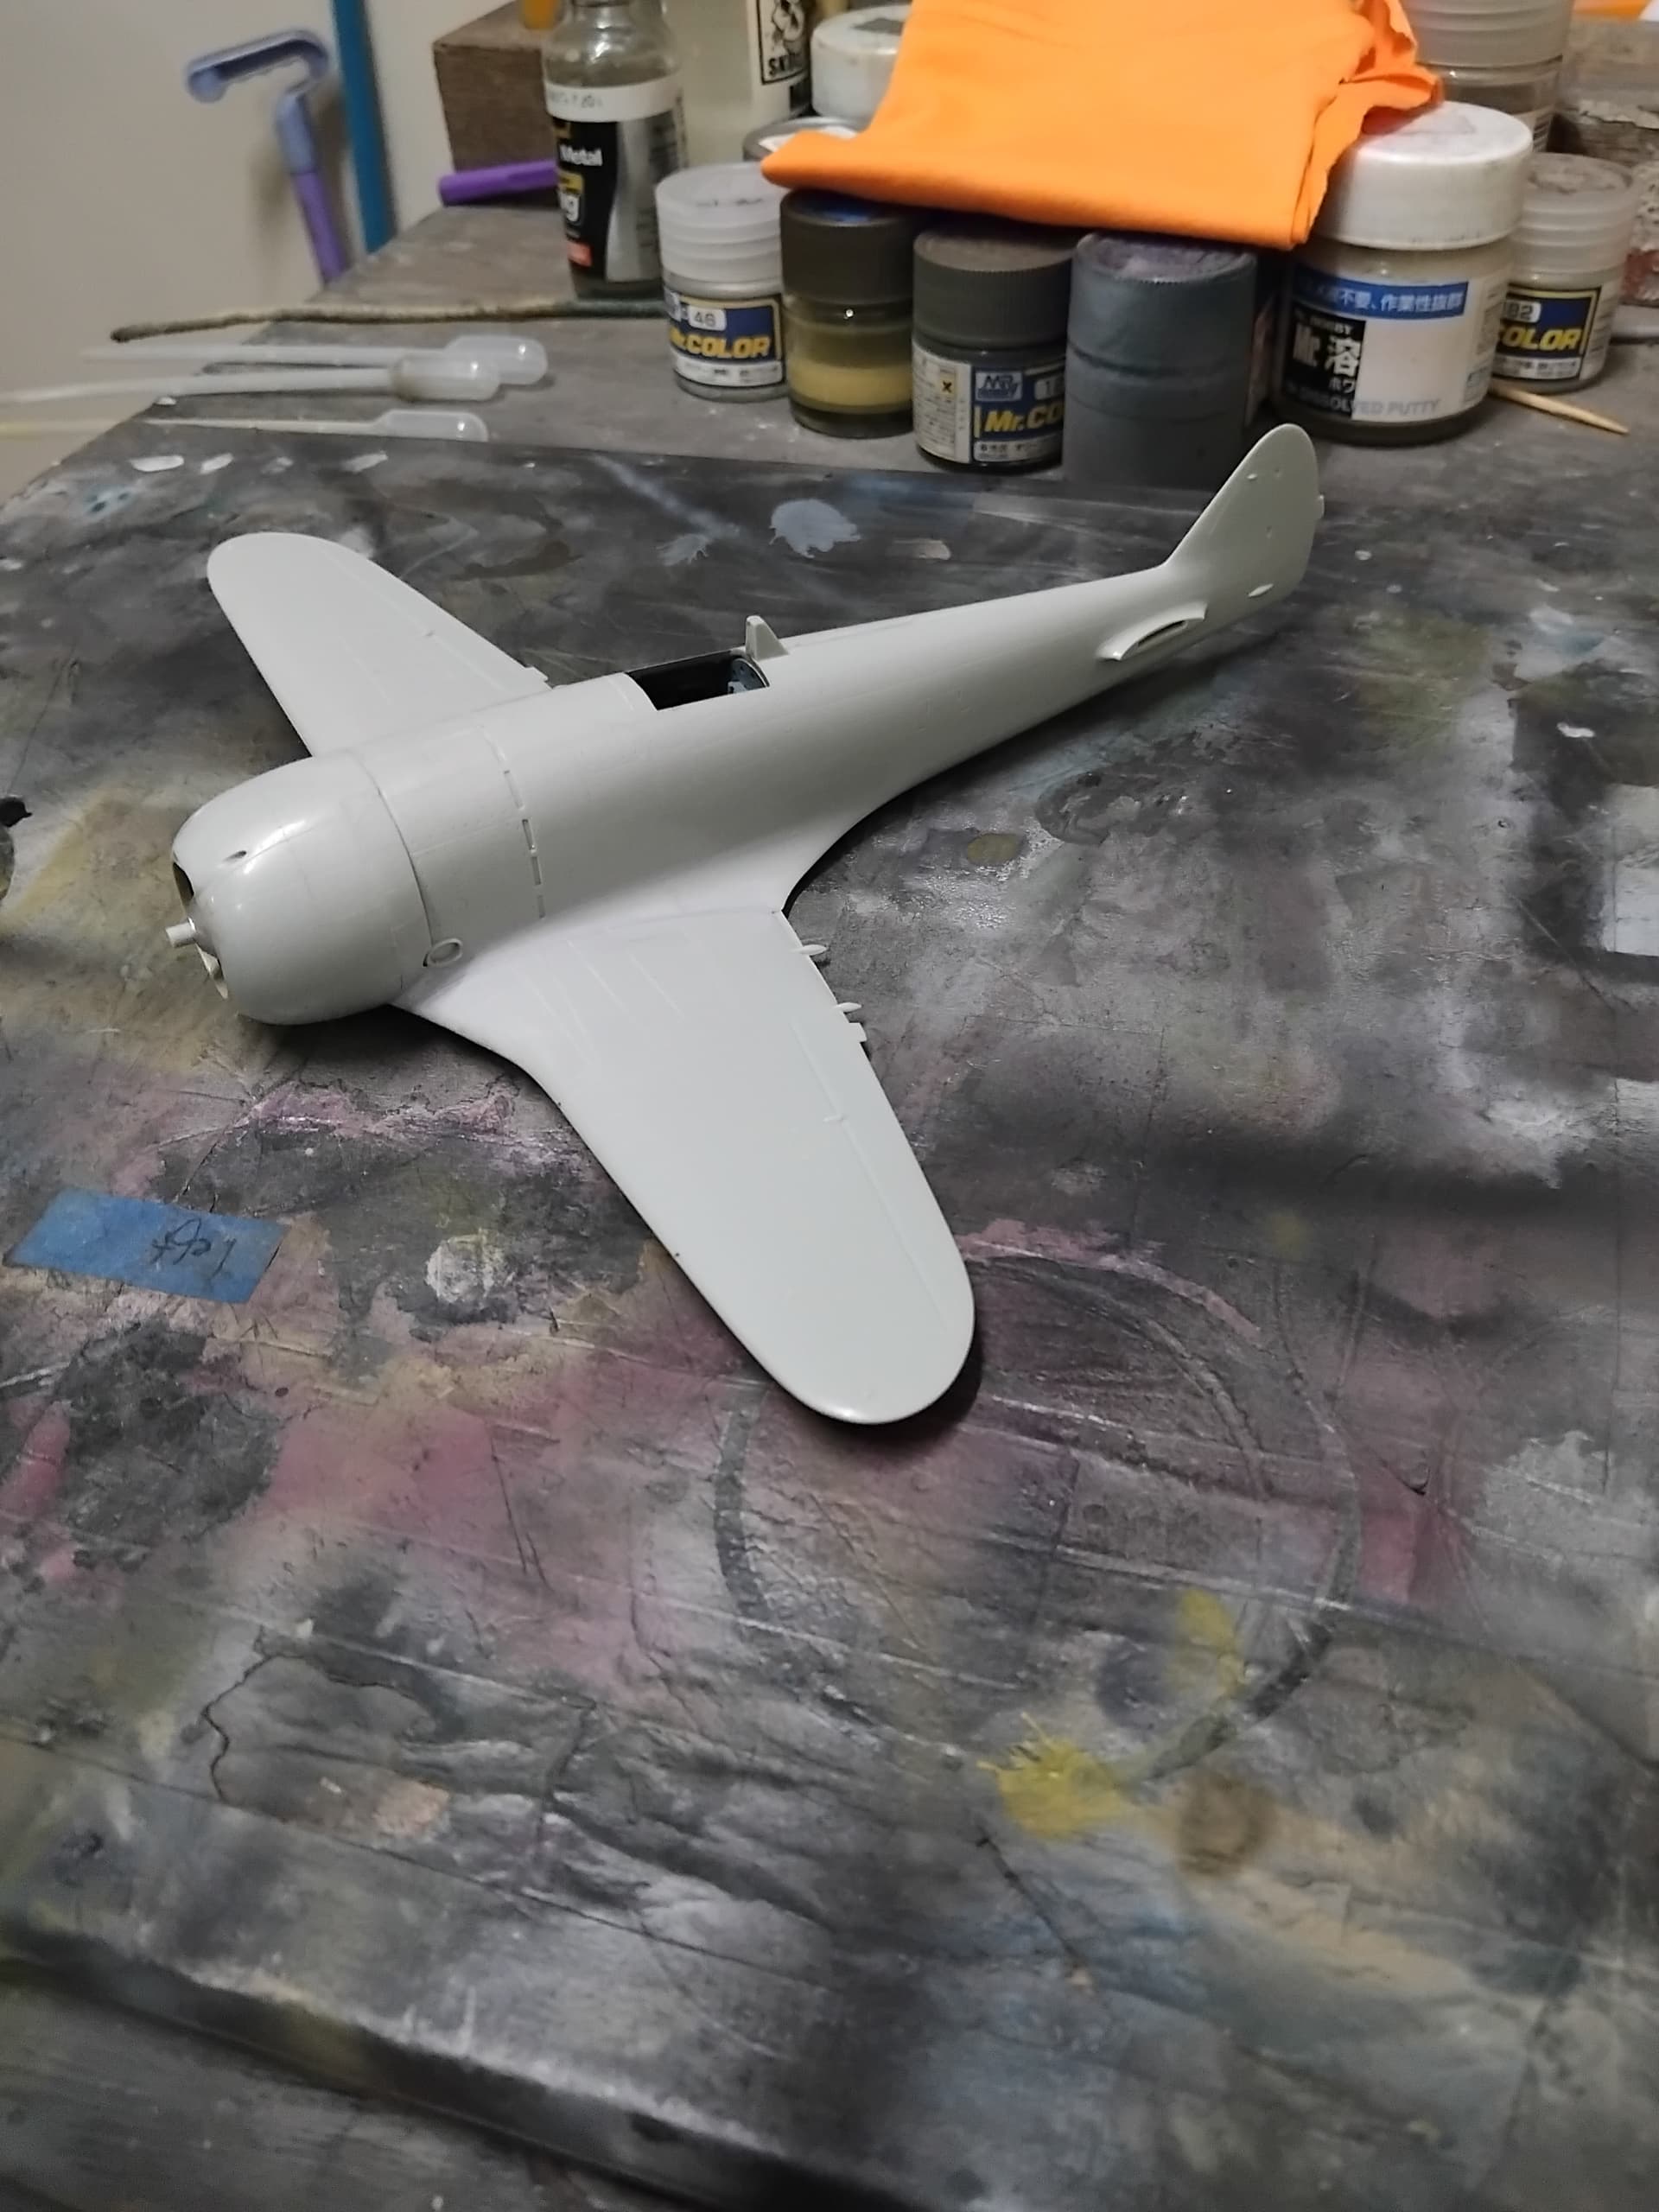
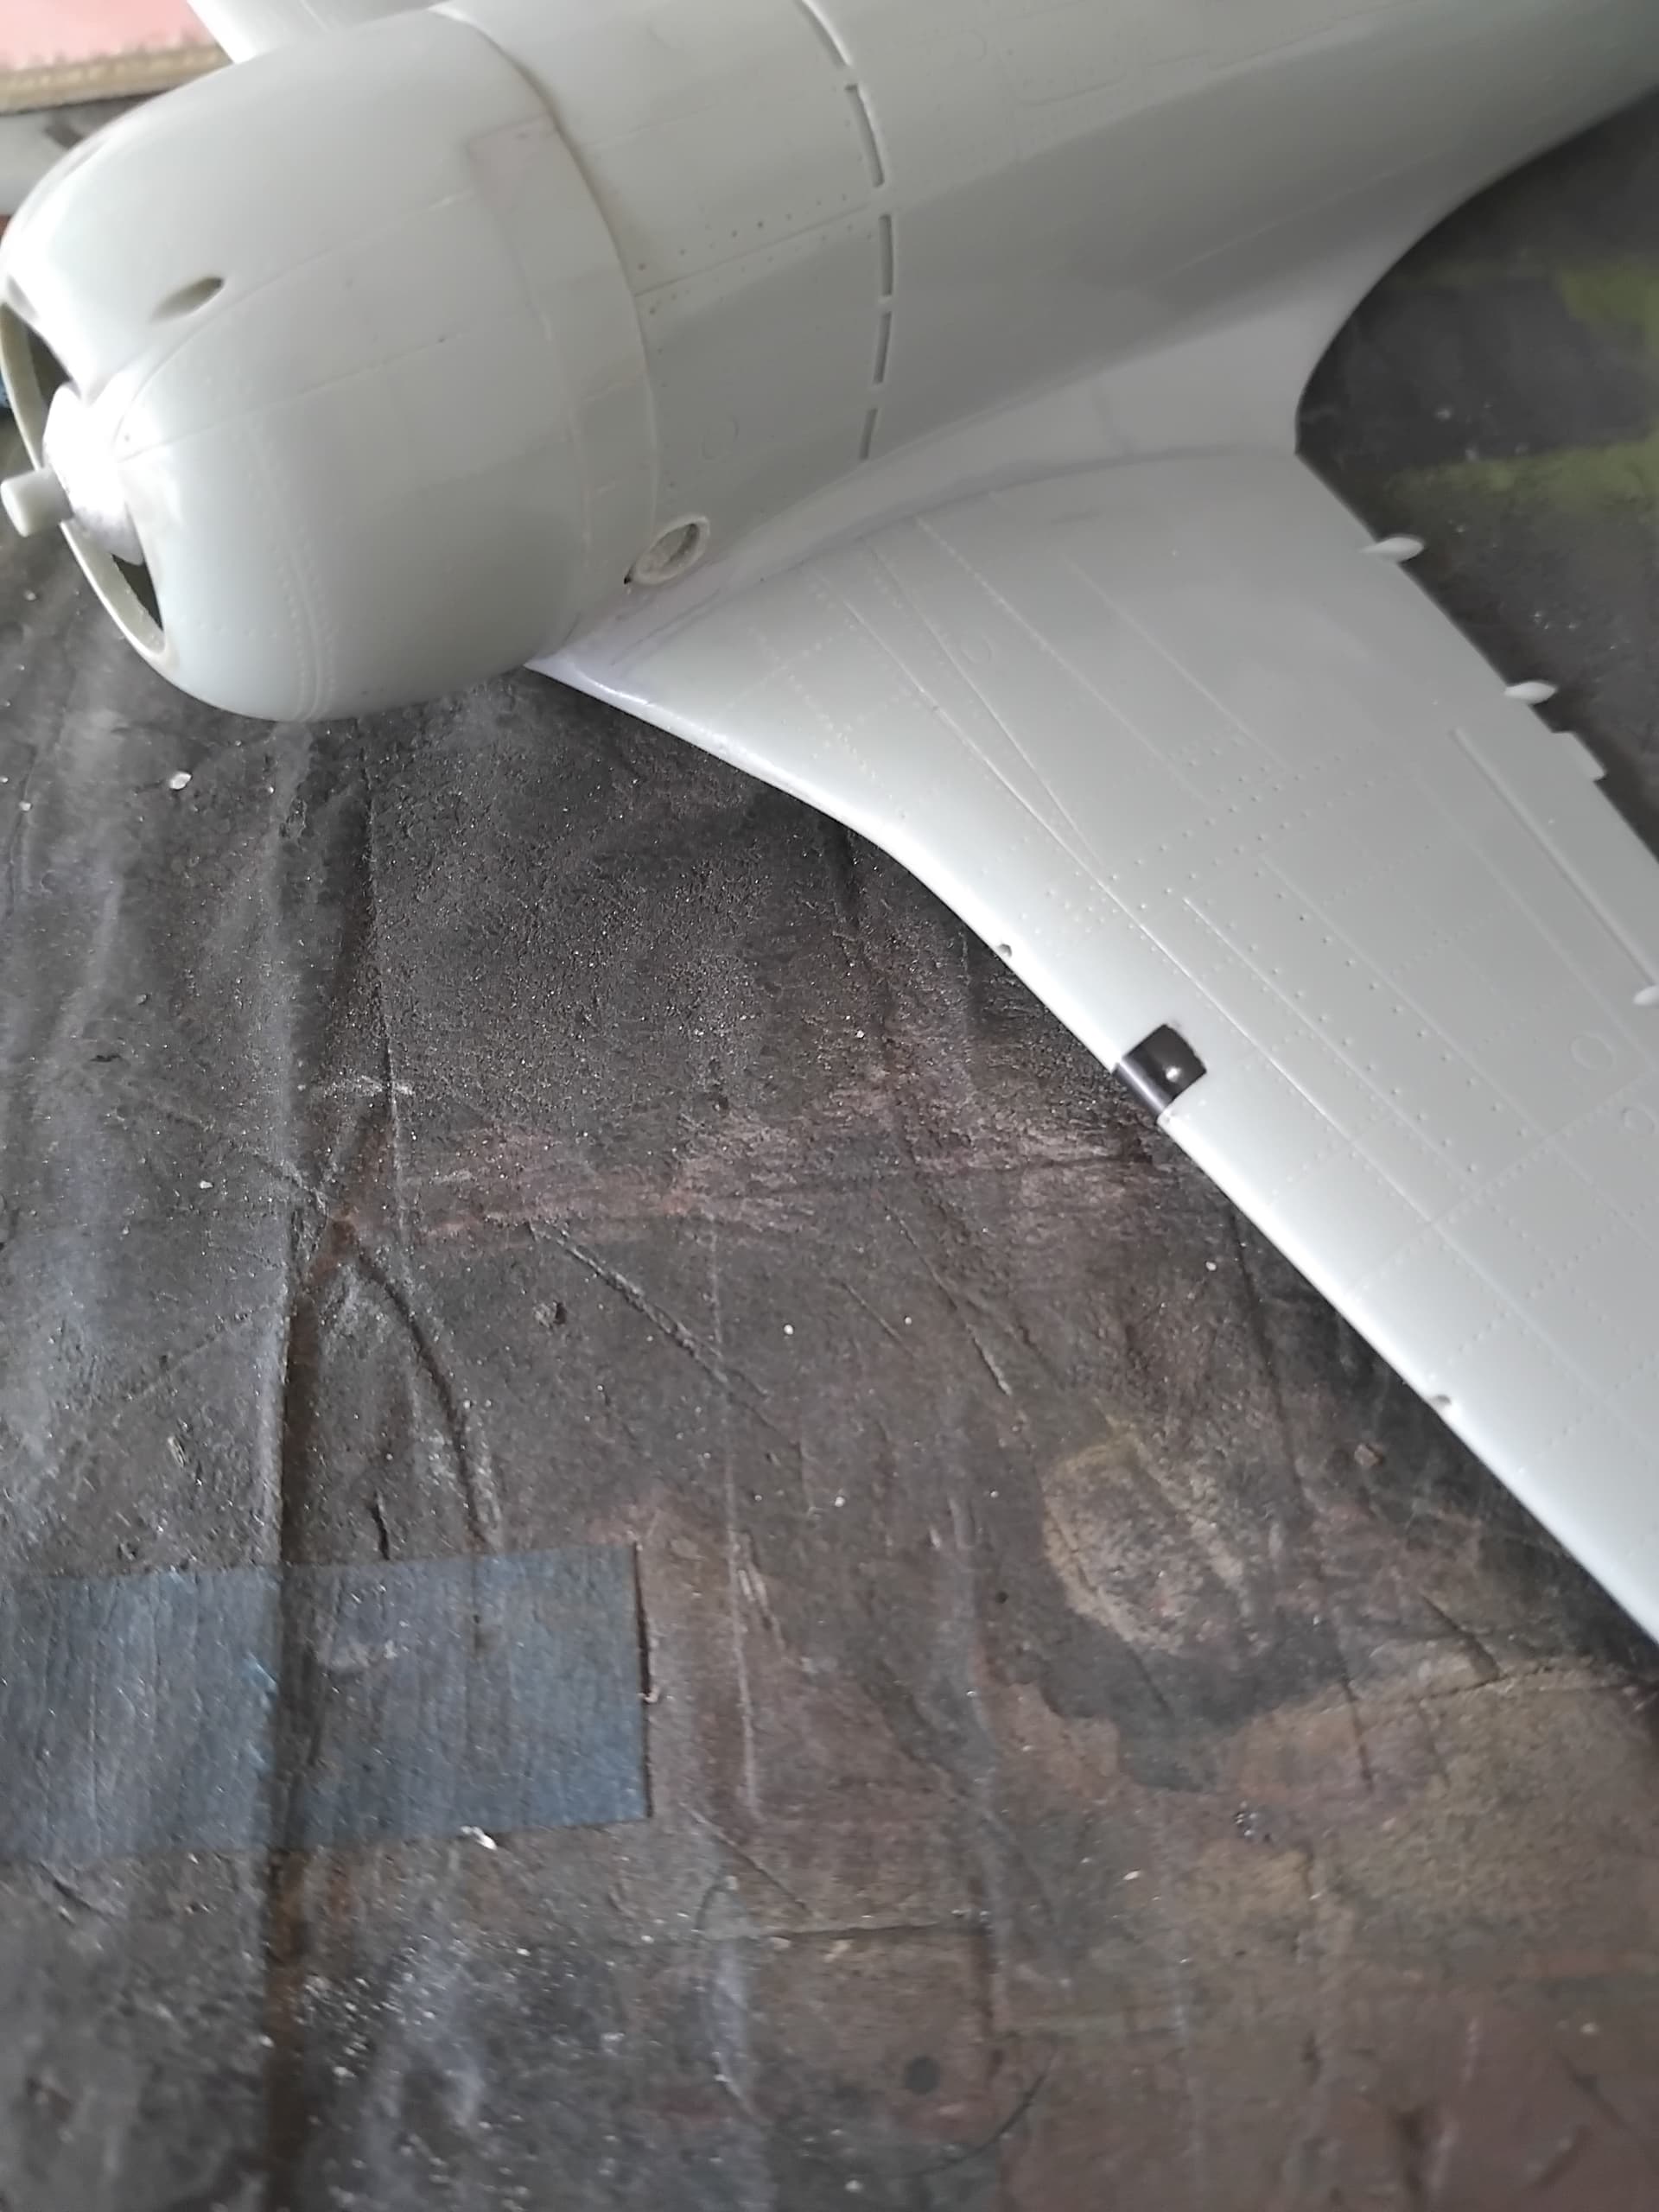
Using a Dremel, course, medium and fine sanding sticks, and then polishing, I was satisfied with the work done! It was then time to mask the little areas that needed it and prepare for a primer coat.
I gave the whole airframe a nice coat of Mr. Surfacer 1500 black diluted 1:4 with leveling thinner. With plans for a chipped paintjob, I wasn’t too concerned if there were surface blemishes, though, there really weren’t very many. Overall, it looked pretty good, I even considered a NMF paintjob.
Up next shall be some color added to this little monster! Till next time, be safe, wash your hands with soap and water, and have fun, because time flies regardless!
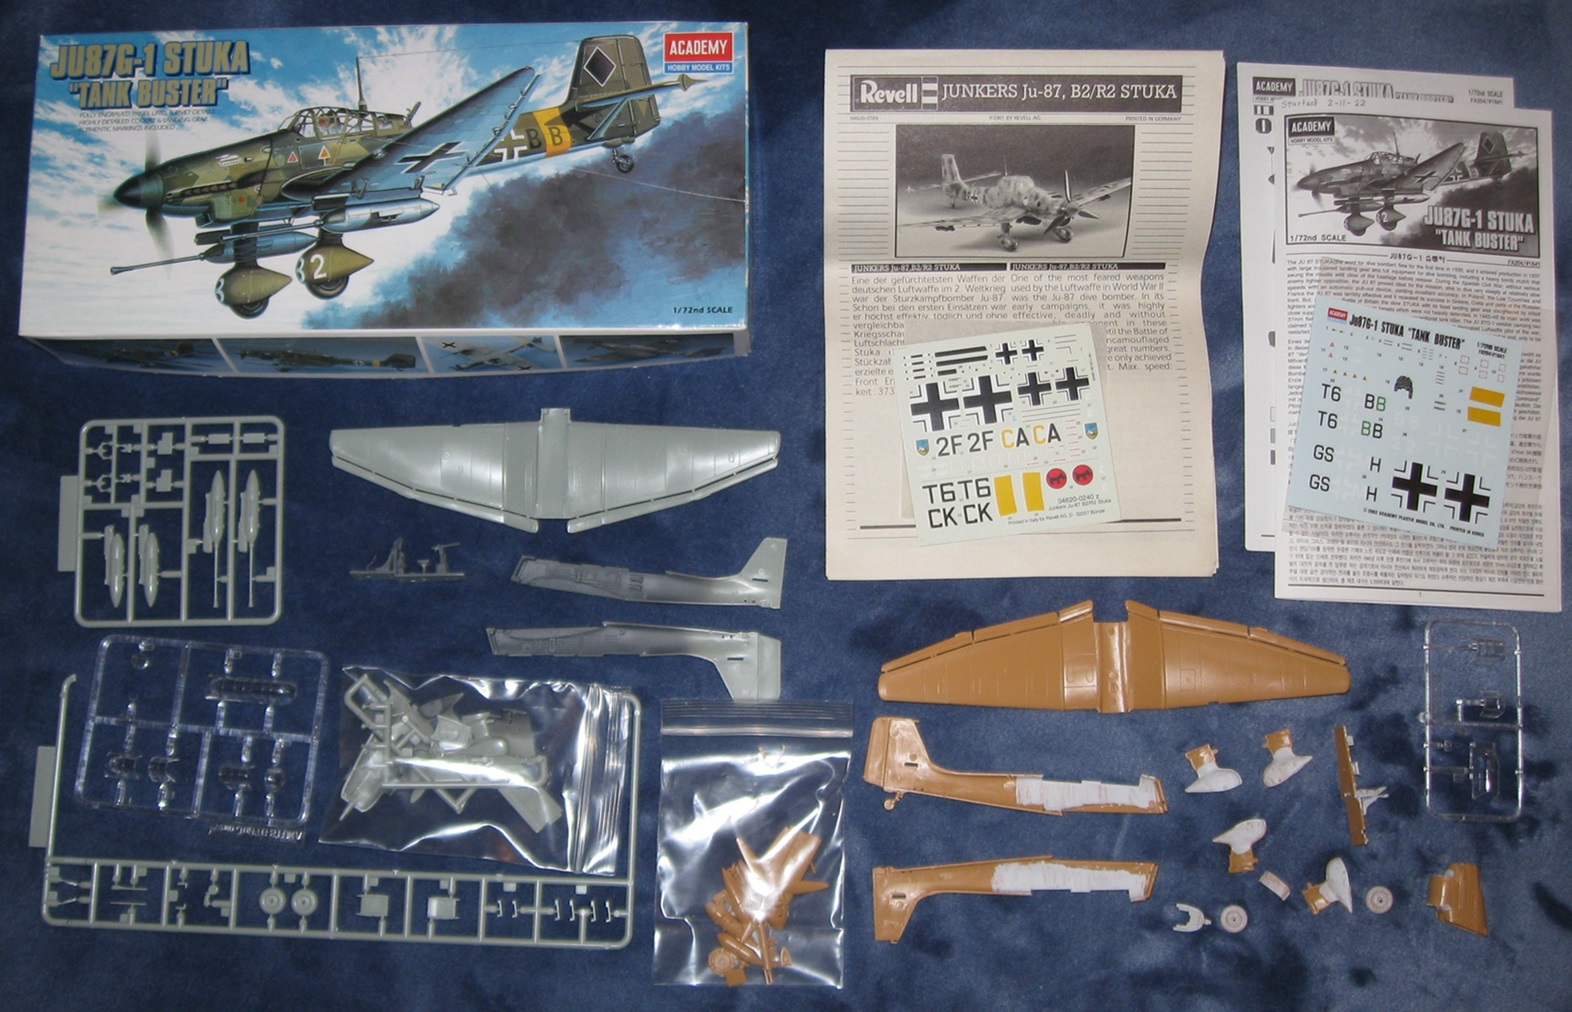
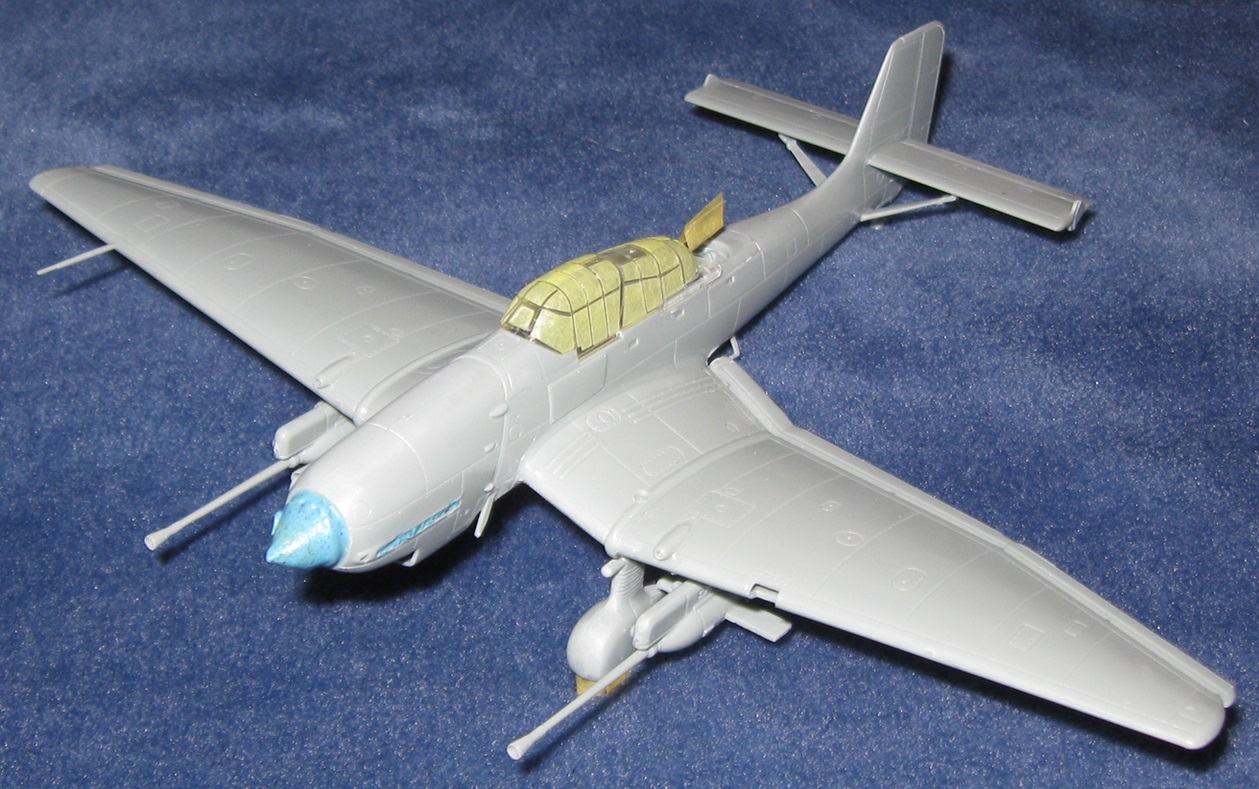
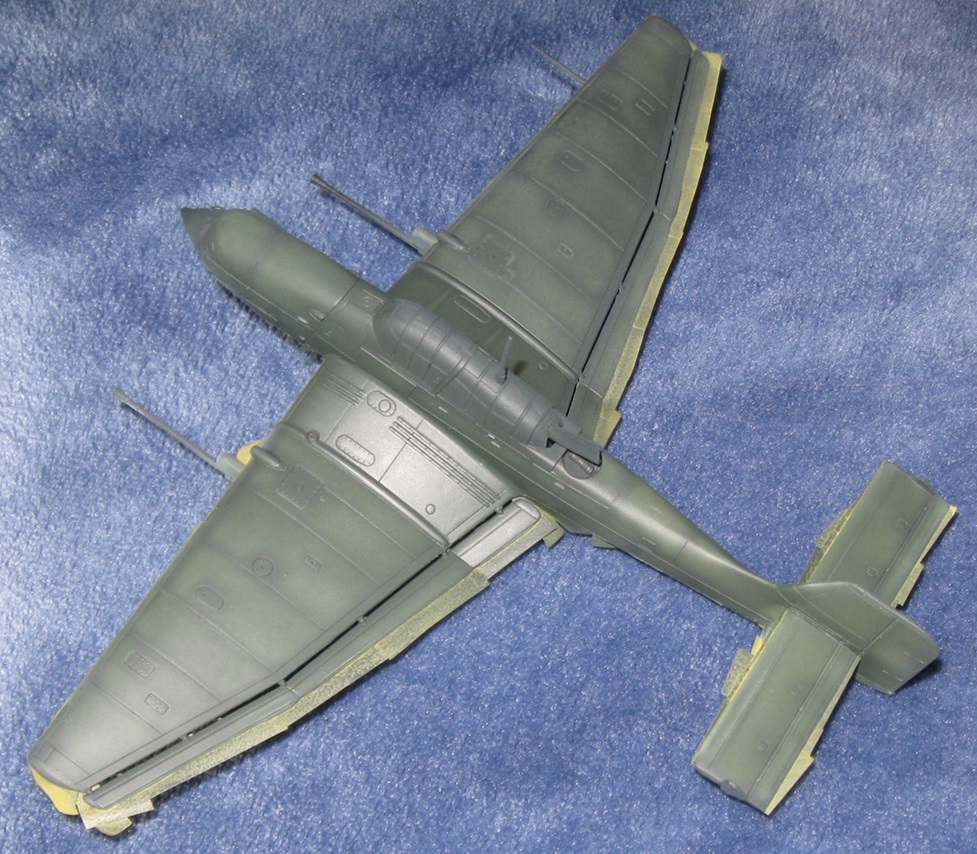
Academy Ju 87G Stuka
Time is short but my work desk is about to clear and I want to practice building some aircraft. Therefore, I have decided to resume work on this Academy 1/72 Ju 87G Stuka (along with a Mustang in another campaign). According to my notes, this Stuka was started on February 11, 2022, about a year before my full time return to model building. The model is light on parts, small, and relatively easy to paint. My only concern is painting the canopy.
Please ignore the second Revell Stuka. It was started on February 12, 2022, a day after the tank buster. As an experiment, I attempted to prime many of the parts with a paint brush. That does not work. Vallejo Gray Primer also sucks. I need to strip all those parts and try again.
Academy Ju 87G Stuka
Built up more stuff and shaded inside the fuselage.
Also stripped the other Stuka. Tail wheel broke off.
Academy Ju 87G1 Stuka
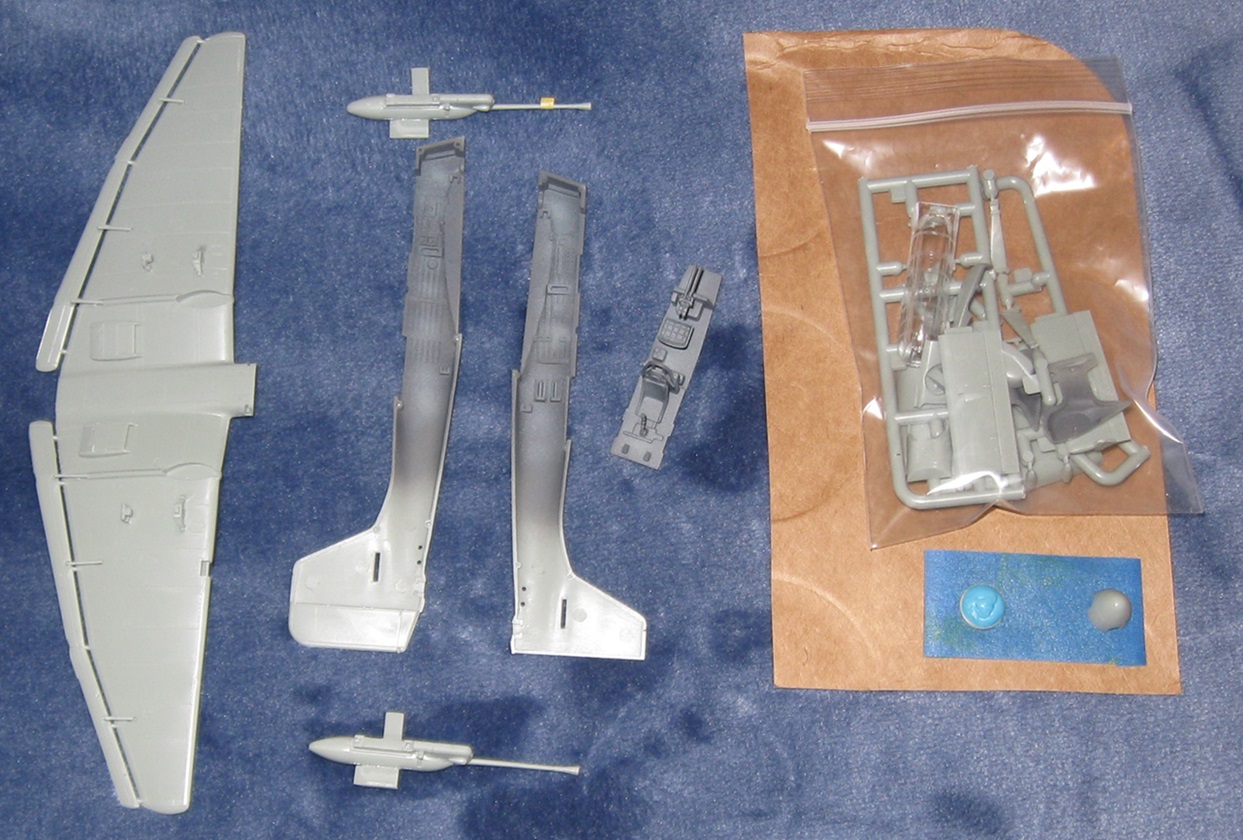
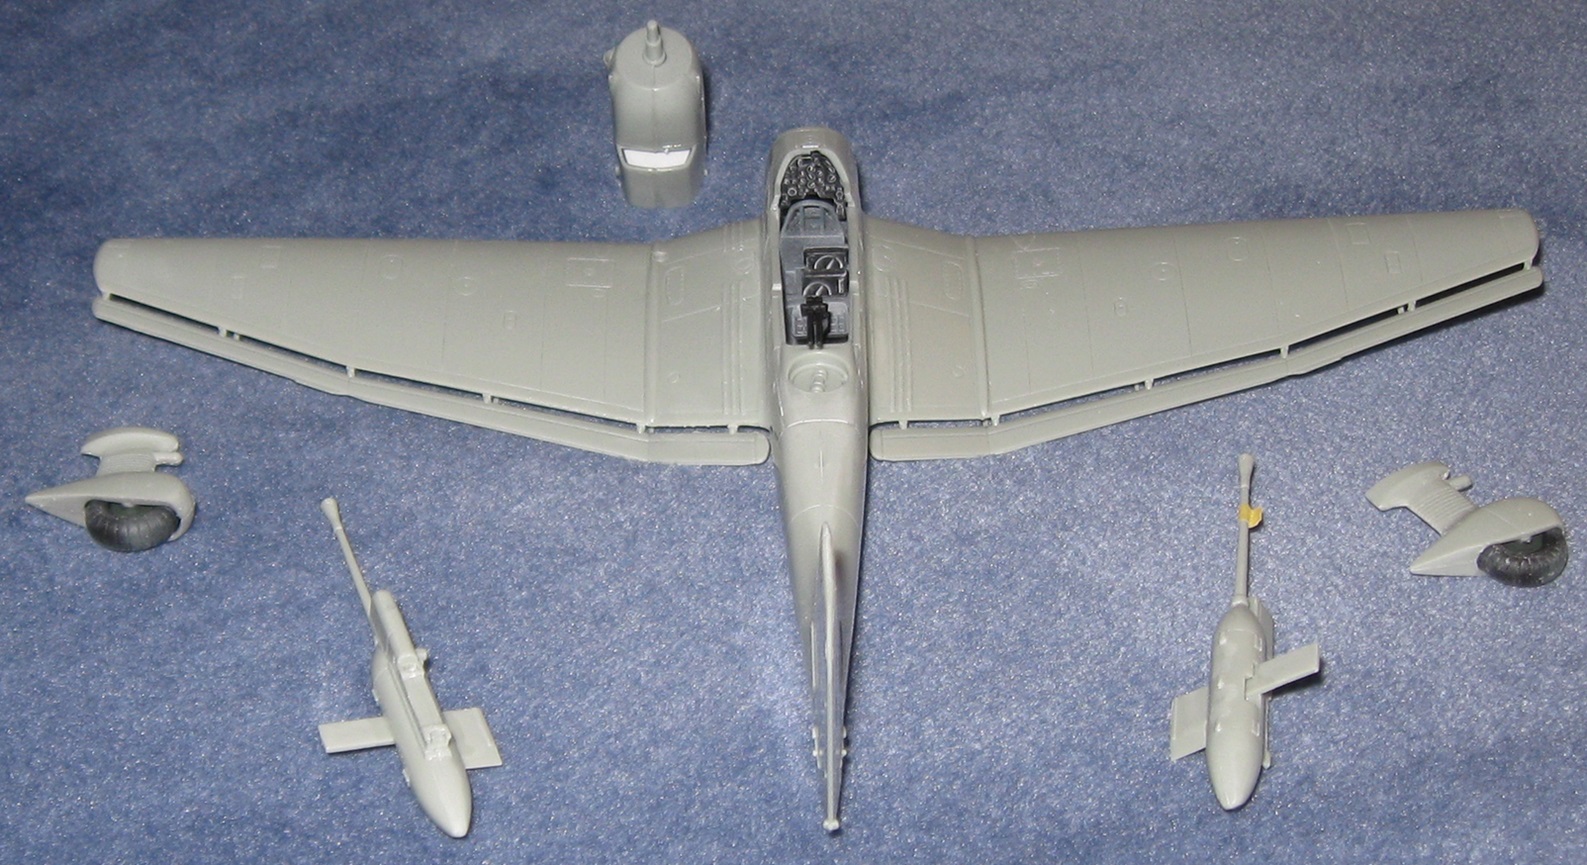
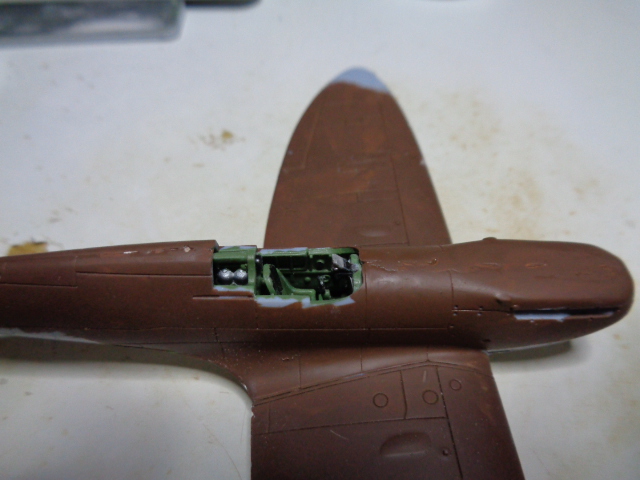
The “hard parts” of this model–cockpit and front landing gear–are now done. For a 1/72 scale airplane, the interior is decent and includes some nice side wall detail.
One problem with stalled projects is the inevitable loss of parts. In this case, I lost the control panel and front radiator. It took about 90 minutes of hunting to find the control panel. The radiator remains lost so I scratch built a simple replacement.
I am still learning to paint interiors and this effort is rather mediocre. It does not matter because the canopy hides all of it.
Planes are really different from tanks. A tank project is build, build, build, paint, plaint. A plane project is build, paint, build, paint, build, paint. The rhythm is completely different. And filler. Planes need filler.
I should be able to put this all together tomorrow. One more day to fill and sand. Priming on Sunday. Planes are my first love. I’m kind of excited.
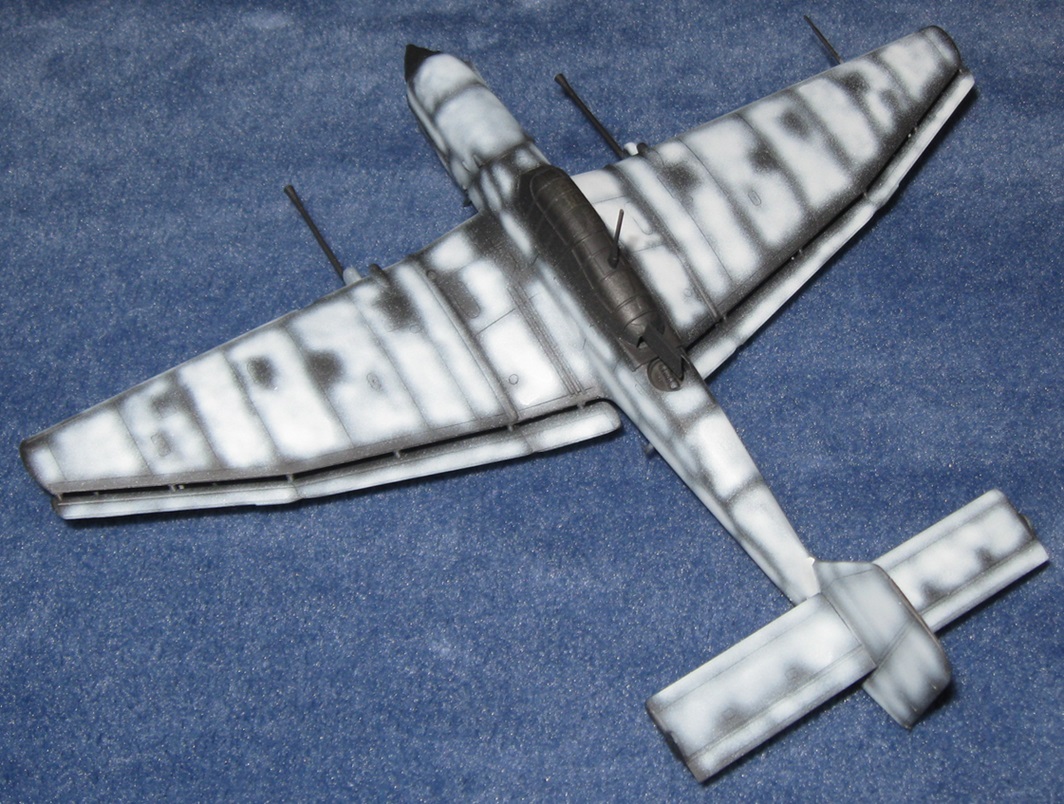
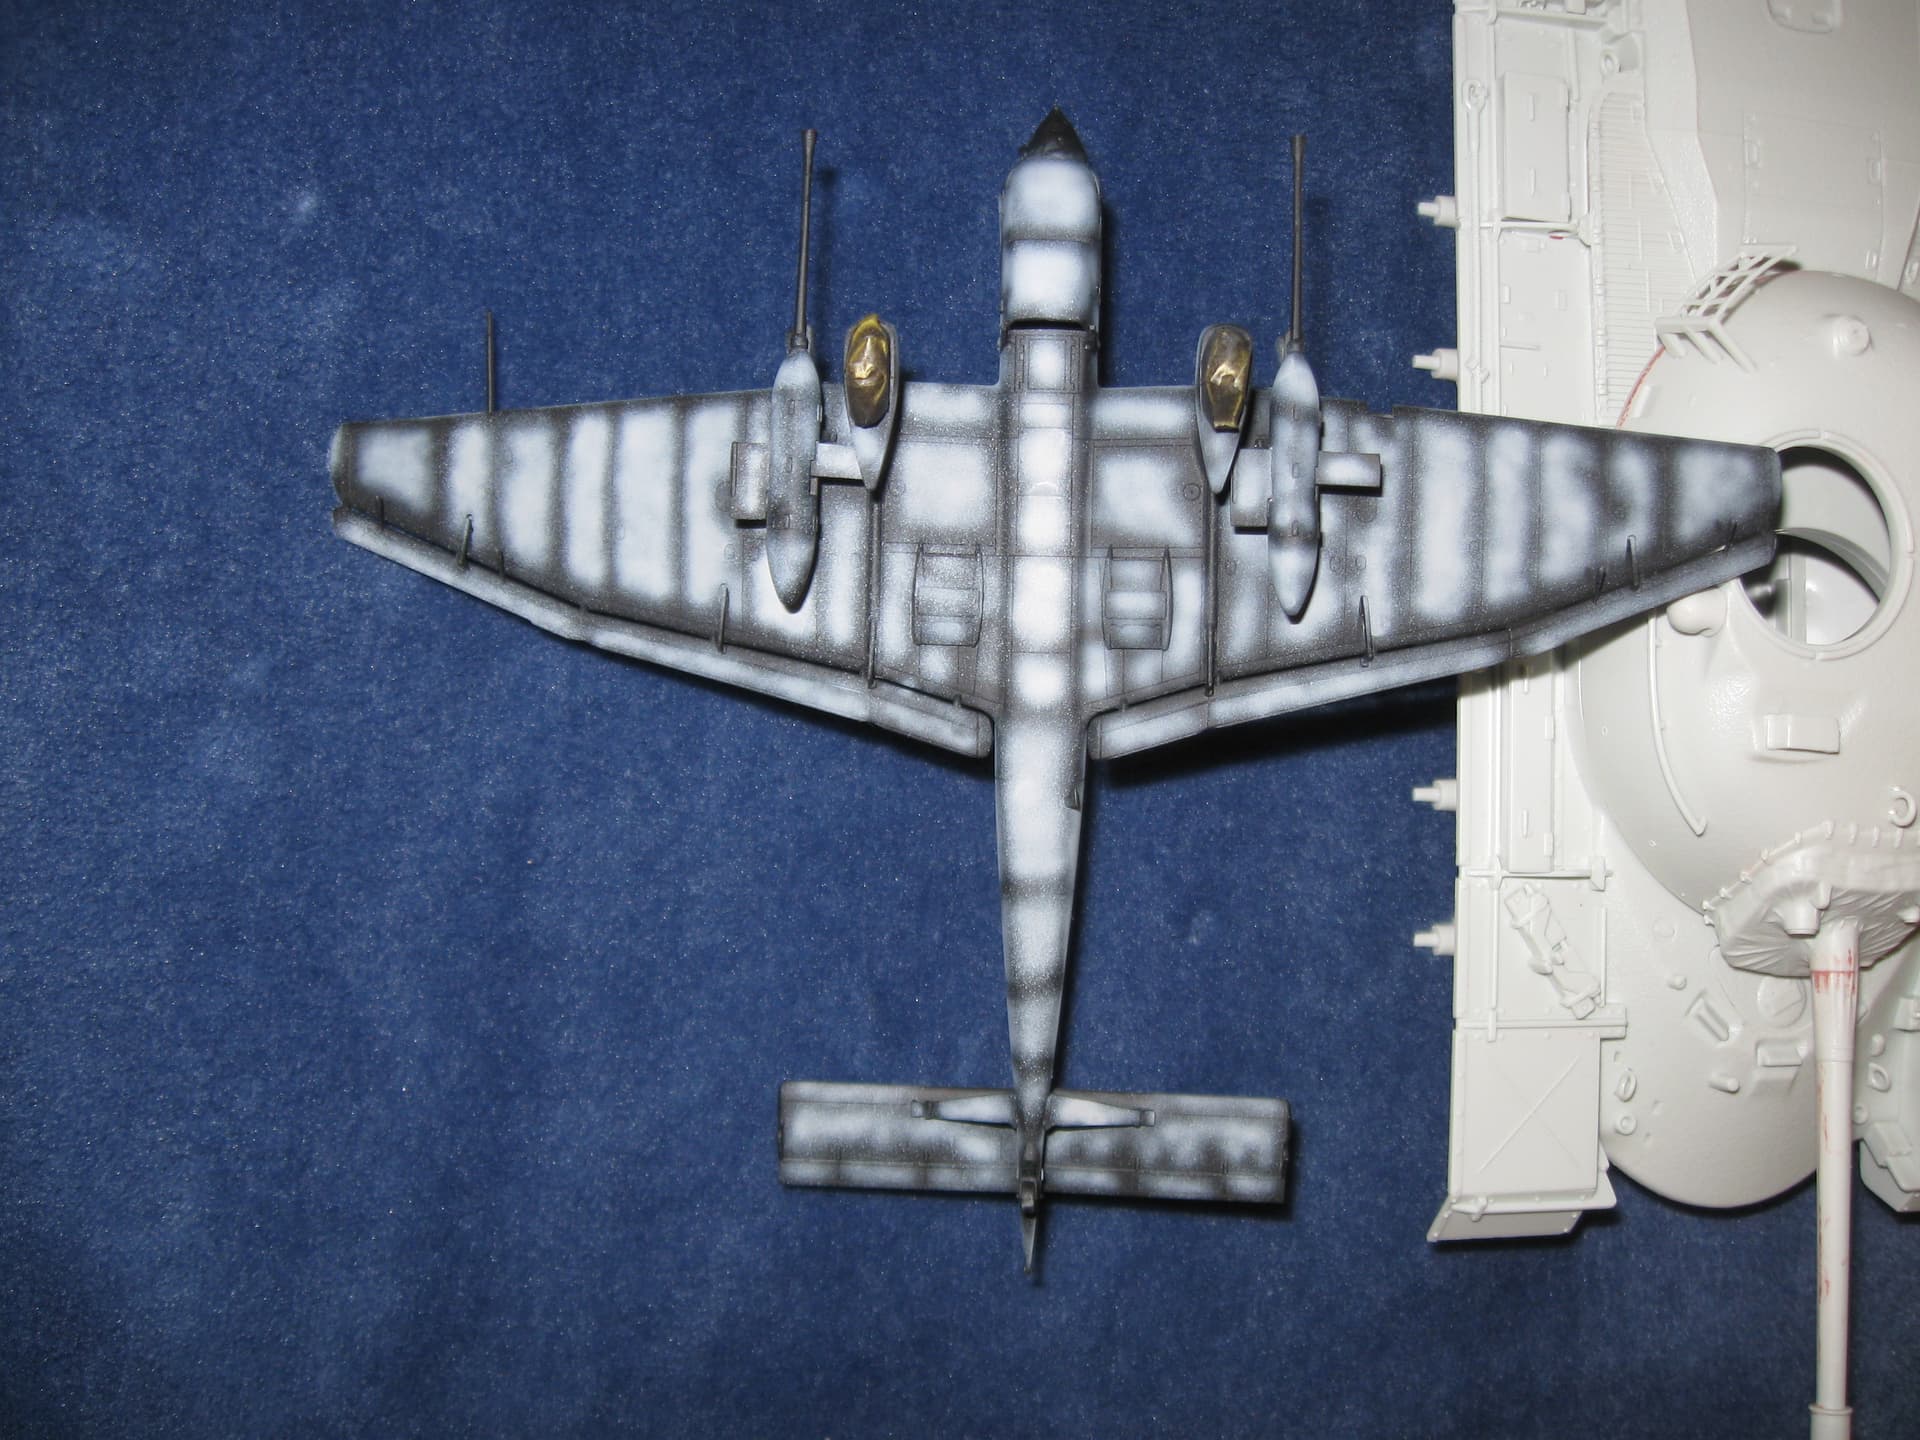
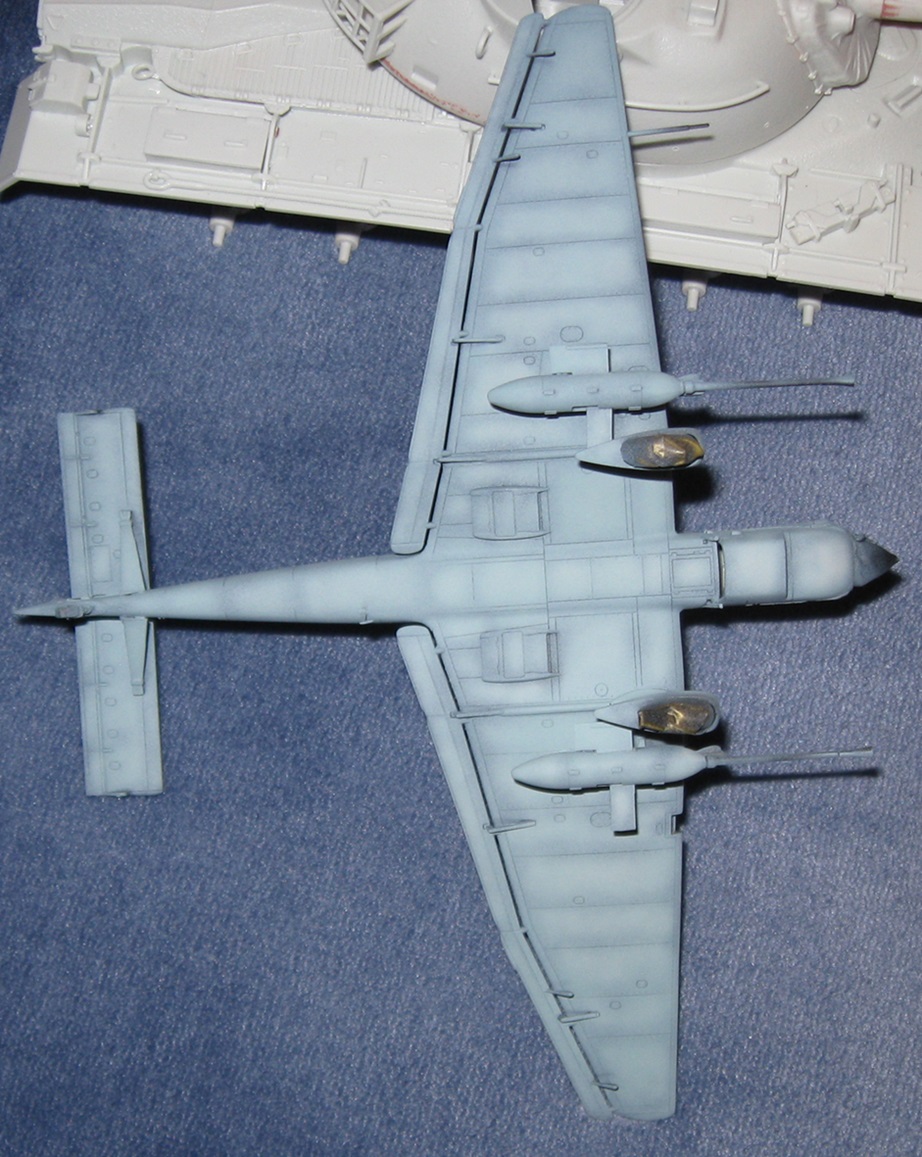
Academy Ju 87G1 Stuka
December is a busy month and things have not gone to plan, but the Stuka is almost ready for priming.
Unfortunately, I lost the engine exhausts and will need to scratch build those parts.
Good fortune struck when I found an Eduard canopy mask for this model in my decal folder. It must be 20 years old!
Academy Ju 87G1 Stuka
Haha! I thought this campaign ended on the 31st, giving me just enough time to finish, but now I see it ends on the 30th. Gonna be kinda silly finishing Hanger Queen XV on Day 1. ![]()
This could get interesting. Can I shave off an entire day and finish in 10 hours?
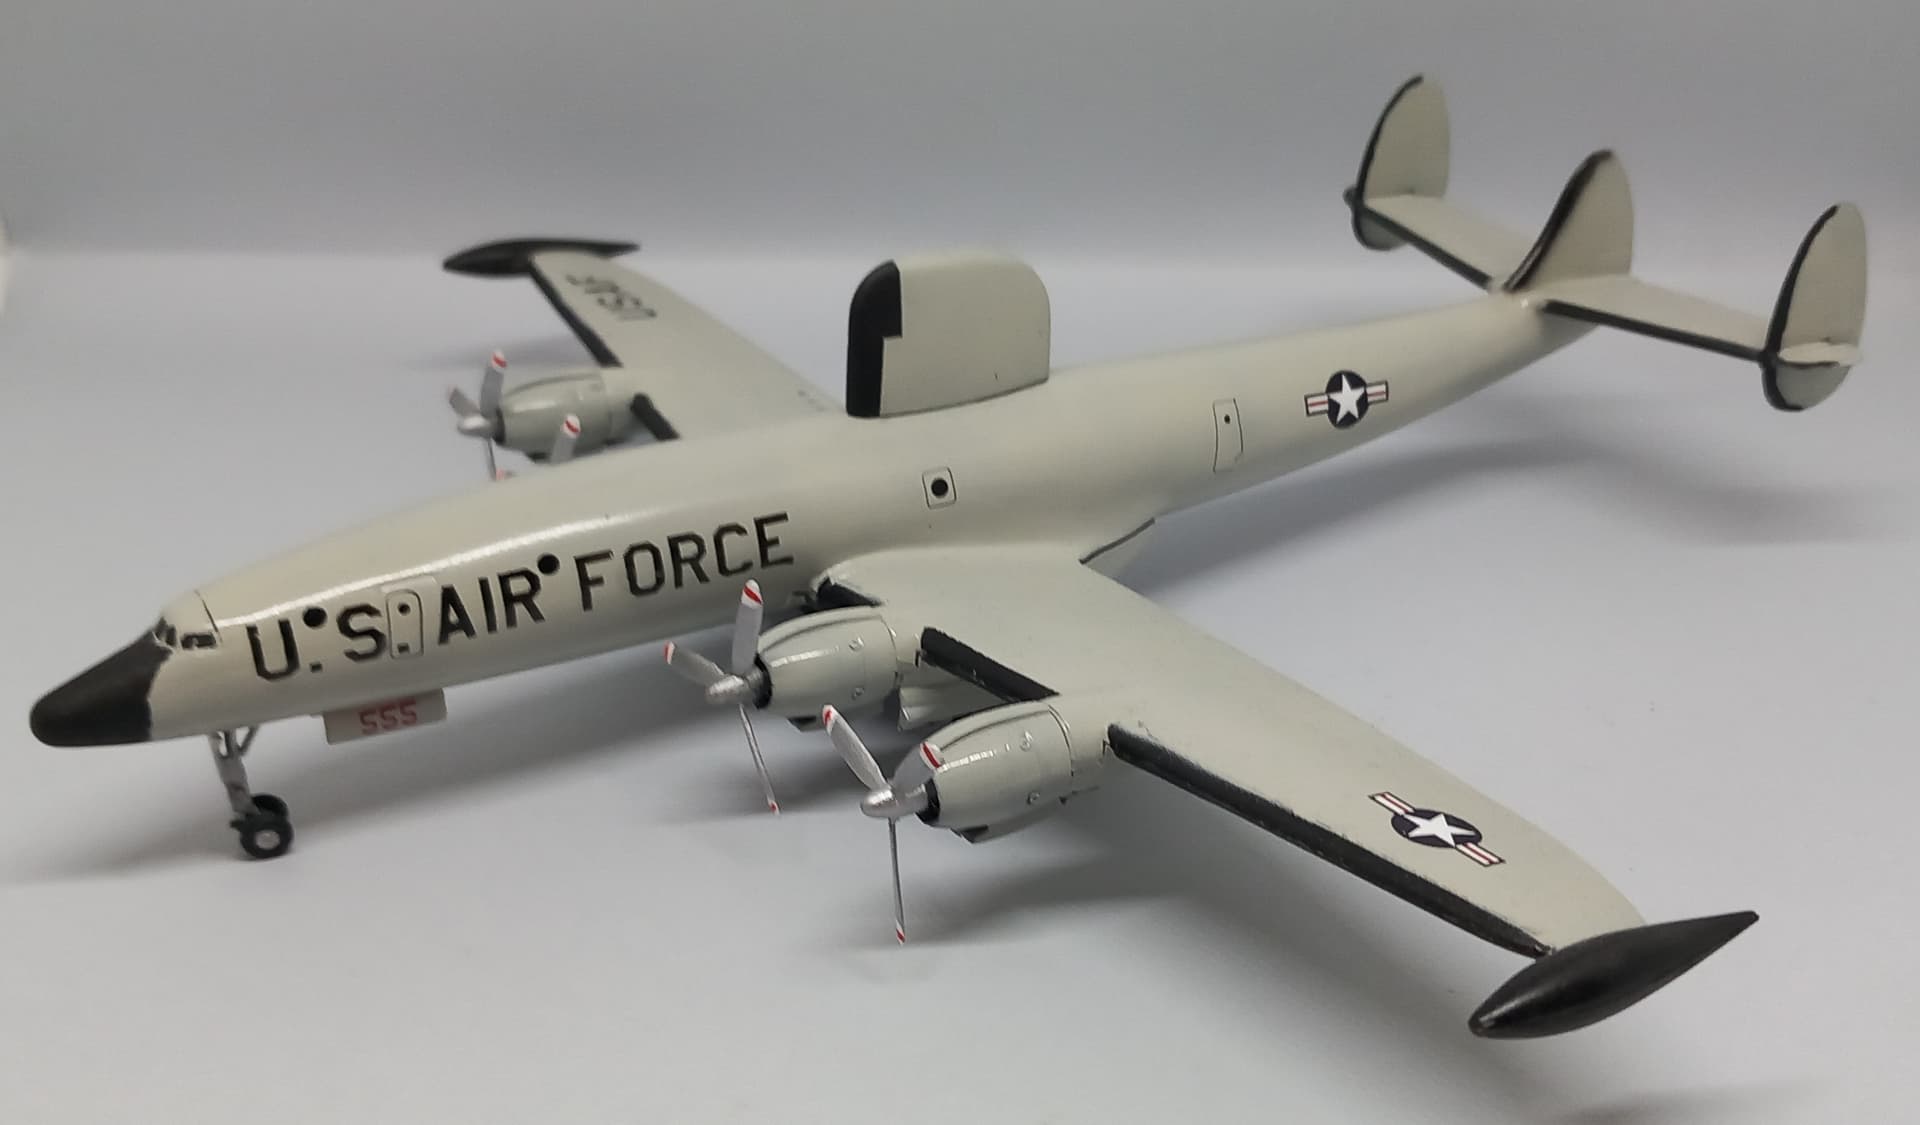
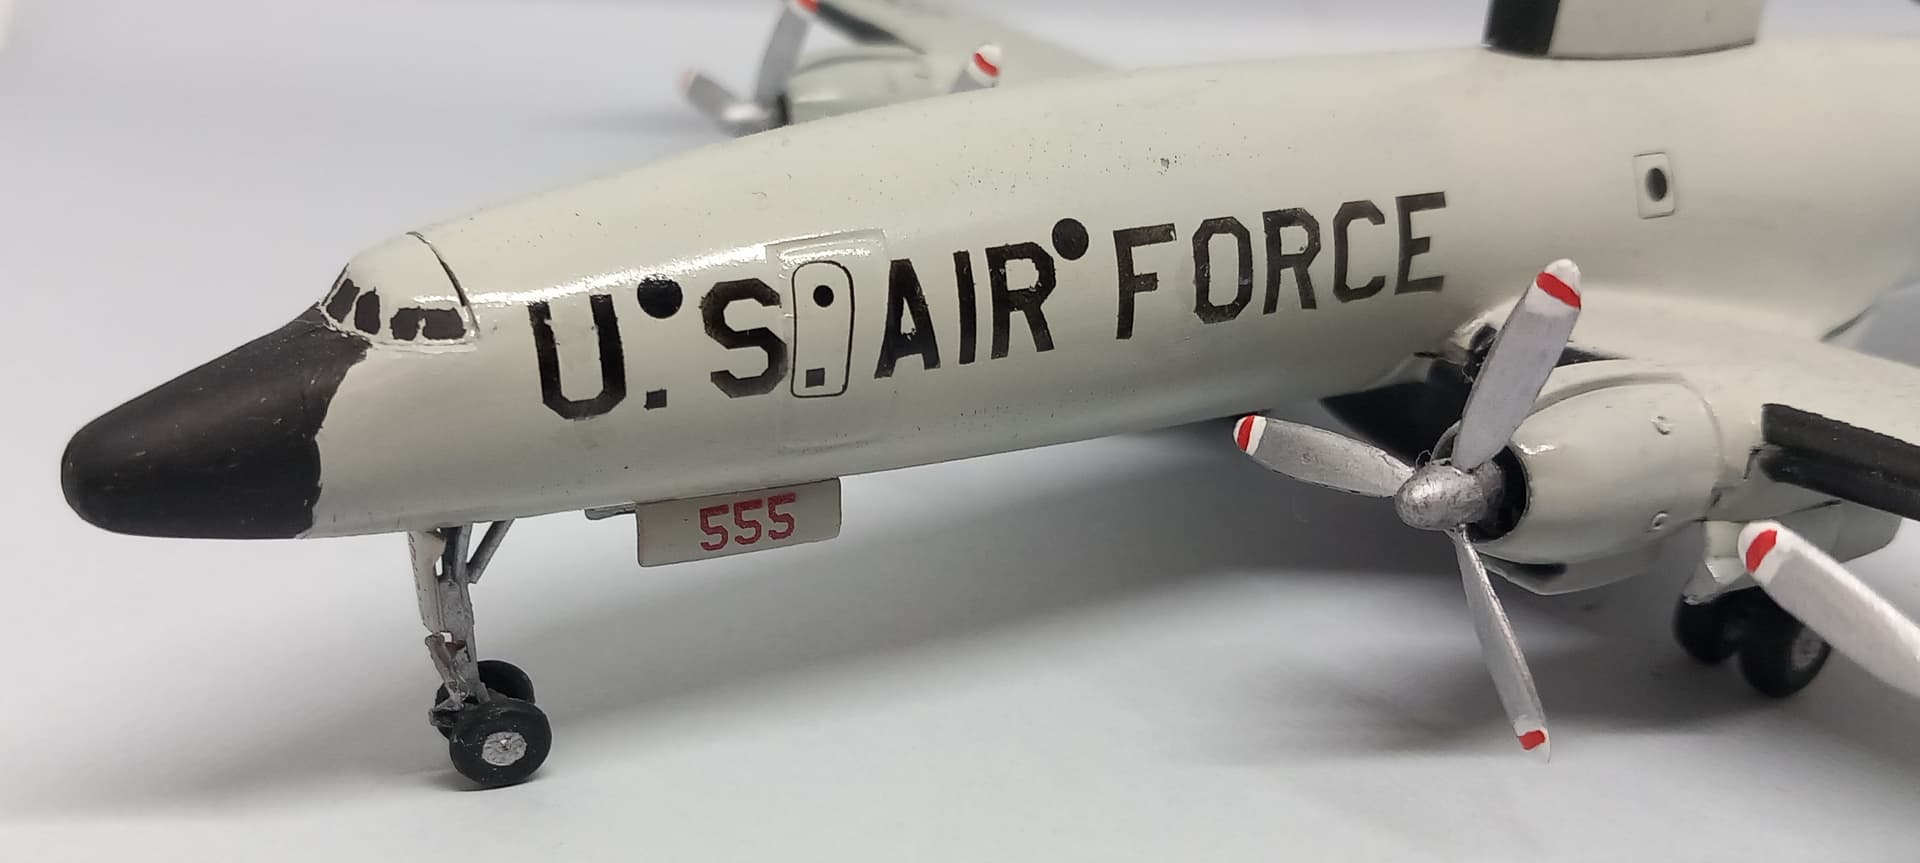
I finally finished the “shelf of doom edition 2024” EC-121D warning yesterday (but posted in the wrong topic ![]() )
)
Not my best work but a lot of tests (self cutted masks, new paint brands, gloss varnish, …) and i’m pleased with the result but not totally satisfied ![]()
I wish you a happy new year 2025 !