Mark,
most likely he never looked, but it’s his responsibility to let you know that there’s missing parts as you did. But if it’s the shell, then the kit is basically useless to you.
joel
Mark,
most likely he never looked, but it’s his responsibility to let you know that there’s missing parts as you did. But if it’s the shell, then the kit is basically useless to you.
joel
Hi Joel,
Thanks for the kind comments. As HG said, it is in all in the lacquers - Alclad to be precise.
On the rollbar, I don’t think describe that quite right. What I meant was the fluid containers hang off the rollbar, rather than circulate within.
cheers
Michael
Hi Damain, I understand you patience with the body and fixing that one blemish.
The “orange peel” effect is an interesting. I have always felt that it came from a poor clear coat rather than the base colour coat. An example would be the Porsche I built last year. The pink was beautifully smooth, multiple coats sanded to perfection (my estimation) but when it came to the clear coat, the curves on car certainly seem to cause a sort of venturi effect and I could not get the clear coat around the top of the wheel arches and rear fins to level hence an orange peel effect.
Would be good to hear other views on this.
cheers
Michael
Michael,
Thanks for the clarification. Now it makes a lot better sense.
As for your issue with clear coats, I’ve found that they’re actually harder to get right then the color coats because generally they’re applied to heavily (hosed), and the result is Orange Peel and uneven coats. My method is the same exact one that I air brush on the color coats, lite even coats and just build up the layers. It’s even more important to wait a good 5 min between coats so that the new coat can bite into the previous coats, not dissolve as clears tend to have more lacquer thinners then color coats. Also cutting the final coat will help to level out the top coat if there’s any issues.
joel
Another week of real life distractions with yet another job change, 3 starts since mid-december 2020! I’m really happy with the new role, a company that I have been involved with for 25 years as both a supplier to them and a competitor to them, but very glad to be getting back into an industry that I know and love. Like putting on a comfy pair of old boots.
Anyway, a little progress on the Ferrari with more clean-up and primer on the nose and LHS door.
Very close to where I want it to be now, a wet sand soon to uncover any little flaws then hopefully on to colour coats.
Cheers, D
D,
Progress is progress and it’s just one step closer to the finish line. Primer looks clean and neat. No issues that I can see what so ever.
joel
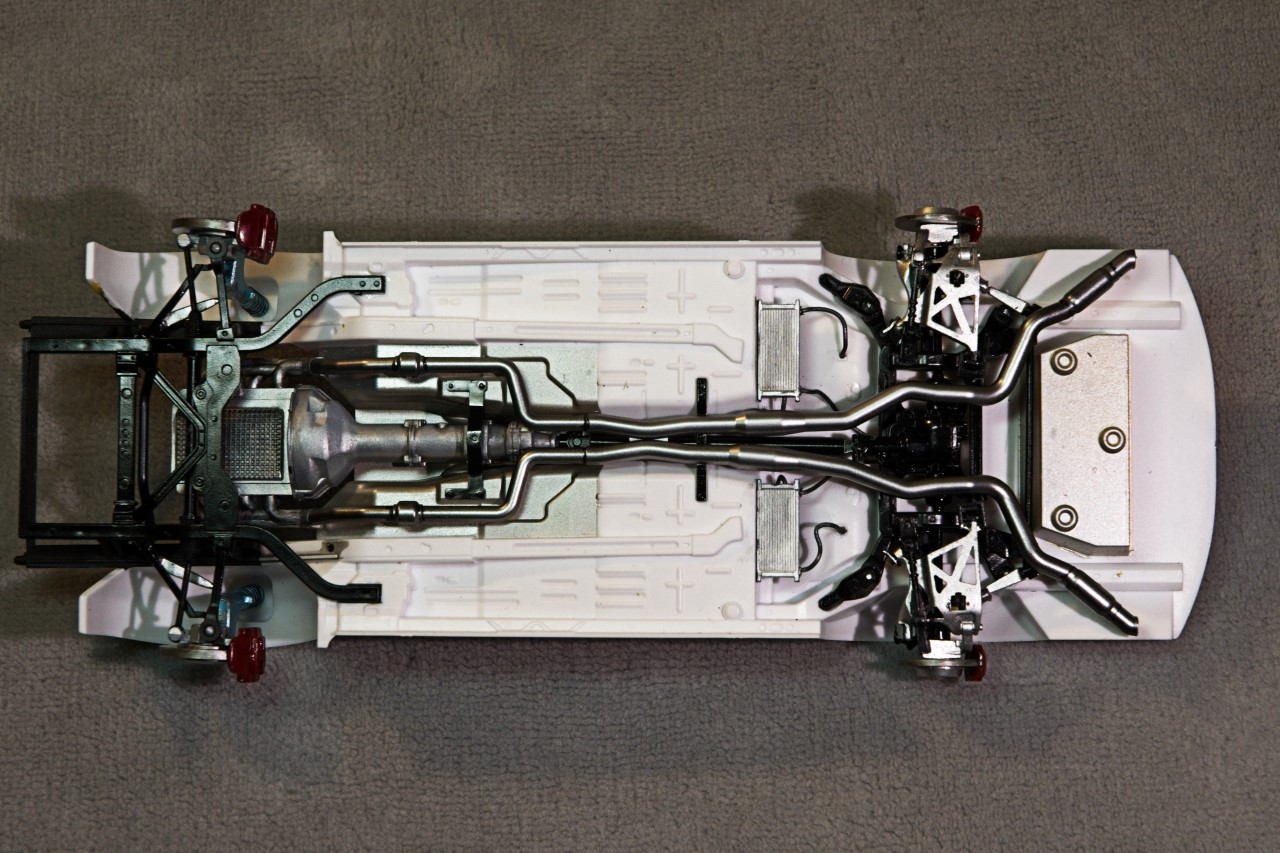
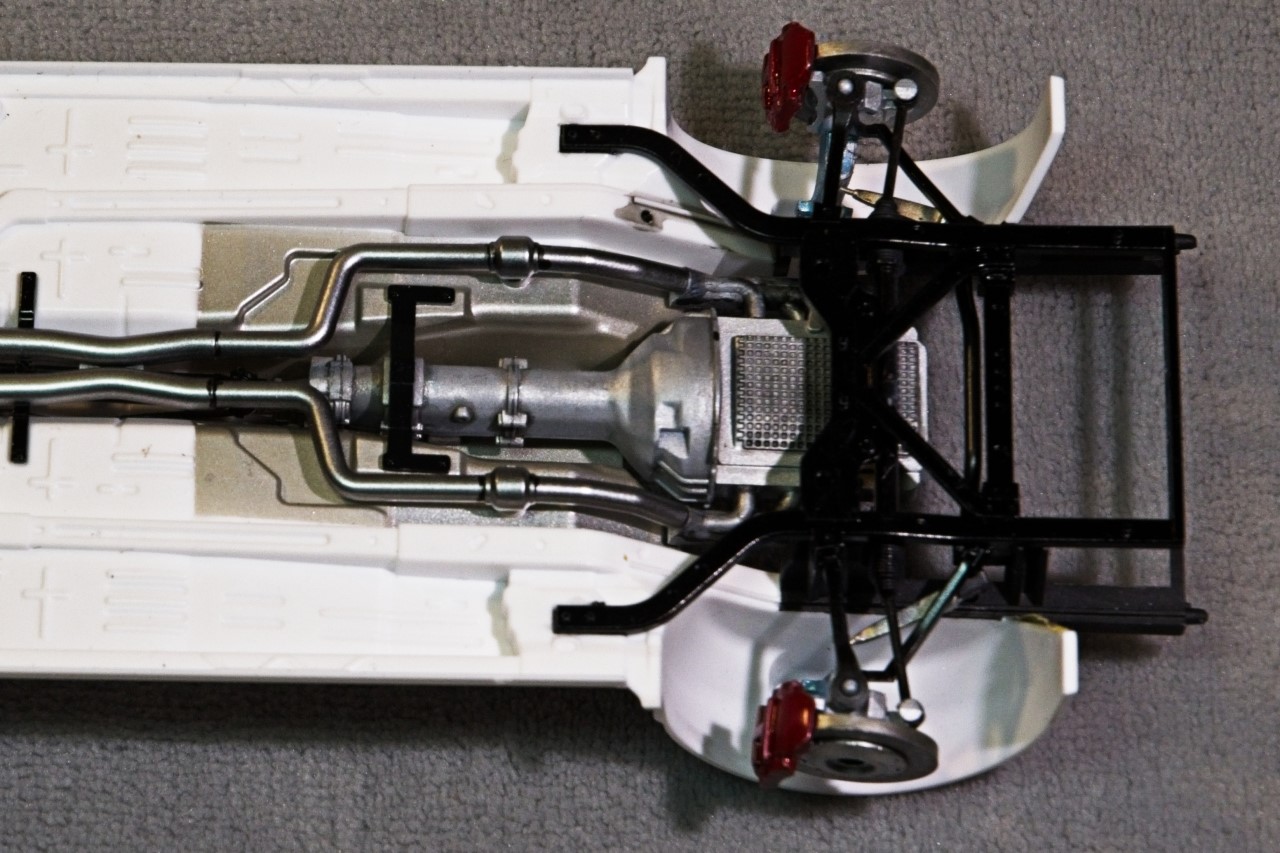
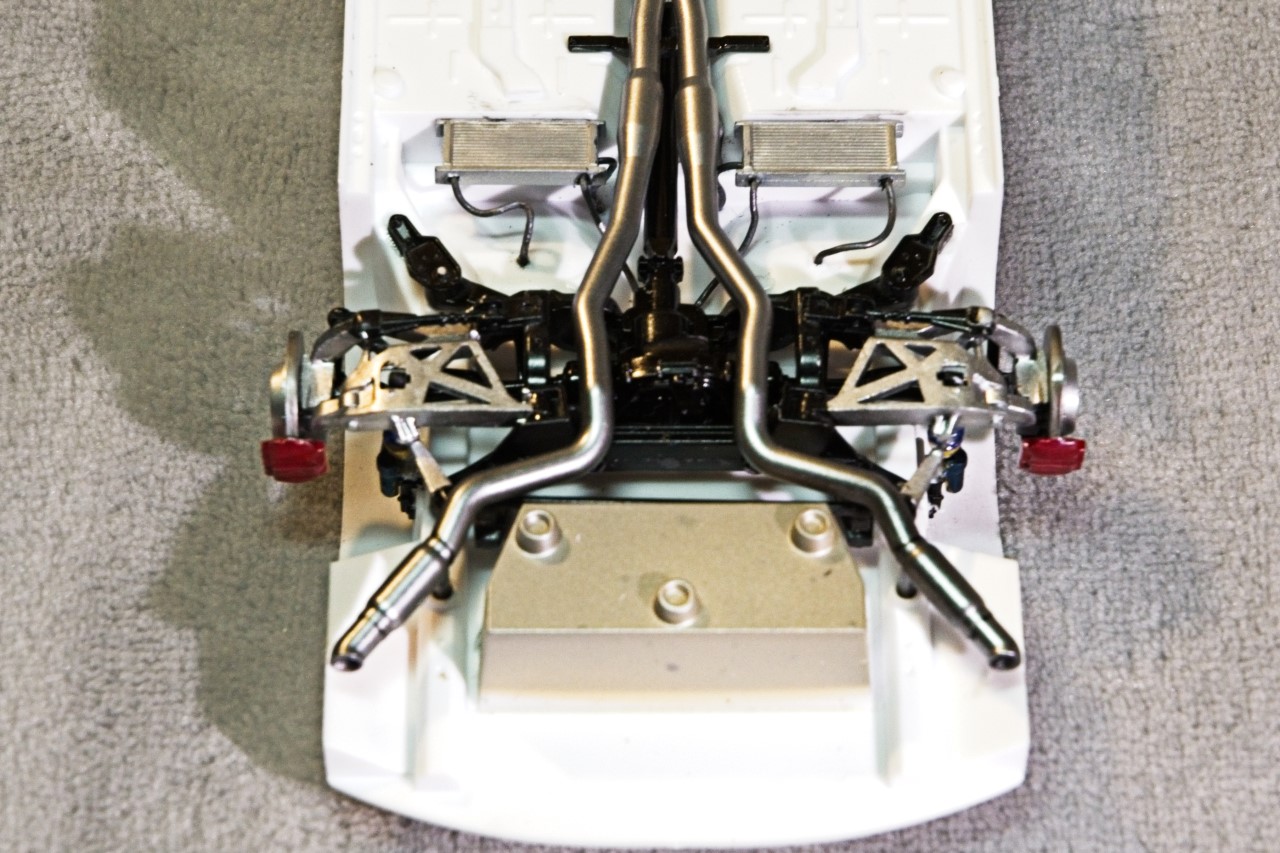
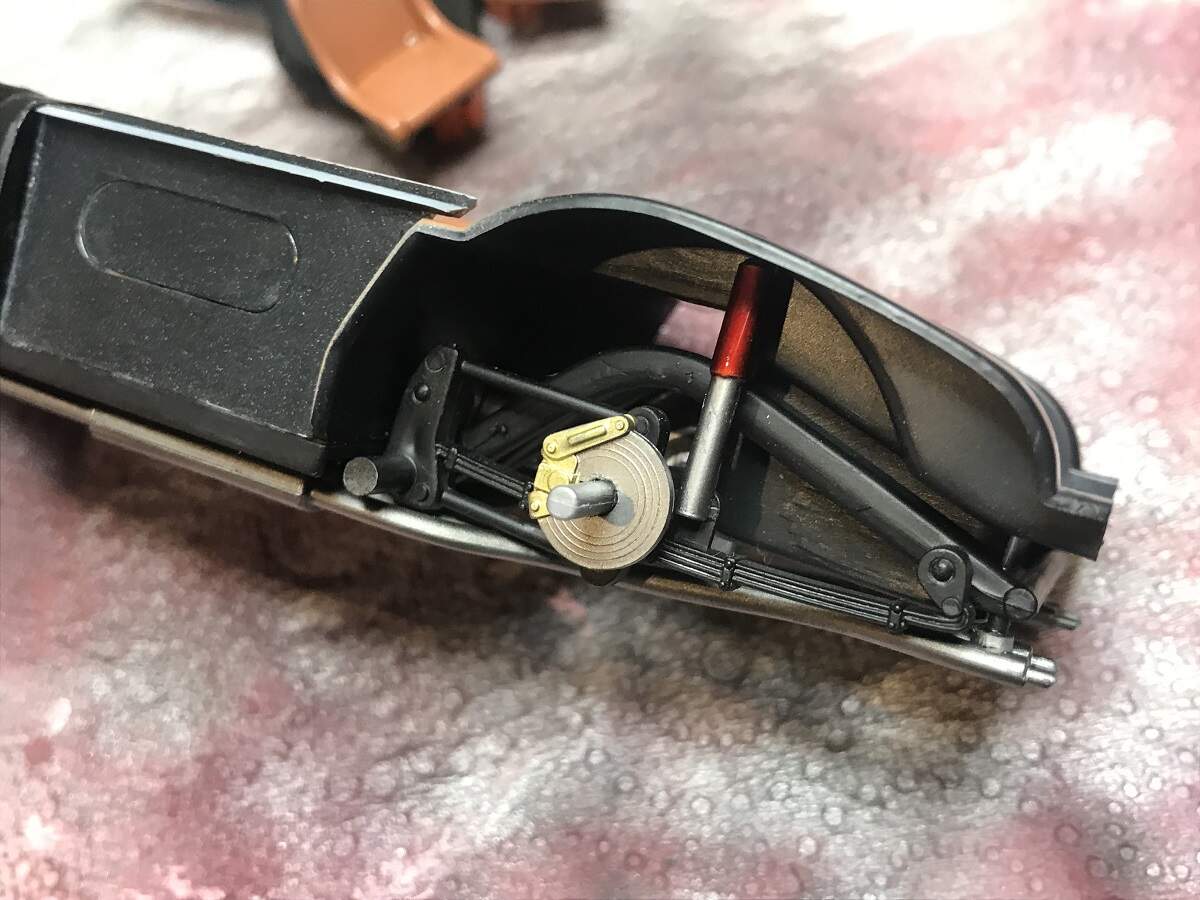
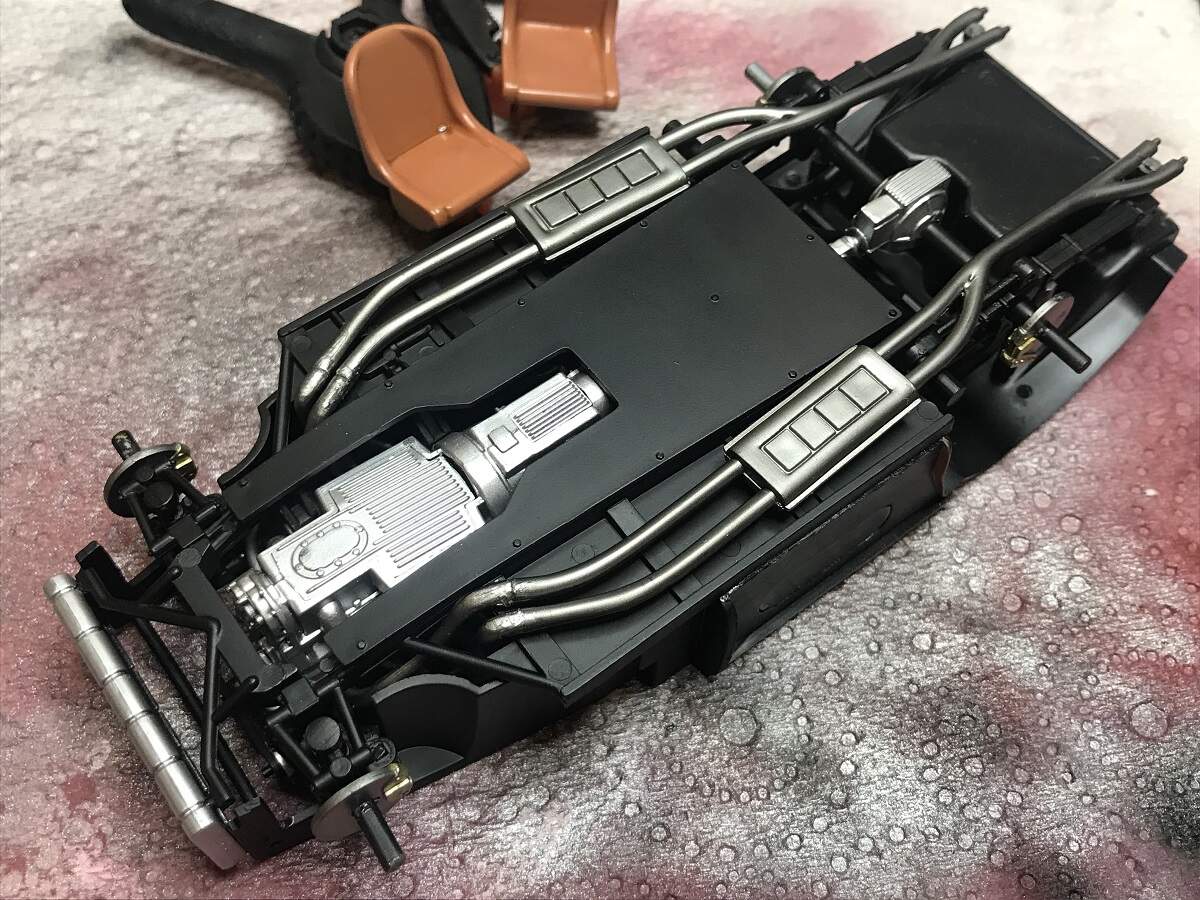
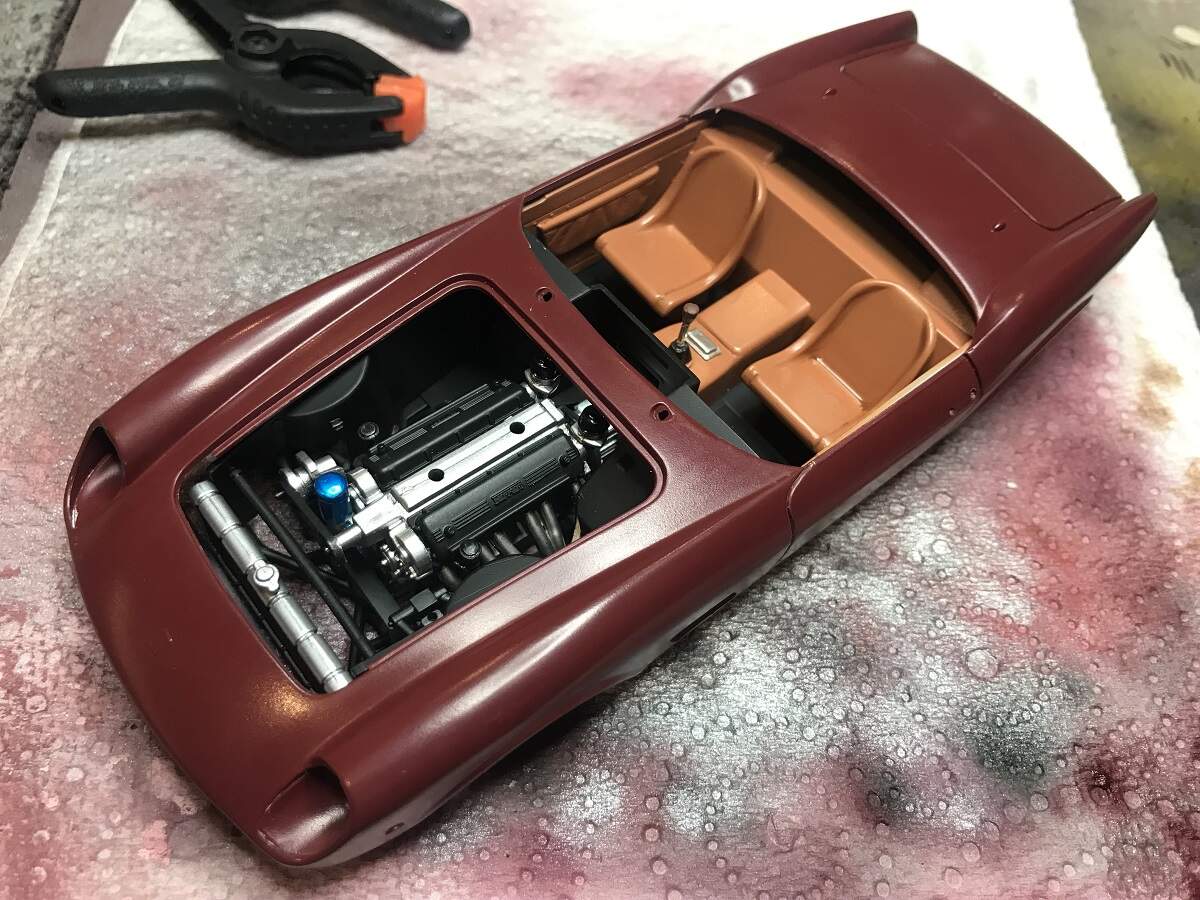
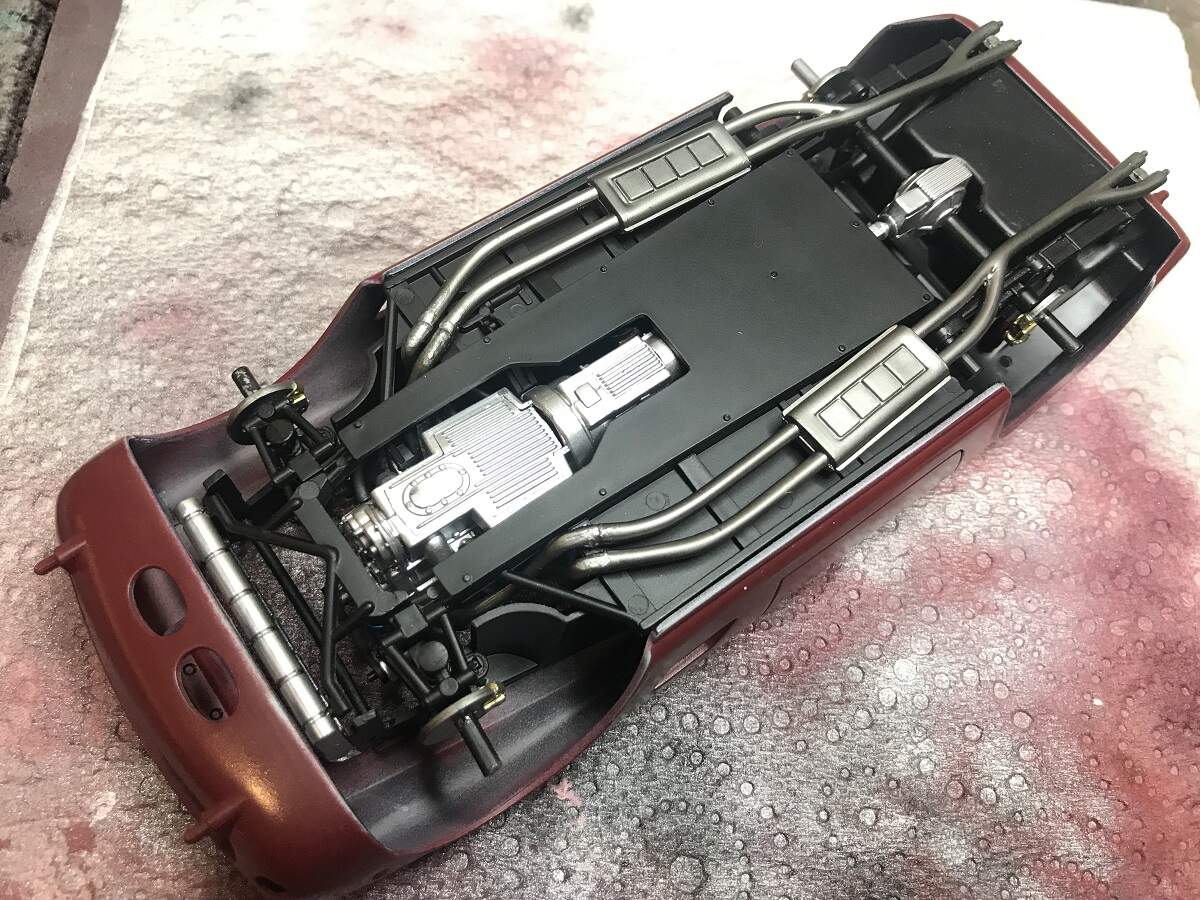
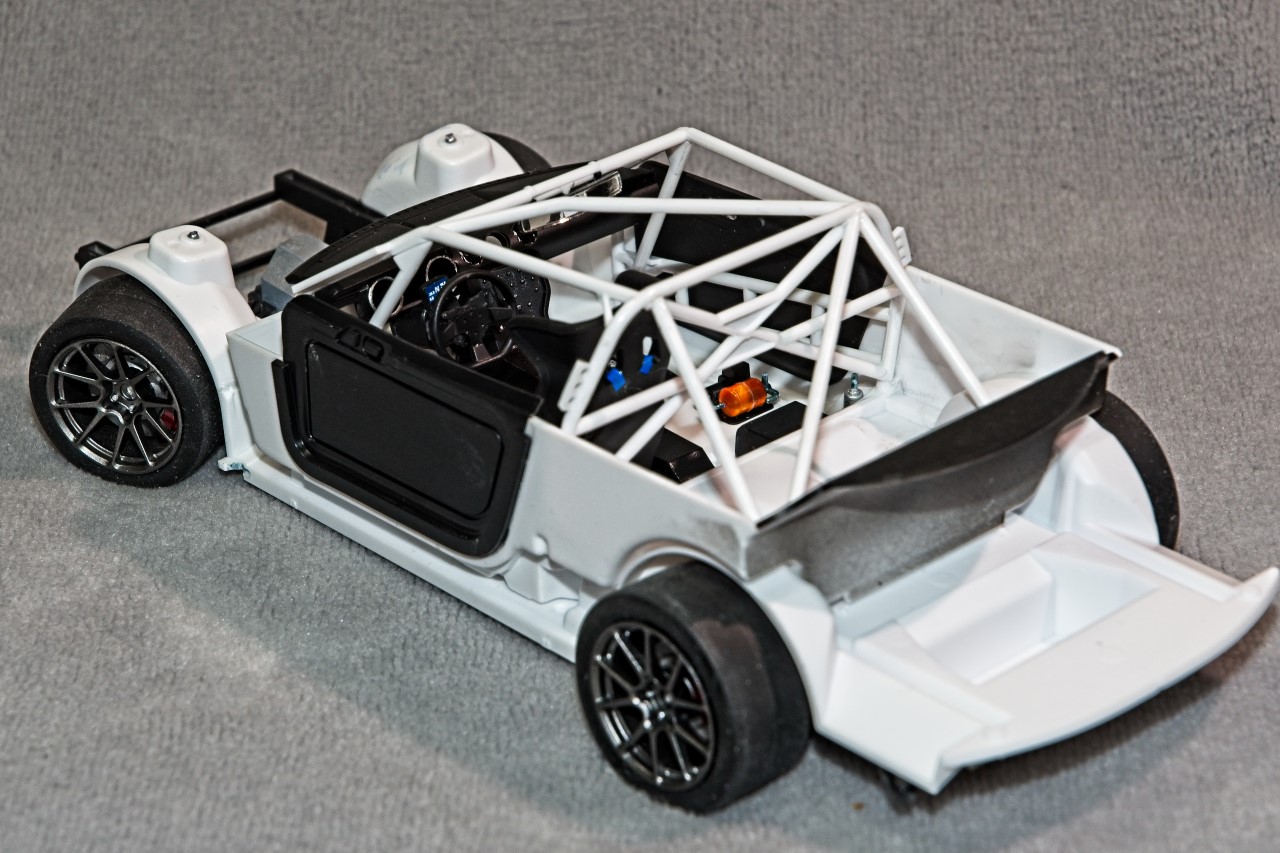
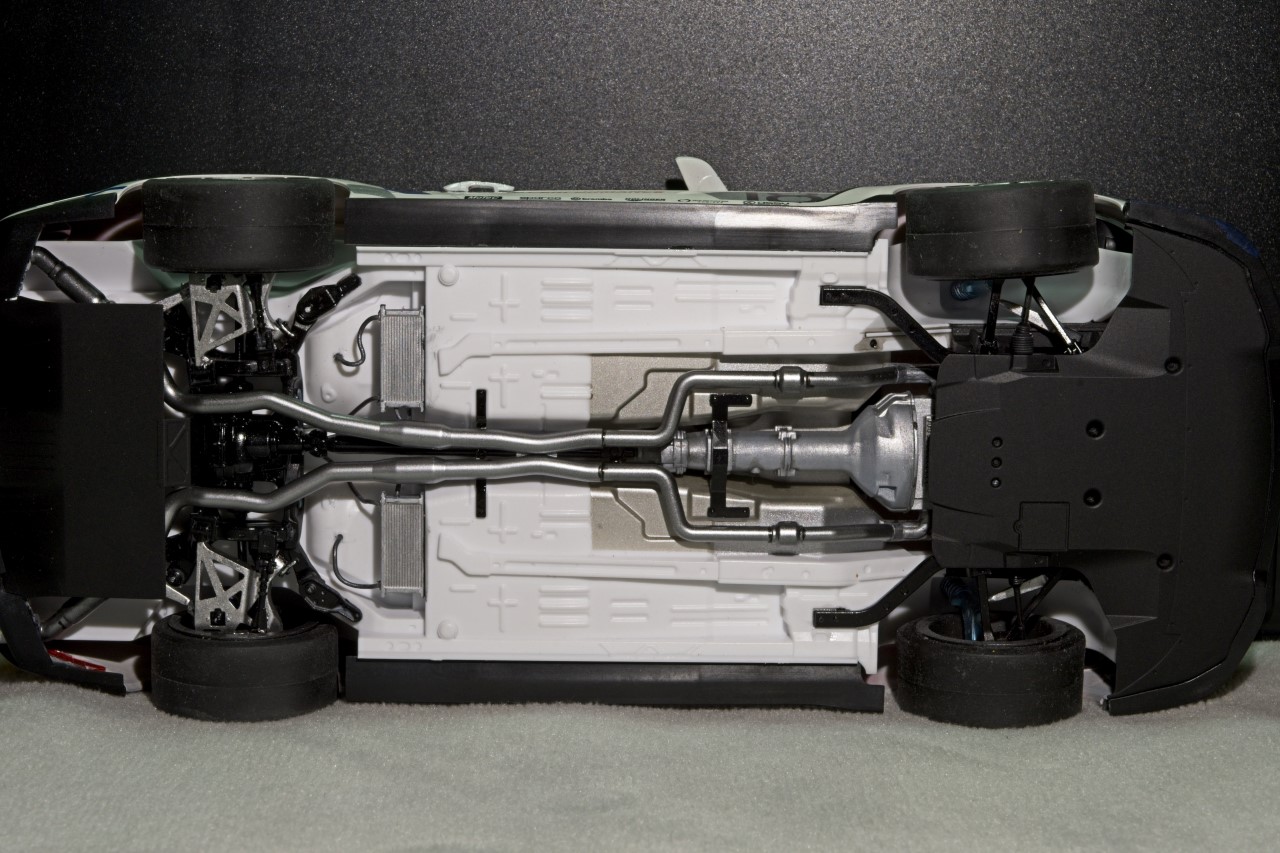
Been spending all my time and efforts on finishing the bottom of the chassis which contains the lower engine/transmission plus the exhaust headers, the front suspension, drive shaft, rear gear housing oil coolers that I just ran some of the oil lines from one to the other, then to the rear end, and the return line re-appears and goes to the other cooler. Complete rear suspension, and finally the exhaust pipes.
Most of the parts were painted as per the Tamiya instructions with main exceptions being all 4 brake calibers as I have a few pictures of them being painted Red, so I went that route just to add a little much needed color. The exhaust pipes were painted gloss Black then Alcad 2 Duralumin because it has a very coldish Blue hue to it like heated exhaust pipes once they cool down. The over all effect does catch one’s eye, so I’m more then pleased with the look of them.
I know it doesn’t sound like much work, but the front and rear suspension assemblies are quite complex, and took this old timer quite some time to complete.
joel
Body is looking good Damian, your patience in getting that right has paid off.
cheers
Michael
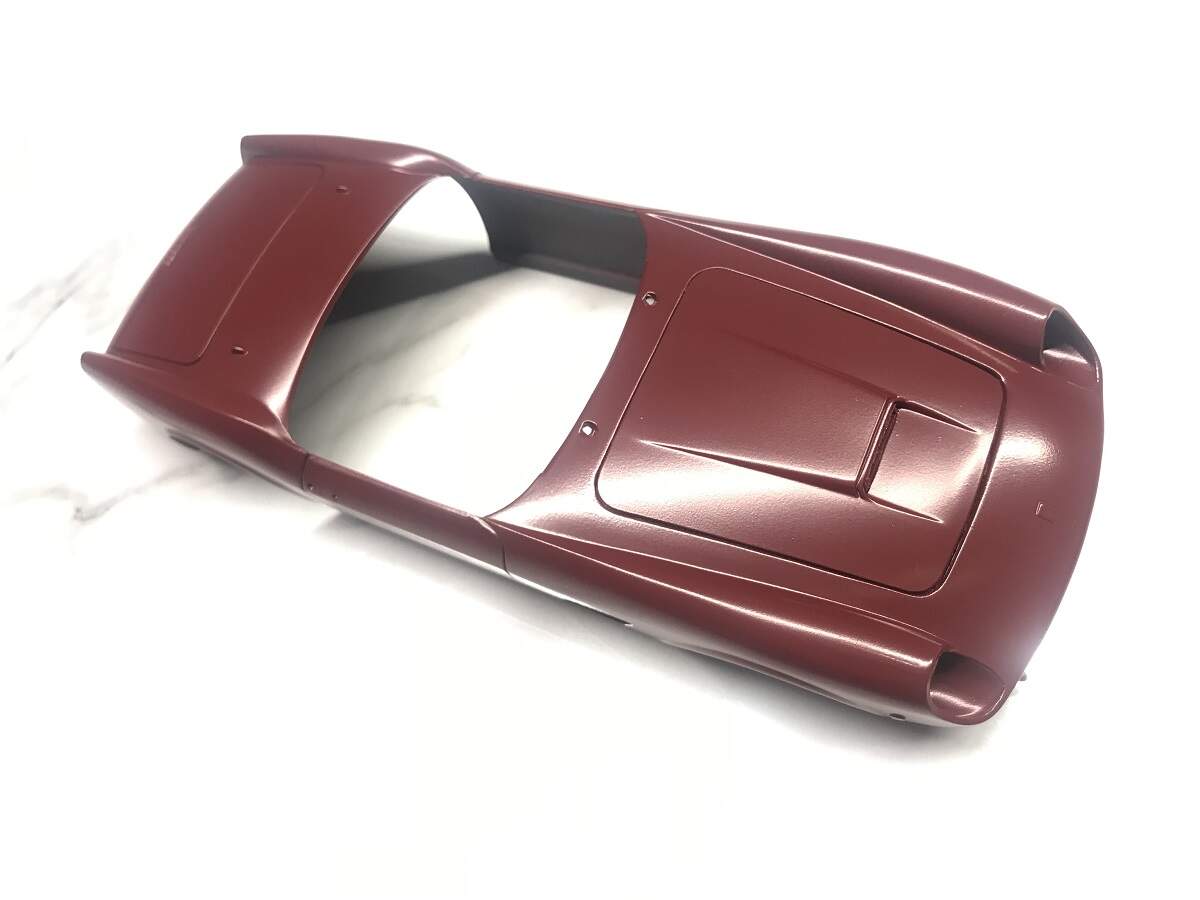
Neat work Joel, that underside is looking great!
I managed some time and got a first shot of colour down on the Ferrari body. It’s got a mild case of orangepeelitis so I will need to treat it with some wet sanding over the next few days and then likely a final light shot of colour.
Cheers, D
D,
1st and foremost, congratulations on the new position. Sure sounds like it’s what you really wanted from the start.
1st coats of color should be a snap to rub out. I do it on every single paint job. Looking forward to your next update.
joel
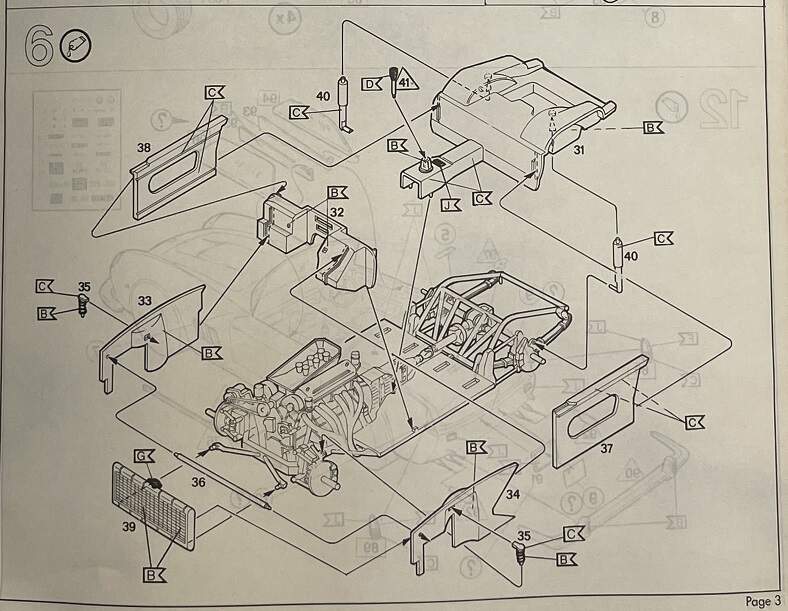
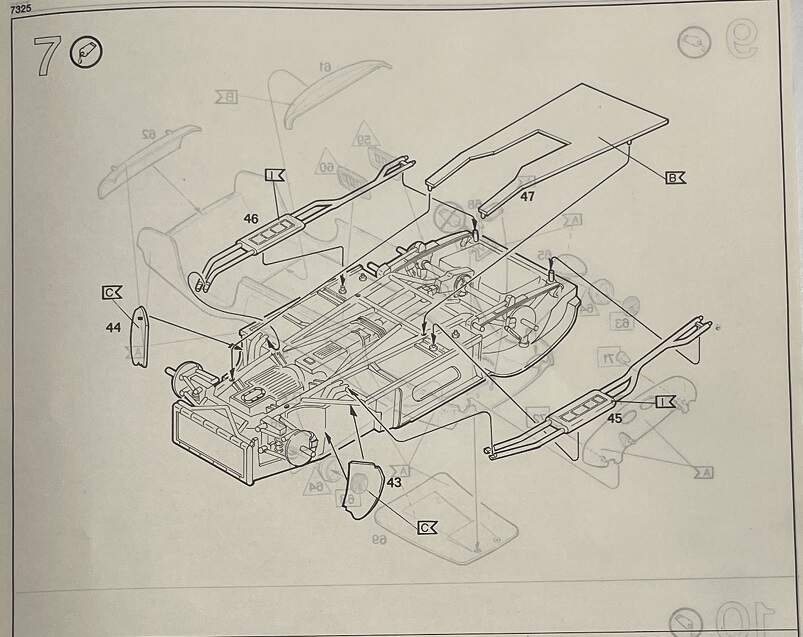
On to some of the major assembly now, completed Step 6 and part of Step 7 tonight.
Everything seems to be slotting together quite nicely, so I thought I would do a cheeky test fit of the body.
Once again, it snapped into place neatly and easily.
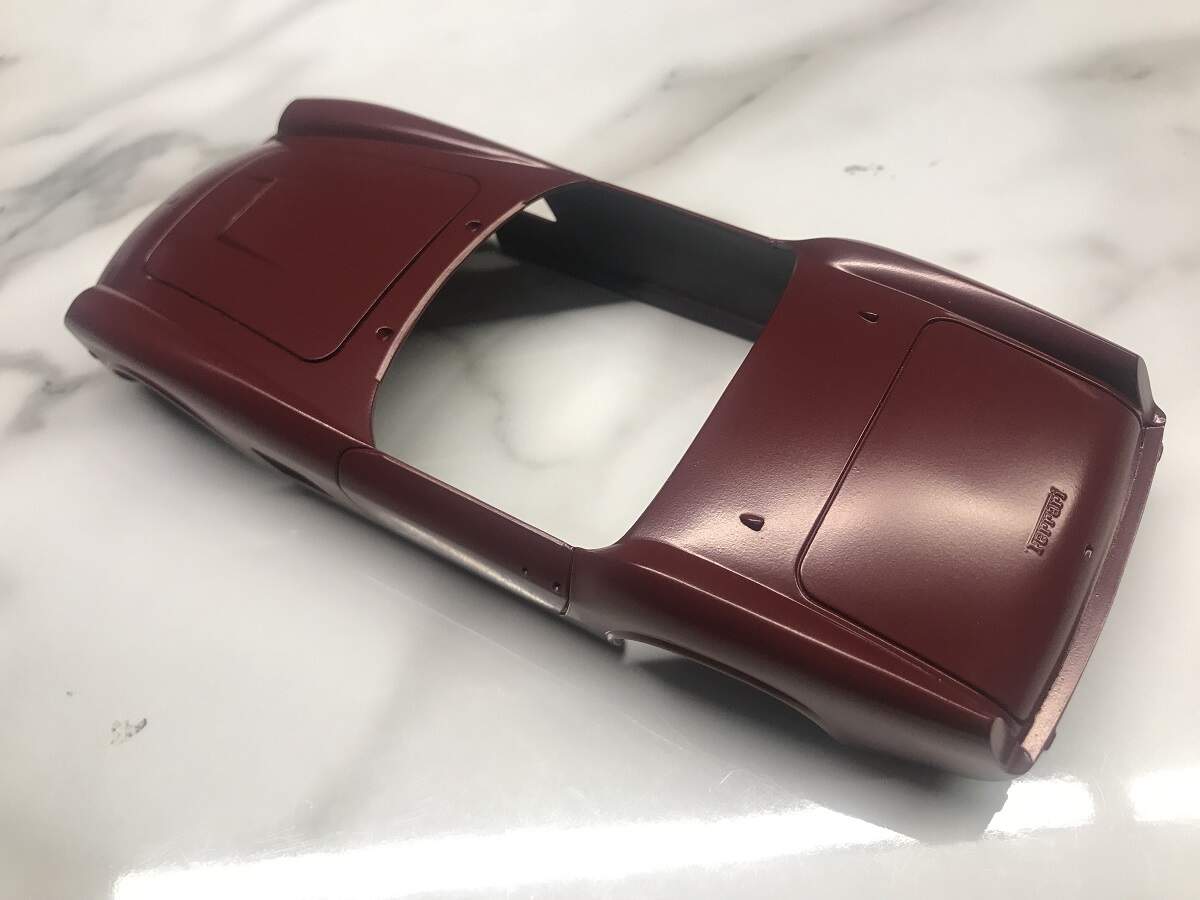
Body work continues. I have found a couple of spots that need more attention so It has had some more sanding and hopefully in the next couple of days a final light colour coat will go on.
Cheers, D
D,
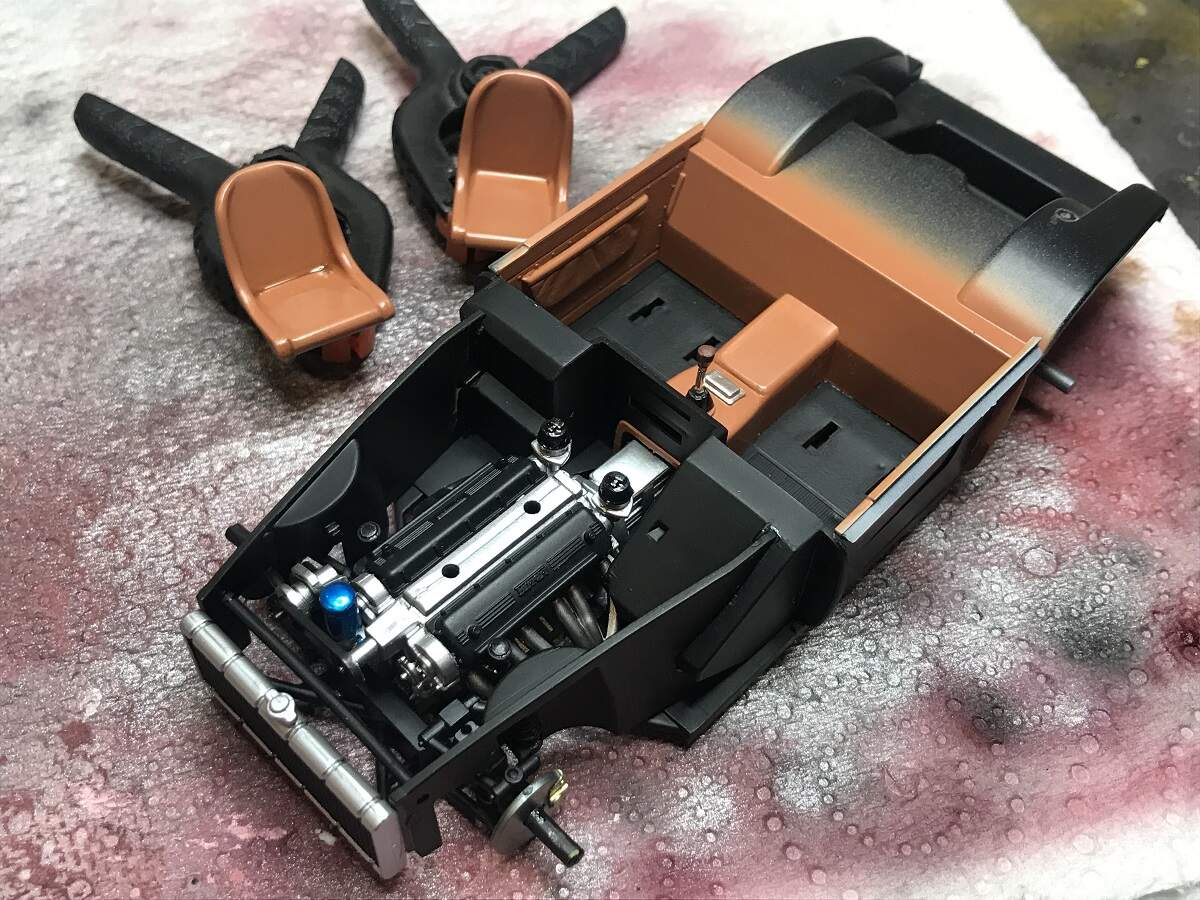
Just great progress on the 250 GTO. Being a circa 1962-1965 production car, seeing a leaf spring in the rear suspension rather then a spring coil over shock that the front suspension has as I can’t see a leaf spring in your pictures, is odd on one hand but normal for that time period. At least it has 4 wheel disc brakes, as rear drums weren’t all that uncommon even on sport/race cars of that period.
Absolutely beautiful work with your air brush and detail painting. the engine compartment and the bottom of the chassis looks perfect.
Back in the '60s having duel exhaust pipes from the headers to a muffler, then a single pipe to the tip was common. Here the duel pipes exit the muffler but go into a single pipe the split into duels again on each side for what has to be only for looks and naturally that sweet Ferrari engine noise. Why they didn’t just continue the duel pipes on each side all the way really doesn’t make much sense, and you’d gain a little extra HP as a bonus.
joel
Thanks for the feedback Joel, always much appreciated! Definitely no leaf springs at the noisy end, but two coil-overs on each side. One on the inside of the discs between the upper and lower control arms, and one smaller one from the upper control arm to the inner guard.
As you said, an interesting and unusual exhaust with the split to dual tips well after the muffler. It must have added to the note, and definitely to the tail-end appeal!
Cheers, D
D,
Interesting that the front suspension was so advanced with duel springs, while the rears were still leafs.
Looking forward to your next update for sure. I’m getting ready to shoot my next update as the chassis/Interior is done except for the tire decals as I can’t find any in the correct scale as yet.
joel
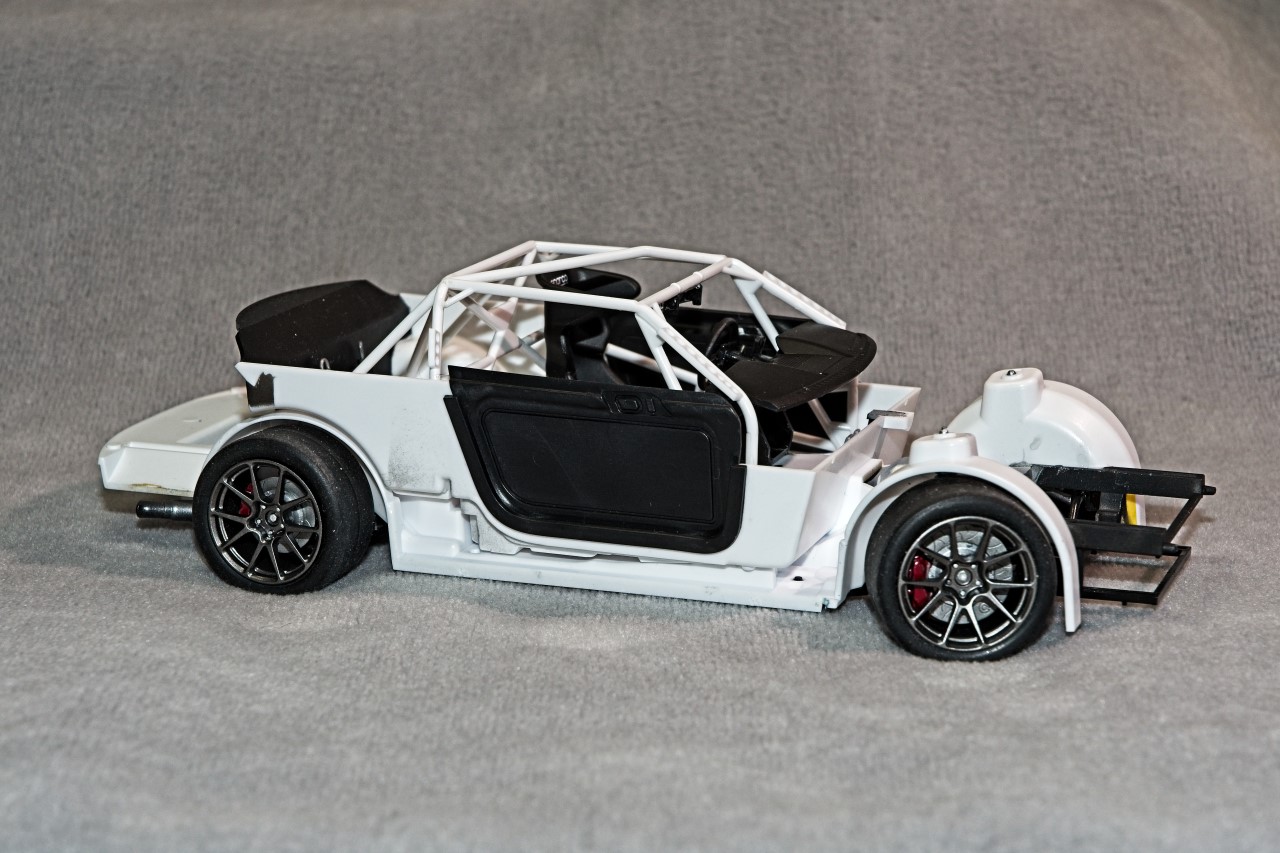
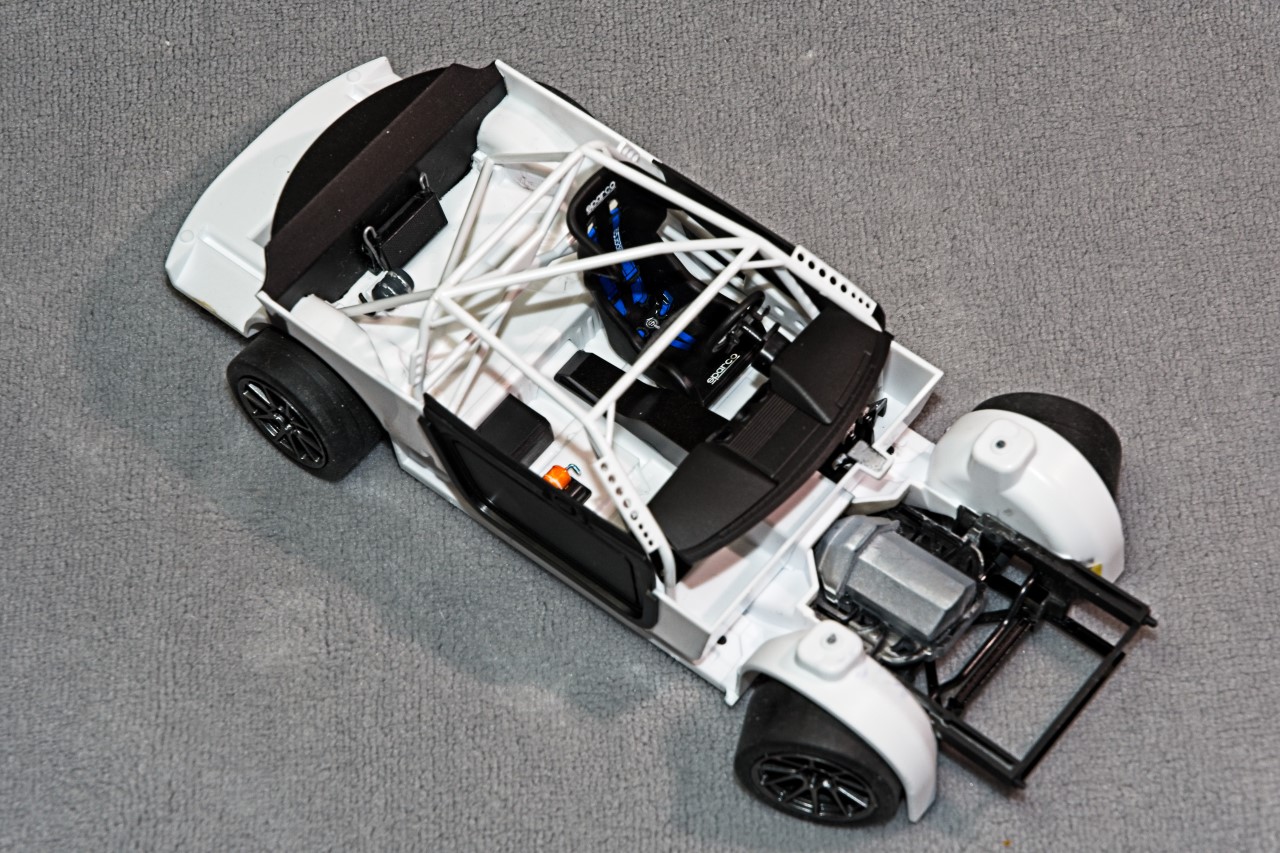
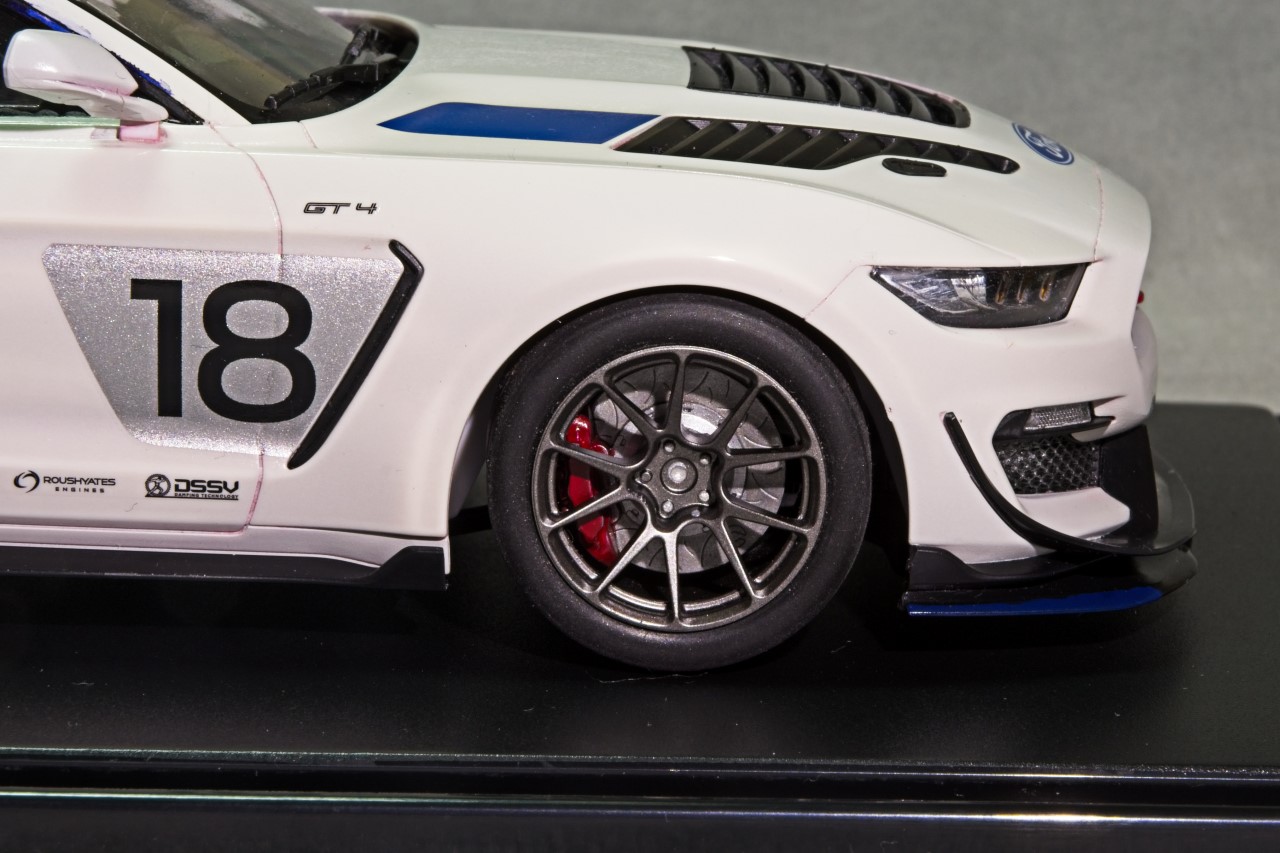
After another week of work, I finally finished the chassis with the addition of the tires & wheels. The alloy wheels were painted Tamiya Gun Metal which is a pretty close match to how they look in real life. the tires were sanded to give the the treadless surface a worn look, but leave the centerline molding seam as I’ve seen it that way in real life. One decision I seem to make on nearly all my builds is to paint the brake calibers Gloss Red as they add just that little bit of color that is really needed with the the brakes being just several different shades of Metallic Alloys. The only things missing is the tire company logos which should be Continental which I found on a Powerslide sheet and ordered, but am still waiting for them. They’re 1/25 scale, so I hope that they look ok as the model is 1/24 scale.
joel
Wow Joel, fantastic work. But after 2 years of staring agog at your craftsmanship I finally saw a flaw. The wheels are turned left and the steering wheel is turned slightly right. 


Mark,
Good catch, but the turned wheels aren’t glued so I turned then for a nicer looking picture showing off the calibers and discs. For the display, the wheels will all be pointed straight ahead towards their next finish line.
joel

 Good one. Keep up the good work.
Mark,
I’m officially just past the last corner with the checkered flag in sight. Of course I have all the glass, a ton of small details including the front and rear air dams, lights, mirrors, door handles, and a few other little bits & pieces. Should be past the flag in one more session. Oh, BTW, yesterday there was a super major, screw up. I’ll post it and the save of my modeling life with the last update, but it’s a gem for sure.
joel
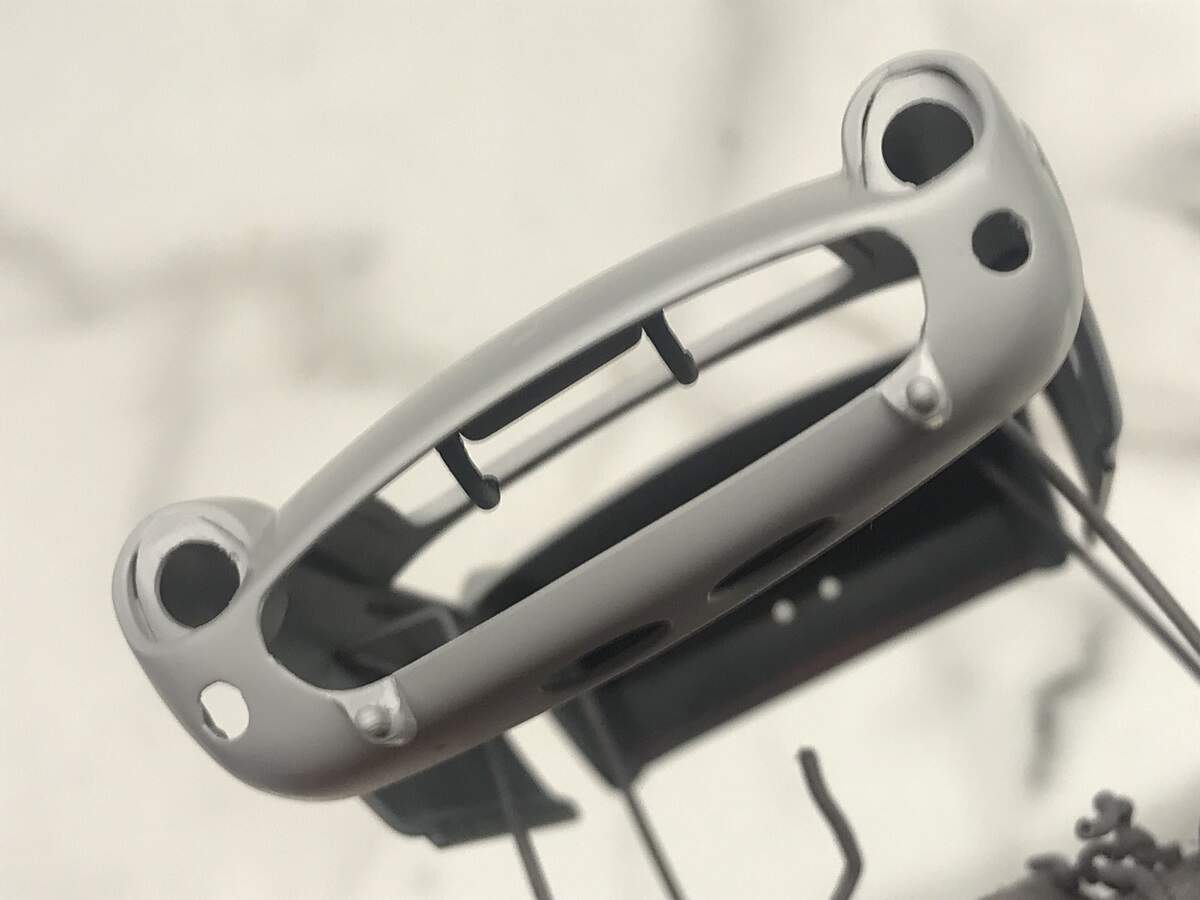
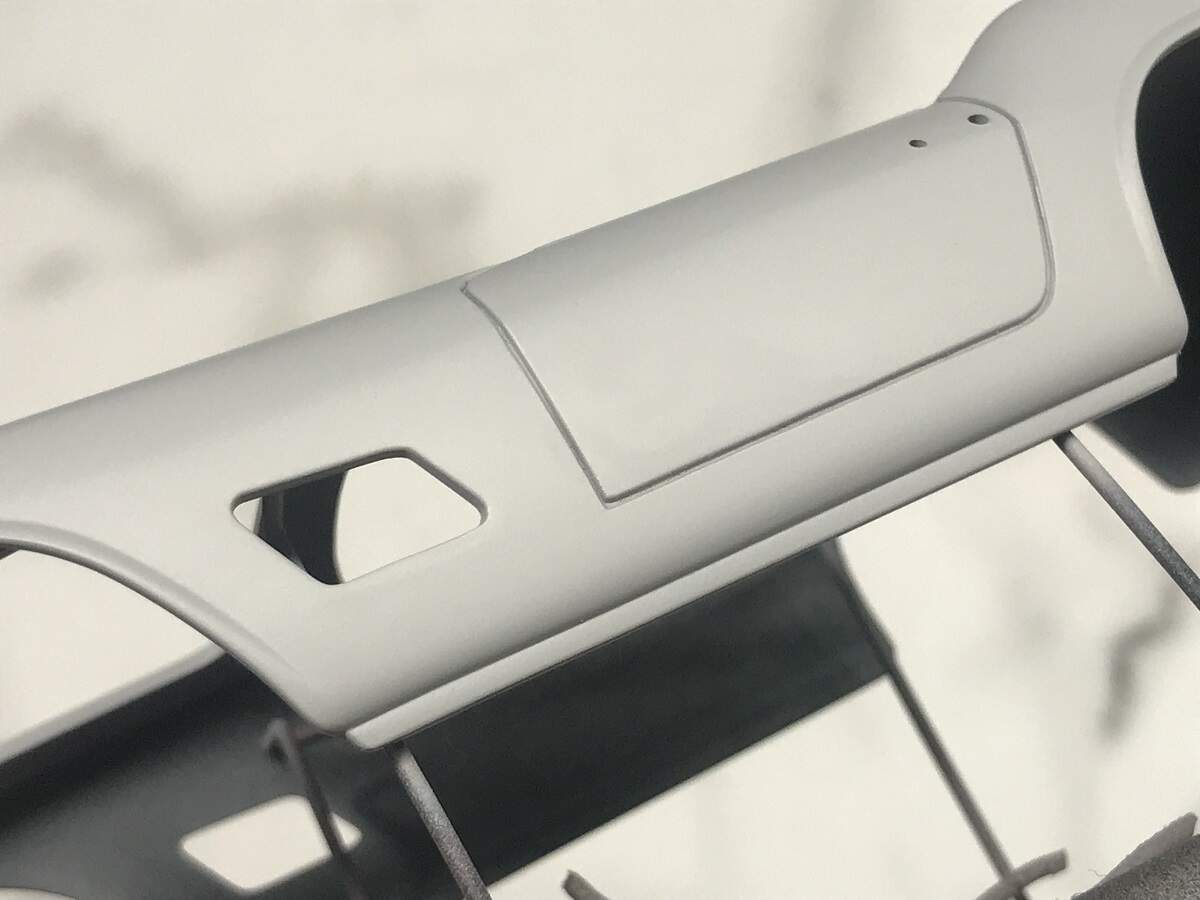
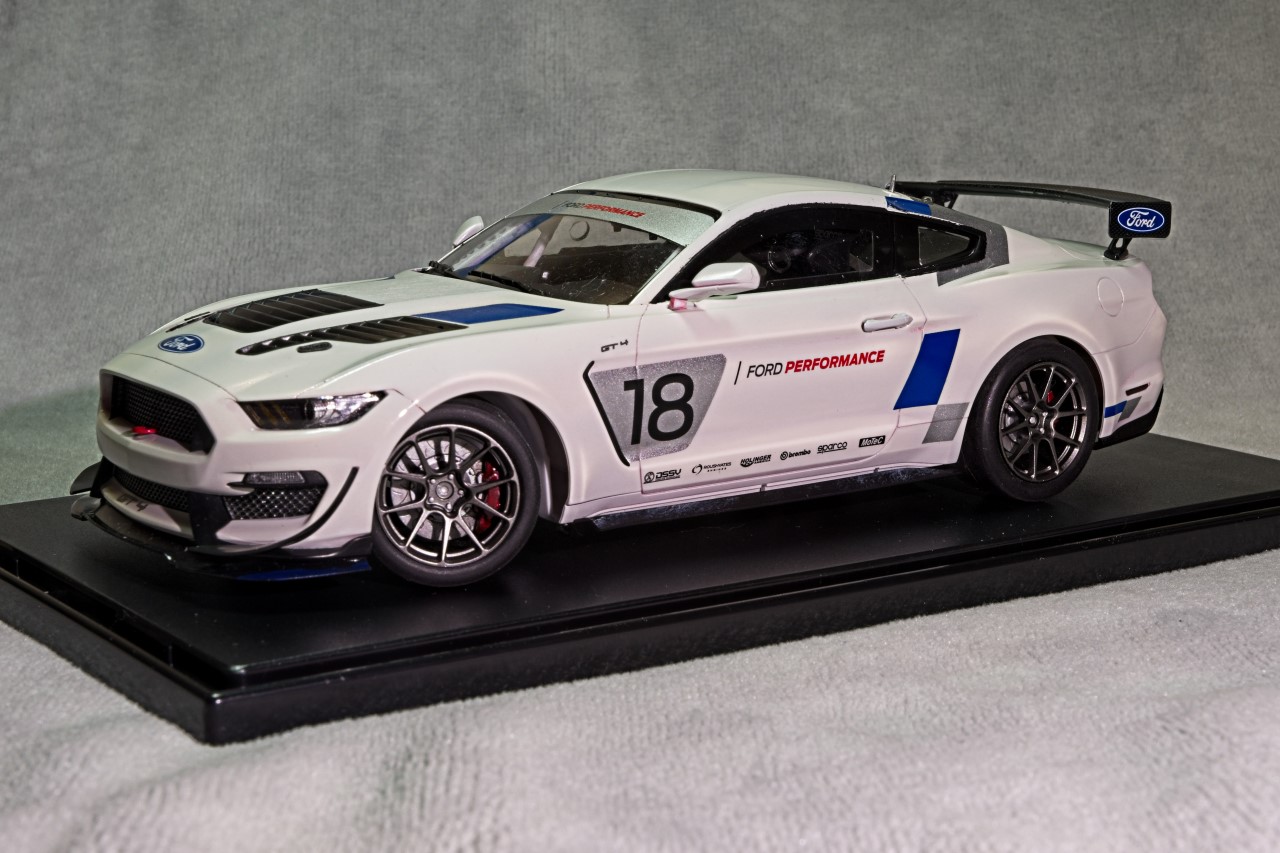
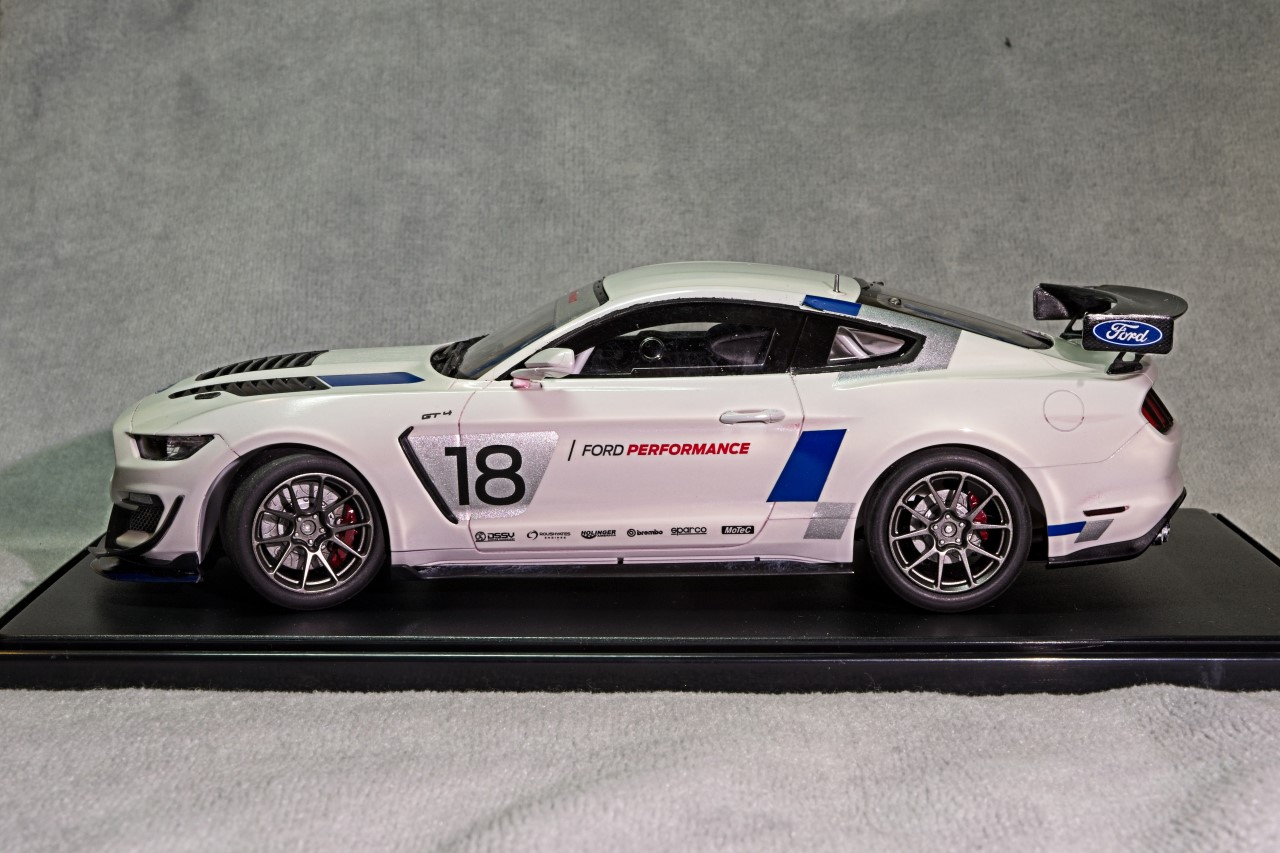
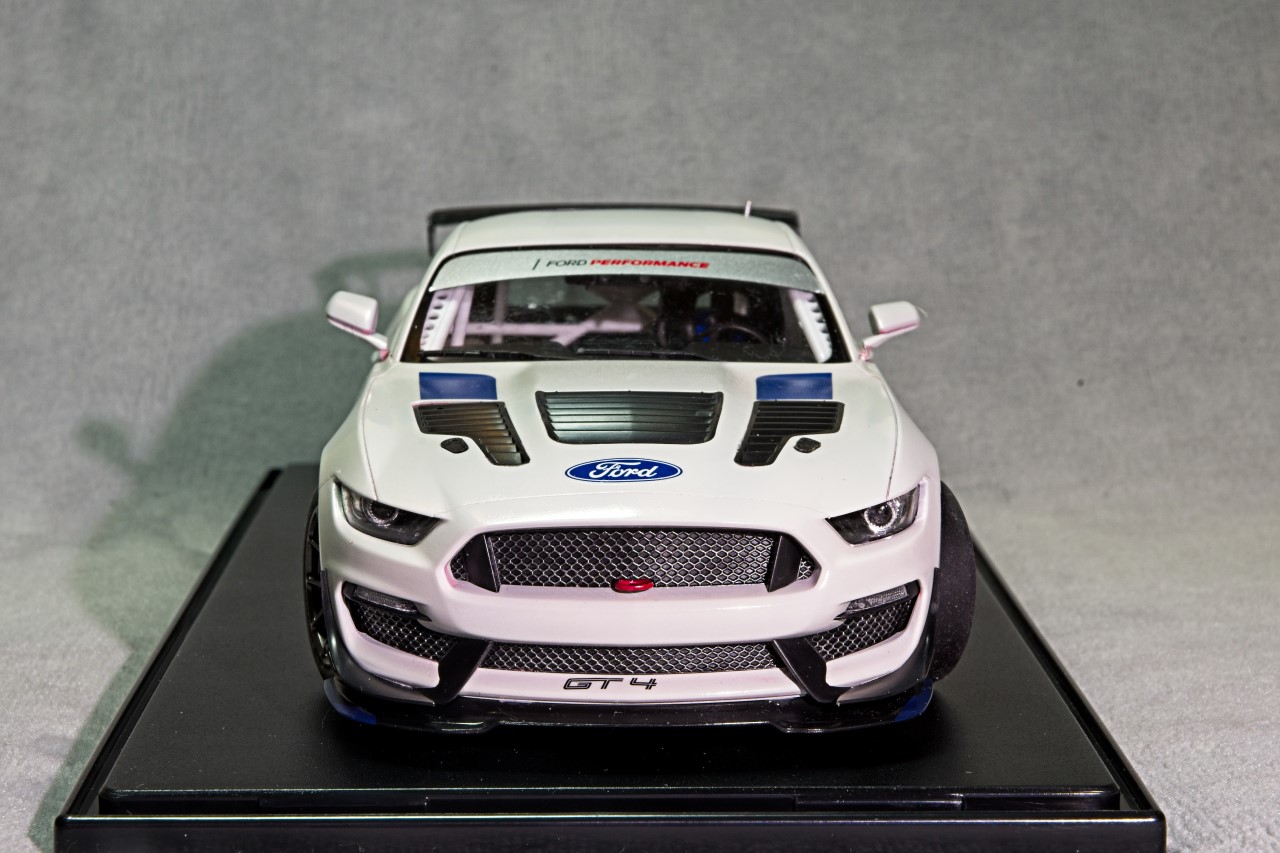
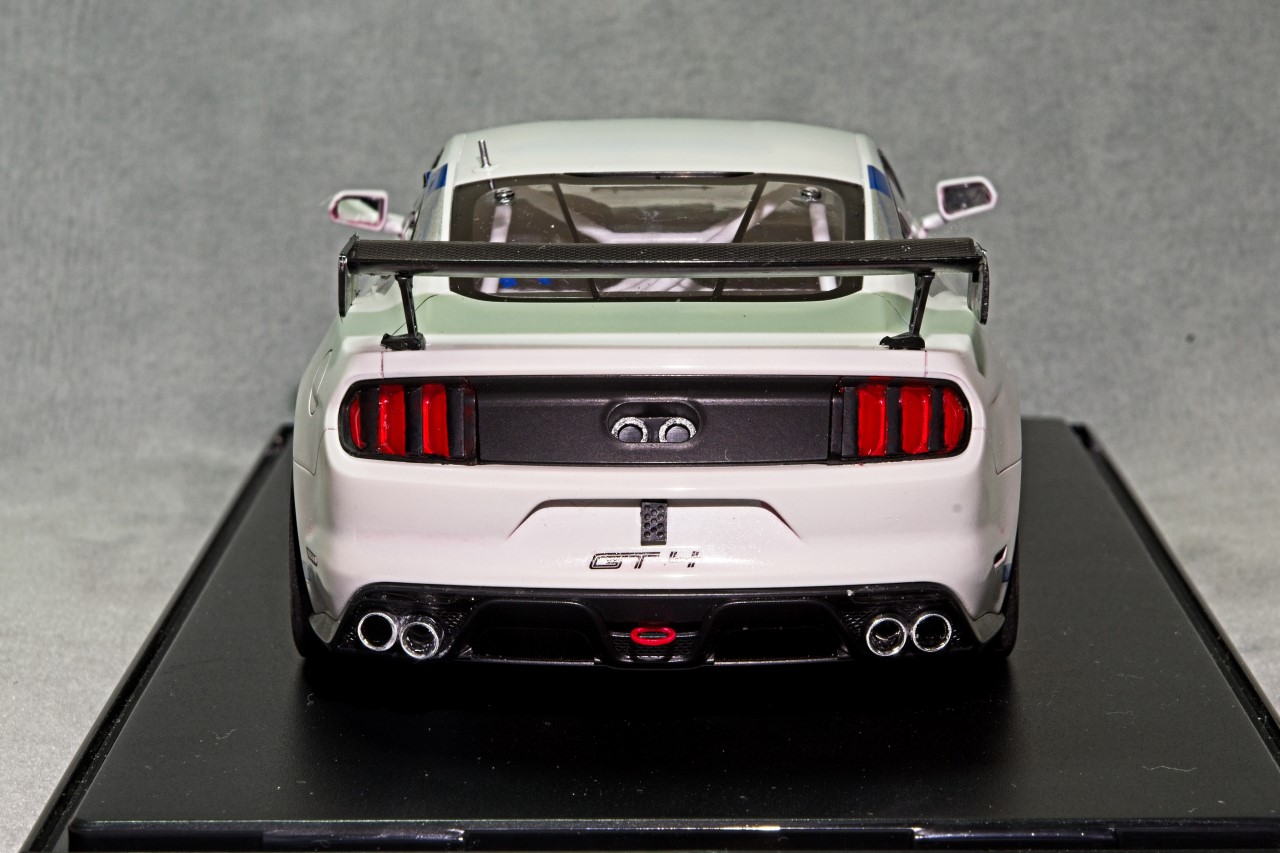
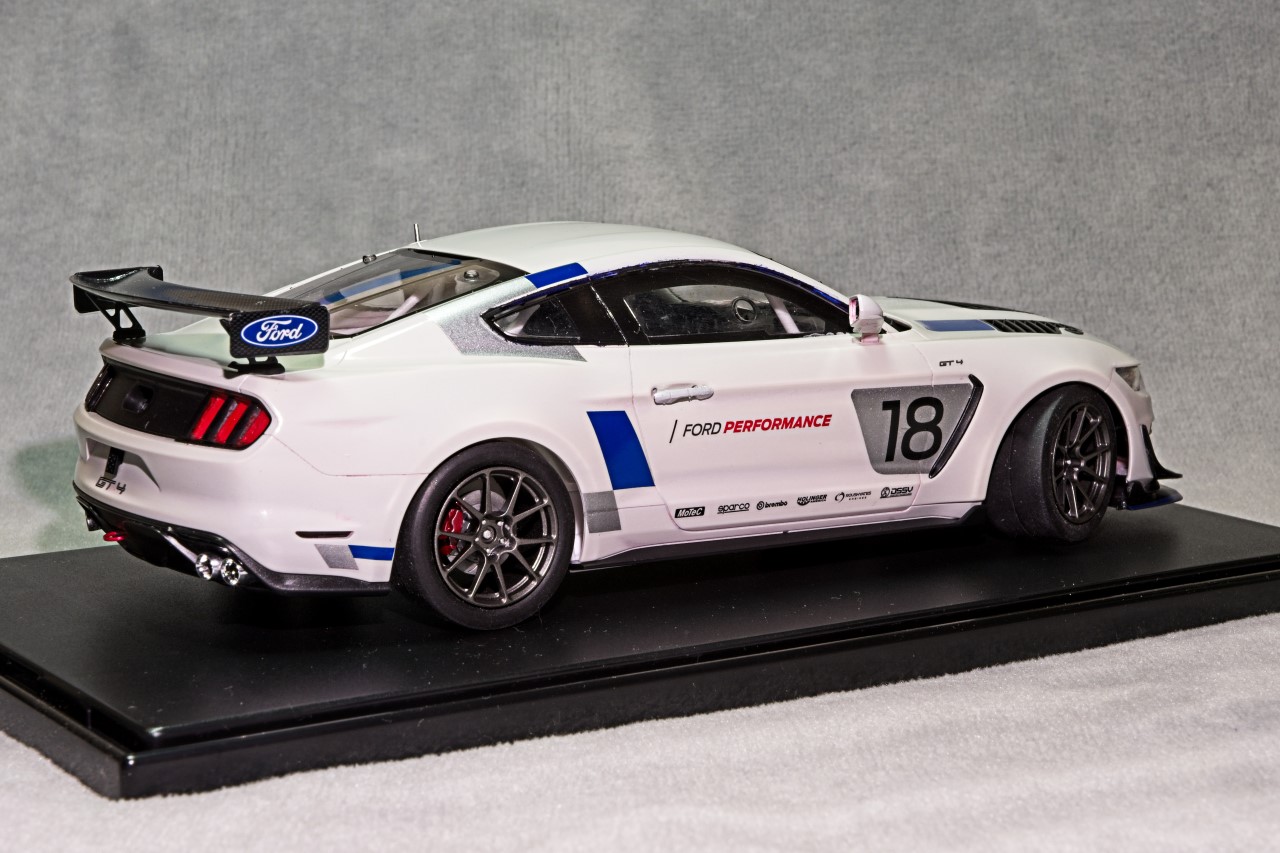
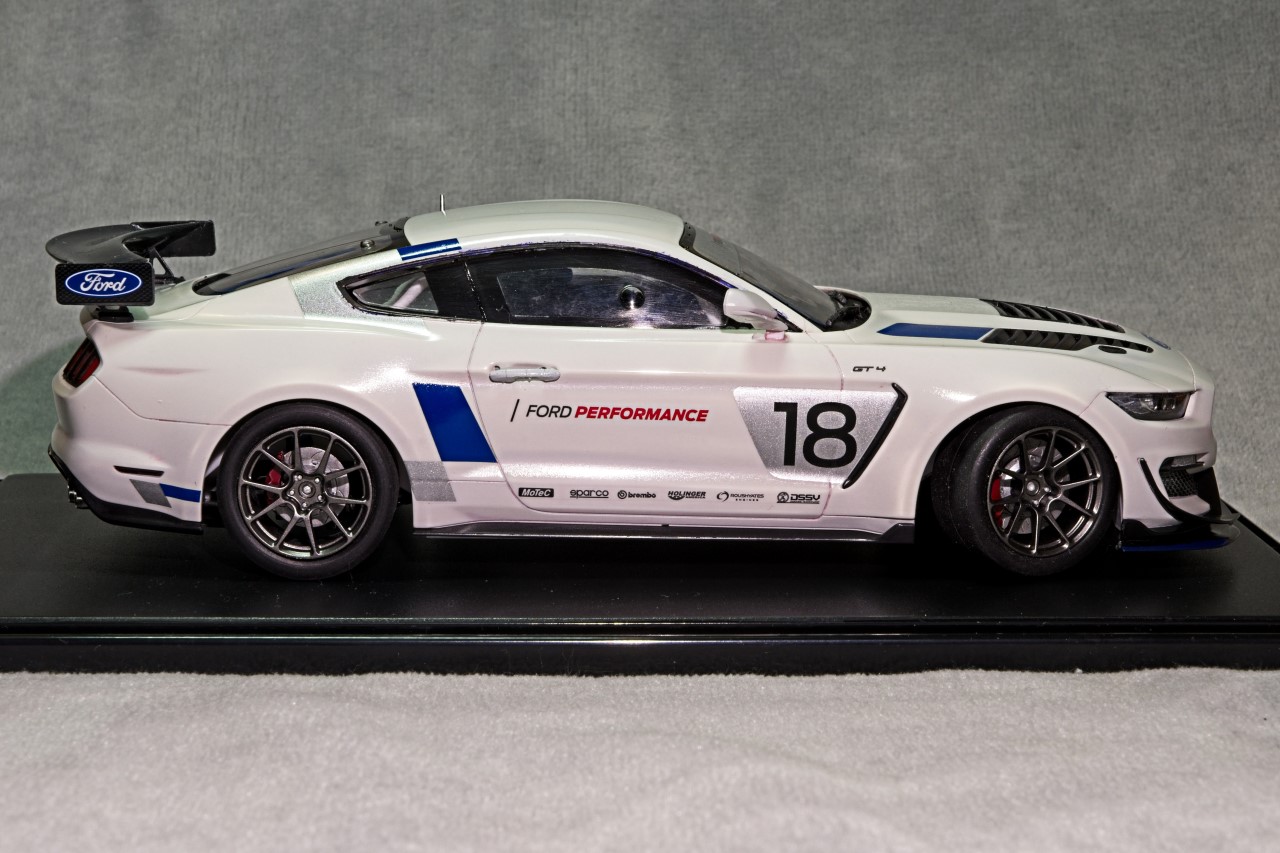
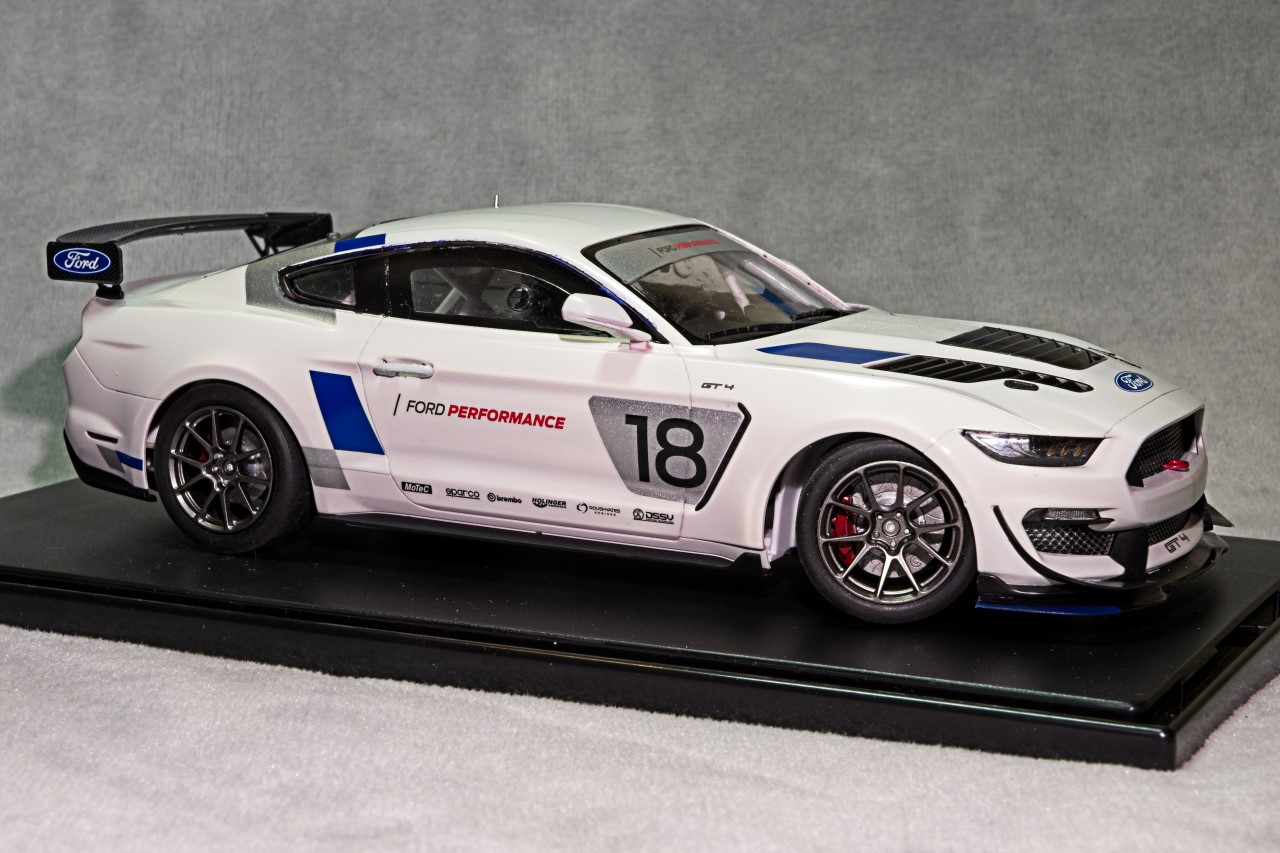
Finished up the body work with the various aero diffusers both front and rear, added both mirrors, door handles, home made roof antenna as I somehow lost the kit one, inserts for the opening in the fenders right behind the wheels for the hot air off of the brakes to exit, which makes no sense to me to close both of them off as now the air has no place to go, the bottom chassis front and rear diffuser plates, and finally the Carbon Fiber rear wing. the only things that are still missing is the decals for the tires which haven’t arrived as yet.
Hats off to Tamiya who did their usual outstanding job of creating a kit that basically just fell together. Simply a joy to build.
joel