Looks like it is coming along well. Nice recovery.
Looking great Maximus, can’t wait to see it with all that armament.
My Lynx is continuing slowly. Just as soon as I sought one problem out another emerges.
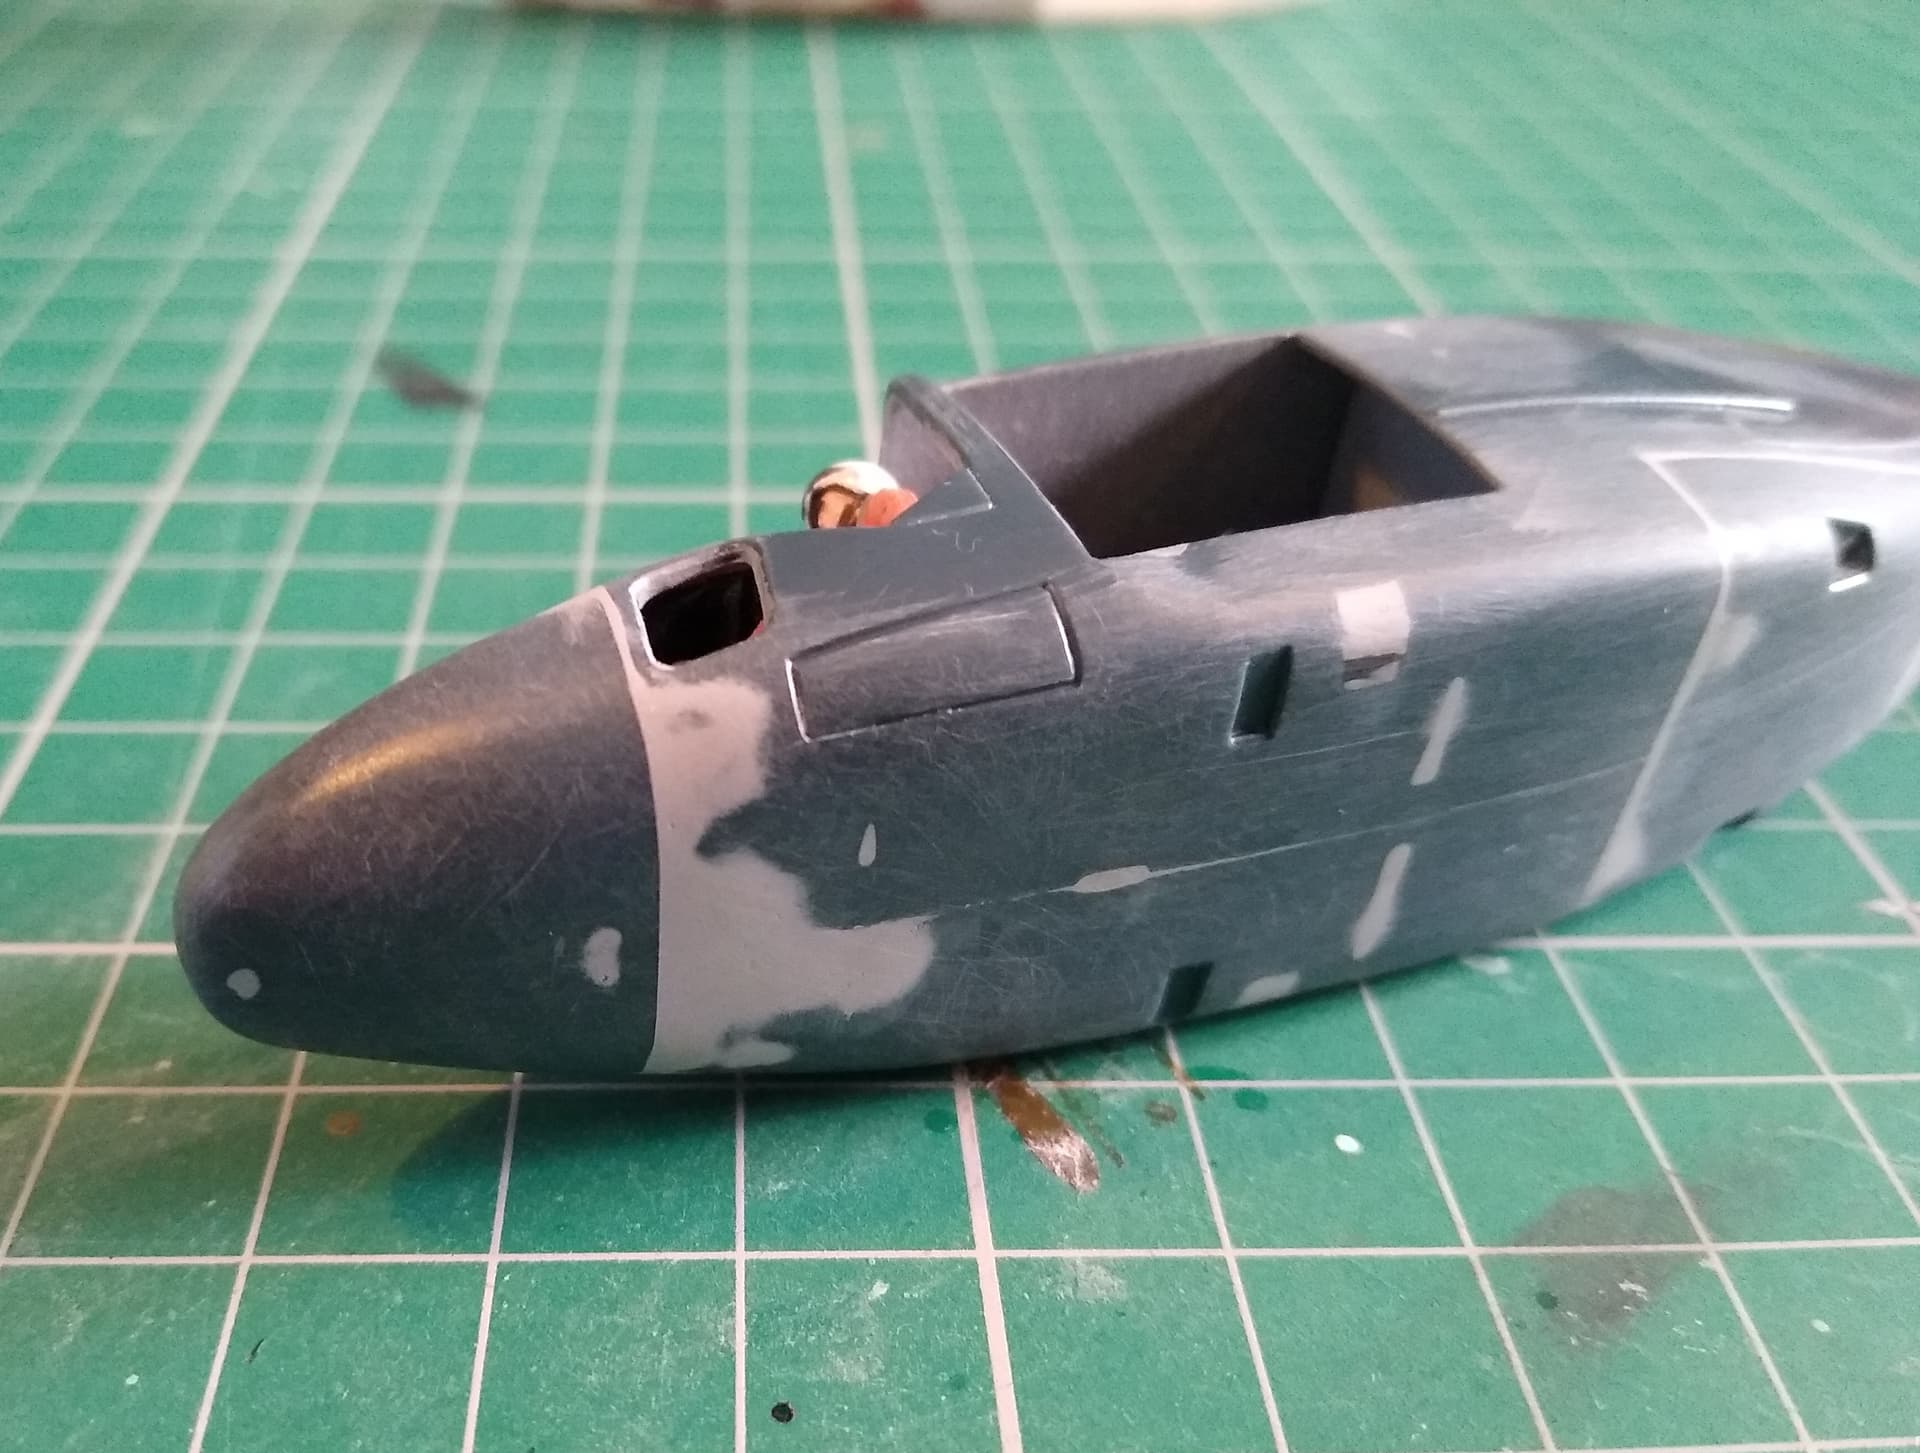
Finally got the seams along the belly and rear fuselage smoothed out, fitted the nose and more seams to fill. I should’ve fitted that earlier and done it at the same time.
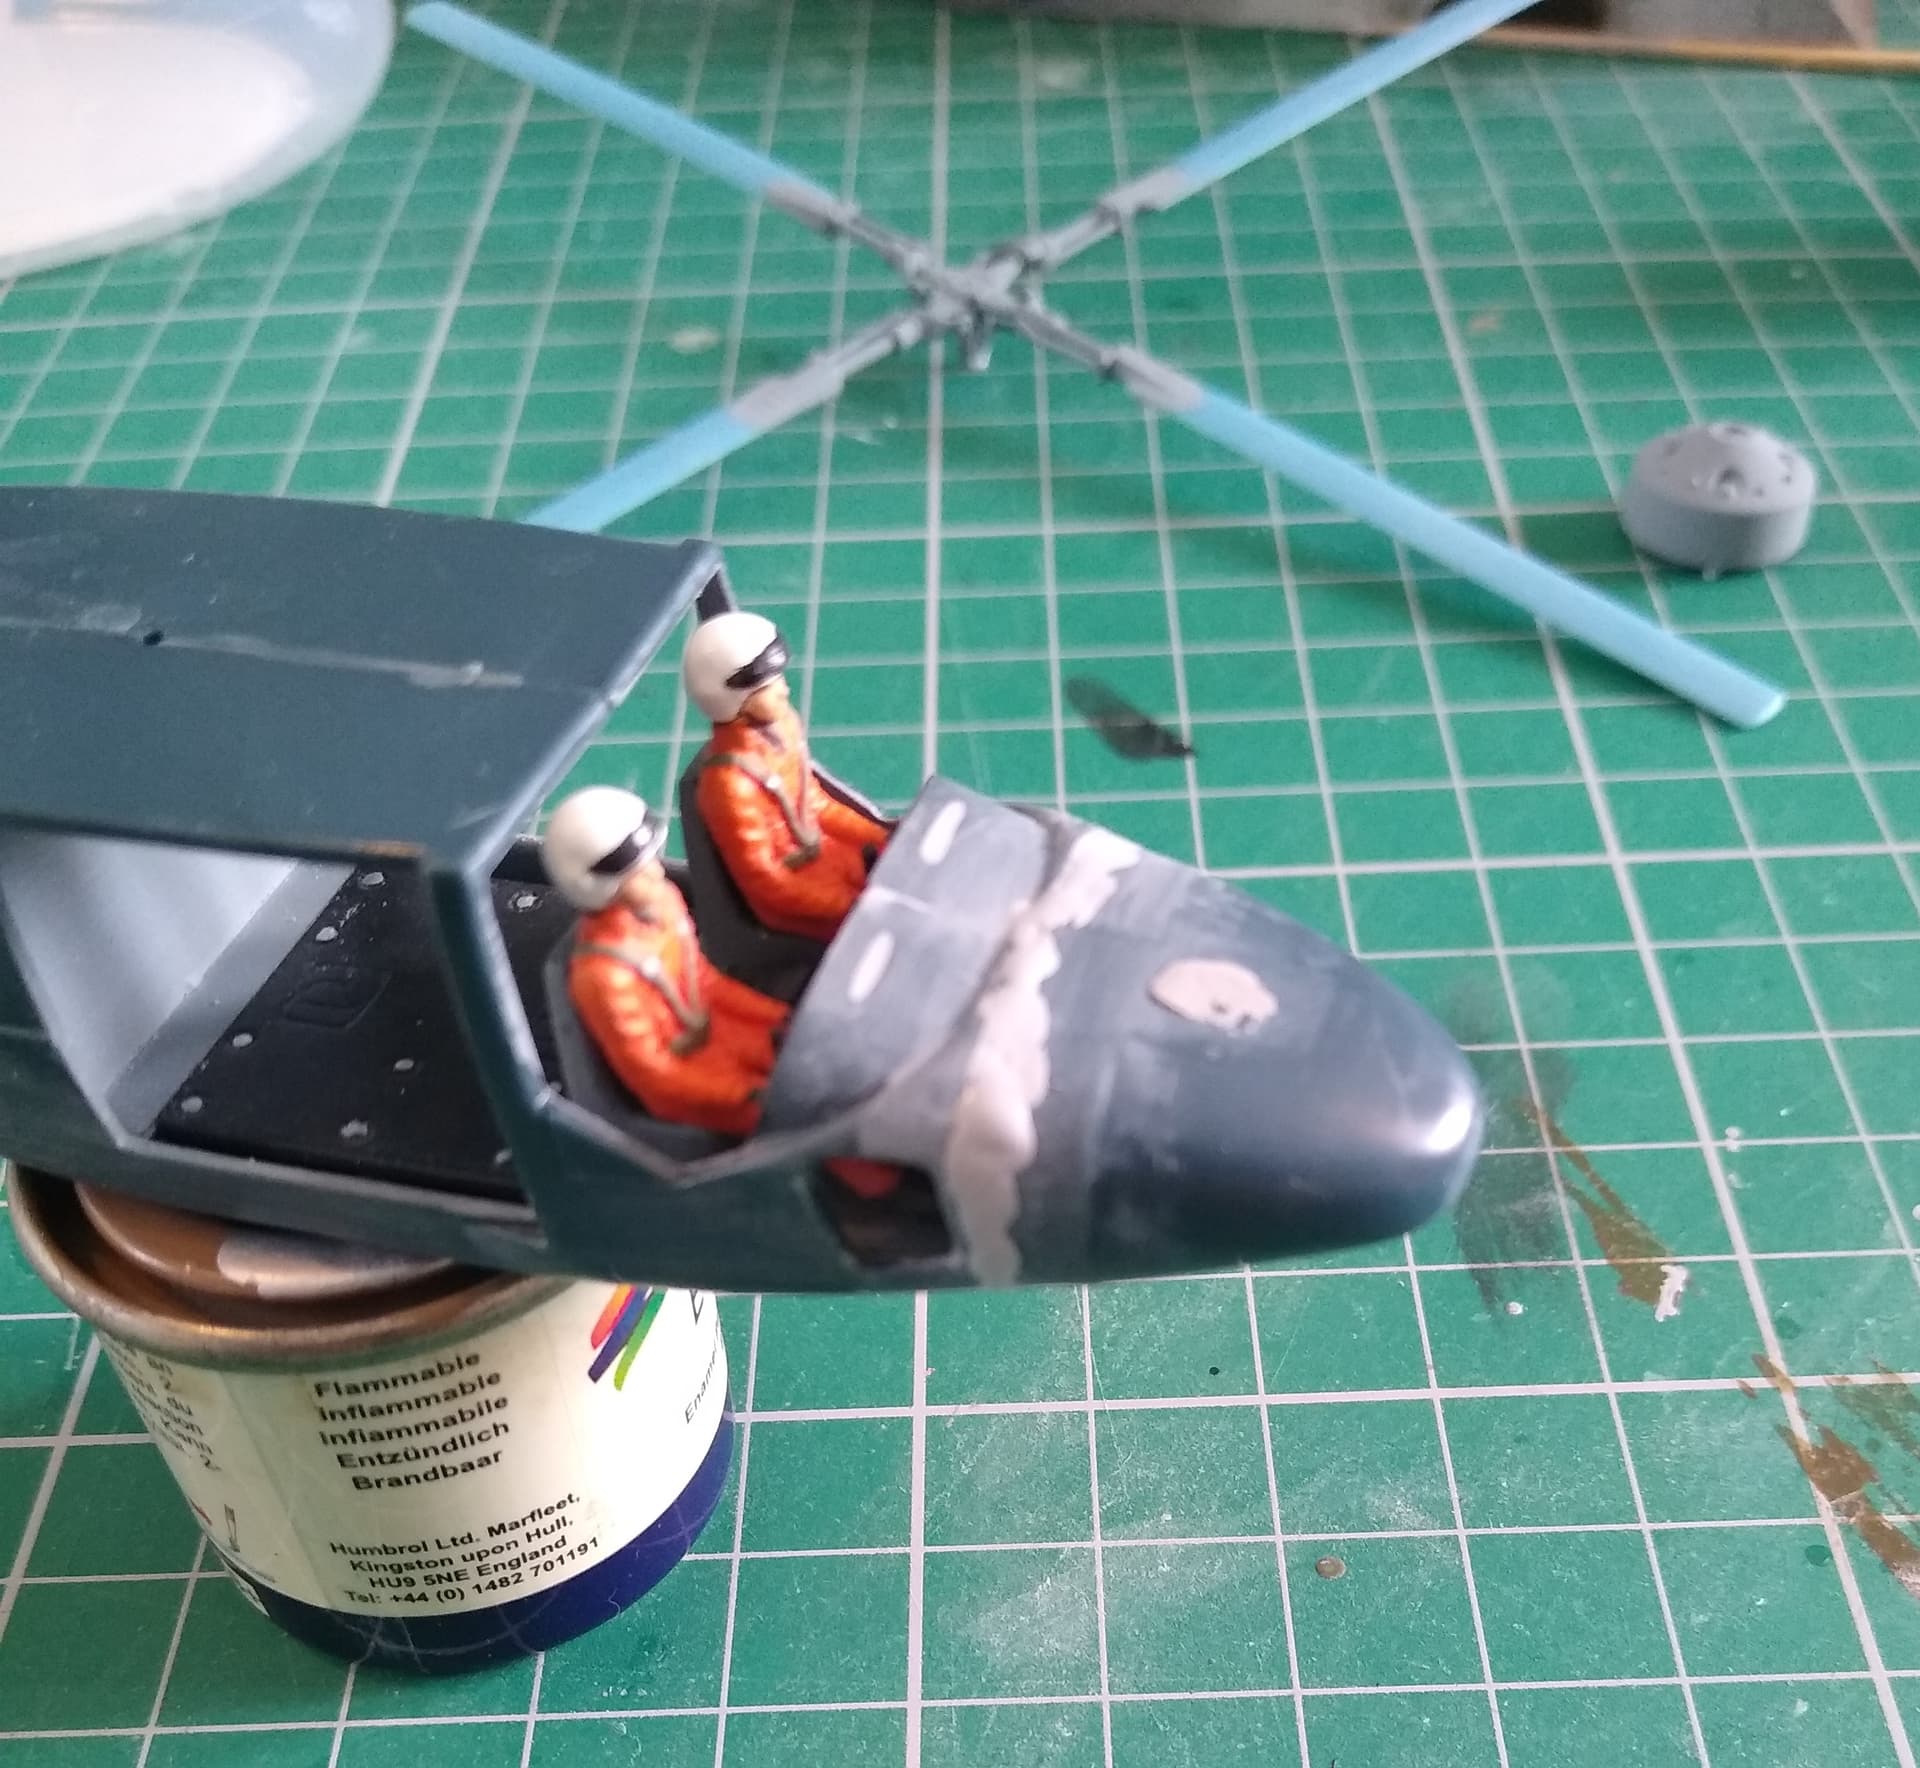
Also painted the rotor hub and gear box with some Humbrol RAF Medium Sea Grey.
Hopefully I’ll make the deadline.
4 Likes
wow you are coming on leaps and bounds Stephen!
1 Like
if anyone feels like designing a campaign medal then go for it and i will try and get it organised and awarded to everyone who completes the campaign!
2 Likes
Thanks, she’s getting there.
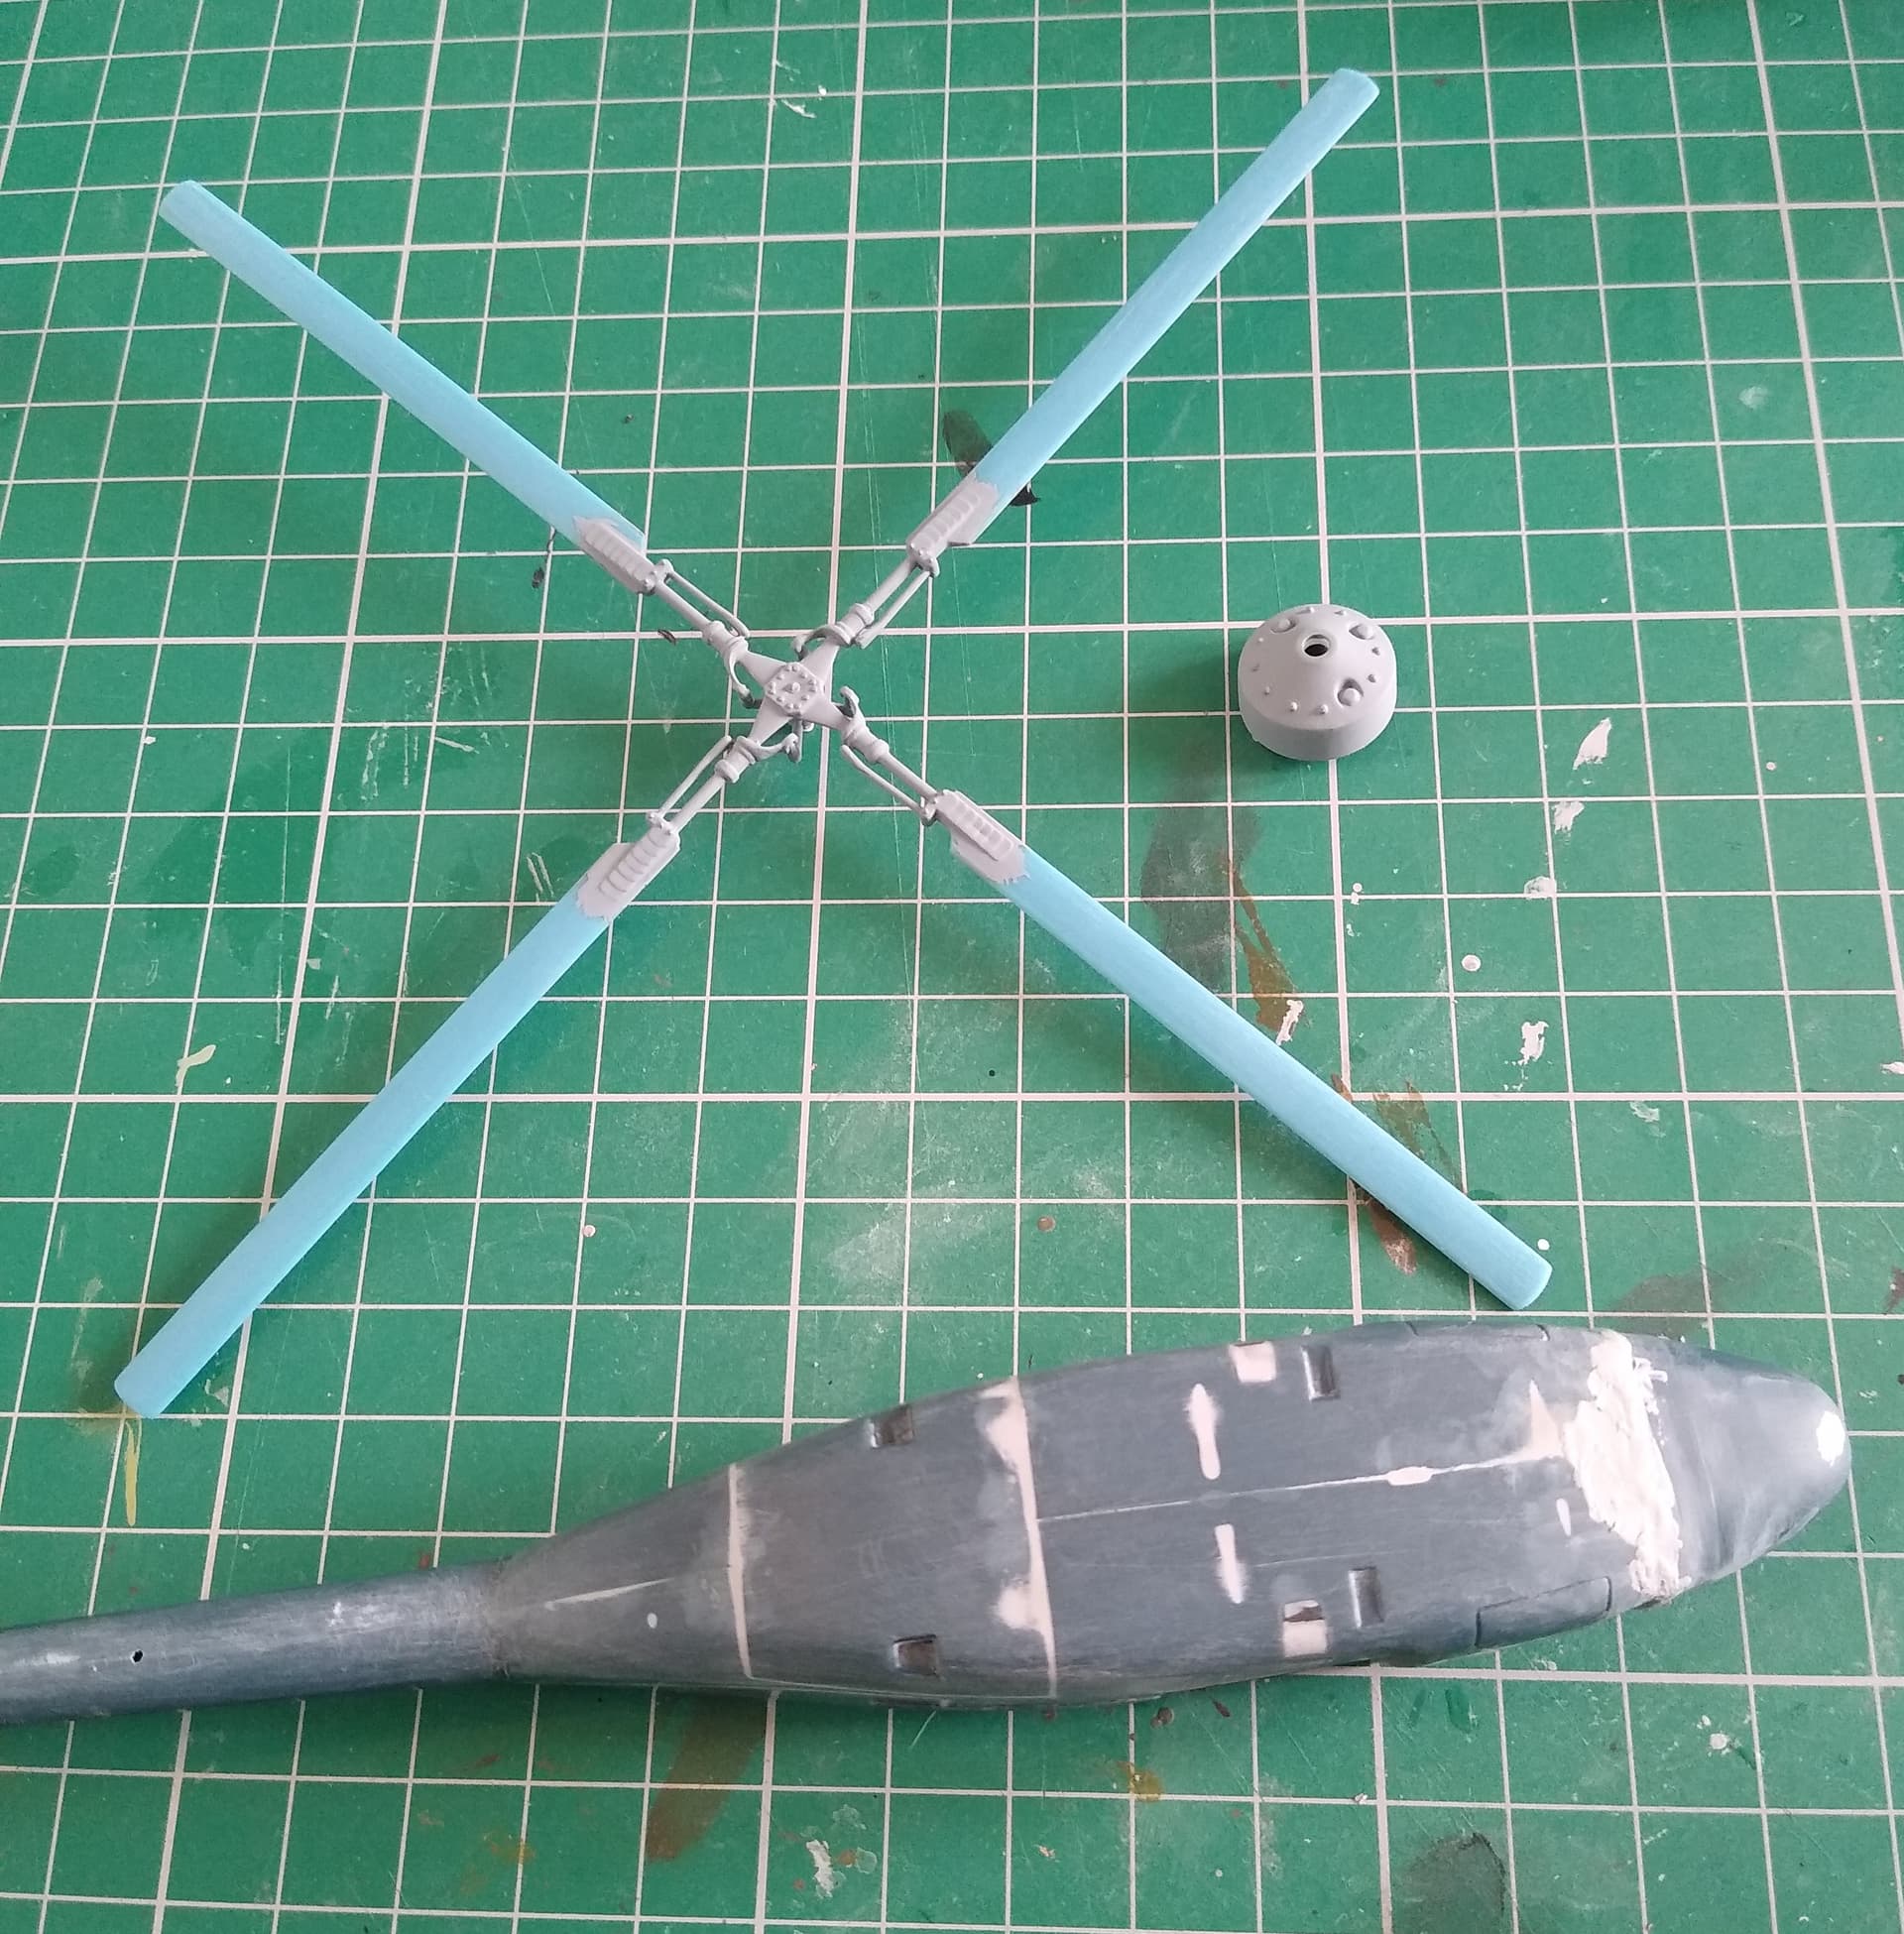
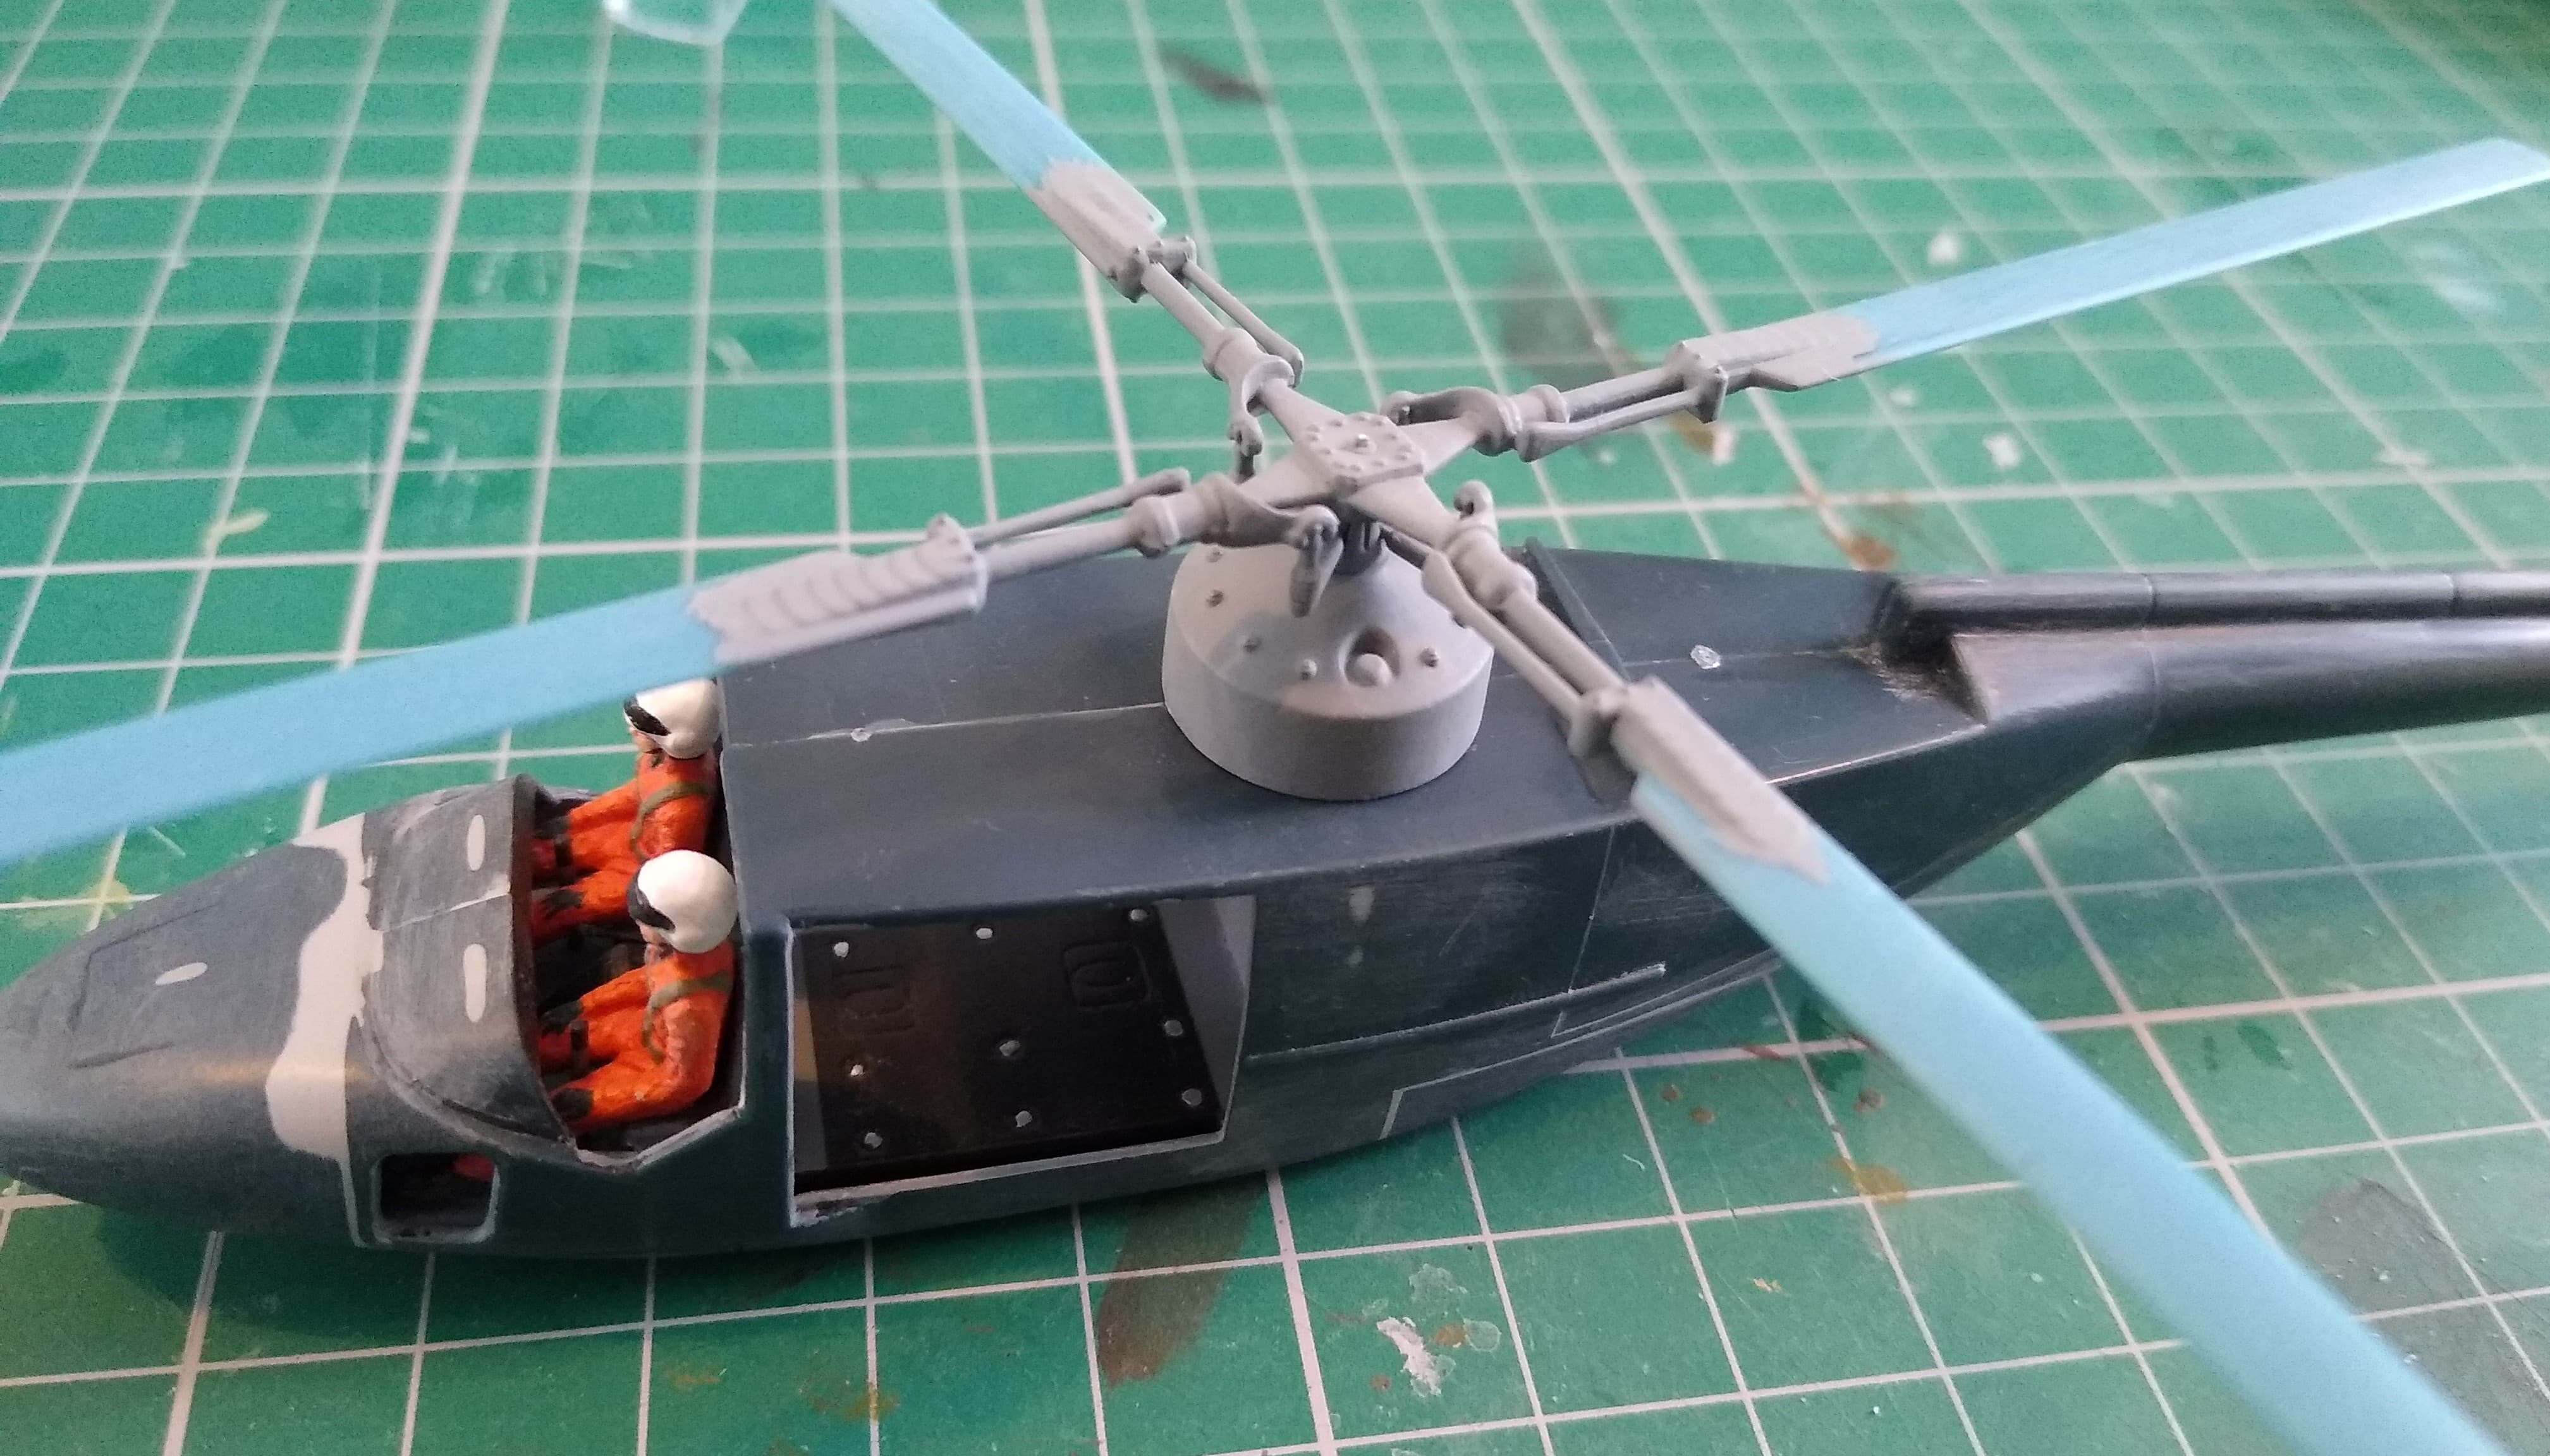
Spent this afternoon sanding down the filler around the nose and how to attach the rotor hub to the gear box. That’s needed some drilling out so I can insert a pin so it can be fitted last of all.
The painting stage has me scratching my head too. All those little windows and the sliding doors means plenty of gaps for paint to leak in if I spray. The windows could be masked easily, hut those doors though? Debating going old school and hand painting this one.

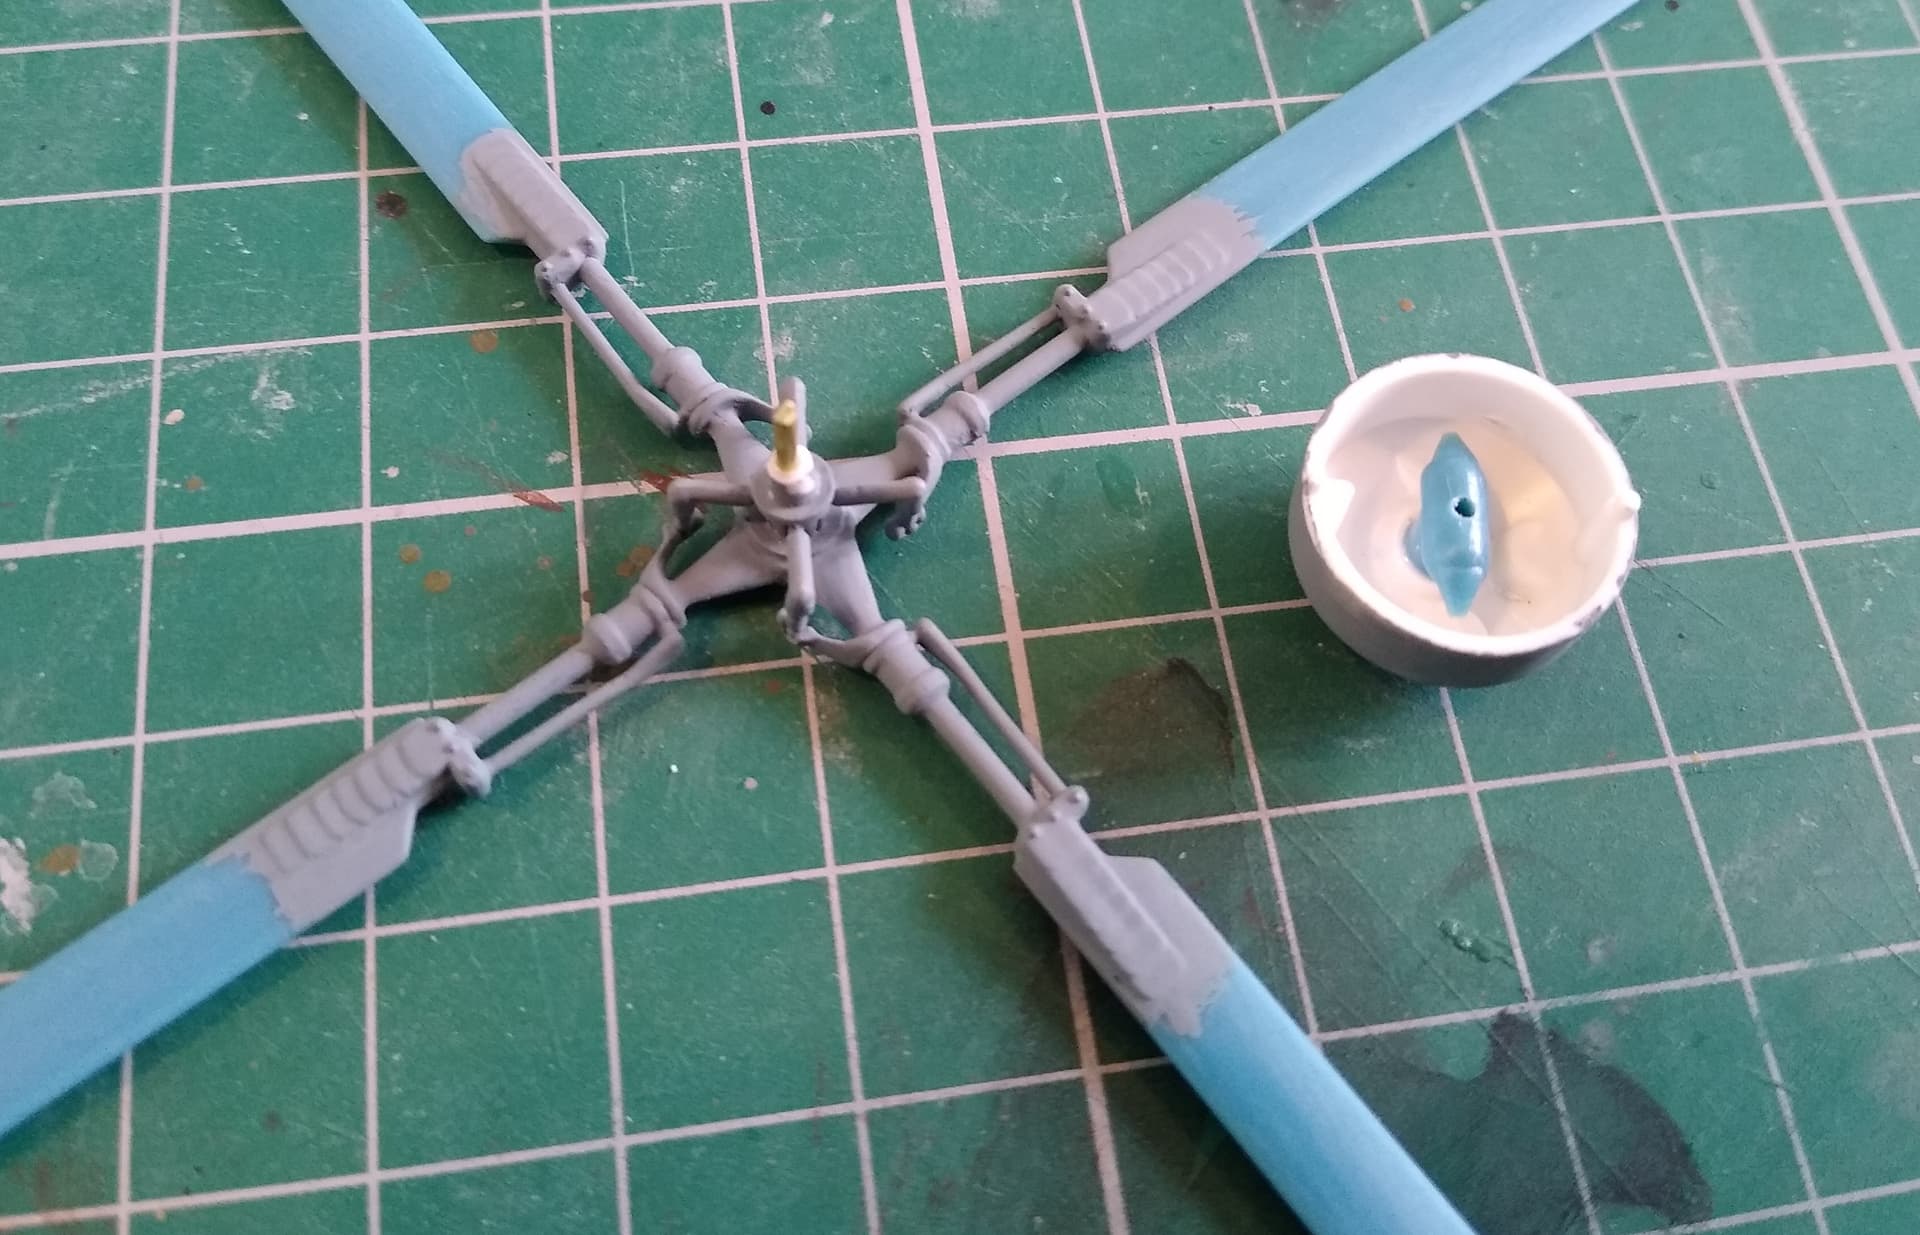
Here’s my solution to the rotor hub assembly.
The hub has had a 1mm hole drilled through it and a brass rod superglued in place.
I glued a bit of sprue on the inside of the gear box and drilled another 1mm hole through that
The result, a very strong join that leaves the rotor free to spin (if it doesn’t spin why build a whirlybird?) and easy to remove for painting.
3 Likes
David @Klaus-Adler I’ve got my fingers crossed for your whirly-bird, sometimes gloss enamel sprayed on the puttied area will act as a self leveling agent, sanding the high spots down to the primer coat should reveal where the low spots have filled in, then squirt again with gloss and repeat the sanding process. 
Best of luck, I know you’ll figure it out,
Cajun 
1 Like

ok, some green paint added to the kit at last followed by a clear gloss coat for the decals which I hope to do at the weekend.
3 Likes
Looking good with some paint on David.
How did you do the “Disco Ball” anti-missle IR jammer? Looks iridescent.
If that was meant for me I used the reflective coating stickers that come with the kit. These are an uncut version of the AFV Club laser protective/anti reflection stickers. They really look the part on the Warriors IRCM.

@Poppa6 I have painted it silver on the inside the used thinned tamiya clear yellow and blue, which I applied as a wash to the outside of it
1 Like
Turned out very convincing. Very realistic finish.
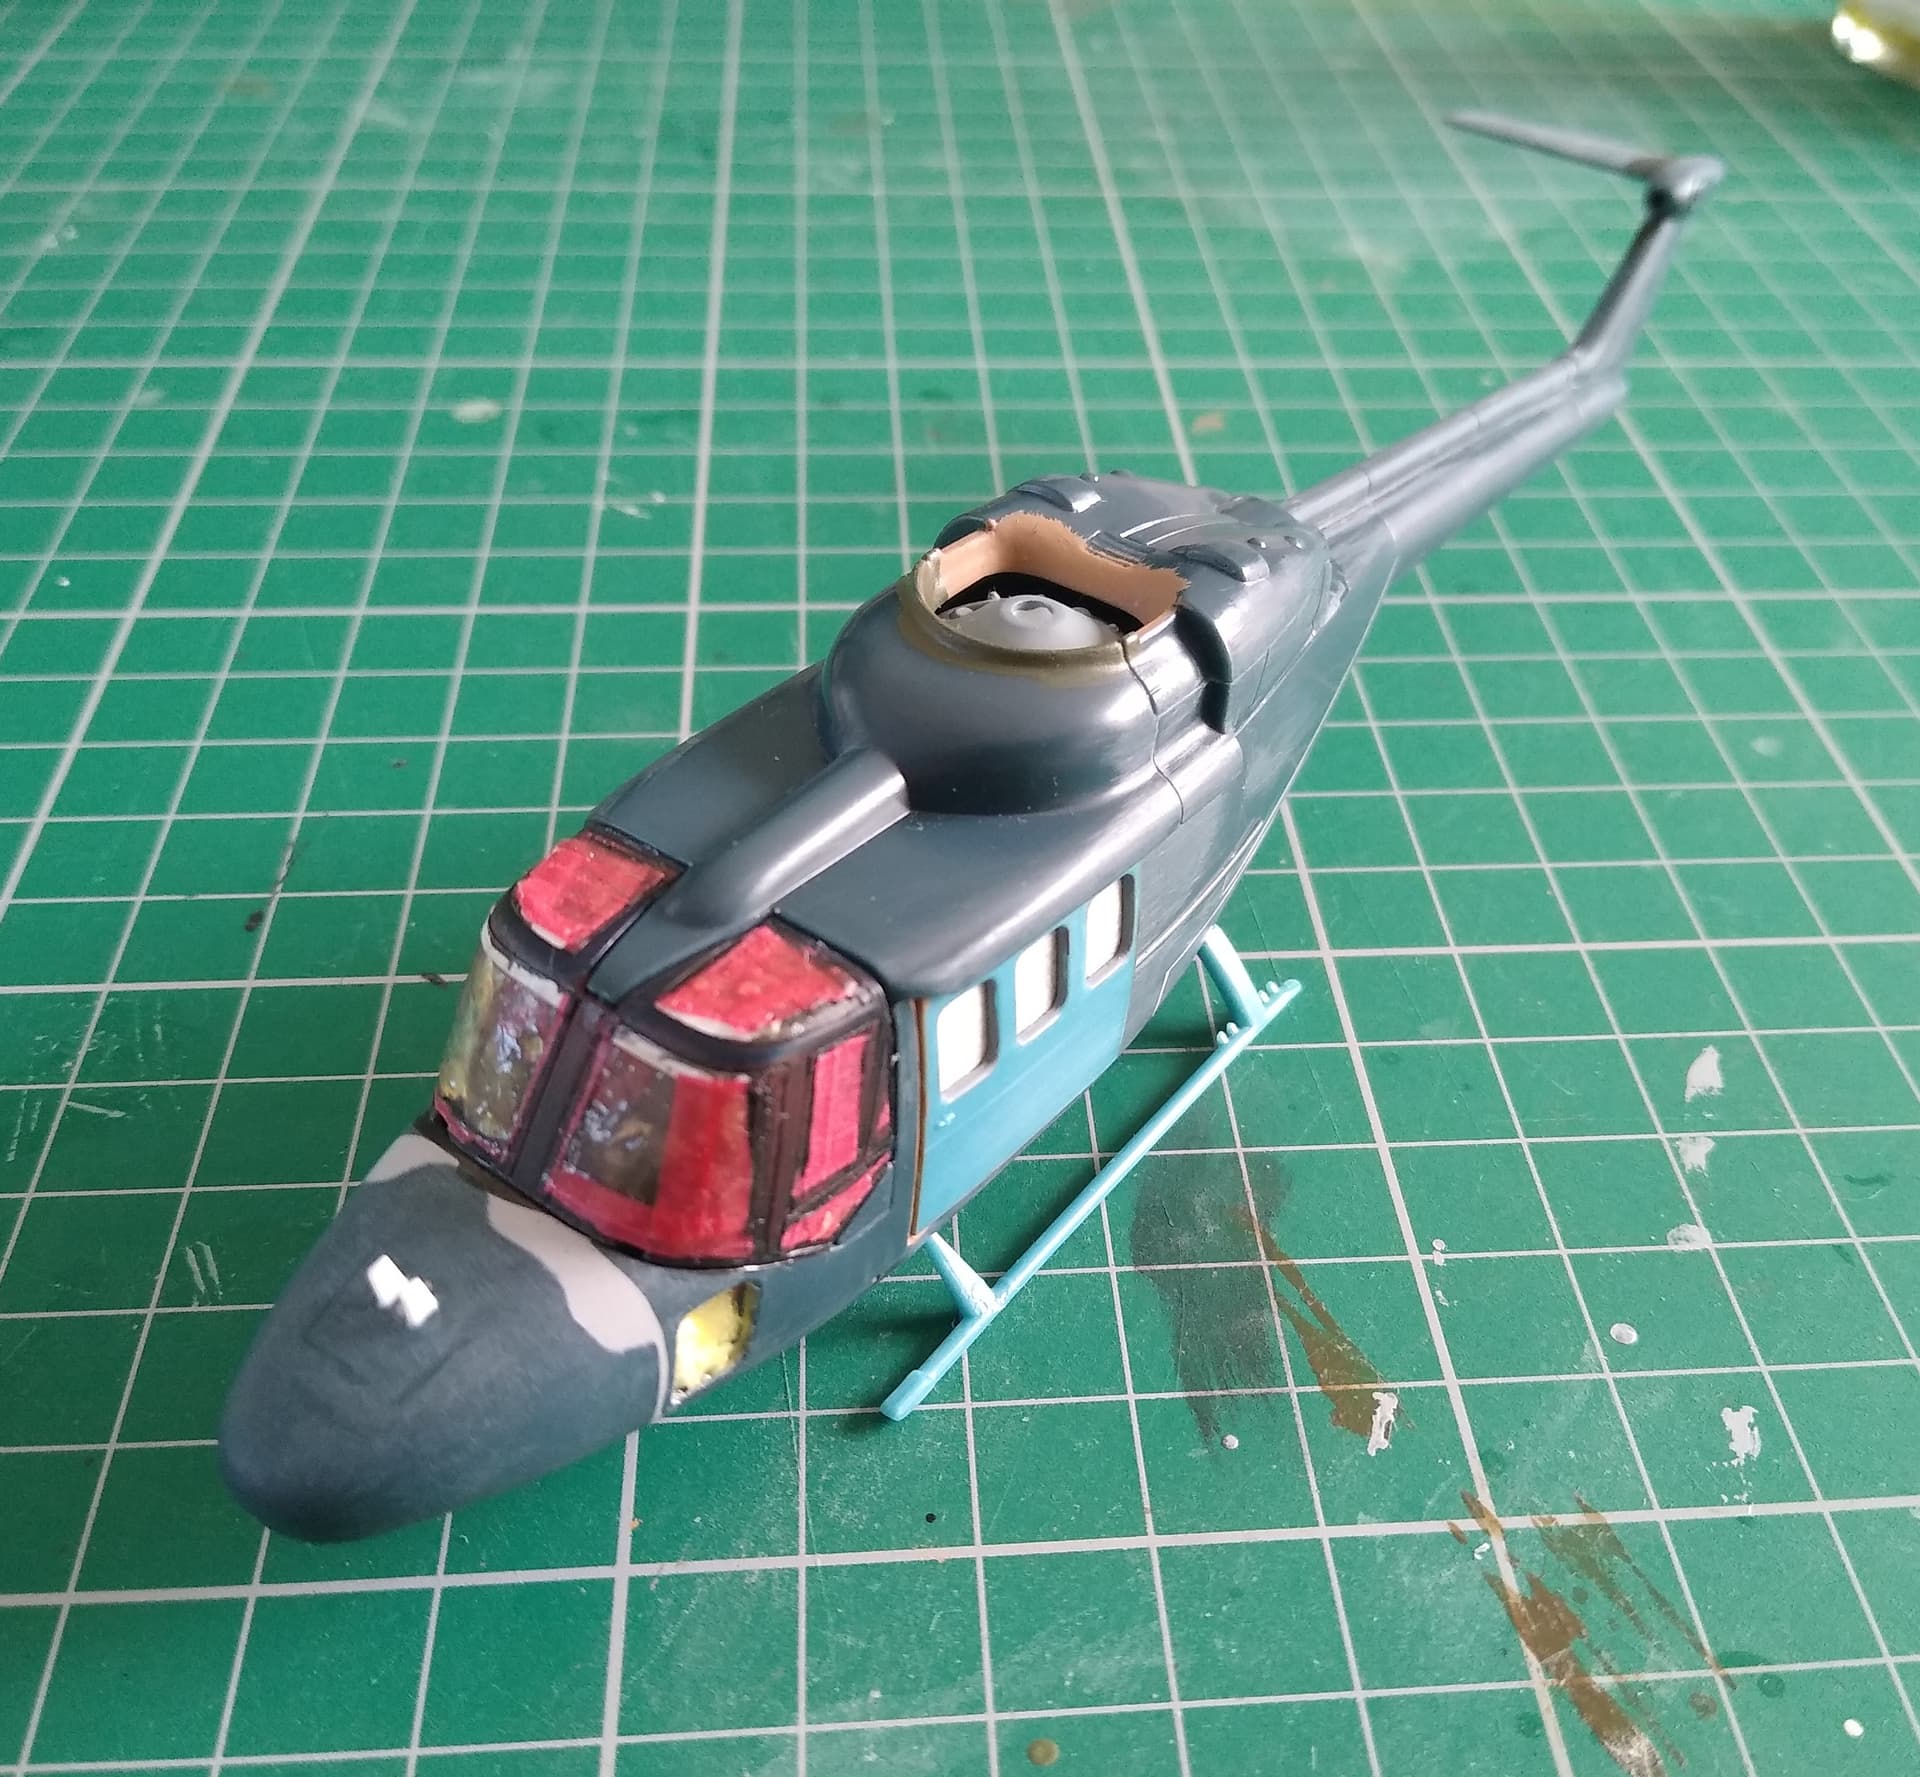
I spent this afternoon masking the canopy. It’s a lot easier when you have nice sharp frames, these were a bit soft and mushy in places, especially the sides. A very tedious job.

2 Likes
Nice base colour David, now that’s on its another step closer 
Stephen, that’s coming along great guns. Nice plan on the rotor head. Should make things easier for sure
1 Like
Thanks John, I wasn’t sure if it was going to work out but it turned out great. Think I’ll do the same on other helicopters from now on. Makes a really strong join.
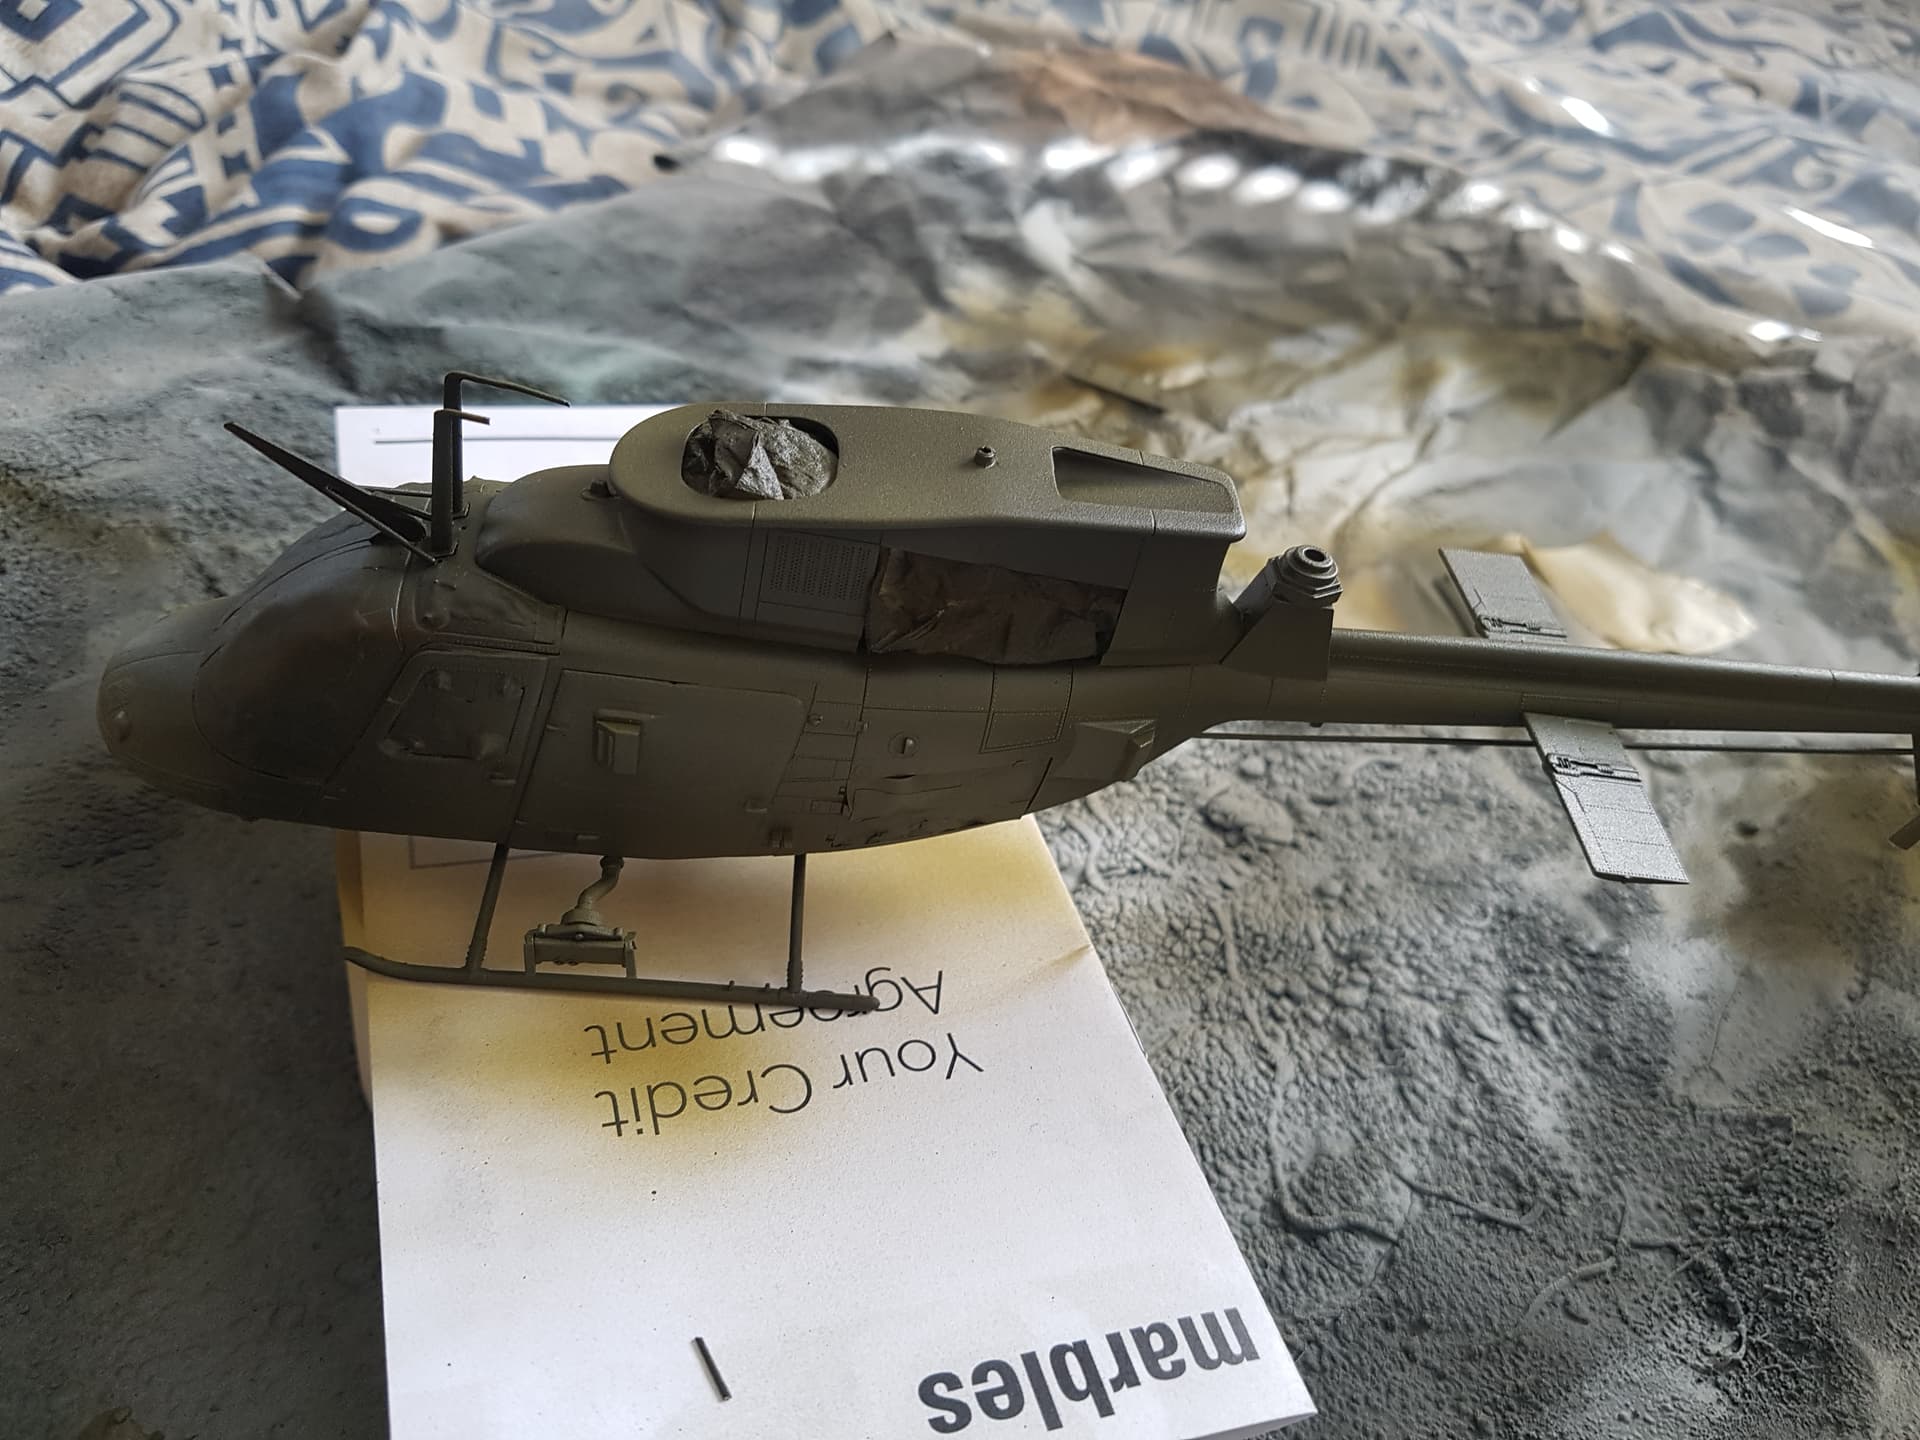
Did the final bit of assembly today. Doors and roof fitted and the skids. She finally looks like a Lynx now!
I’ll start getting some paint on tomorrow. With any luck I’ll make the deadline.
3 Likes
First coat of paint on today.
I used Humbrol 119 Light Earth enamel. This seems to be the closest colour that XX153 was painted. 29 Dark Earth was far too dark. And after all the mess and stink of thinner while cleaning up the airbrush, I remembered why I switched to acrylics. Unfortunately I couldn’t find any matches to this colour.
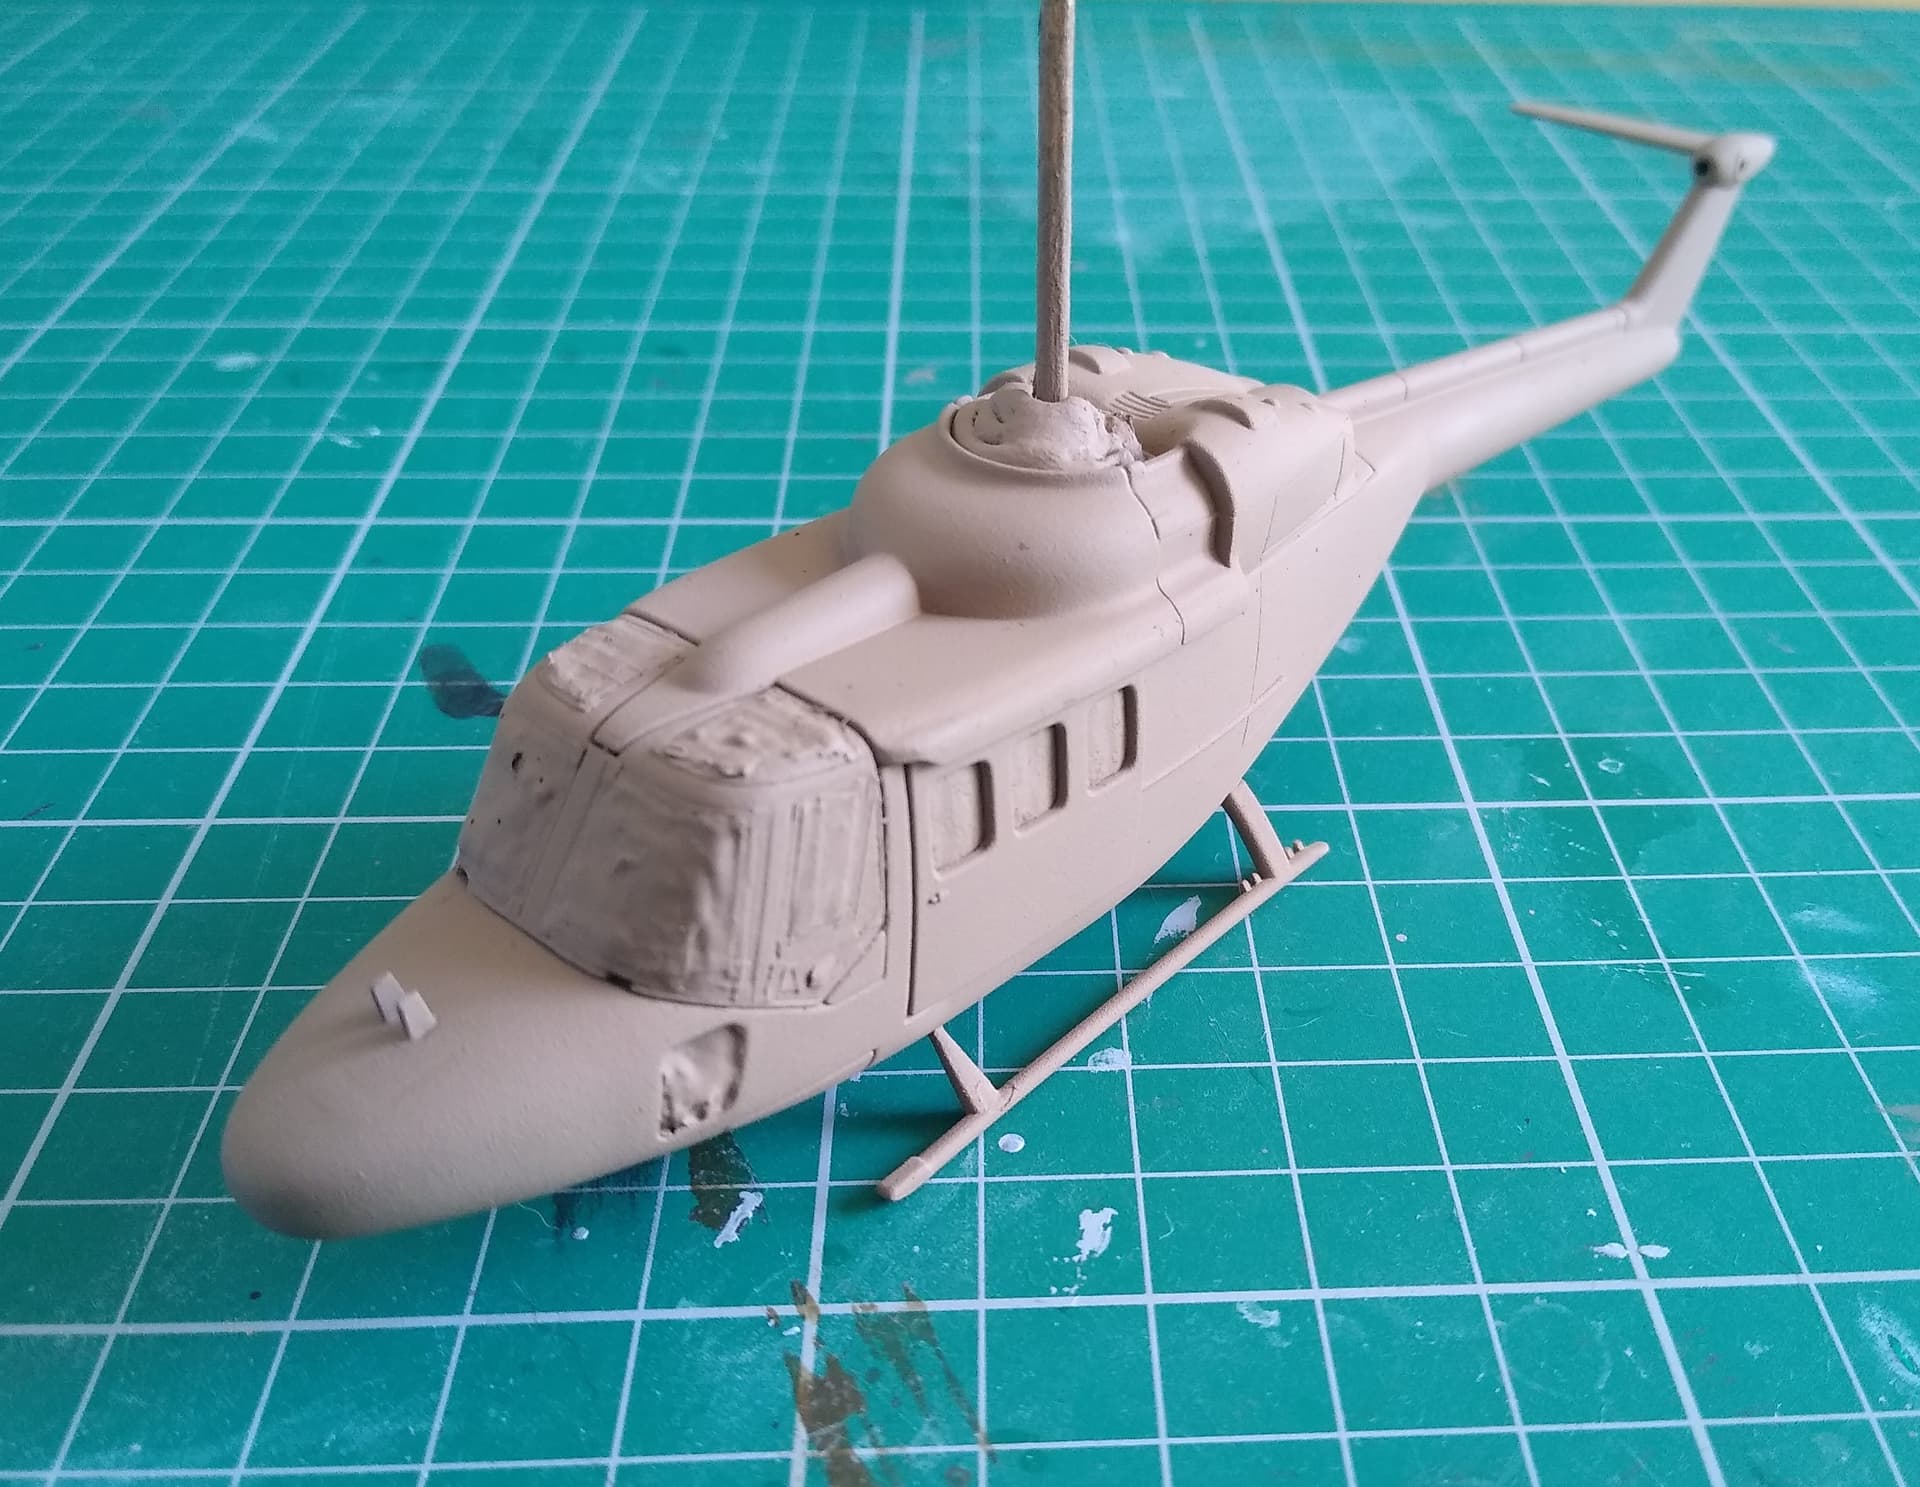
Tomorrow, mask this and spray the dark green.
5 Likes