I am painting the road wheels separate so they aren’t attached yet. Fenders are just sitting in place for the photo op. The soldier is 1/18 so a tad small but still reasonable for perspective.
I was able to get back on my model bench and paint the Calcutta’s deck houses. i had a Loooooooooong break because of summer trips then a heavy rain storm which knocked out power and caused flooding in my basemant. which in turn meant weeks of tearing out and then replacing cabinets etc. that got moldy.
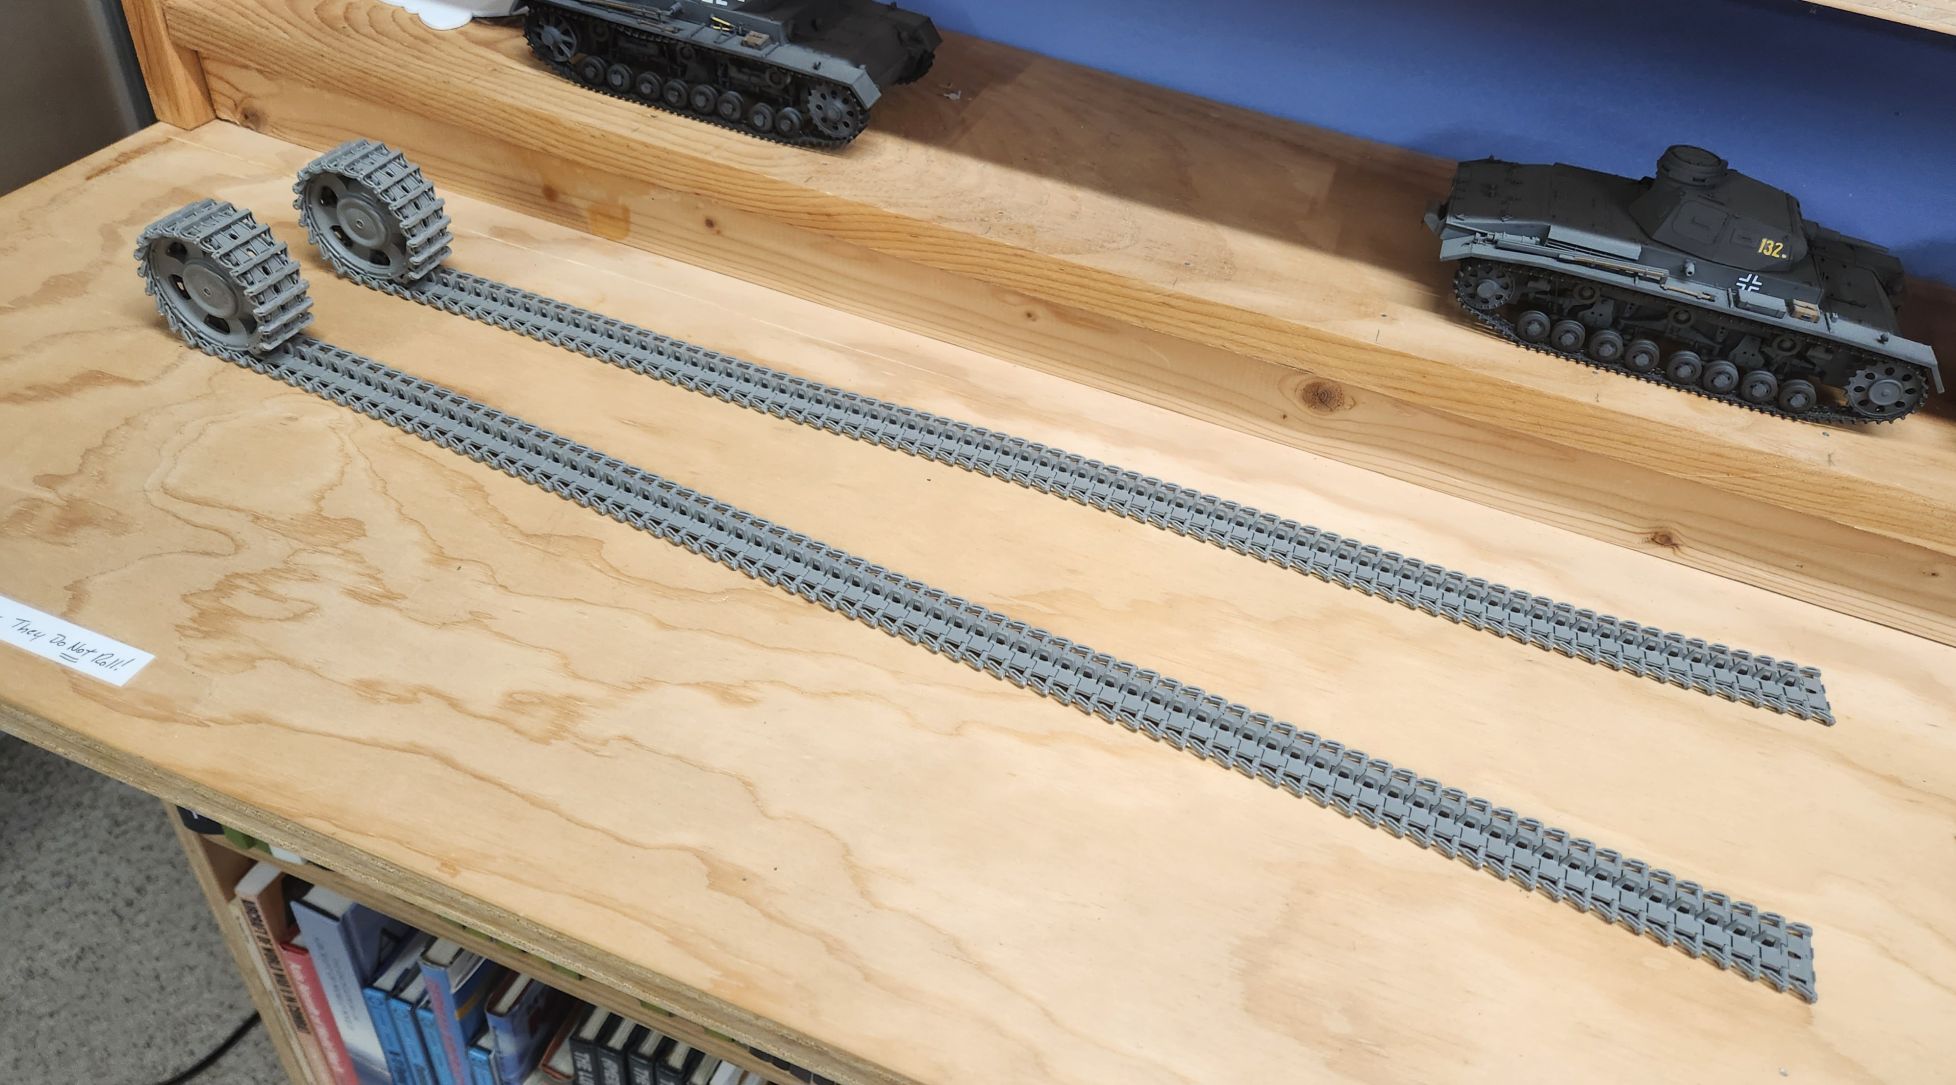
I am just about ready to start painting the Pz. III. I finished the tracks this afternoon and most everything else is assembled or waiting for paint before closing up (gun and turret interior, etc.) Trying to figure out which brand of rotoxid to go with.
Other than the tracks assembling differently, this was almost like building a 1/16 Dragon Pz. III kit.
It is so big compared to the 1/35 kits behind it; the turret is the size of a whole tank.
Since the bulk of my 1/18 figures are in ETO/Russia uniforms I have to decide if this will be gray with Dunkelgelb added as the secondary color or Dunkelgelb possibly with Olivgrun as secondary for a vehicle around the Kursk time frame. I can’t do a white wash as none of the figures have winter gear.
Or…would it be possible for a late J to be in the RAL8020/7027 African scheme at the Eastern Front?
Looks great, Radek, you did a fine job with this build! My congrats
As I have this one in my stash, too, I hope it will work out like yours…
Cheers
Peter
I observe your builds here and I’m sure you will give this kit a well deserver buildsers justice
What I can tell about it from my own experience is that there are some areas where you need to be careful. At least from my perspective this kit has some problematic assemblies:
undercarriage - you can see plainly from my pics I messed it up, but not purposedly - it was fiddly and not fitting well, so … I broke it few times and when re-attaching it with CA I put it in wrong alignment;
gun cover/flap in front of front part of canopy. This is hard to align and sinks between hull parts (if you look closely you can notice that these parts + canopy are slightly misaligned.
even if don’t want to build engine and gun mounts - do it - they’re supports to top guns and cover interior of plane in way you don’t see a nasty empty hole through undercarriage.
you can cut of moulded pitot tube from right wing - it will be broken
don’t follow instructions where it tells you to glue guns on wings early on - just do them afterwards, otherwise - see point 4)
That Dora really came out nice. Its hard to believe its not in a larger scale. Well done!
After months of dithering, I have finally finished the Vargas 1/35 3D printed Mk. VIII “International” tank. Its a large model with a great deal of intricate detail, some of which my fumble fingers broke off while handling the model for the various operations. Its all small stuff & I was able to hide the damage pretty well.
I took a long time committing to the finish. It was painted and weathered and sat on the section of the bench with other kits waiting to something to get them finished. What this Mk VIII lacked was something to offset it massive bulk, its bristling machine guns & cannons, its clanking brutish presence. What it needed was a bit of whimsy.
Someone must have loved this monster. Some crewman or mechanic must have considered it his baby. He may have painted his pet name on the side to show his love for this beast. He painted BUTTERCUP on the entrance door in simple block letters. “It may have two heads but its mine all mine!”
I have no proof of this, I have no photo or written description but I do have a fertile imagination and that’s all that is needed here. So here is BUTTERCUP in all of her brutal magnificence:
This was a new tank, just built and being tested along with the little Chase Ford sometime in 1920. It is dirty, dusty, run through a muddy stream, rained on and being “treated rough” as they said of armor back in those days. The Chase Ford and a WW2 Jeep are included in the pictures for scale.
The Mk VIII really was a labor of love. I have known about the tank ever since I was a kid. The old cartoons on Saturday morning TV sometimes used to feature highly stylized versions of the beast. EG, when Popeye ate his spinach his arms would show a picture of a battleship, a multi-engined bomber or a Mk VIII bristling with guns and power. I never saw a kit of it until Vargas came out with this one and what a magnificent job he did.
Having waited so long, I was in no hurry to finish it and was willing to set it aside and get it just the way I imagined it.
Assembling various parts to the deck houses. The instructions call for the foremast to be installed but I can not imagine not damaging the mast trying to put on all the ready ammo boxes, winches etc and especially trying to align the 6 legs on the 50 cal bandstands to the 6 holes in the deck if the mast was there.
More progress, stacks, 50cal bandstands and foremast attached. The instructions call for the foremast to be fully assembled then attached but pre-fitting of the long legs showed that it should be assembled on the model because the legs go thru the deckhouse deck then to the main deck. Trickyish to do but not to bad. The top can be added later
Added the lift arms to the foremast and because no spar is going to stay up without support I coated some streched sprue with light gun metal, cut them to size and installed them