Very nice paint job, Radek! Well done so far ![]()
2 Likes

Phantastic work, Tim!
Thanks Peter!

With all the screens done I did a quick test fit with them and the major subassemblies. I had been annoyed with myself for messing with the perfectly fine kit parts, but they do look better now!
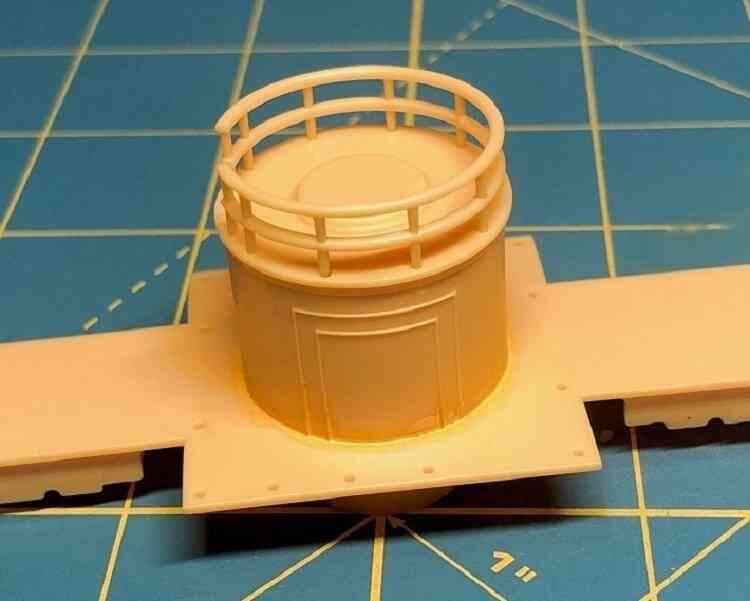
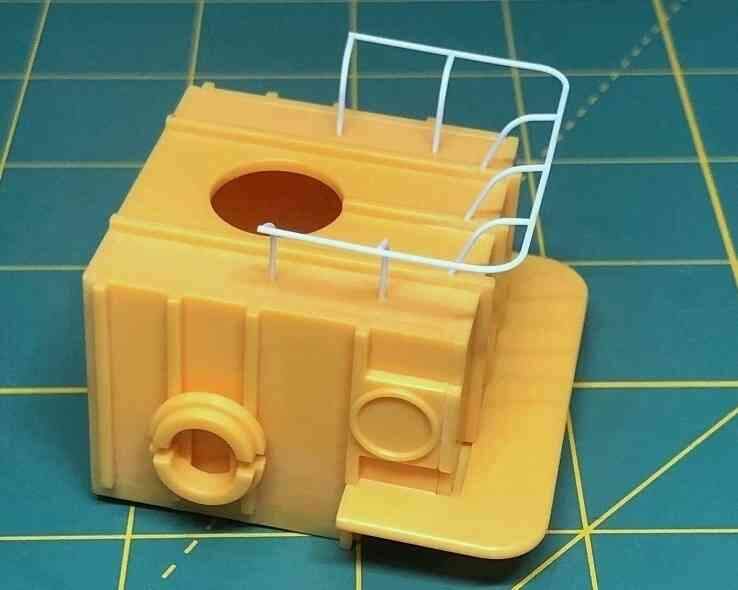
I also cleaned up and test fit the railings. The round rails atop the cylindrical ballast tank No. 1 were a simple, cleanly molded two-part assembly that fit perfectly.
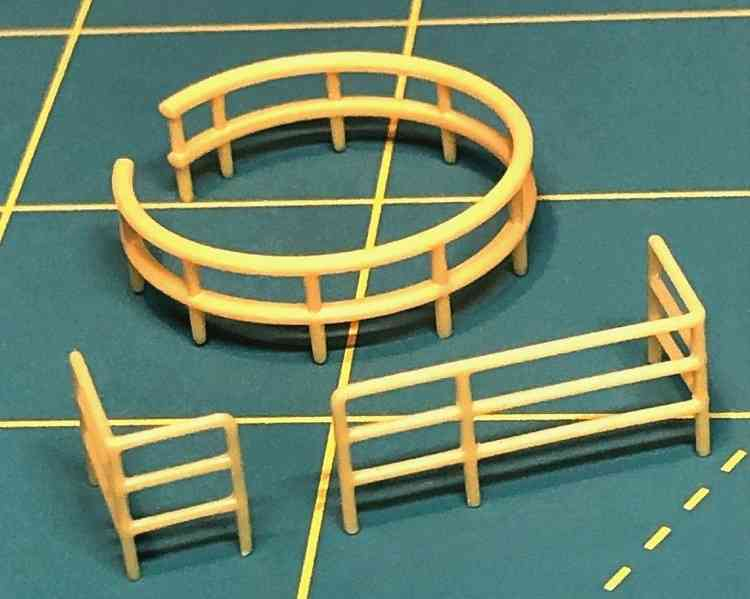
Unfortunately, though they should all be the same, the kit’s top rails are noticeably thicker than the straight rails below on the platform deck. They are also not properly round in section.
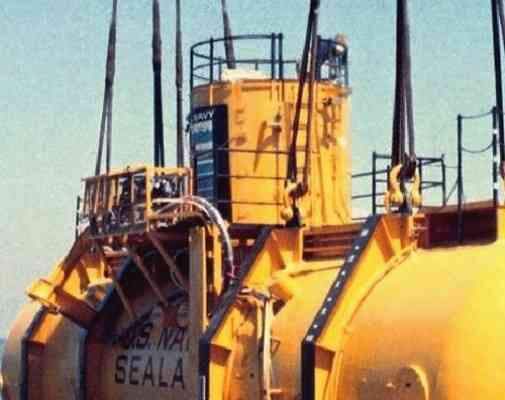
In reality these rails were all alike, and they were a good deal finer than any of the kit parts too!
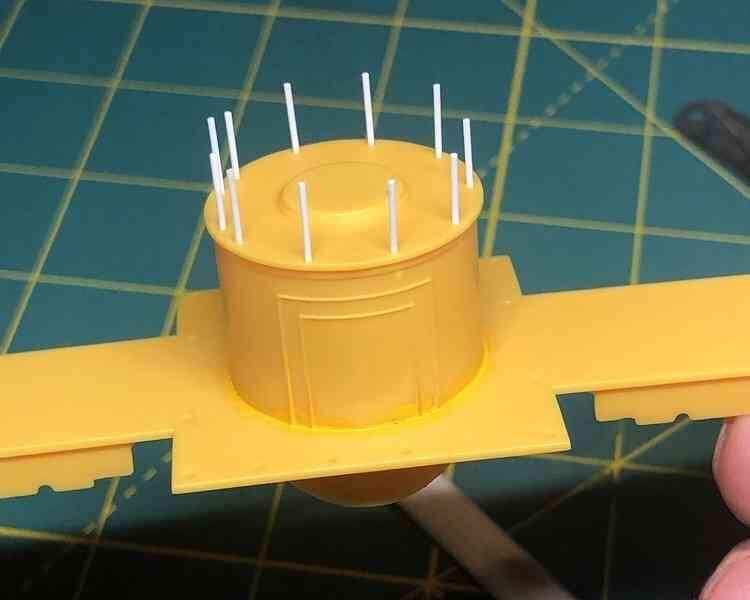
Still, the kit platform rails look pretty good, so I opted to just redo the ballast tank rails to go along with them. Plastruct .025 inch (.6mm) styrene rod is a good match, so I used this to make the stanchions.
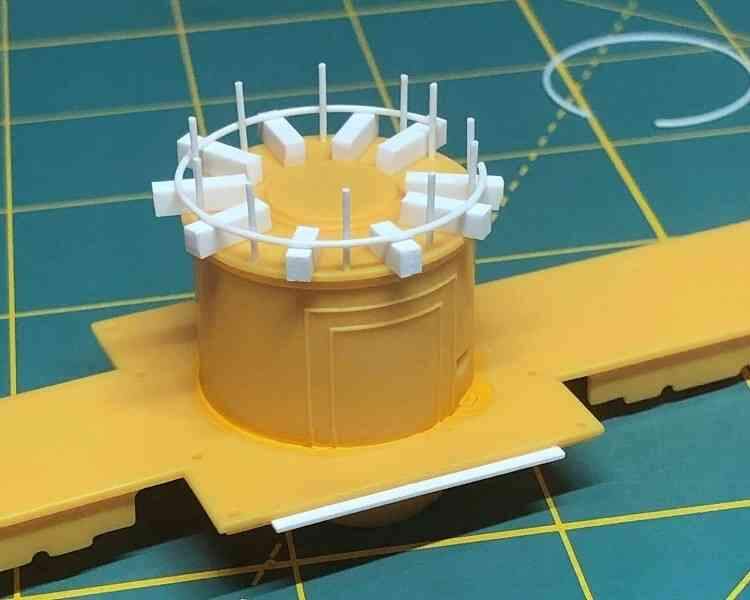
Next I heat formed a couple of plastic rings around the neck of a wine bottle to make the horizontal rails. Short lengths of .080 X .100 inch plastic stock acted as temporary spacers to ensure uniform height. The rail was secured to the stanchions with plastic cement applied with a fine paint brush.
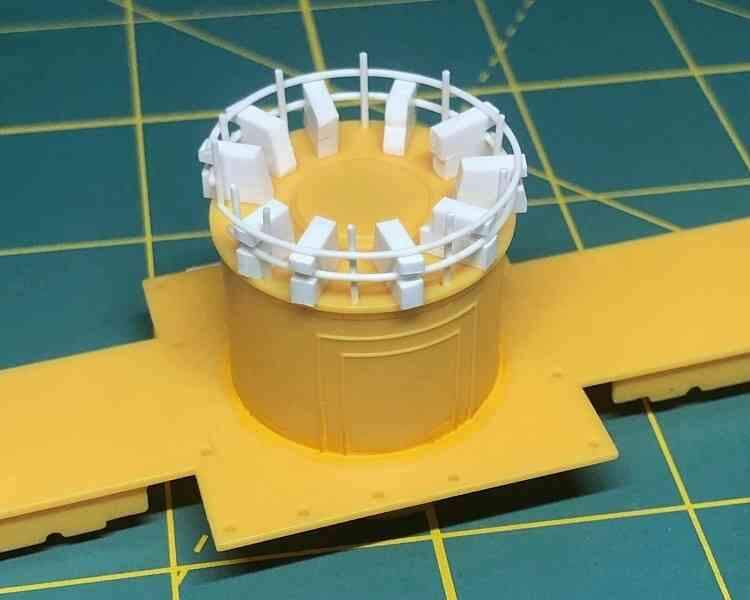
The upper horizontal rail was done in the same way, this time with second .080 X .100 inch plastic spacers attached to the first to set the height of the upper rail. Notches were cut in the spacers to clear the lower rails. As before, the rail was secured to the stanchions with plastic cement.
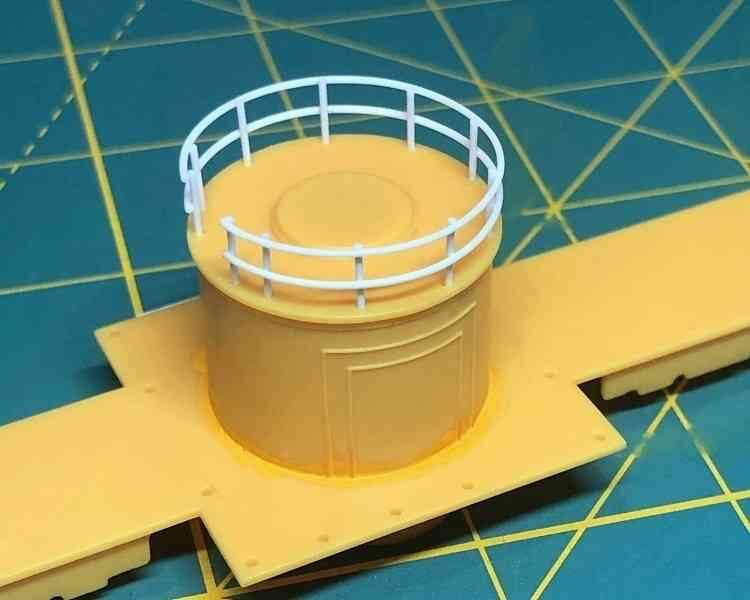
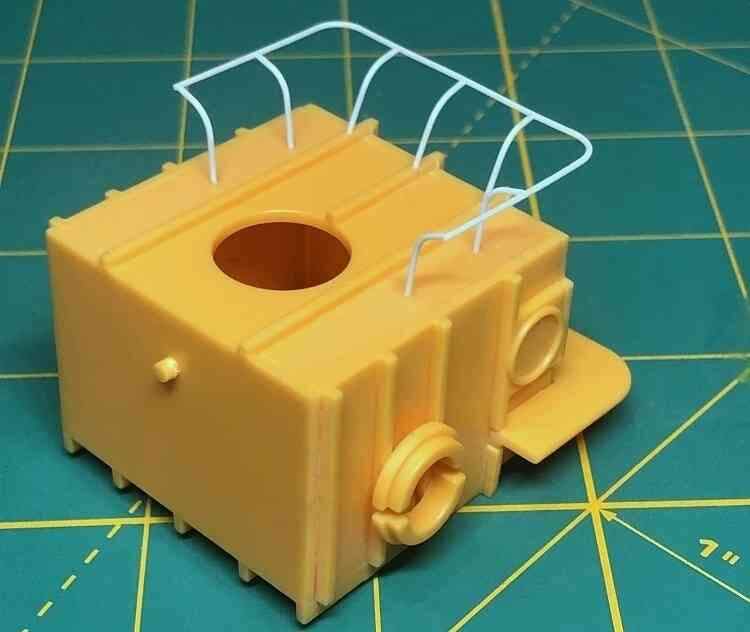
With the spacers removed and the stanchions trimmed down, the whole arrangement looks a bit finer and will better match the platform railing.
7 Likes
Looks absolutely great, Tim. Did you not promise yourself not to do scratchbuilding on this? ![]()
![]()
Your work is really making a big difference for the details. Looking forward to see more.
1 Like

Looks absolutely great, Tim. Did you not promise yourself not to do scratchbuilding on this?
Thanks, but what can I say? Mission creep strikes again… ![]()
3 Likes
Tim, it is defintely worth it.
Should I extent the campaign with another month until end of January?
2 Likes
Tim, it is defintely worth it. Should I extent the campaign with another month until end of January?
Yes, please… I should be able to get SEALAB deployed by then! ![]()
![]()
2 Likes
OK, great. Extension to end january approved. ![]()
5 Likes
No don’t do it, ‘it’s a trap’ lol
any plans to repeat this campaign in 2026?
1 Like
Far as I’m concerned, yes. Jesper?
Michael ![]()
![]()
1 Like
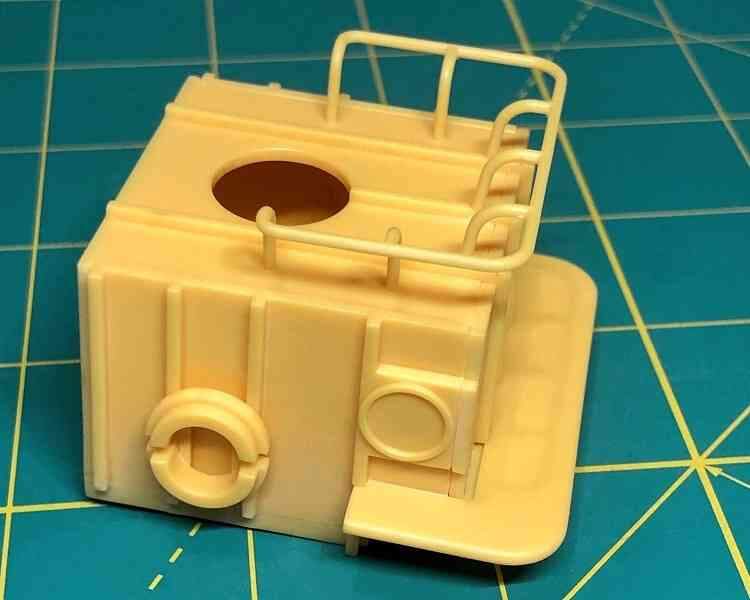
Having replaced the railing on the ballast tank, the kit rail previously installed on the observation & storage station was starting to look awfully heavy…
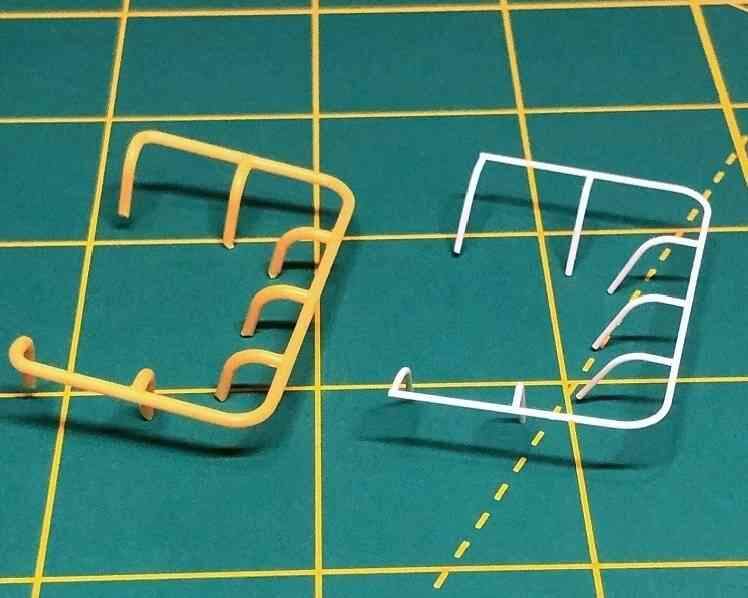
Although I’m not fond of re-work, I cut the completed rail off the station and used it as a template to fabricate a new one from the same Plastruct .025 inch (.6mm) styrene rod used for the ballast tank railing.
The kit-provided observation & storage station rail really would have been ok as is, but after changing the ballast tank rail I couldn’t just leave it!
6 Likes
Yes, I will repeat this and the Sci-fi campaigns again in 2026. ![]()
2 Likes
This campaign is extended to 31st January 2026. However, for those getting new models for Christmas, you can alrerady sign up for next years campaign in the staging area. ![]()
3 Likes
Thanks Jesper for extending the campaign. Although I should finish within those 10 days left this year… but… it’s better to have some pressure relieved before Christmas ![]()
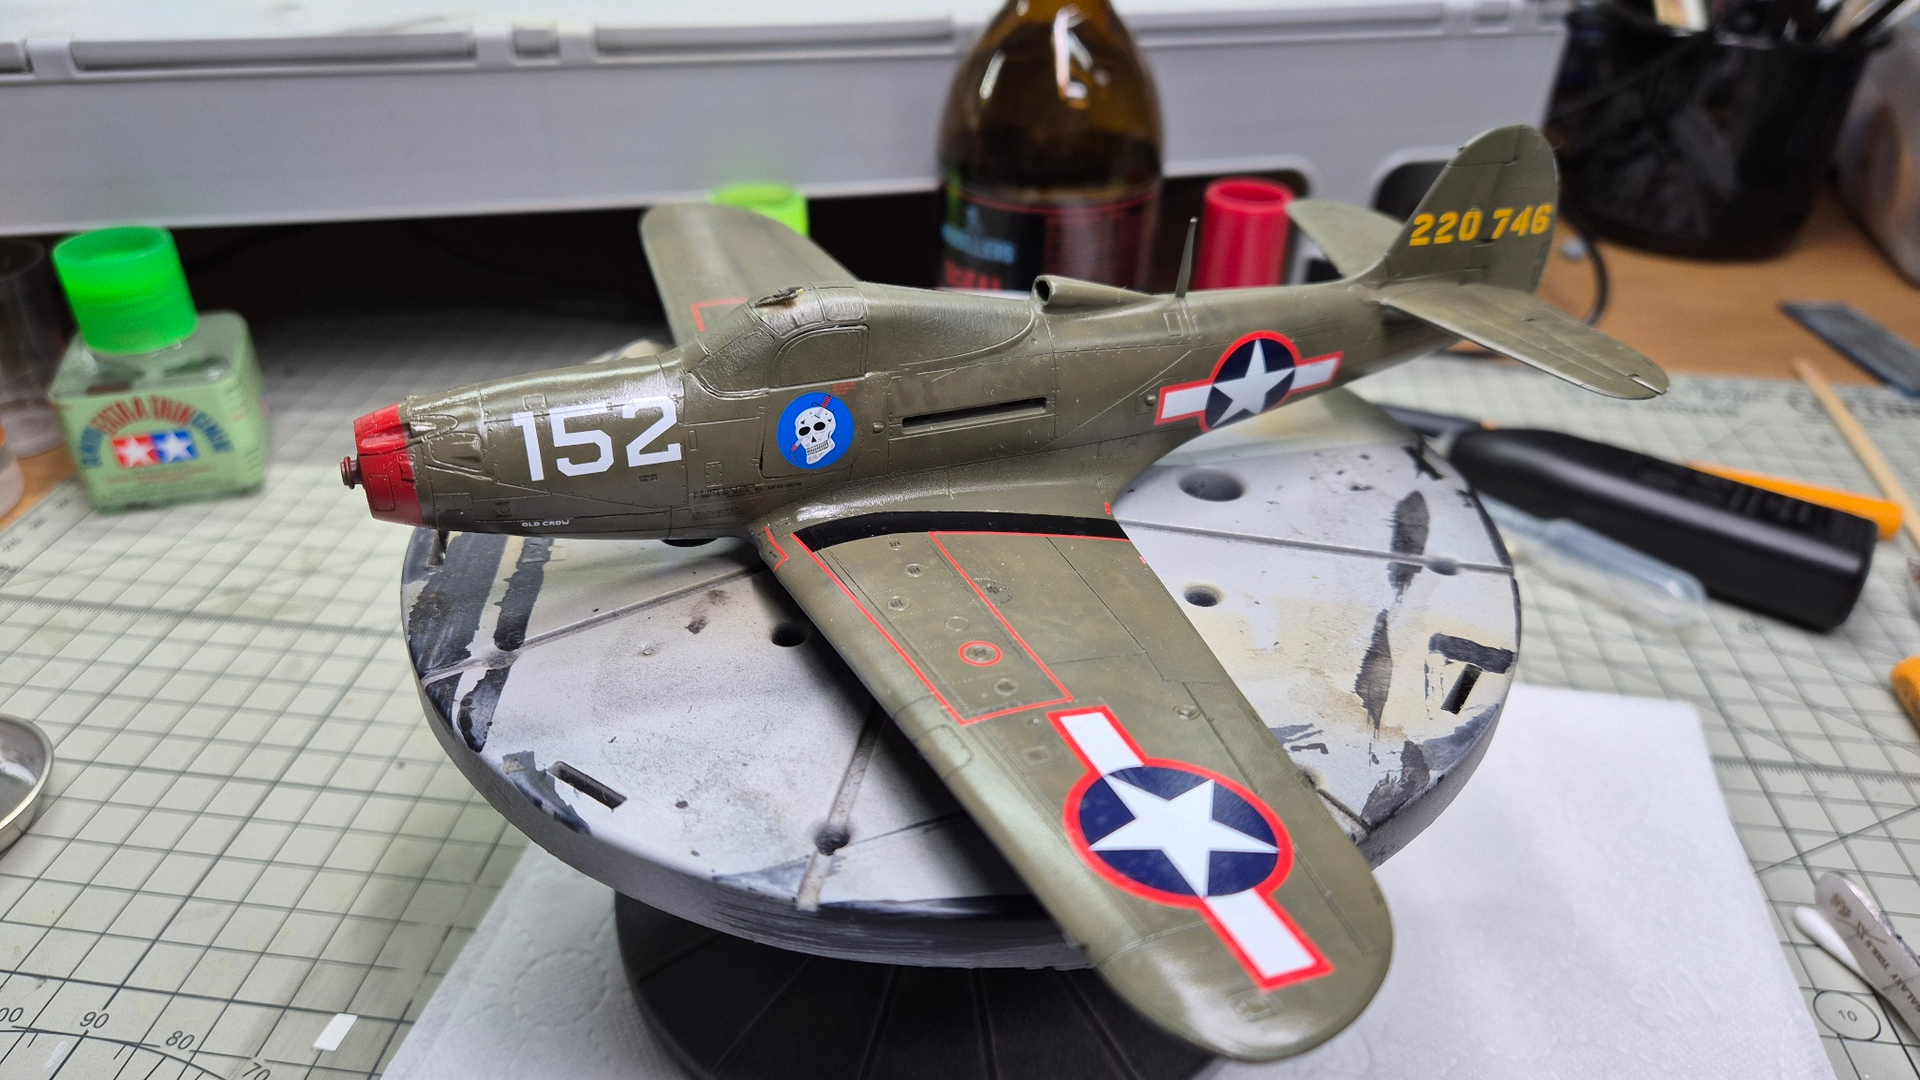
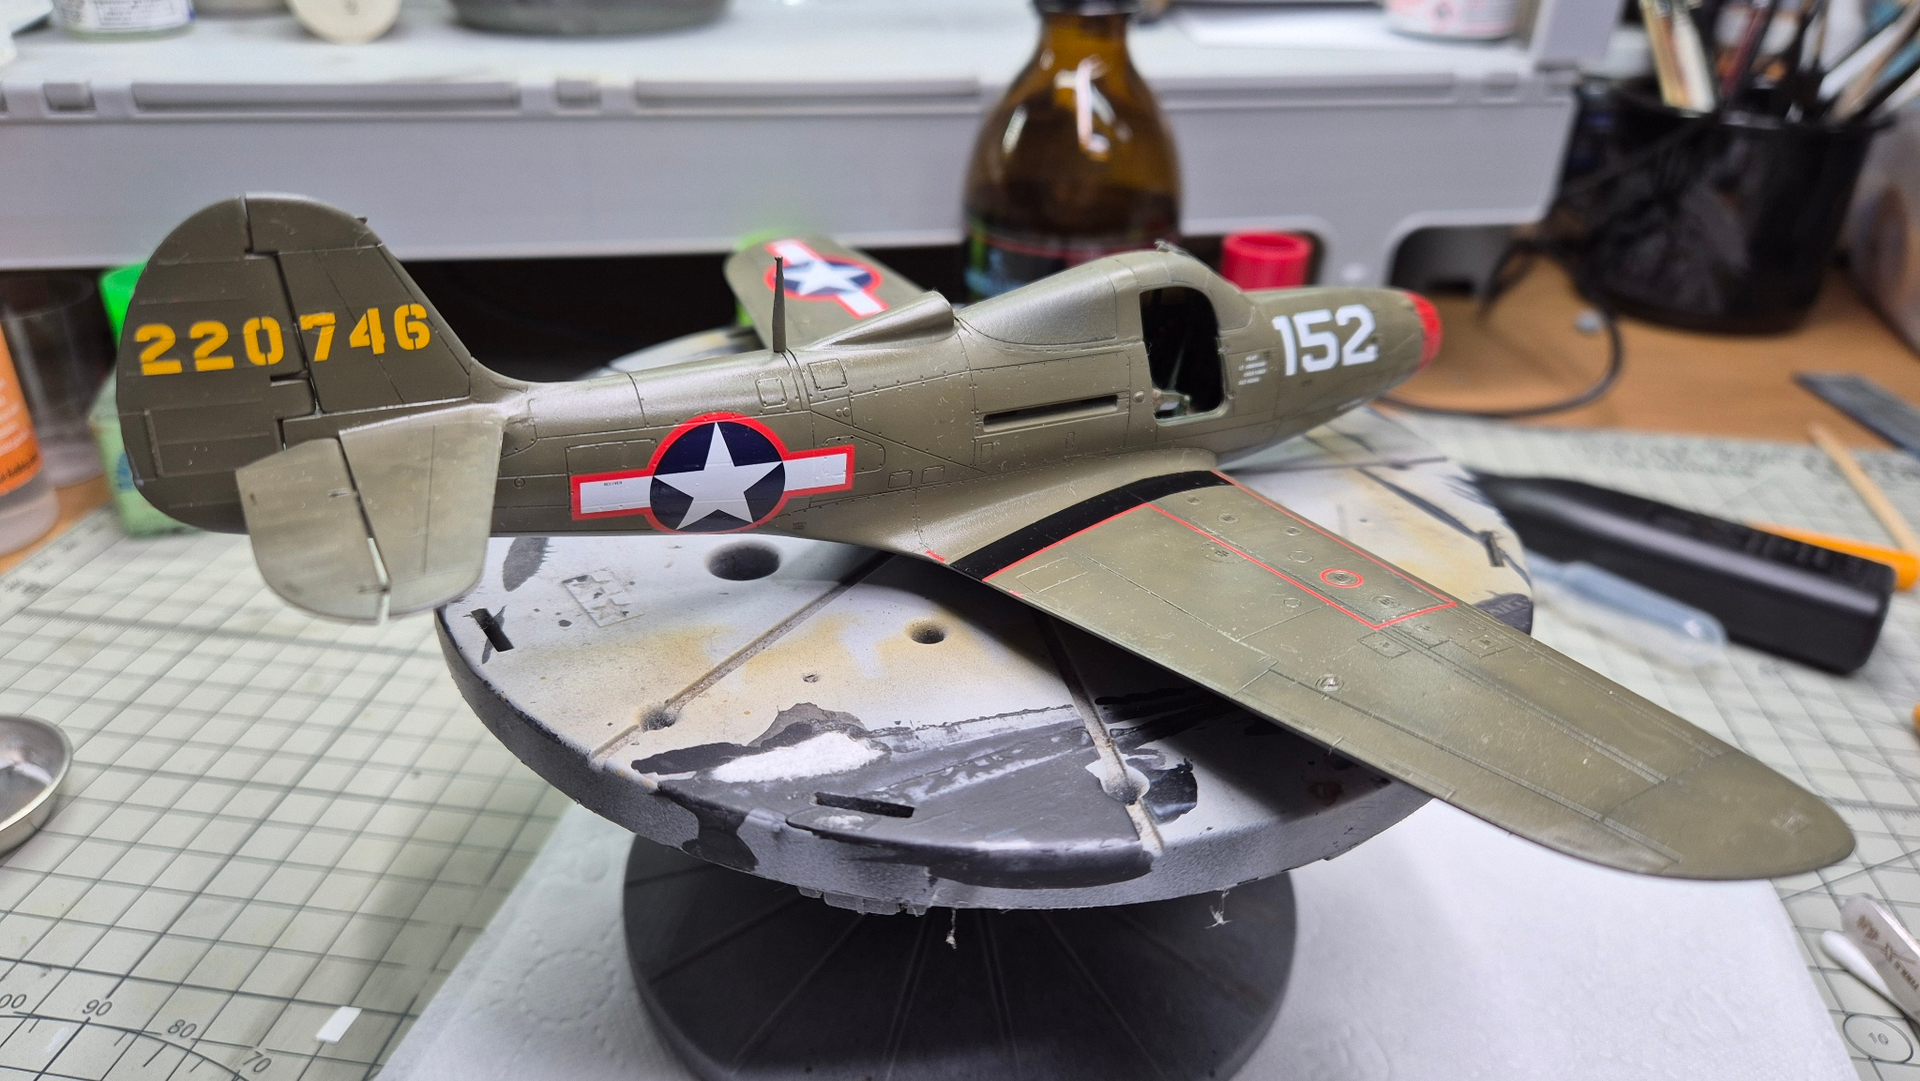
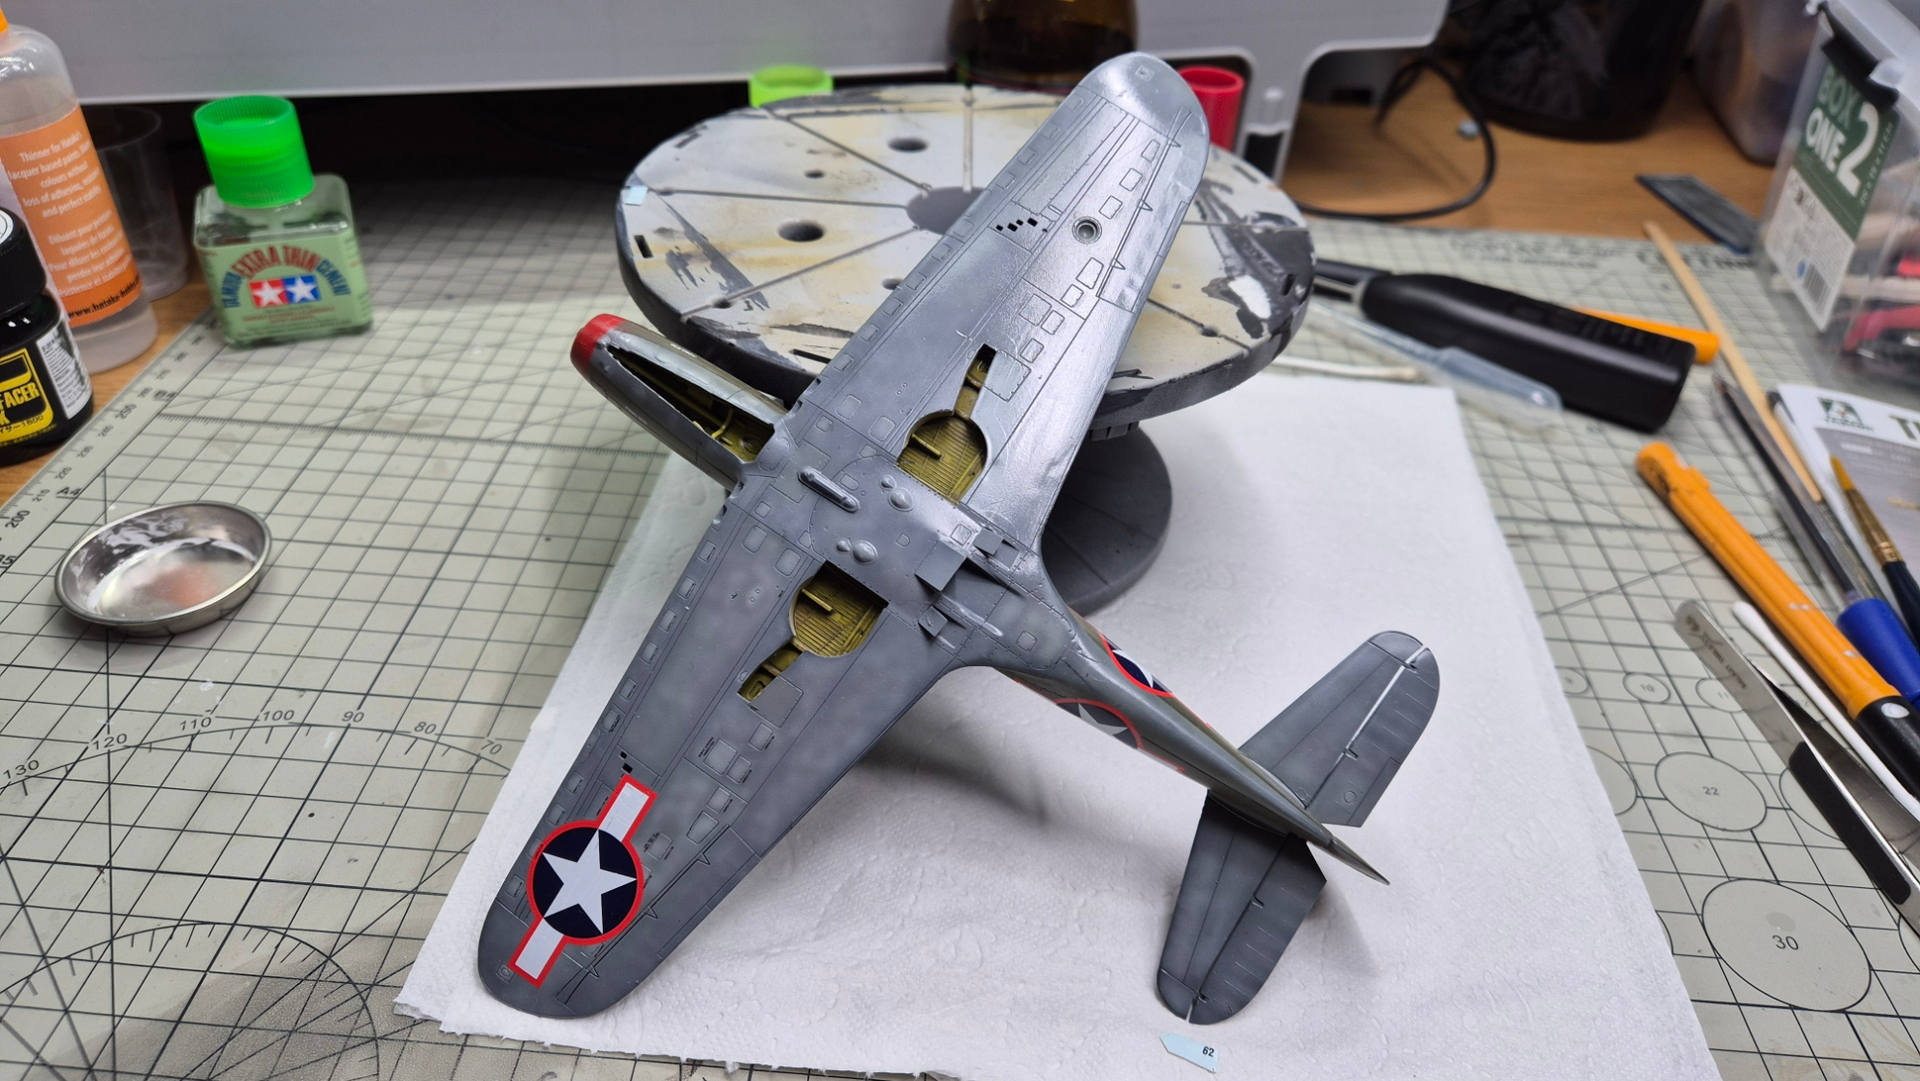
I managed to apply decals on Airacobra. They worked like a charm with Micro Sol & Set. The only issues I had was that they were quite stubbornly attached on paper, so it usually took me more than regular few secs to get them off.
Also for some reason one decal with US insignia twisted a little on one end. I also probably put some technical stickers upside down… they too tiny even when working with magnifier. I shouldn’t use it … it helped a little with decals, but revealed tonnes of errors made on earlier stages ![]()
7 Likes
Thanks for the extension, Jesper! Due to holiday season, family affairs and above all, one cold ![]() after another LOL…I got stuck with my build for more than a week now.
after another LOL…I got stuck with my build for more than a week now.![]()
Now I can still try to finish my Mustang. Photos will follow when I’m fit again!
Happy holidays everyone!
Peter ![]()
2 Likes
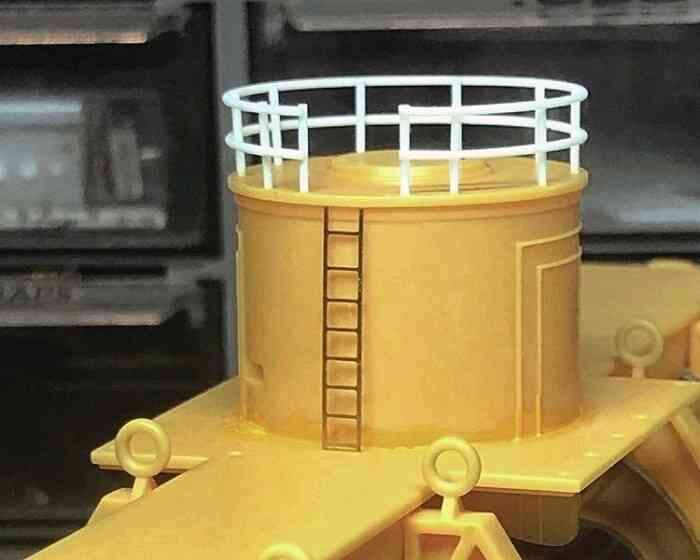
A last addition to SEALAB’s ballast tank No.1 was a small etched brass ladder taken from an old Gold Medal Models HO Scale steam locomotive detailing set. At 1/87 it should have been a bit too big for the 1/93 SEALAB model, but it ended up fitting perfectly!
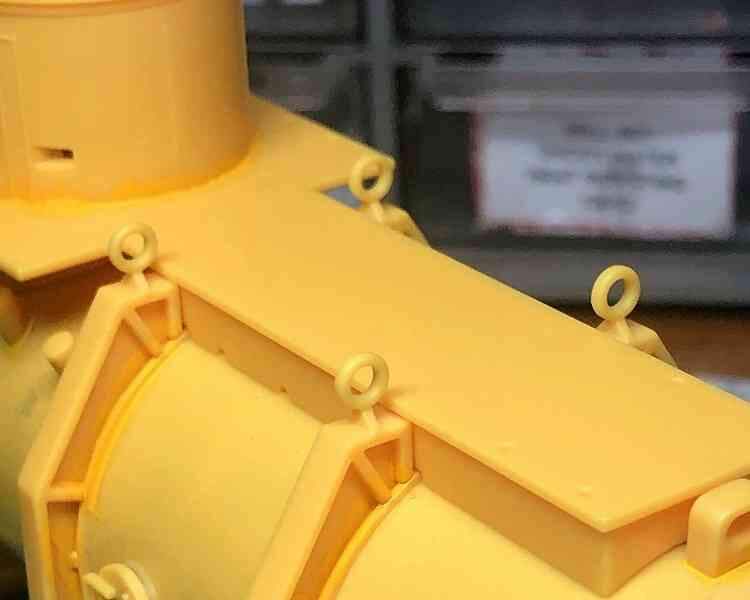

While looking at my reference photos I noticed that the habitat lifting rings as depicted on the kit weren’t actually rings at all, but rather shackles.
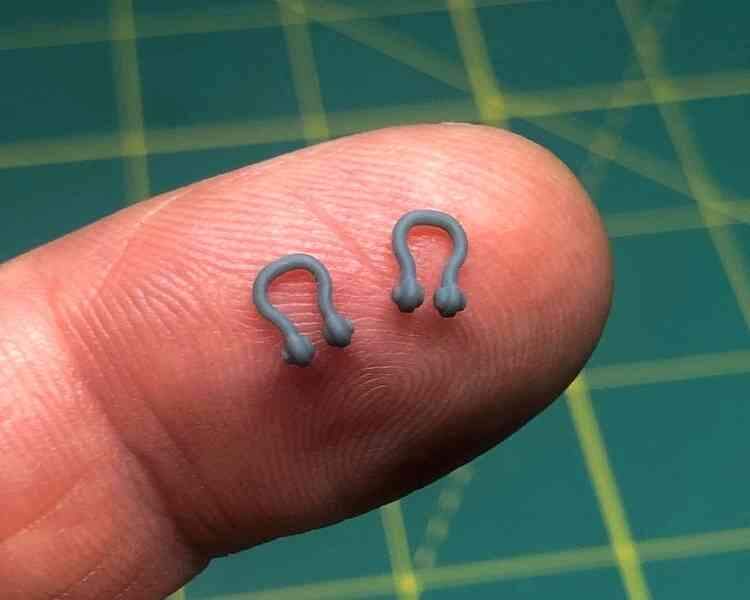
I hadn’t intended to make a lot of changes on this model and am getting anxious to throw some paint on it, but these 1/35th scale tank tow shackles were a perfect match for SEALAB’s eight lifting shackles, so why not?
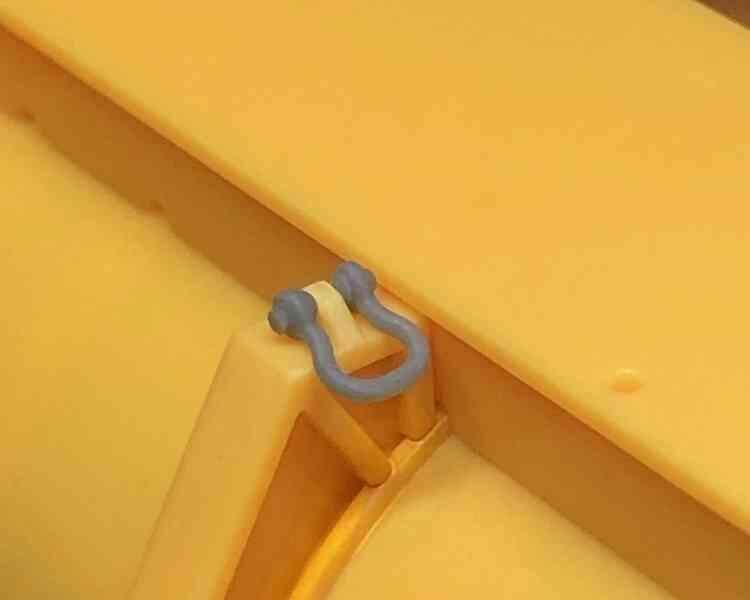
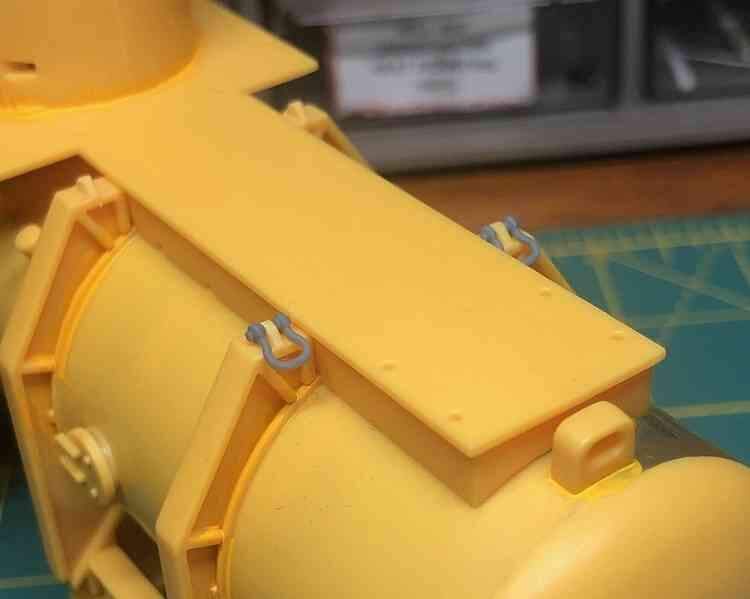
After trimming Aurora’s simplified rings away, the tank tow shackles made for simple, snap-fit upgrades. Now for paint!
6 Likes
Hope you feel better and do not spend too much of the holidays with a cold, Peter!
Tim, super nice details! Lets be honest, you are never going to get paint on that one! ![]()
![]()
![]()
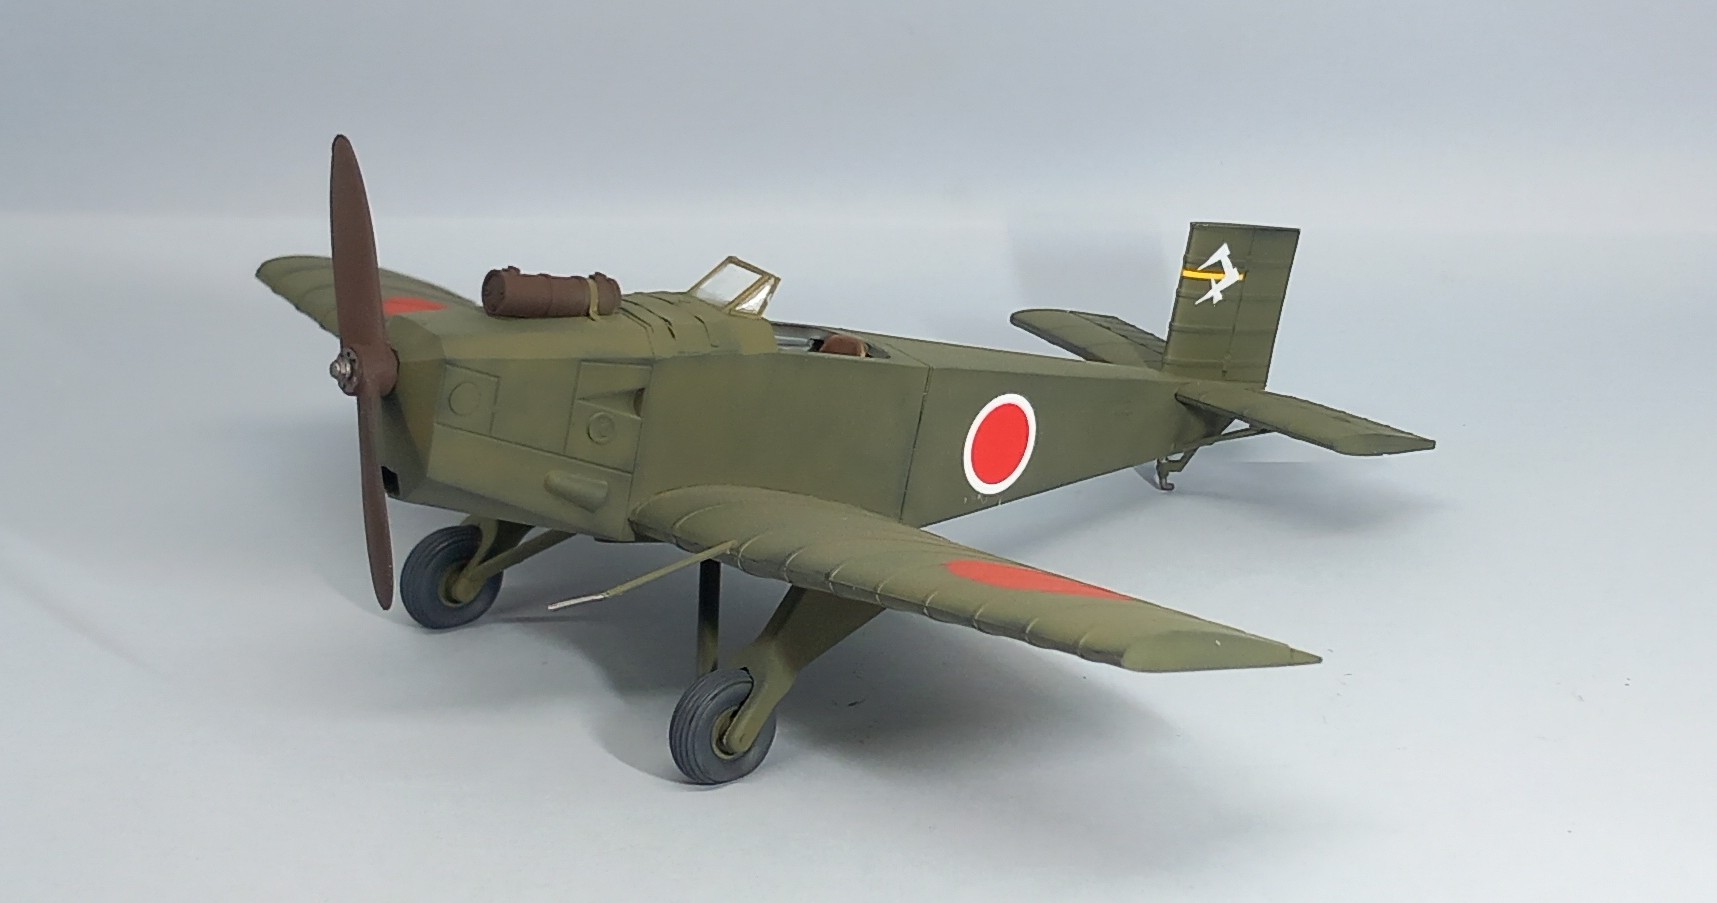
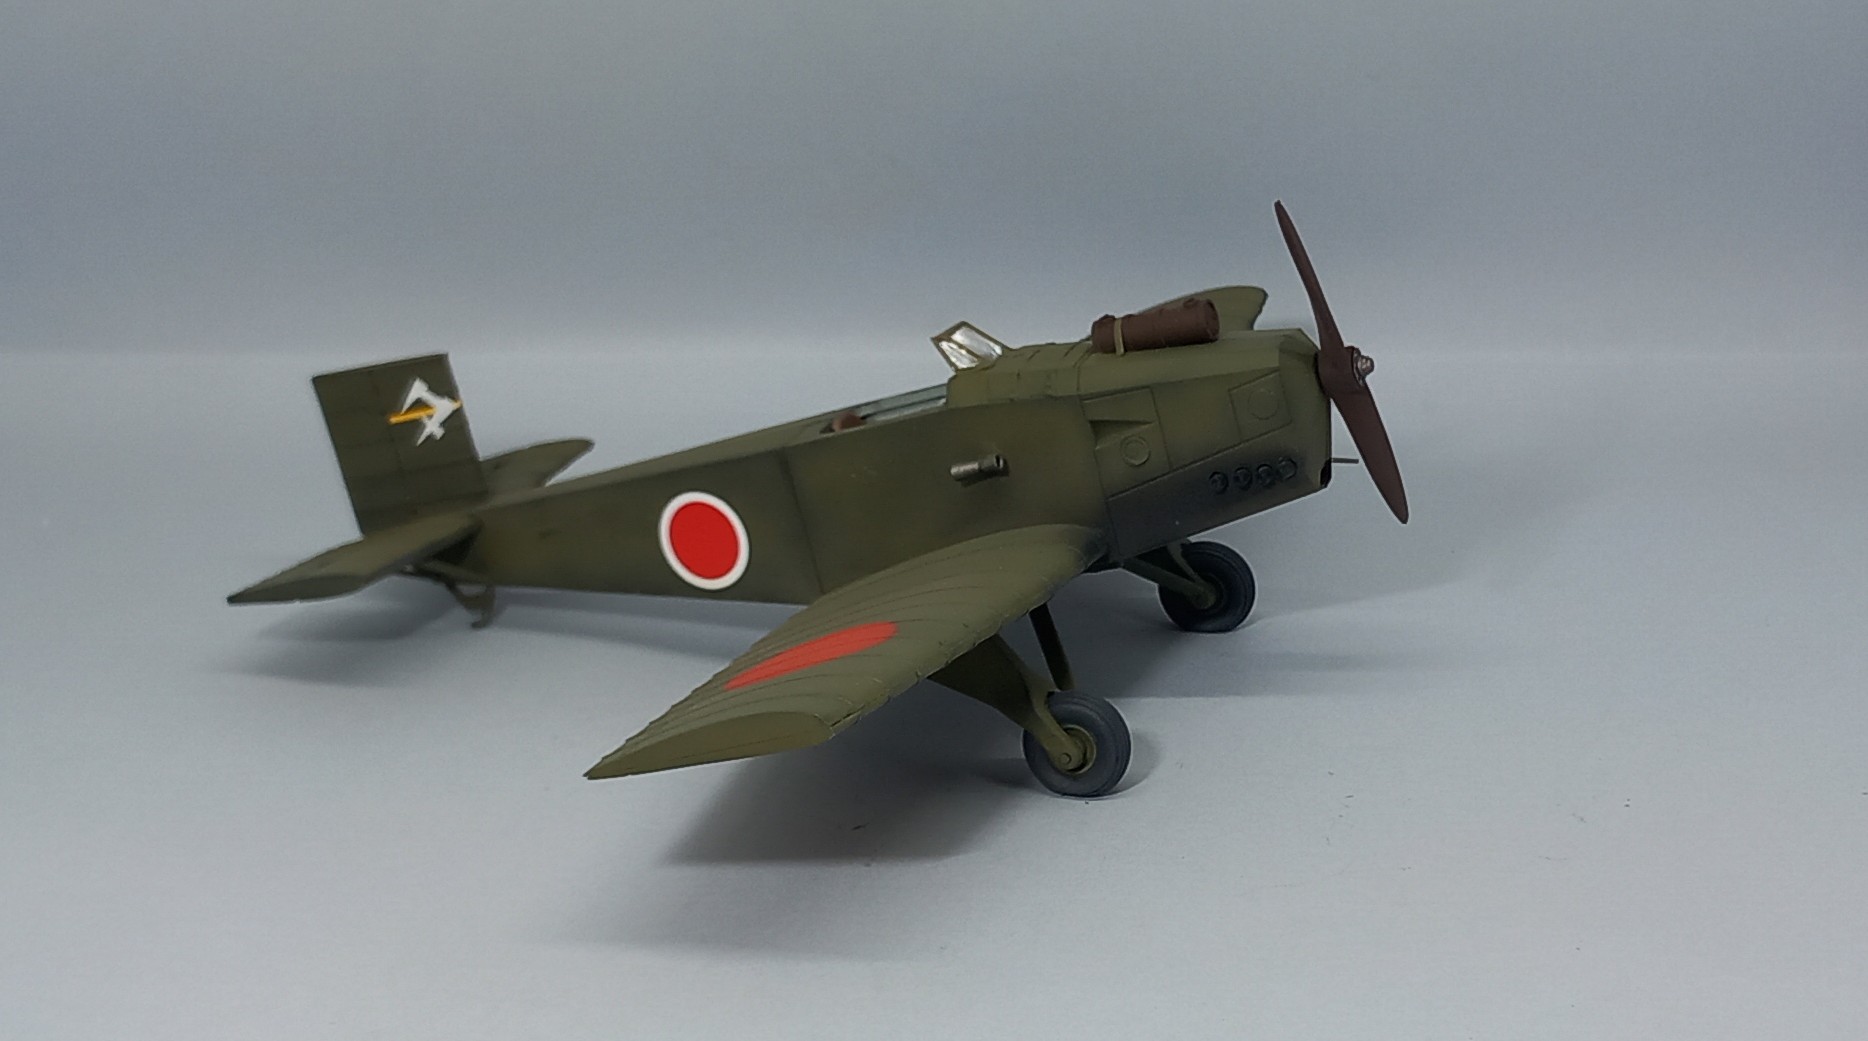
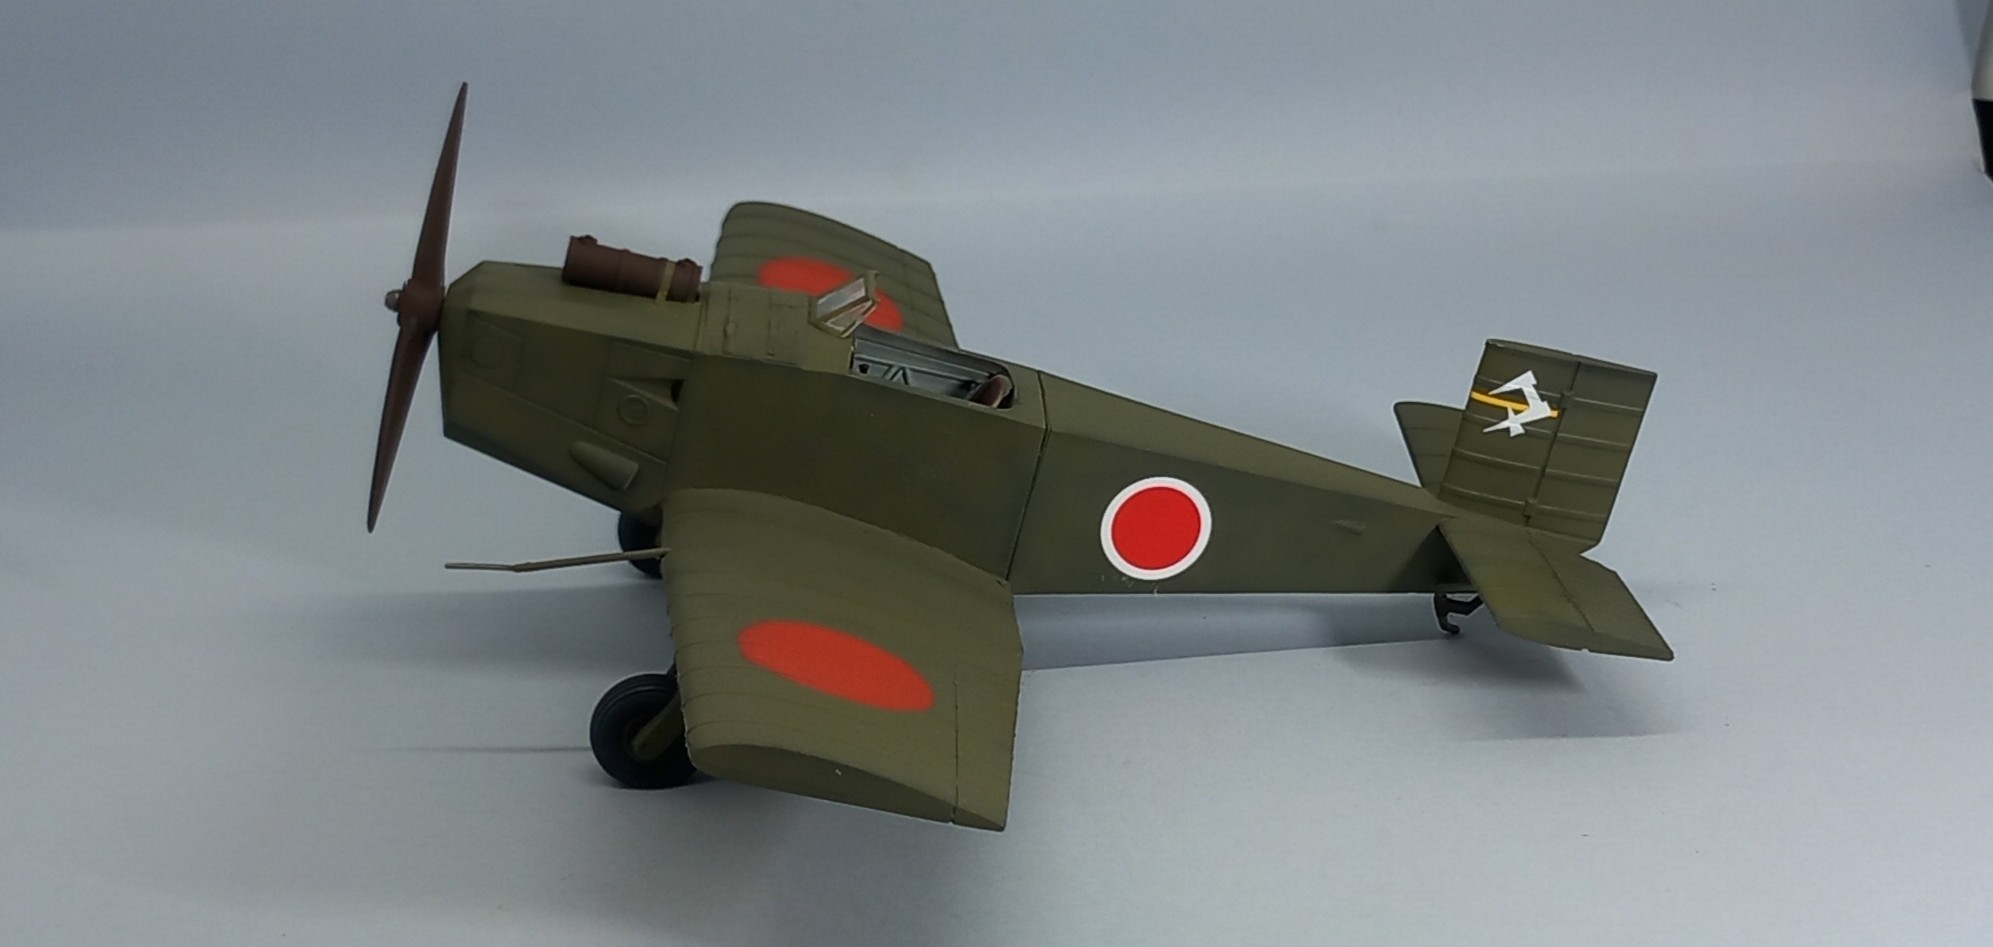
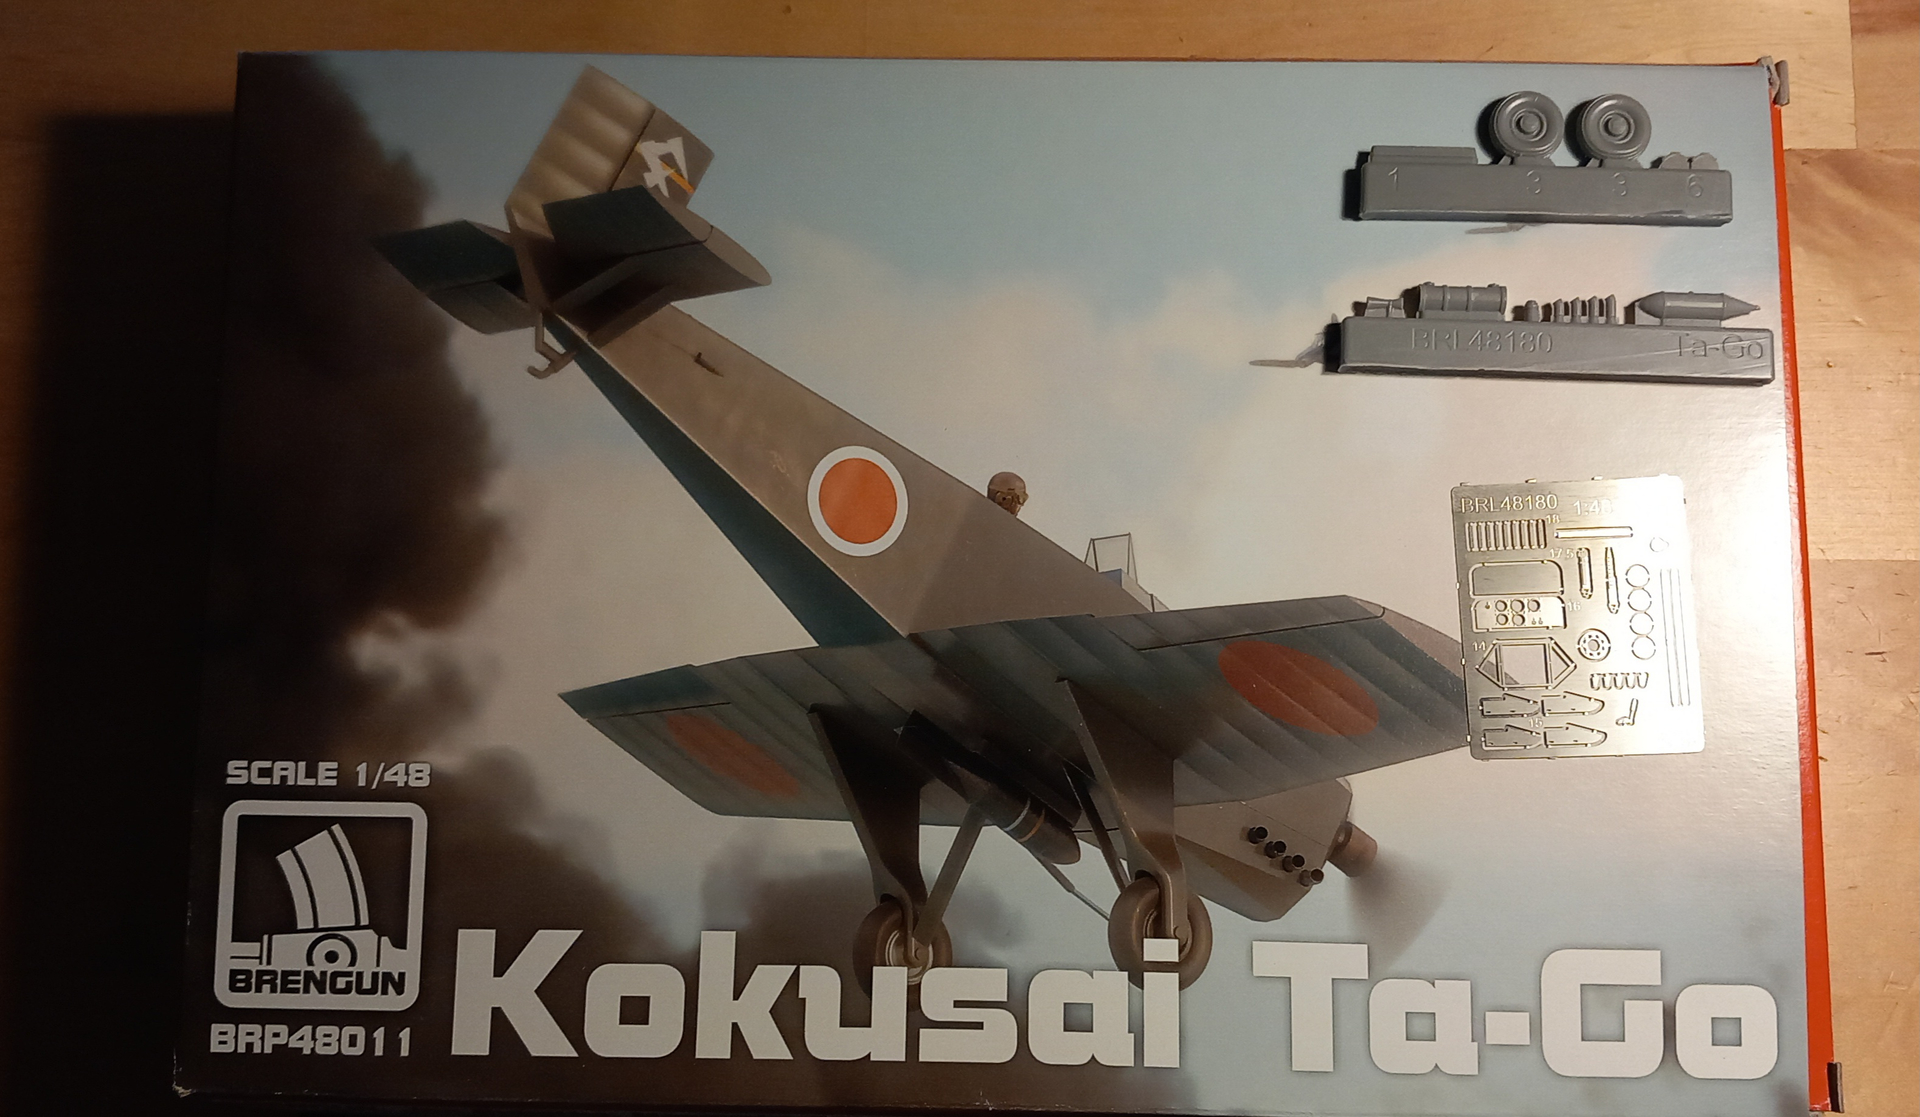
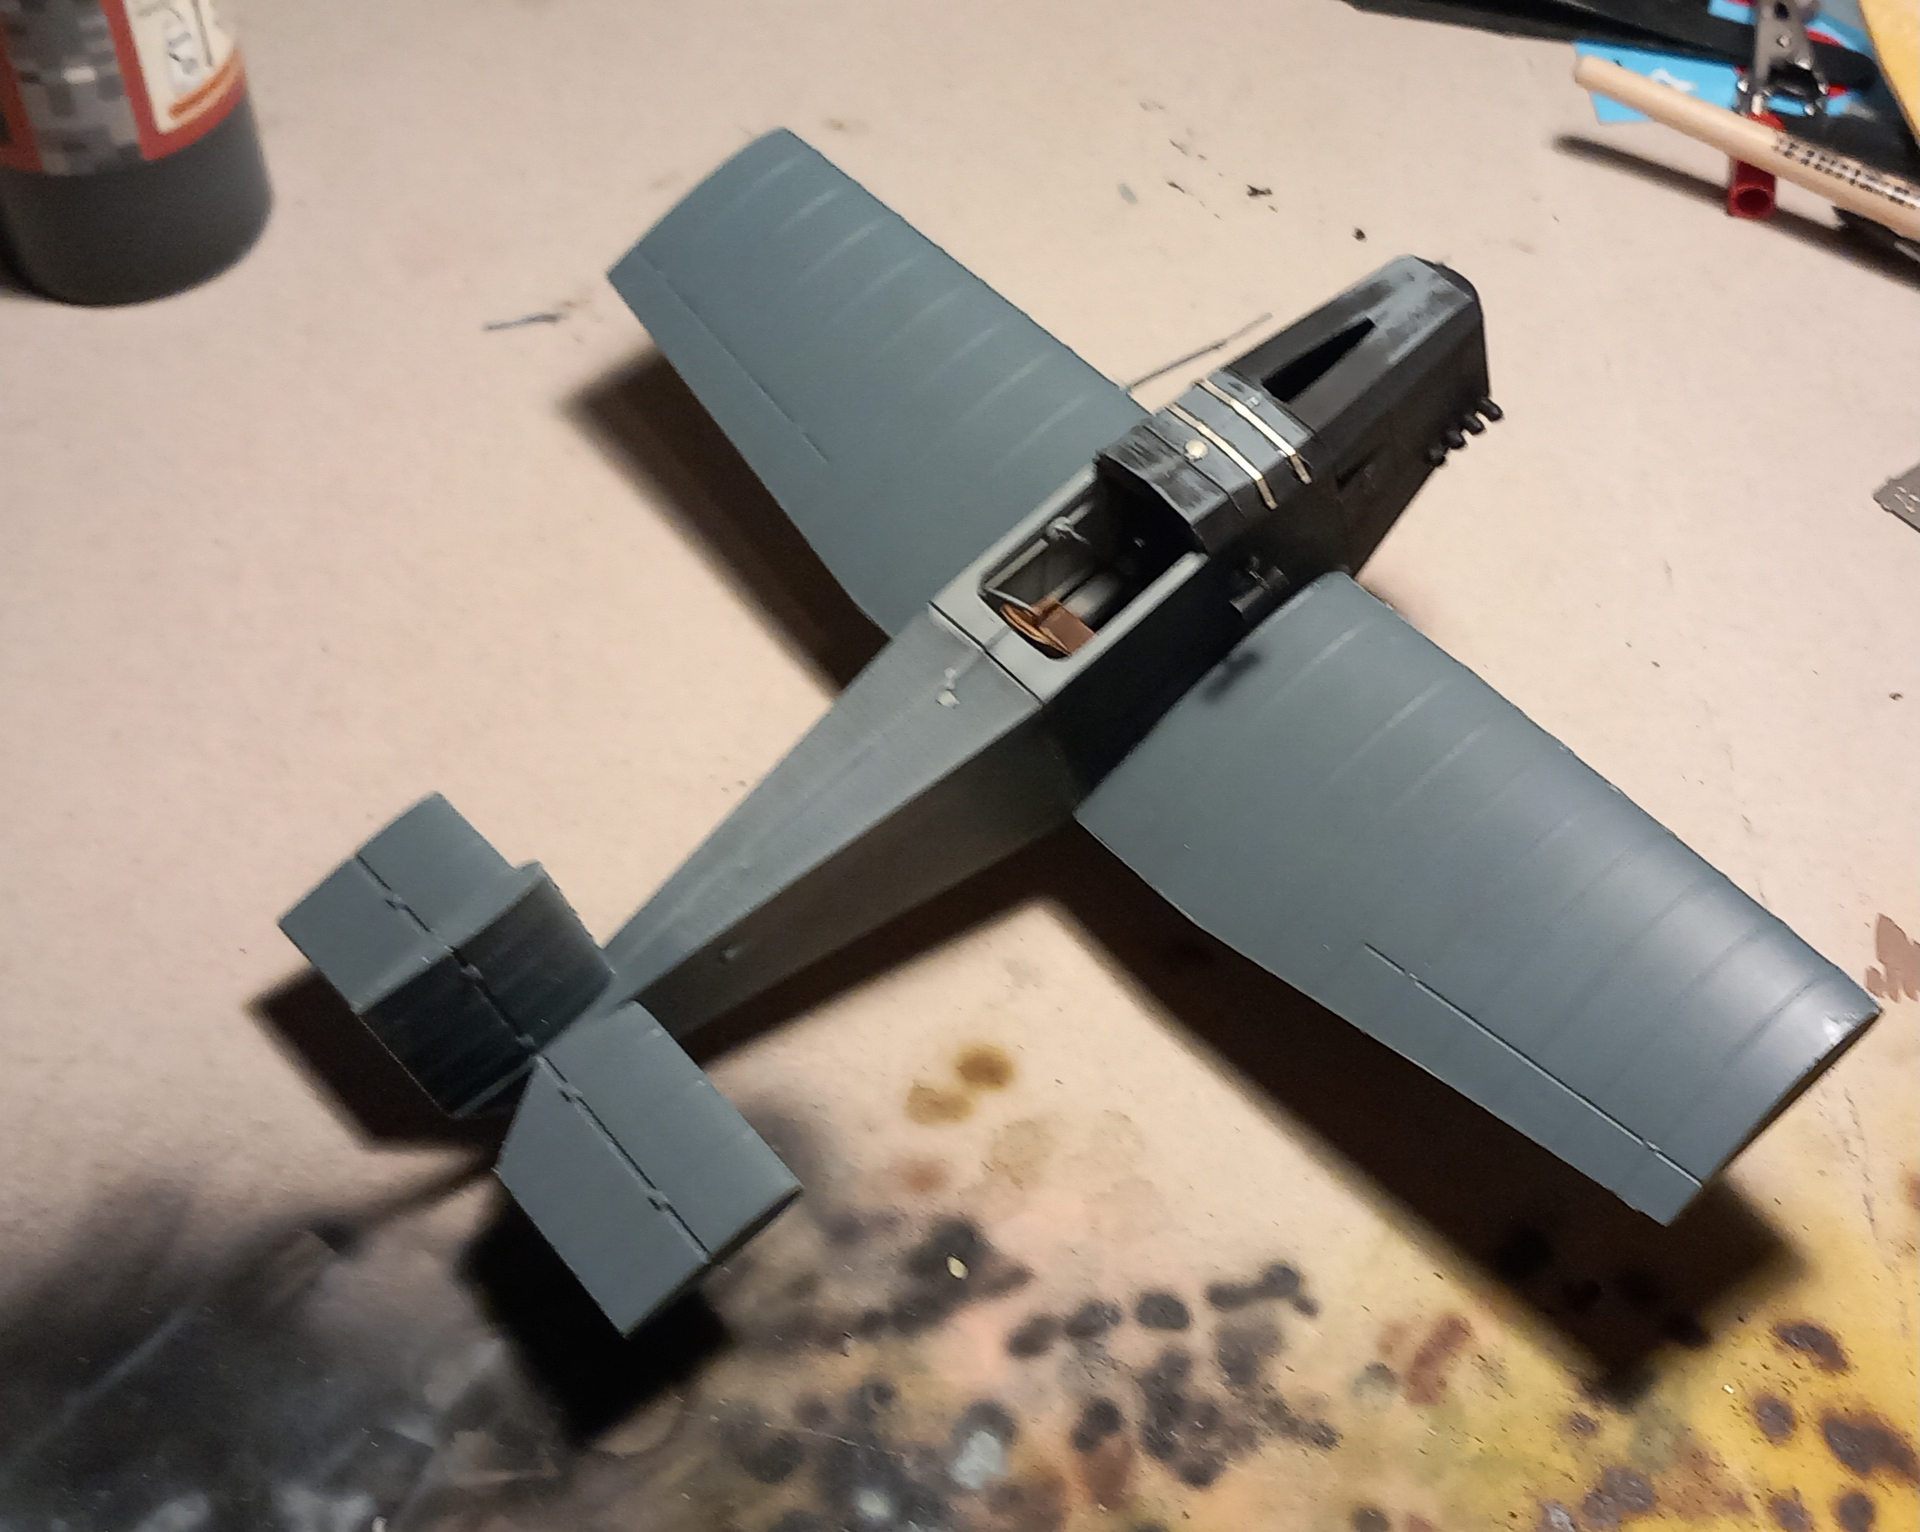
@FlyingSauerkraut What is that plane? A low cost Kamikaze plane? It looks like a trainer, but has a bomb underneth.
2 Likes
Yes,
it’s a “low-cost” kamikaze plane designed to carry a 100 kg bomb and powered by a 100hp 4 cylinder engine. This plane was designed by the Captain Yoshiyuki Mizuyama and a prototype was build by Nippon Kokutai (renamed in the 60’s to Nissan). The prototype flew in June 1945.
This kit is issued by Bren gun and was released in March 2025.I added a detailing kit consisting of resin and photo-etched parts to this kit.
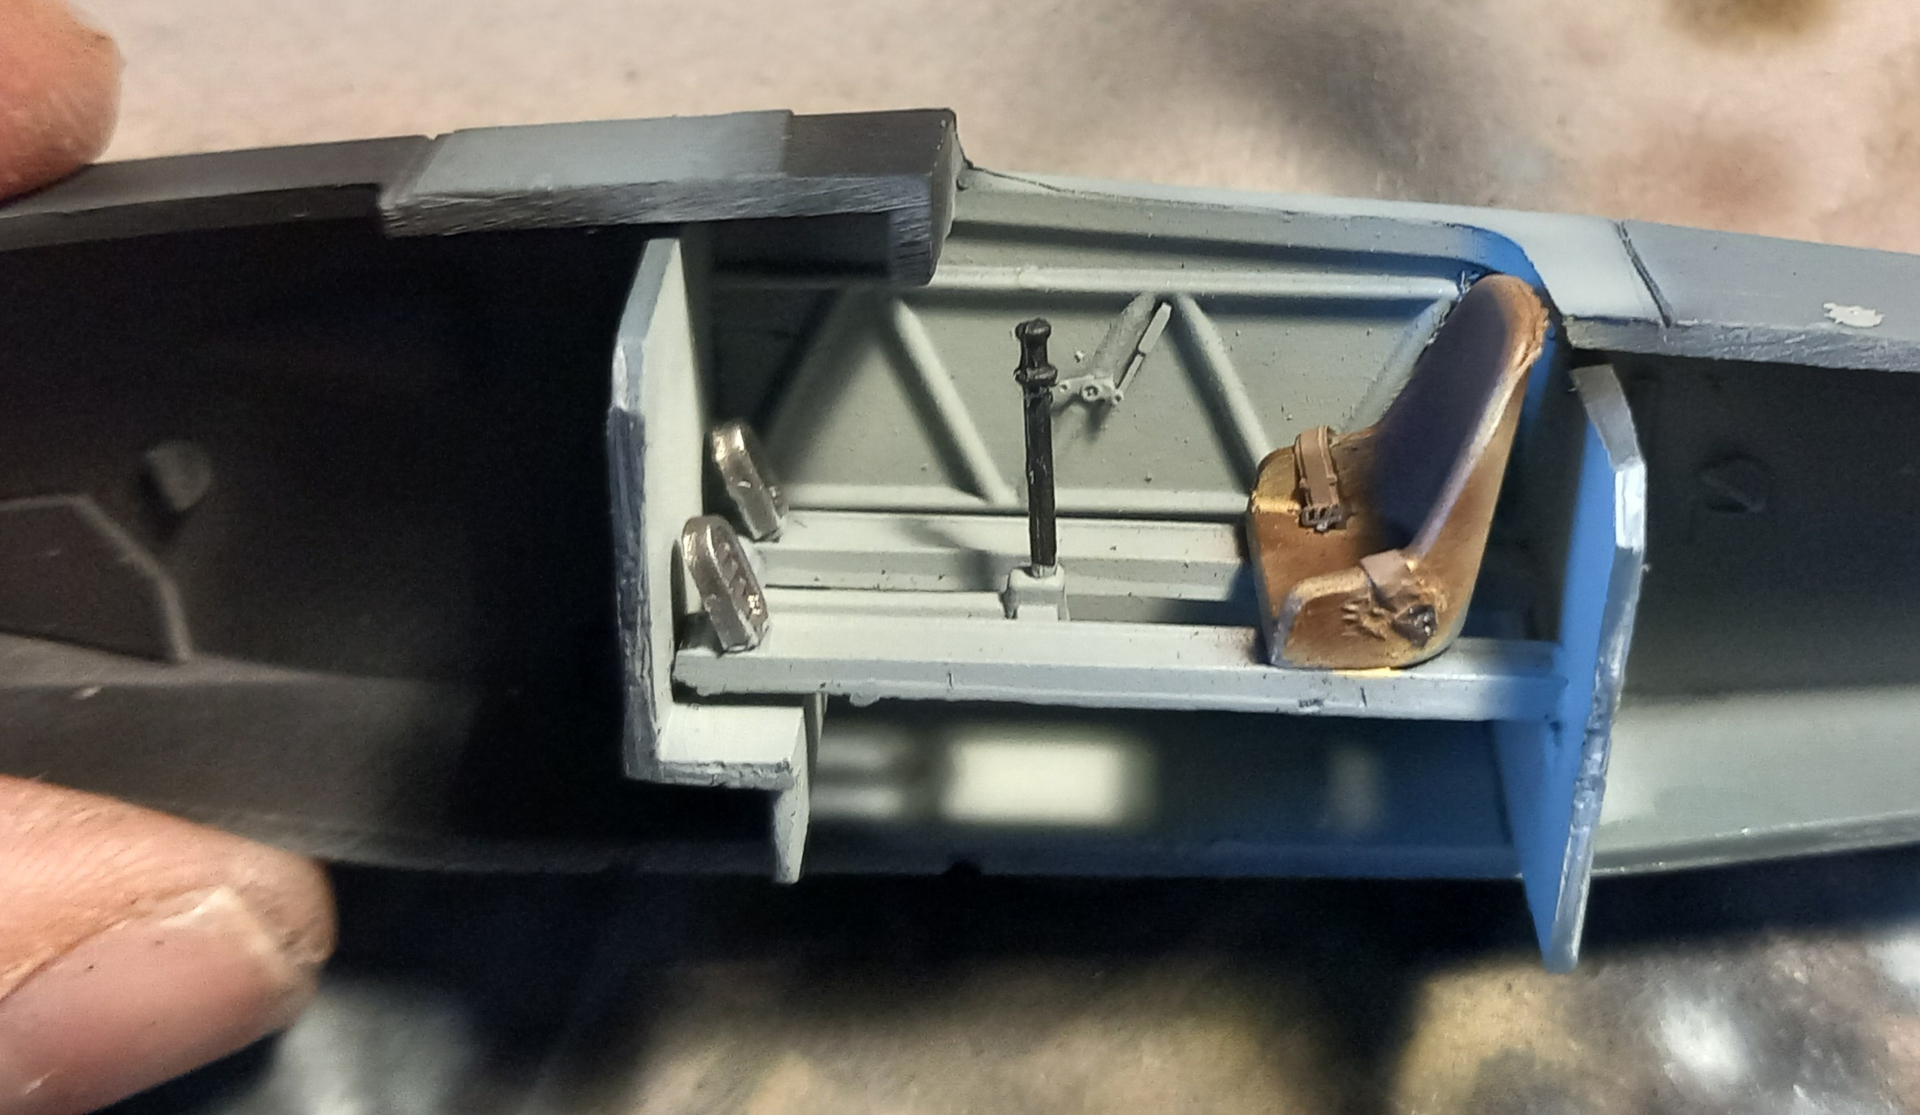
The construction was relatively quick and intuitive. I didn’t use the entire detailling kit and chose to represent the plane without bombs. I plan to display it in a small diorama.
6 Likes
Hi mates, my build at the moment
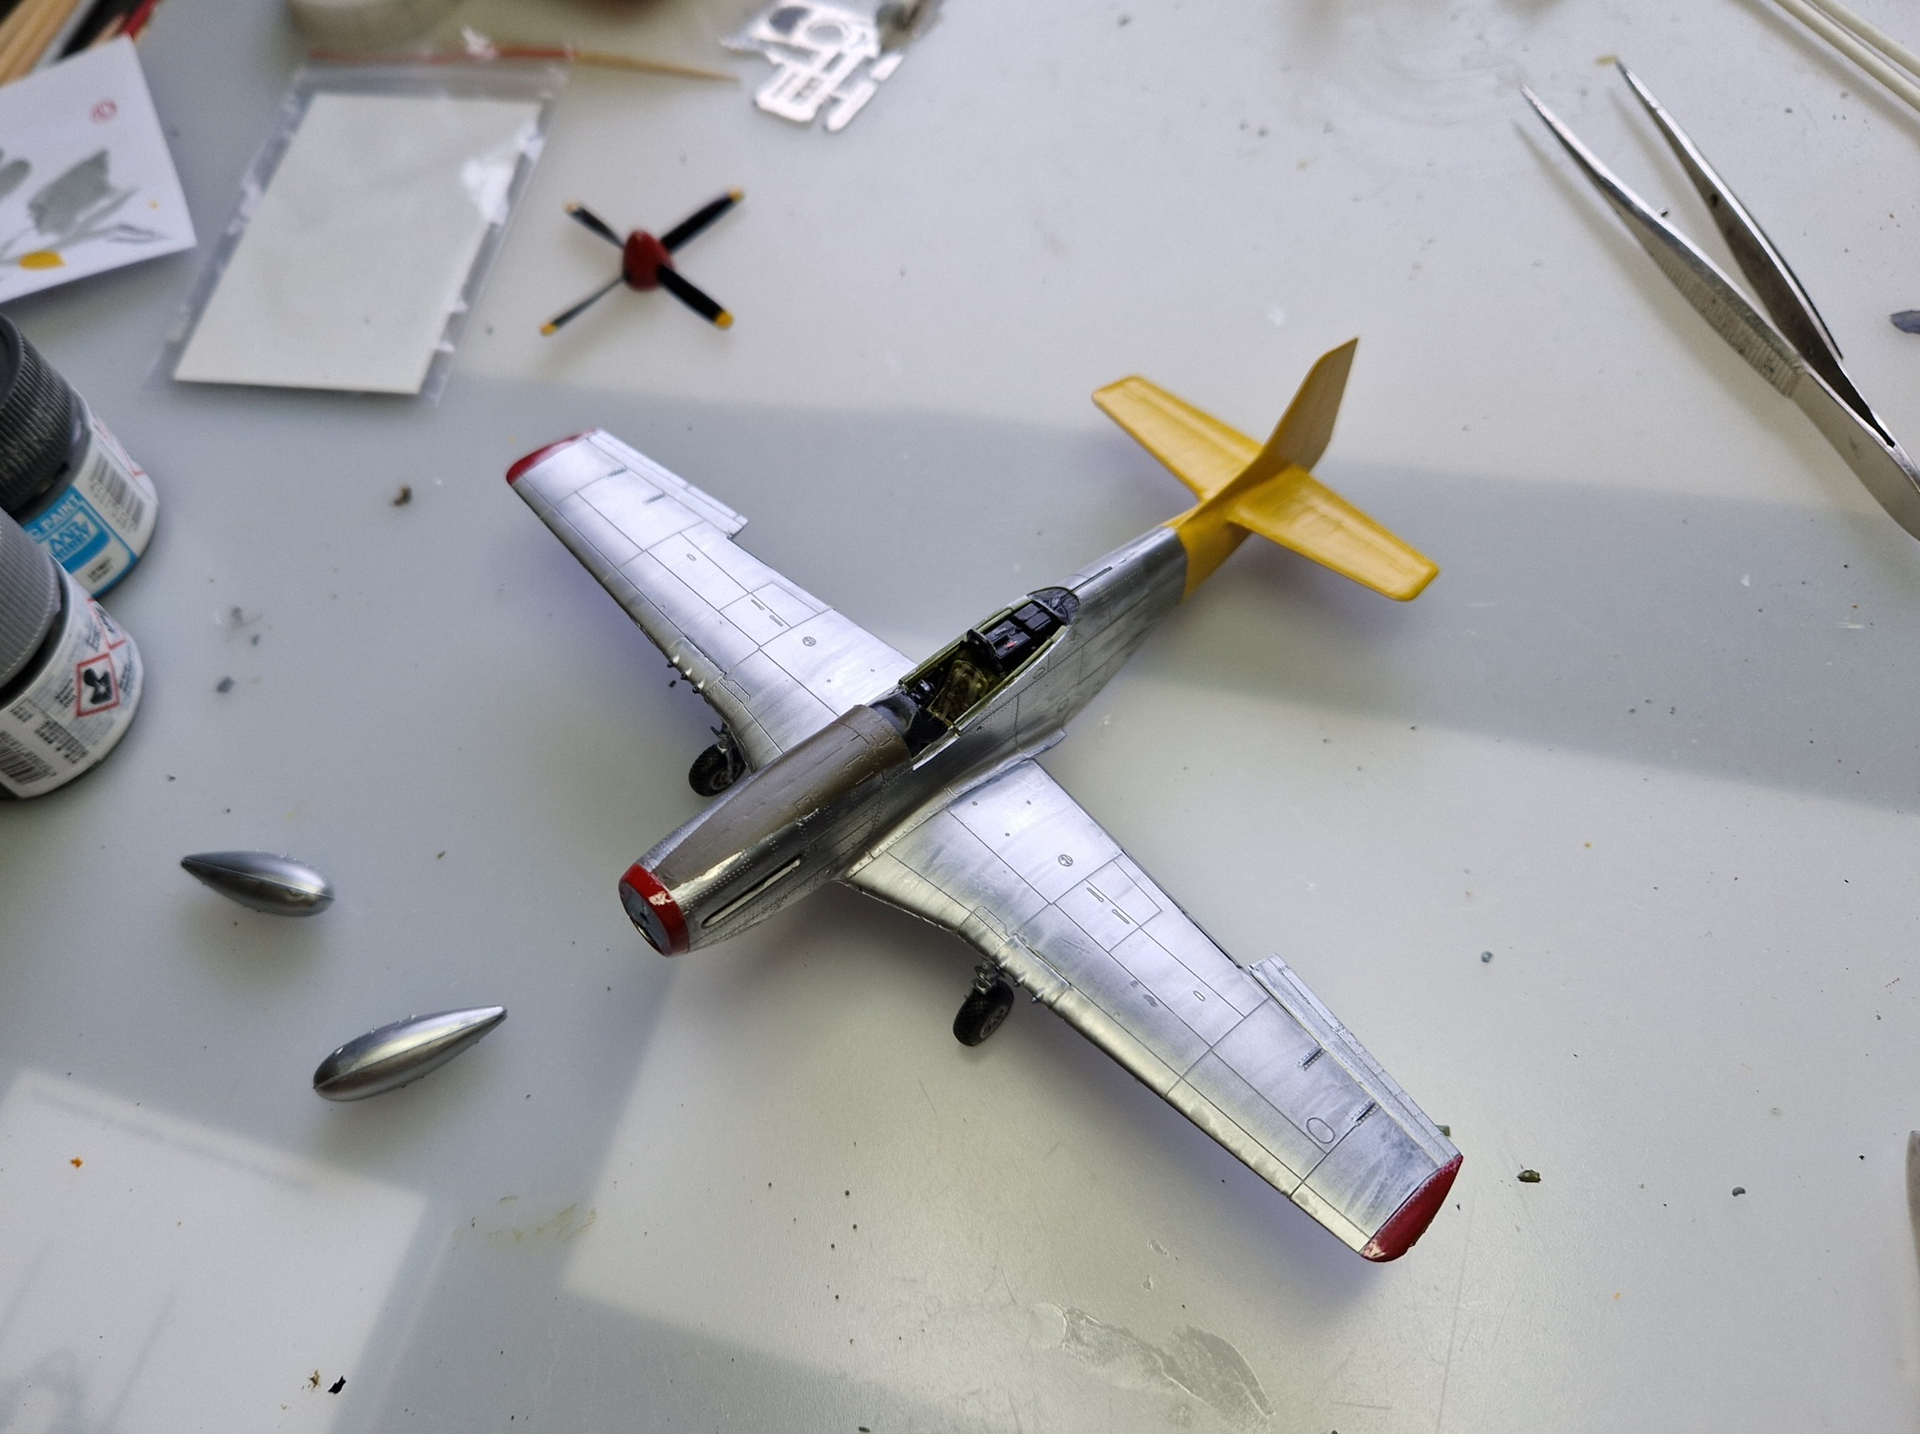
There is still some paintwork to do, especially in tight places with awkward masking….
But I’m confident to finish till the end of January ![]() , now that the
, now that the ![]() is fading away!
is fading away!
Cheers
Peter
5 Likes