OK a new project. I’m not sure it belongs in Armor/AFV or automotive. Armor won!
I’ve always had a hankering for trucks and in particular some of the WW2 trucks. They is just big n ugly. The sort I like.
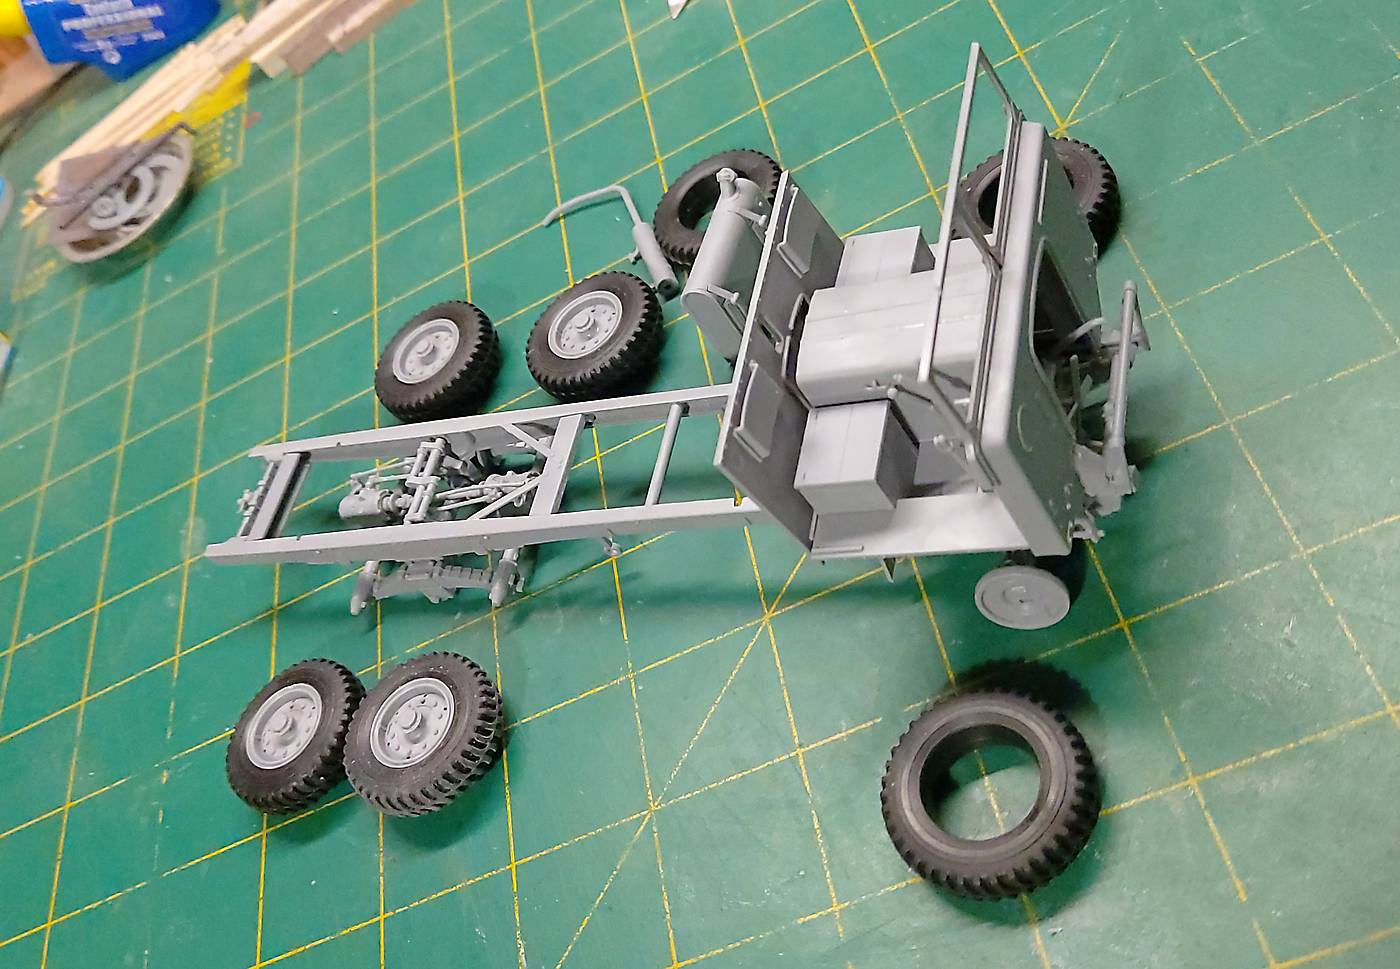
First impressions of the ICM kit is mixed. Sort of good and sort of ho-hum.
The kit is their #35600.
Not a lot of parts. The build has been quick and simple. Instructions are ok with just a few ‘huh?’ moments. The detail is great in part but very basic in other parts. ie I would have liked more detail in the engine department. I’ve searched the web for images and what I have found shows a very simple engine so it may not be such a big issue. Tyres are great. But I’m struggling to figure out to ad ‘weight’ to their profile. Any hints?
The plastic is VERY soft. Cutting parts off the sprues needs to be done with caution. Sanding and cleaning up the sprue gates needs to be done with care especially on smaller parts.
Any way here’s where I’m up to. I’m just building a nondescript trucks with little weathering and damage.
FWIW I normally paint as I go. But I’ve been watching some of the ‘greats’ like NightShift on YouTube and he paints after he is finished. So I’m trying that method. Wish me luck.
It’s worth noting with this version (35600) you can also build the Early Production version (35602) although this isn’t an option shown on the instructions and kit 35602 appears not to include the rear canvas option either. If you fancy the even more primitive version just get 35600 and download the 35602 instructions from the ICM website (instructions link at the top right of the page):
This the kit BGT is building if you wish to follow along:
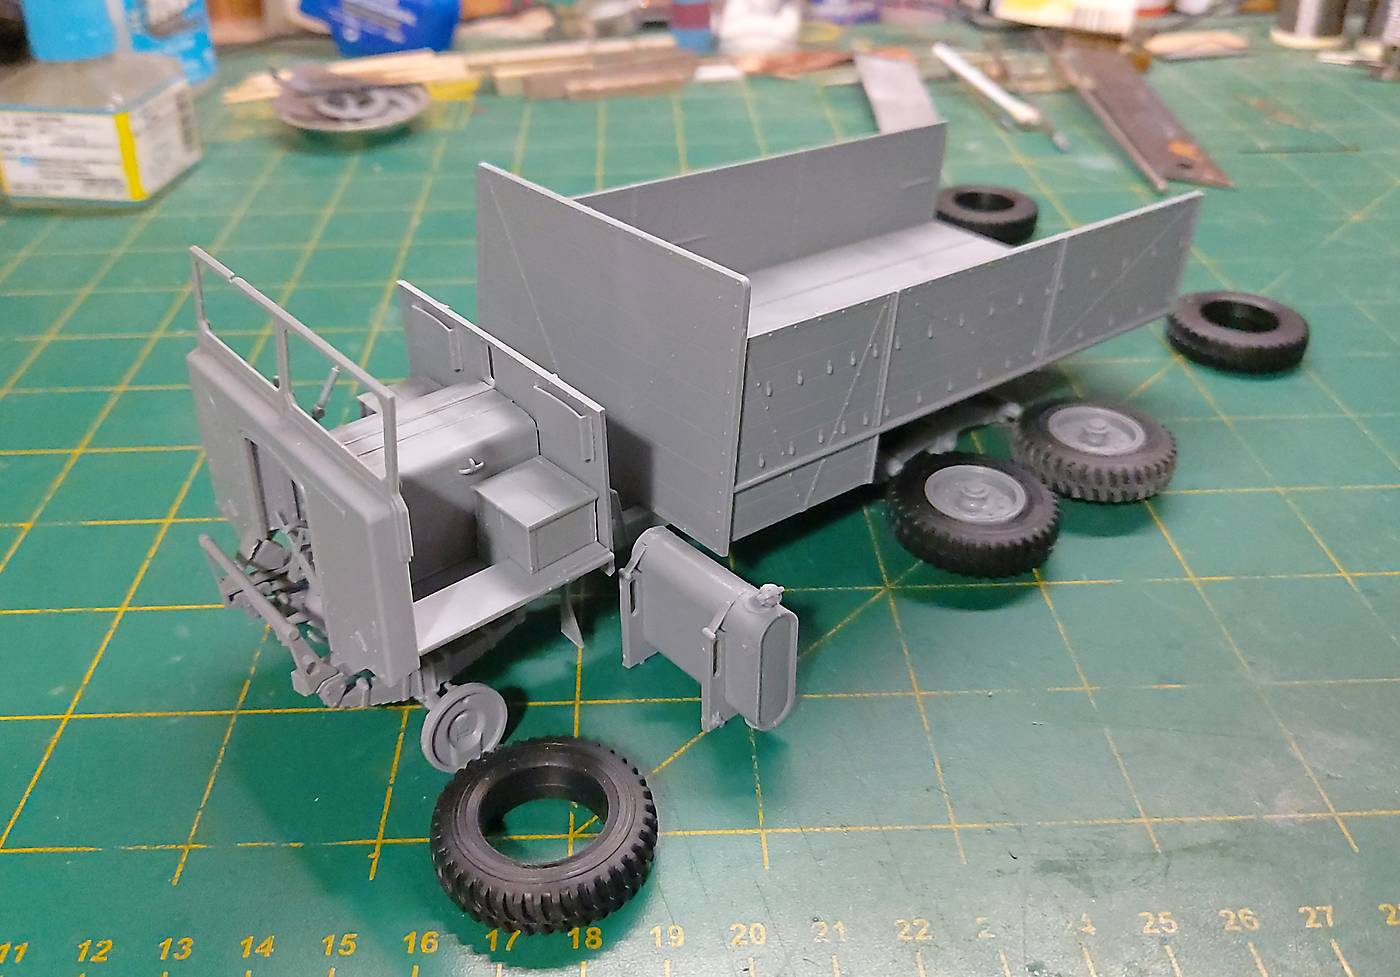
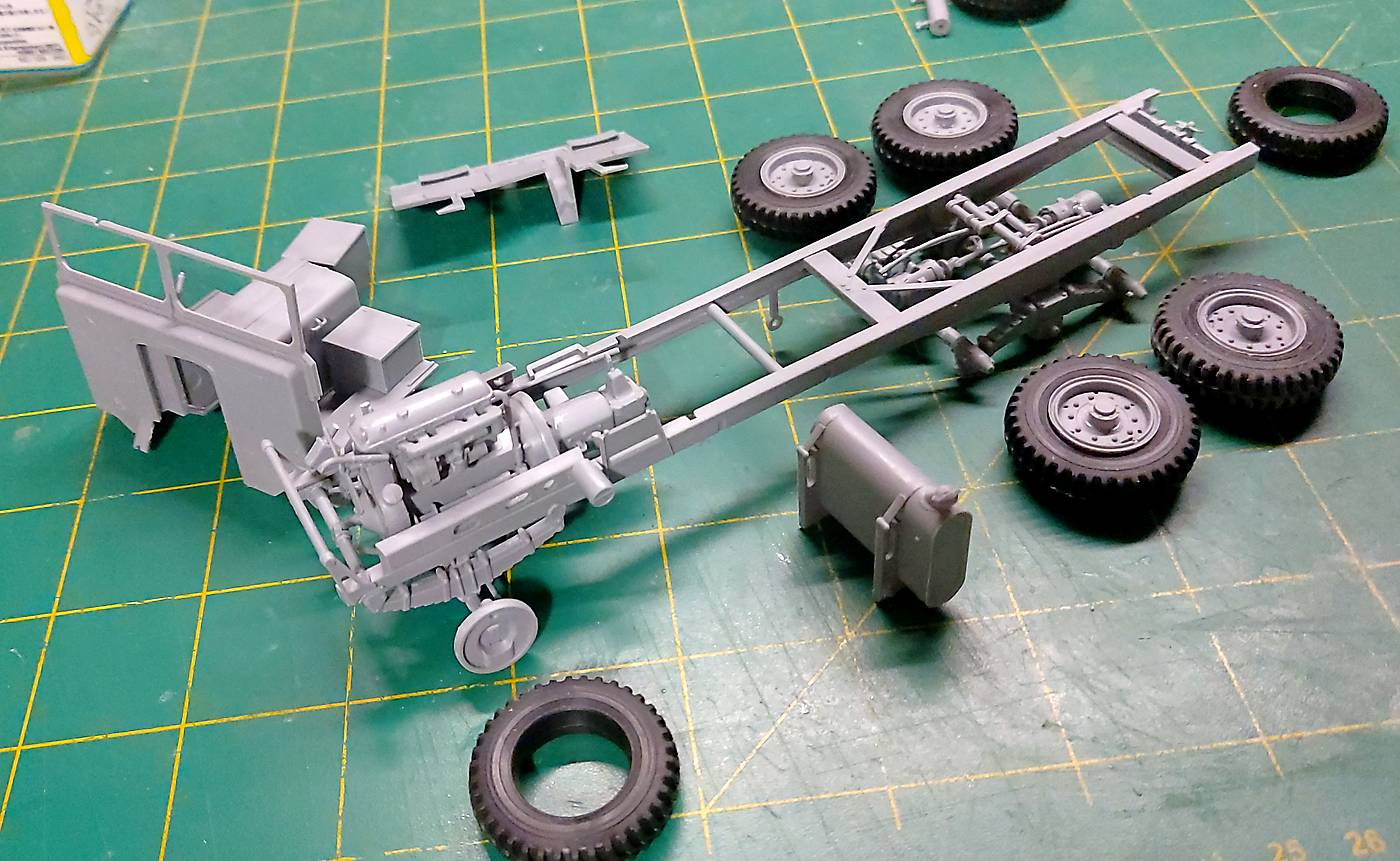
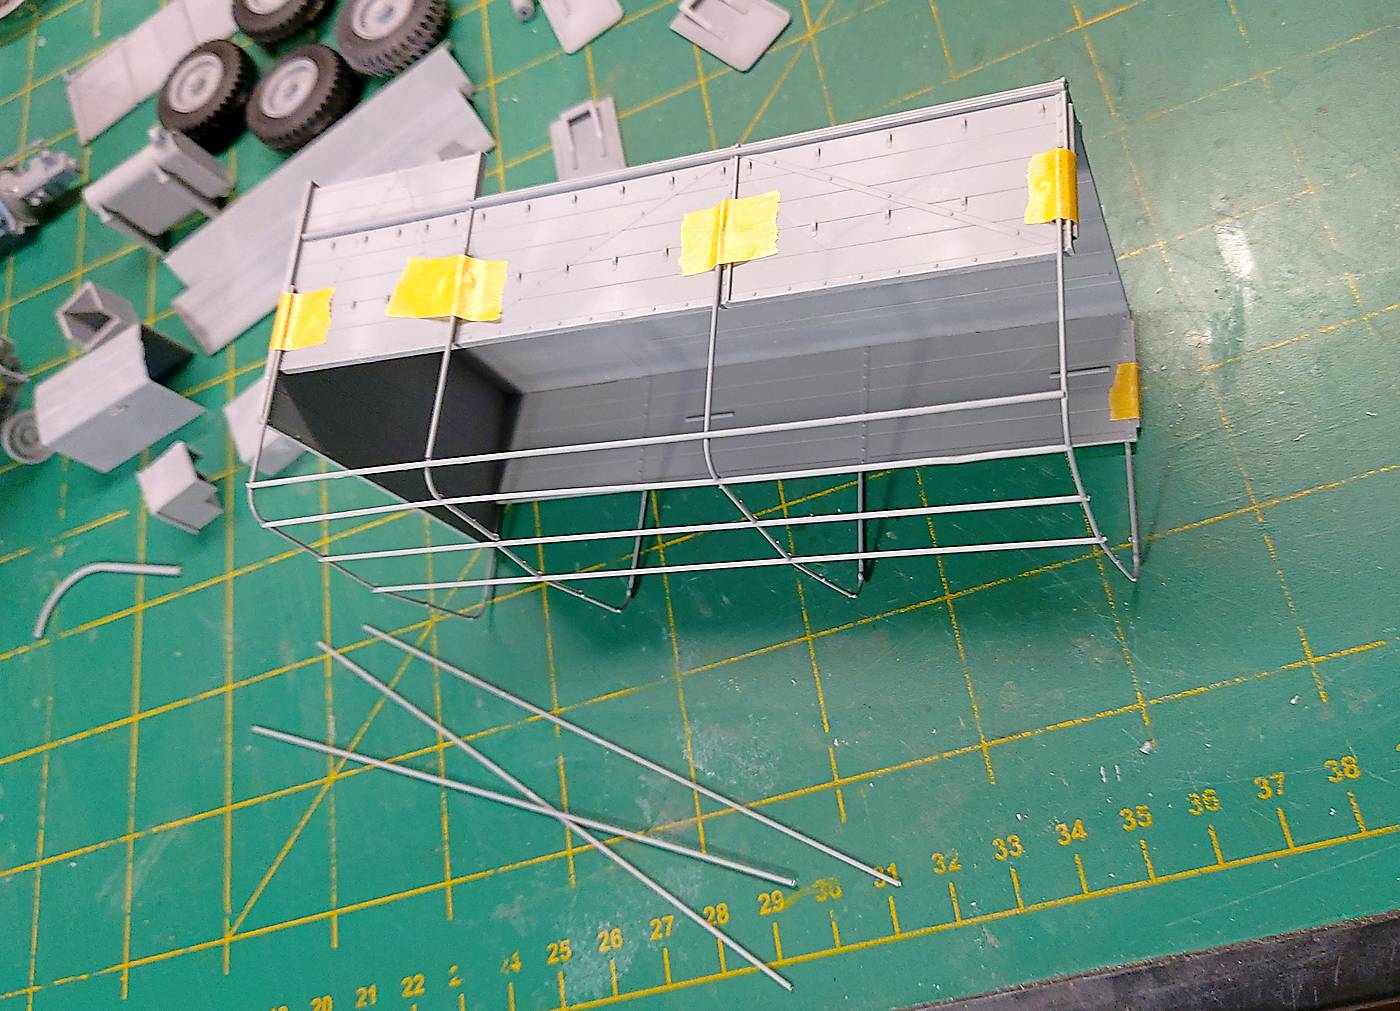
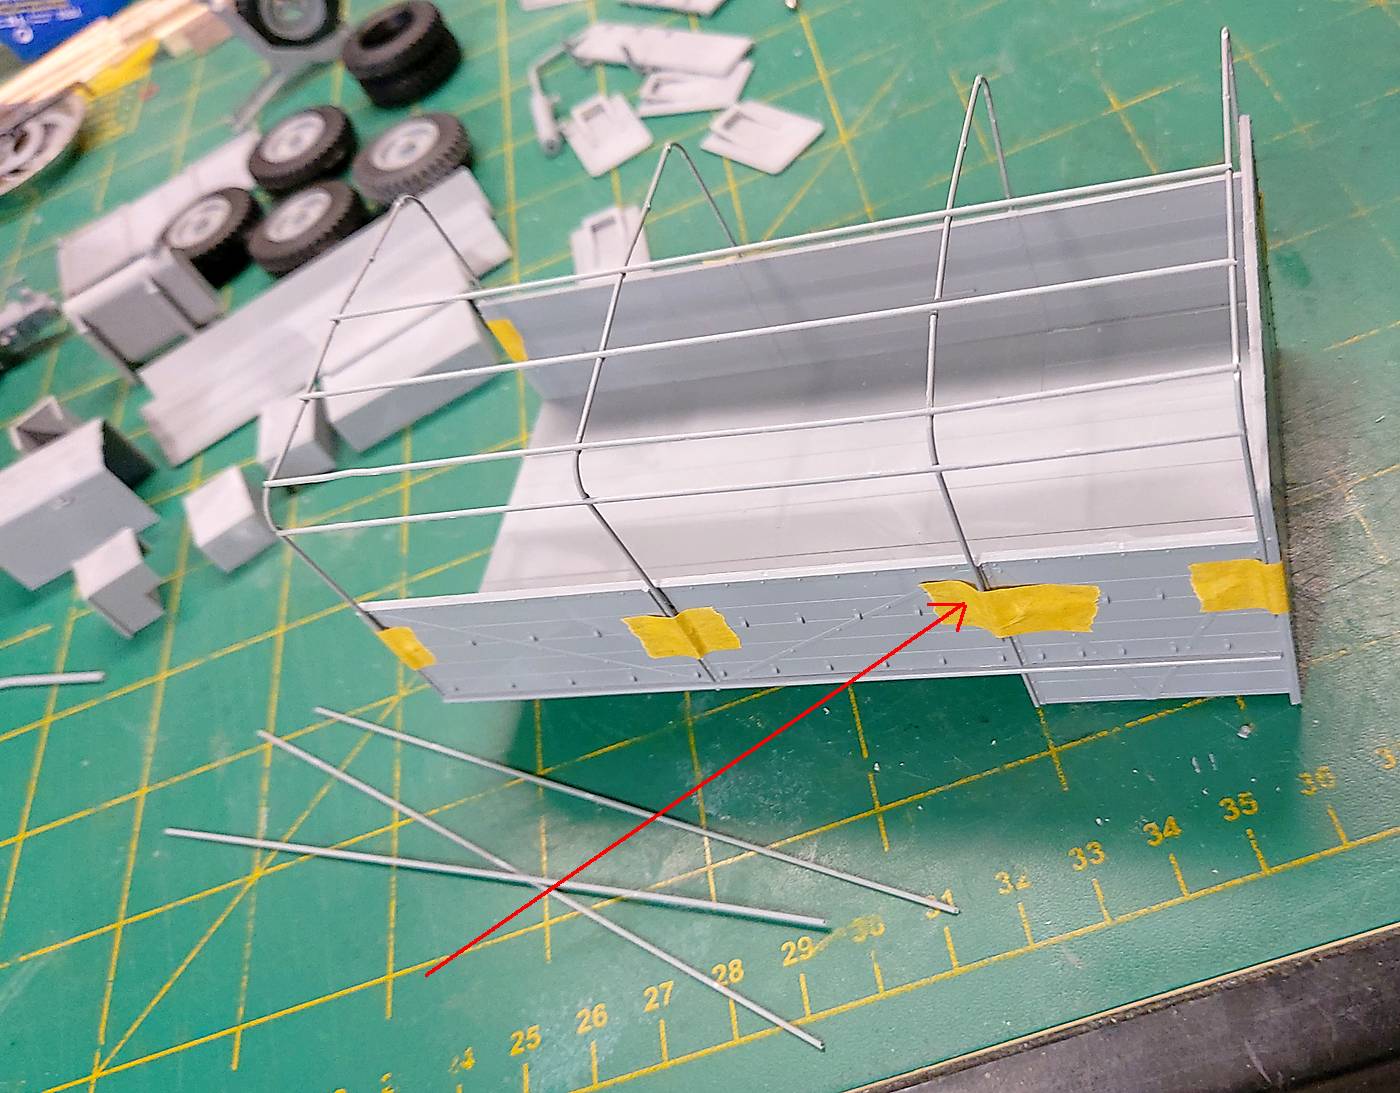
A bit more work. Note I’ve decided to build the kit without the canvas cover on the back. That requires installing all the framework. These frames are very fine/thin and can break EASY. The plastic is very soft. So be warned.
The second image has a red arrow. That points to where there should be two holes to locate the frame. There is only one hole. Both sides are the same. You need to drill the holes to fit the frames.
I taped my frames on and then glued all the joints. I want to be able to remove the frame for painting and adding a load. It is very fragile so I’m taking bets on how many times I will break it.
Caution - I use Mr Cement glue on the joints. Too much glue will melt the plastic. I know because one of my joints failed because it simply melted.
Sorry folks. No progress. I’ve been in the sick bay for sometime. Maybe the next few days.
I did manage to get it all primed. Next step is the actual paint job. I’m leaning towards some sort of olive drab.
OK folks. Some progress. (I’ve been sick then caught covid. Boy was that fun!).
Nothing real exciting! I had trouble spraying Mig Ammo topcoat. Then shaded it with some AK. The Mig Ammo is still a bit sticky after a week!
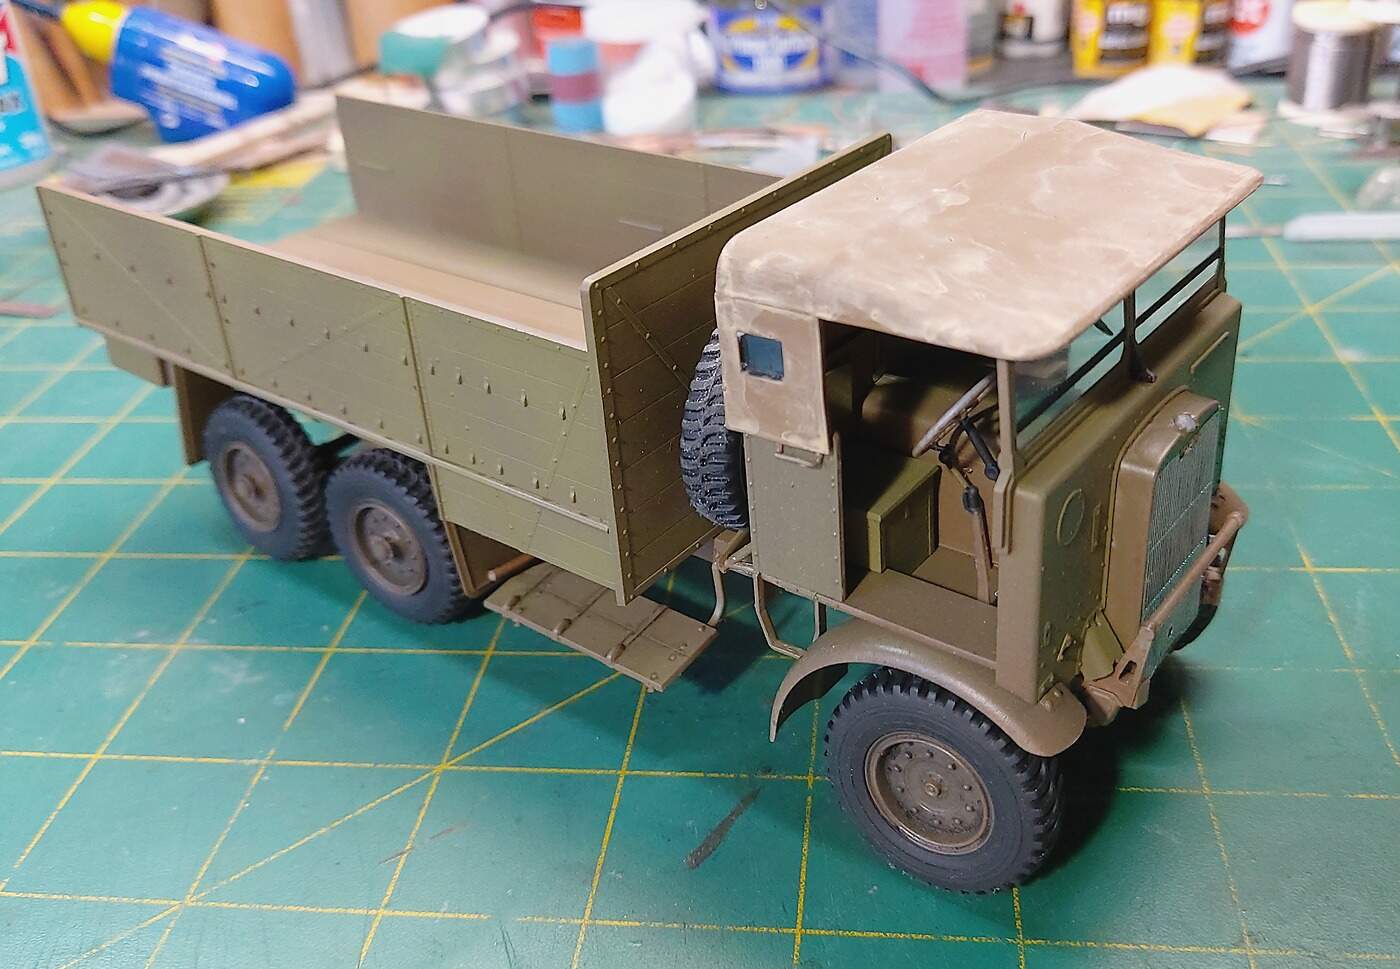
Image below are all just dry fitted.
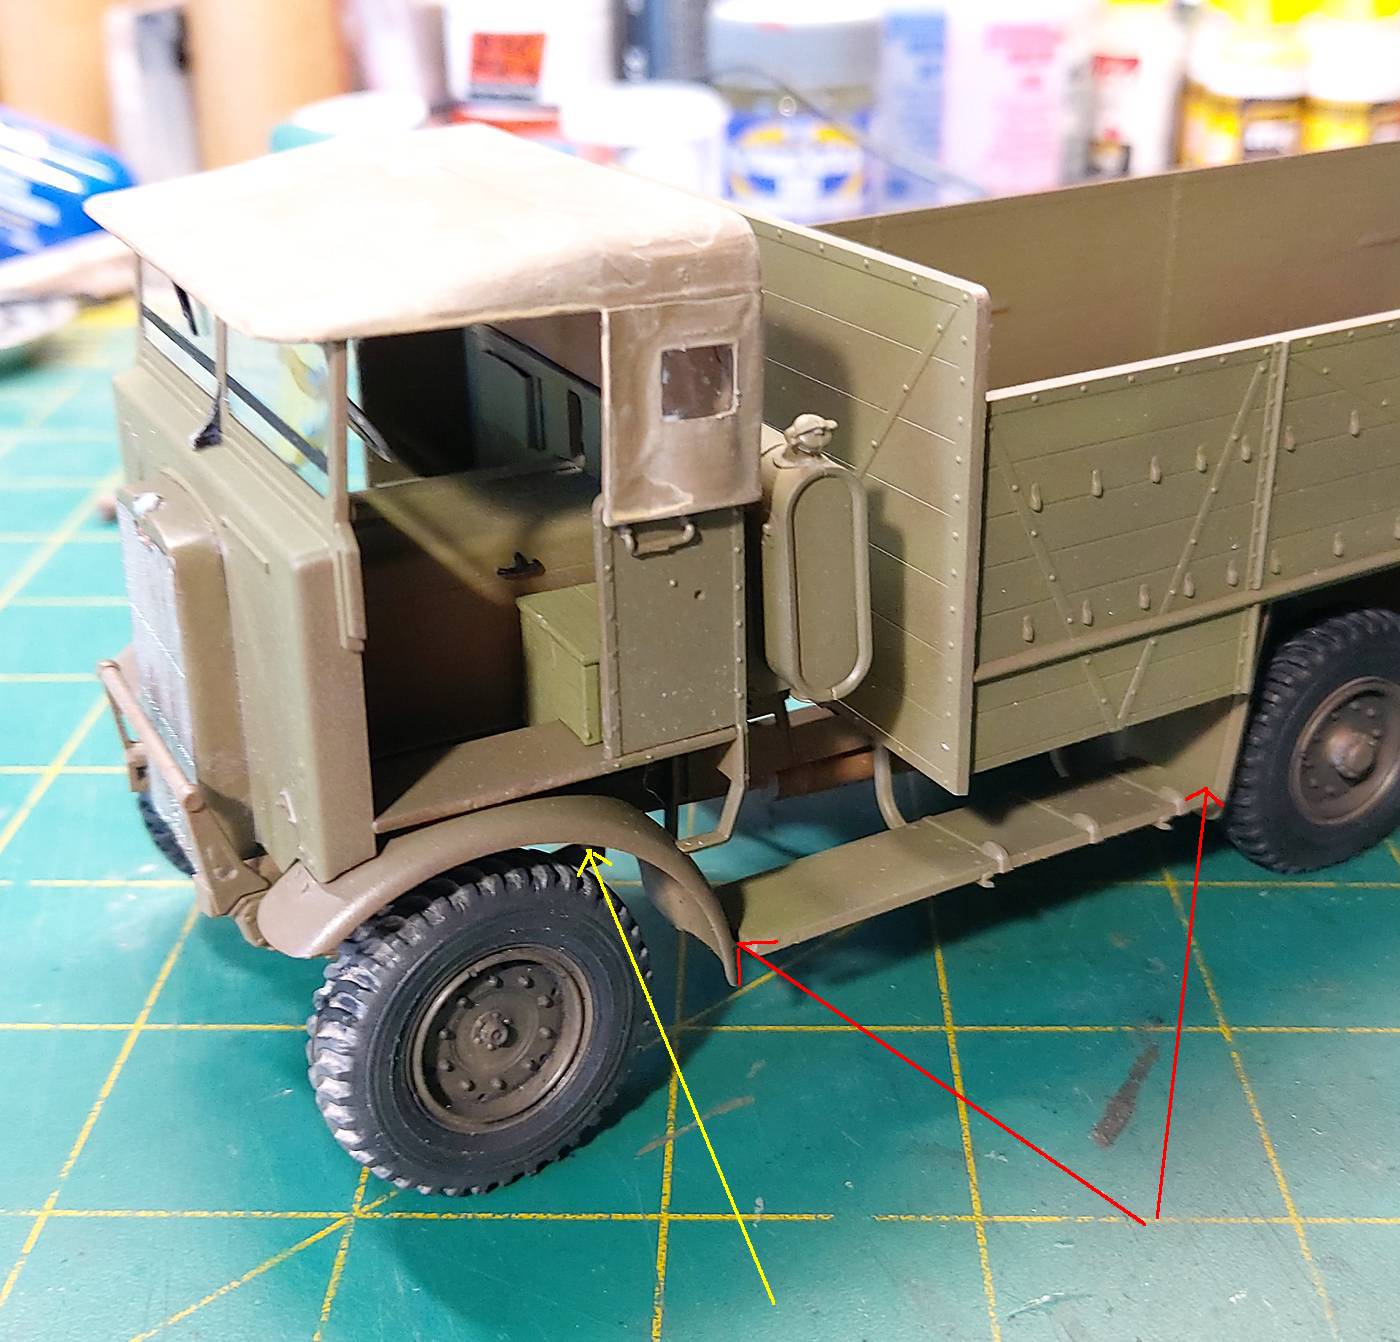
OK the yellow arrow refers to part B14 step 10. If you install it at step 10 you won’t be able to get the cab/front guard over it later. Well I couldn’t.
The red arrows. The side boards hit the front fender passenger’s side. Beware of this for later fitting. The rear mud flaps need to be near vertical to clear the sideboards on both sides.
The tyres are a pain. Nice rubber but I couldn’t sand them and had difficulty flattening the bottoms. At this stage I’ve weathered a couple to see what I can do with them.
Apart from that it’s a nice simple kit. I started to detail the engine but it can’t be seen when finished so phssst.
Next a clear coat and weathering.
Perhaps we need to change the title expression from Armor to something more like Military Vehicle - Ground
Na . . . just doesn’t roll off the tongue the way it does when you say,
Armor!
True story:
In my life I have had the good fortune to have won two “Best Armor” and one “Best of Show” awards. In each case it was with a Softskin Military Vehicle that I took the prize. In every case it so happened that it was the President of that IMPS chapter giving out the trophies. In each case they said the exact same thing:
“In this club I am a car guy and it pleases me to say the Best Blank Award for Armor was won by a truck!”
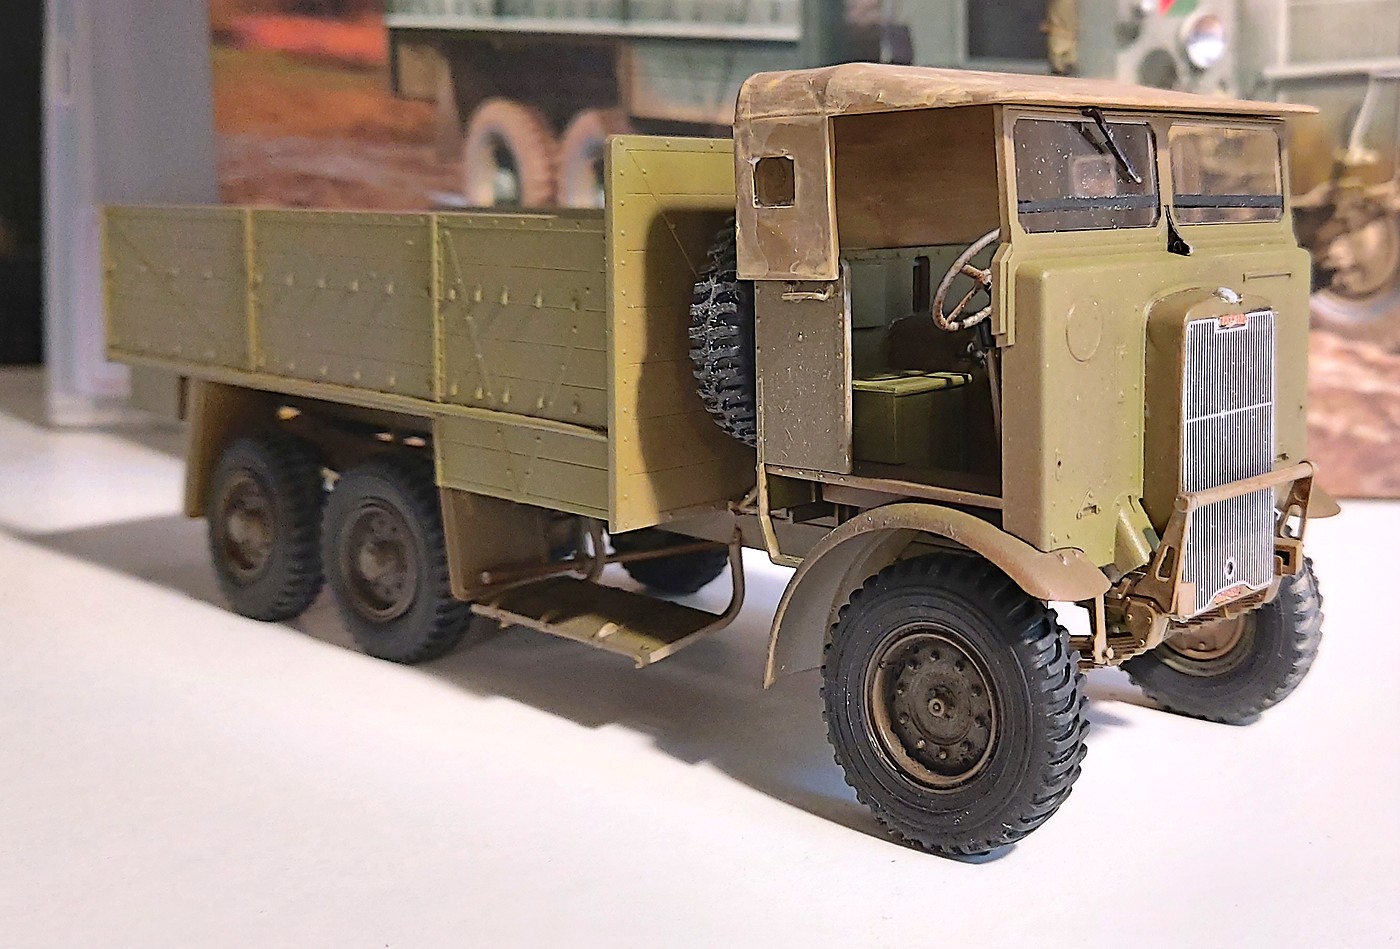
I hand painted a few bits. Headlights etc etc. After 48 hours they still haven’t dried. Our humidity at this time of year is a real pita. Next step is a clear coat and weathering but I’m wary of putting on a clear coat in this weather. (Yes my room has a/c. But I hate a/c more than I hate sticky paint.
Yes I know they shouldn’t be silver. But hey the ground crew were ex hot rodders!!
Note the centre seam on the tyre. The rubber is so soft that sanding just balls up the rubber. And a sharp blade fails to get all of it. Don’t get me wrong. They are great tyres but they do need a lot of work.
Enquiry proceeding into how I’ve never seen this thread before, glad to have caught up though. The build looks excellent & bonus points for the canvas, perfect. I think you hail from nearby (NSW) & I totally corroborate the humidity currently, my AB always reverse-hibernates during the hot months. One thing although maybe too late – I always use wire for the vertical canvas supports for the reason you gave, ease of removing for painting, never have to worry about breakage. Whatever I really like what your doing
Borrow your wife’s hairdryer. On low heat and low fan speed it works wonders on speeding up my painting and weathering. I how have my own hairdryer on a hook under my bench…