I saw it while looking for more information/possibilities for my Chieftain funnily enough, amazing job on it!
3 Likes
Your centurion is SO COOL!!
You did an awesome job, I love the figures and weathering you did. Also, I’ve always been looking for figures to modify into IDF tankers from a bunch of eras and seeing you turn dragon german figure sets into six day war IDF tankers really shows me that you can use about anything ![]() Great job!
Great job! ![]()
2 Likes
I’m really excited to see how this will turn out, good luck! ![]()
1 Like
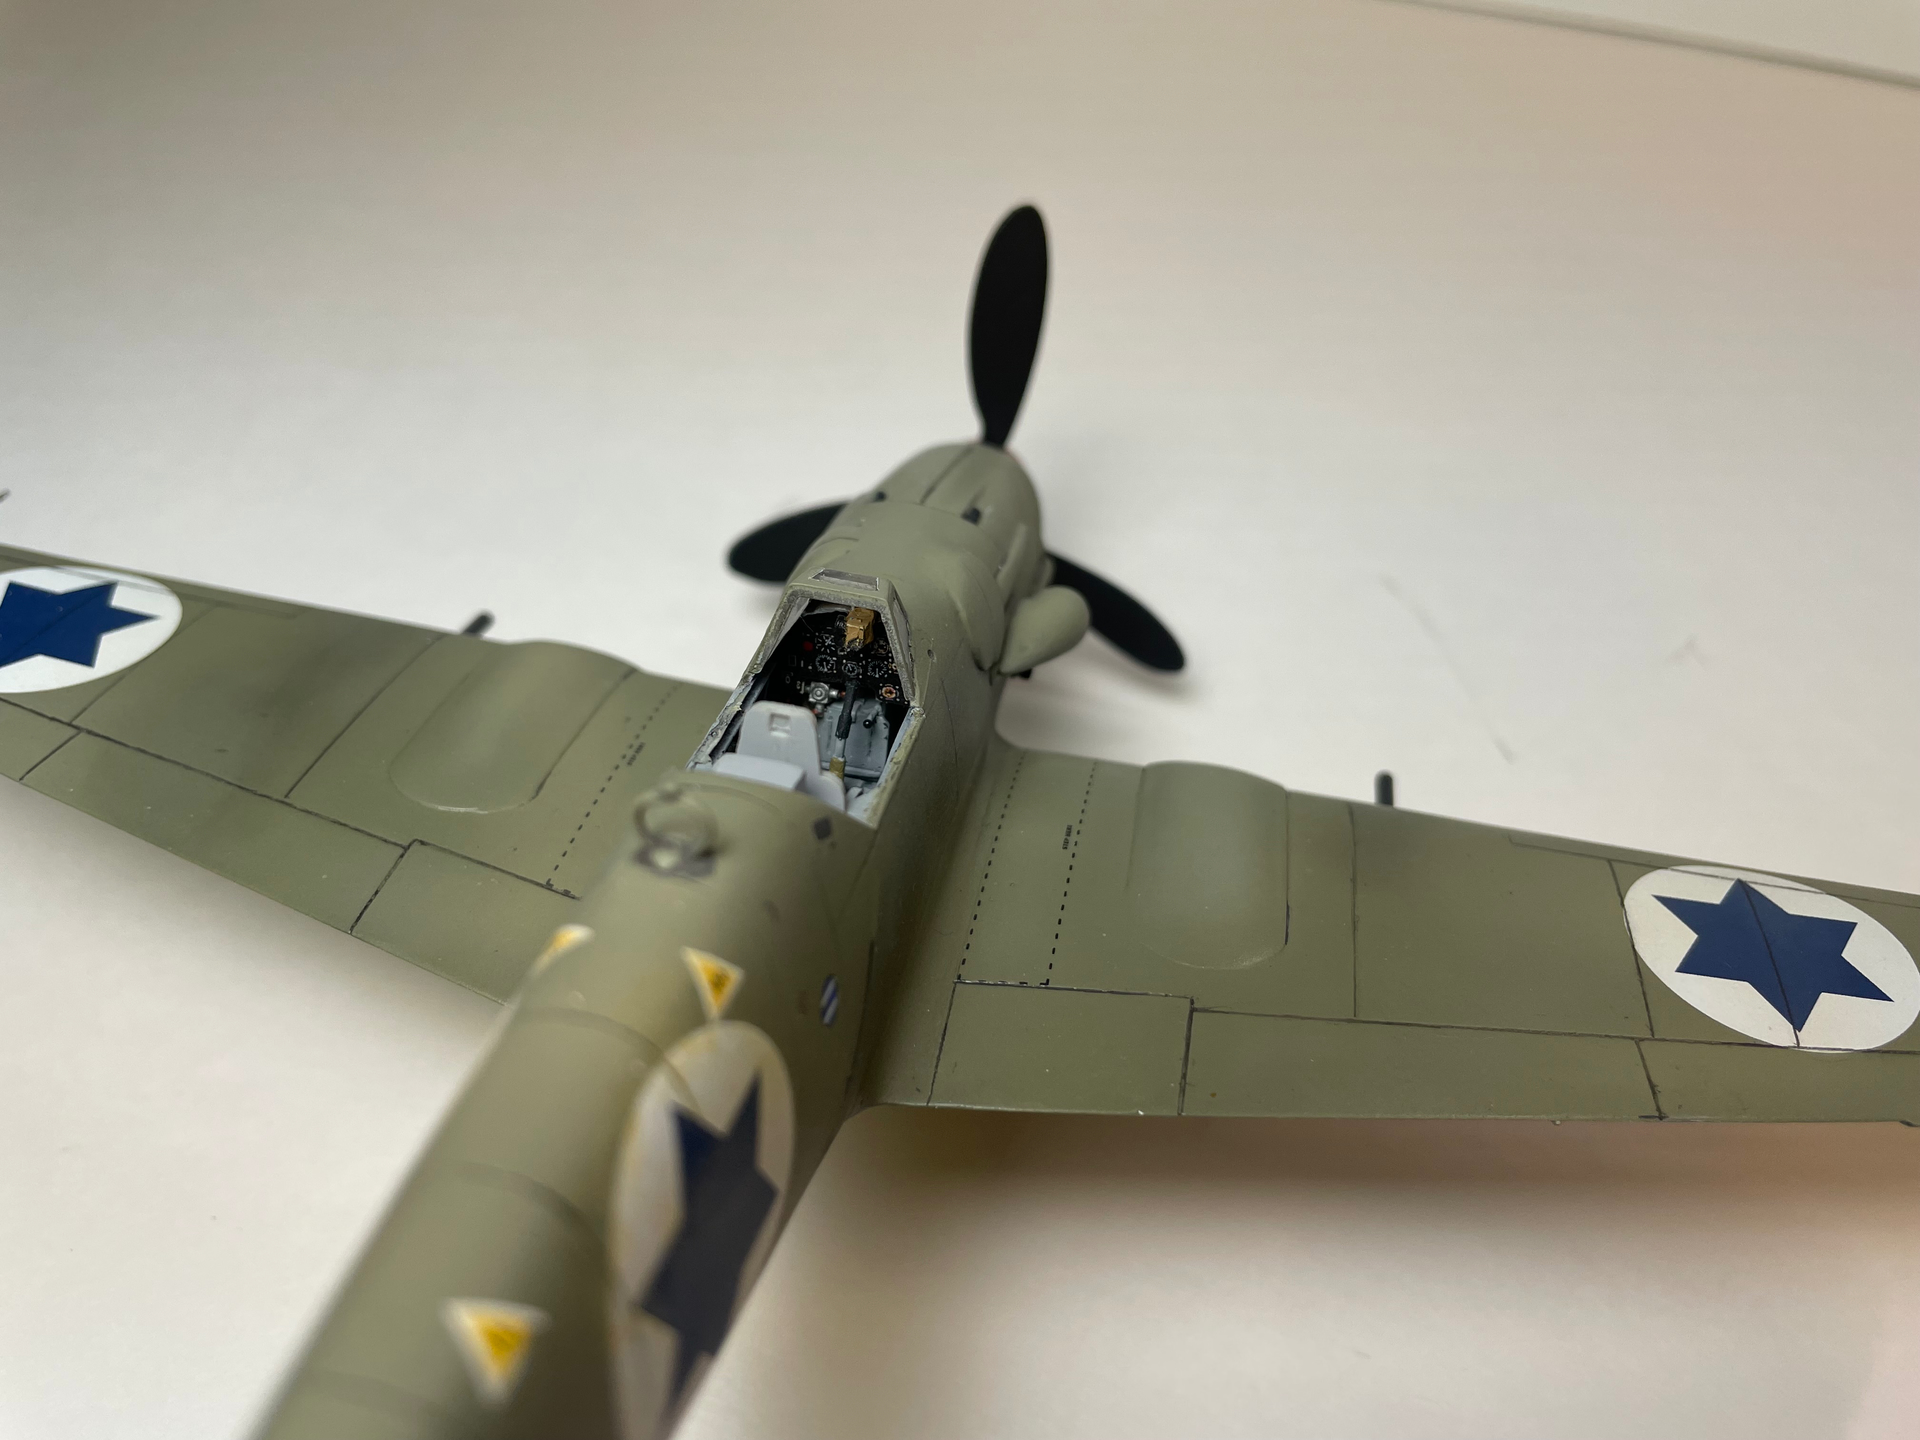
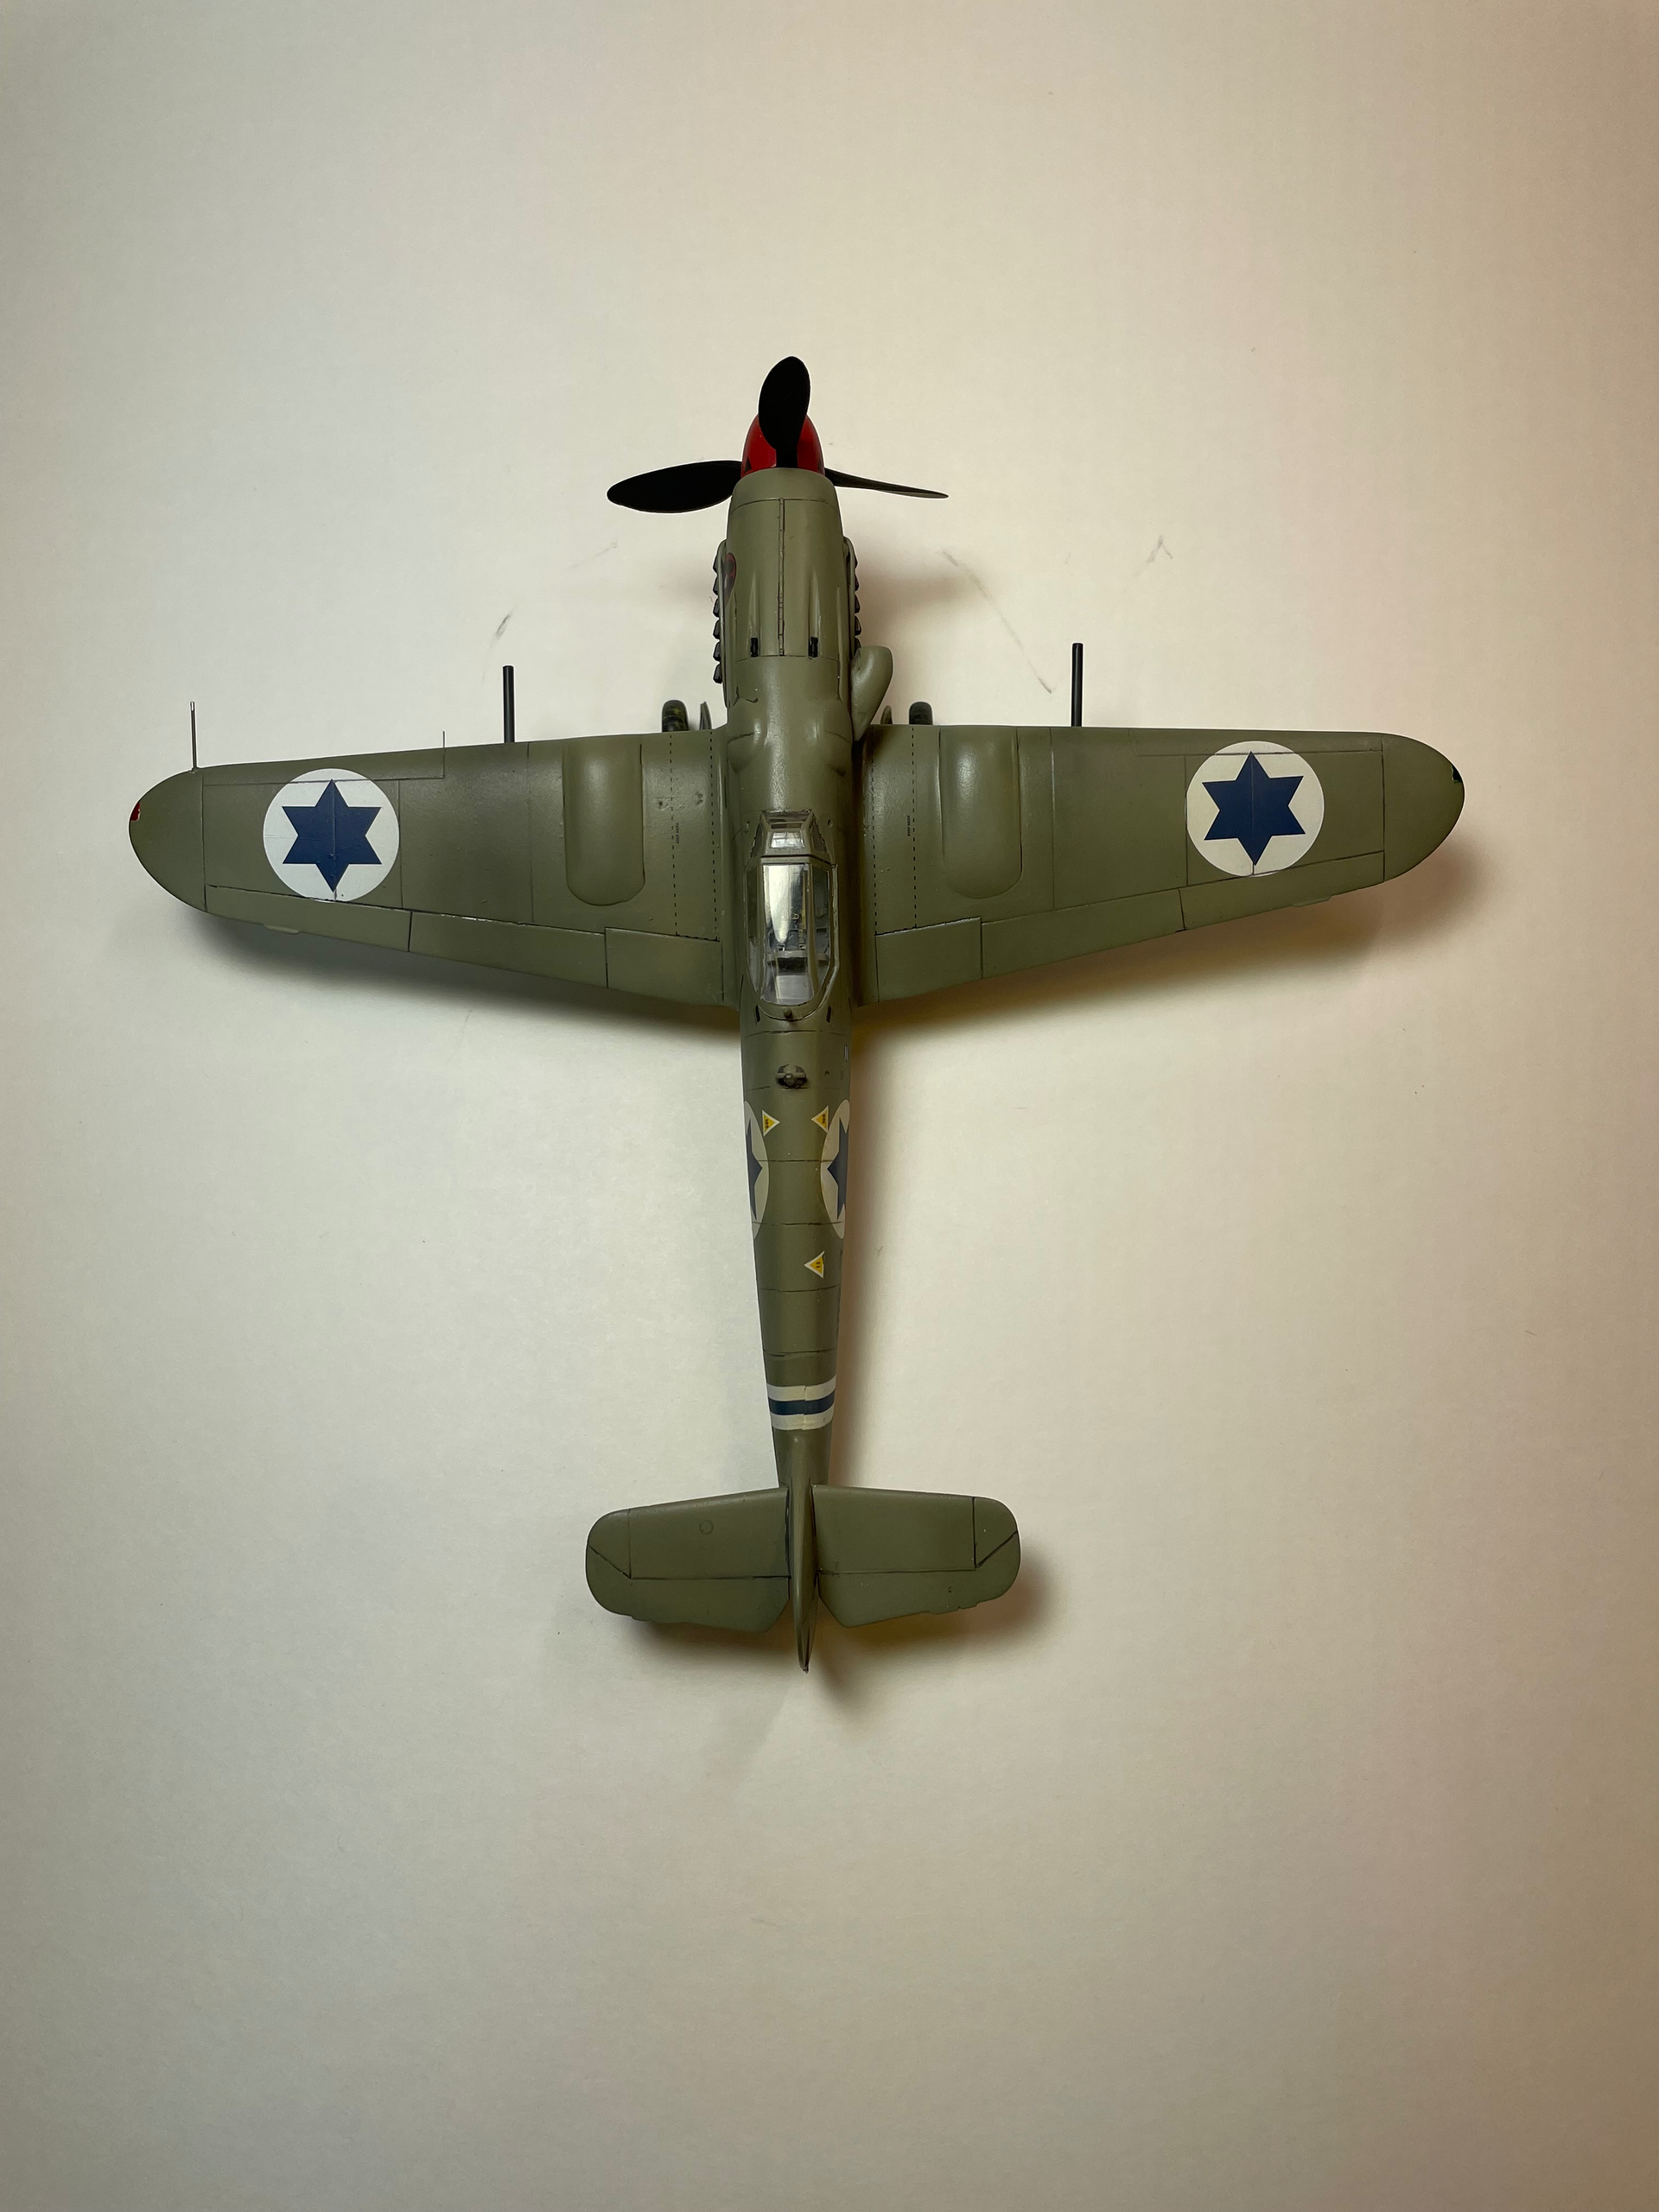
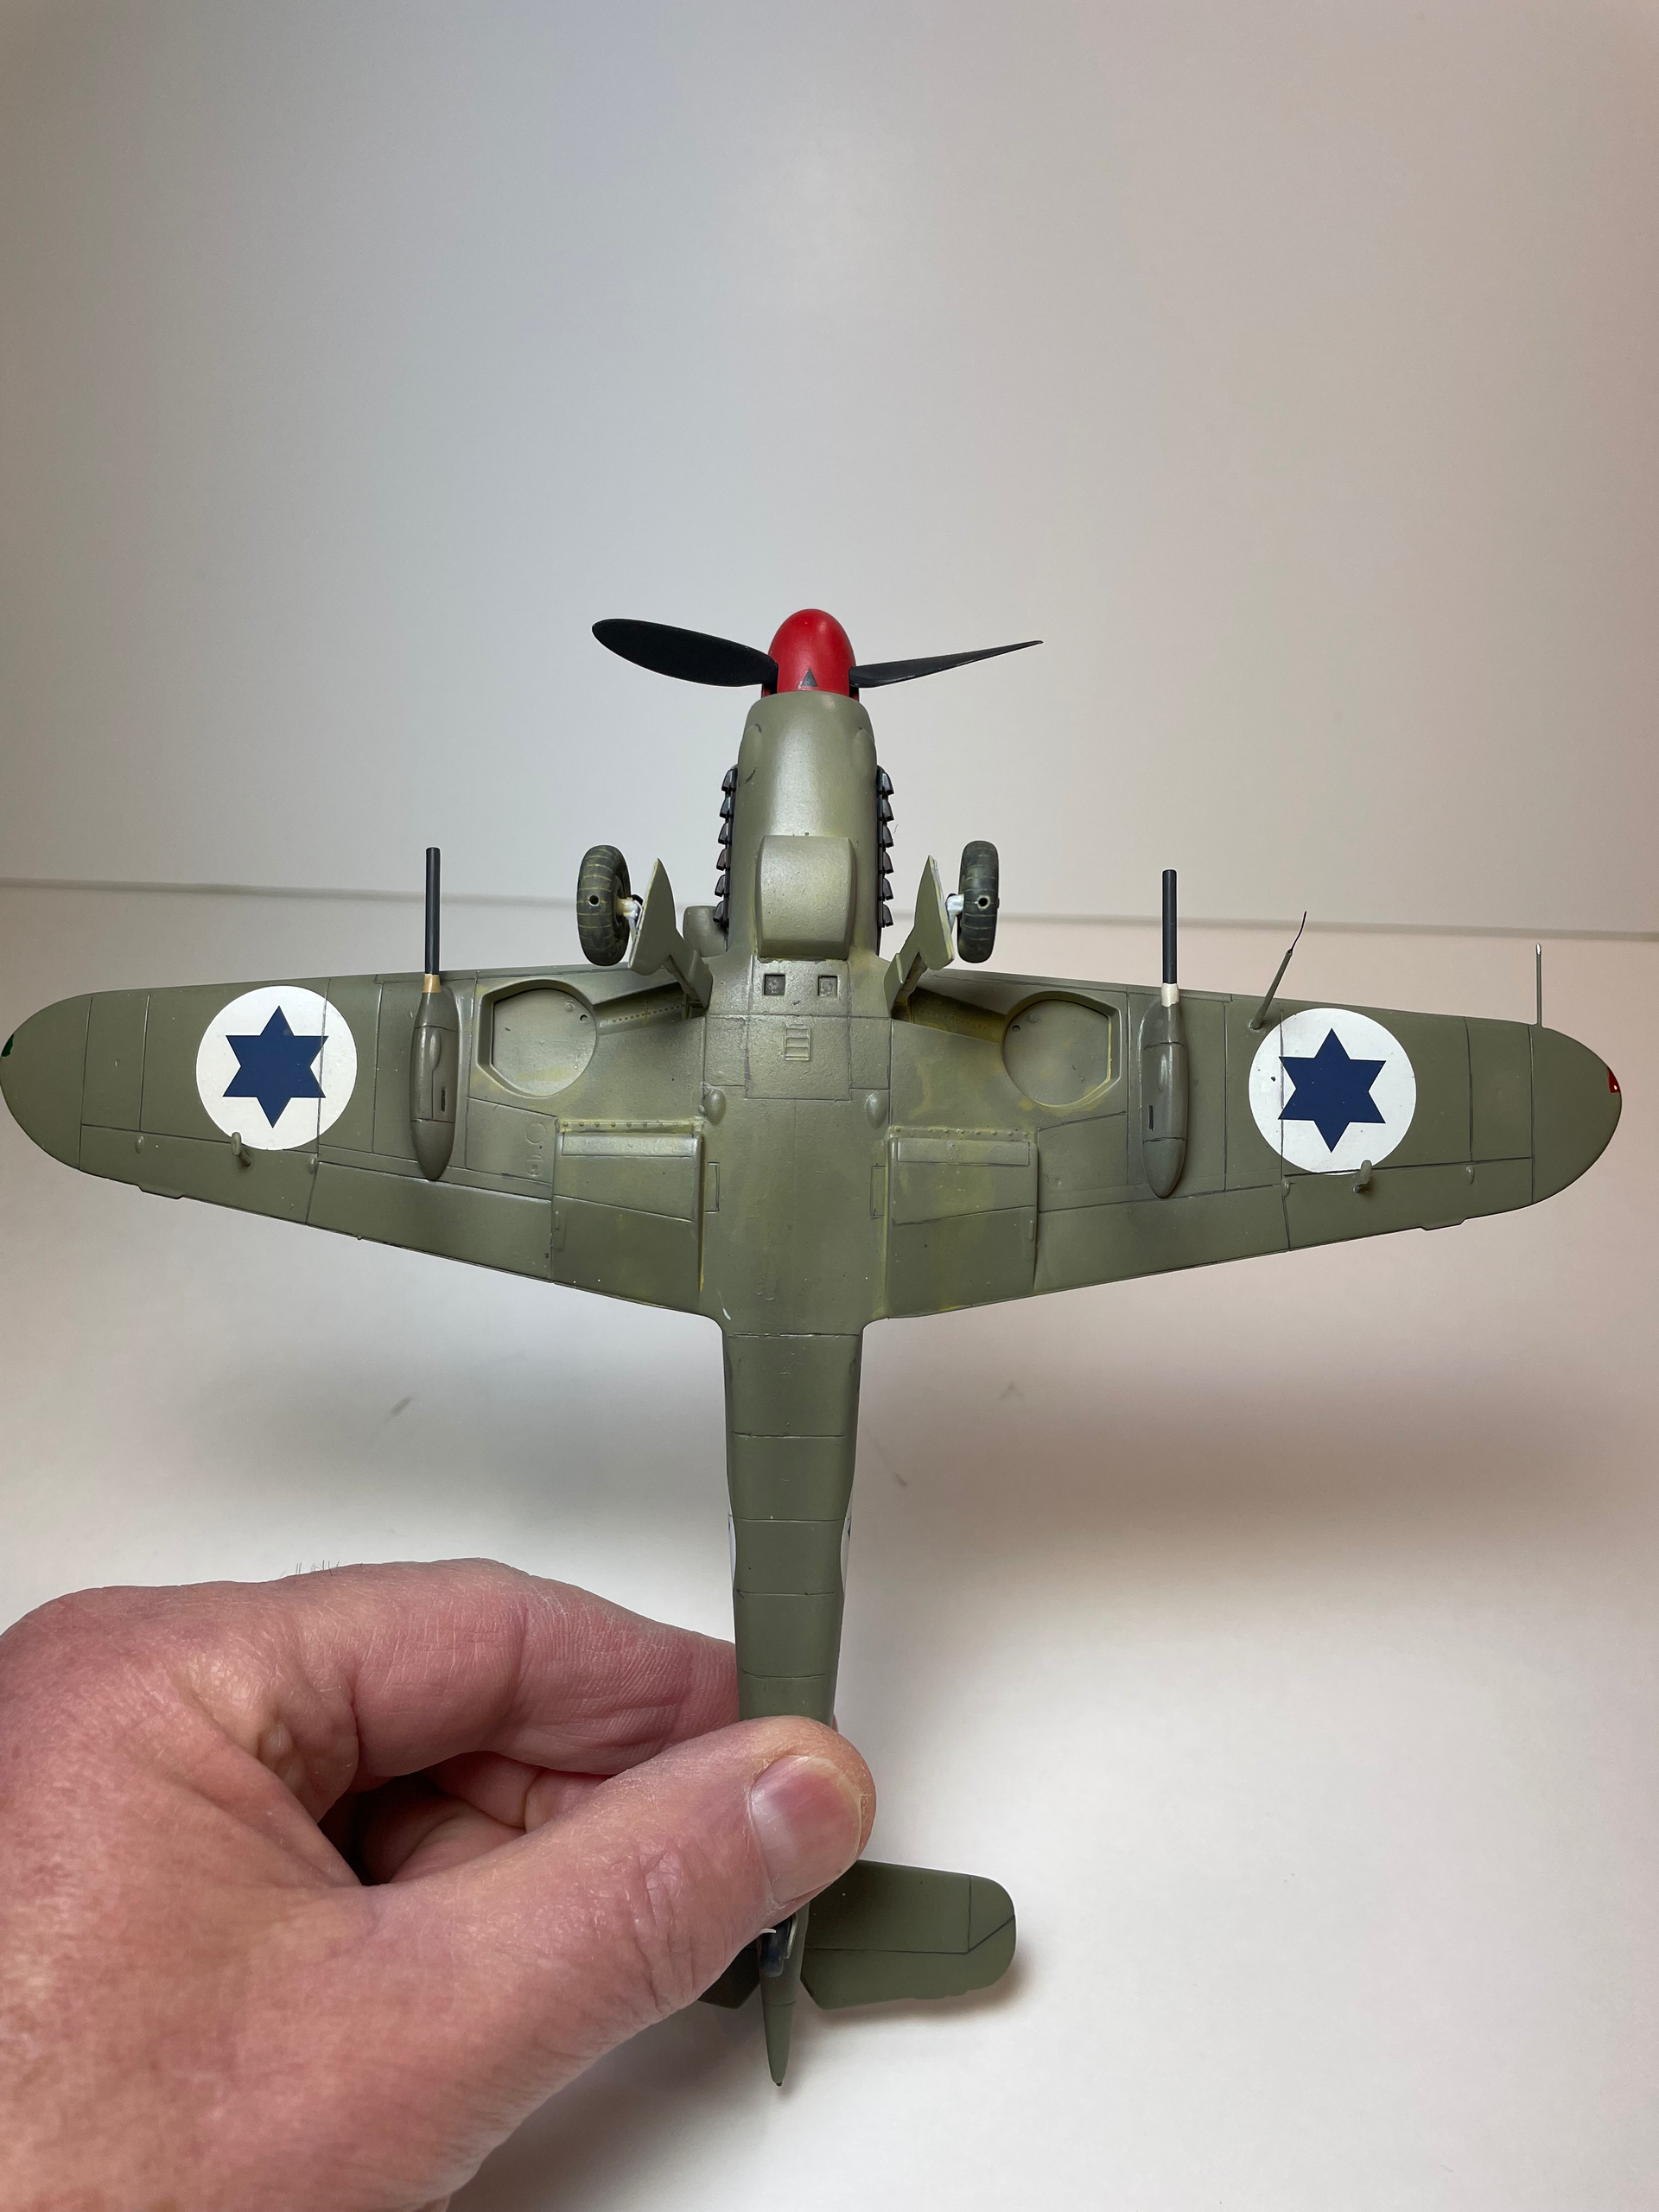
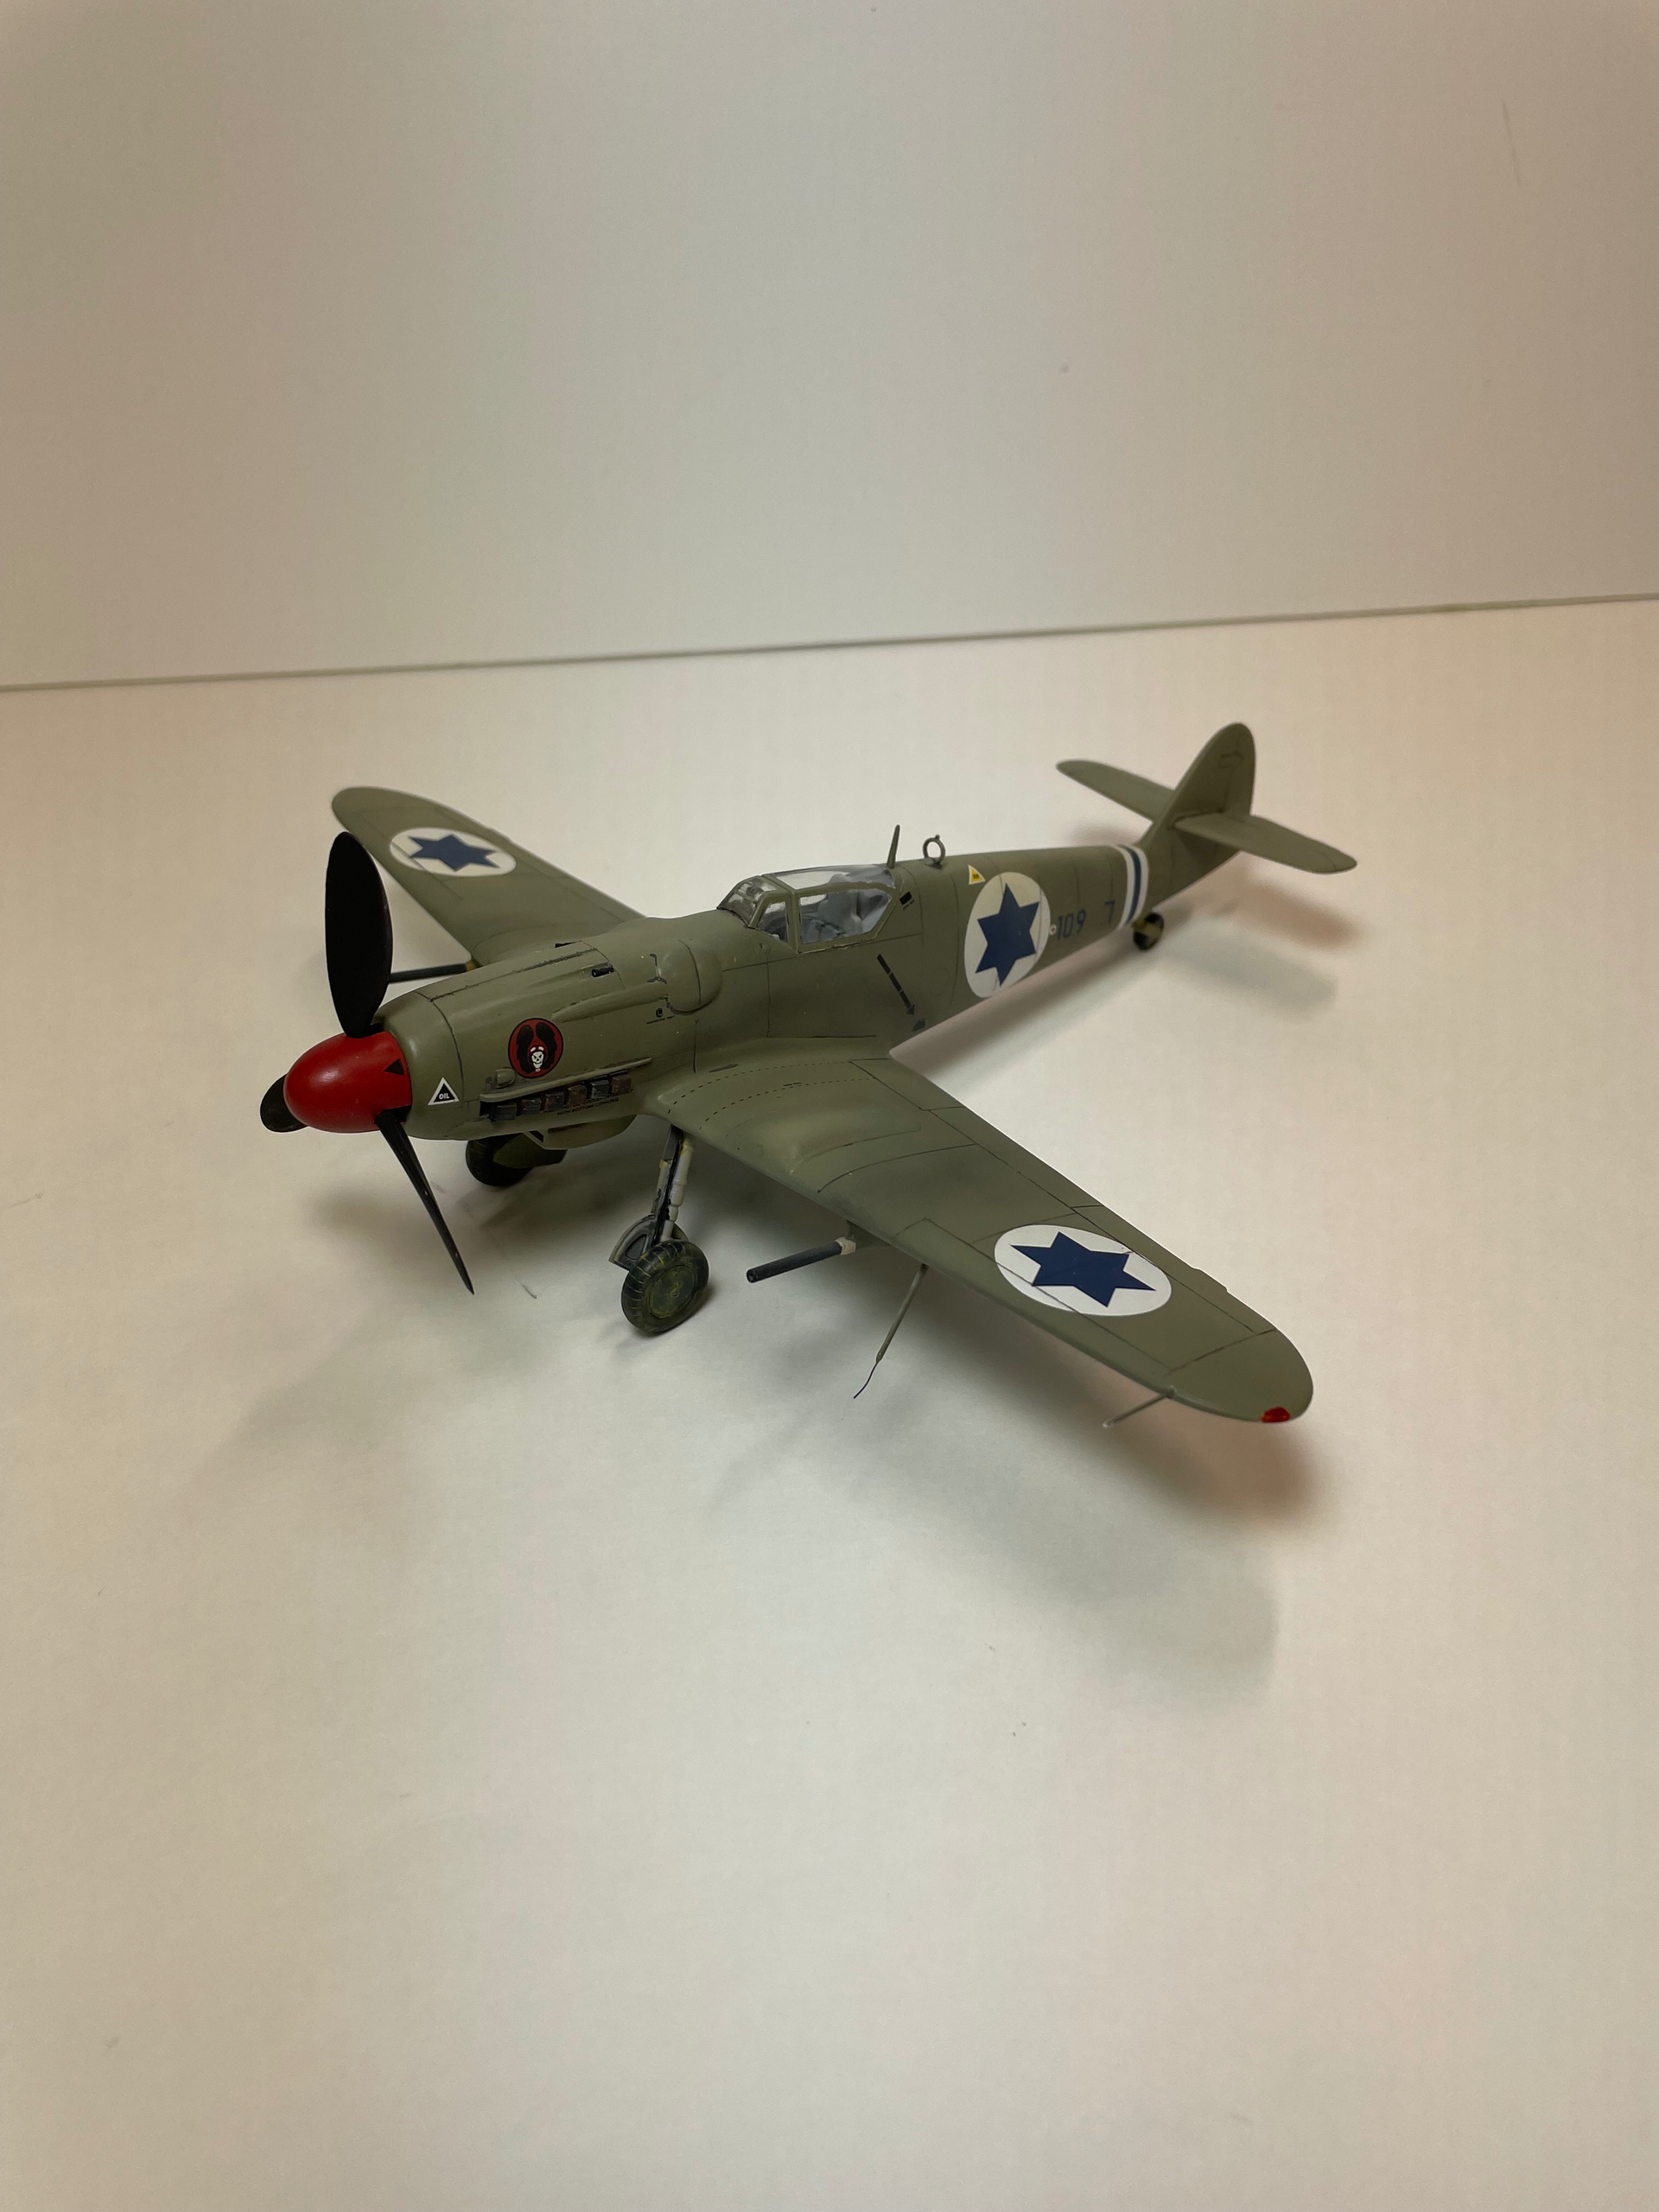
Well it has been some time since I could work on this, but it’s done now. I applied two different panel line washes and neither worked out well. Either my washes are too old or I waited too long with them on the model each time. In any case I got the aircraft cleaned up and sprayed on a Matt coat. When that was good and dry I started drawing the panel lines with pencils. I finished with that and then started attaching the last items, antennas, pitots, landing gear and such. The landing gear was still coated with gloss so I added some weathering with oils. I removed the masking from the canopy and decided to let it just sit on the model loosely so it could be removed to view the cockpit. This kit was harder than I was expecting what with the wing steps and panel line washes not working but it’s done.

15 Likes
I am racing to finish three other models but they are all deep in painting–not my favorite activity. Sometimes I need to build so…

This is another el cheapo model purchased for painting practice. A number of people in these forums tackled the same project. They did all sorts of scratch building. They added brass and resin parts. Yeah. No. I know nothing about this tank beyond the Wikipedia article. No references. No clue. My only goal is to finish on time. ![]()
Funny aside. Tonight, while taking a break from painting, I washed the parts for this thing. The plastic is now so old and brittle, just removing trees from the never before opened bags caused parts to snap off. That is the wrong word. They shot off. Zoooooom.
6 Likes
Classic old kit, Doug.
Sometimes it is nice just to build something straight out of the box and live with whatever inaccuracies are there.
Sometimes it is fun to (try to) make a silk purse from a sows ear.
I often do exactly as you do here with old matchbox and ESCI kits. Those are full of fun and nostalgia for me ![]()
3 Likes
I still use parts from that Magach kit on current builds, and I’ve used it as a starting point for others.
1 Like
@SGTJKJ When I was a kid, I really enjoyed the 1/72 scale ESCI armor and plane models. This will be my first 1/35 scale ESCI model. I look forward to building it.
@rfbaer Your build of the model was a factor in my decision to purchase one.
…
When putting the washed parts back in the box, even more brittle parts popped off the runners! I was going to buy more old ESCI kits for nostalgia but the brittle parts thing has me spooked.
I may look for a ‘what to fix’ article or walk around or something. I do not want to get deep into the weeds but am okay with fixing easy stuff.
3 Likes
Thanks for the warning about parts jumping off, will remember to open my box very carefully…
2 Likes
Popcorn kits Bert… be aware .. ![]()
![]()
3 Likes
![]()
![]()
![]() I‘ll be extra careful…
I‘ll be extra careful…
2 Likes
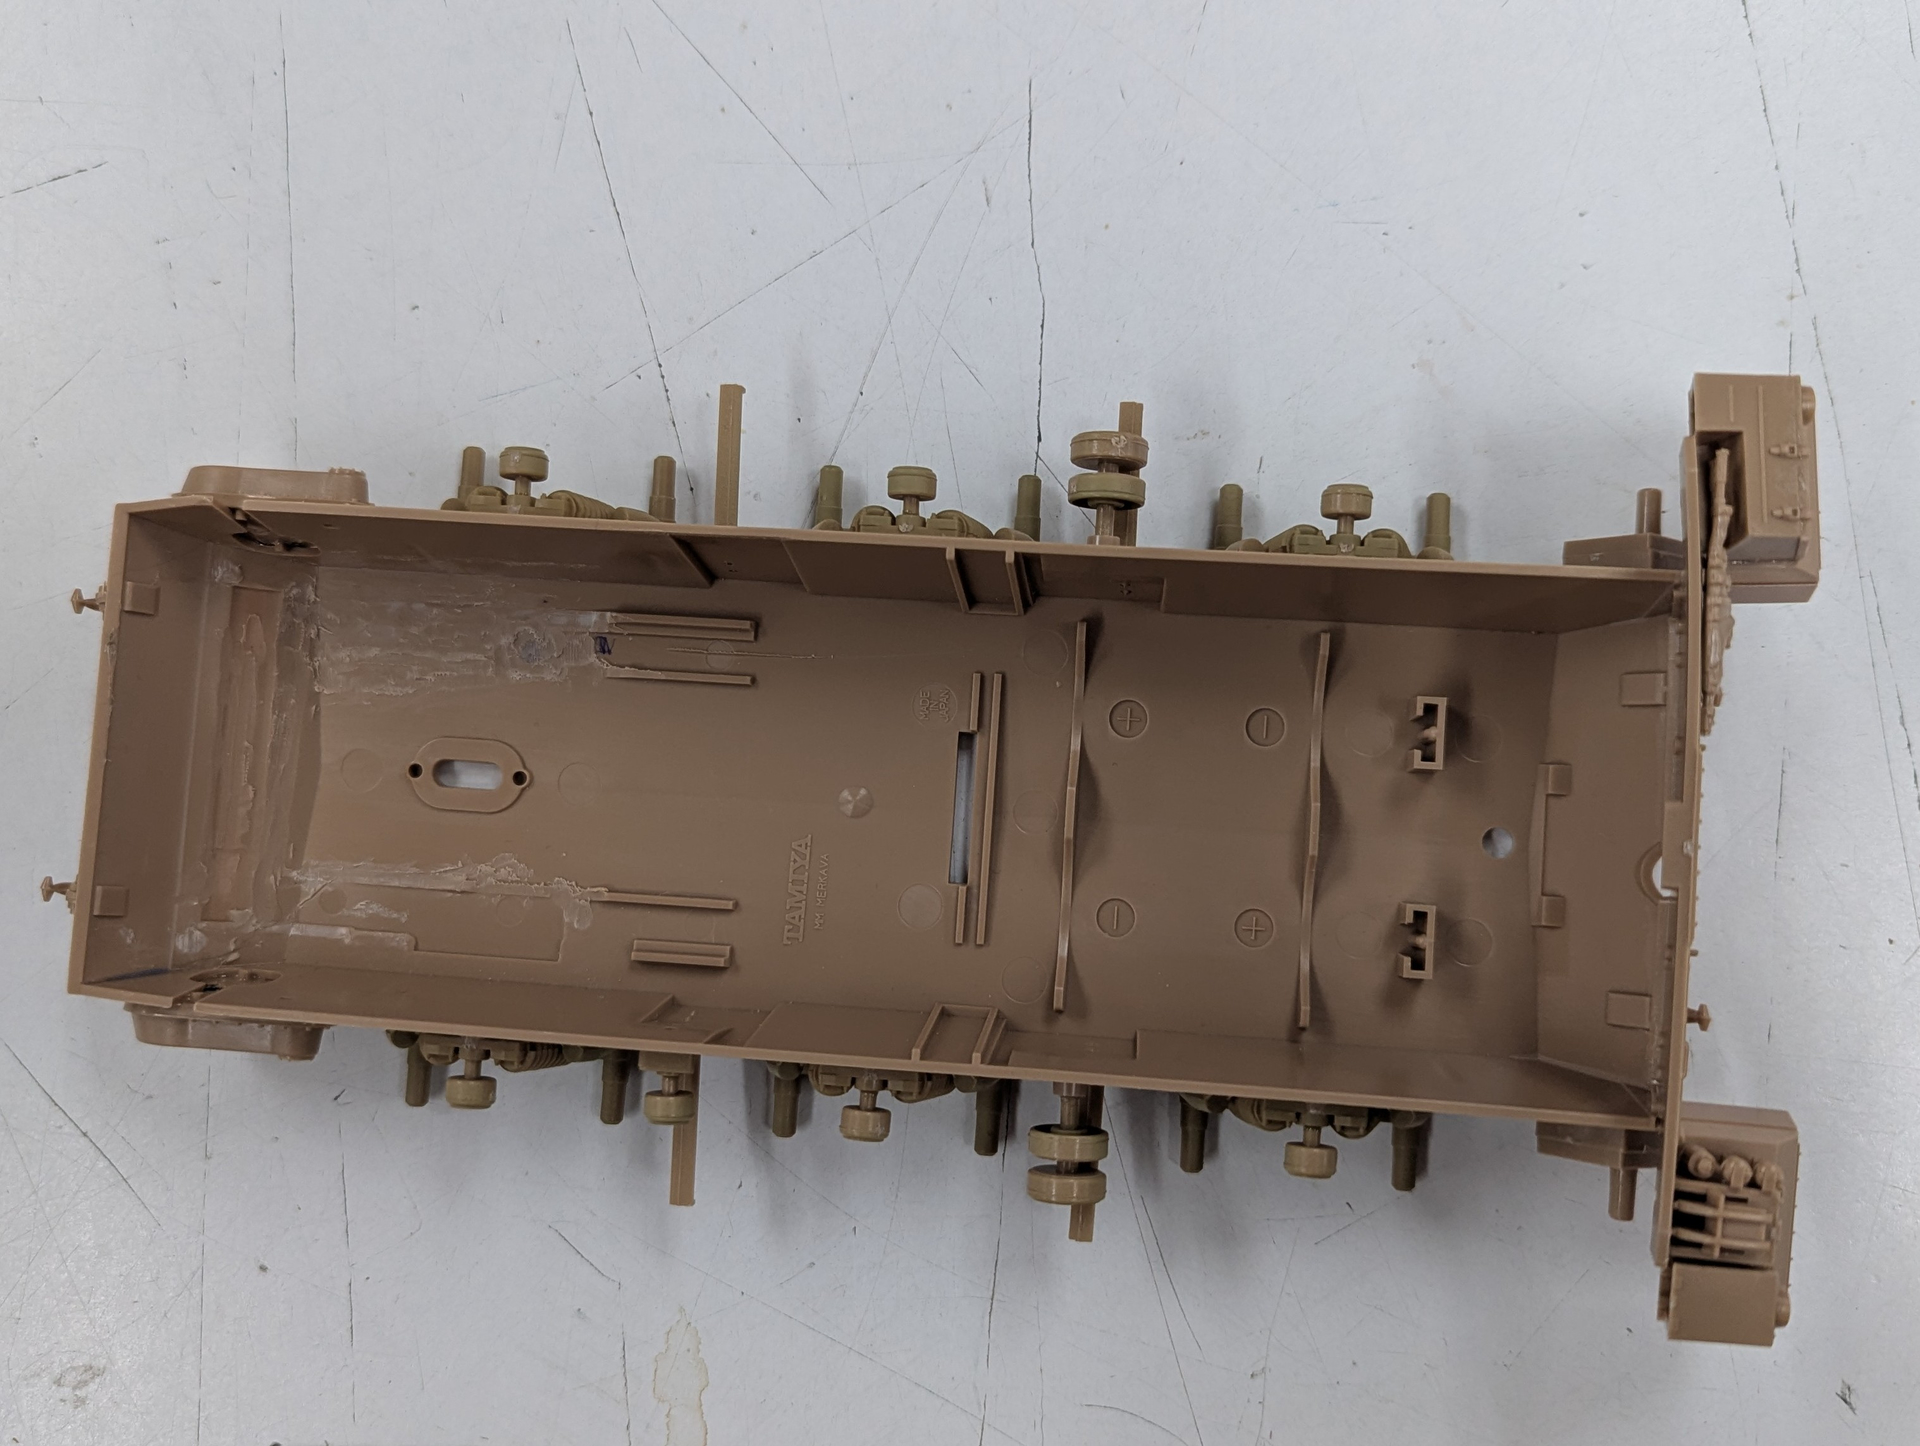
Lower hull assembled, minus running gear, pre painting. Currently sitting in the paint booth drying.
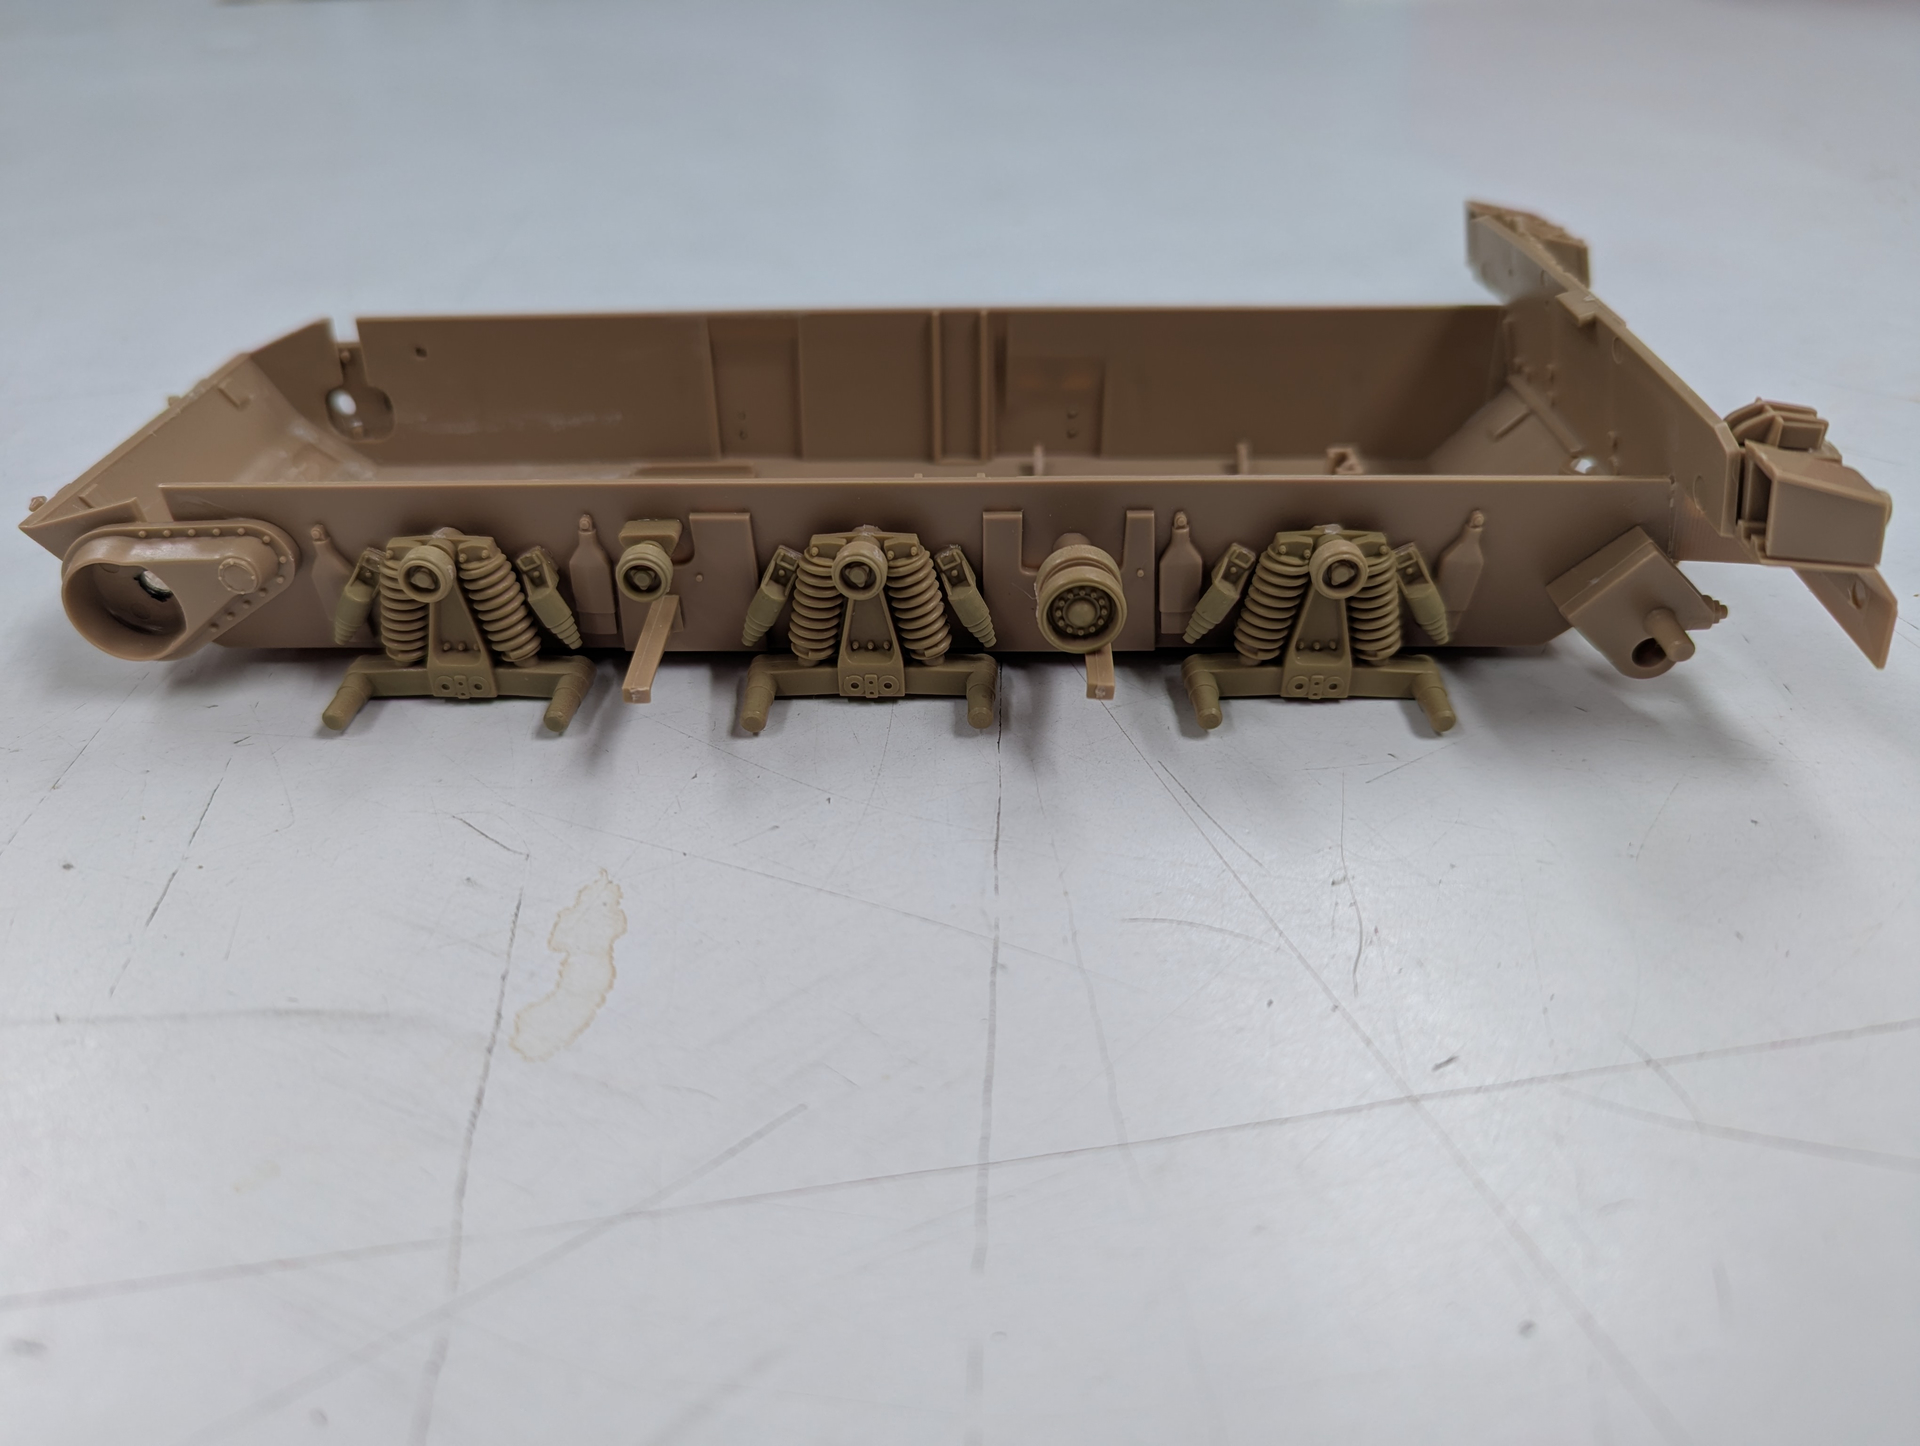
Ground out some of the pads for the original gearbox to fit a Tamiya dual motor gearbox.
2 Likes
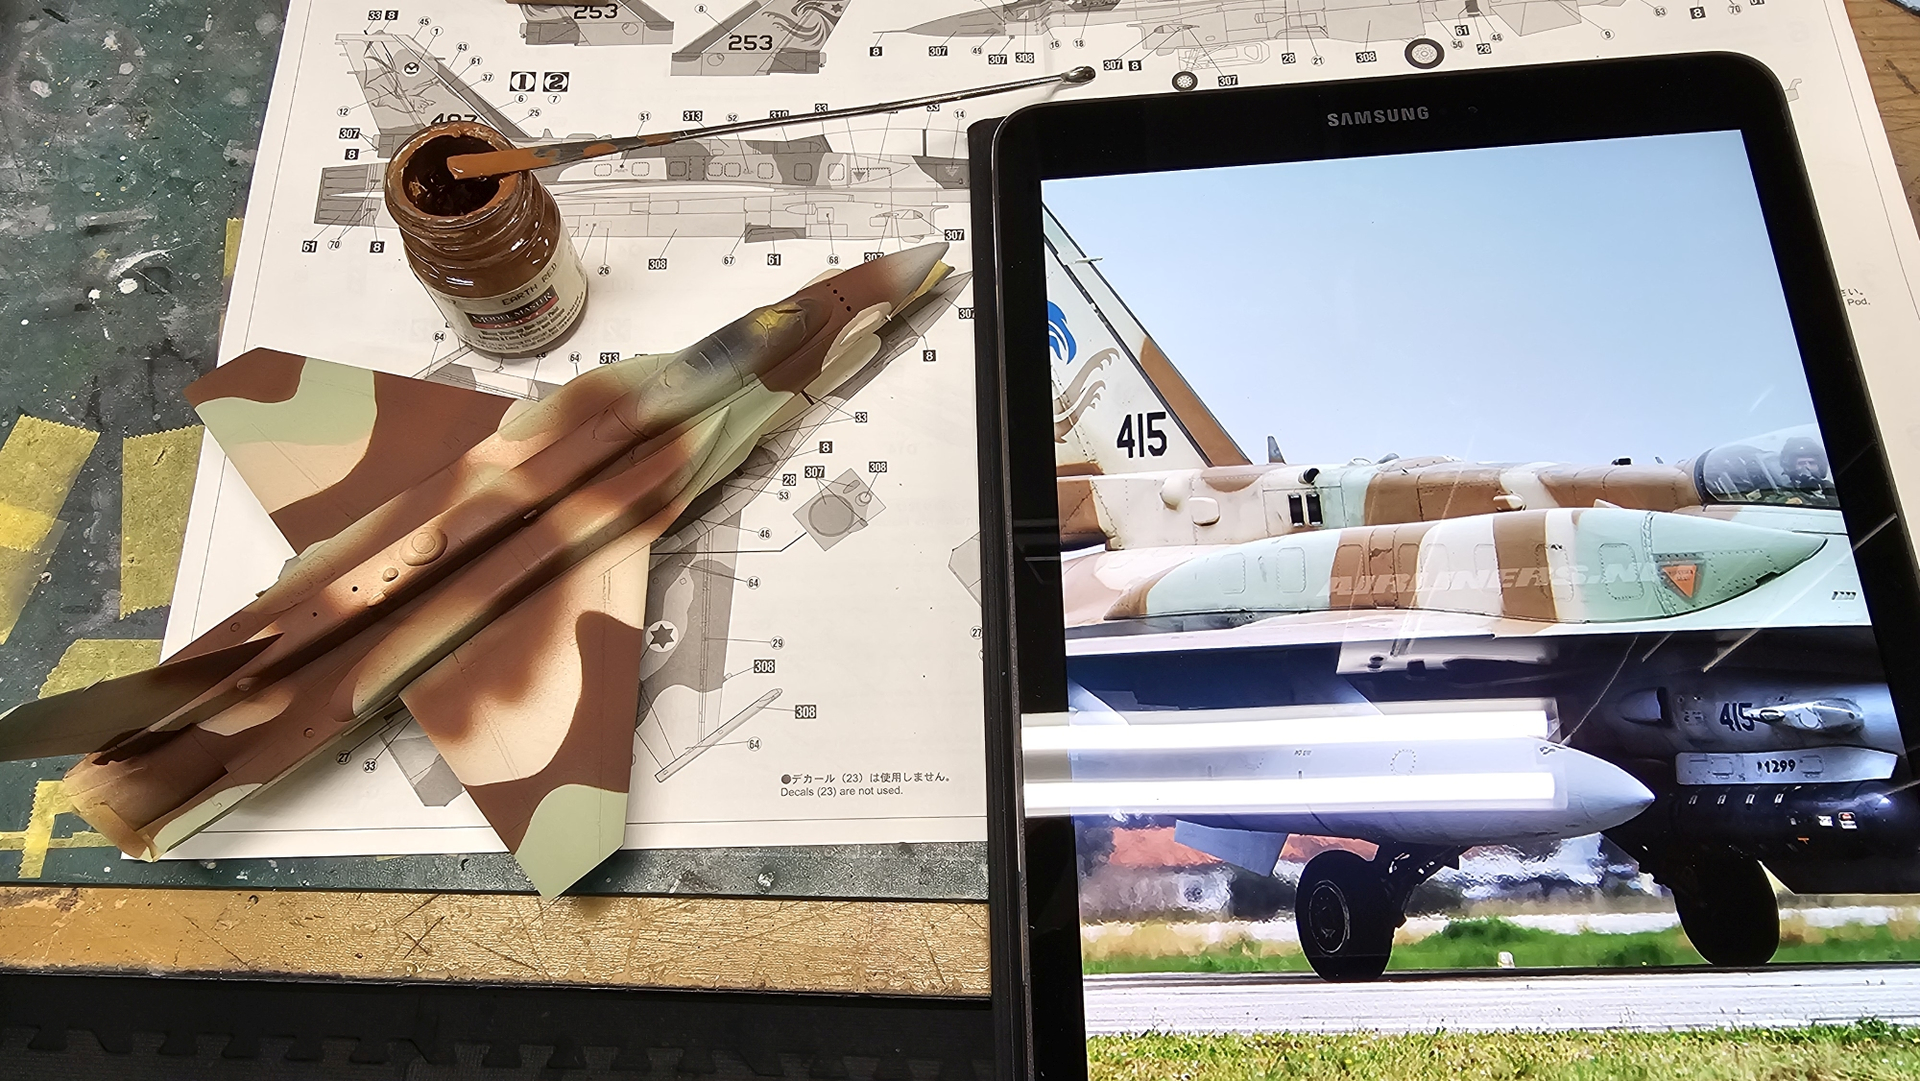
Trying to finish not to be too OCD about colors for the F-16. The tan and green match fairly well, but I used Tamiya XF-79 Flat Linoleum Deck Brown and it’s way too dark. The best match I have is an old bottle of Testors Acryl Earth Red.
6 Likes
Lucky for you to still have some. The -16 is looking good. I’ll have to remember that combination when I do my F-16I and I better look and see if I still have that same color.
1 Like
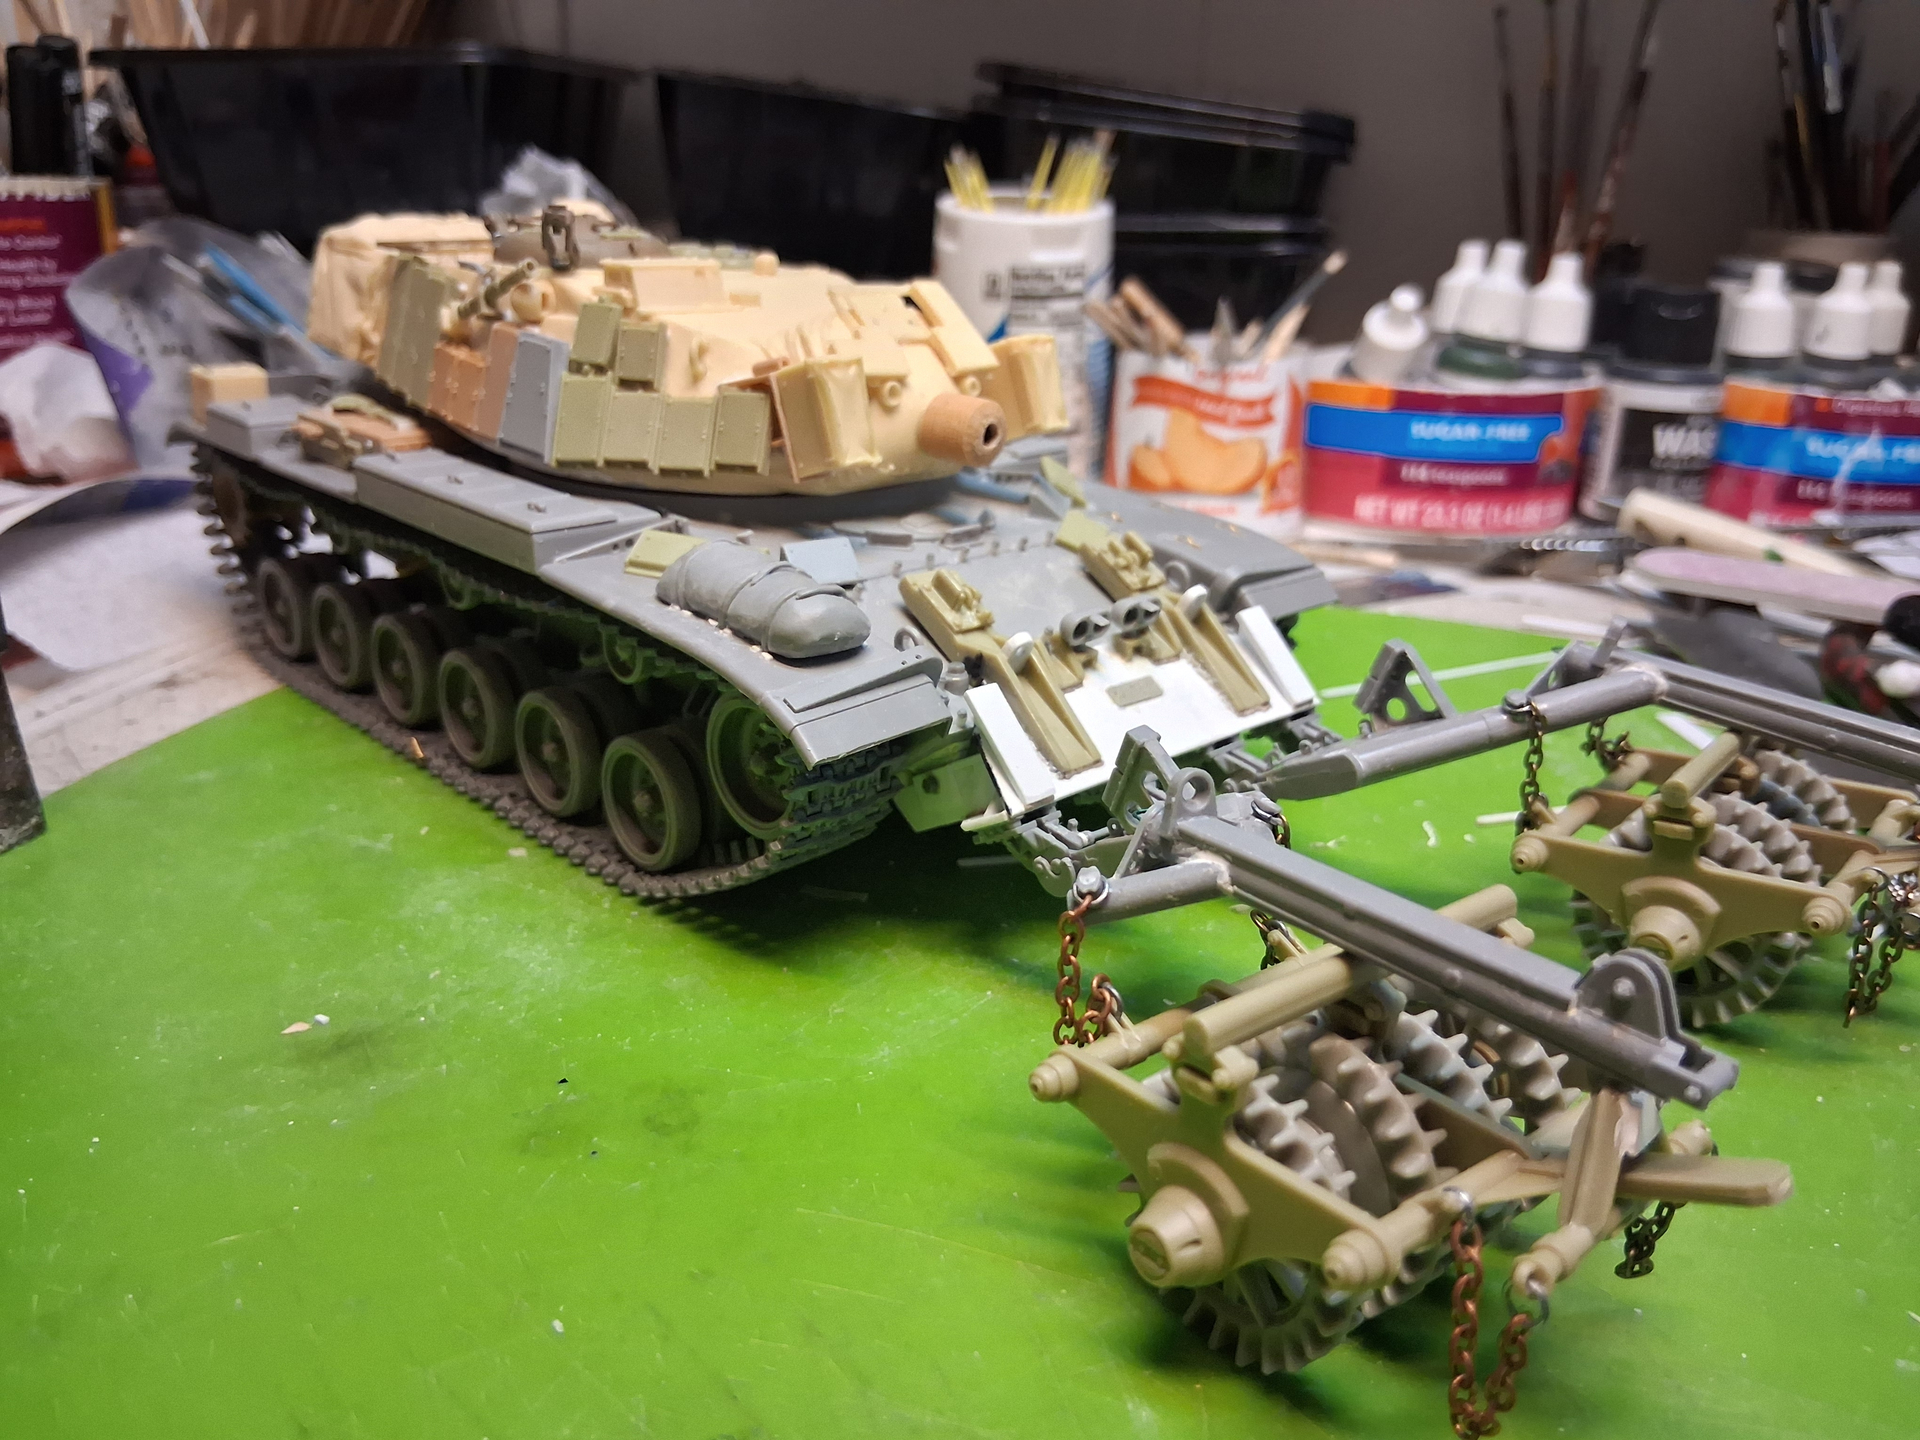
ESCI M60A1 BLAZER
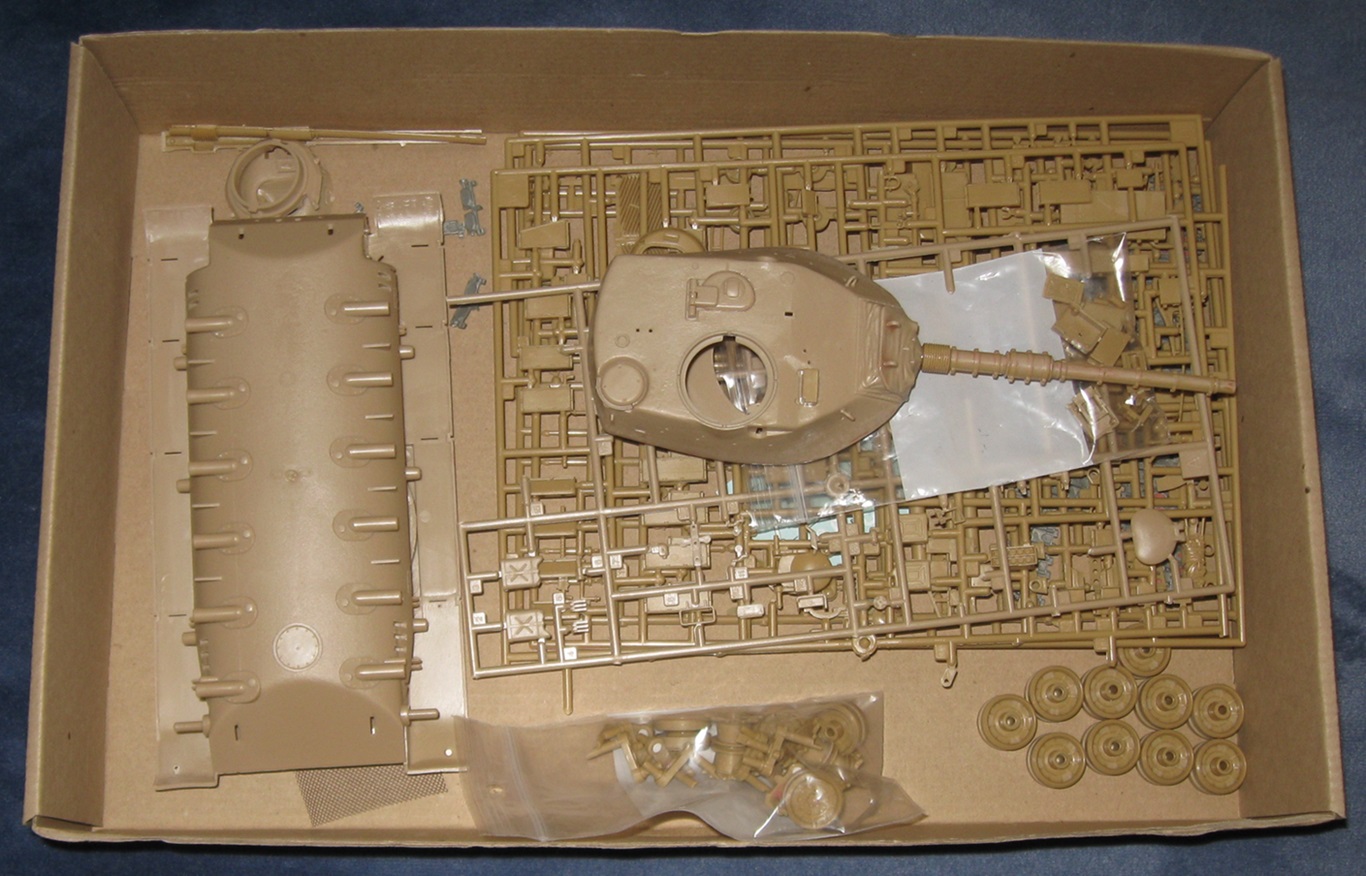
Really regret starting this. Bummer of a model. Most of the plastic is very hard to work with. Couple hundred ejector pin holes and sink marks to fill. This is 26 hours of work. Just now, I discovered the range finder hoods are missing so no way to complete the model unless I can figure out some kluge. Really bad luck with these Israeli campaigns.
Edit: Slept on the problem. Decided my best bet is to sand some tubing into domes. Drove out to Hobby Lobby. Long drive. Never been there before. Closed. Learn it is always closed on Sundays. Funniest part is, for the gas, I could have ordered what I needed, and then some, from Scale Hobbiest. Lesson learned. ![]()
3 Likes
ESCI M60A1 BLAZER

I actually managed to make things worse. ![]() So, the instructions are really bad and there are no locator holes for the reactive armor blocks. I found some pictures of the real vehicle to guide me and started adding the blocks. That was a lot of trial and error and they do not fit at all. The real vehicle has welded bosses for the blocks. This model does not have those. I get to the end on one side and realize the smoke launcher may not fit. I build the smoke launcher. It does not fit. Even without the armor blocks it does not fit. I realize I need to move all the armor blocks about half a millimeter back. I start peeling off the armor blocks and a bunch shatter because…brittle plastic. So, after 5 more hours of work I added a few more hours of work. Golf clap for myself. This one I can fix without buying anything but really a bummer of a model. No fun at all.
So, the instructions are really bad and there are no locator holes for the reactive armor blocks. I found some pictures of the real vehicle to guide me and started adding the blocks. That was a lot of trial and error and they do not fit at all. The real vehicle has welded bosses for the blocks. This model does not have those. I get to the end on one side and realize the smoke launcher may not fit. I build the smoke launcher. It does not fit. Even without the armor blocks it does not fit. I realize I need to move all the armor blocks about half a millimeter back. I start peeling off the armor blocks and a bunch shatter because…brittle plastic. So, after 5 more hours of work I added a few more hours of work. Golf clap for myself. This one I can fix without buying anything but really a bummer of a model. No fun at all.
3 Likes
Keep on keeping on Doug!
2 Likes
Hang tough, Dude !
2 Likes
I’ve got a bunch of spare parts for that model, both ESCI and Academy….
Also, the smoke dischargers don’t fit on any of the above, always have to be “adjusted “. I generally get the smoke dischargers on first, then work from both ends to the middle and mount the armor modules on short pieces of rod stock to get the stand-off.
Pic is what I’m currently working on, until I get back on my Sho’t.
Armor modules are from Academy, ESCI and Dragon.
PM me if I can help with parts.
6 Likes
Yeah. After mounting the blocks back to front because…that makes sense, I realized the fit is so tight with the smoke launchers those really need to go on first. Problem. That means putting on all the front parts and figuring out what works. That means finding more pictures.
I also figured out going back to front that many blocks need bosses, otherwise they cling to the tank by magic. I was going to add those bosses with round stock after getting everything to fit. Now I am thinking of rebuilding all the explosive armor blocks, adding the bosses first, then gluing the blocks to the tank by the bosses, which is how things really work. Problem. That means all the armor blocks need backs because otherwise, oh hey, I can look into the model. Problem. That means I need to paint everything before mounting the armor blocks because there is no way I can get paint behind them after the fact. That means I need to know where the bosses go before painting. That will be really ugly but the most realistic. Or I can pretend. Dunno. Bummer of a model. Learning a lot about how this stuff really works, though.
Also, do not have all that spare stuff you have. I have to make what comes in the box actually work. Really nice model, though. From the start, I had your pictures and 3 or 4 other builds as references. Everyone else used lots of add on parts, though.
Sokay. Will make it work. Or not. Have not decided.
1 Like