AEF Designs went Tango Uniform before I could purchase their IDF M50 155mm howitzer “kit.”
I have a couple of the Heller French 155’s that it’s based on. Does anyone know of a good reference book that has enough detail photos to scratch build one, i.e. interior photos?
Better yet, have any of you bought one and immediately had buyer’s remorse? I’ll take it off your hands if you pay me enough.
Thanks. Unfortunately the M50 was a a Sherman based SPG. But your reply was helpful nonetheless. I figured if someone goes to the trouble of naming a book …Non Sherman Based, then there’s probably one that covers Sherman based as well. Turns out there is.
I had indeed considered the M40 as a starting point. The first thing I need to do is decide which version of the M50 I want to build - the later version with HVSS suspension and cast transmission housing, or the earlier version with VVSS suspension and three piece transmission housing. Both appeal to me, and would be equally doable.
The slope of the glacis on the M40 does appear to match up well to drawings of the later M50. Unfortunately my M40 is too far along to use it. I’ve put too much work into correcting it to quit now. One day I might build something completely OOB. And in that day the earth may well stop spinning on its axis.
I could use an M12 for the earlier version - correct suspension and housing. It’s made it all the way to final finishing stages, so I guess I’m purchasing one or the other. The earlier version does use air cleaners very similar to those found on the M40. For the early version I might very well need both kits if I don’t feel like scratch building air cleaners.
They have a neat philosophy on AR15.com. When in doubt about which gun to buy next they just buy both. I can see myself eventually building both versions. If I live long enough…
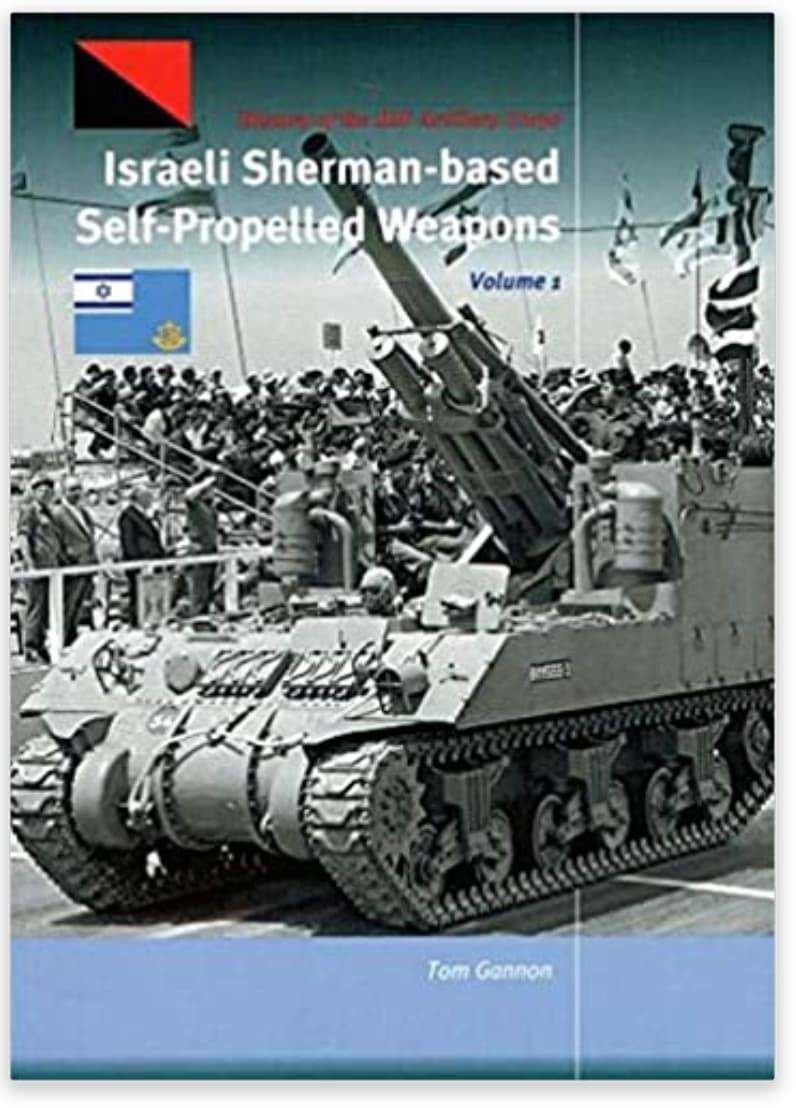
Thank you for that, but I did find that kit during my searches, and while it looks cool for wargaming purposes, the engine deck turns out to be totally fictitious. I only know this because I did indeed purchase that book by Tom Gannon. I’ve always said (because I sell them myself) that ya gotta have good references to do a build right. This book is a great reference - to an extent. It certainly covers the later Cummins engined version well enough to do one properly.
Unfortunately the book does not show the engine deck of the earlier Continental version well enough to do it properly. Vague glimpses of the right front show three louvered access panels for the repositioned engine.
That said, I will still attempt it once I gather more references. I can always save that area for last There are actually three major variants: (the I categorize them anyway)
The early Continental engined TOMAT with VVSS.
later Continental engined version which is virtually the same except for having HVSS and an added stowage bin.
The Cummins engine version (much higher glacis) with HVSS.
All are based on M4A4 hulls, so only M4A4 kits will suffice for the conversion. I intend to build 1 and 3, so for no.1 I’ve ordered a Dragon M4A4 with 60 lb. Rockets. Apparently that kit did not sell well - it was relatively inexpensive. I chose that kit for its three piece final drive. I’m donating the rockets to a fellow modeler.
For no. 3 I’ll use the Dragon M50 Sherman kit. It’ll come with a lot of the necessary things I’ll need such as the track stowage brackets. I’ve also ordered the AFV Club HVSS suspension kit to replace the awful Dragon suspension.
These later Cummins engined variants were apparently around long enough to undergo some upgrades themselves - namely the addition of a pneumatic rammer complete with compressed air bottles mounted outside the fighting compartment, and extra stowage baskets. I believe the old AEF Designs kit came with the baskets but not the rammer equipment.
So this project remains in limbo until my kit arrives. If anyone happens to have a Dragon M50 built or unbuilt I’d be interested. I’ve got plenty of Legend items to trade or I can buy it outright,
The problems you get when you want to be accurate…
I have been reading quite a bit about the IDF, and got the impression that, certainly in the early days, they would almost take anything they could get their hands on and use it… and i have the feeling that if you put 10 M50’s from those early days next to each other, you would have at least 5 different versions…
Me, I might even consider getting a Priest or a M110, do them in IDF colors, stick IDF decalls on them, load them up with IDF stowage…
Probably more than five - I met a guy in the nineties who wanted me to build several of them, all requiring different engine decks representing different eras. My favorite was the one built from the ancient Italeri kit with the Dragon HVSS, a la Shep Paine. Damn, that guy was inspiring.
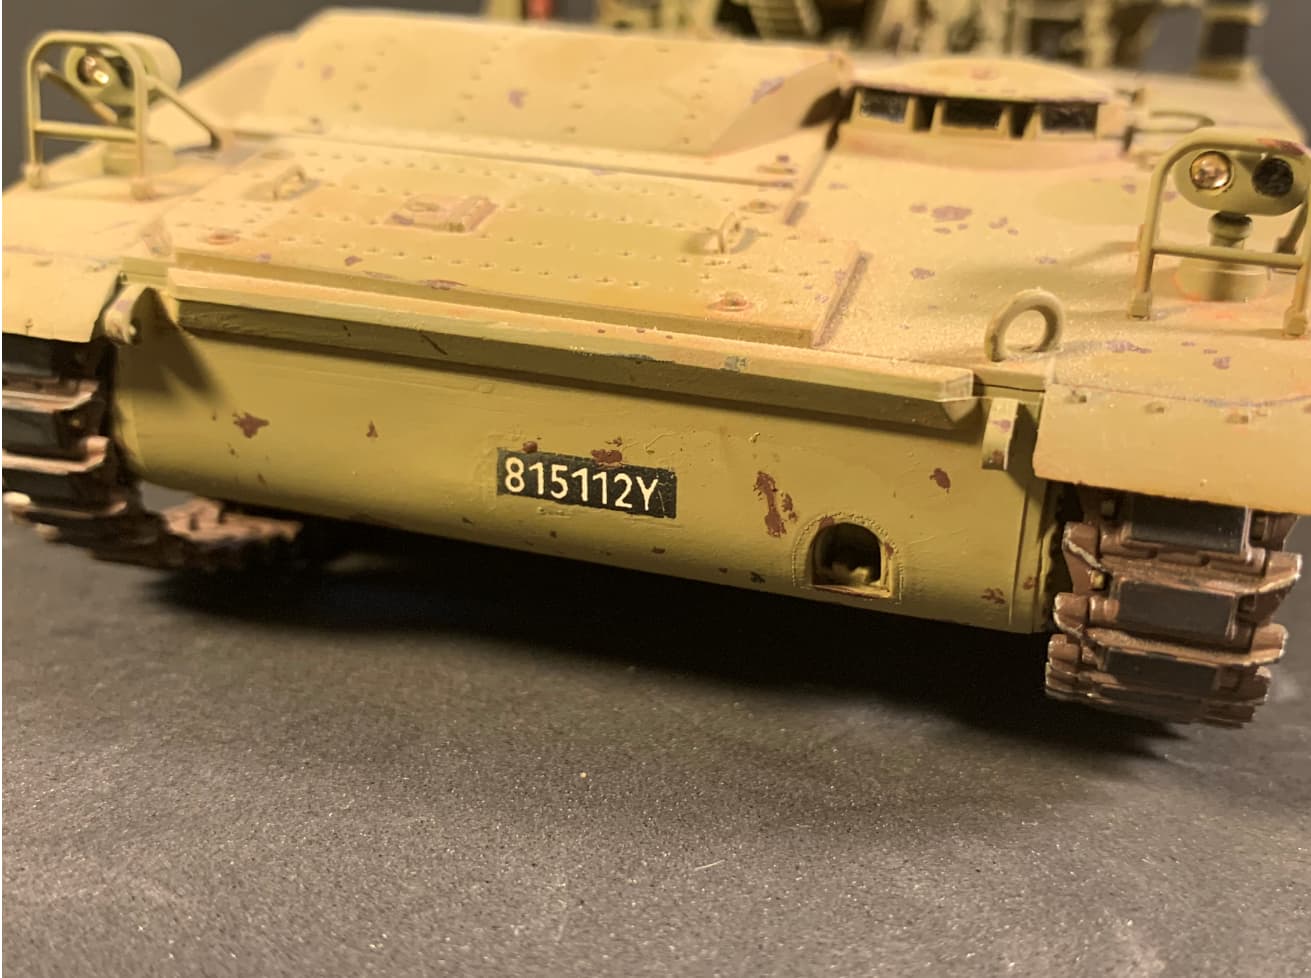
I did several IDF Priests as well, but never got to keep any of them. The problem was I only altered the things I knew about (different tool stowage, additional gun crutch, etc.) but missed a lot of things I was unaware of, like the armored intake cover. I guess that explains why I’m on a Priest kick again after all these years, but still using the old kits I had started:
I’ll probably redo it one day - remove a lot of the not so realistic looking chipping, and change the chipping on the engine and transmission covers to reflect the fact that they’re actually made from aluminum.
Kits and accessories are starting to arrive.
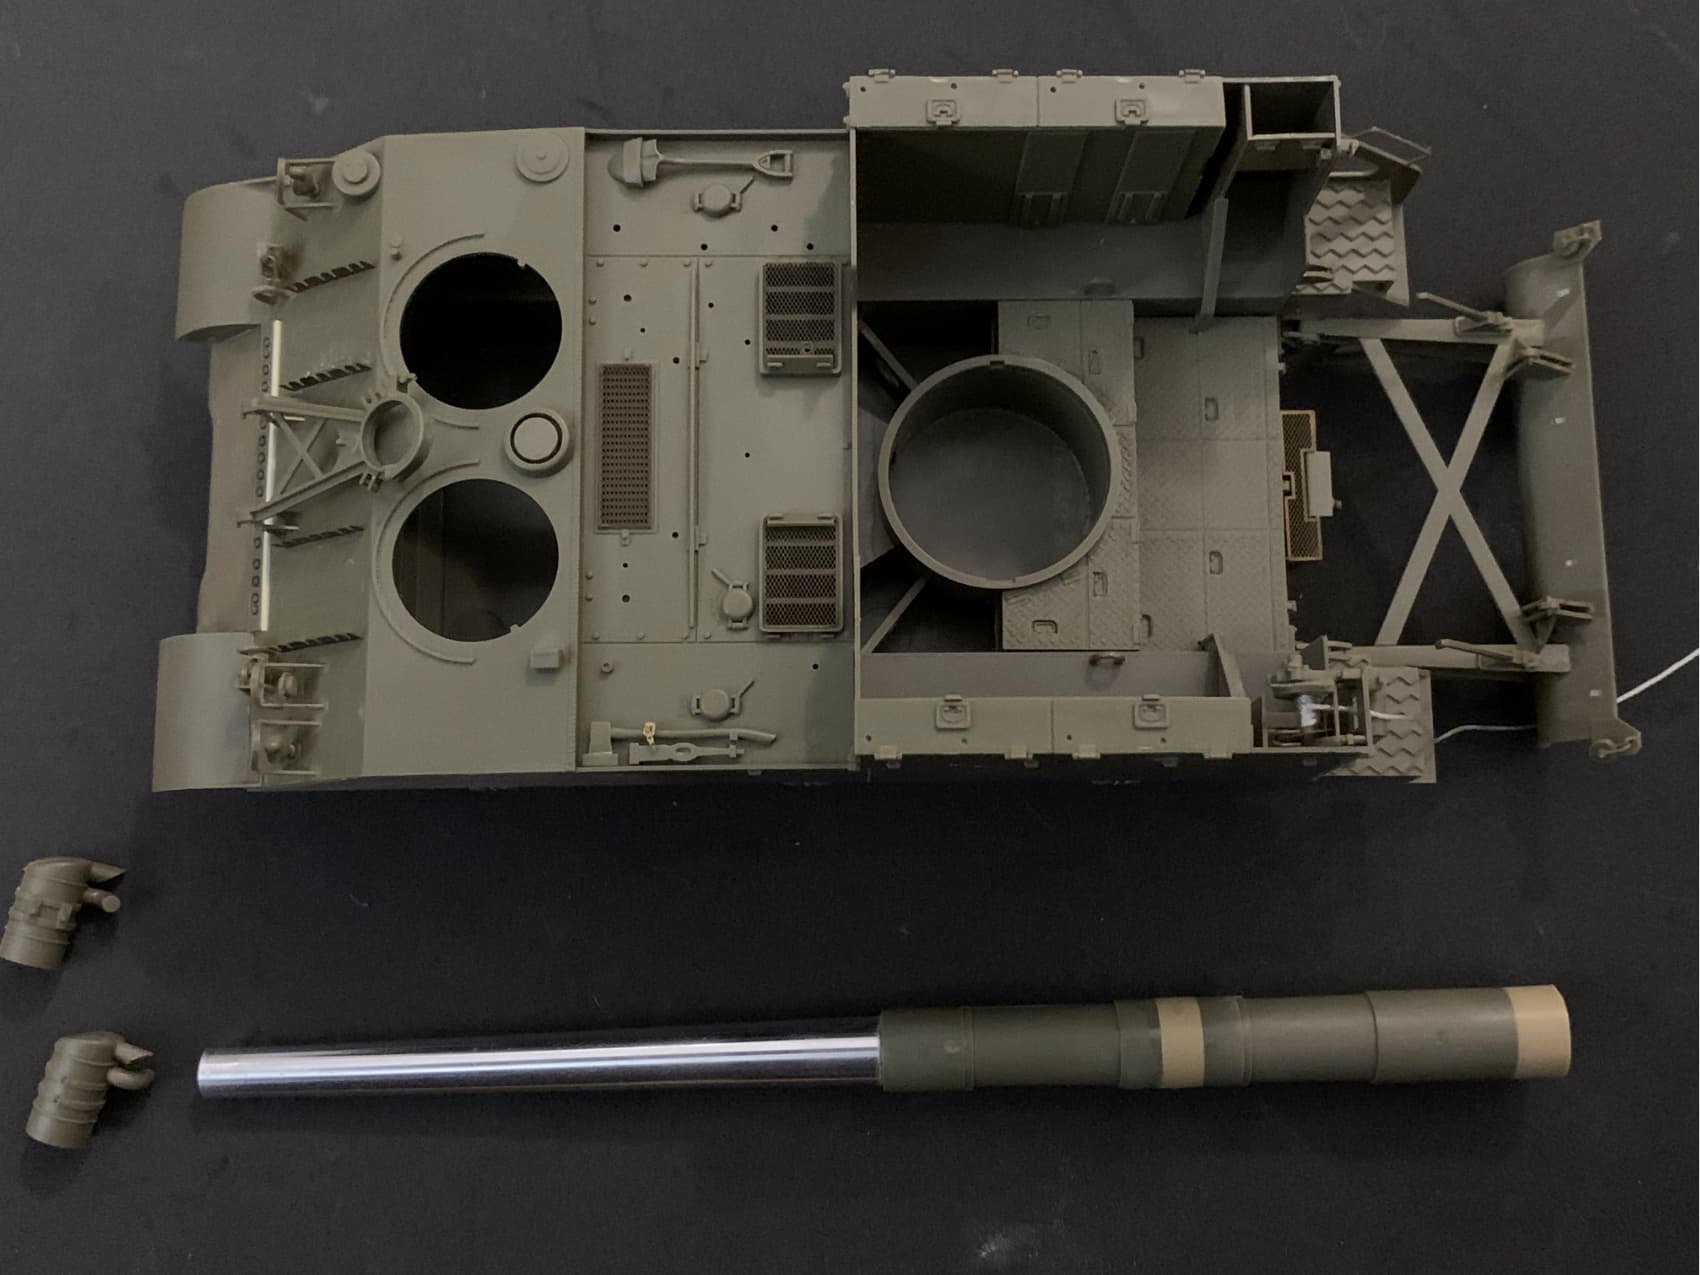
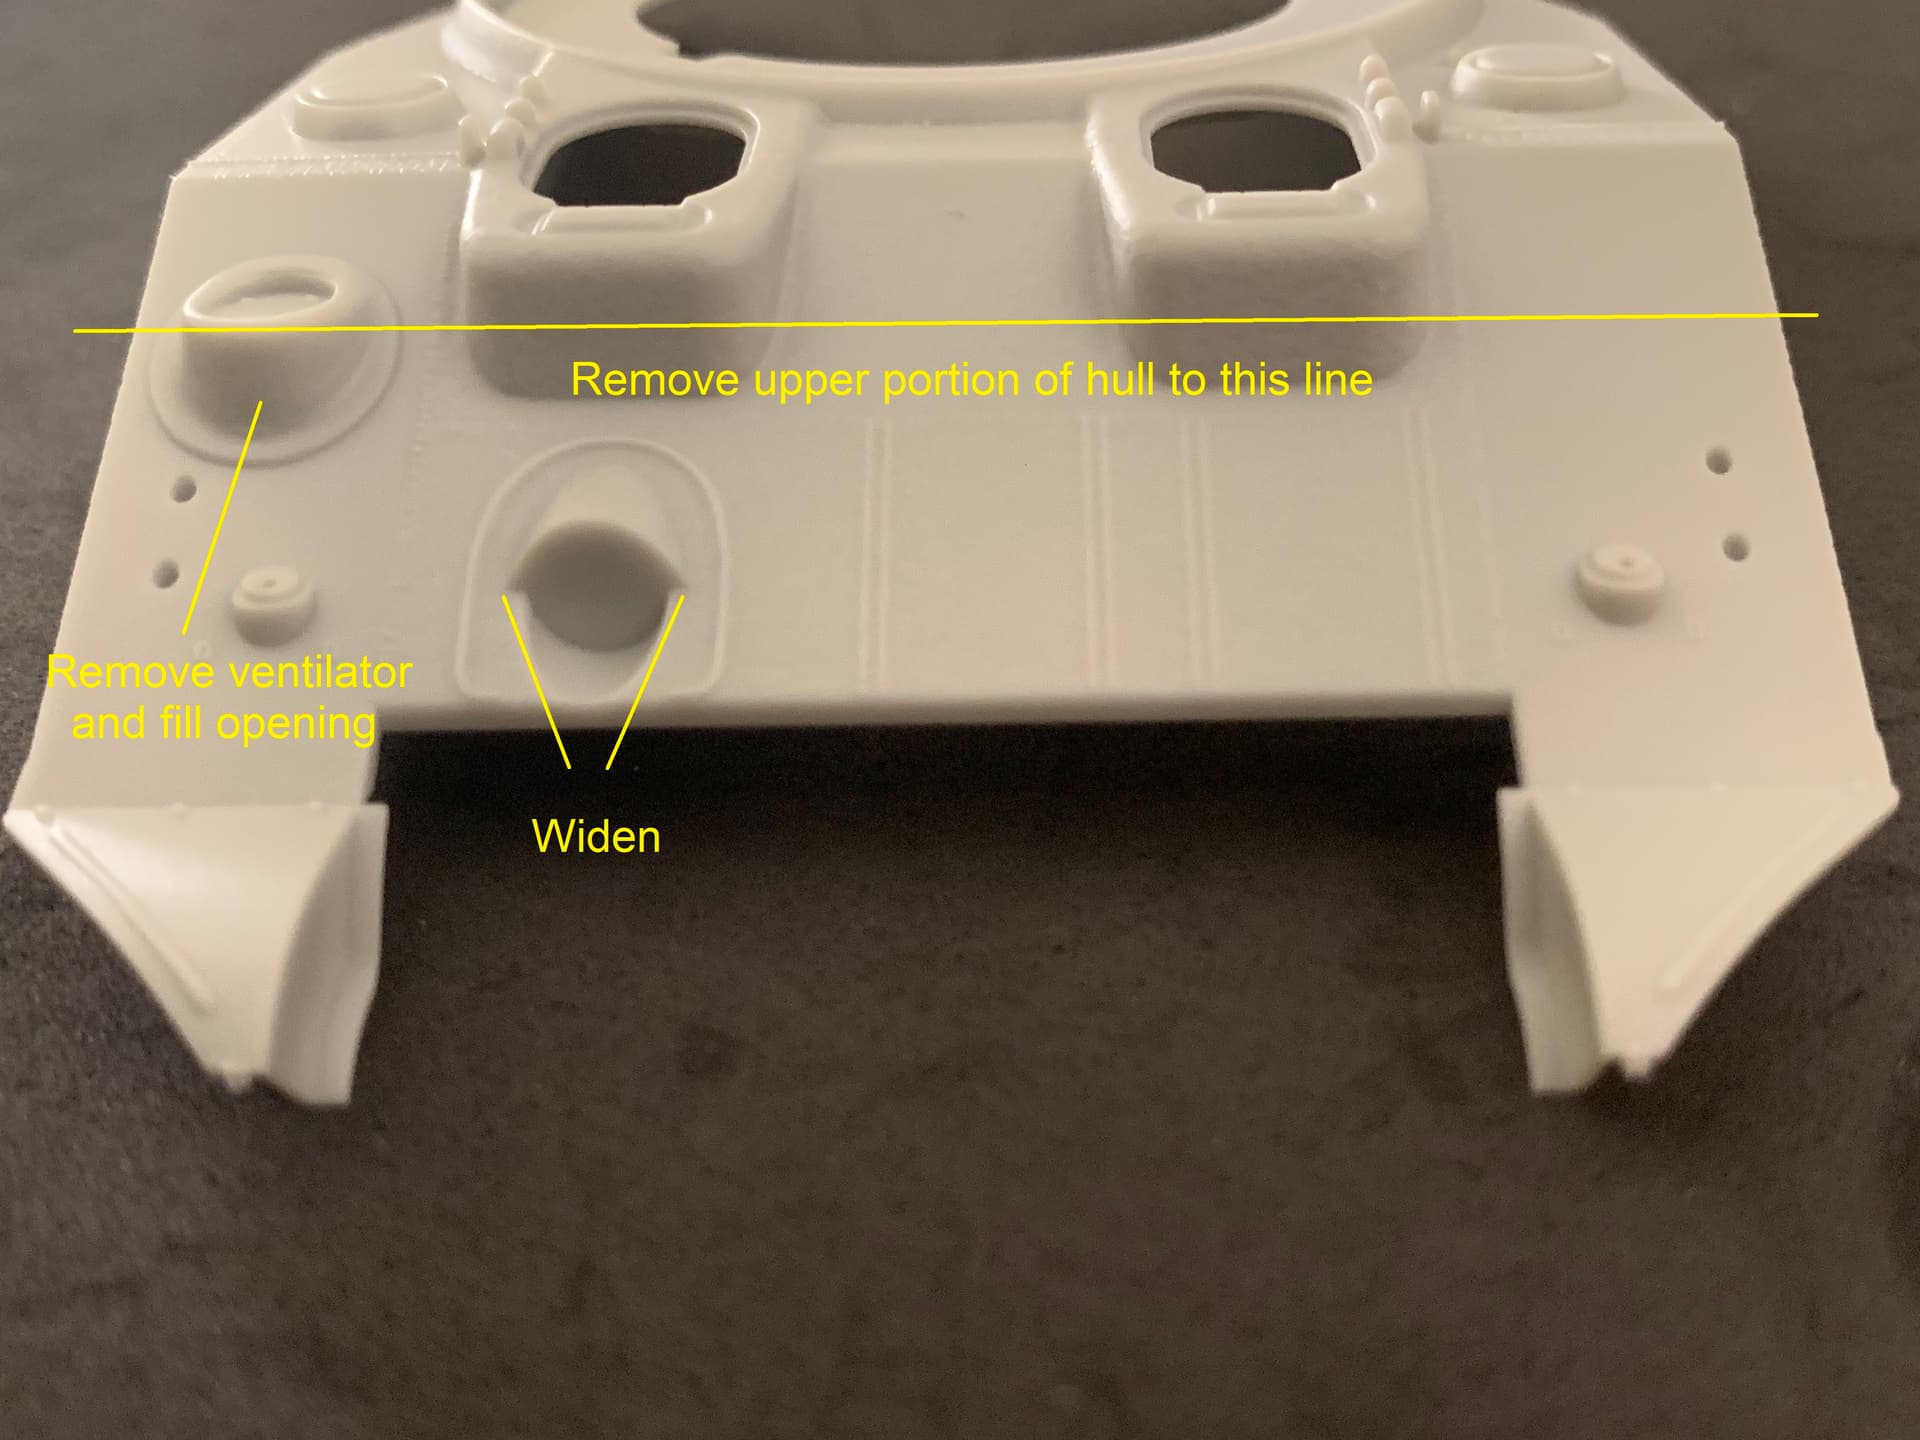
I’ve decided to build the earlier Continental engined M50 first. The first thing to do is cut down the M4A4 hull as did the IDF.
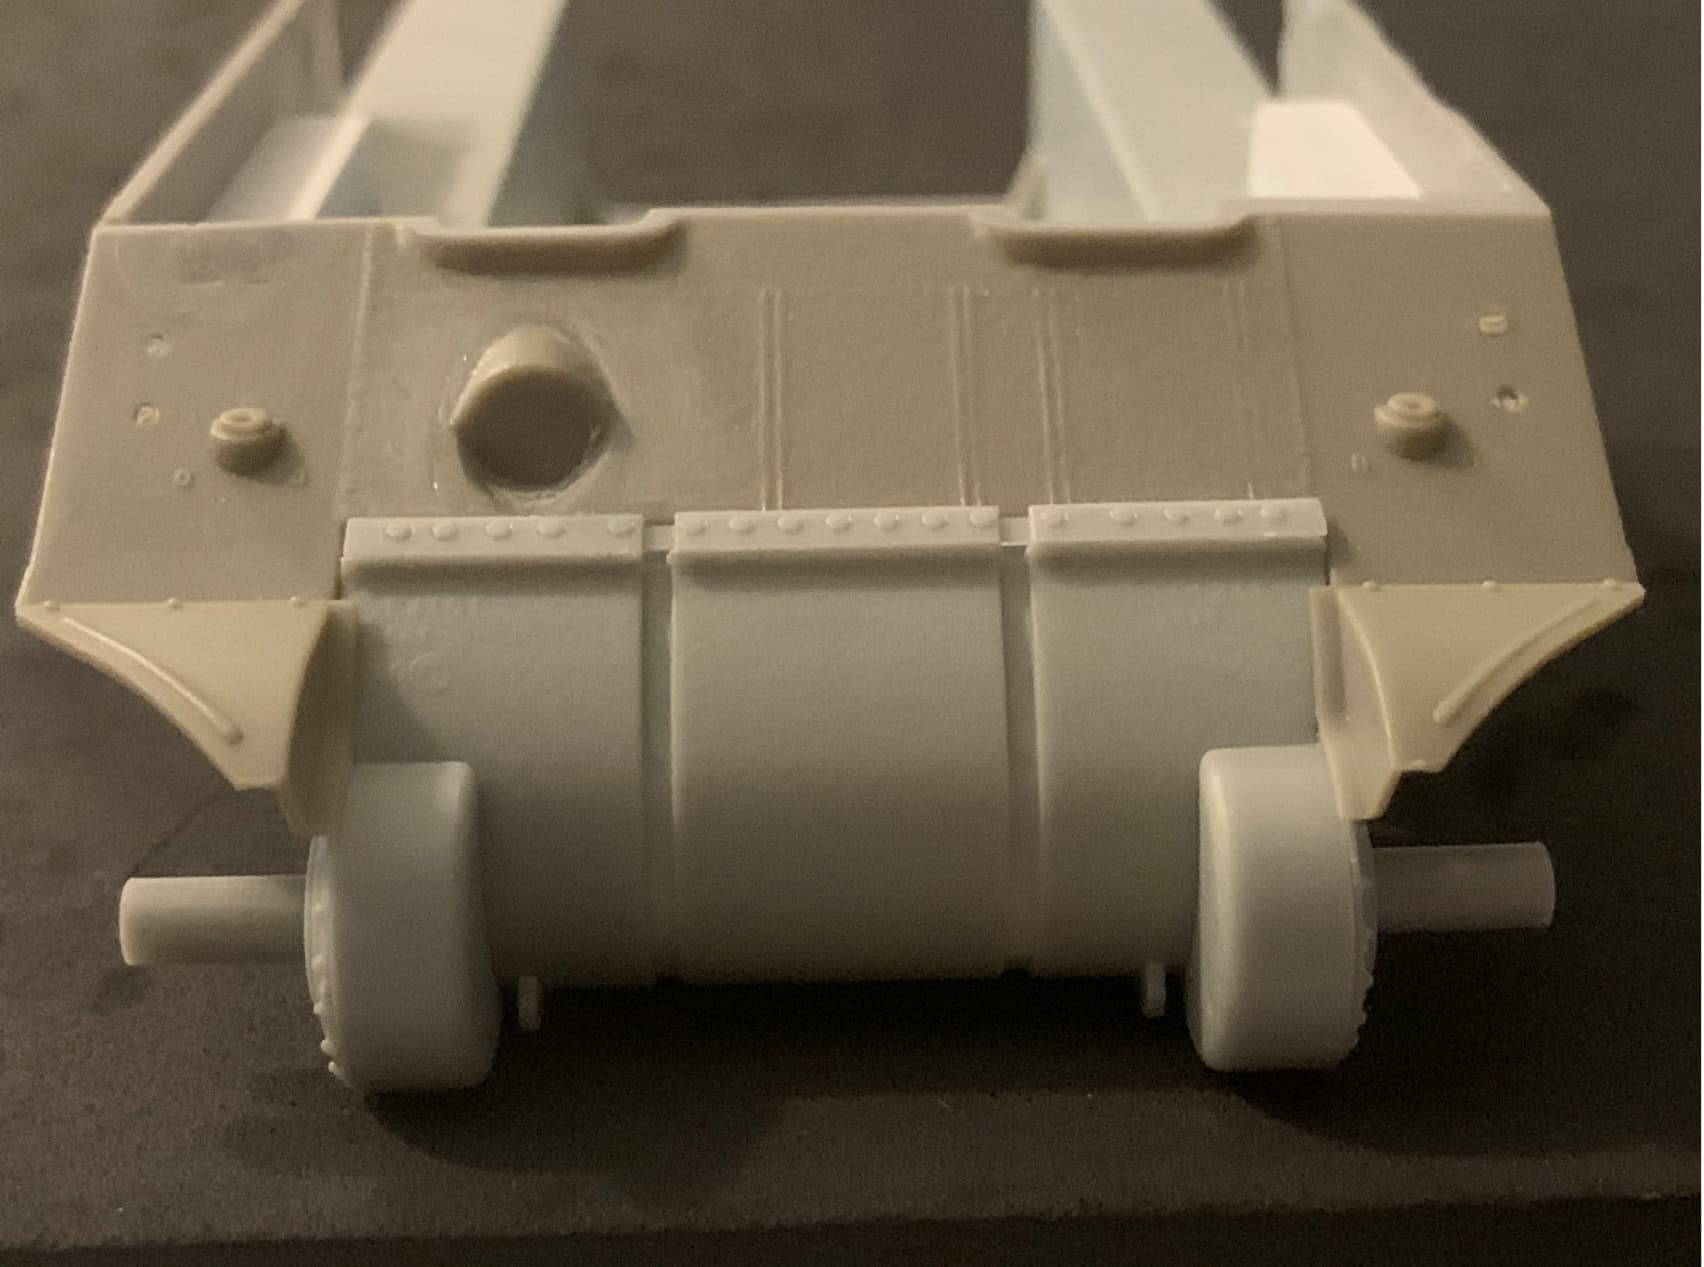
I had forgotten how bad some of the old Dragon kits are. The flanges tor the three piece final drive housing each have three knock out pin marks, all between bolt heads. They’ll need to be dealt with. But the bolt detail itself sucks as well - each side is fairly flat. The actual bolts need pretty large castle nuts on the inboard side of each flange, I’ll have to fix the flanges before I add them. Note in the photo I also removed the curved rod around the MG socket. I needed to enlarge the lower opening to accommodate the armored vent cover that will go there. See photo at beginning of the thread.
Getting close to finishing what I wanted to get done for today. The 'Boys actually won so I was a tad distracted by that.
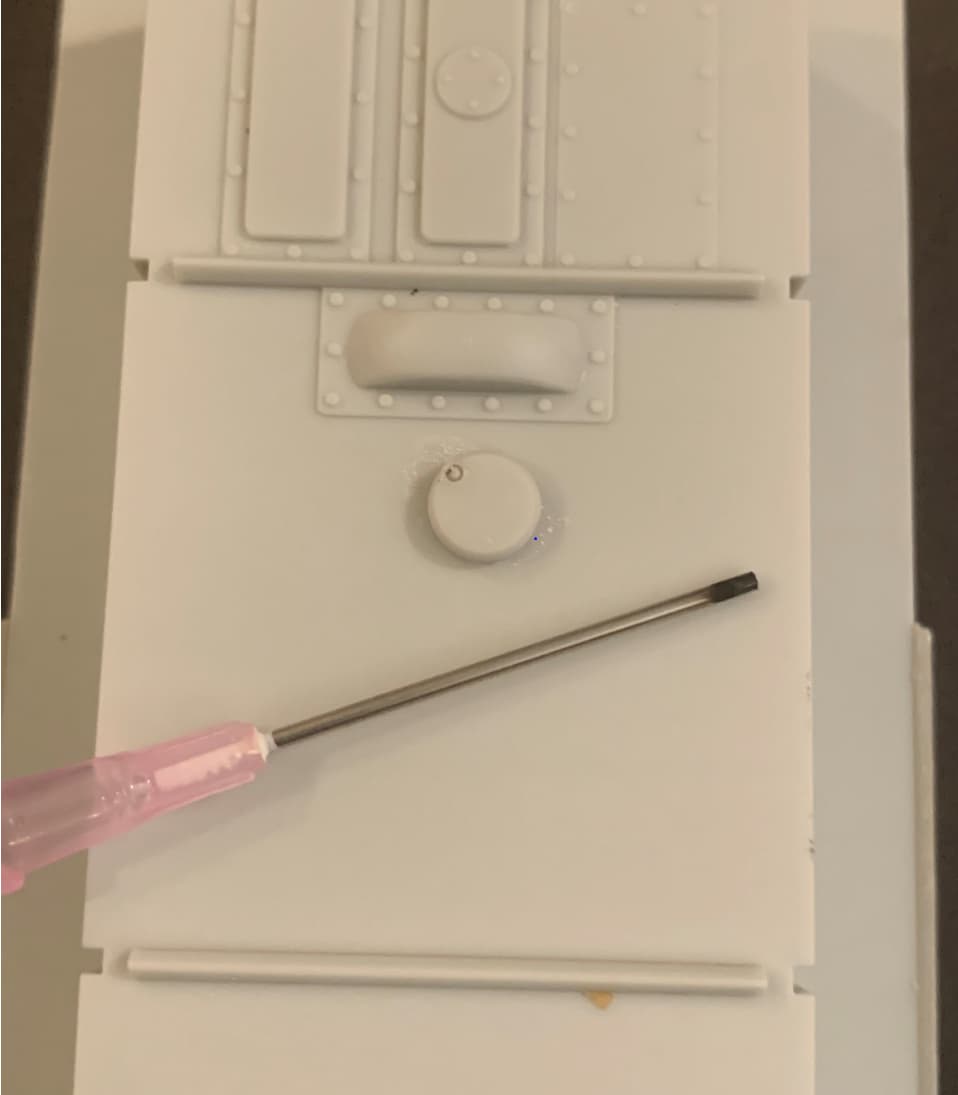
I sanded the detail off of the armored vent cover so that I could add my own. Then I temporarily cemented it to the bottom of the hull to keep it from moving. I took a large (ish) bore needle from my IFAK (you never know when you might need to perform a needle decompression) and ground the tip off. Then I heated it slightly to make the impressions in the part. They indeed are supposed to be asymmetrical. I demonstrated this several years ago for a Chinese tank the had to be reworked quite a bit.
I’m pleased with the result. Tomorrow if I have time I can work on something a little easier, like the bogie assemblies.
You can compare this with the photo of the book cover at the beginning of this thread: