Well all that effort certainly paid off. It looks fantastic.
Stunning!
Fine job getting that crane assembly completed, is it all glued or are any solder joints? Mark ![]()
All glue. Never soldered PE. Its a skill I need to learn (gotta buy an iron first ![]() )
)
Although working with photo-etch can make my hair hurt, when done right, it looks amazing, as does your crane. Brilliant.
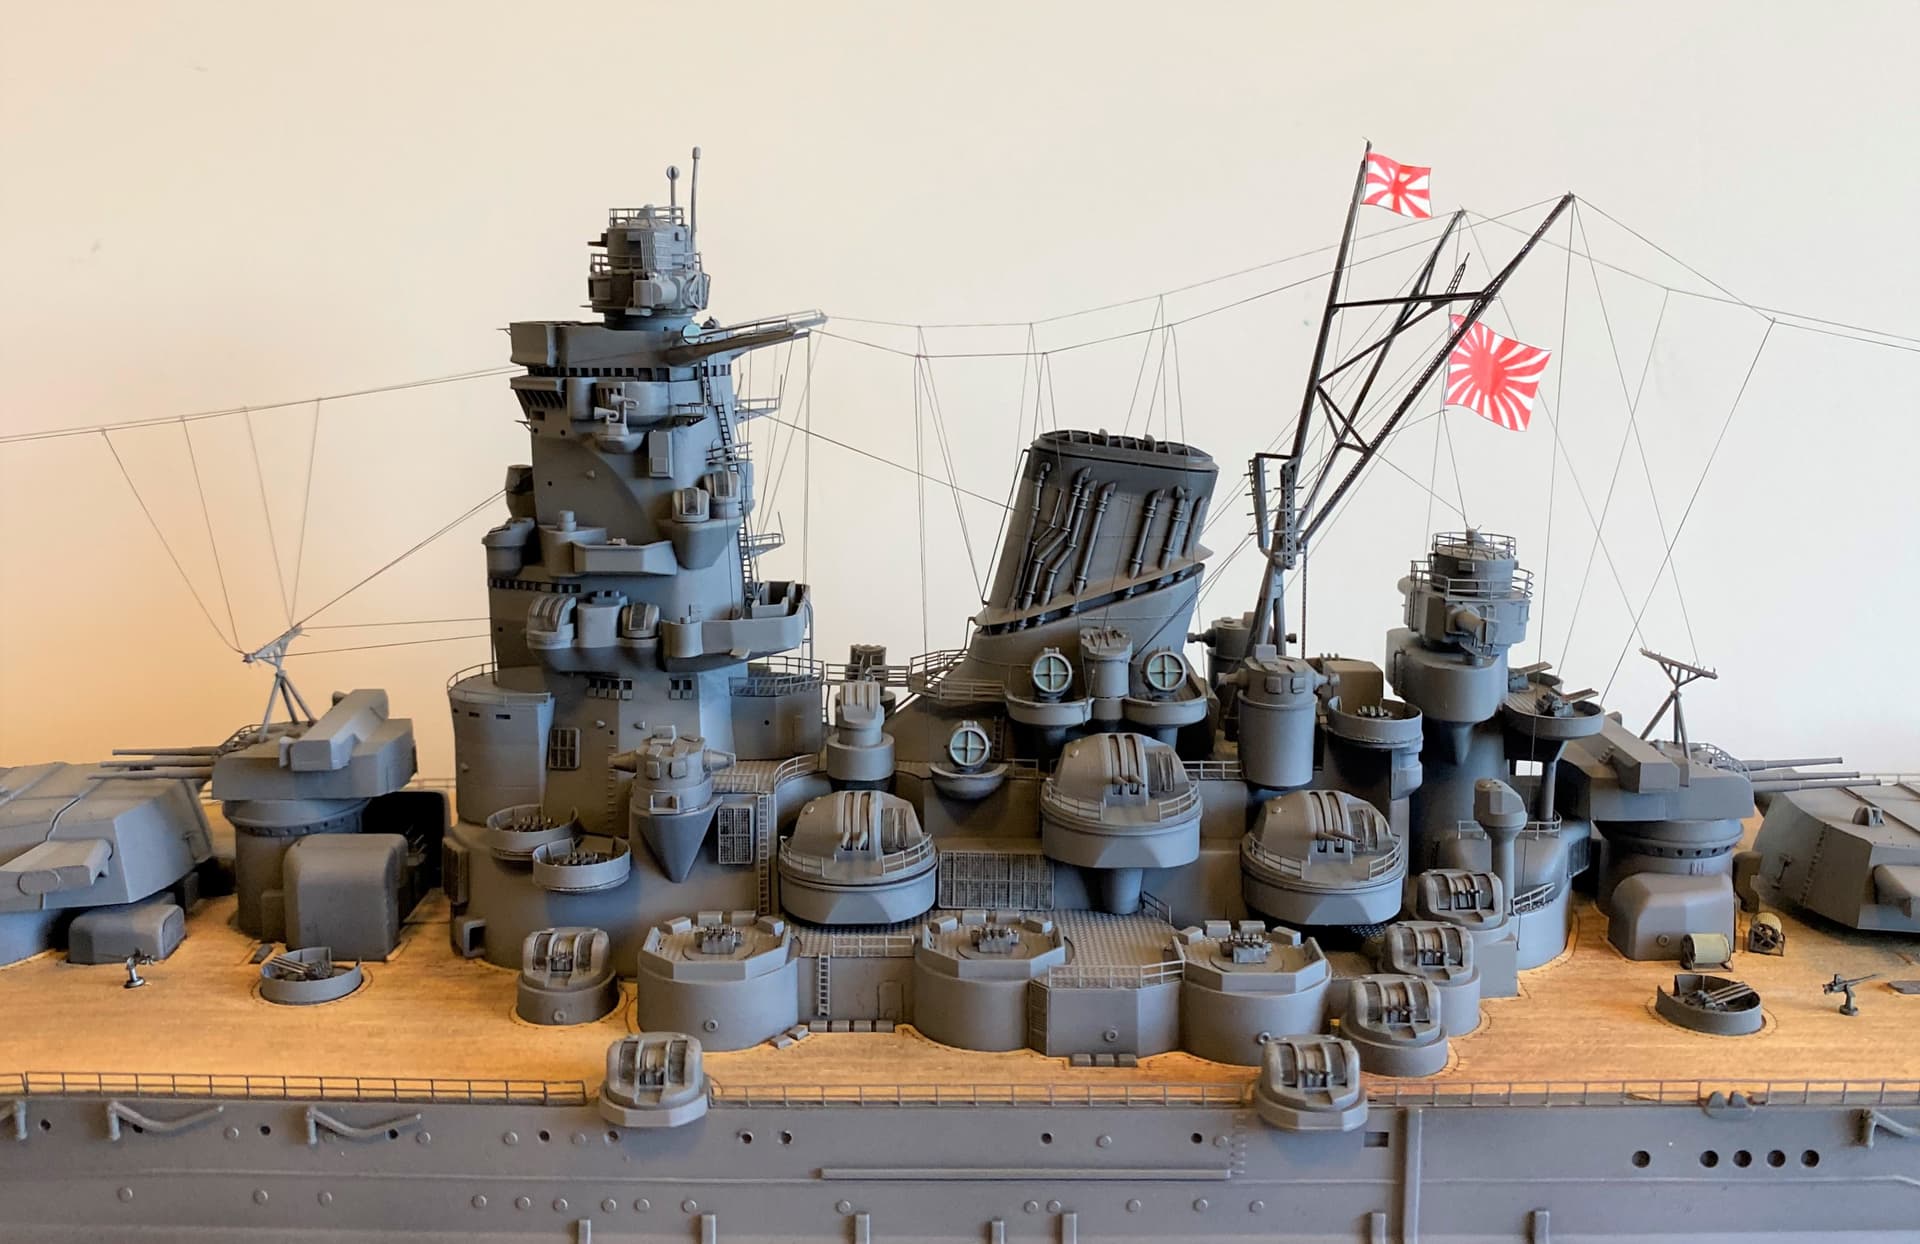
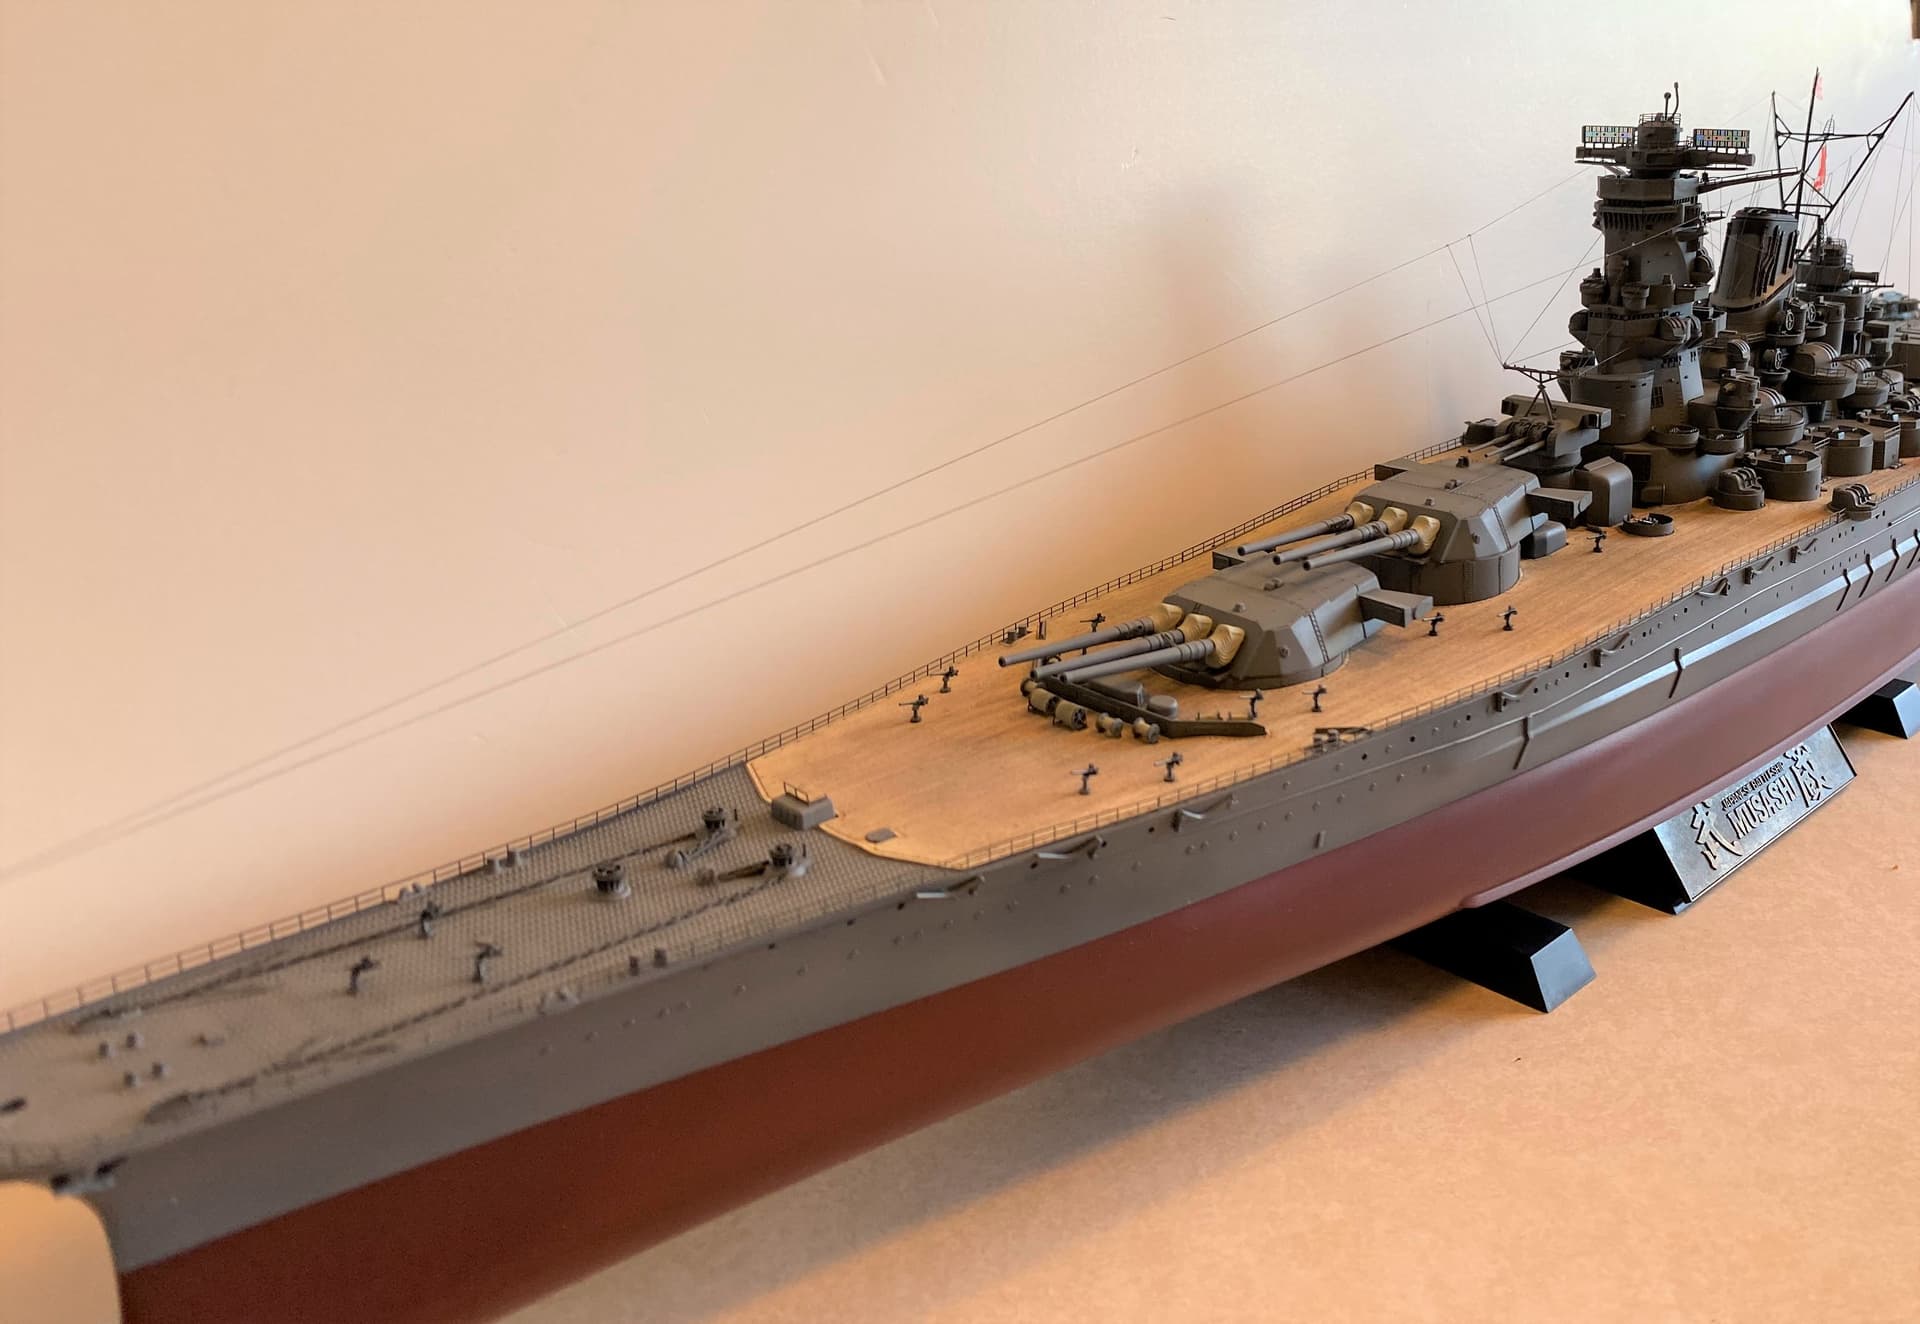
In todays edition of “Lets see how good my eyes still are” I have started rigging Musashi. Whole aft section done. Still need to do the forward bit but the bulk is complete.
The diagram in the instructions left a lot to be desired so I ended up logging into my World of Warships account and looking at the Musashi and Yamato on there for help.
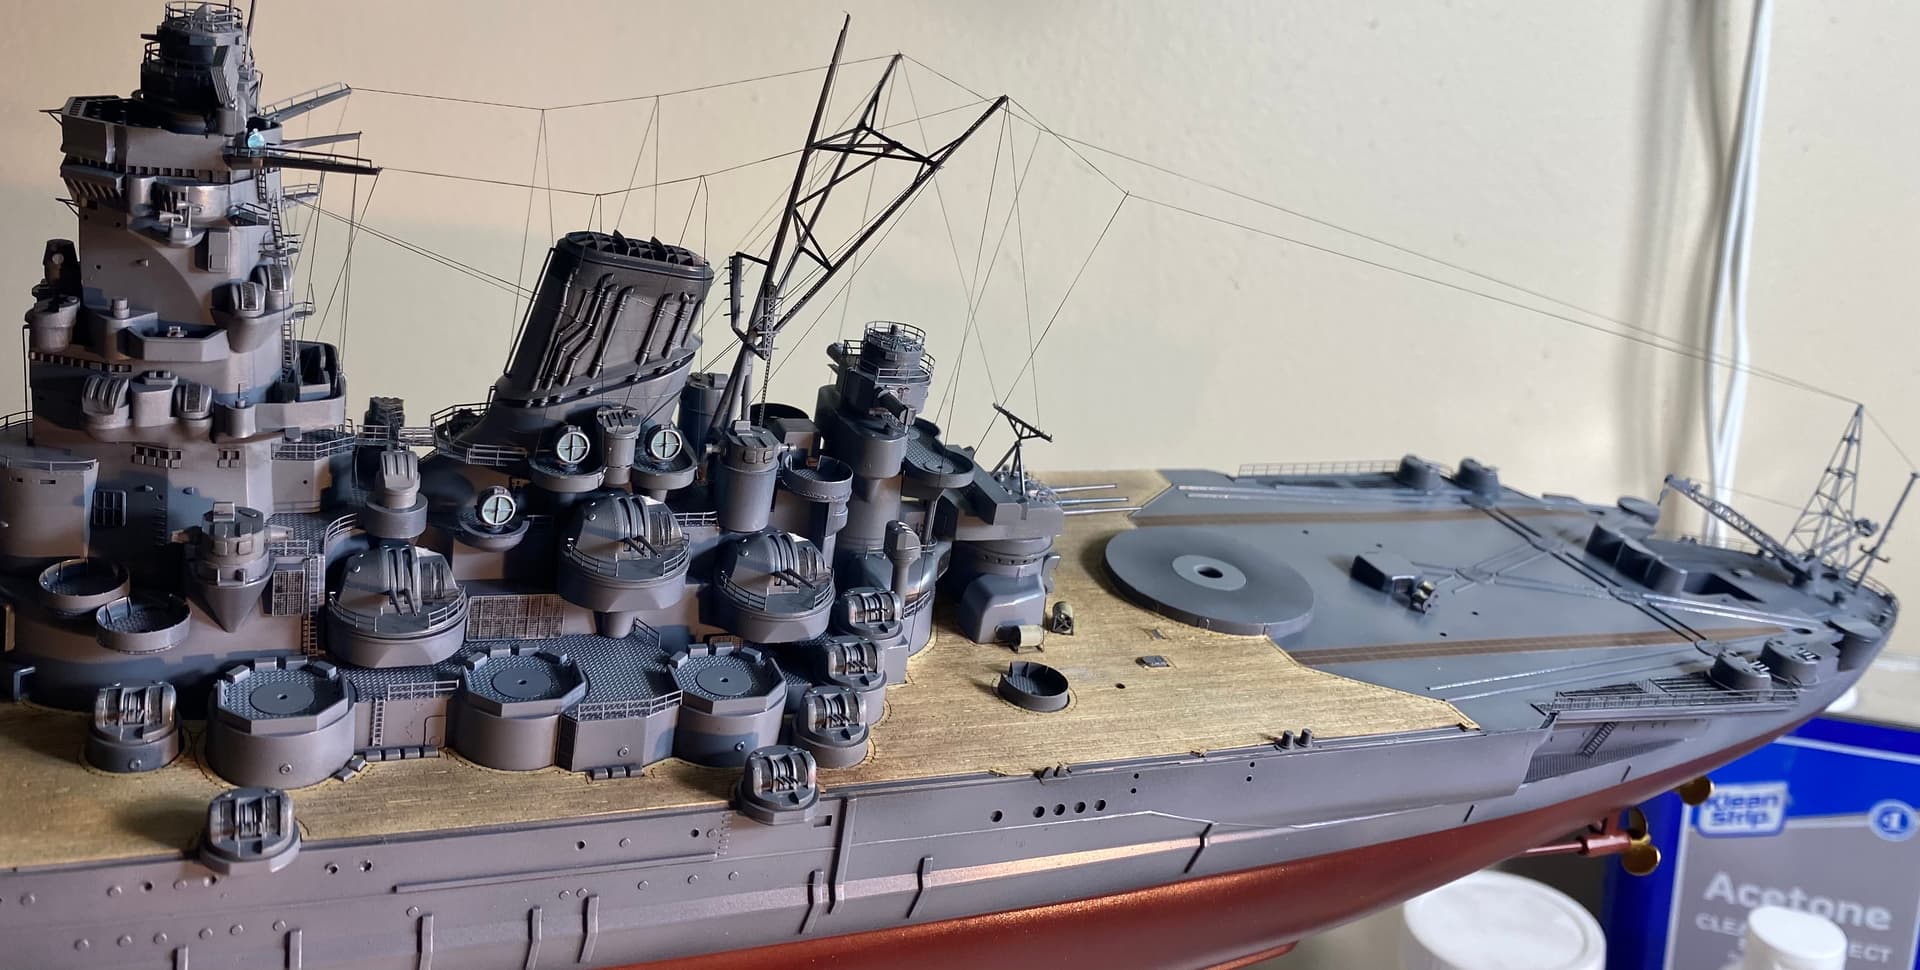
Not 100% accurate but a good representation.
8 Likes
Sometimes you have to just go with what looks good … and that looks very good indeed. Lovely neat and even work ![]()
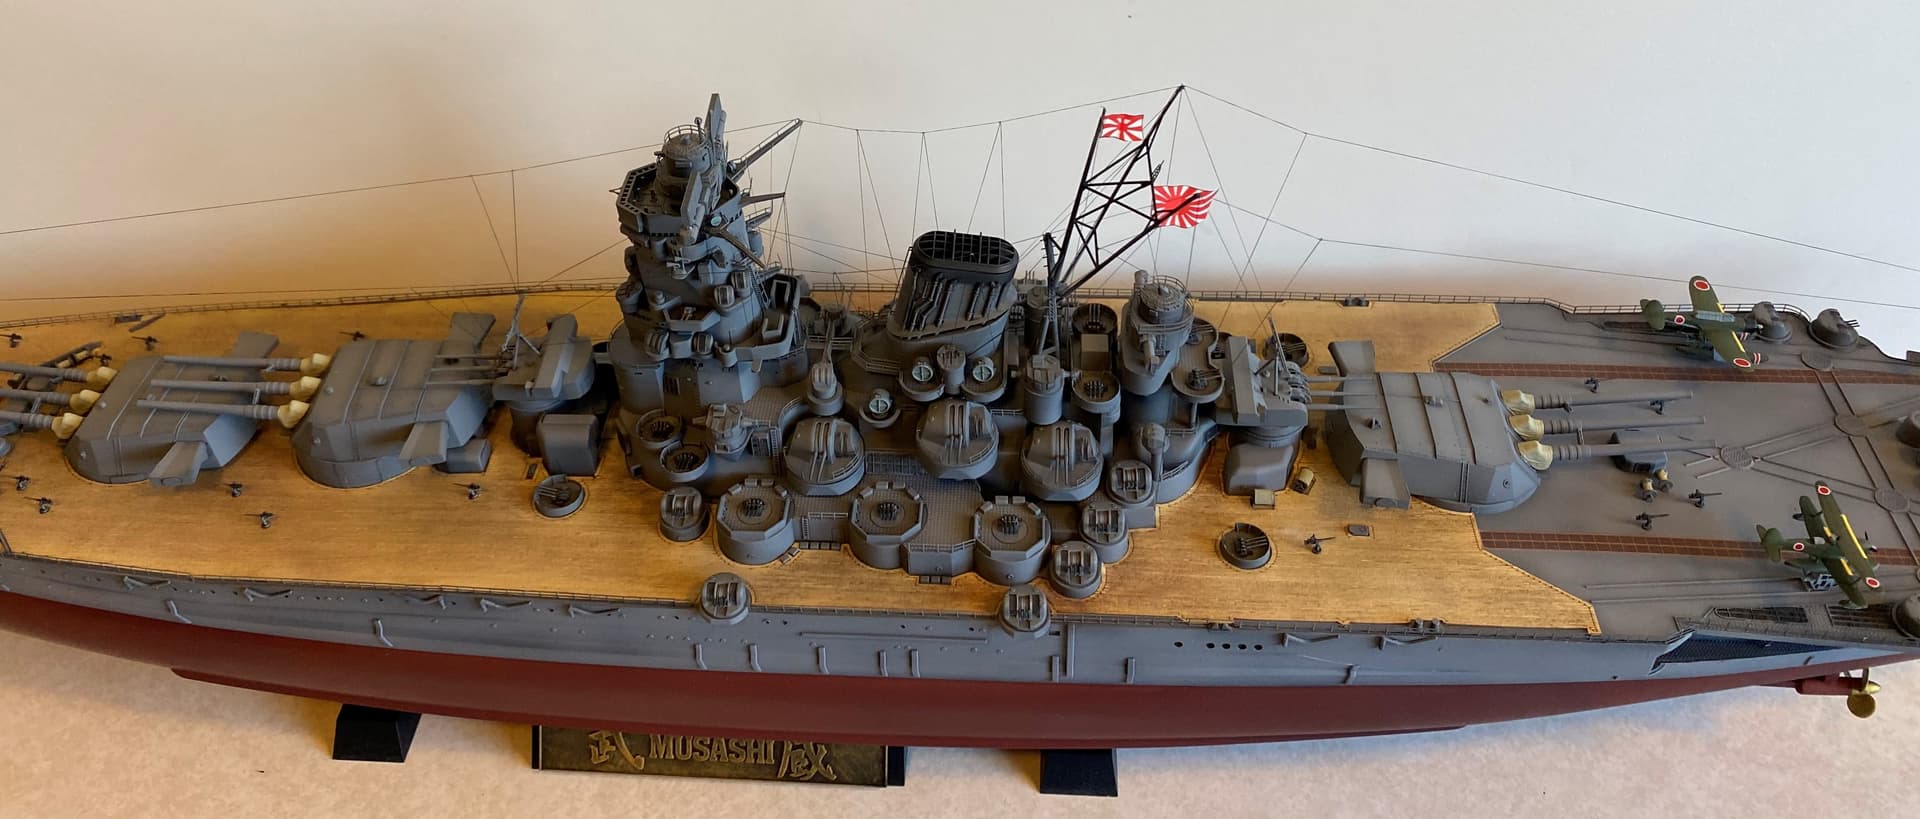
Forward rigging is completed and I am not out of rigging line so I am glad I had enough.
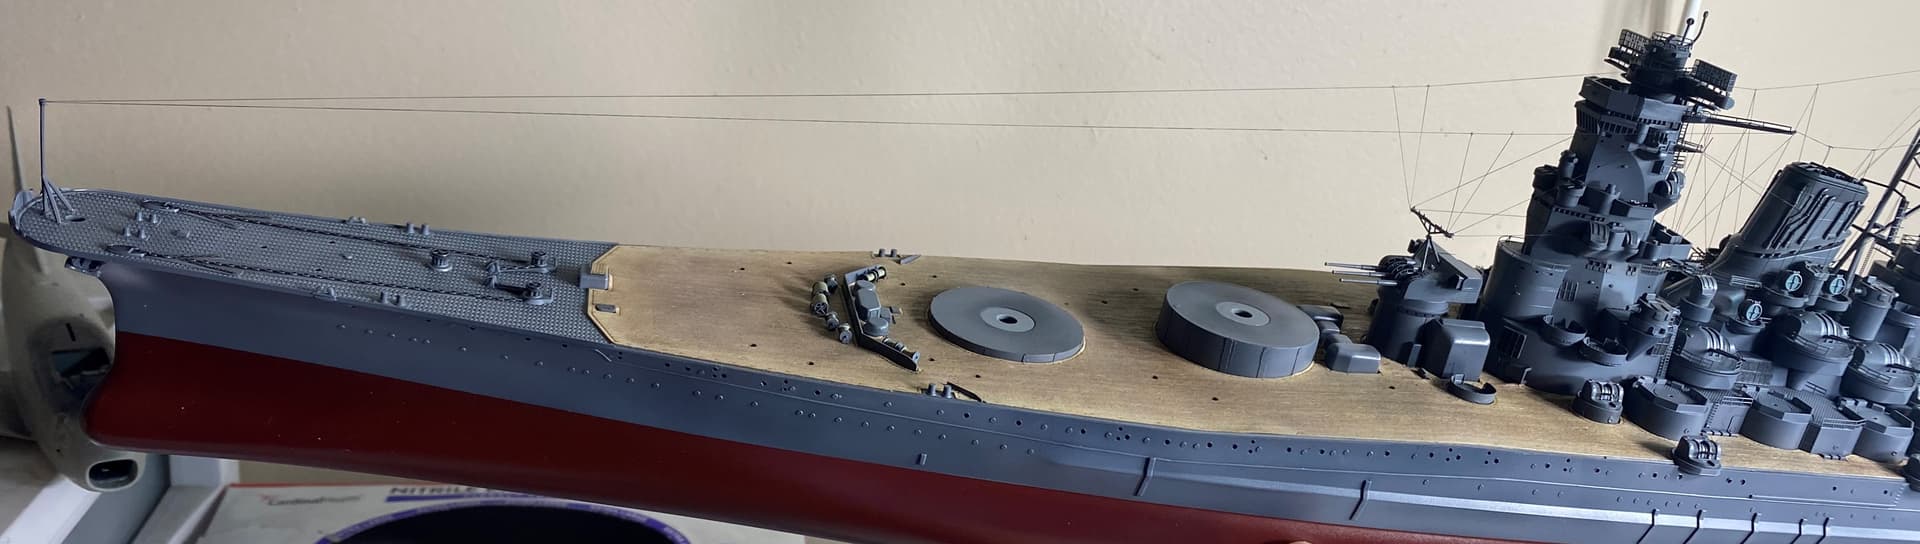
Picture is not the best but manhandling this beast around is a chore. Plus she is now fragile as hell.
Almost done if I am honest. Just need to add the railings, catapults, planes, side derricks and the last of the AA. Maybe done by the end of the week? If not then next week.
6 Likes
She looks great, Rory, although I gotta say you’re braver than me. Usually I leave the rigging to the very last thing, as I know with my clumsy butter fingers I’d knock it good, placing those final details aboard ![]()
1 Like
Normally I would too but luckily all that’s left to add is outboard of the rigging. Plus I knew I would knock off railings and such while messing with it.
1 Like
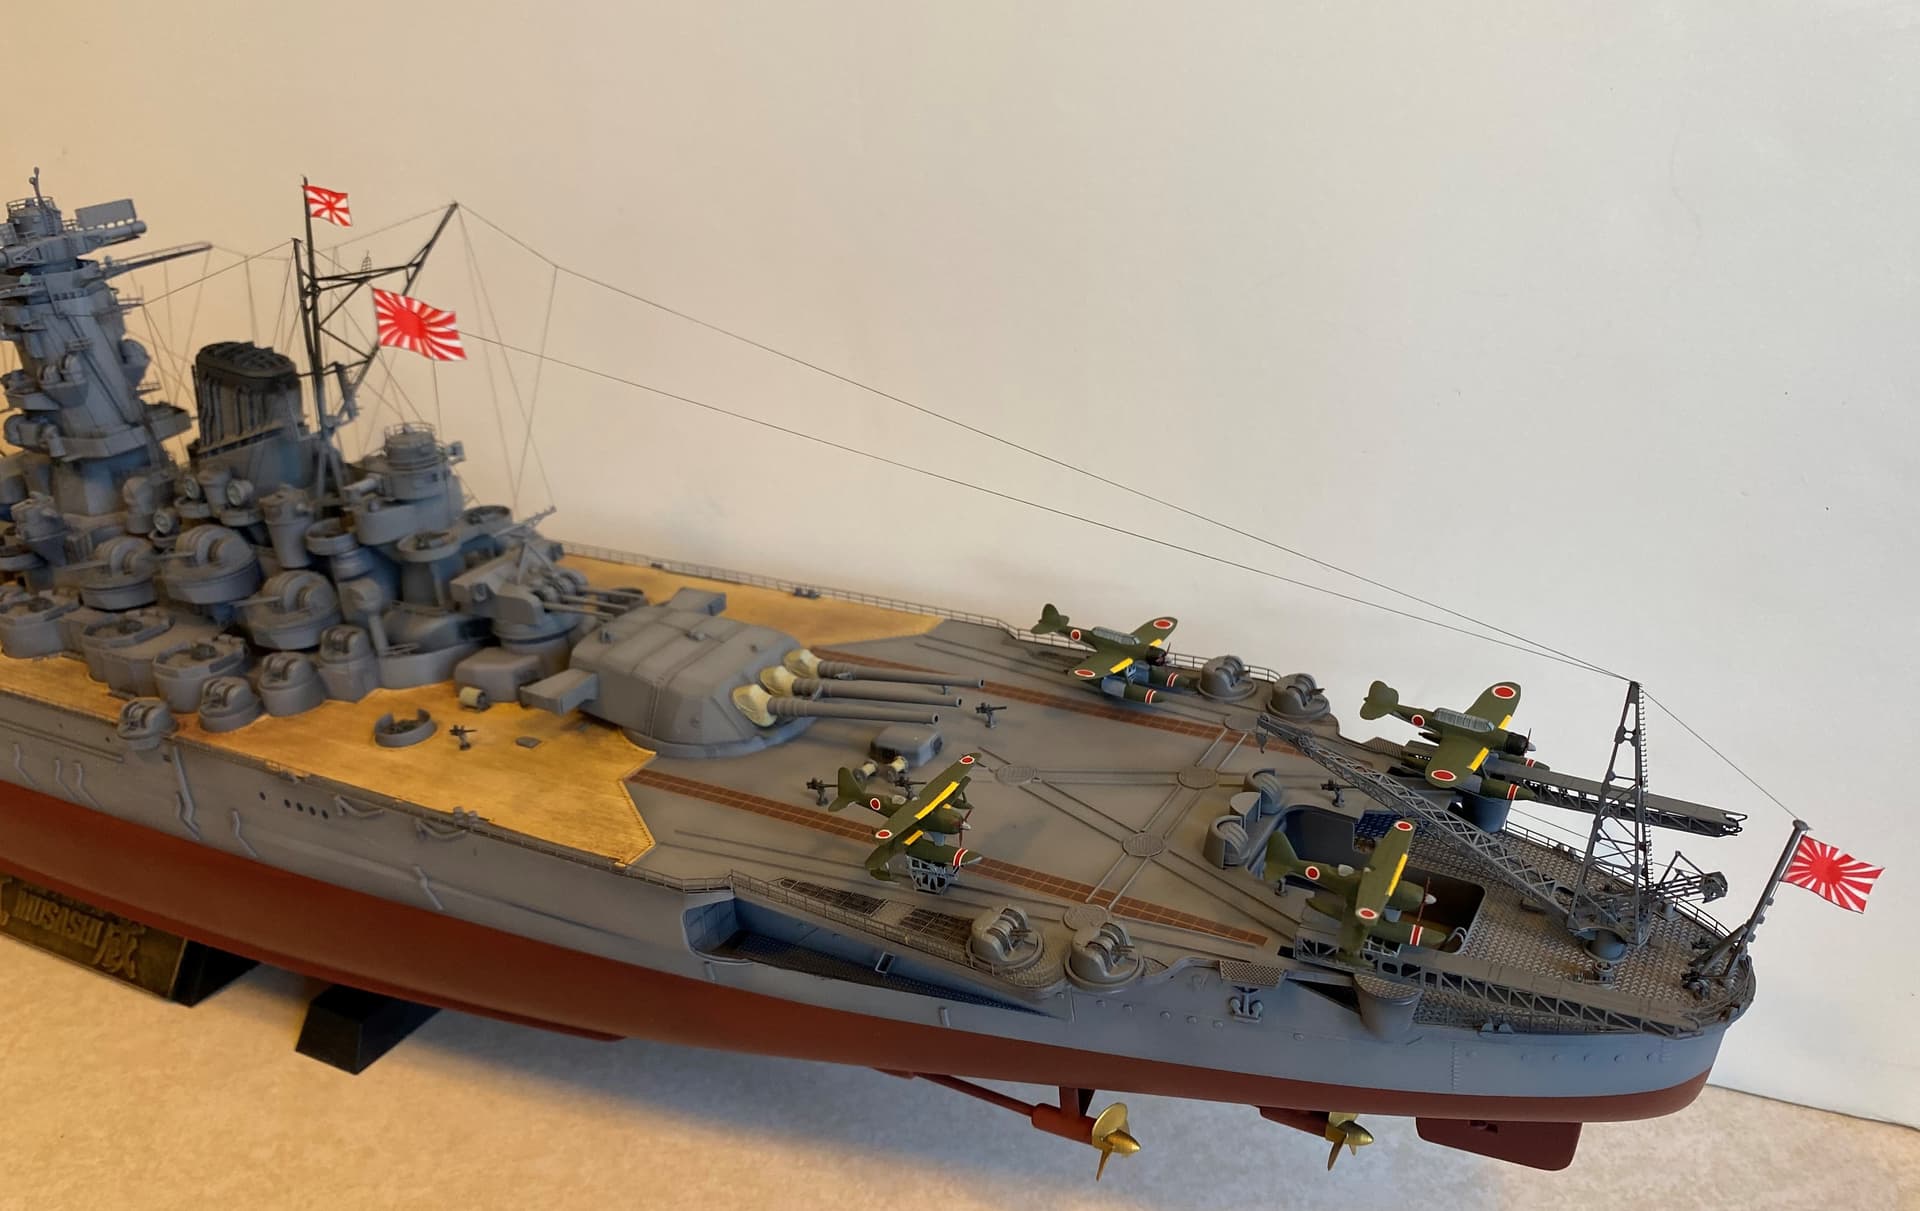
I have to admit to defeat. I had planned to replace the triple 25mm AA with some lovely Infini PE replacements but after trying to build one for over an hour (destroying the piece in the process) I just decided it wasn’t fun. If I only had to make like 2 I would likely have persevered, but I had to make 19 sets.
In the end I went with the kit parts. They aren’t awful and with paint etc they look acceptable. Most importantly, they were 1 piece parts.
Instructions for the PE replacements. 16 pieces of barrel and PE
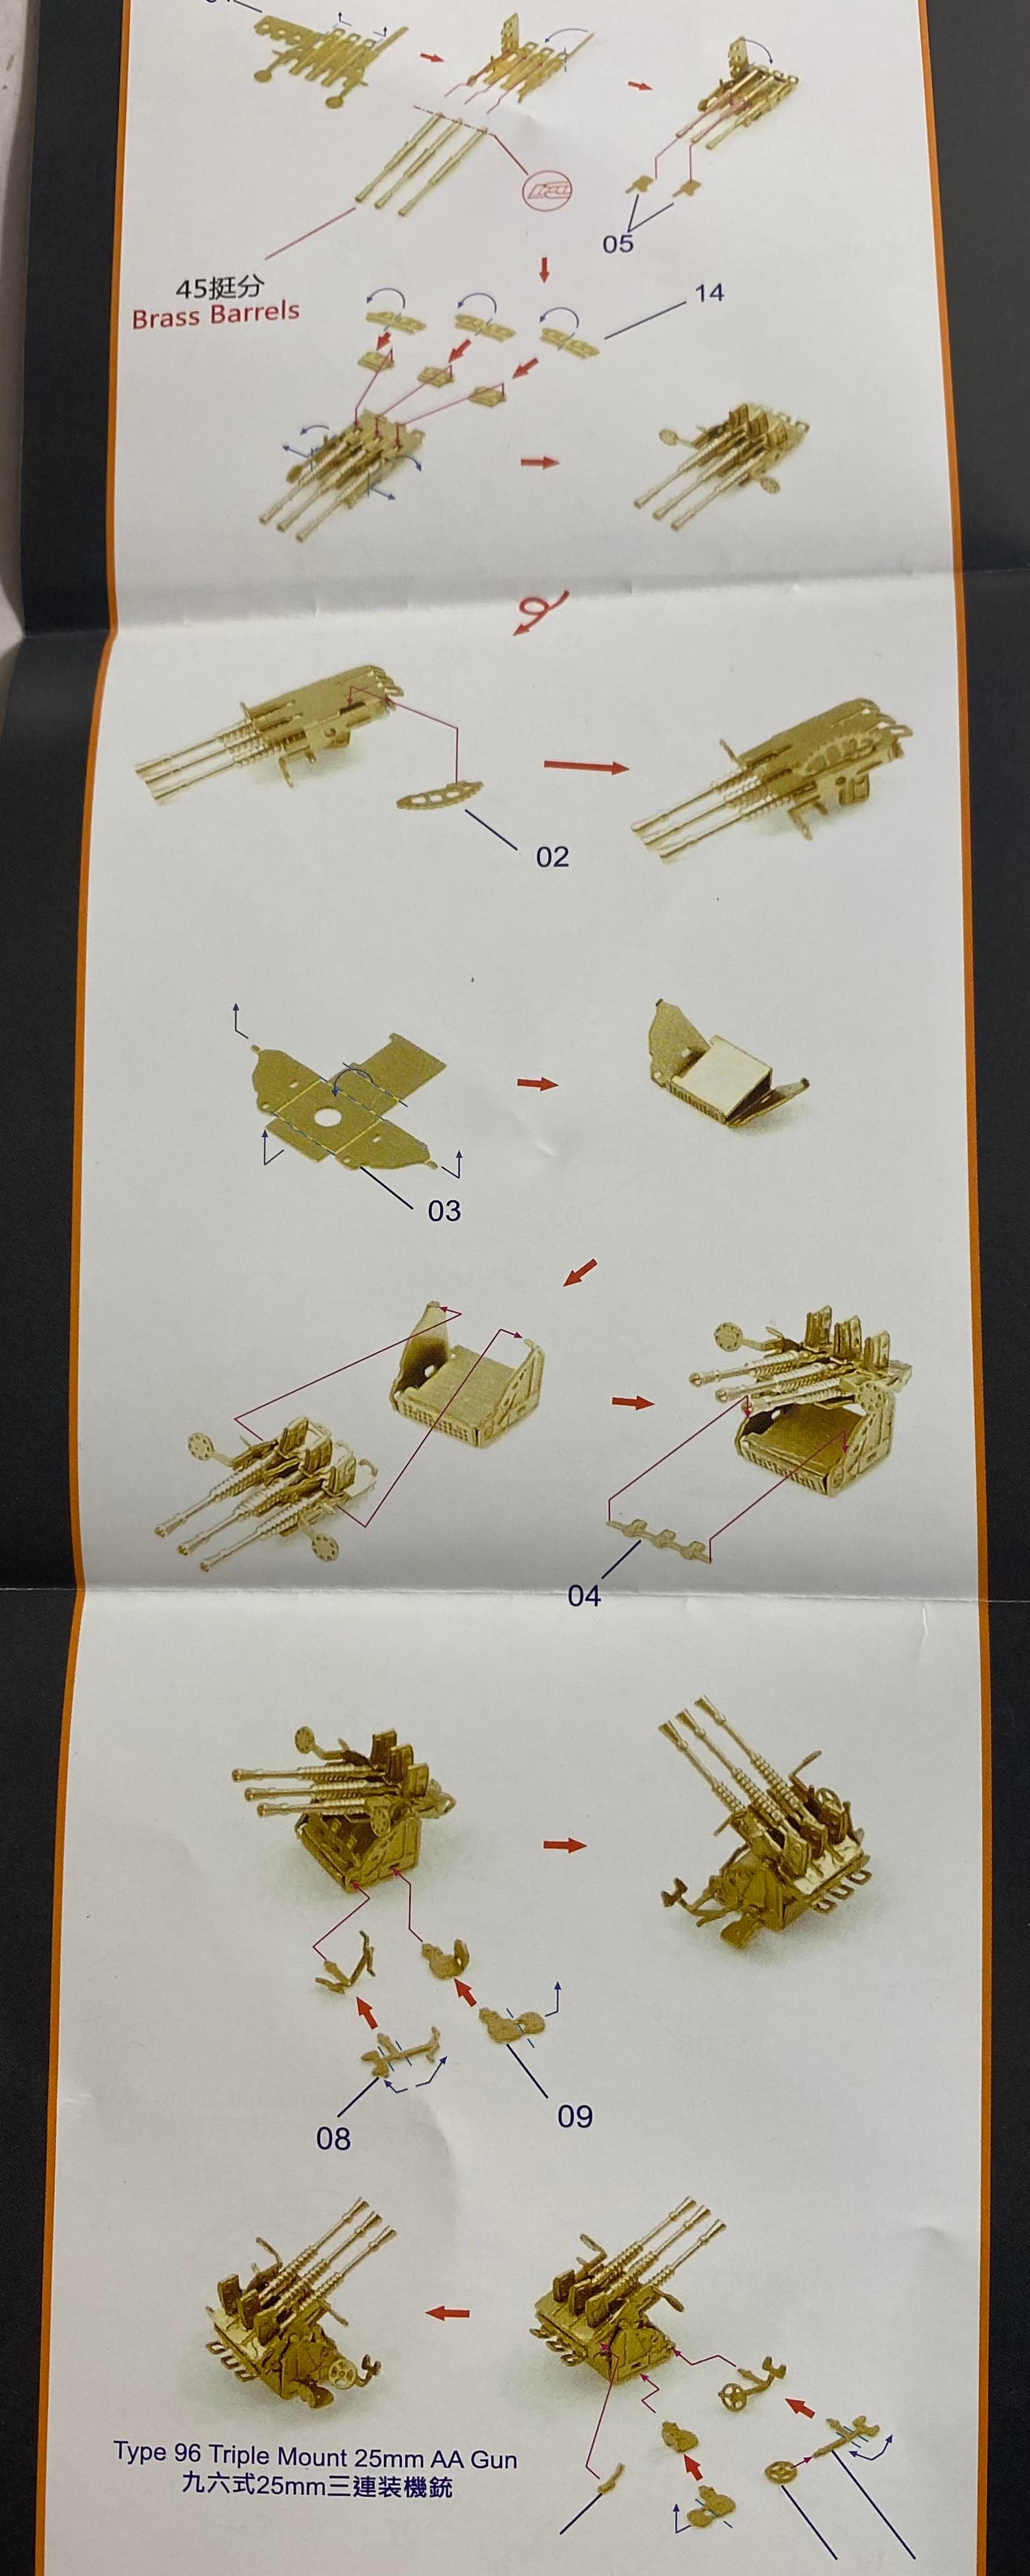
What I ended up with on the ship. For some perspective, that’s my pinky next to it. These are not big AA guns like a bofors.

3 Likes
That would break me … The kit ones look perfectly good mate. And the other crazy PE you have done will cancel out the bits you couldnt face ![]()
2 Likes

2 Likes
Good call, using the kit parts Rory. ![]()
As much as the Infini set looks great, these AM guys sometimes forget that the parts they’re producing are beyond what’s visible with the optivisor, let alone what can reasonably be achieved using our regular set of modellers tools ![]()
The kit parts are a win IMHO ![]()
1 Like
That is some beautiful work you have done so far. Hats off to you…Cheers Mark
Very nice work. The rigging looks great!
Last update before launch day. All construction is completed and now just have to glue some parts in place and wait for matt coats to dry.
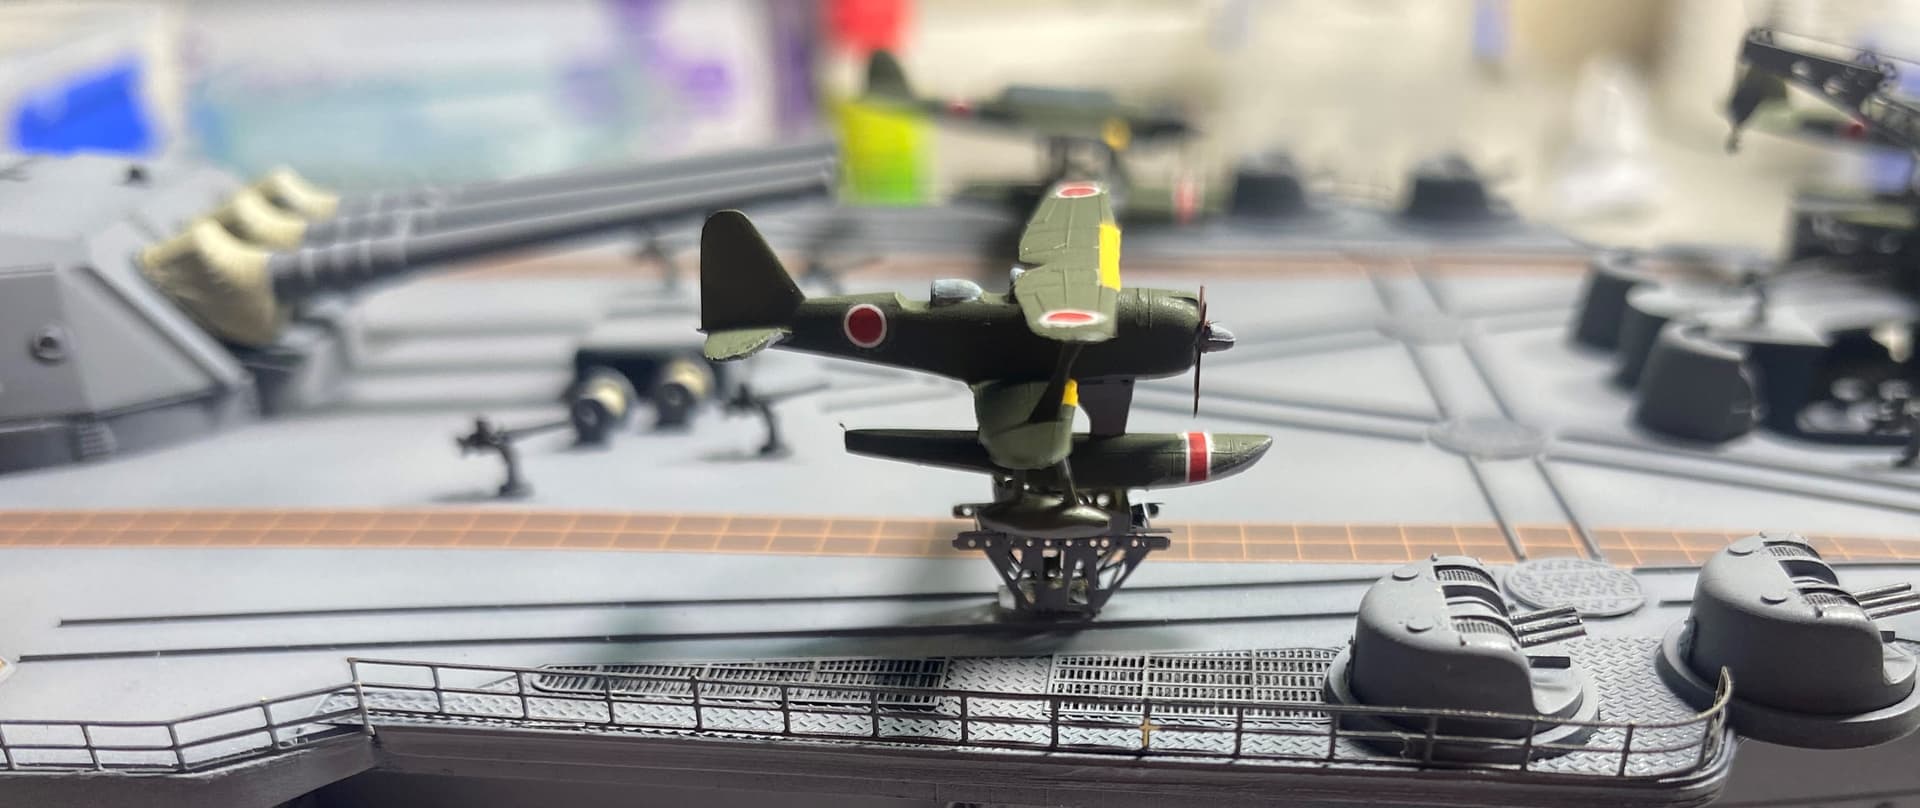
Weekend was spent on these little buggers. They came out pretty good in the end but were rather fiddly. I spent way more time on the decals than I would have liked since there were super stiff and thick. Did not want to bed down.

I really am a fan of the IJN green aircraft. The meatball just pops and yellow on green is always a good combo.

They are all mounted on nice PE cradles (which you can barely see) so that was fun to make.
9 Likes
Looking great all the major bits are on now. The railings and aircraft look terrific ![]()
Commissioning day has arrived ![]()
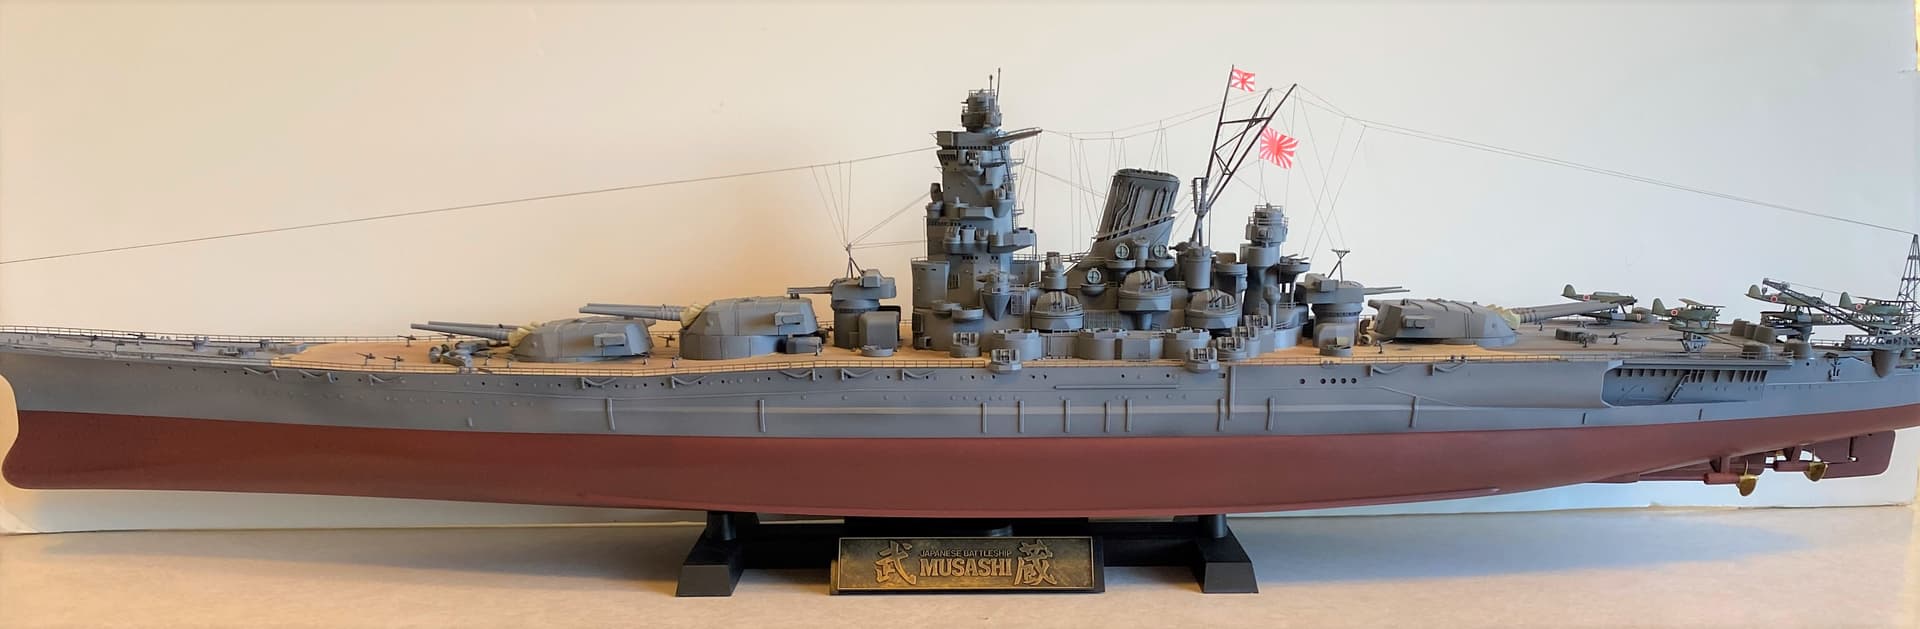


I am really happy with how she has turned out and apart from a few minor issues, she pretty much just fell together. It was really nice not to have to fight with a kit after my last few builds. I am also very happy with the rigging. This is only the second ship I have rigged and was really apprehensive when looking at the rigging charts and just how fragile some of the masts etc were. But I took it slowly and it all came together.
There are a few small things I am not happy about (which I will keep to myself ![]() ) but overall I think being conservative on the aftermarket and not pushing myself into building (and spending the money) on super detailed PE really made this enjoyable.
) but overall I think being conservative on the aftermarket and not pushing myself into building (and spending the money) on super detailed PE really made this enjoyable.
Now to take a short break and crack on with the next ship hull sitting on my shelf. Should I return to HMS Vendetta or tackle more of USS Arizona?
16 Likes
Rory,
She’s a fine looking model, and it just goes to show what a magnificent showpiece can be made using solid modeling techniques on a good kit with a modest amount of aftermarket. Best of all, you didn’t drive yourself crazy getting here - well done, sir! ![]()
![]()
![]()
![]()