You have a done a great job so far Stephen. A bit more work cut out for you though.
1 Like
Thanks Pete.
This was one of the first of the new tools after the Hornby takeover and it’s been repopped a lot over the last few years. So I can cut them a little slack. Just very annoying.
I’ve also just noticed Airfix missed the NAVY decal for the port side upper wing. Should have one in my spares.
1 Like
Well, I finished my piece for this group build…
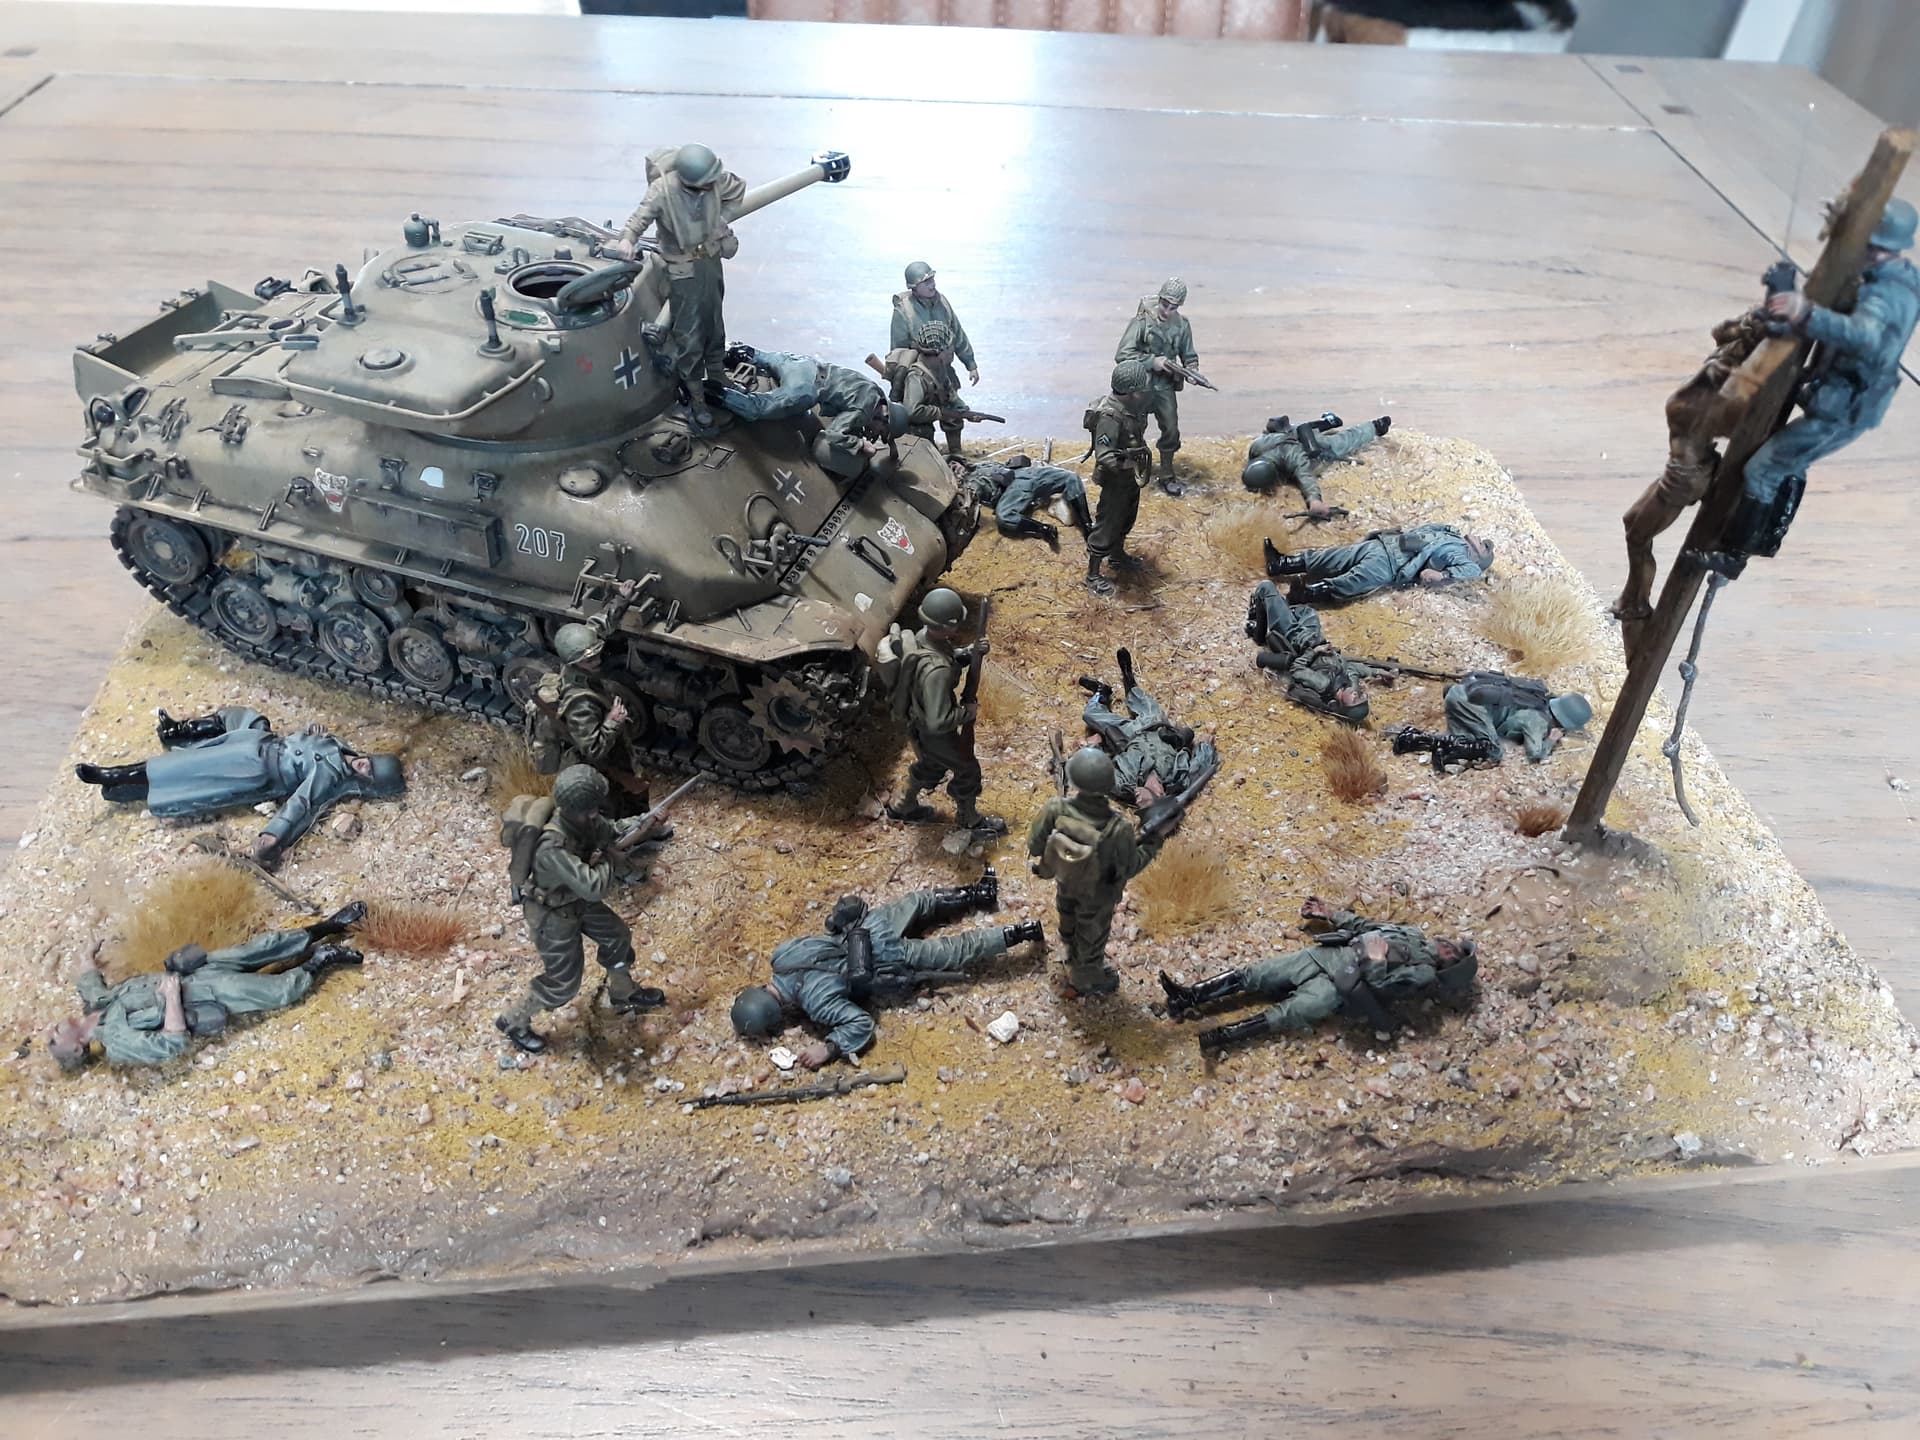
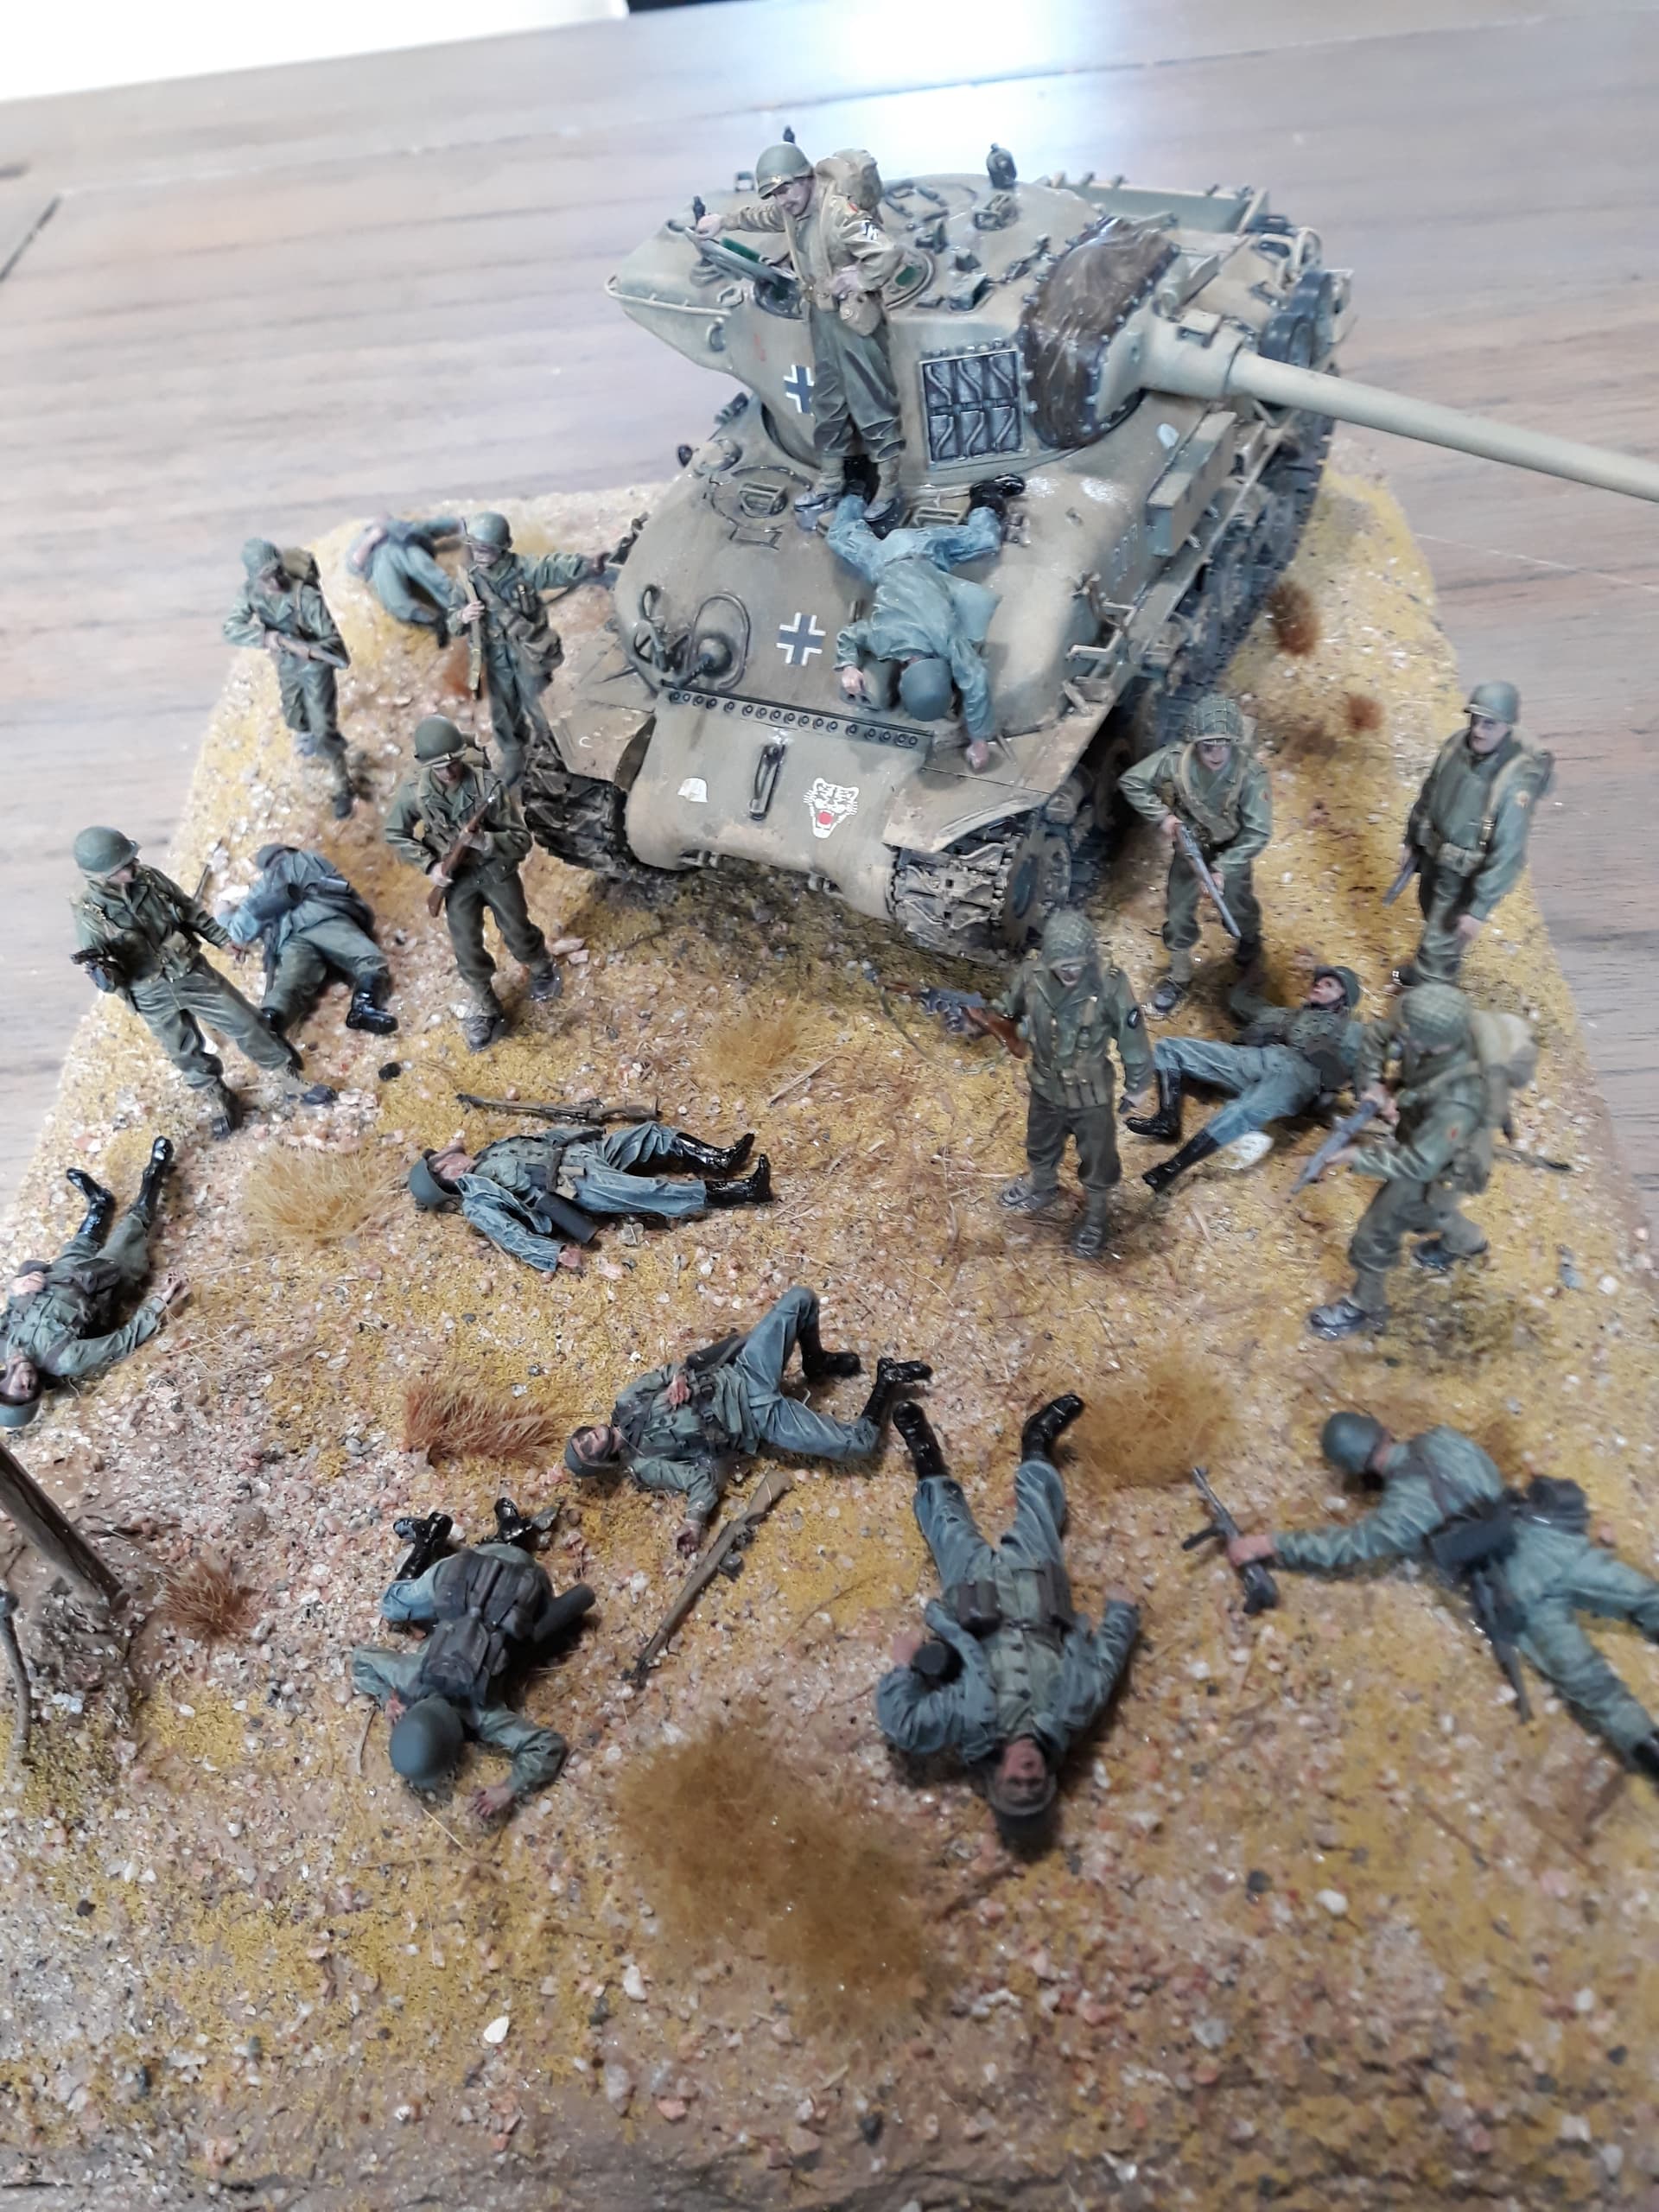
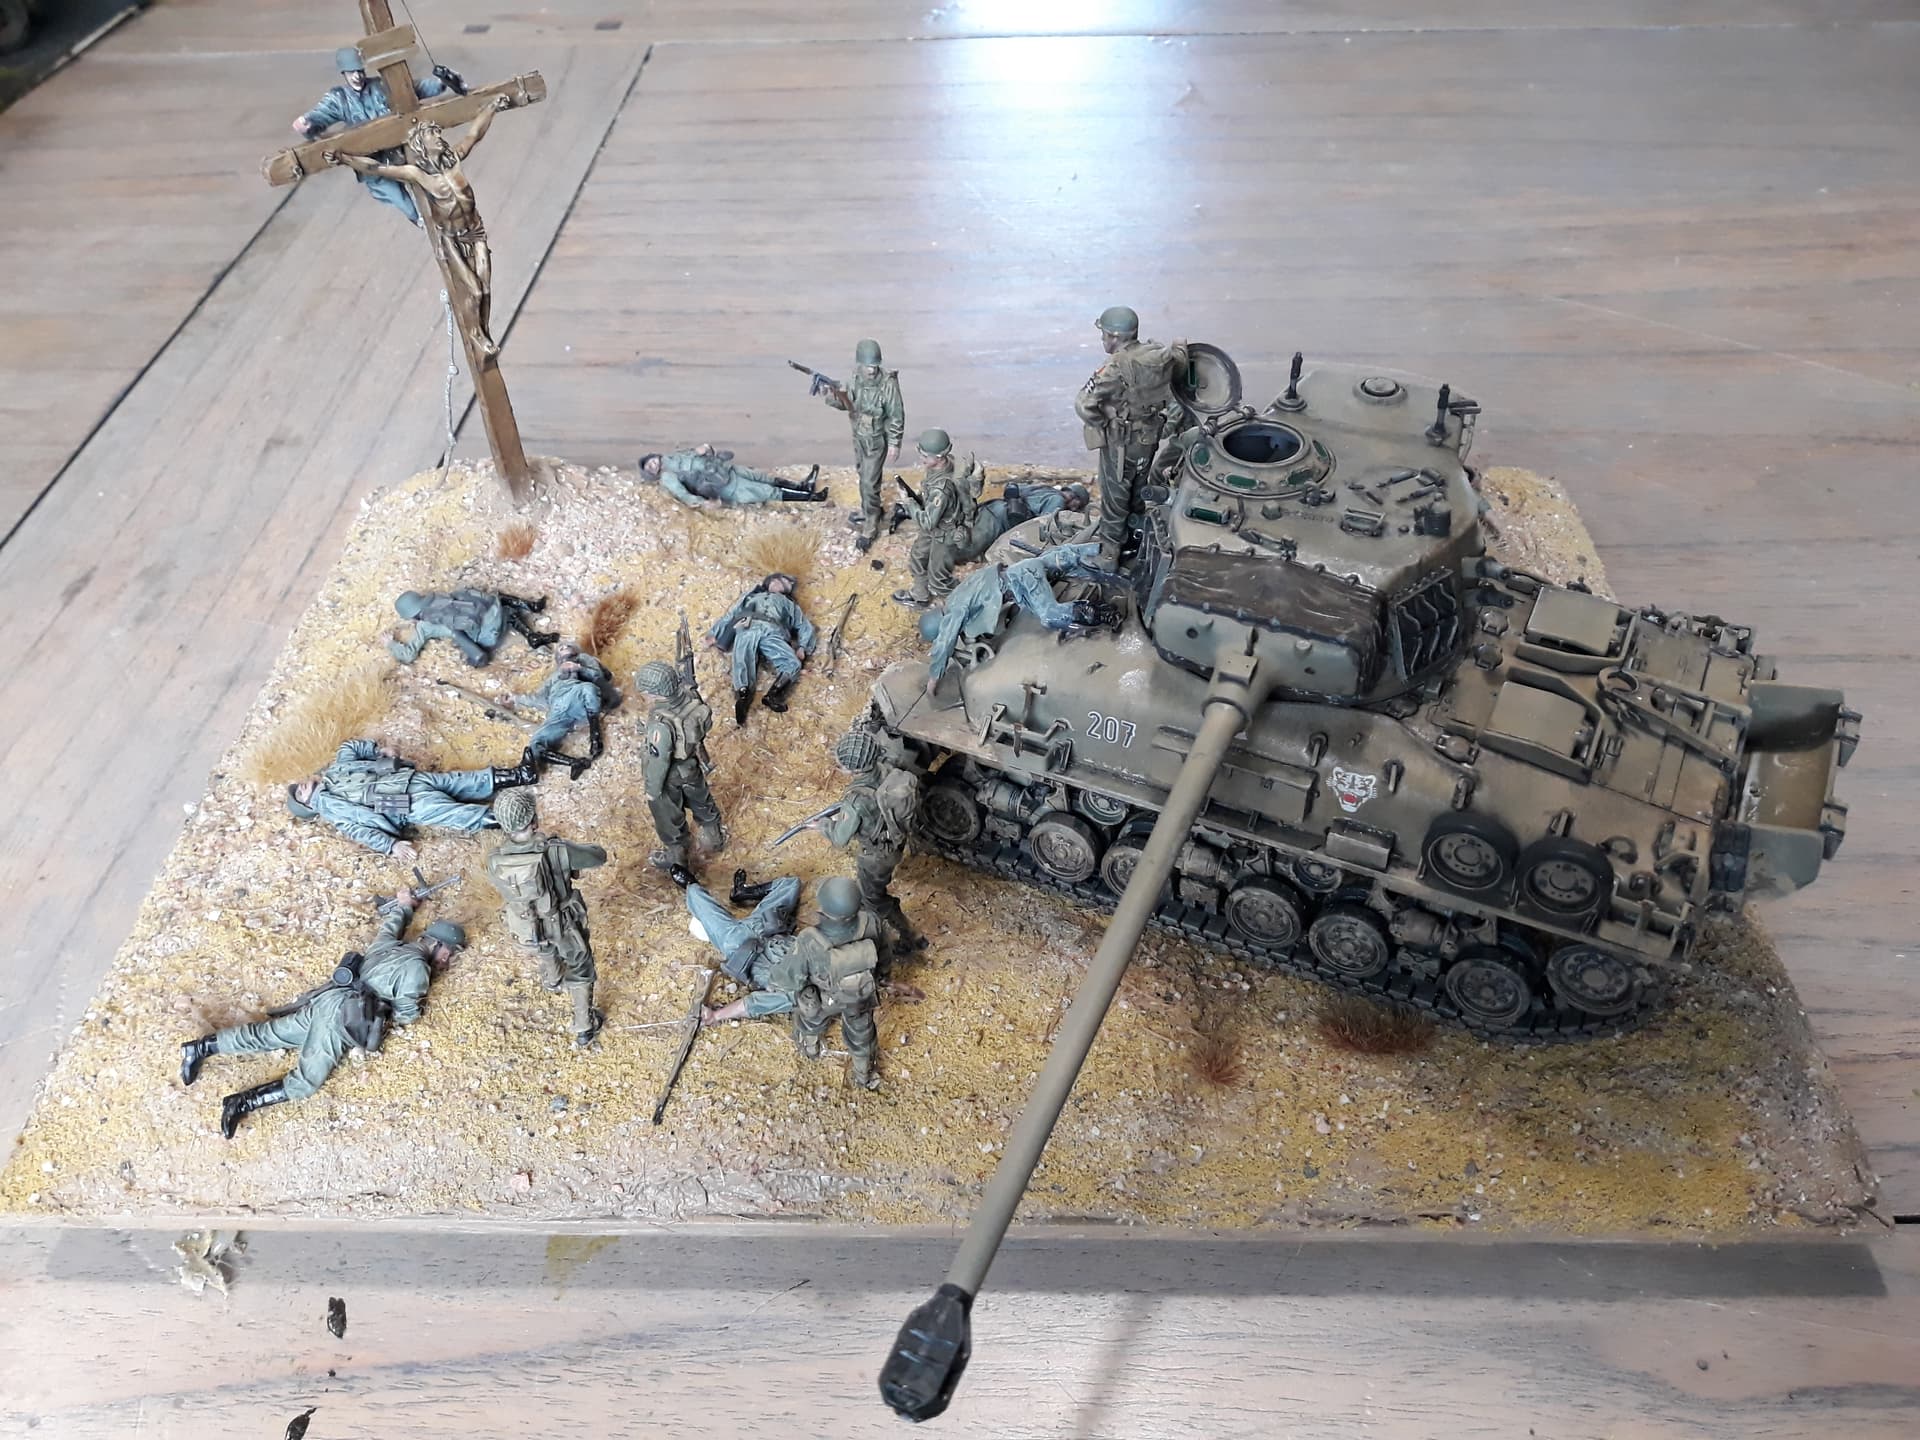

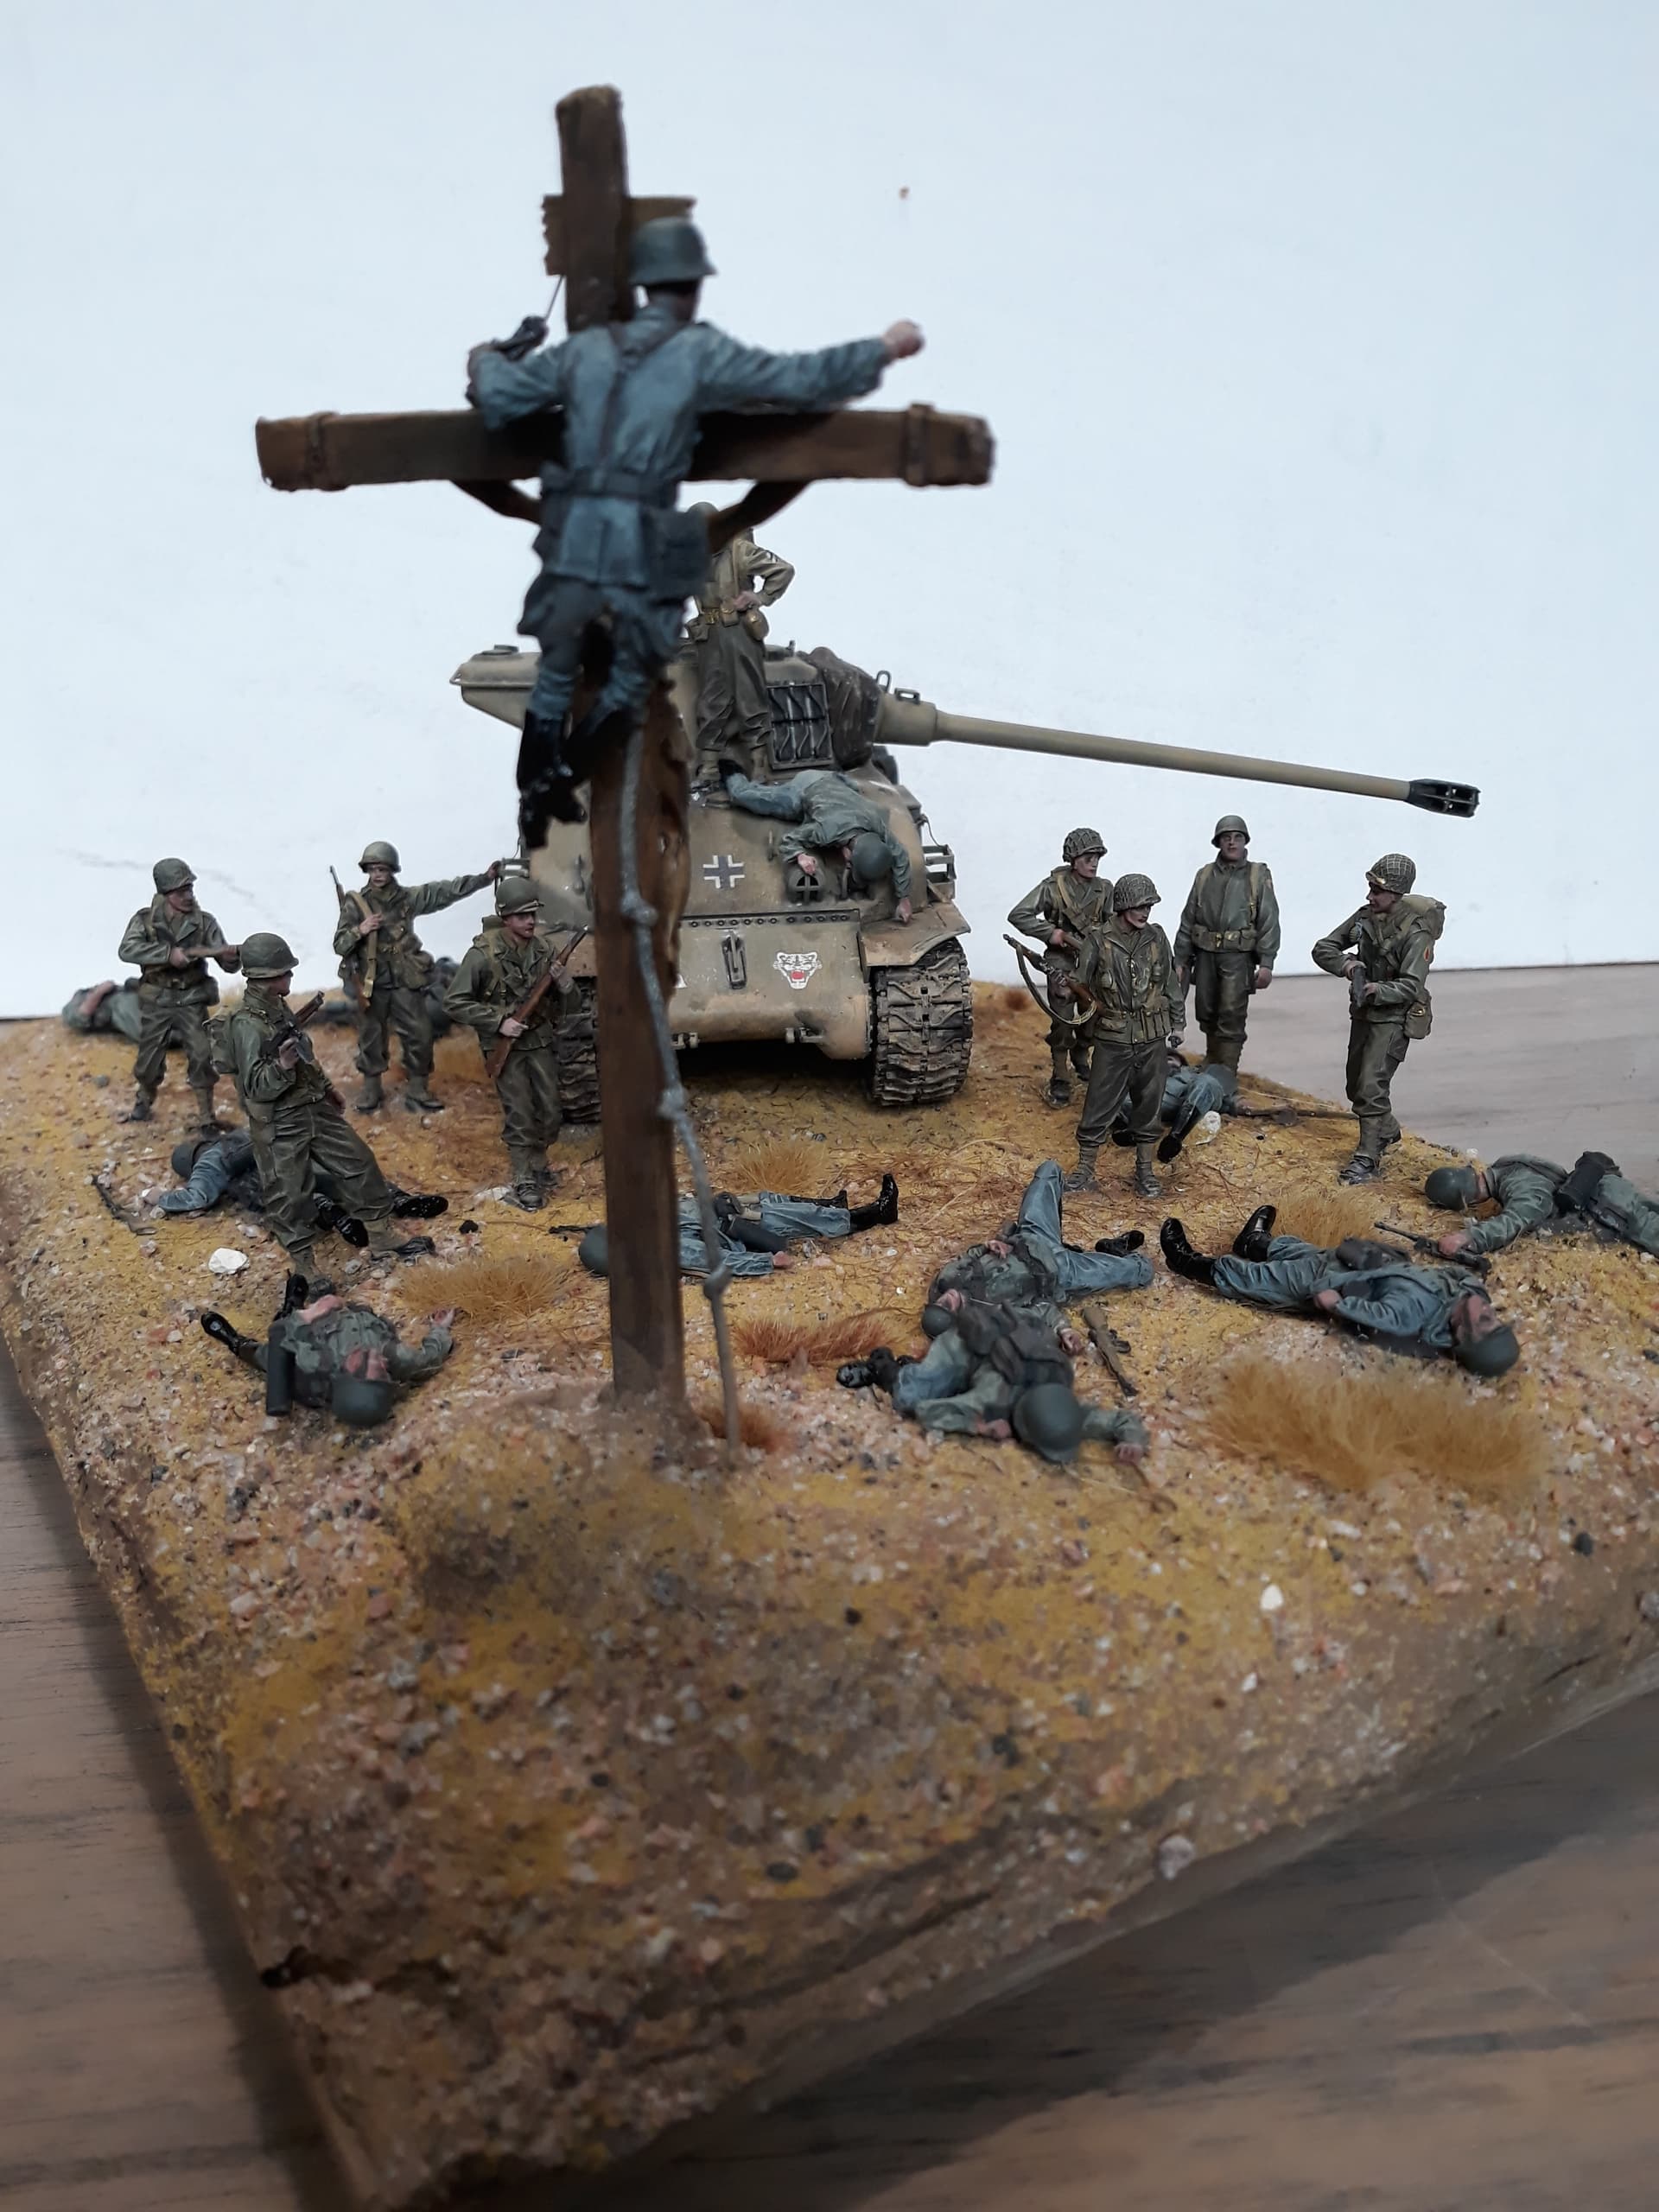
This was fun, doing something different than my usual stuff, thanks for organising it!
17 Likes
Nice! Still kinda blows my mind that they used an Israeli tank to portray a German one.
Michael ![]()
5 Likes
Great job Bert. The figures add some life (pun intended) to the overall look.
Thanks for joining in. I’m glad you had fun, that is the whole point of this build!
4 Likes
Fantastic job!
1 Like
Thanks guys!
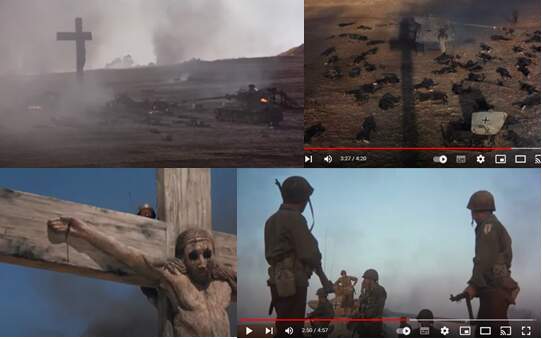
Very nice finish! I remember this scene
2 Likes
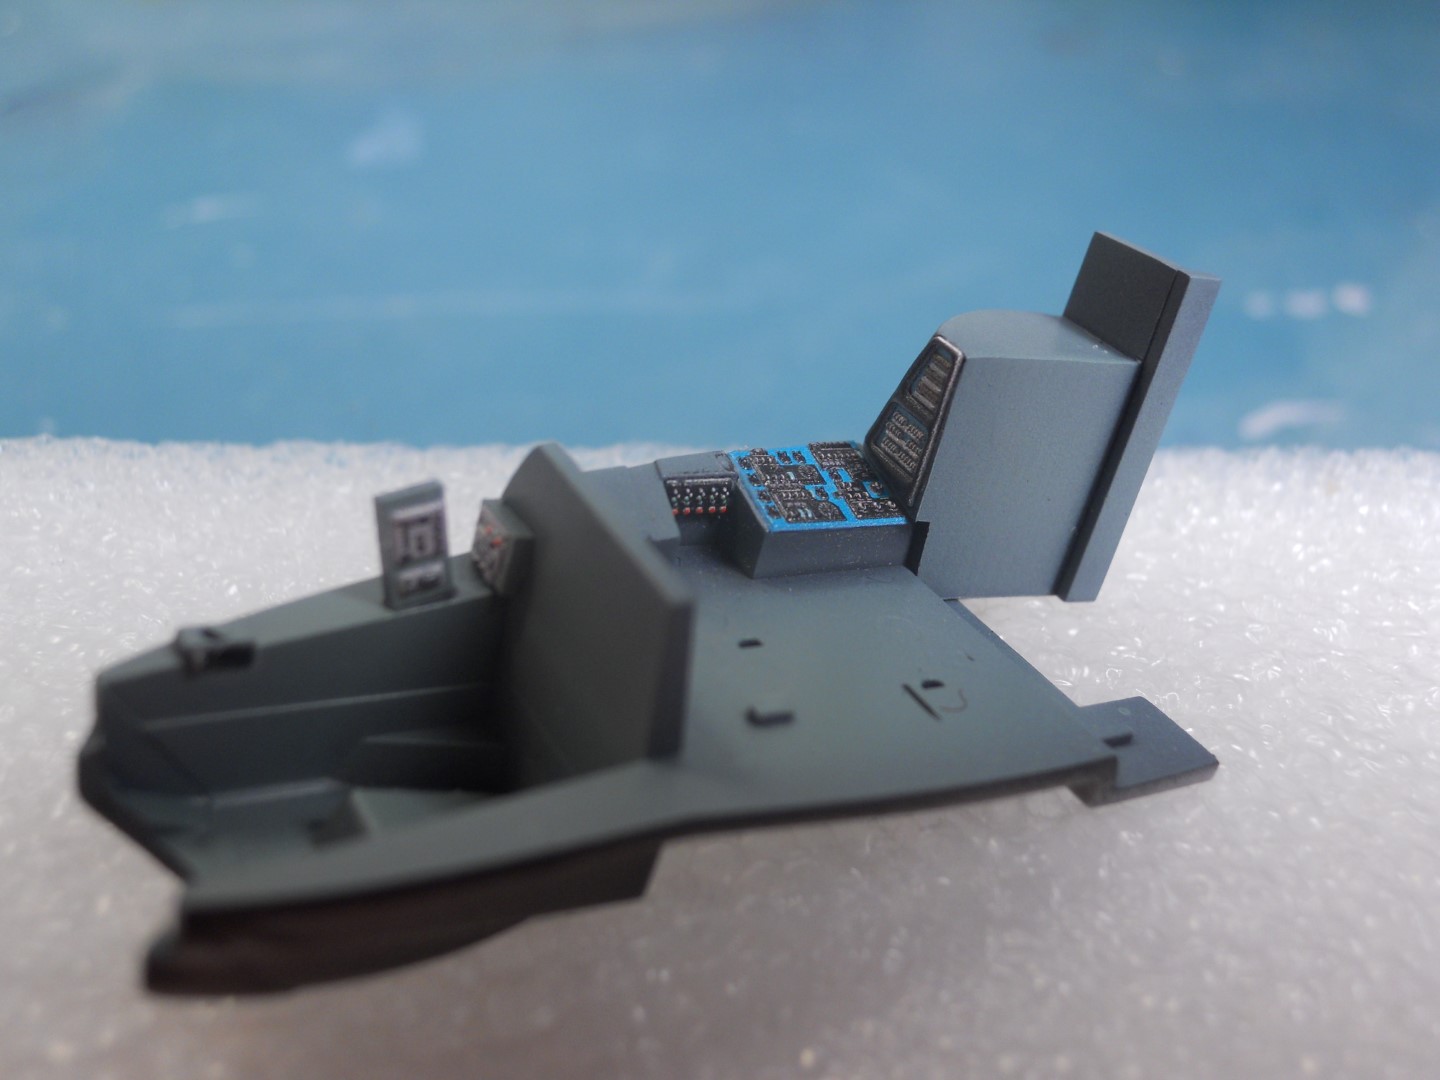
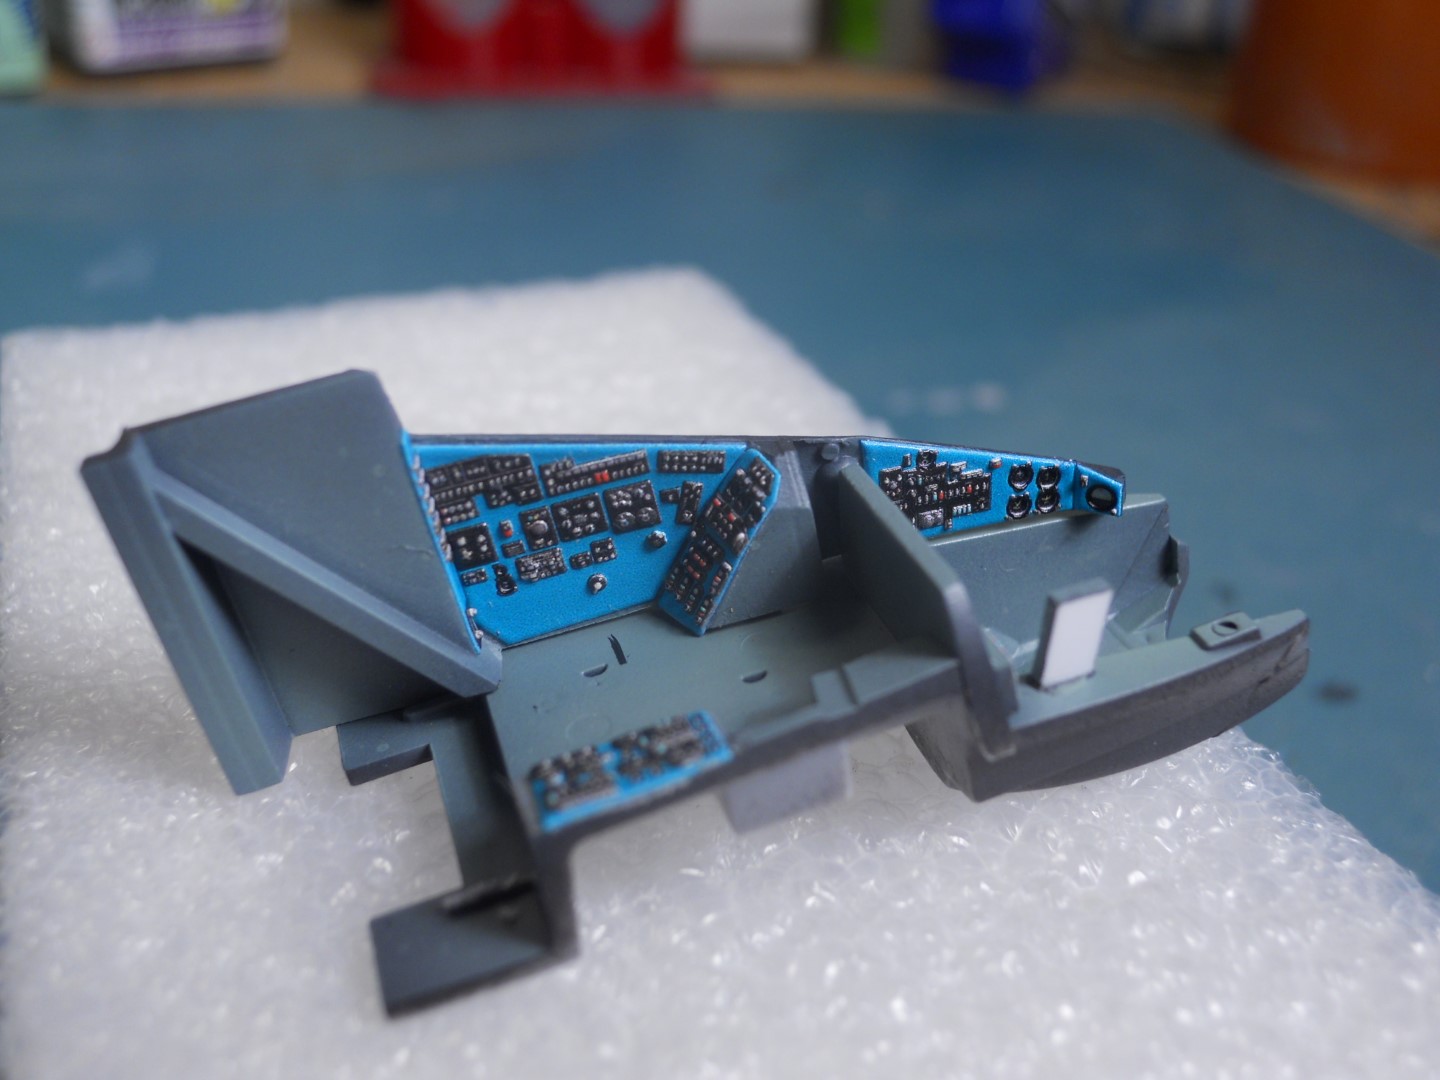
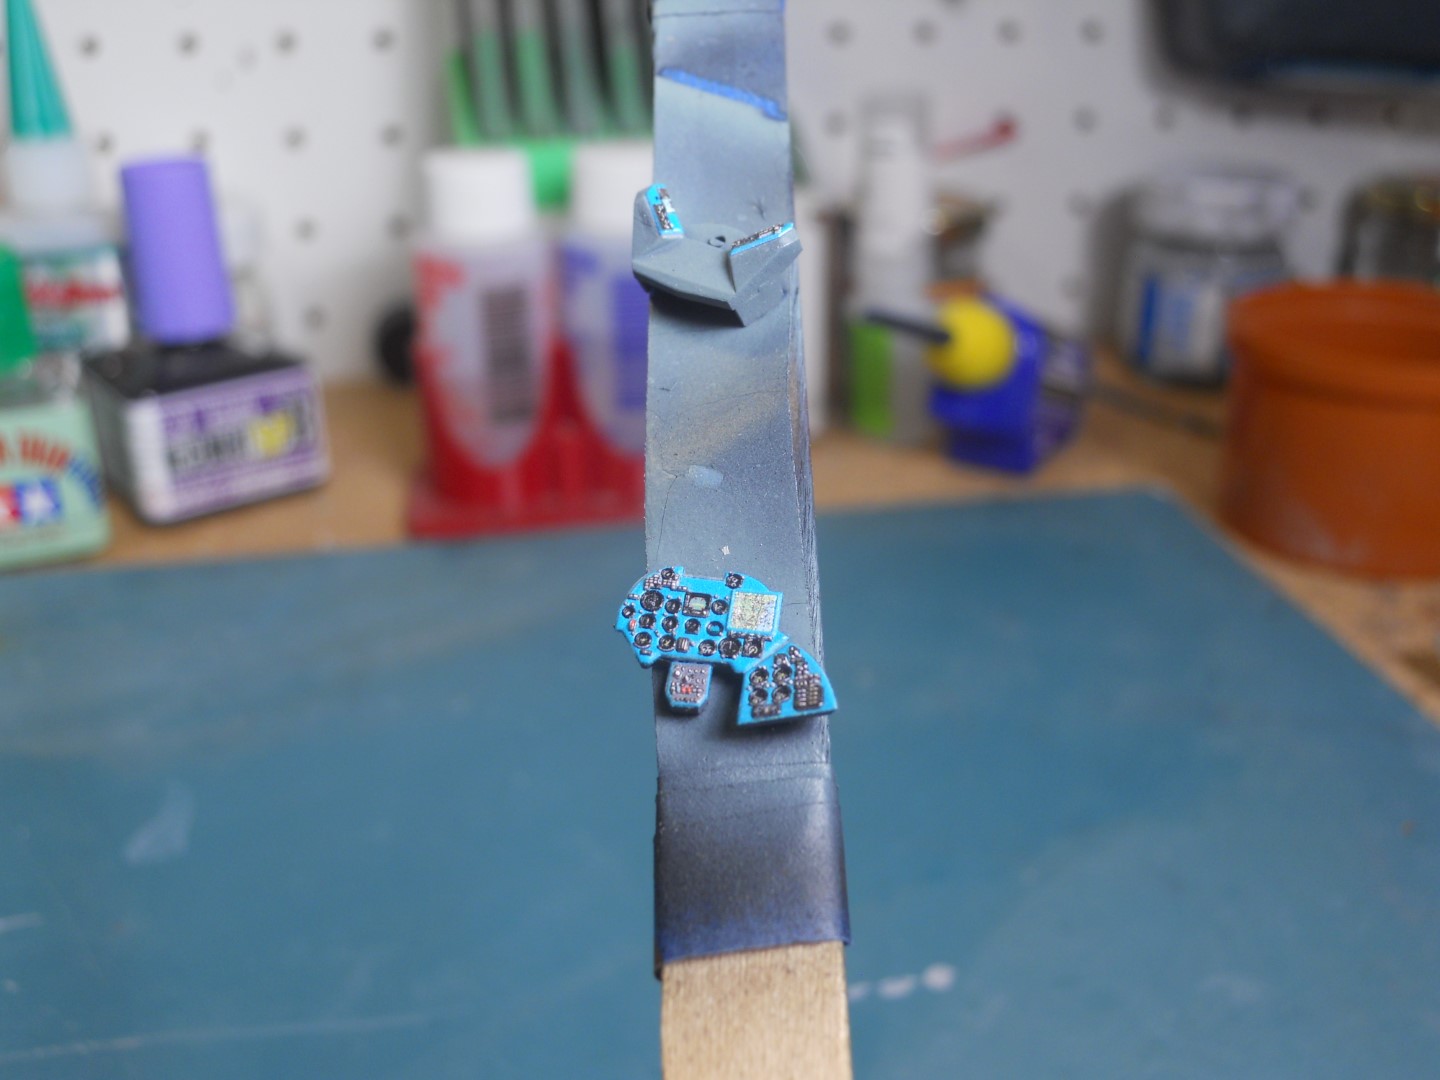
I am now starting to find some free time between my other builds to get moving on the Coast Guard Hind. Like a lot of aircraft builds, this starts mainly in the cockpit and cabin so I have the most progress in these areas. I have been looking for an excuse to try the Quinta 3D decals, so here’s my chance. Note that in the photos I am posting, the background color for the panels look bright blue. That is likely a problem with my digital camera. It does not like the color of the 3D decals! To your eyes in normal room light, the background color is turquoise which looks very close to published photos of Mi-24V cockpit panels. The funky blue color might also be a result of the bright light I use for illuminating models when I photograph them. Anyway, the color looks a LOT better than is appears in these photos! Here is the different parts of the cockpit before I start to seal it up.
Have fun modeling!
Mike
7 Likes
Those decals look sensational Mike. Those big canopies should show these off well.
Thanks Peter, that was what I am hoping!
Mike
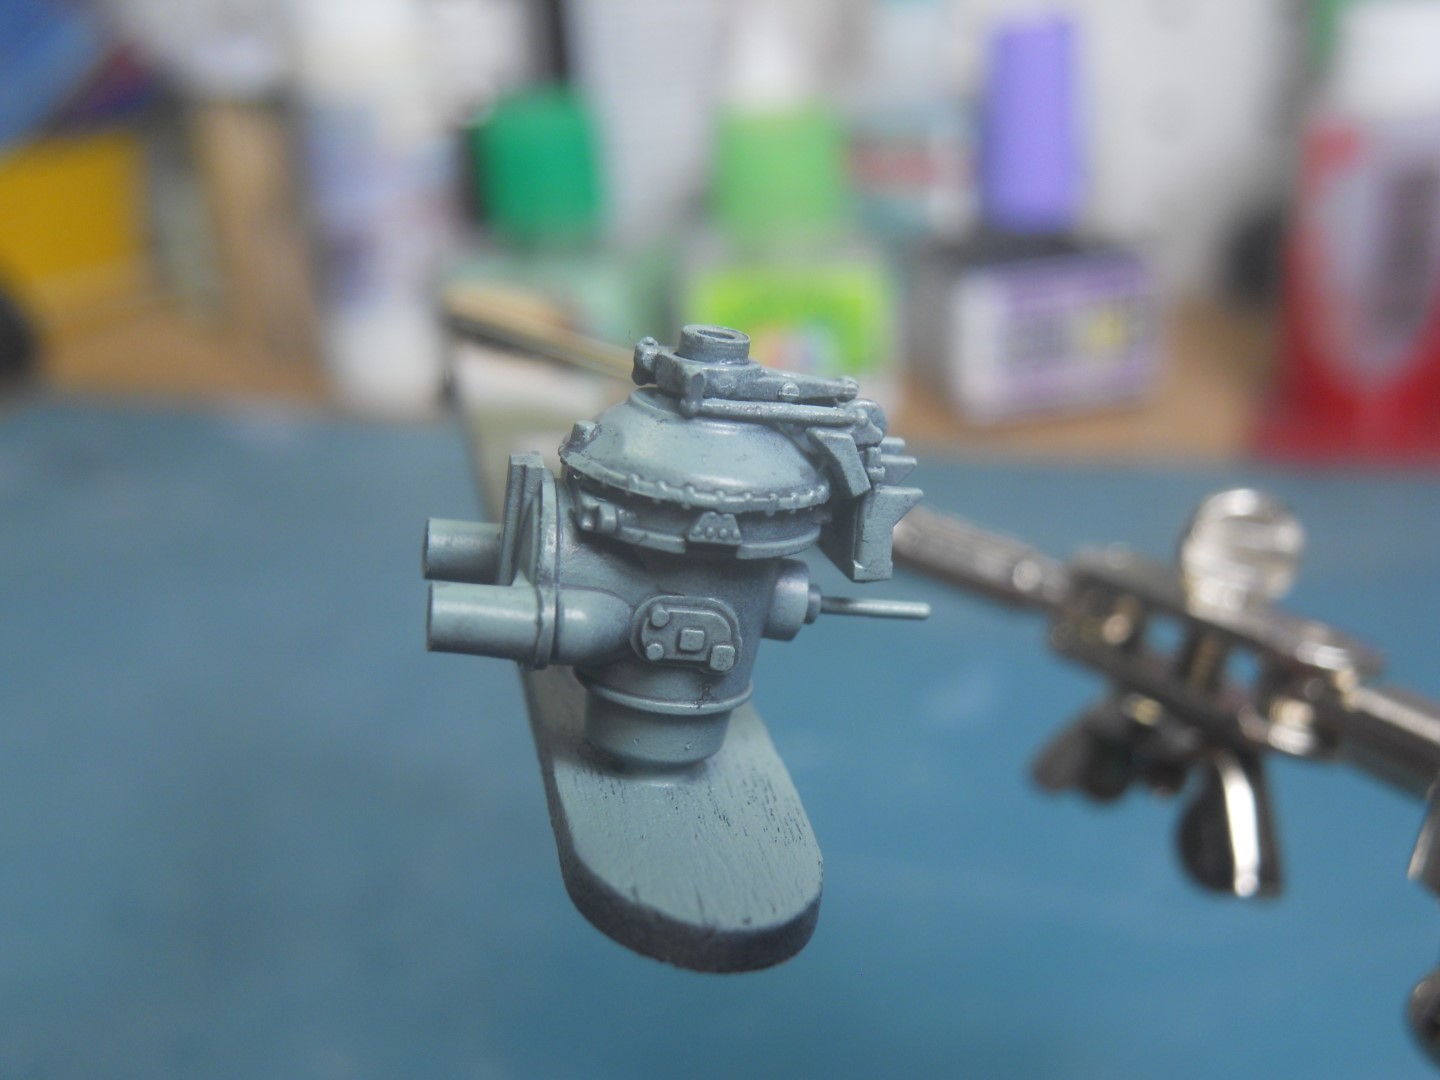
One of my goals in this GB is to try a few new modeling tricks, tools or techniques. The Hind I am working on has quite a few options that you can only see if the panels are opened. I plan on having the Hind buttoned up so this gives me the opportunity to try something and if it does not work, it is hidden anyway. One of the options is to have the rotor blades transmission bay opened up. In my case it will be closed but I decided to build the transmission
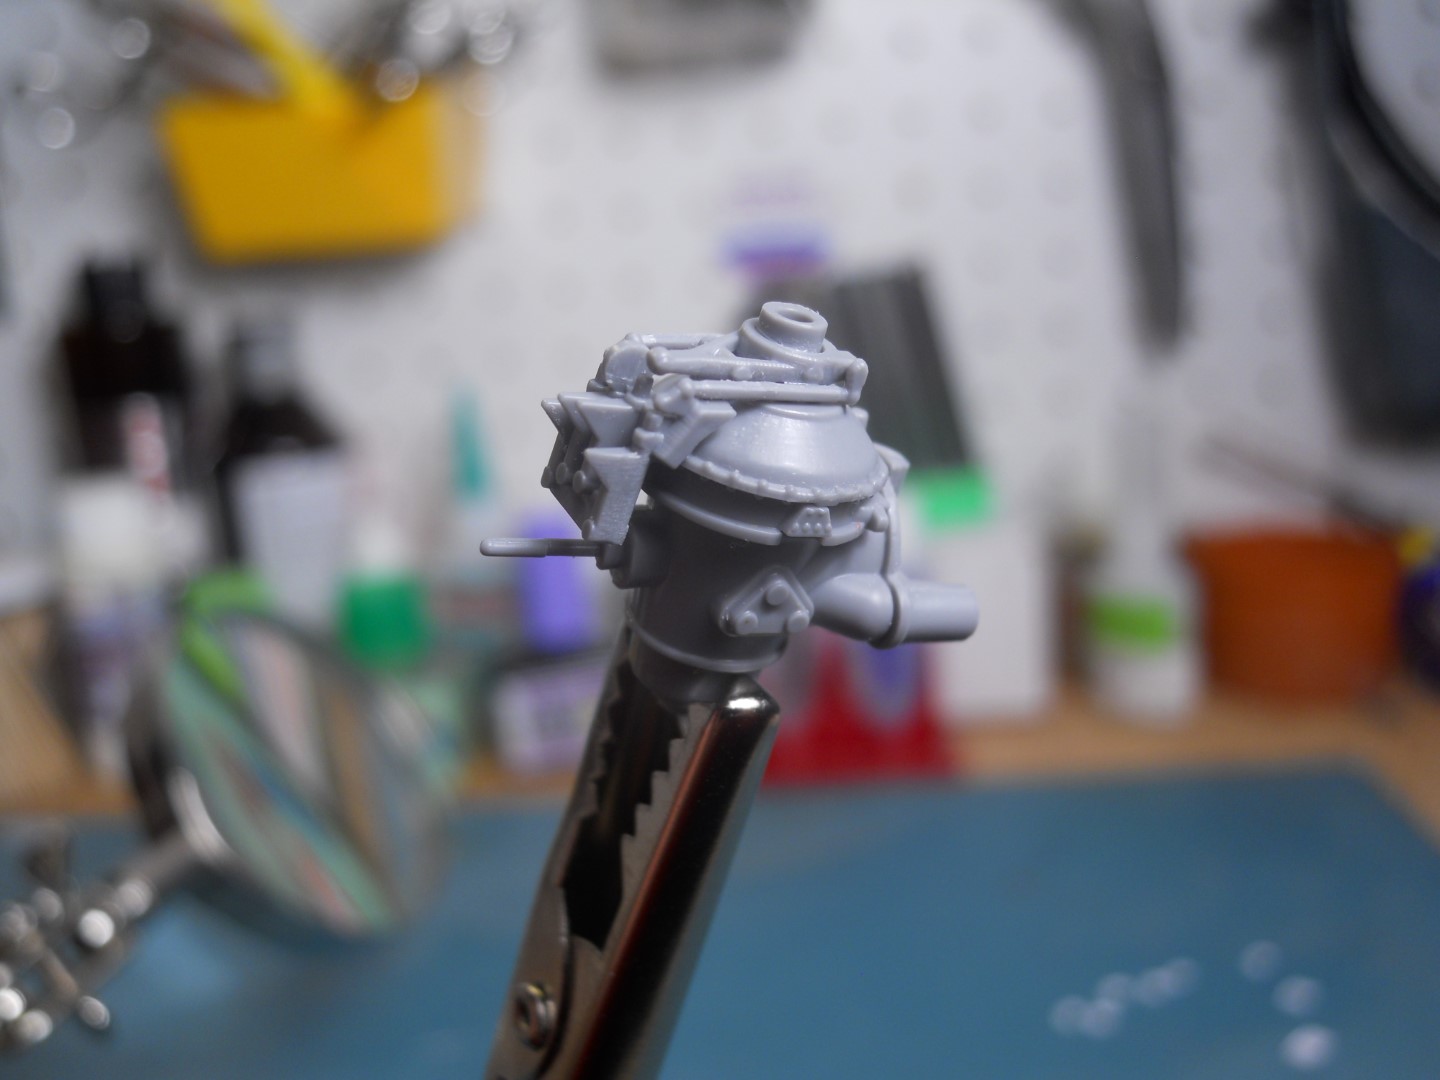
unit (?) anyway. Here’s the base unit as assembled. I am using MRP paints for only the second or third time and I wanted to see how they weather. I sprayed the transmission MRP Russian Blue Grey to match photos and then weathered it with Tamiya Panel Line wash. This looked like it worked well so I can add this to my modeling tool box!
Have fun modeling!
Mike
6 Likes
Cool. That does look quite good. Looking forward to seeing the other techniques you are going to test.
Noice! Look forward to seeing more. ![]()
1 Like
Main flight deck of the USS Enterprise is painted and ready for decals ![]()
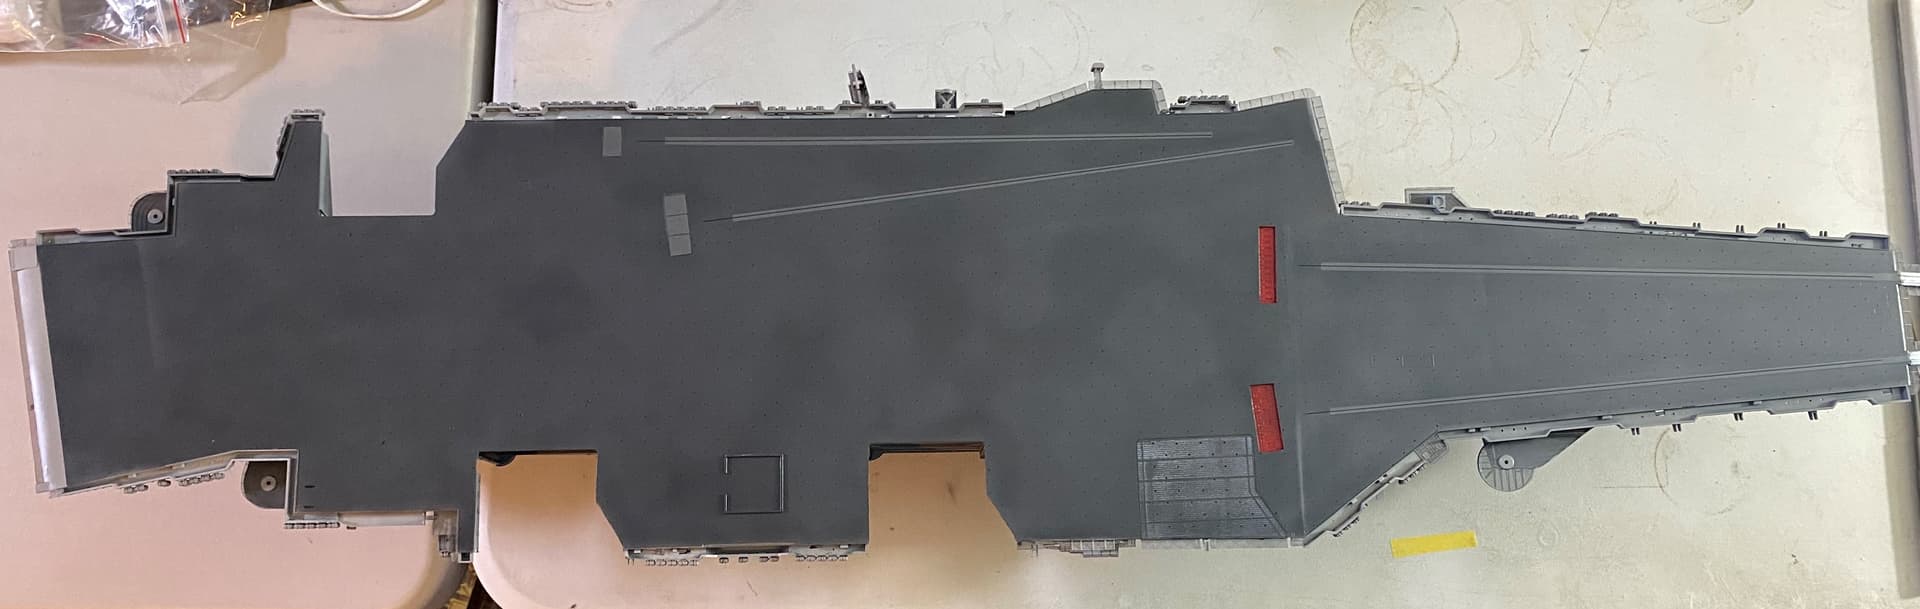
This kit has been a challenge. Build log (of sorts) can be found here: USS Enterprise CVN-65 (Tamiya 1/350) - Ships / Cold War - KitMaker Network
8 Likes
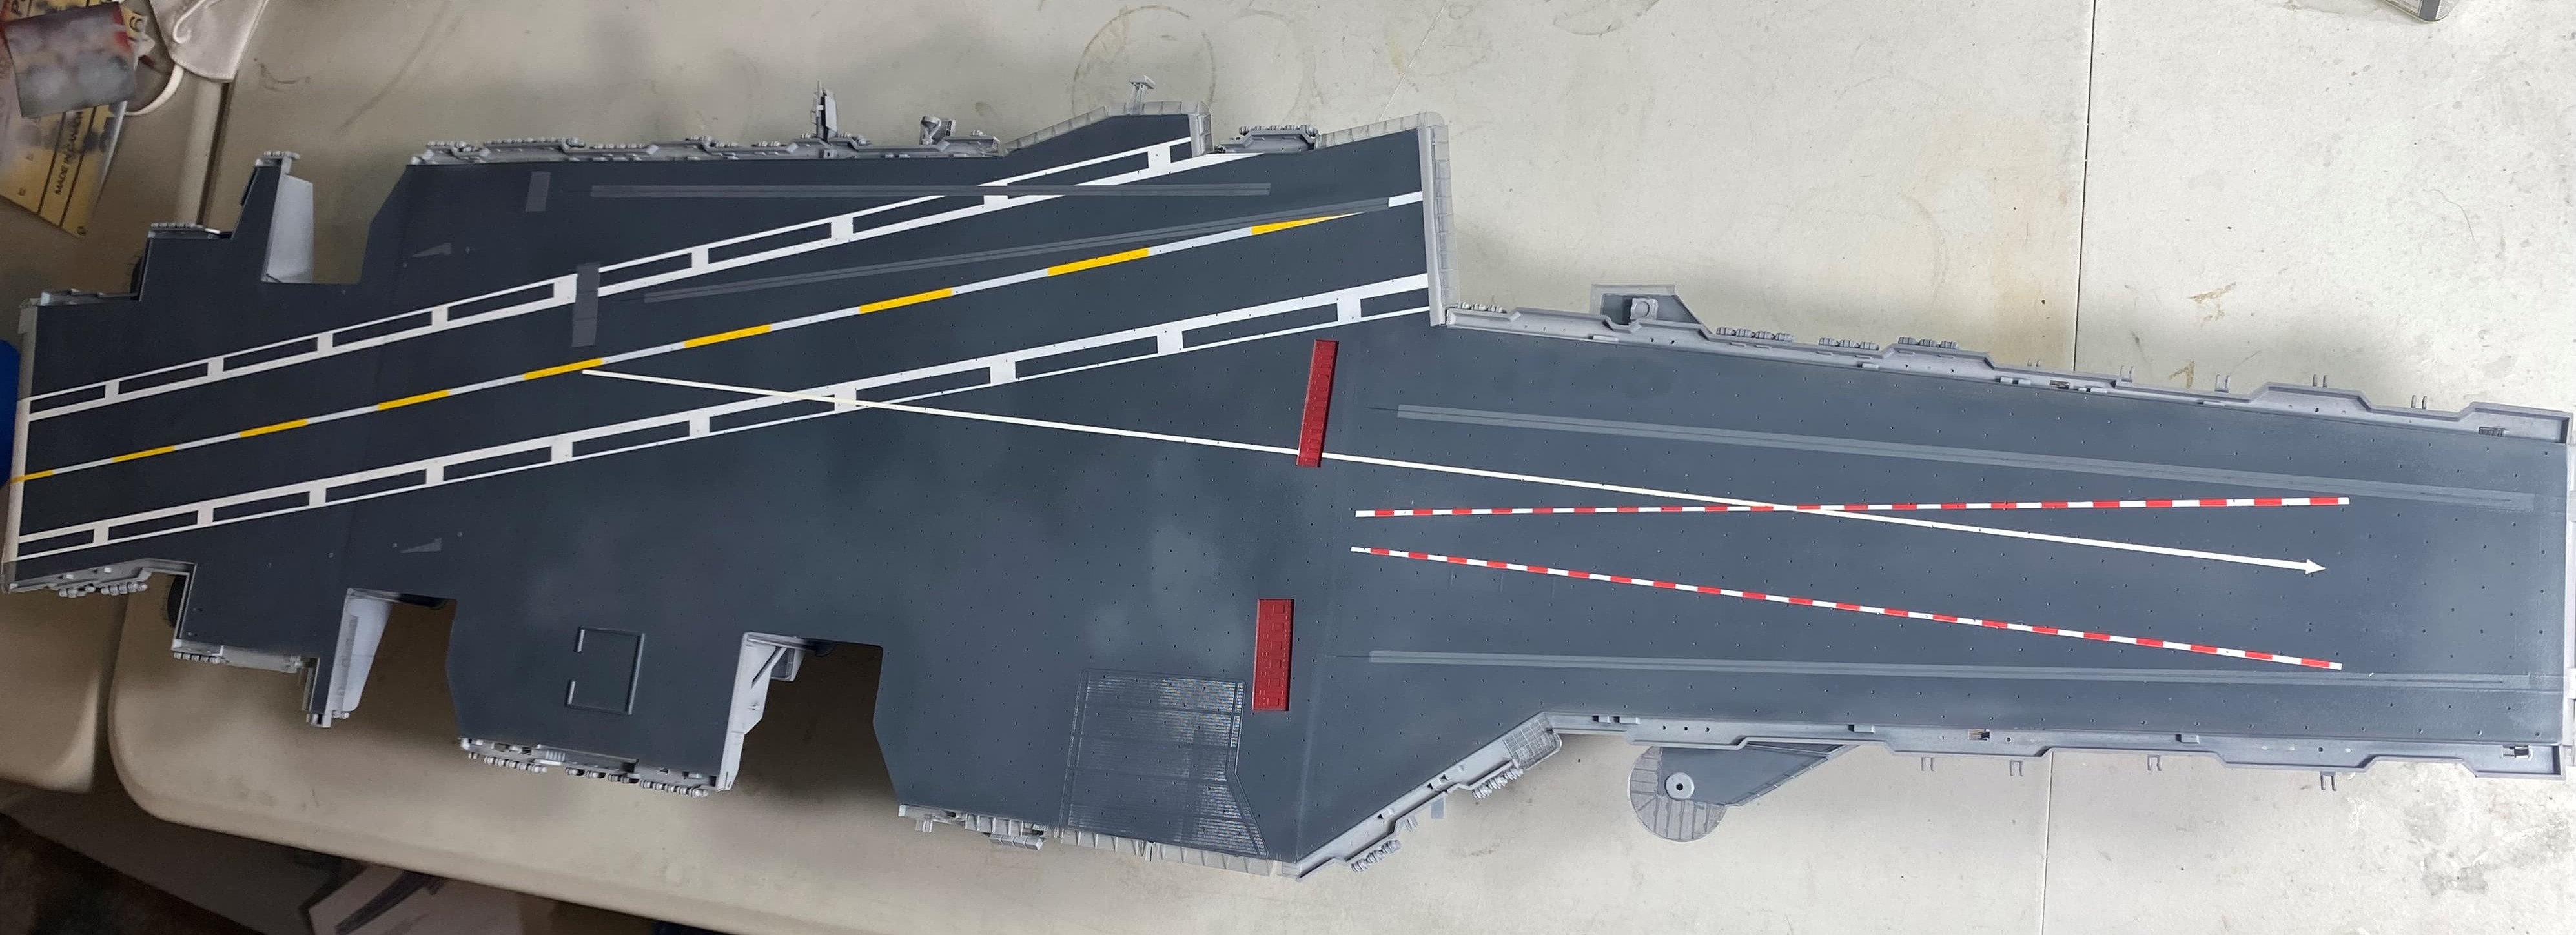
A few days later and still no decals. Madness overtook me and I decided to mask off and paint the majority of the large deck markings ![]()
10 Likes
That looks sensational Rory. Madness or not, I think you went the right path here.
1 Like
Wow, just wow ![]()
1 Like
Methinks that this looks much better than any decals could ever do… ![]()
1 Like
The markings on the deck are great! You did one outstanding job with the masking. Very impressive!
2 Likes