Spent a couple of hours at the weekend trying to tidy-up the edges of the base, the downside being that it resulted in some gaps which had to be filled with DAS which, once dry had to be re-scribed, . Likewise the resultant gaps between the groundwork and façade needed filling, and will need re-scribing and blending, .
The downside of this is going to be trying to blend everything together as seamlessly as possible colour-wise, . I had the same issue on my previous Braille build, but it wasn’t as problematic as it was a mainly grass/undergrowth base, …think next time I might construct the edges right at the beginning and cover them with a film to protect them from my messy build nature, .
The front section isn’t yet glued in position as I might need to cut-out the base beneath whatever vessel I settle on in case it has to sit a bit lower in the water.
Fantastic progress views G! The following might help with the touching-up, it’s hard to match tones and colours simultaneously - often it’s the right colour but wrong tone, or vice versa. I’ve used this technique with reasonable success, by first applying a base coat of grey tones. You could even use the 2nd photo as the guide, or DIY a better version to your eyes…
Use dilute washes to just paint the approximate grey shades directly onto your white areas – the least grey paint required the better. When dry, mix some patches of greens/browns etc that look like the range of existing colours on the wall. Then with a small soft brush apply them in a series of dilute washes, adjusting where necessary between each wash. So you’re tinting rather than painting, until it’s an acceptable & hopefully seamless match.
Worth practising on say a couple of stones at the bottom first. The tricky bit is discounting the lightest and darkest bits in any monochrome image (i.e. edges and crevices respectively) because they’re not the “true” tones…or colours for that matter. It’s far from an exact science with so many variables – e.g. light values when the photo was taken vs. when painting etc., but worth trying if not confident of nailing it all in one go
Thanks for the heads-up on your possible solution to solving the problem of blending the existing painted areas to the new re-scribed areas Tim, much appreciated, . As for not being an ‘exact science’, well I consider you the modelling boffin when it comes to diorama building, so any suggestions you make are likely to be as exact scientifically as they come, .
So I spent a quick hour trying out your method this morning and it seems to have worked reasonably well enough on the first element I tried it on, .
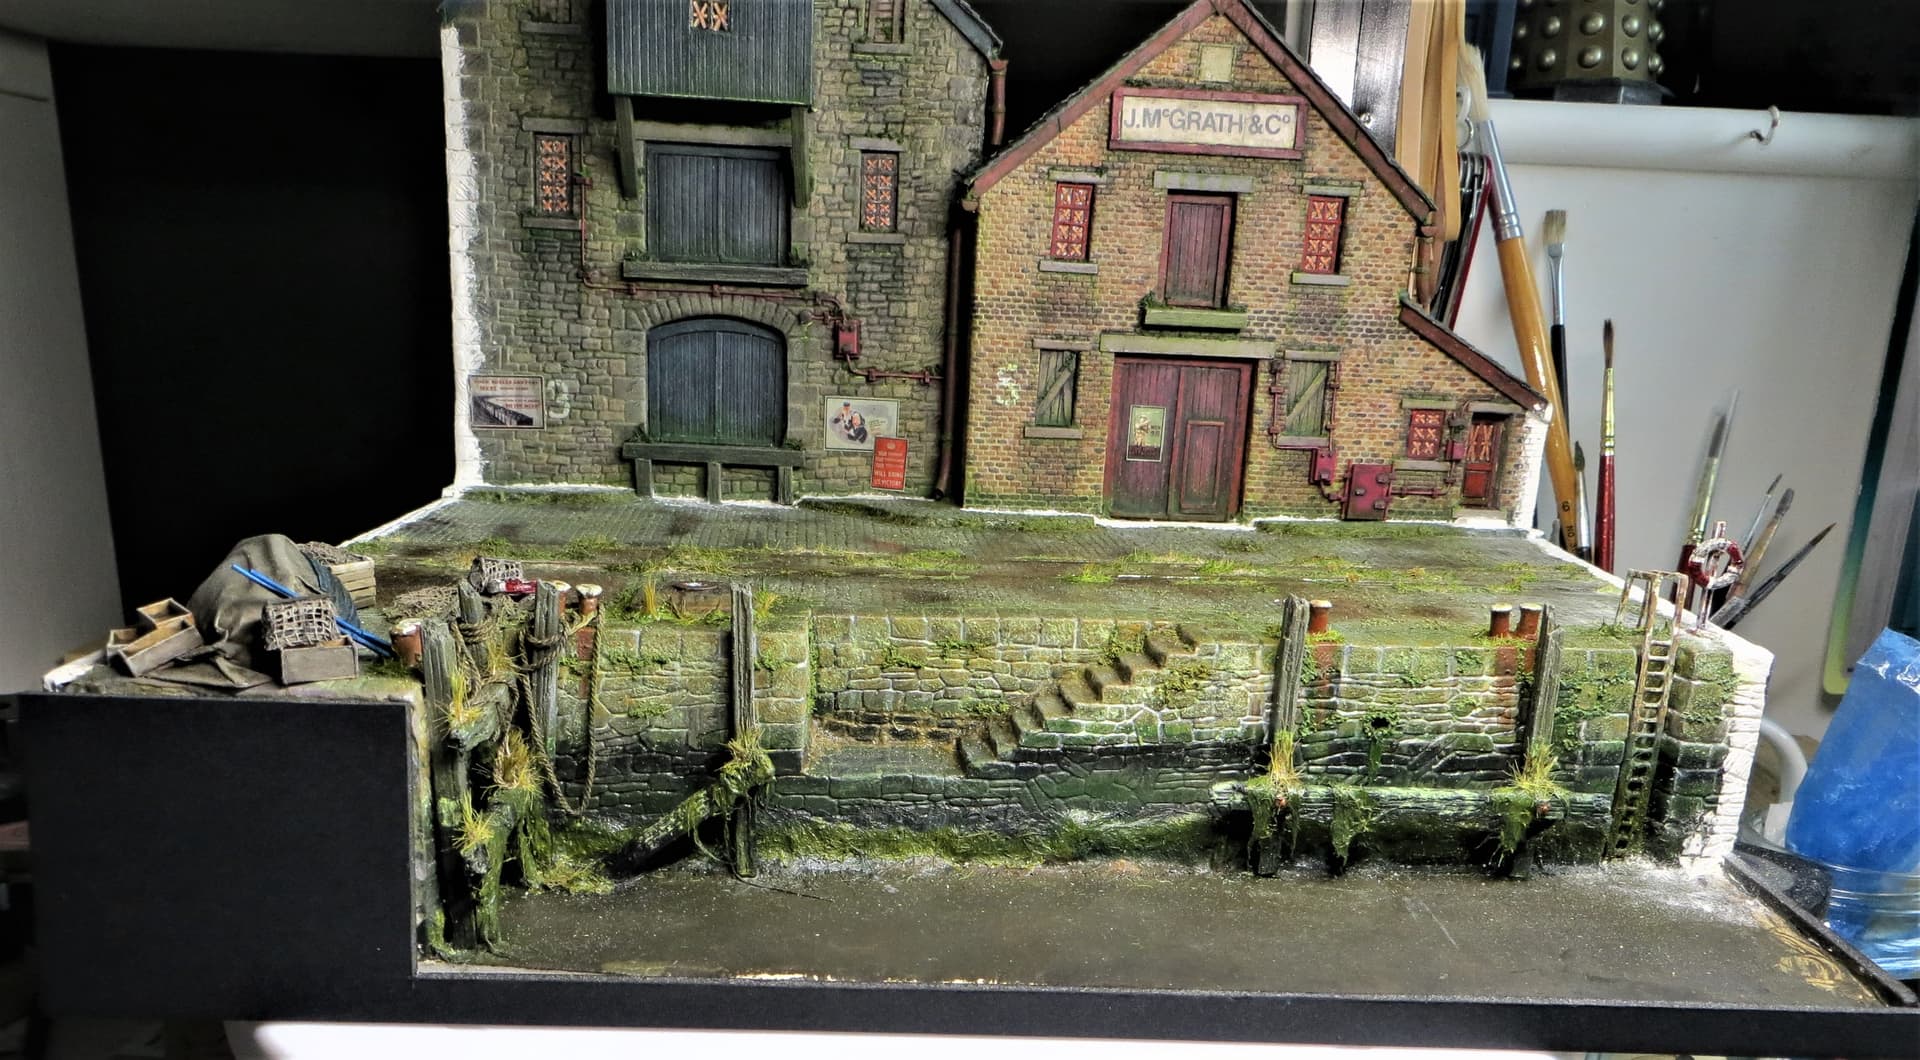
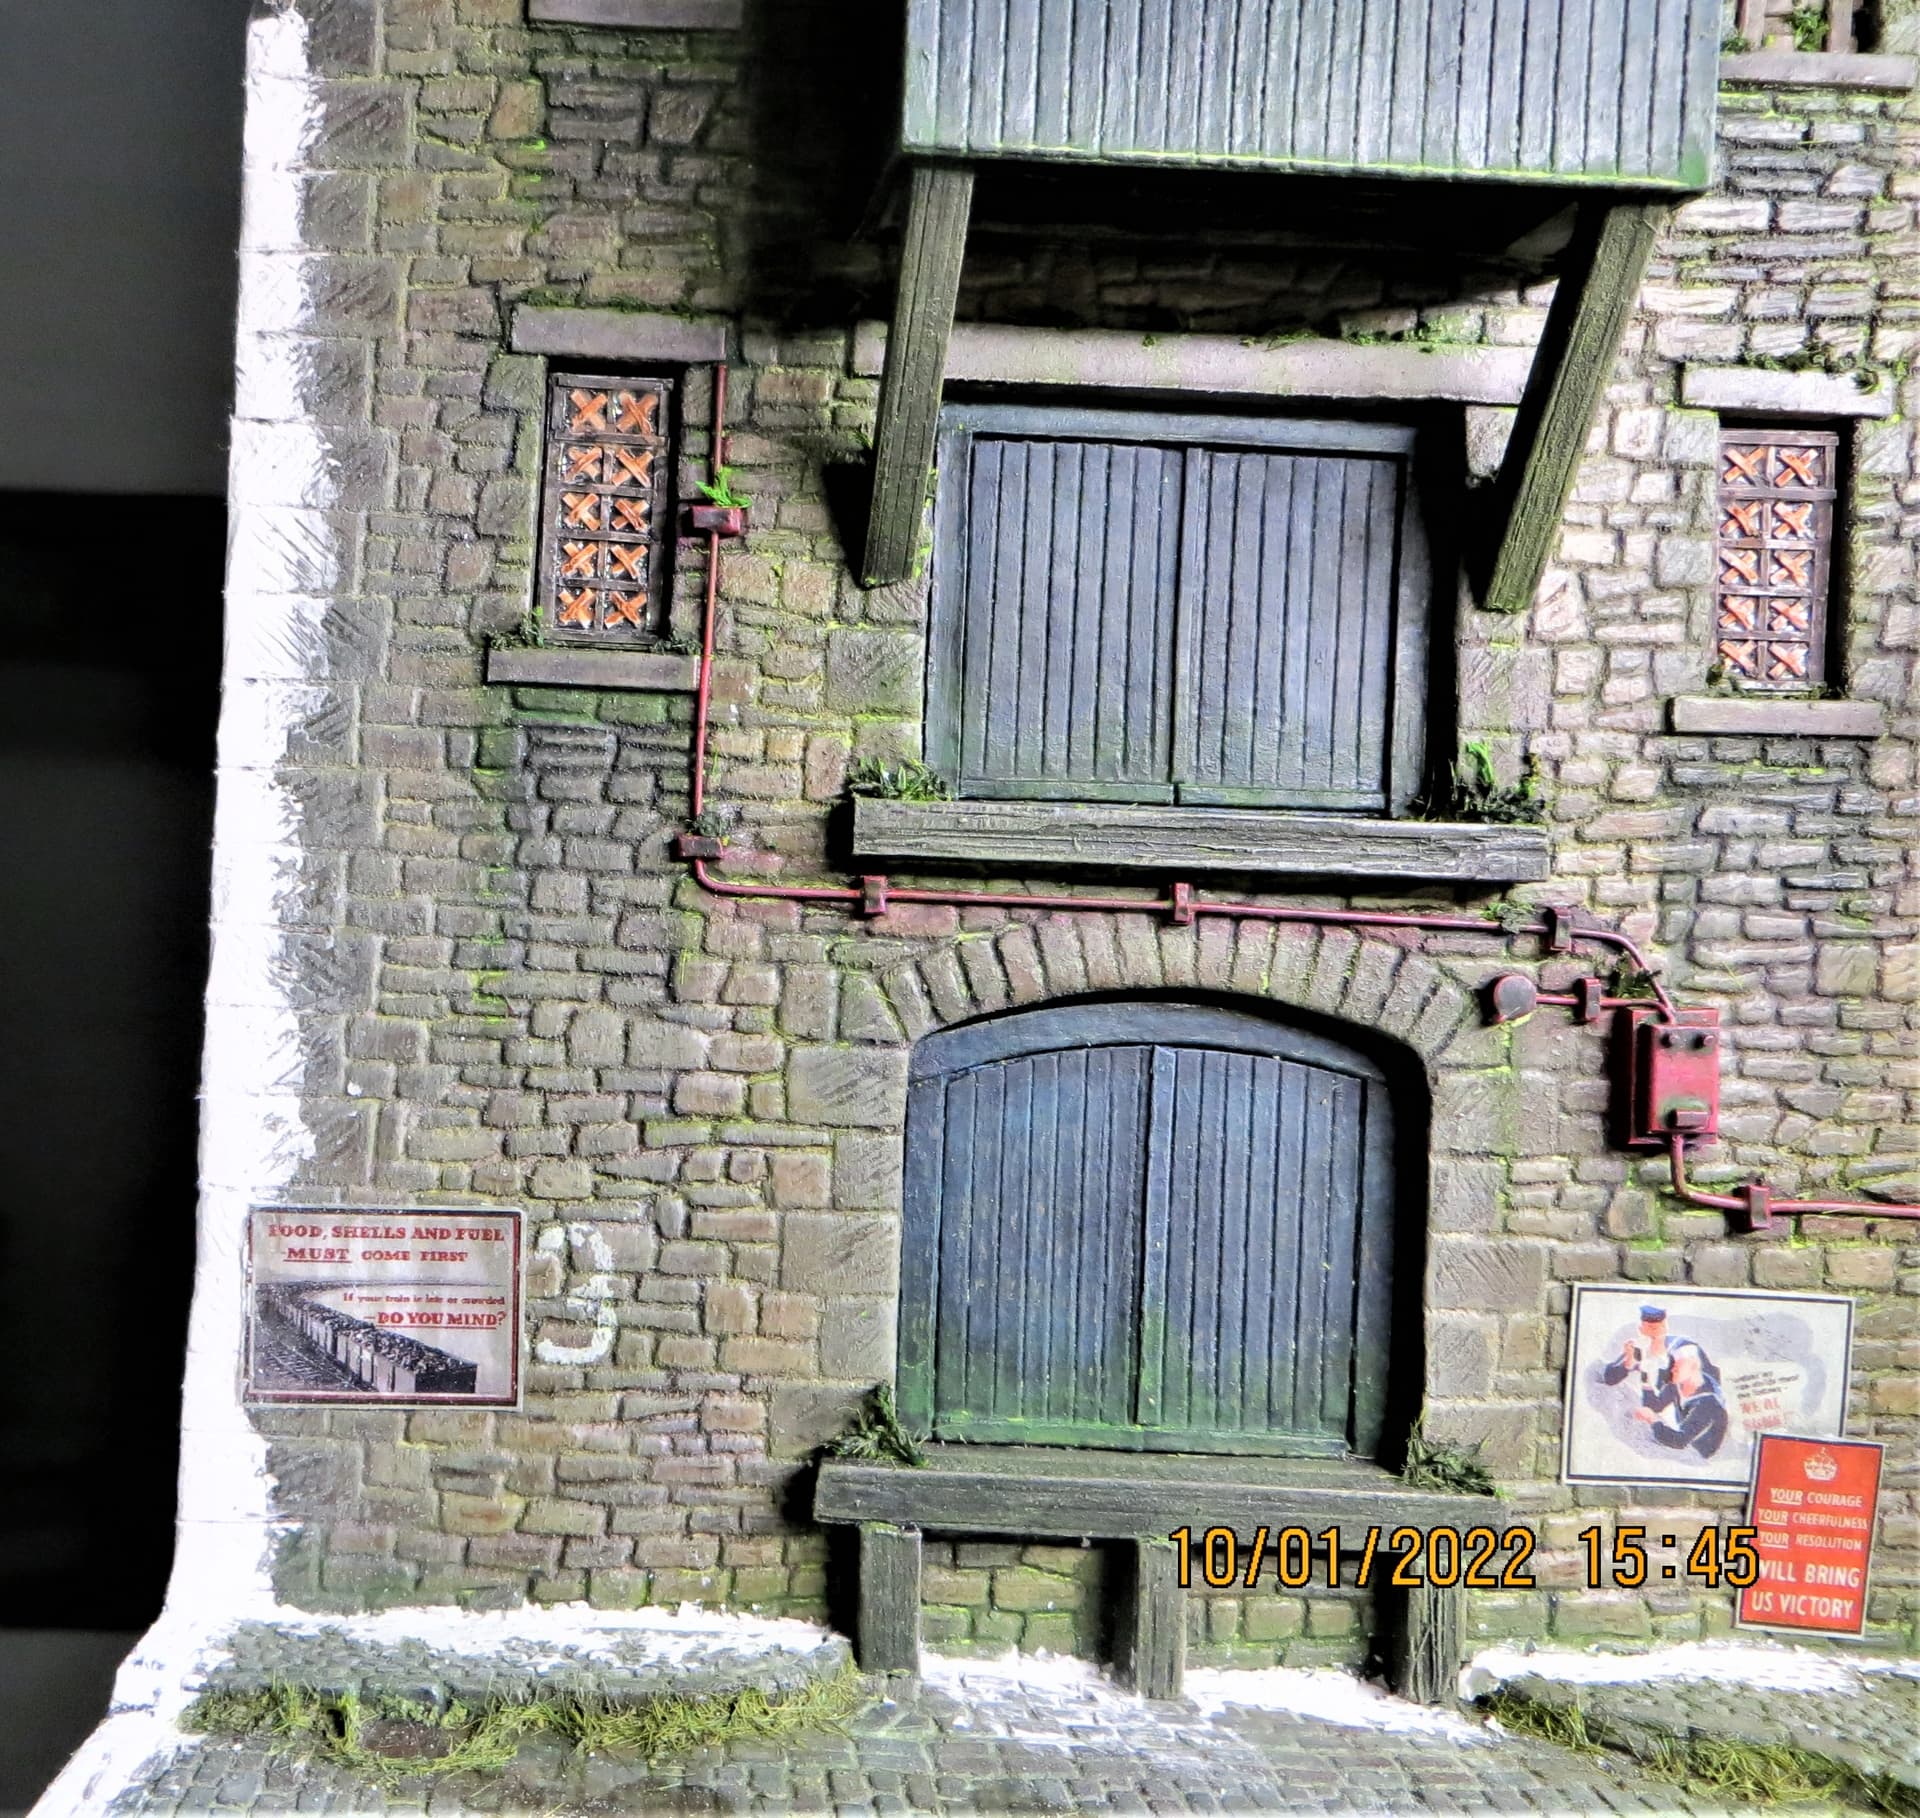
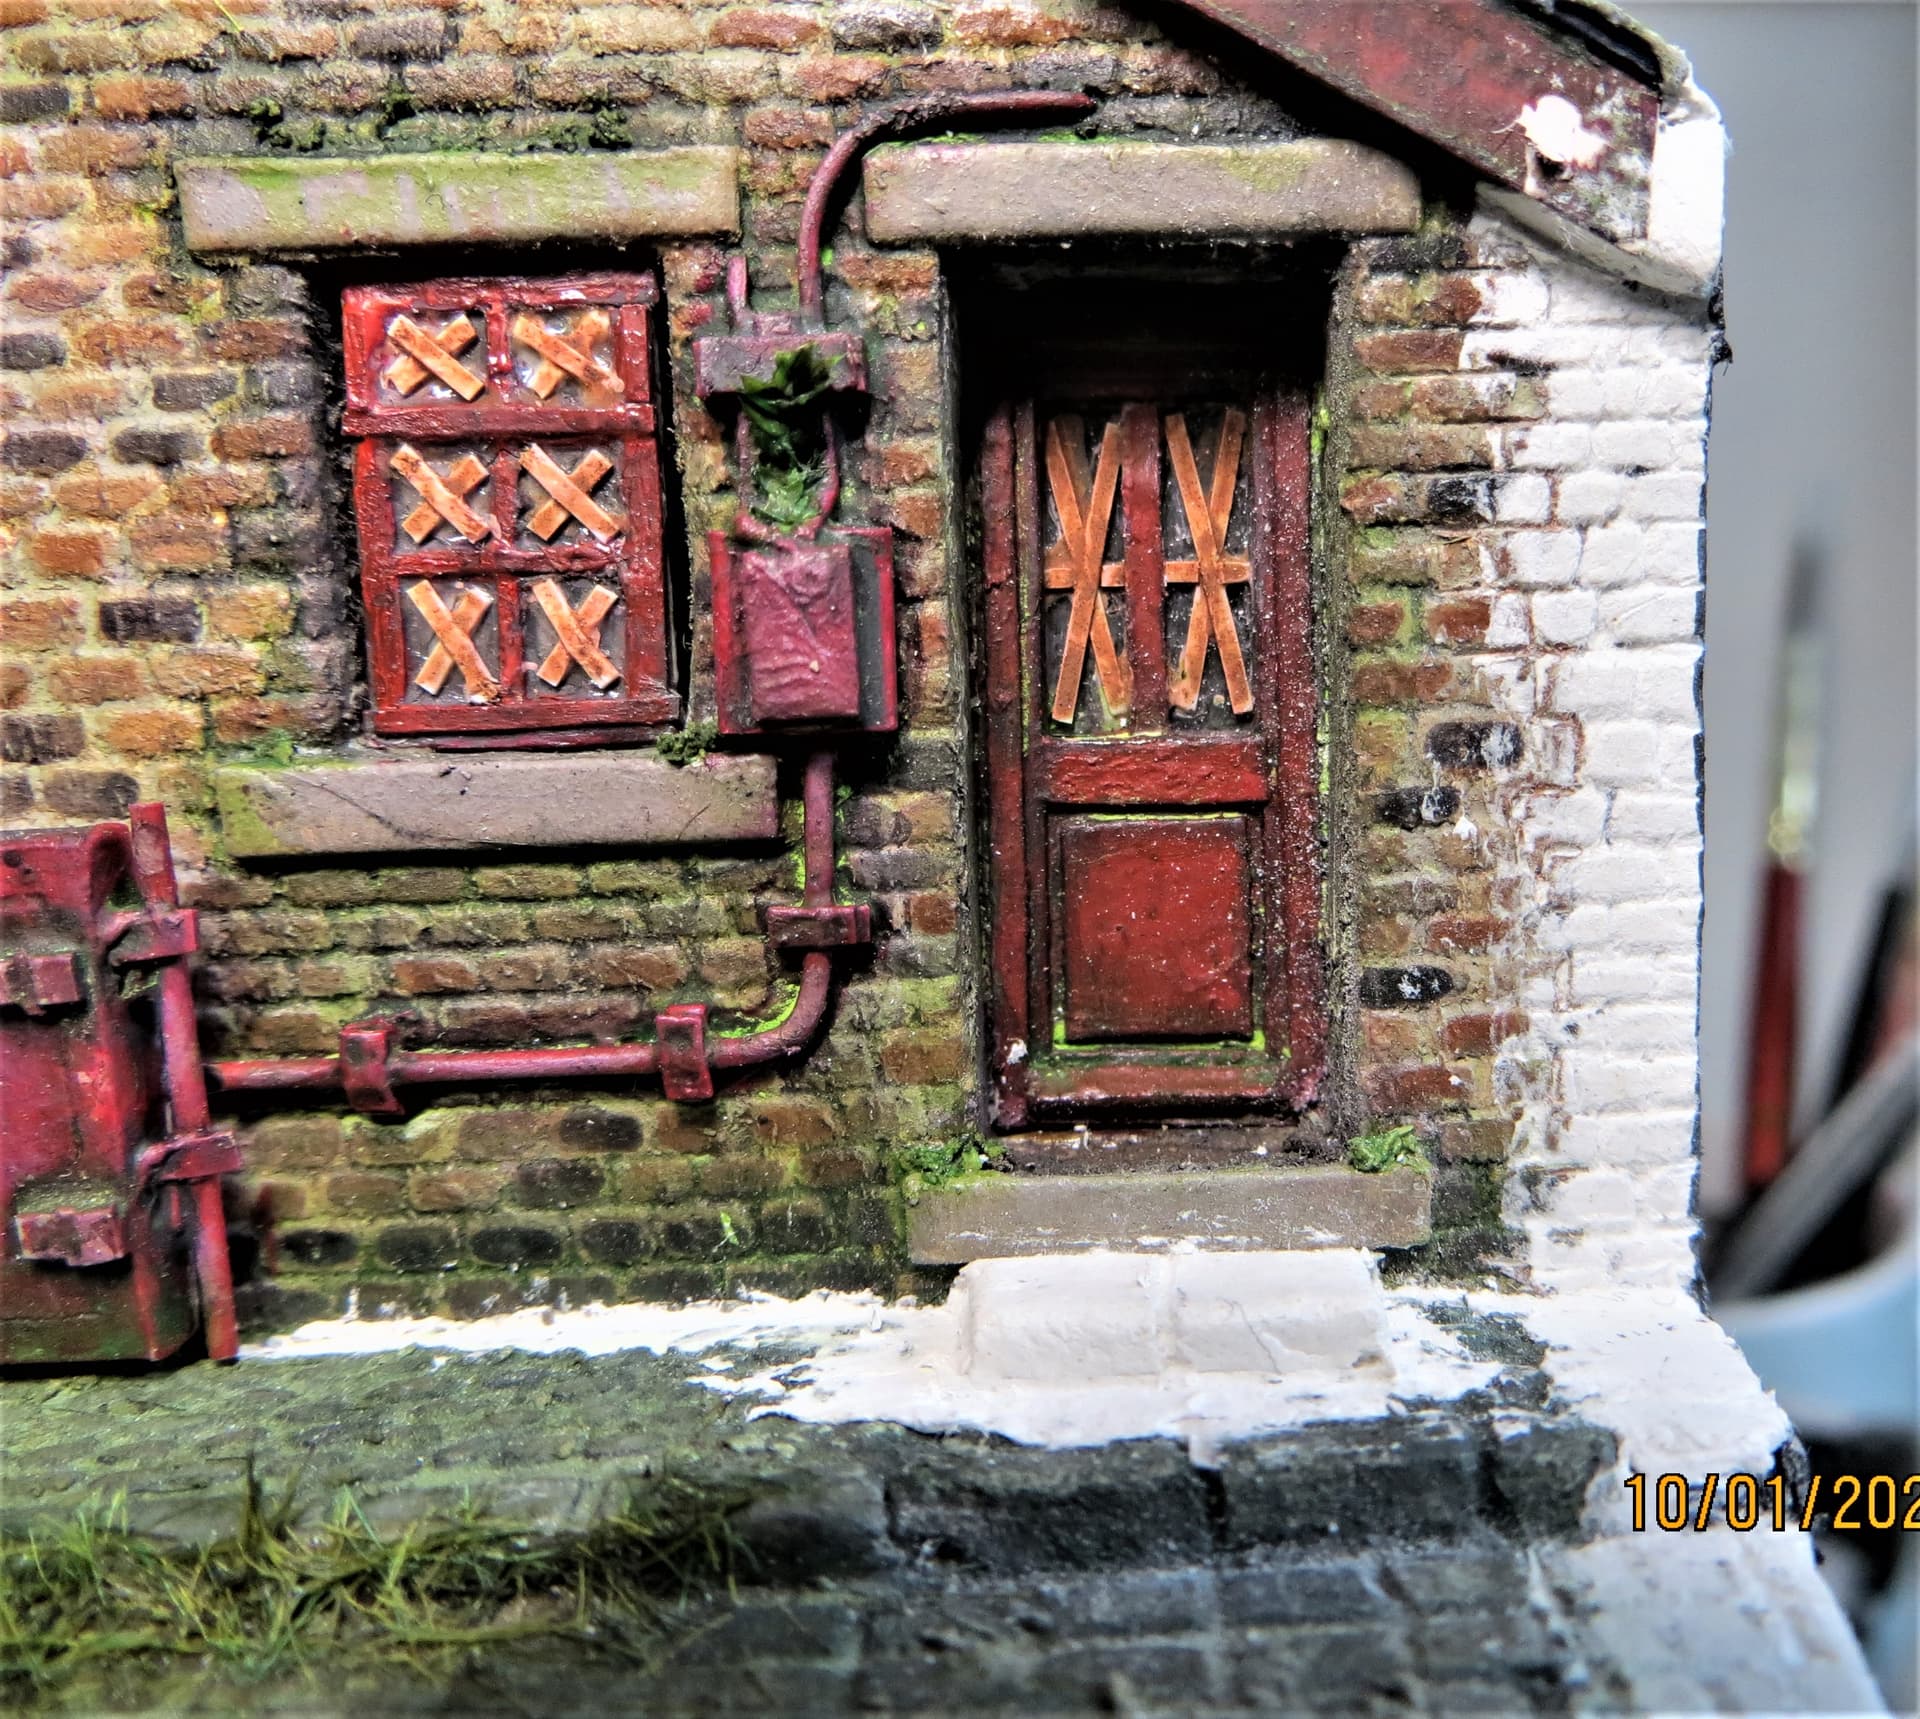
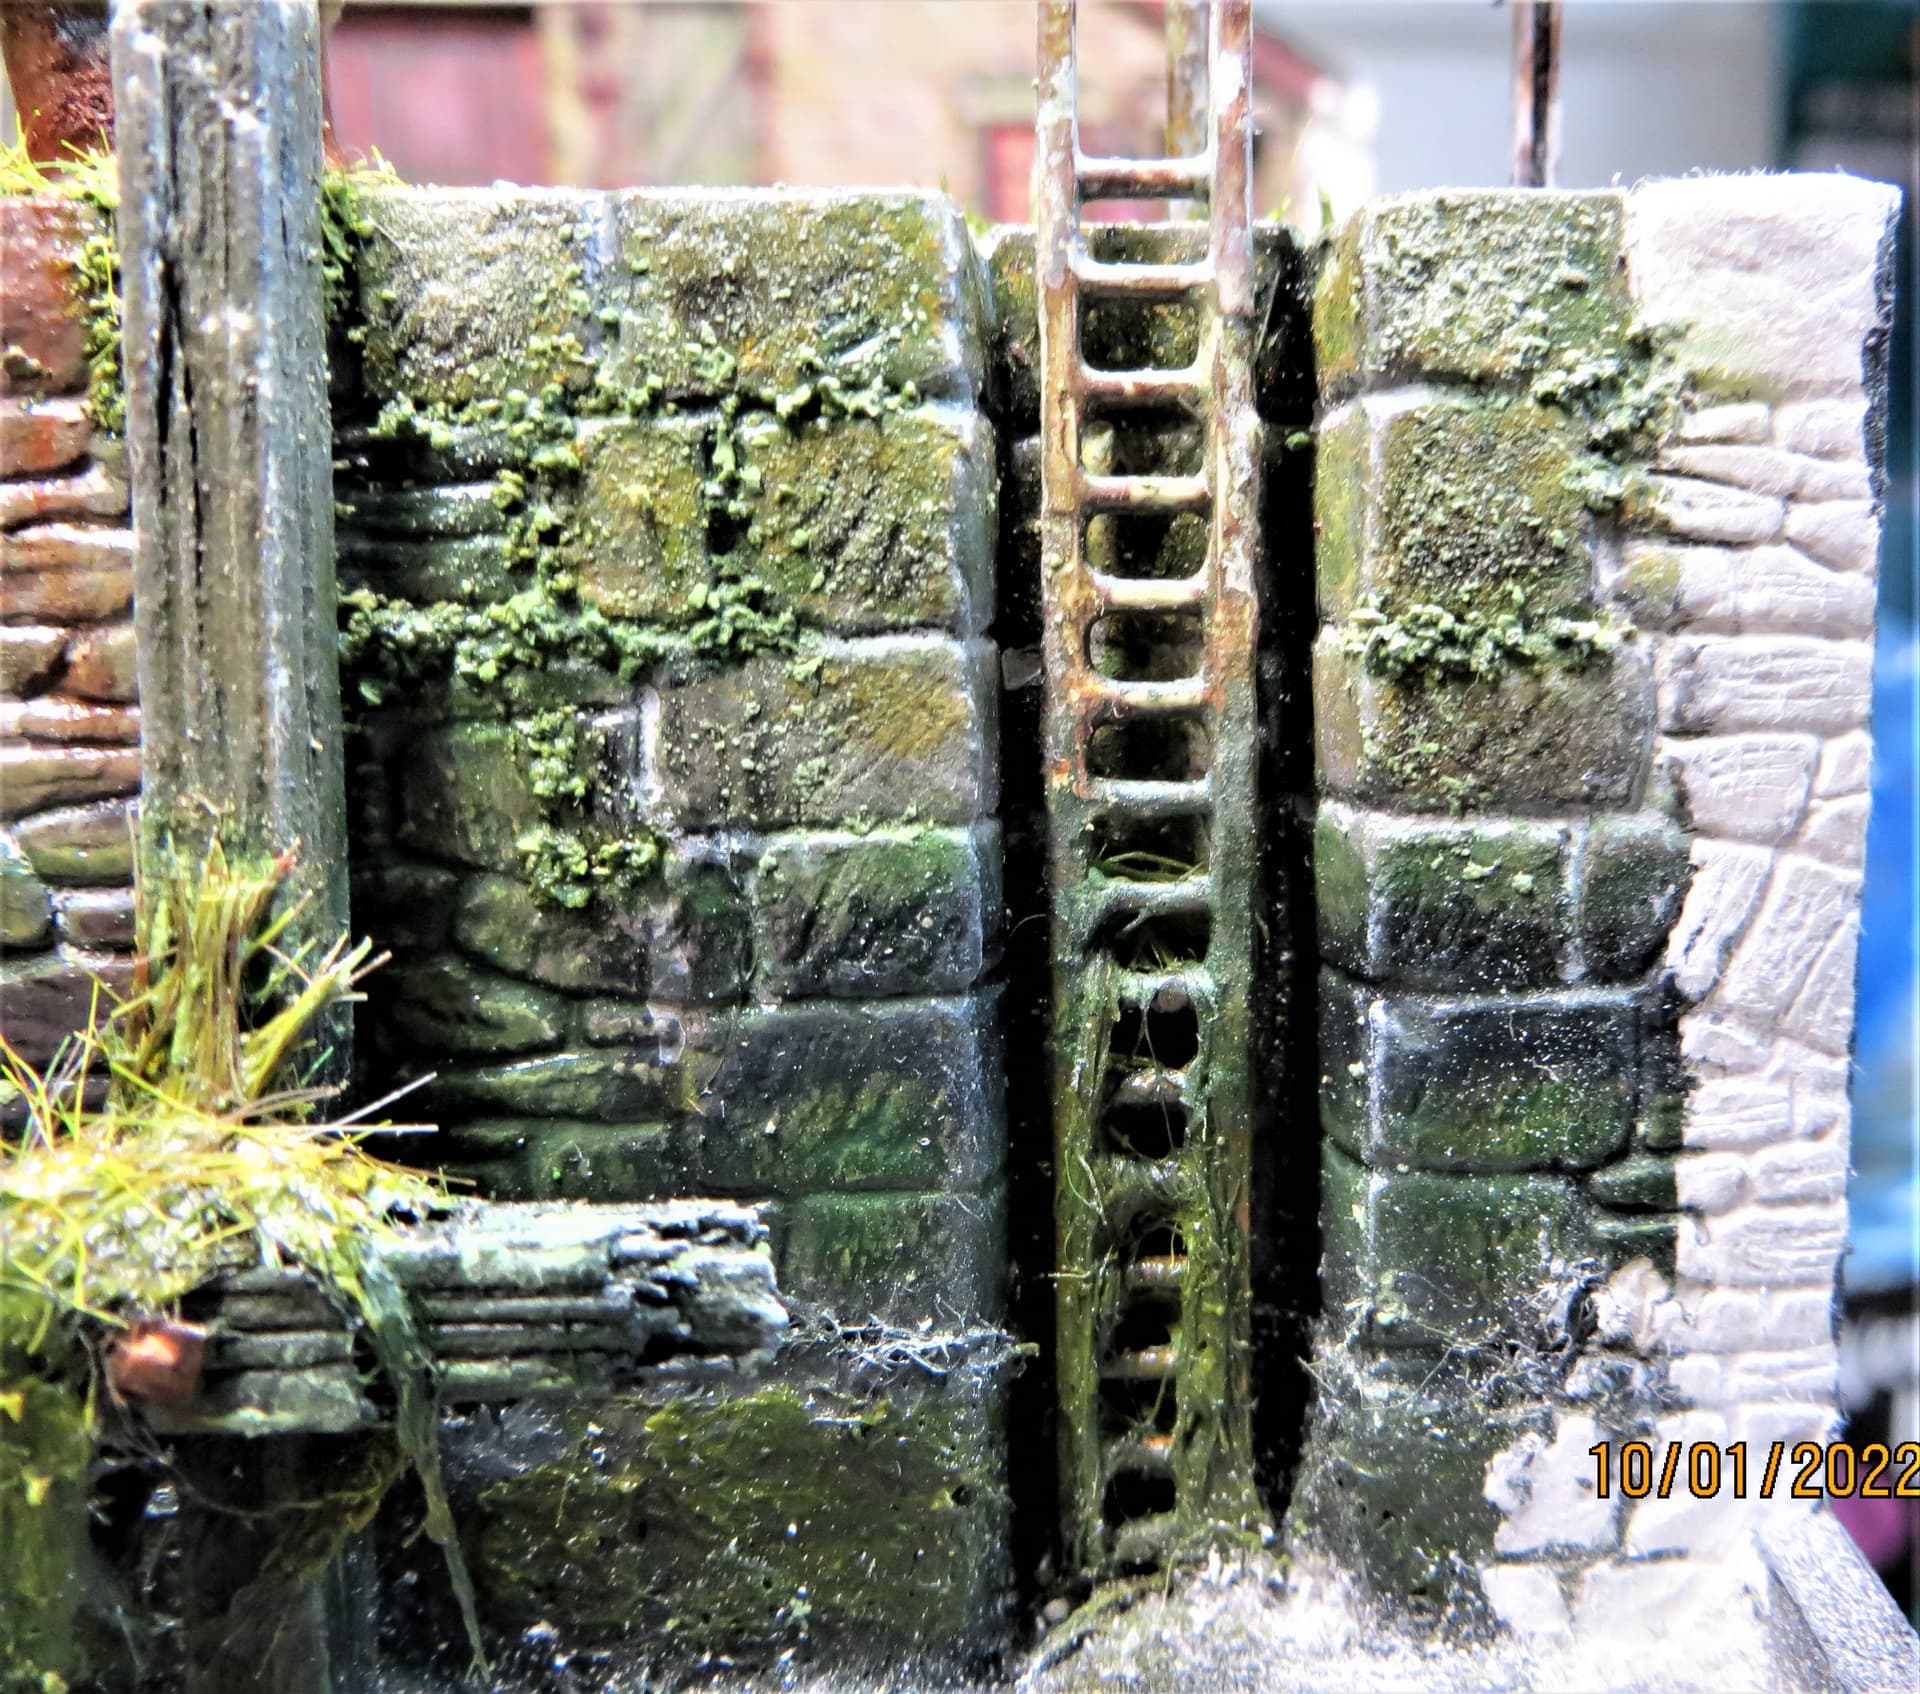
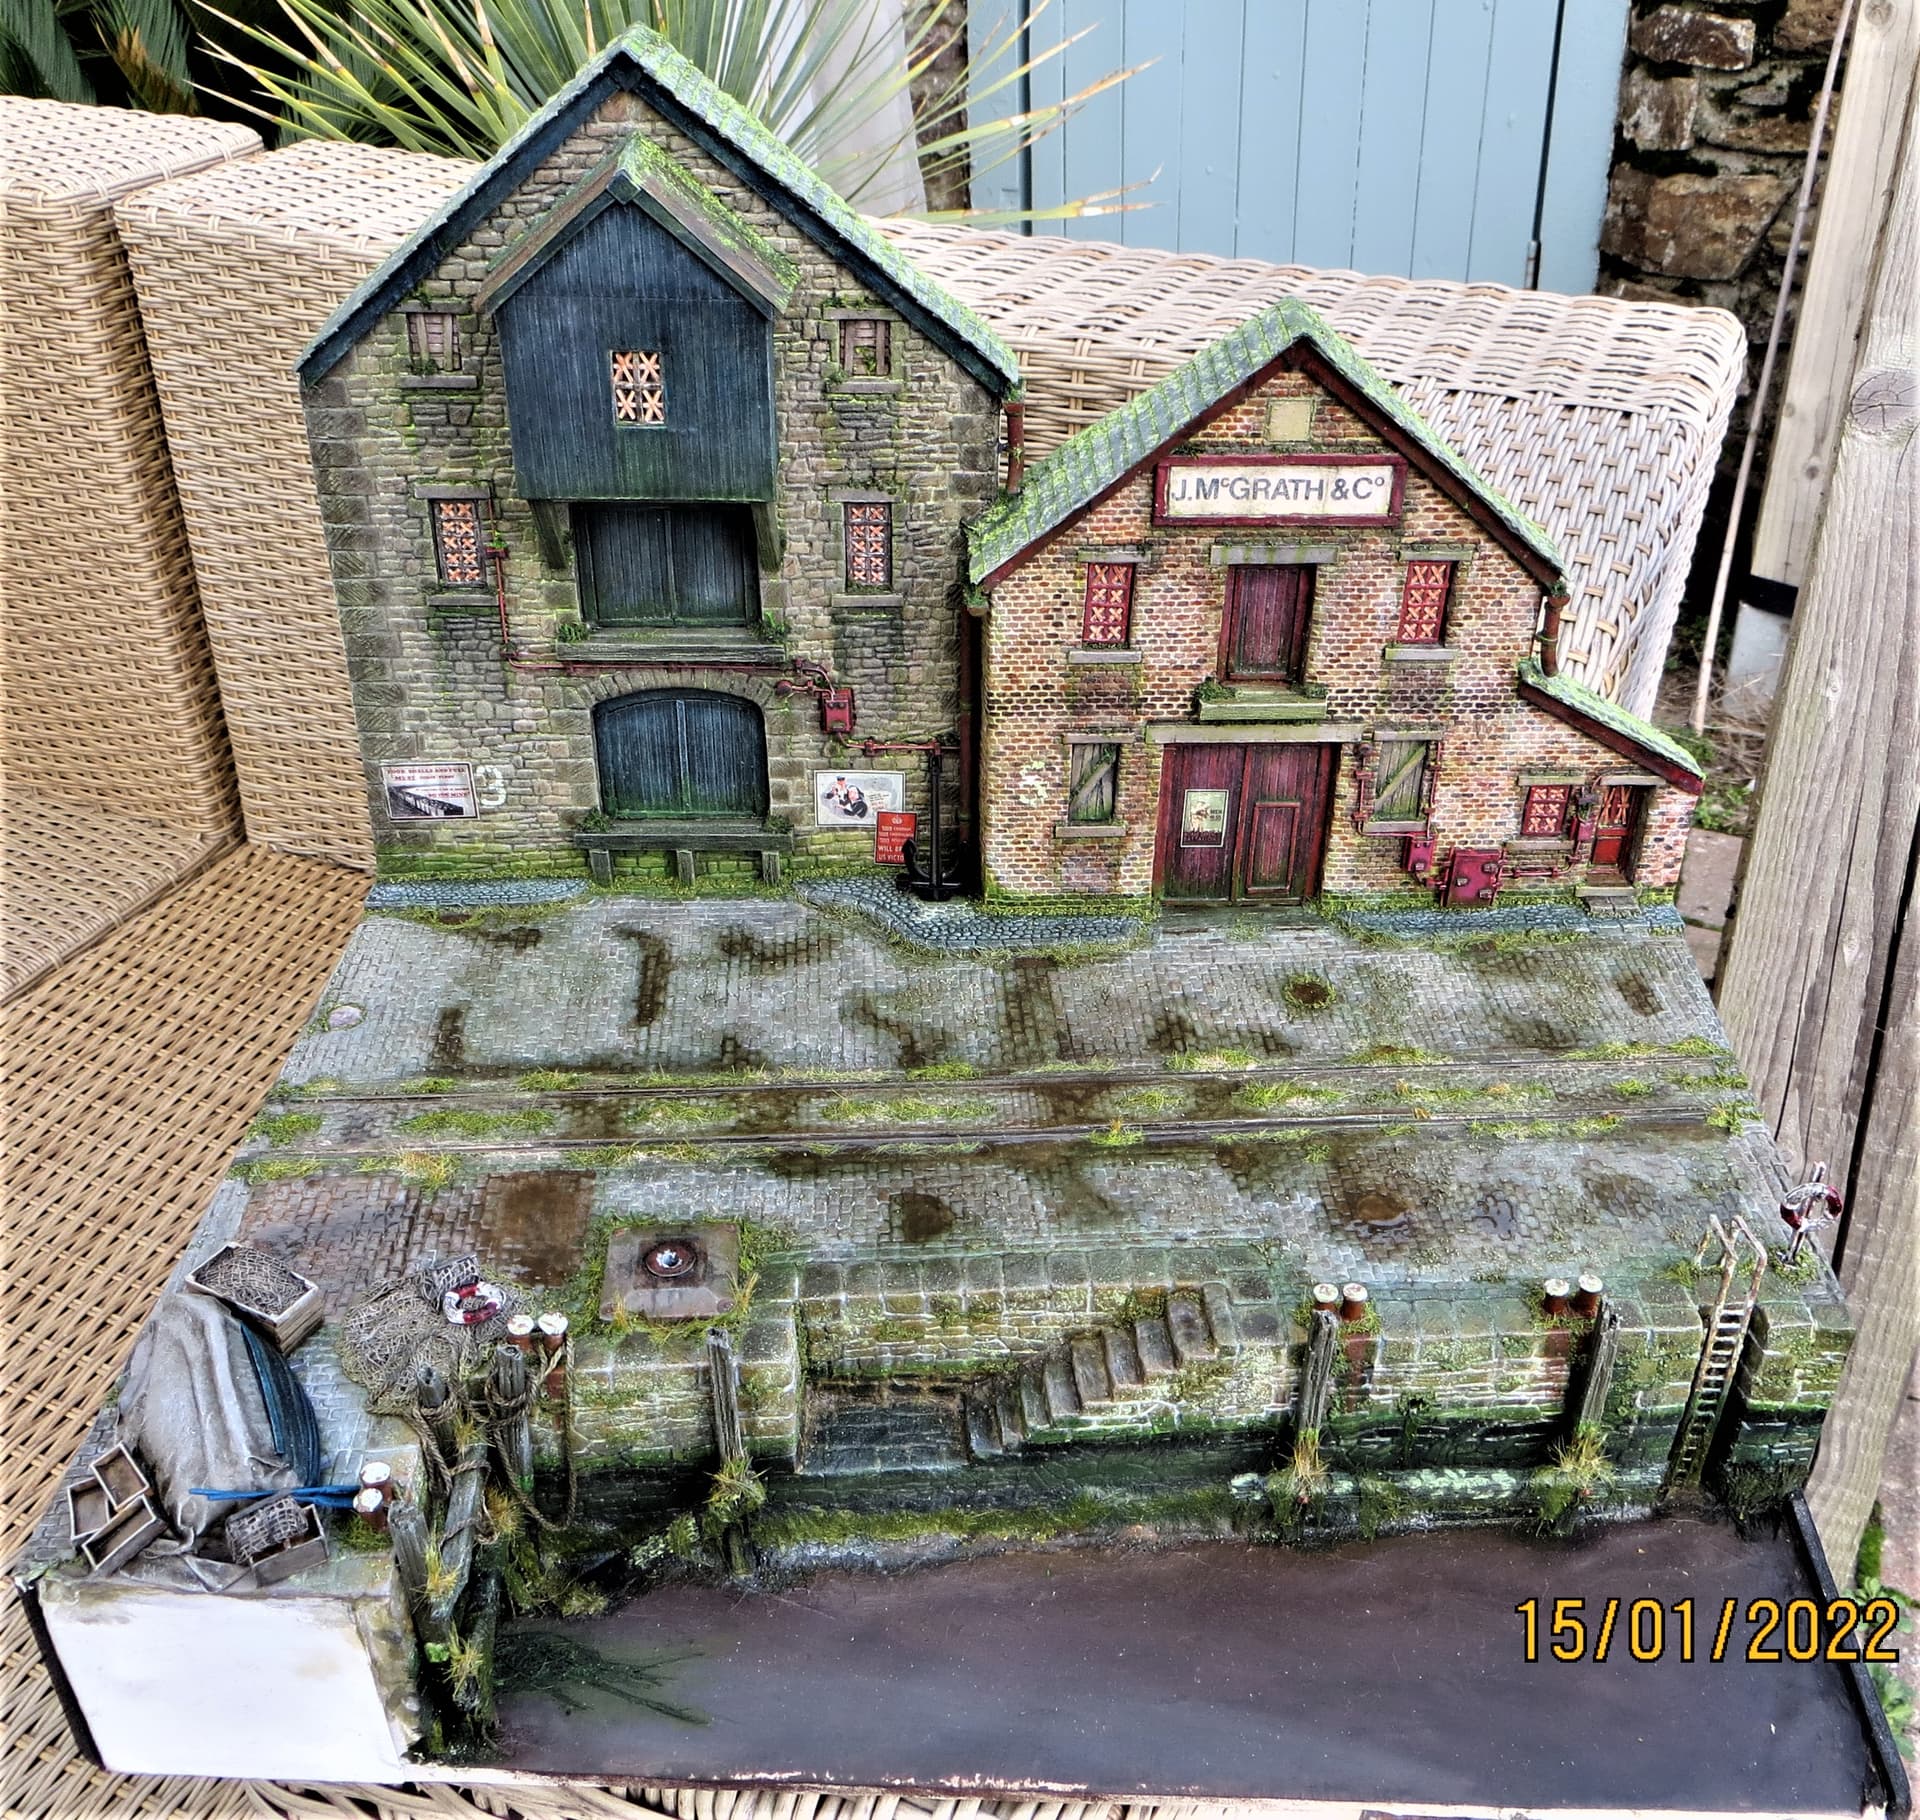
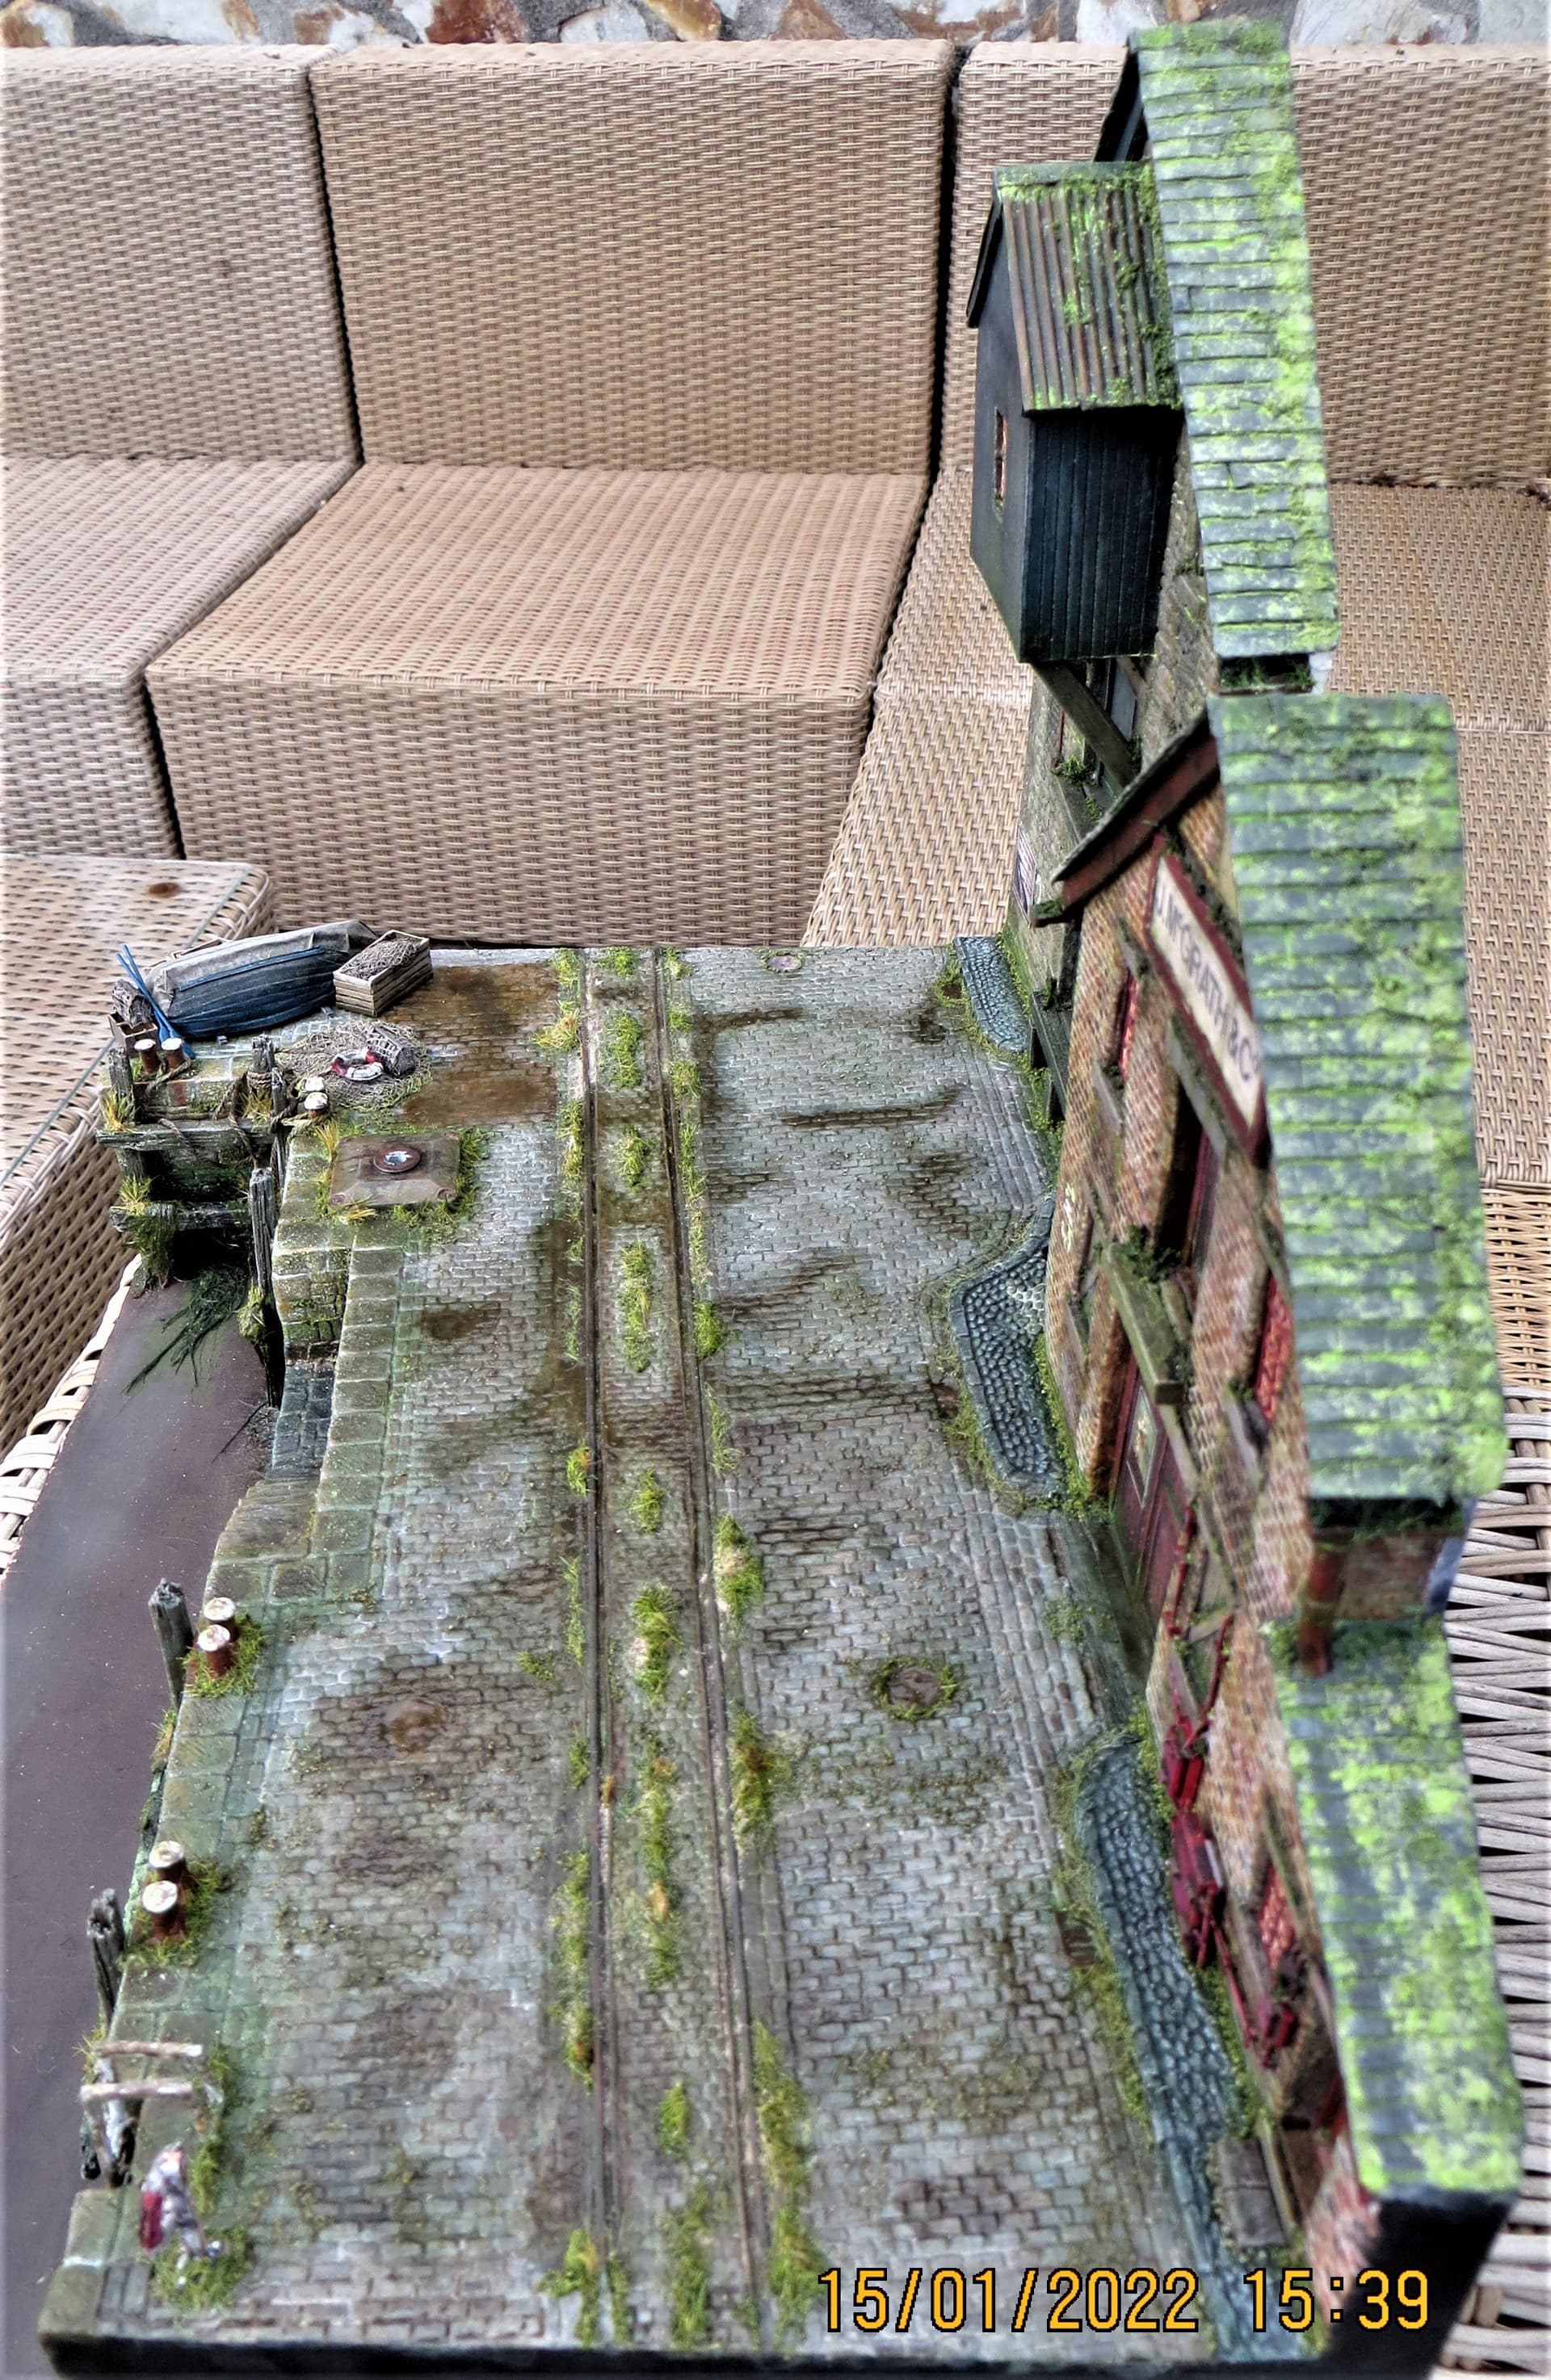
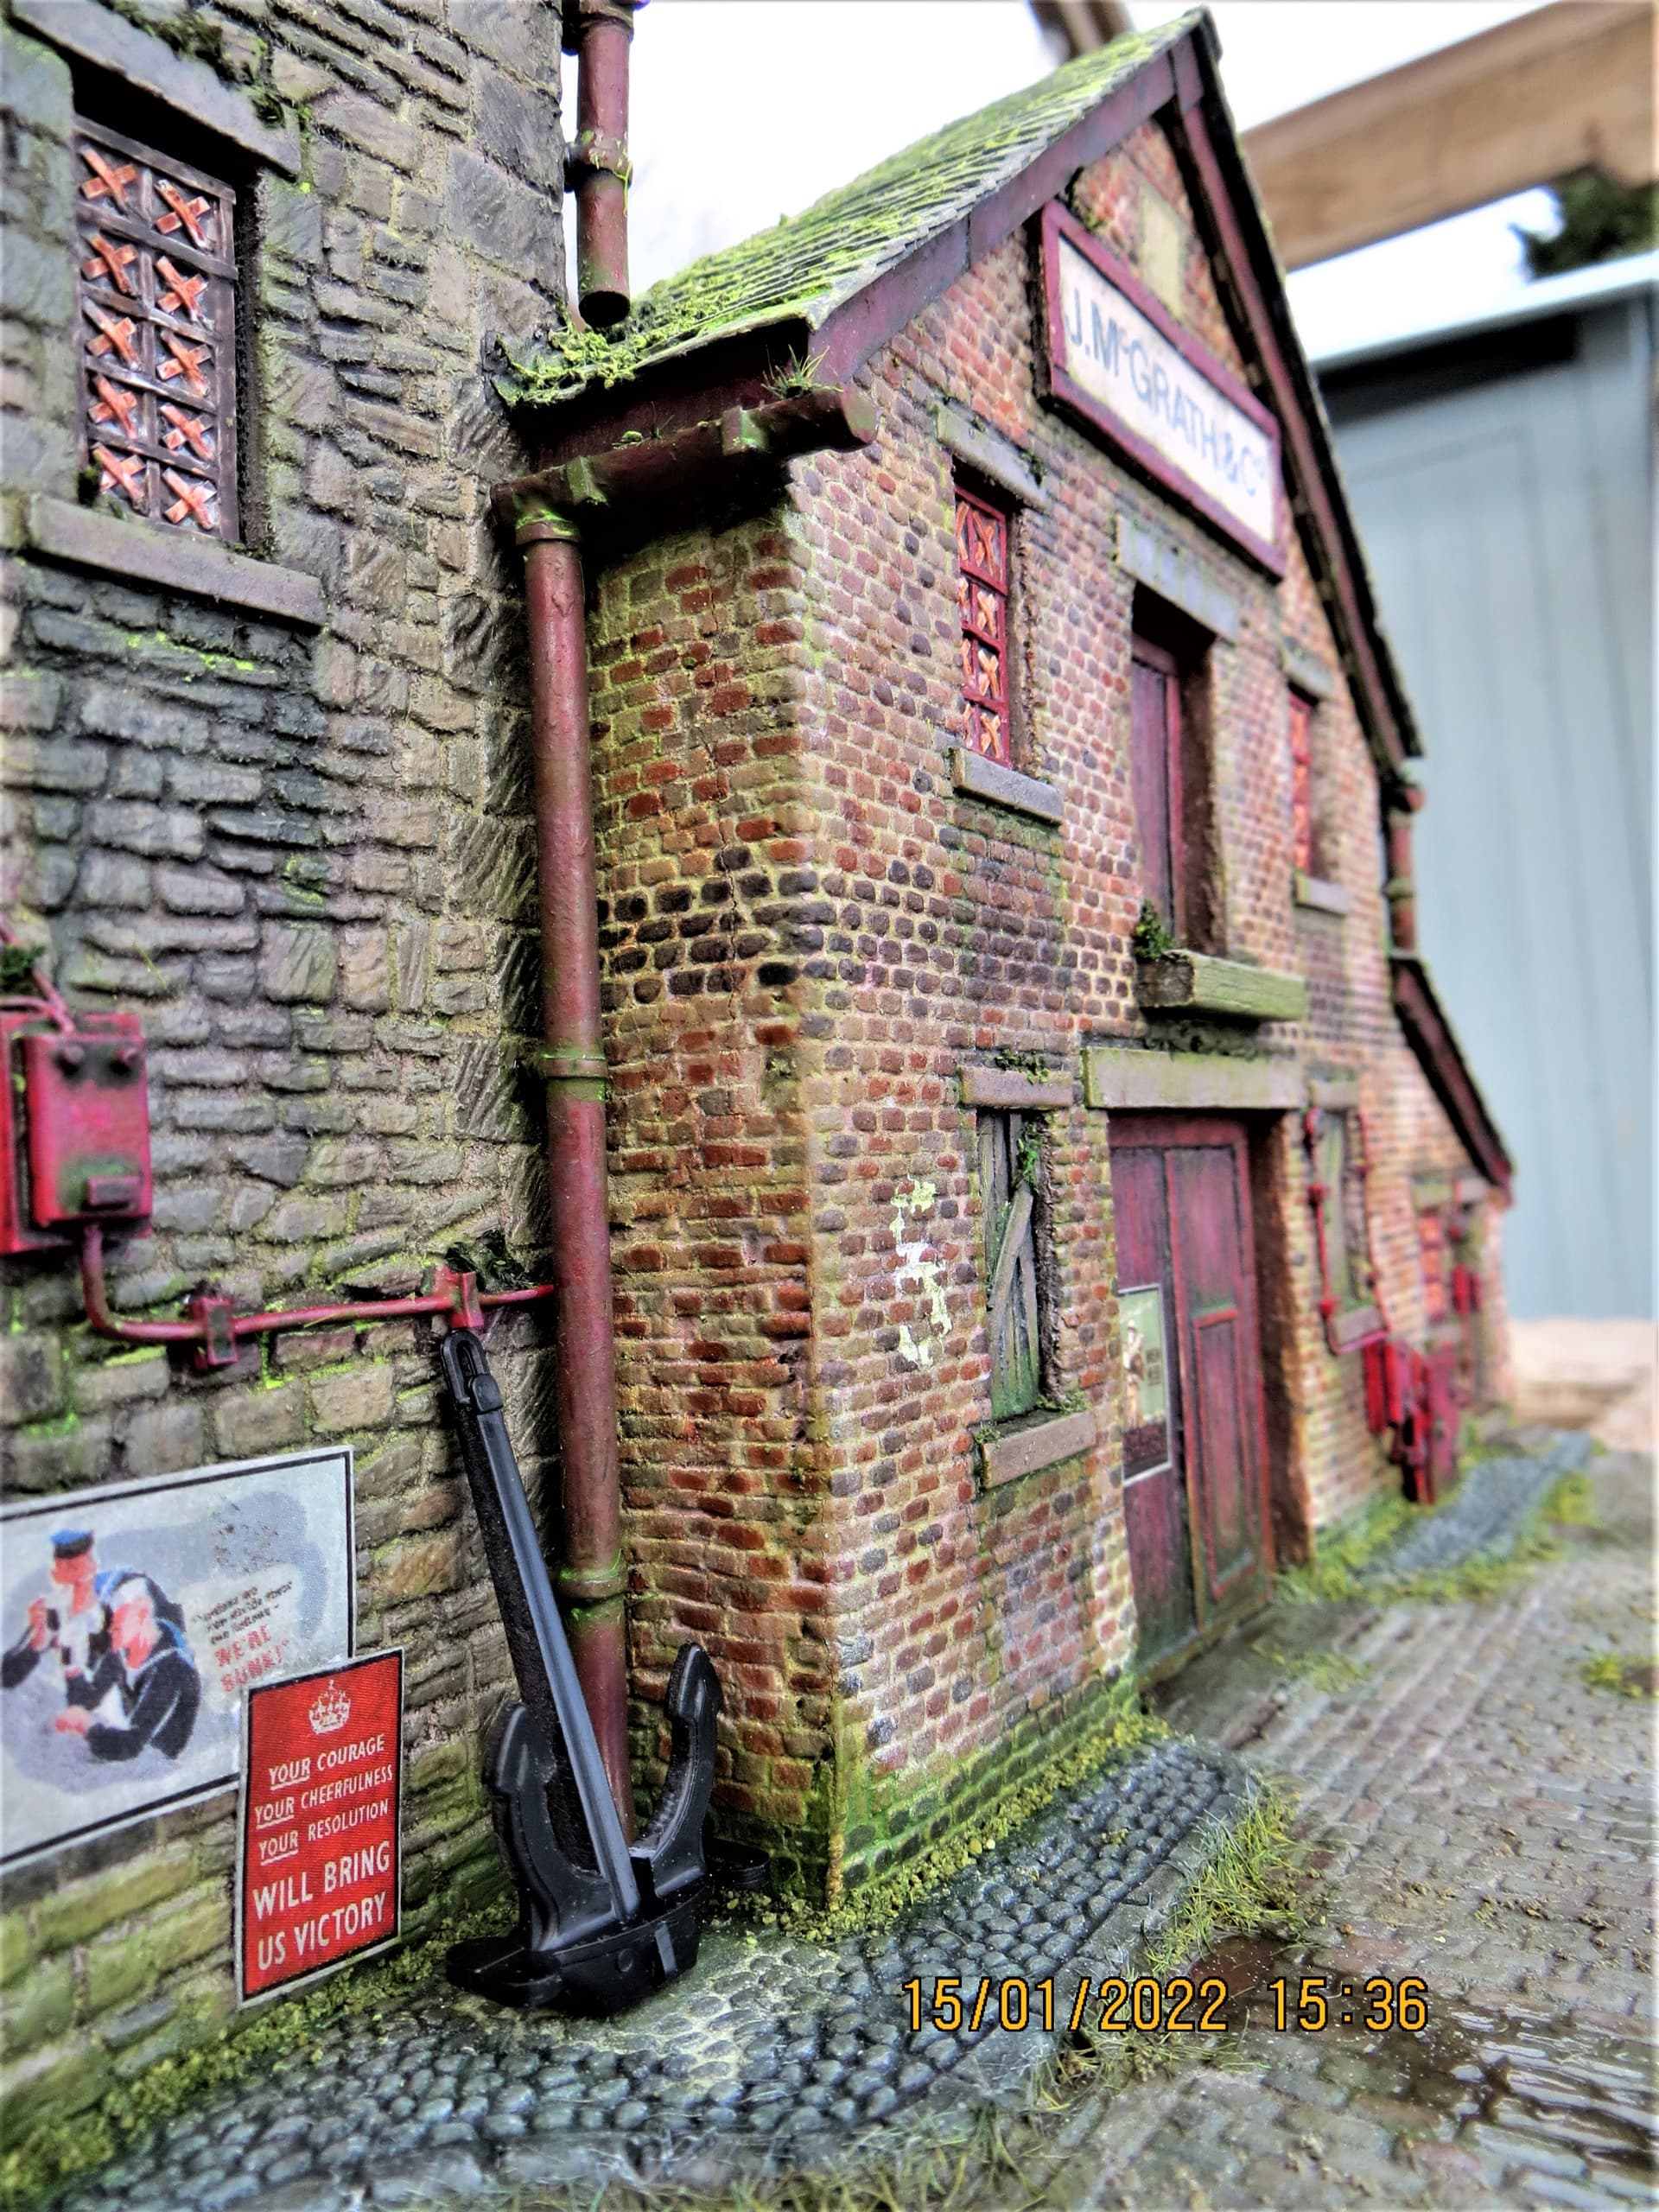
Managed to finish off blending the areas around the perimeter that I had to extend slightly and re-scribe (the white areas on the first image below). This also includes the back edge of the roofs, and the gaps between the ground and the façades. I think the finished areas are just about acceptable, .
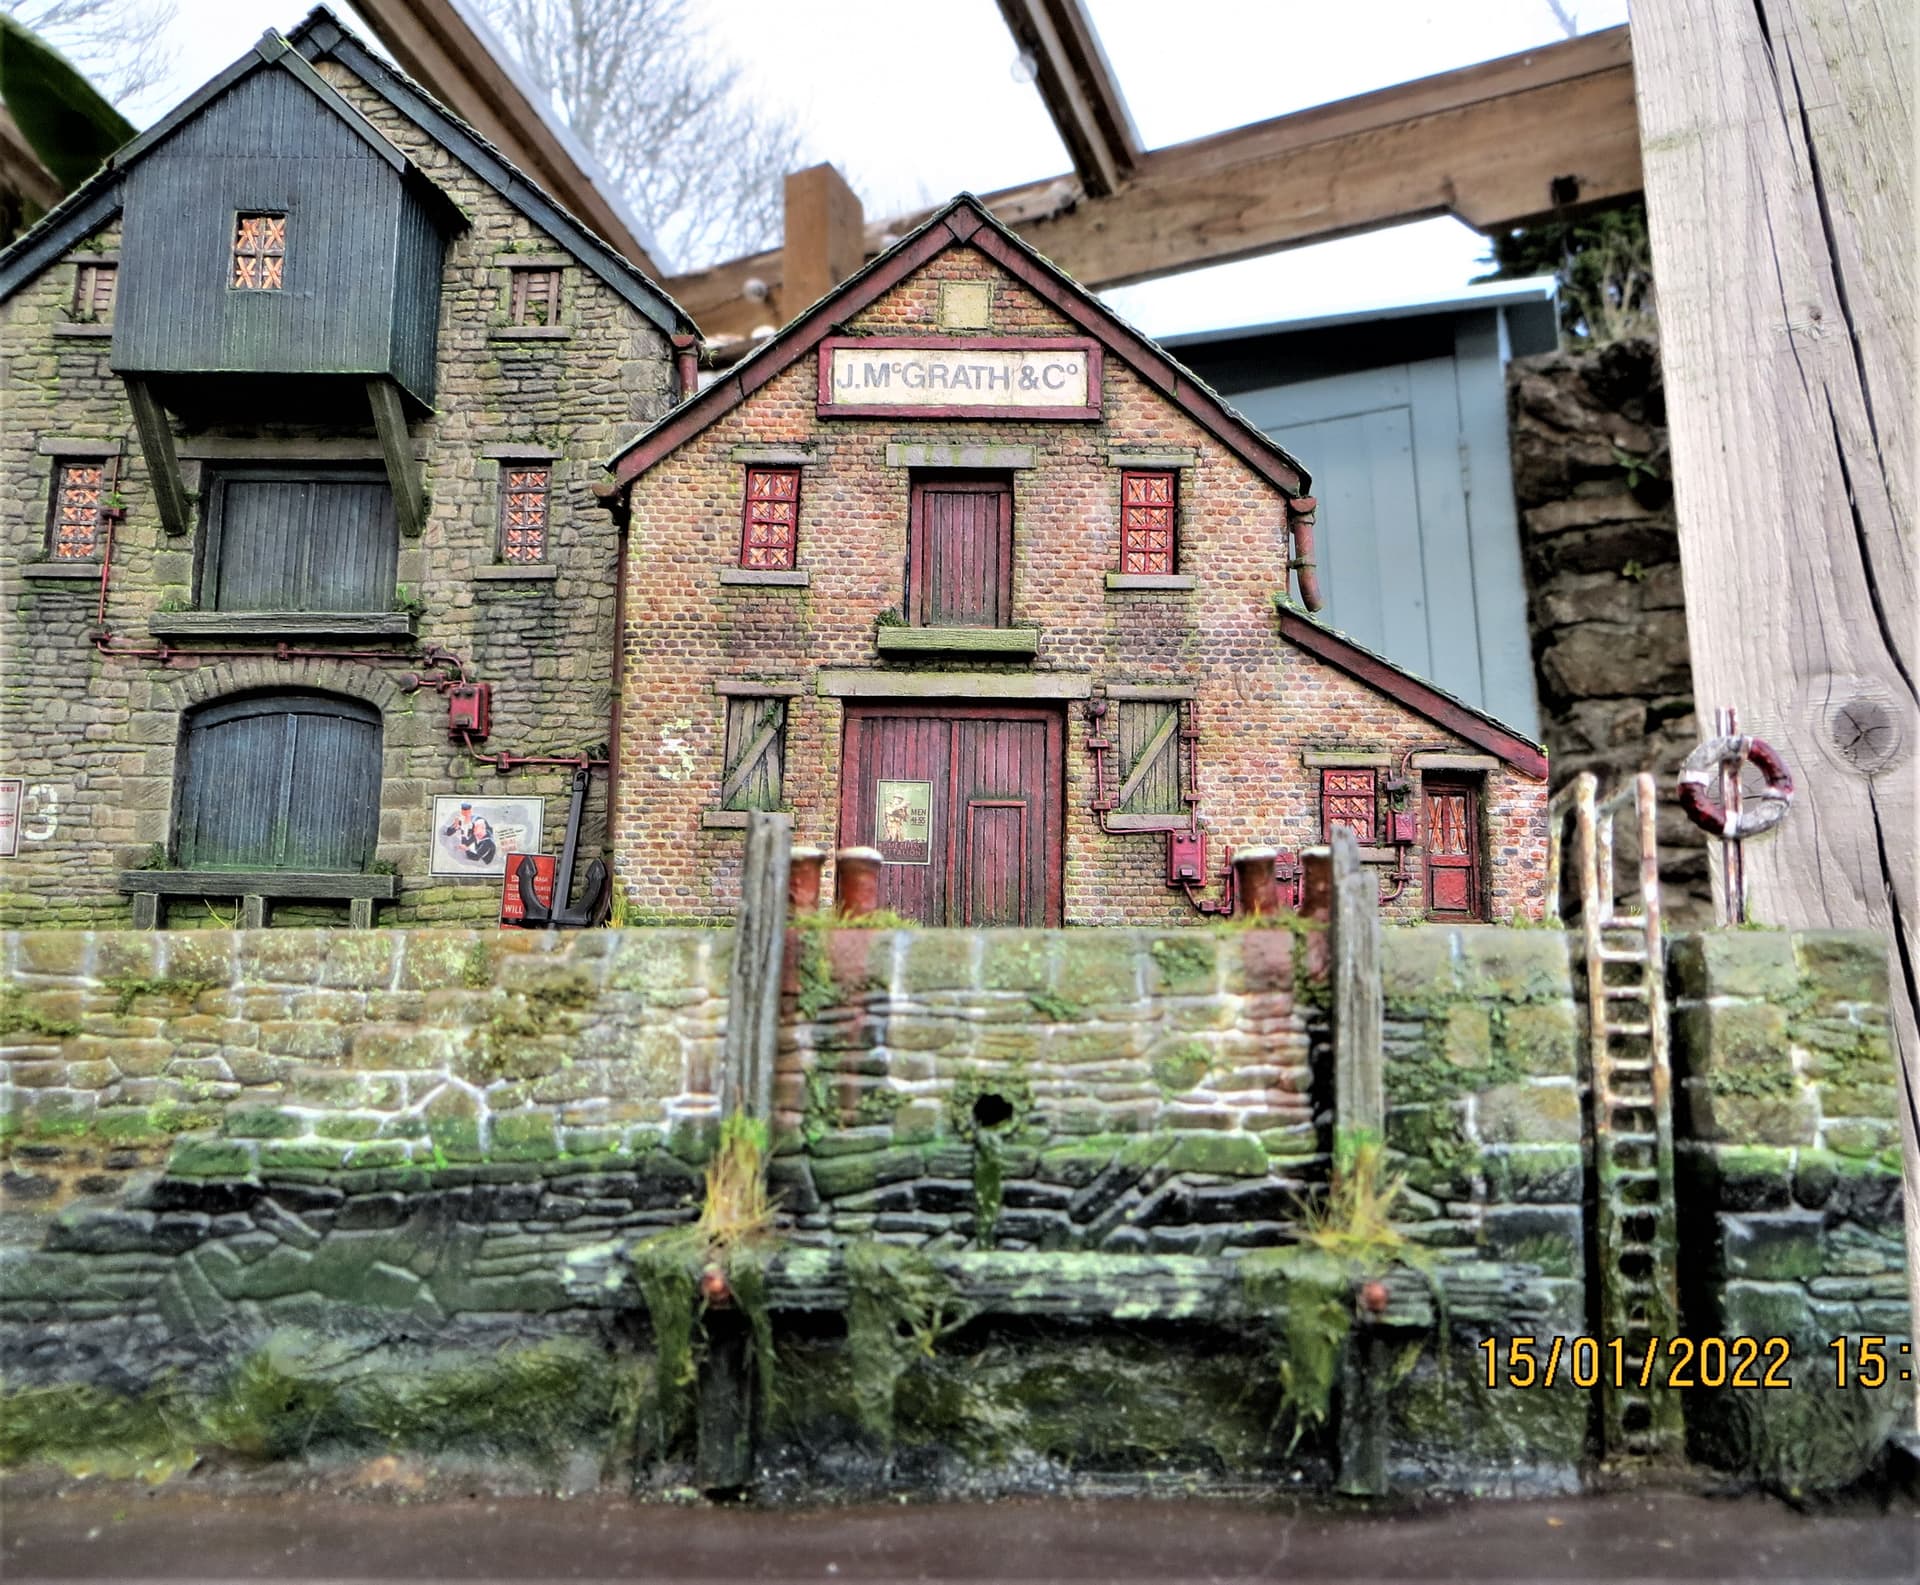
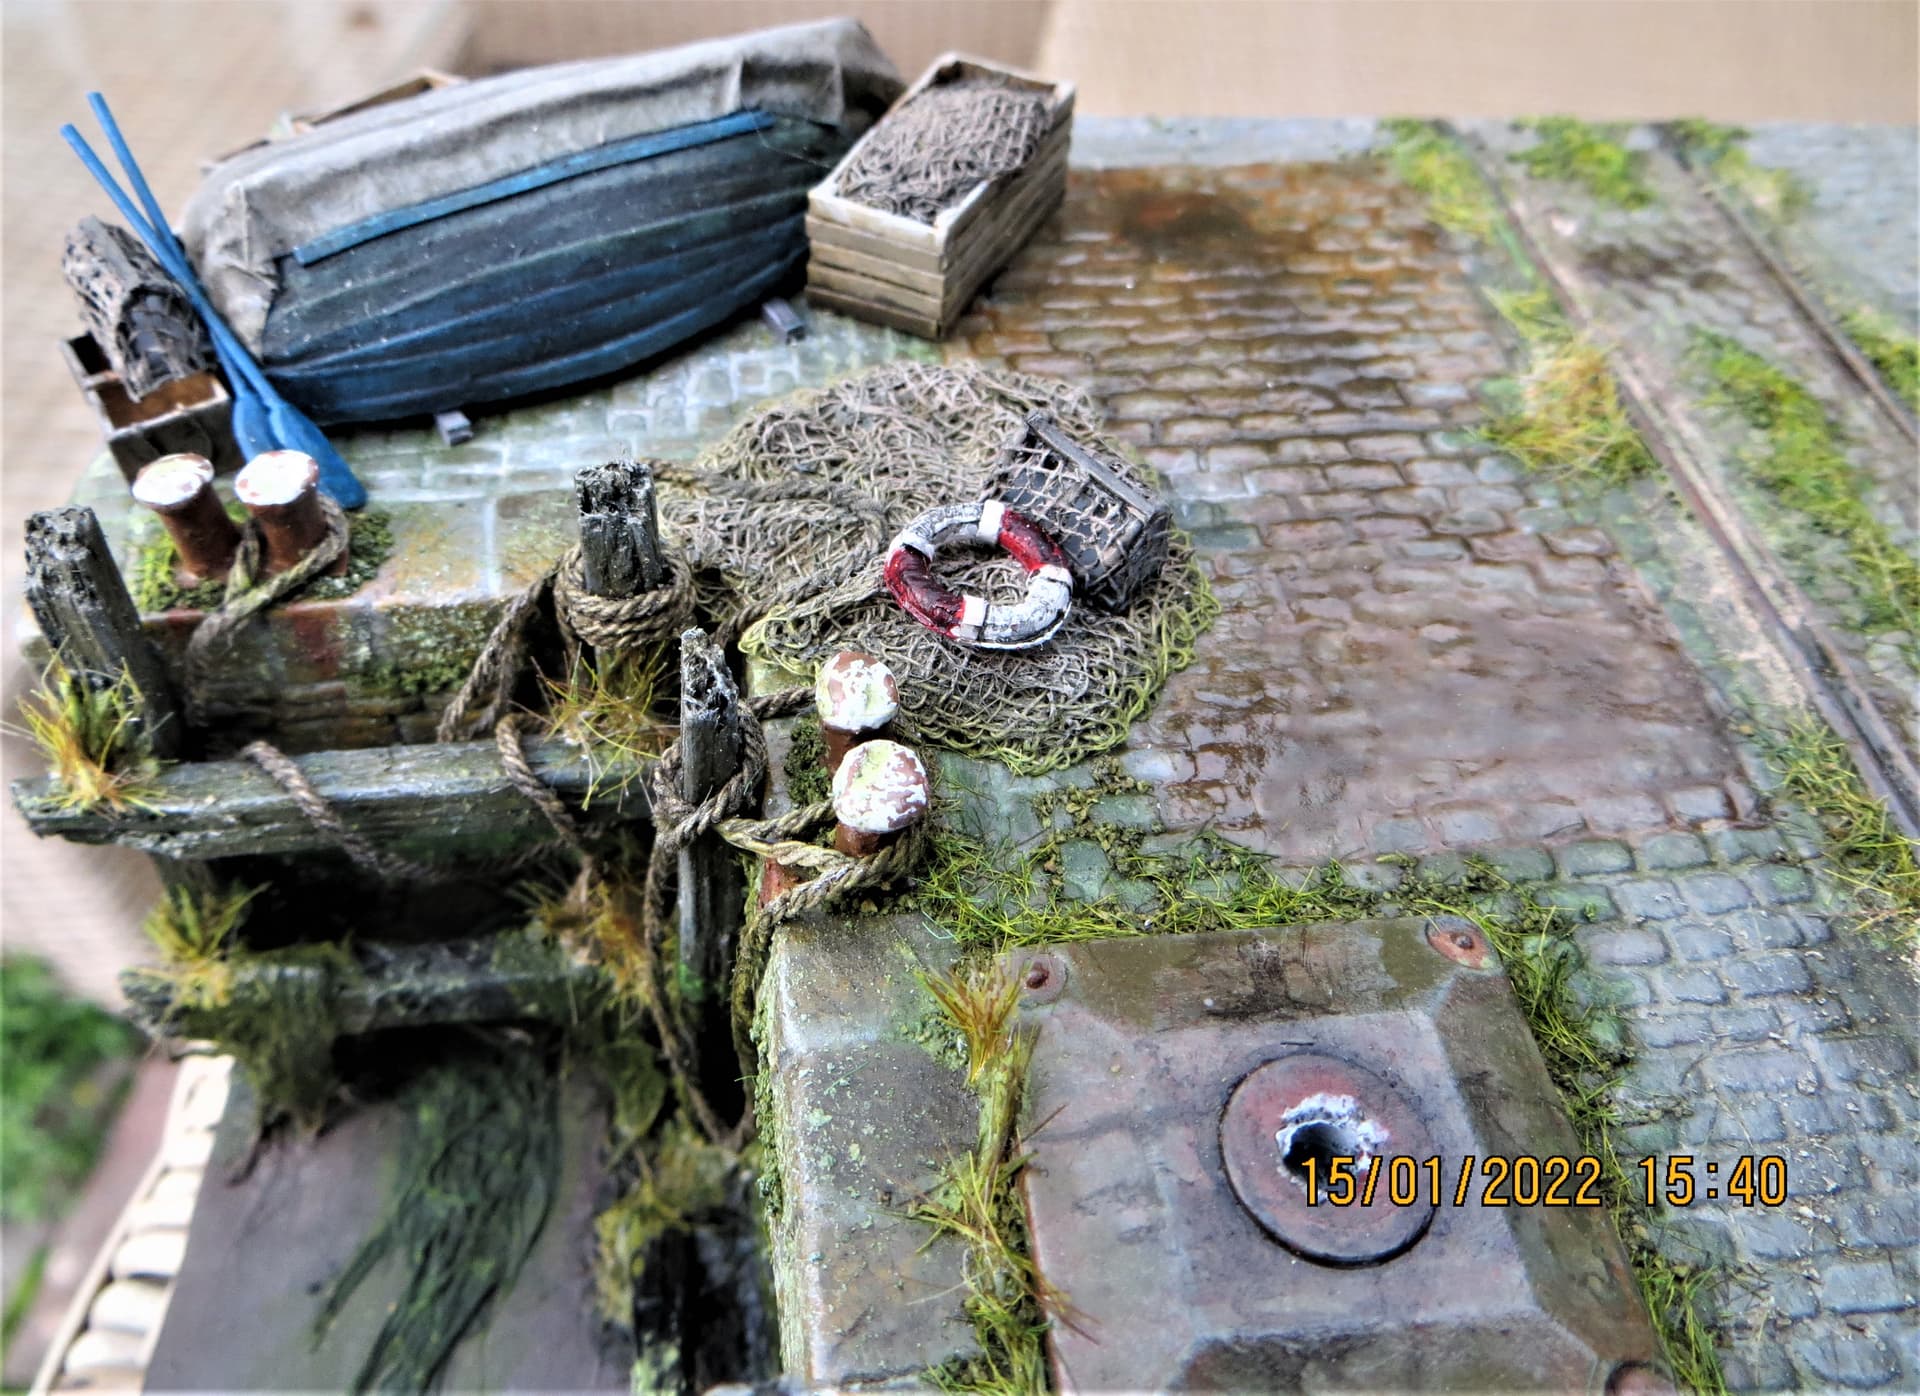
Below are some general images showing close-ups of some of the blended areas. I also need to add some longer tufts of grass randomly along the base of the façades, and I think I will add a rusty old anchor and have decided that a few old wall lamps might be needed, .
What’s not to love with this … Diddy scale but a monumental tick in every box… You have, dare I say it, surpassed the Bocage Dio with this one G… I love the anchor propping up the wall …and the blending in has passed with flying colours… It’s seamless
Natural light confirms Magician at work - 6548 & 6551 in particular look like photo references, to my mind the highest praise there is & fully deserved
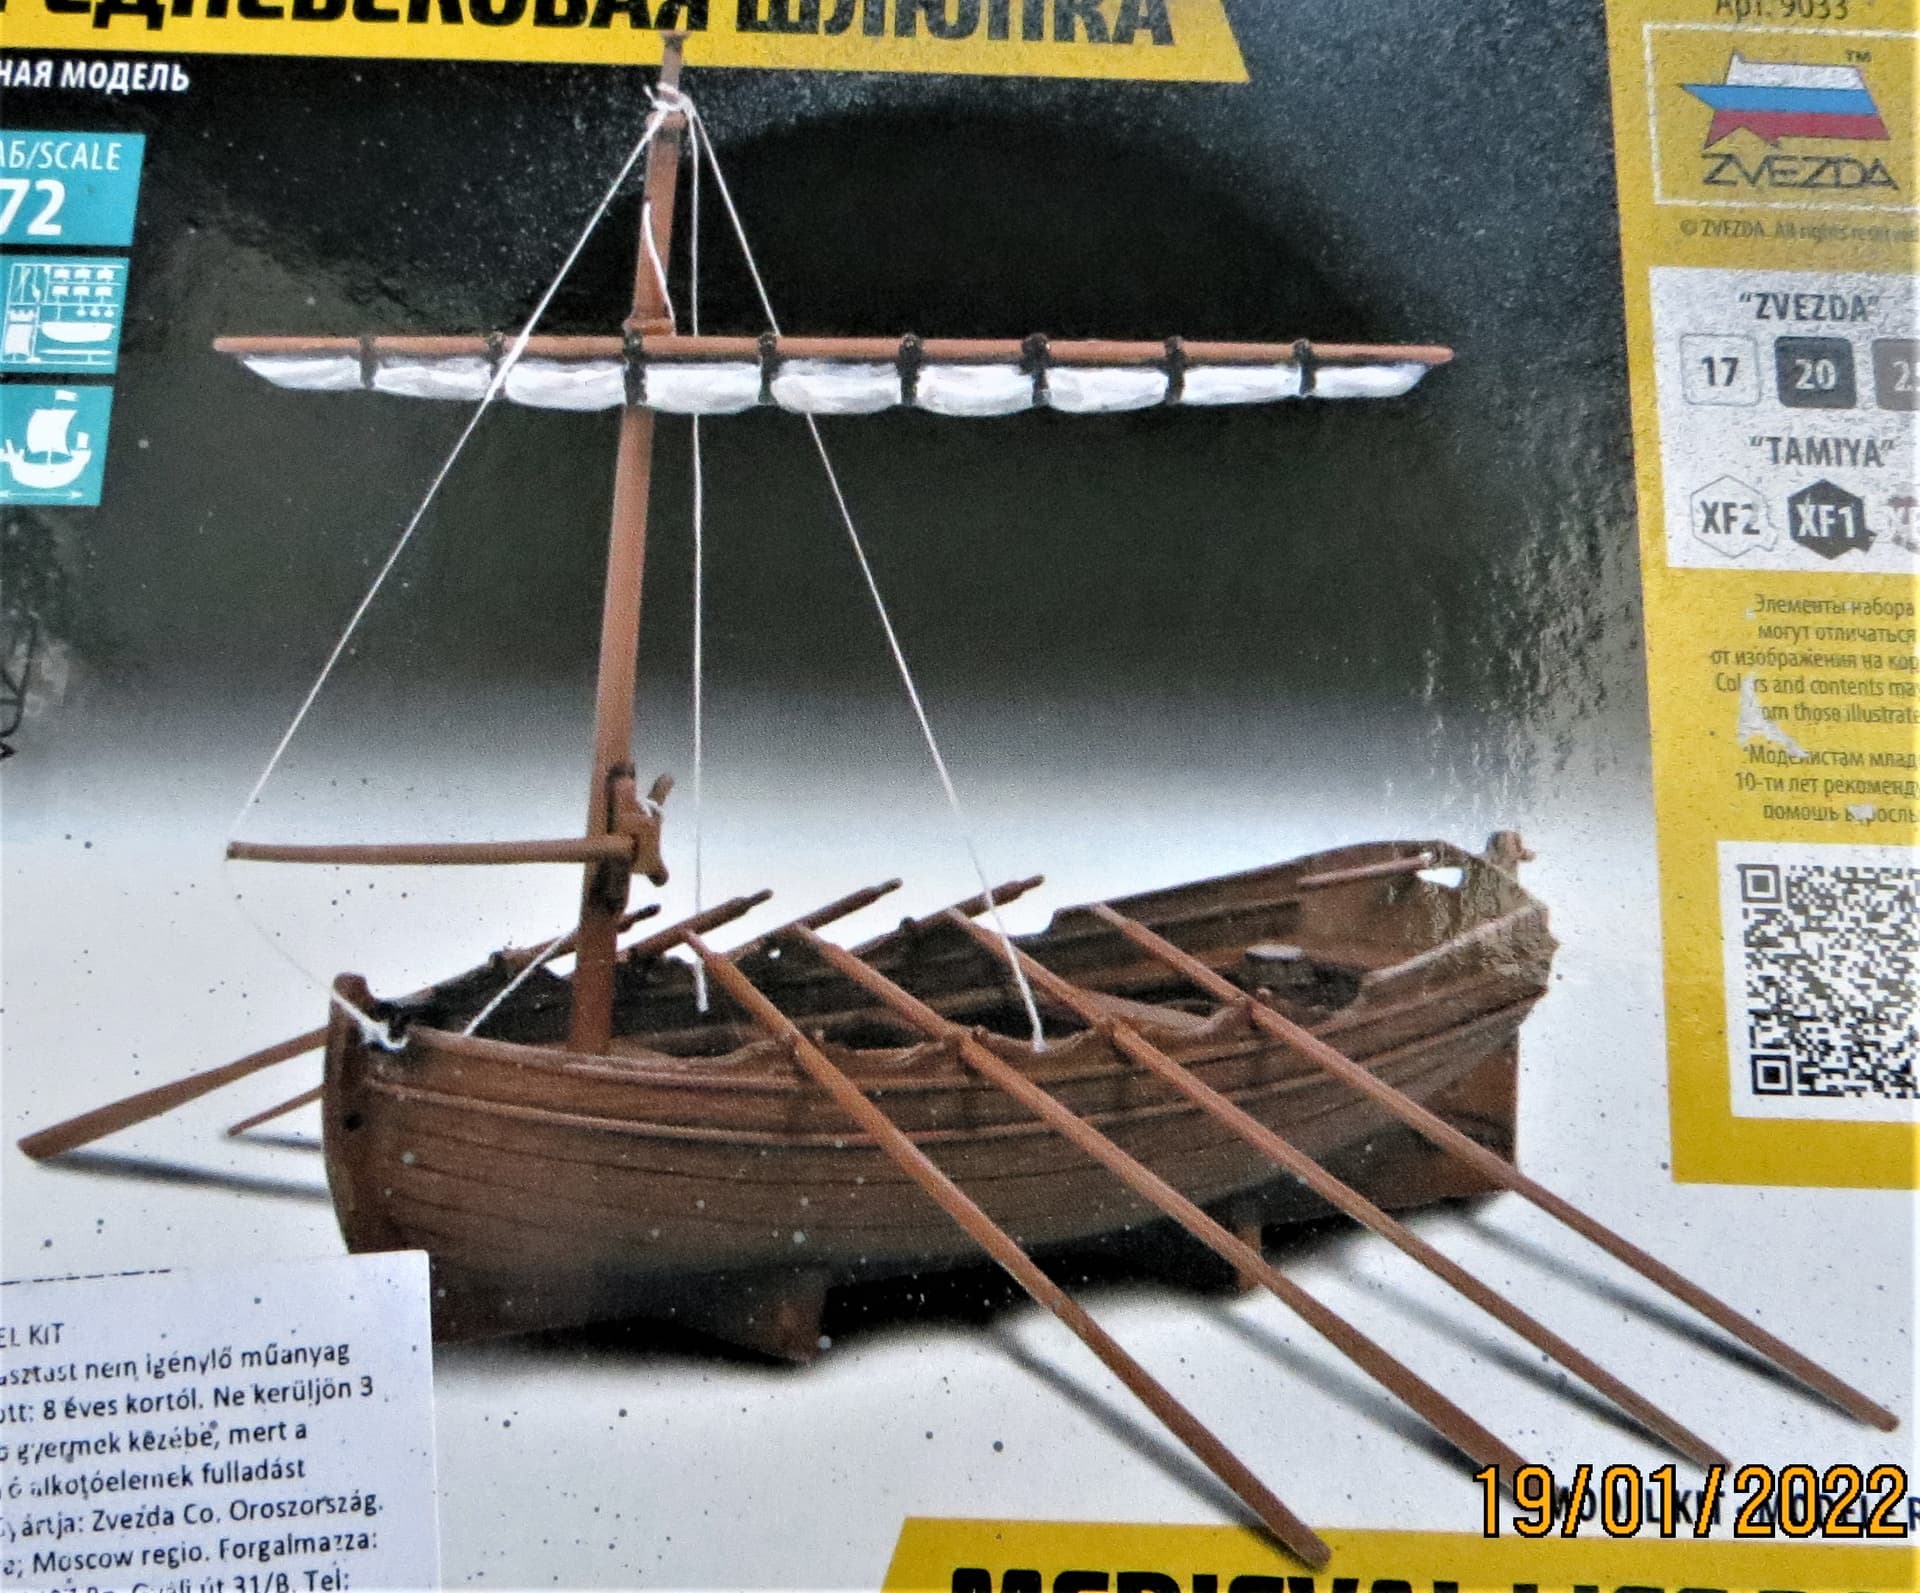
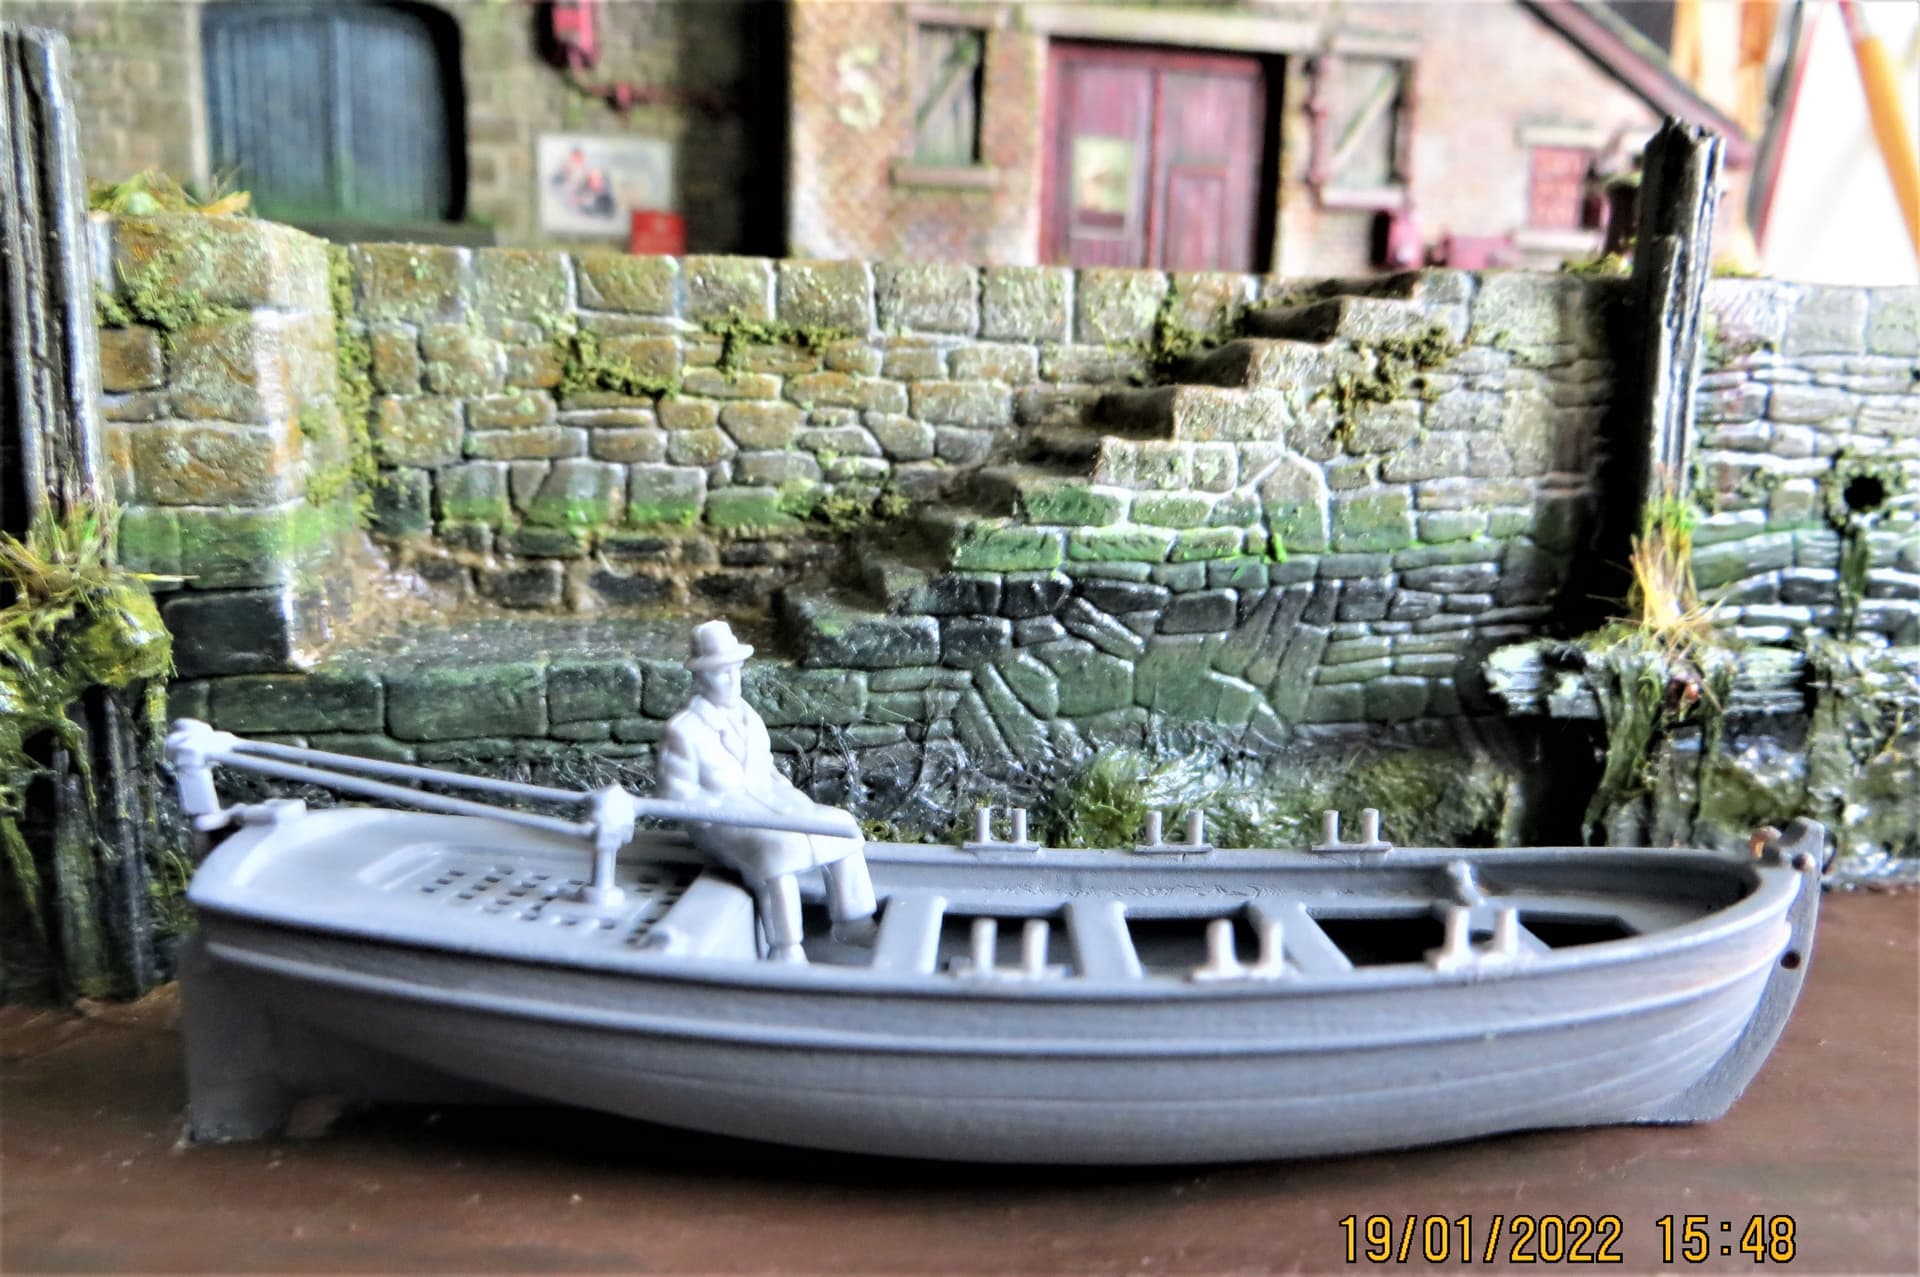
In the end I’ve gone for the fall back position boat-wise and purchased the Zvezda medieval lifeboat kit and have spent the last few hours hacking it about so as to make it look less olde worlde.
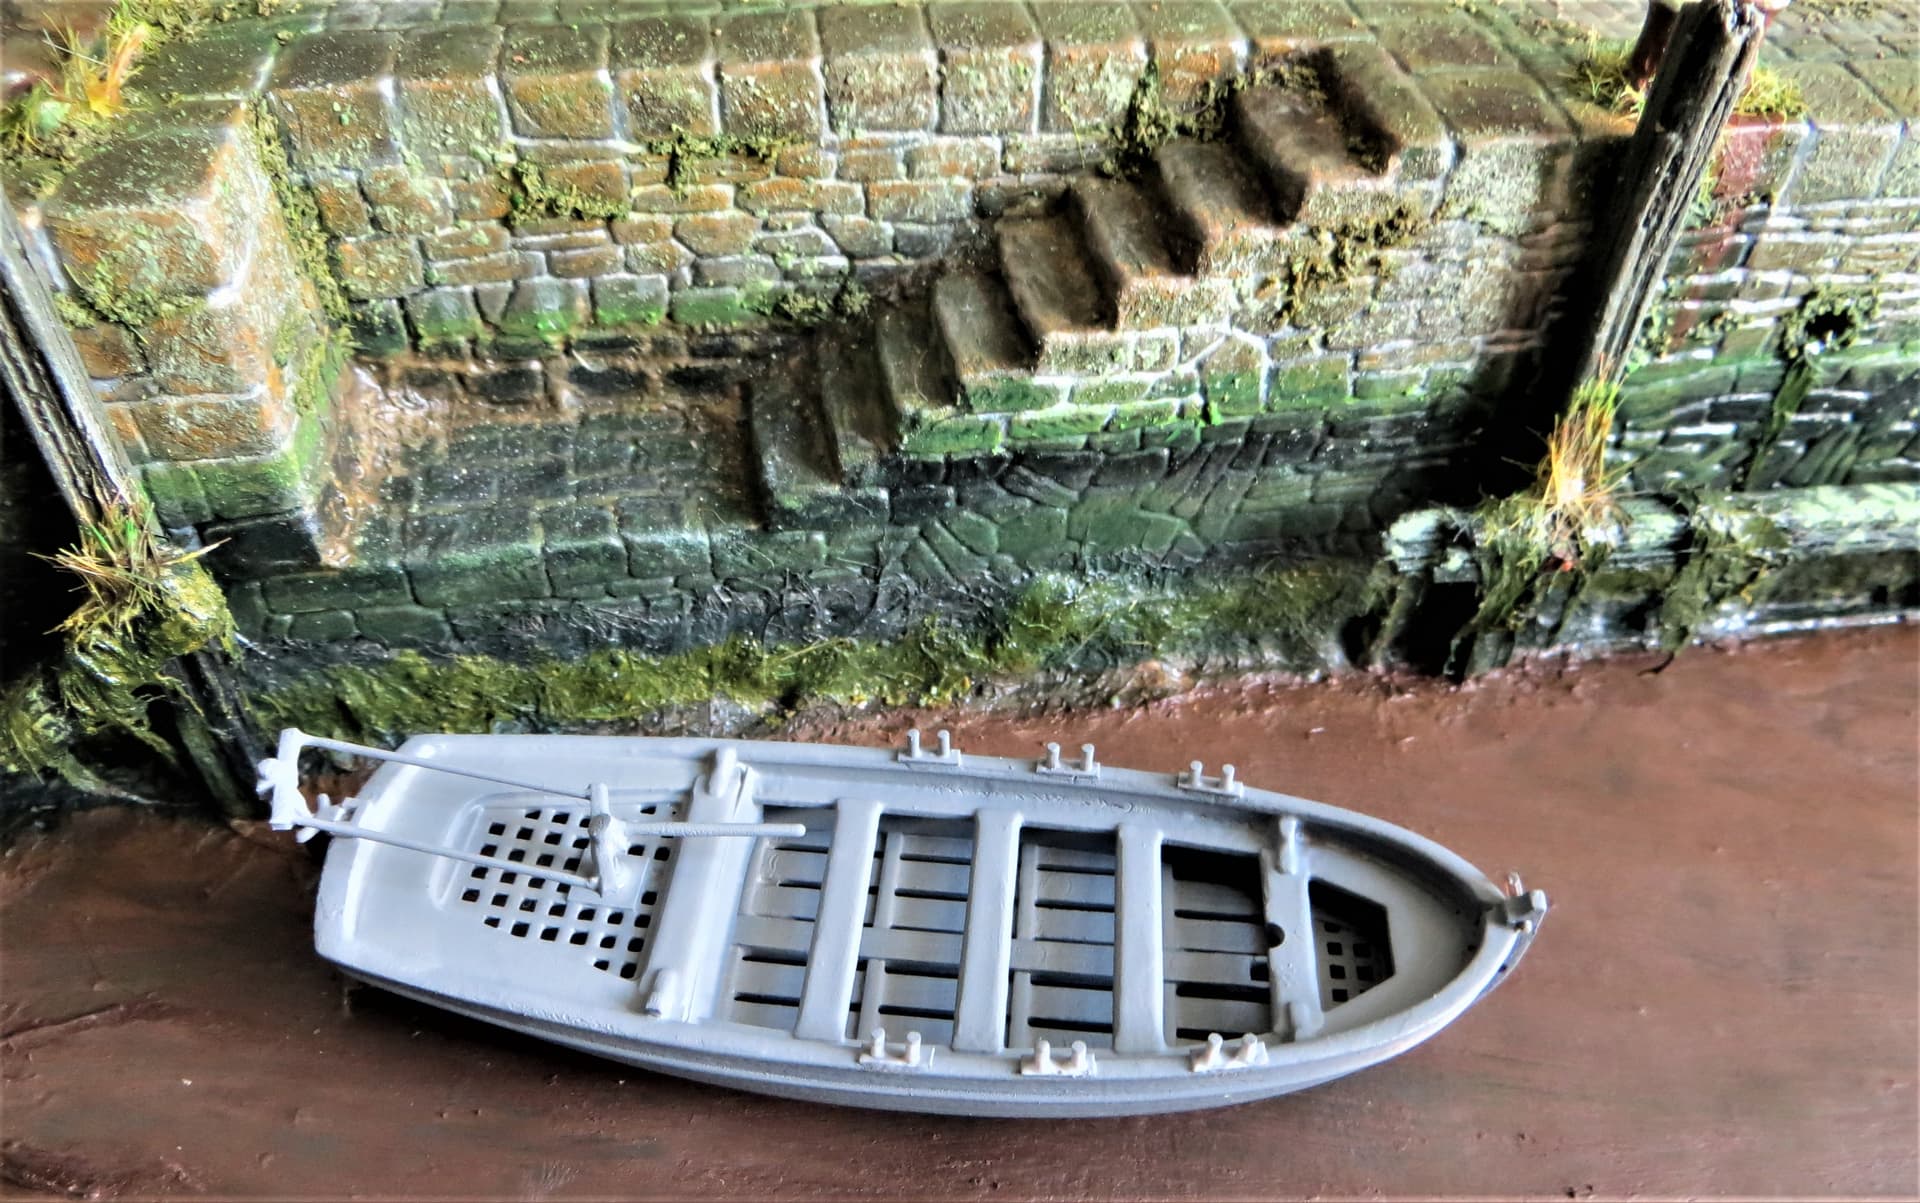
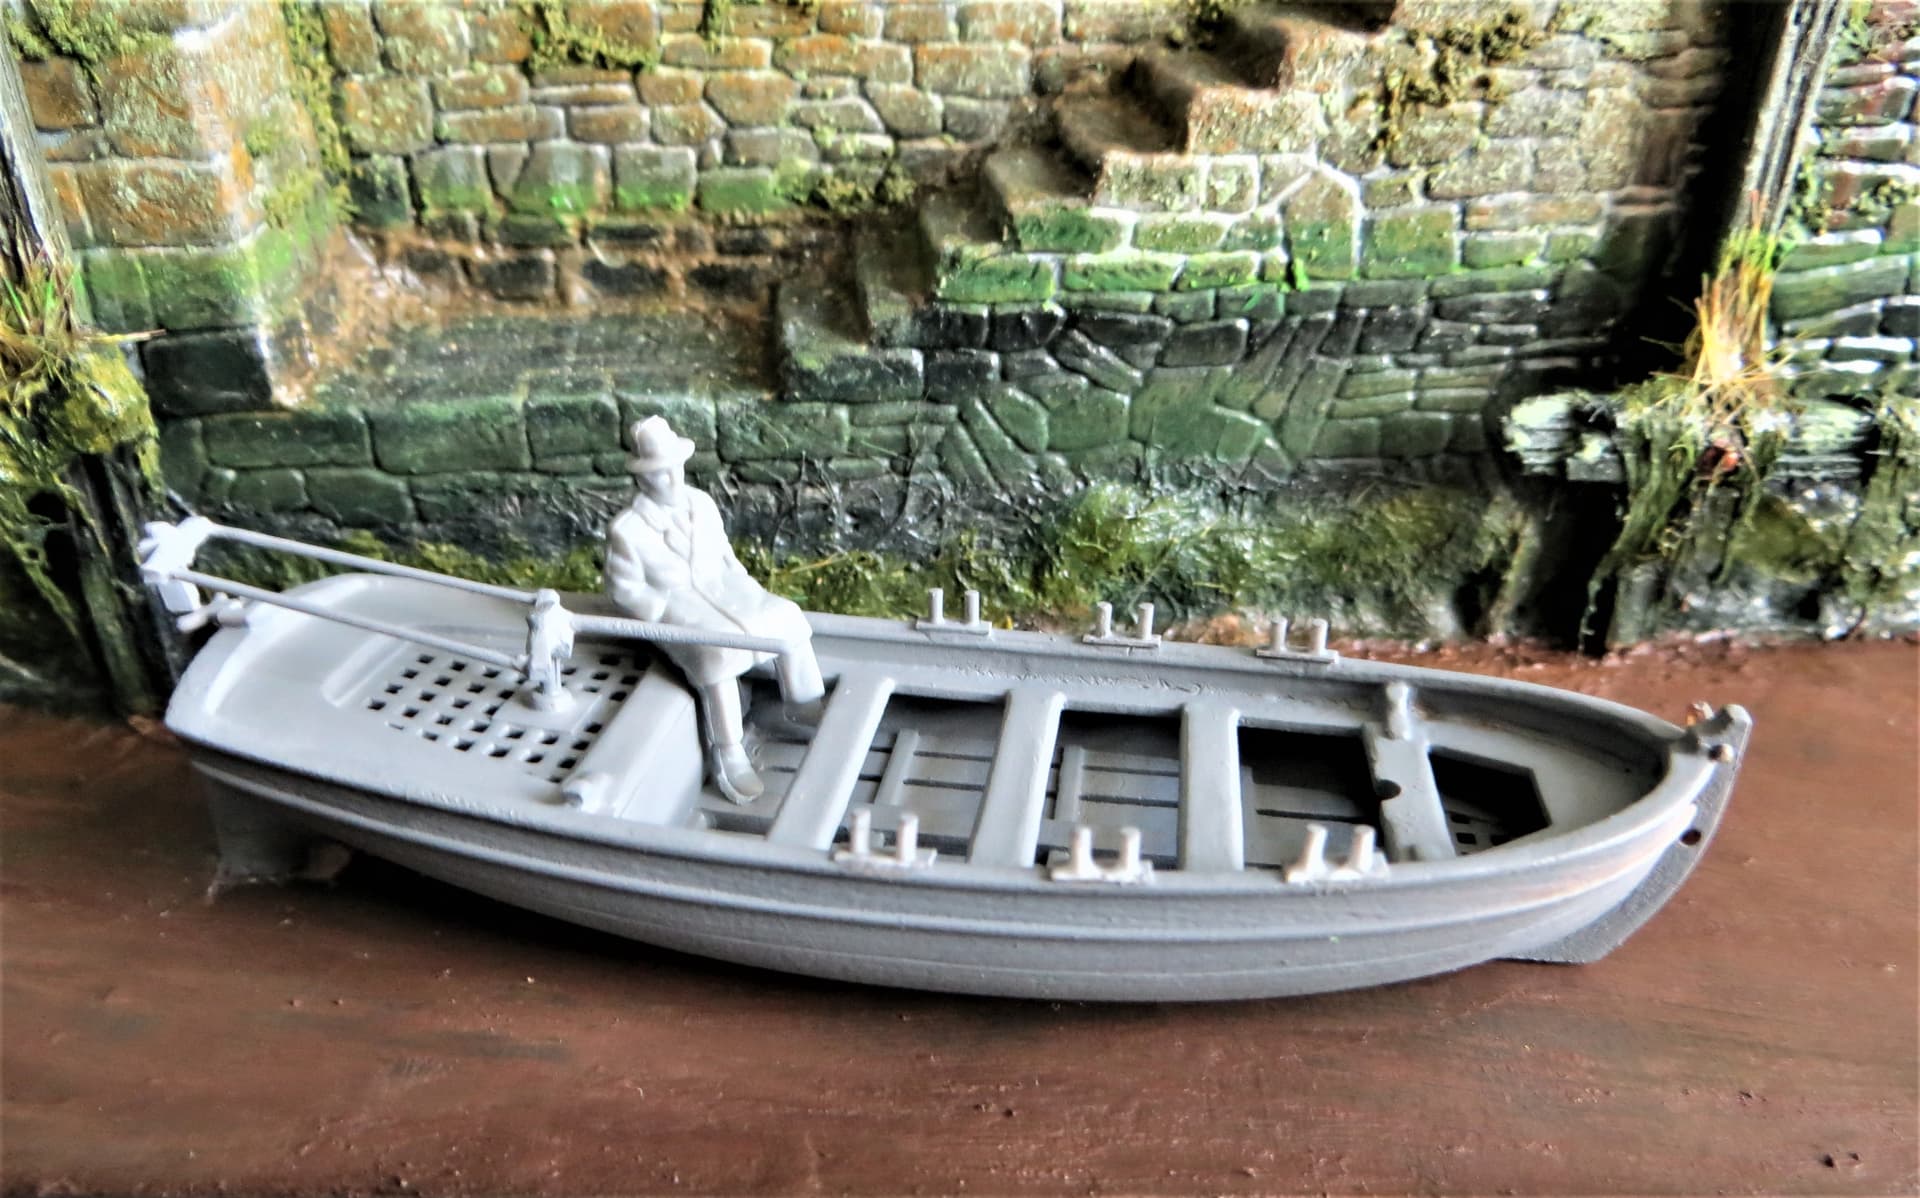
The kit itself is very simple to construct but I decided to cut off the ornate moulded oarlocks and the raised area that runs around the transom and the stern quarter of the boat. I’ve done away with the mast, constructed simple oarlocks and a steering device, it’s rough, but it’s based on a photograph I’ve seen of a WW2 Royal Navy whaler. I’ve also raised the perforated platform at the rear, this originally lined the floor of the lifeboat.
And below are some images showing the modifications. I’m going to try and convert the figure, taken from the Dapol Station Figures set, to a Royal Navy crewman…if my skills permit, .
Cant help with the colours for this one G but you have made it look very good. Totally different from the purchased kit. Will be a nice little part of the scene
If you really want to change it further you might remove the moulded strip around the sides - most small boats I can recall are simple and have plain sides. But it’s no biggie if you keep it as-is…
Thanks to John and Tom for the kind feedback, much appreciated, . Unfortunately Tom, though it might no longer look like the Zvezda kit, it’s also been pointed out to me…in the nicest terms, …that it doesn’t look like anything else that would have been around, , so it’s back to the drawing-board for me, .
With hindsight I should have spent a bit more on something more suitable as the cost of the number of failed attempts is adding up, .
With the base nearly complete I’ve decided to really push my boundaries…think they’re likely to buckle and break, .
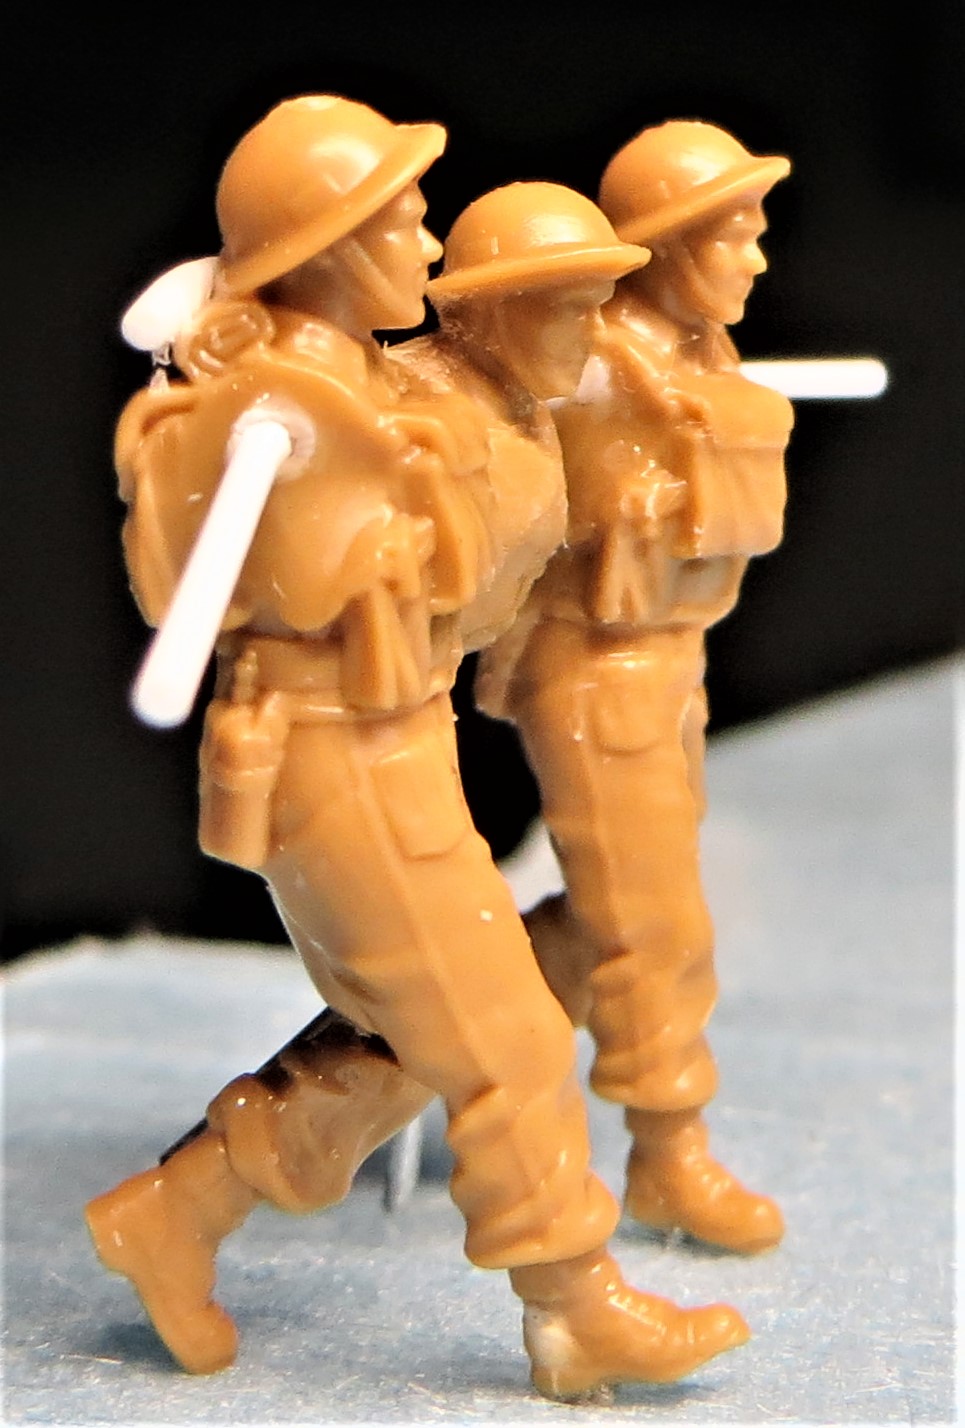
I need to start the figures, something I’m cr@p at in 1/35th, so likely to be even worse in 1/72nd, .
For Christmas I had a number of boxes of the Zvezda British figures and will be converting a number of them to better suit my intent. The first is to try and get a couple of chaps supporting an injured comrade.
I have taken the head and torso of one, chopped of his backpack and chestpack (is this a gasmask bag and, if so, by what time would it have become obsolete…is it best to remove all chestpacks?). I’ve then added wire for the legs to be constructed around and thin plastic rod for arm positions (see images below).
Now for the hard part, trying to build-up acceptable arms and legs in 1/72nd, something I’ve never tried before in any scale…eeek!
As an aside I’m also building the 1/72nd Airfix Tilly (see below), the instructions show the Tilly driver/passenger door hinged on the leading edge (as most modern cars do) when open, however, I seem to recall seeing a build of the 1/35th Tamiya Tilly which had the doors hinged on the trailing edge when open…does anyone know which is correct?
I think the Tilly always had suicide doors i.e. rear-edge hinges. Looking at those figures & remembering you recently mentioned the setting is early war, did I miss that this is survivors-of-Dunkirk 1940? I don’t know if it helps to find an acceptable craft, but that would open the way to the entire spectrum of small civilian boats (not just RN ones) - everything and anything was used in that mass flotilla. Even row-boats were used to ferry soldiers to land from larger ships anchored off shallow harbours
Thanks for the feedback Tim, much appreciated, . I double checked the Airfix instructions (see below) and they definitely show the doors hung as most modern cars on their leading edge.

 . Likewise the resultant gaps between the groundwork and façade needed filling, and will need re-scribing and blending,
  .
. . I had the same issue on my previous Braille build, but it wasn’t as problematic as it was a mainly grass/undergrowth base,
  .
.

 ,
,


 . As for not being an ‘exact science’, well I consider you the modelling boffin when it comes to diorama building, so any suggestions you make are likely to be as exact scientifically as they come,
 .
.


 …I’m open to suggestions,

 . Unfortunately Tom, though it might no longer look like the Zvezda kit, it’s also been pointed out to me…in the nicest terms,
  , so it’s back to the drawing-board for me,
 .
.