Hi Robin
Yes, though the side opening hatch means either no trackways or short trackway on this vehicle, bailing out on to a moving track - not recommended.
Not rocket science, but getting it wrong could cost lives (Yep, I know, fantasy tank)
Mal
Hi Robin
Yes, though the side opening hatch means either no trackways or short trackway on this vehicle, bailing out on to a moving track - not recommended.
Not rocket science, but getting it wrong could cost lives (Yep, I know, fantasy tank)
Mal
I didn’t mean that you should go for the same solution as the Cromwell, it was to show that hatch-and-hinges wasn’t the only possible solution in the designers toolbox.
Sliding or pivoting after a minor lift wouldn’t work due to the periscopes sticking down below the hatch.
Hinges at the back will foul the armoured box around the guns.
Hinges left or right will cause the hatch to hit the gun barrels.
Hinges along the front edge could possibly work if the armoured box around the guns was cut off att an angle along the lower edge. Maybe in combined with pulling the rear edge of the hatch forward so that there is some hull roof between the hatch and the turret ring. Raising the turret slightly could also help in letting the hatch clear the armoured box.
A sliding hatch would require moving the vertical frontal armour forward so that the periscopes can be mounted in a flat portion of roof in front of the hatch.
A more radical change could be to make the frontal vertical slab pointed. A flat piece to hold the round hatch (what is it actually?) and angled side pieces going back to meet the hull sides.
This would also eliminate the need for that cutout in the glacis. The area above/behind the round hatch could now hold the three periscopes. When the hatch is free from periscopes it can slide left or right or split in two parts so that each of them slides outwards and avoid the hatch hanging free over the tracks.
lol. okay okay. pedantic and fussy model makers are pedantic and fussy.
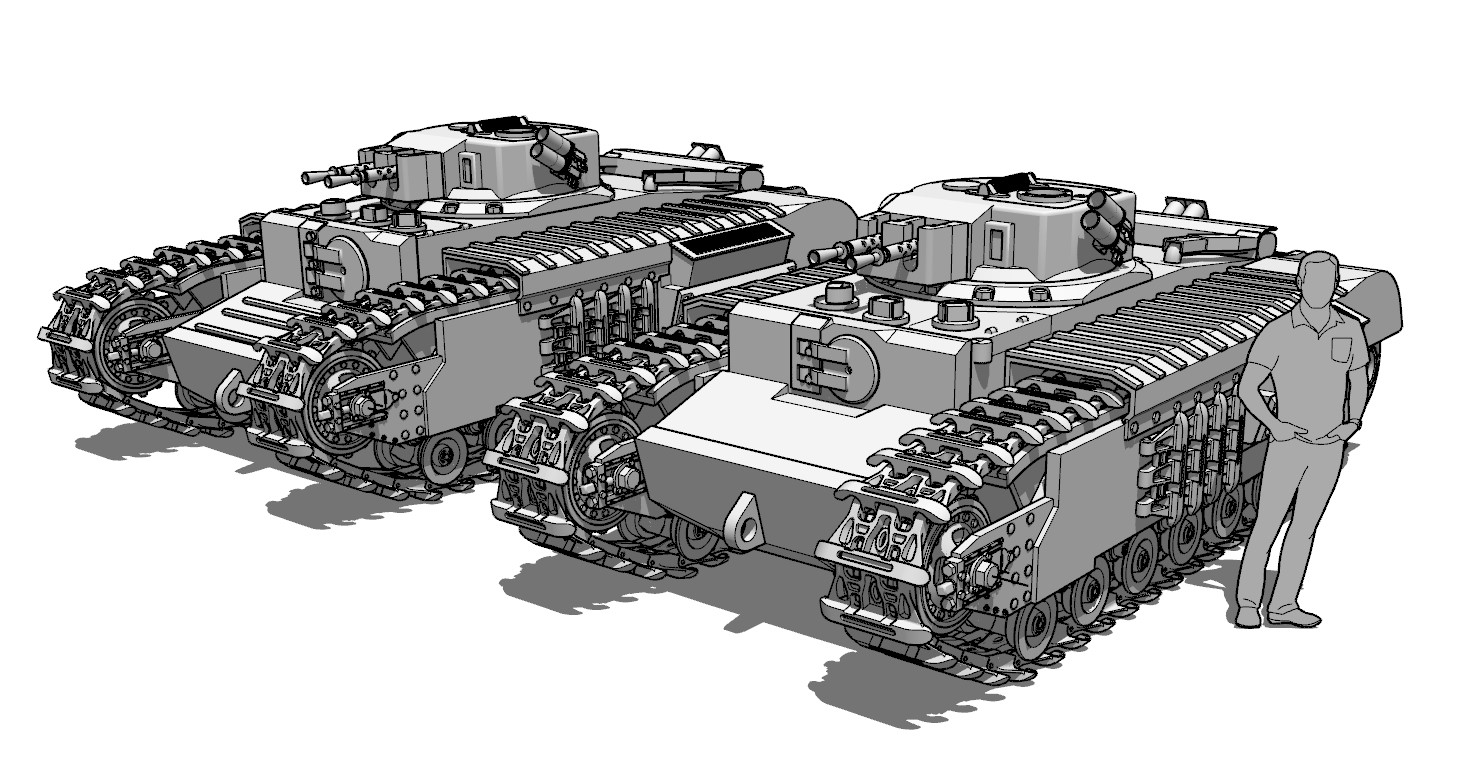
Fantasy tank, but BELEIVABLE fantasy tank. At least that’s what I’m going for here. Pzkpfw 1F, but if the British did it.
Changes!
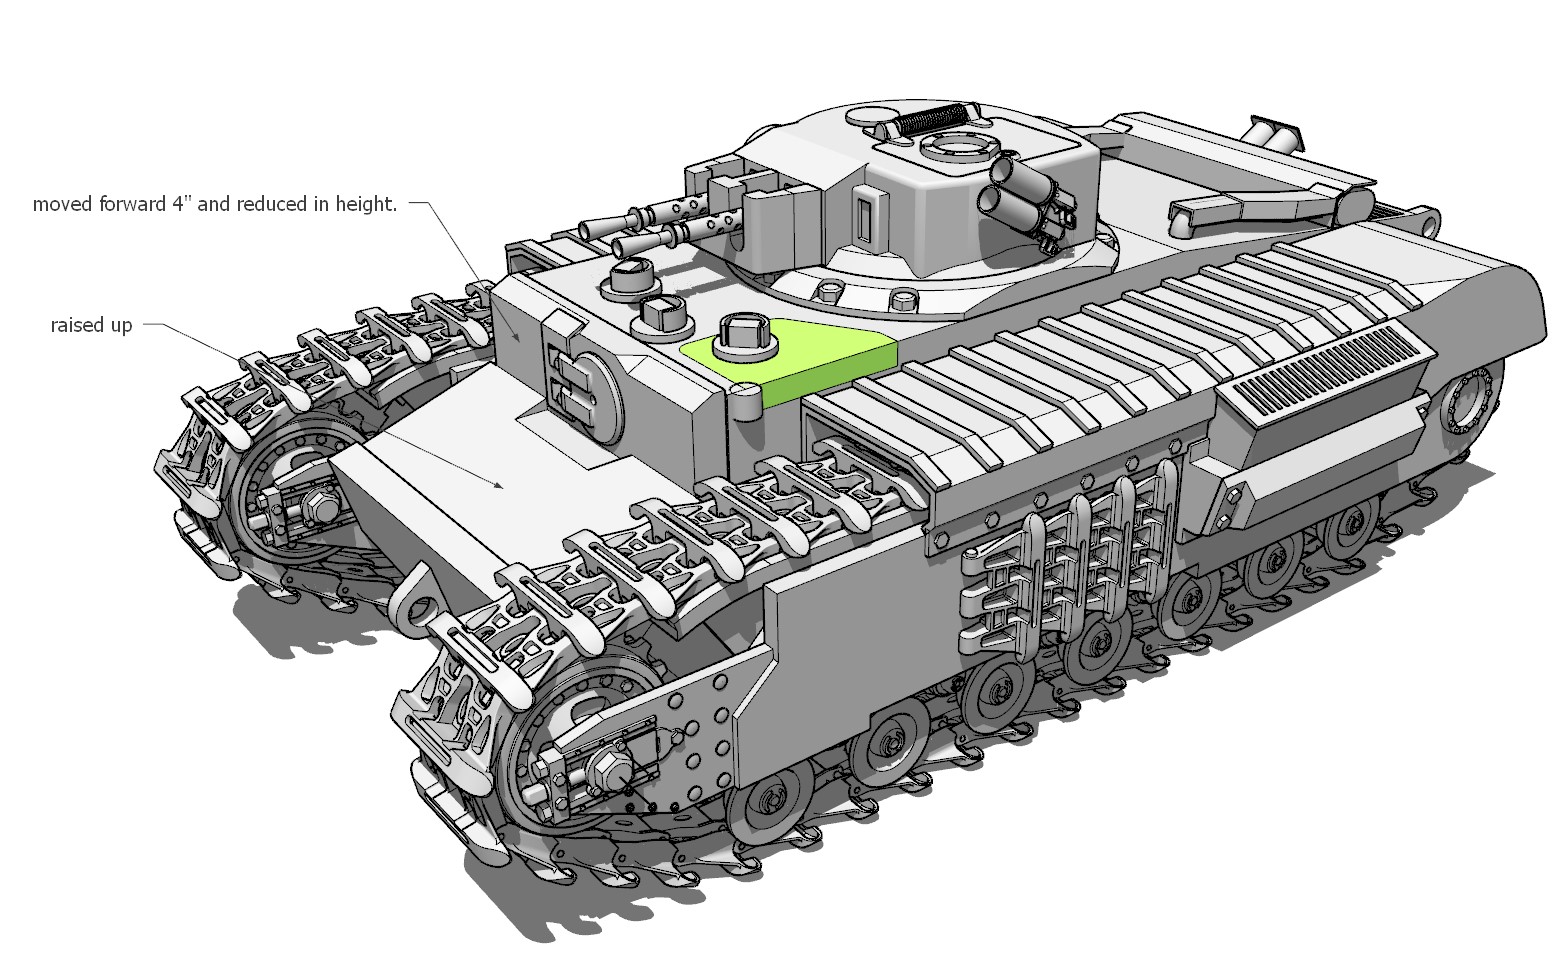
Moved the front glacis forward about 100mm and adjusted other angles to suit. Also found that I had overestimated the diameter of the drivers vision port, which meant I could also reduce the height of the front plate a bit. Side swivel hatch blocked in.
I’m not entirely sure how the hatch periscope would clear the hull, but I’m sure I’ll figure something out.
and, yes. The turret would be extremely squishy. and the drivers hatch awkward to get out of. But there are plenty of ‘oh God, the tank’s on fire’ videos demonstrating that this would be far from unusual.
Lots to think about here, Robin’s pointed front slab is interesting, but loses the Churchill connection. With the side hatch, you have a similar set up to Tiger I, making head out driving difficult. The ‘Tanks on fire’ escape videos are always done from a static vehicle, not quite the same challenge as when in motion.
I think this is actually a practical demonstration of the difficulties involved in AFV design, lots of conflicting requirements, that either need balancing, or ignoring totally.
Mal
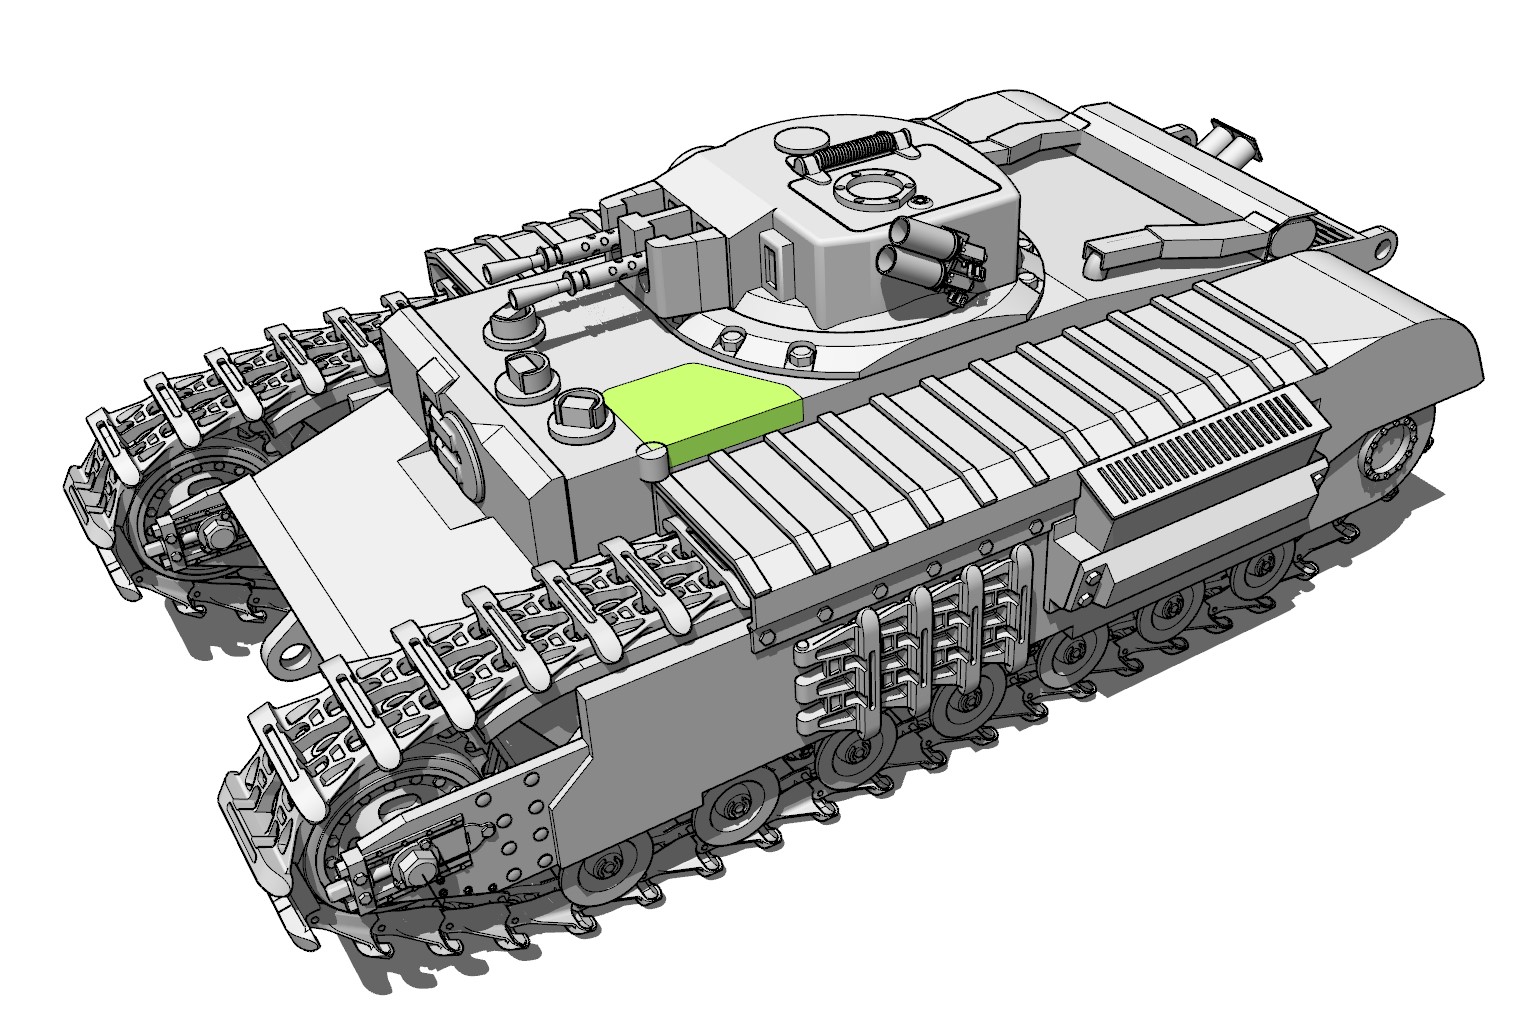
Righto. Think this fixes it. Measured the cromwell hatch from some plans, turns out I was being a tad generous in size and sqwidged the turret back a tad.
That’ll have to do. there’s a war on damnit.
Looks good
Mal
Thanks!
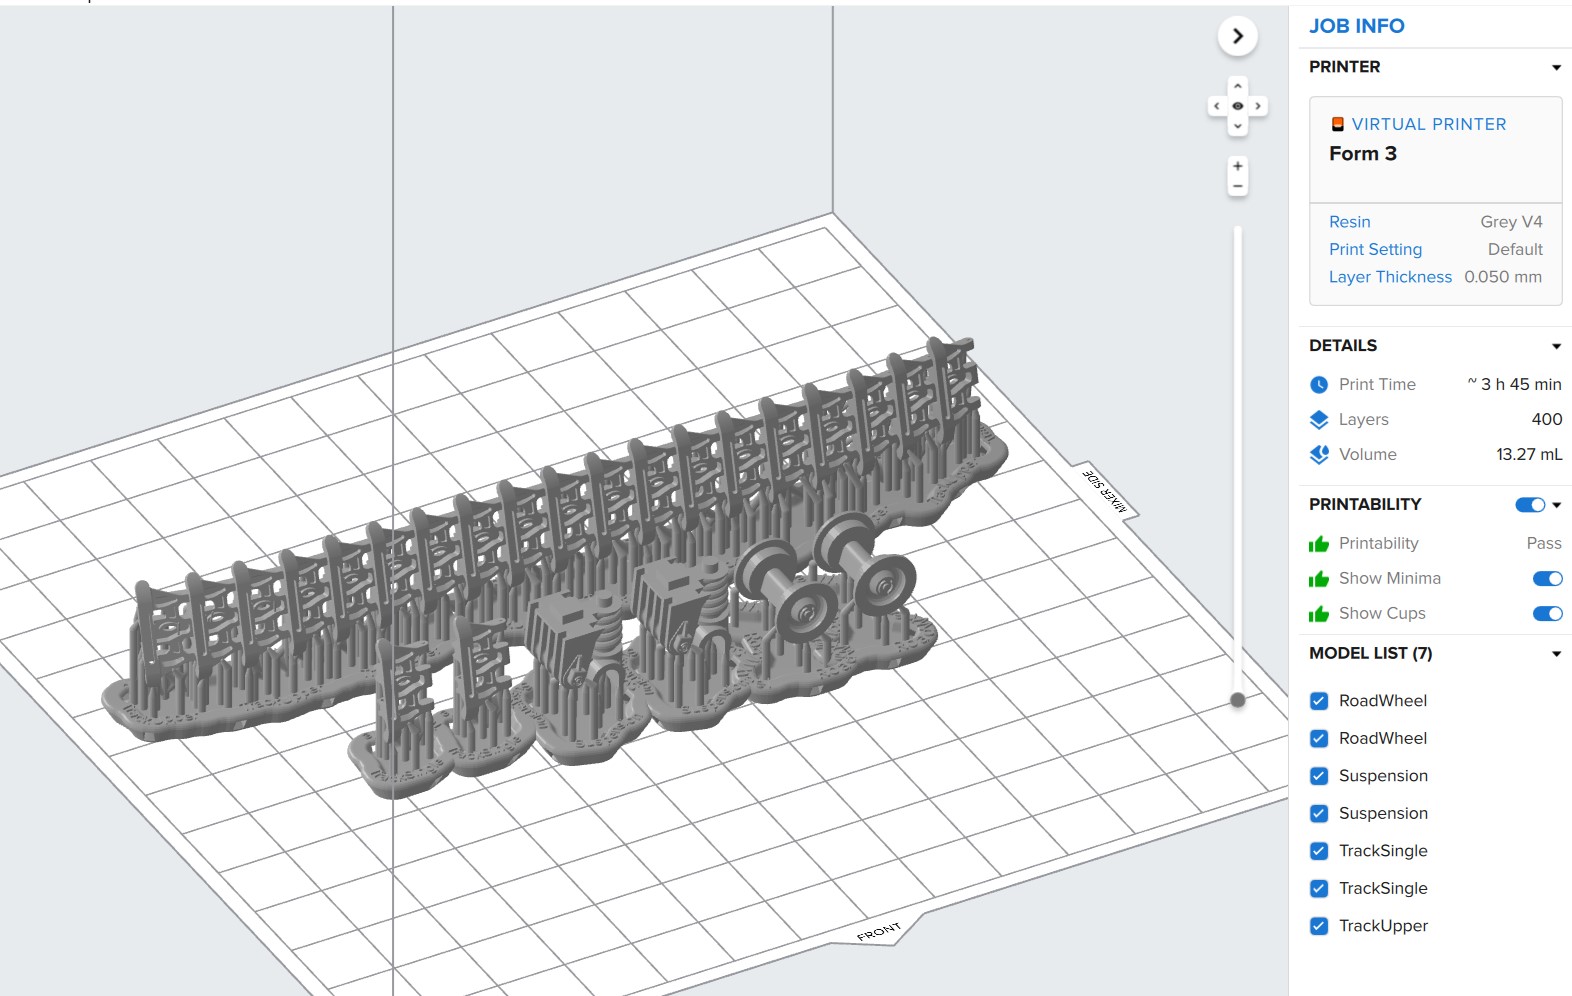
Going to have a go at printing a few bits. Realising I may have to divide up some parts to cater for smaller printers than mine.
This’ll take about 4 hours on a medium resolution. Should fine for a test.
Cool
Are we there yet?
(Sorry, couldn’t resist)
Mal
Nah. not yet. had to do a bit of maintenance and swearing.
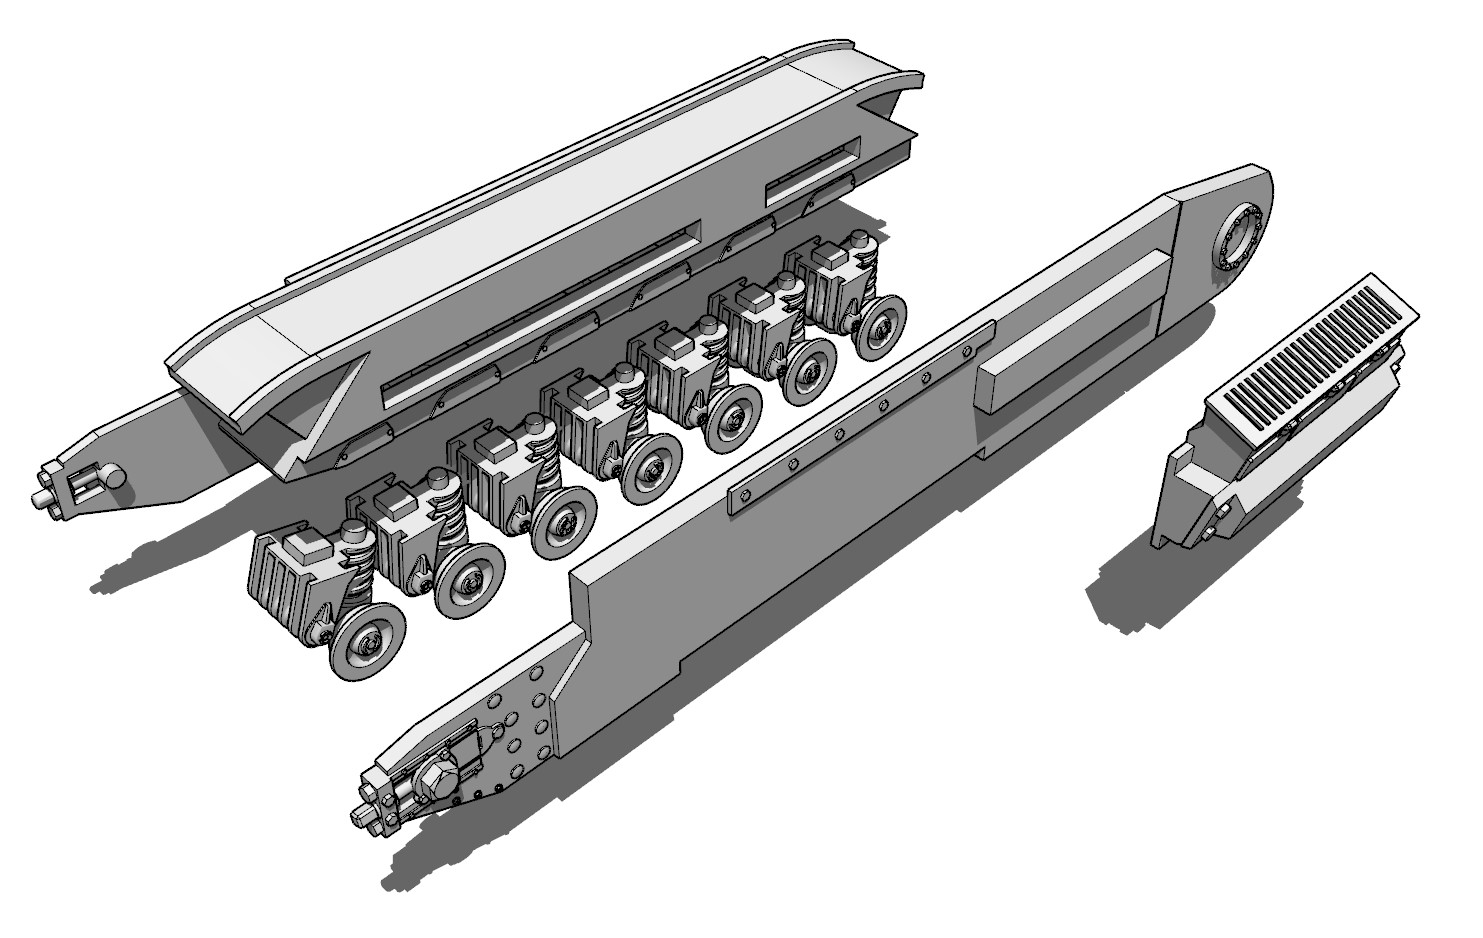
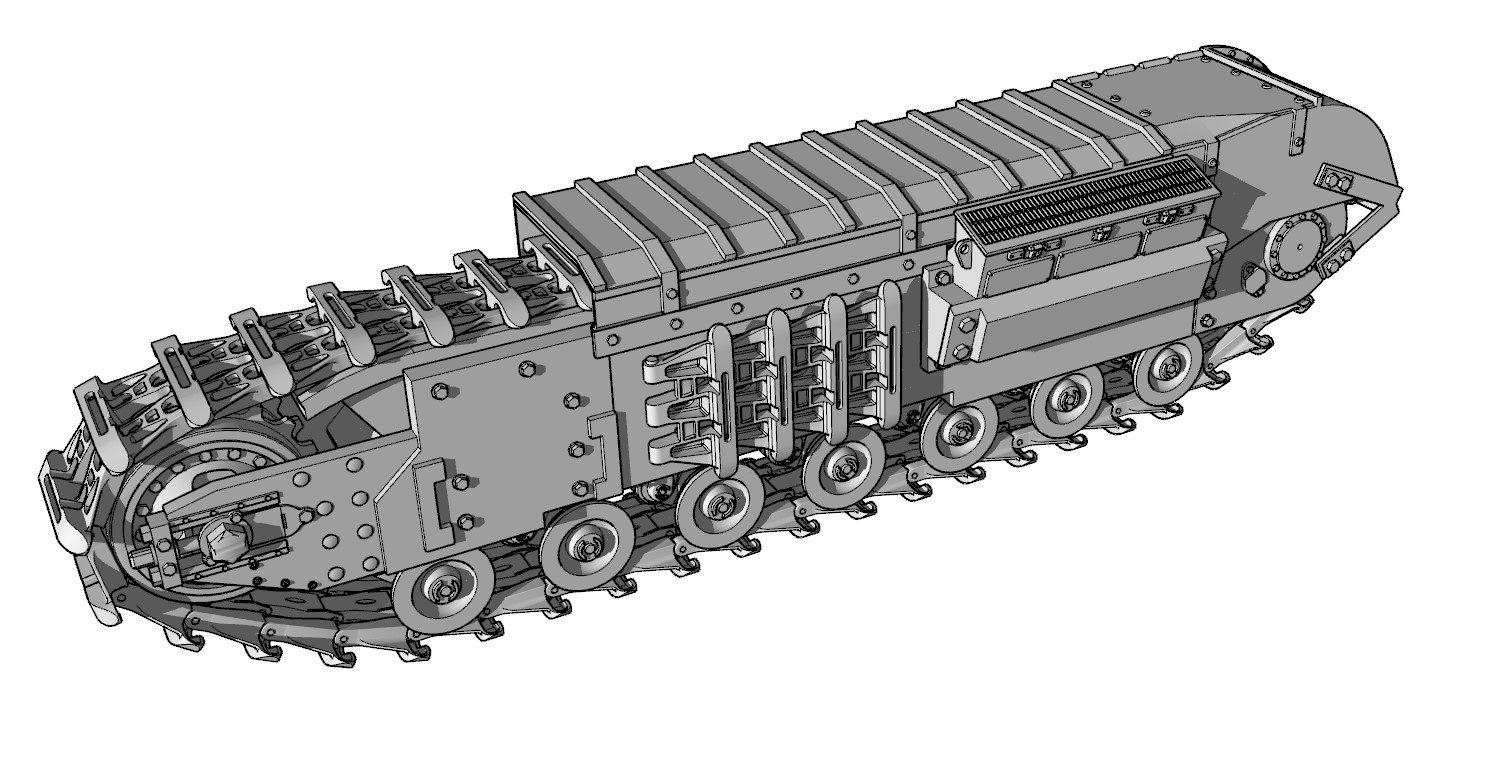
in the meantime, more parts breakdown.
trying to make it printable and assembleable. that’s a word now.
Ah, you need a Degree in Assemblage.
Mal
Looking good! Now make it amphibious.
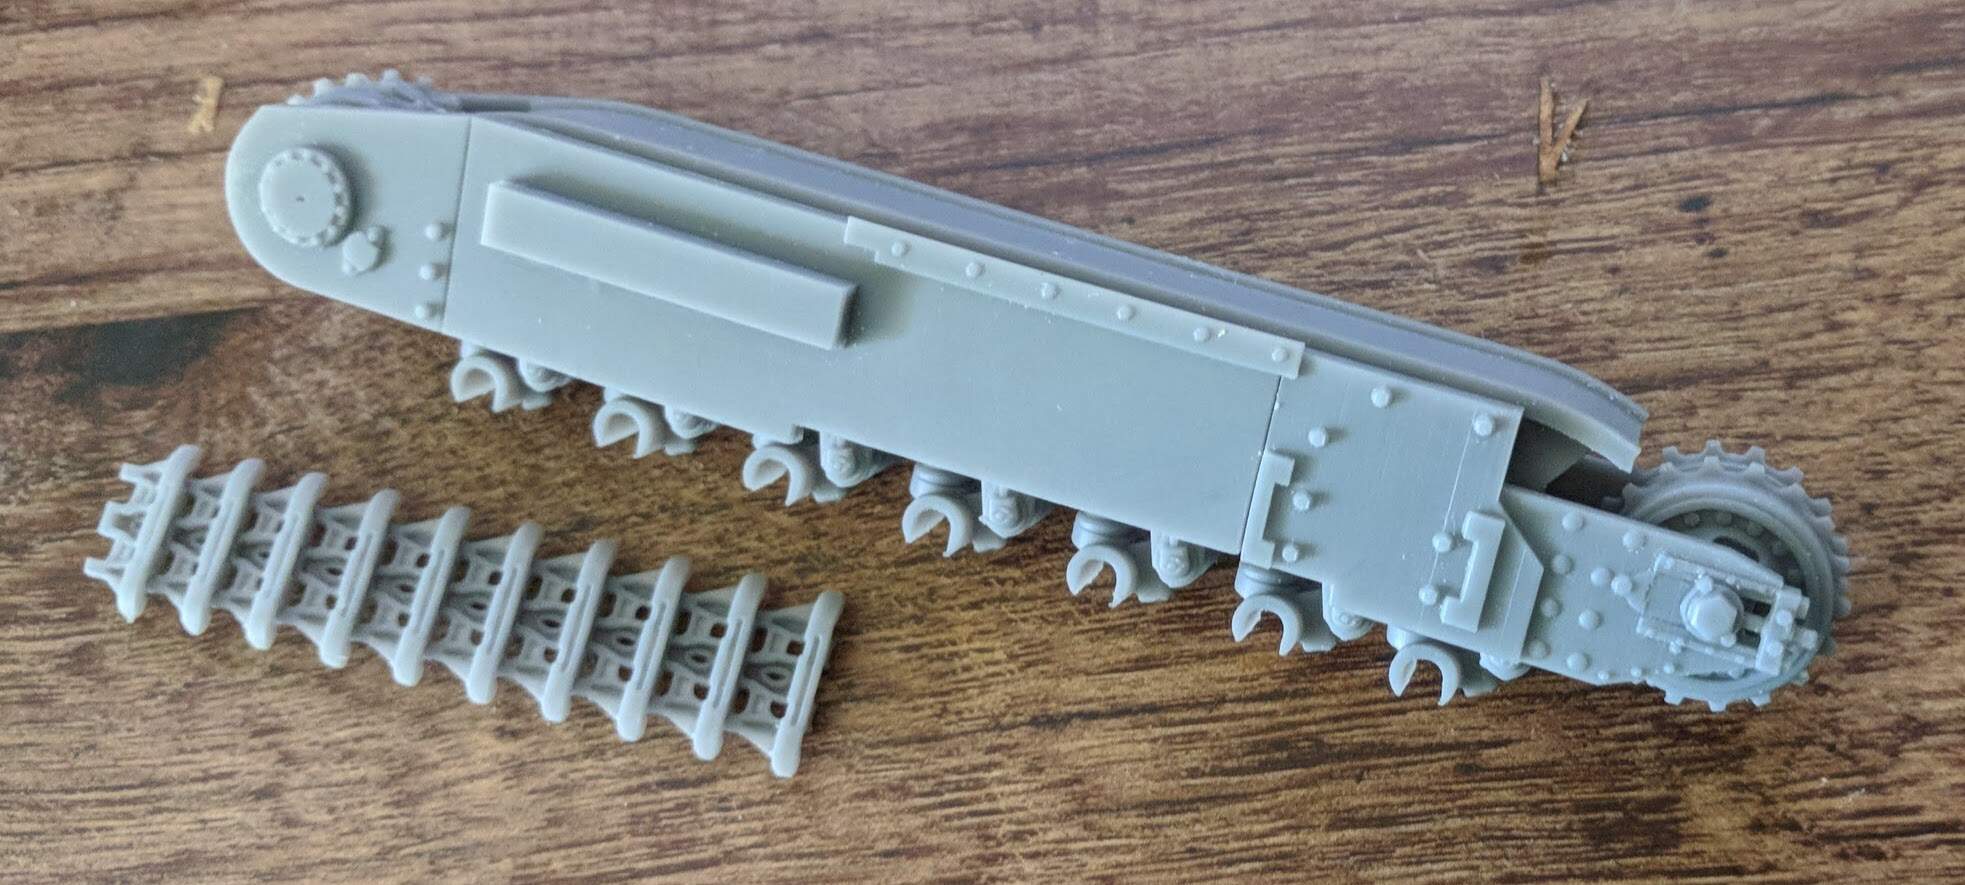
Tah dah! Printage.
…and fittage!
This is the bit, where if I were building an aeroplane, I would say " I love it when a plane comes together". But I’m not. So I won’t.
Nice, now just needs to be in 1/16th…
Mal
see, now that’s the wonderful thing about 3D printing. Just have enlarge by a factor of 2.18…
Cool
Any further print progress?
Mal
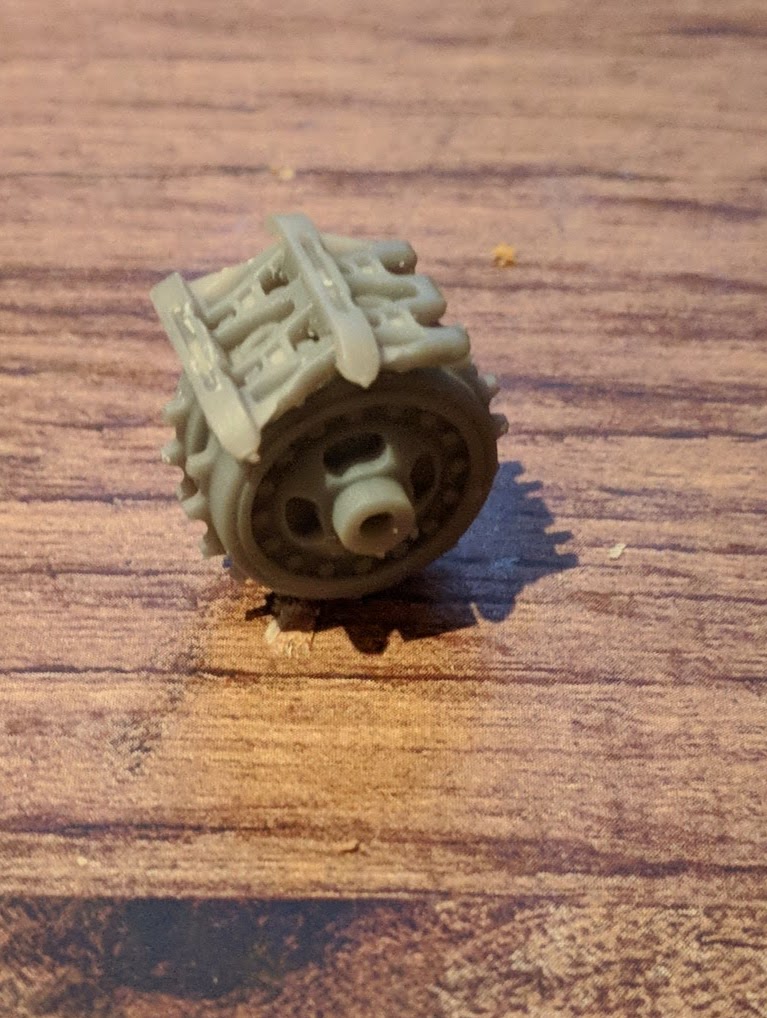
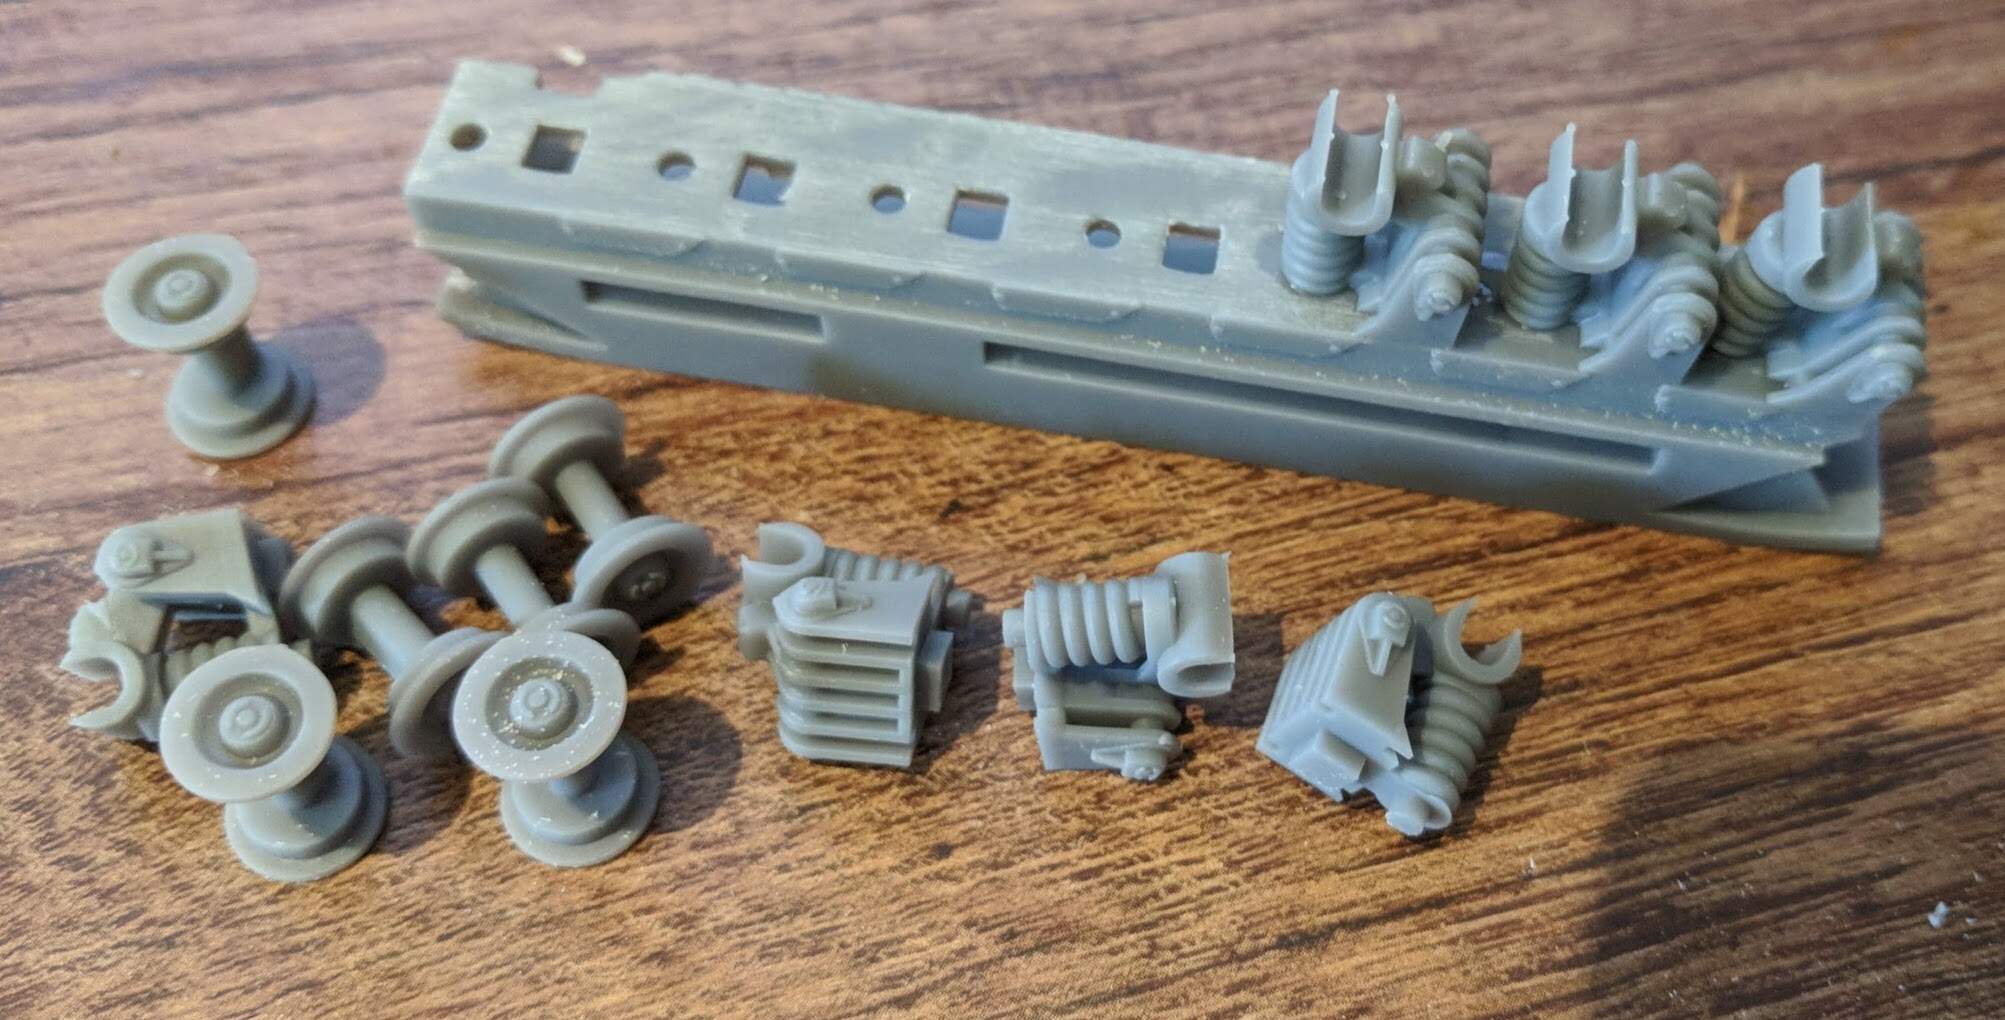
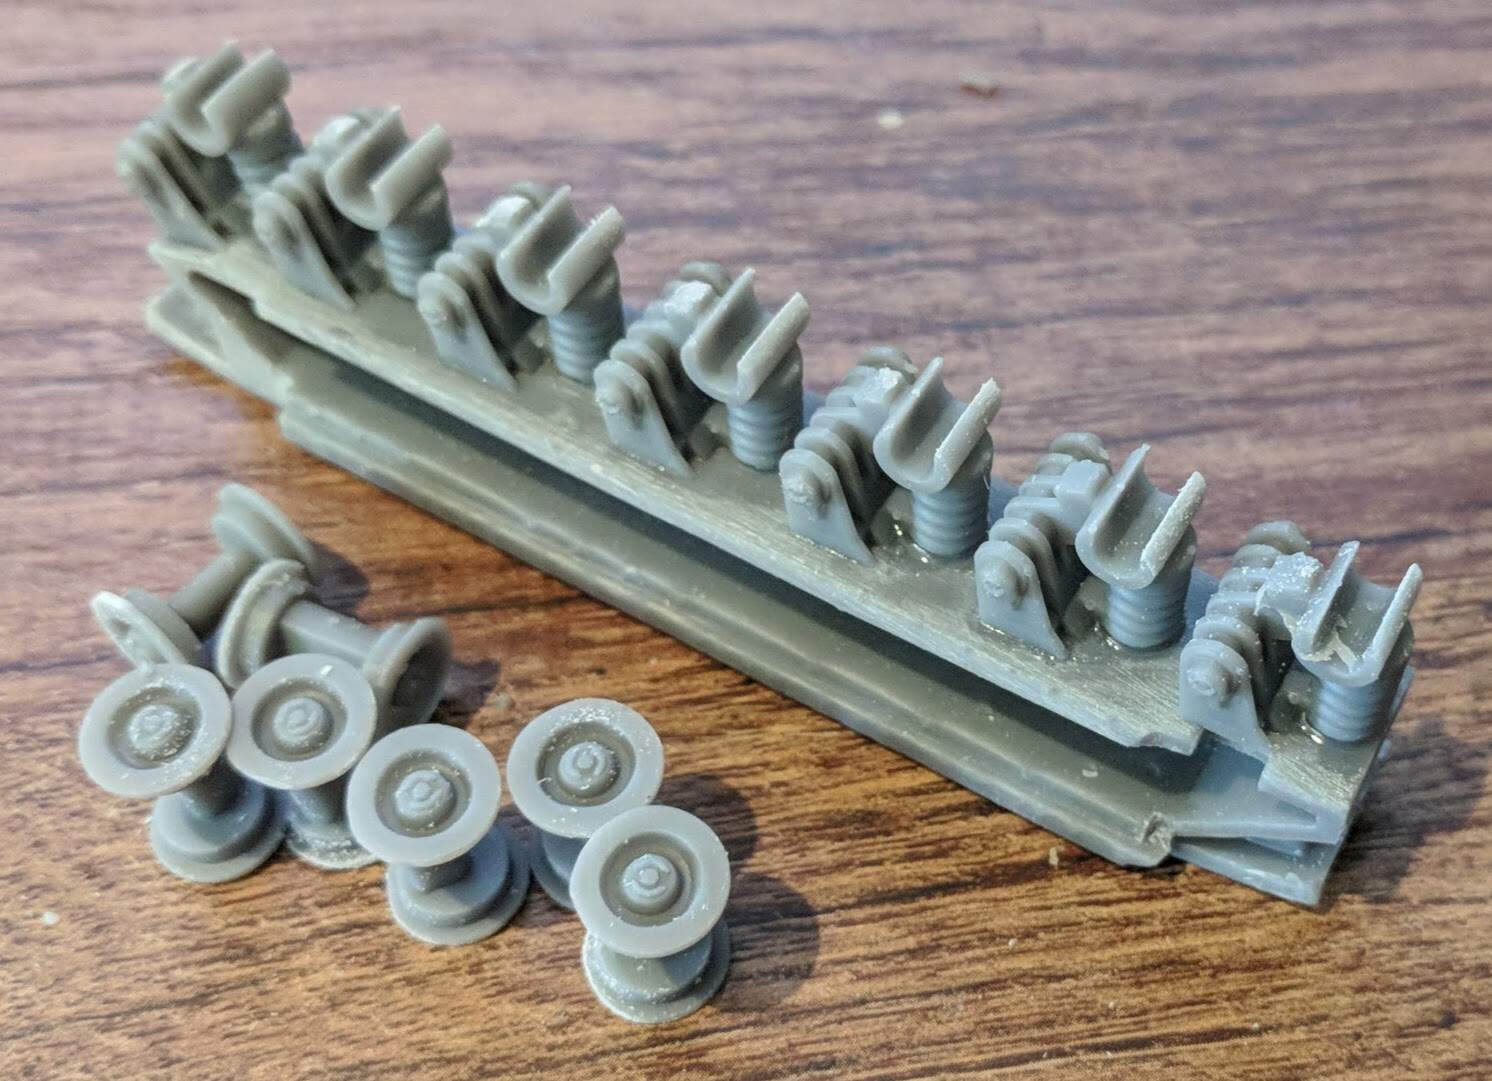
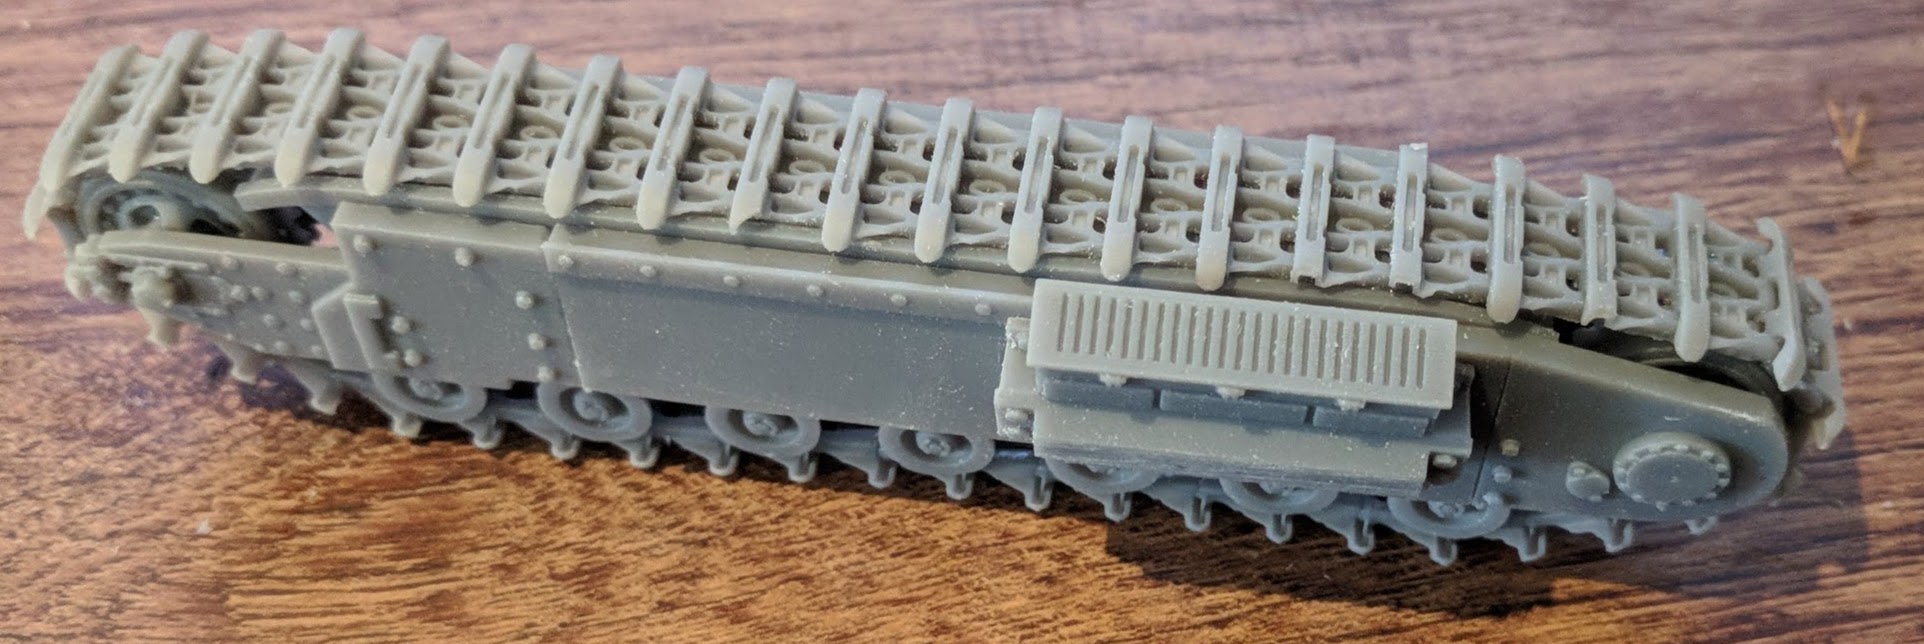
Pile o’ bits.
Removed from support, but not cleaned up properly. I’ve managed to trim some of the cleats with more enthusiasm than is normally warranted. Far too excited I guess. It’s a test anyway.
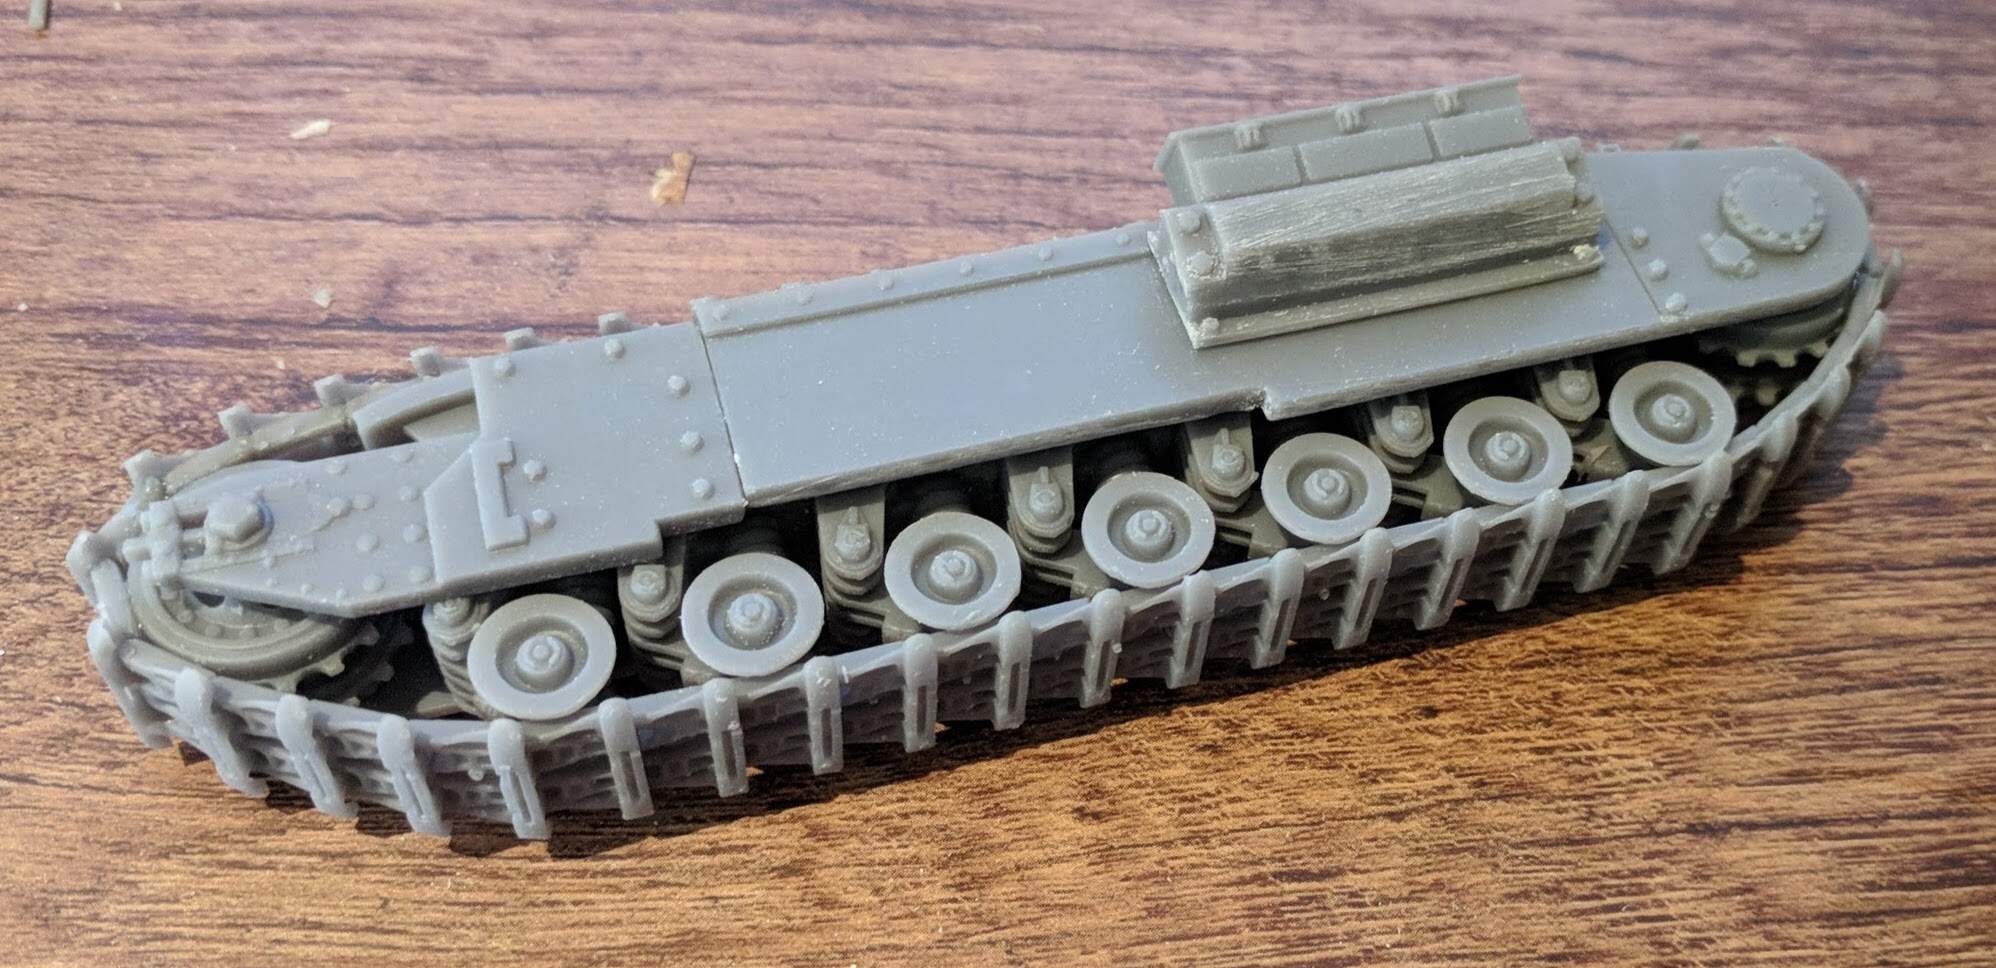
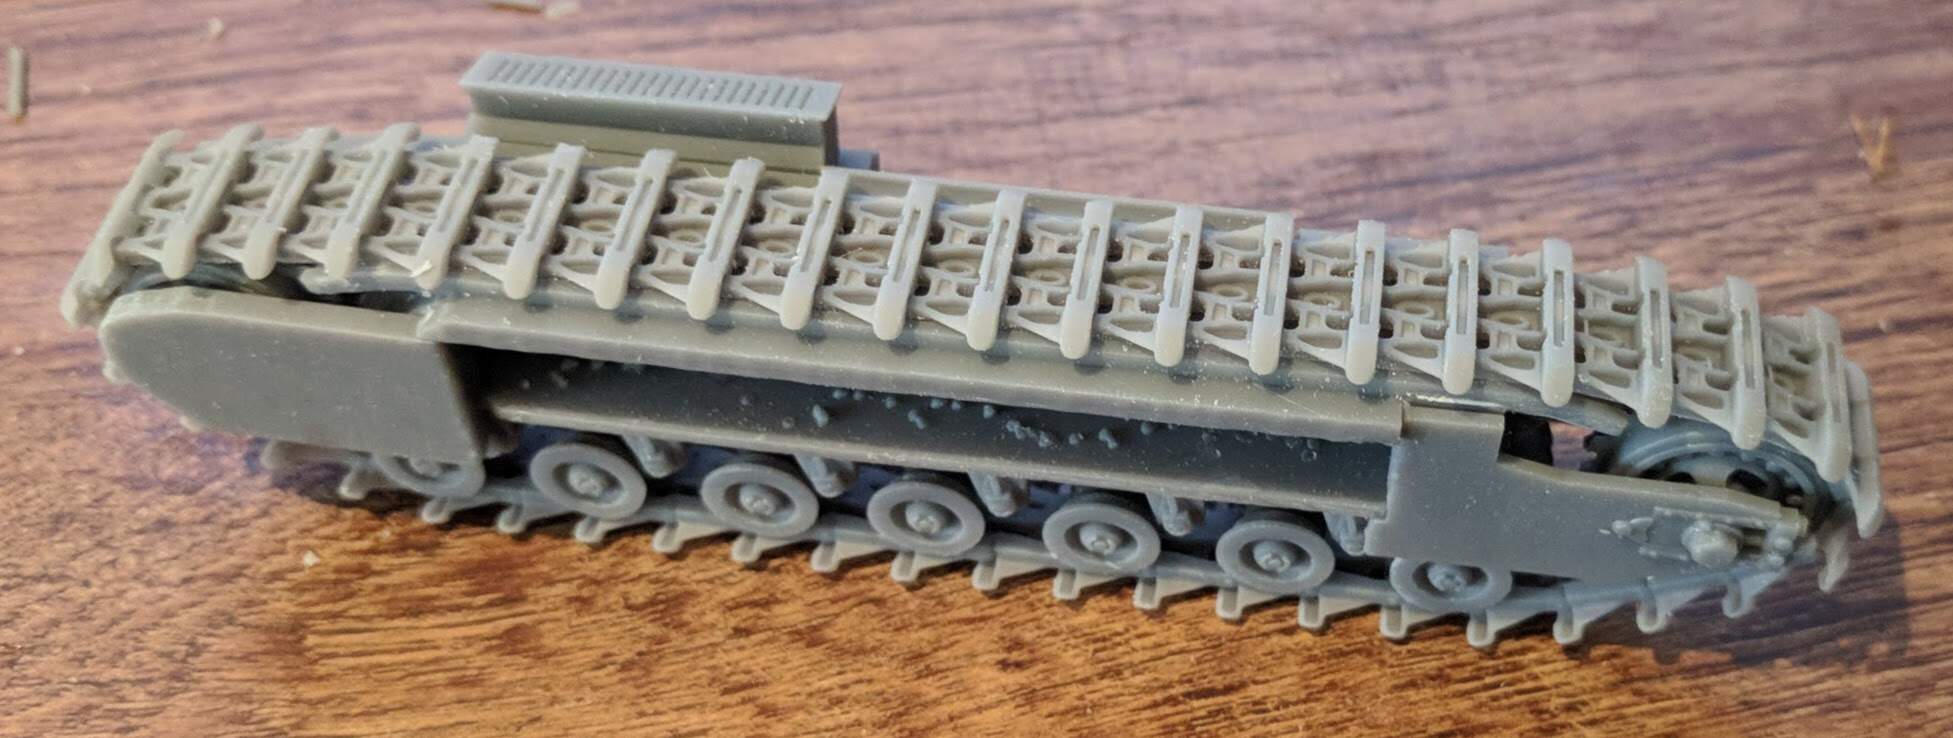
…aaaand test (mostly) successful. A few edits to be made, but very happy overall.
I love it.
Looks really good
Mal
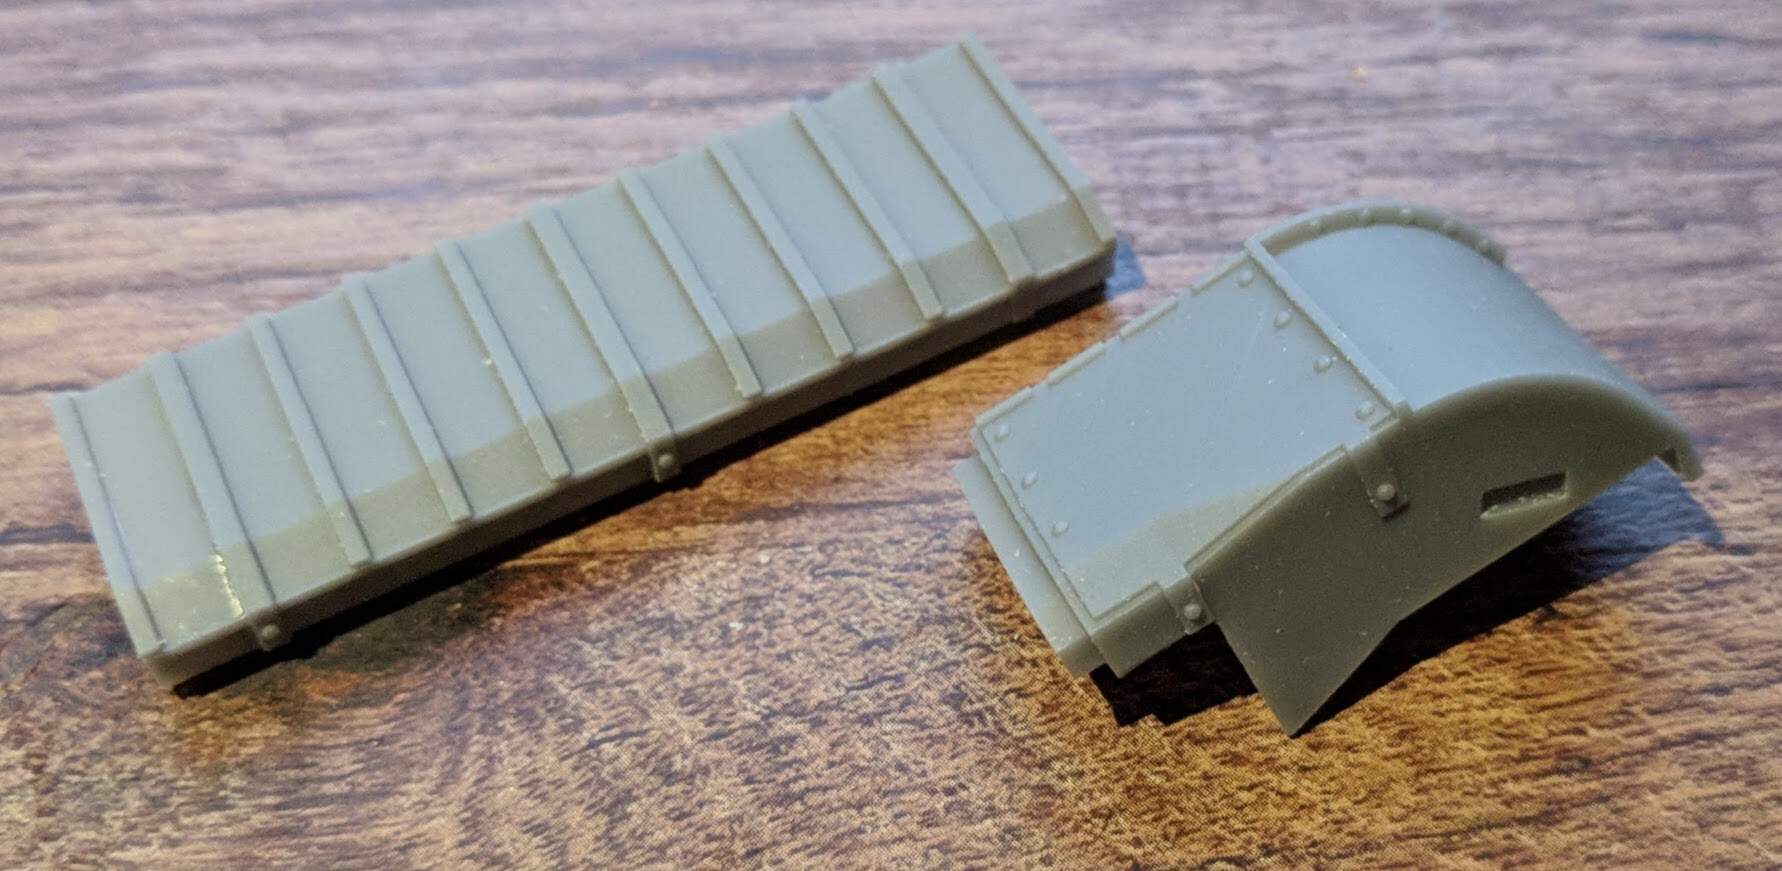
Second Sponson test print Success! All the bits fit.
Right hand side this time.
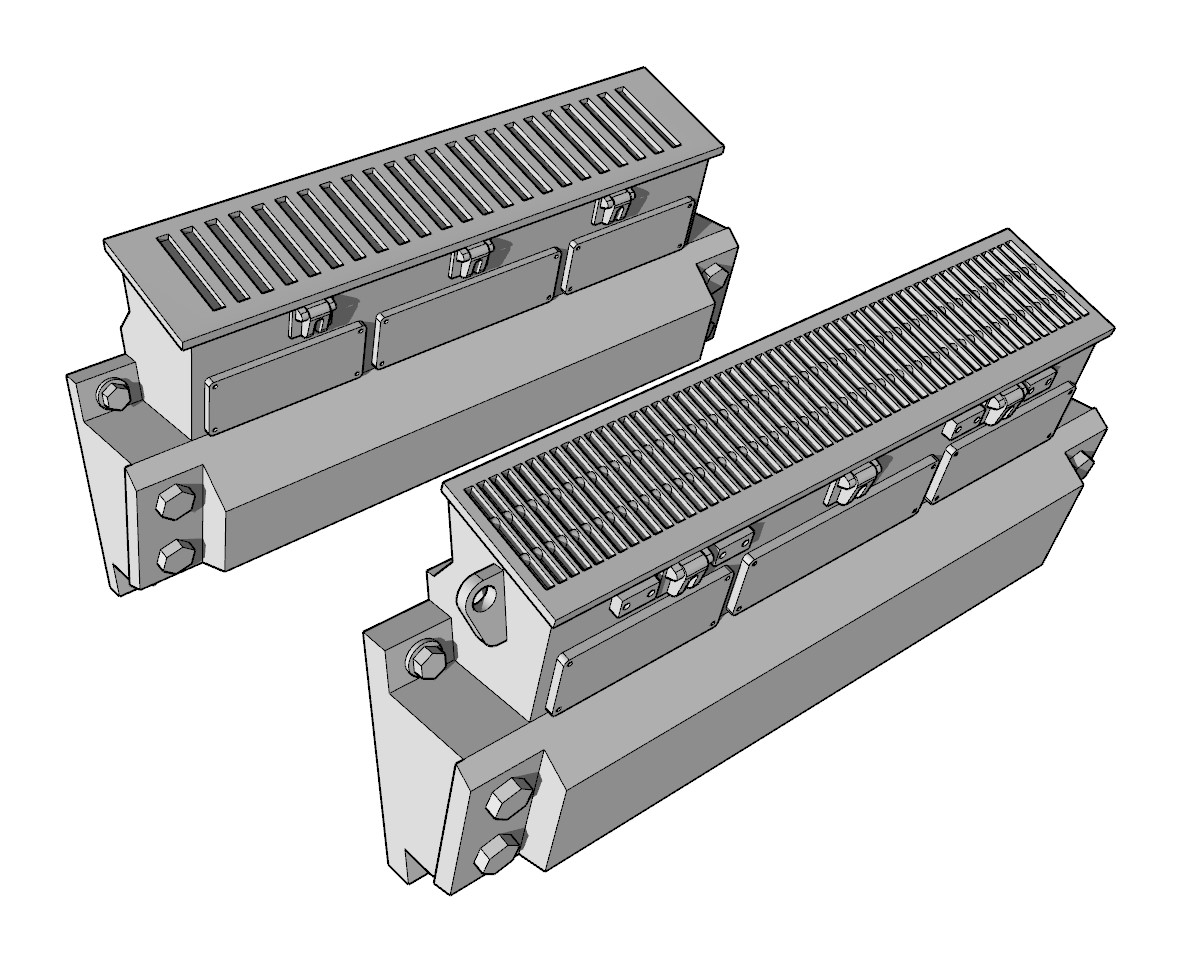
Added some details to the side intake…
…and finished up the fenders…
…printing now…
Woot. Great success! Kinda.
I have, of course, duly printed the wrong side fenders. that is, I’ve printed left handed ones, and I need right handed ones to test. Sigh.
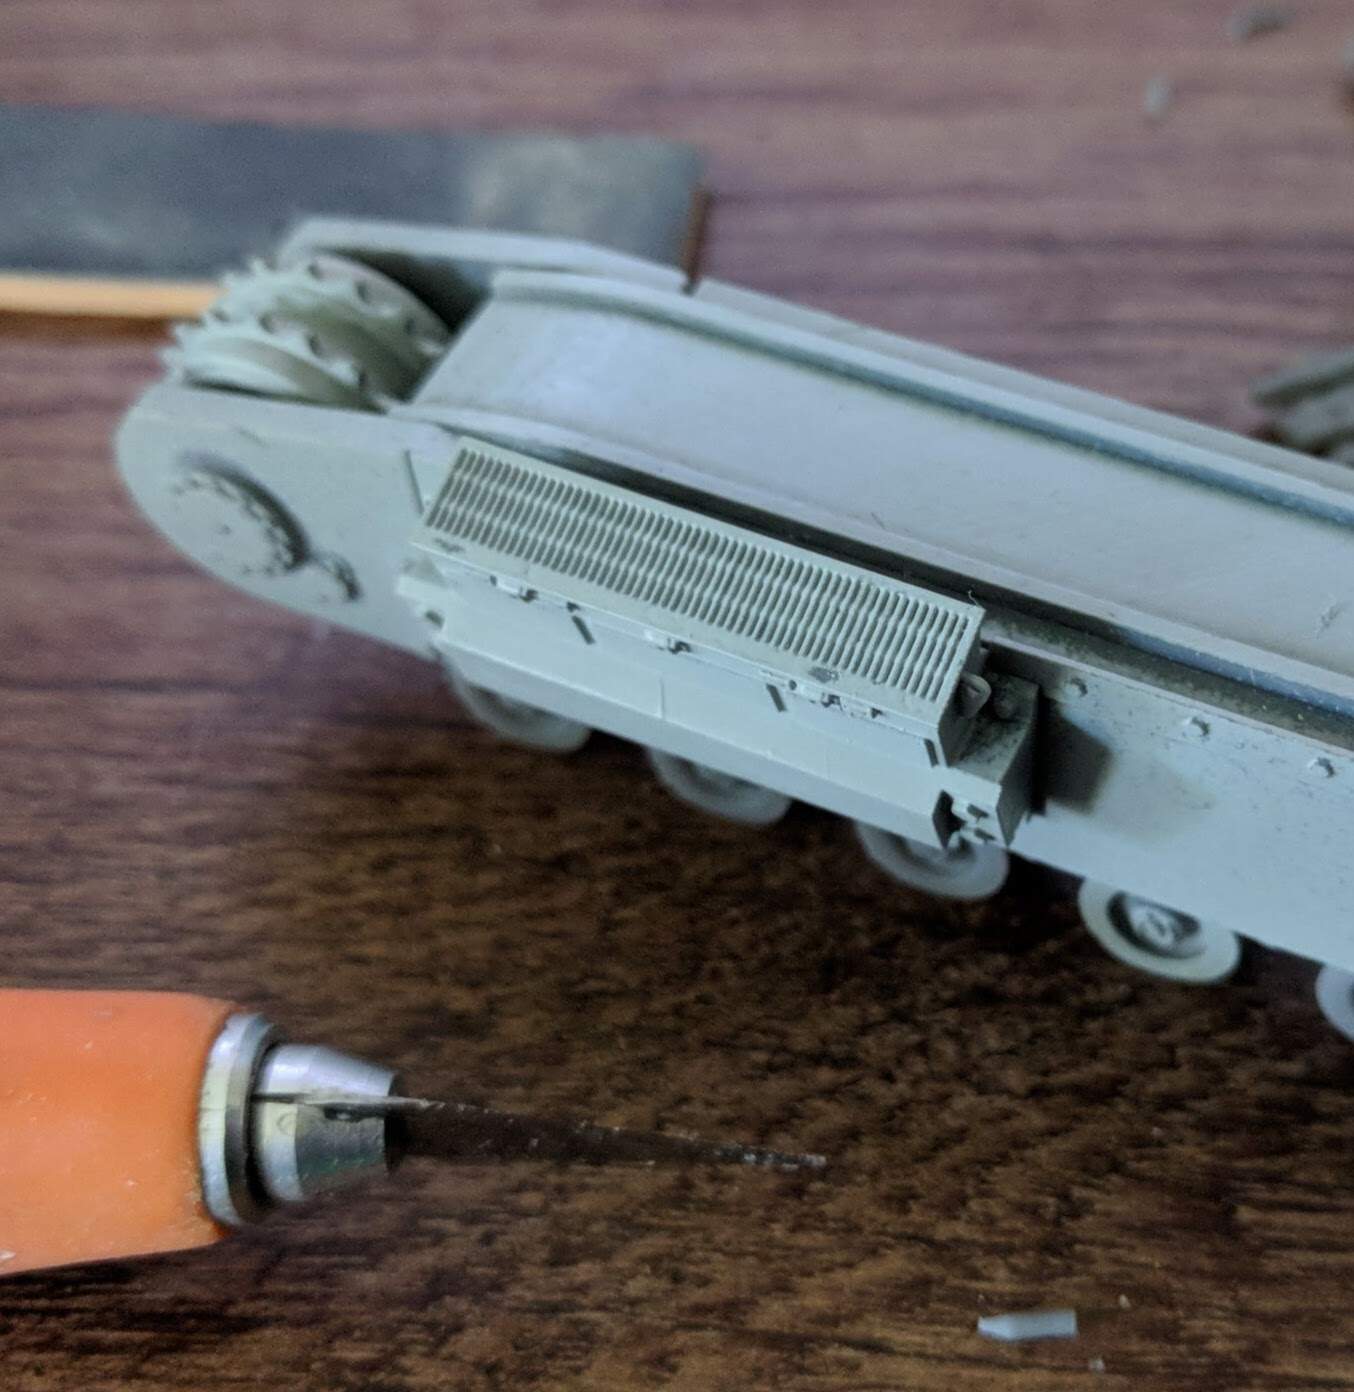
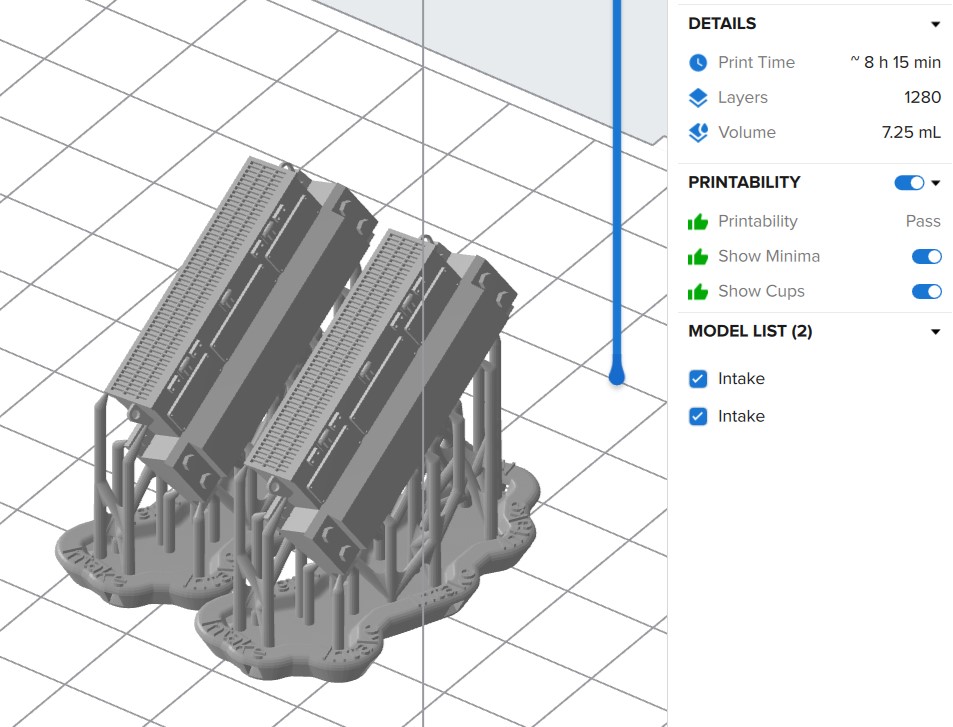
Anyhoo, The intake vents turned out real good, but I’m going to try them at .025mm resolution instead of .050mm to see if they get noticeably better. Here’s a pic of the ‘low res’ intake with some primer on.
High res all queued up:
While I’m waiting eight hours for that to print, I’ll work on the hull details.