Yep. there will be latches and tools. And finish off the turret bin and smoke discharger brackets.
This will take a while, but it’s the little details that really help sell the model.
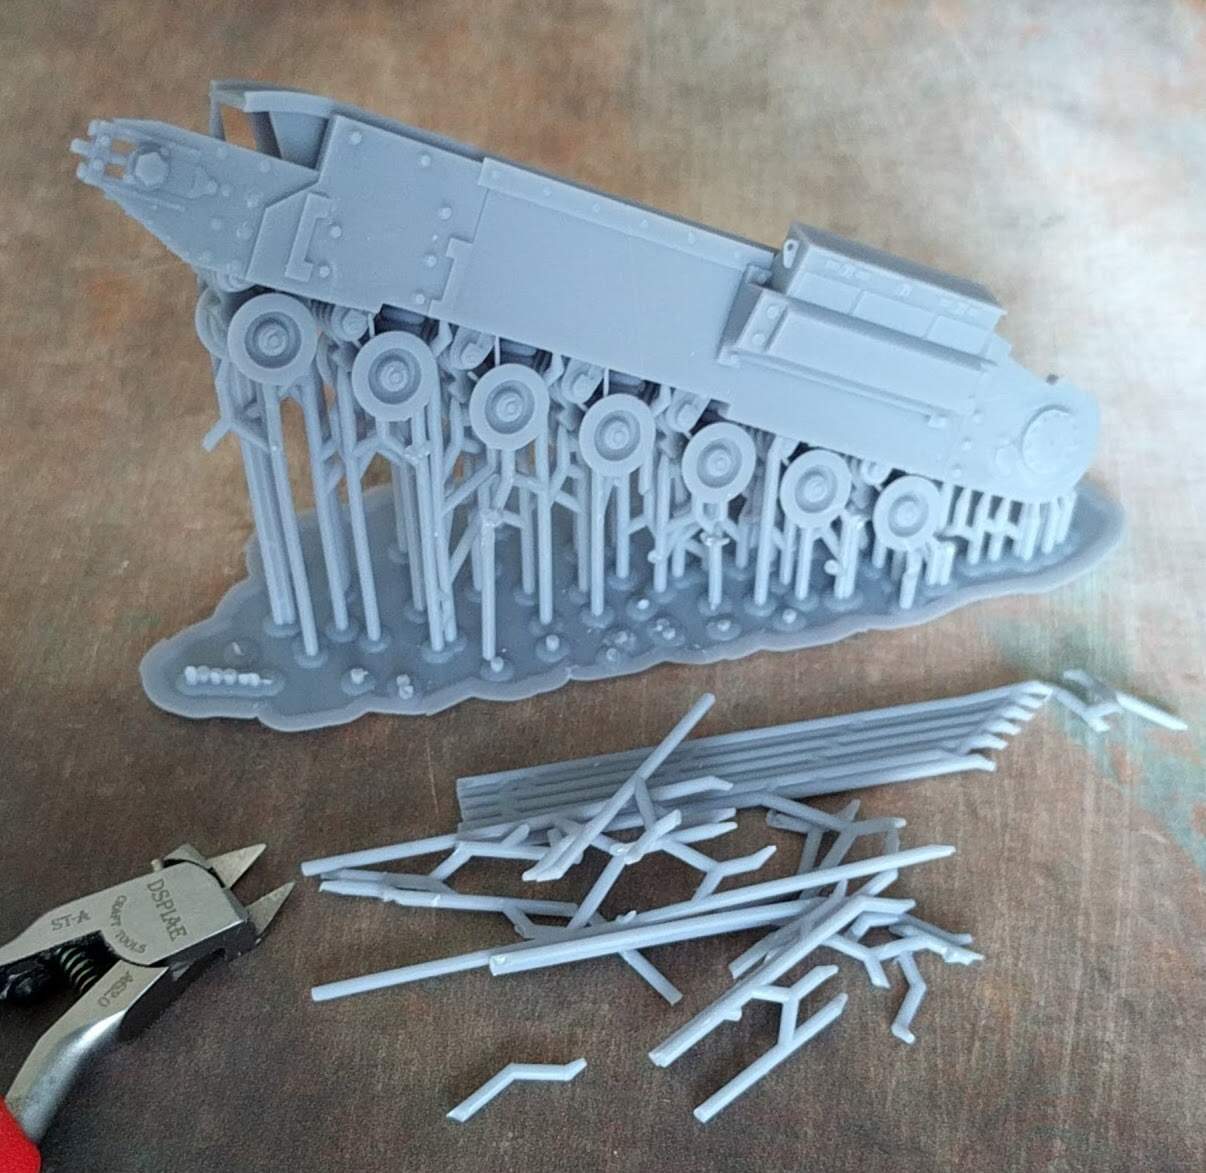
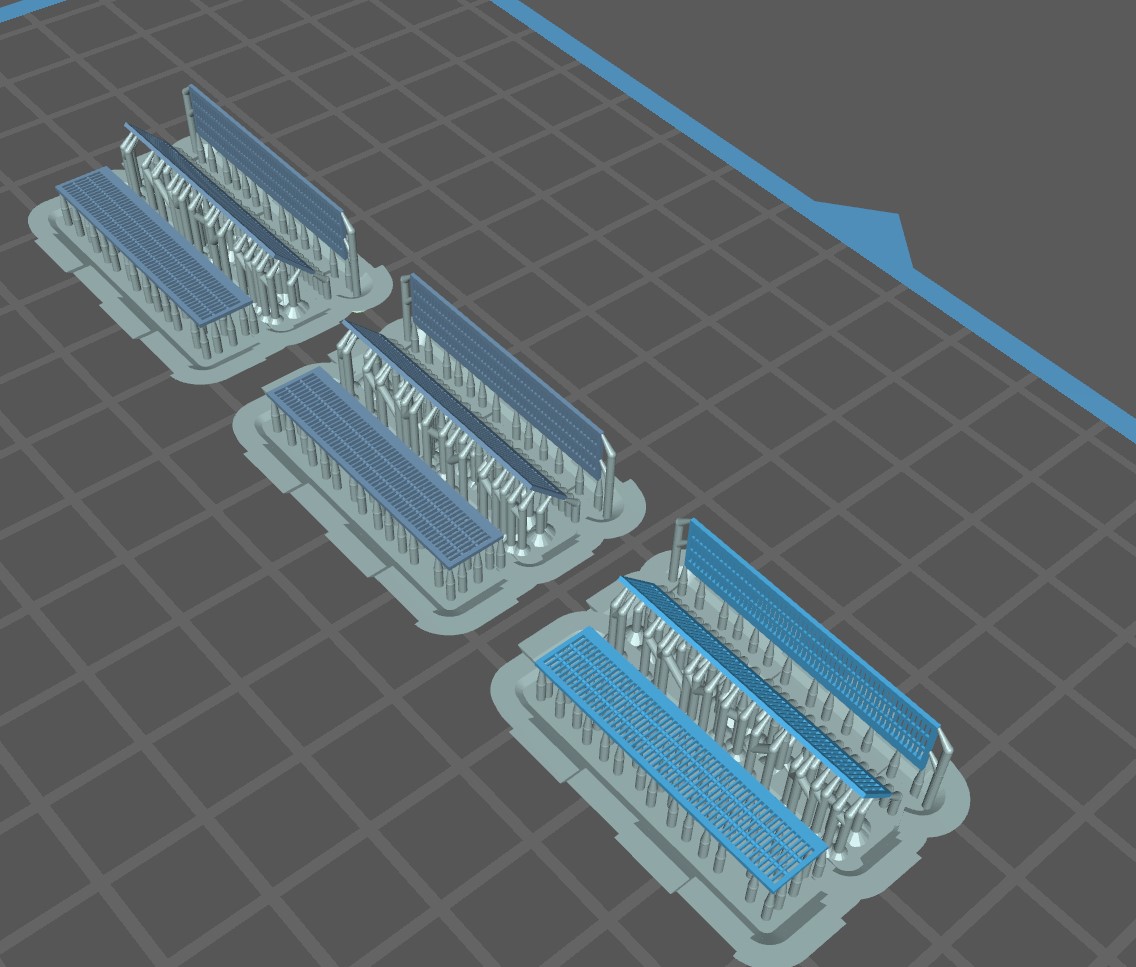
Left hand track sponson set up for a print:
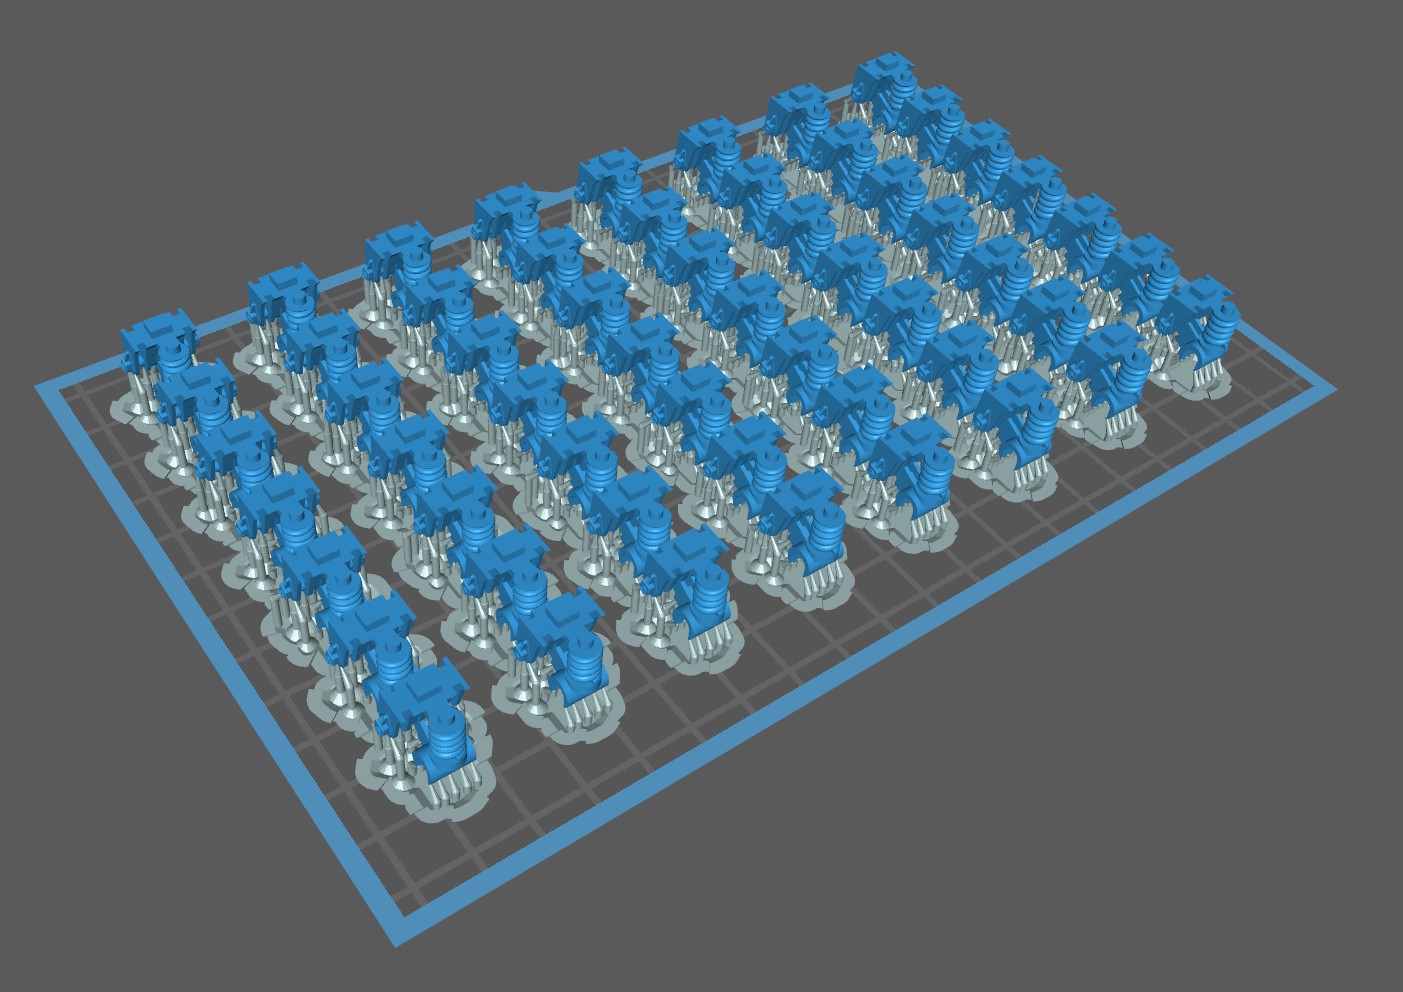
this a very not optimised layout, and as it stands will be a 10 hour print. I can do a lot to makes things better for production, like printing the large central part separately at a lower resolution (it’s mostly hidden on the finished model) and printing all of the suspension and wheels a a huge batch. The time it takes is about the number of layers, so printing a bunch of similarly elevated components on a single plate is more efficient.
See?: enough suspension units for 4 kits in about 3 hours.
4 Likes
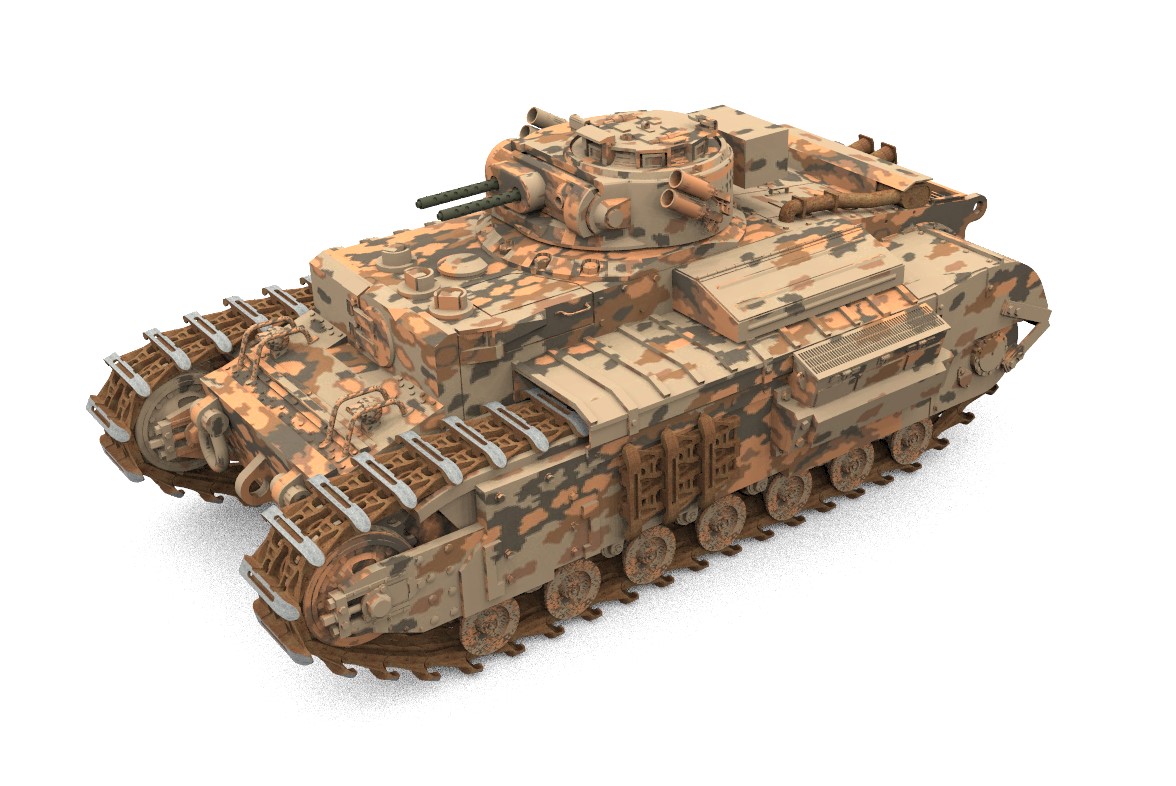
Righto, because it’s super important to be sure the Wehraboos are not left out, some obligatory captured versions.
Okay, the second one IS kinda fun. And as an added bonus, now I know how I’m going to paint my Maus.
6 Likes
I mean I’m ok leaving them out, but you’re right, that bottom one is the business.
4 Likes
I’ll have a test build of the track unit up shortly.
In the meantime, This:
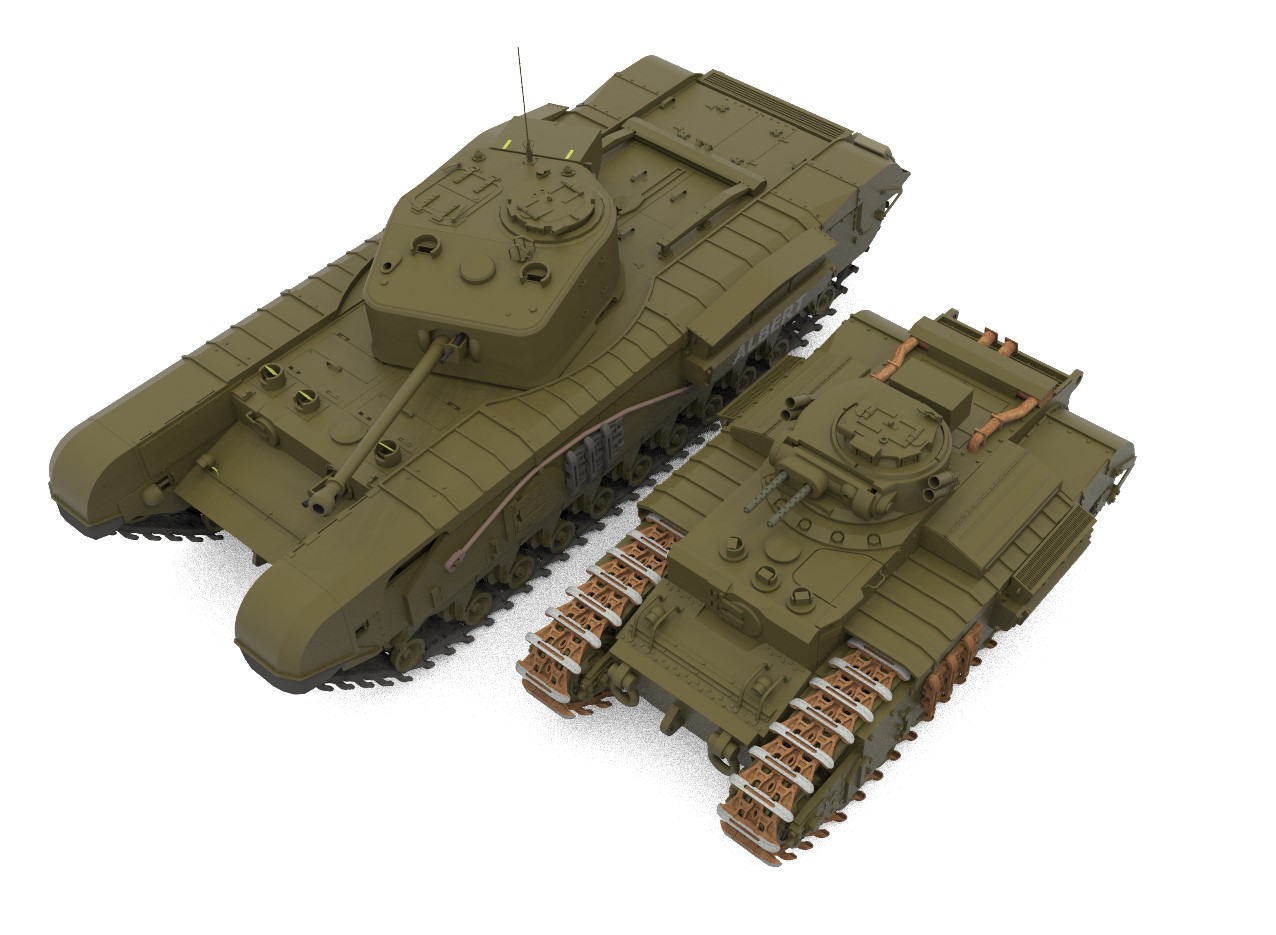
If a Churchill and Matilda 1 love each other Very much …
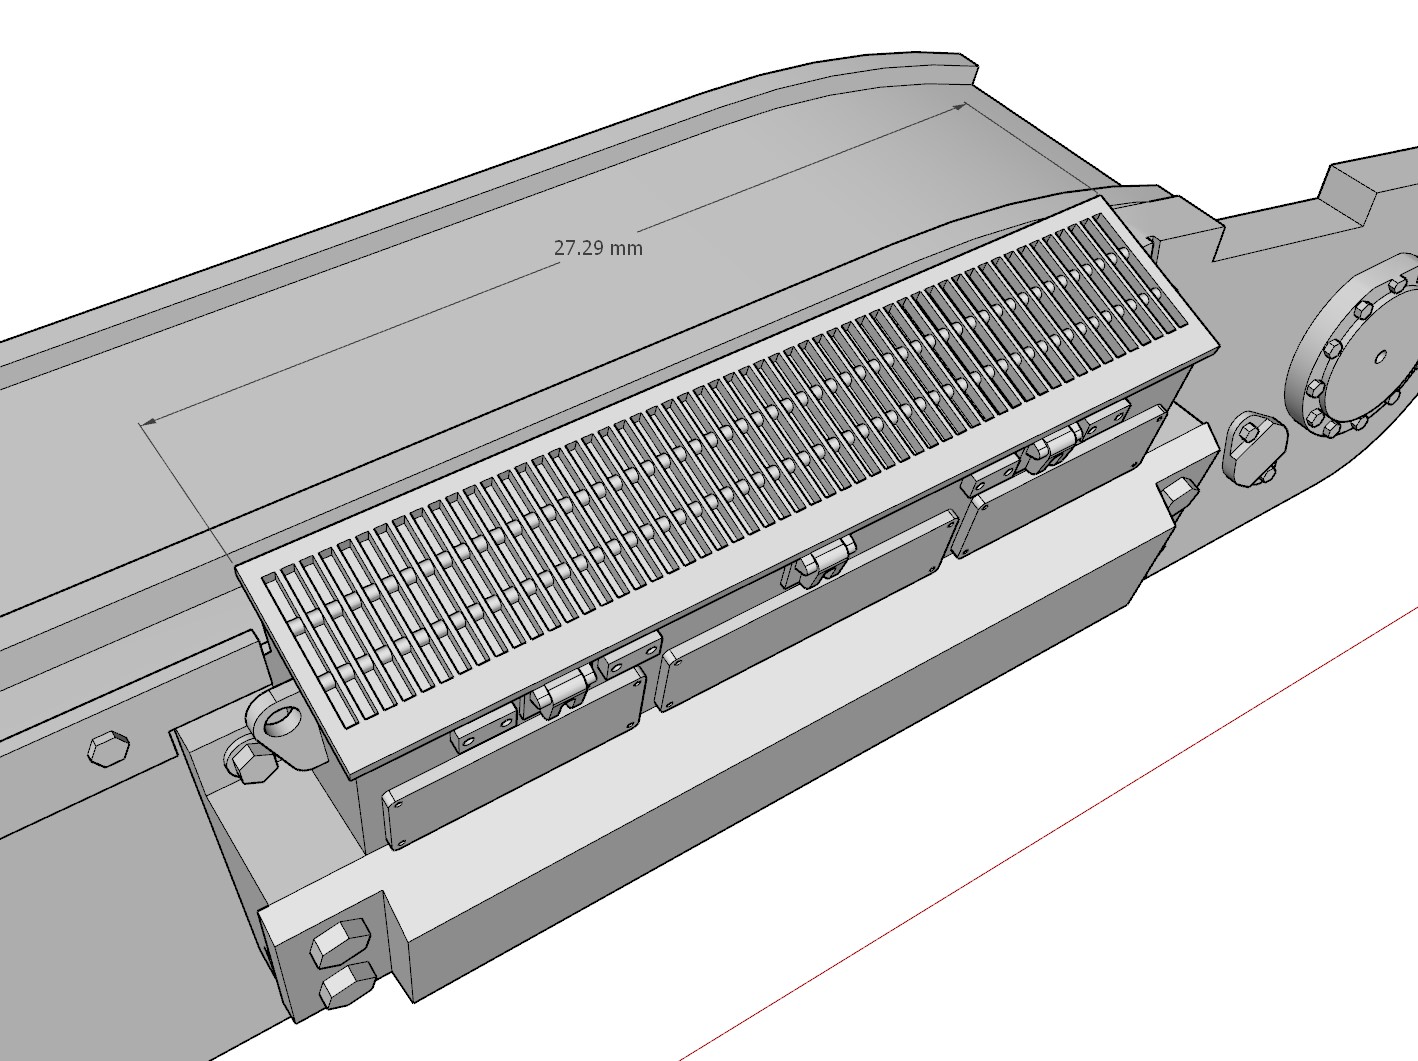
(I borrowed somebody elses CAD for the comparison. Not MY Model) Things like the tracks and suspension and cupola are standard parts from a Churchill or other mid to late war British vehicles.
6 Likes
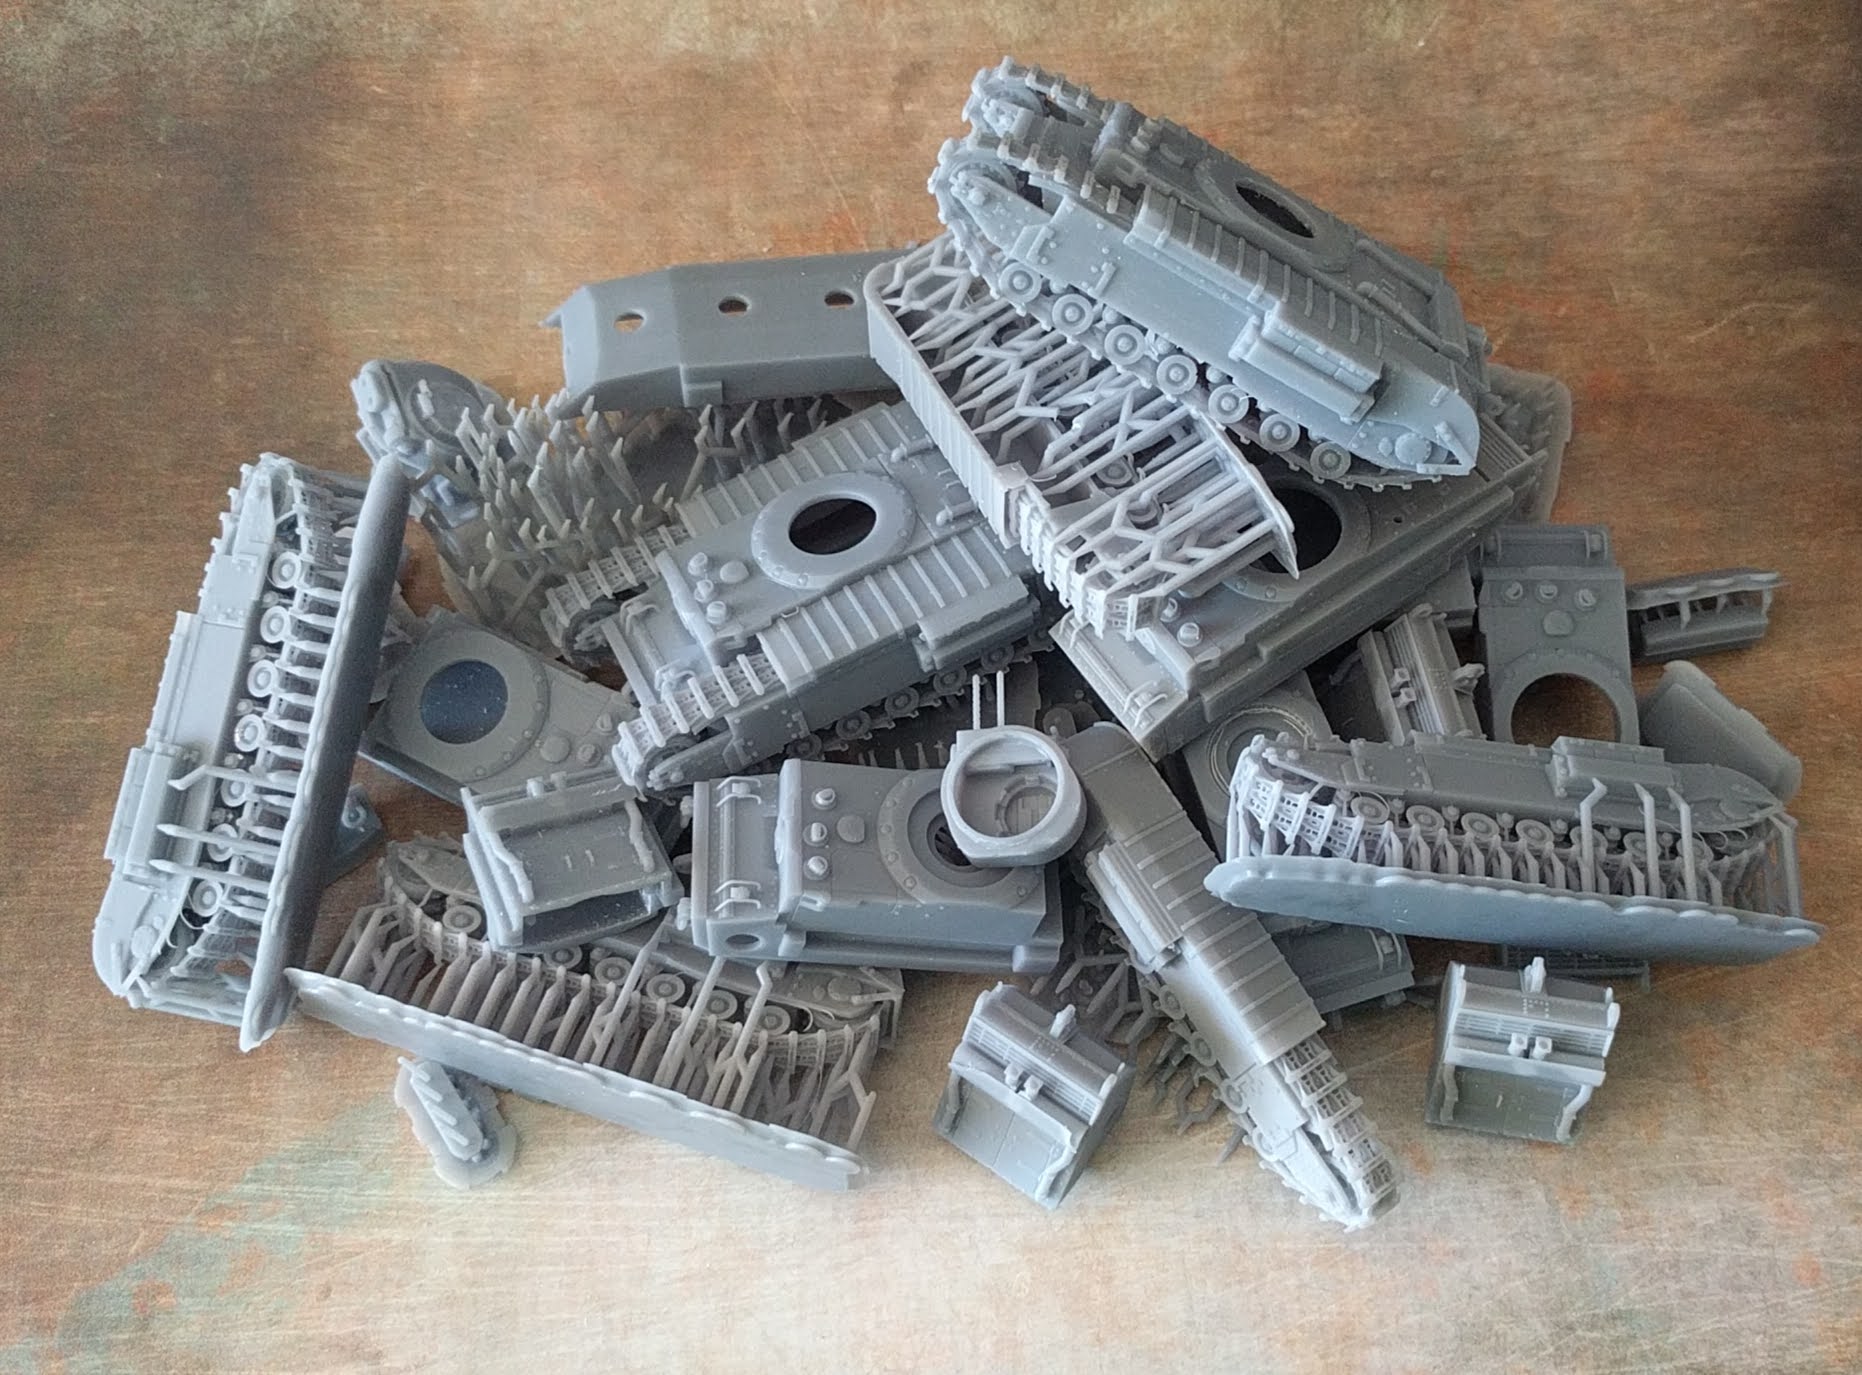
A little more experimenting for best printness.
I’ve tried combining a bunch of parts to cut down on print times, but the amount of support material becomes a bit too scary.
So I’m going to print the suspension and wheels separately. The sponsons are a little awkward from a logistical standpoint, and that I can only print three at a time and they will be a 6 hour print. This model could easily turn out to be a bit pricey. I’ll try to keep it a comparable price to other similar kits on the market though. The wee 1/72 version is a MUCH simpler exercise, and significantly less printer intensive.
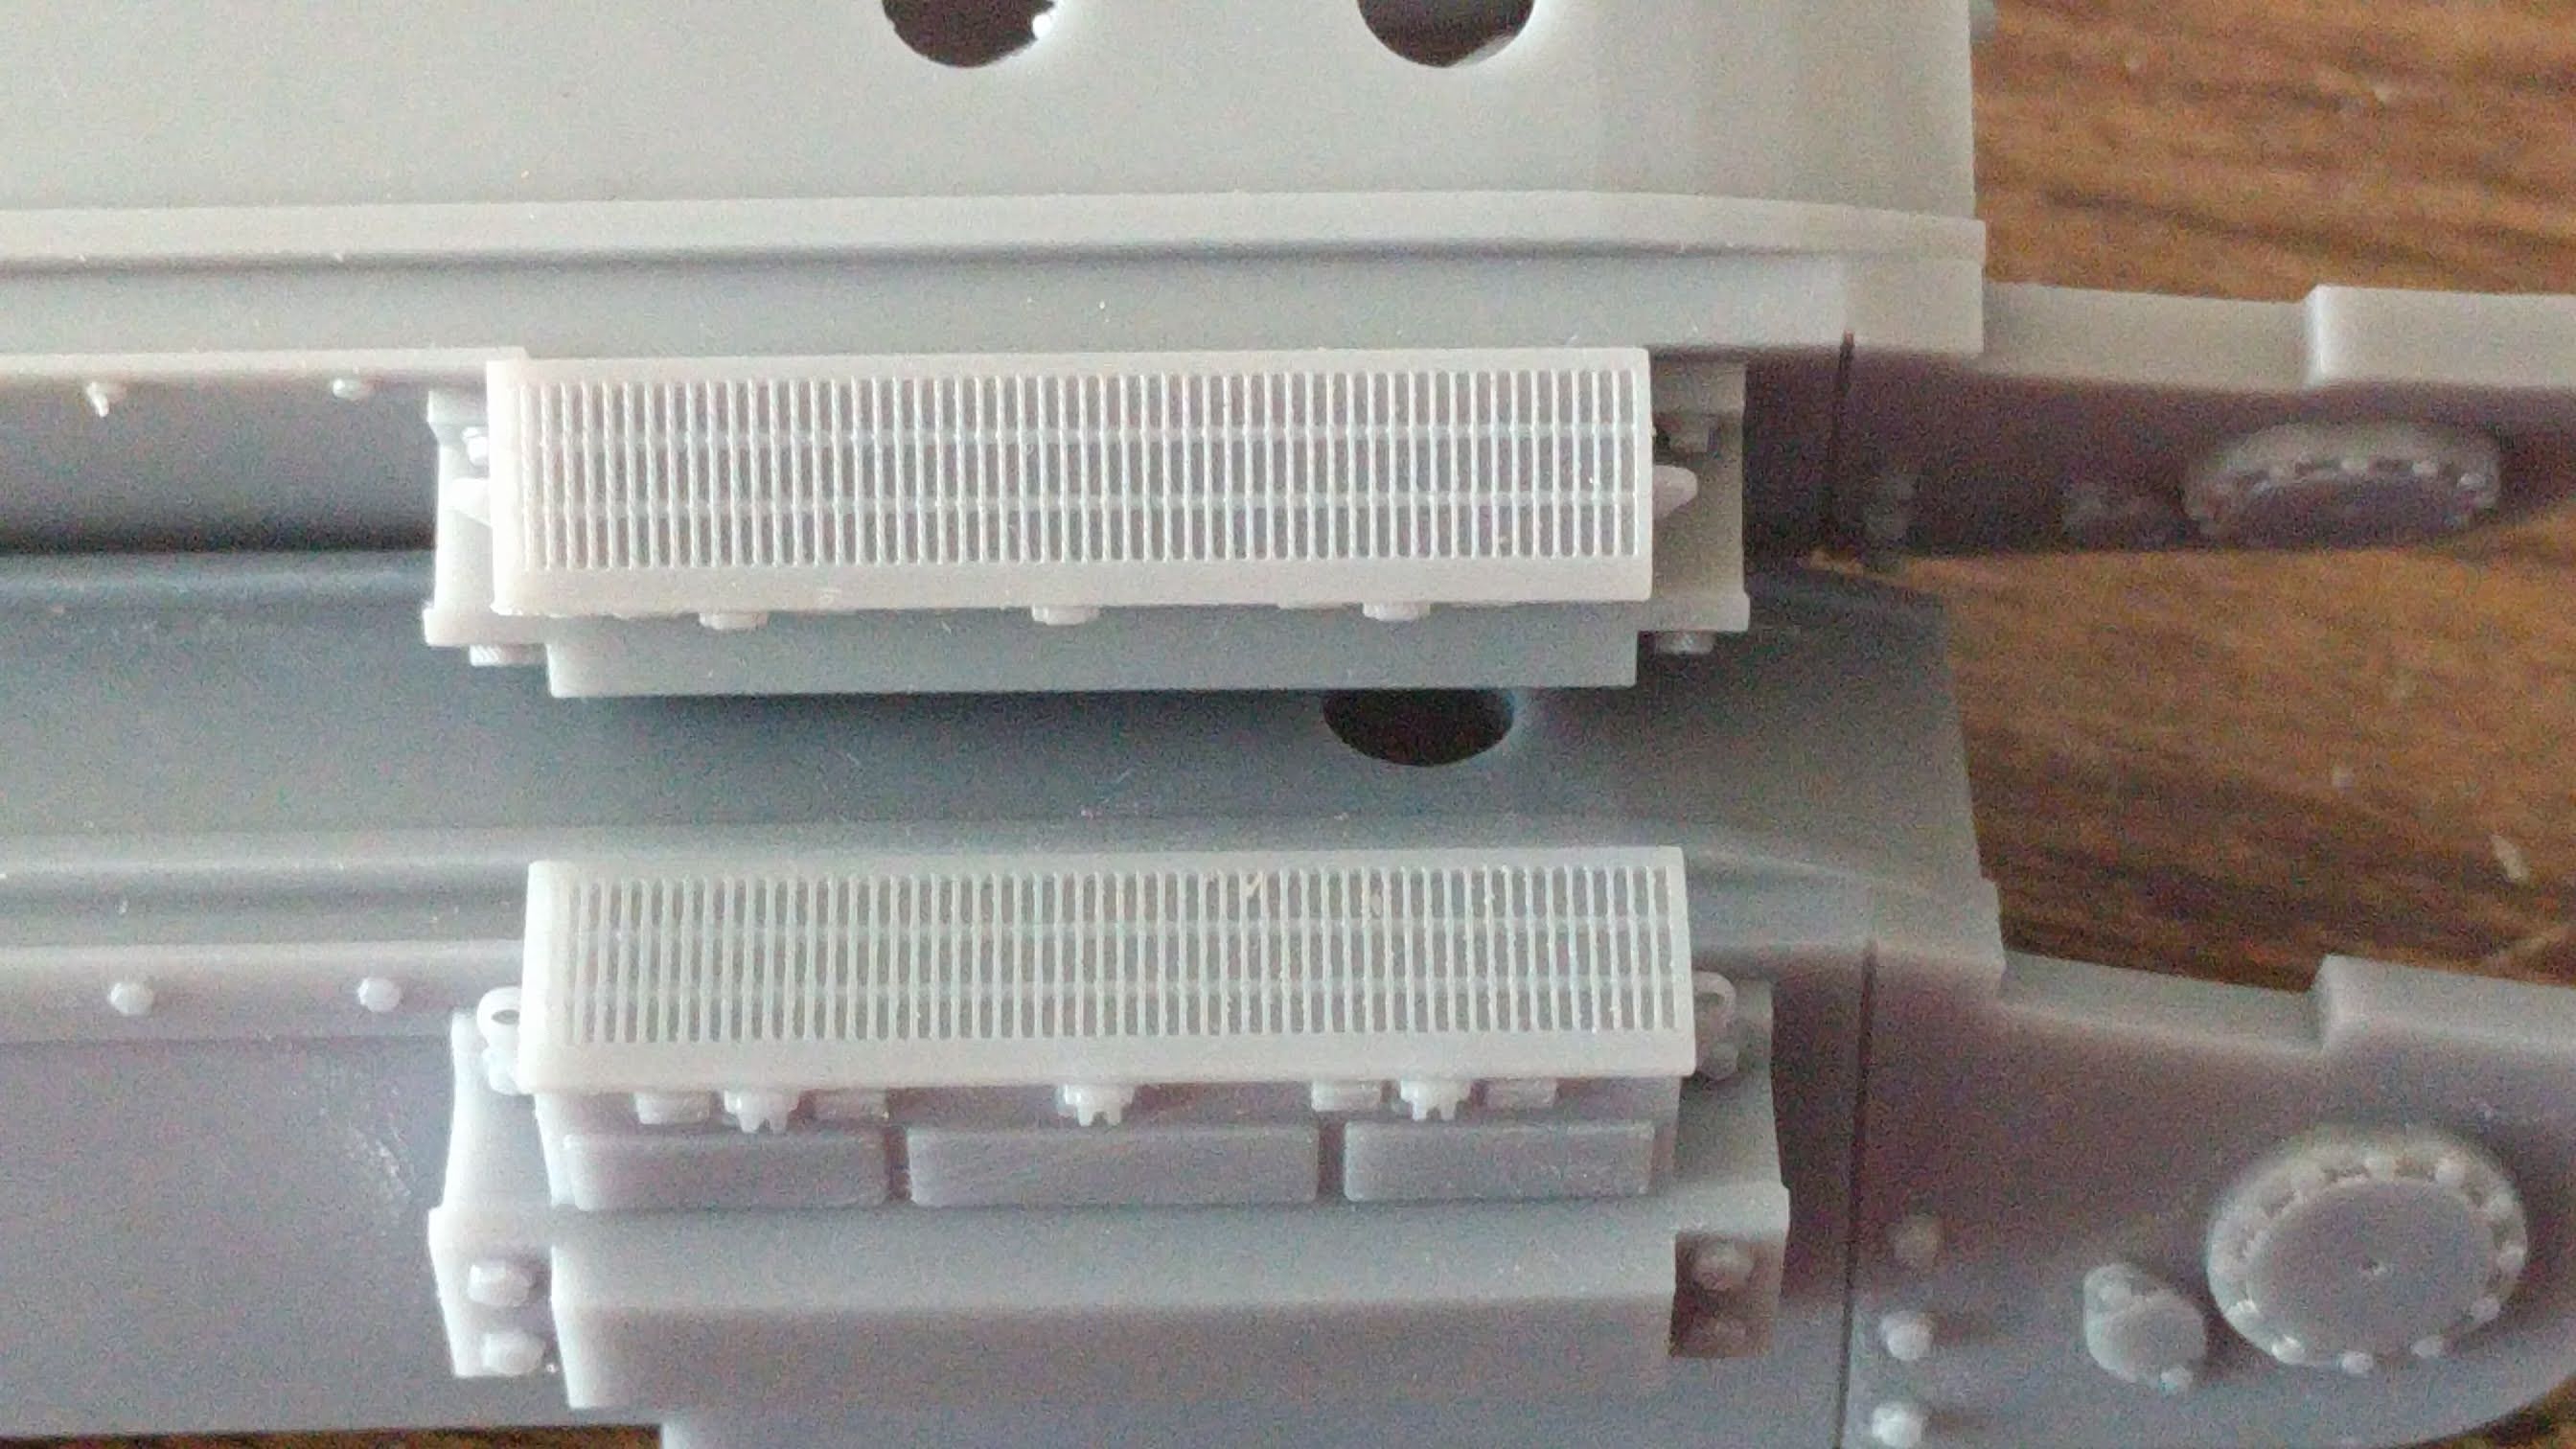
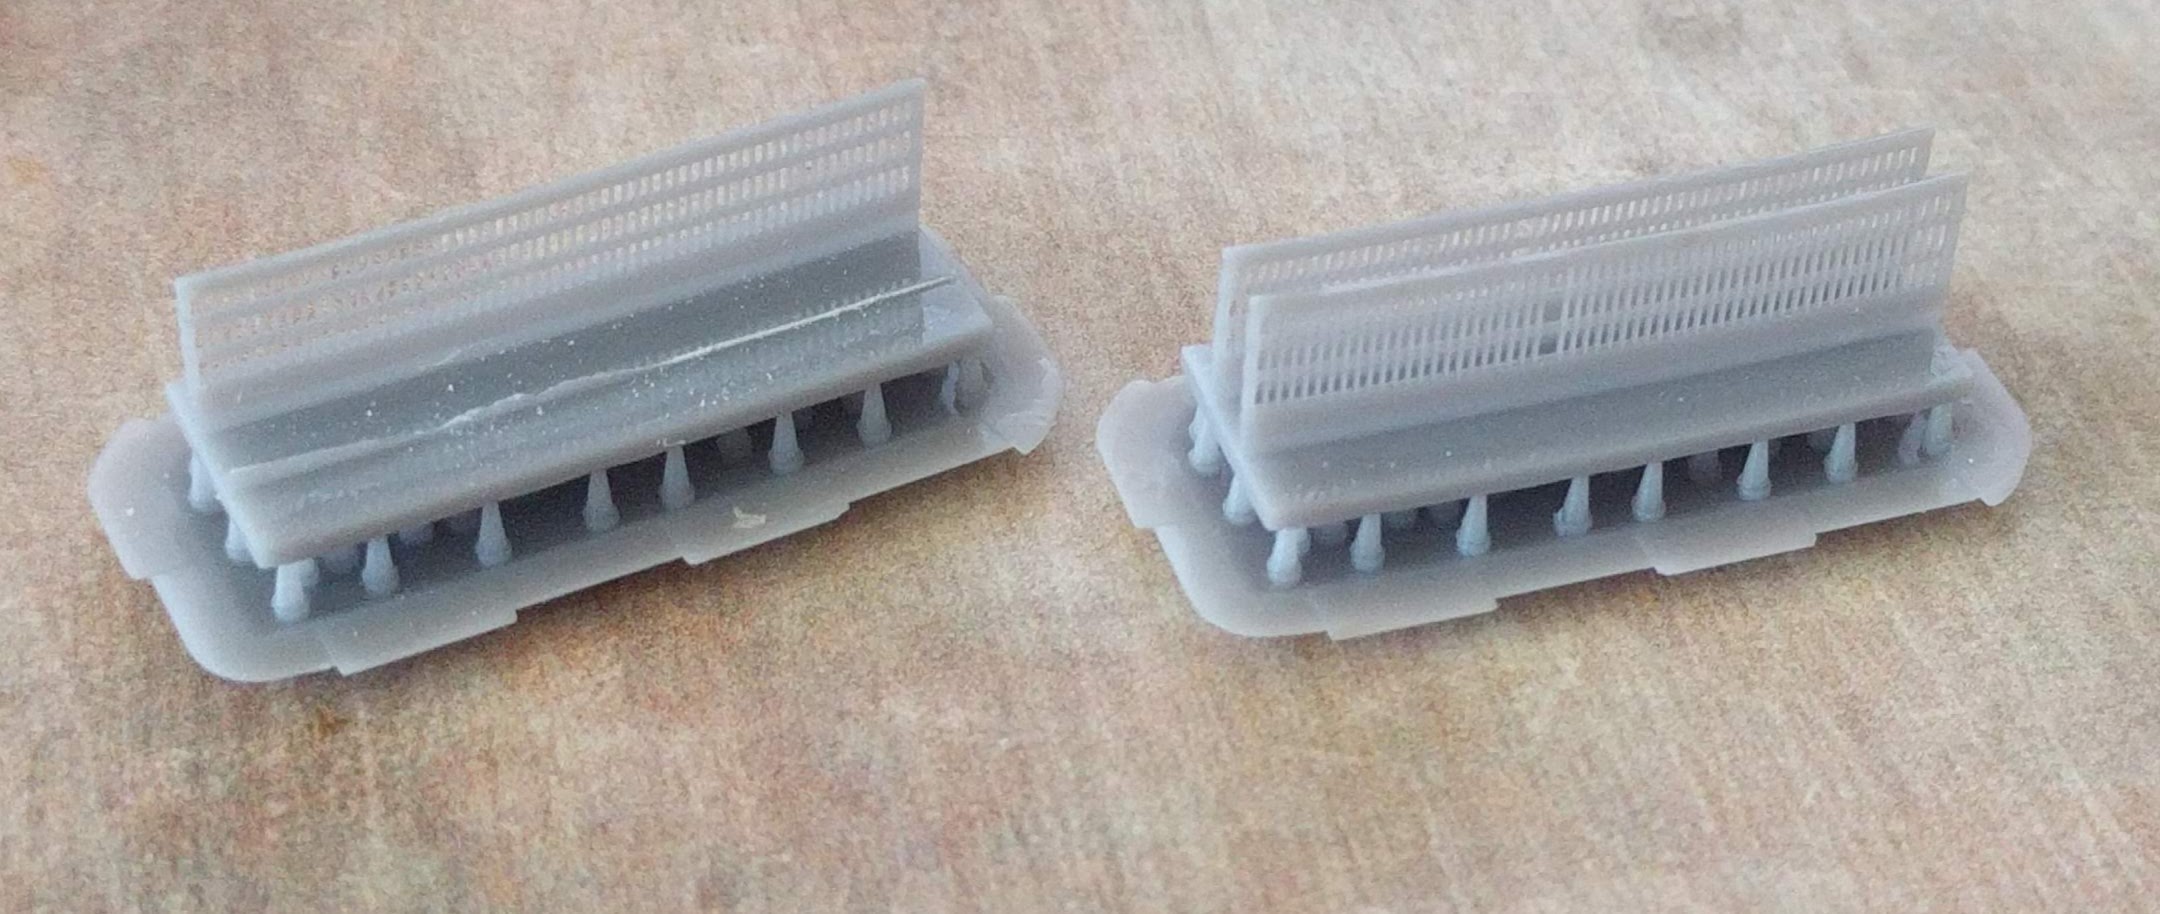
An interesting comparison:
The top sponson is printed at a resolution of 0.05, and is about five and a half hours.
The bottom is 0.02 and closer to eleven.
there is a difference, but not much. I might throw some paint on them and see how they come up. Suffice to say, I would need a second printer to make producing these viable.
Edit: note these vents are real small. .3mm wide between louvers.
5 Likes
Make the vents separate parts and print the rest of the sponsoon
at a more efficient resolution?
1 Like
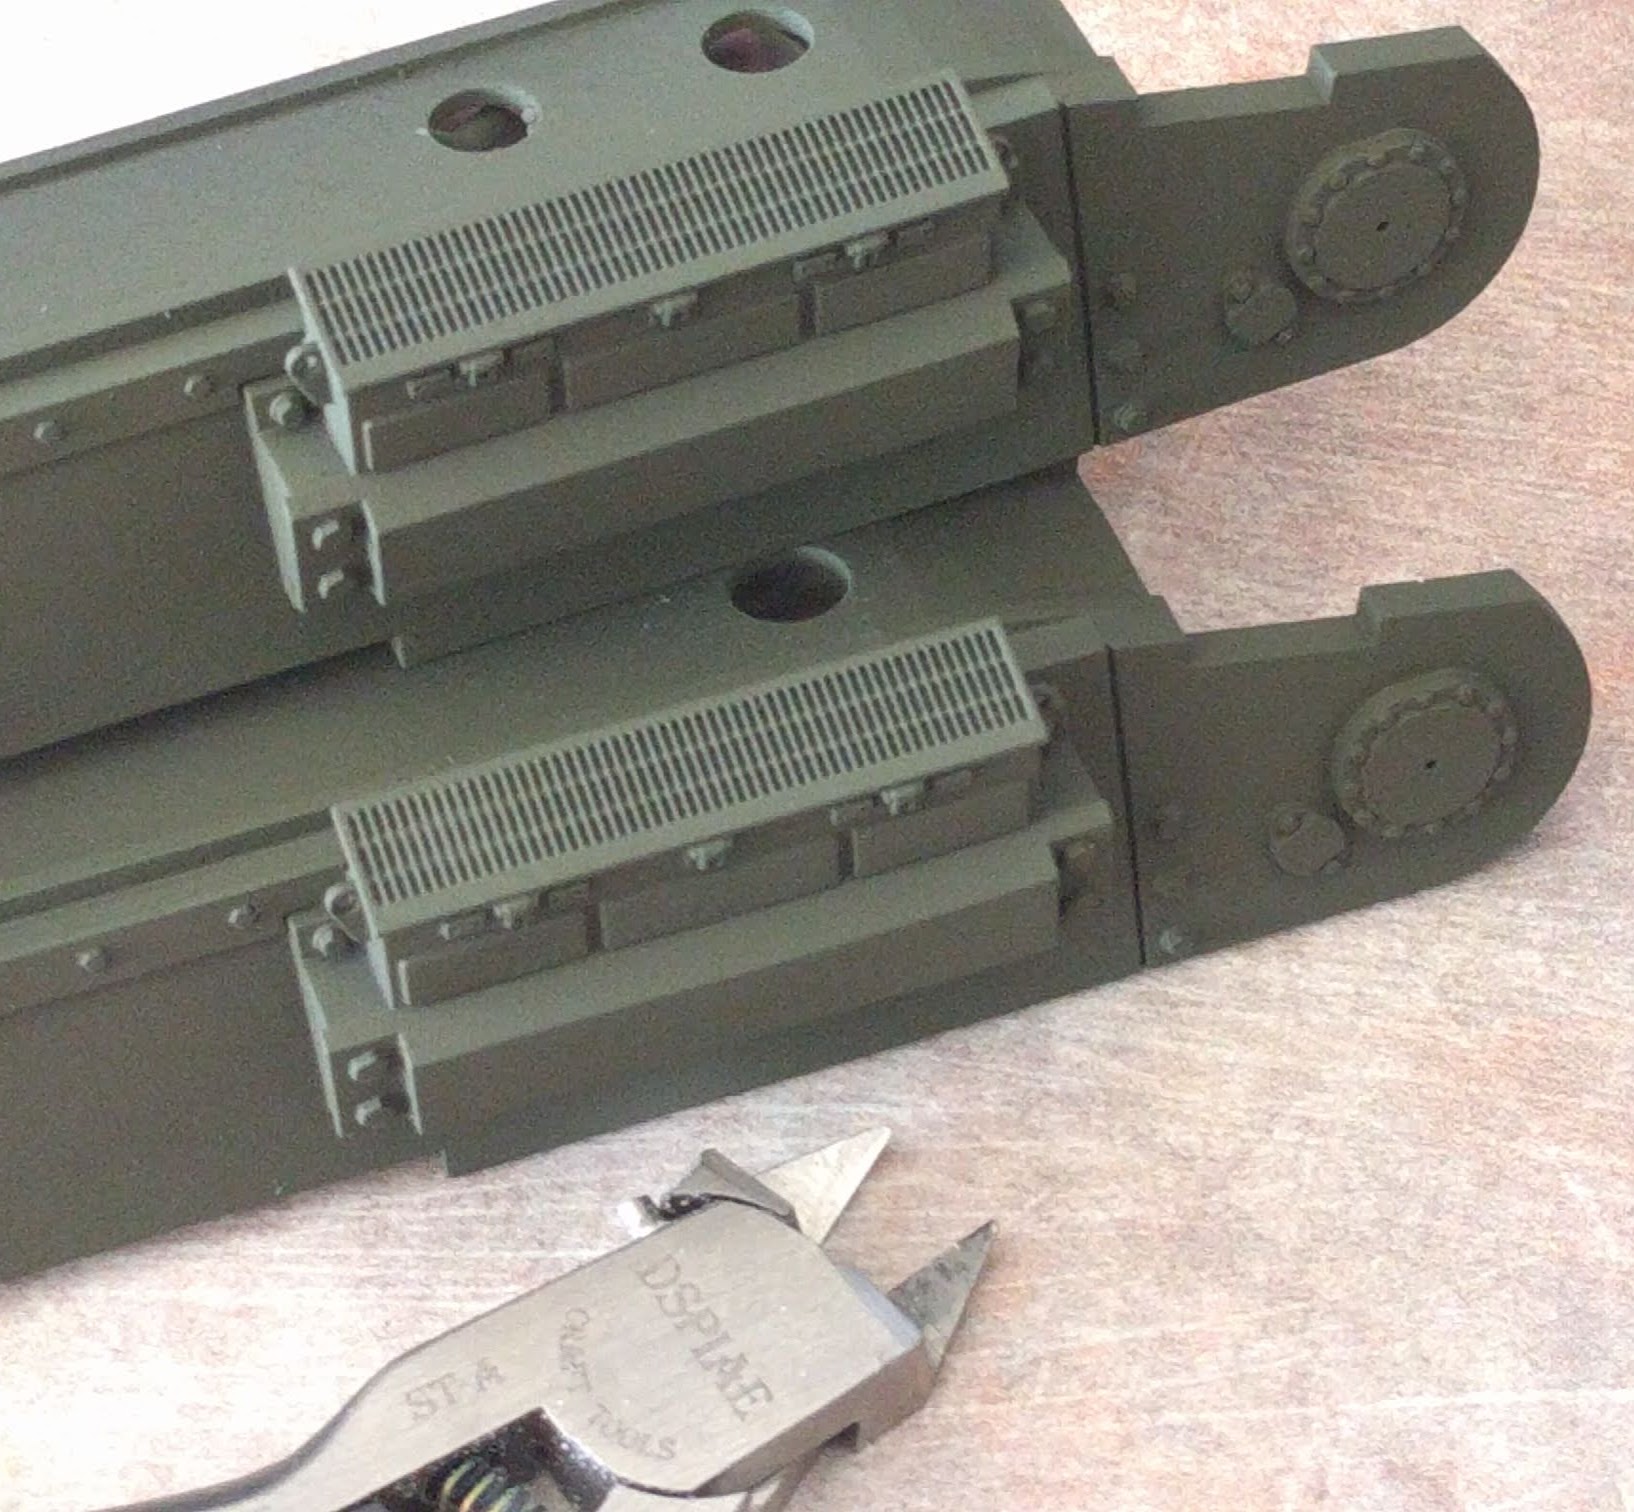
Now with a nice layer or two of AK SCC 15. At least it would be, if it weren’t so darn hot making the paint a tad pebbly. Ah well, didn’t notice until the camera magnified the bejebuz out of it.
again with the finer resolution at the bottom. I don’t feel there’s enough difference to be worried about.
There IS a tiny amount of diagonal banding visible on the lower res version, but two swipes of #800 sandpaper would eliminate that.
I’ll have one more go with printing just the grill at a very fine resolution, but I suspect is may be too prone to warping (but would be far more viable than printing the whole sponson at max res…).
5 Likes
one of the problems I’m having was warping when I tried printing the whole vent box separately. I’m going to try just the grill itself.
I wrote vents when I actually meant just the grills 
I can understand that the whole vent box with a flimsy grill on top might be prone to warping.
Those who want the grille openings to be real openings can sand it down gently from the backside.
I presume that printing with open holes doesn’t work
dunno yet. I’m going to give it a go. Seems a bit overkill though.
Modelling was so much easier before digital cameras! 
That’s a stunning model - even at low-res.
2 Likes
The lower resolution looks absolutely sharp. That’s a beautiful thing Craig!
1 Like
Man that 2nd scheme is pretty nice - great work (stealable).
Yeah. nah.
way too bendy. I’ll have another couple of goes, at different angles and wotnot, but I don’t think they’re quite viable.
In other news, the 1/72 version progresses well.
The NEXT print test will be perfect. I just know it will…
5 Likes
Print them lying down horizontally and forget about making the openings open?
1 Like
yeah, I’ll give that a go. and at an angle. But I think it’s the thinness that’s the problem. they’re only about 0.5mm.
The ribs between the openings or the whole grille?
Whole grill. only about 0.5mm thick.
It becomes a problem of adding more support material, which makes it less wobbly, but more difficult to clean up without damage.
Going to try this:
…but I’m not super confident.
In the original print you had the grille mounted on top of the vent box with the openings closed.
My suggestion about printing the grille separately was aimed att allowing a high resolution for the grille while still being able to print the big chunk of the hull side with a lower resolution.
Would it be possible to print the grille with a backing plate, 1 to 1,5 mm, that could fit into the vent box? Print the top 2 mm of the vent box with the grille and let the modeller fix the joint line when assembling?
1 Like
Yeah, that’s my next option. The top part of the vent box should be easy enough to print separately, and has a natural join line. The Problem I’m finding is it’s very difficult to print a perfectly straight part, and when you try to mate that with another not quite straight part, the join becomes disappointing.
As much as I’m aware of the limitations, I want these to be as good a possible. I don’t want to be that guy who prints out a few bits and just expects the customer to to just deal with it. Though that does have to happen after a point.