Intrigue of Cats, litter of Panthers

In the 1990’s Italeri still put punch marks on exposed exterior surfaces of the rear plate. Most of the raised surface details has depression/sink marks.

Fortunately none of that mess has to be fixed since its being removed for Zimmerit.

Messy

Small desk vacuum helps.

Patch & fill

Good enough

Zimmerit sheet has some bolt details Italeri missed, no sink marks and fit fairly well.

2 Likes

Return of the Cavalier Zimmerit resin goo. Found it this morning in several places with the Cavalier Zimmerit.

No accelerator used. It only occurred where a large drop of StarBond Black was used to address a loose edge.

I think that solved the mystery. Regular StarBond Multipurpose had no reaction. So I know going forward not to use the thin SB Black to tack down corners and edges that were missed.

Boring stuff today like tweaking Zimmerit seams and clean up.

I think the patches in blue are OK but the ones in red need more work.

3 Likes

This old set of Model-Kasten Panther D wheels is finally going on a model.

Model-Kasten went all out explaining how to use the wheel set on an Italeri or Tamiya (old?) Panther kit and provided various spacers plus detailed instructions. I believe Tamiya wheels can also be swapped to an Italeri kit.

The parts were easy to clean up and fit well.

Working on the zimmerit patch.

Mock up

6 Likes

Holy crap Wade that patch is beautiful! Excellent work!

2 Likes

Thank you, Matt.
The patch was a very fun part of the build. I love that Molak Stucco Putty thinned with Testor’s Liquid Cement.

Being this is a Panther ausf A kit, we have an OK sprocket. The teeth are spaced correctly it seems as DML Panther D (old, not magic) tracks wrap nicely.

I’d like an early D sprocket, since it’s a conversion. Like shown here, in Jentz & Doyle’s Germany’s Panther Tank: The Quest for Combat Supremacy (for discussion only). There’s a rounded raised area (red) on the early D sprocket.

Wrapped solder around punch and cut in to a ring.

A little skinny but a couple more of coats of Molak Stucco Putty and it’s probably good enough for my Italeri Panther.

5 Likes

Idlers, Italeri on the left and RFM wheel set on the right. Had Italeri included a center ring their idler would have been pretty good. Making a ring with a punch & die doing concentric circles is difficult in my experience. Two thin washers & CA was my plan in the day.

Italeri’s sink mark or depression is visible under some conditions. Putty and sand, easy fix.

The RFM idler needs drilled out to fit.

I think the RFM track & spare wheel set is well worthwhile even if one doesn’t use the tracks.

The sprocket teeth are just a little too square for my taste. Not saying this is “correct” but I sanded in tooth taper for aesthetics.

Wheels & suspension.

The return roller near the sprocket isn’t installed. I think early Panther D’s first 80 or so might have omitted the return roller? I need to check the Jentz book.

For tracks, went Sector35 Early Panther D white metal pre-assembled. My other options were build Fruilmodel’s, steal Tamiya Panther D’s rubber bands or use something from a Dragon kit.

Thankfully all of these mismatched parts aligned satisfactory.

The track sag is excessive in my opinion so will removed one link and reinstall.

5 Likes

Moving along great Wade… Very nice work on the sprocket hubs … :+1:

2 Likes

This is beautiful work so far!
Bill

2 Likes

Thank you, Bill.


Pulled one track link. It’s an improvement but just a touch too slack. The idler is fixed so no adjustment. I think after paint and weathering the tracks will slightly snug up and be acceptable. Otherwise, might to reach into the Model Build - Dirty Tricks Bag.

Briefly got inspired to slap an old Verliden engine in the Italeri Panther but I don’t think even the Germans were insane enough to pull cylinder heads with the V-12 still in the Panther.

5 Likes

I think once the tracks are painted up Wade they will look fine.

2 Likes

I don’t think you can pull those cylinder heads without removing the engine. It needs to be a straight pull in order to not bend the studs and you can’t do that with the engine in there.

1 Like

Johnny, thank you.

Matt, thank you. In hot rod mode thinking doing LS1/LS6 heads & cam packages engine in with head bolts, not head studs. Big difference sometimes.

General question, how long does it normally take for Hobby Easy to confirm an order when it kicks to the item manufacturer for confirmation?
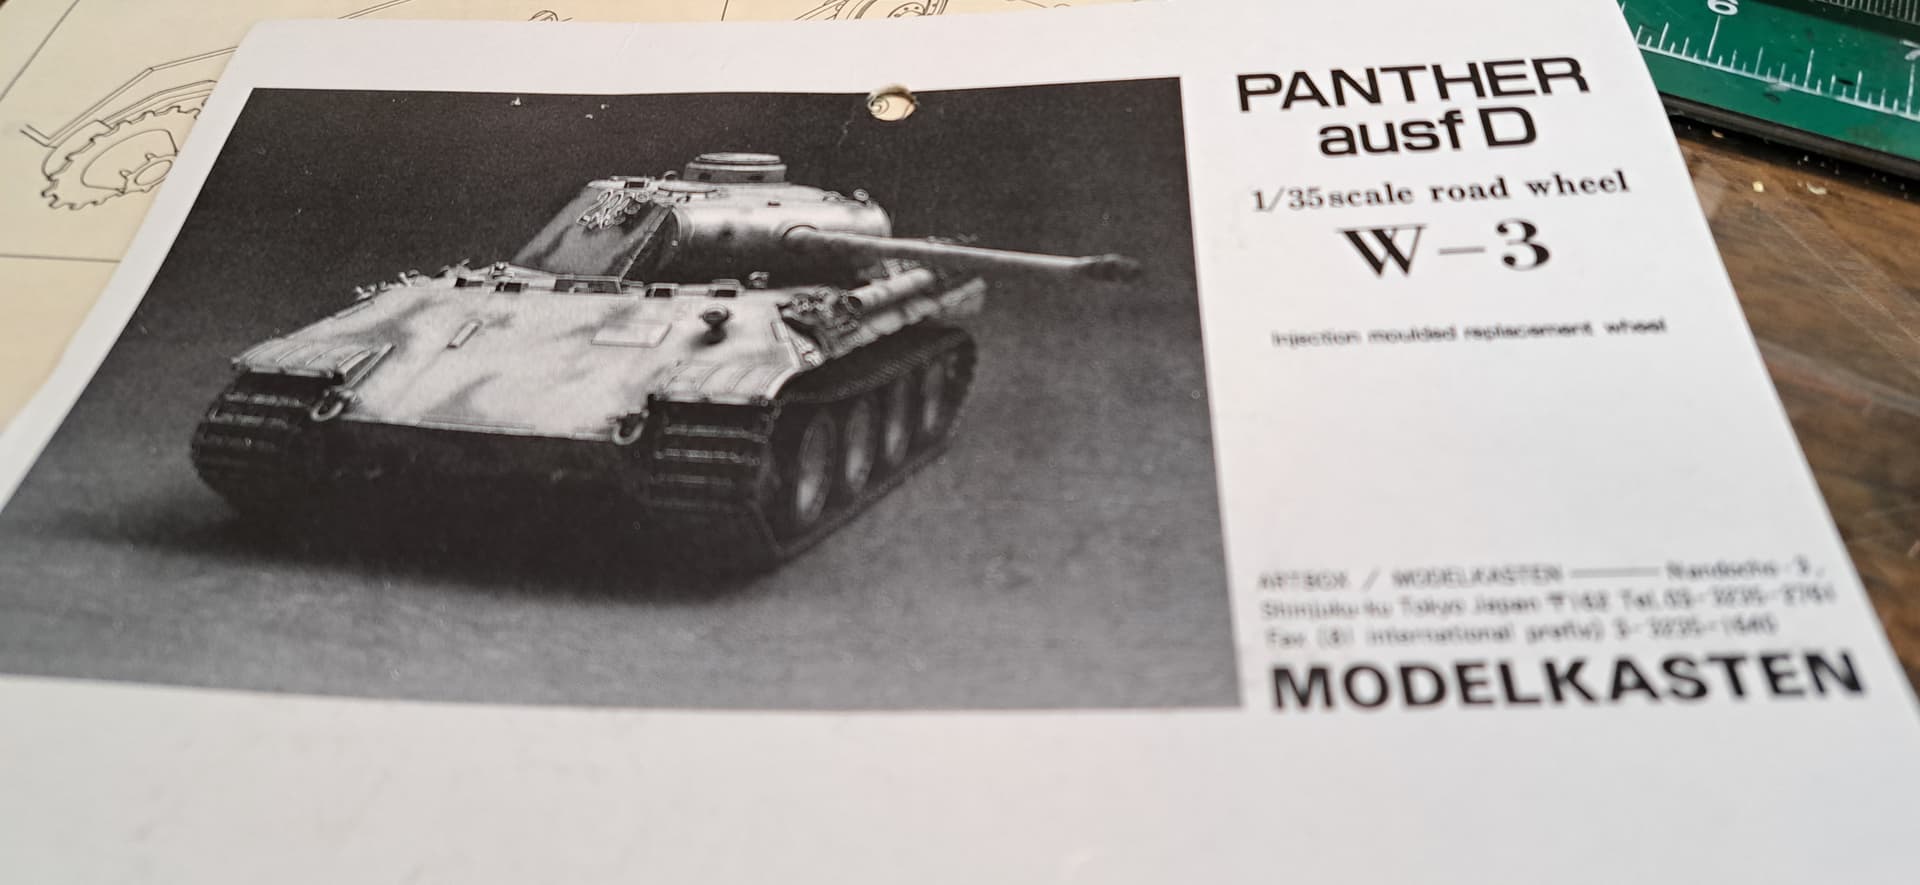
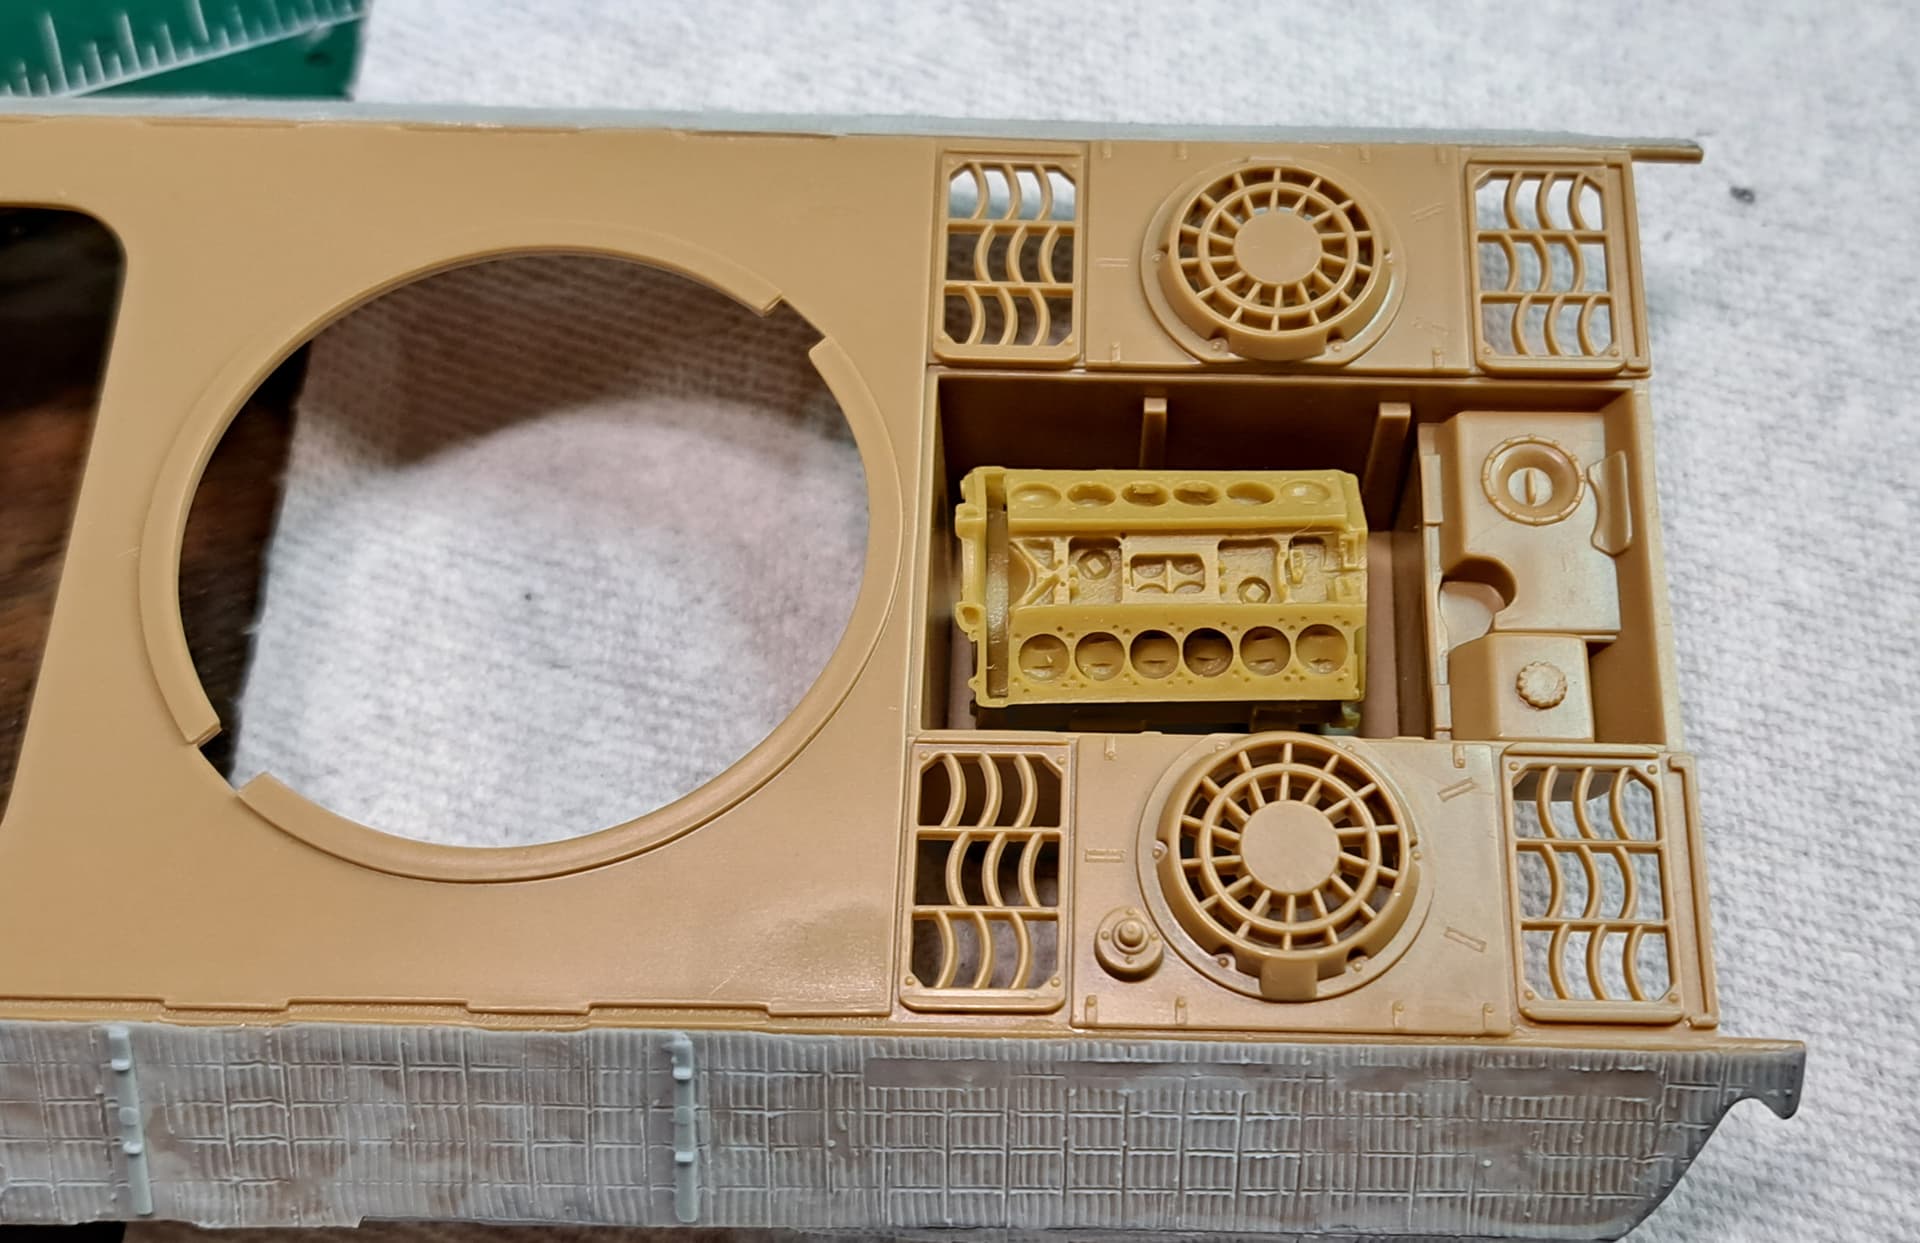
Panther Dilemma

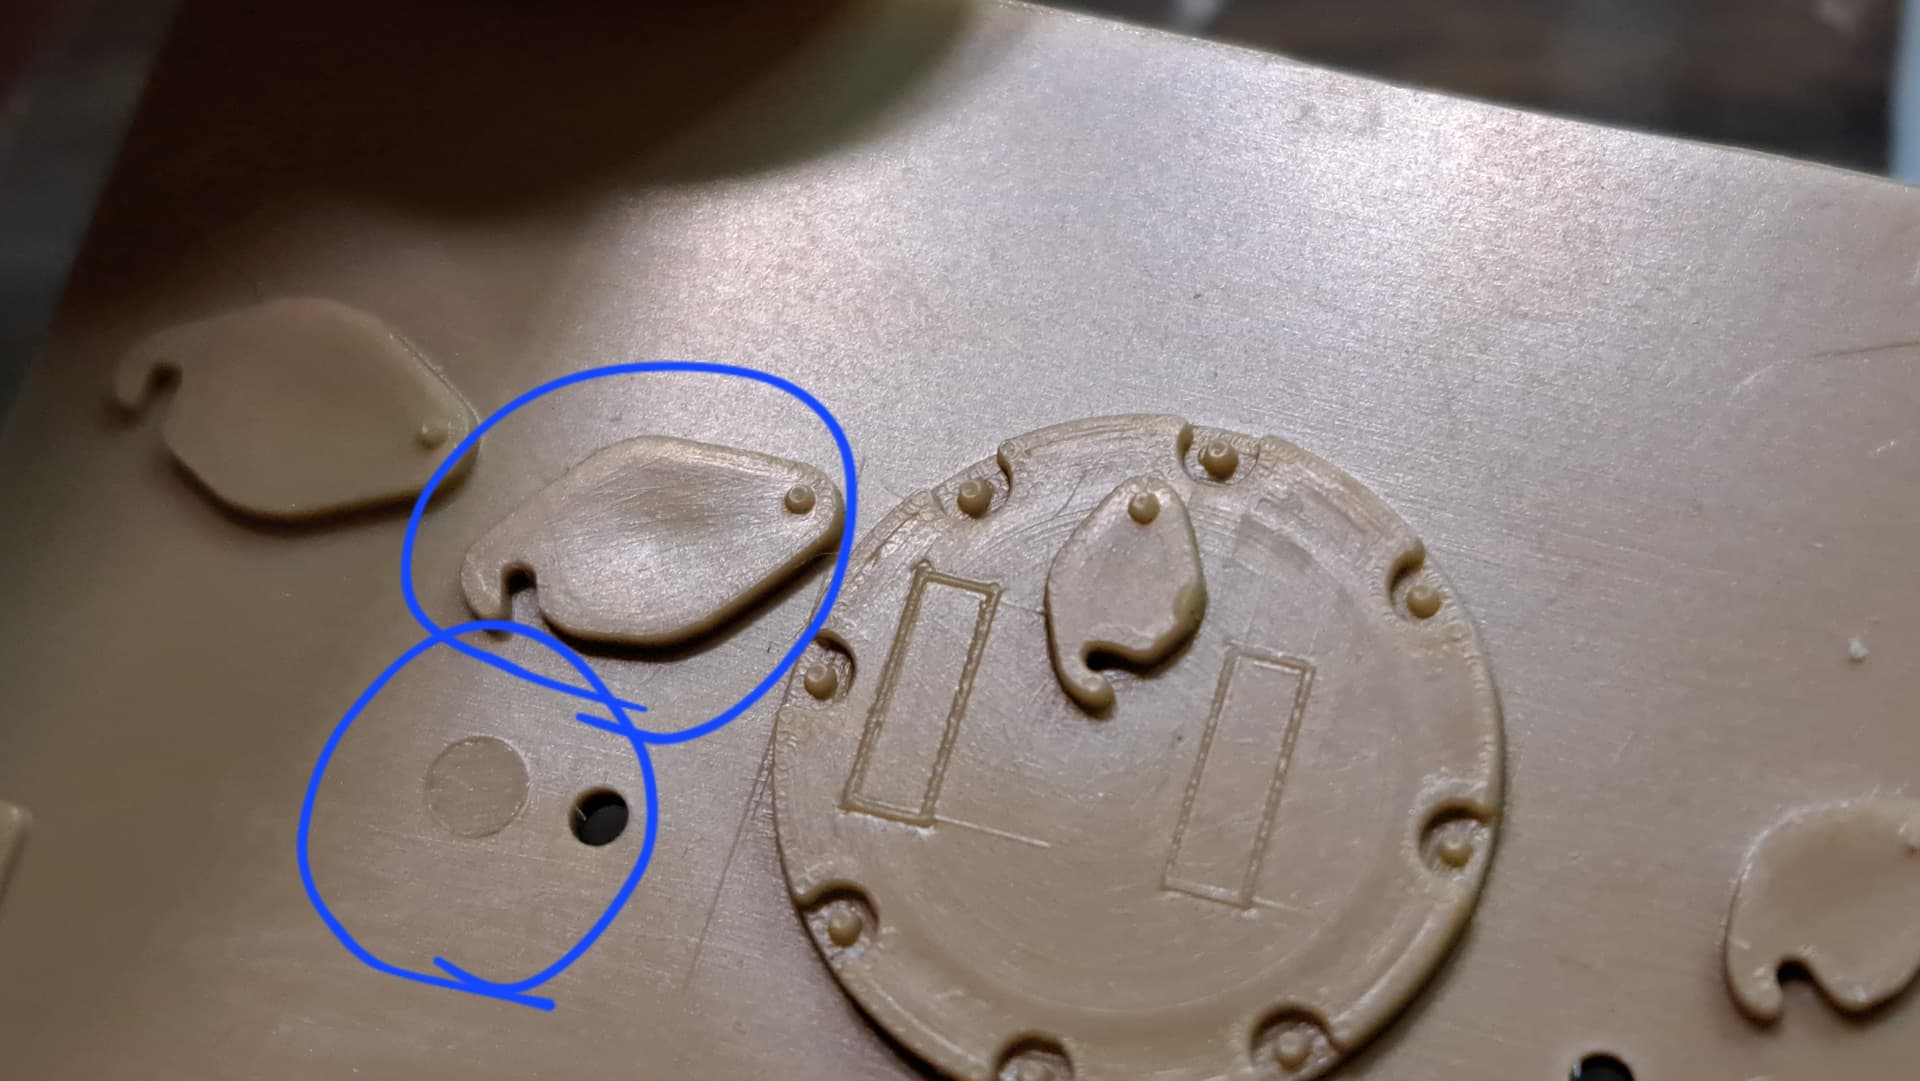
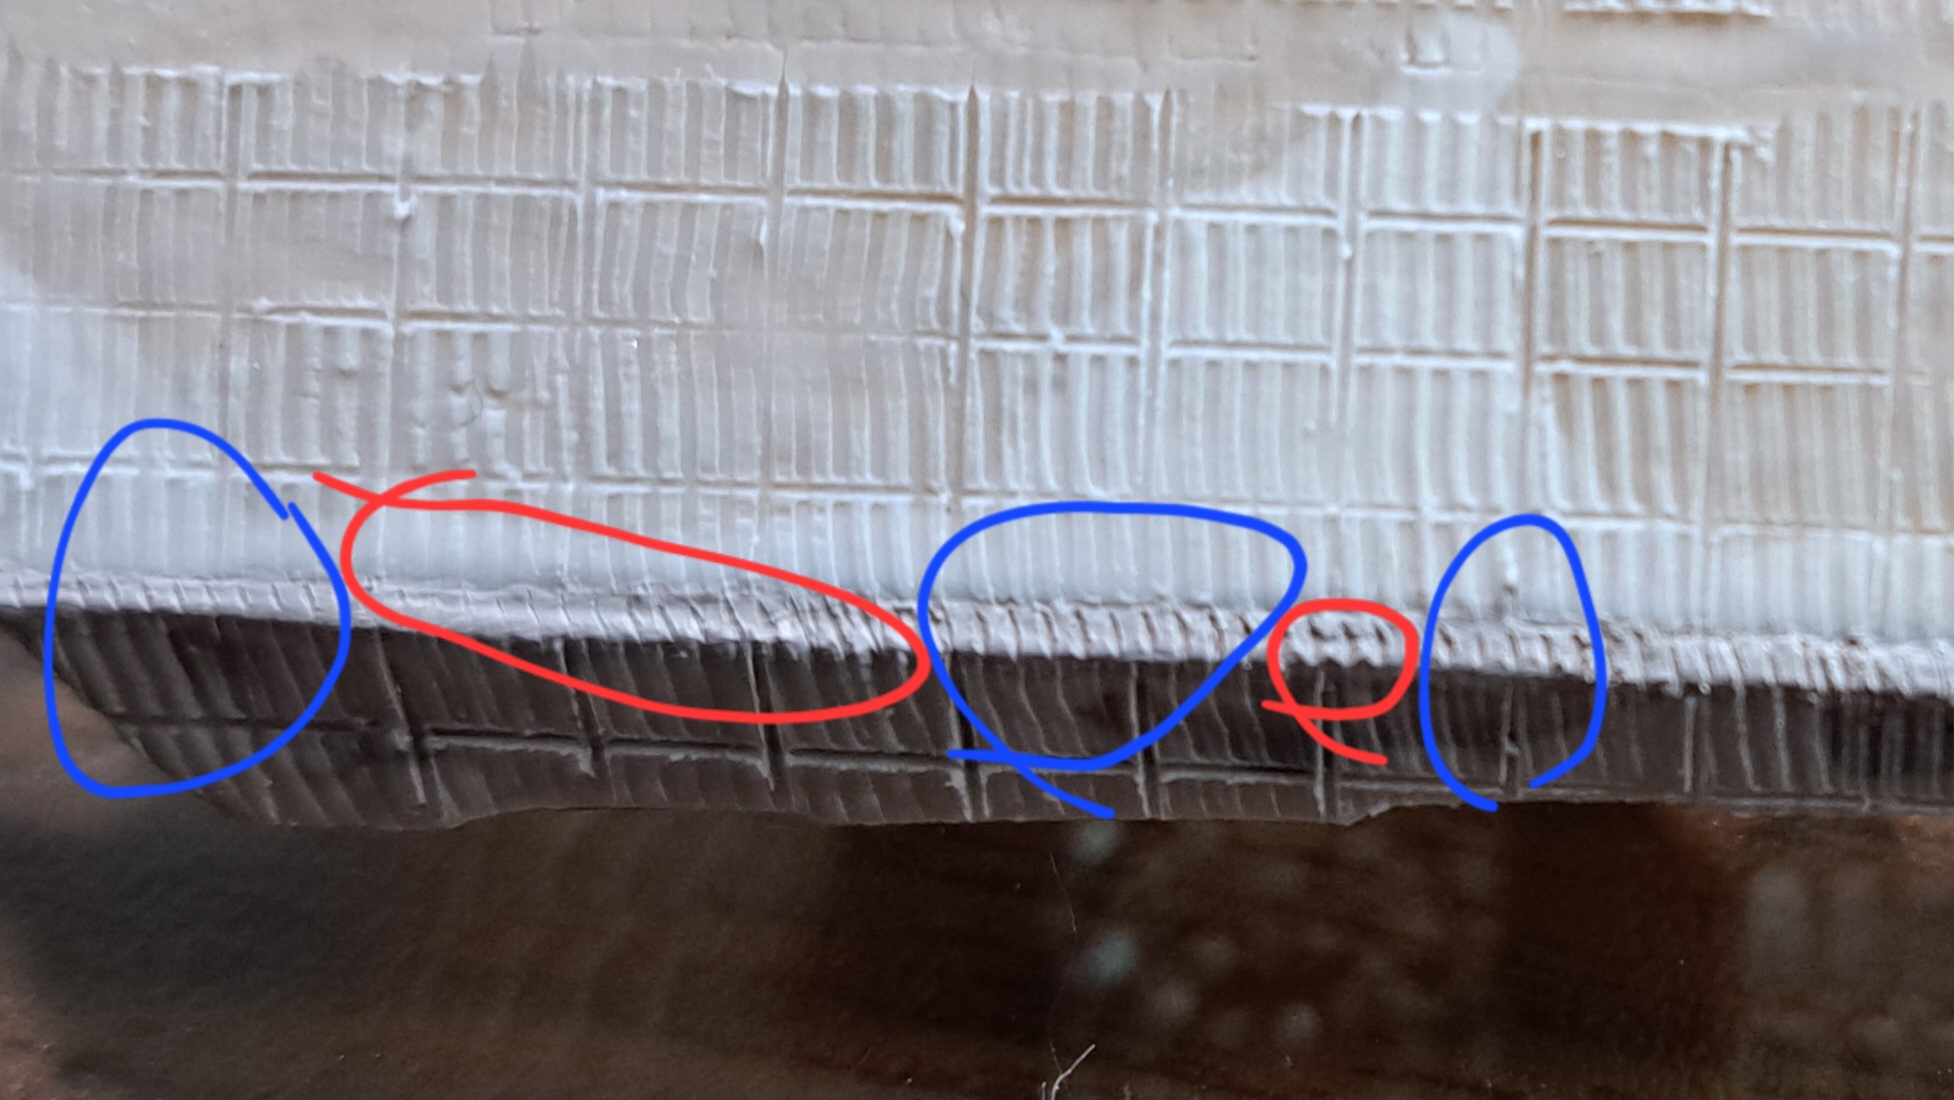
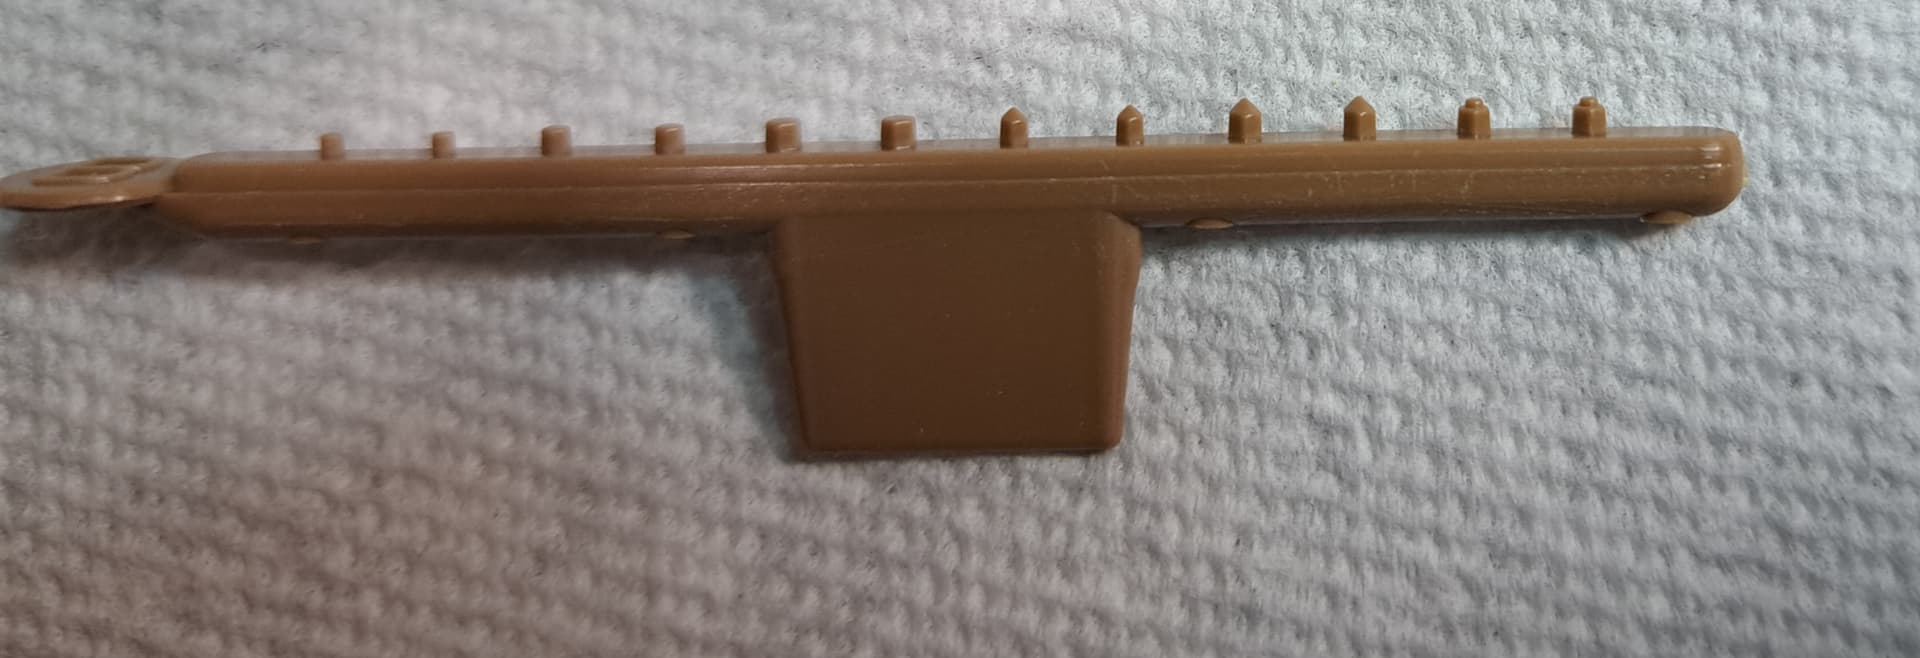
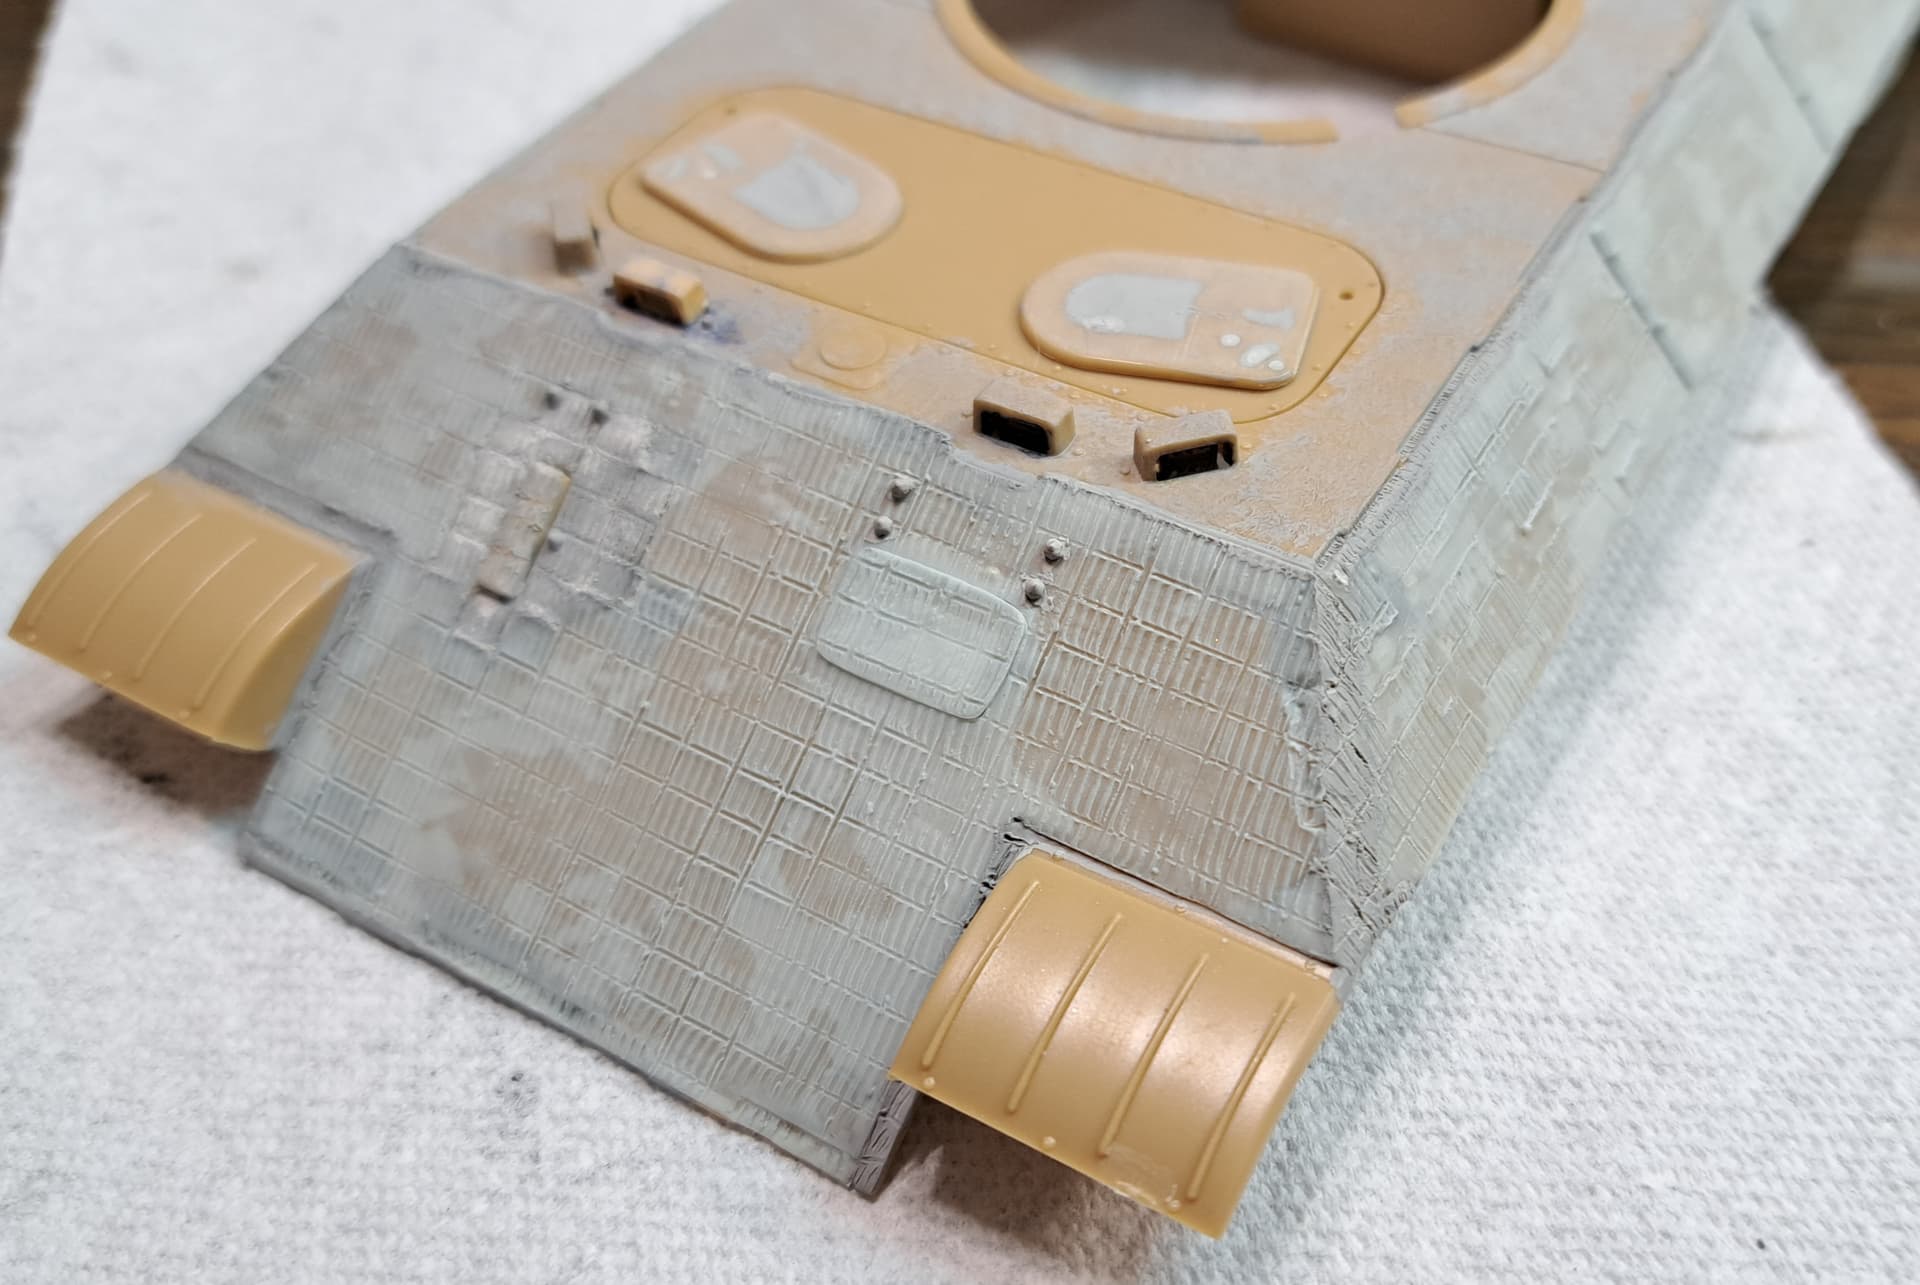
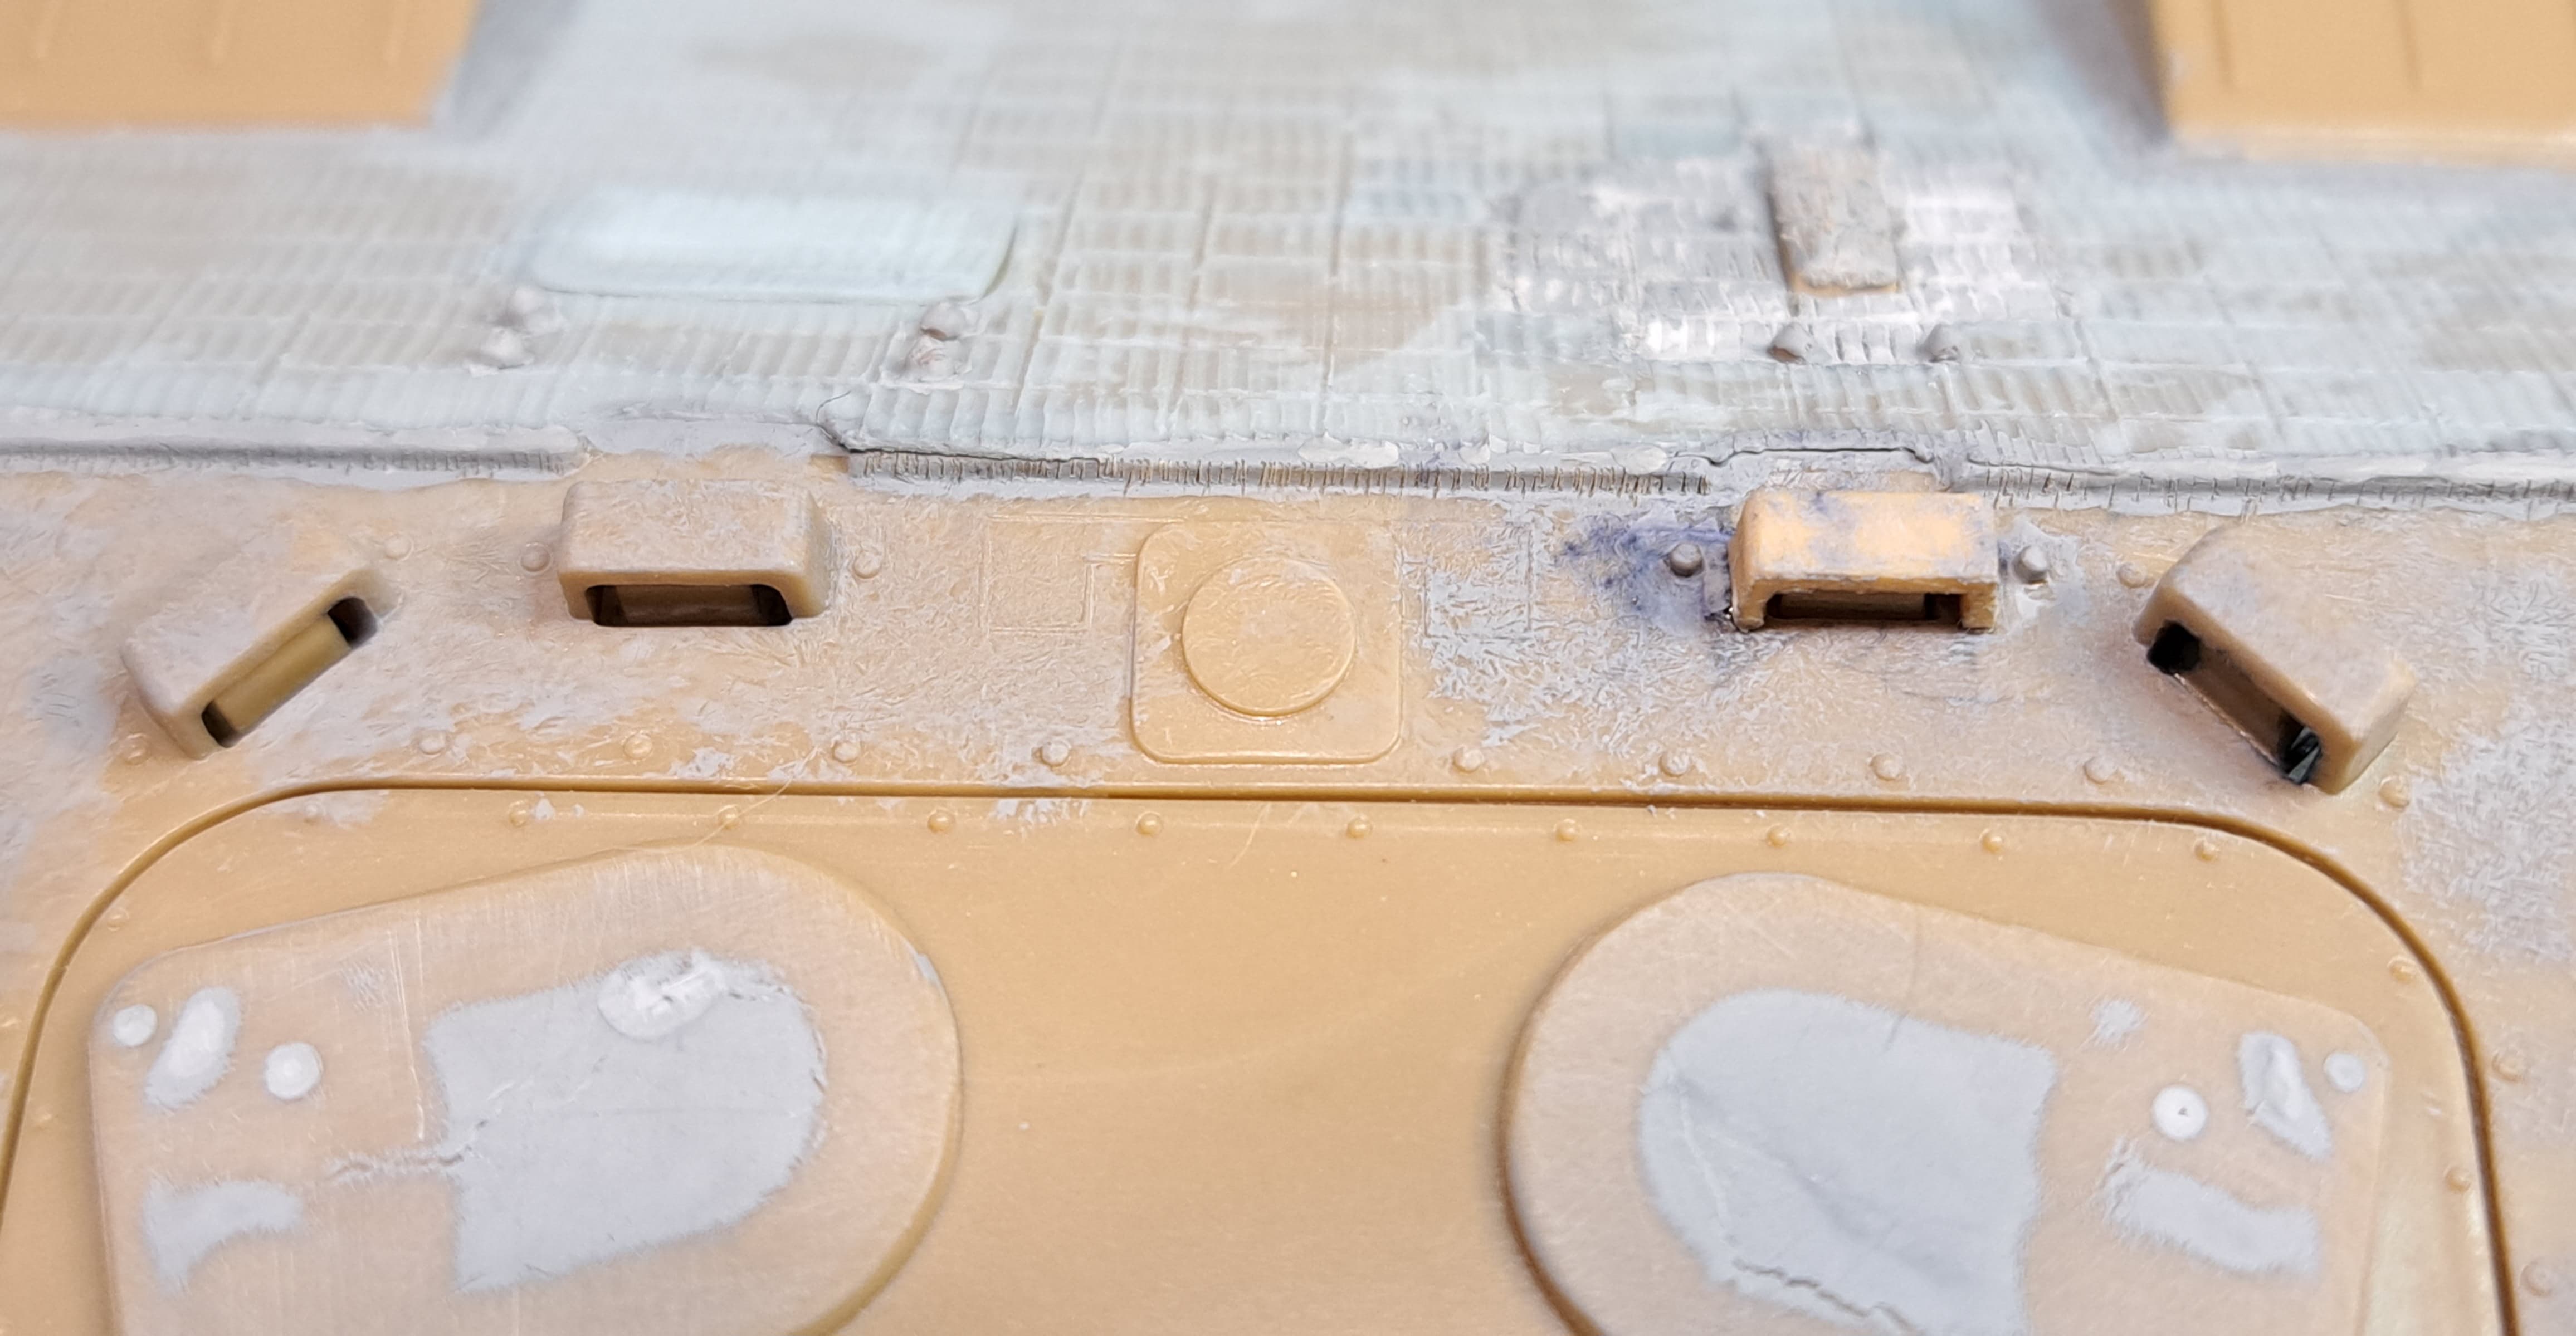
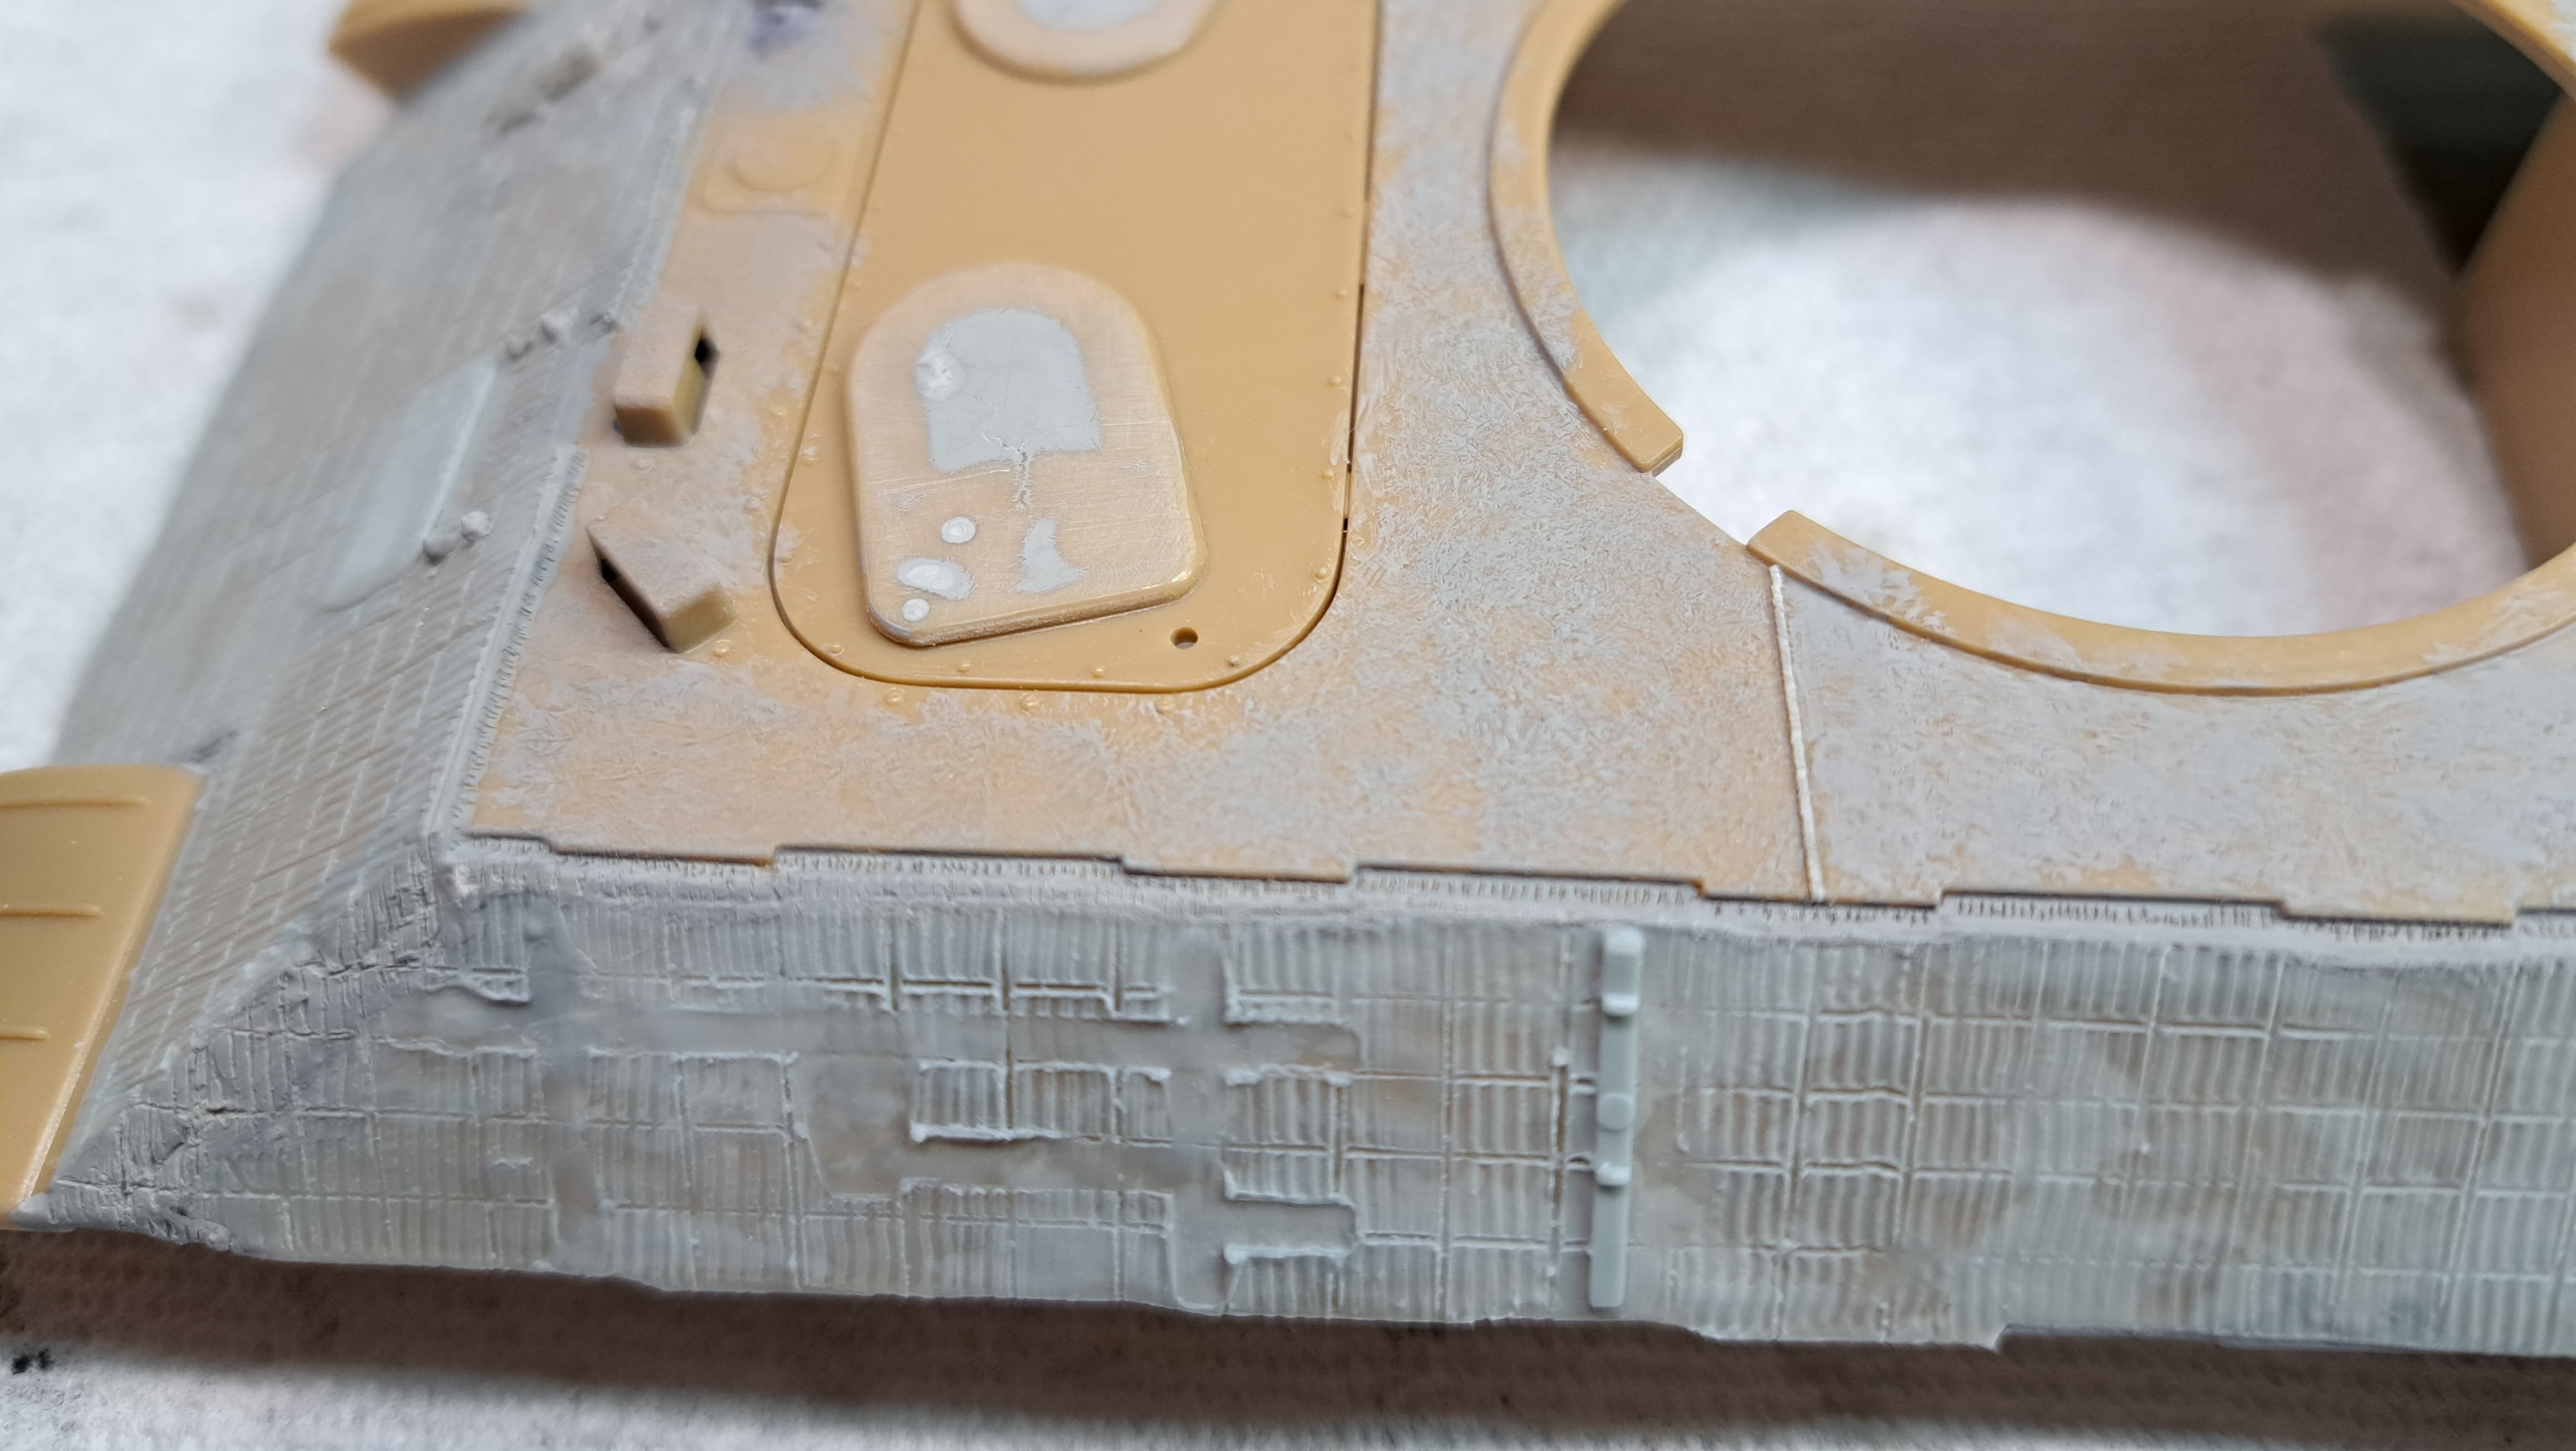
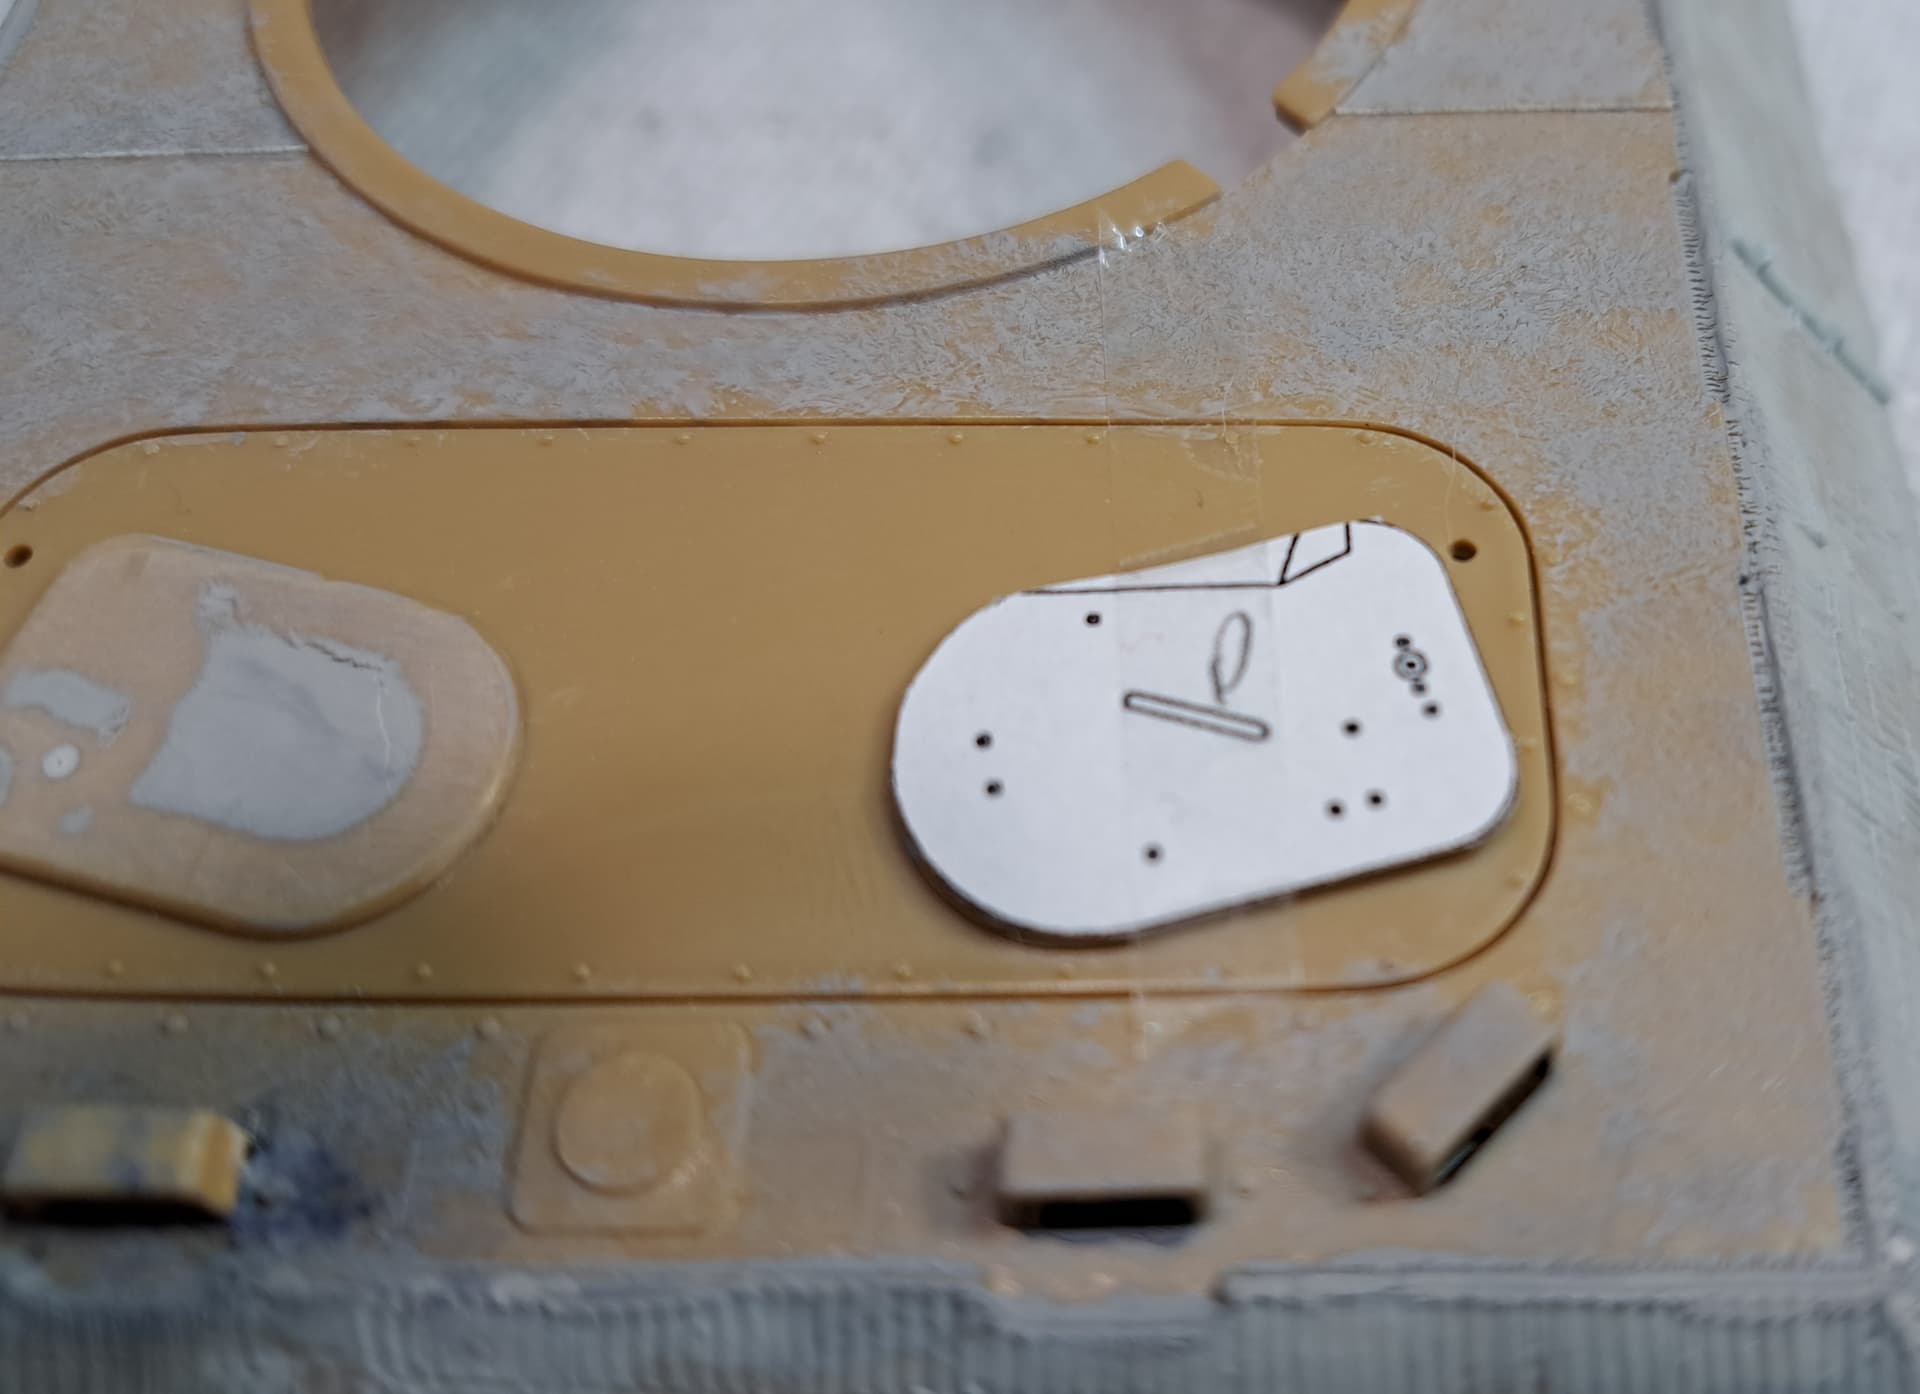
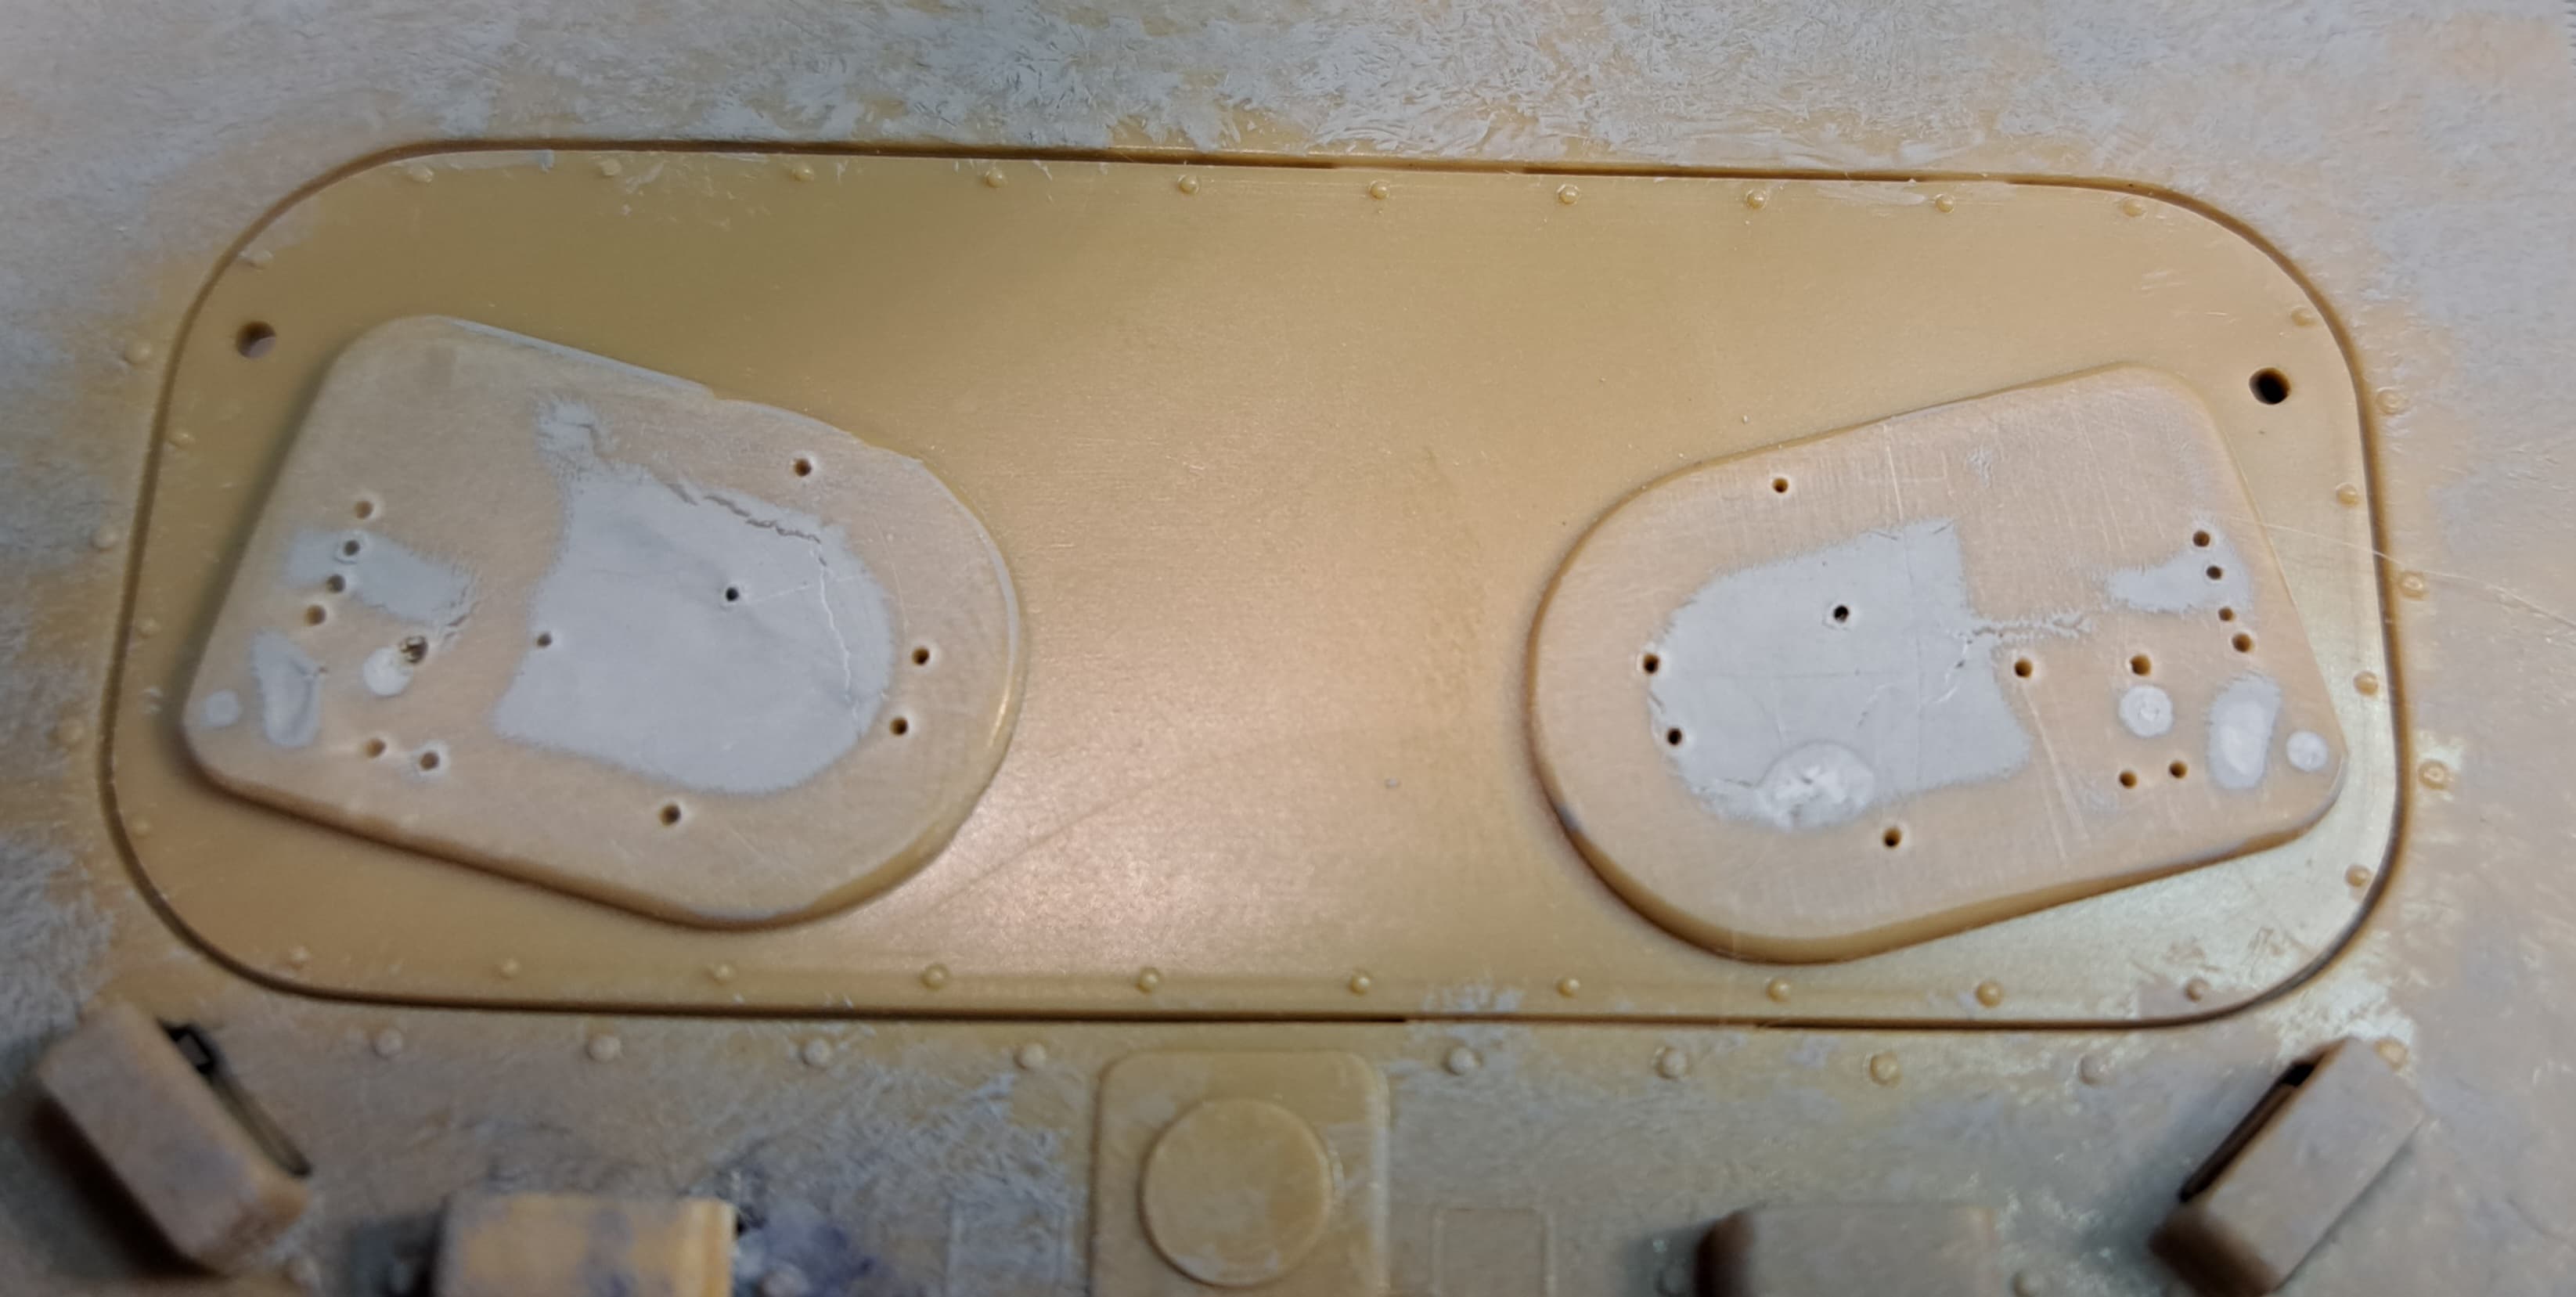
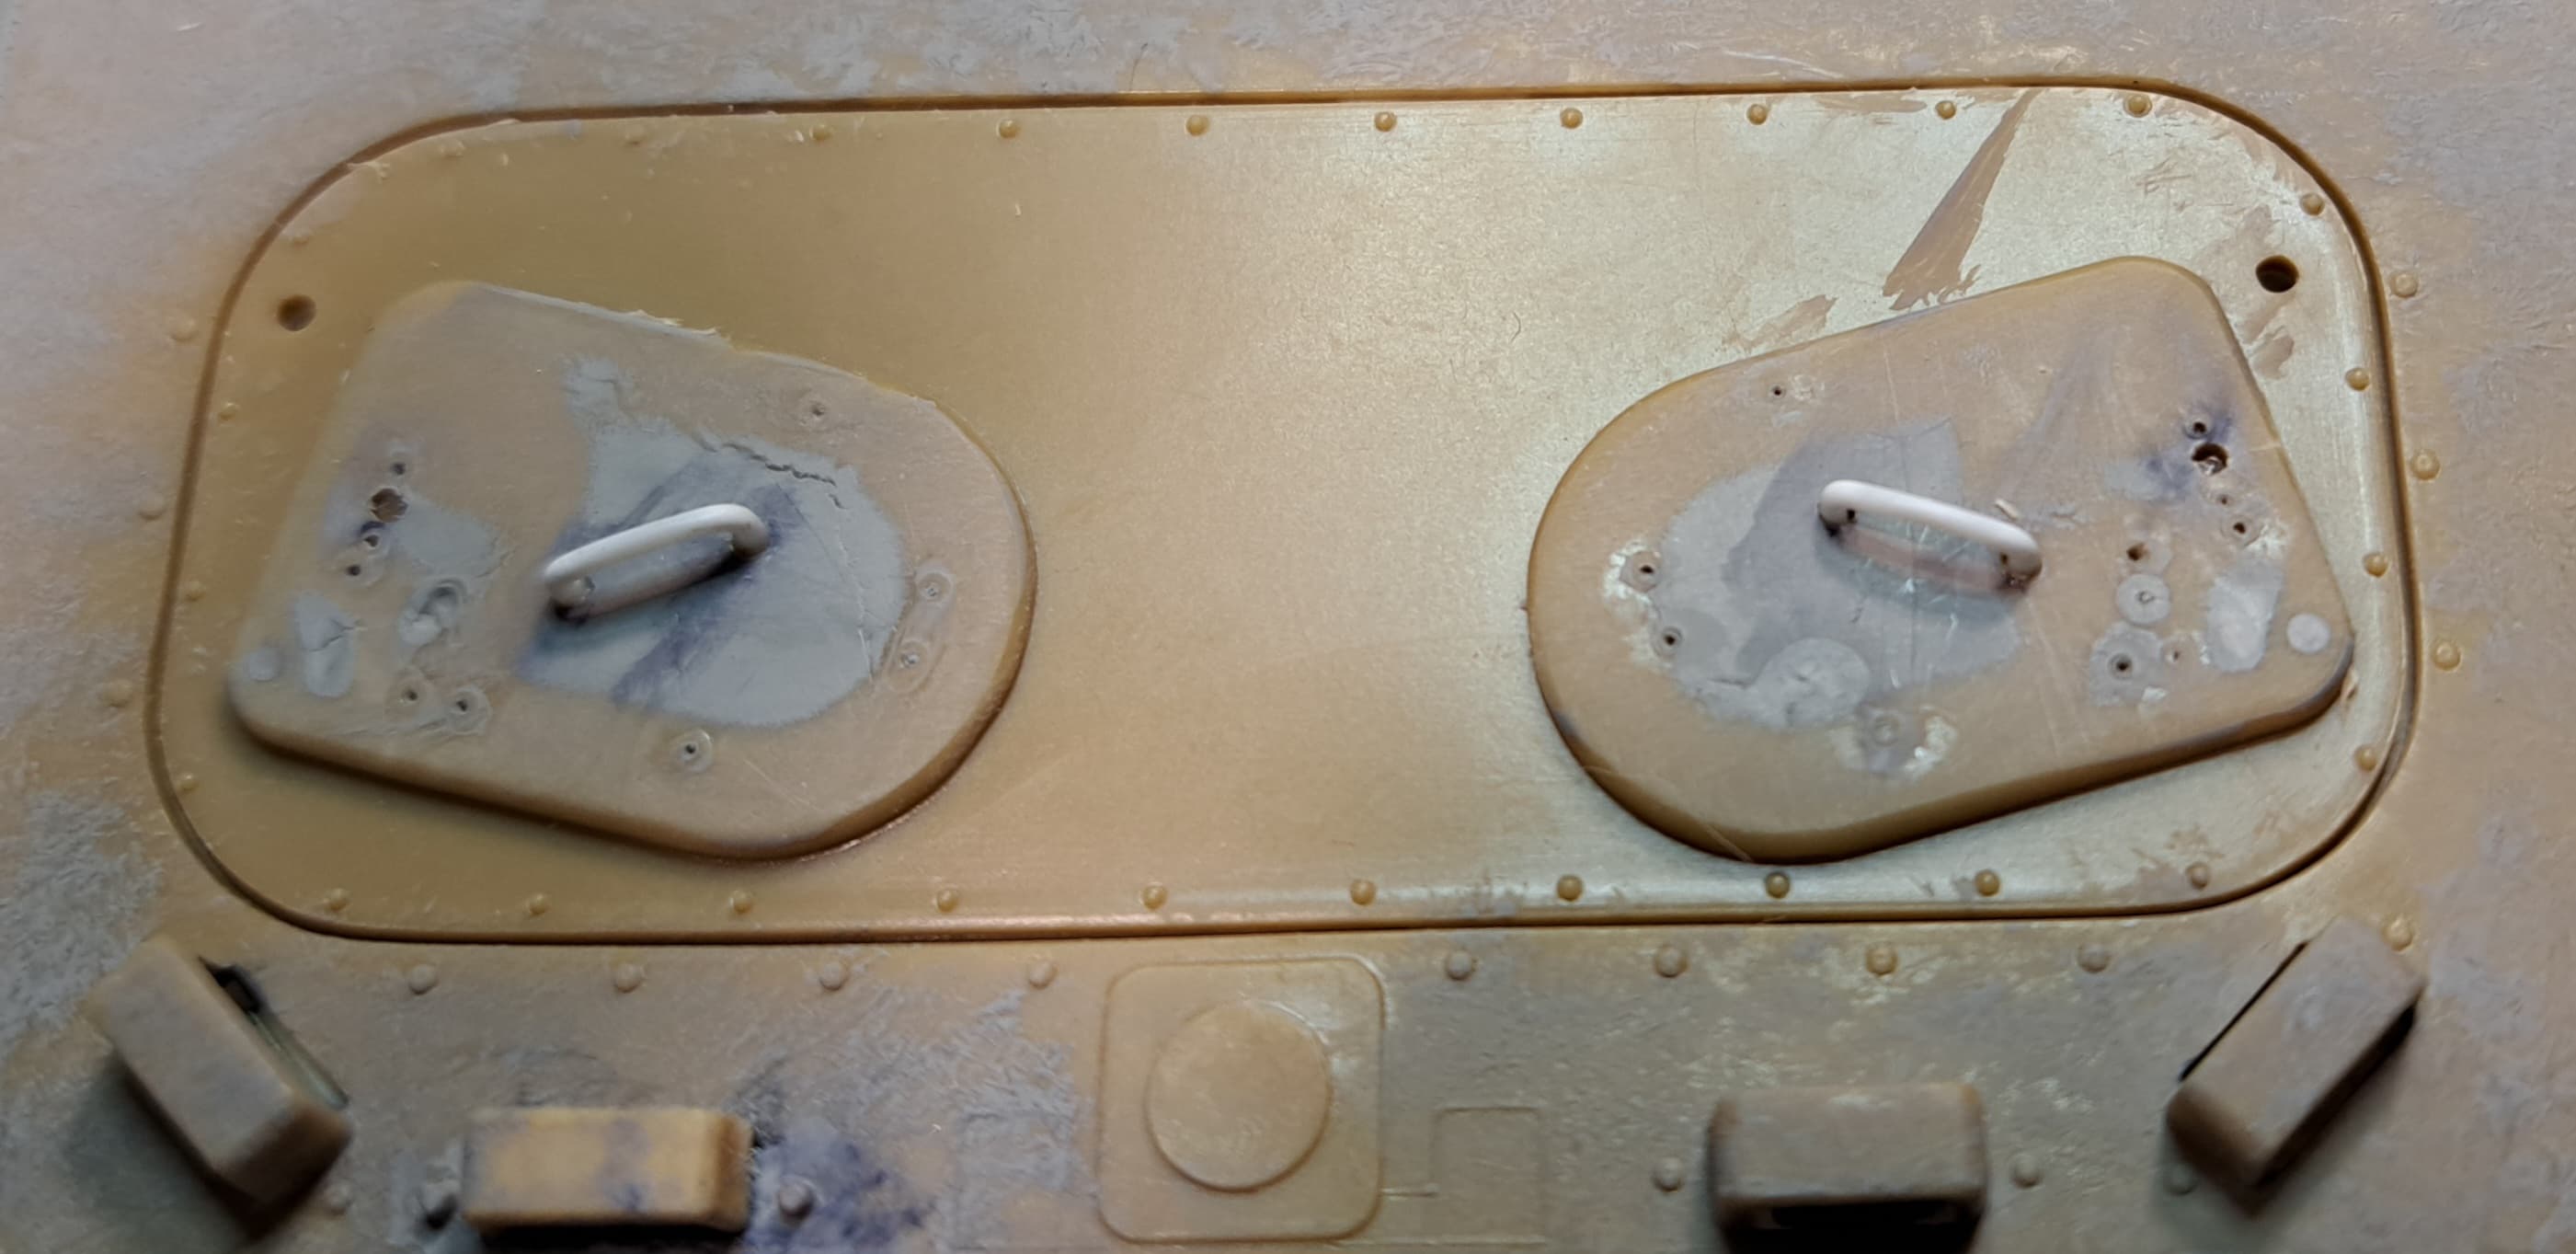
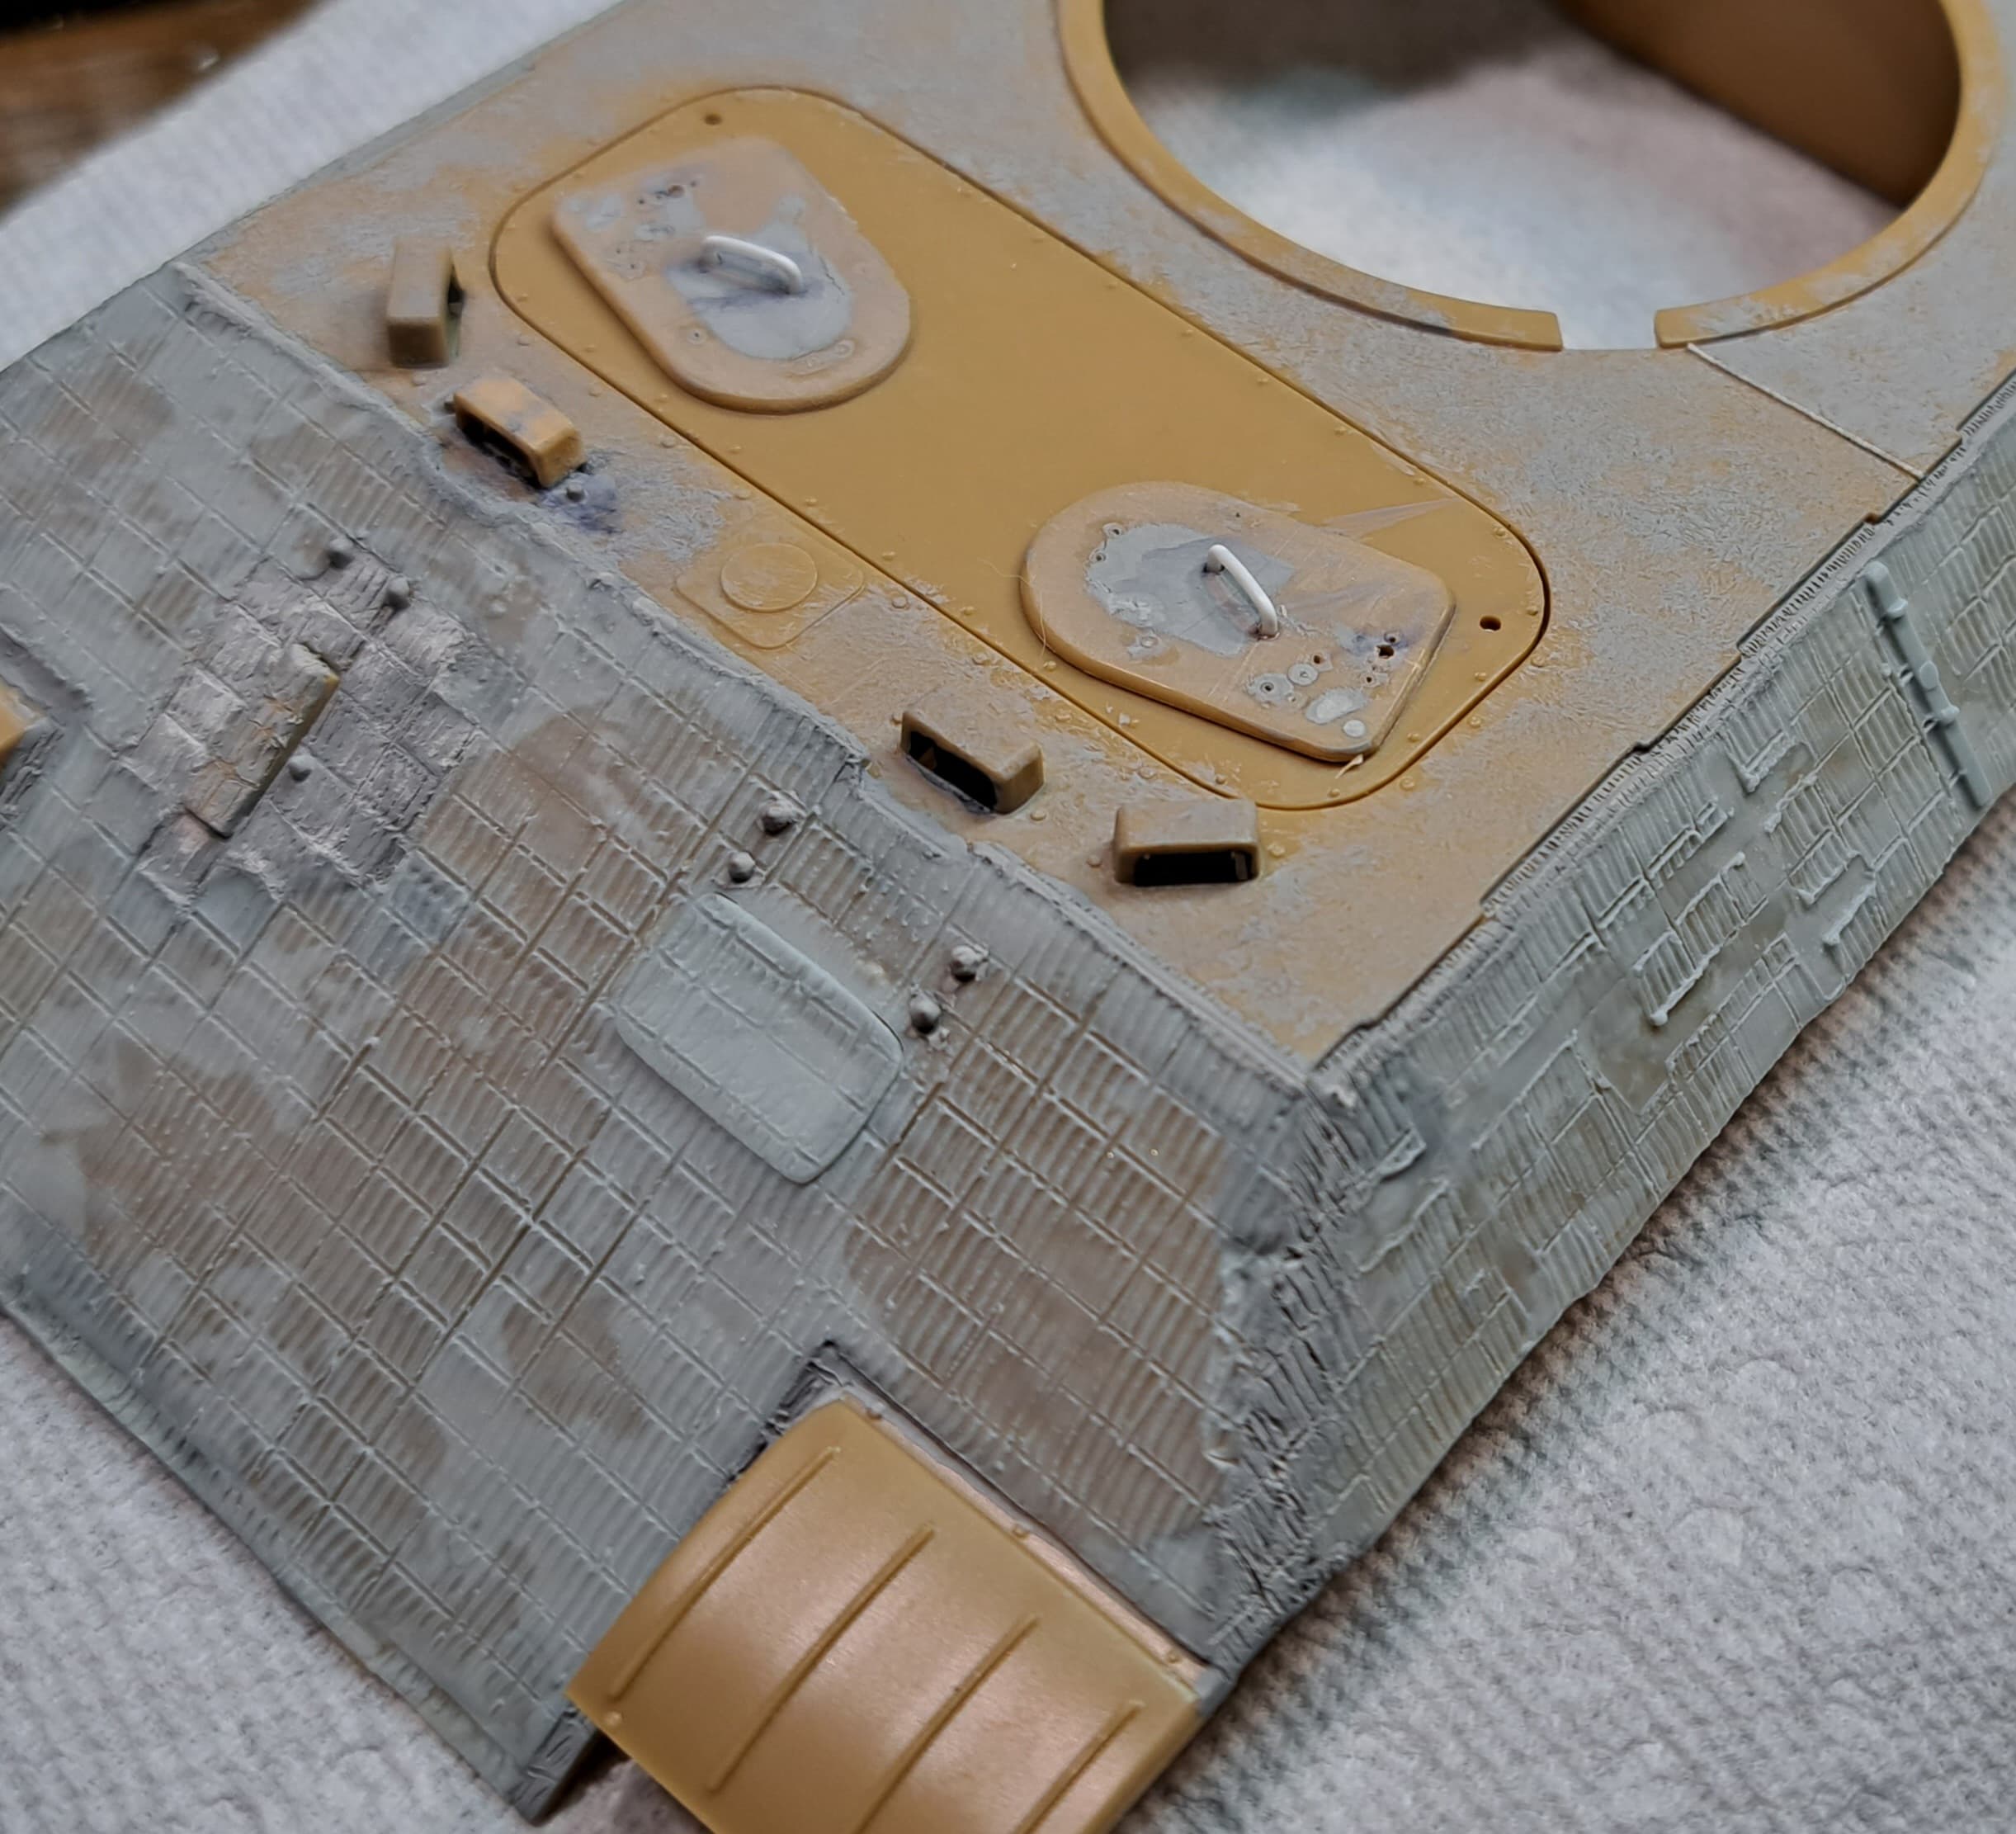
The driver & radio operator hatches need love.

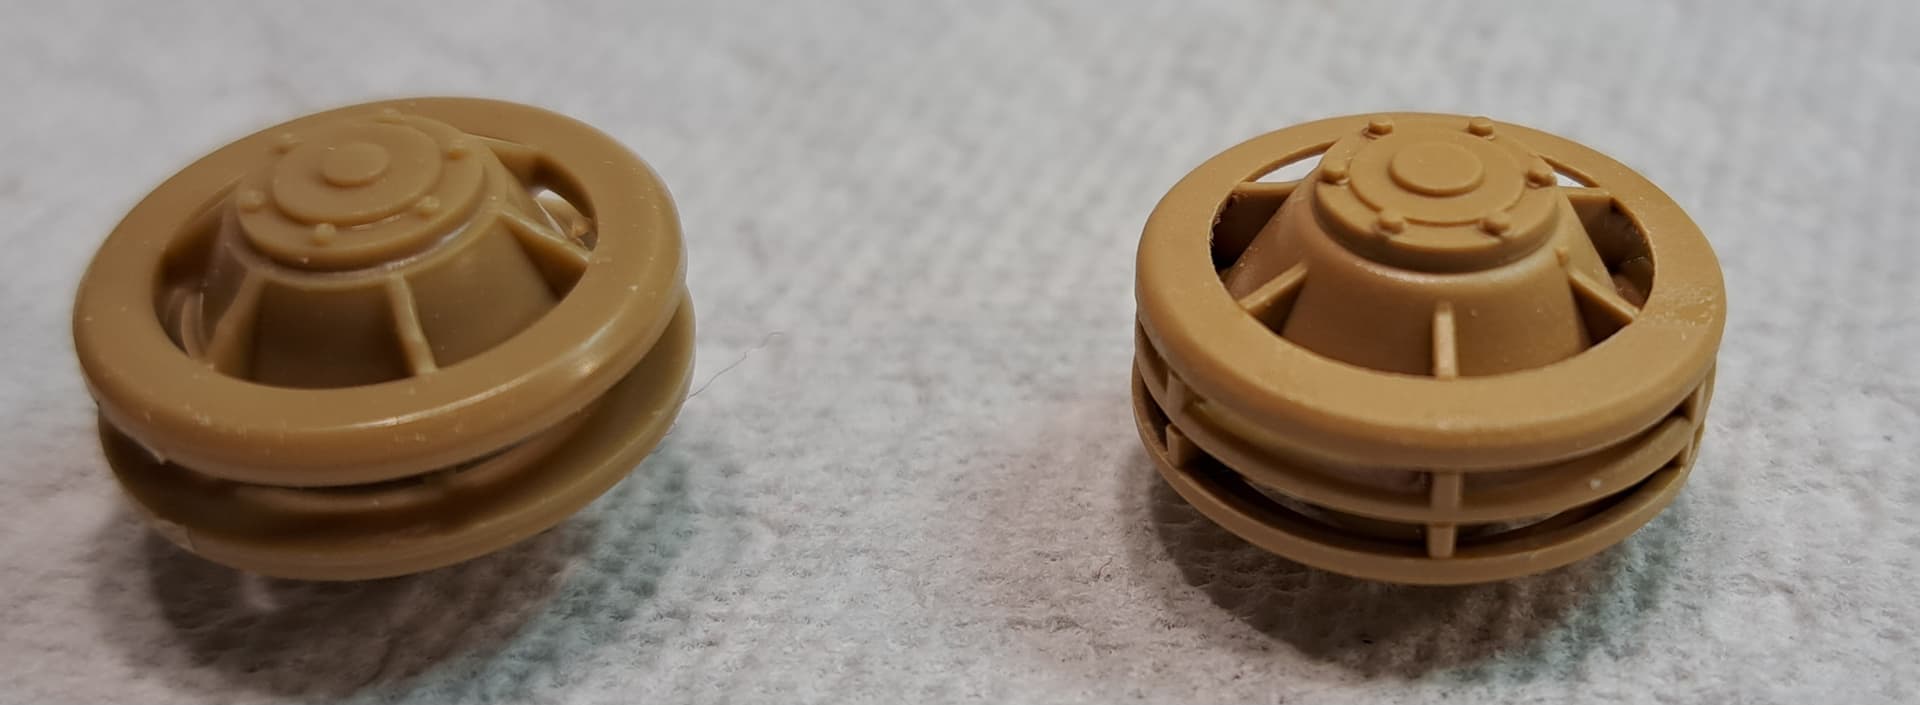
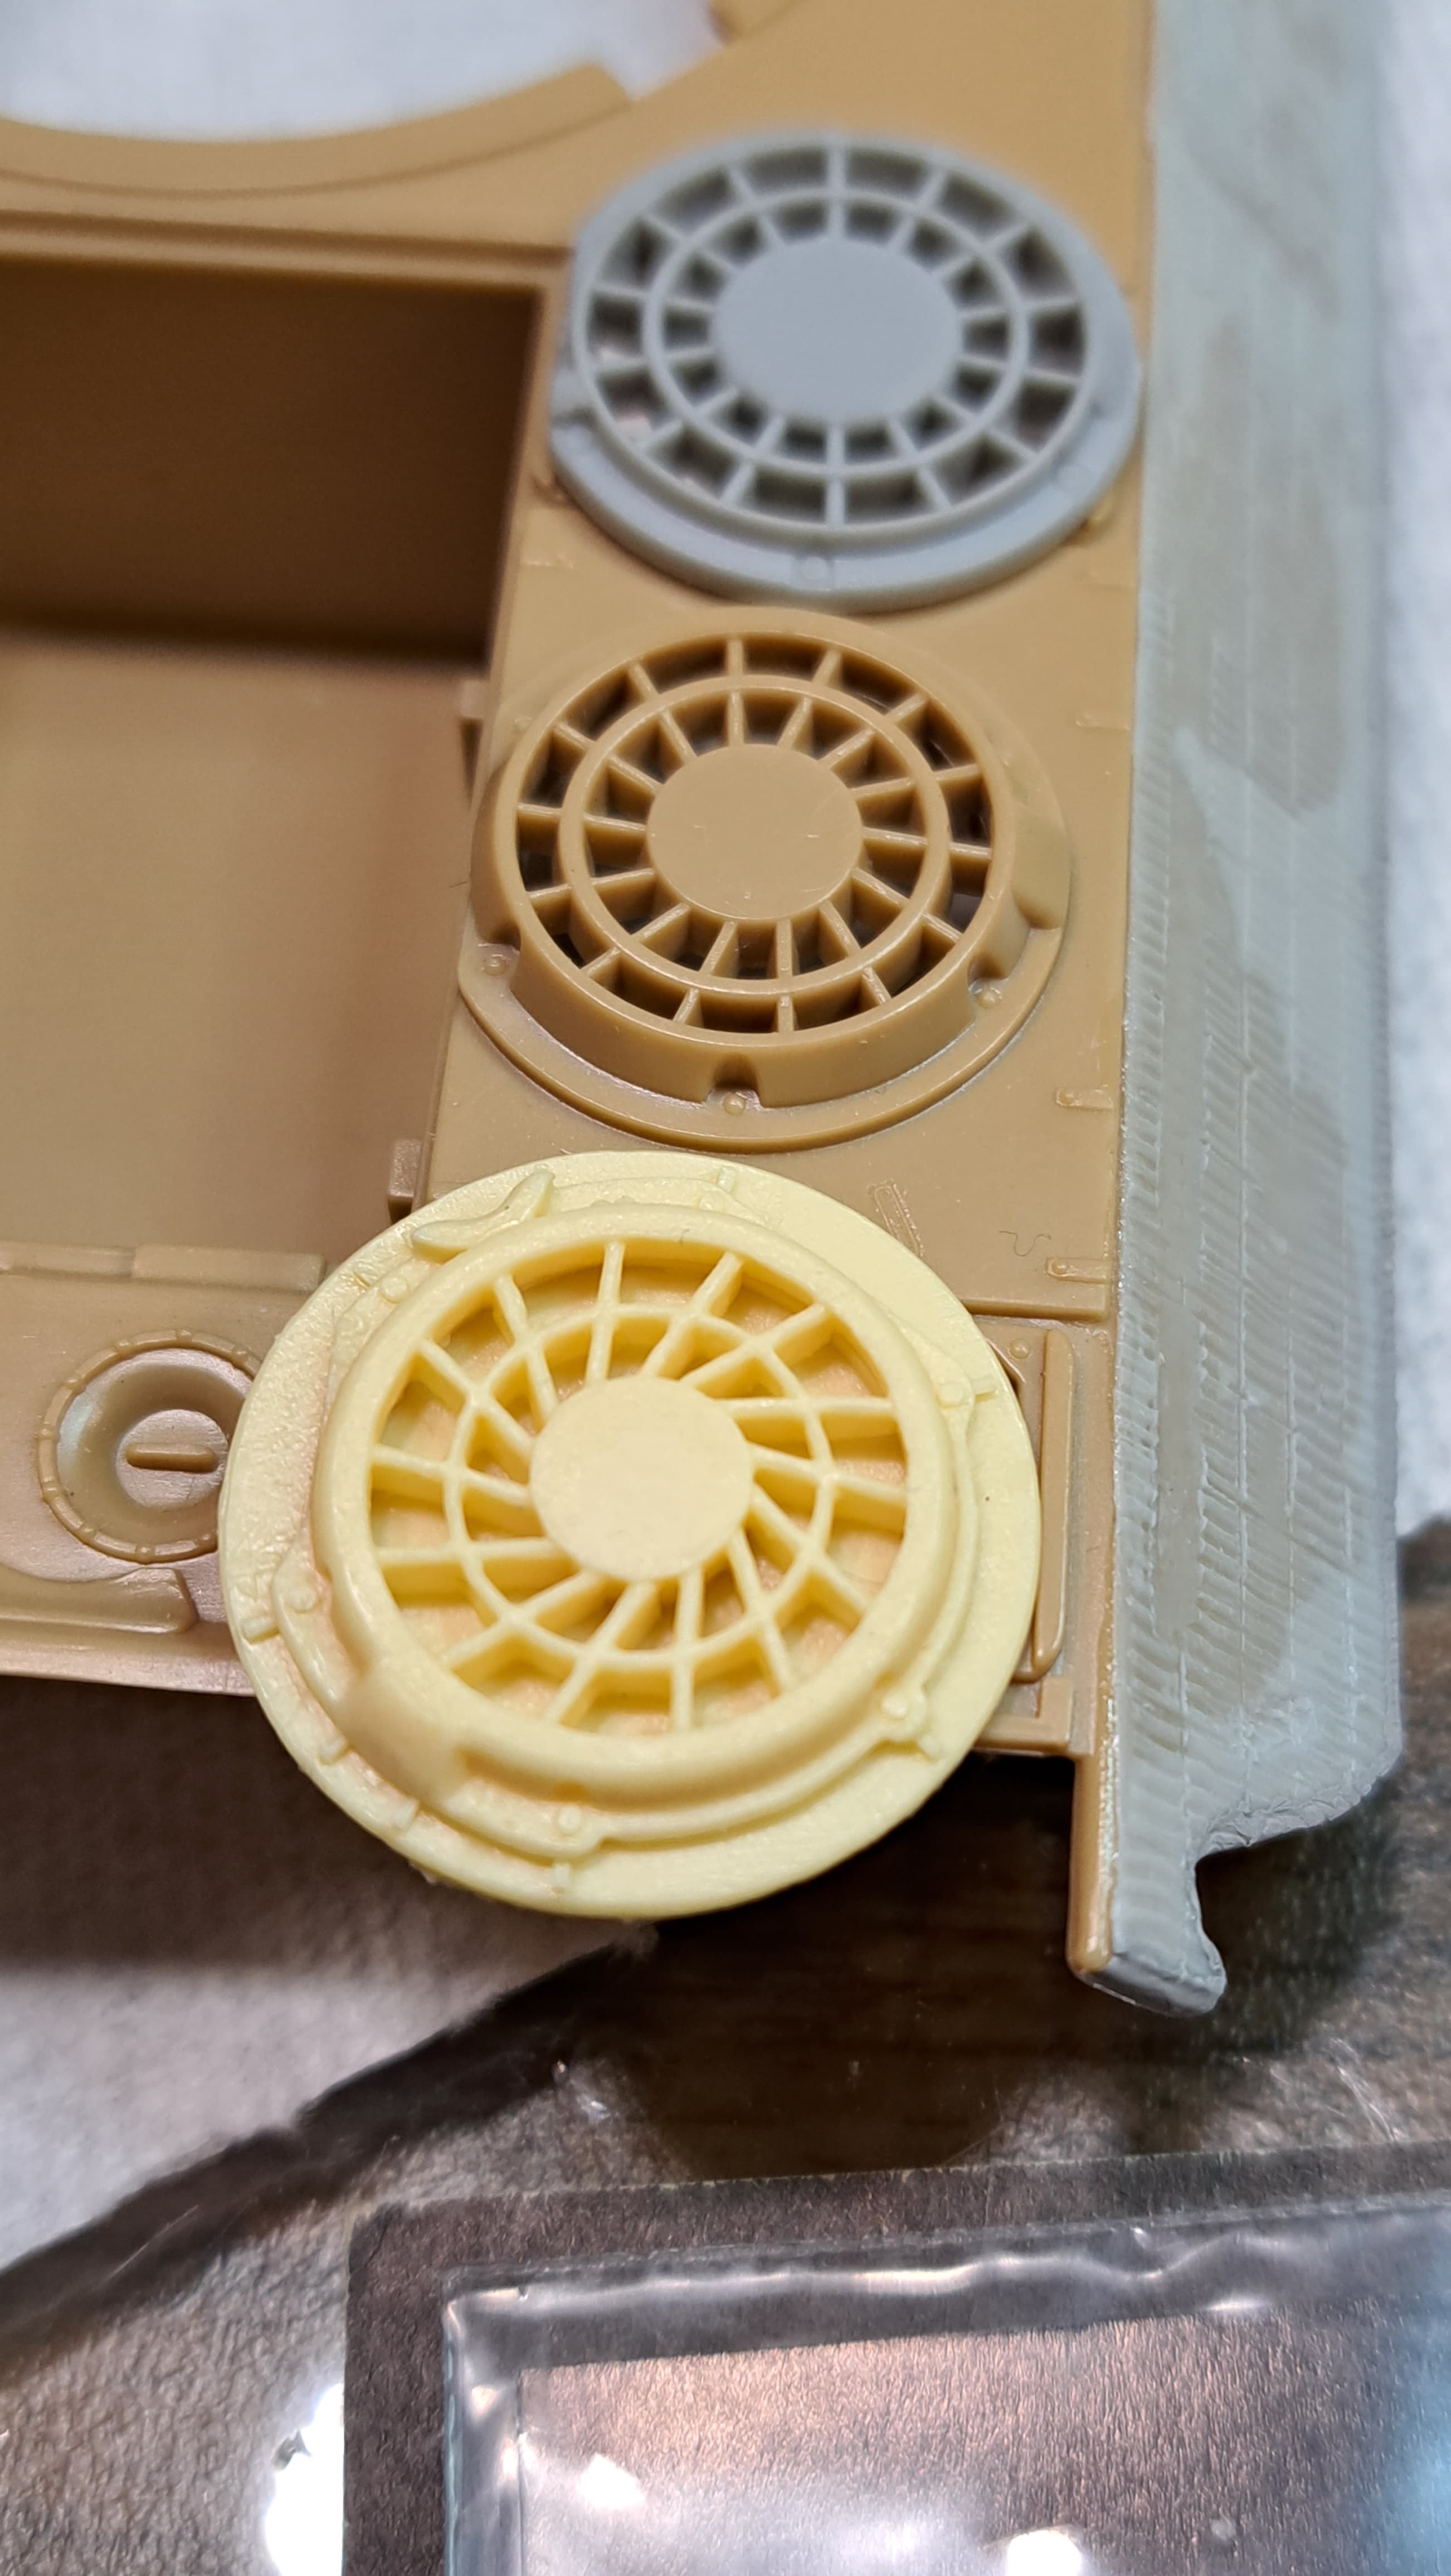
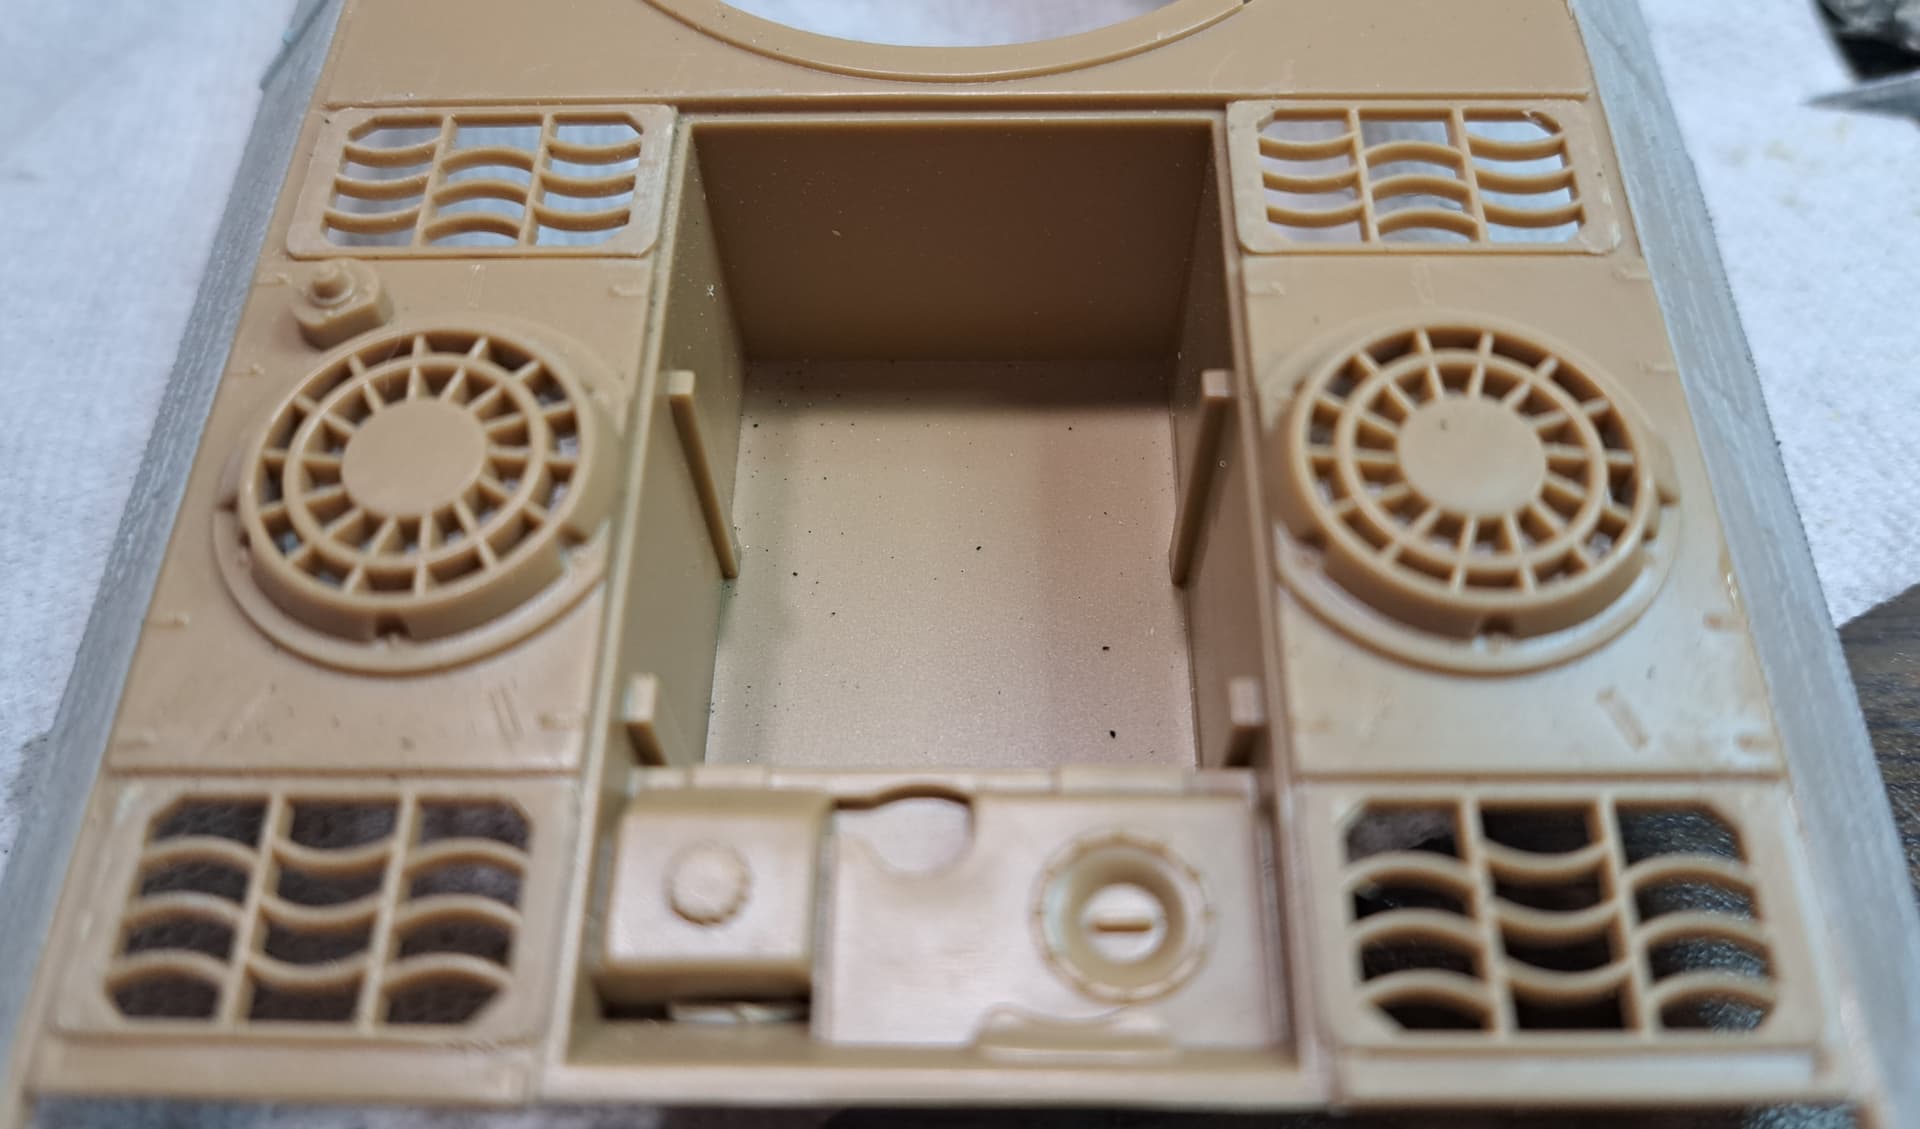
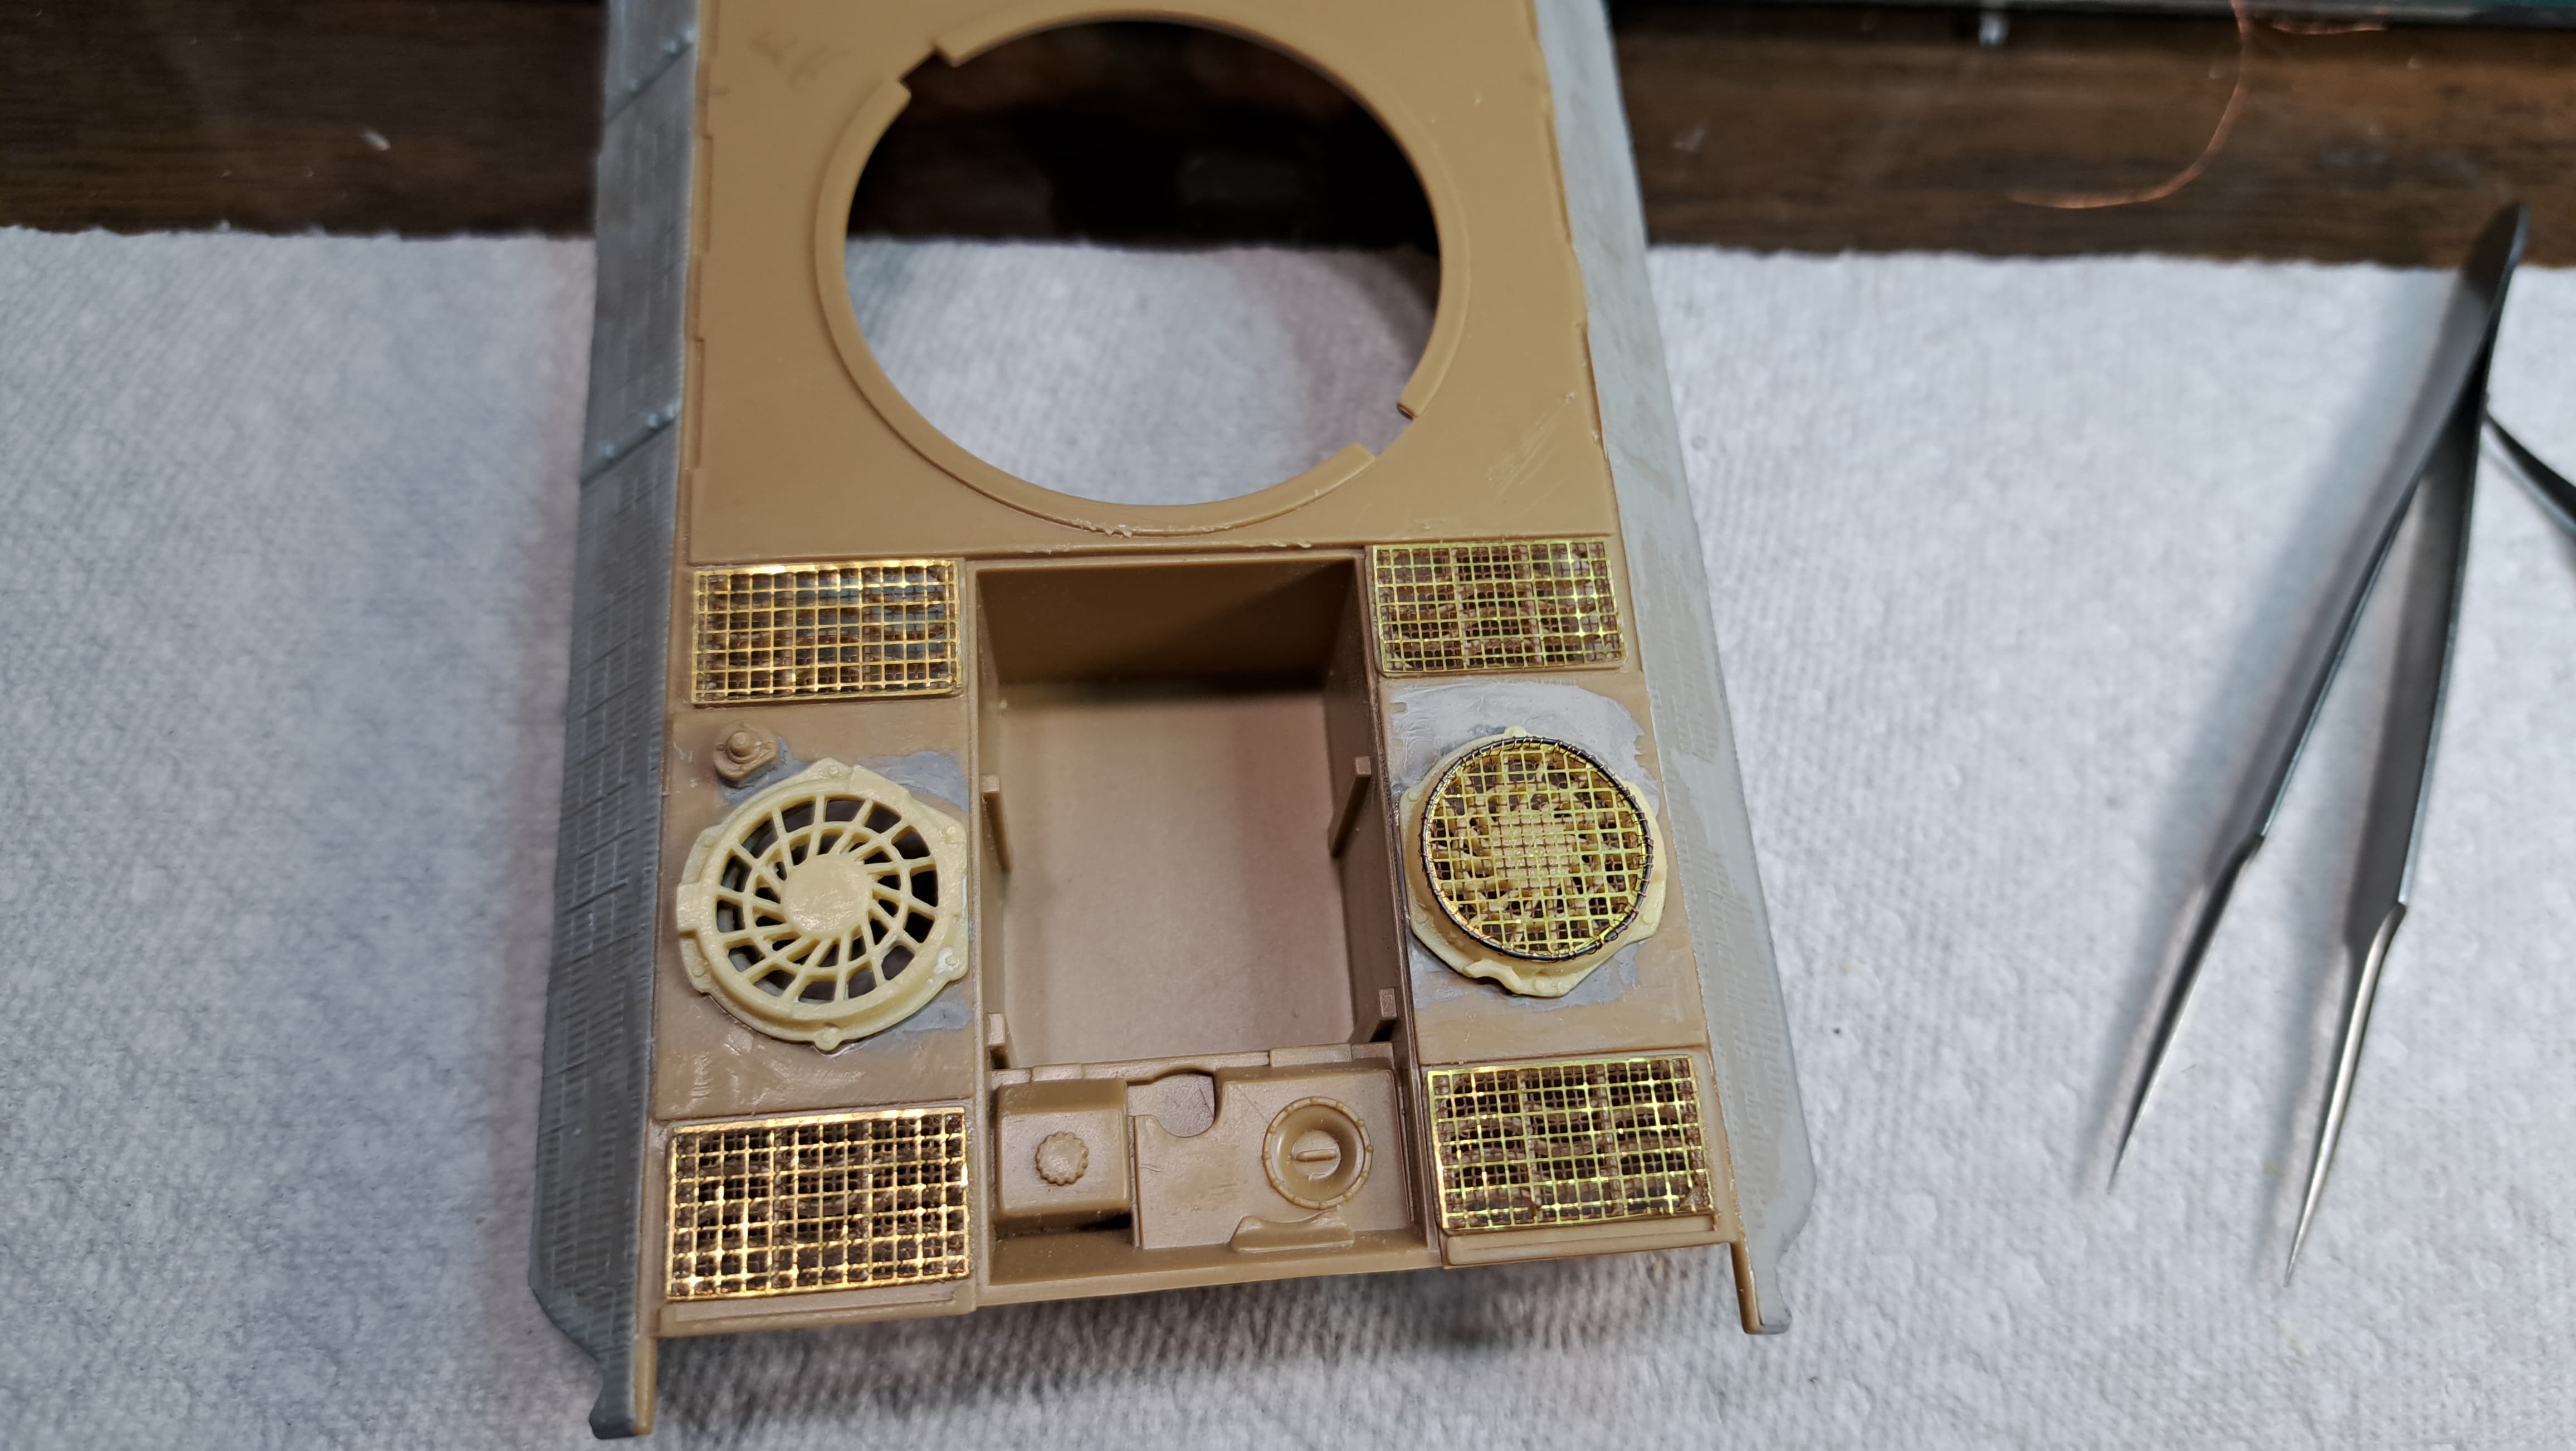
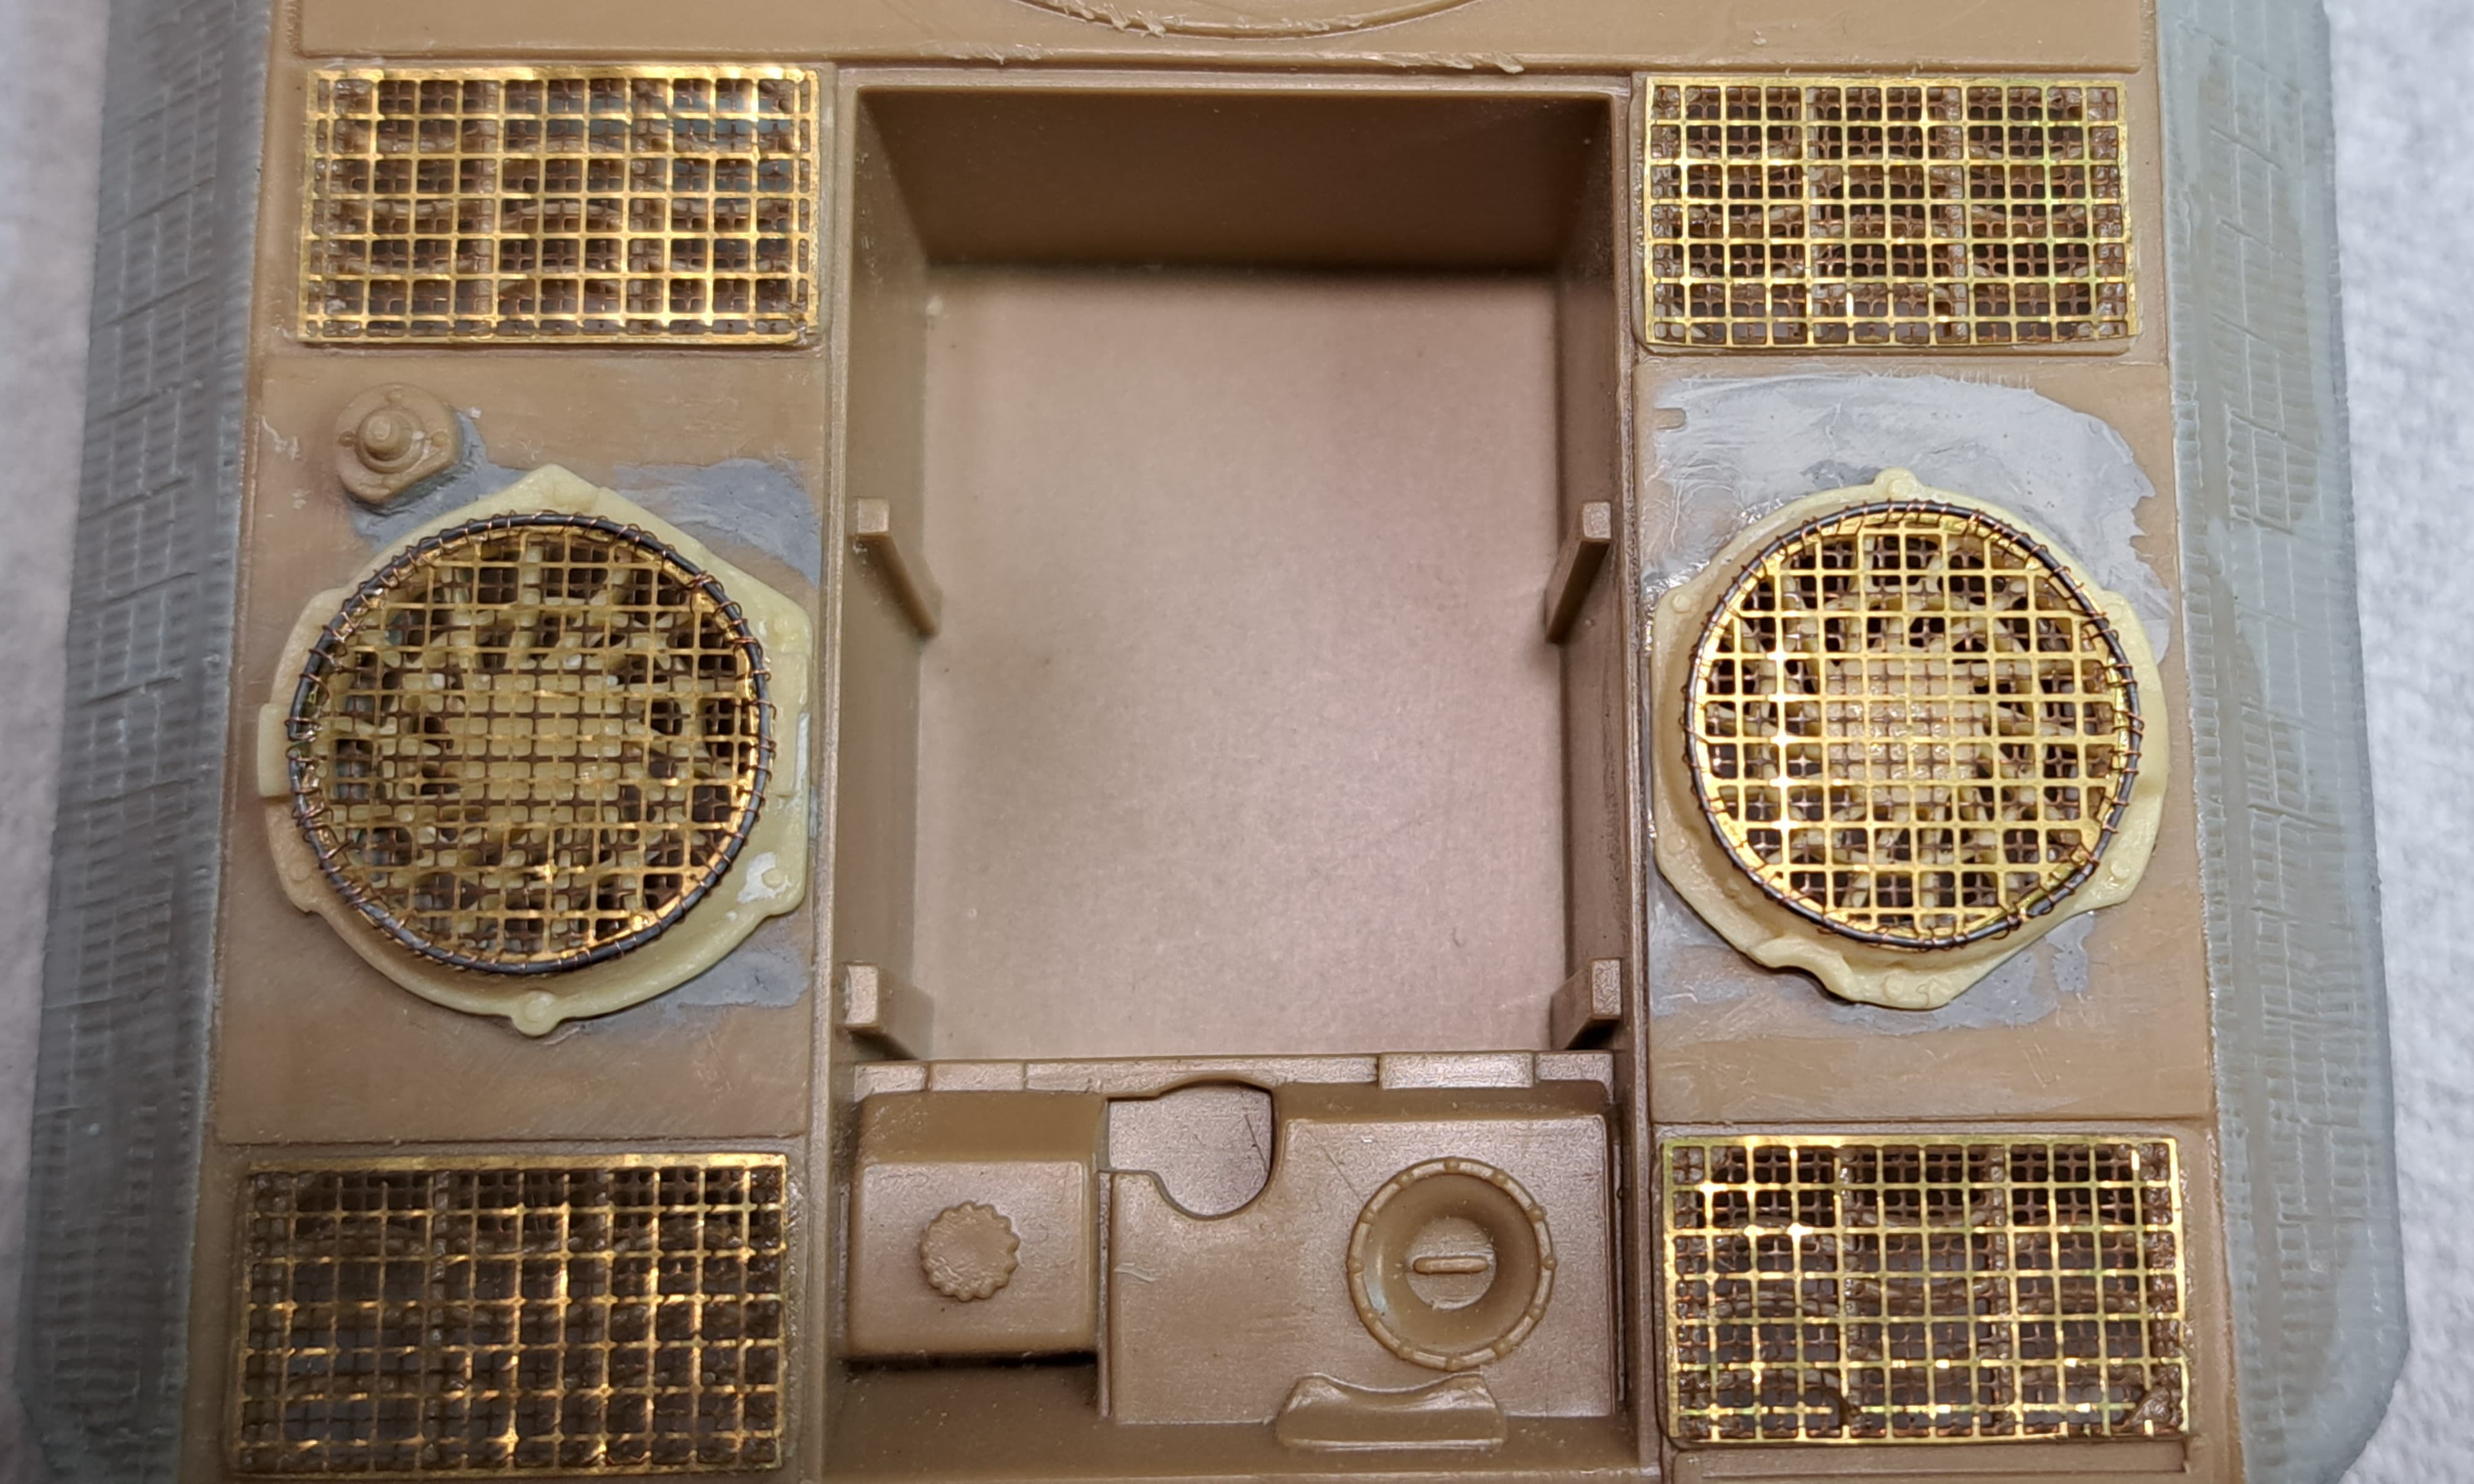
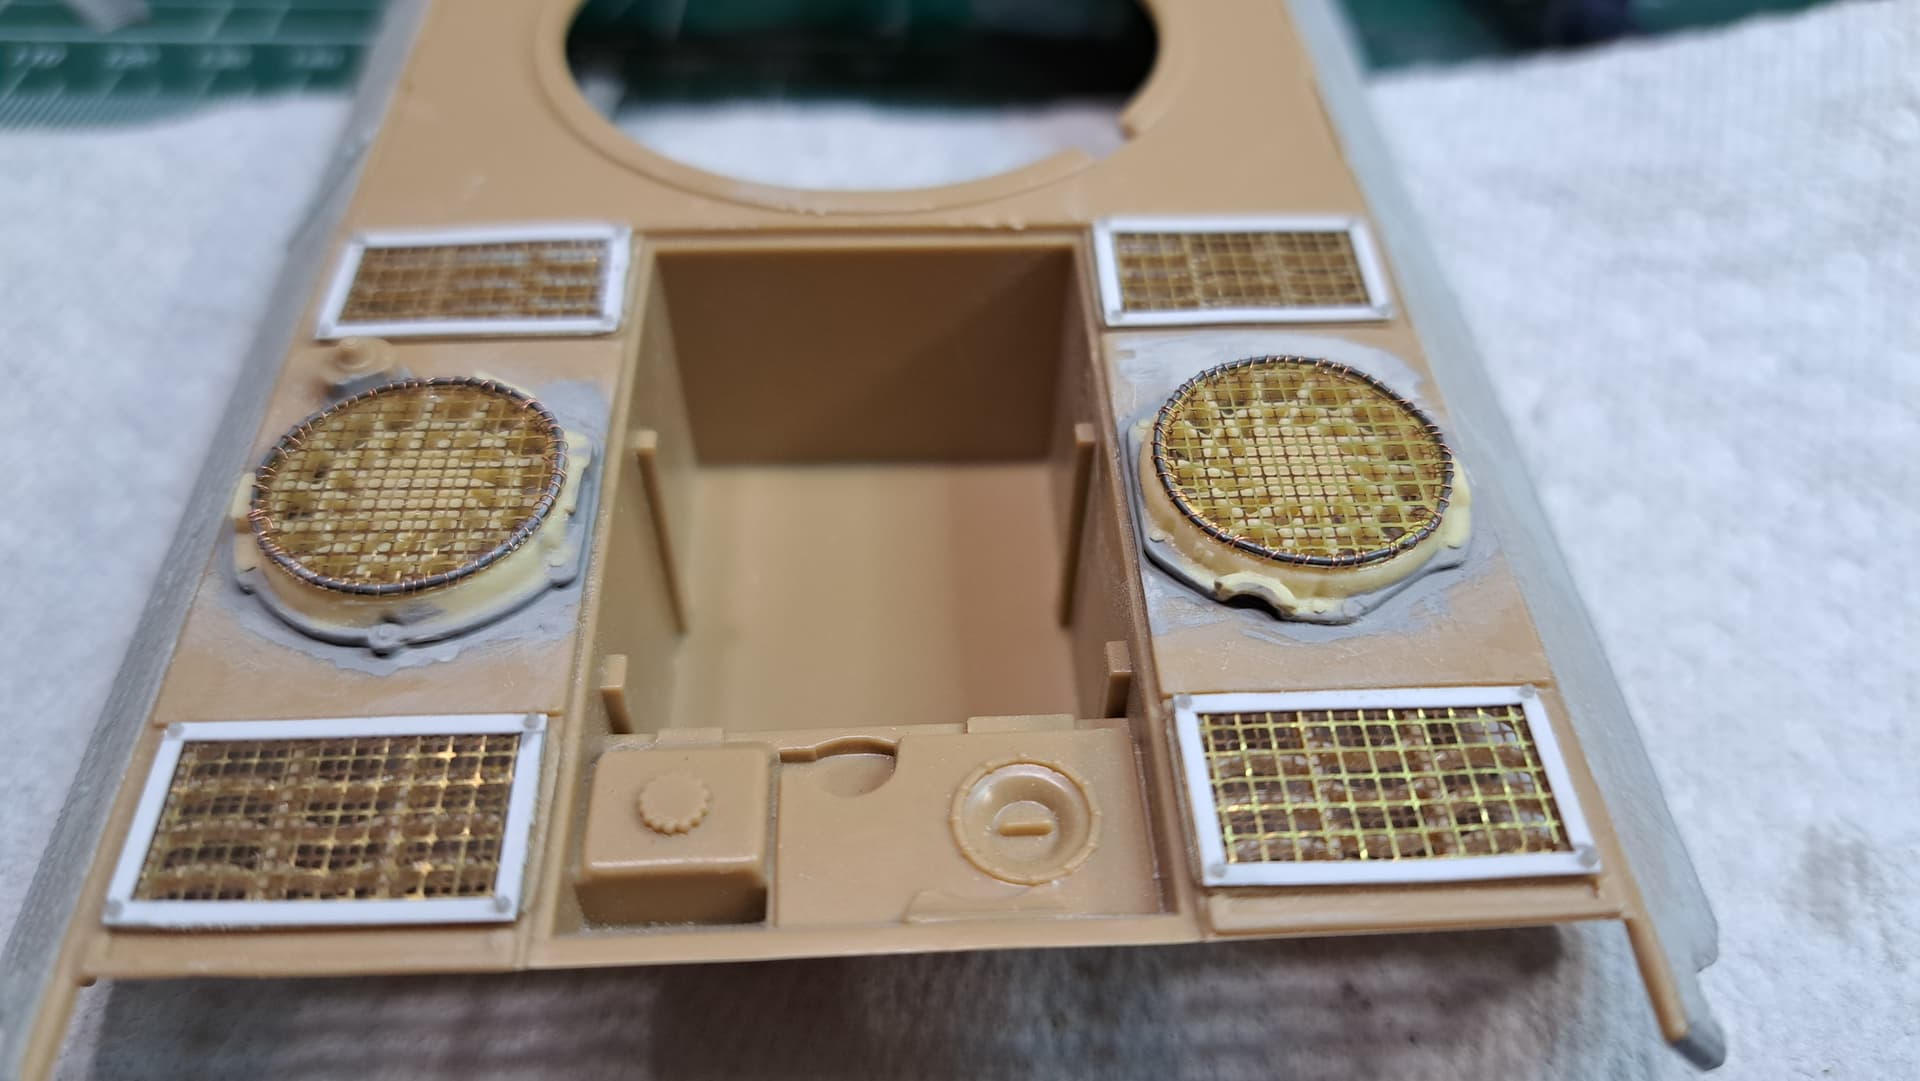
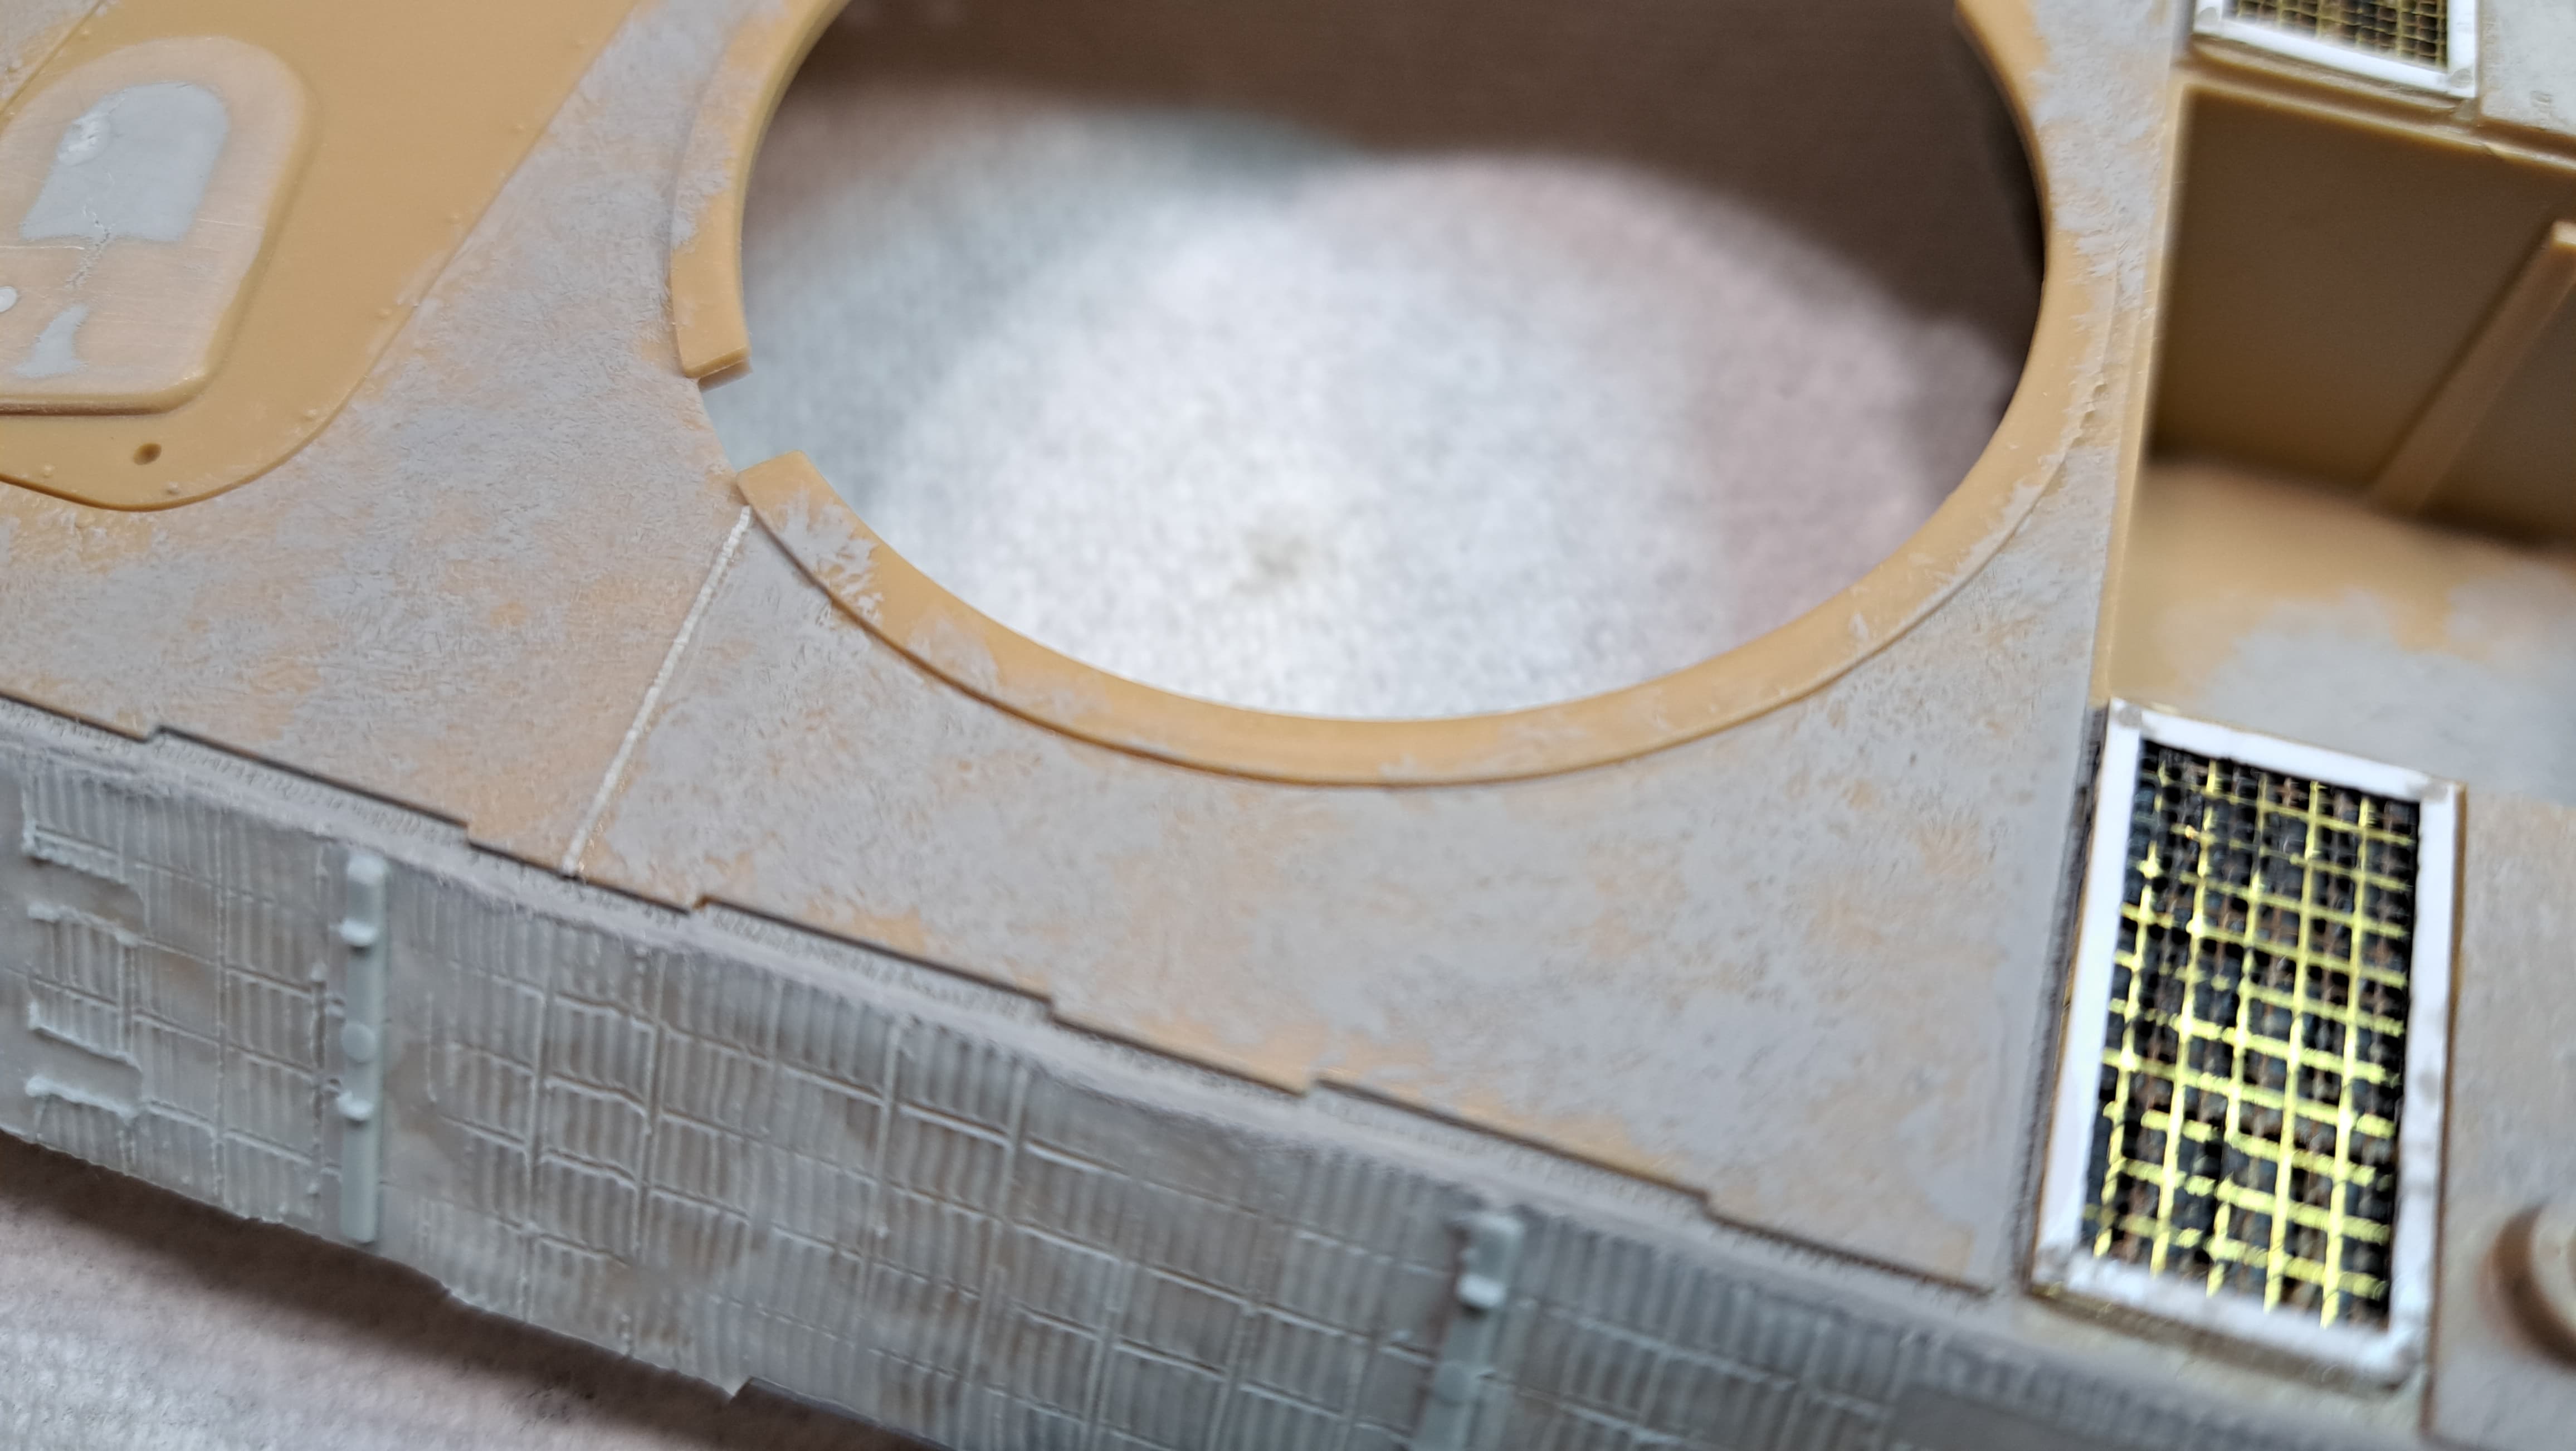
What to do about this? The Italeri round grates are pretty decent looking. They’re probably good for a later D or A model.
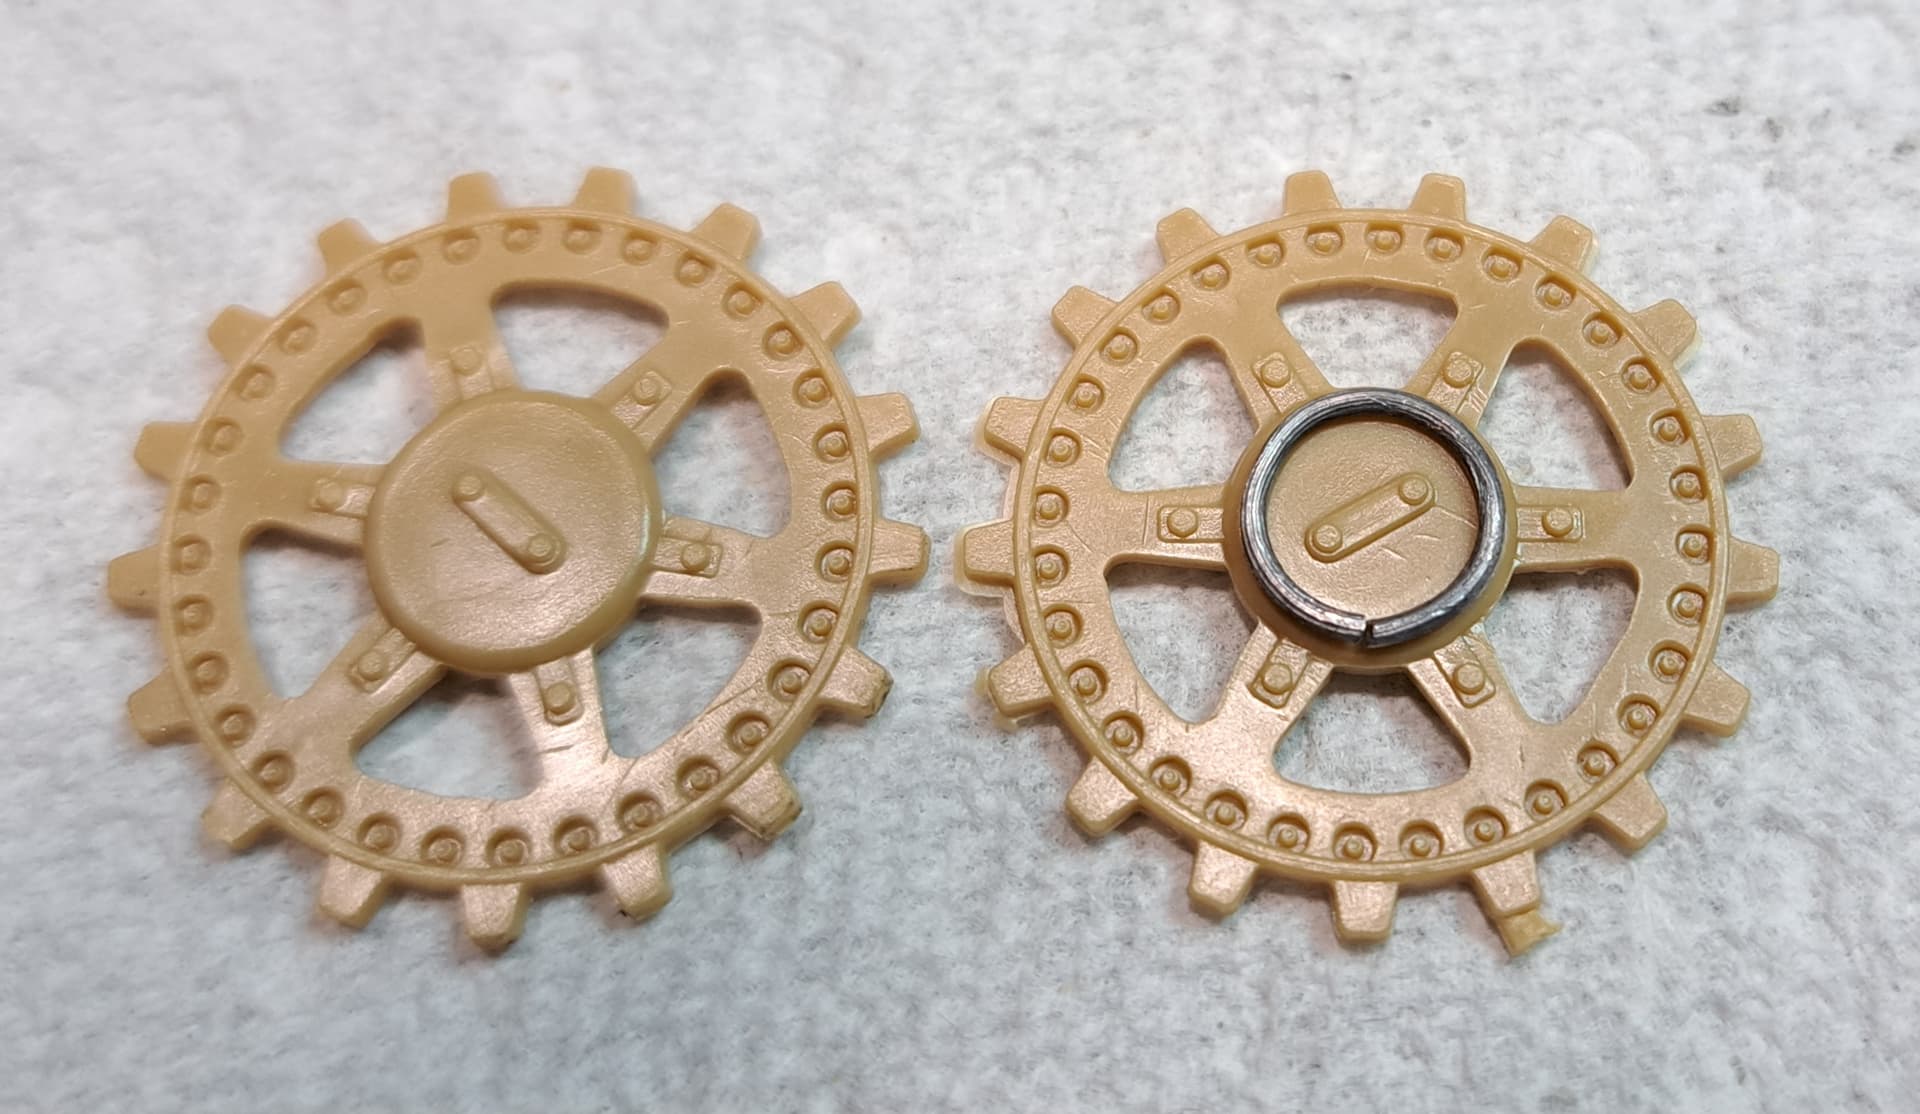
To my eye they look a little under sized.

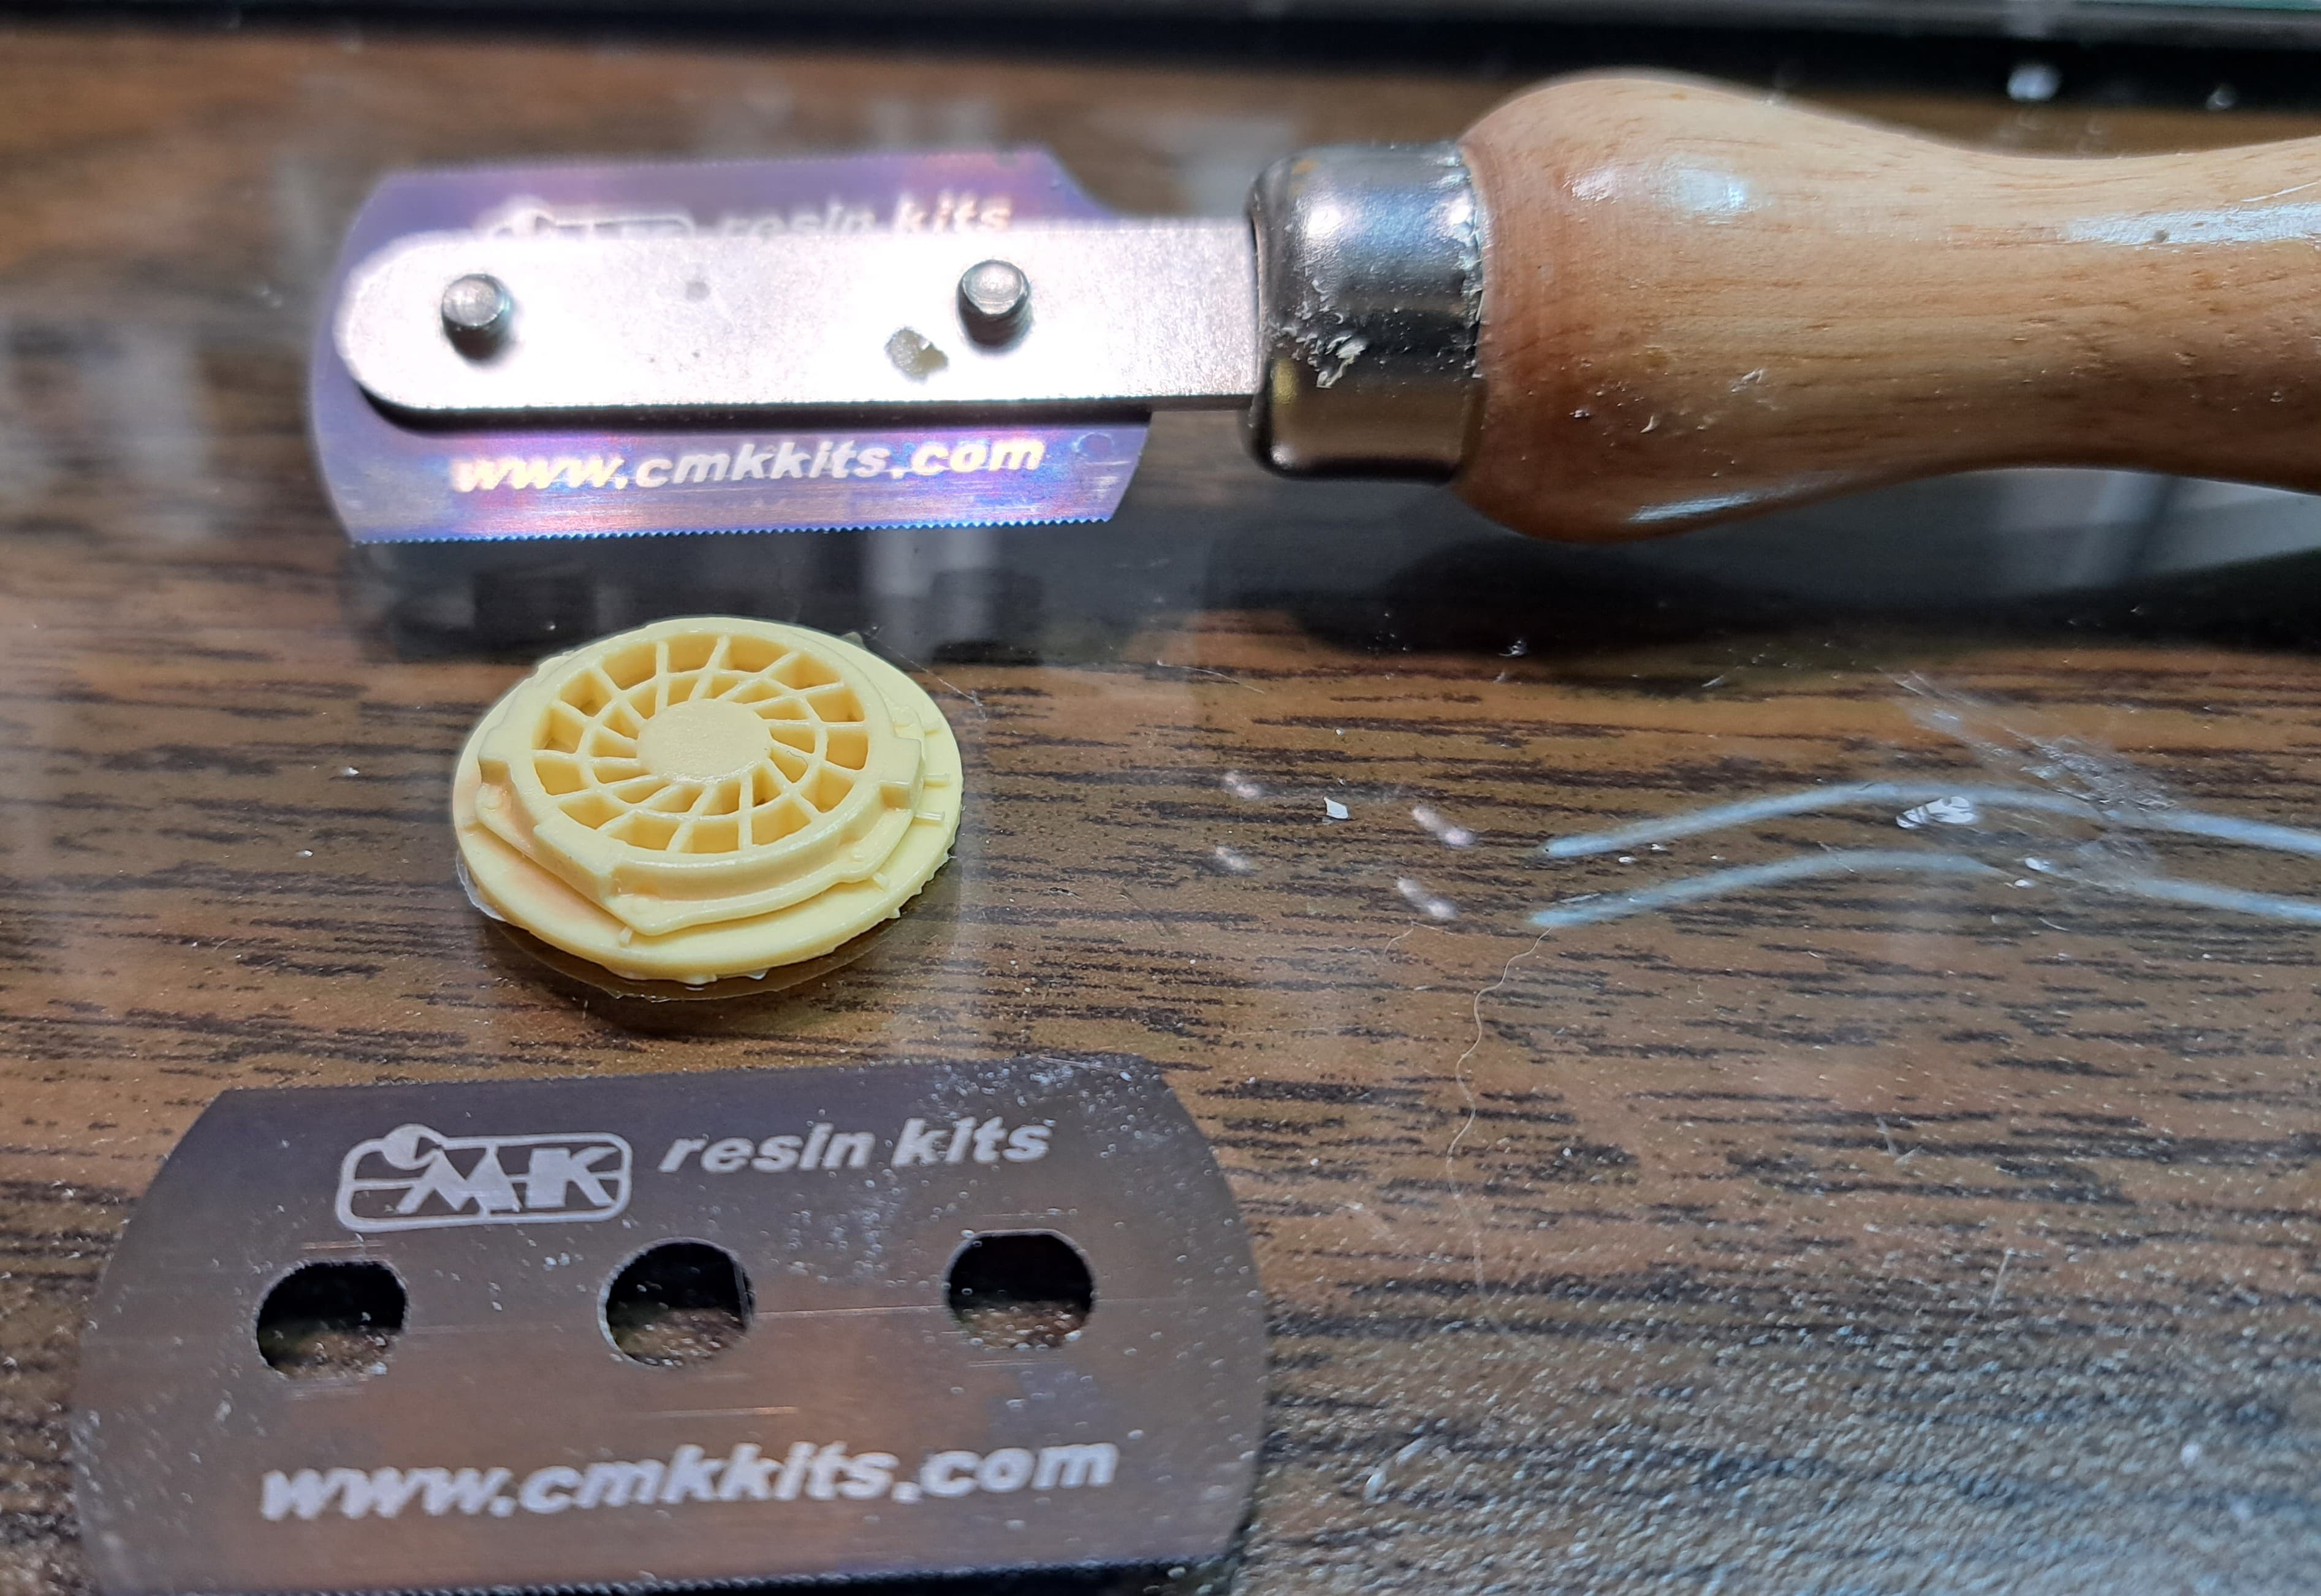
I think the Mig early Panther D grate (yellow) & Dragon ausf A grate support that impression. No, I’m not breaking out the calipers to see who’s most accurate. This model has so many minor & one major dimension errors, nothing is caliper critical to me with it at this point.

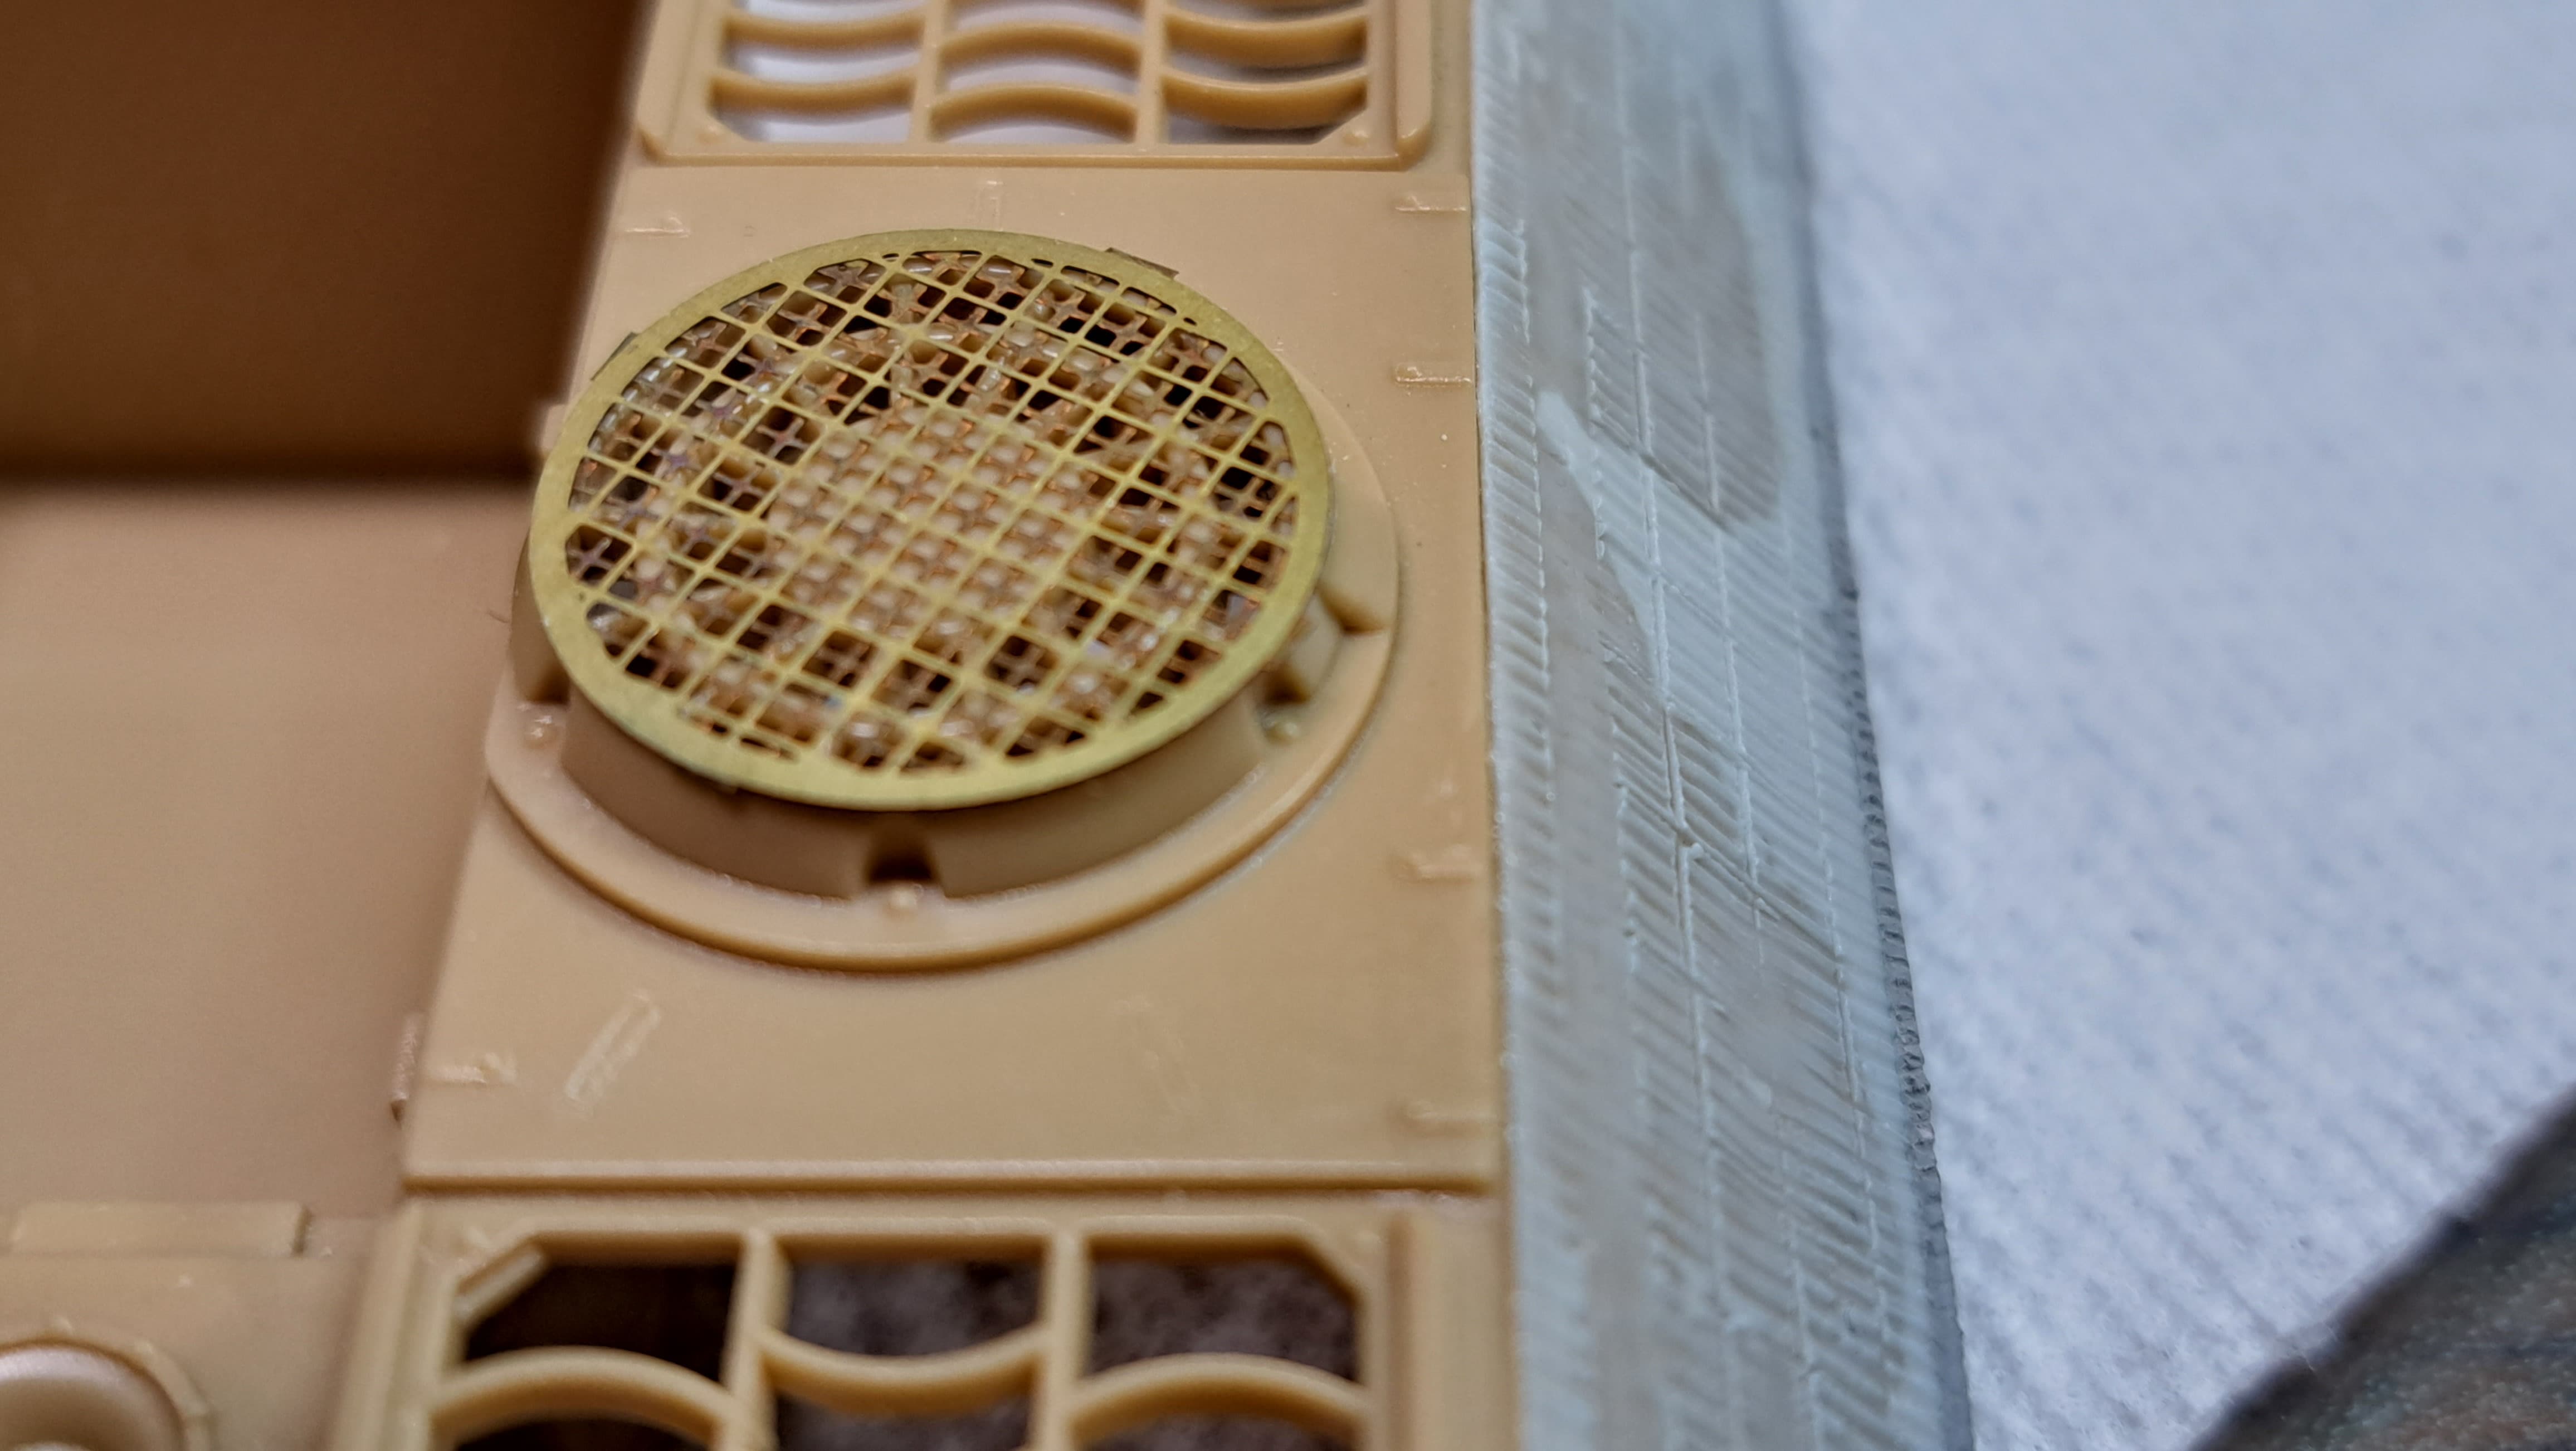
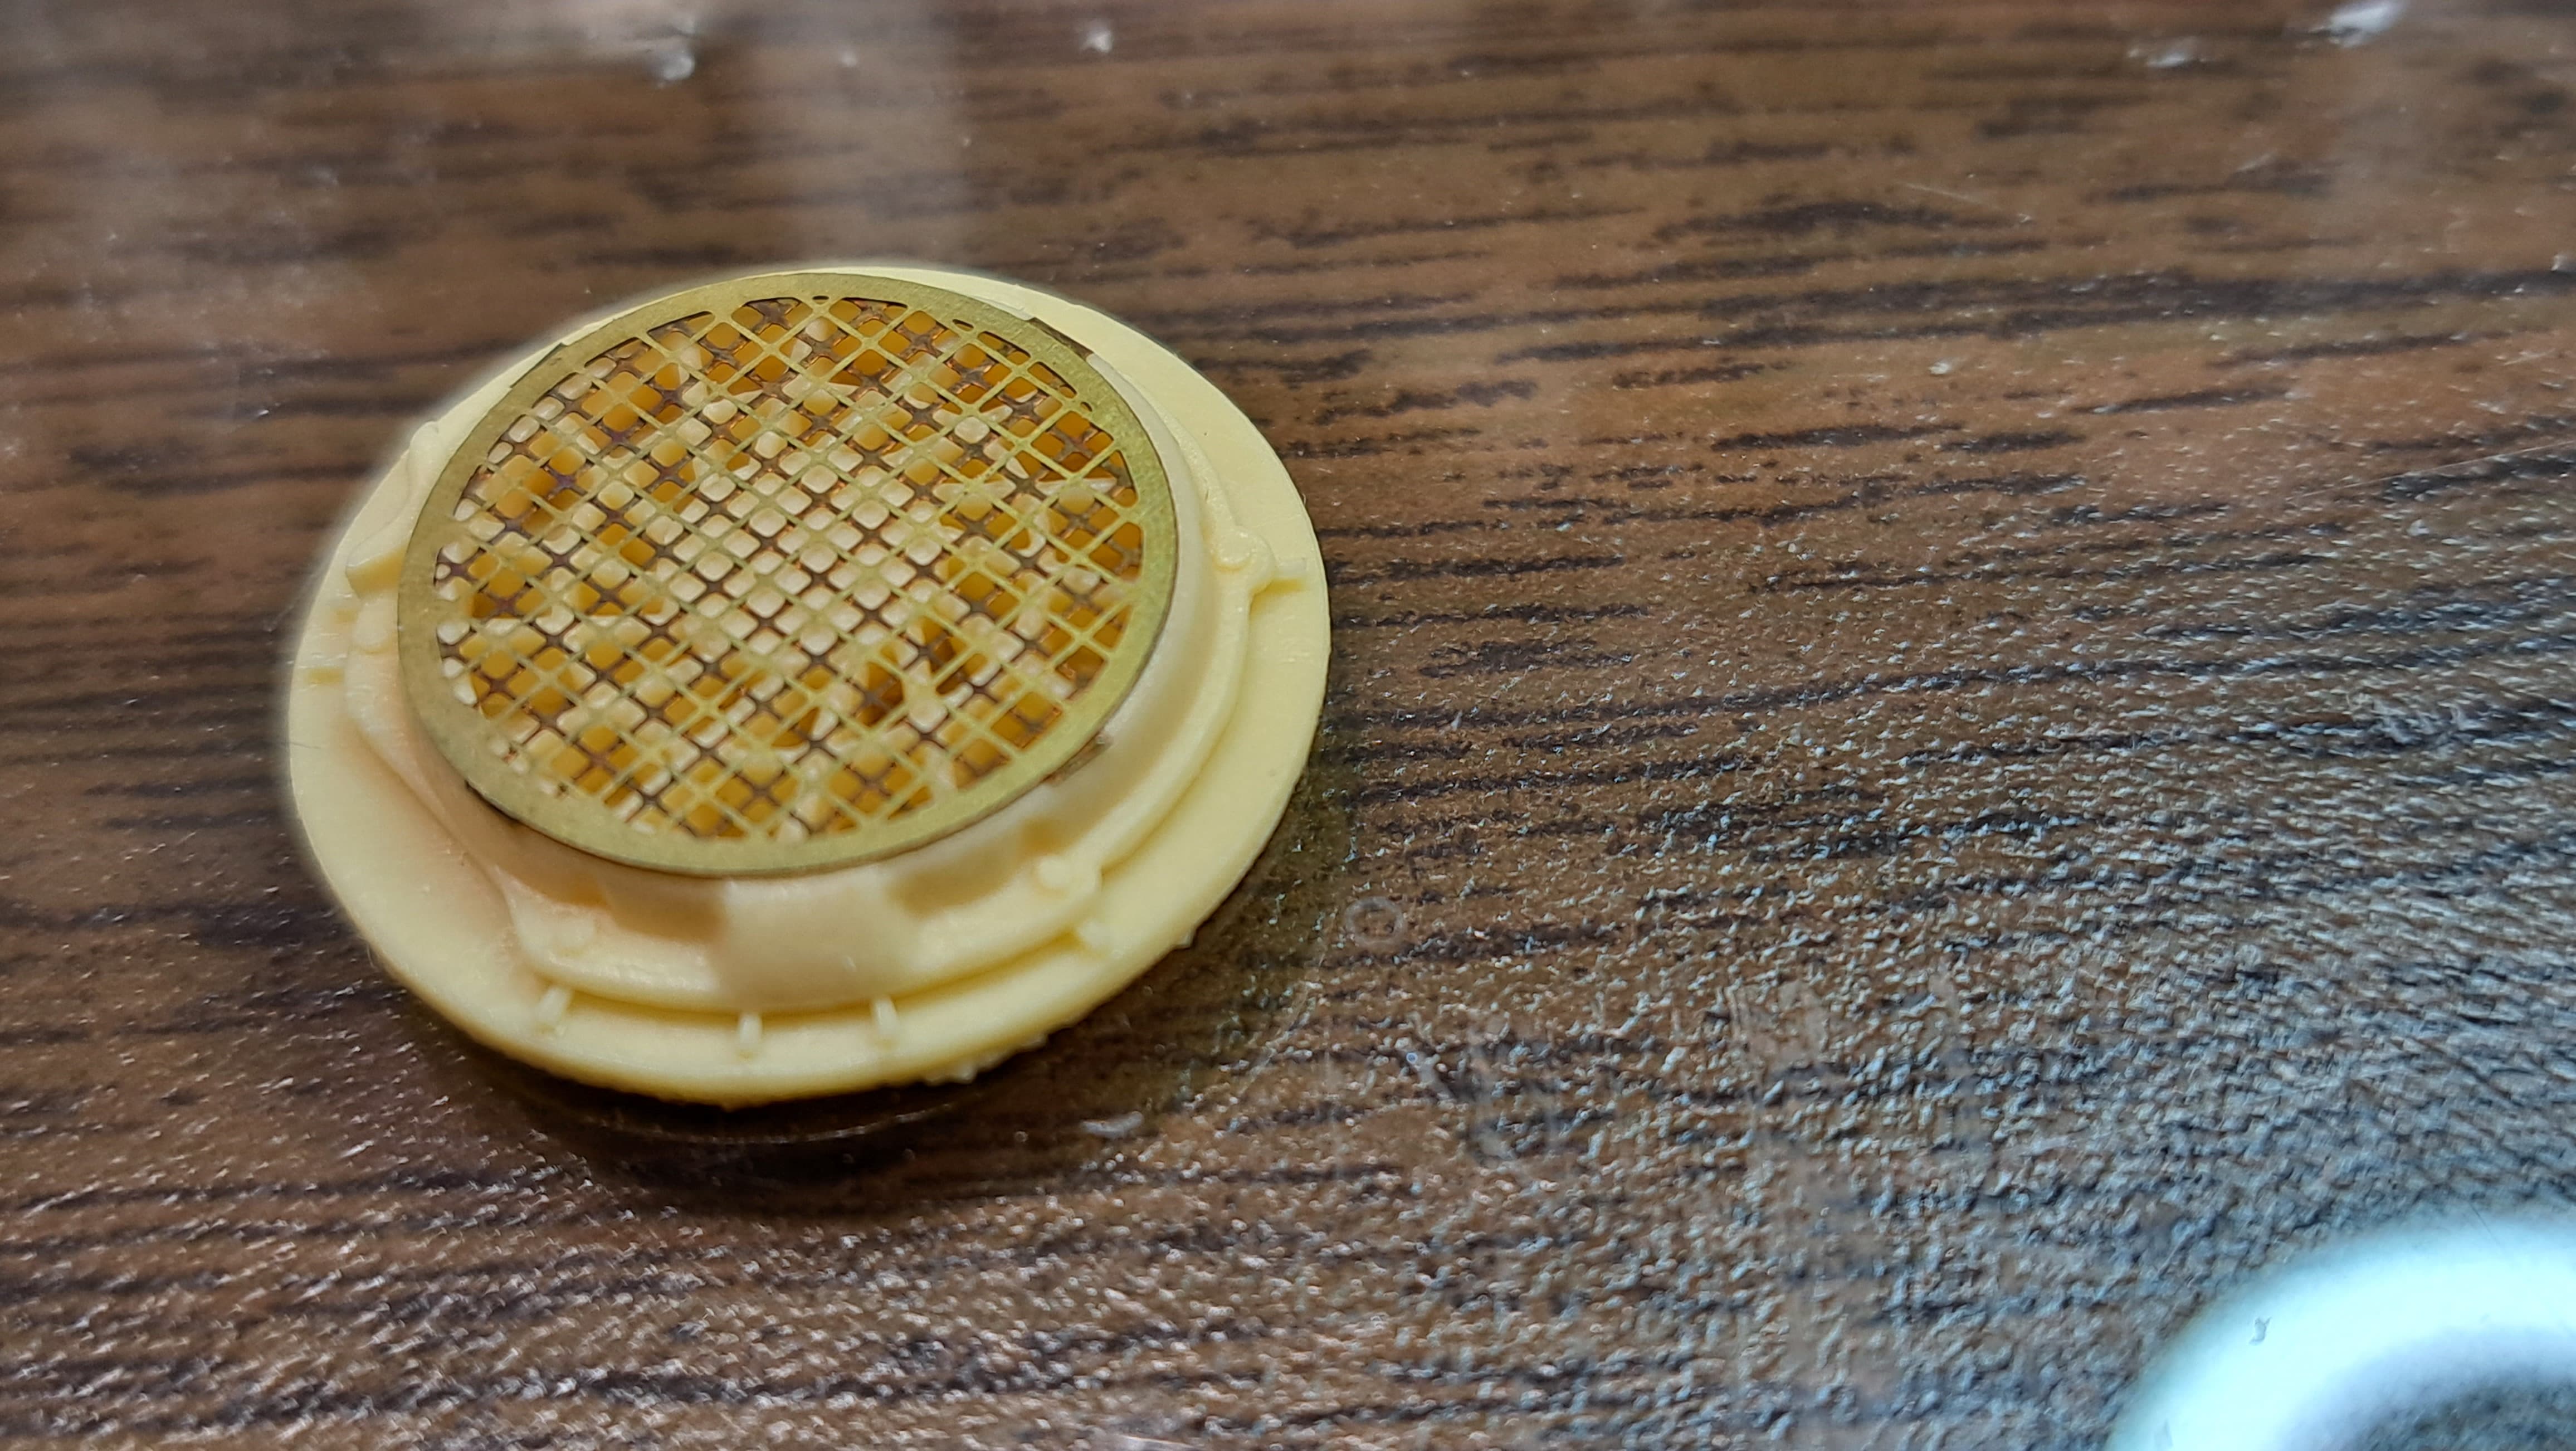
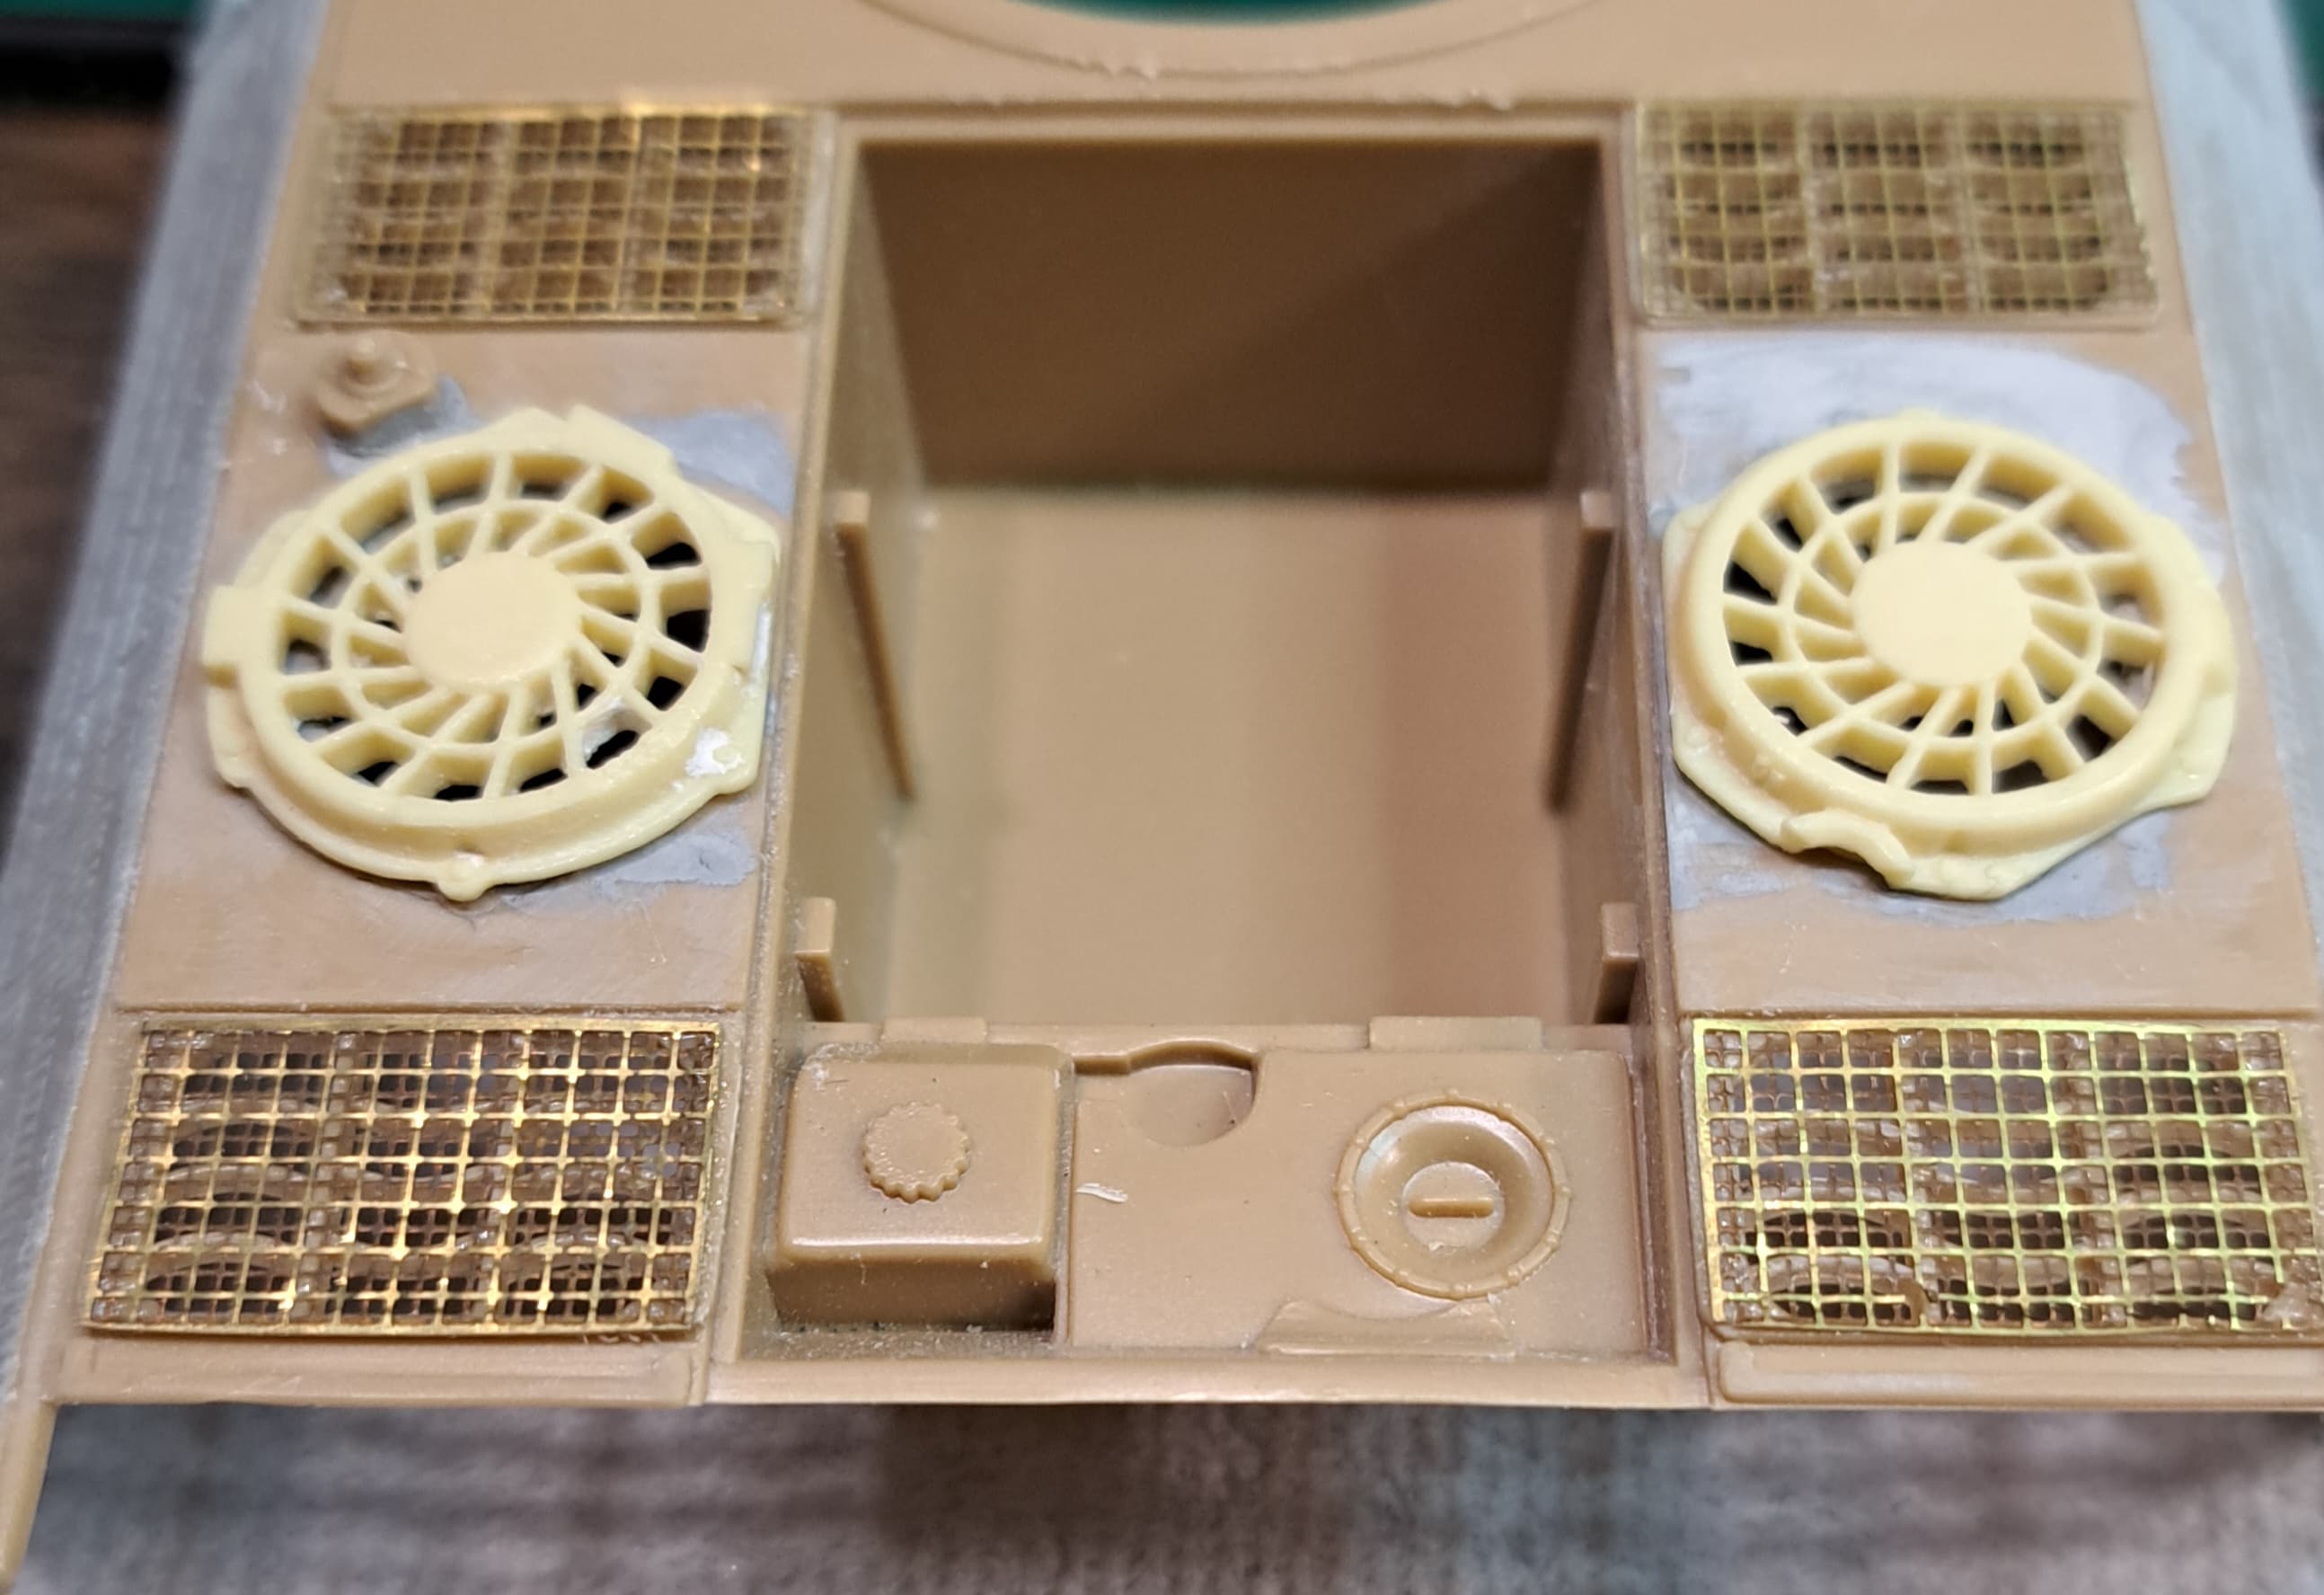
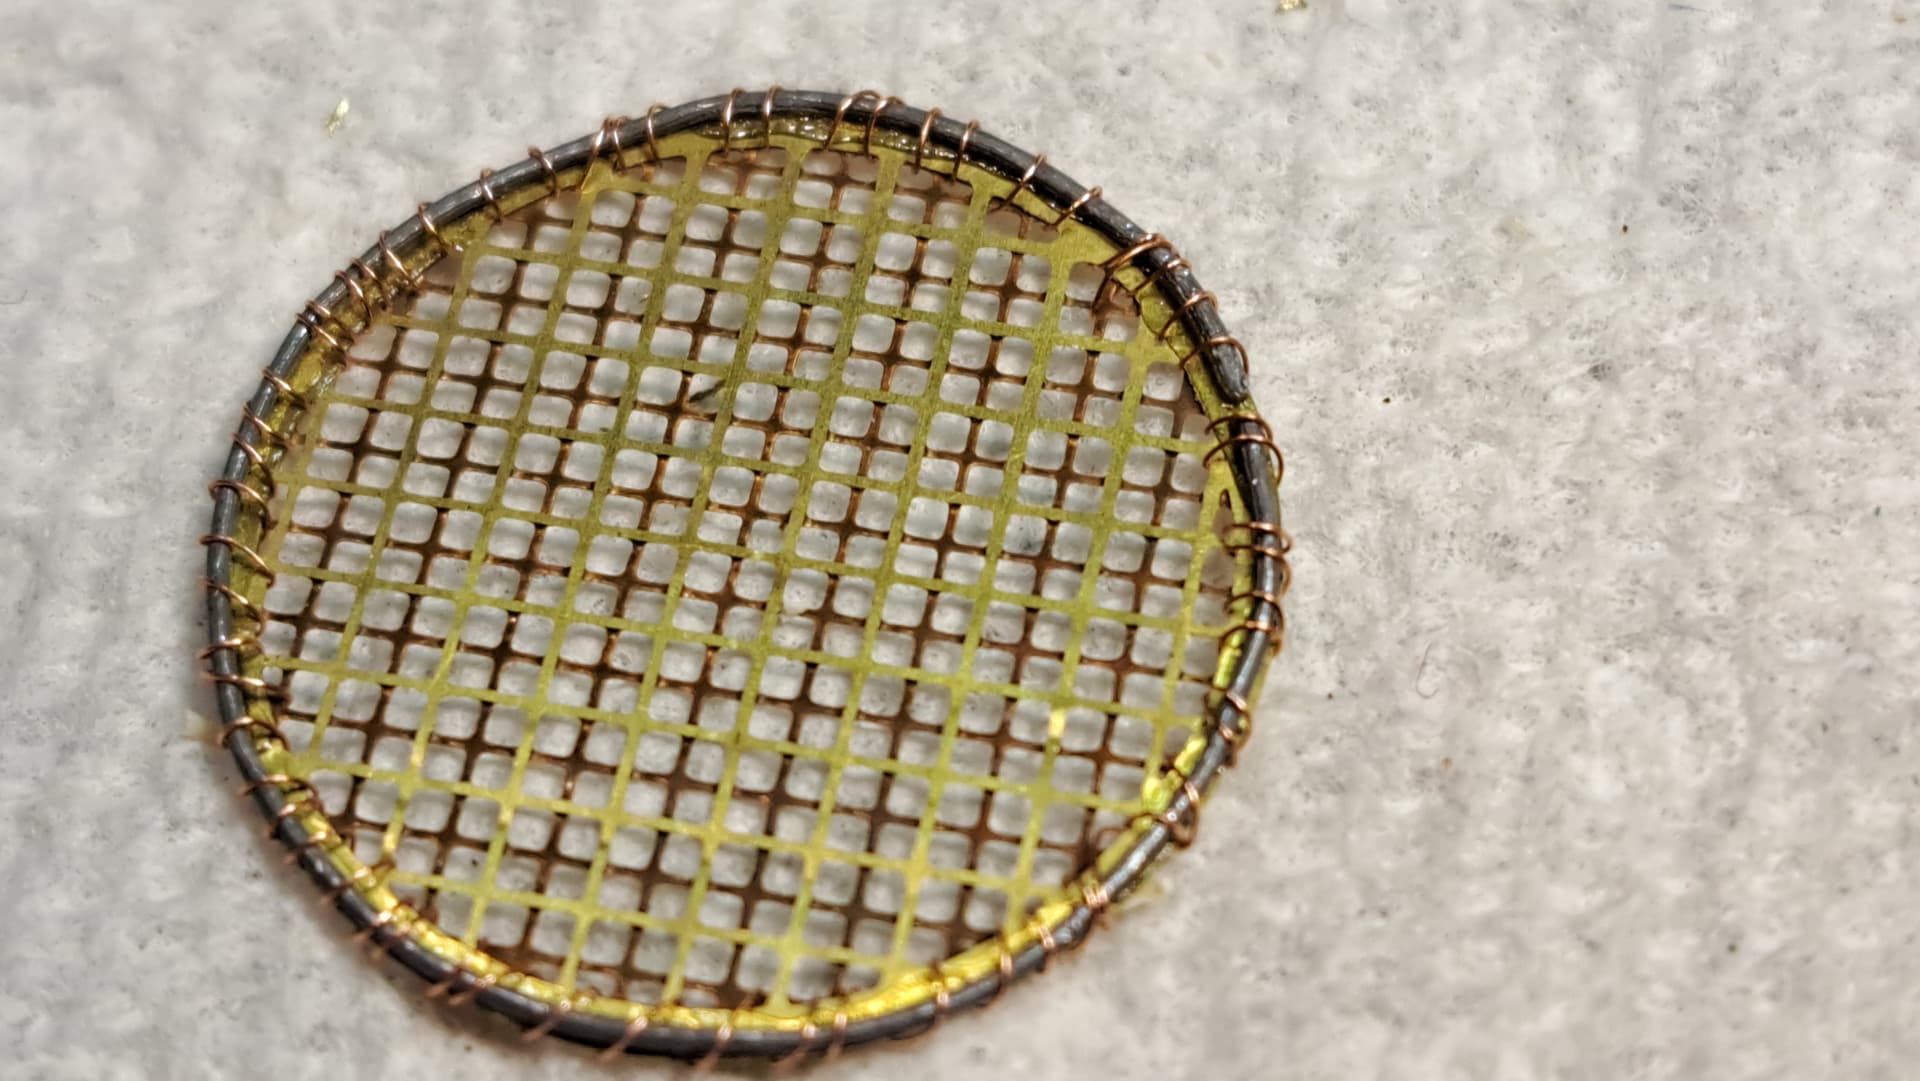
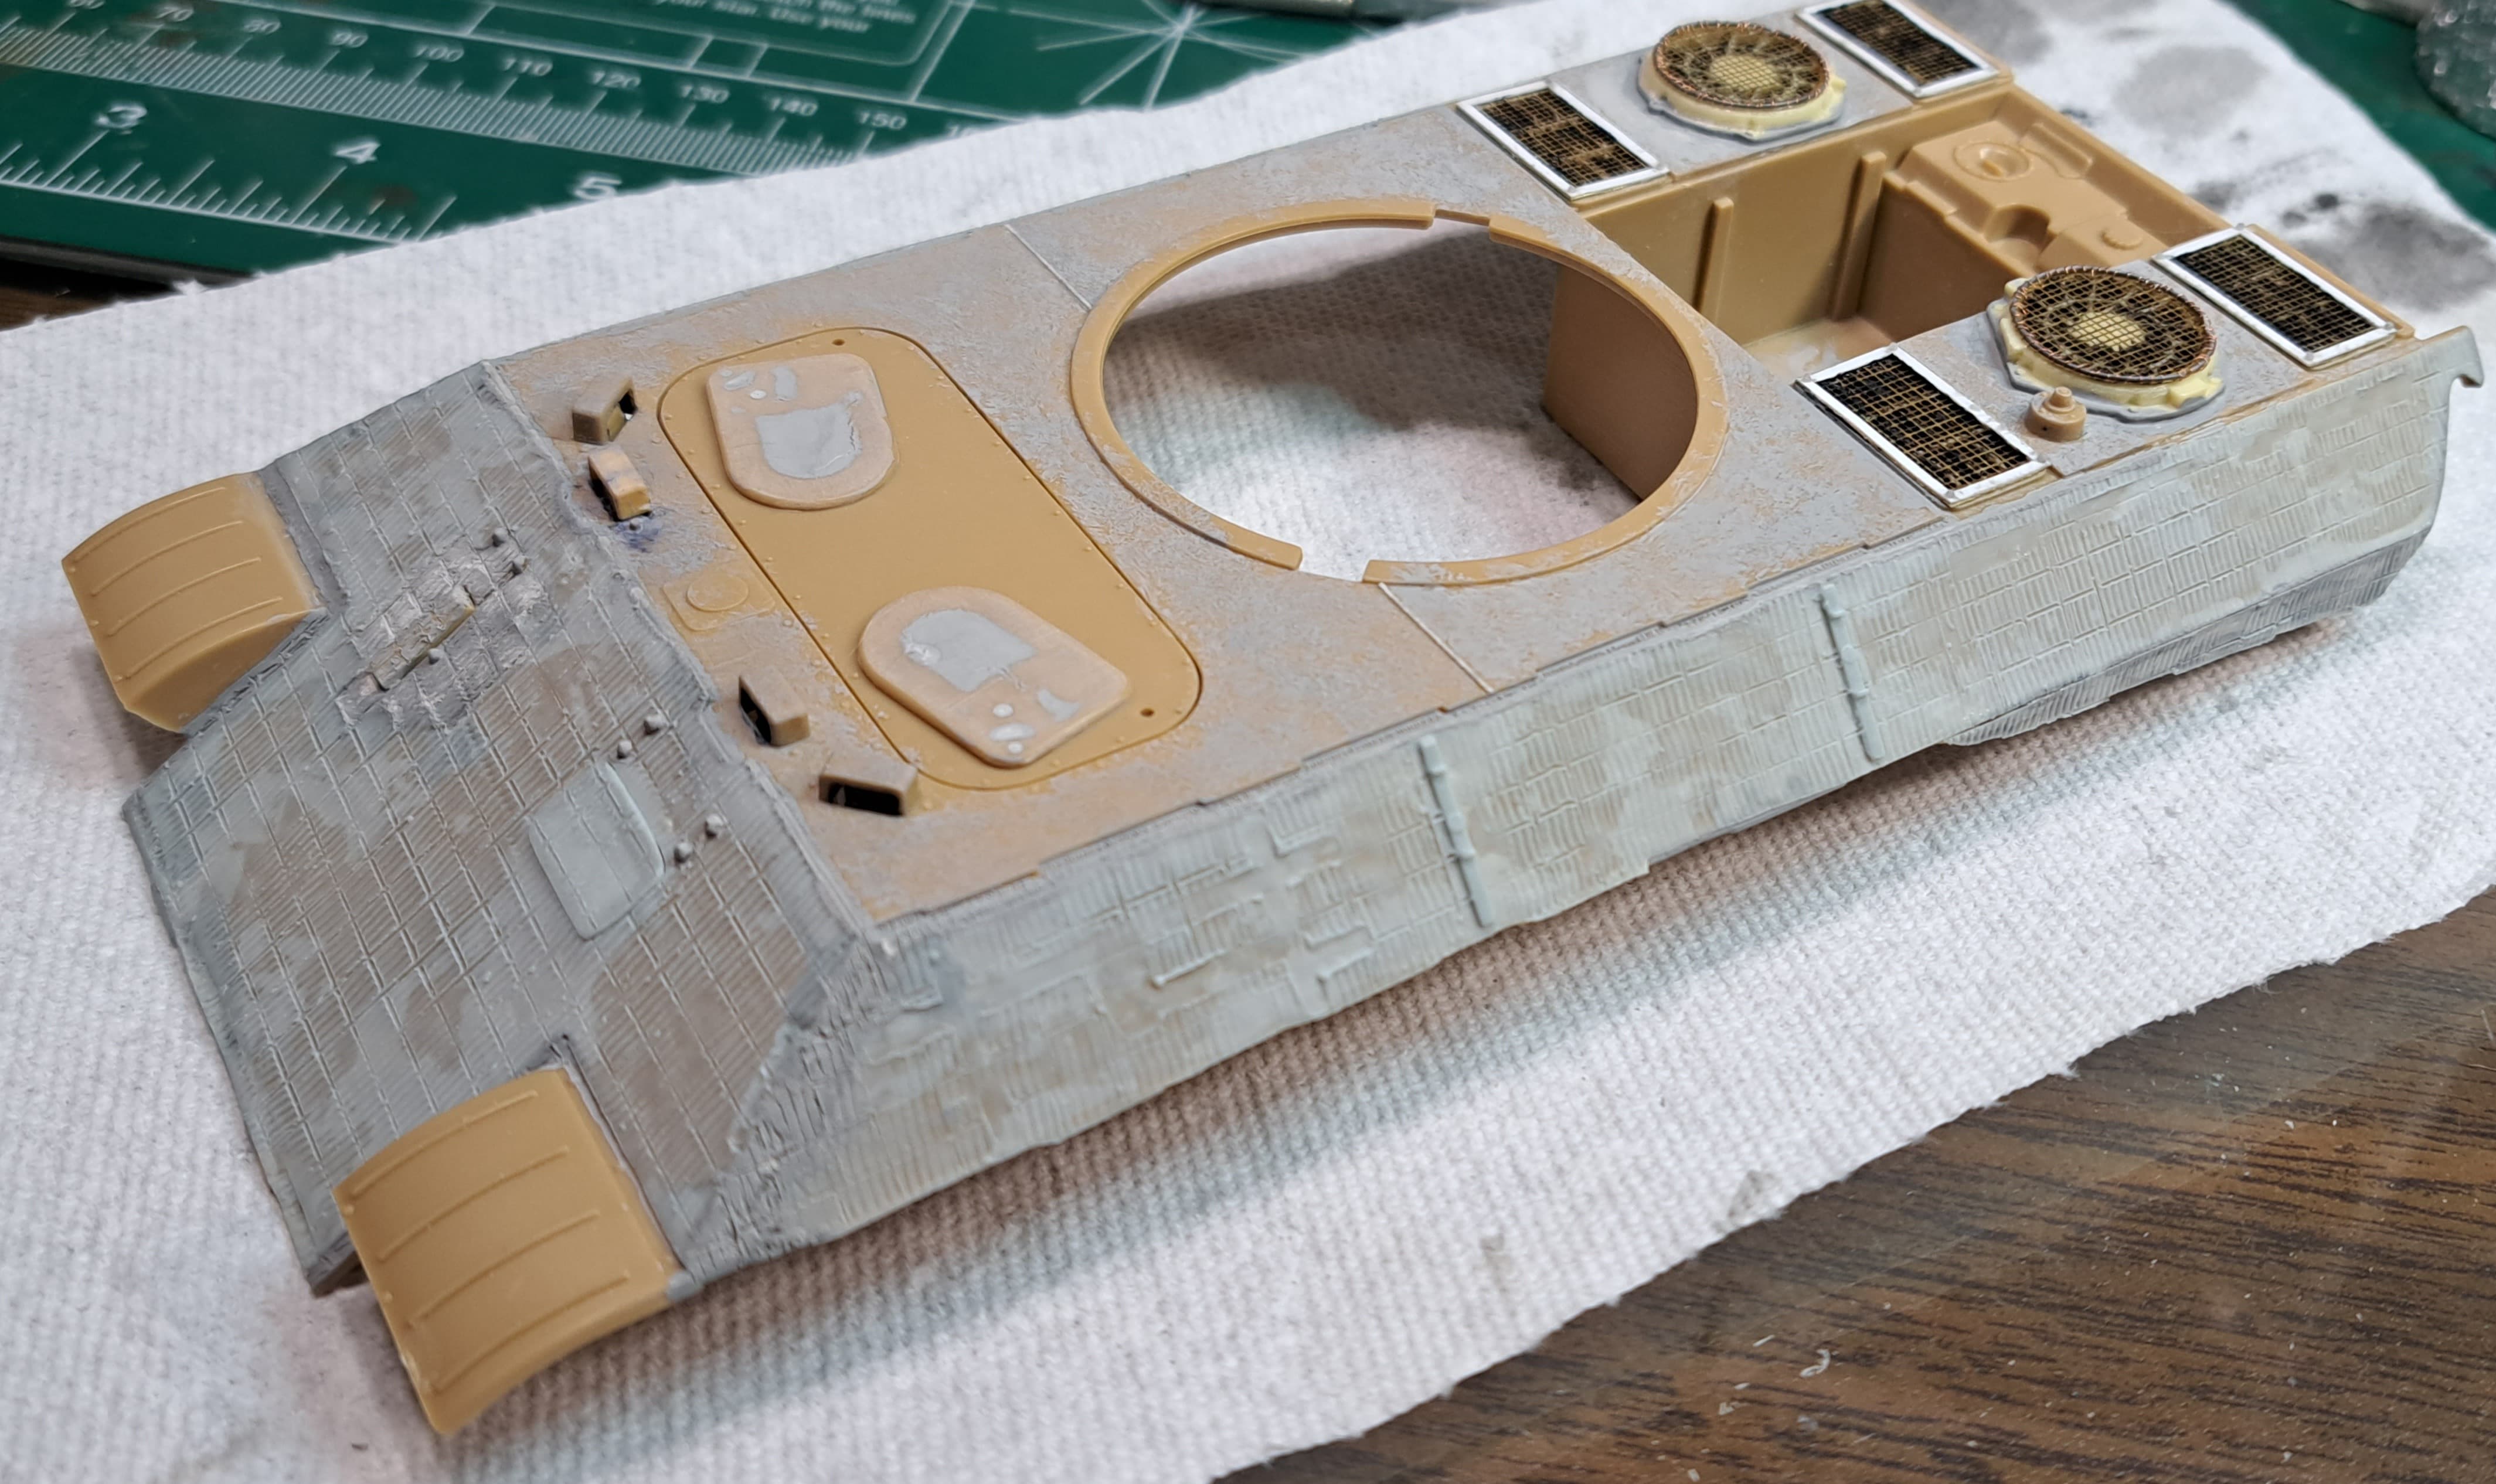
The Armor Research Company PE screens don’t fit the Italeri cover very well. This is no one’s fault as the ARC parts are for Tamiya’s relic of a Panther A kit.

Surprisingly the ARC screen does fit the Mig grate pretty well! It also fits the Dragon part pretty well.

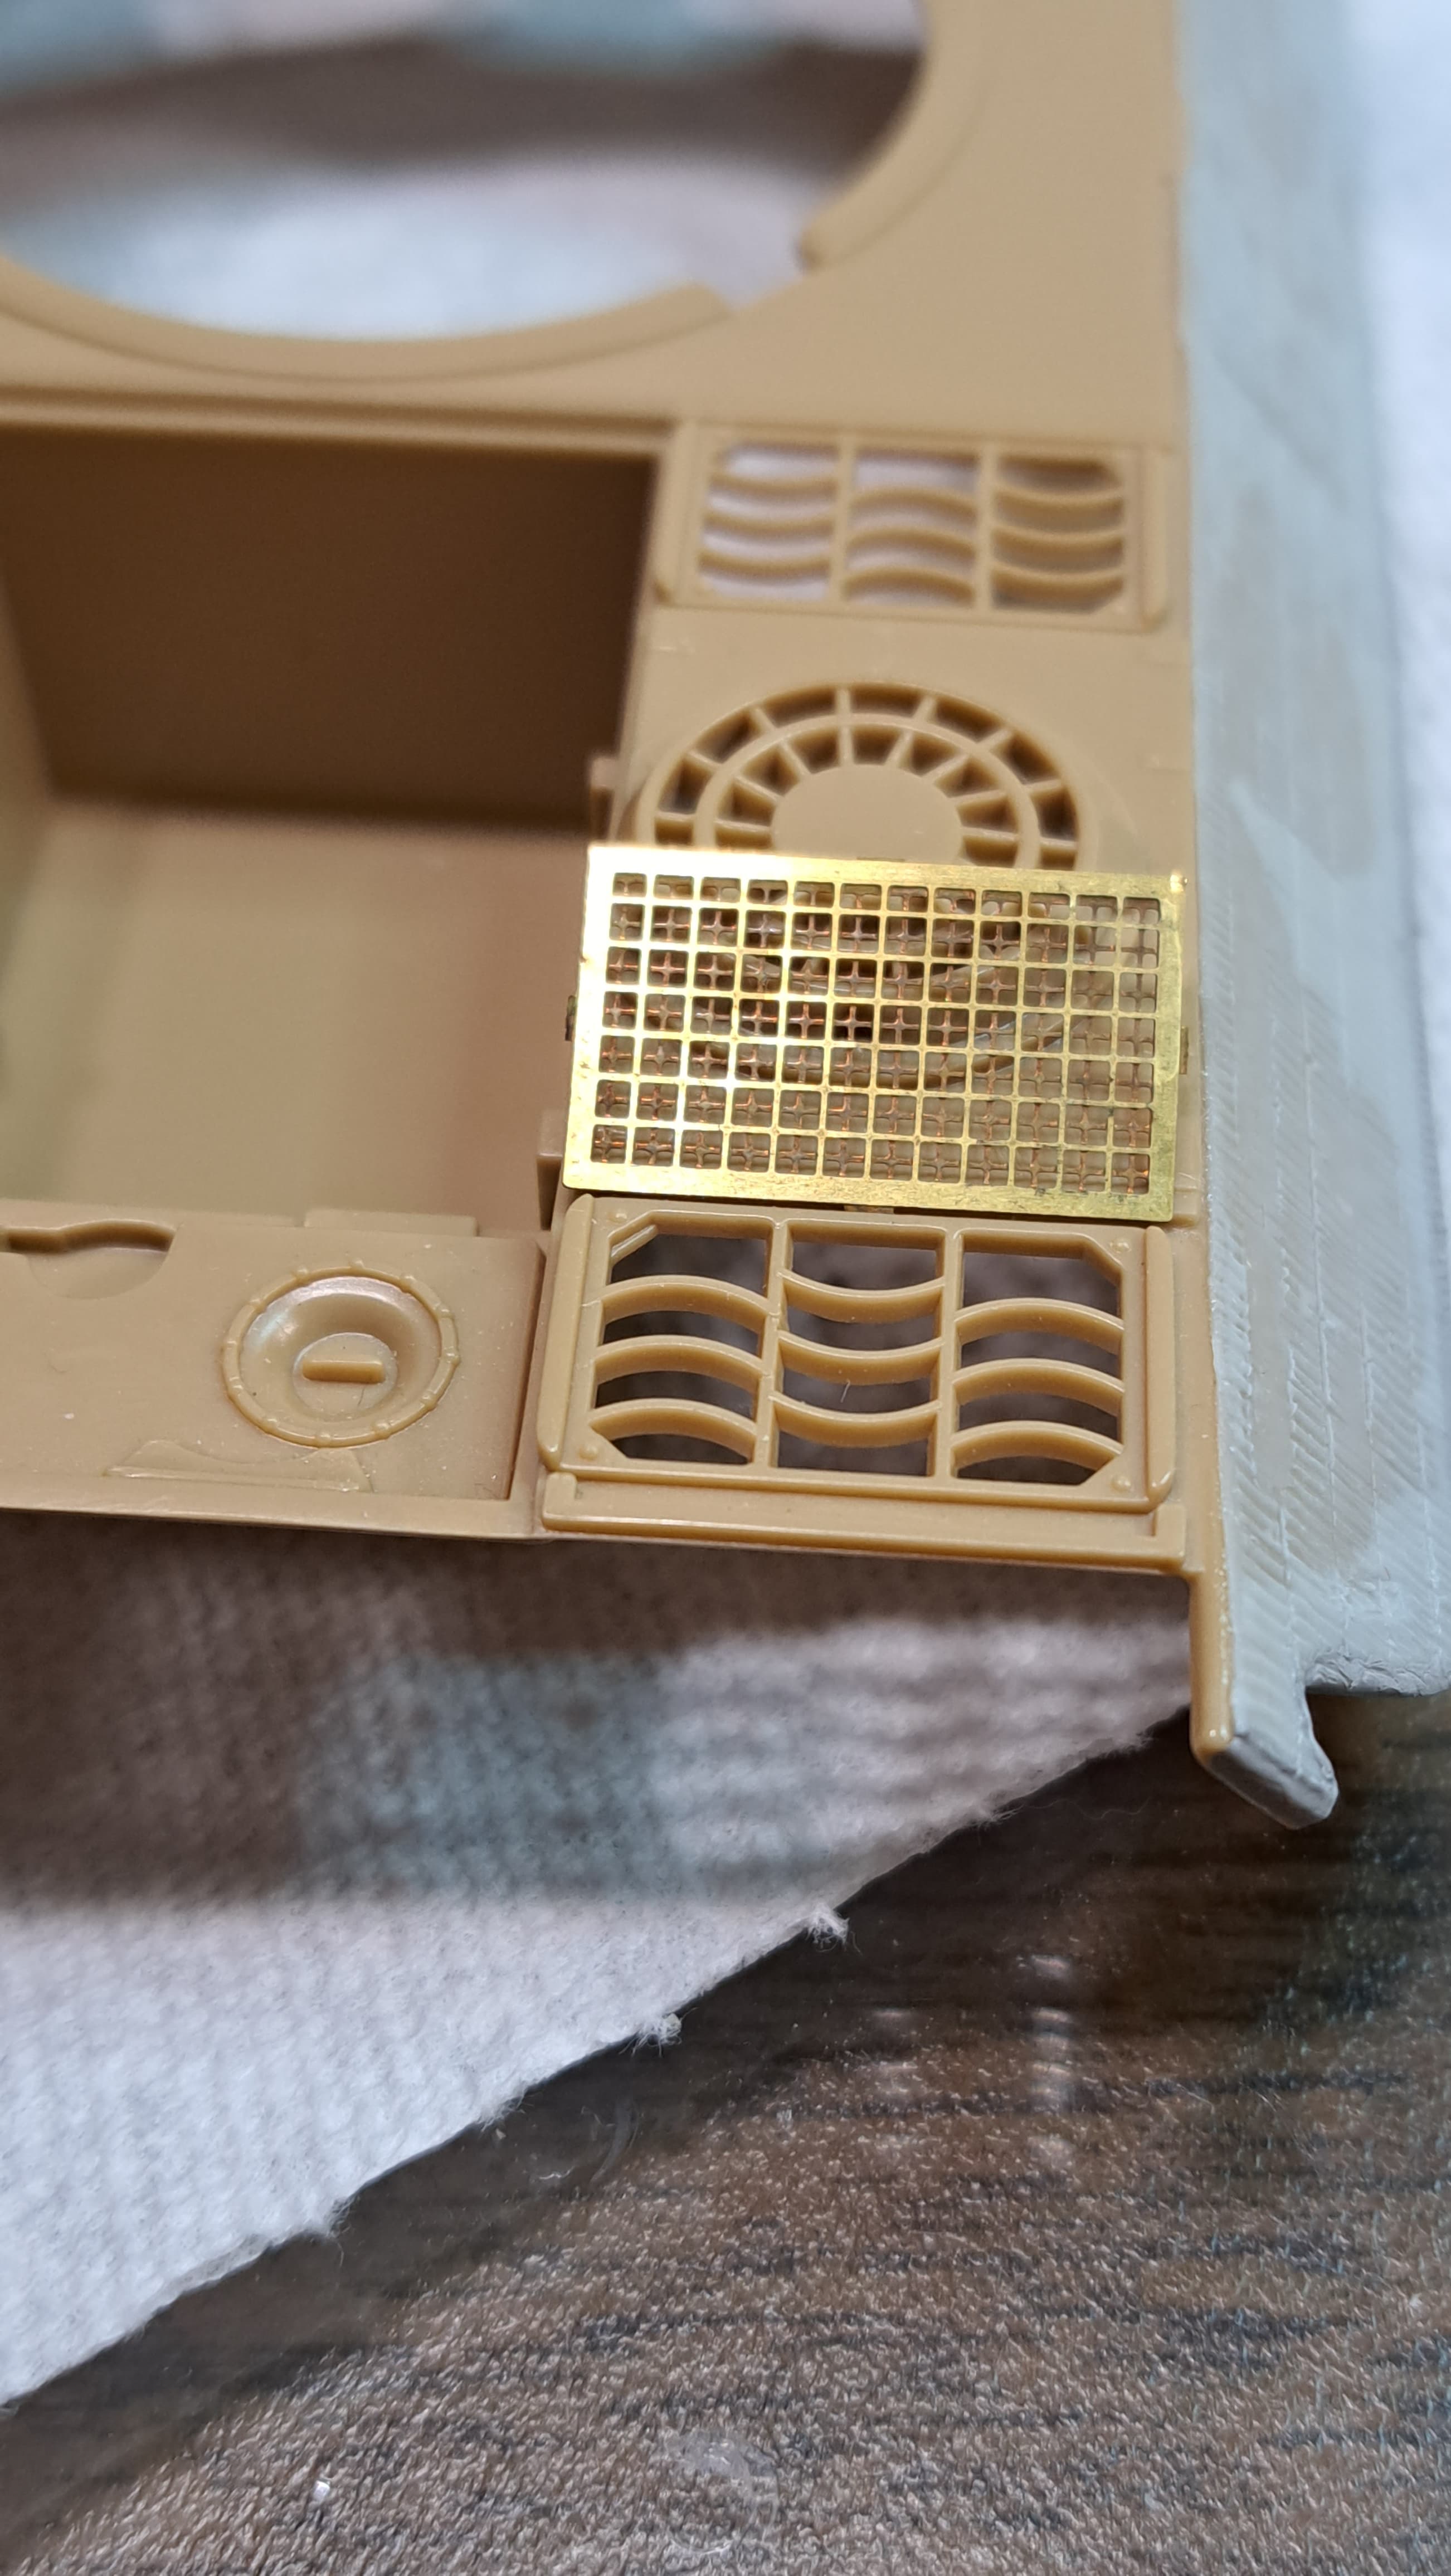
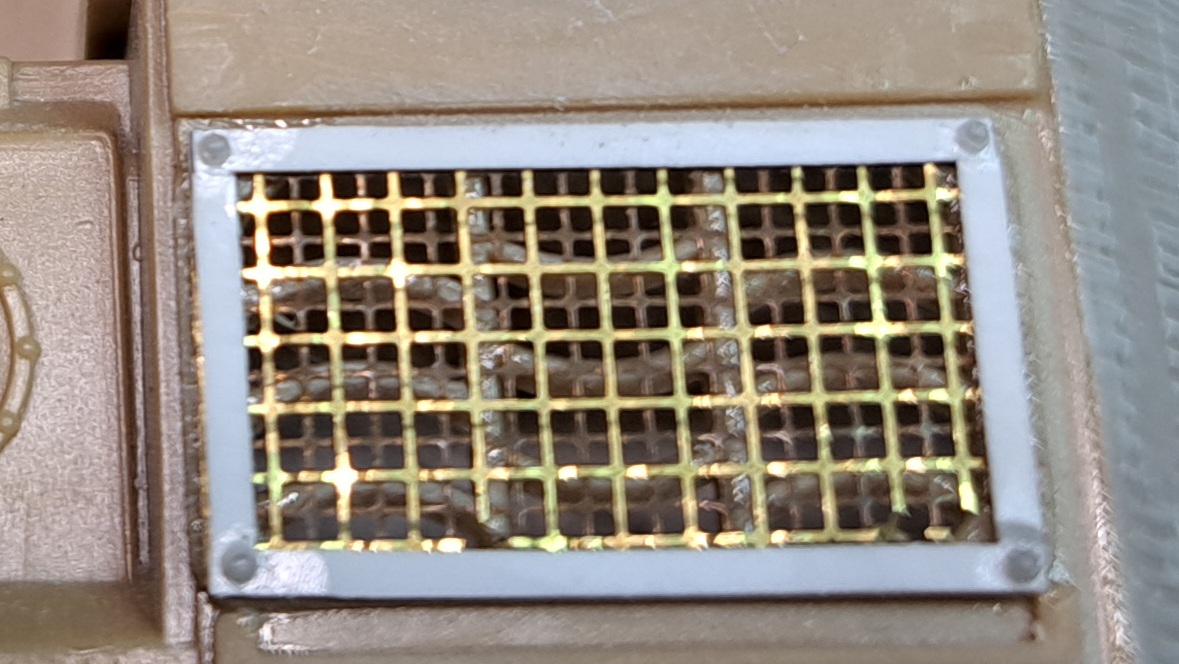
Likewise the ARC rectangle screens won’t fit the Italeri Panther.

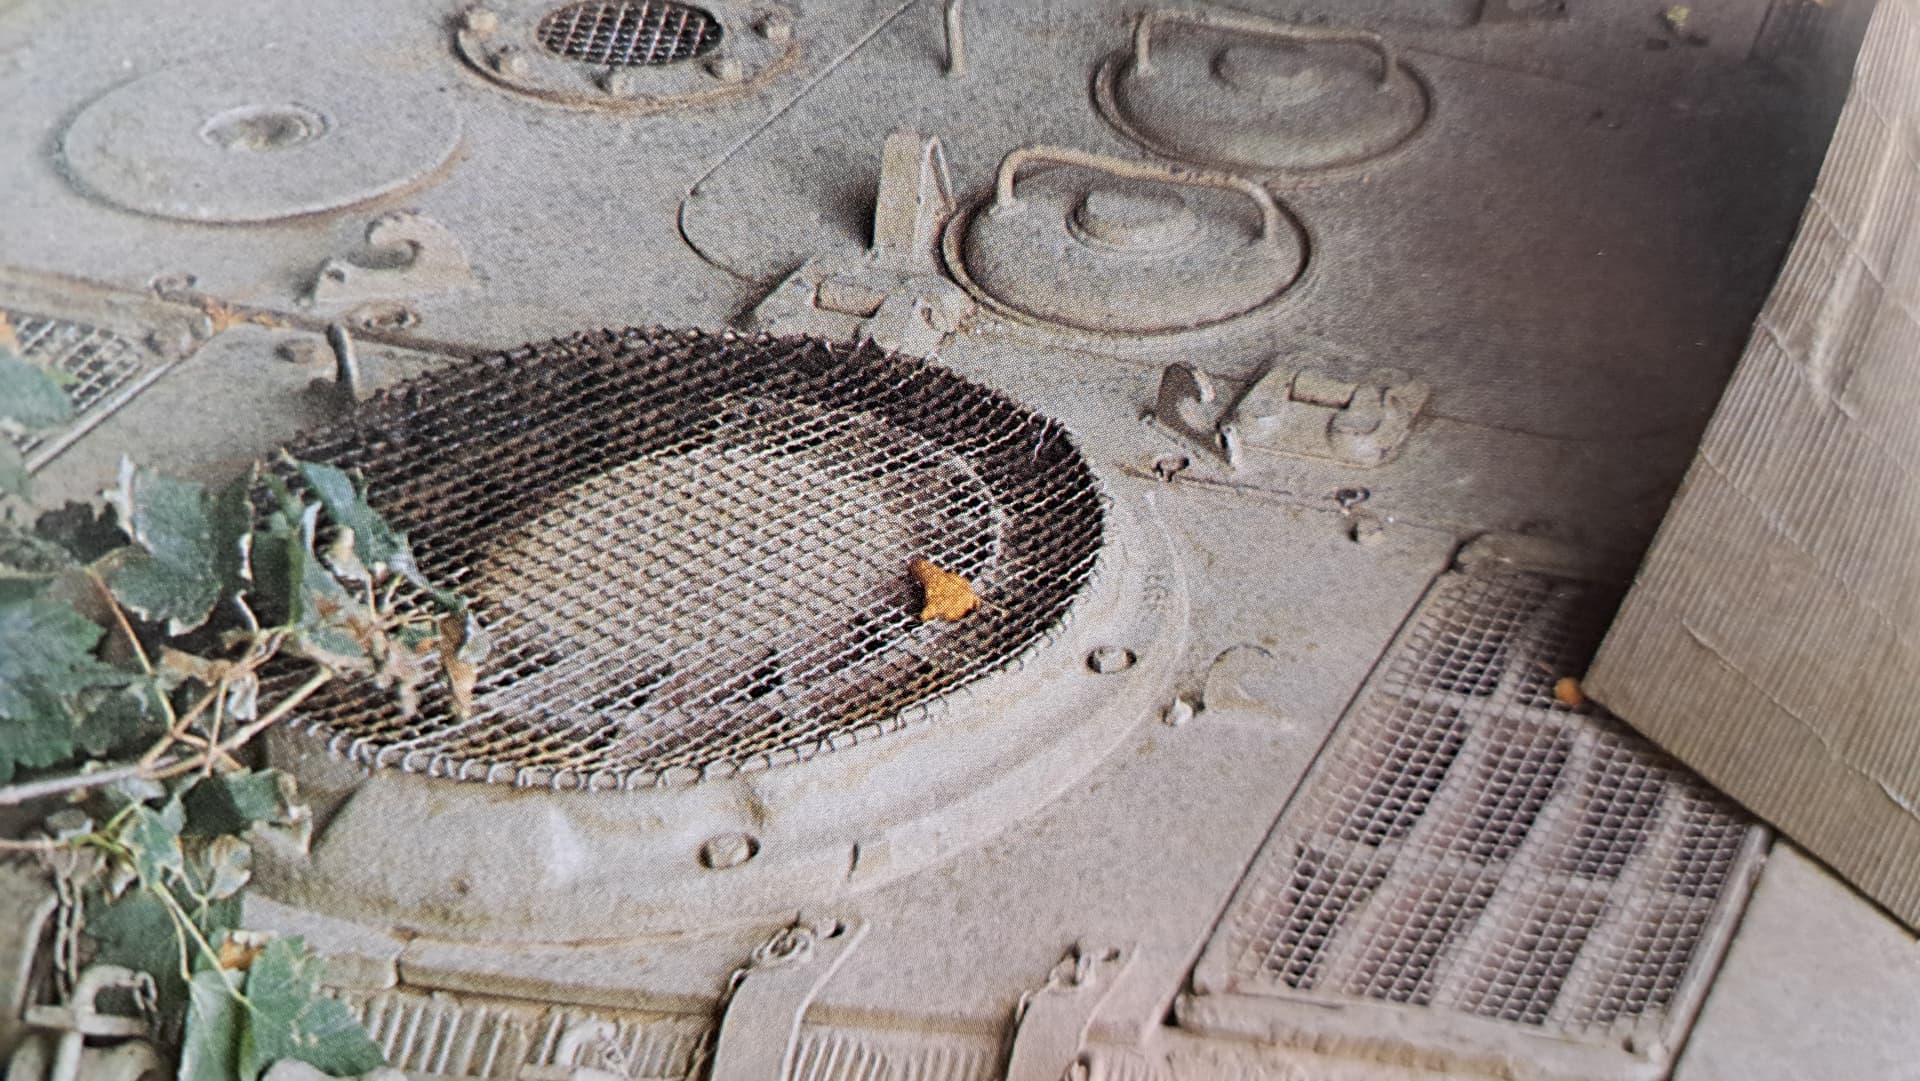
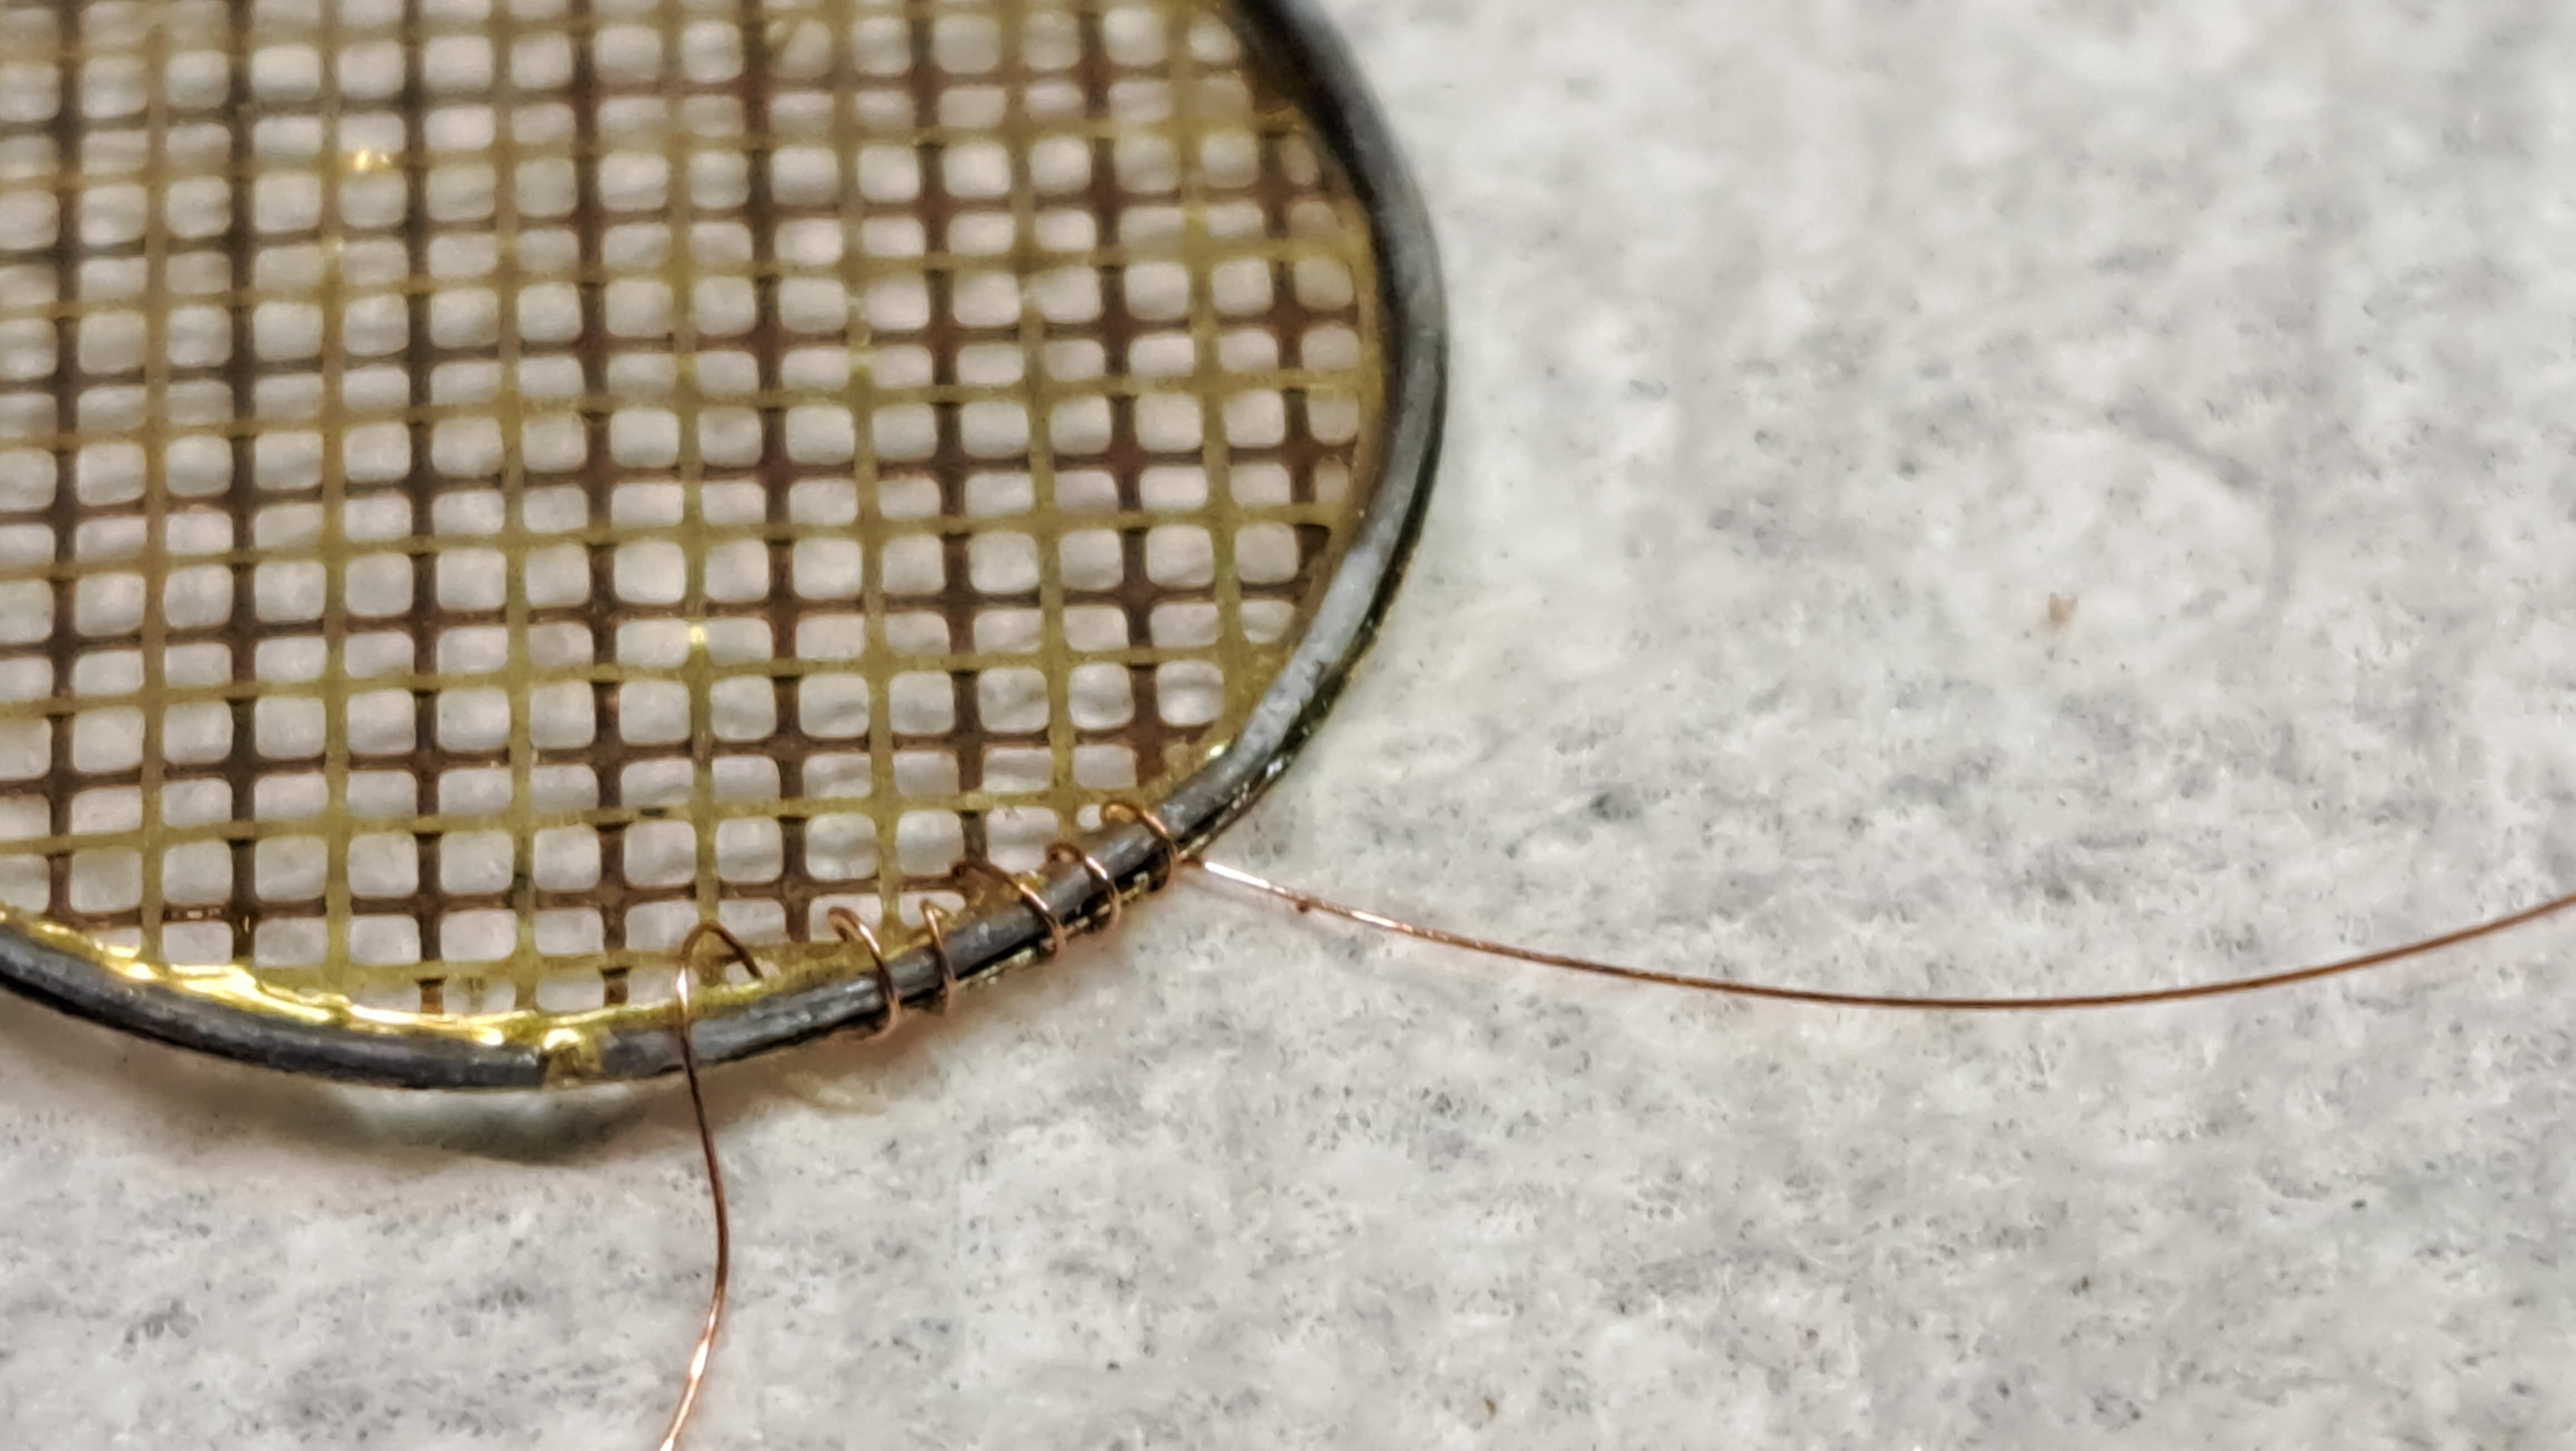
For the Dragon Panther D at start of the thread, I’d cut down an ARC screen because in ~2002, ARC was the only company to get the interleaved mesh correct in my opinion. Like all good panzer police (j/k) of that era I wanted interleaved screens damn it!

So like any panzer cop worthy of the name, the ARC PE screen was chopped down to fit the Dragon kit.

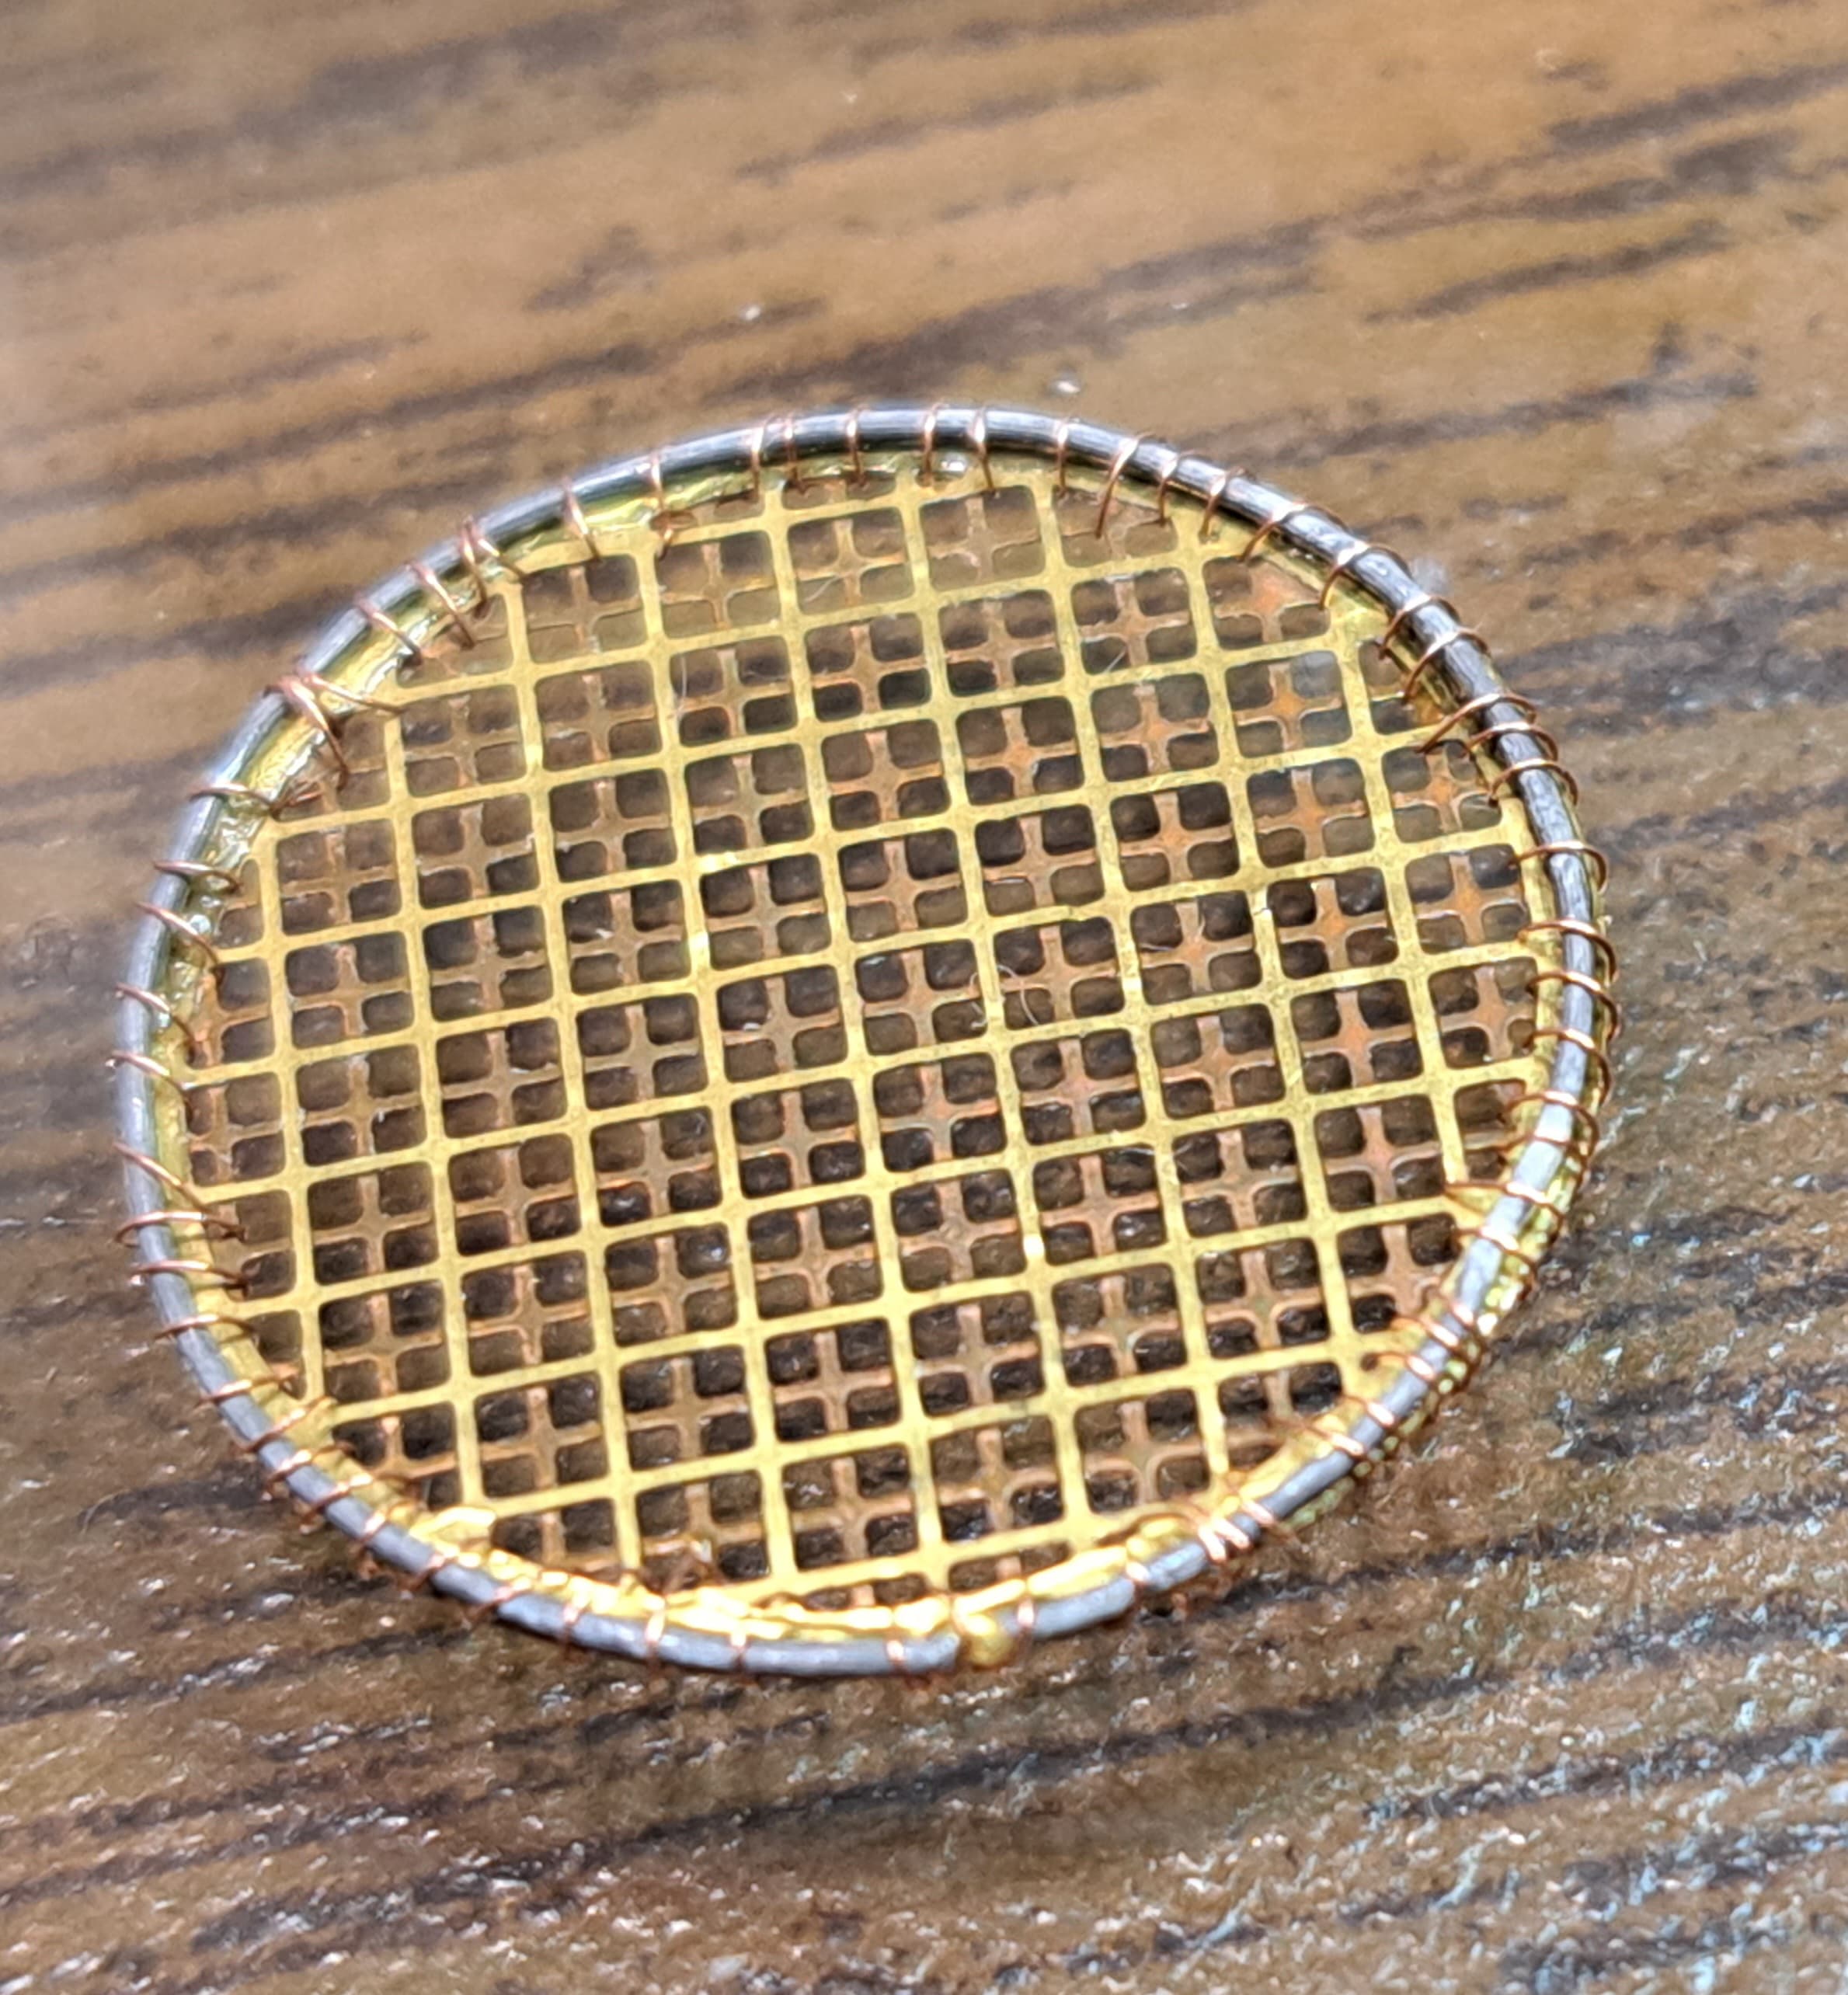
It’s still just a bit too big after chopping for the Italeri Panther! The slot for the screen could be modified to make it fit…I think.

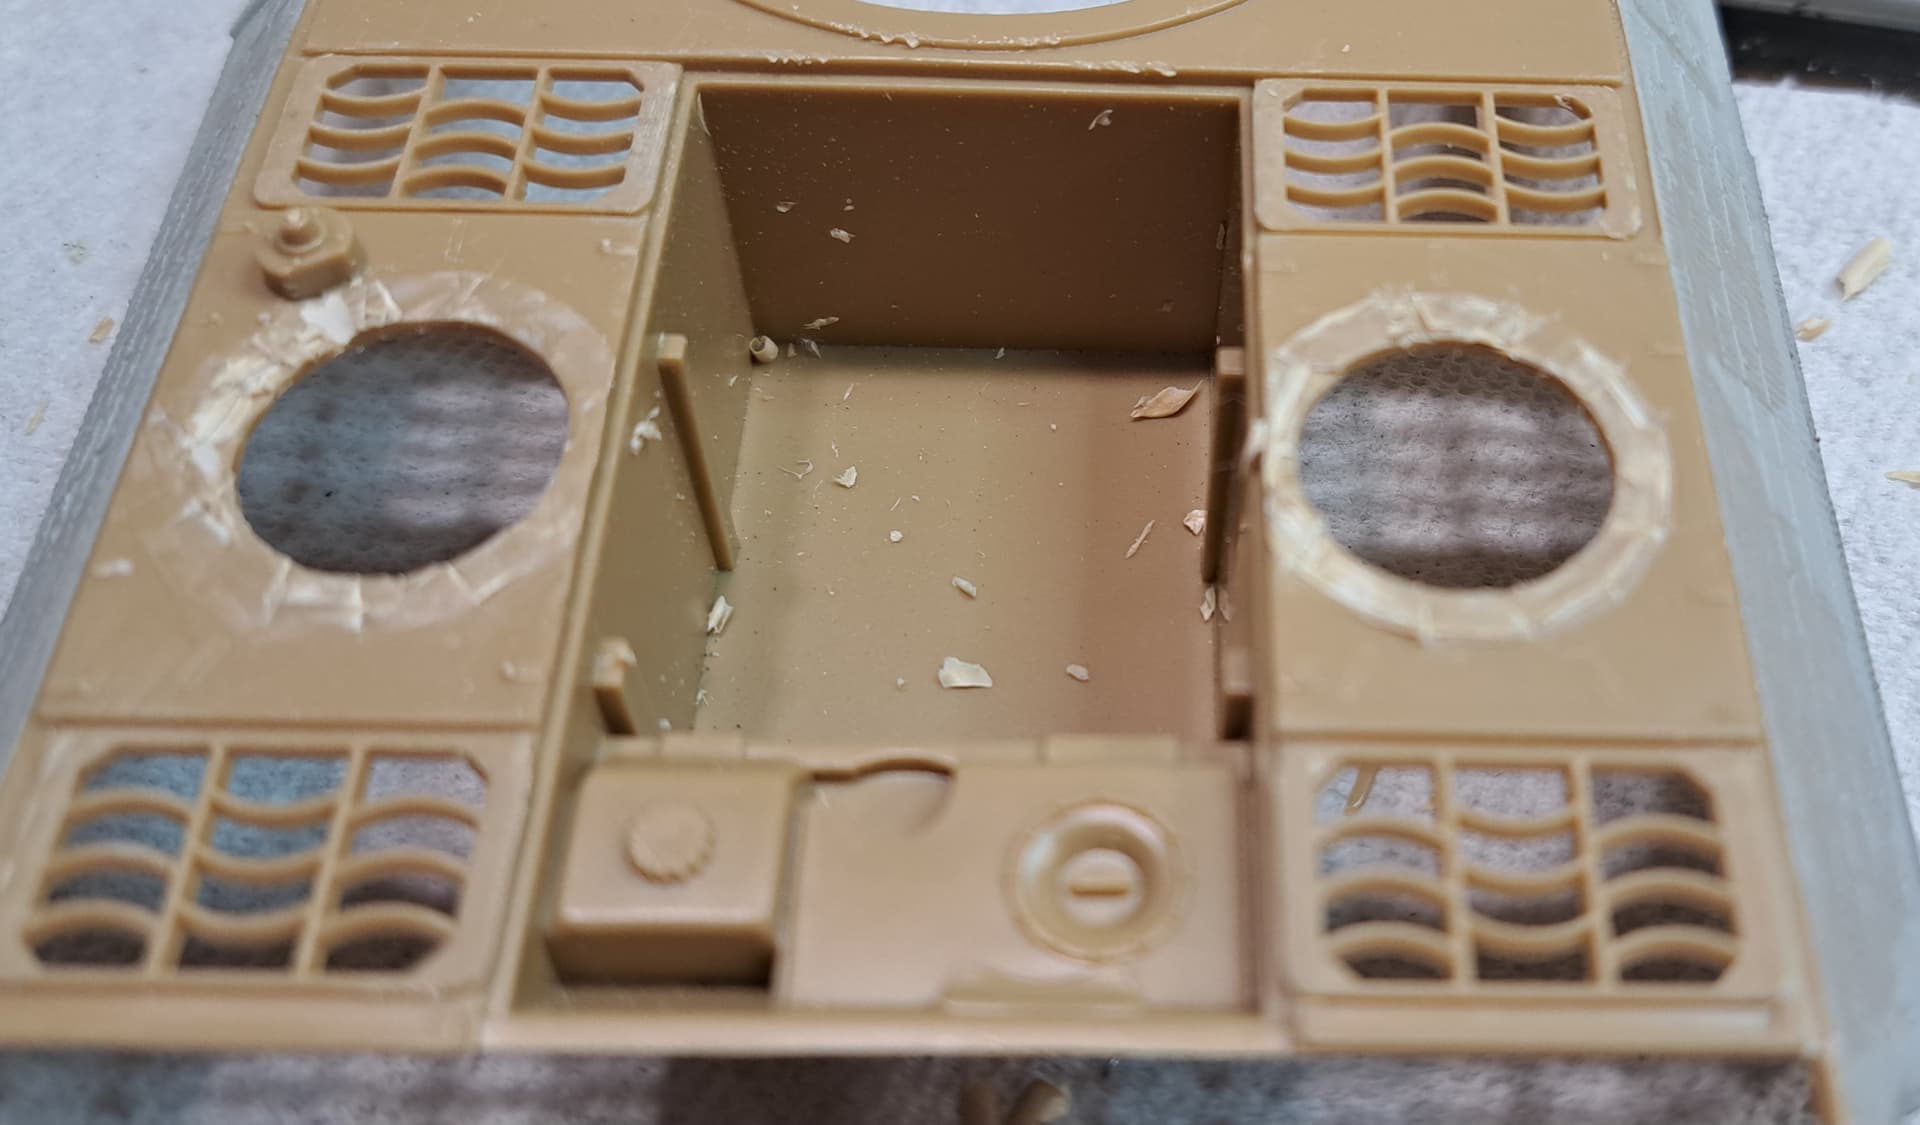
If the ARC screen hadn’t been chopped, replacing the entire Italeri engine deck with the one from the spare Tamiya Panther A hull might be less hassle :thinking:
Of course the round grates on the Tamiya Panther A would still need replaced.

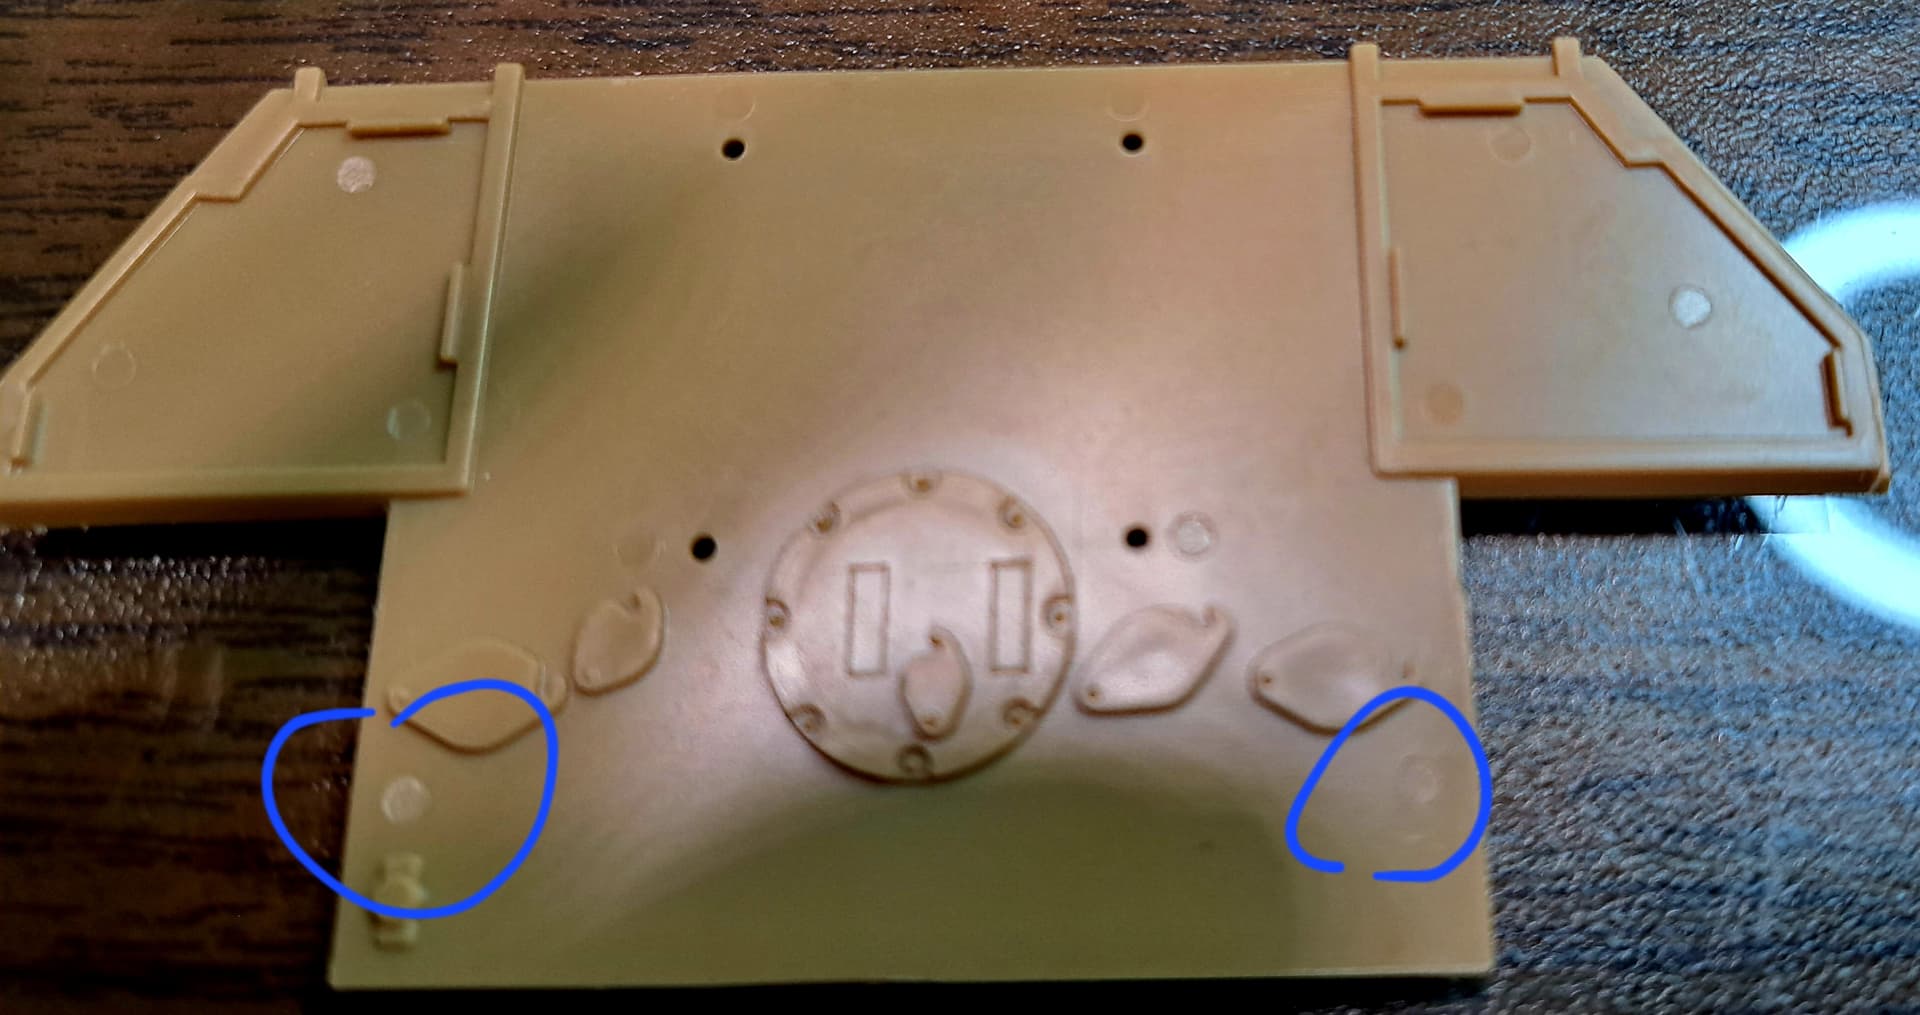
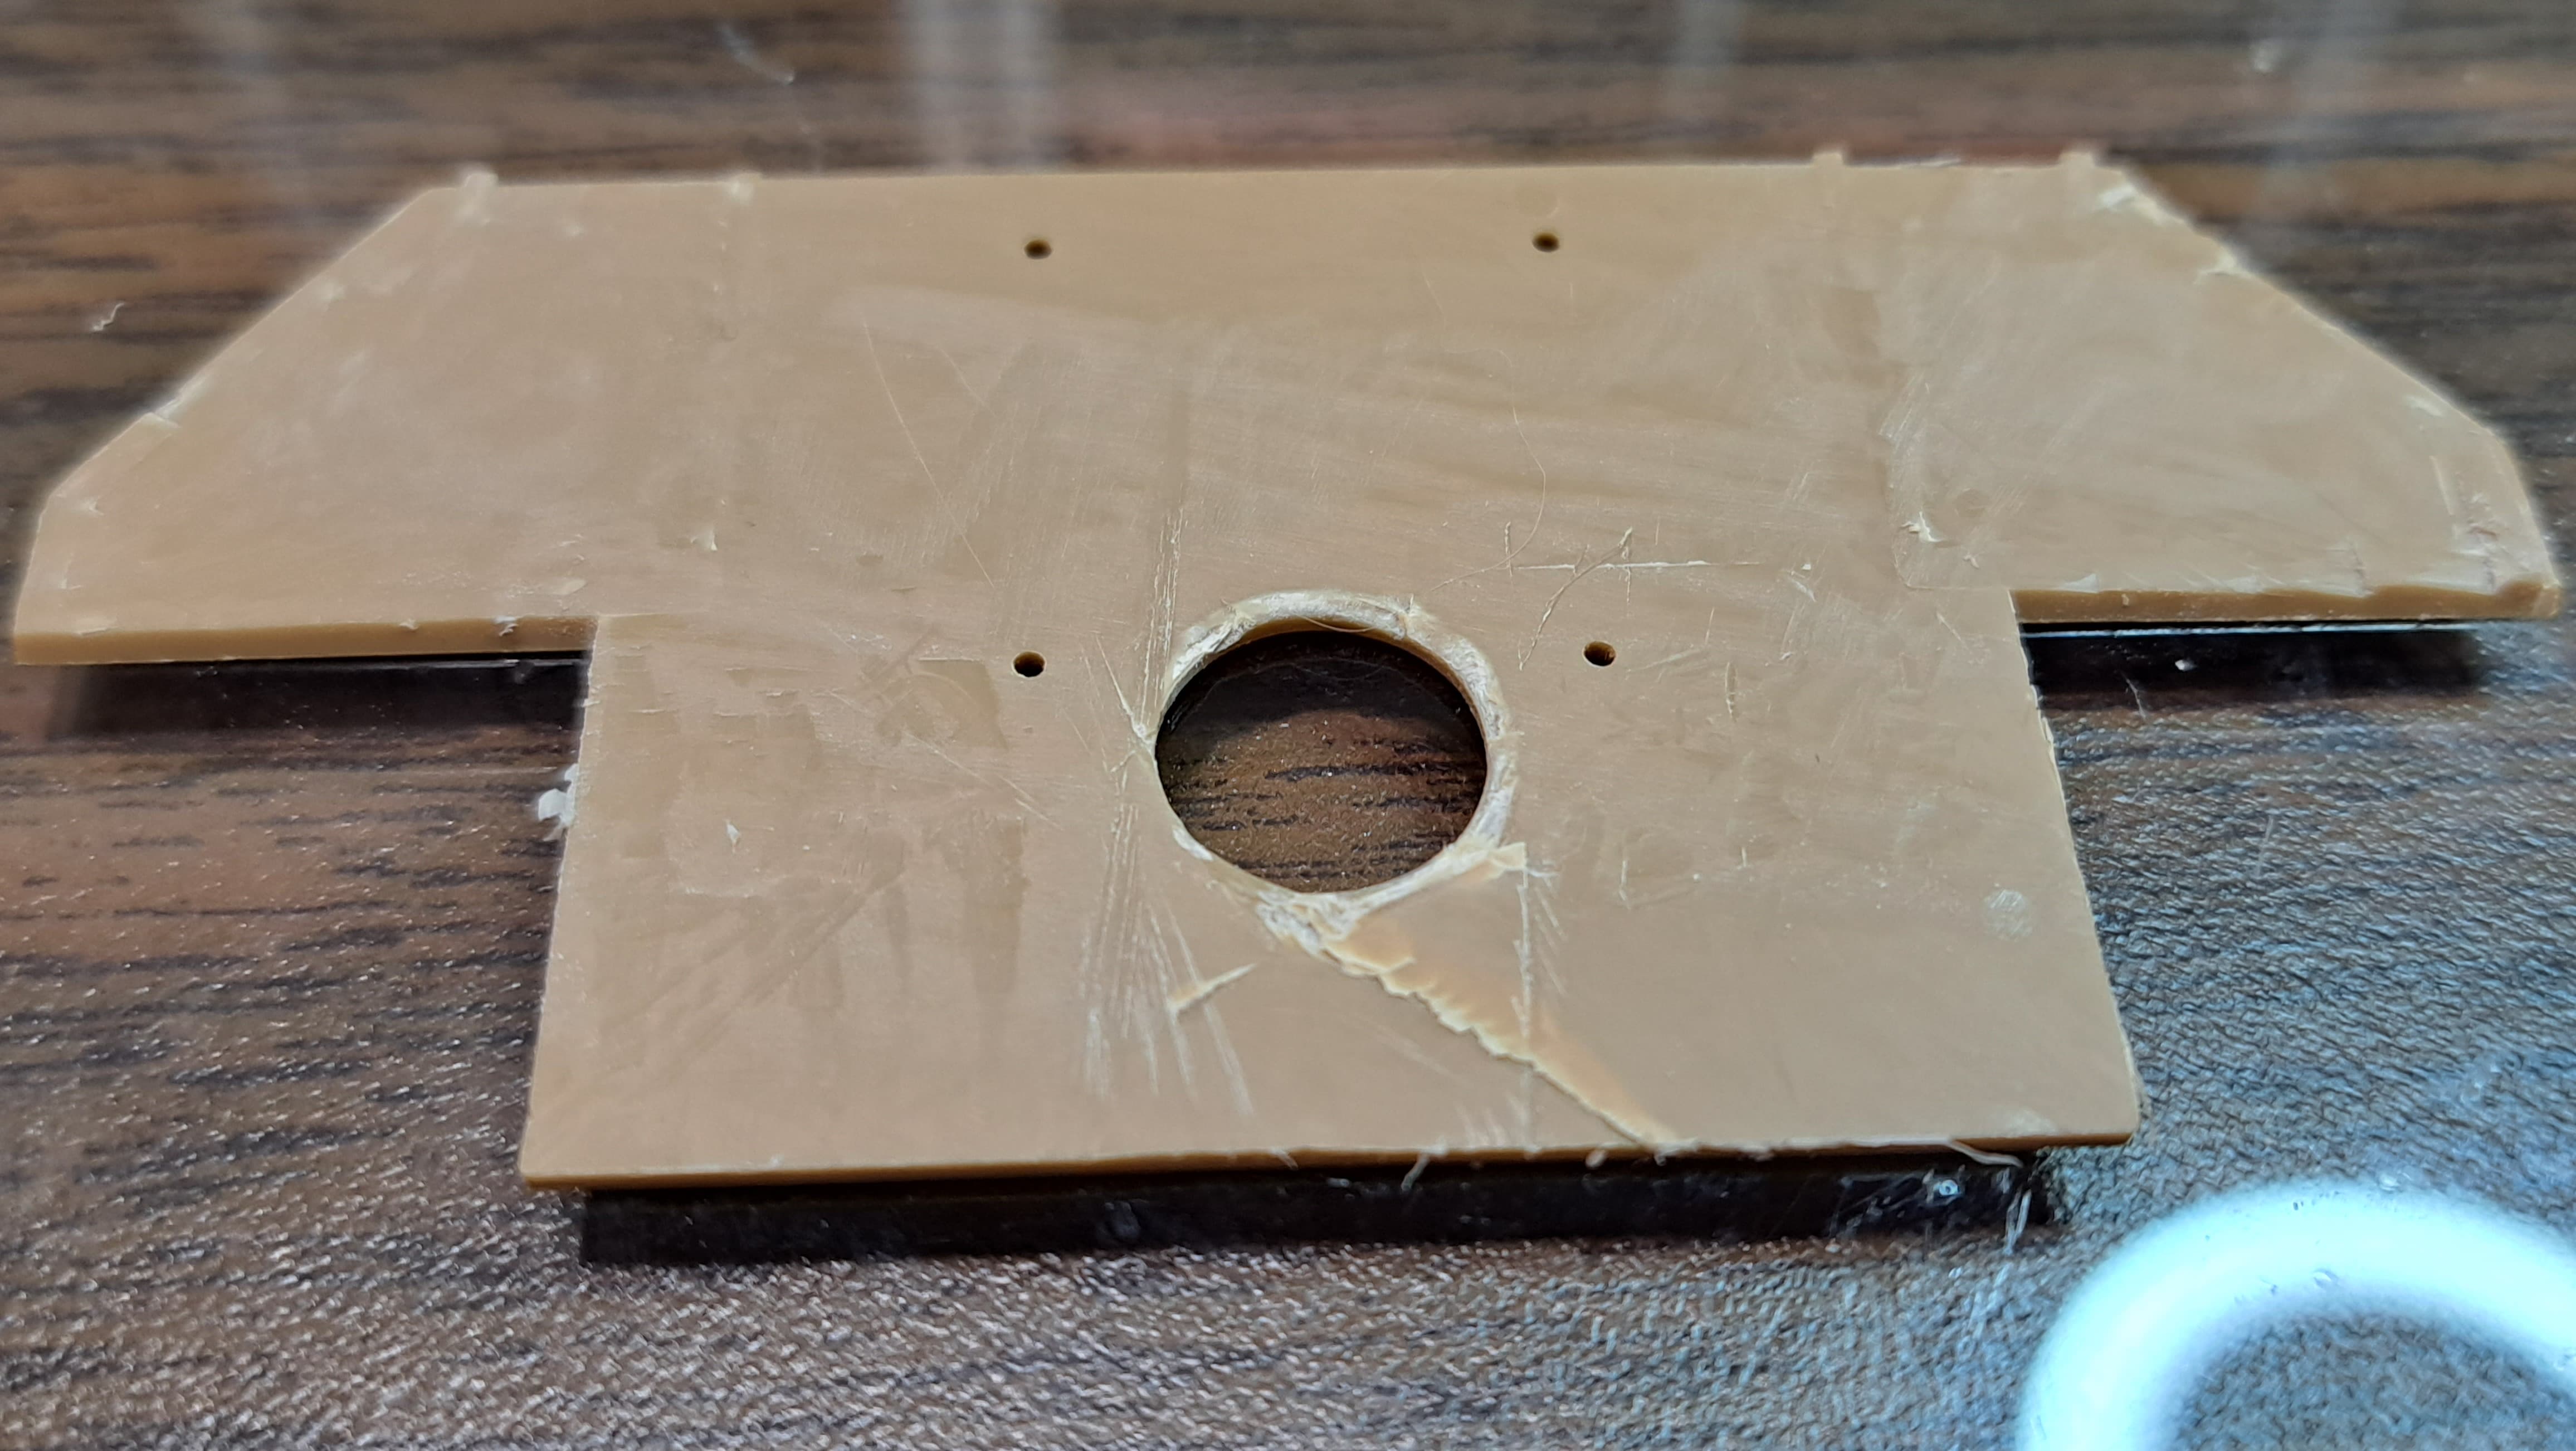
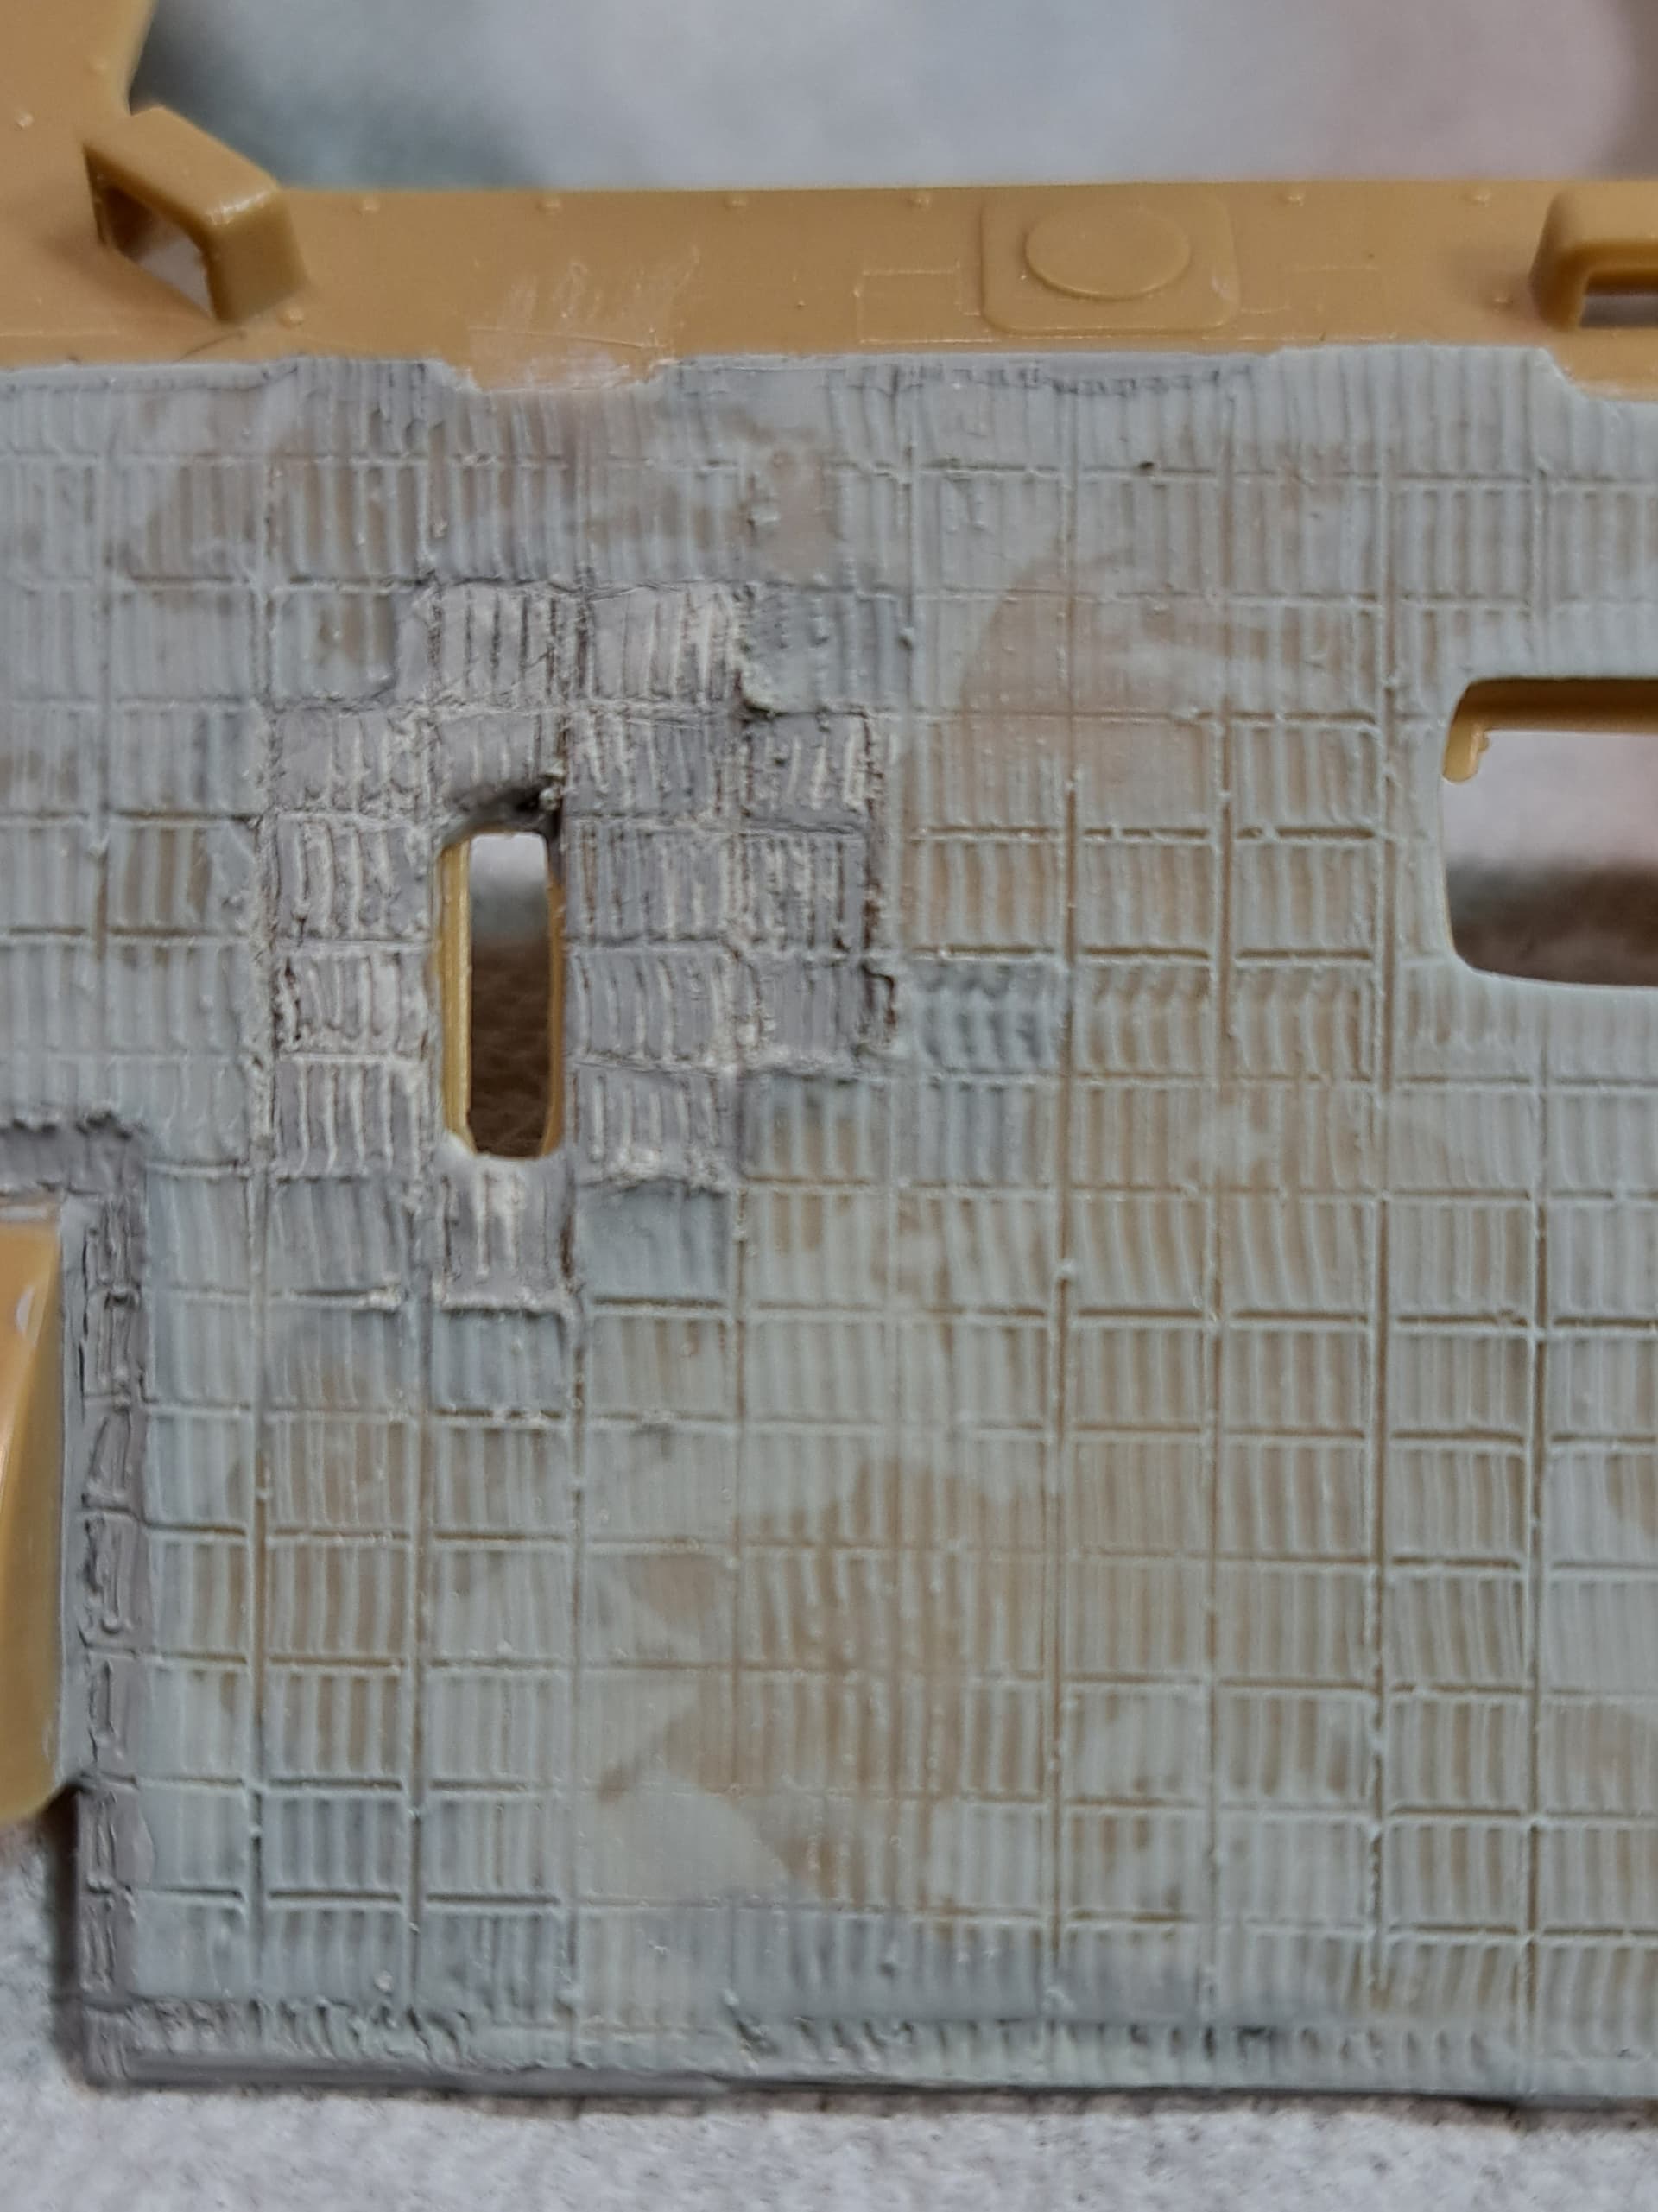
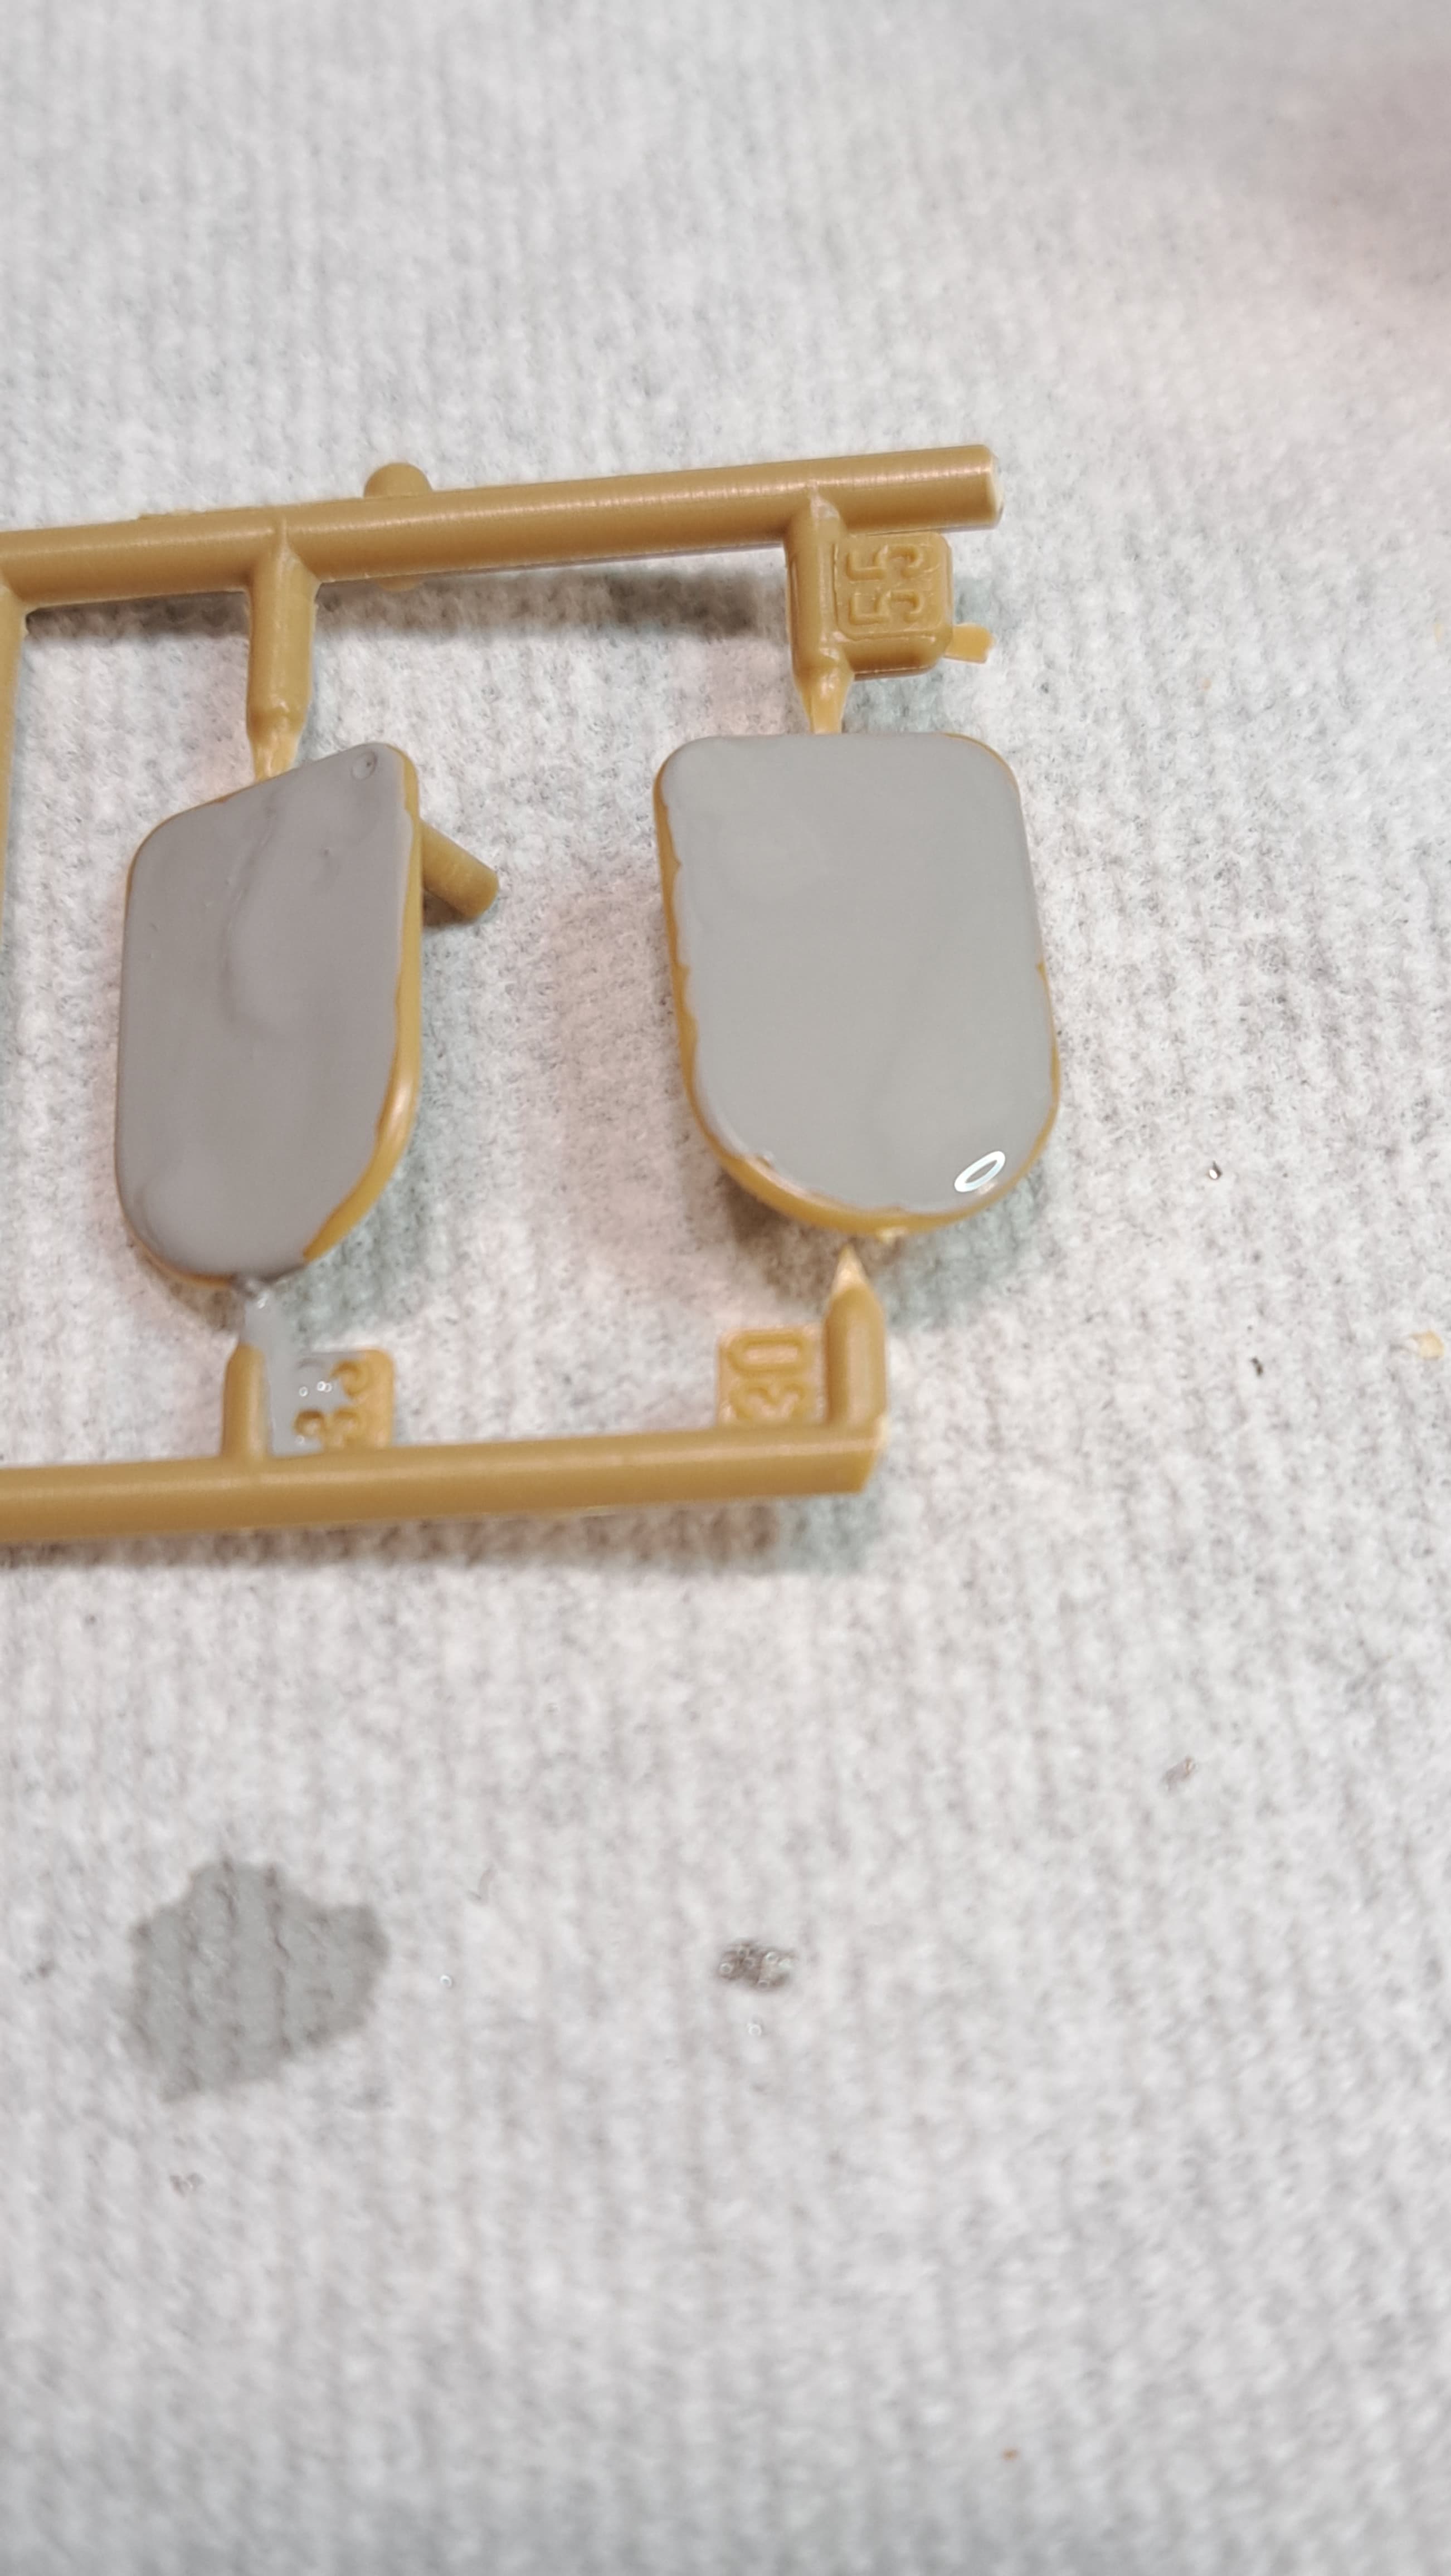
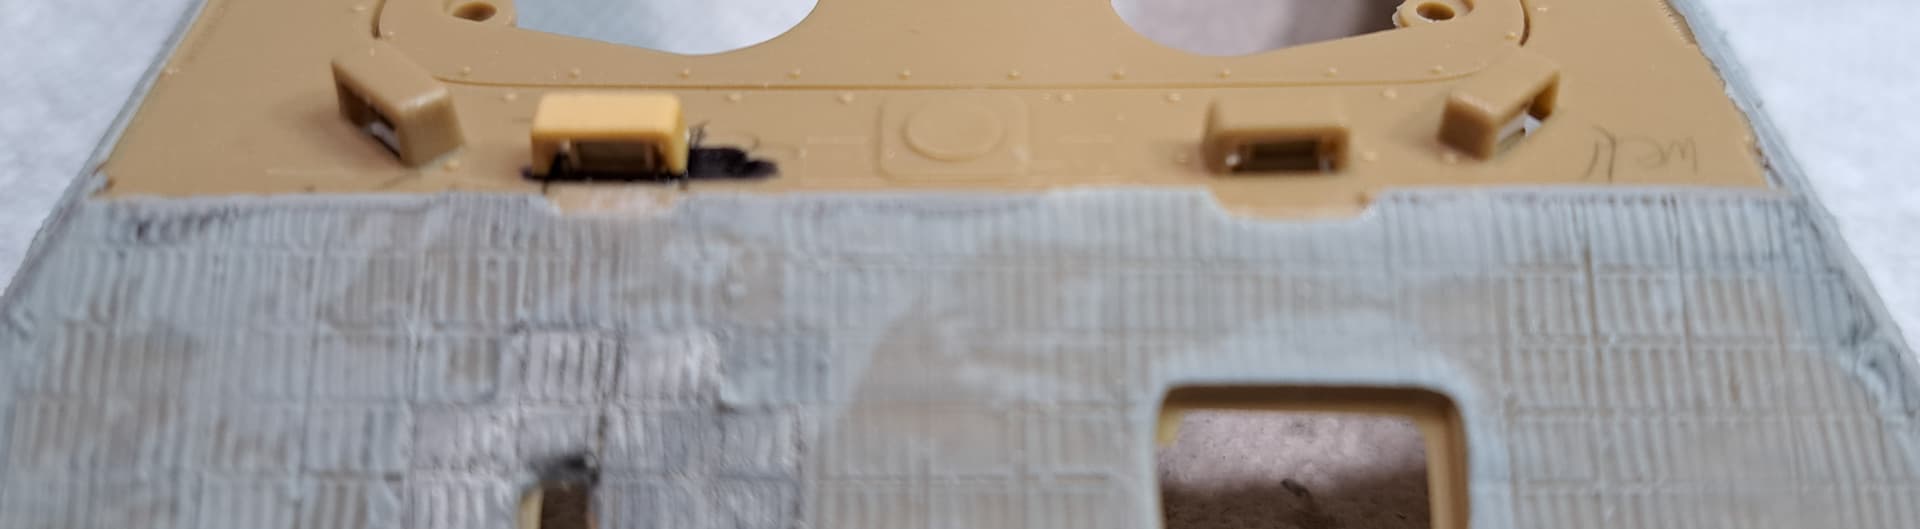
I had one big break. The hull roof cover for the driver & radio operator was cleanly molded and fit well enough.

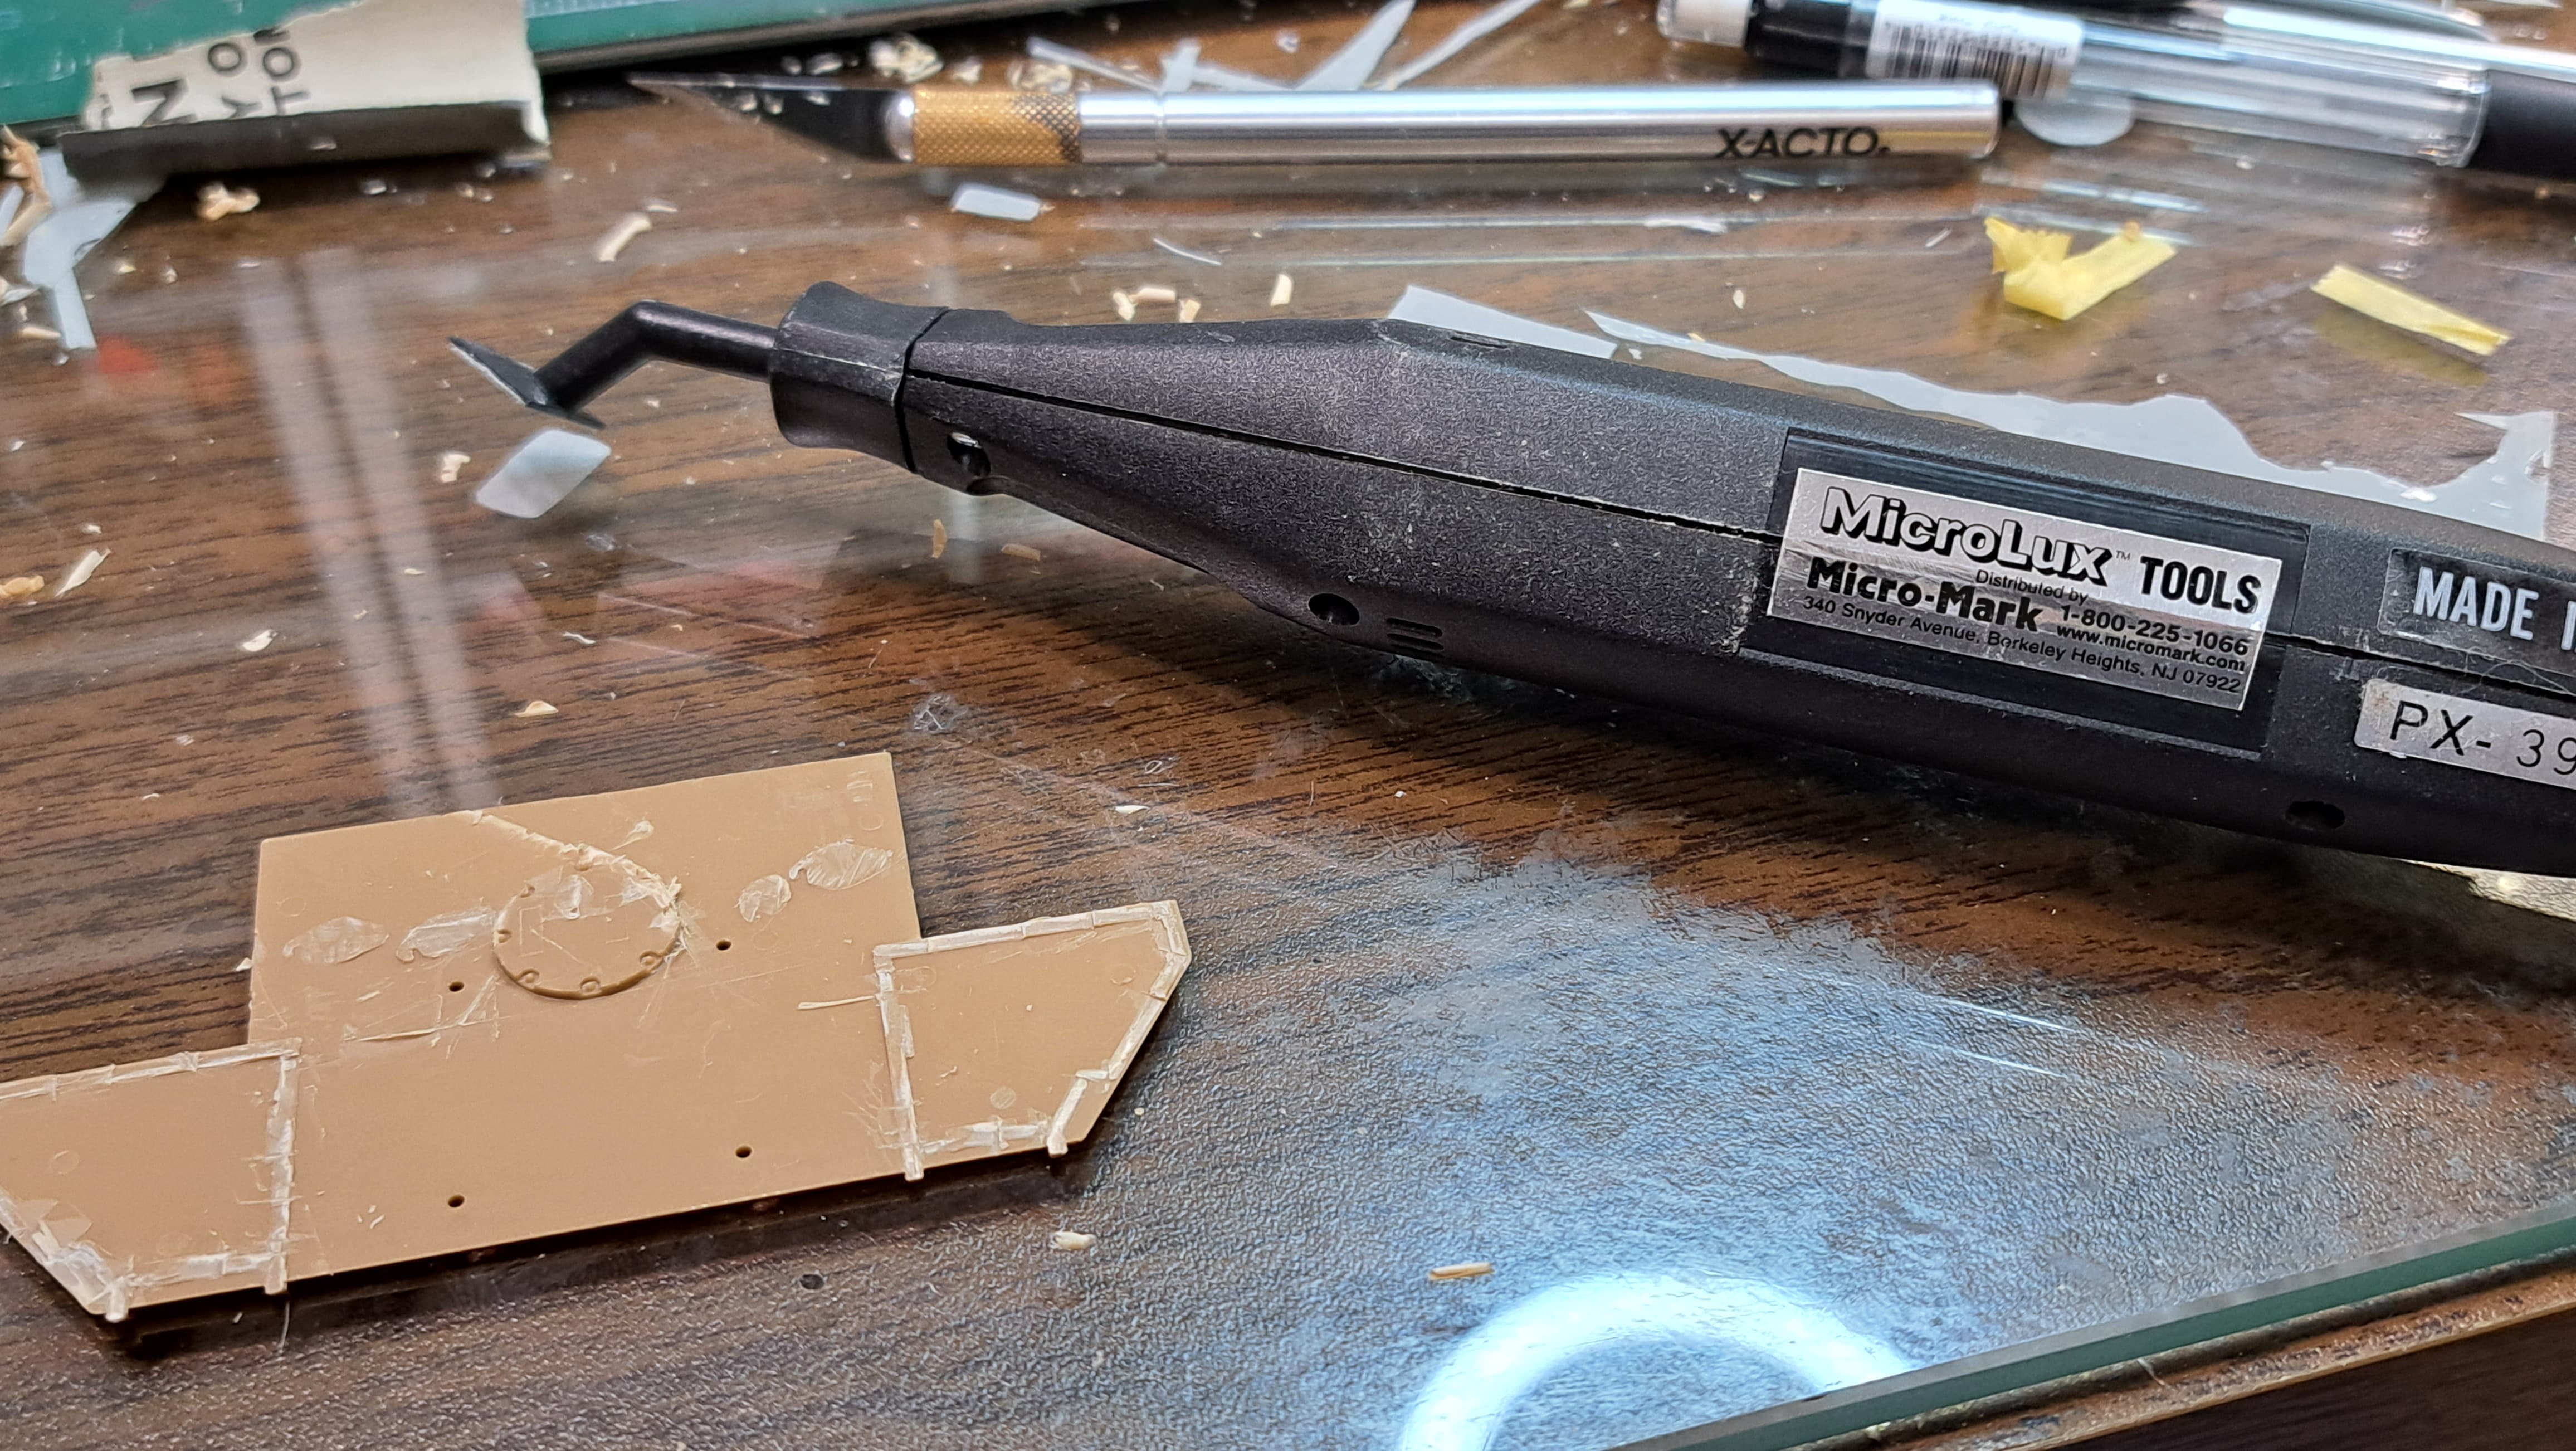
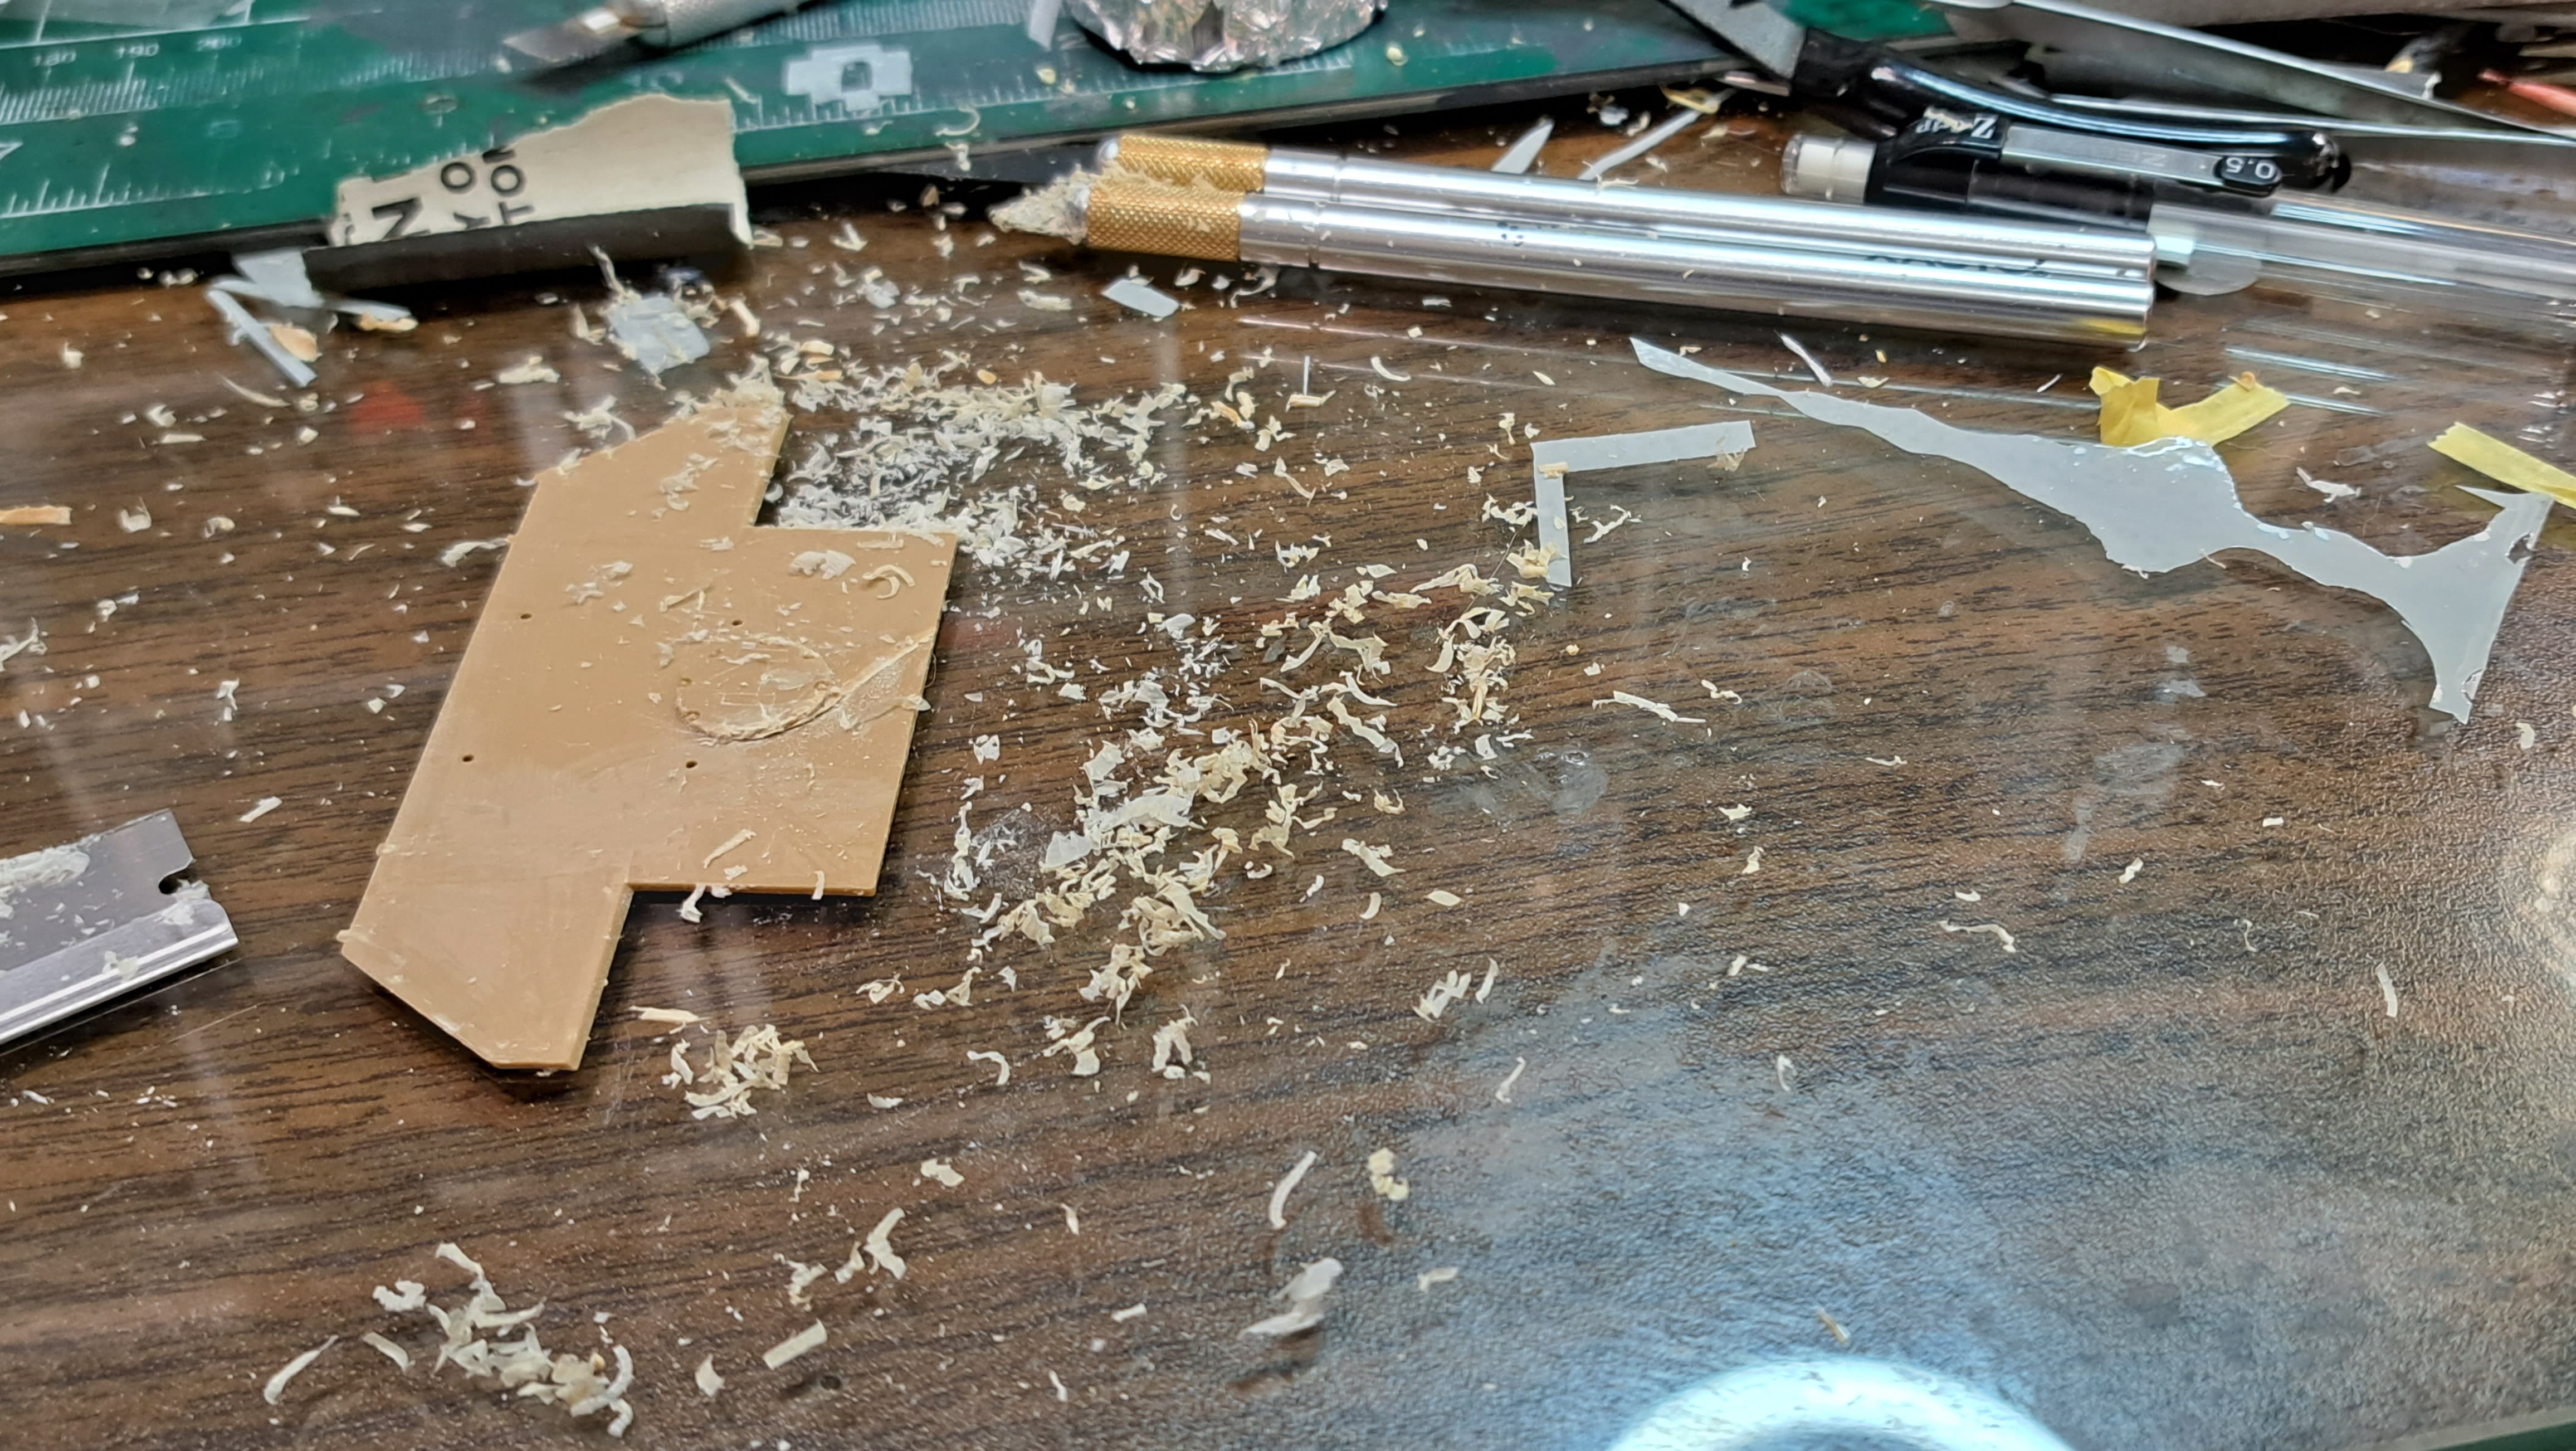
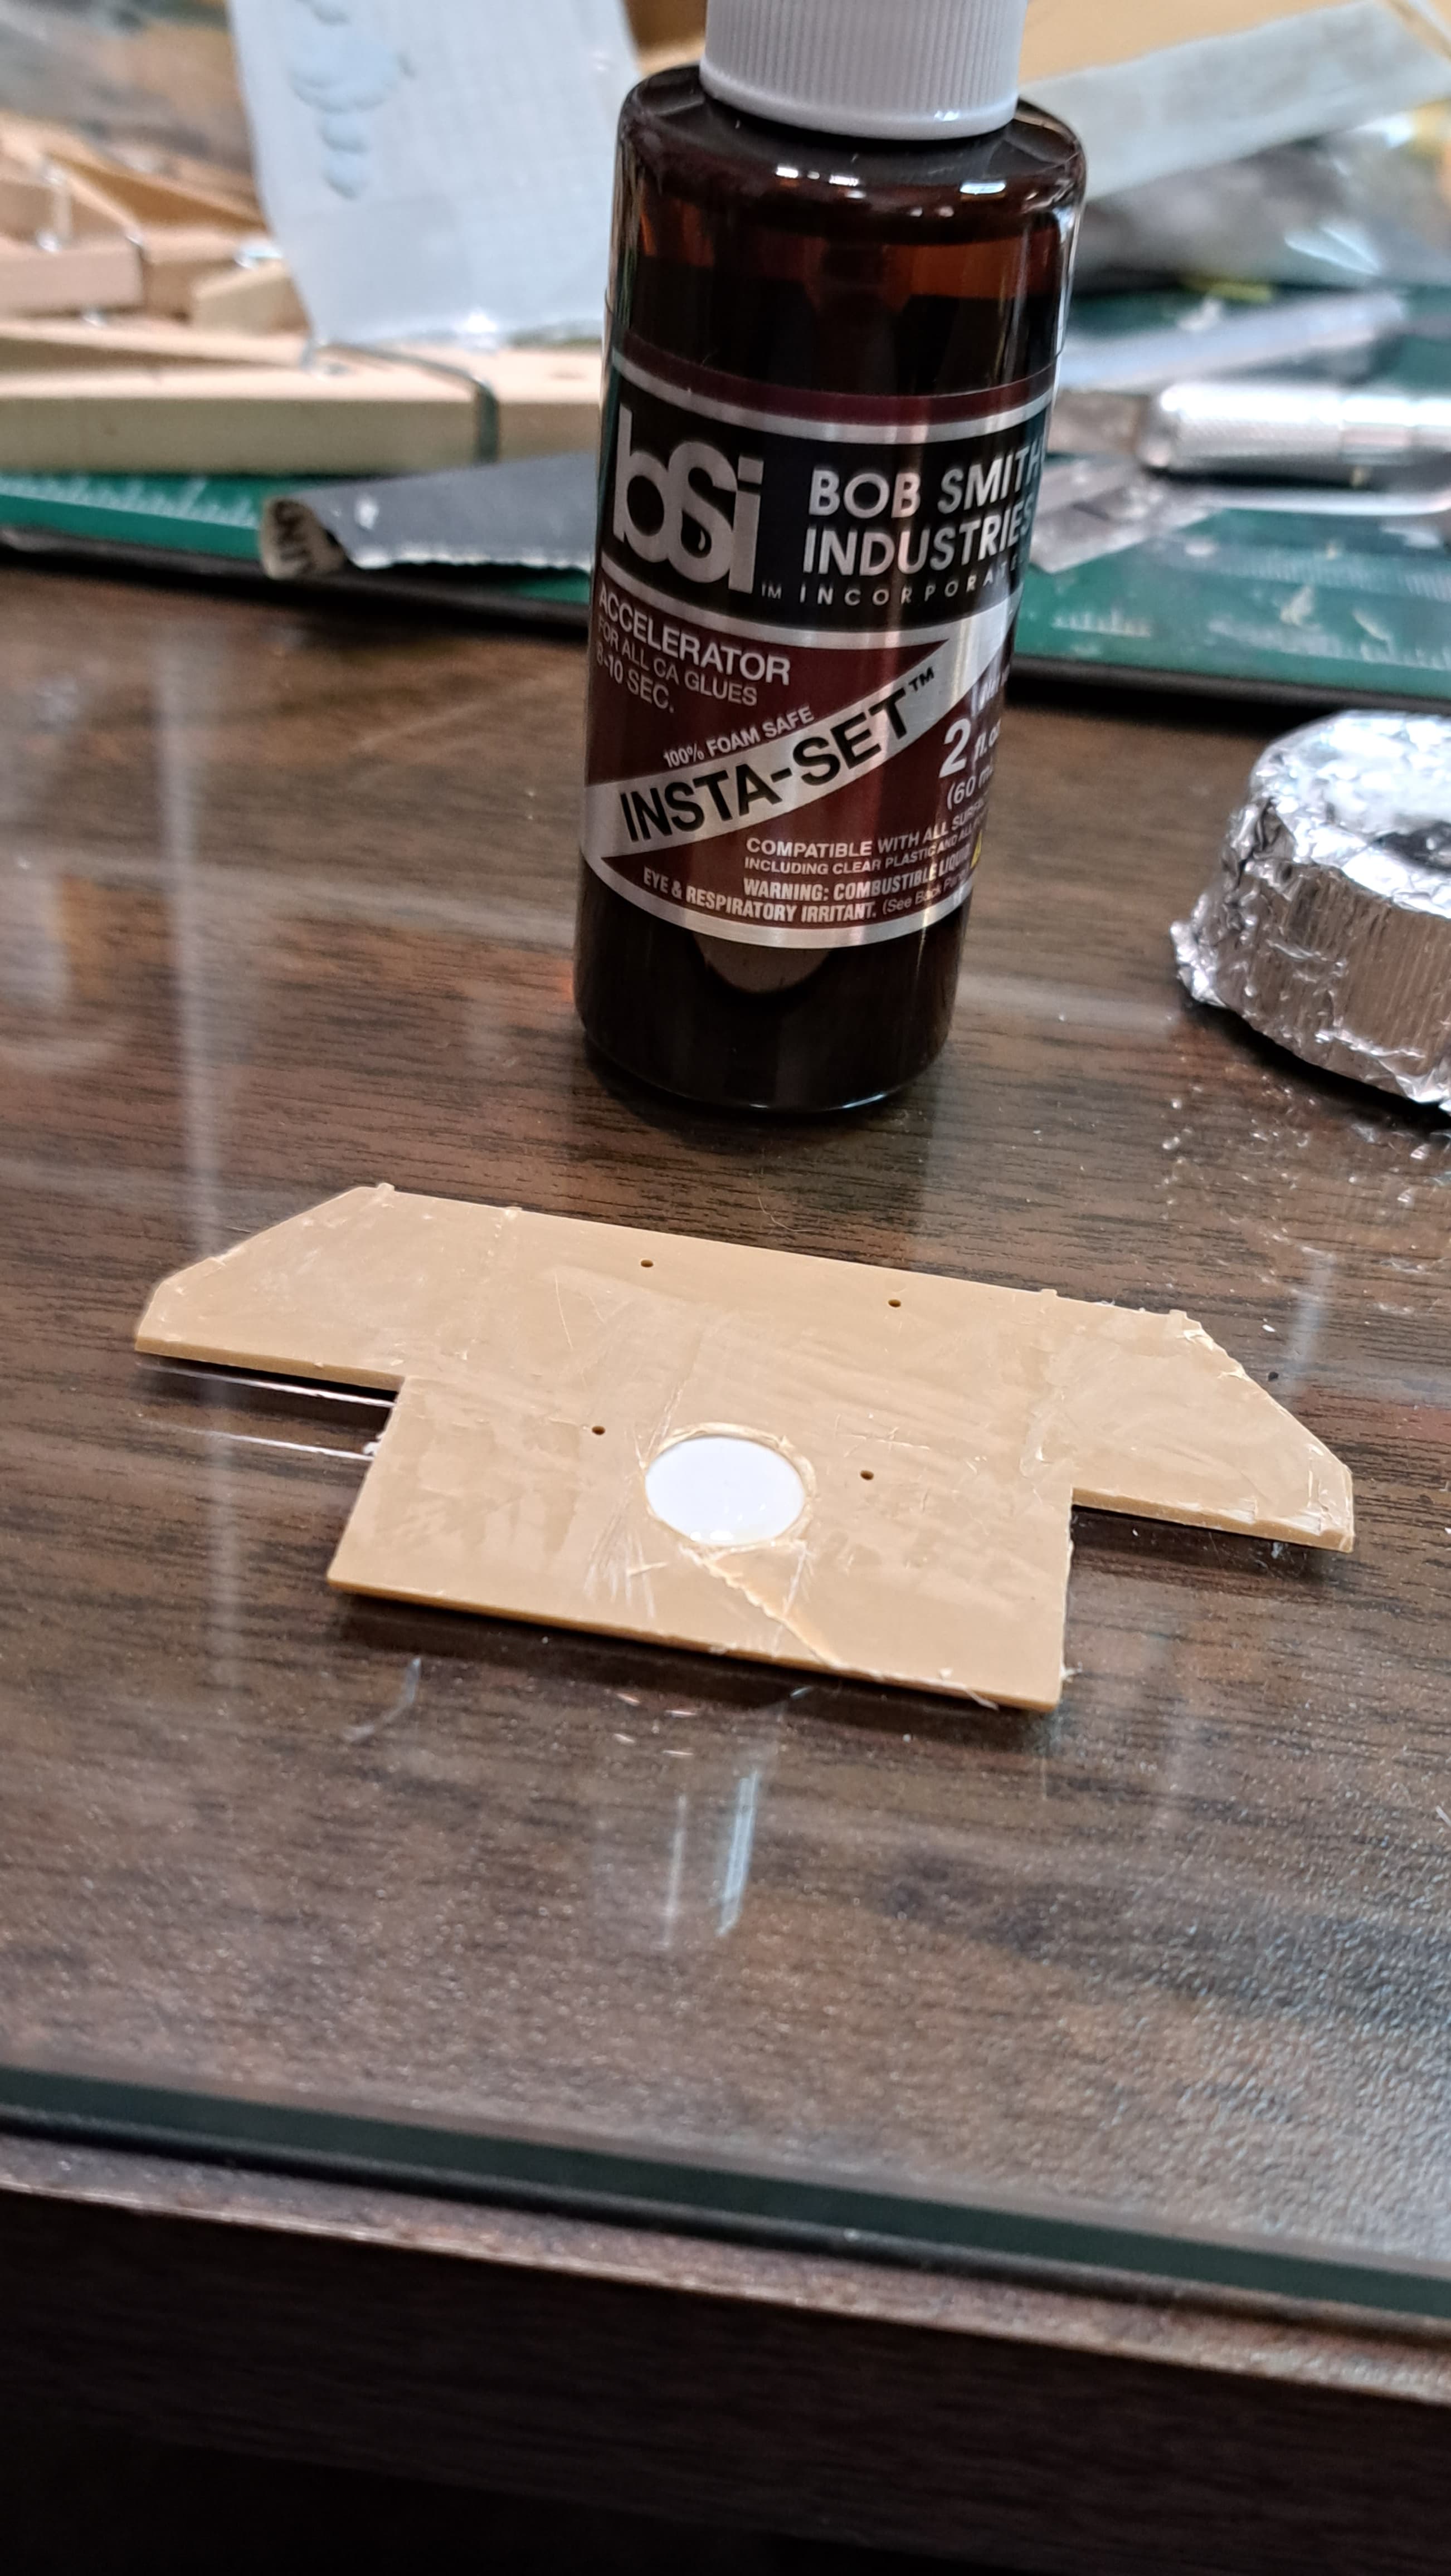
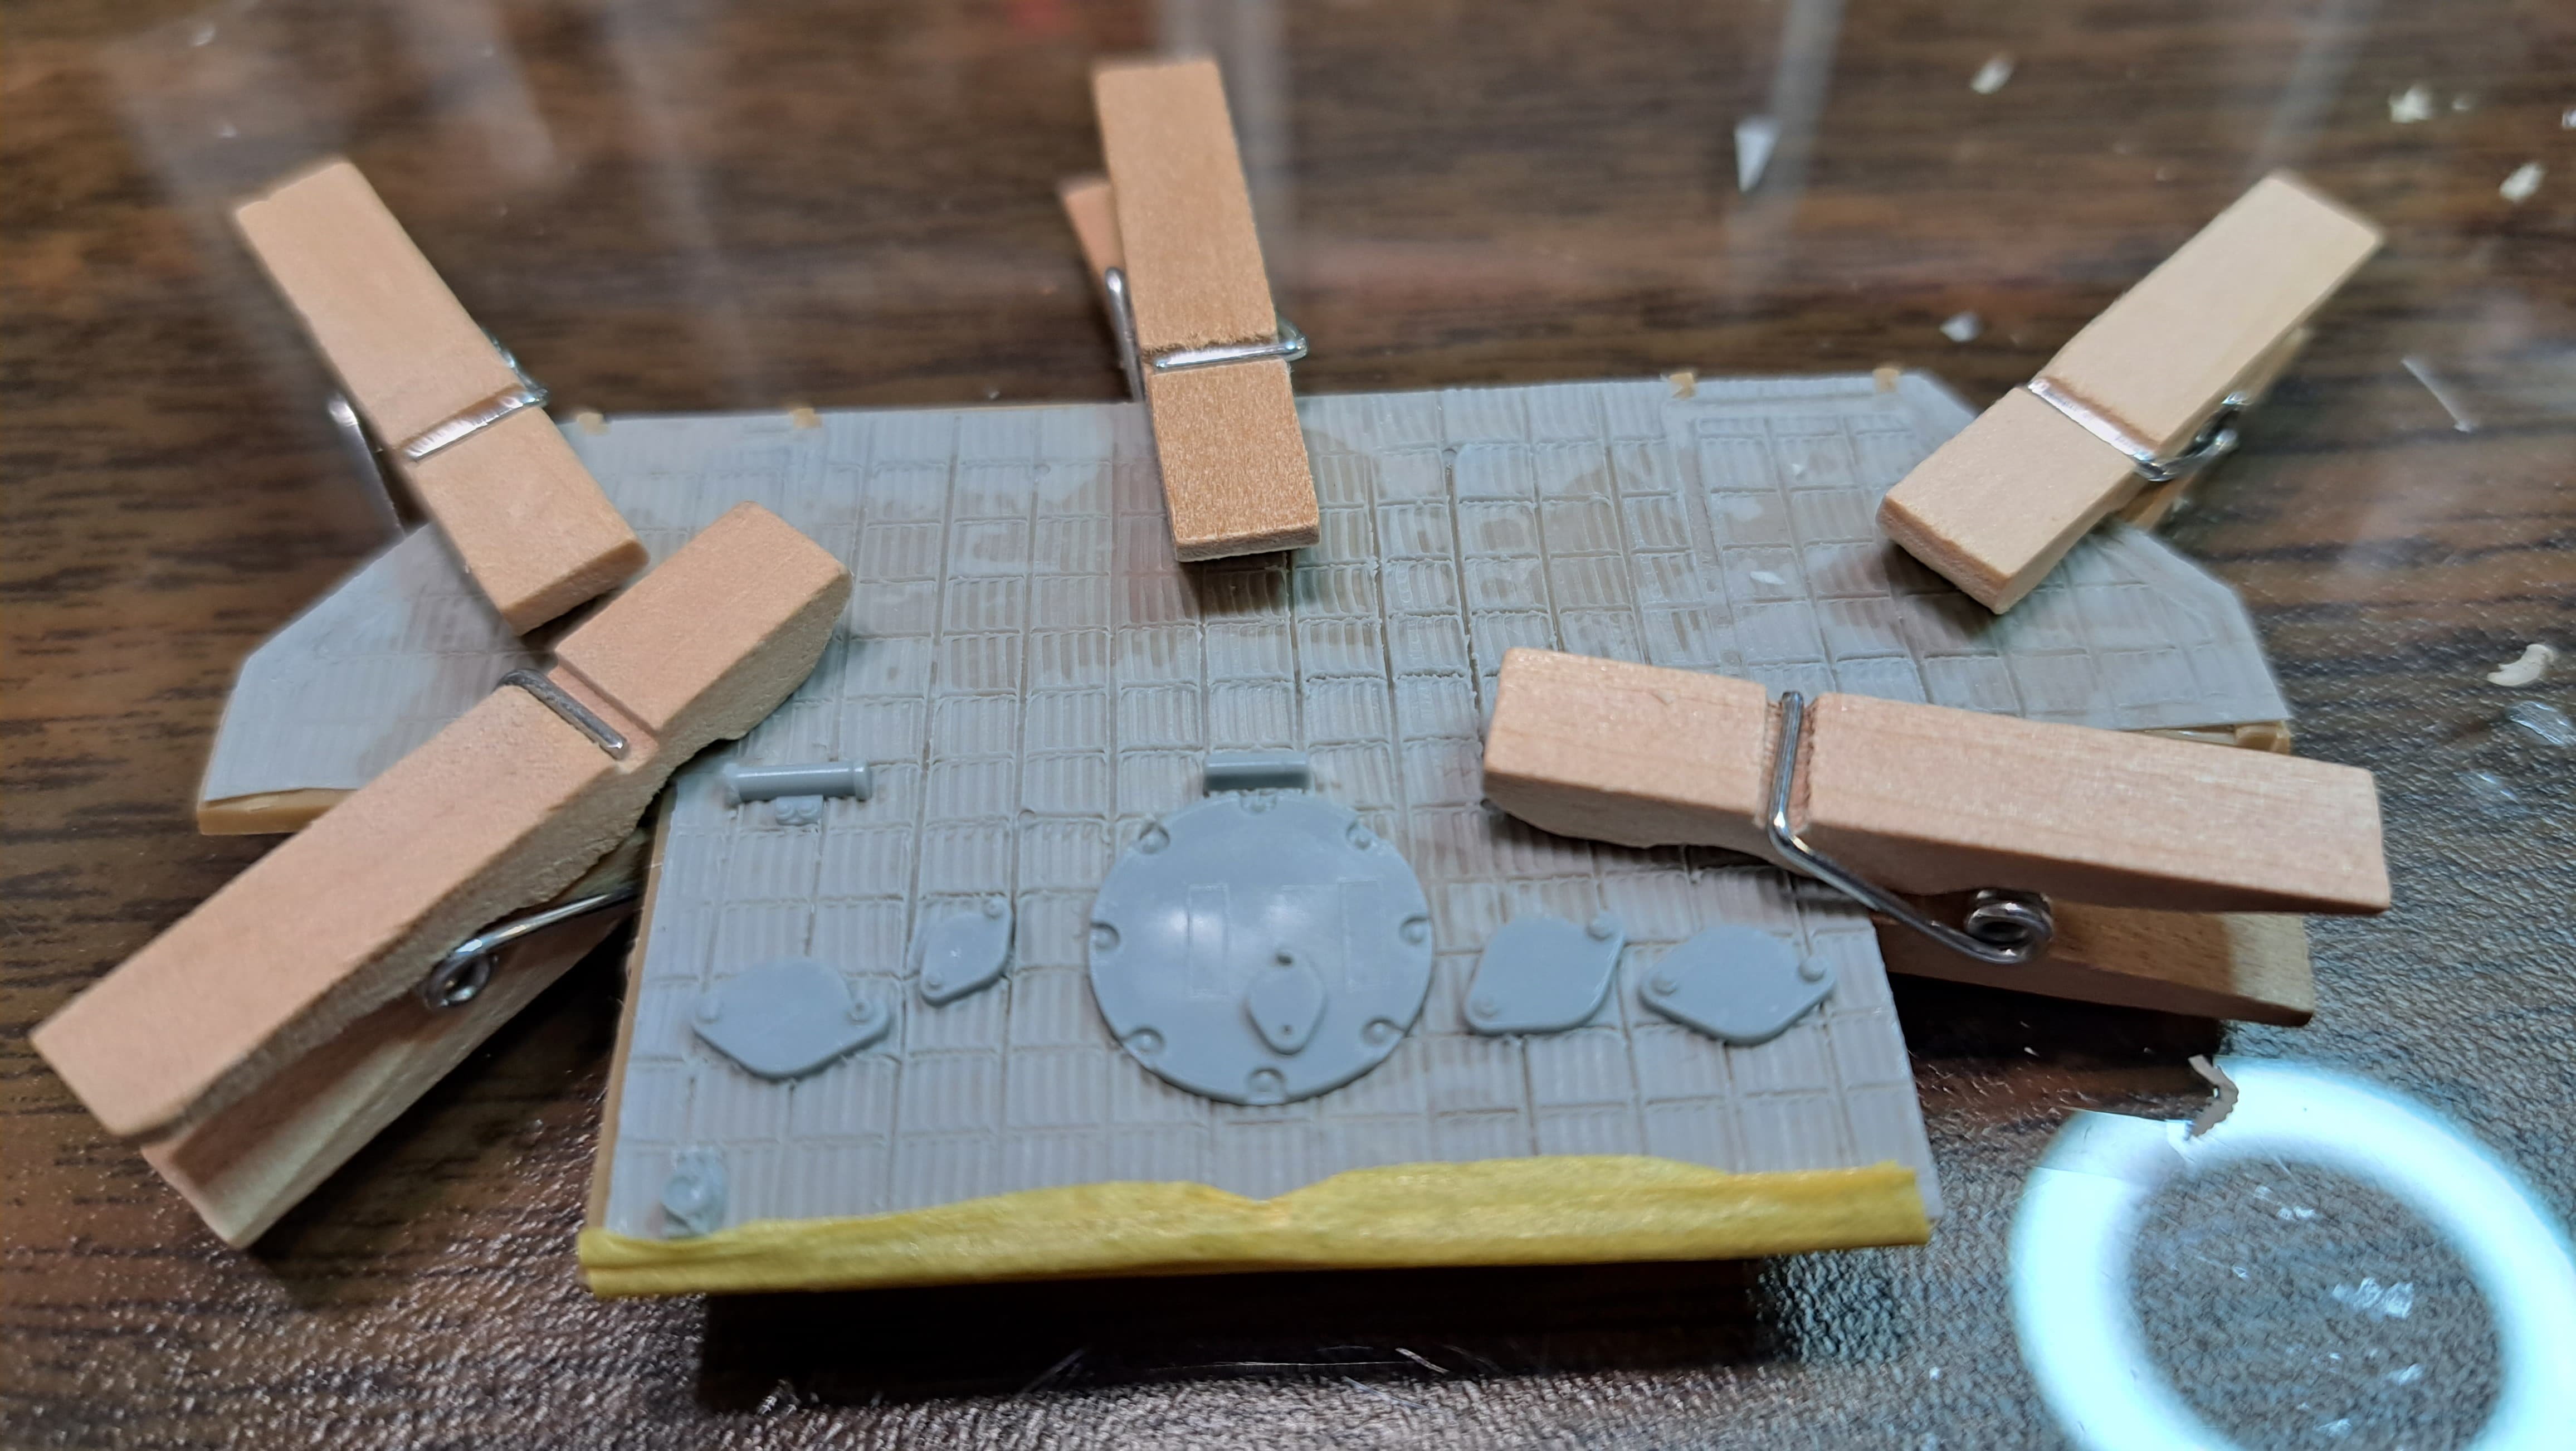
Edit - Operation Brute Force Ignorance has started…

4 Likes

Last chance to back out…

…point of no return…

…perfect tool for removing resin parts…

…early Panther D engine deck…

…Armor Research Company screens…

…continued…technical advisor wants a snack…

Edit returned after break.

From Panzers in Saumur #2 which features a Panther ausf A. This excellent engine deck shot that shows what the round screen looks like. It isn’t PE flat. Note wire wrapped around the outer edge interleaved with the outer edge of the screen. (picture for discussion only).

Made a .010 ring out of solder. Used thin copper wire for the interleave.

With one in place. Have to finish the other one tomorrow

Engine deck.

Kudos to the Armor Research Company. Very happy with this 1980’s era product.

10 Likes

Super work on the sreens Wade. Totally changed how they look giving them a real look. Its worth noting that the fuel cap handles and the screens in the Saumur pic all show good signs of how they get walked on and bent and misshapen over the time :+1:

2 Likes

That round screen weaving is sorcery!

2 Likes

Thank you, Johnny & Matt. That’s an excellent point, that things on the engine deck get beat up over time.

The Glue Looper proved very helpful. I think Matt posted about it previously. Easily one of the best new tools I’ve learned about on Armorama.

Using the Glue Looper, was able put a bead of super glue on to attach the solder ring without gluing either screen to the glass desk top! The stand by razor blade for getting the screen loose from the glass wasn’t needed!

Picked this up at an AMPS show long ago and it’s amazingly useful.

Really glad there’s only two of these to do!

It’s repeable but fiddly.

Happy the round screens are wrapped.

Want to tweak the rectangle screens a bit.

Picture of exterior of Star Wars, Millennium Falcon…looks like a Panther Ausf A model to me…probably Tamiya

:blush:

8 Likes

Added radio operator’s forward periscope position and the respective periscopes. Spares from the Tamiya Panther G w/interior above.

Added frames to rectangle screens and GrandtLine nuts to bolt them down.

7 Likes

Really lovely work Wade :+1:

2 Likes

Thank you, Johnny.


I feel bogged down in the grind of making little tweaks at this point. Kali’s getting bored, says wake me if you attach something bigger than a wing nut.

So feeling the motivation slipping, I took a suggestion from @oldwarloke Donald to heart and ordered several Heavy Hobby items.

At first going 3D printed for this old pig felt like a cheat but then I realized 3D printed parts would probably allow me to throw away all of the Italeri tools!!! :blush:

Also by the time this model is together, I’ll likely be out of gas for Tamiya Panther G/Dragon Panther D fiddle bit routine for this one’s tool set.

Model Kasten bolts to tweak the front based on Jentz & Doyle’s Panther Panzer Tracks.

Added radio operator’s forward periscope & cover (Panther D stuff), then realized there should be bolts to the side of the cover. To Italeri credit they got that on the three other hull periscopes.

The Jentz & Doyle work also helped me spot a couple of missing welds on upper hull. One glacis to hull top and one joining the hull top halves by the turret. That one is textured white styrene strip. Decided to tweak the remaining welds with a little Molak Stucco Putty & #11 blade.

Light texture was added to the open areas. I’d rather use artistic license and go slightly too rough texture than have flat glass smooth with no texture. Besides it covered more Italeri plastic surface area with a non Italeri product and that makes me happier with this model :blush:

Hope to move to the engine deck next.

4 Likes

For an early Panther D the driver & radio operator hatches need recessed detail added and the hatch handles repositioned to the center. Panzer Tracks Panther by Jentz & Doyle proved very helpful finding the details.

Made xerox copy of relevant hatches, cut out and used as a template for detail placement.

Taped template in place and poked with a sharp divider to add recess details.

Handles & spacers.

Hatches detailed. Still need to add hatch latches.

9 Likes