@Uncle-Heavy Robin,
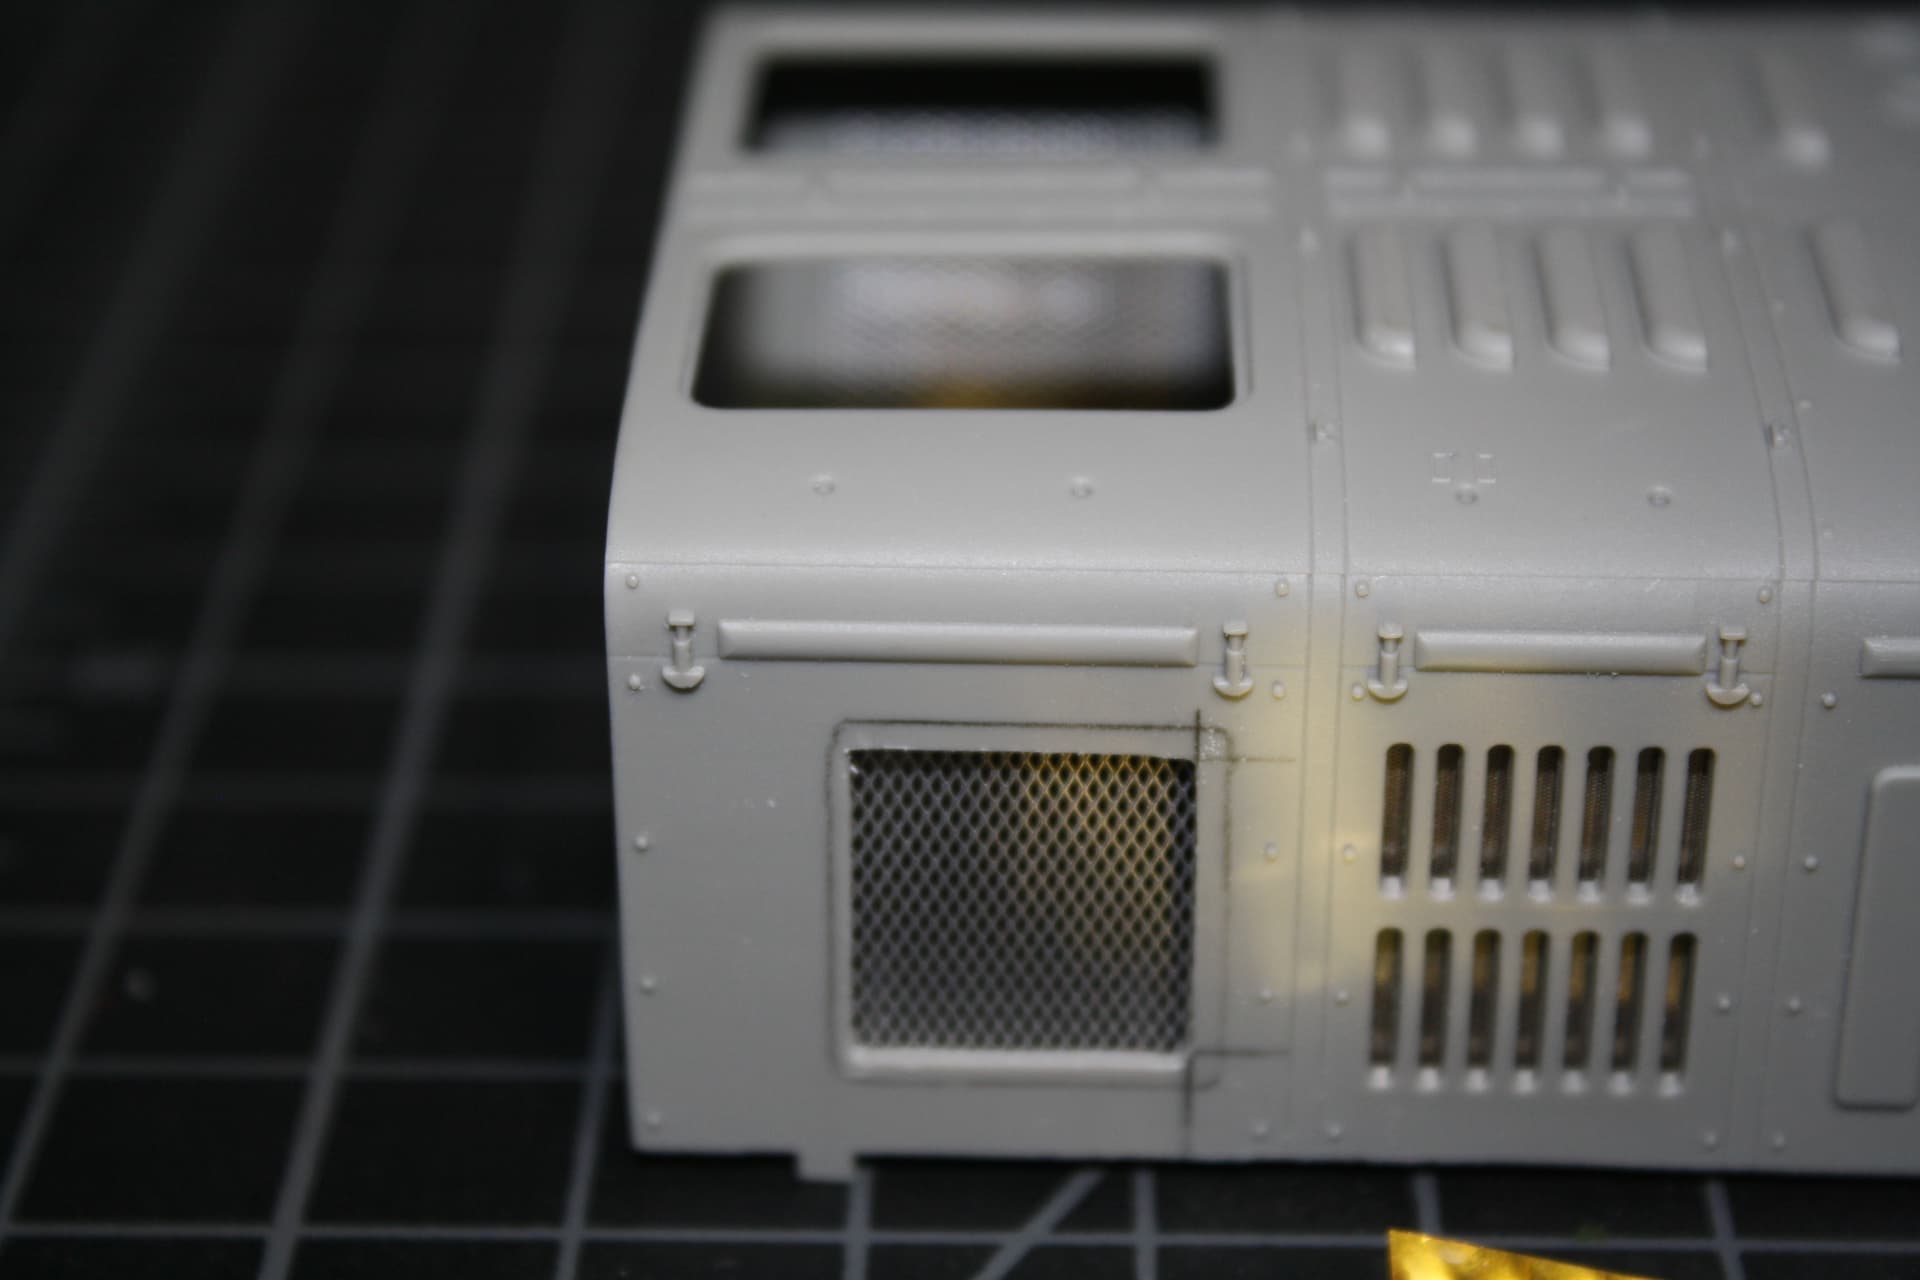
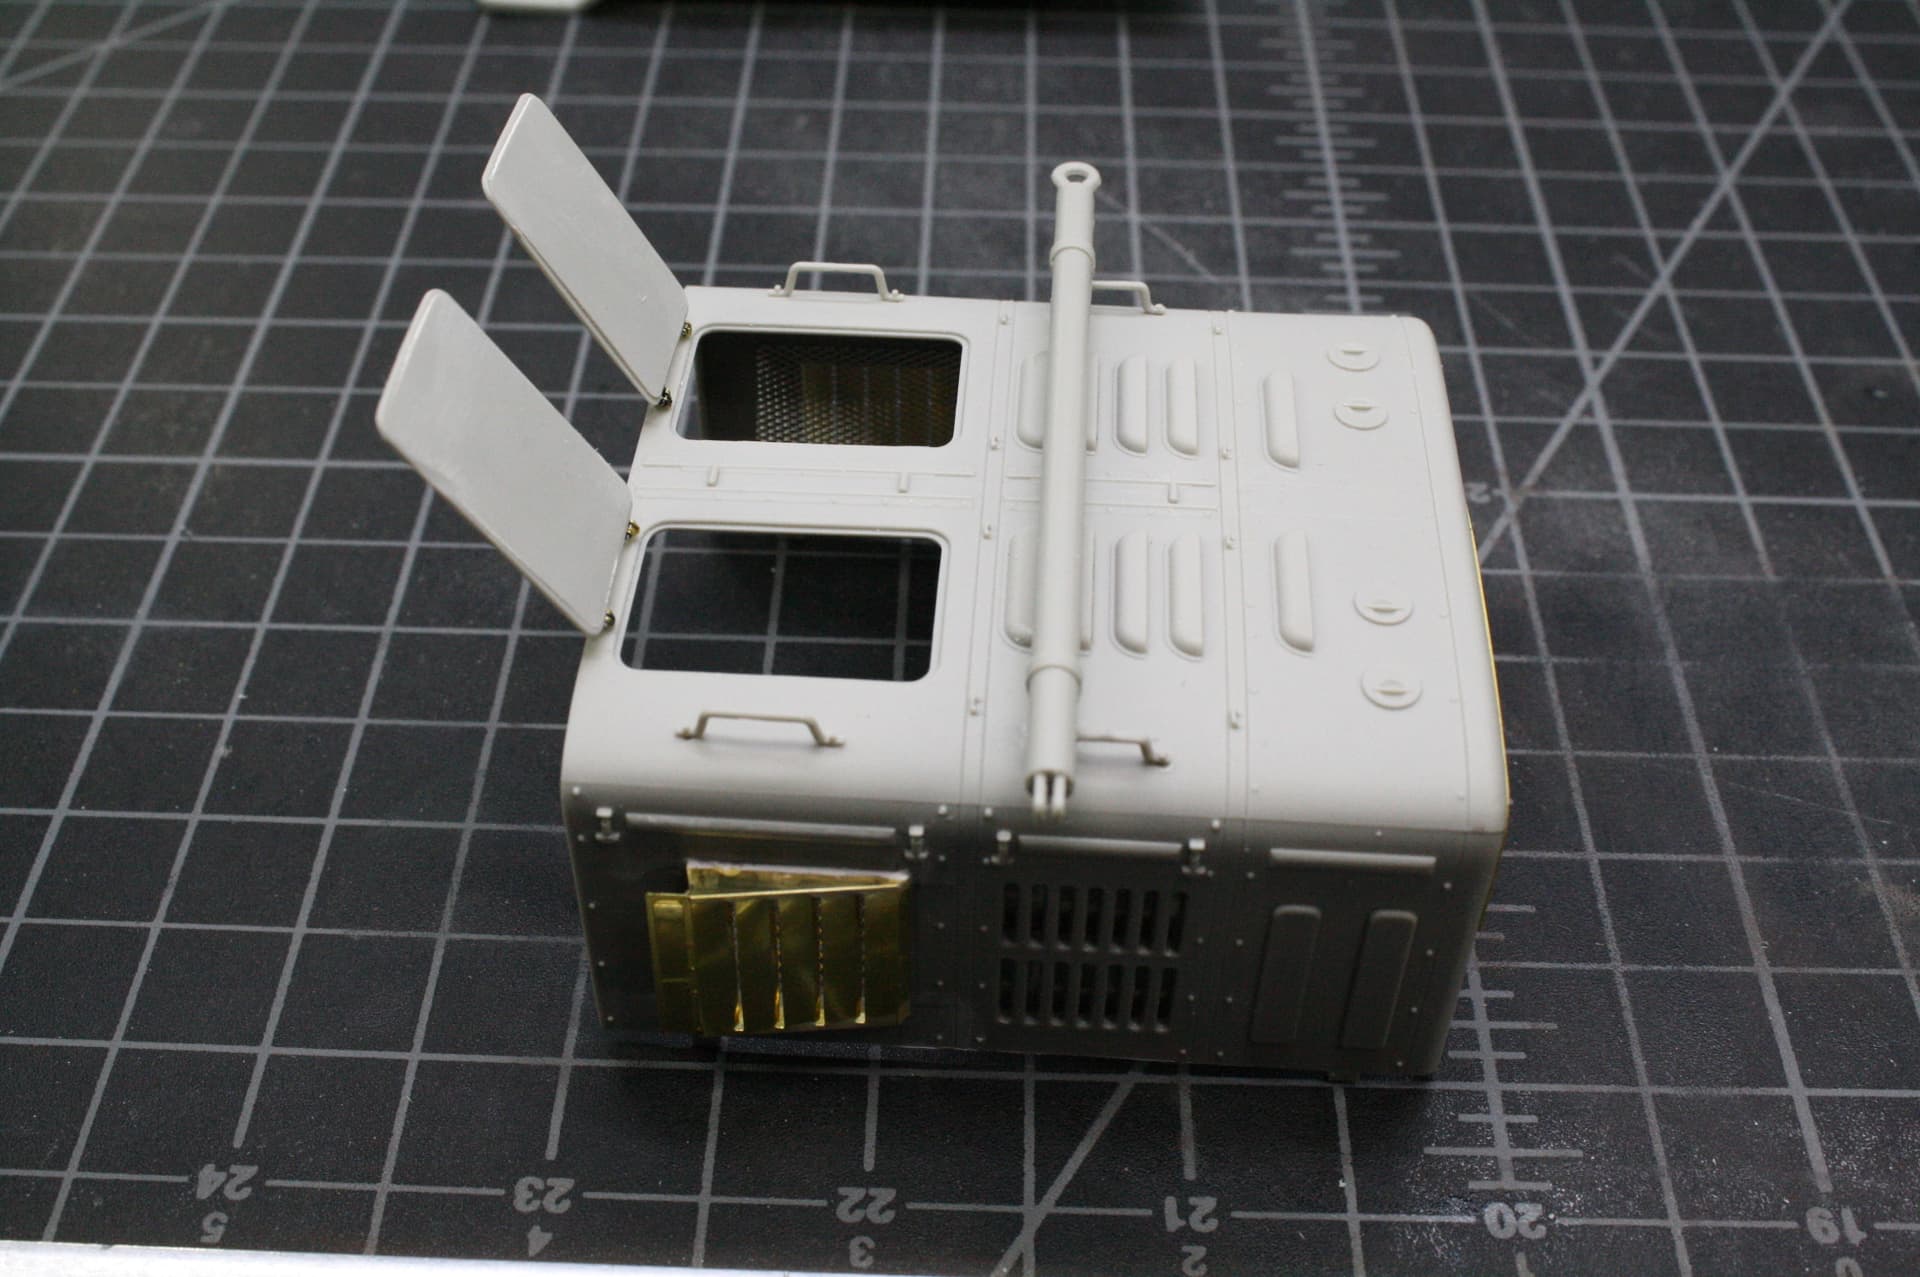
I’m not quite decided on that yet. It depends on how the rest of the PE and resin updates go. I wasn’t planning on opening the main hatches on top, just the small hatches. I didn’t have plans for cutting the whole engine cover apart, even though I’m installing a whole engine. the molded latches, even if a little inaccurate, aren’t horrible, IMHO:
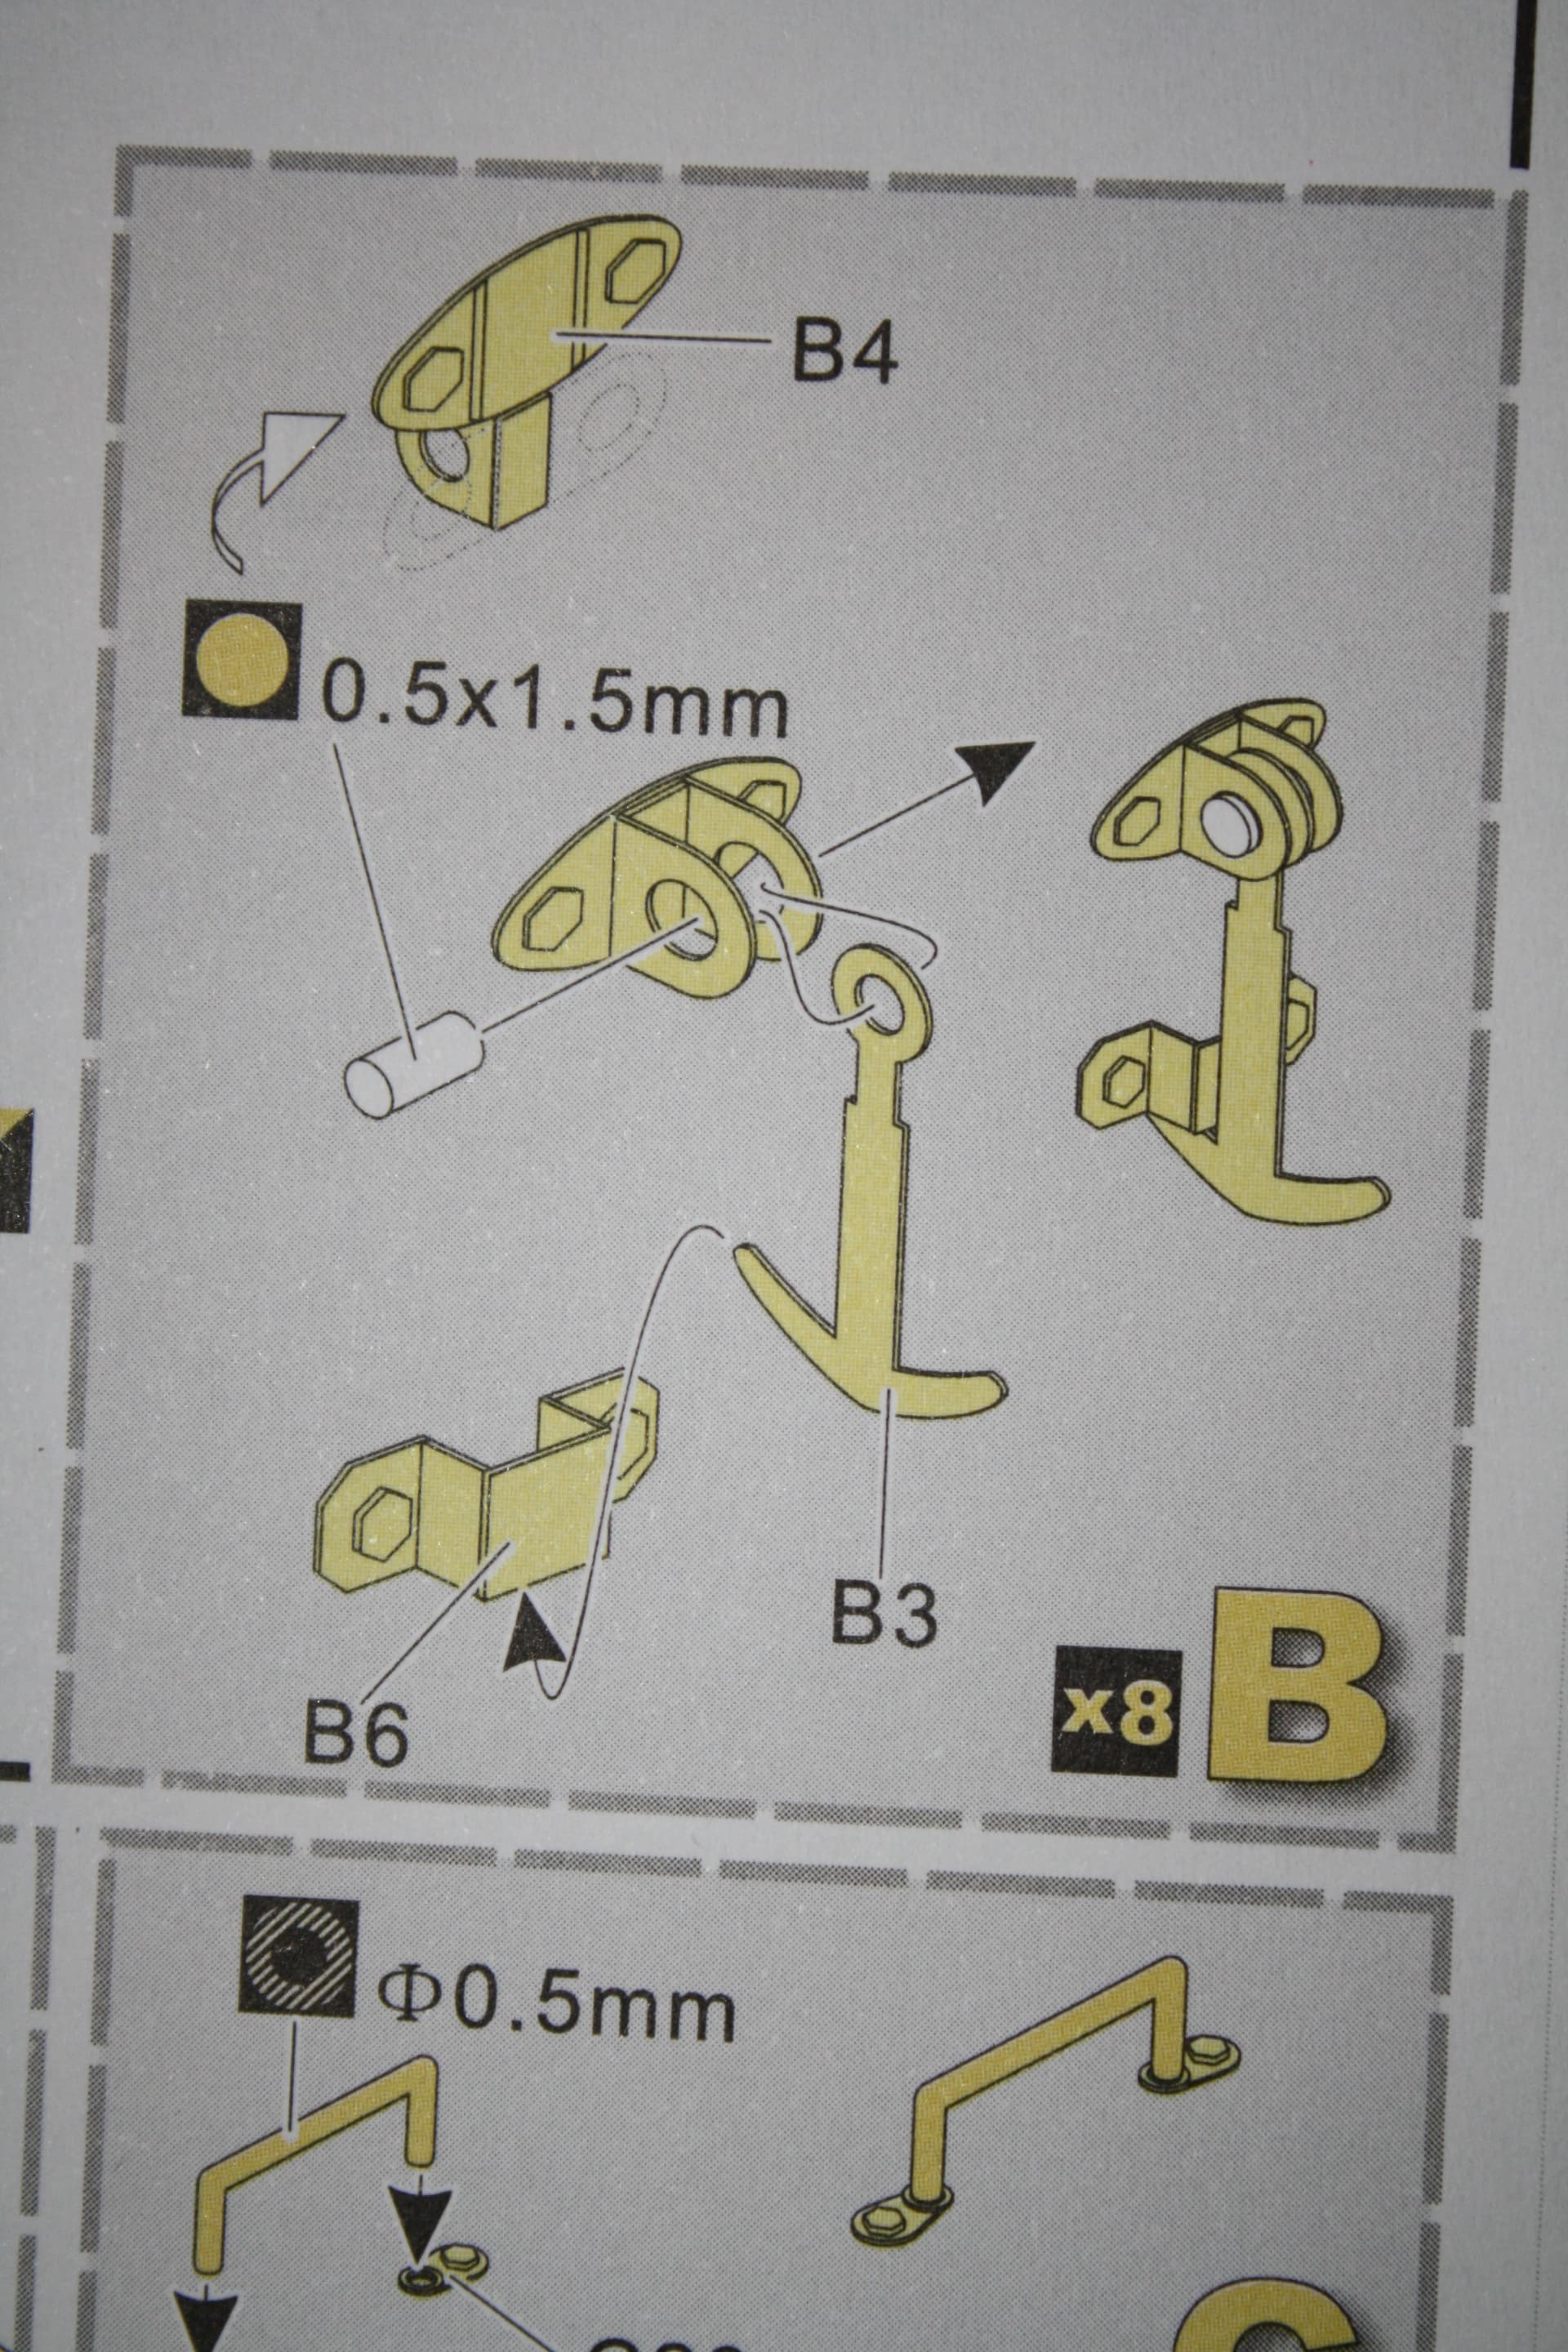
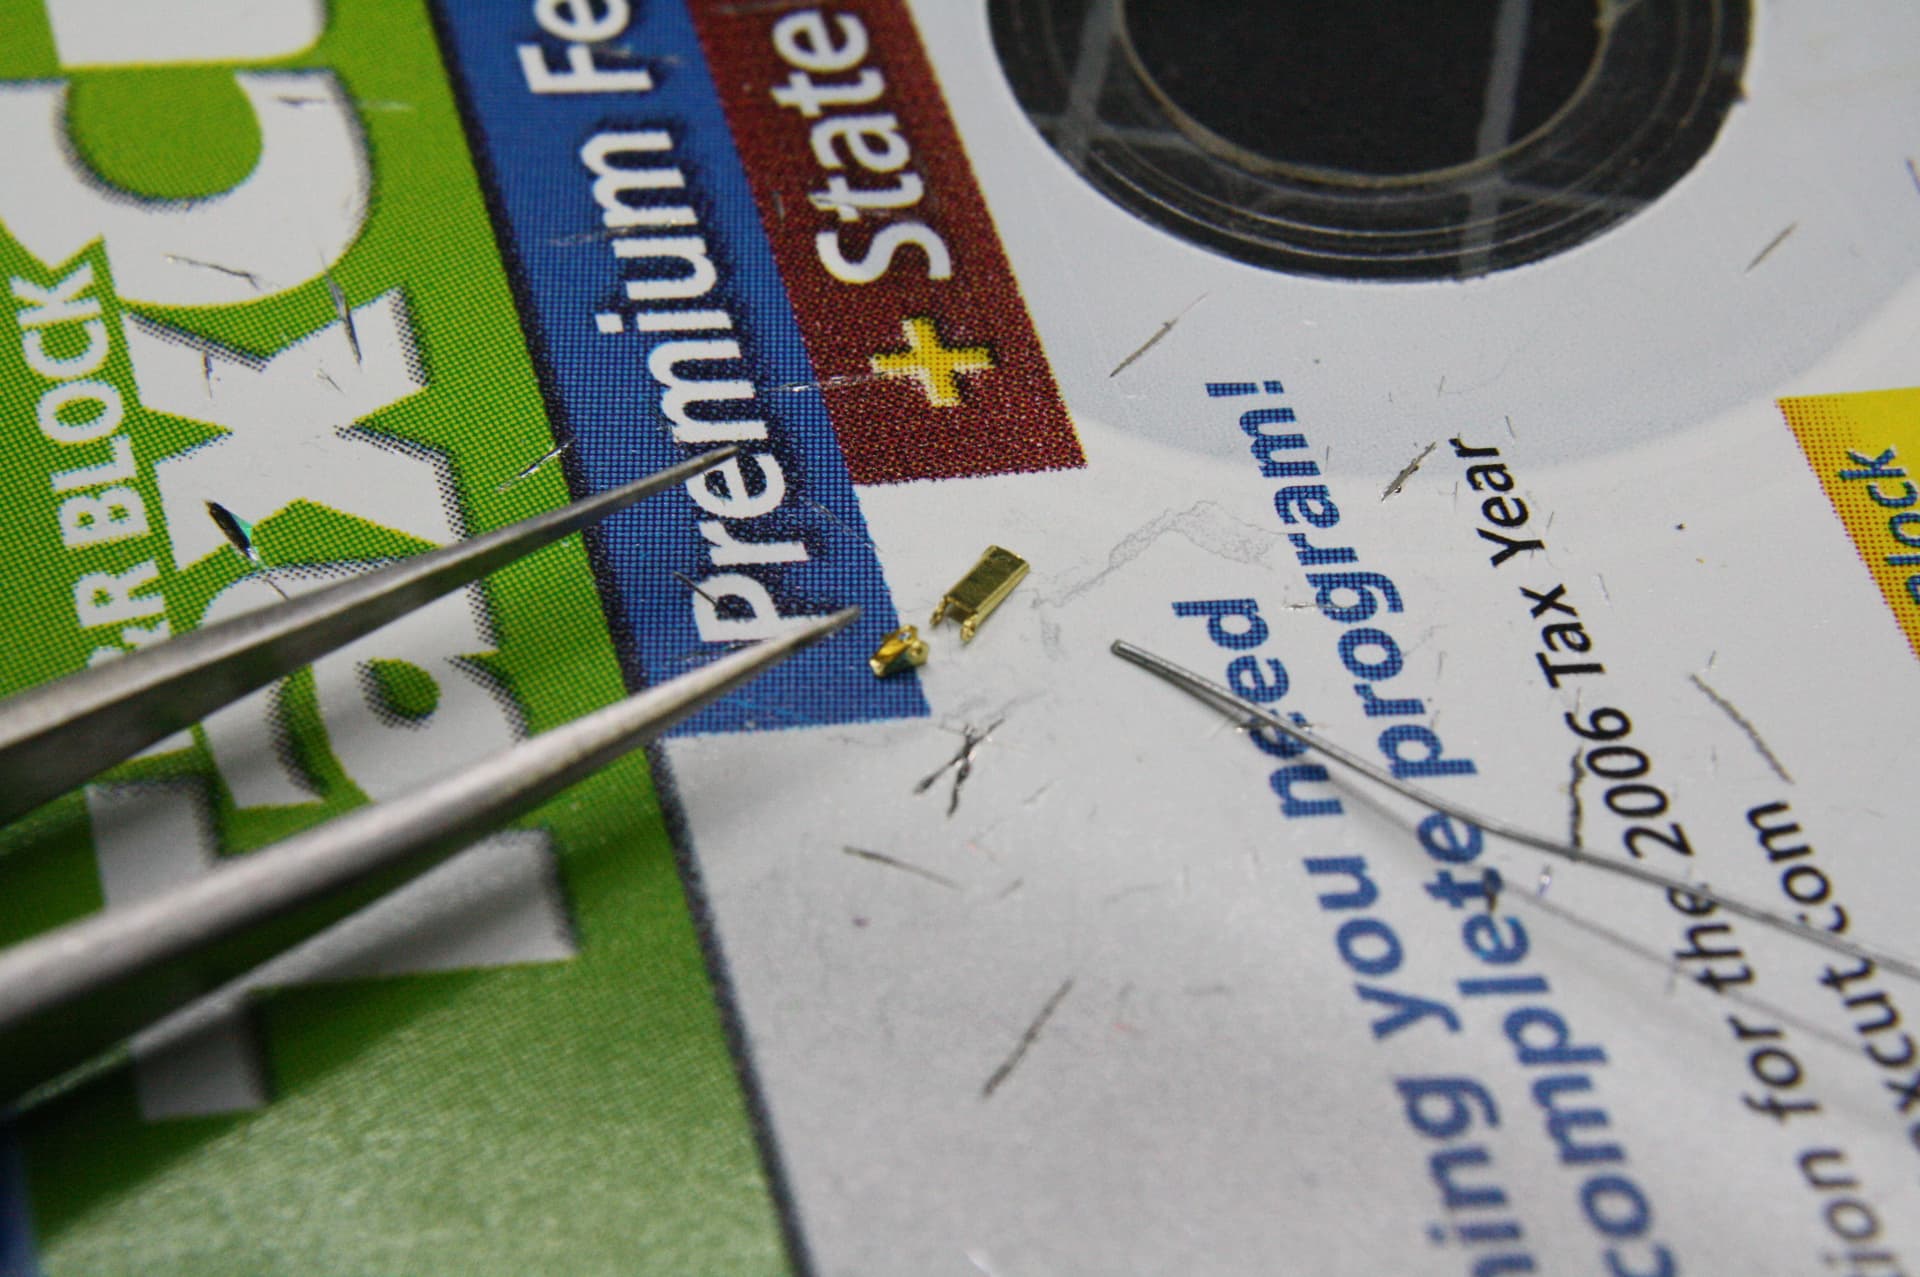
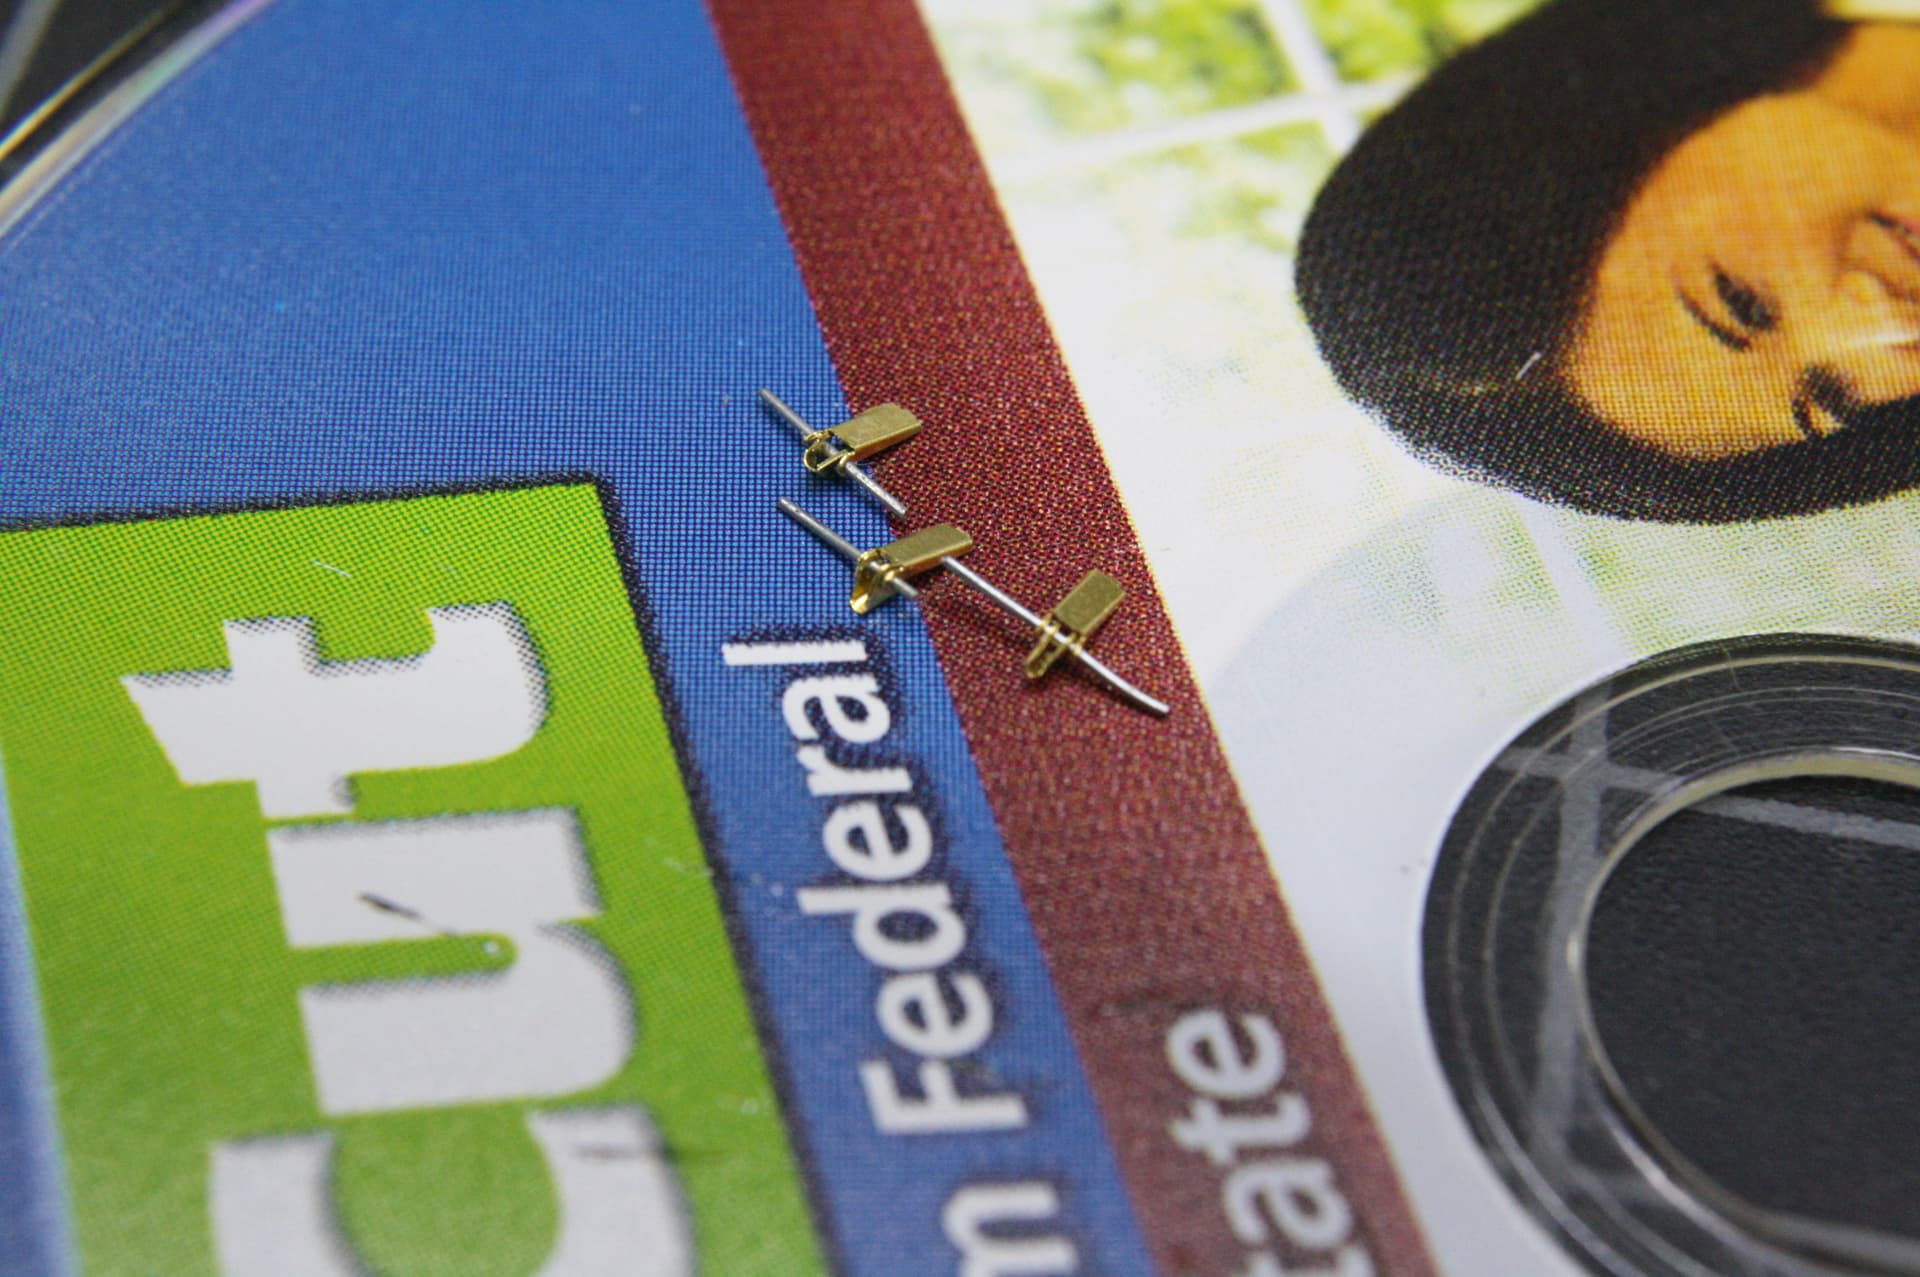
This is finer than even my sharpest surgical tweezers. Even with no caffeine that day, I’m not sure these are do-able. I’ll give them a try, but no guarantees they’ll show up on the finished model. And I have to make 8 of them. Damn. I bet the Chinese engineers at Voyager giggle evilly when they design parts like these, knowing full well that human hands cannot form them.
Without a doubt the most insane / intricate thing I’ve ever built. Wearing 8X magnifiers, bent and assembled working hinges for the small hatches on top of the engine compartment. Had to line up all 4 holes and get the .25mm wire through. Managed it 4 times. Took me 3 hours!
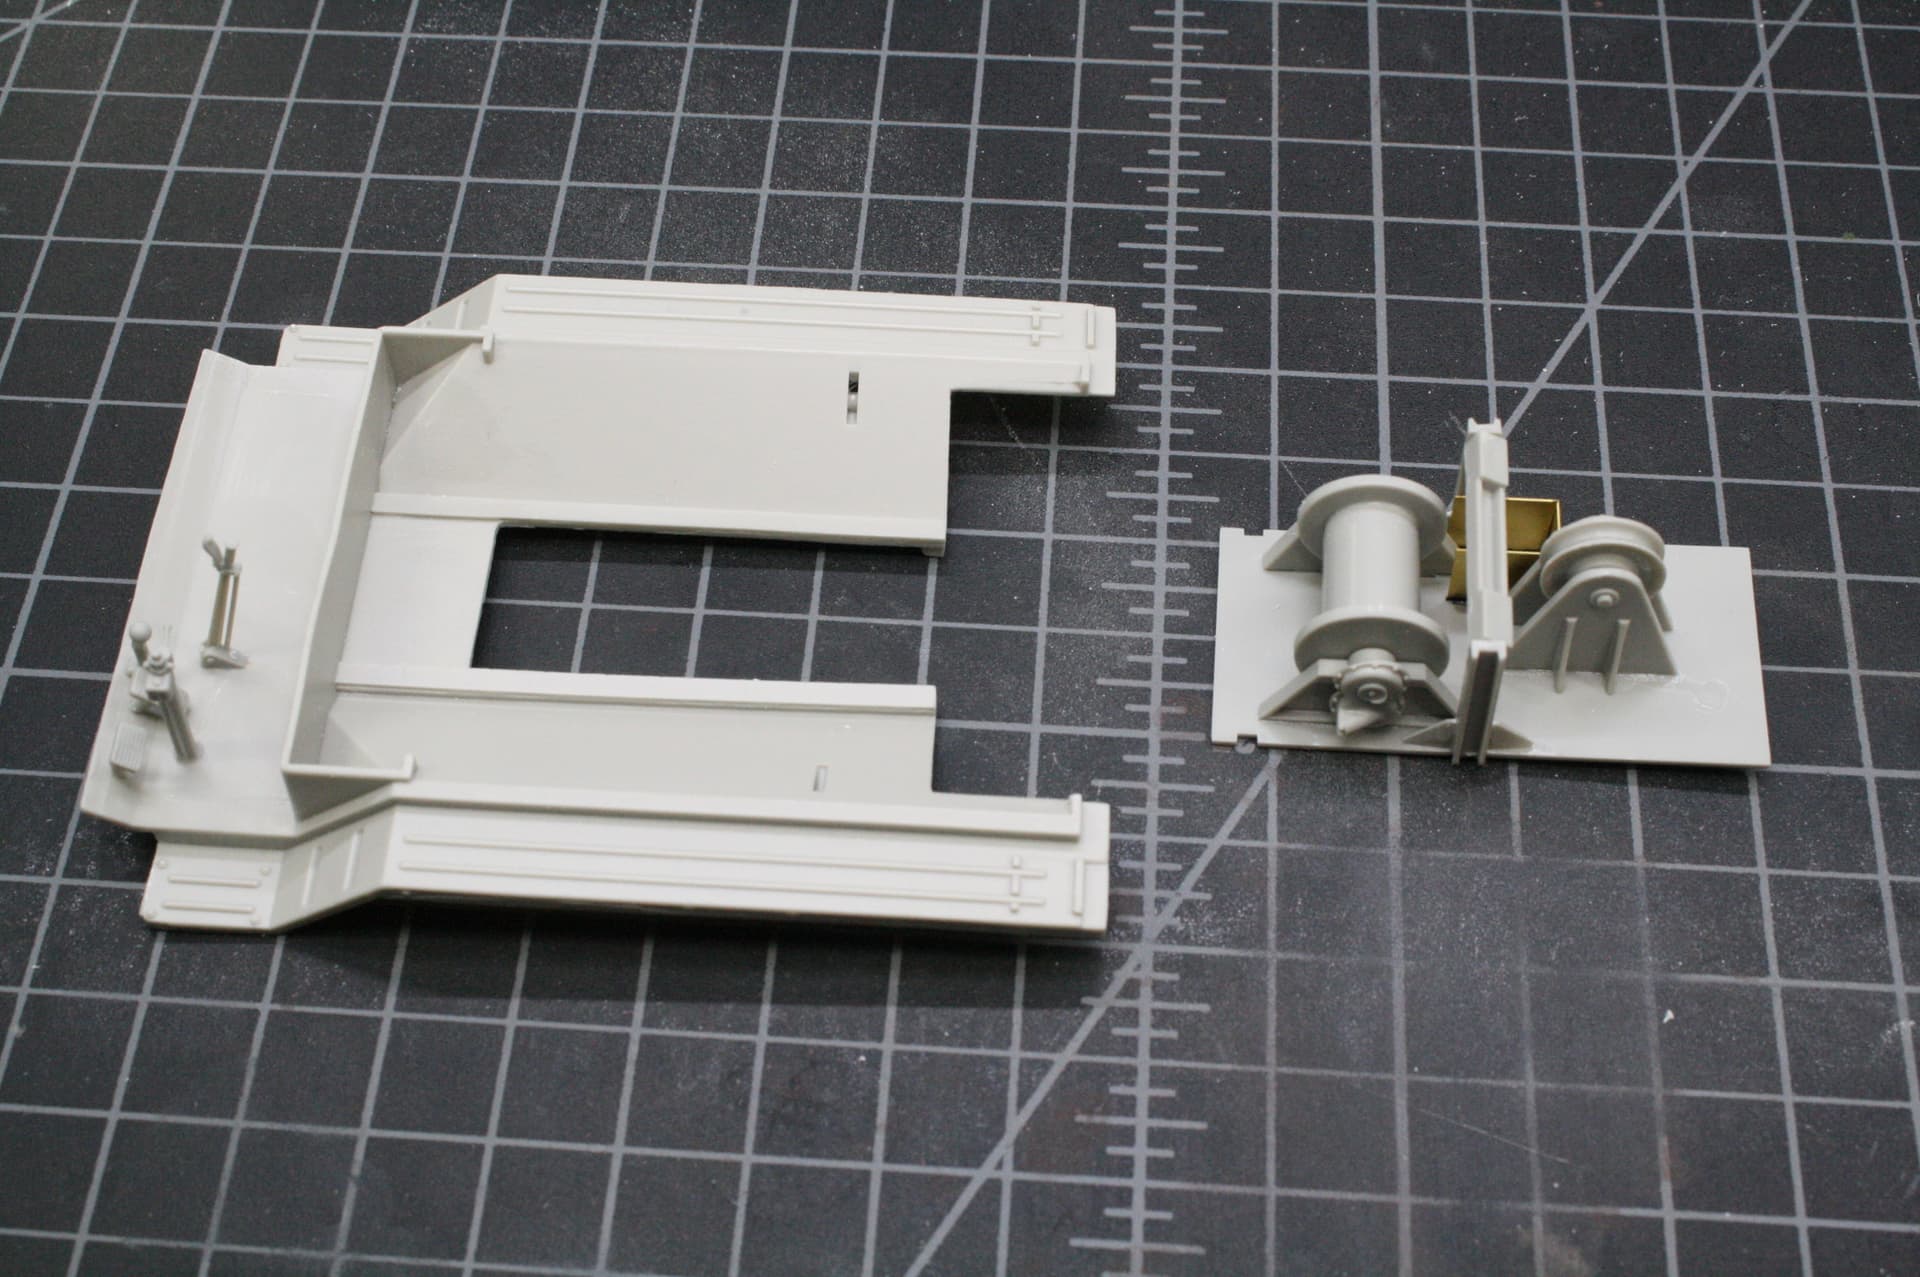
Not too much done lately. Finished the engine cover. I will leave it removable when finished. Also got a couple more sub-assemblies done for the green side.
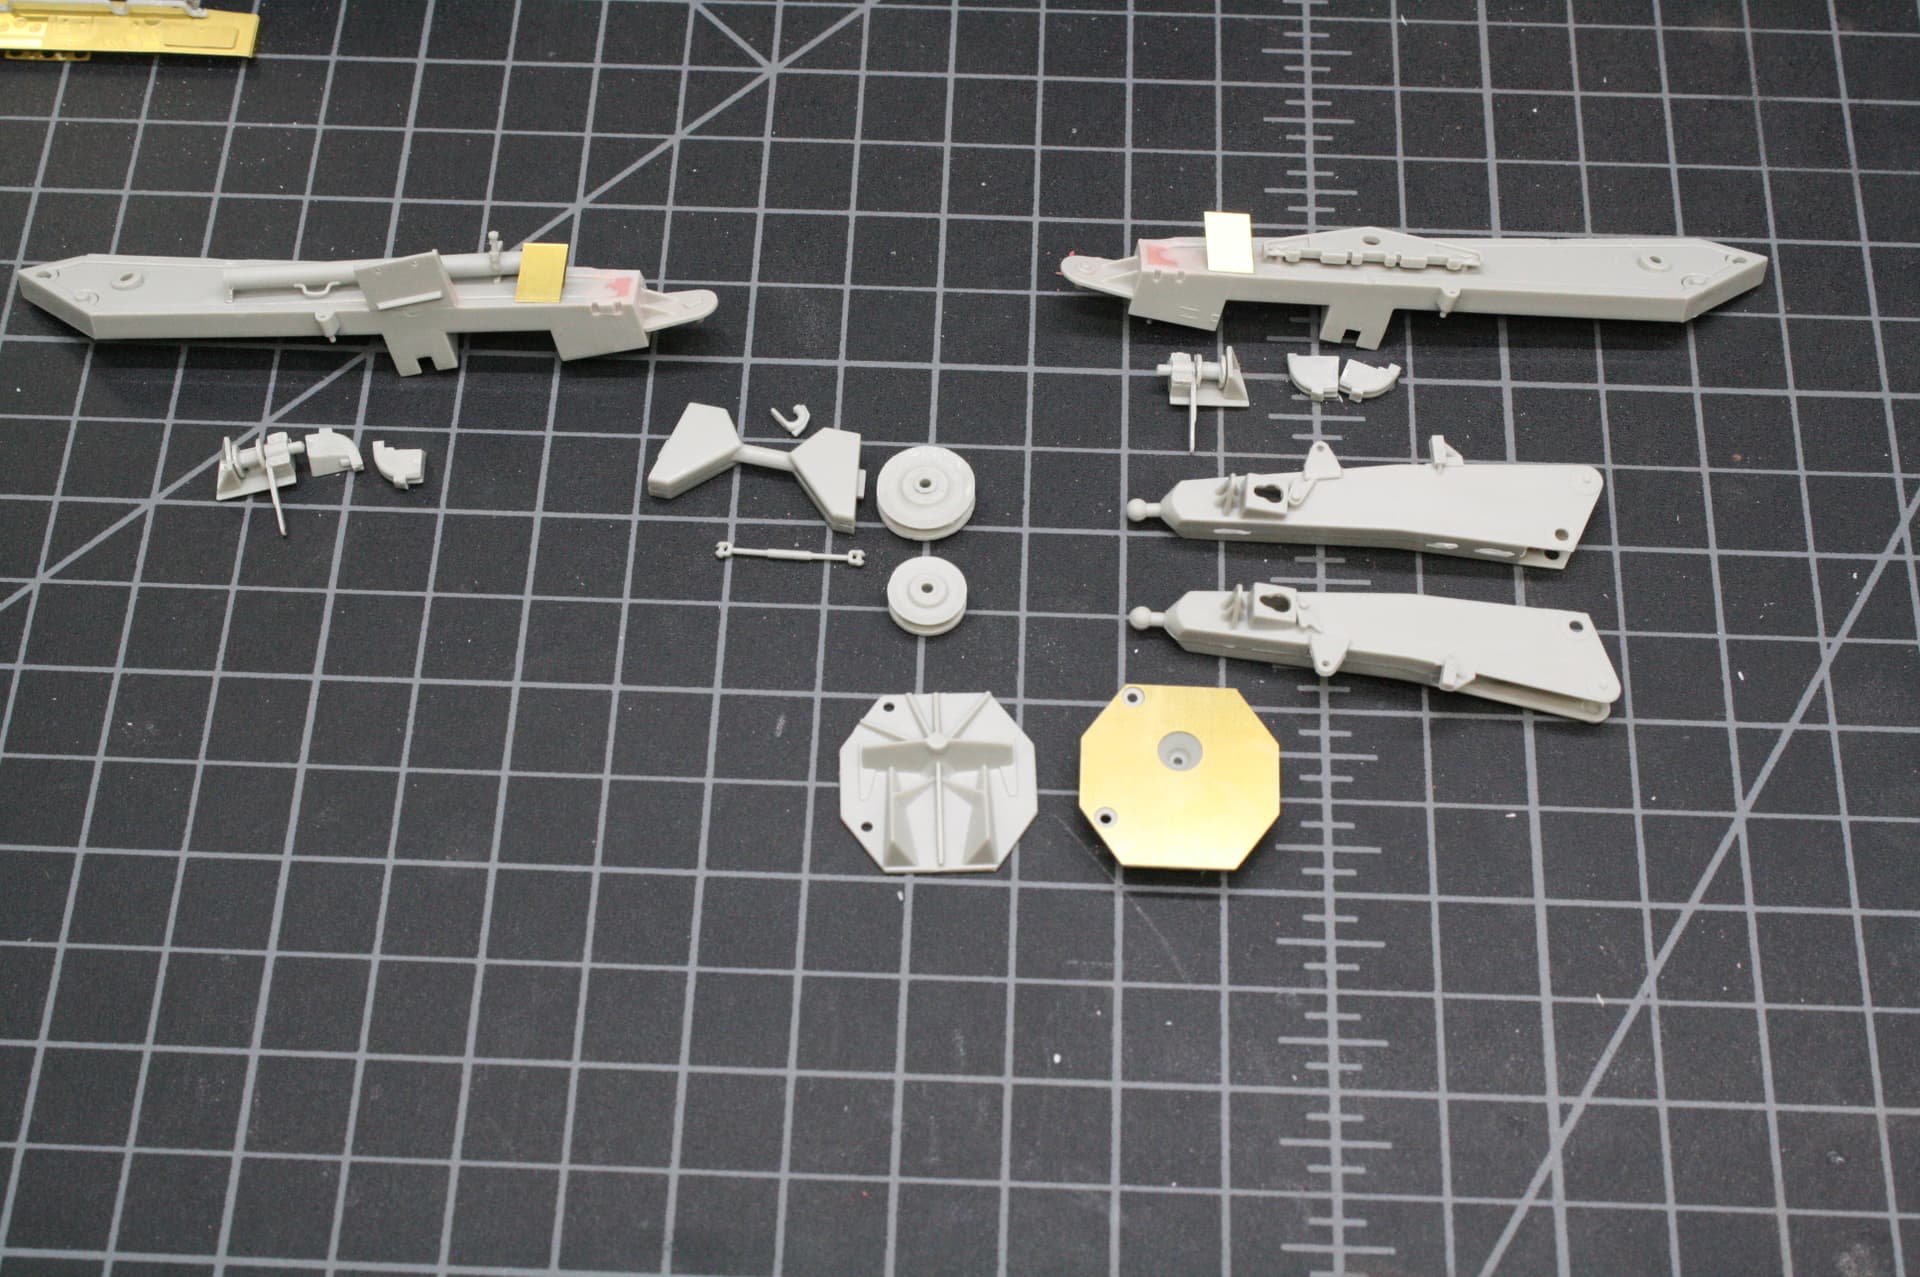
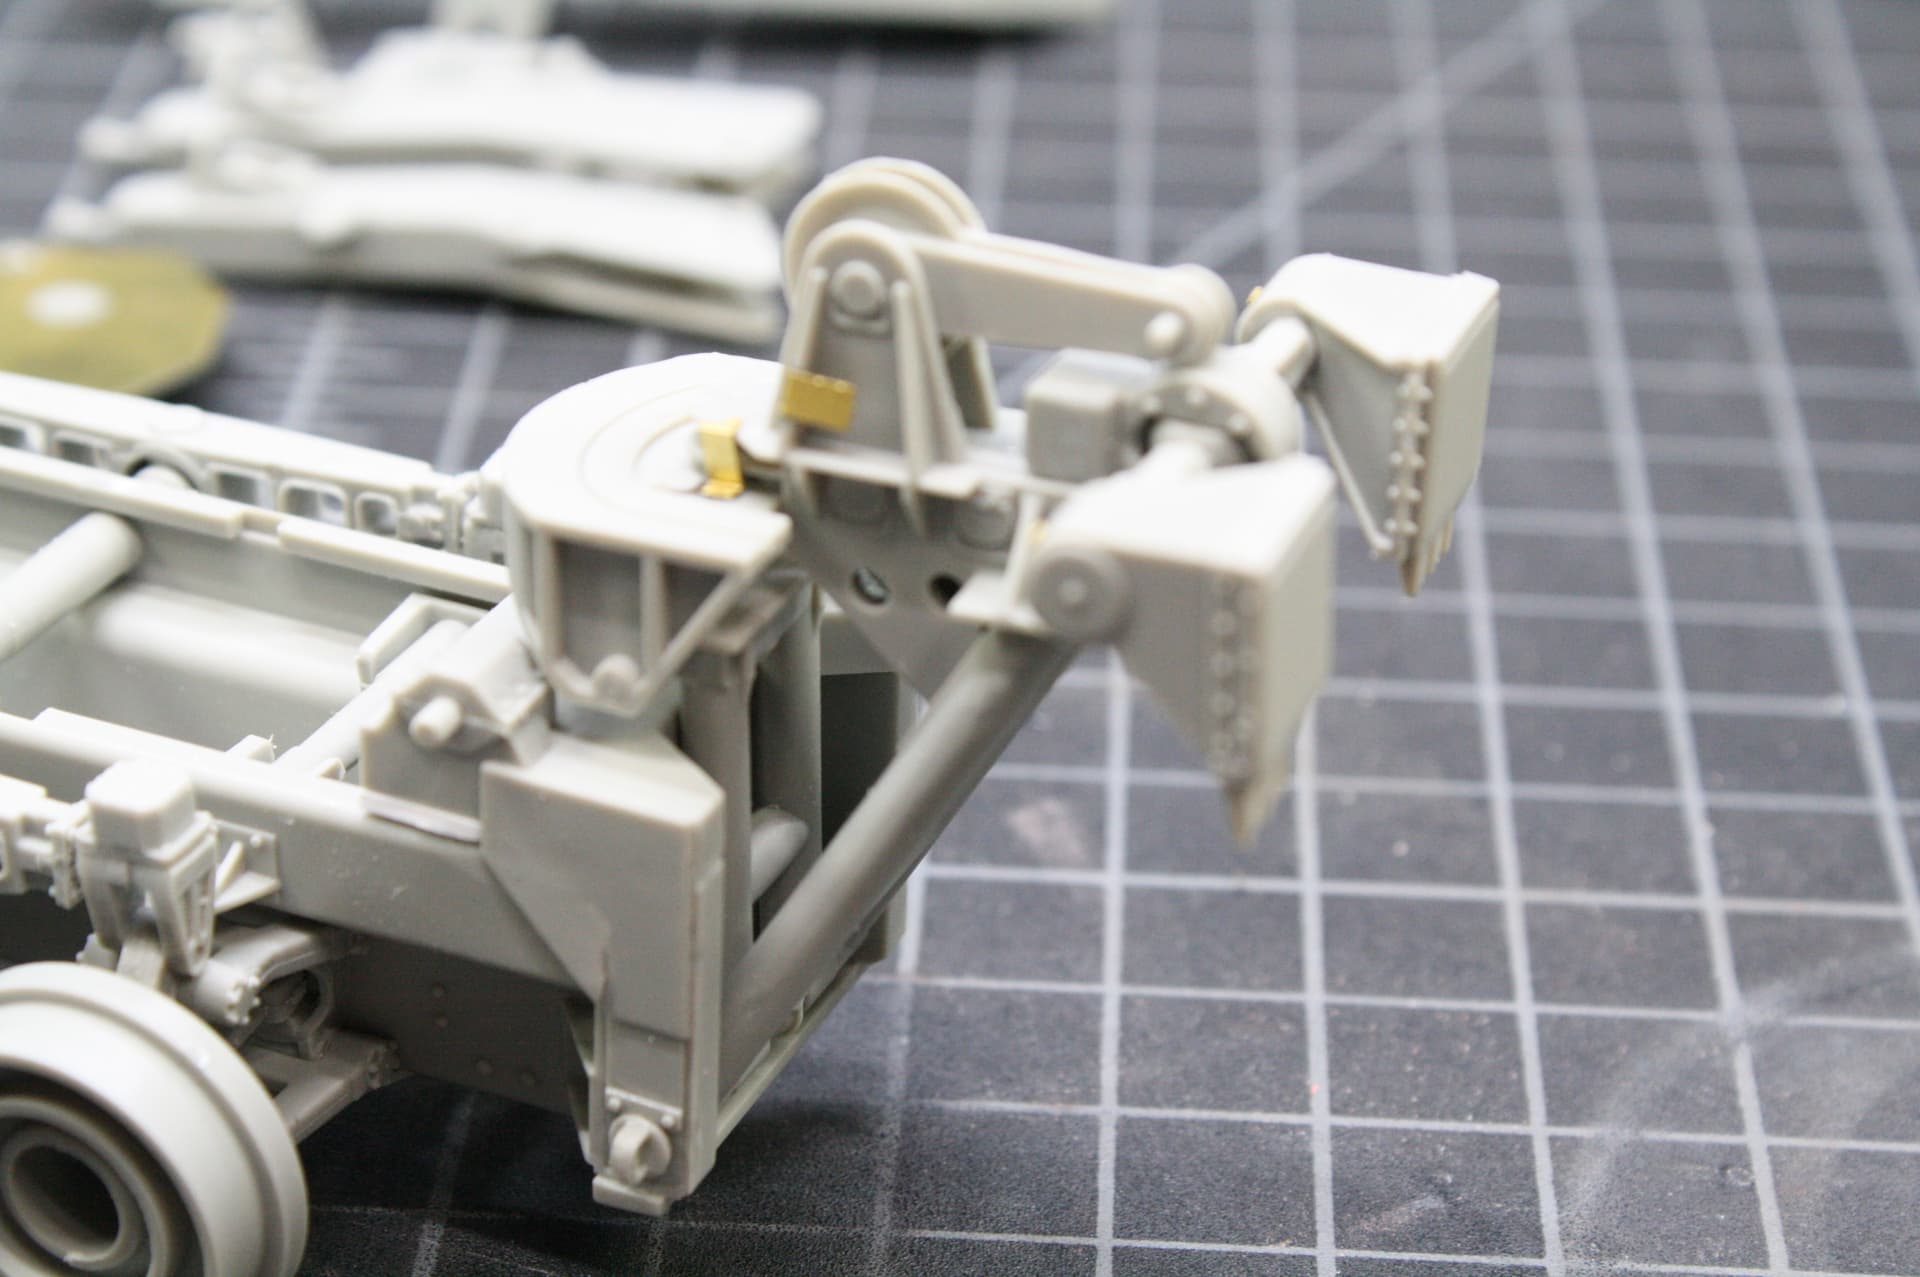
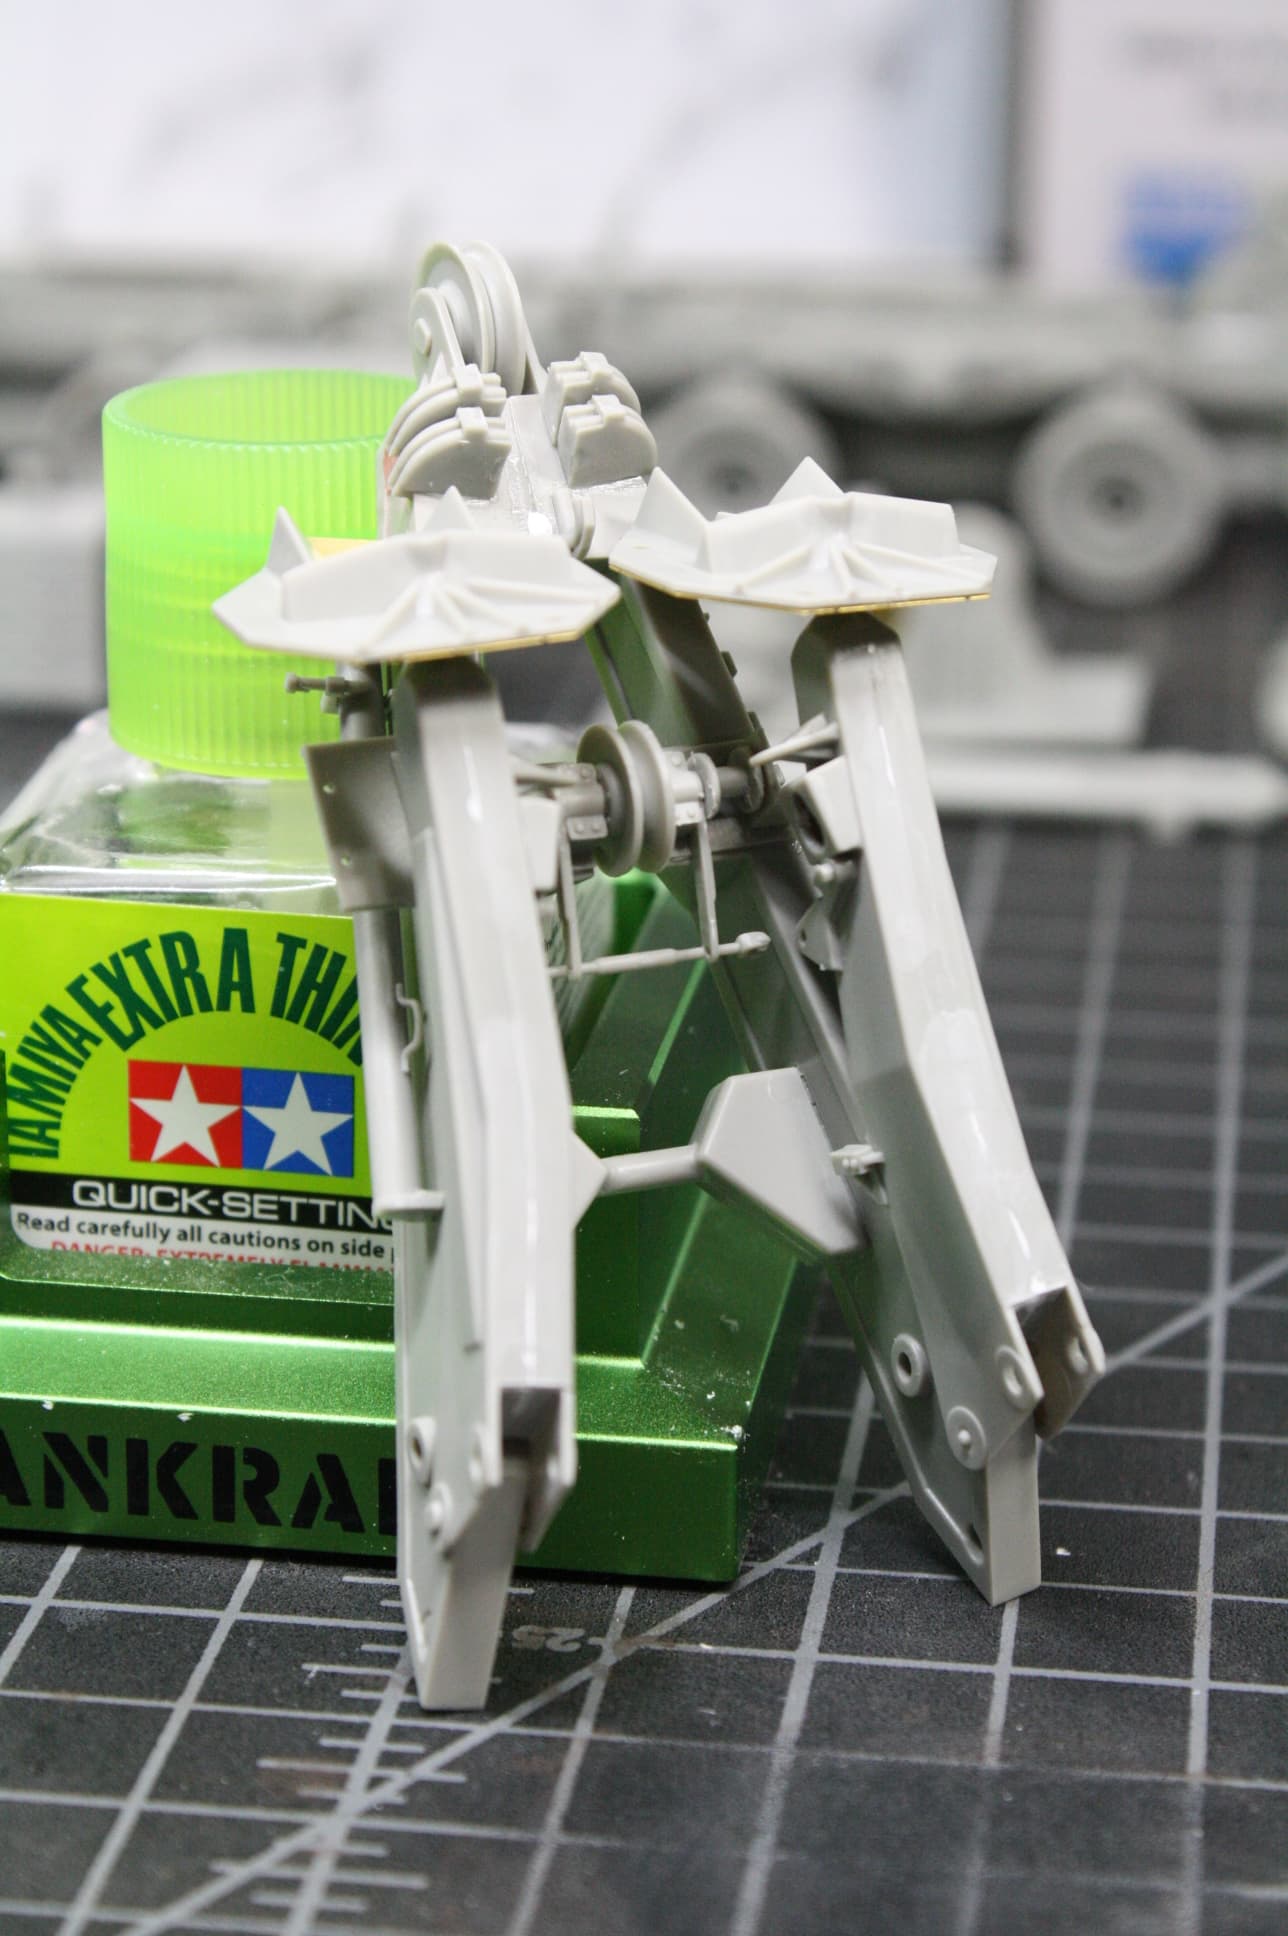
All the components of the main boom completed. This was a complicated step with lots of cleaning and finagling! Some teeny parts, too. The main footings (outriggers) are here, too. All of this will assemble into one massive crane!
@SSGToms . Thanks Brother. Its good to be back . This place is like home for me .
Been having a bit of a rough time lately , but all in all I’m tough as a Chinese Drill Sergeant.
Just getting back in the groove