She sure looks pretty even without her makeup.
1 Like
Holy crap that thing is a monster. I love it!
1 Like
The test fit looks great! That’s one impressive KET-T. Definitely looking forward to more. A++ 
This fellow from USSR would appreciate 
1 Like
Woah thats huge! I love it Matt!
1 Like
It is a monster, but a beautifull monster!!
1 Like
Thanks guys for all the kind words.  Wait until you see it with the monster truck tires on it.
  I have a model club friend casting me a spare tire now.
1 Like
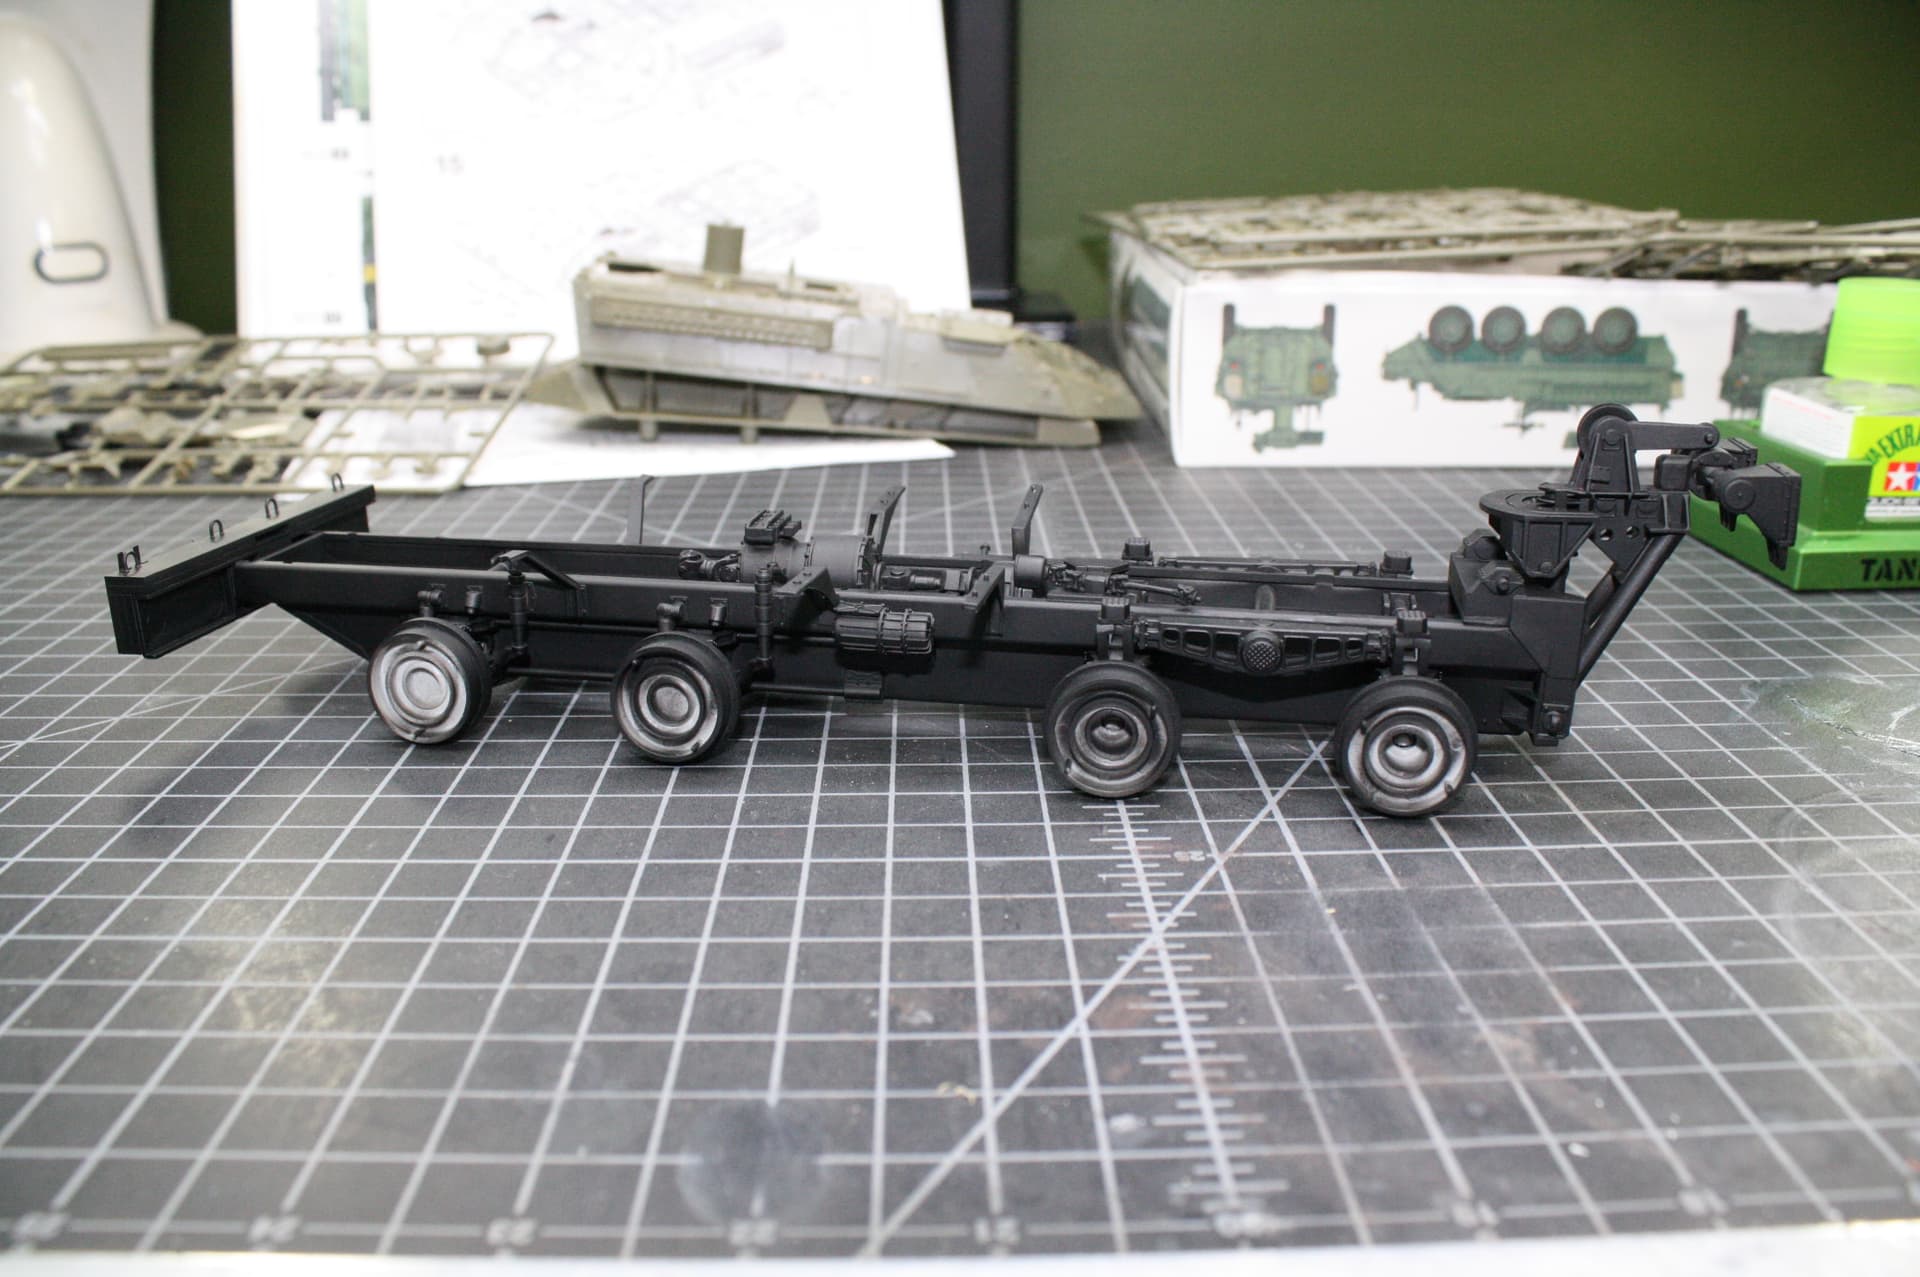
That is a great looking dry fit Matt. And it’s one big bad 8 wheeler. The 3/4 front shot is nice as it shows in through the vents and you can see the mesh screen behind it. Some lovely time consuming work but it’s definitely worth it
Did they only ever come in the bog standard green paint job or were there variations ? Cool build and looking forward to the next installment
1 Like
Thanks John. There is a green-sand-black scheme, but it seems like ALL my modern stuff is getting done in that pattern lately. I’m kind of partial to the green on the top half / black on the bottom half myself with the yellow caution stripes on the front bumper.
1 Like
Looking Good!
1 Like
Awesome build! 
—mike
1 Like
Super impressive . It us a joy to see this come together in the hands of a master
2 Likes
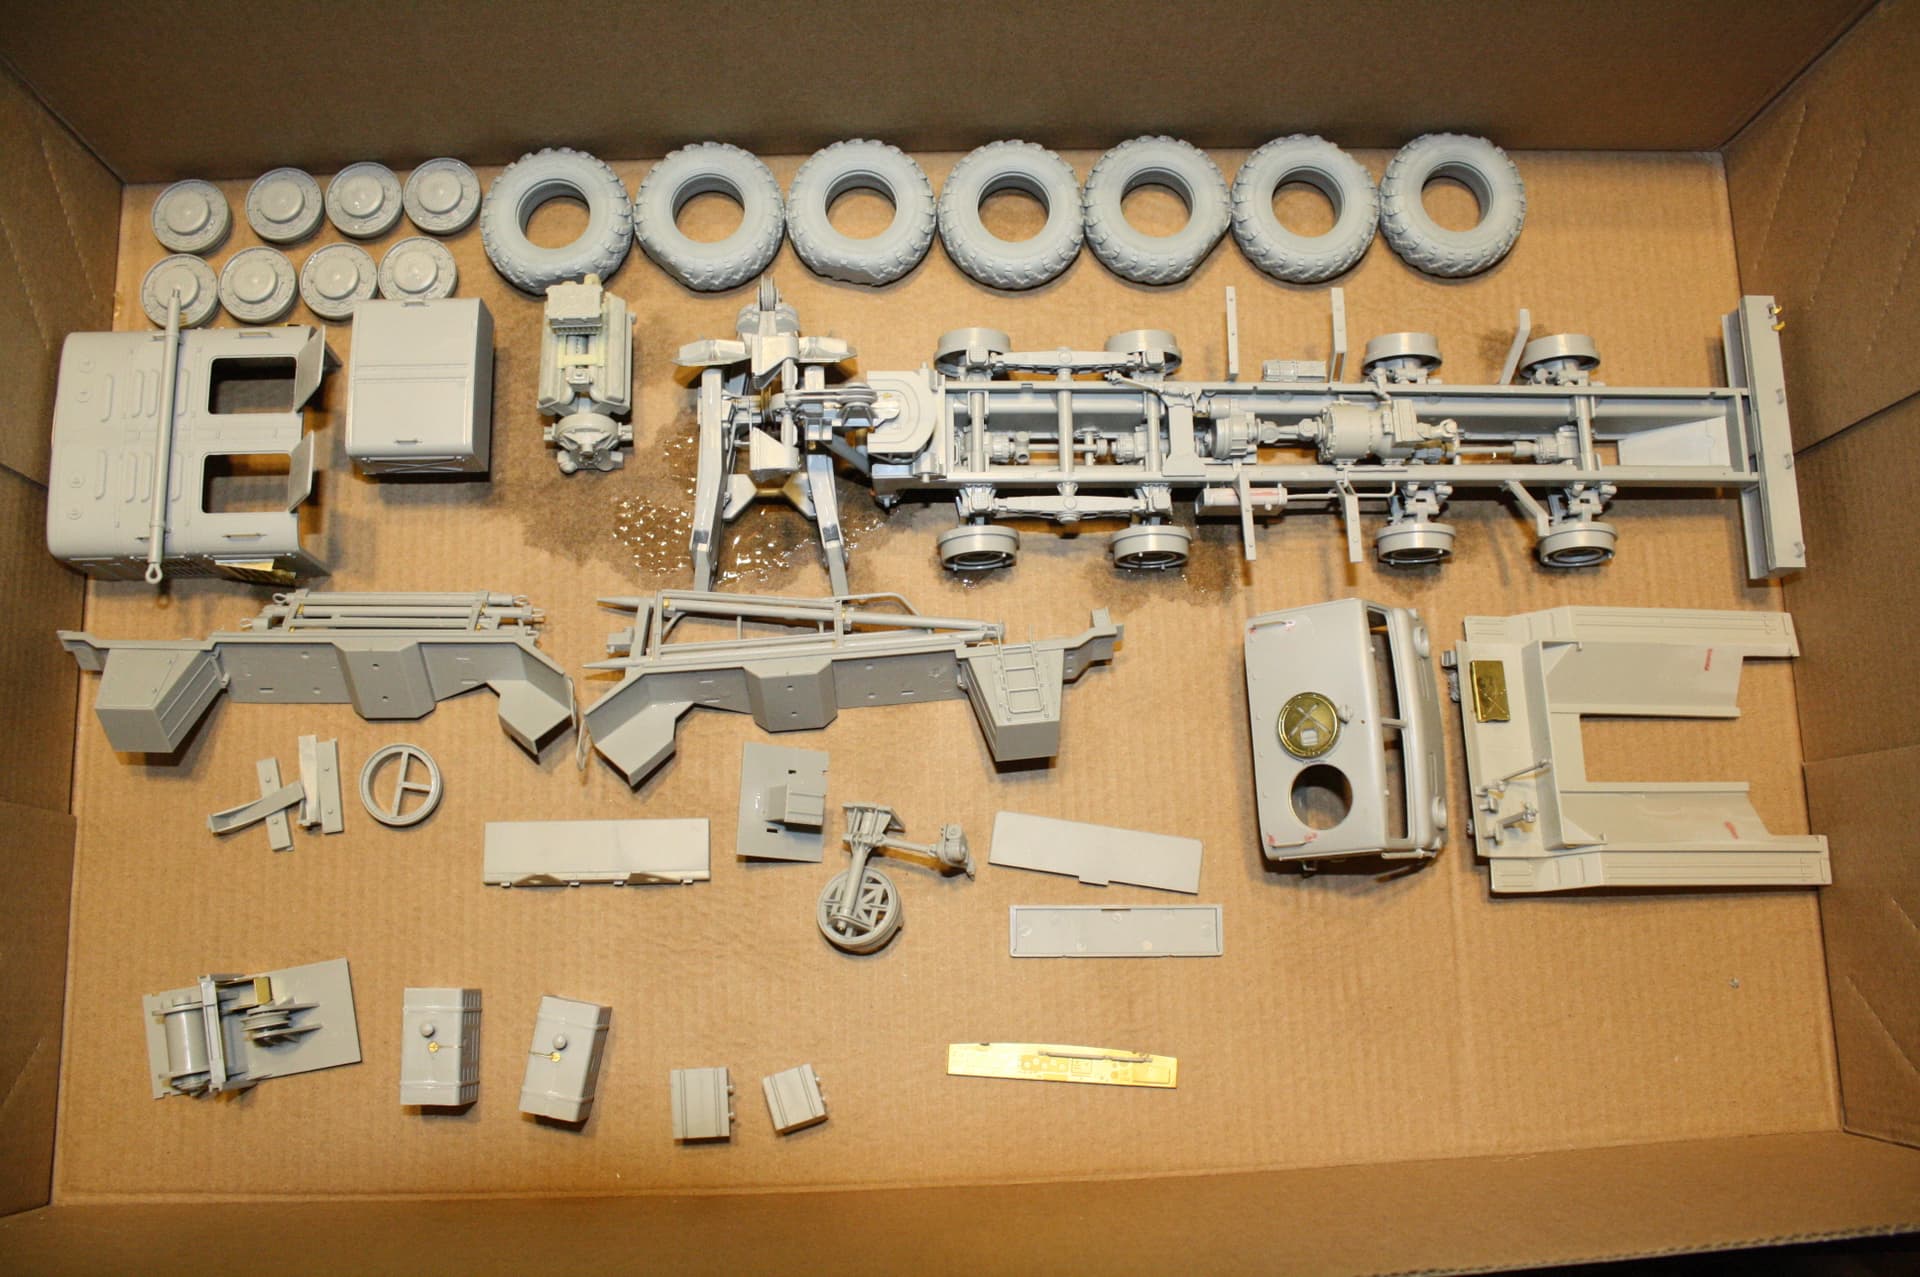
All the parts are washed and now drying, covered, in the box. I usually dry the model under an inverted Tupperware but the KET-T outsizes all my wife’s plastic goods. I eliminate the need for primer by spraying all the sub assemblies very liberally with Windex, then gently rinsing them with my kitchen sink sprayer. This removes all oils, mold release, and gunk without having to physically handle the model or scrub it, so that no parts are knocked loose. Then - no primer - the paint sticks tight to all materials, styrene, resin, PE, aluminum, white metal. Works like a charm every time. I personally learned this trick decades ago from Steve Zaloga himself. He was in our model club back in the 2000’s and spent many a Saturday night hanging at my house talking tank models. Then he moved to Maryland. I still talk to him every once in a while. Anyway, the parts are still drying since last night, hopefully they’ll be ready tomorrow and I can begin throwing some paint!
So for today, I’m scratchbuilding fire extinguishers.
Then some Jerry cans, their PE racks, and a few other stand alone PE bits.
7 Likes
Matt that’s a fantastic tip on the Windex & Wash to clean and skip primer. A+++
Looking great! Really excited to see the painting of this monster model!
2 Likes
I don’t disagree that Windex would work but you will have issues if you future the glass.
1 Like
That is looking great even without paint Matt. Fire extinguishers are going together nicely as well. Looking forward to seeing each stage with the paint them as a whole. Great work
1 Like
No issues, the parts are thoroughly rinsed clean with water.
1 Like
Looking like a Beast - cannot wait to see color and weathering !
1 Like
I suggest to just crack the valve on an oxygen bottle and lay it on your workbench in front of you while building this model.- - GREAT stuff going on here!
1 Like
Outstanding job so far Matt can’t wait to see that beast painted up!
1 Like
Thanks guys. Mike am I suffering from oxygen deprivation? Or am I just depraved? I got the bottom half shot in black. Also all under the fenders and wheels in black.
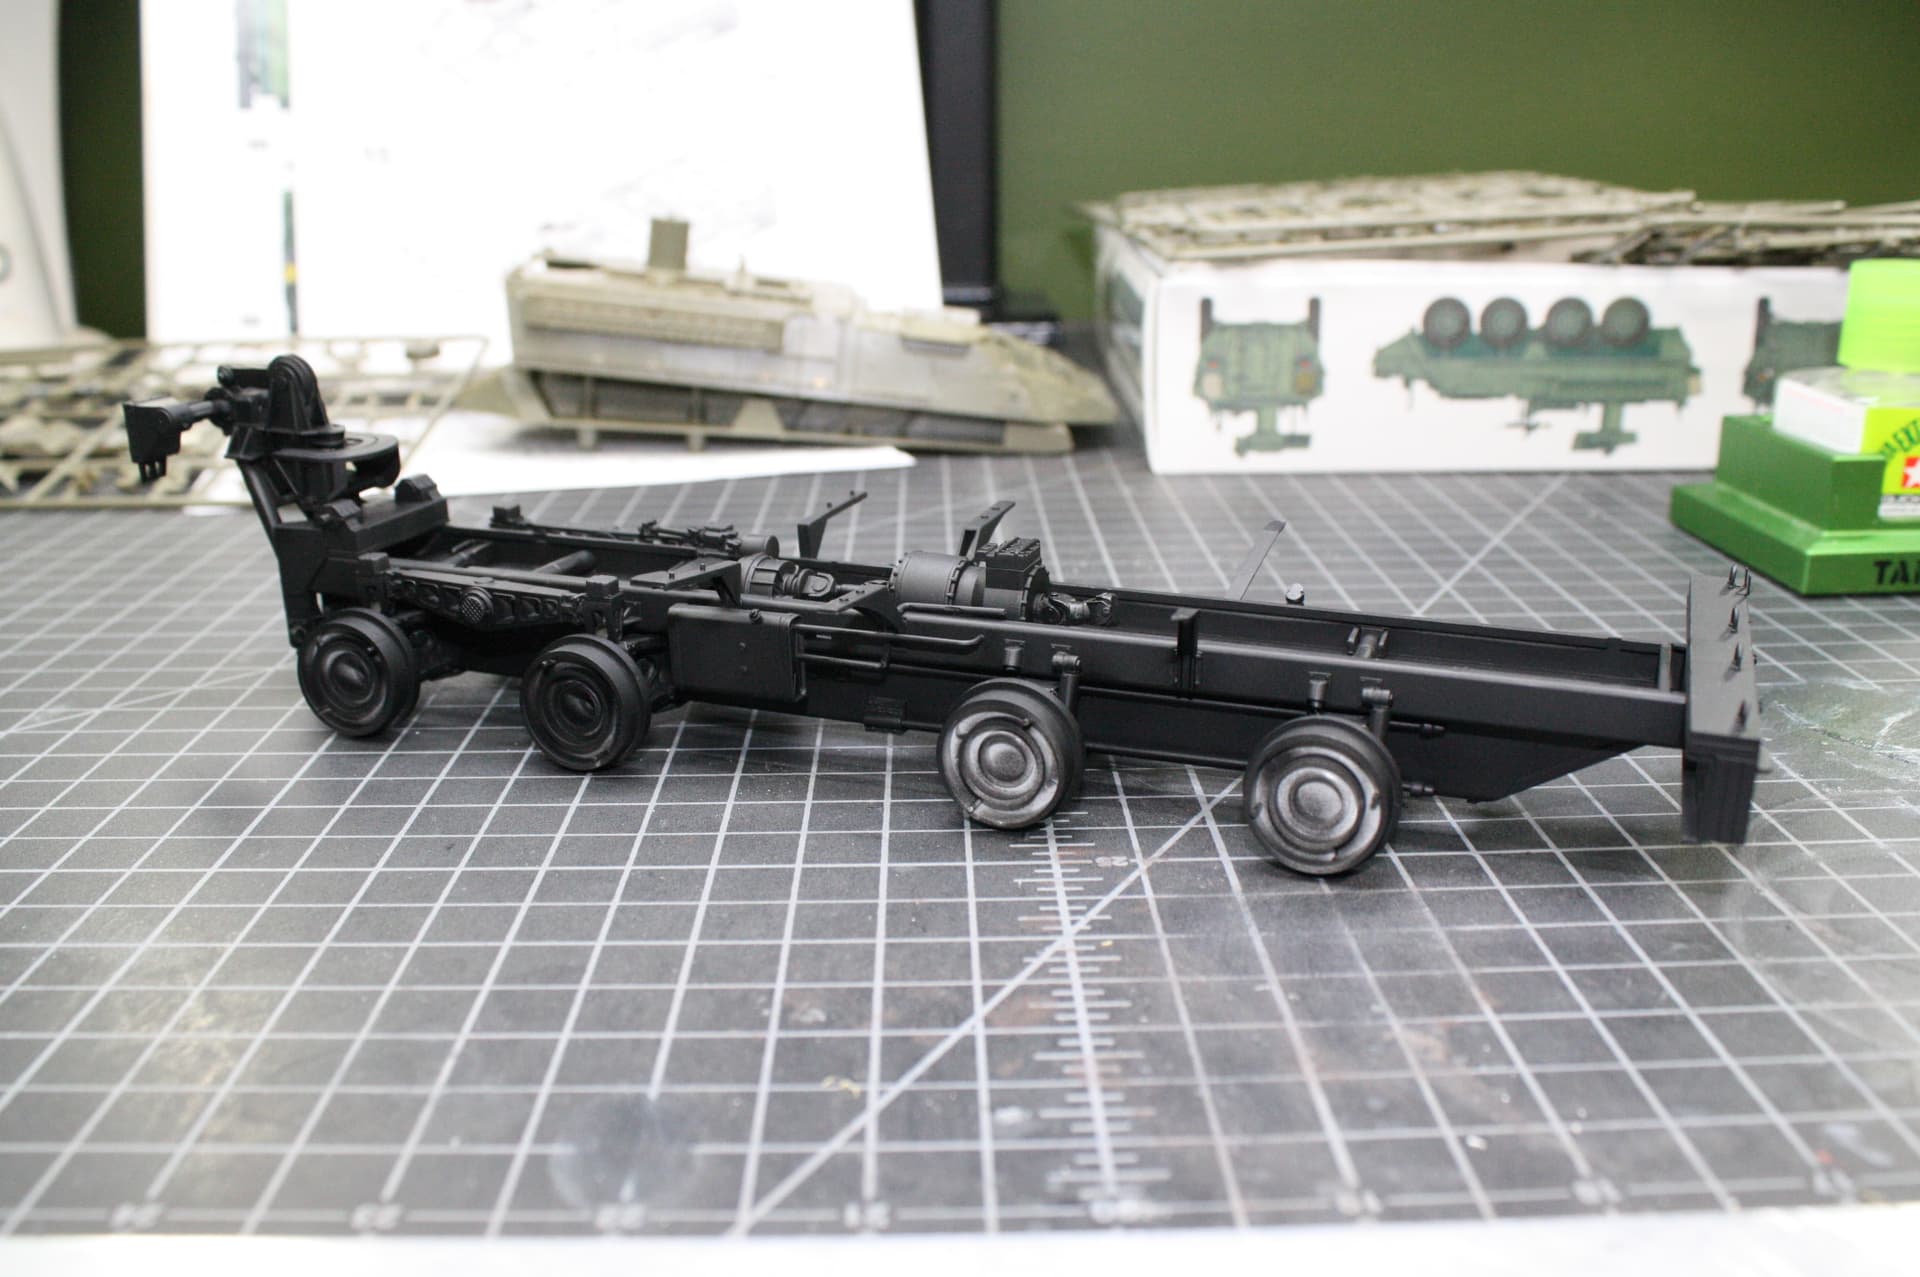
Sorry for the Stryker AT clutter in the background - also building for the Stryker campaign which ends in 3 months.
While visiting the American Heritage Museum, I got to take extensive photos of their Scud B, which is a MAZ - 543 chassis, very close to the MAZ - 537. Among the photos I got were some cab shots.
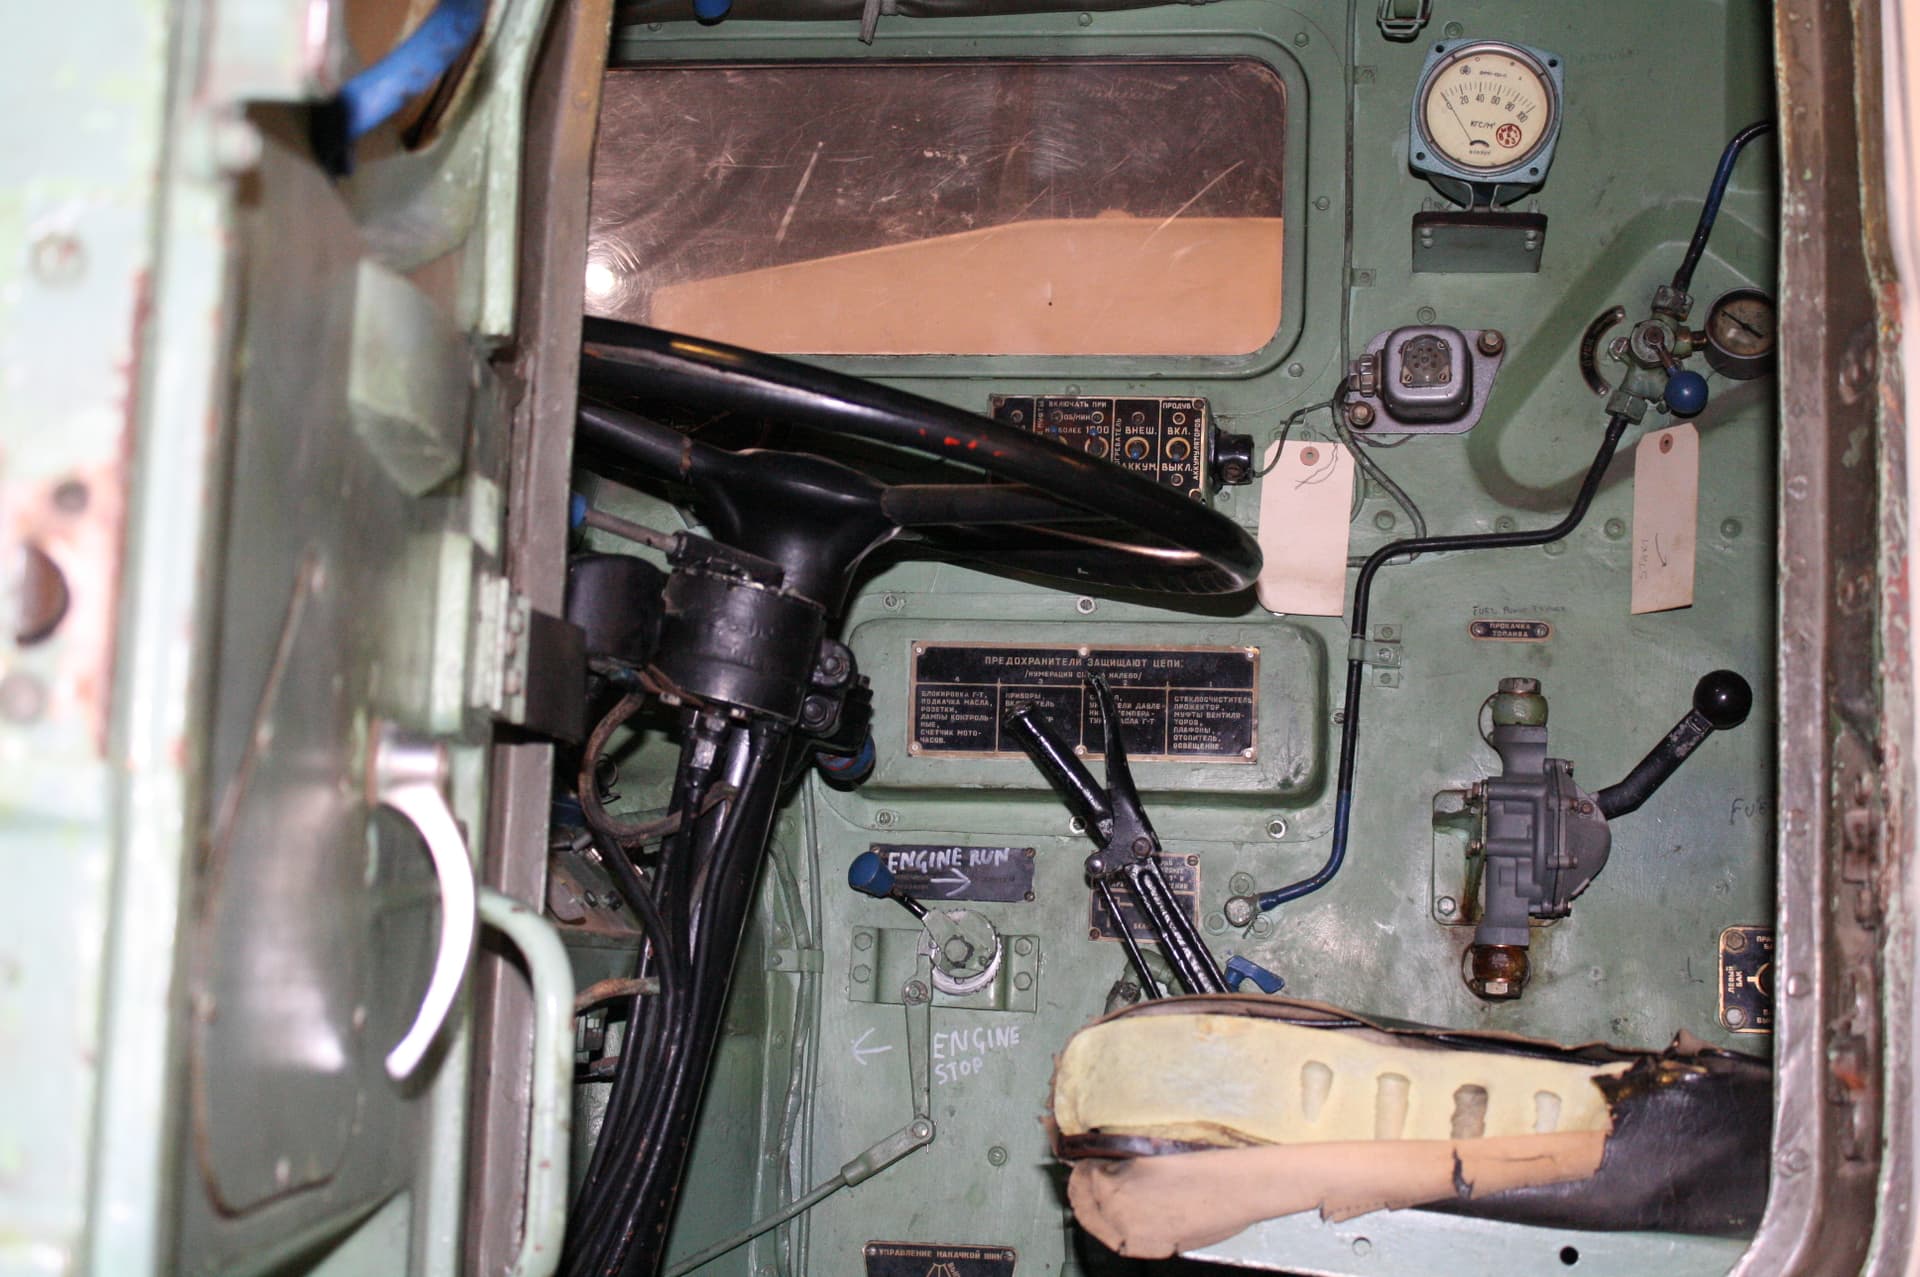
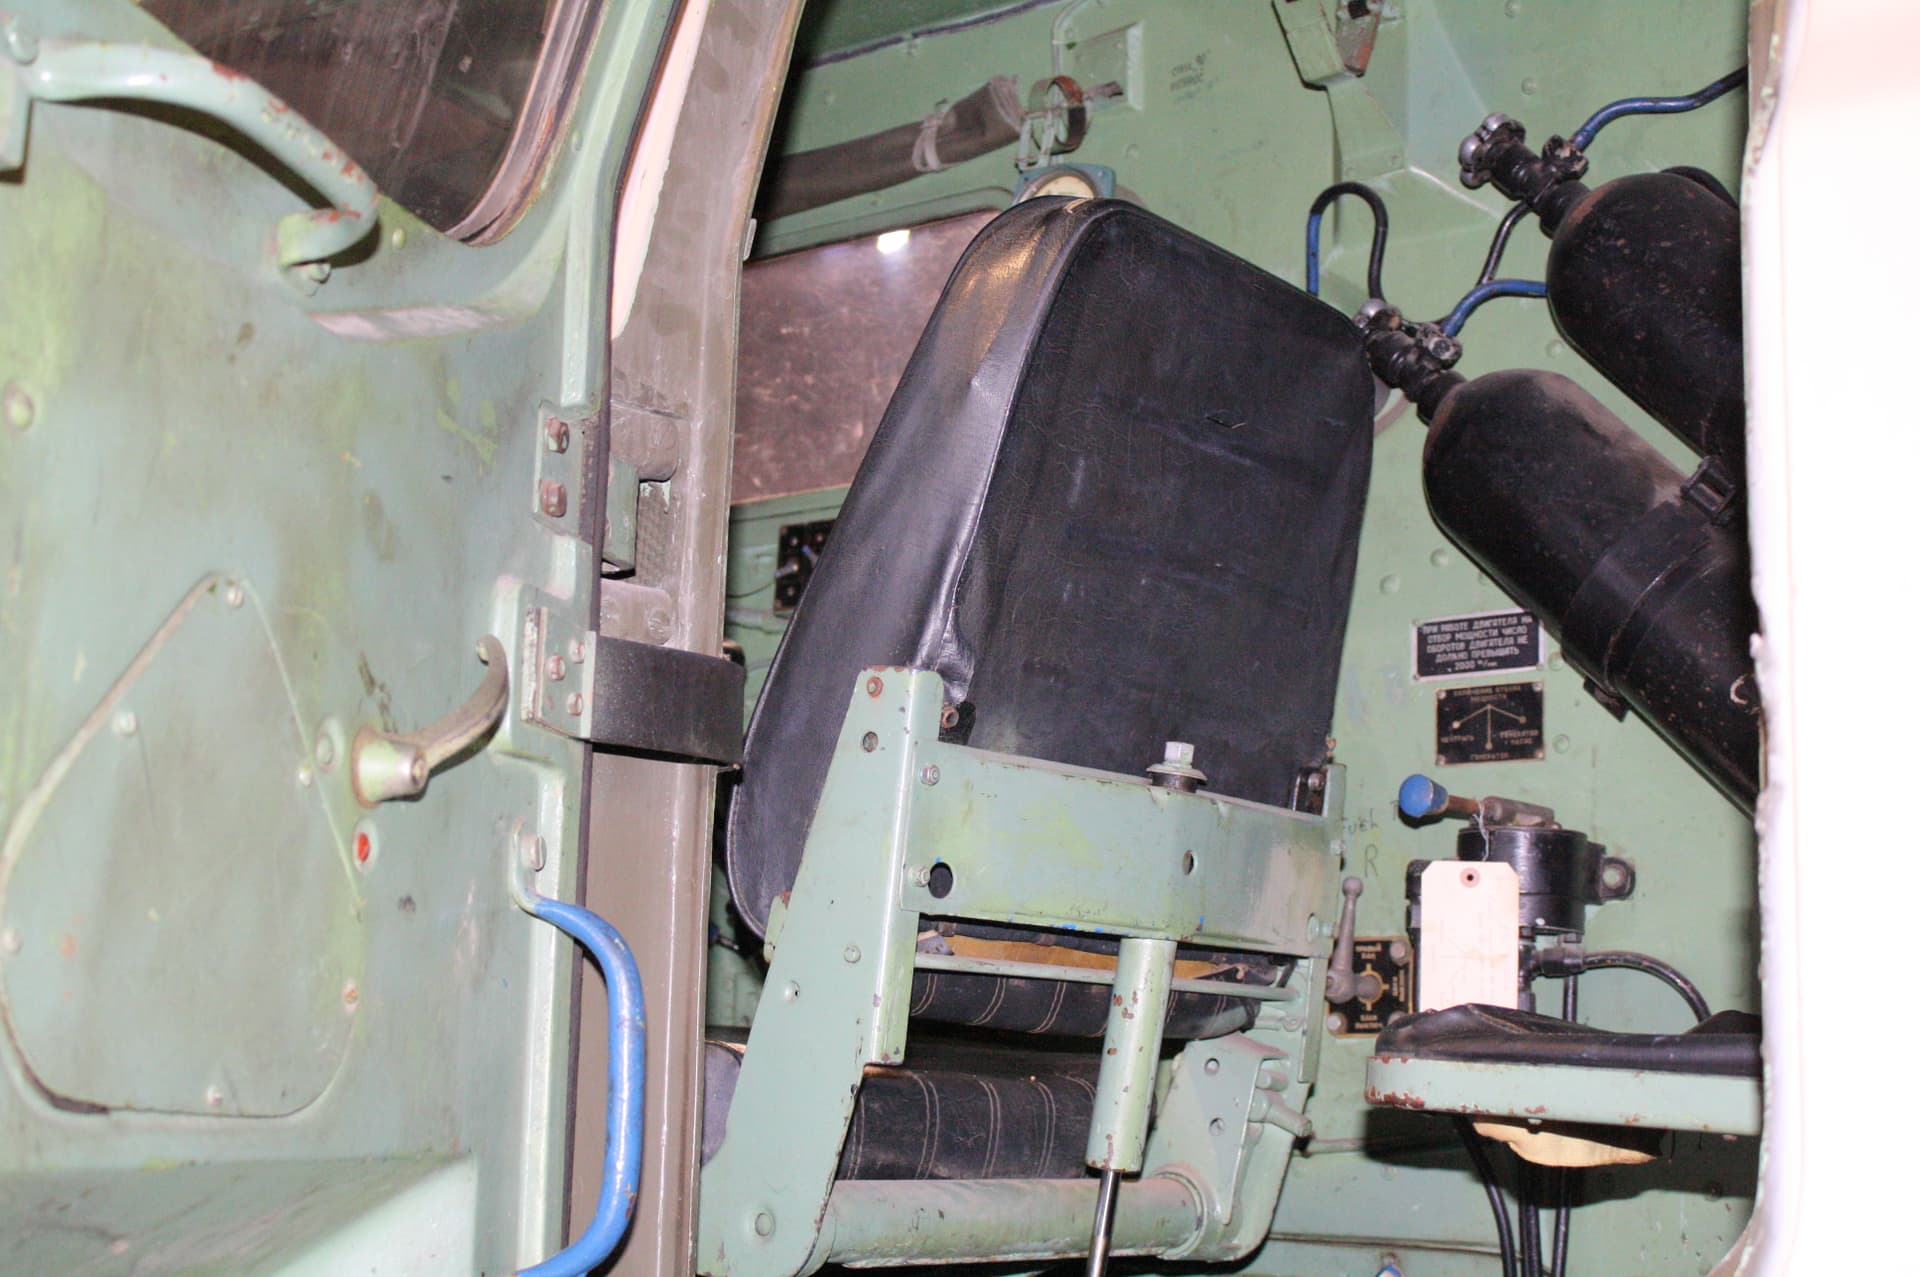
The interior color of Soviet vehicles is somewhere between US Seafoam Green and Russian Cockpit Turquoise. So I had to order some paint from Angel at Microworld Games. He gets it to me in 2 days, so it’s almost as fast as a LHS. It is coming in todays mail. Nobody around me carries AK RC. I’m going to mix the Seafoam Green and Cockpit Turquoise to match the color seen in the photos for the cab interior of the KET-T. So painting the monster is on hold for a bit.
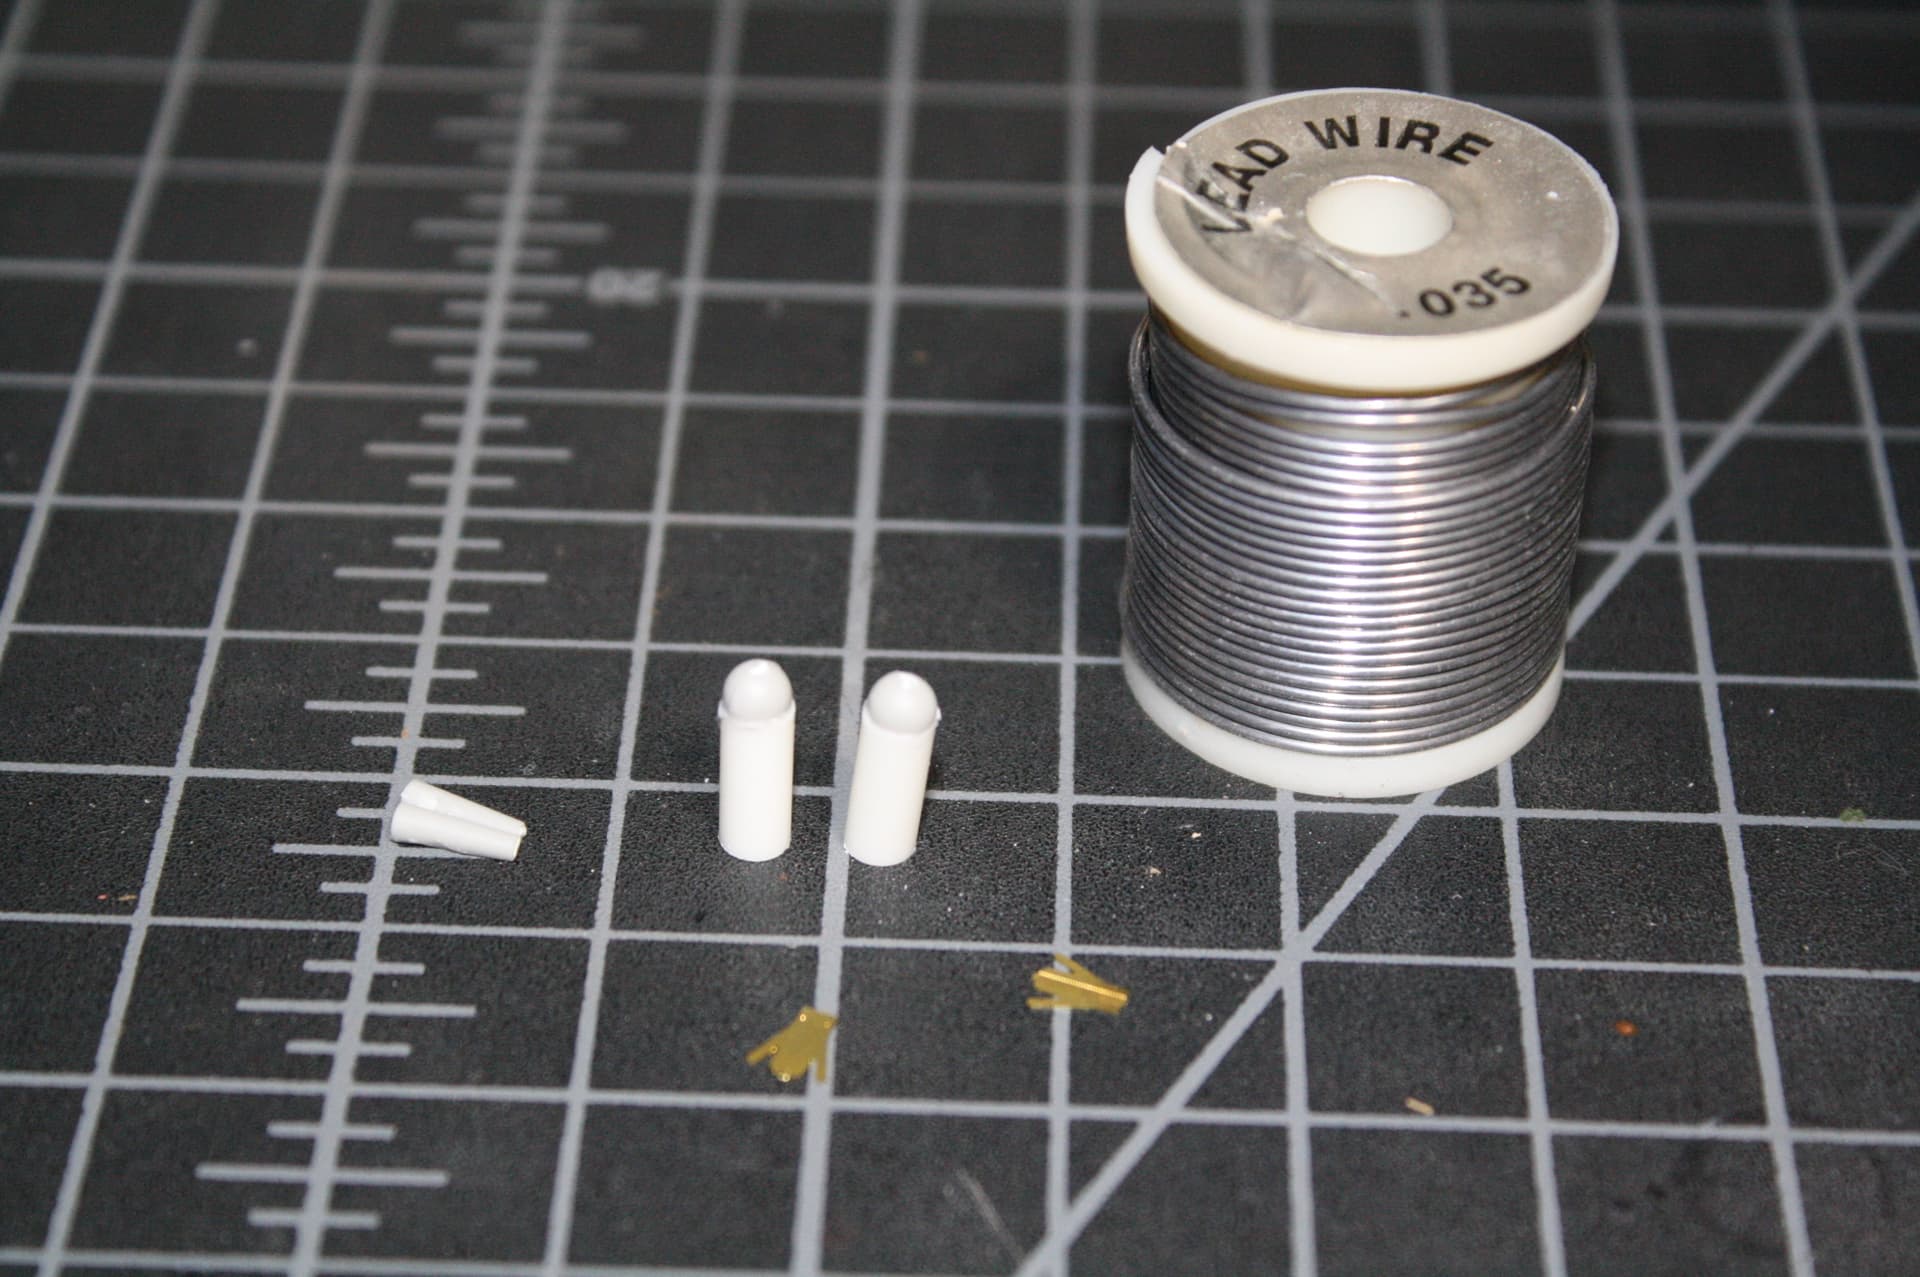
Meanwhile, there’s been spectacular progress on the spare tire front. If you’ve been following along, you know that Miniarm only provided me with 8 bulged resin tires, no spare. And the spare tire figures very prominently on this truck. It’s huge and hangs out in the open right on the middle platform of the truck. Can’t miss it. You’ve also seen how the kit tires don’t match the resin ones at all and can’t be used as a spare. I gave one of my bulged resin Miniarm tires to my best friend Dr. Barclay Caras, a member of my club, and asked him to cast me a few copies. I planned to sand out the bulge and sculpt the resulting scars with putty. Well, Clay did me one better. He knew my plan and improved it greatly.
Here’s the original bulged Miniarm tire:
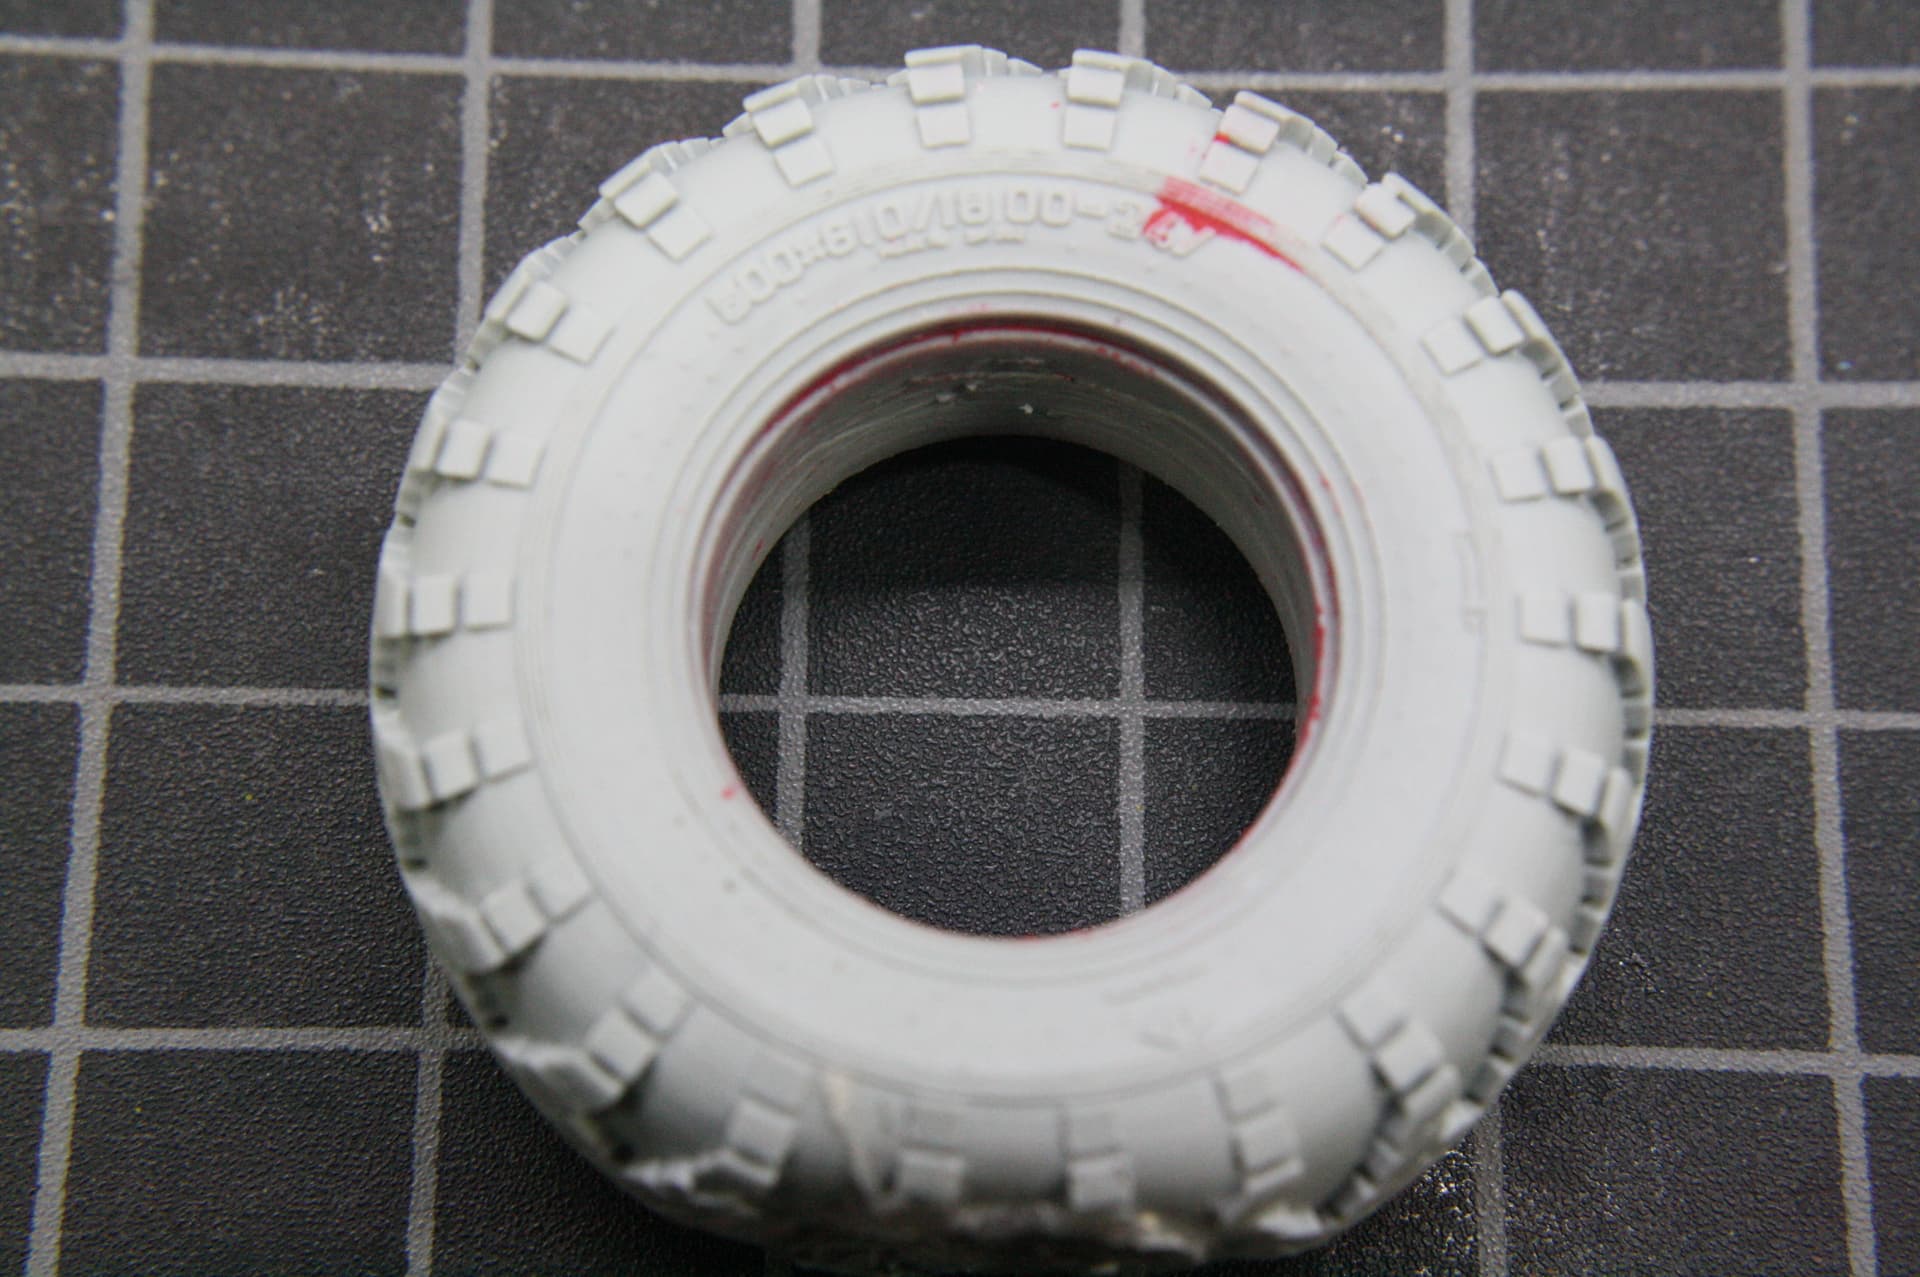
Here’s the resin copy:
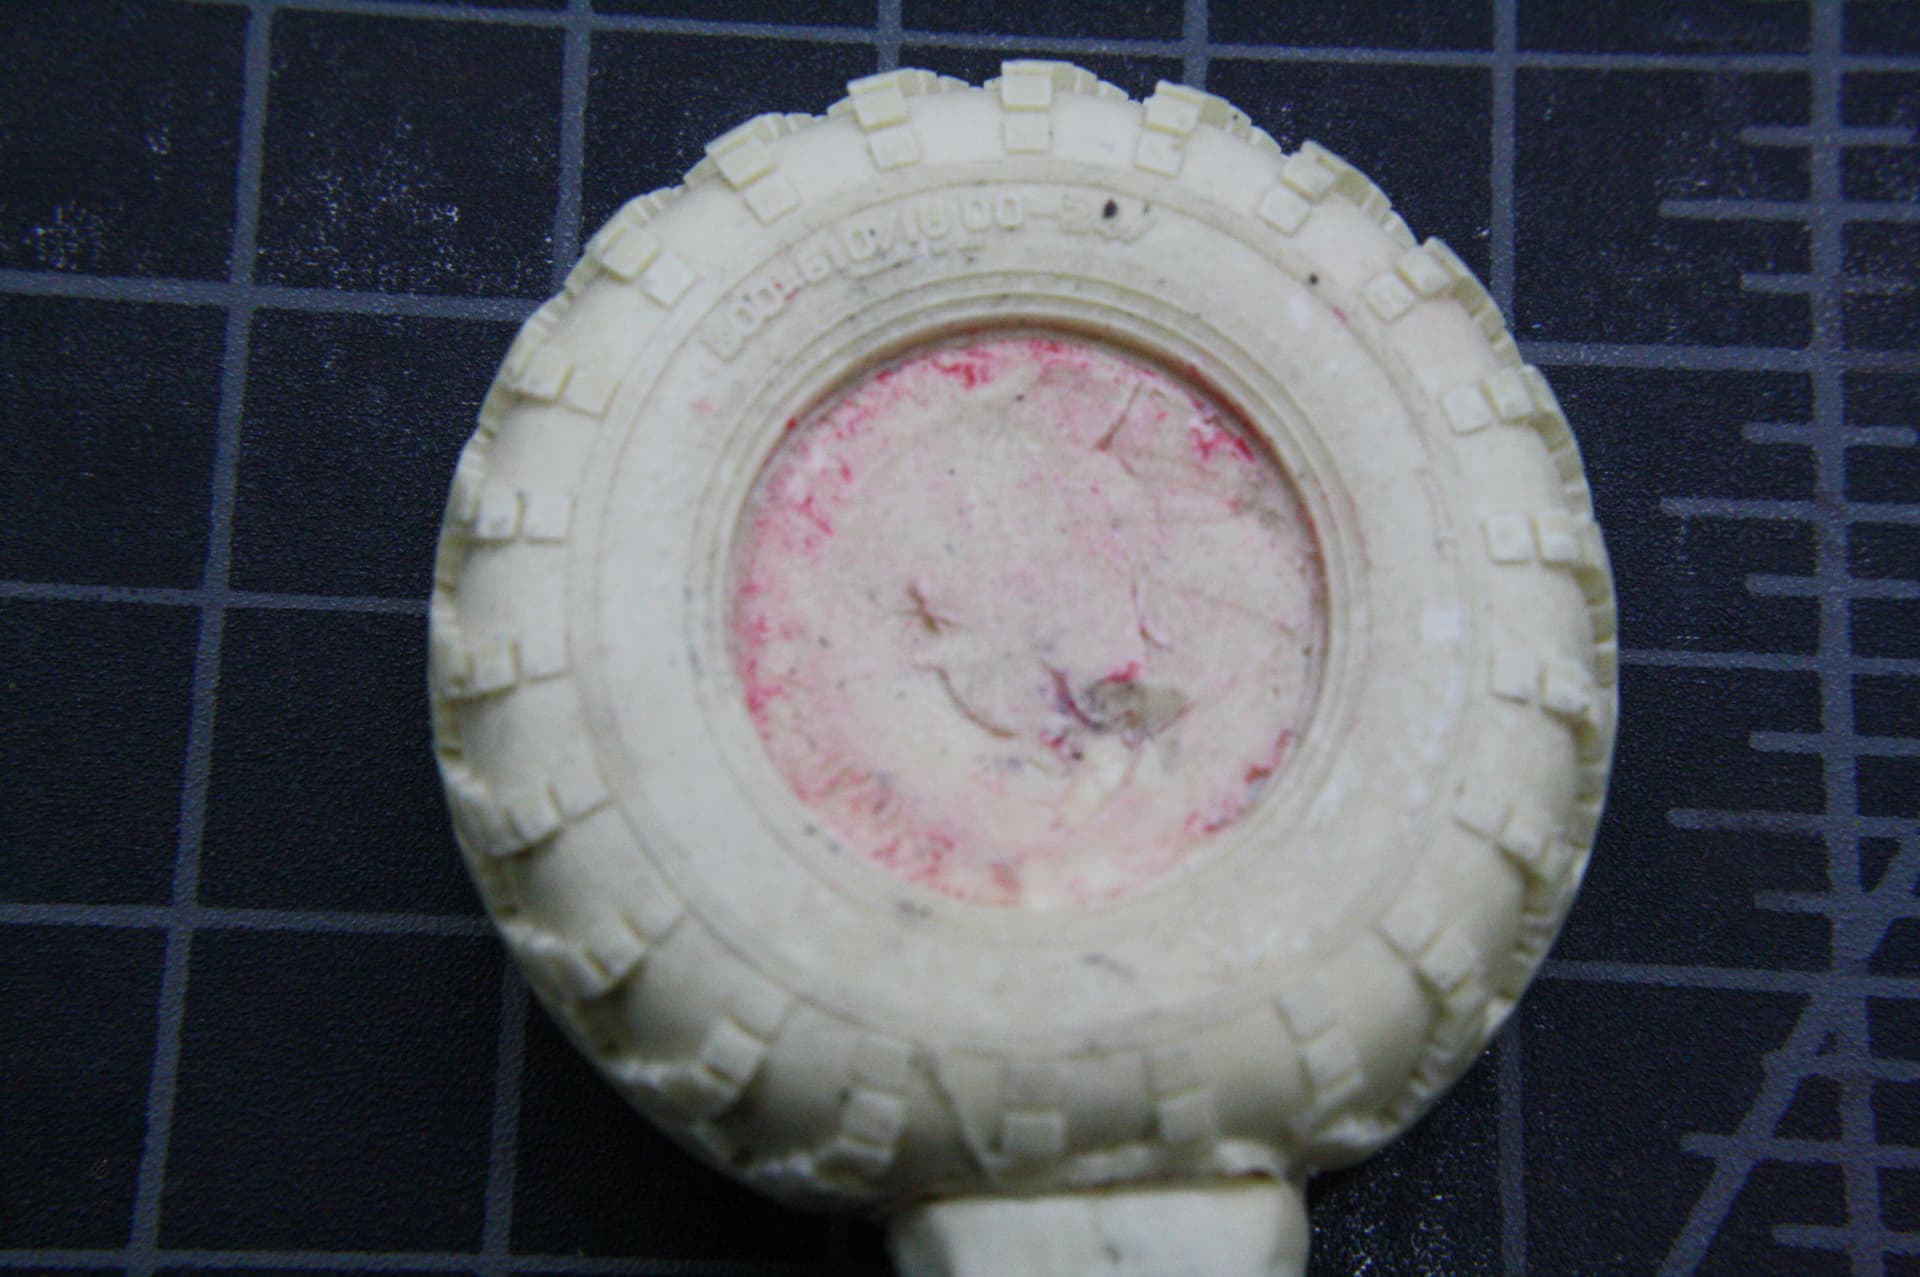
Then Clay drilled out the middle, cut two casts in half, glued the non-bulged halves together and MATCHED THE TREAD PATTERN PERFECTLY and re-cast the tire:
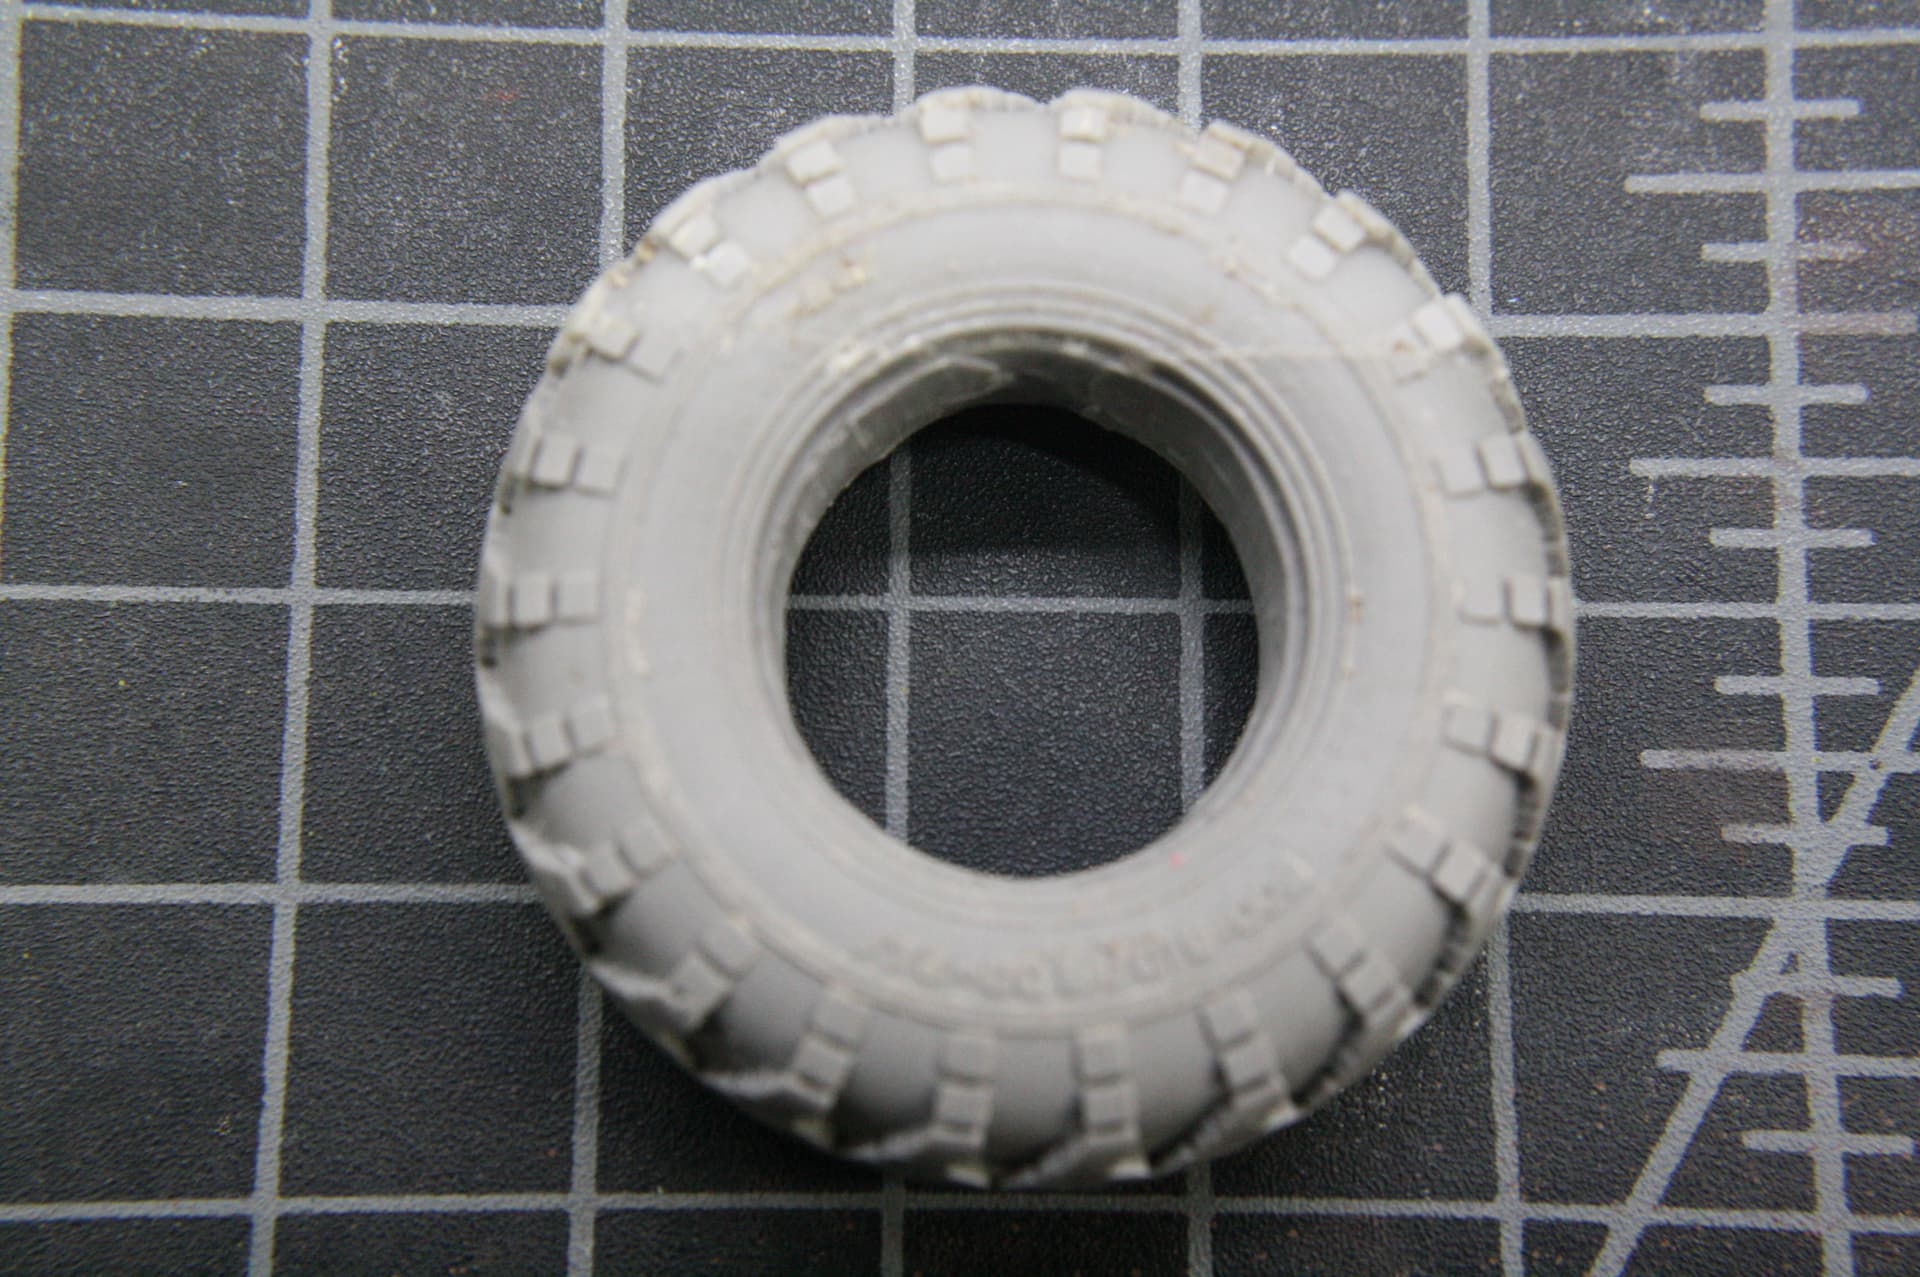
You can just barely see the line across the top where he cut them and matched them up. A little Mr. Surfacer and clean up with lacquer thinner and a Q-Tip and it will be impossible to see. I have a perfect resin spare that matches the Miniarm tires. I owe Clay a bottle of single-malt.
Miniarm, when you do an 8 tire set and charge $40-$50 for them, would it kill ya to include a matching spare?
This build blog will recommence when my mailman ambles his sorry butt to my door this afternoon (after his nap) and drops (literally) my paint there. See you soon and thanks for reading.
8 Likes