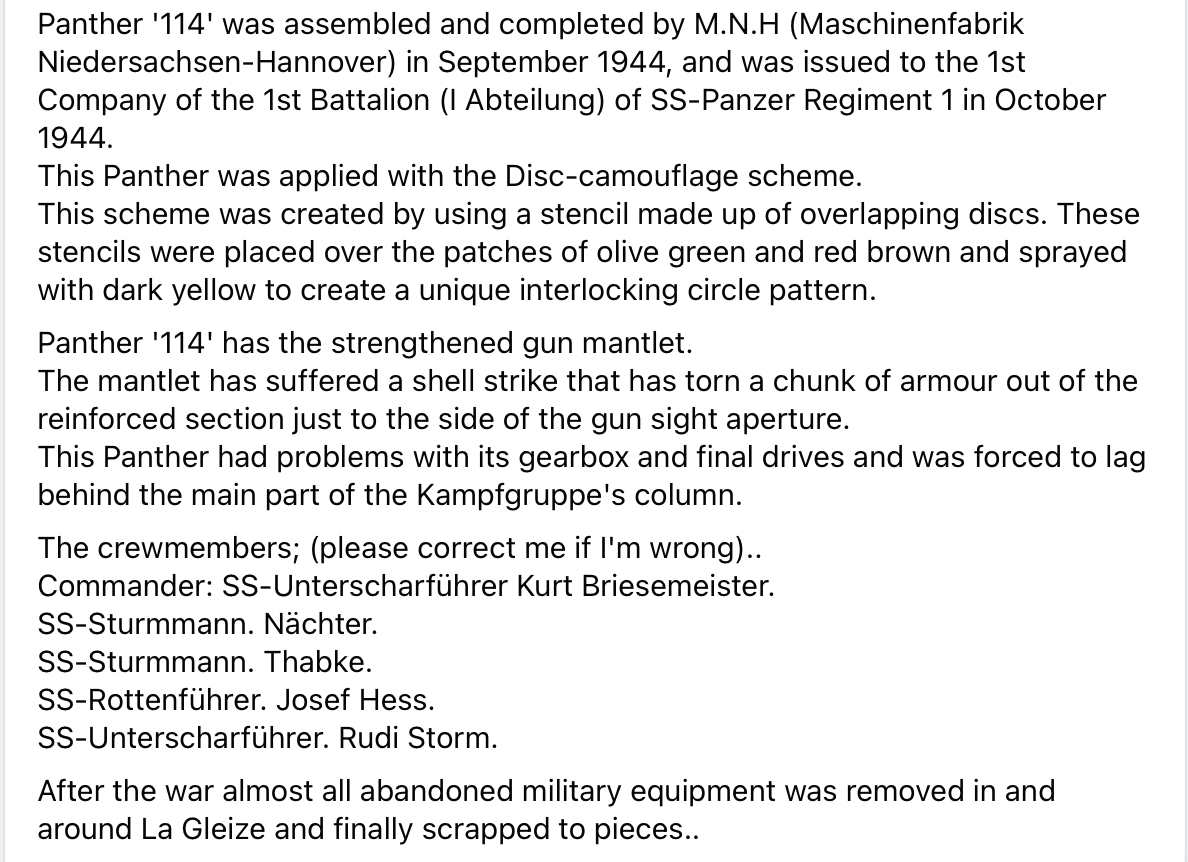
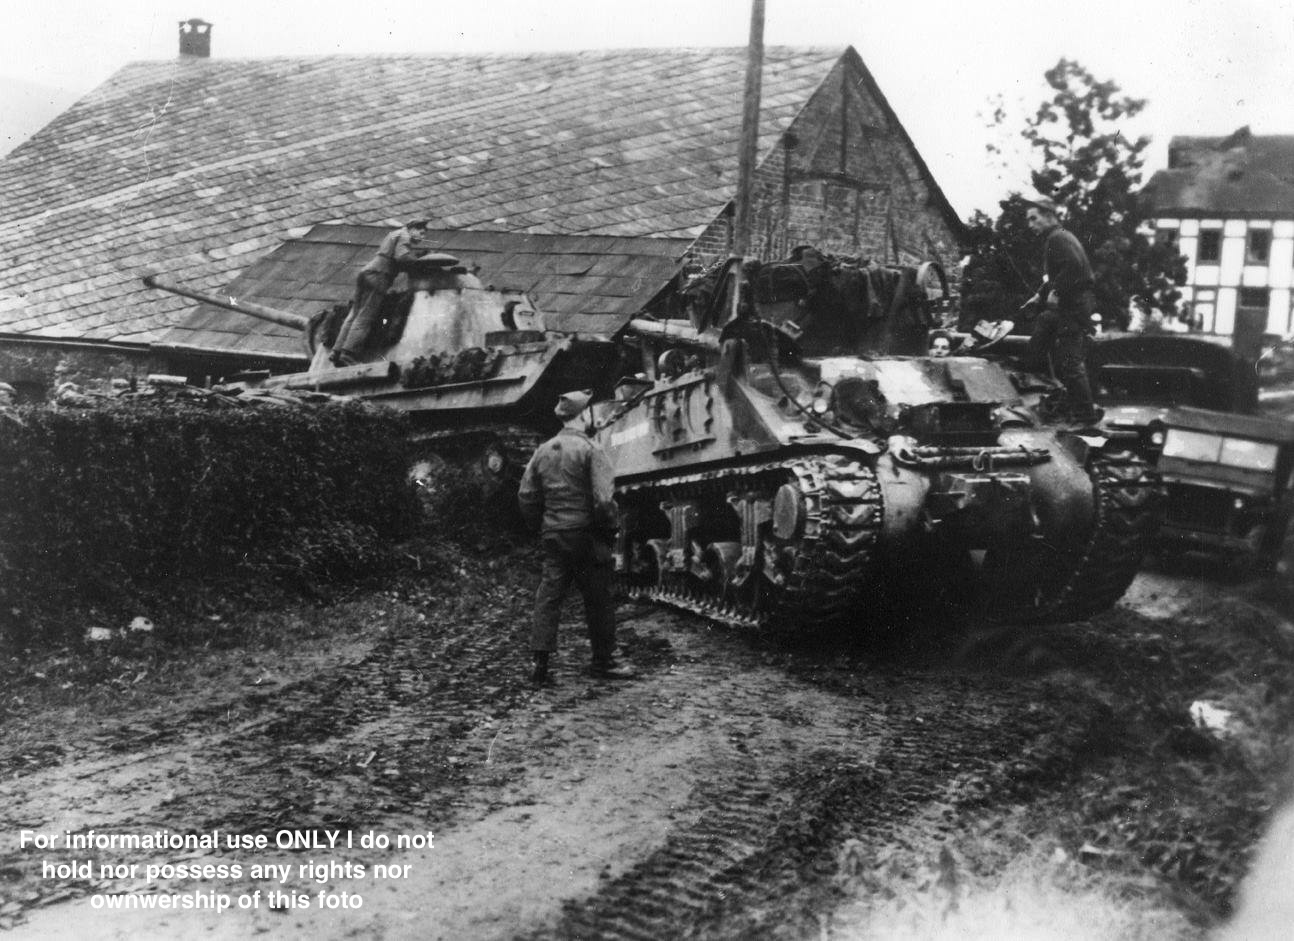
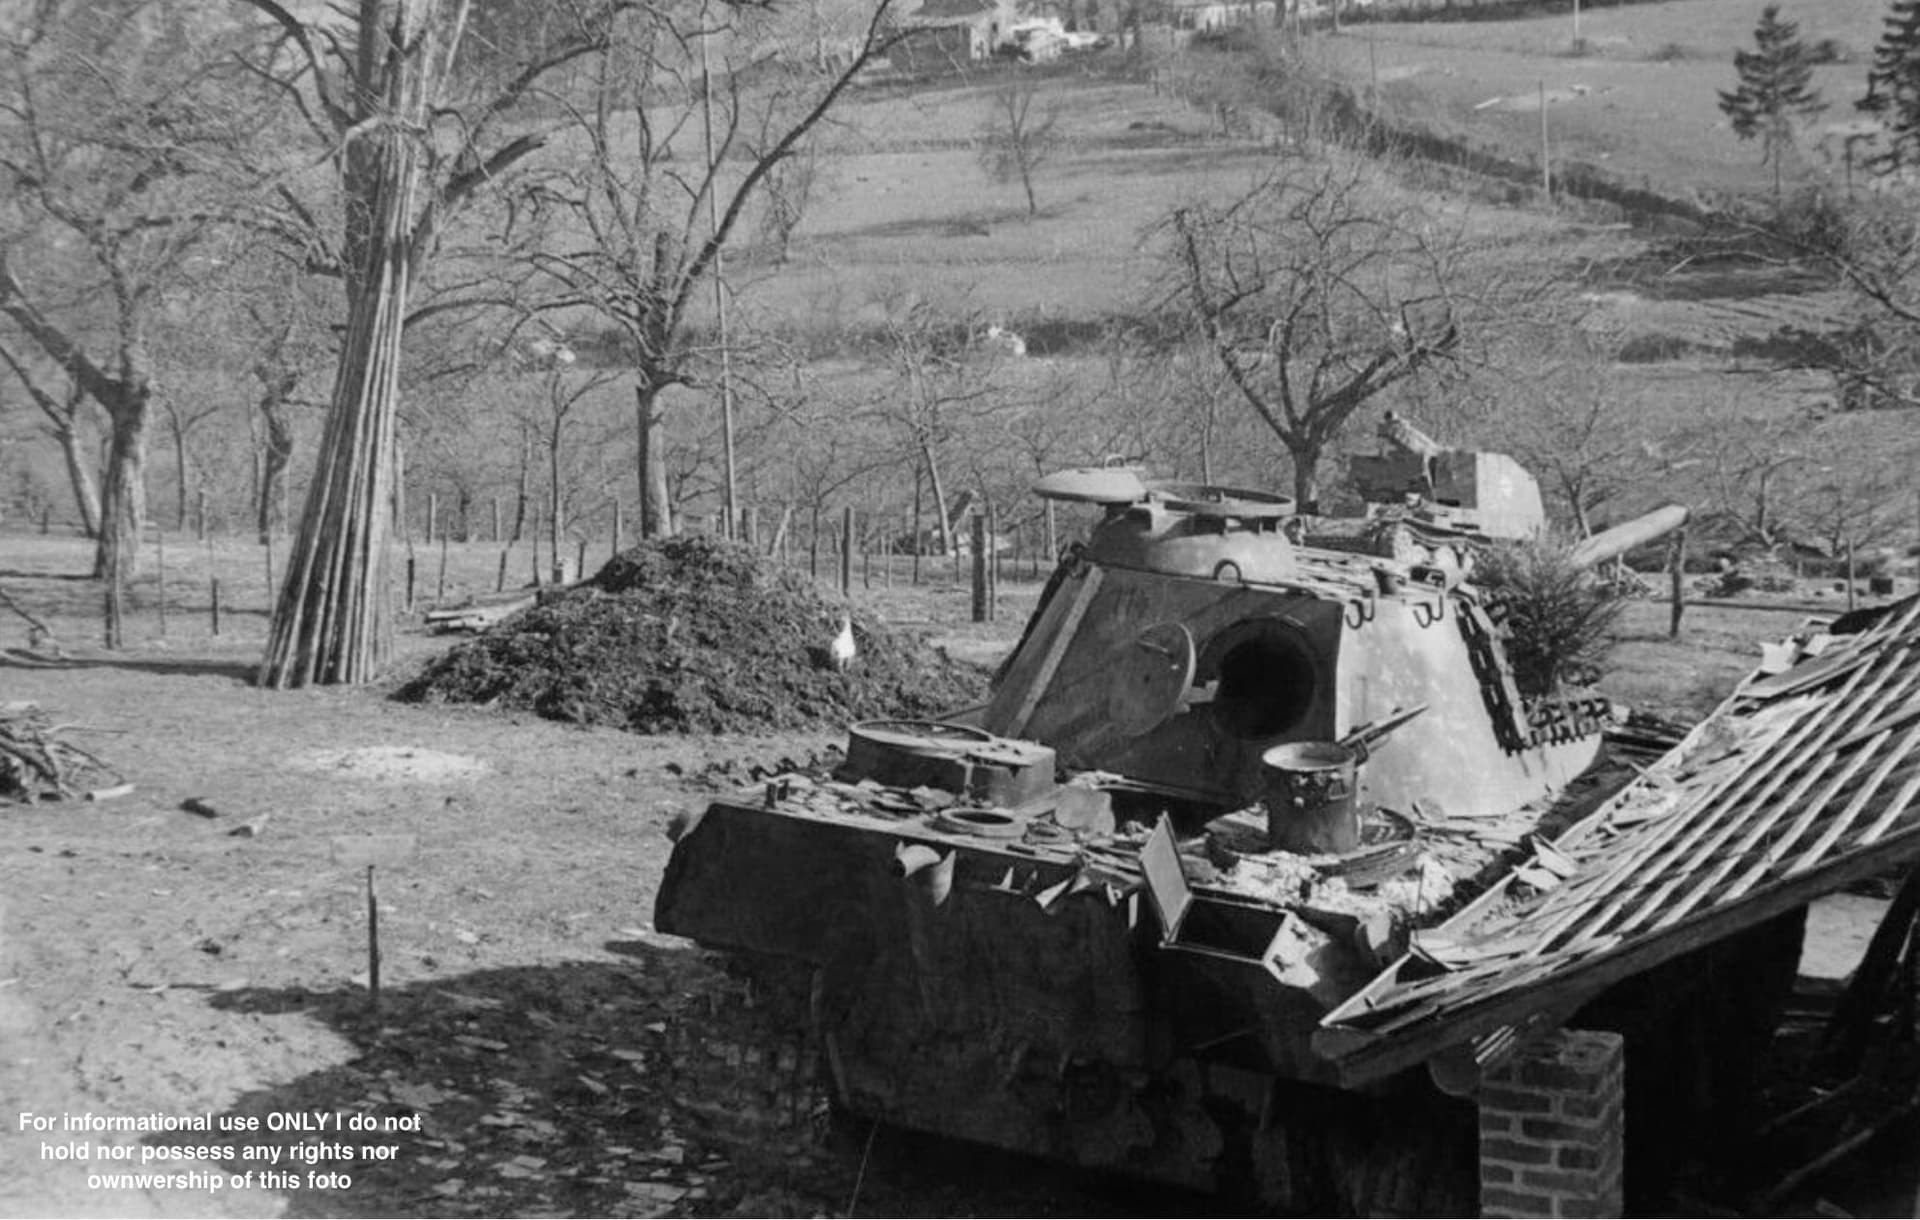
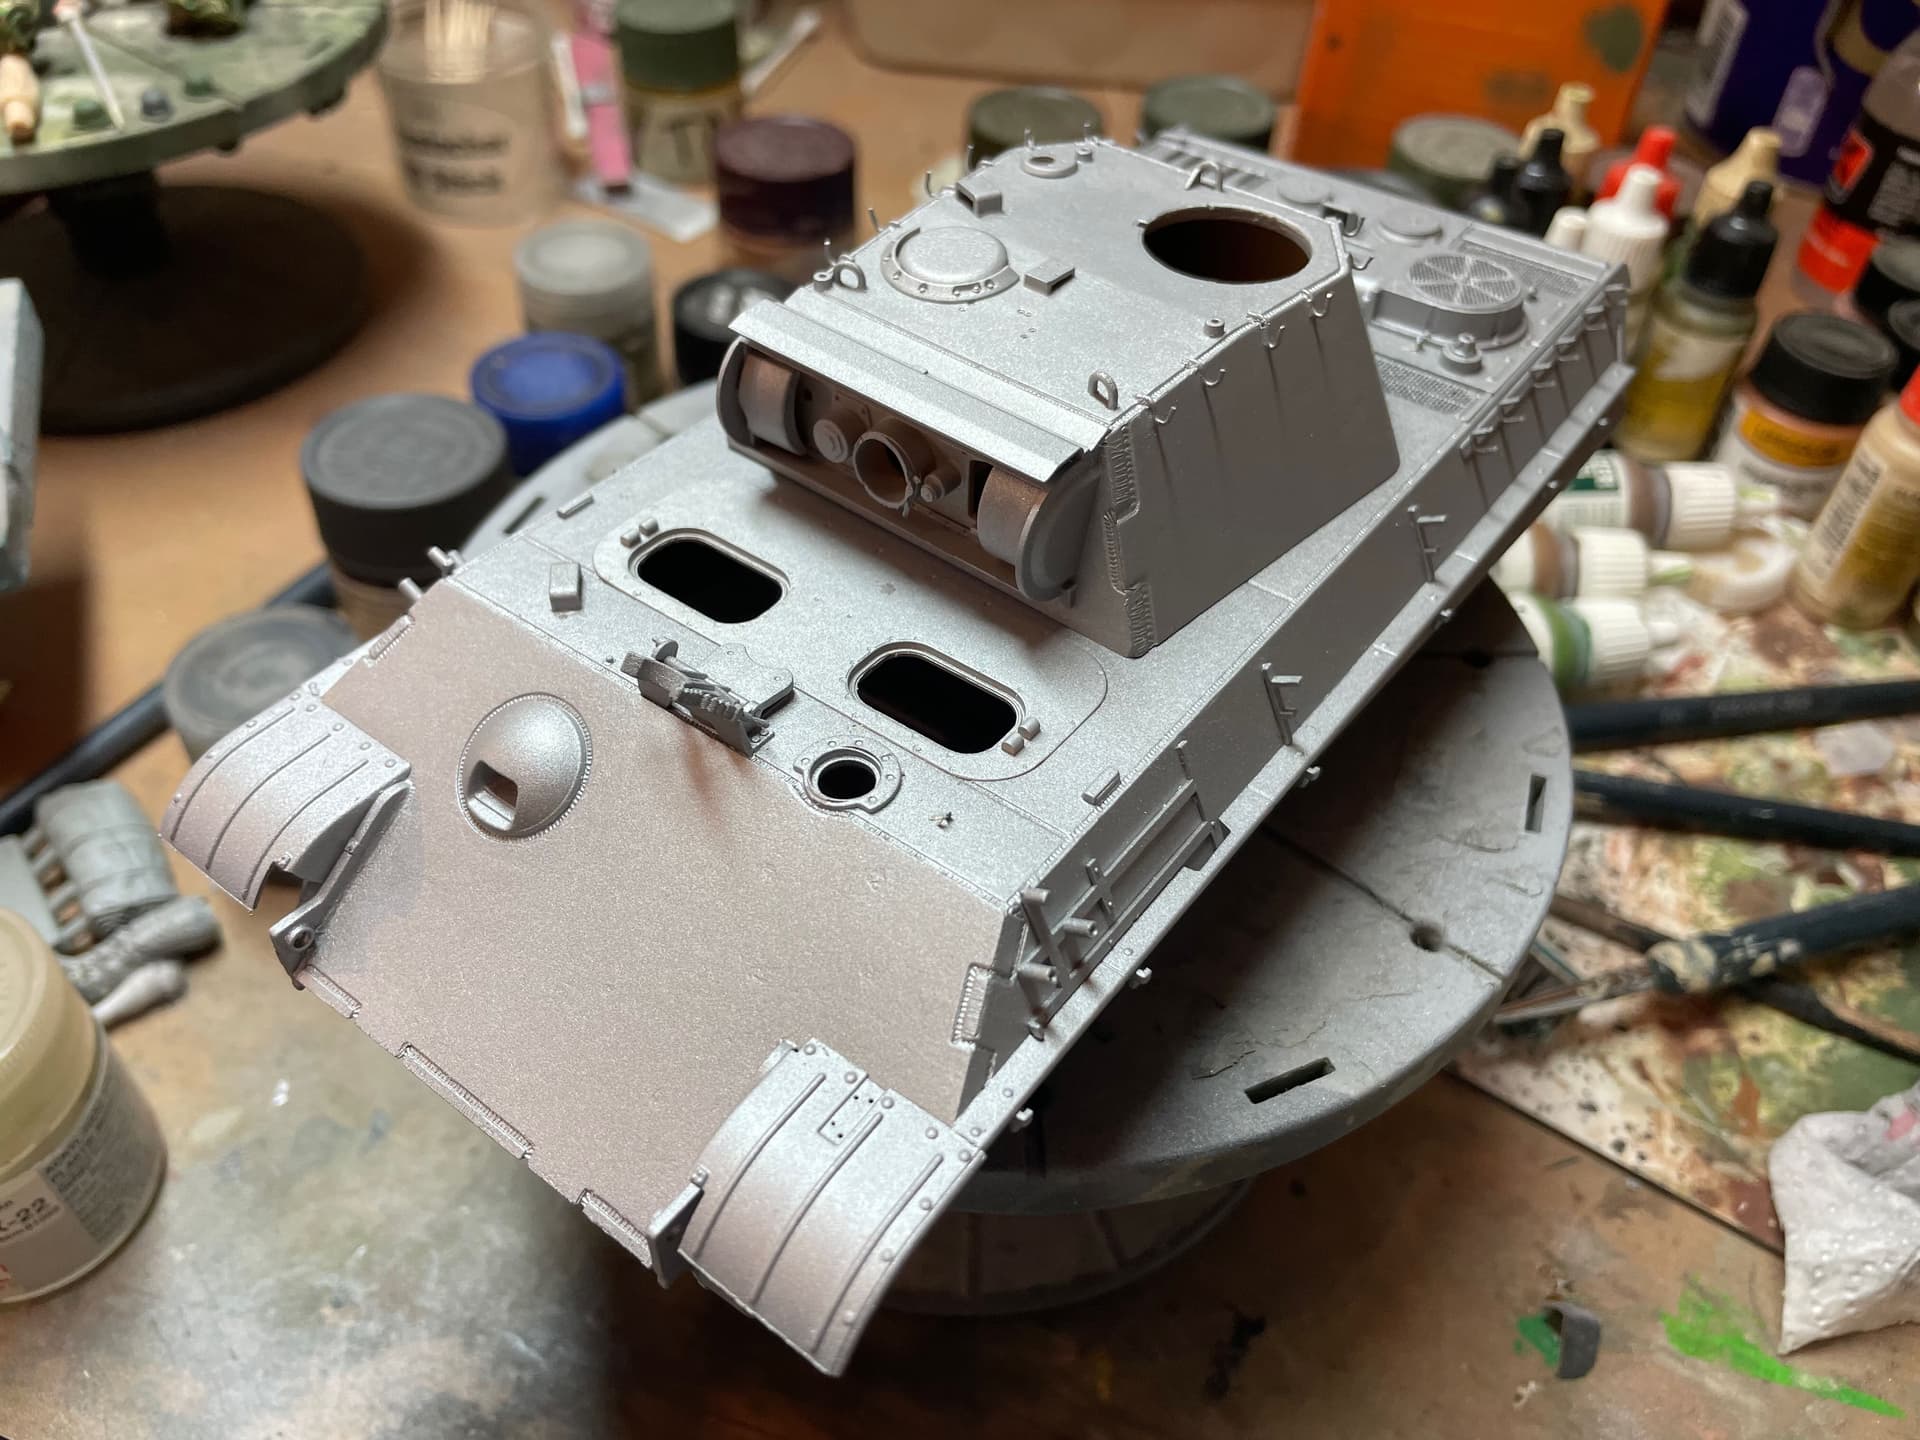
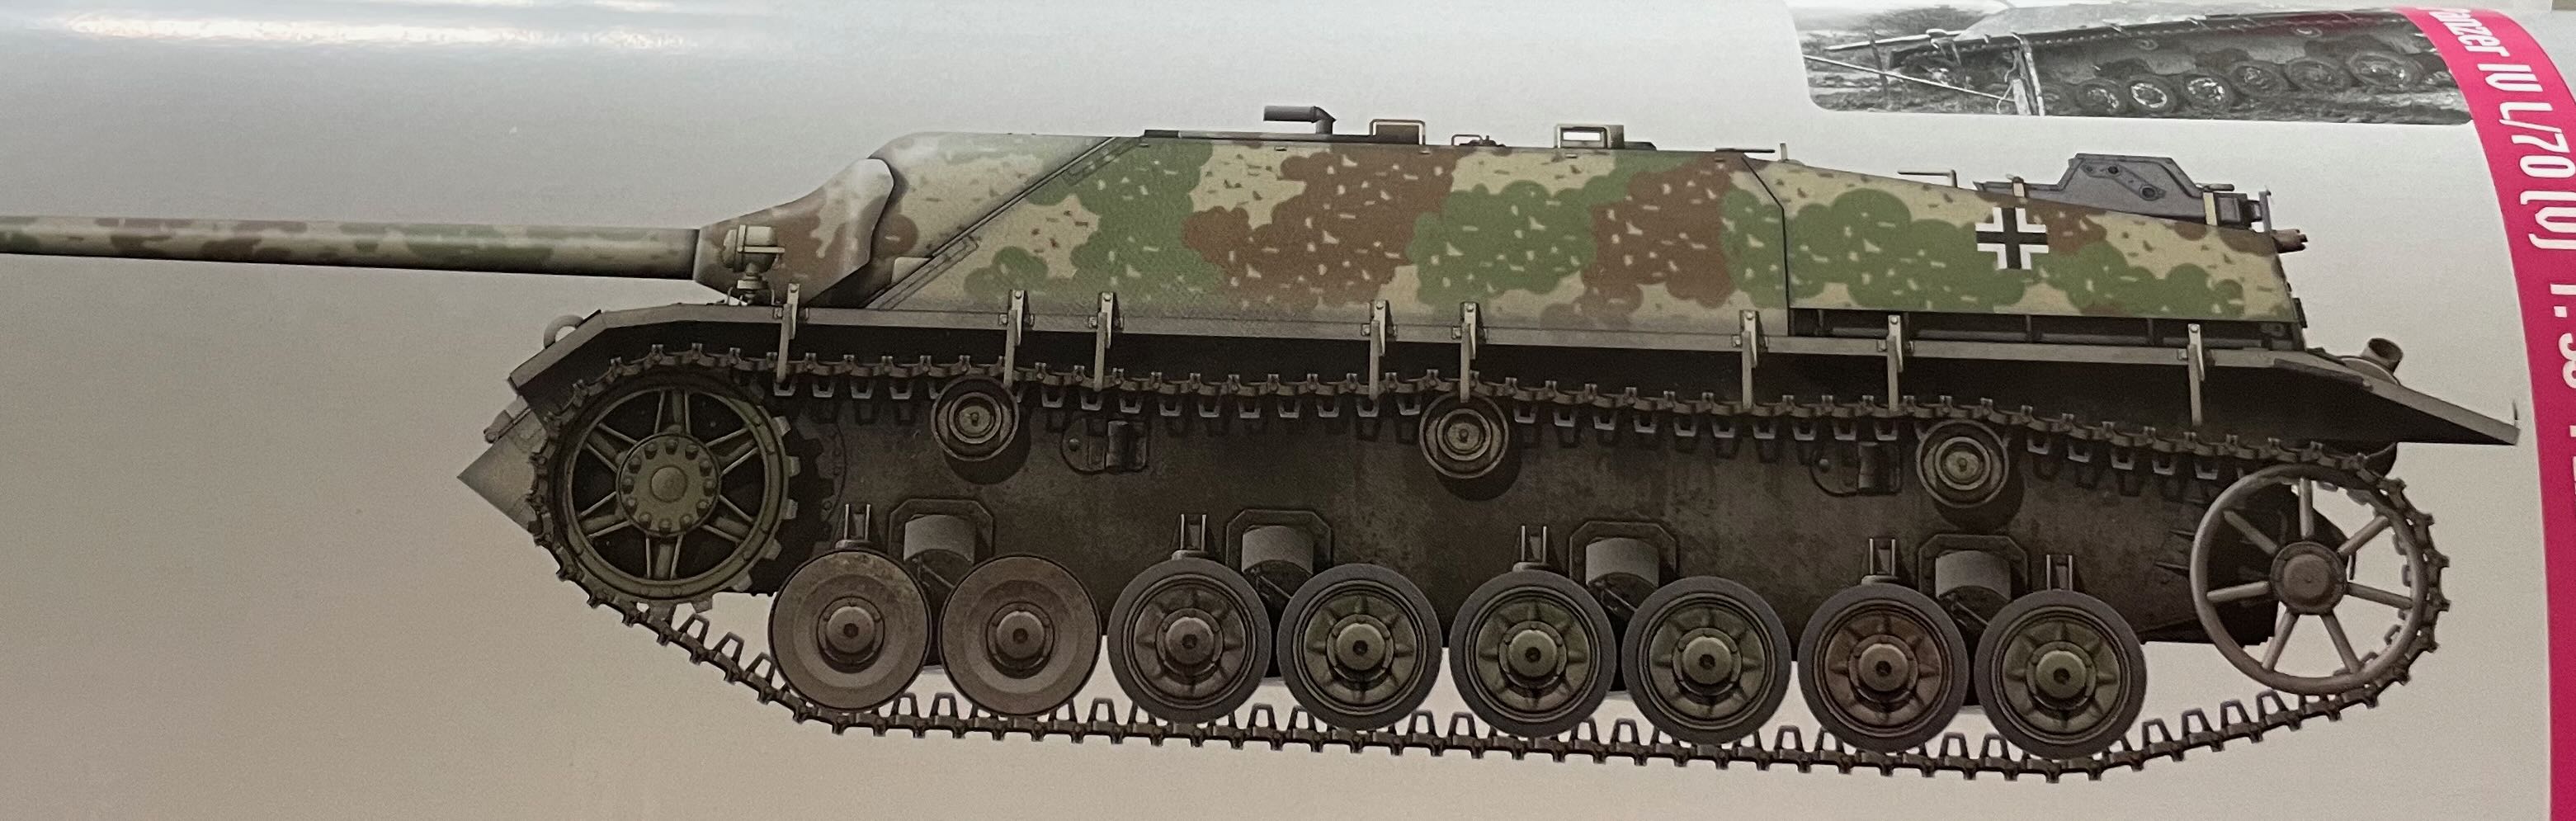
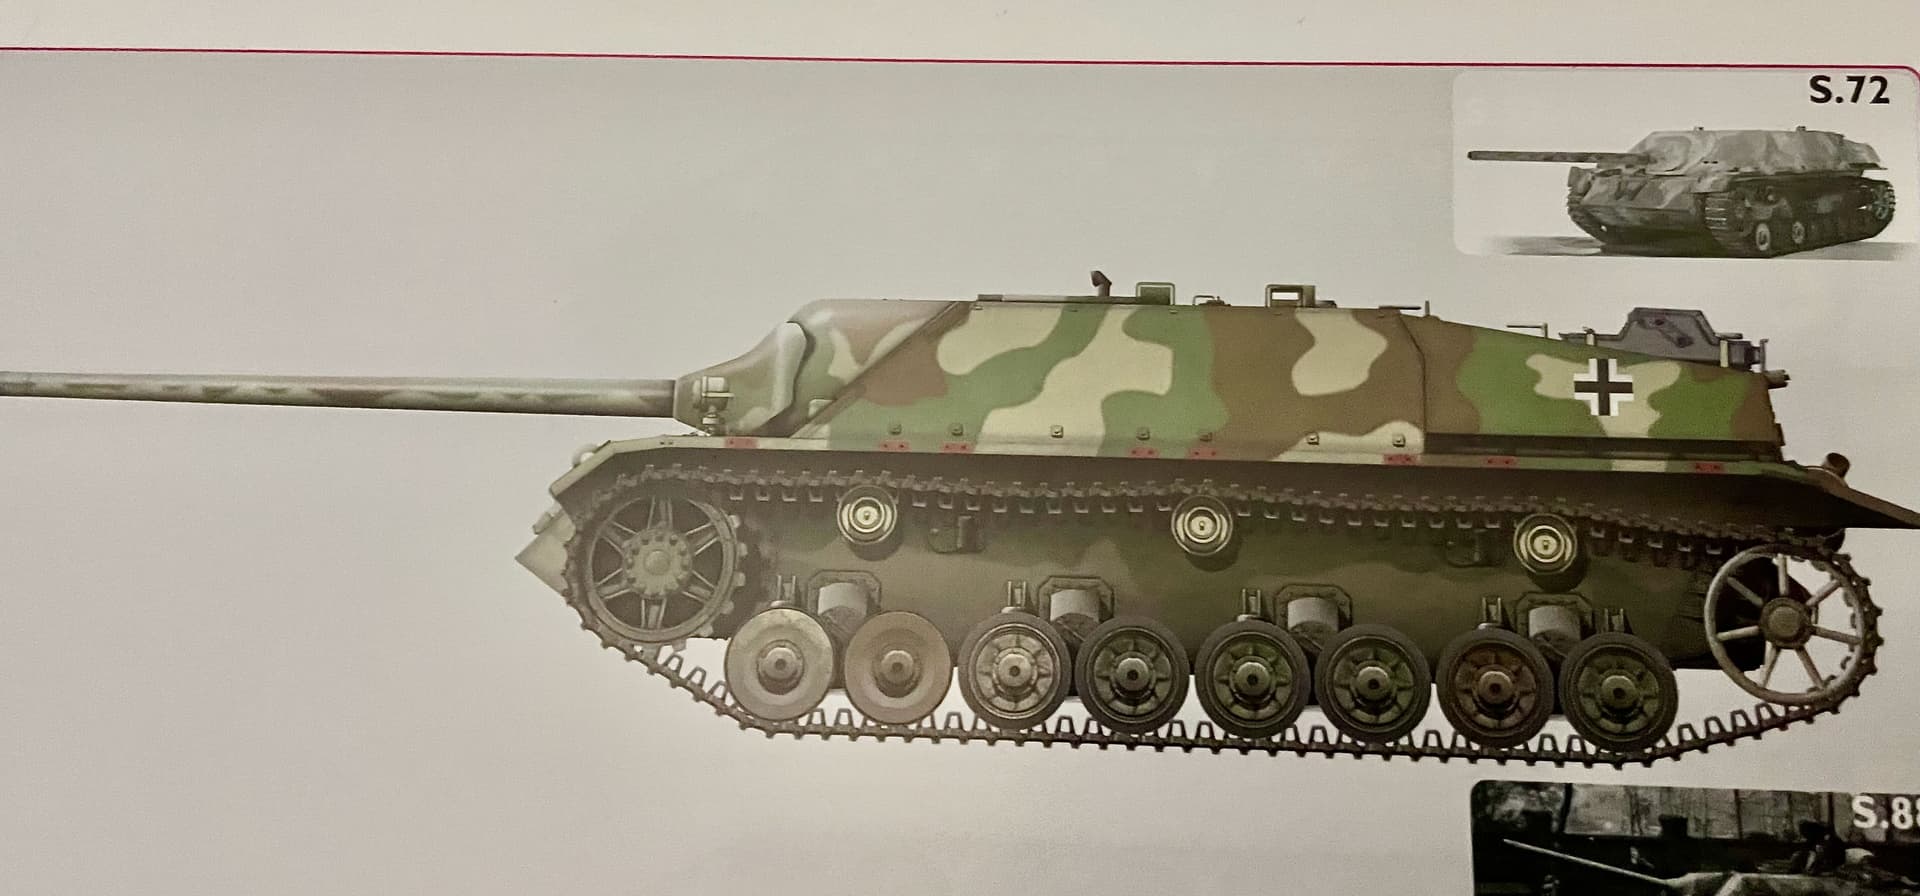
I use the chose the RFM PantherG / 5018 kit for this project, the reinforced gun mantlet came from TAKOM and so did the track link holders on the hull sides.
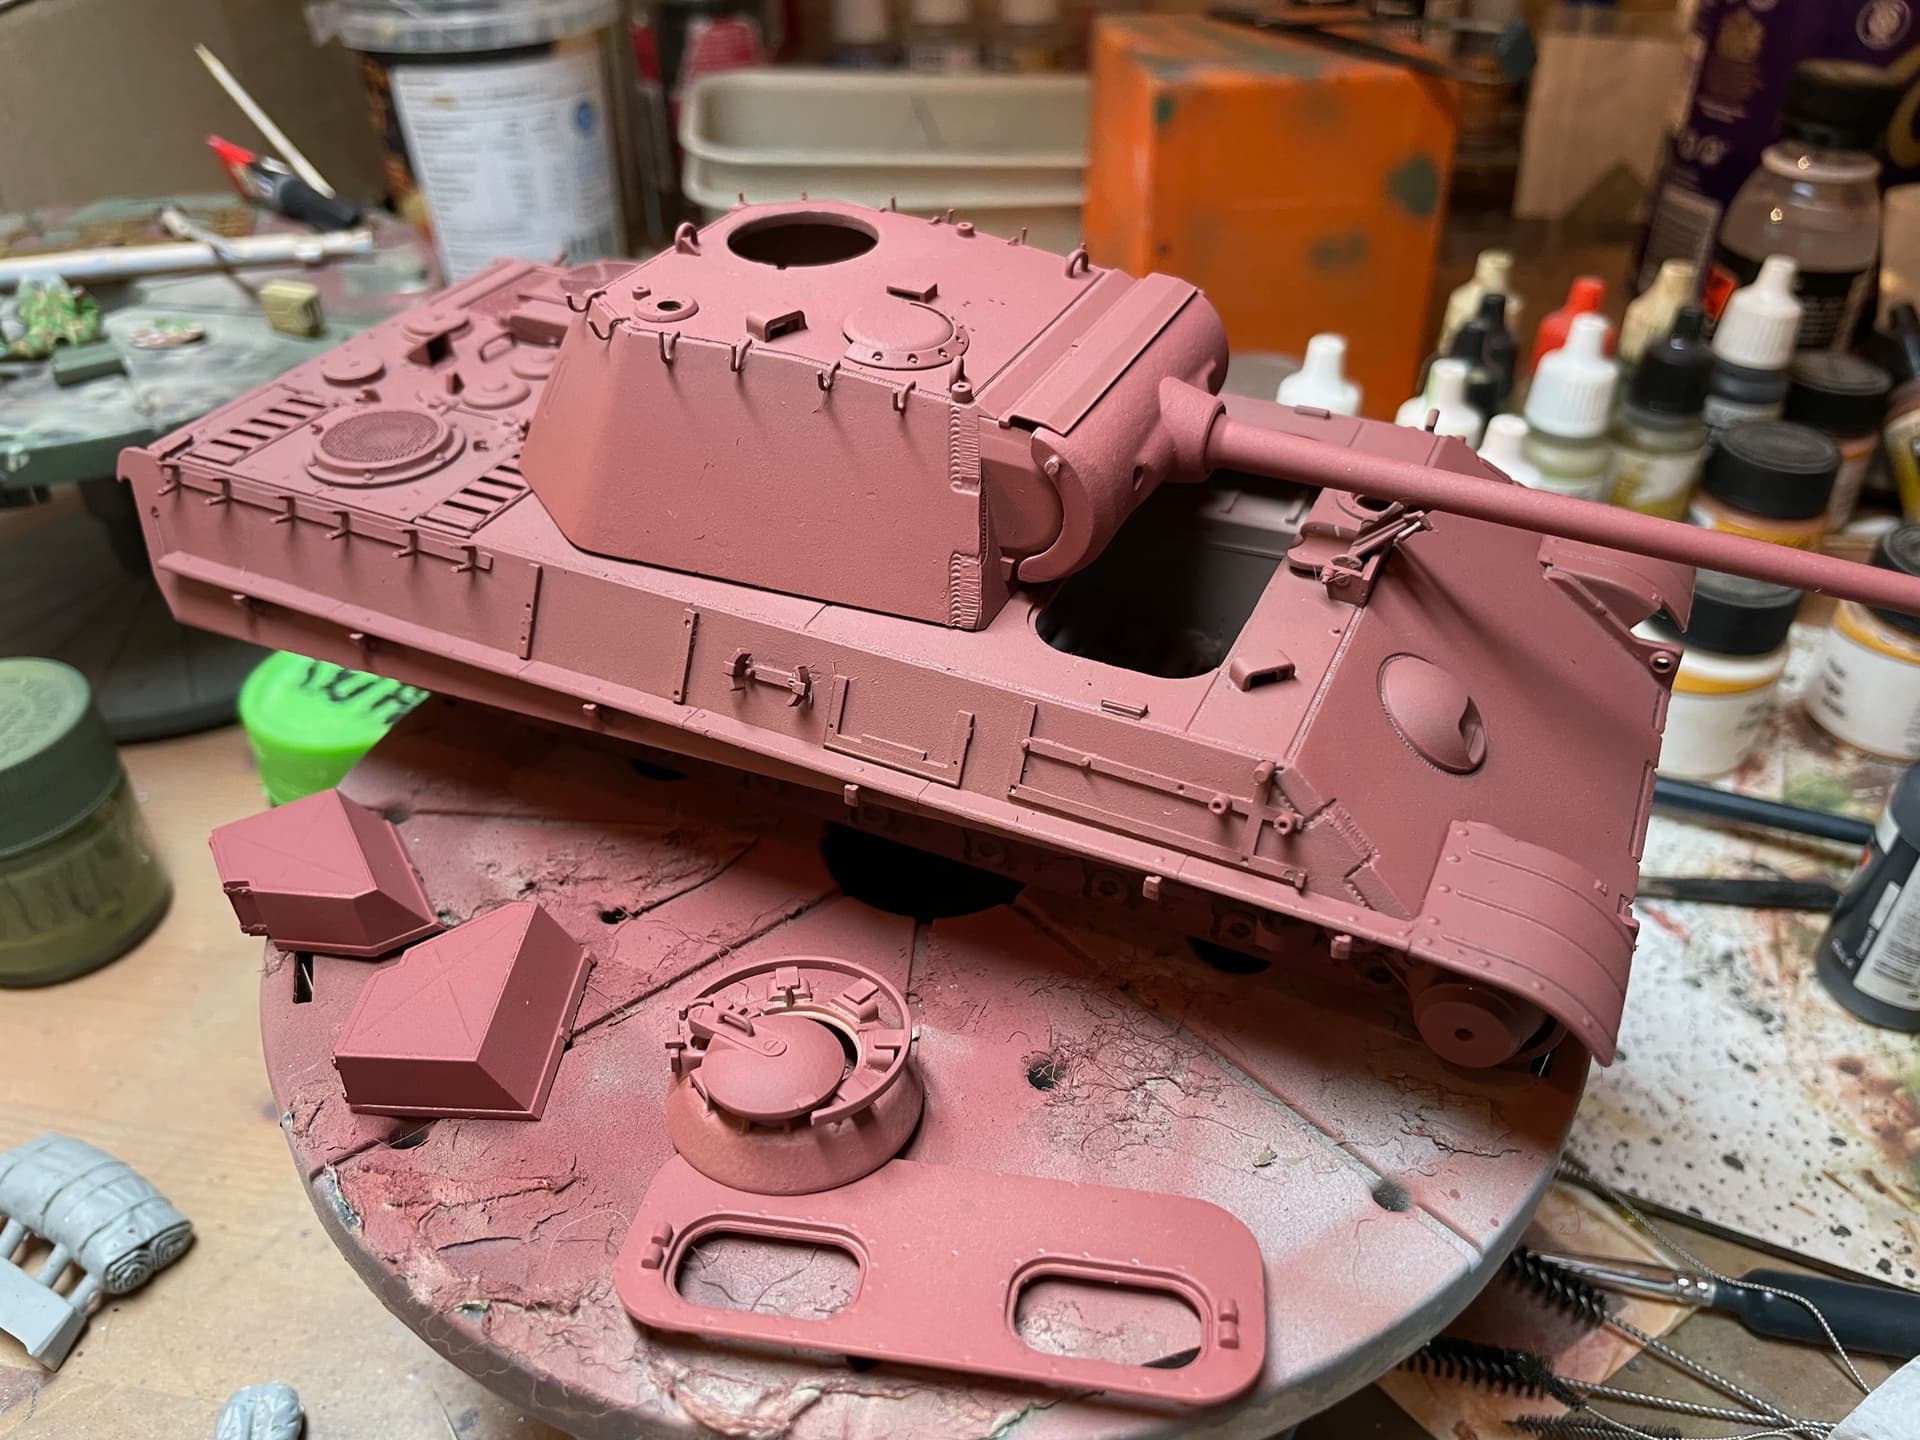
I tend to paint my models as close to the original so that is why I take all these individual steps:
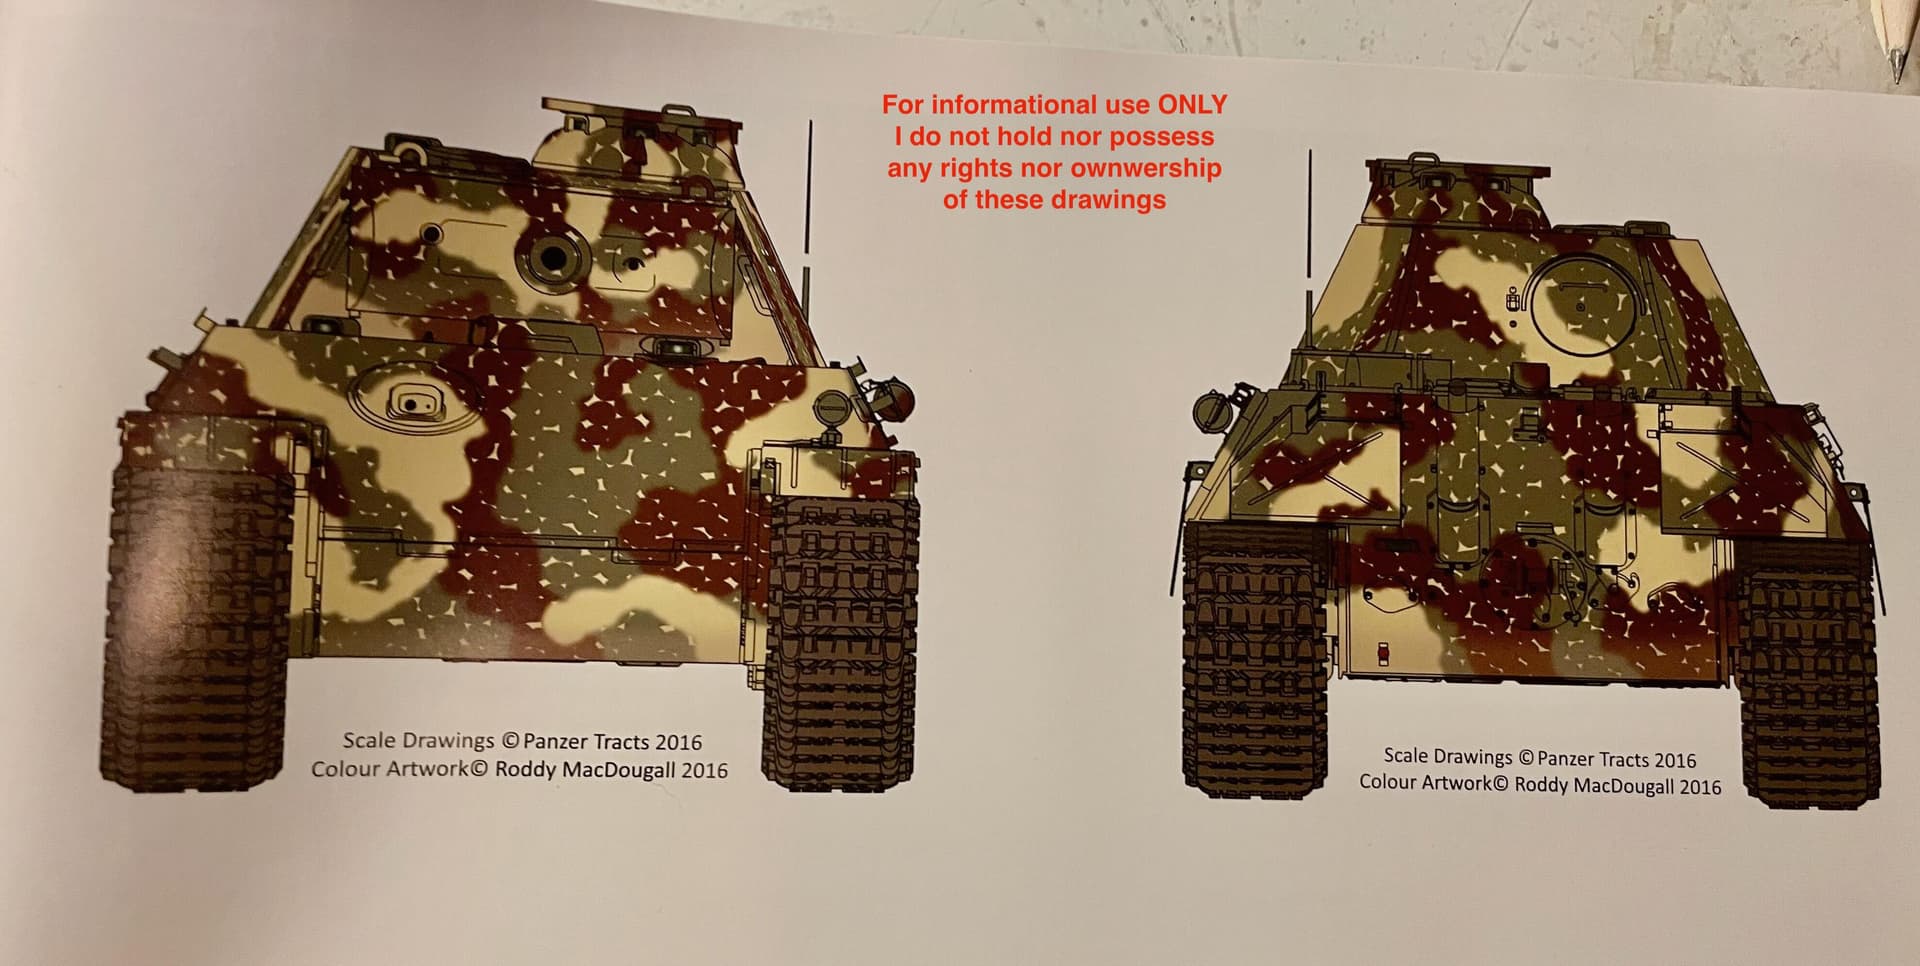
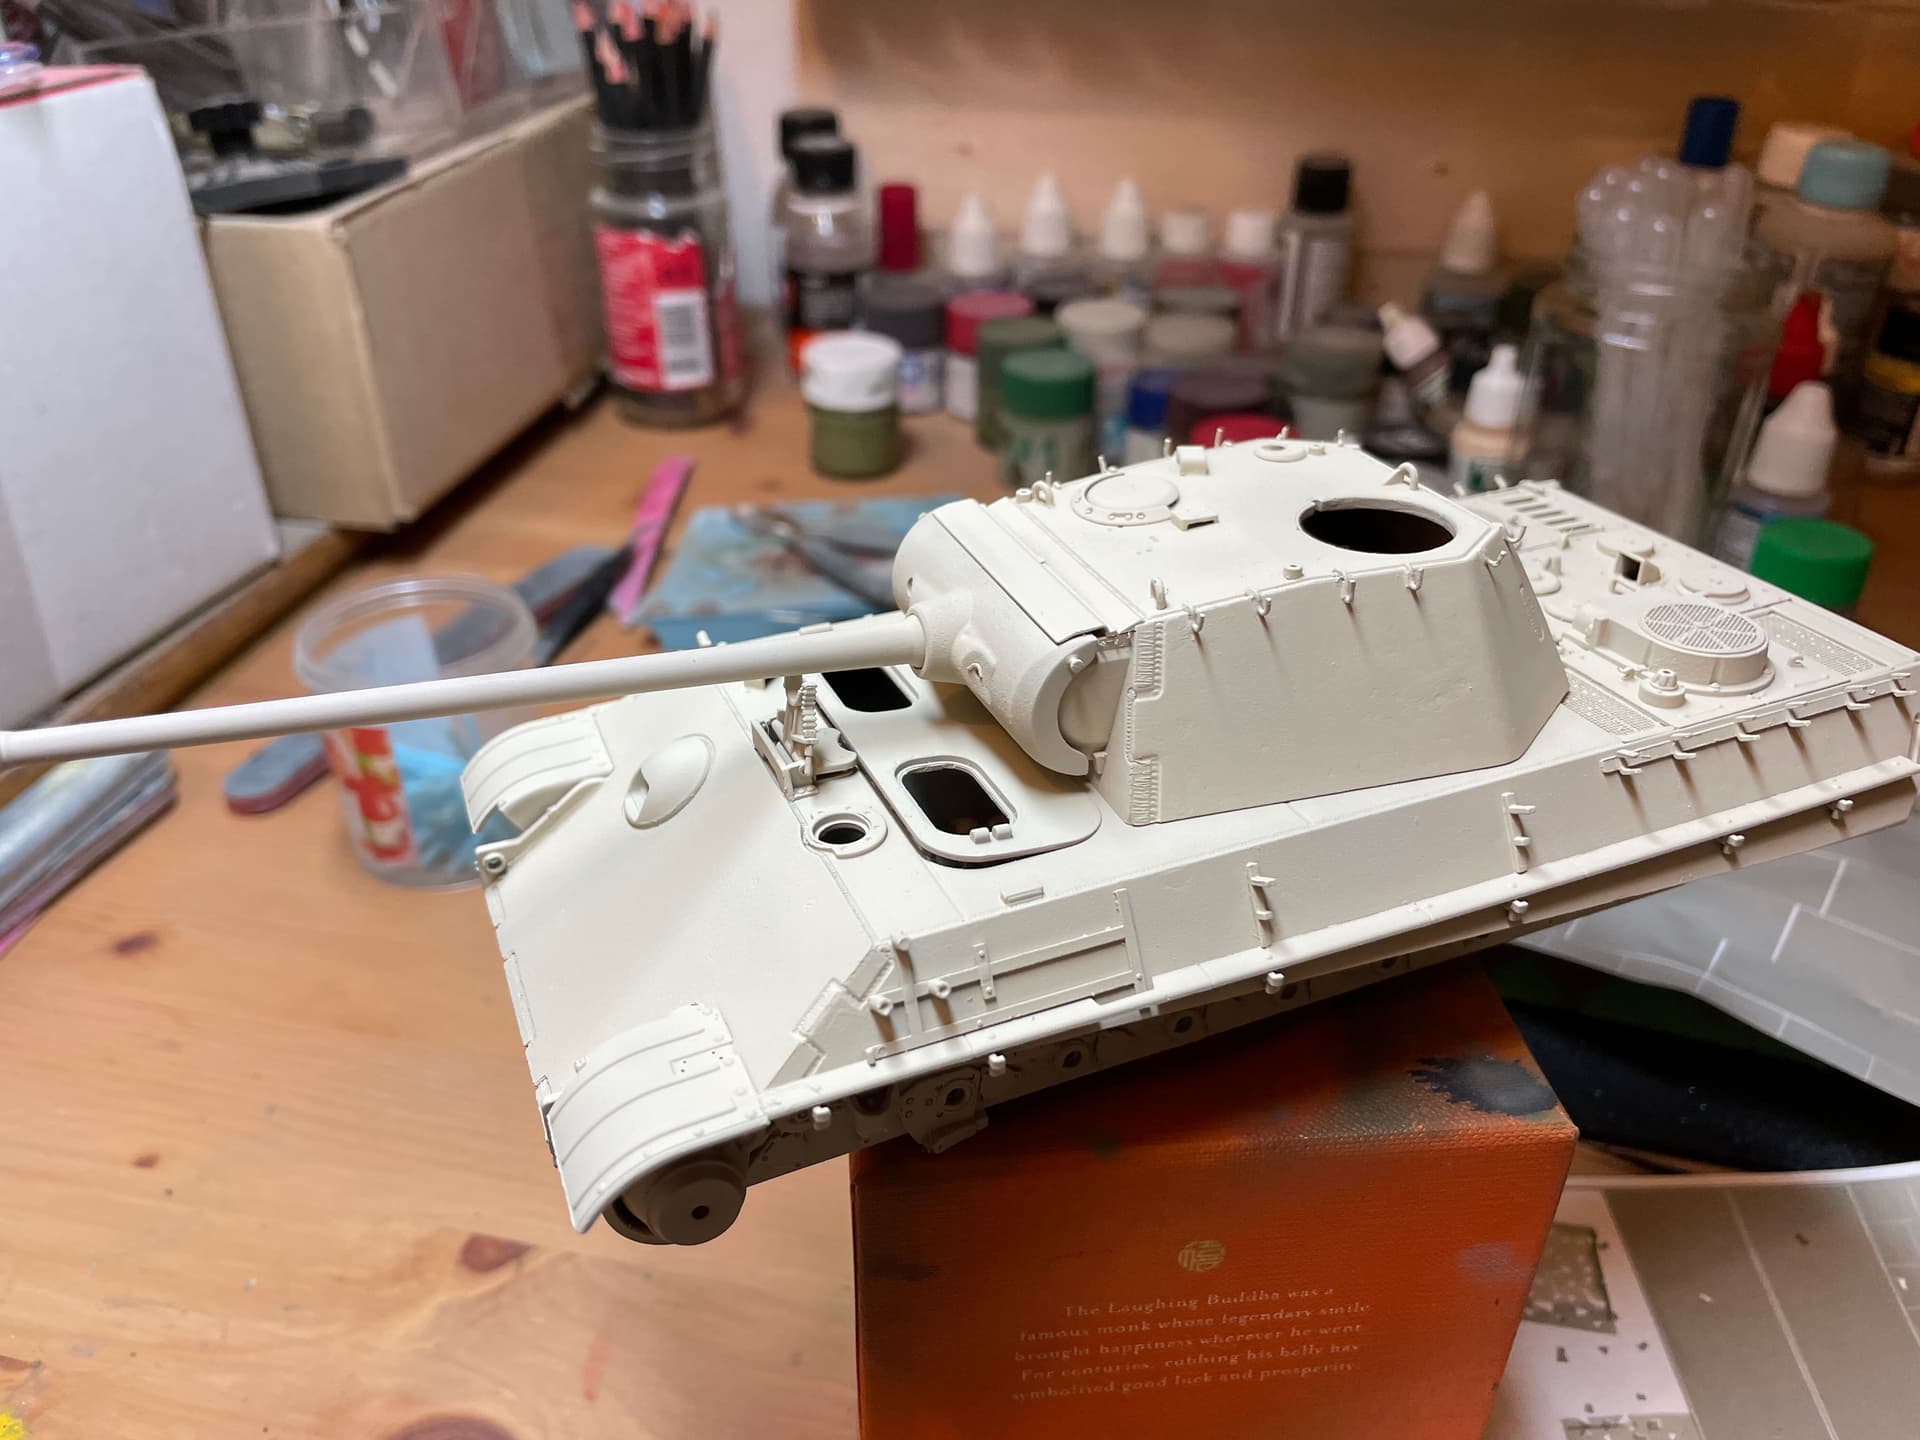
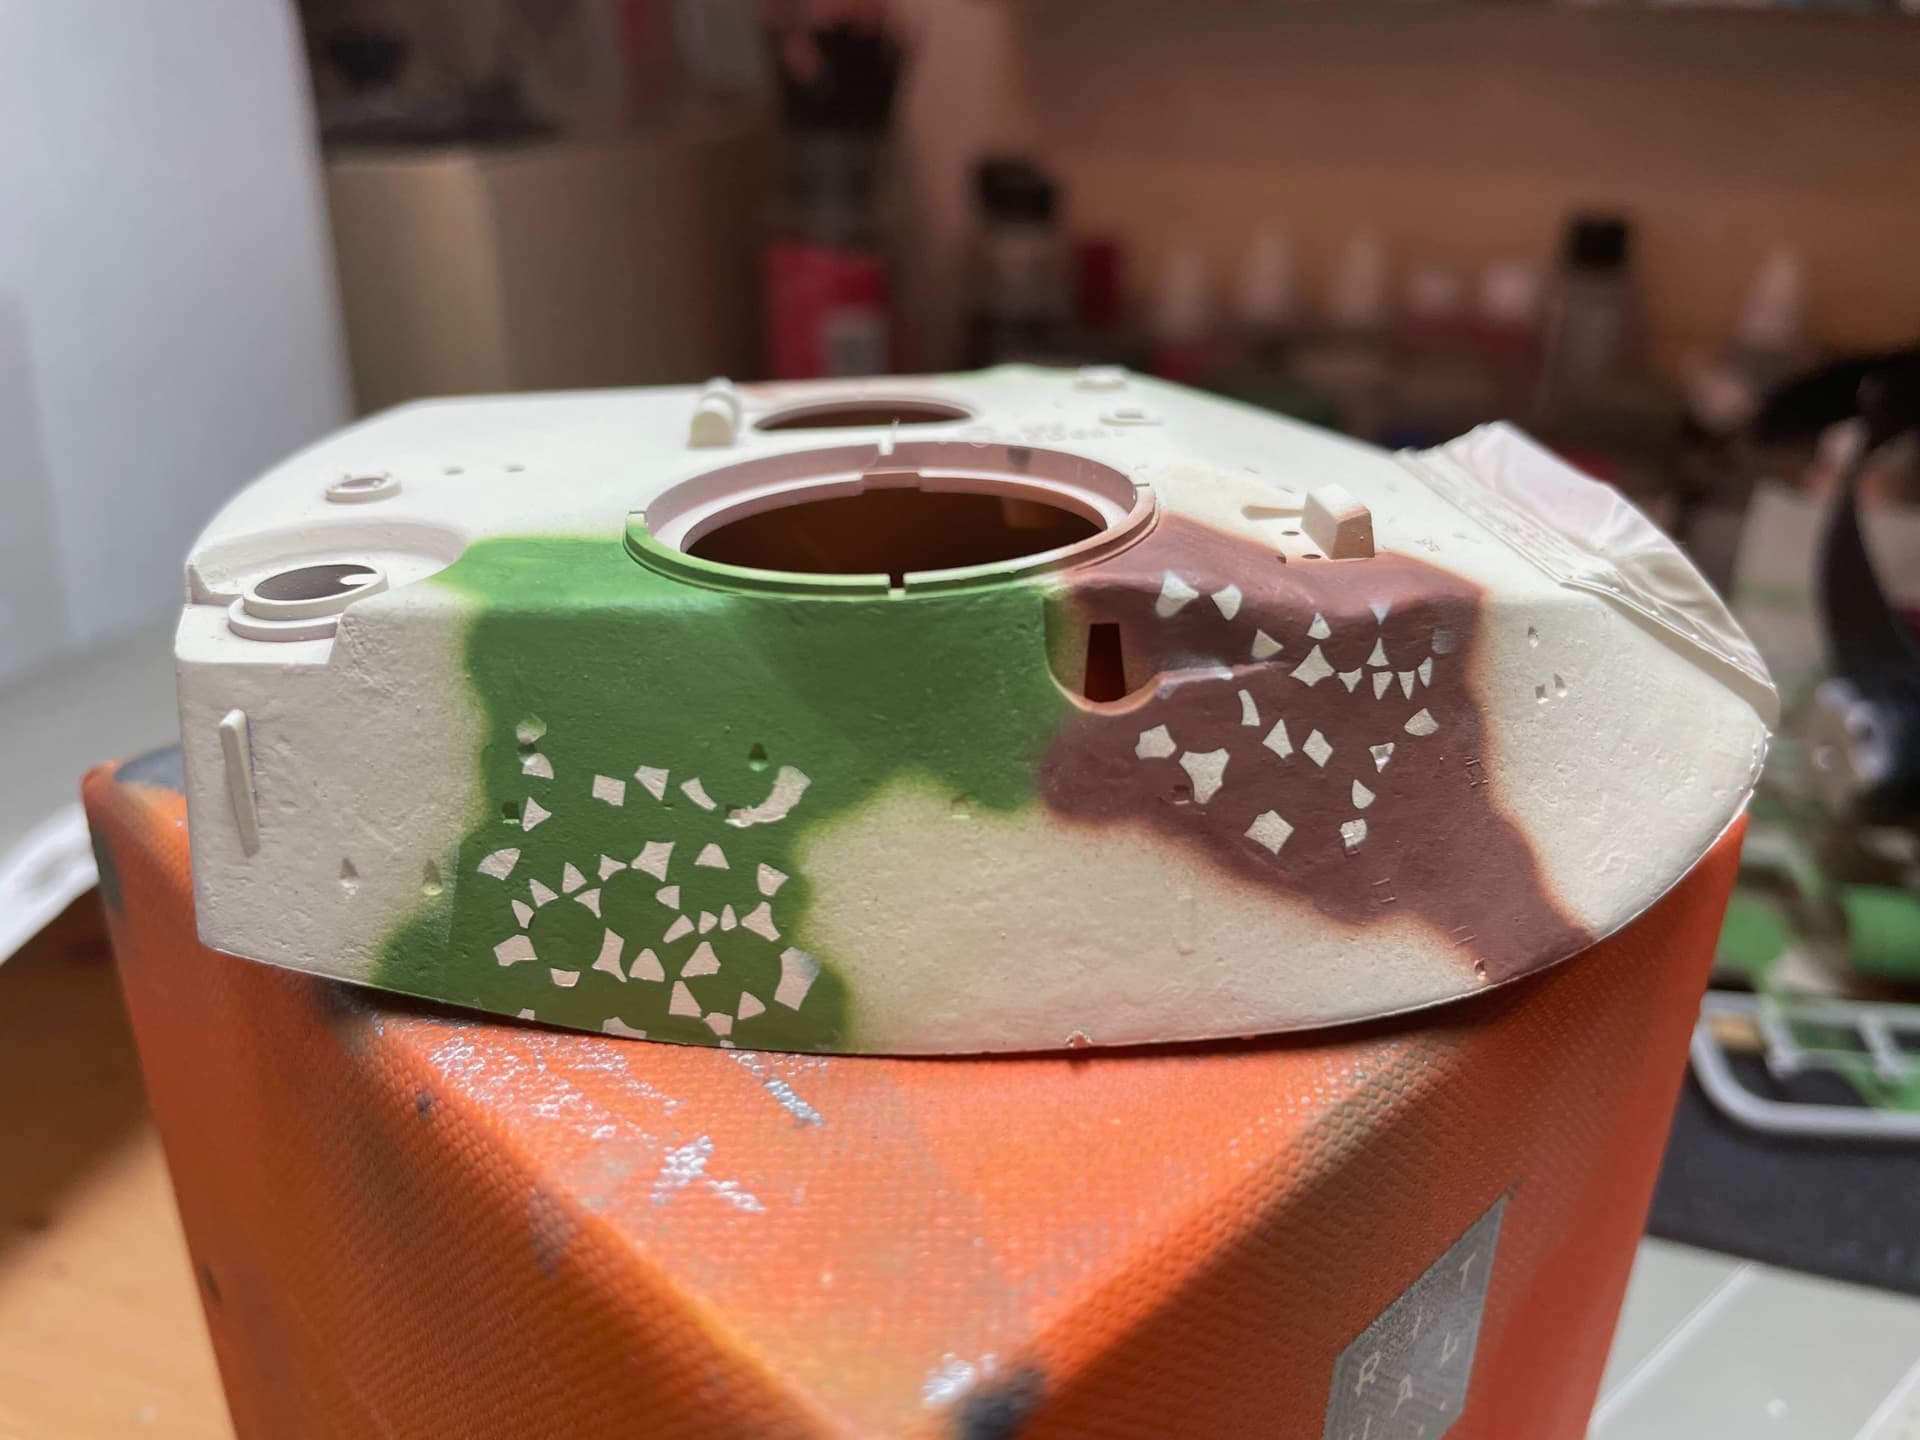
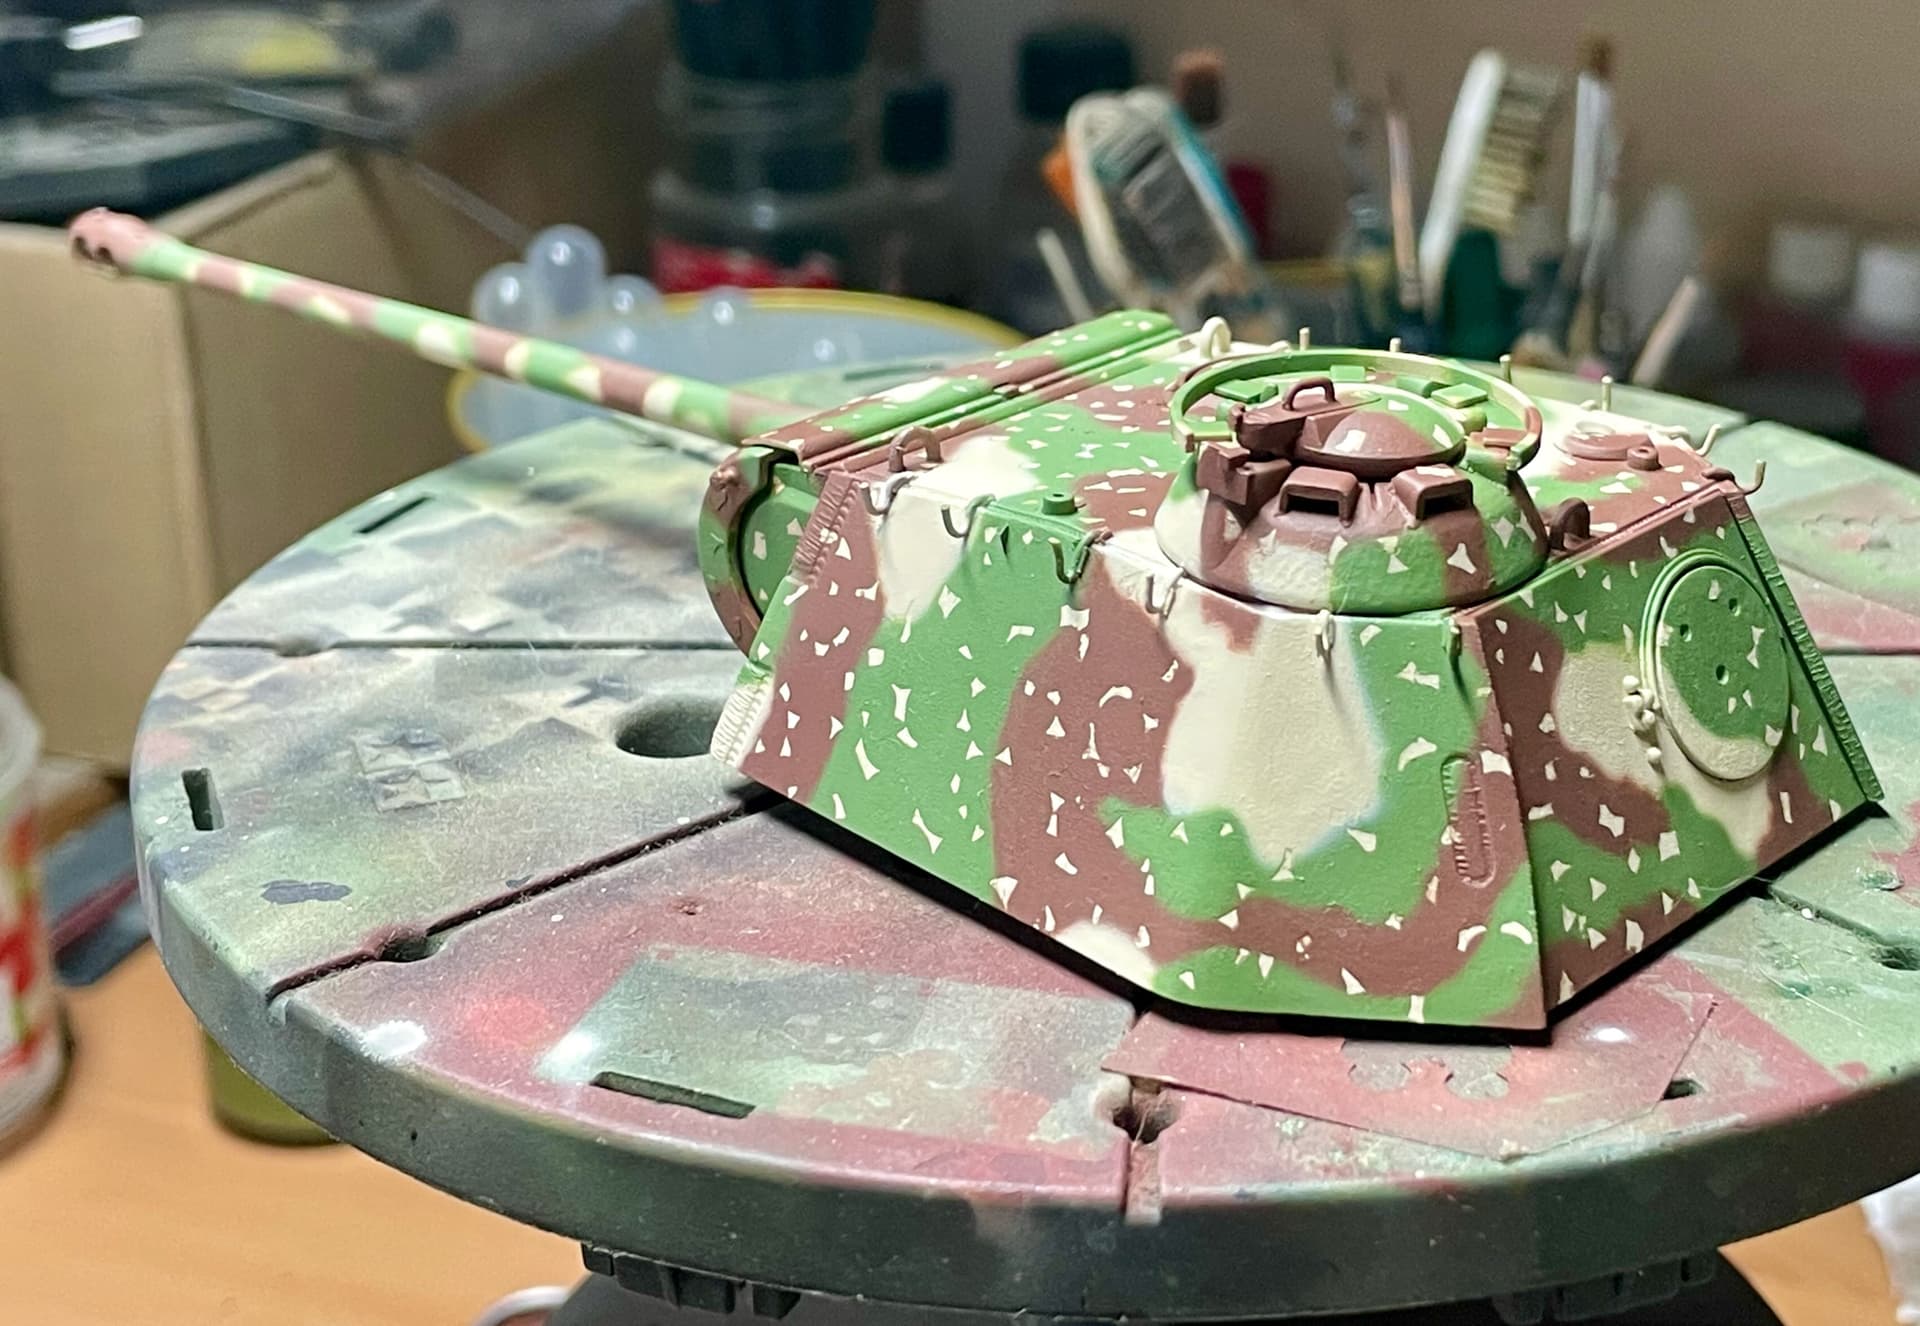
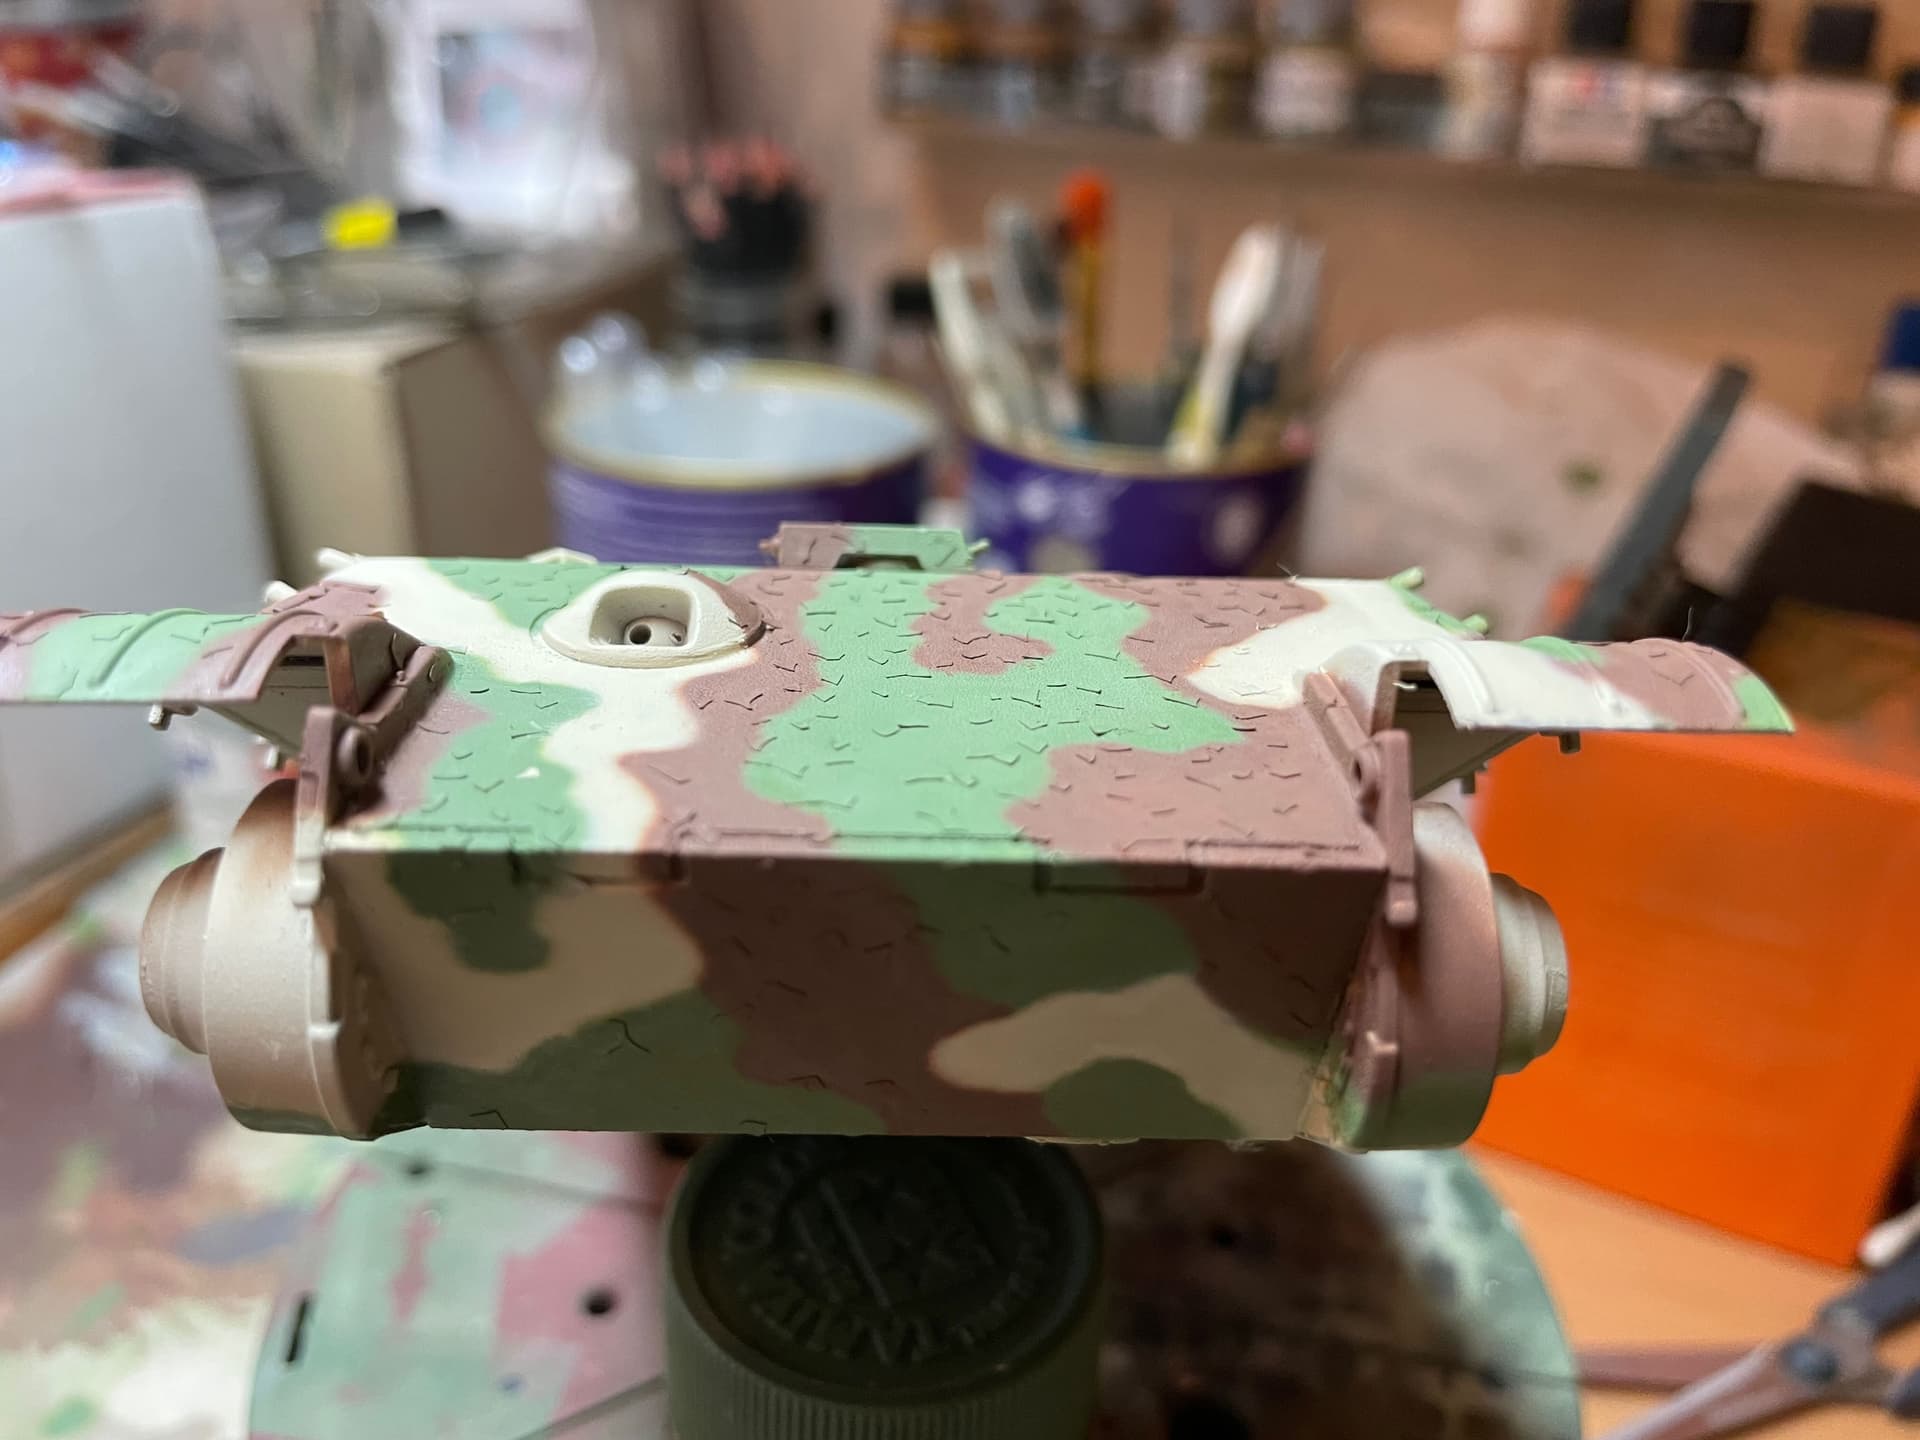
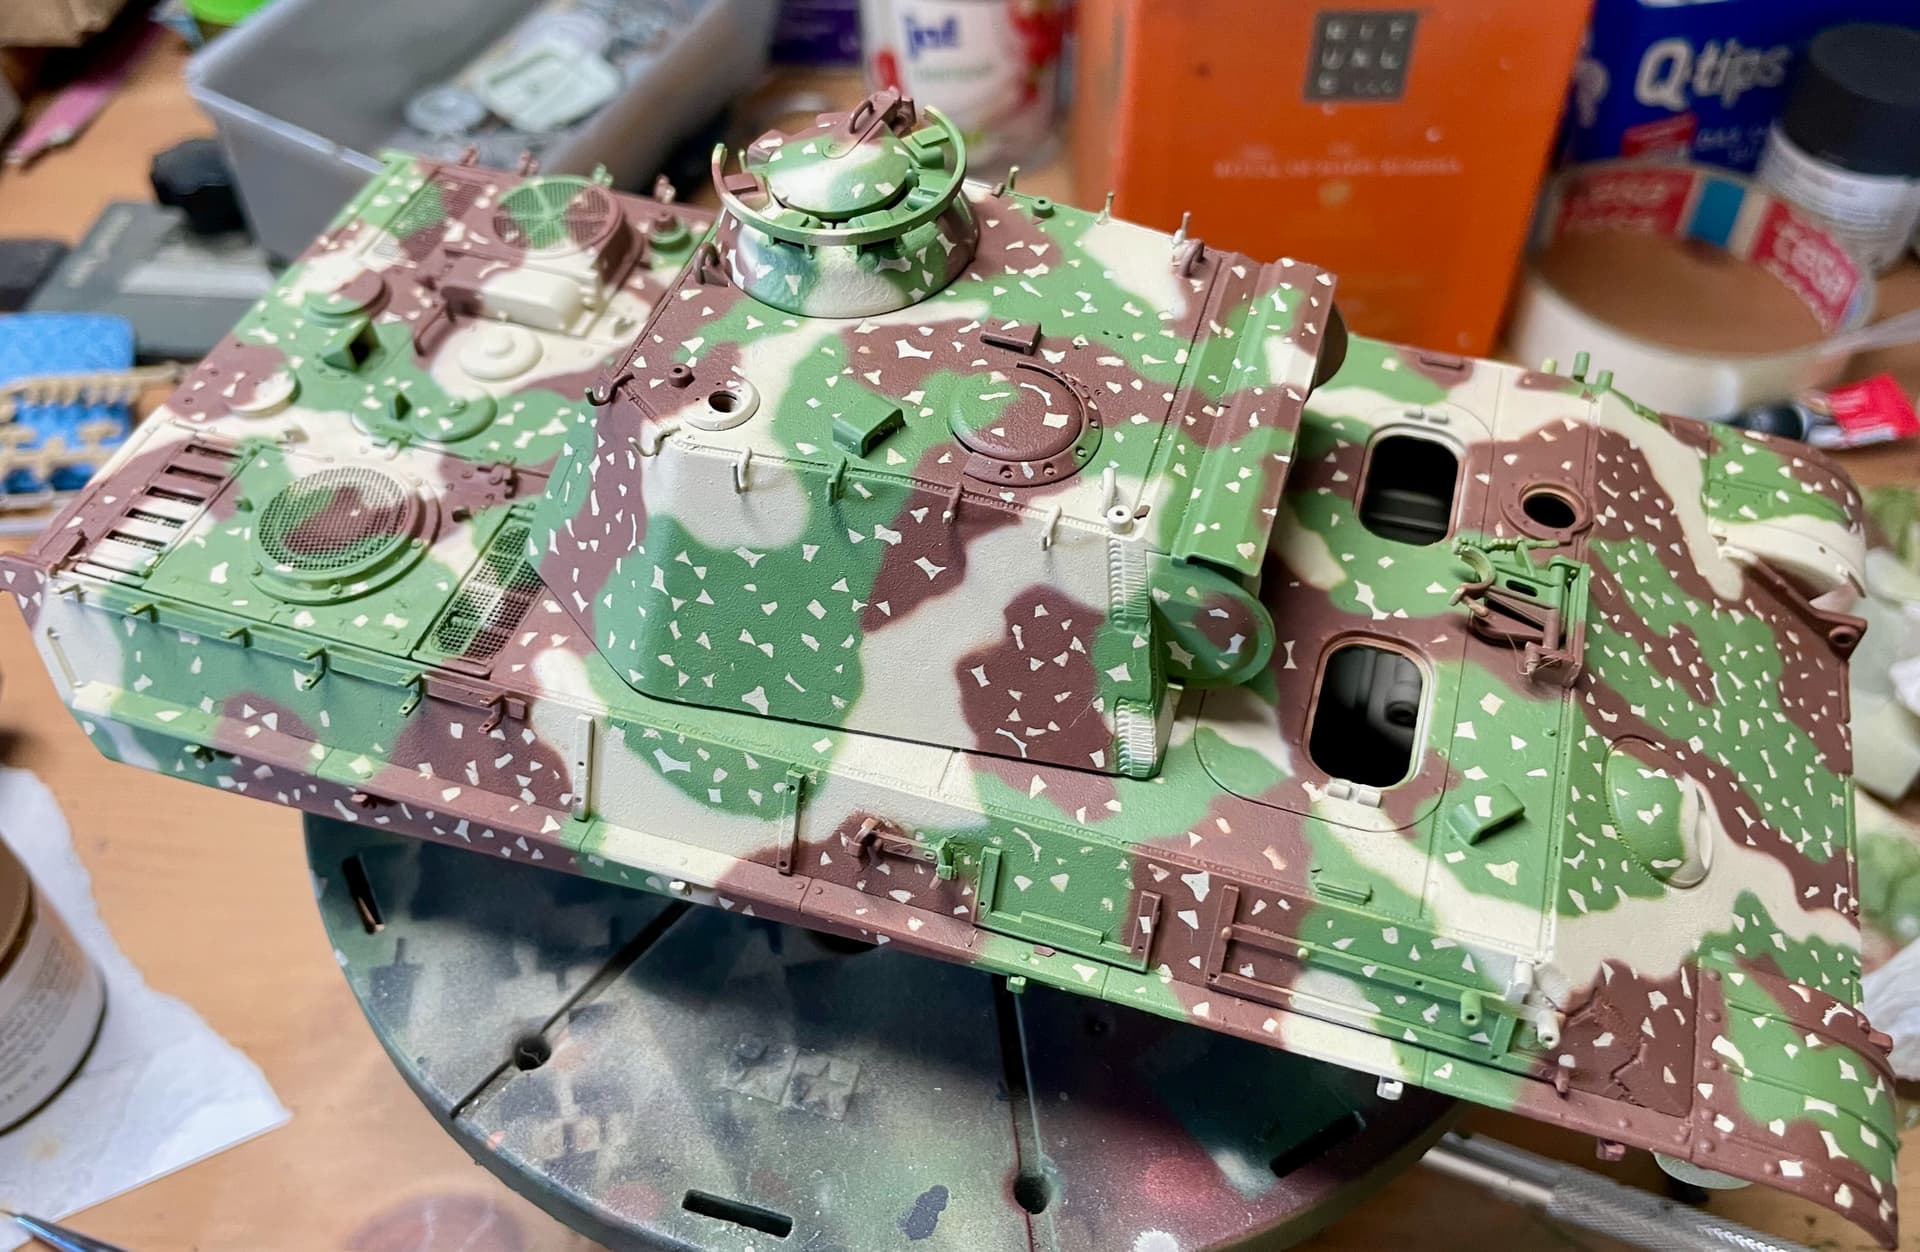
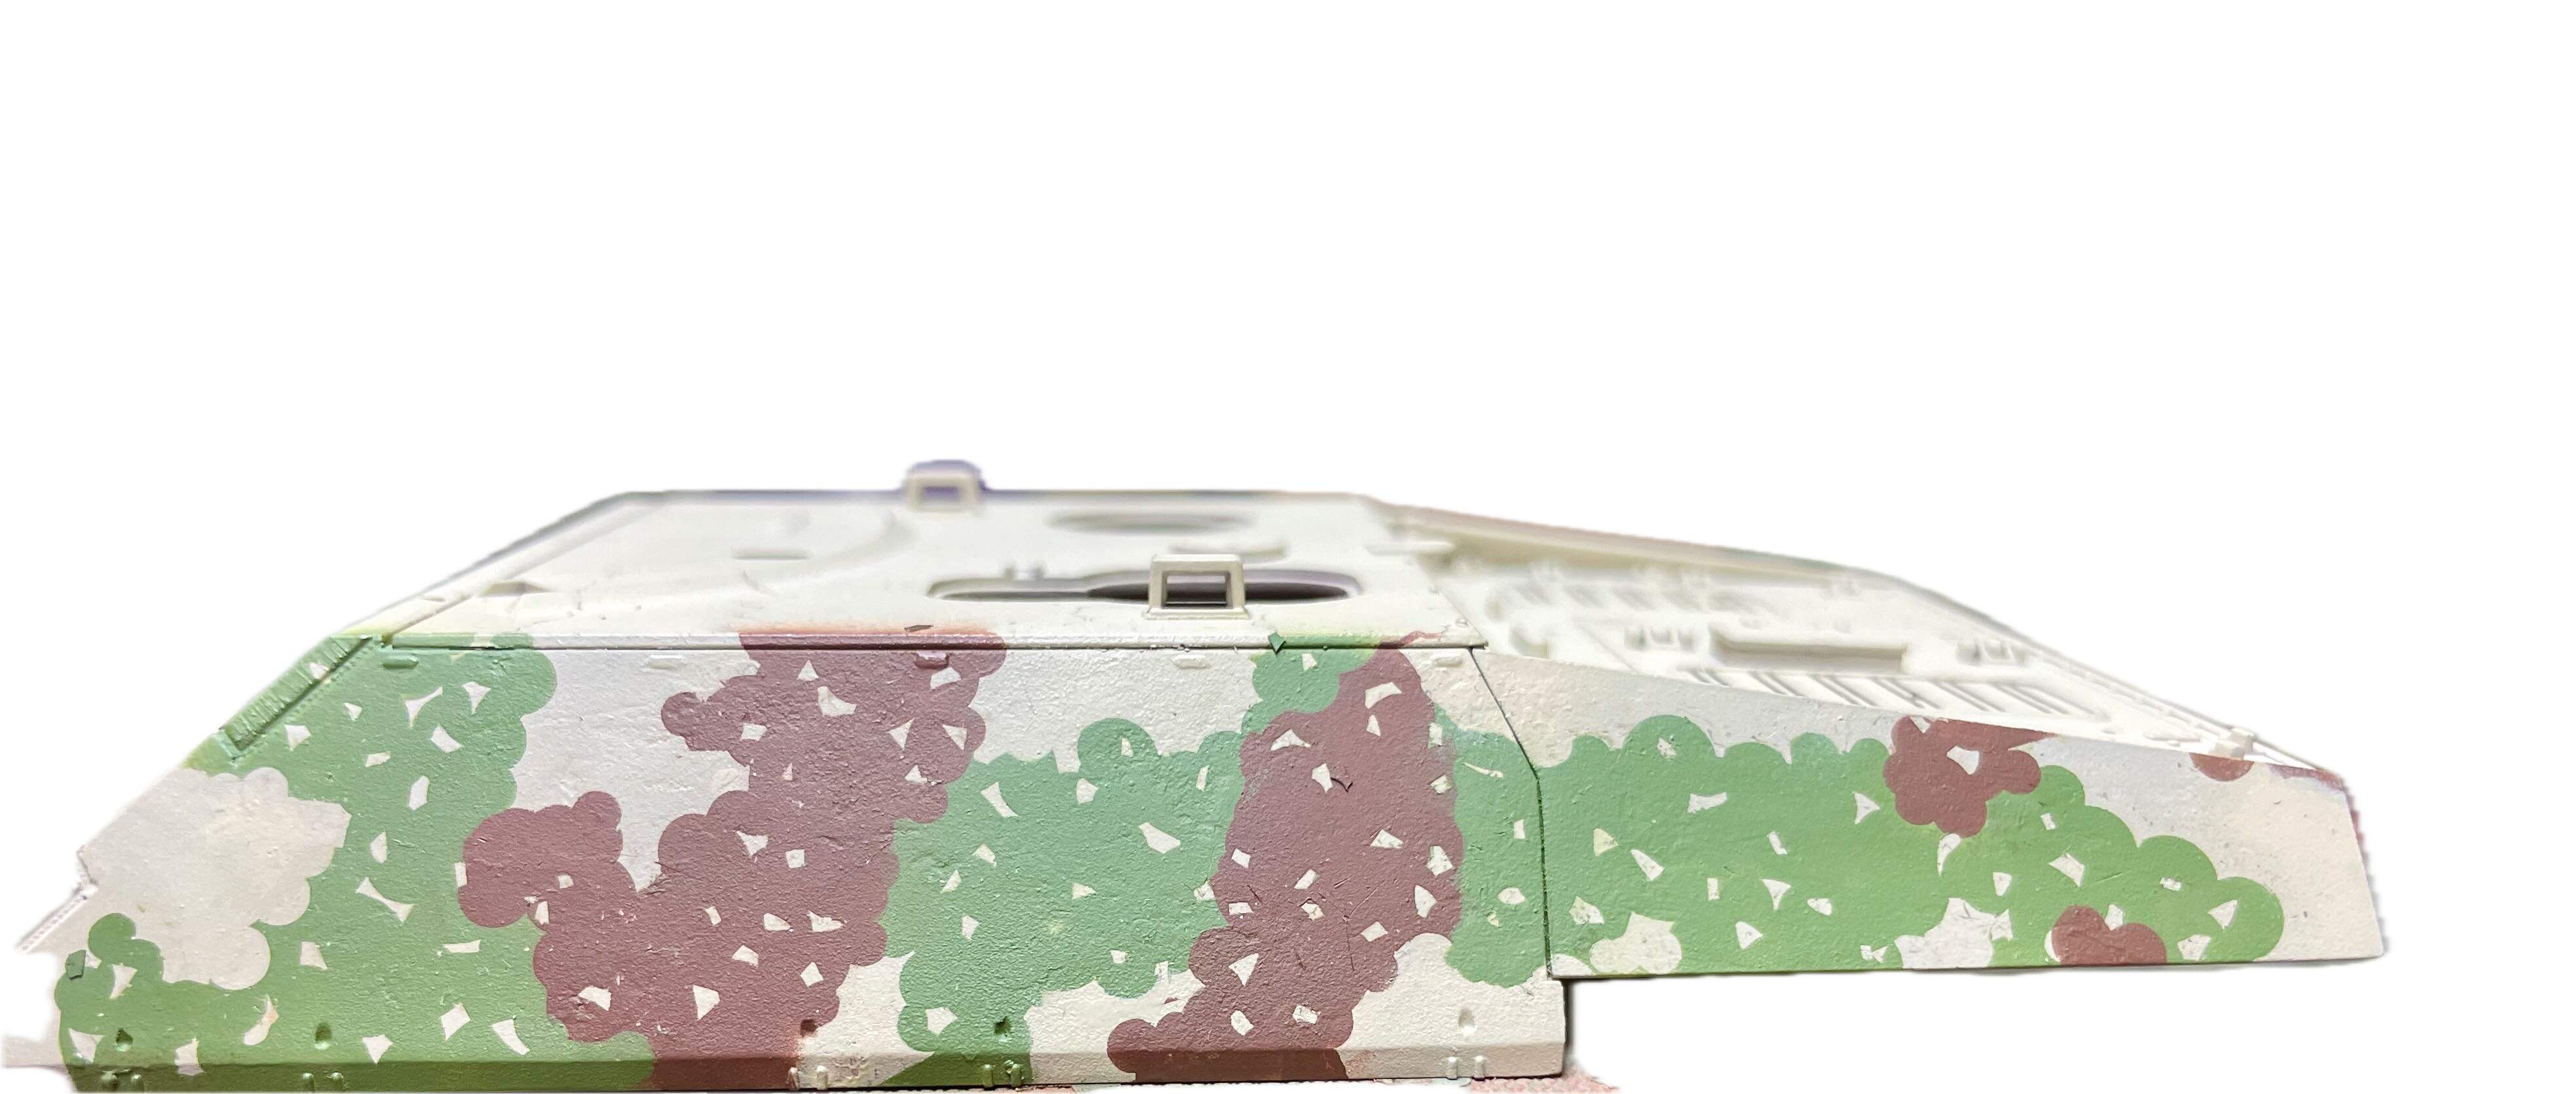
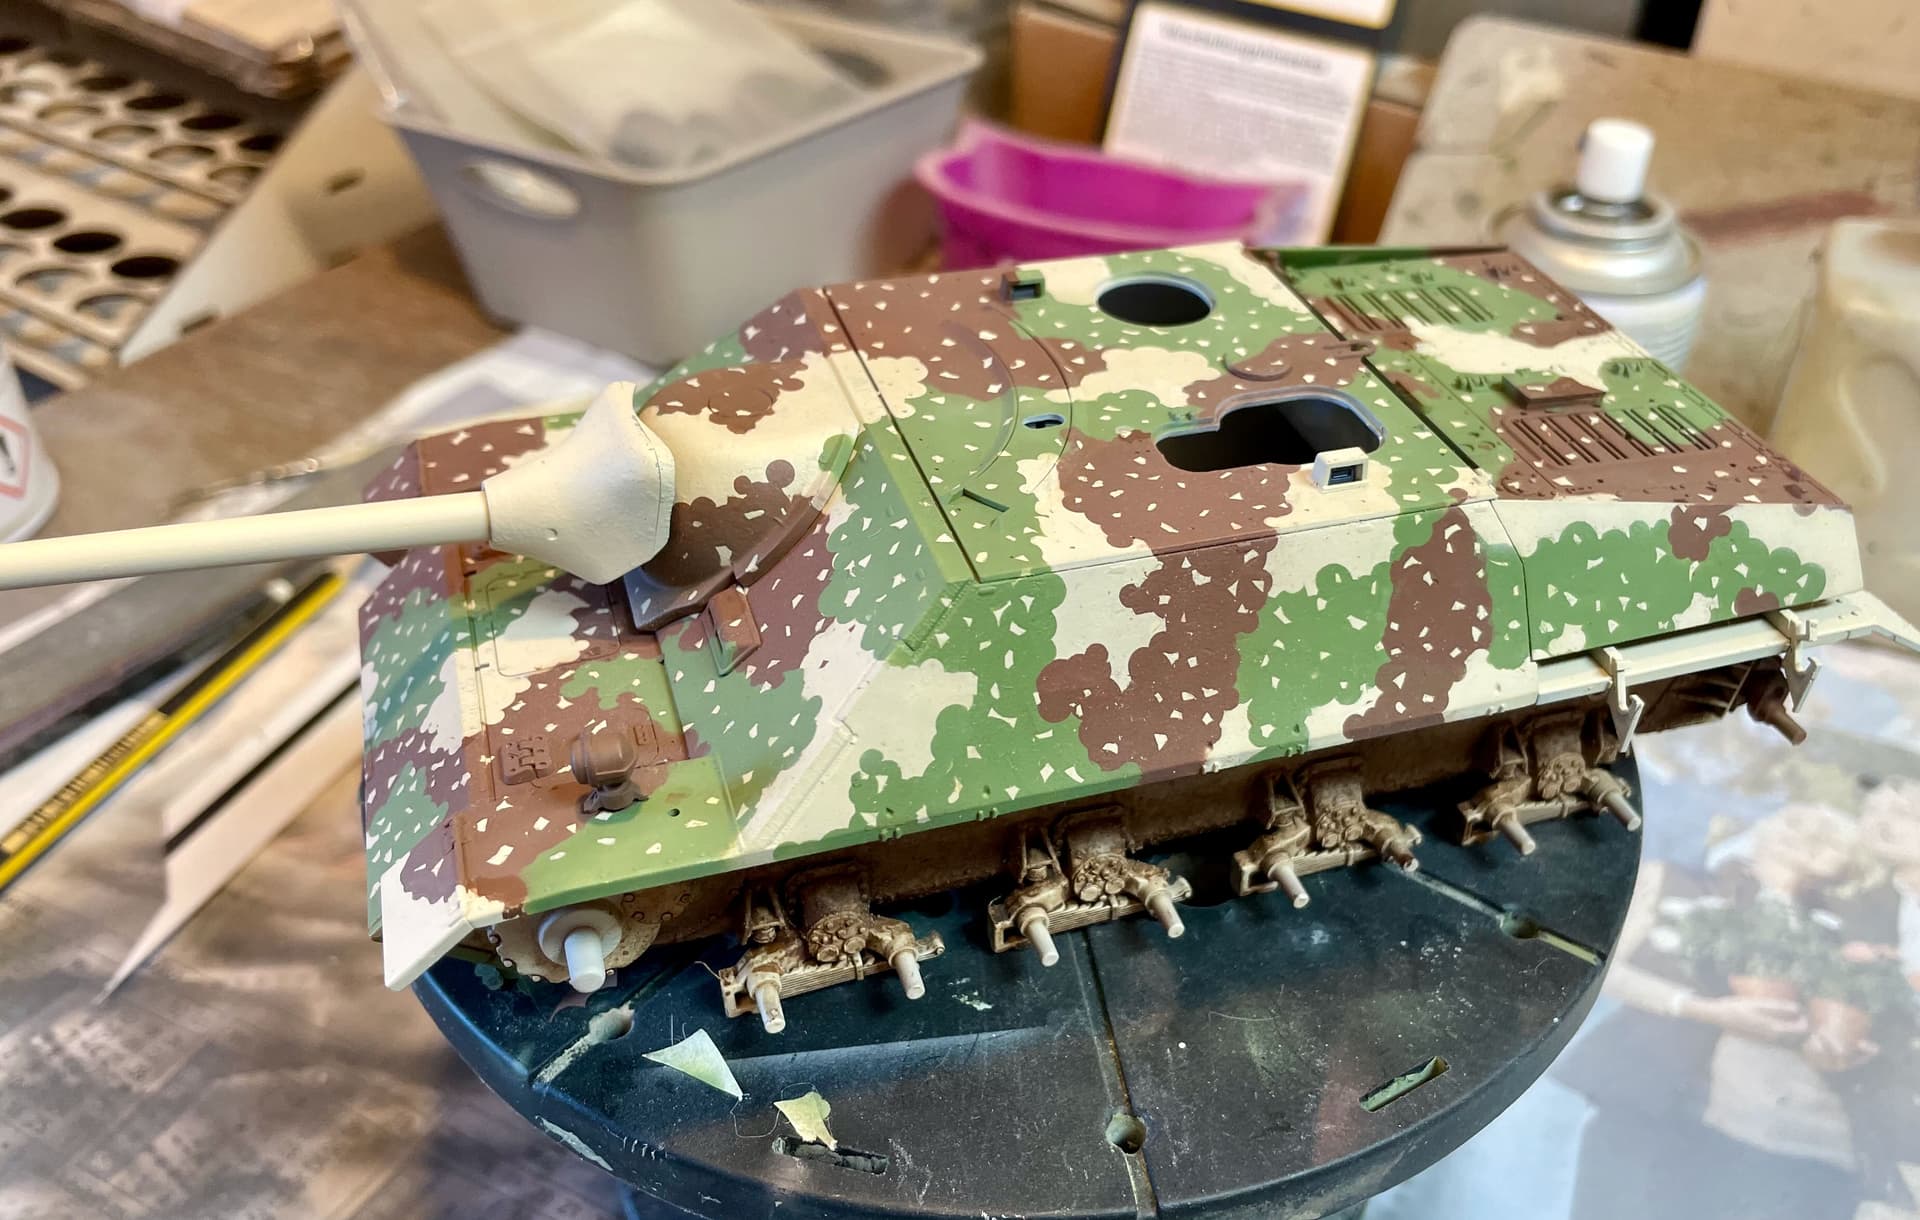
I started with the turret … although I have the appropriate mask set for the Disc-Camo I decided against it after making a sample on an old M60 turret.
It appeared a little too “dense” for my taste so I chose doing it the hard way.
Although quite time consuming it allowed me to replicate the designate scheme more closely which does not reflect a “uniform”, rather a more random appearance.
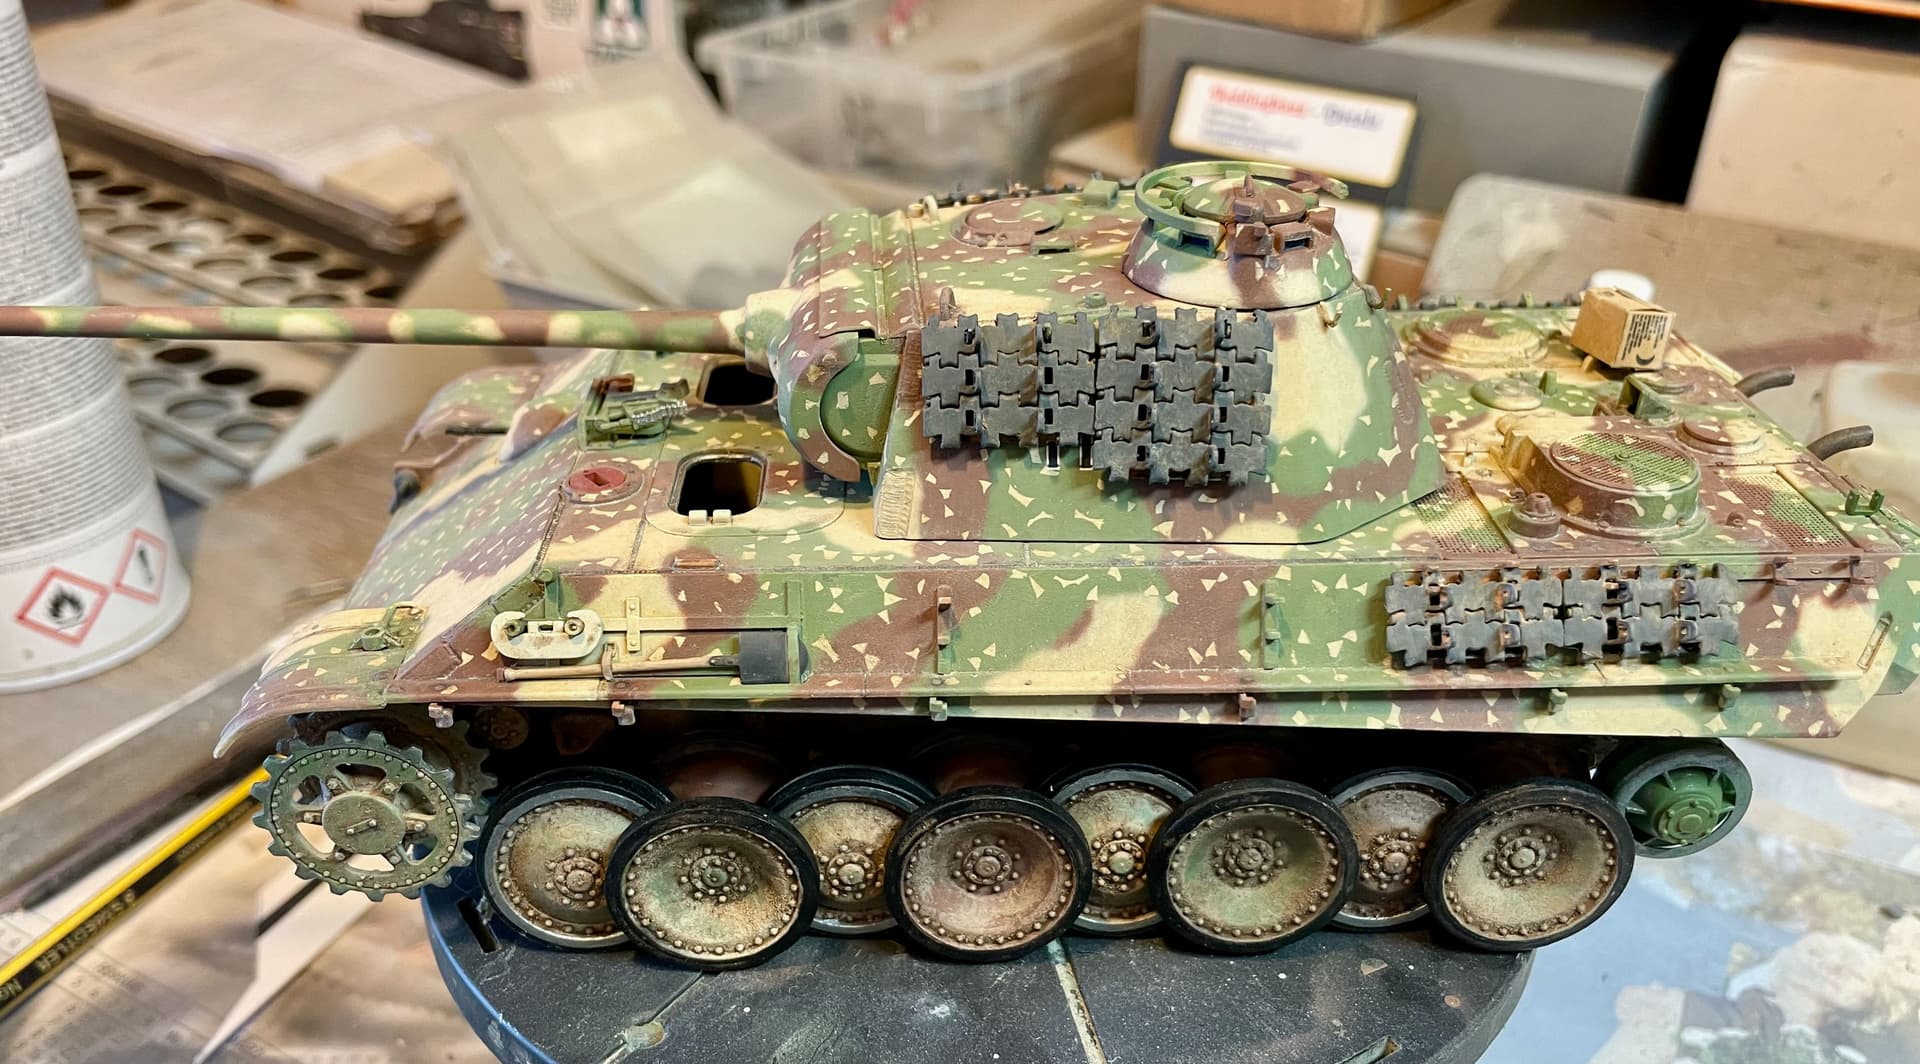
A pretty nice “Ambush” cammo job so far. Itsy-bitsy pieces of Tamiya tape?
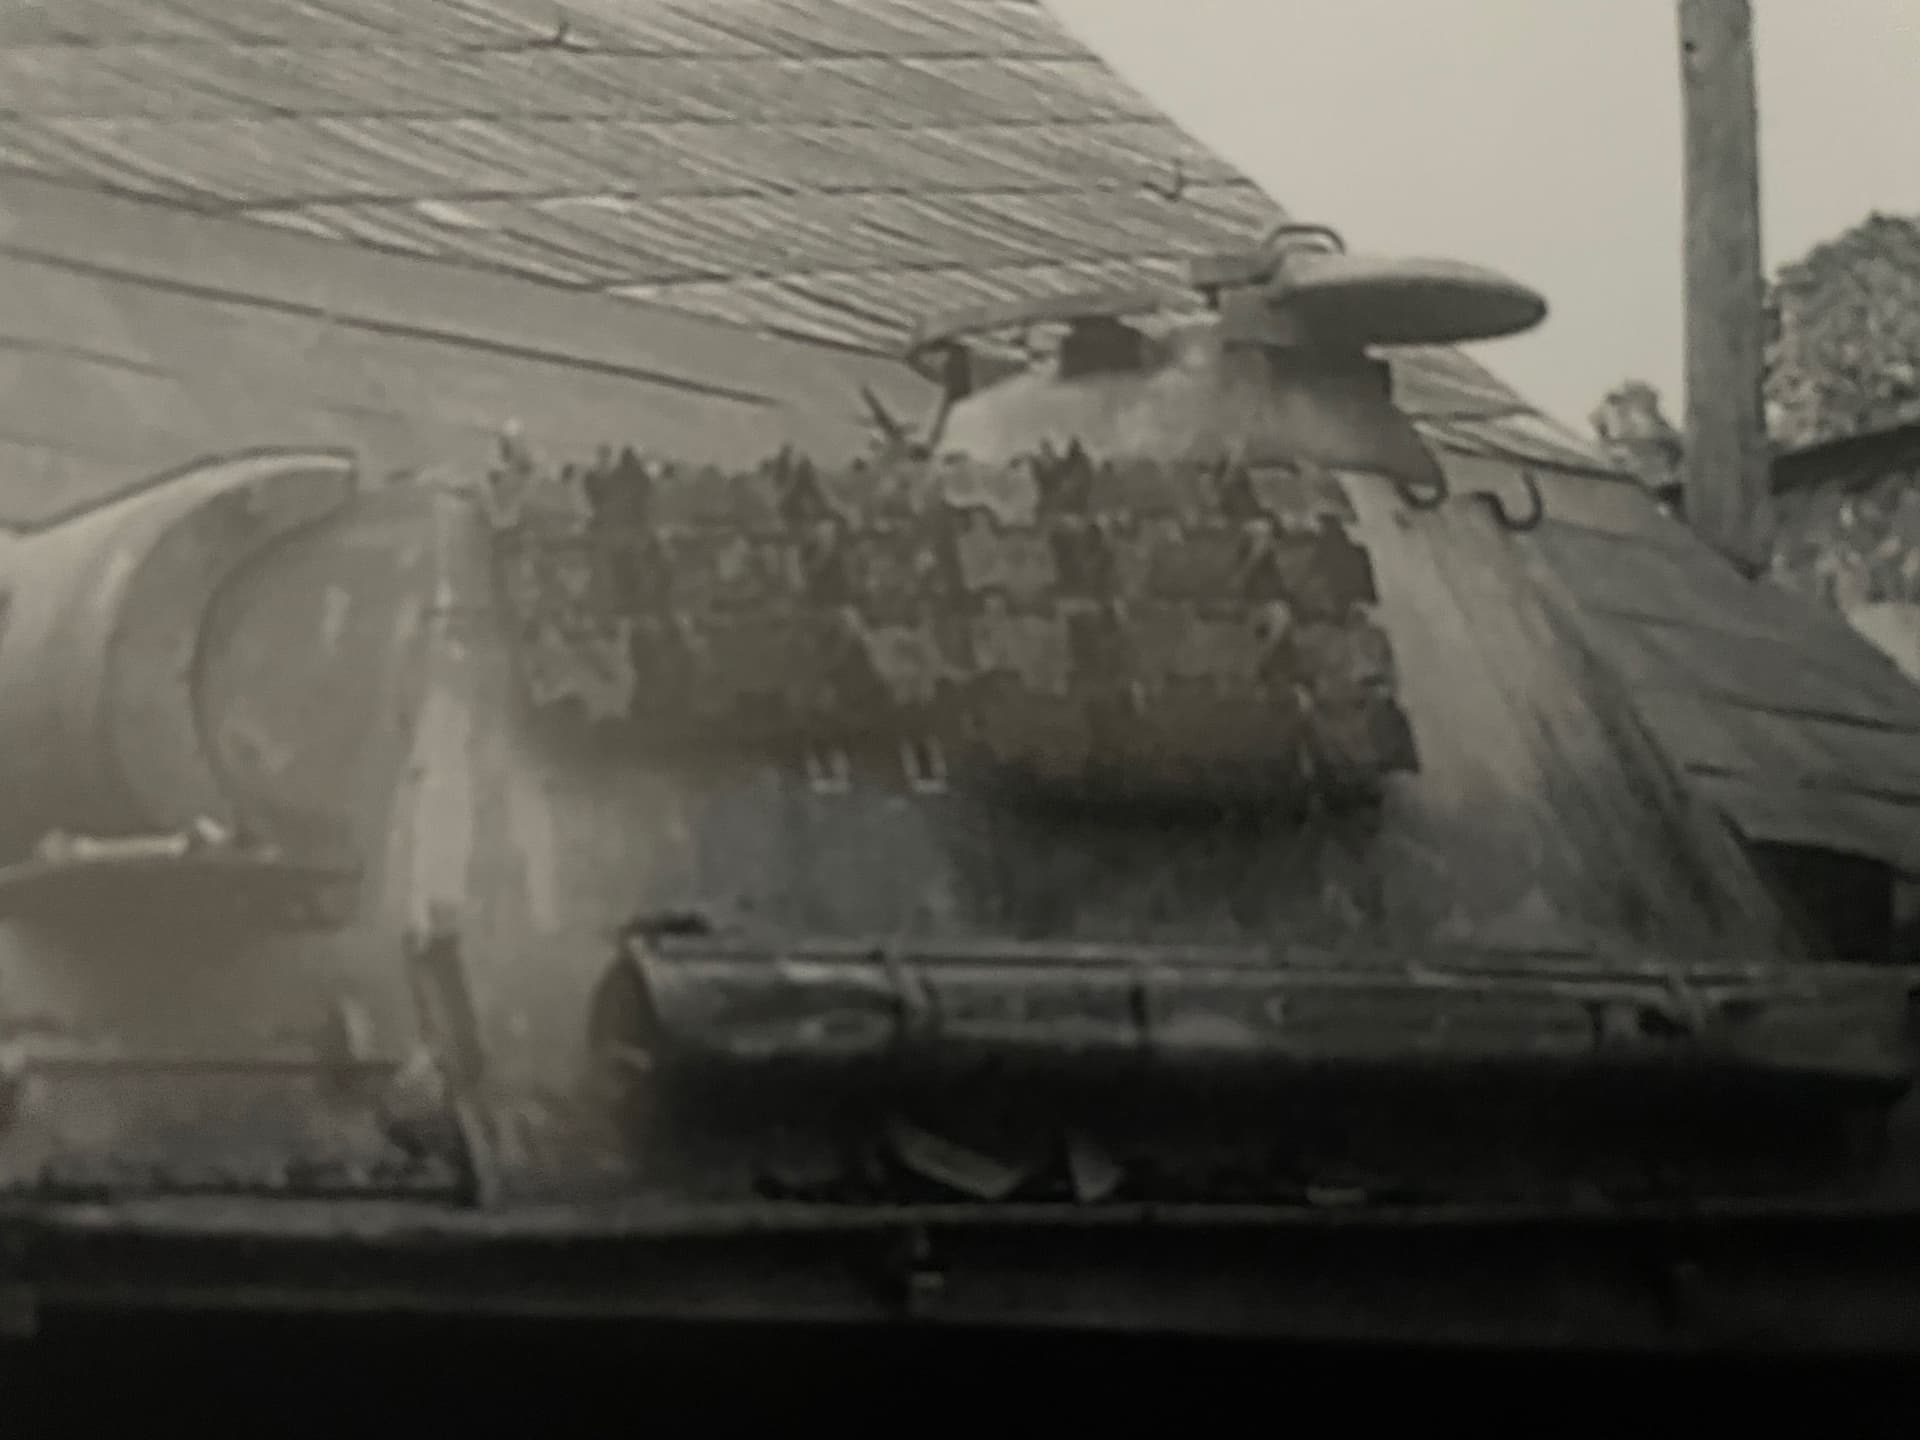
And a big thanks for the historical images.
Please keep us updated with progress pics.
And thanks for sharing!
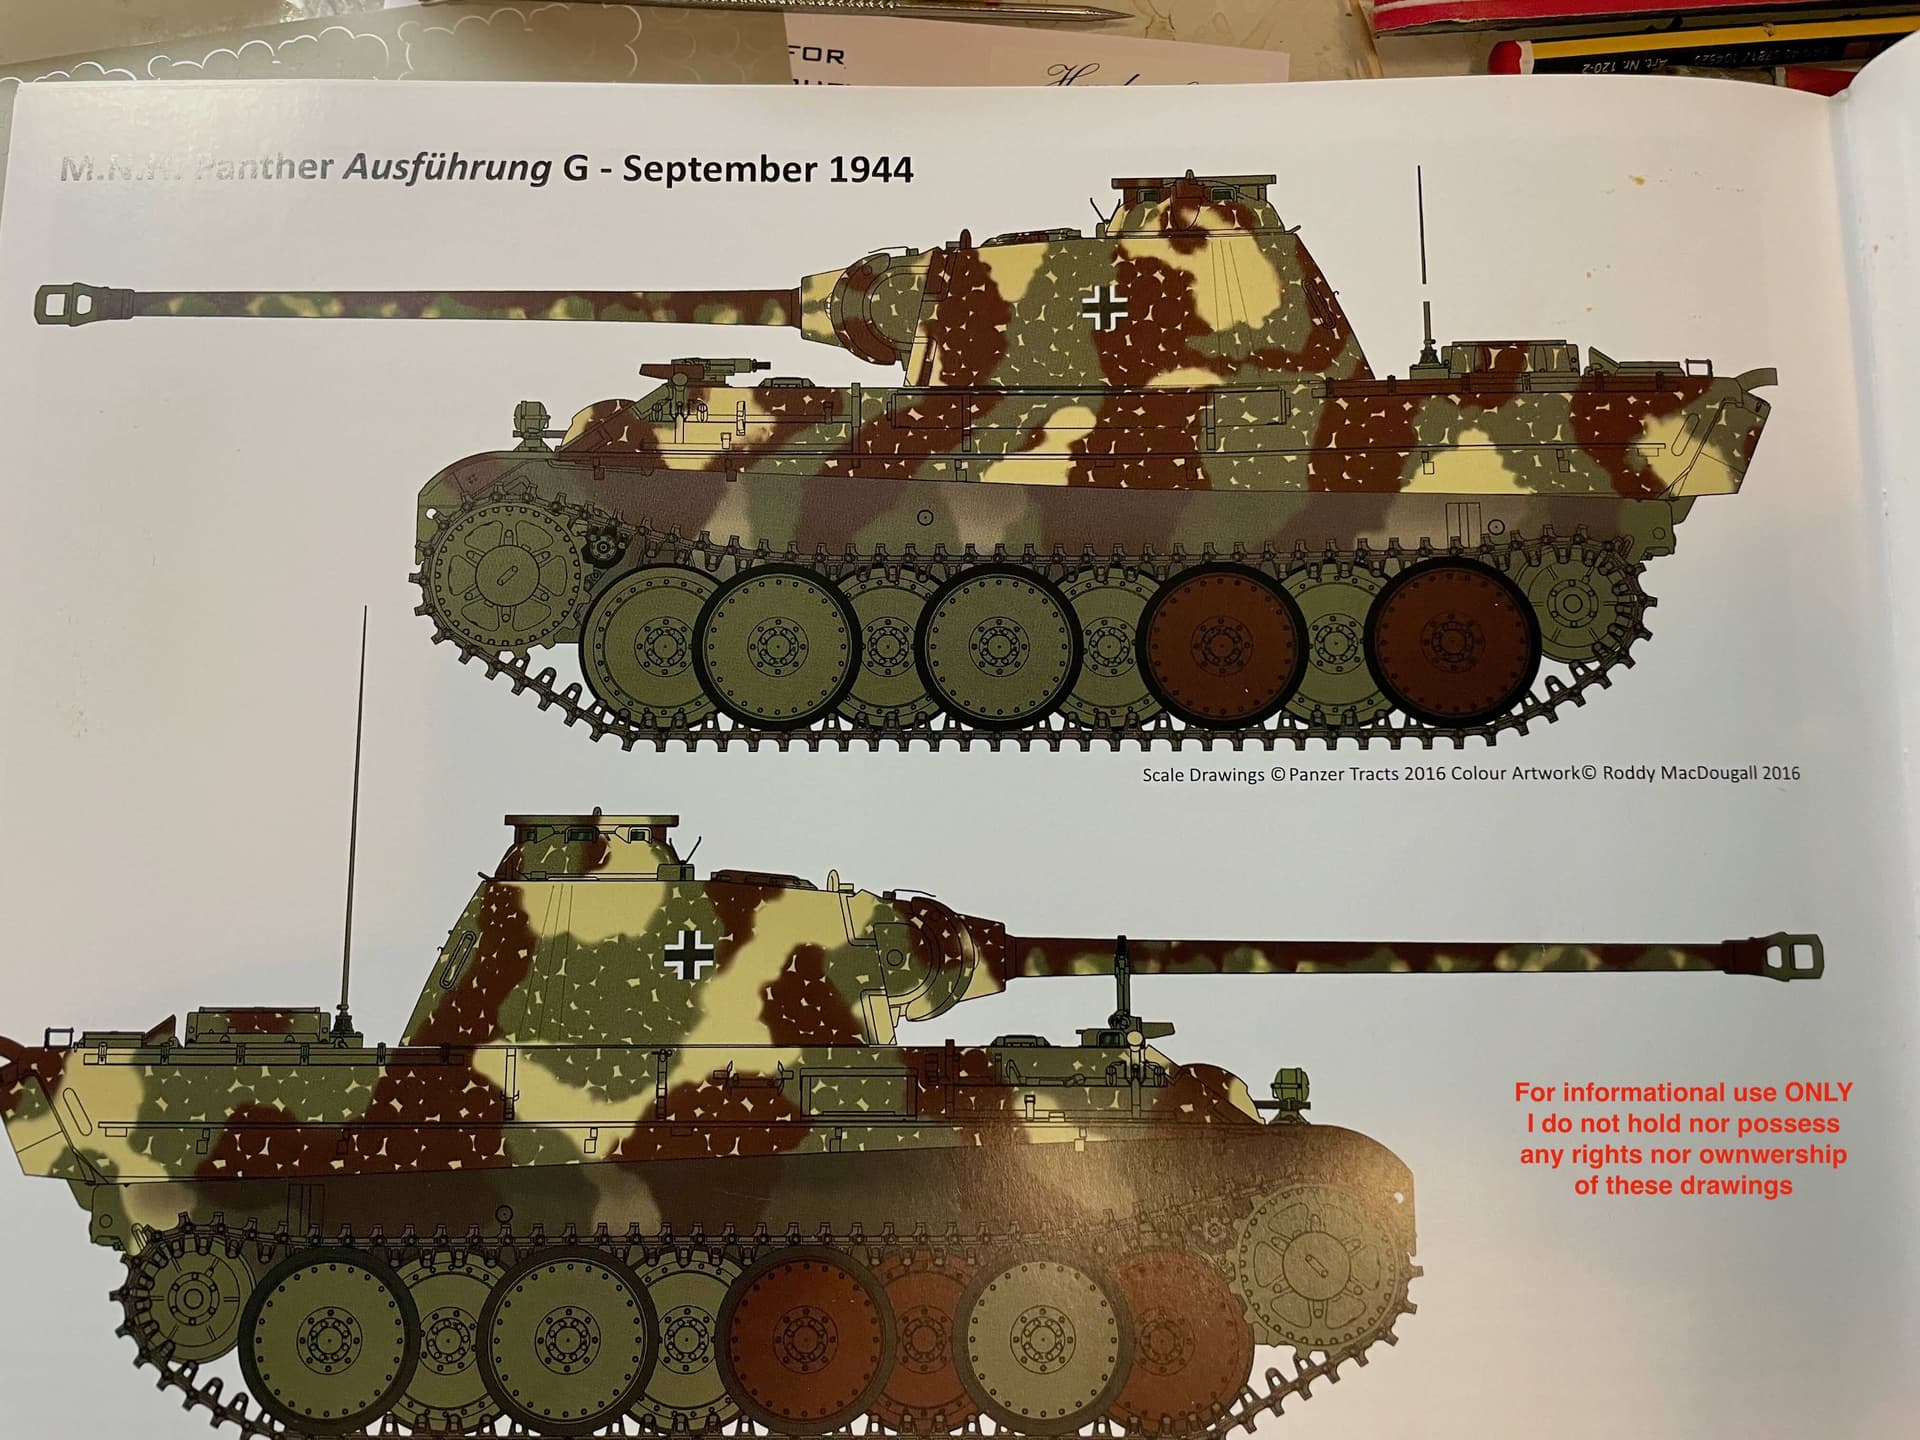
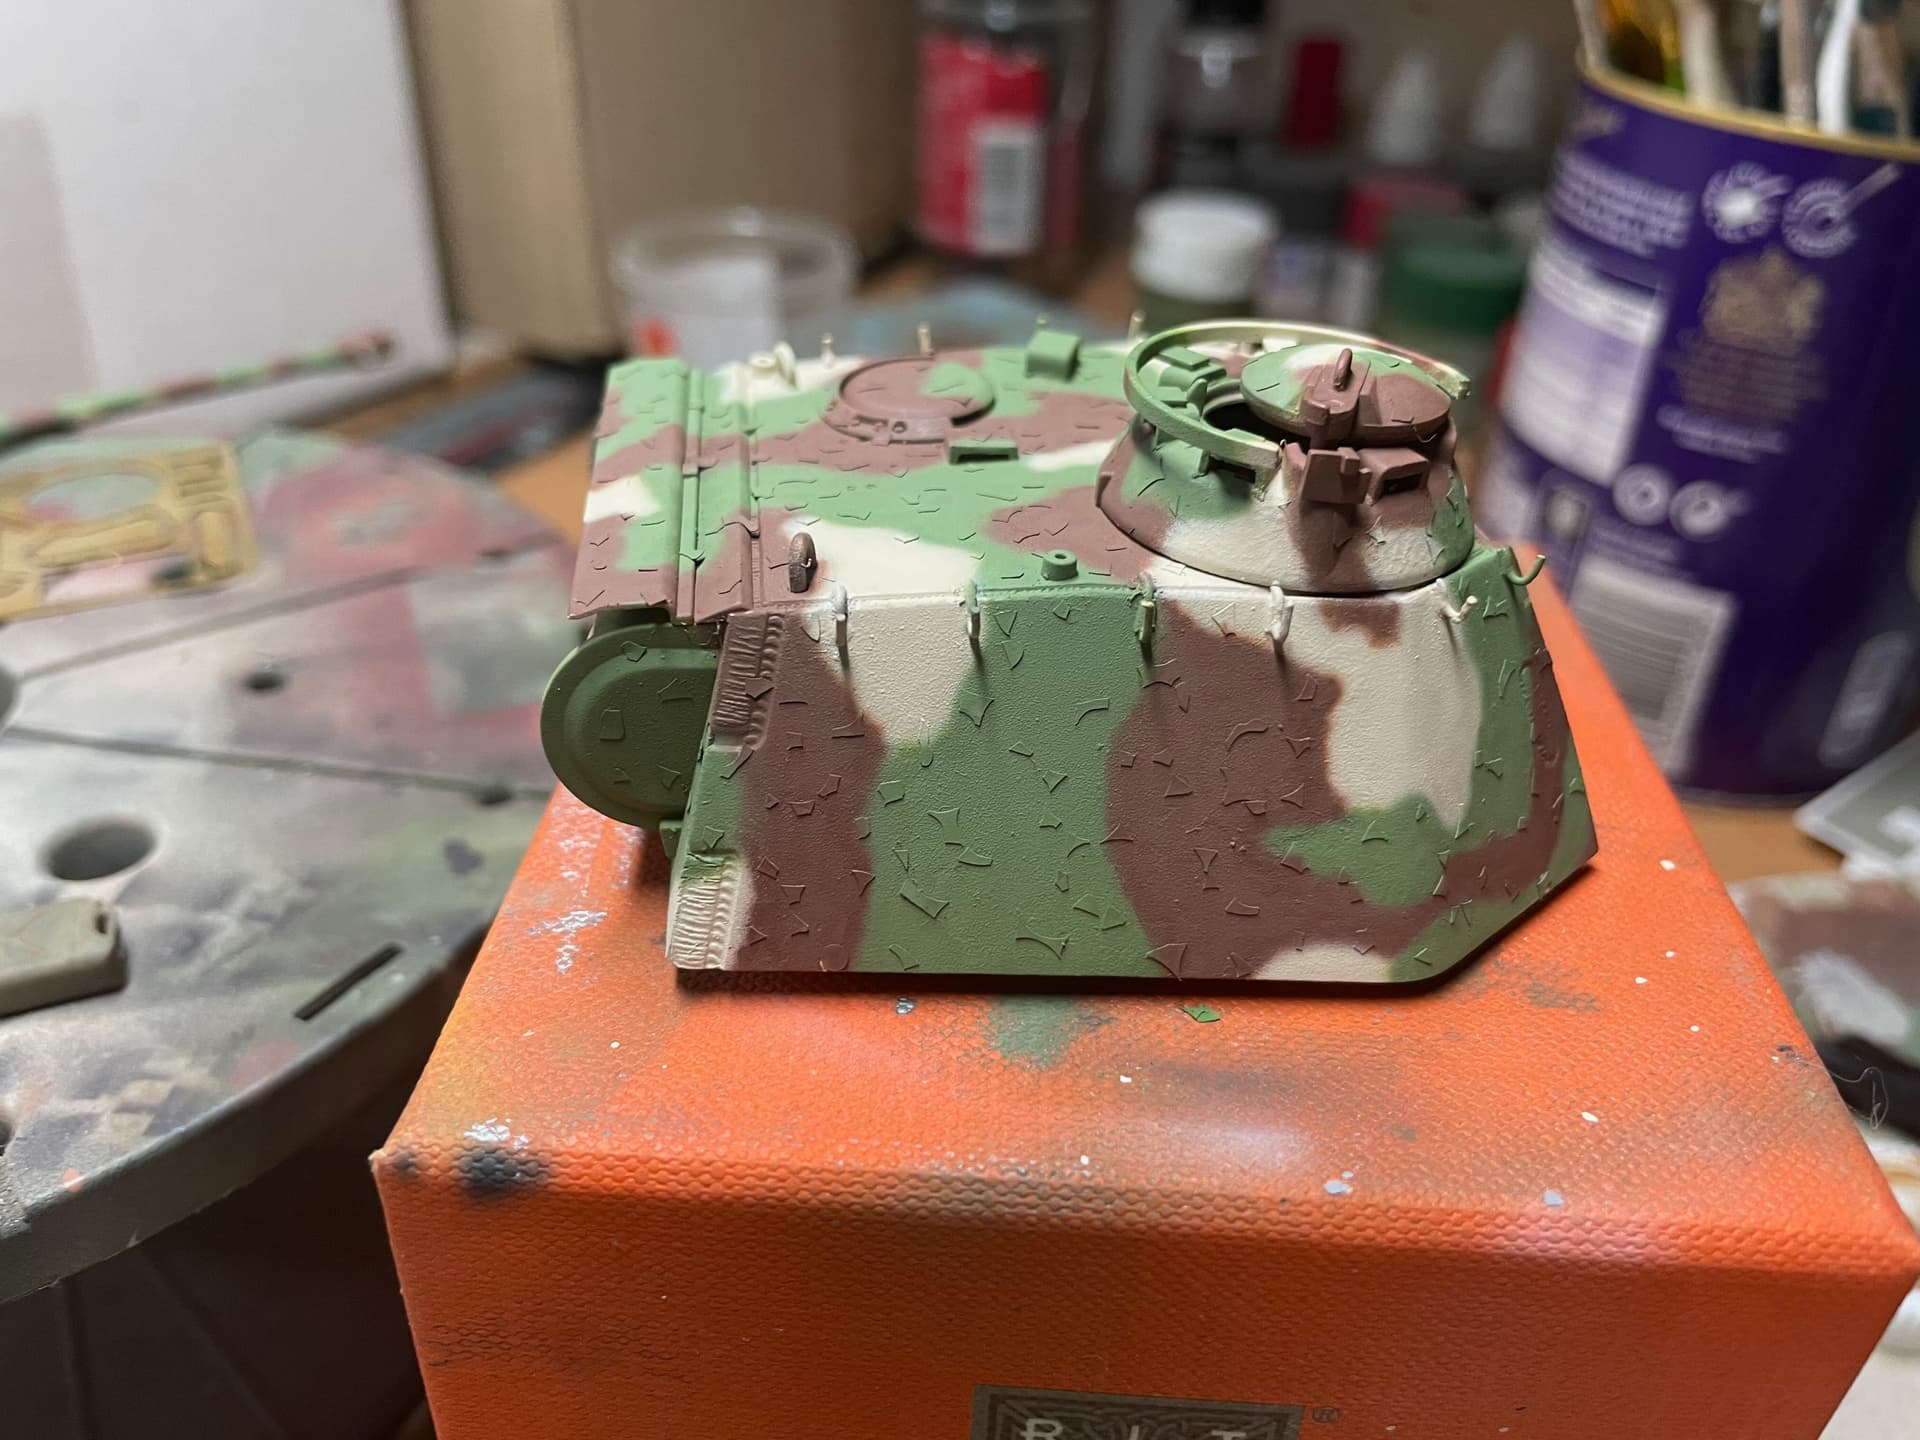
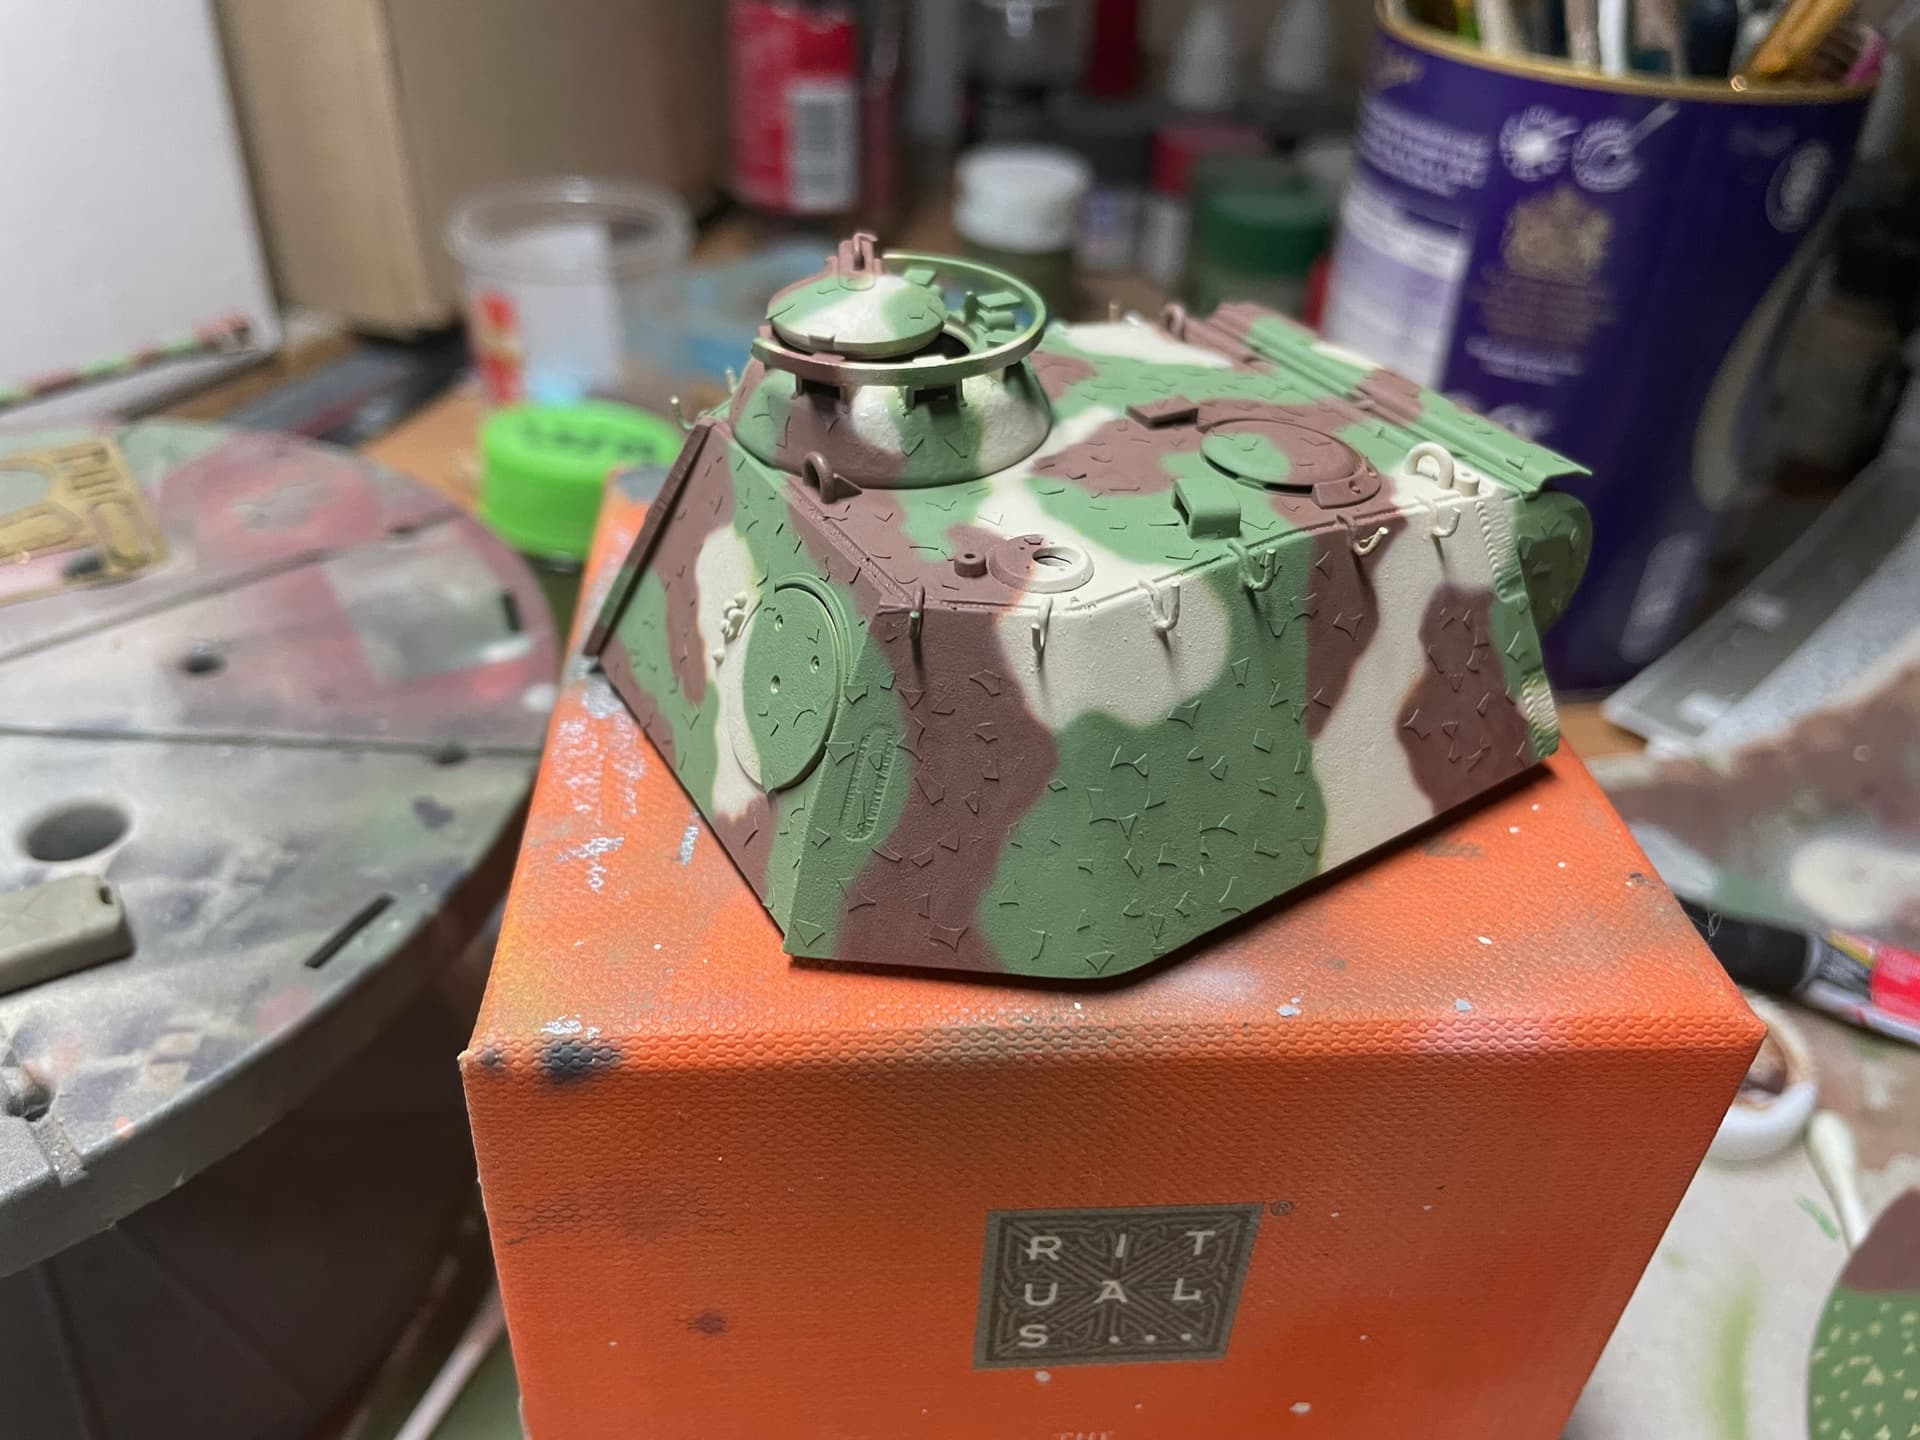
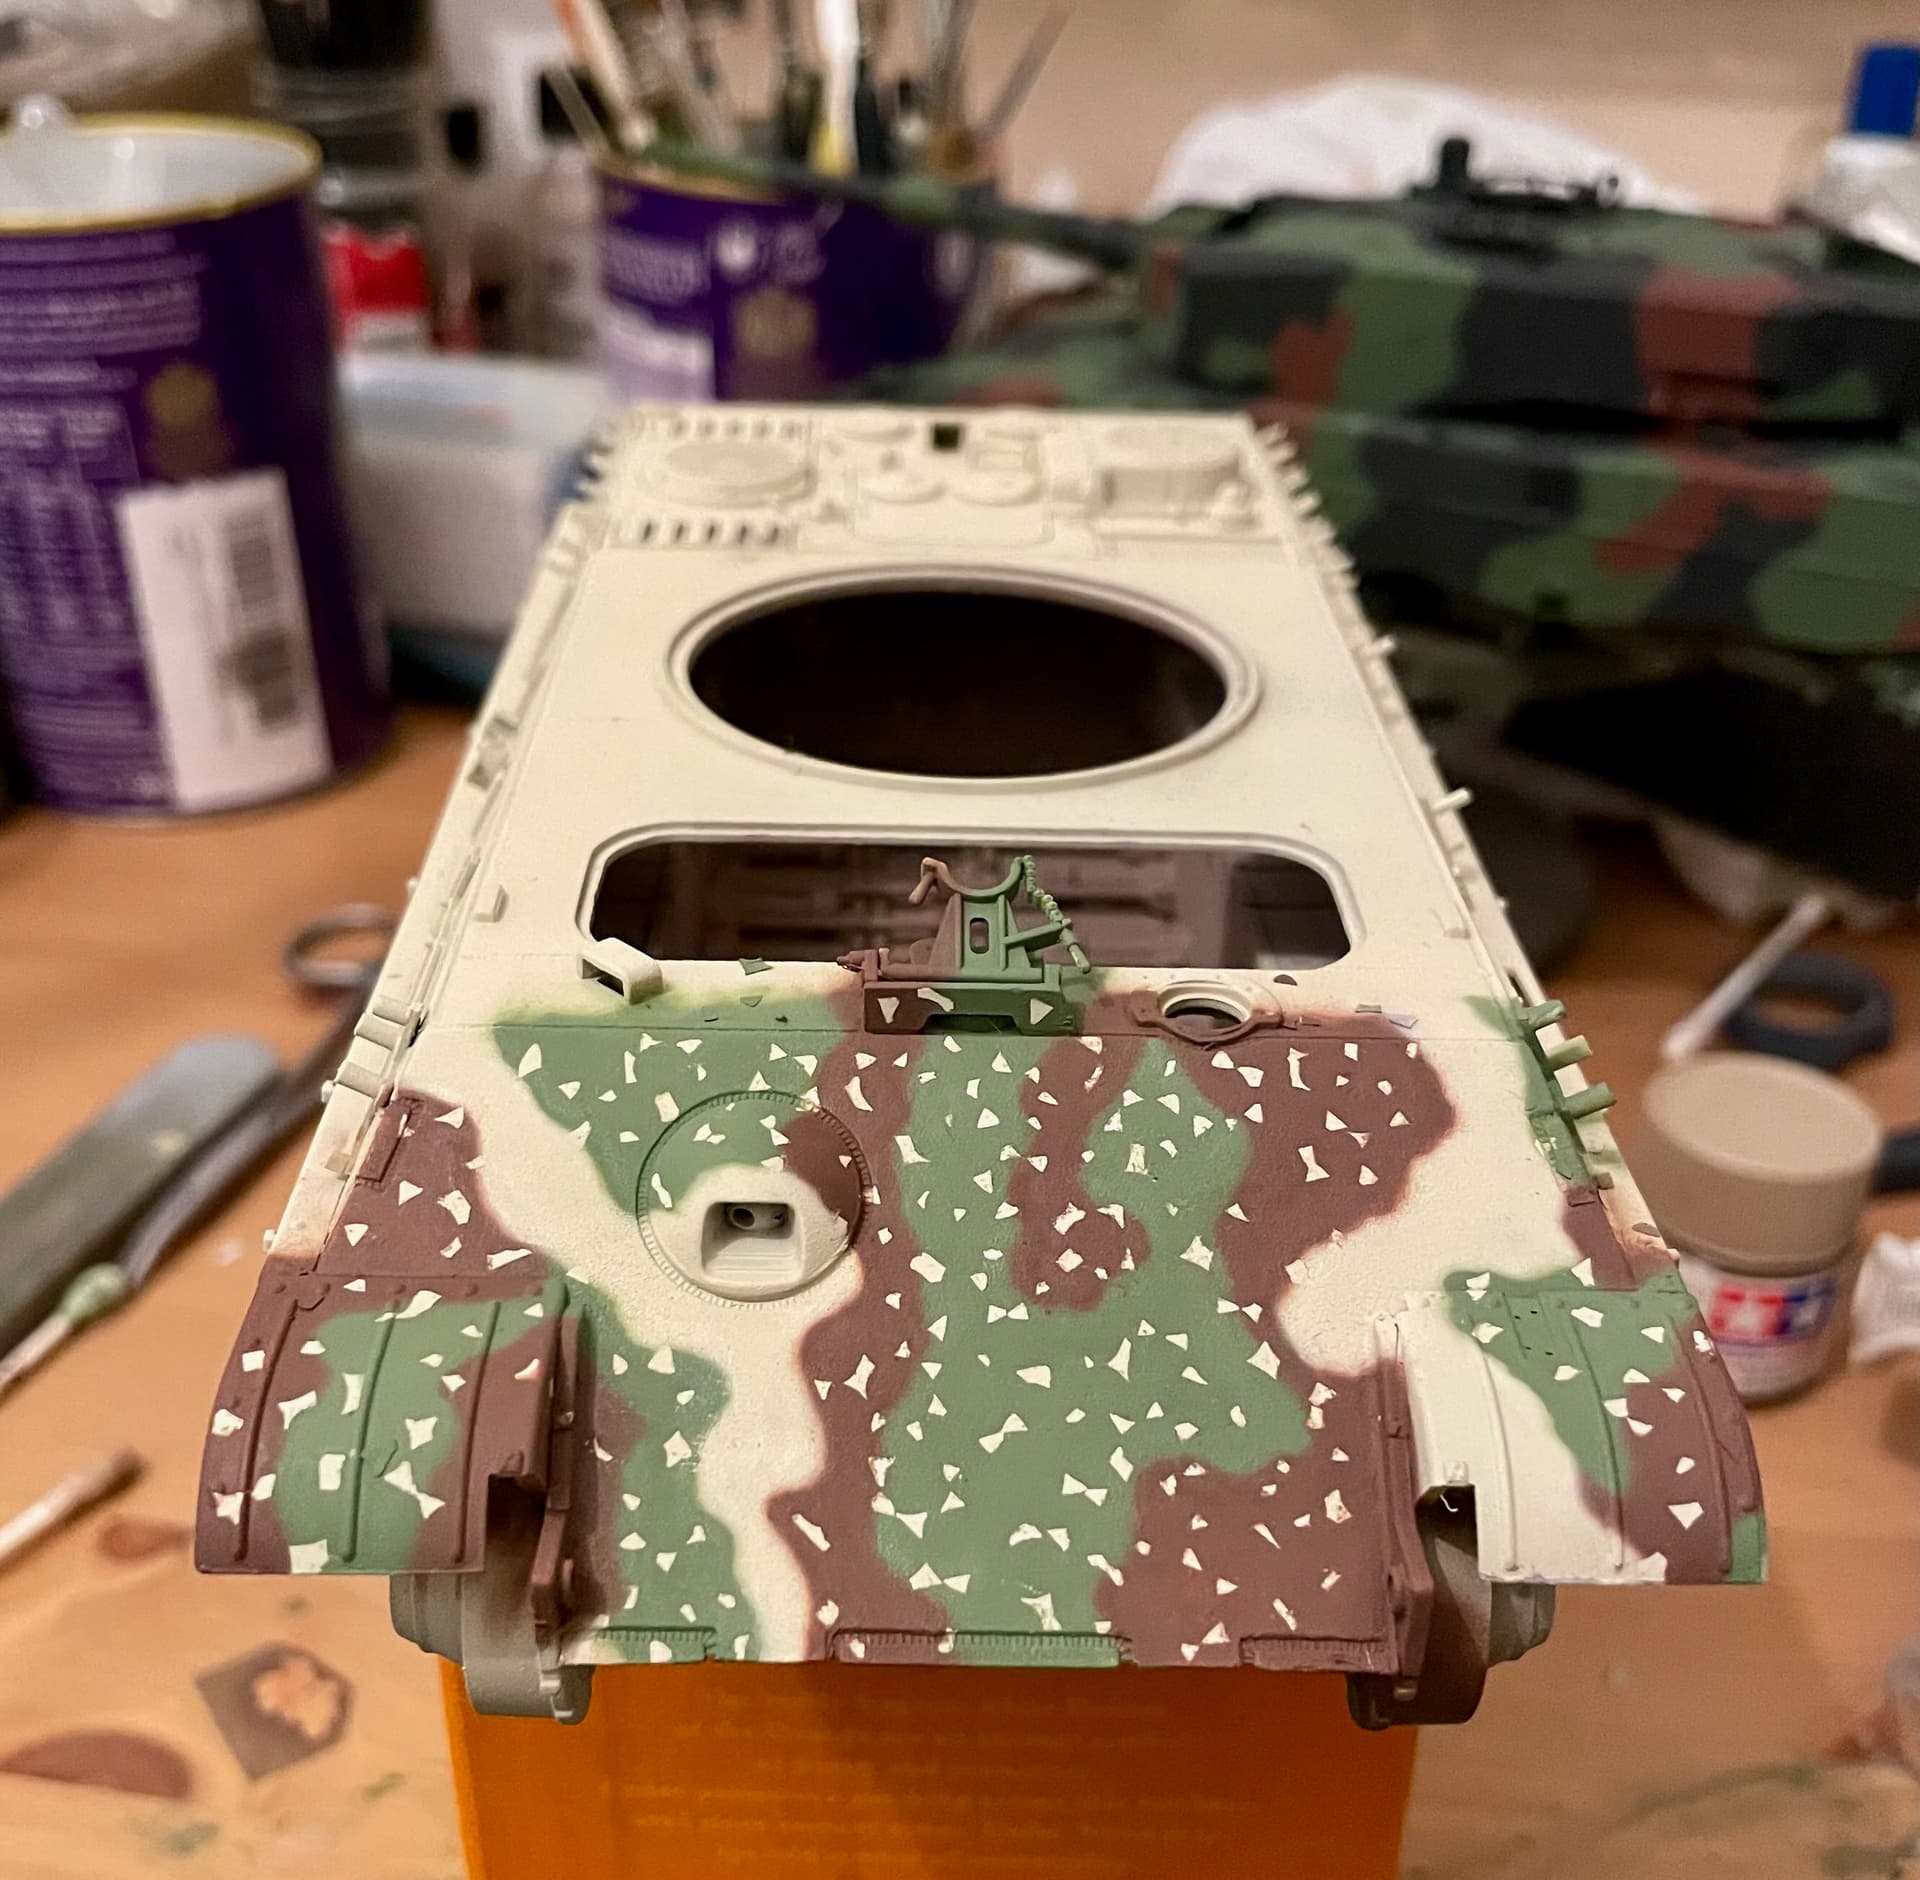
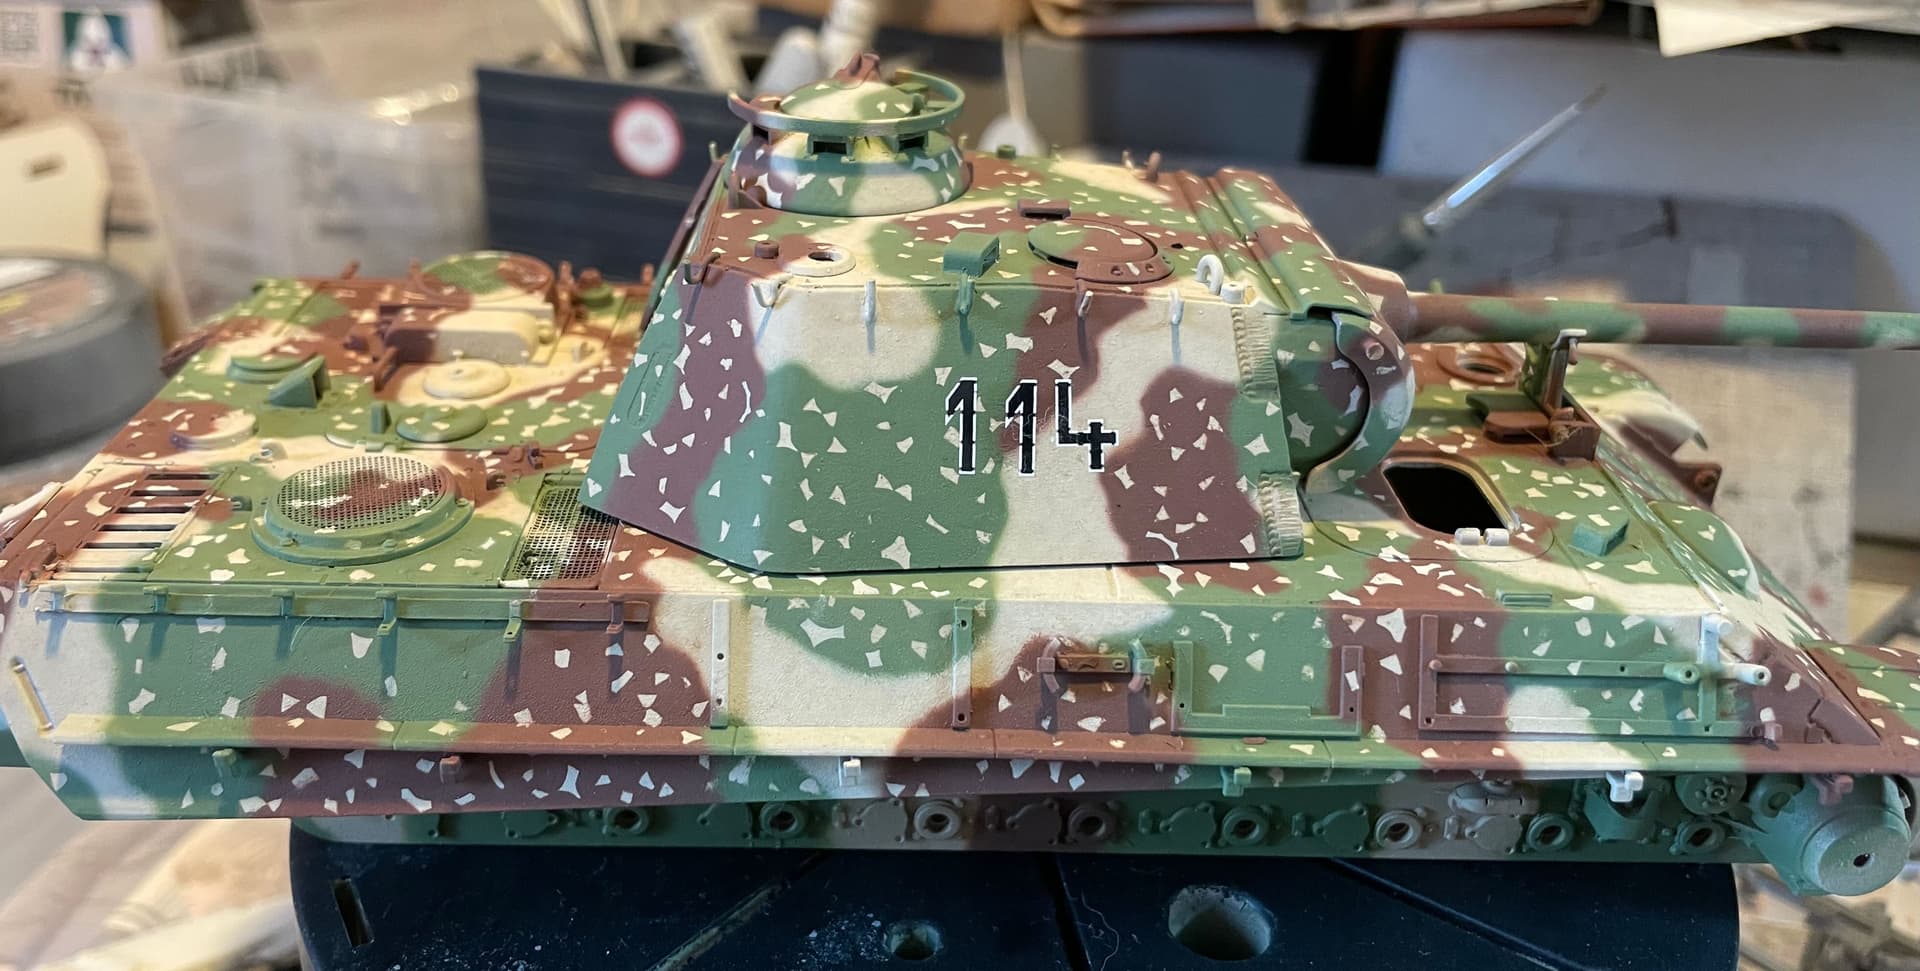
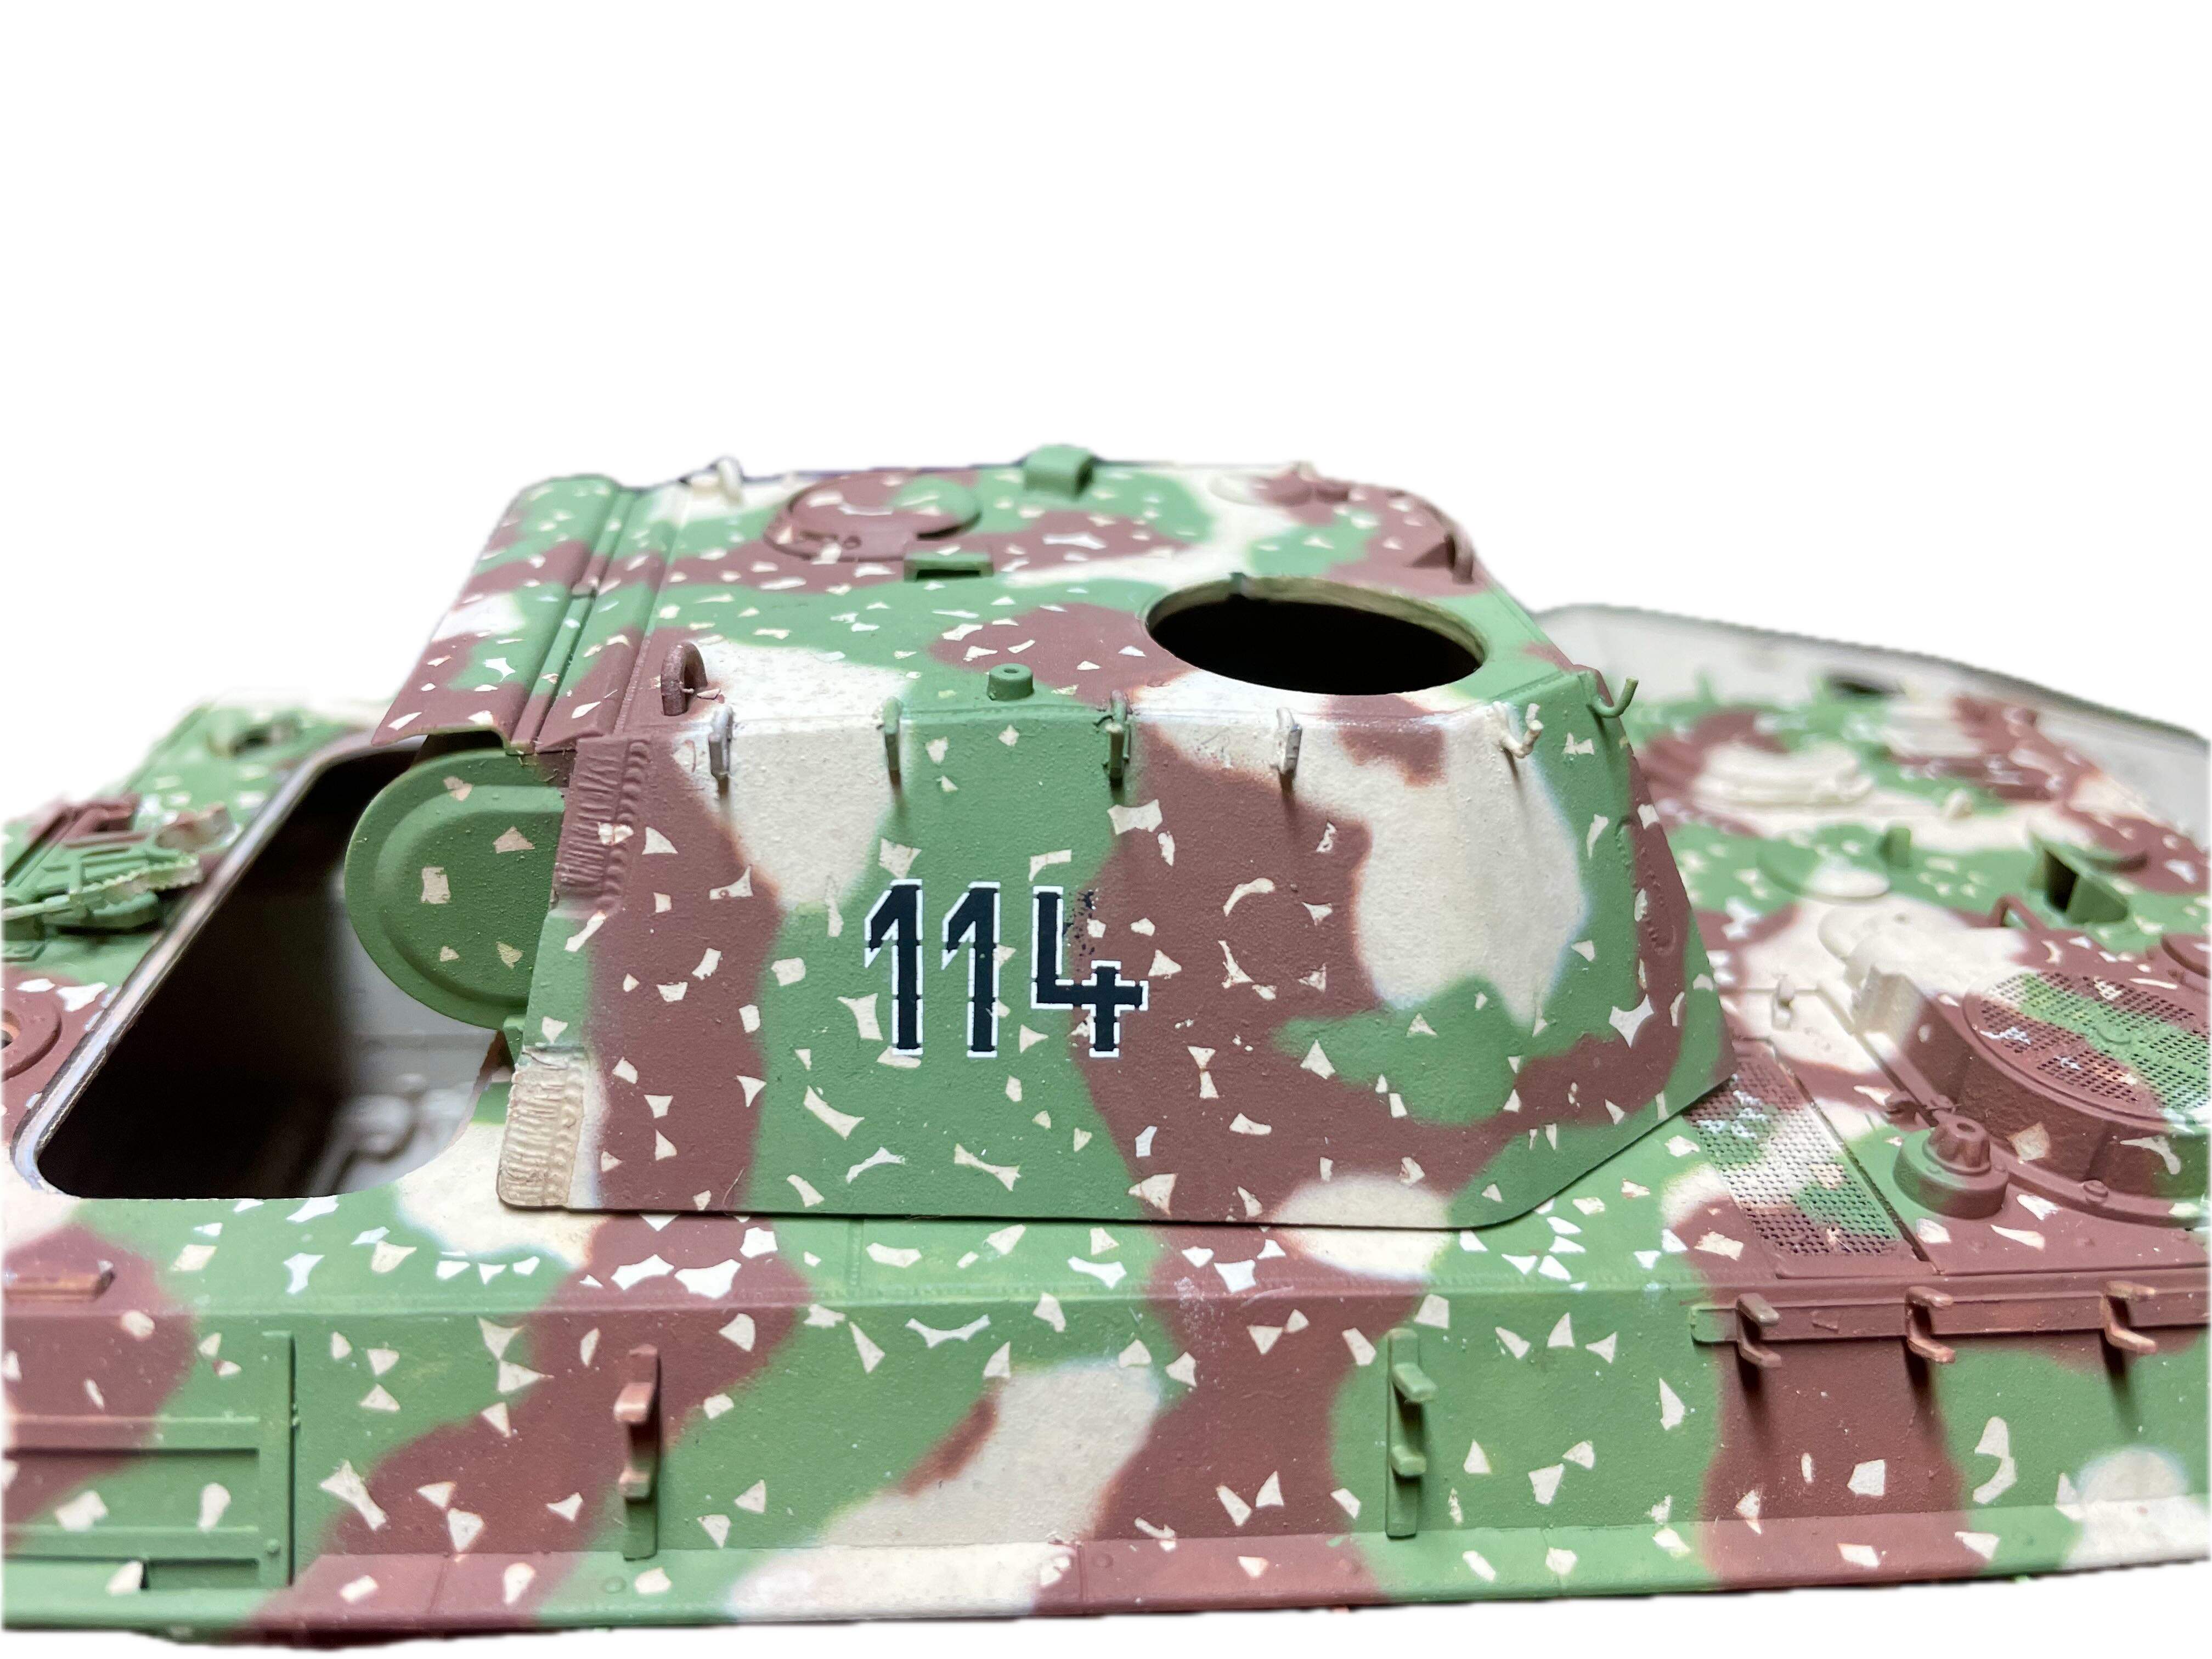
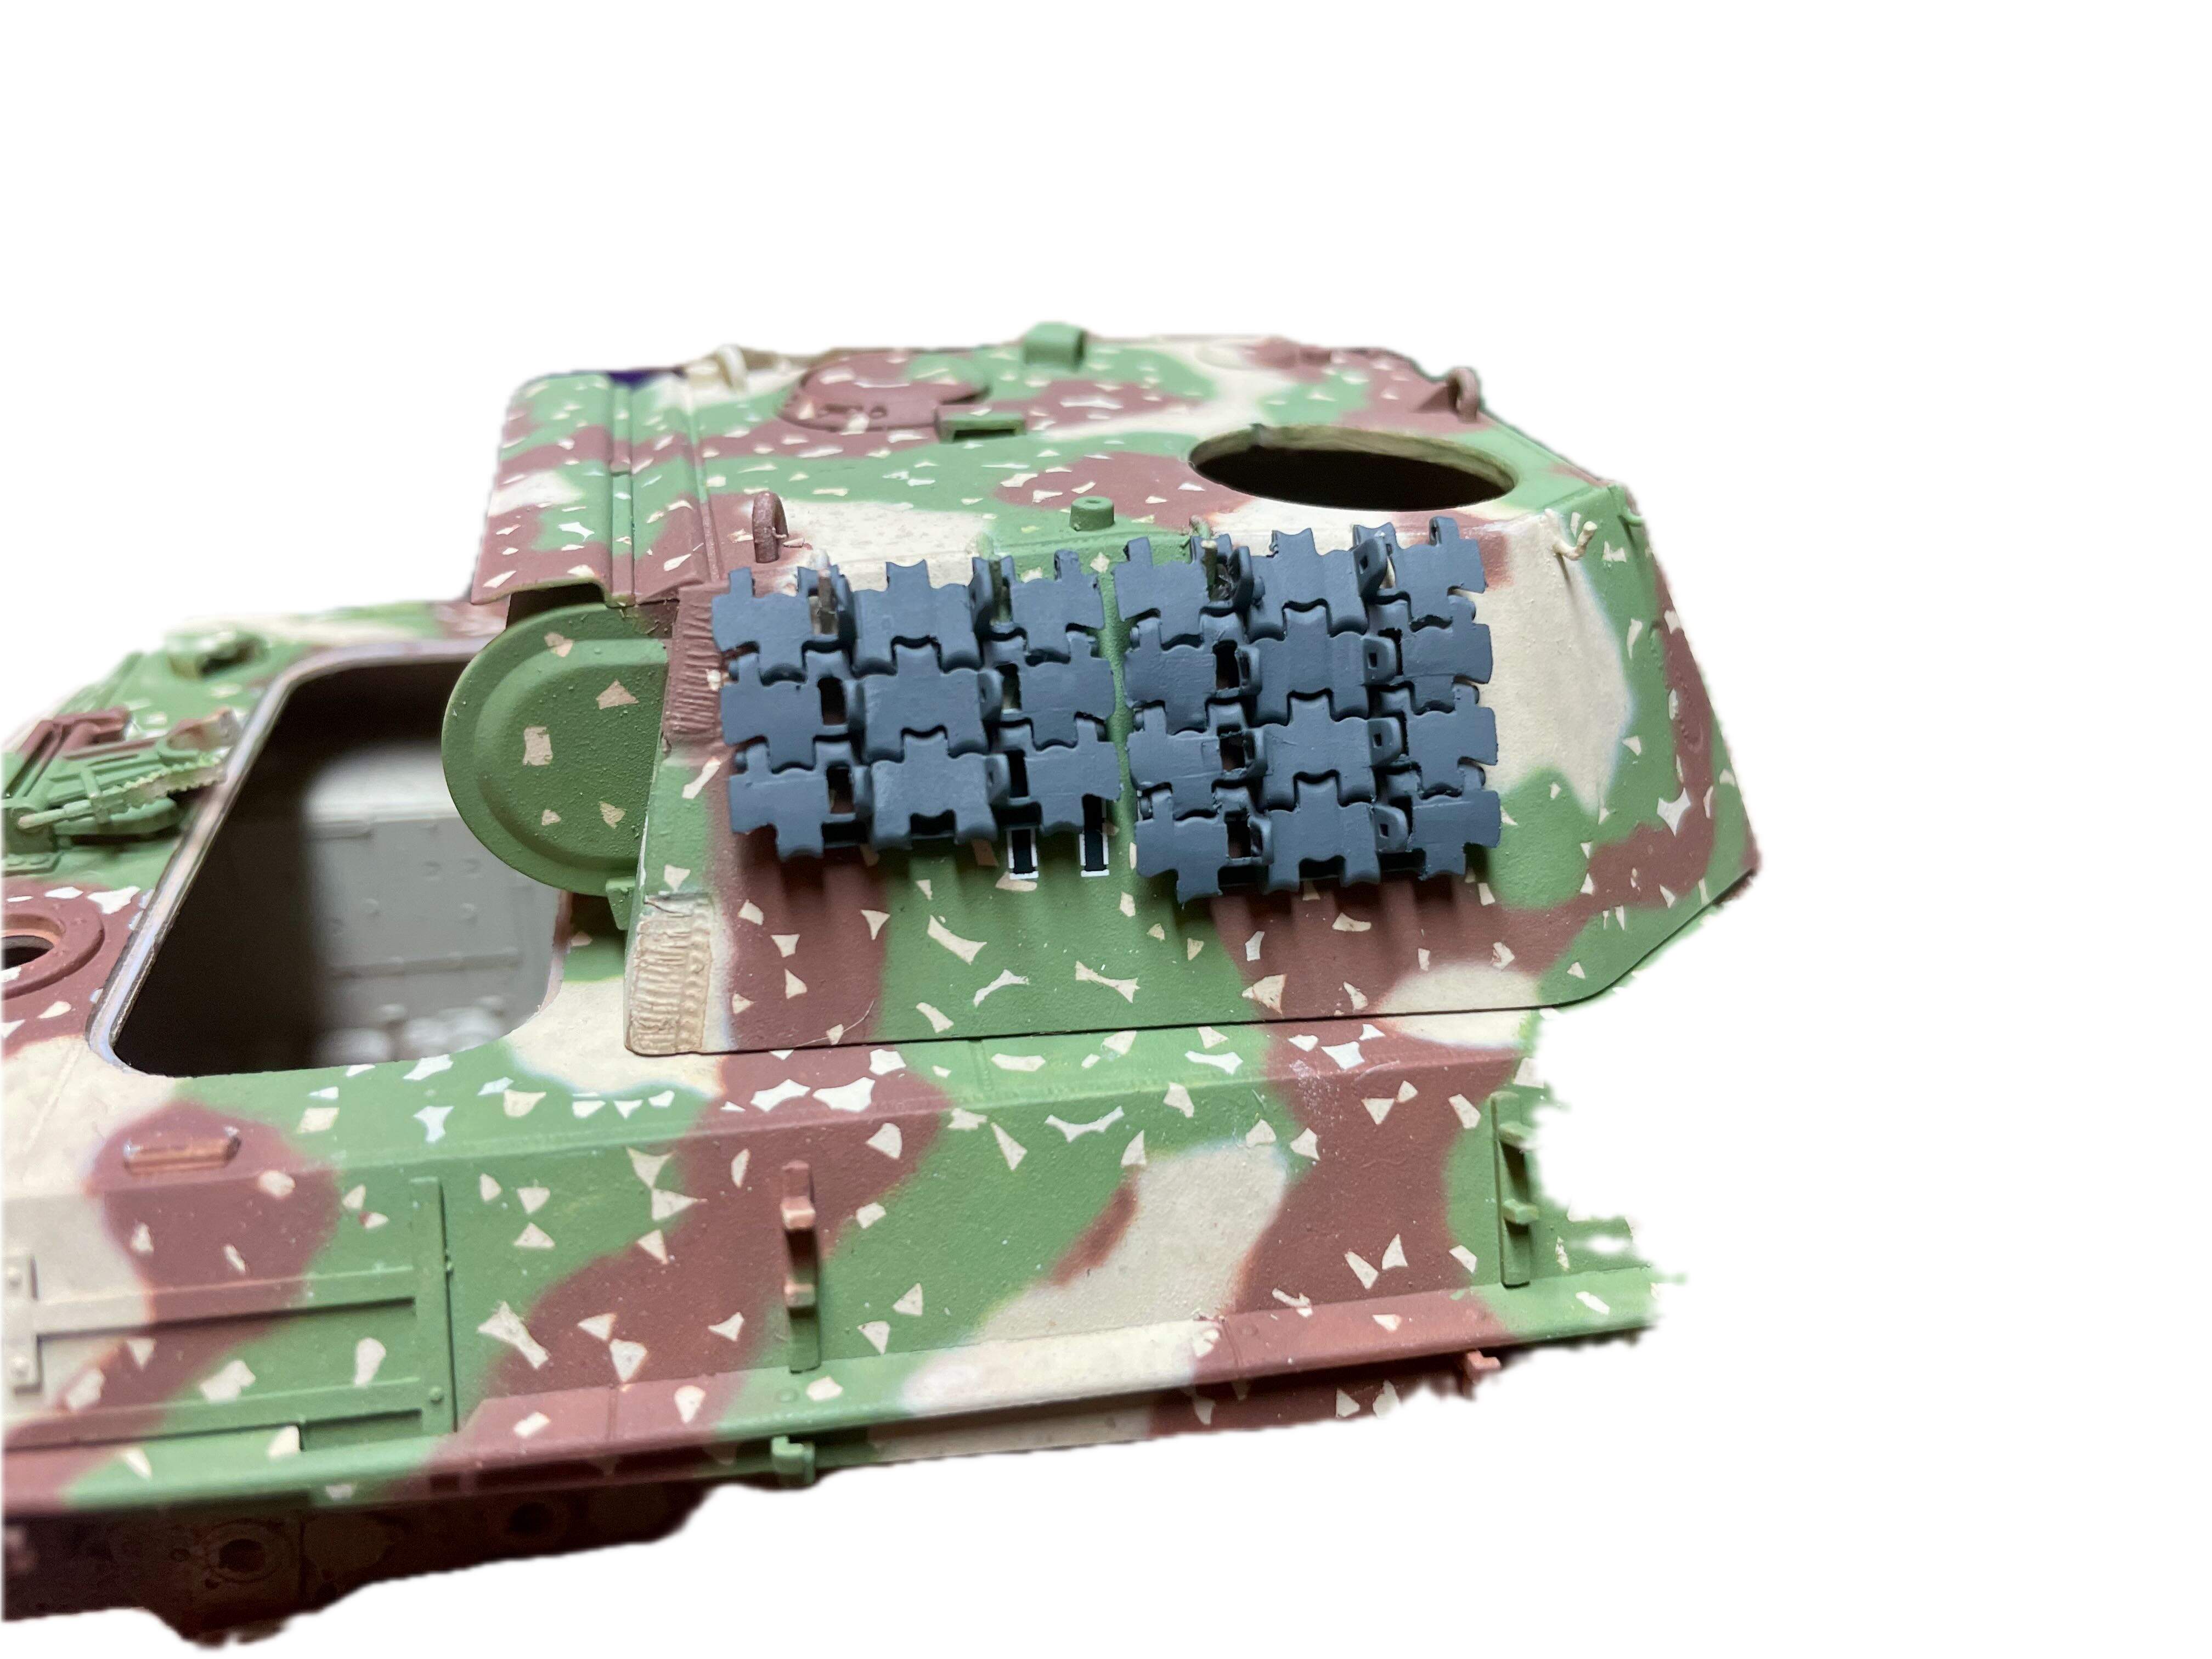
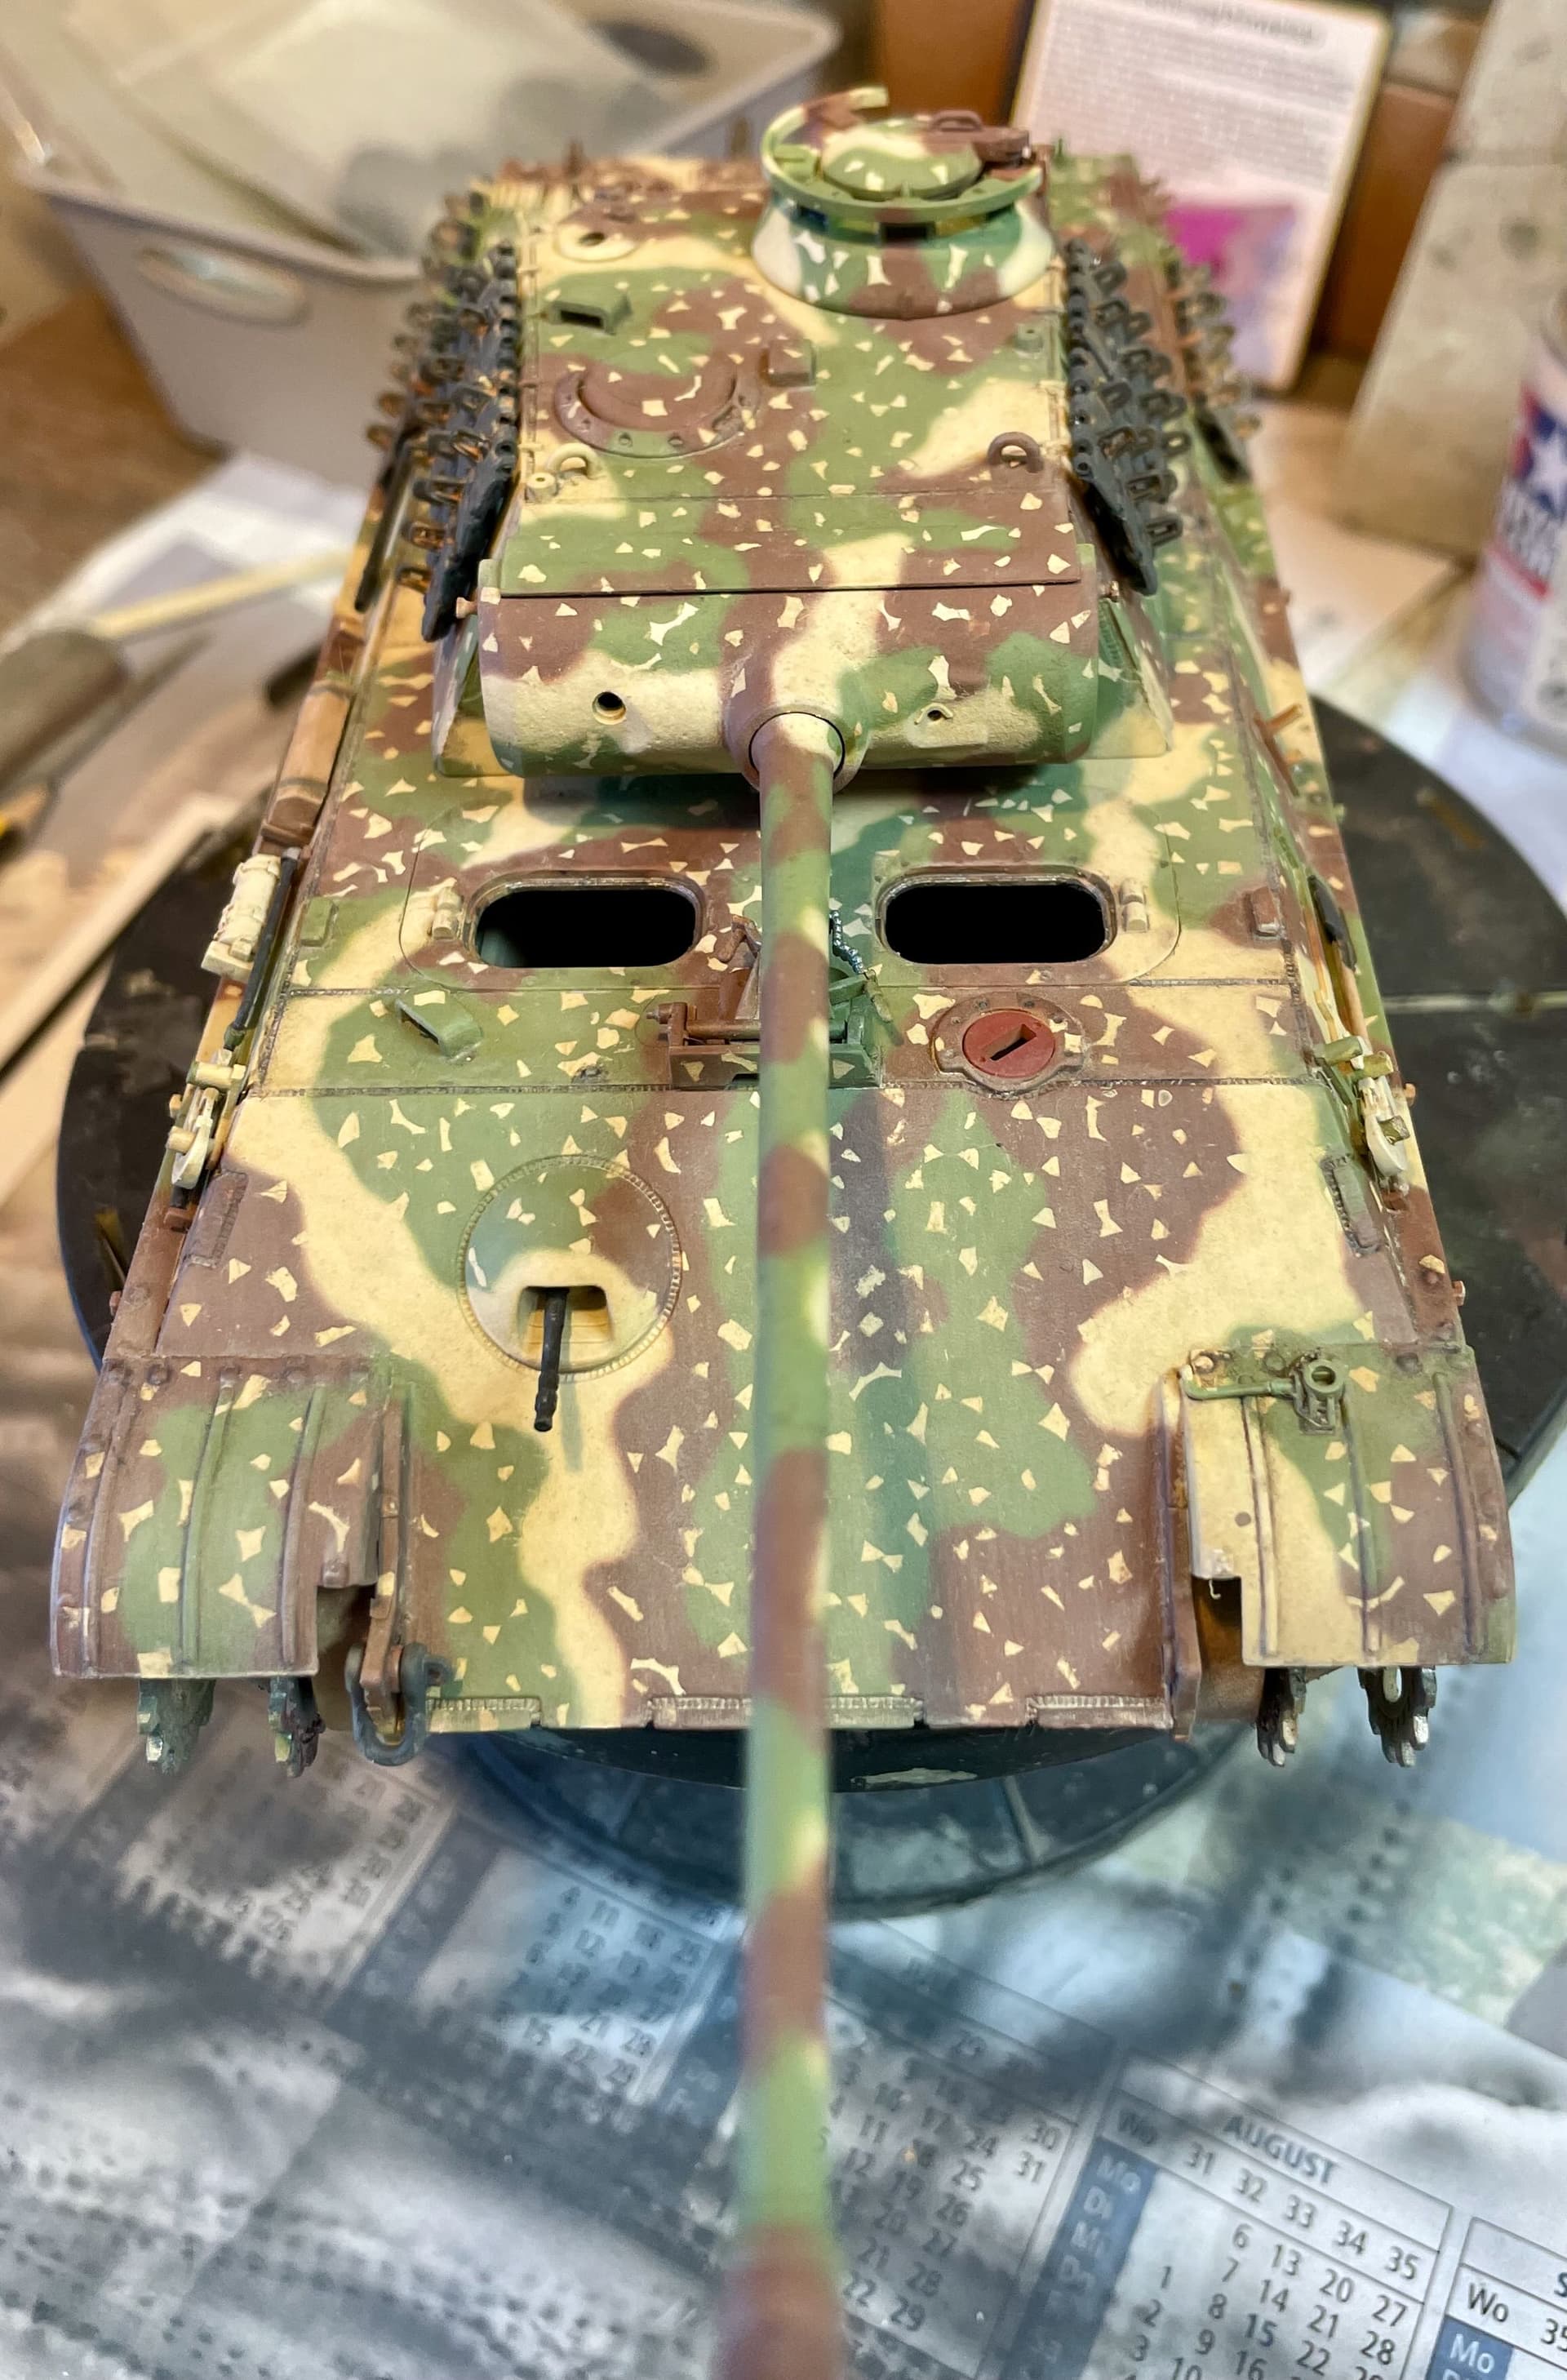
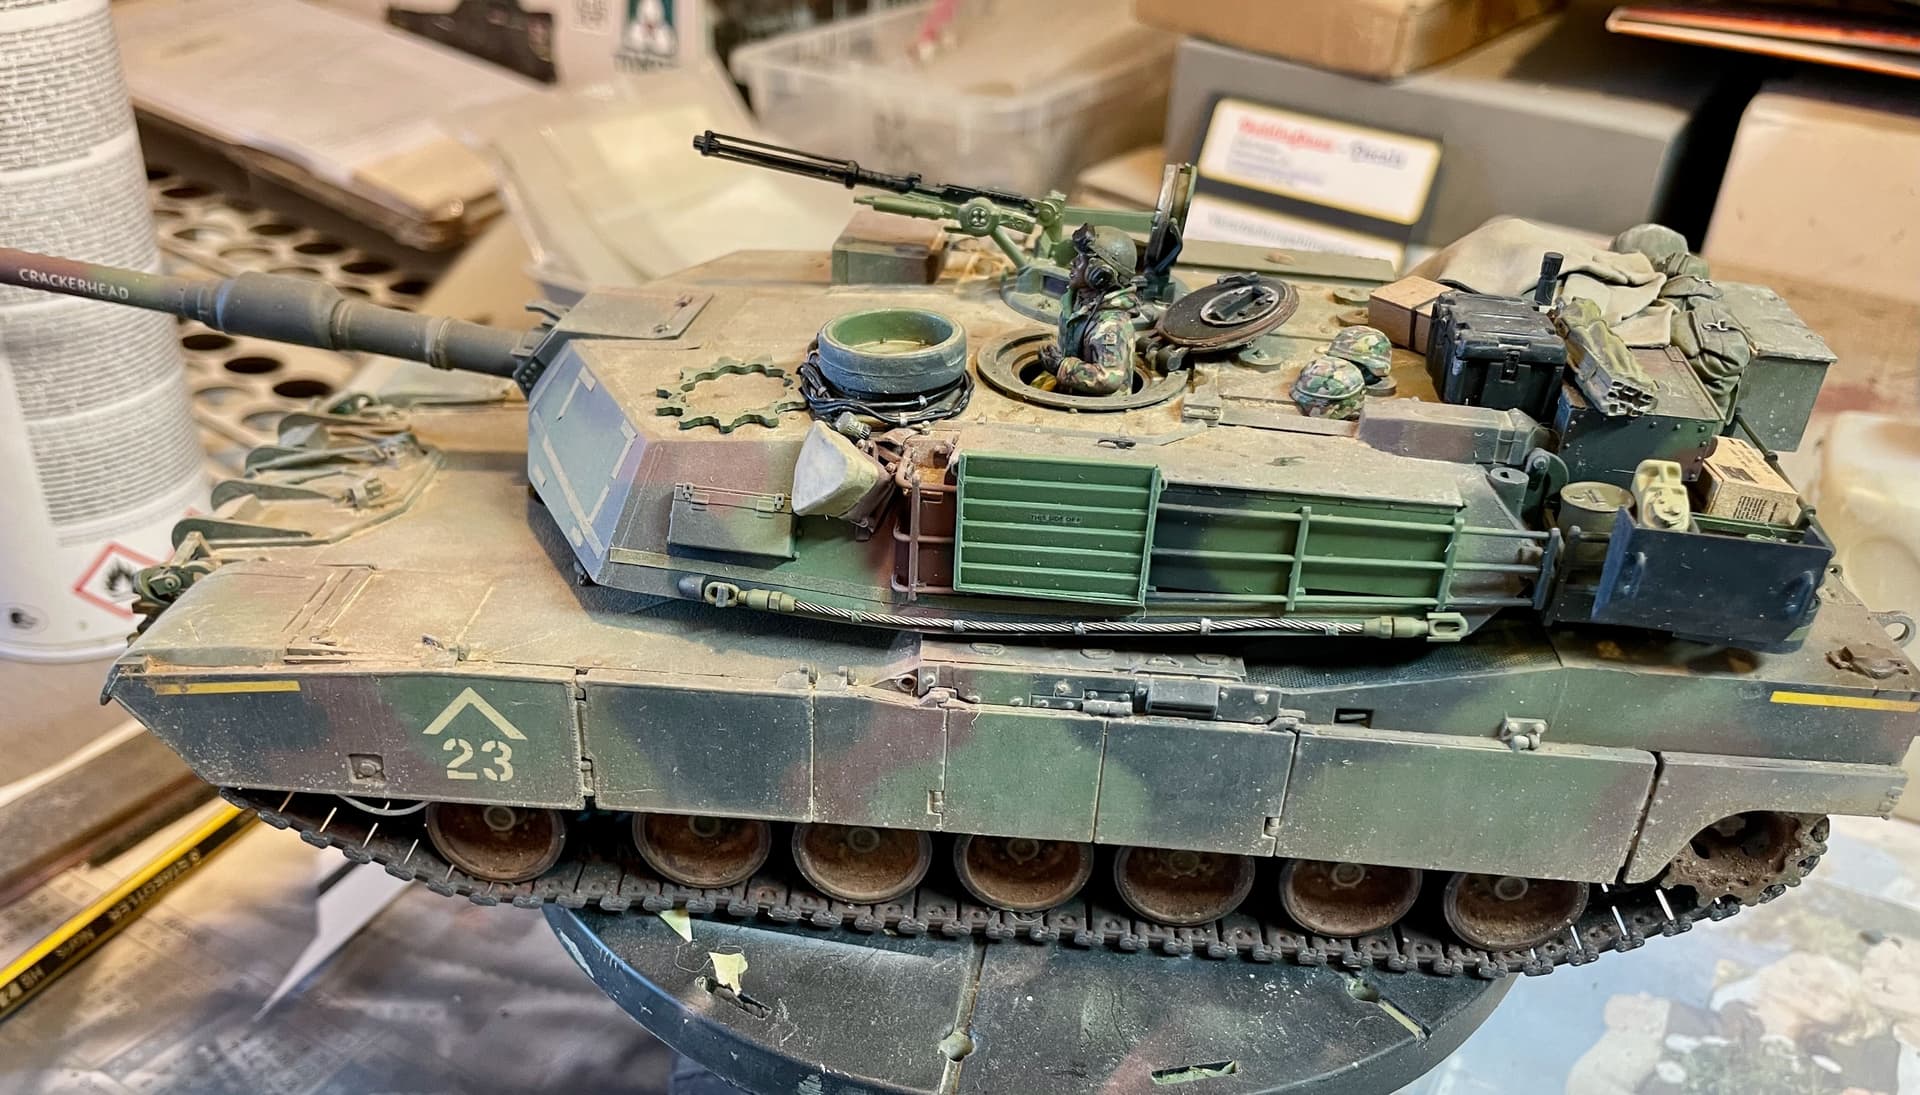
Here is the result … I’ll add some individual “splinters”. here and there.
Took some artistic liberties with the brown spot on the right top corner … made it a little more “wavy” .
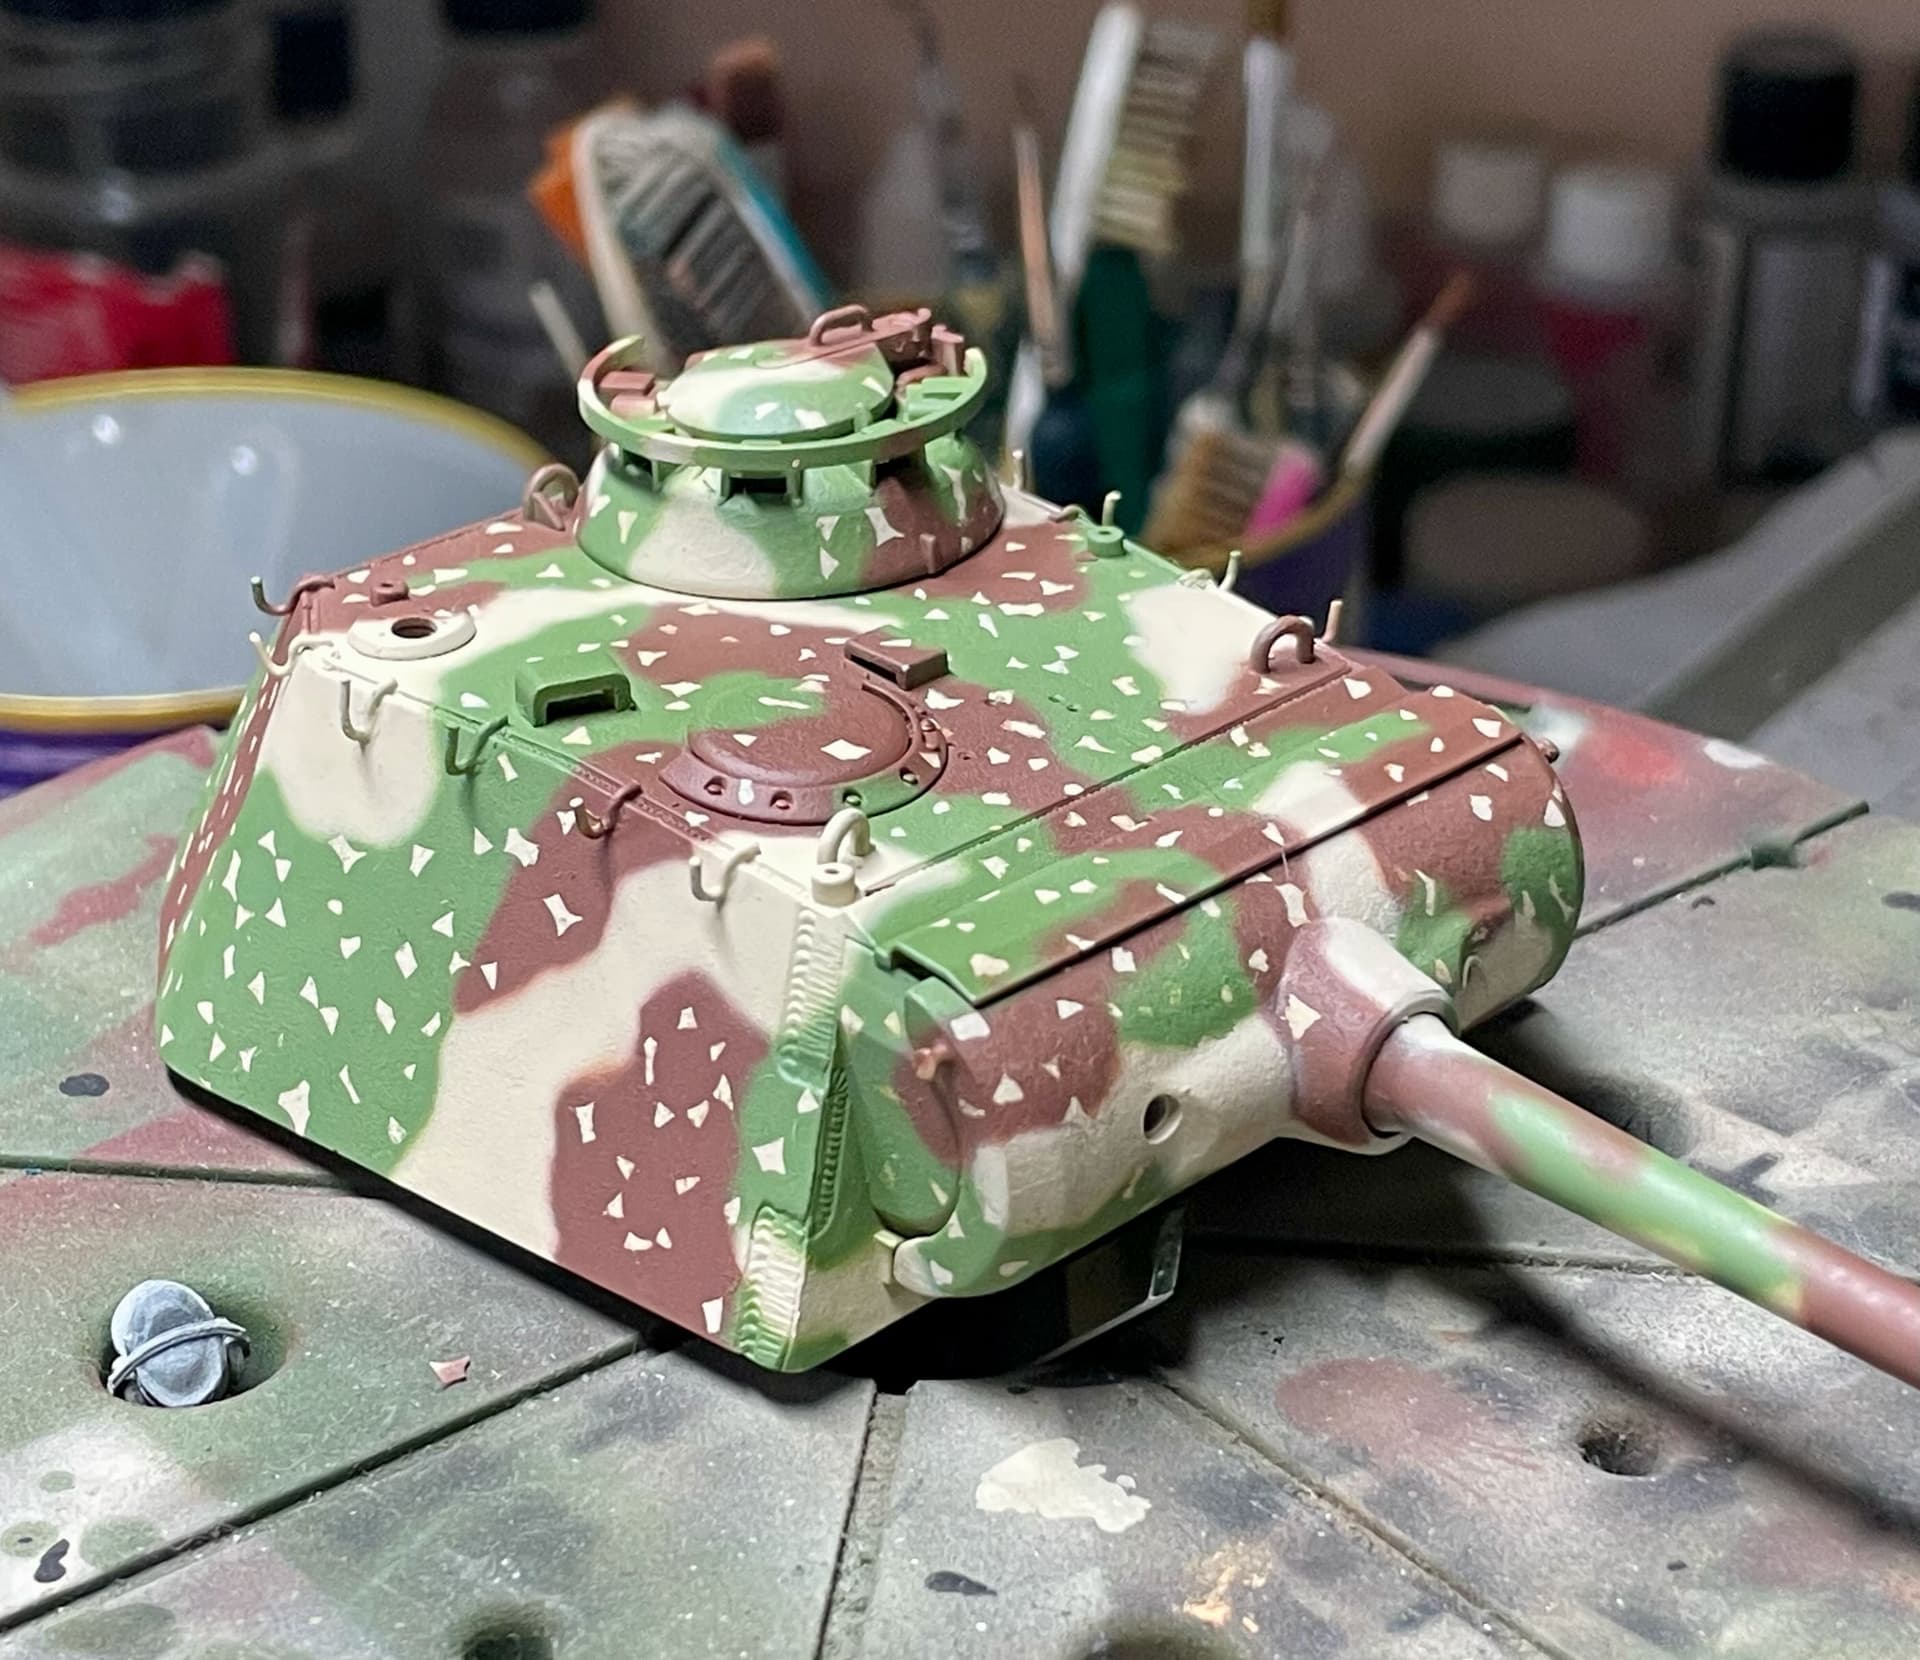
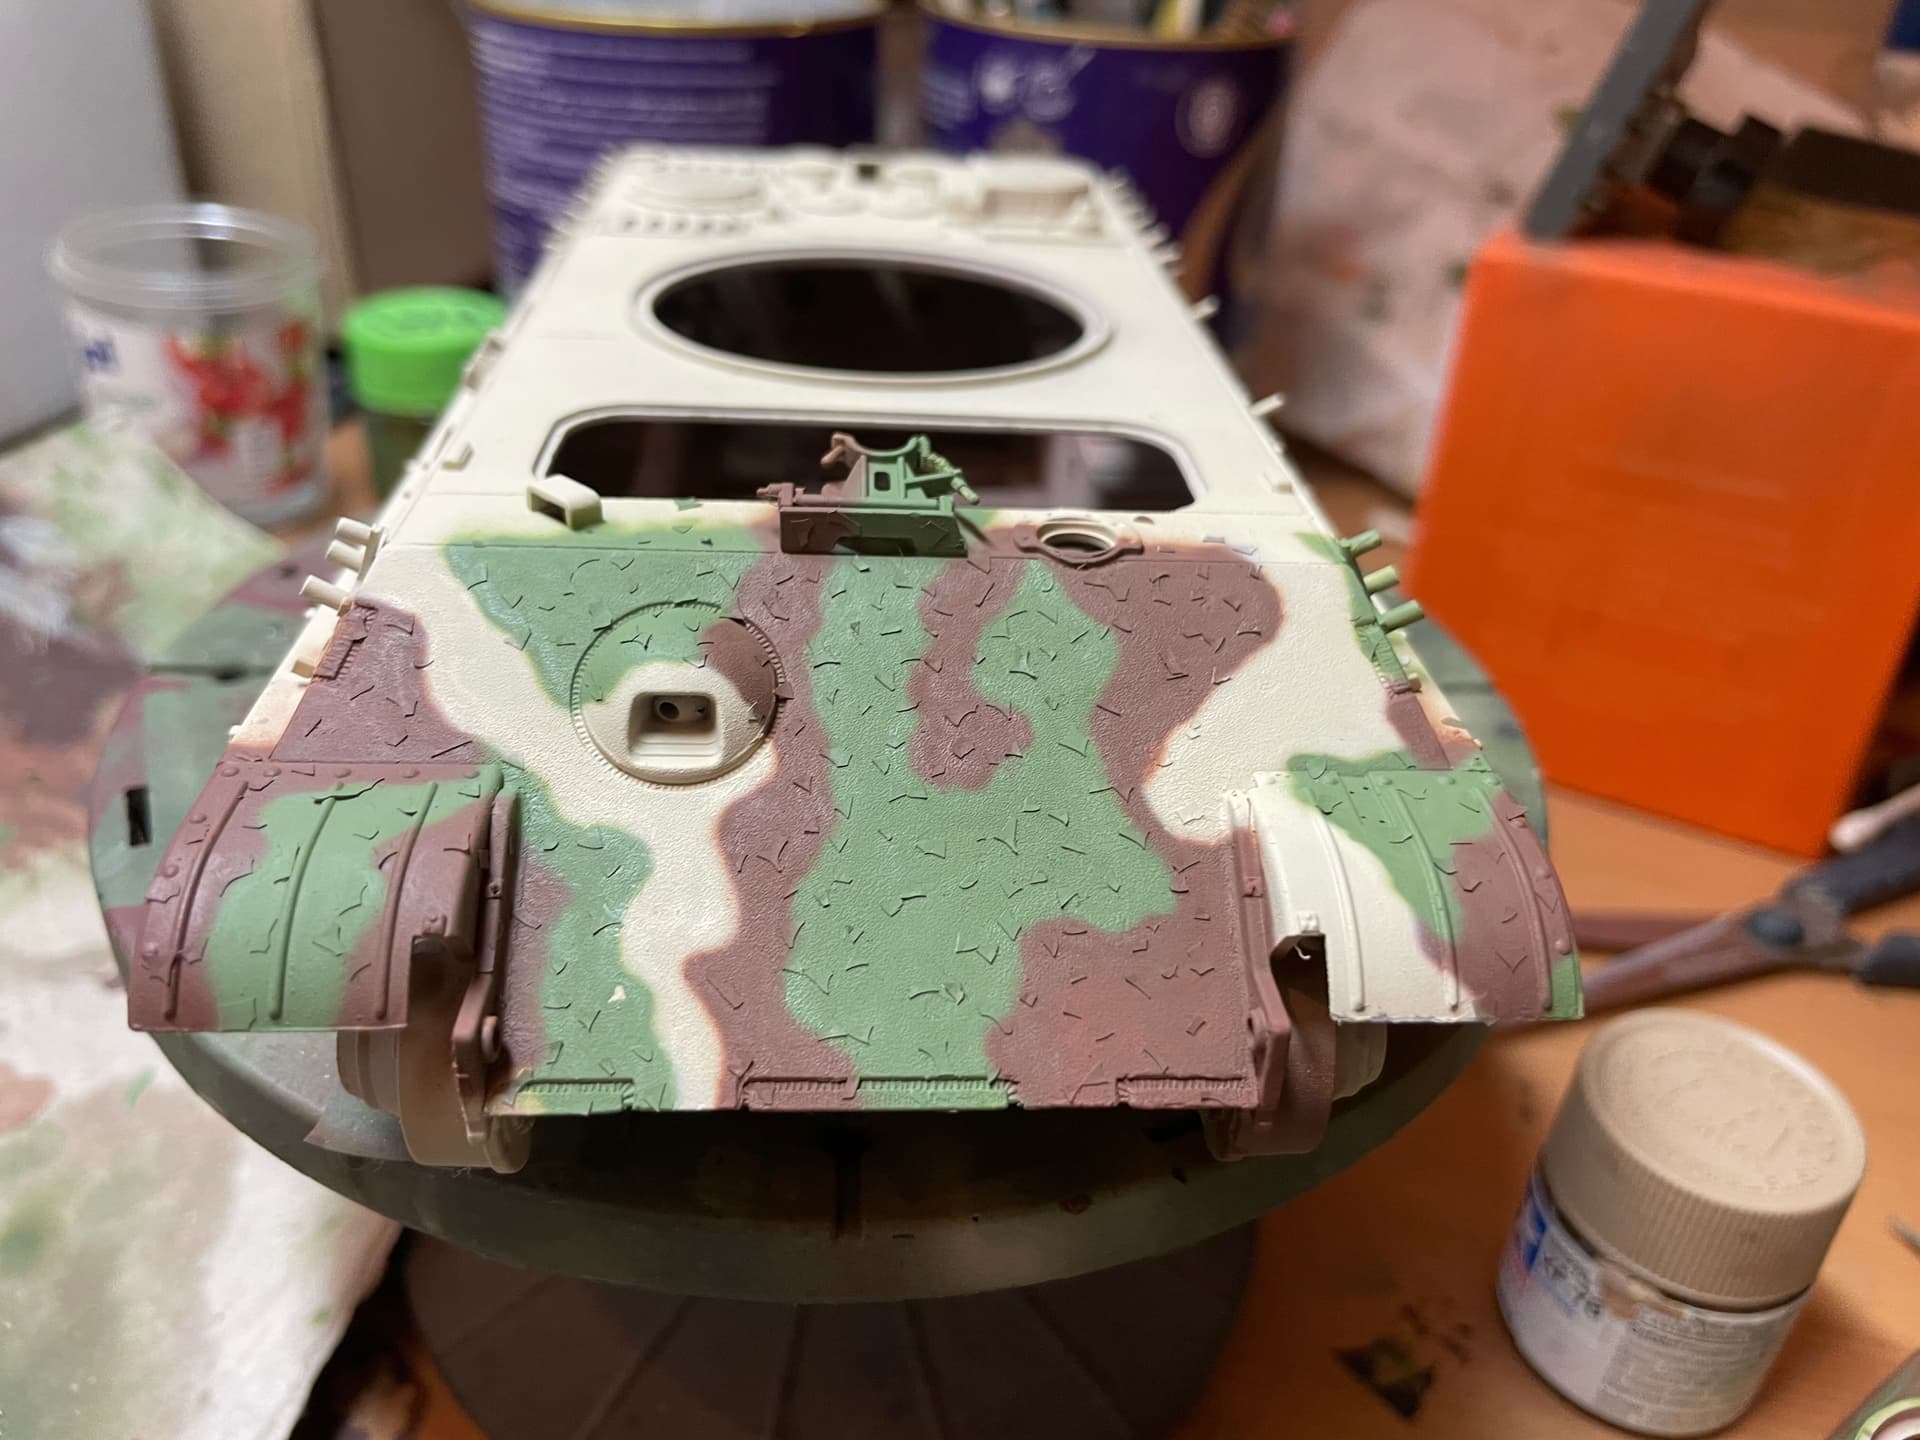
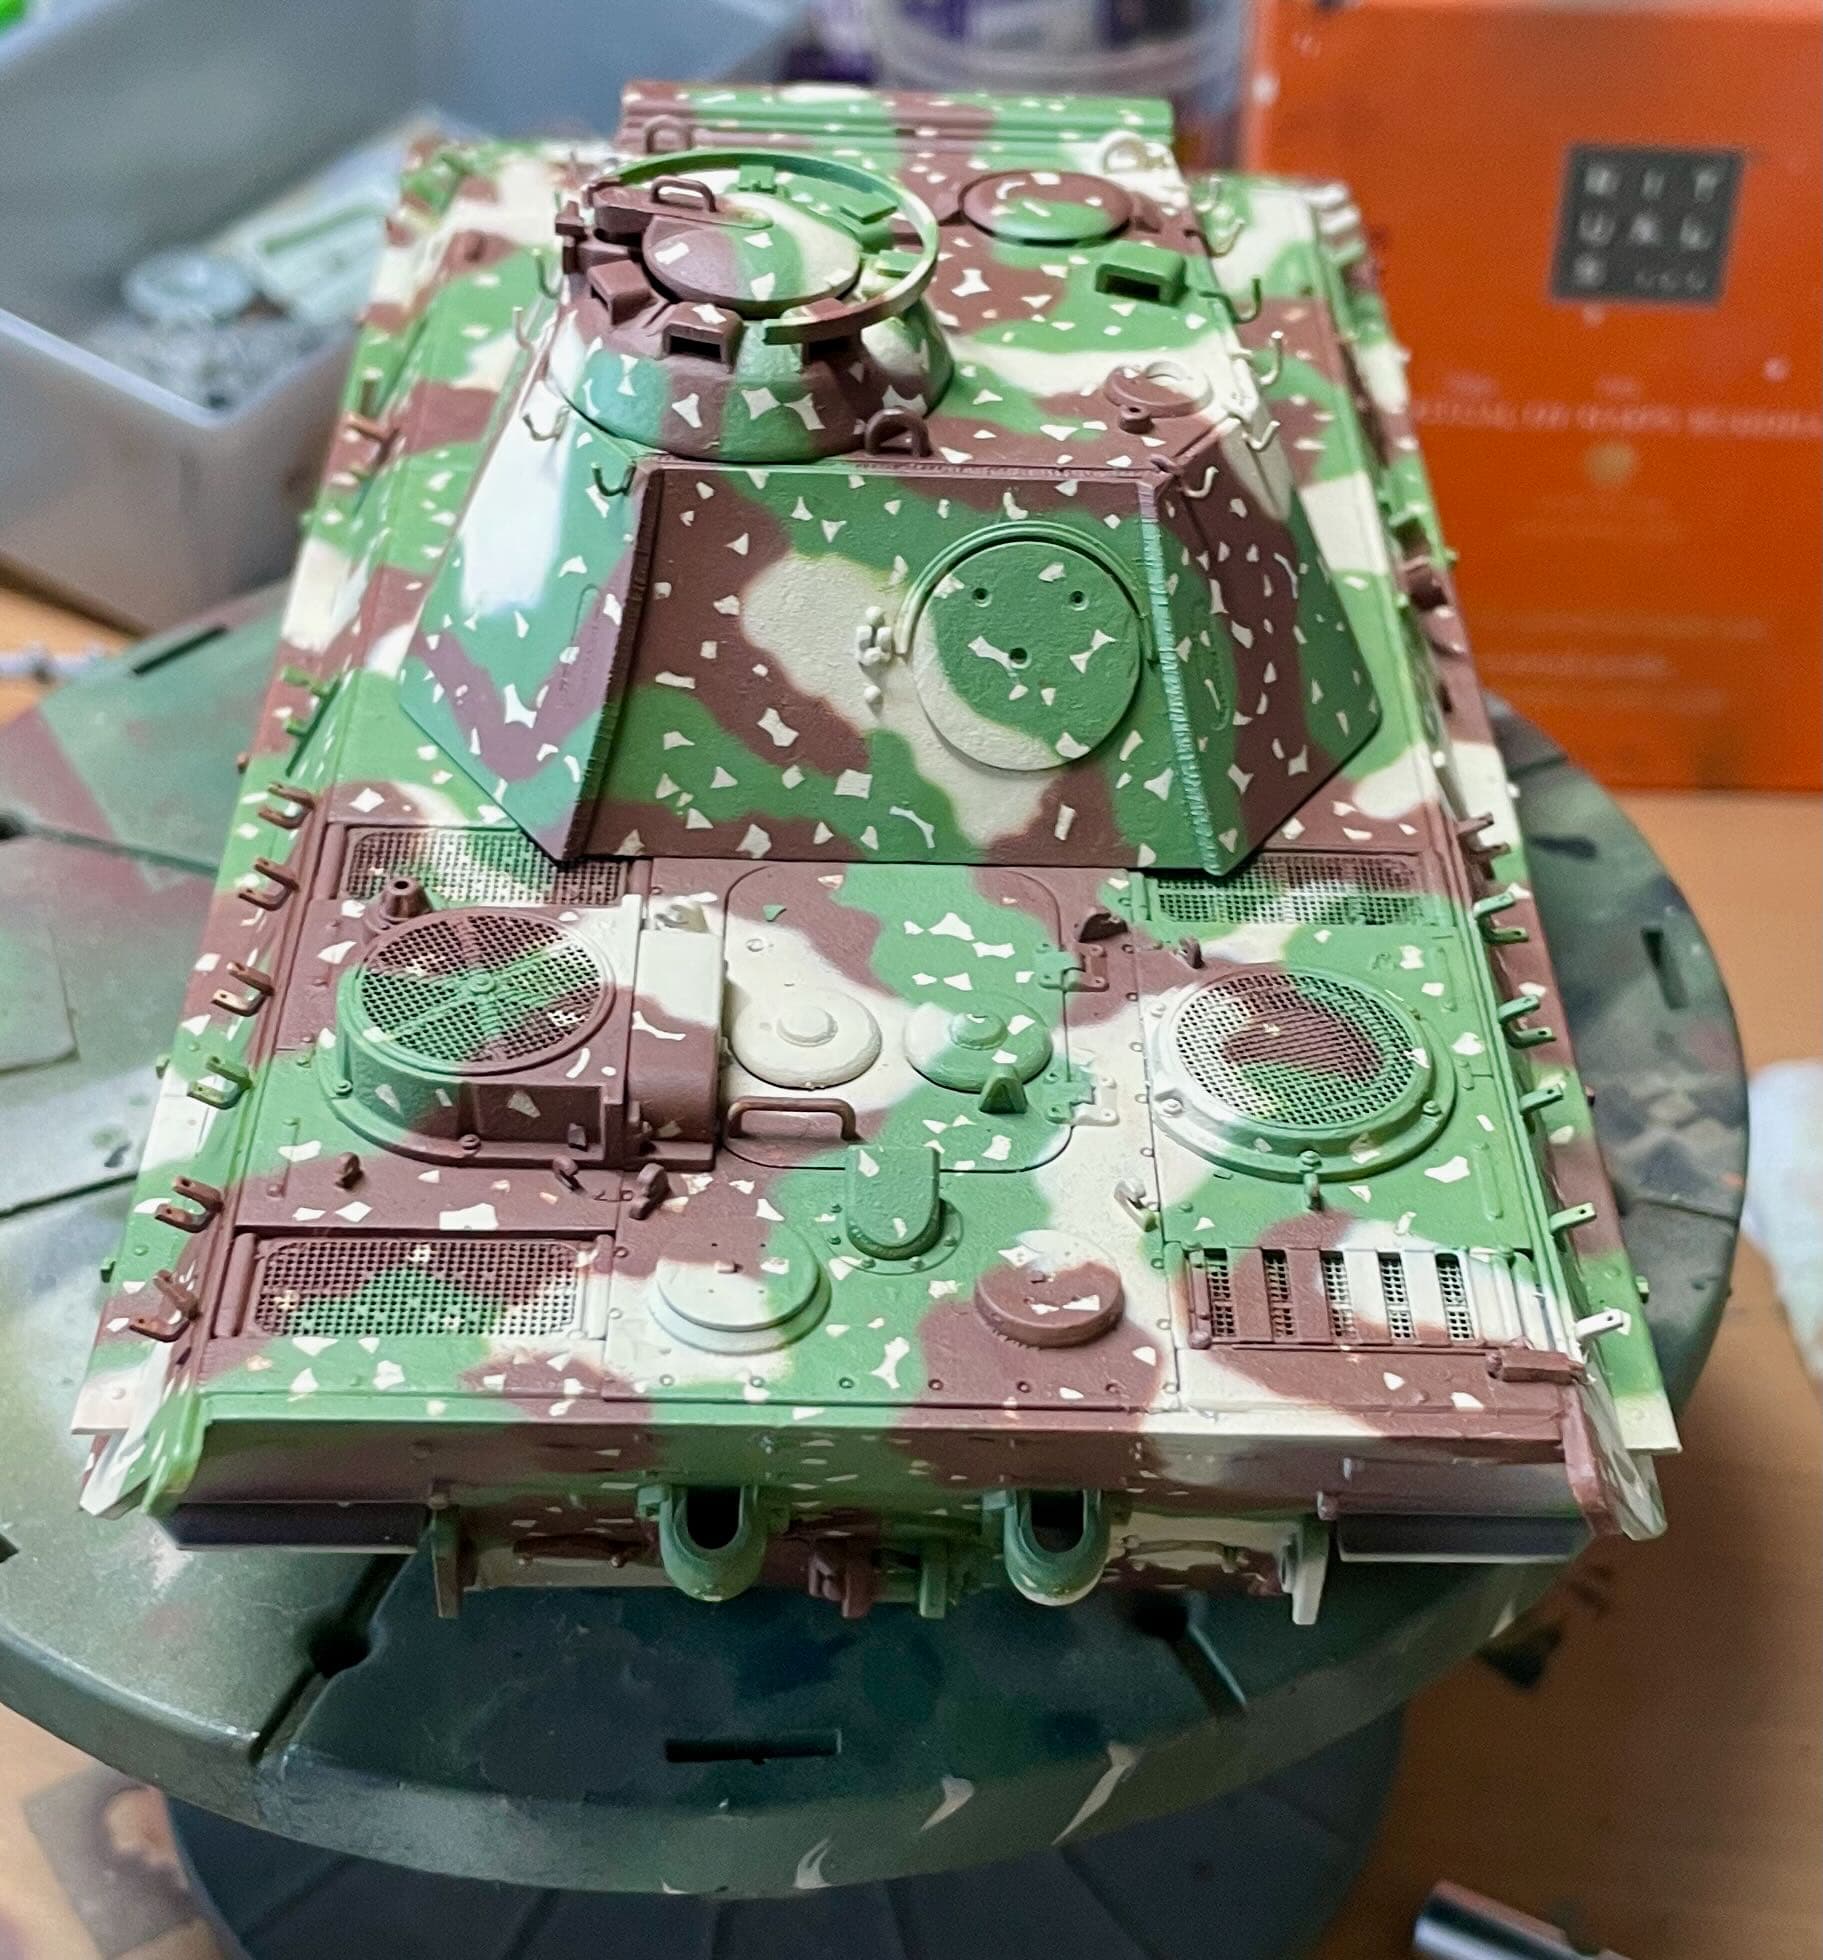
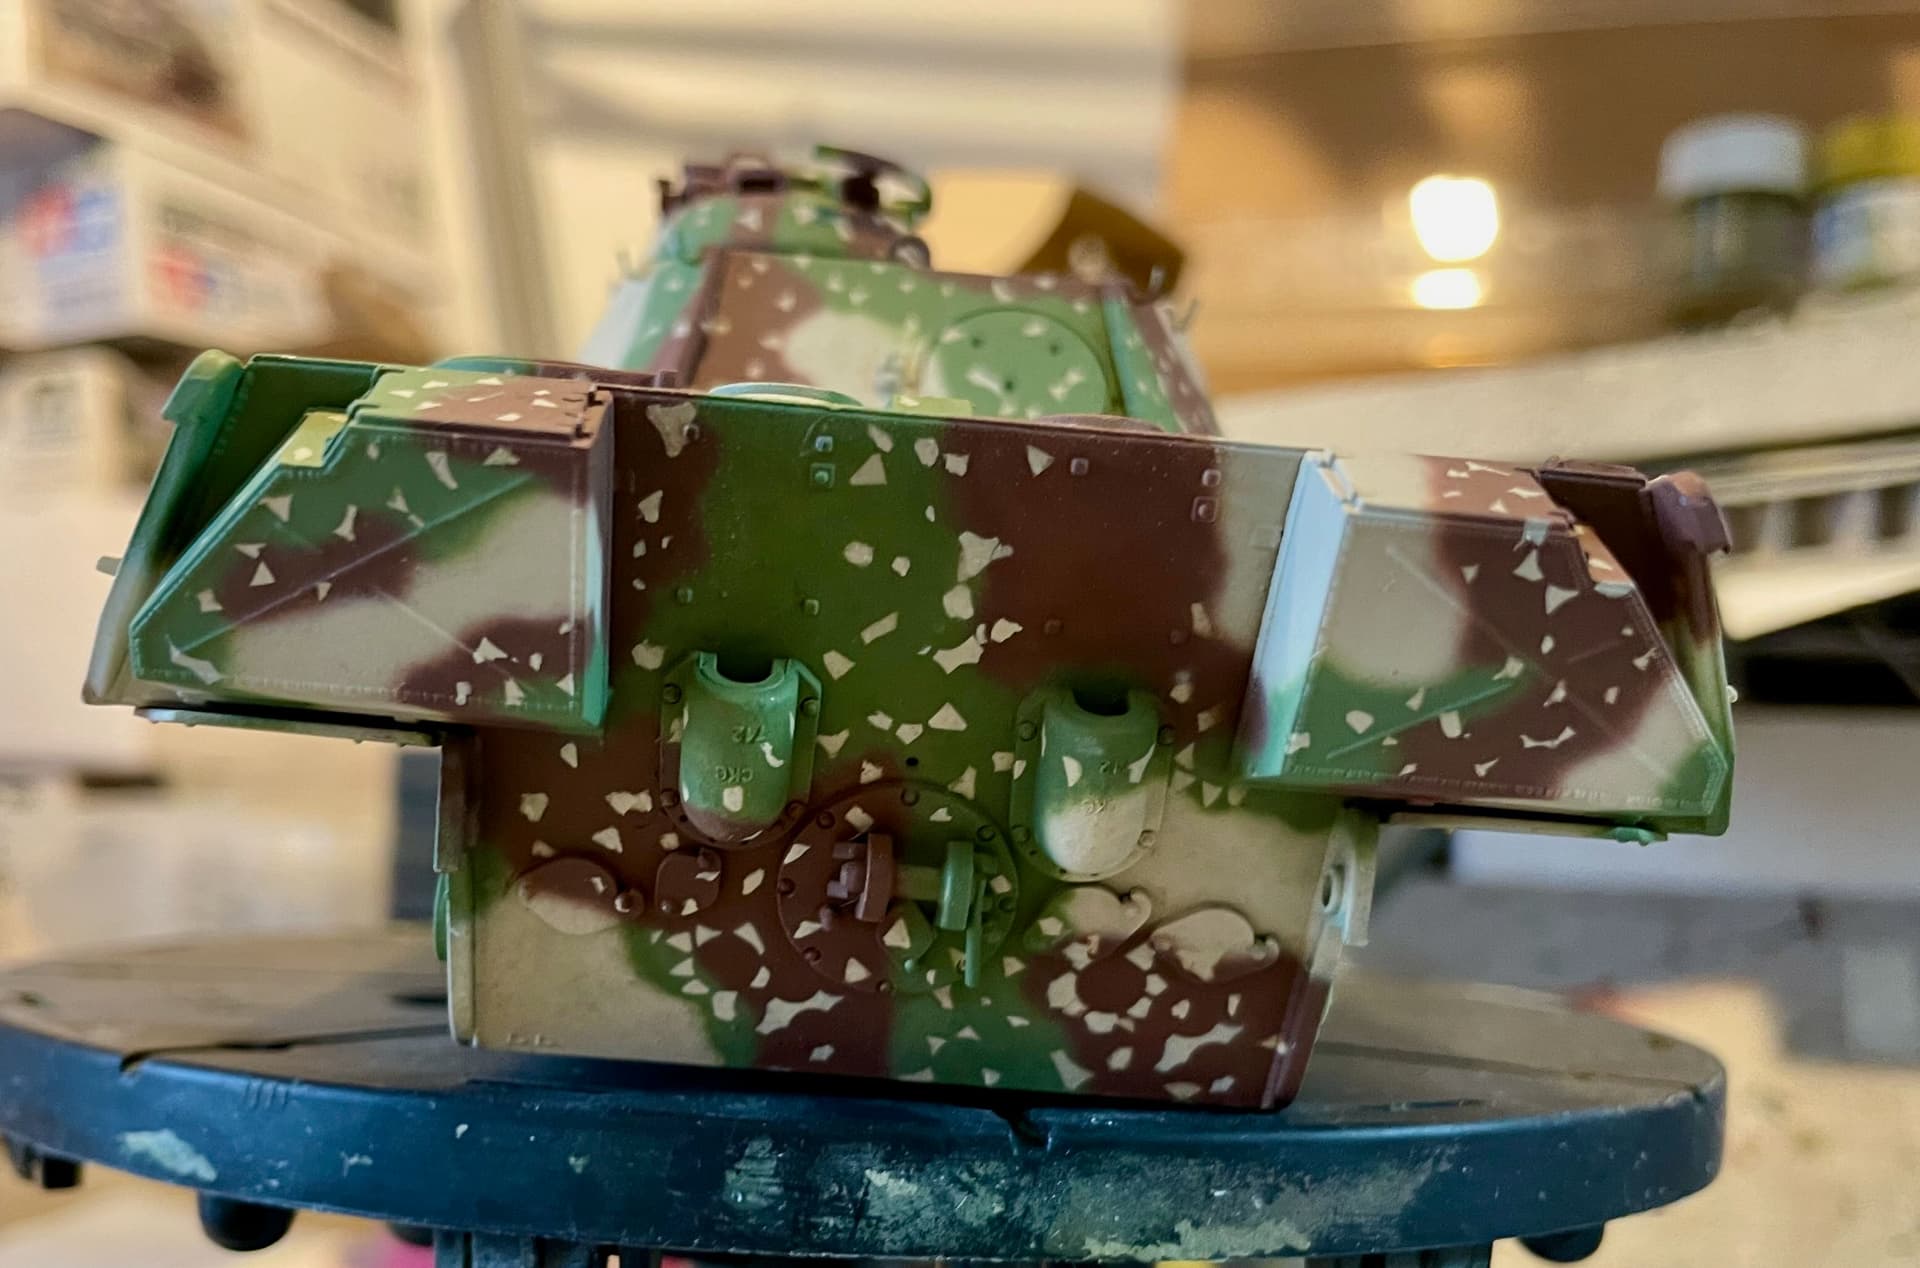
Sides are up next …
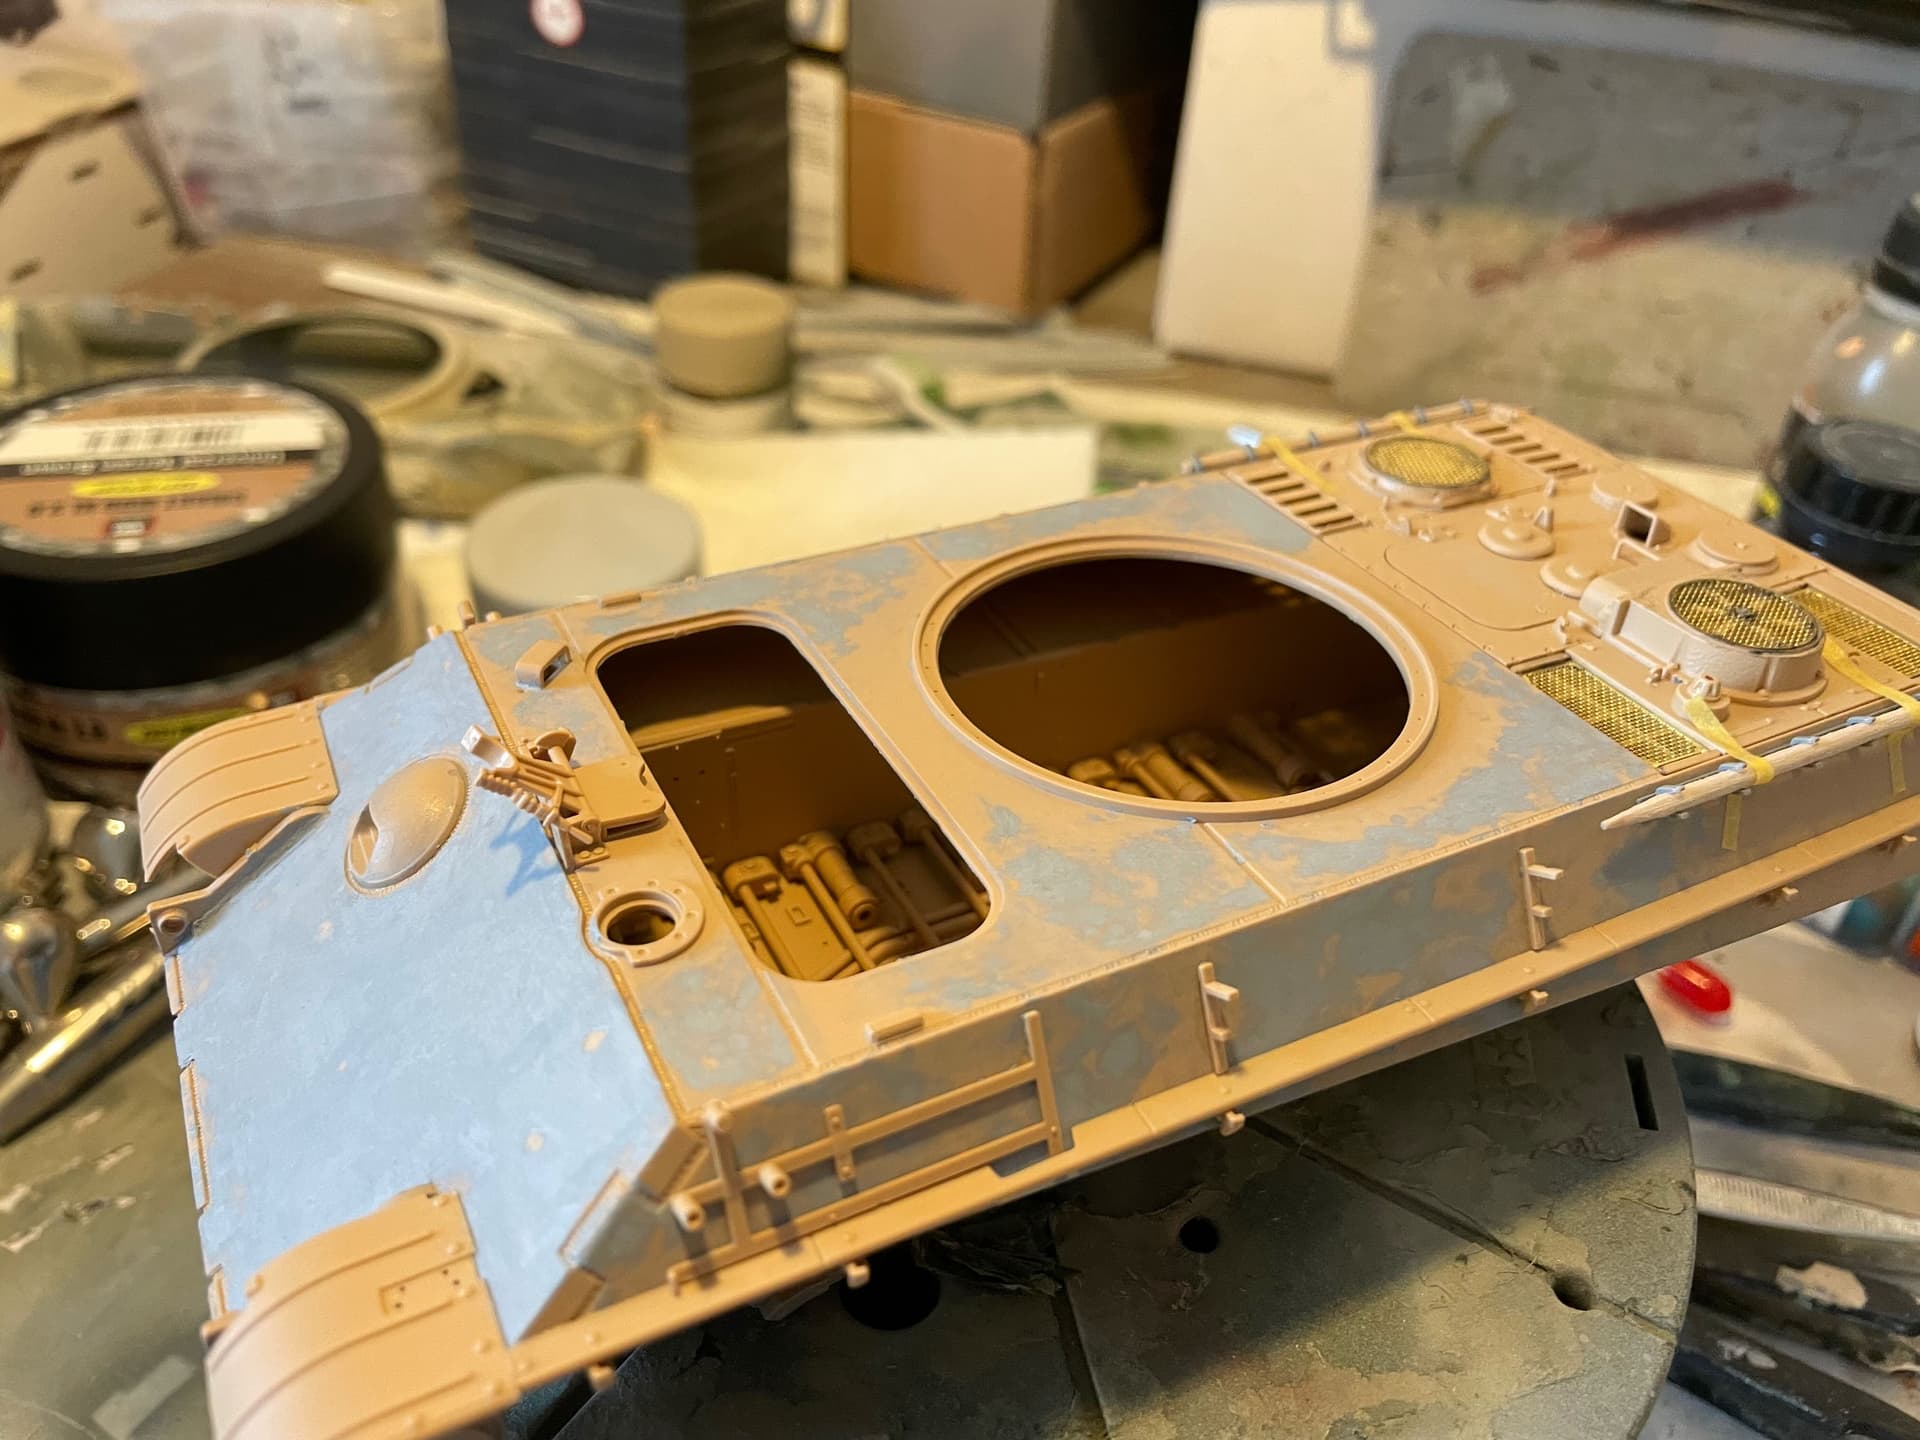
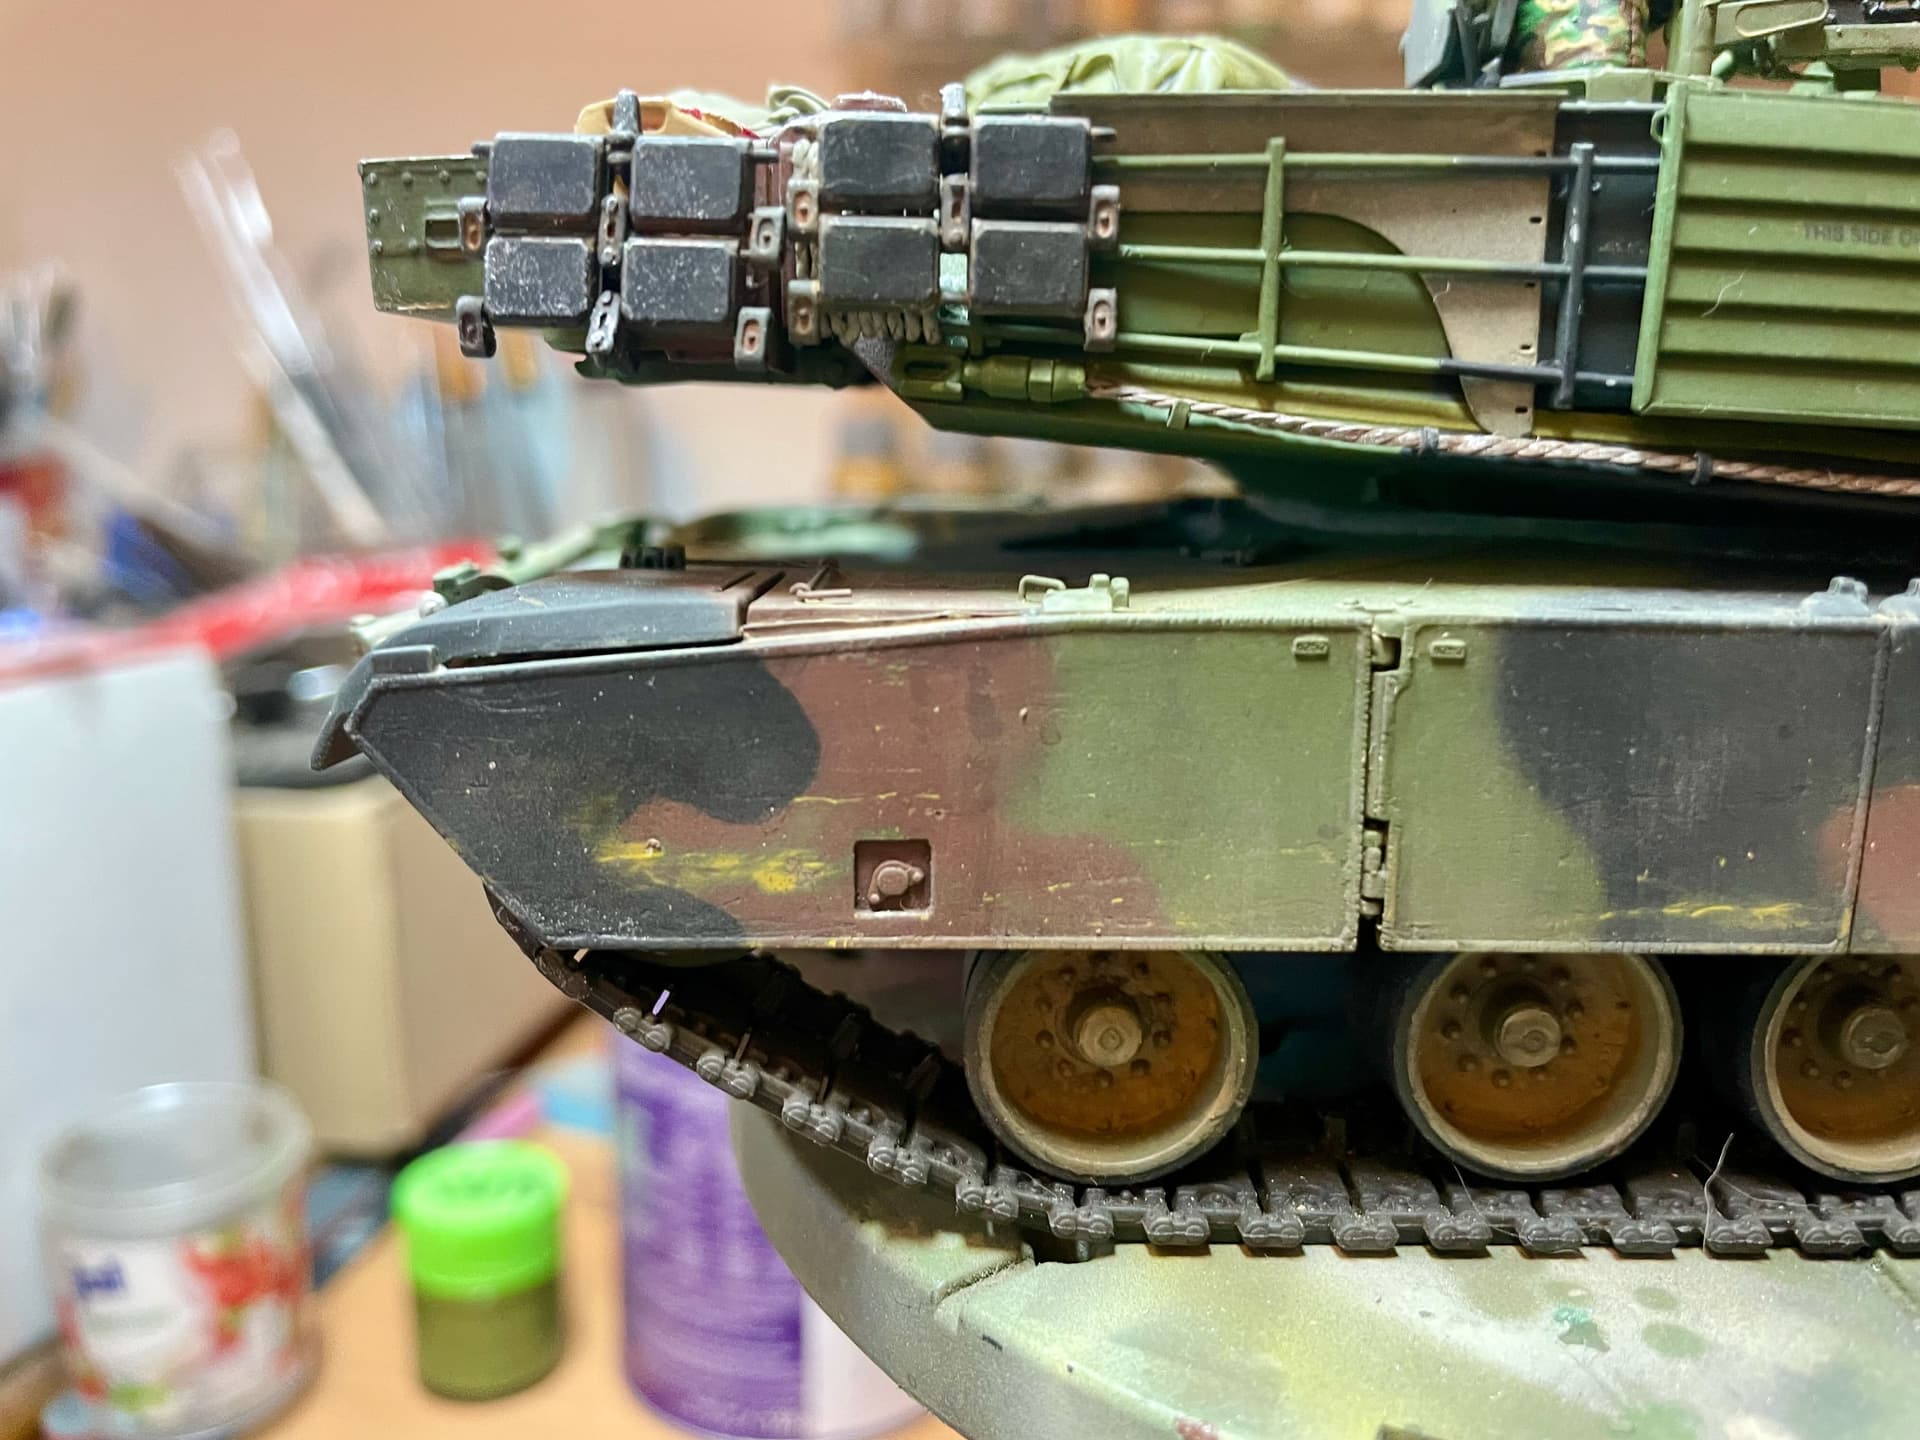
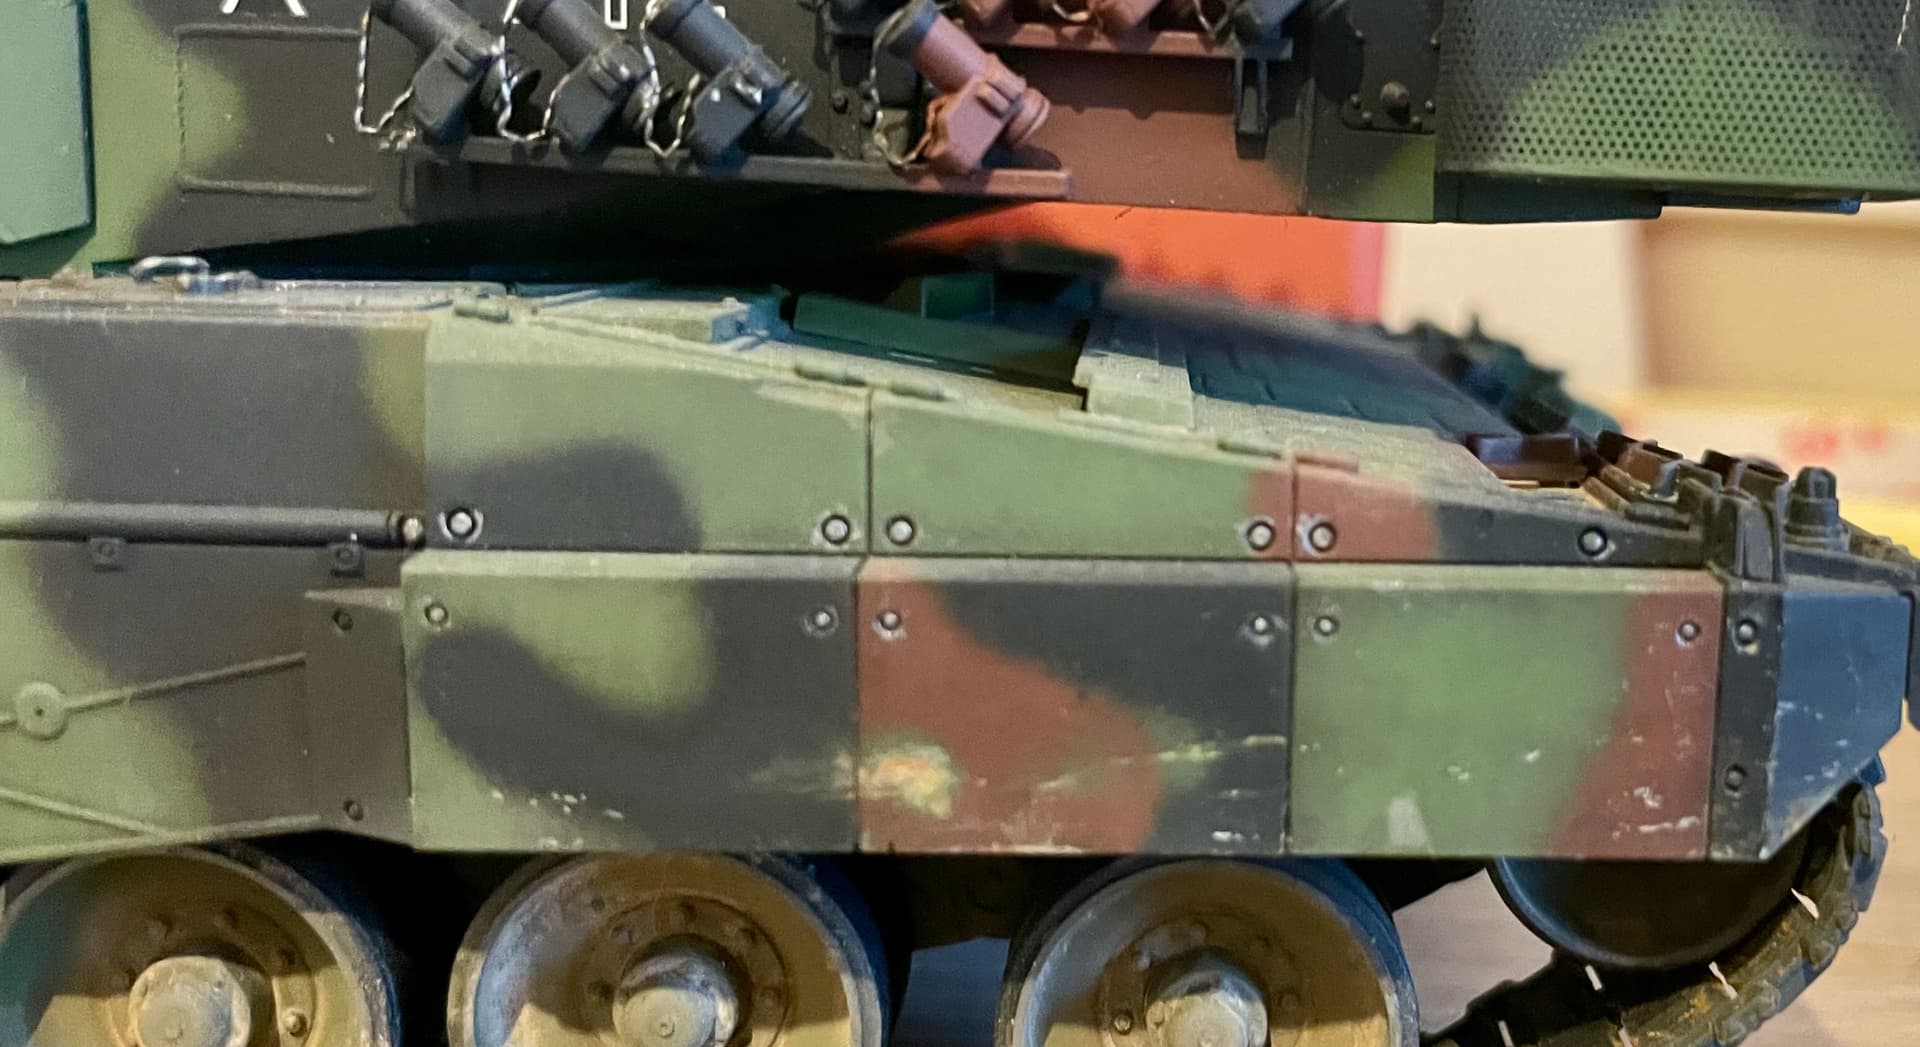
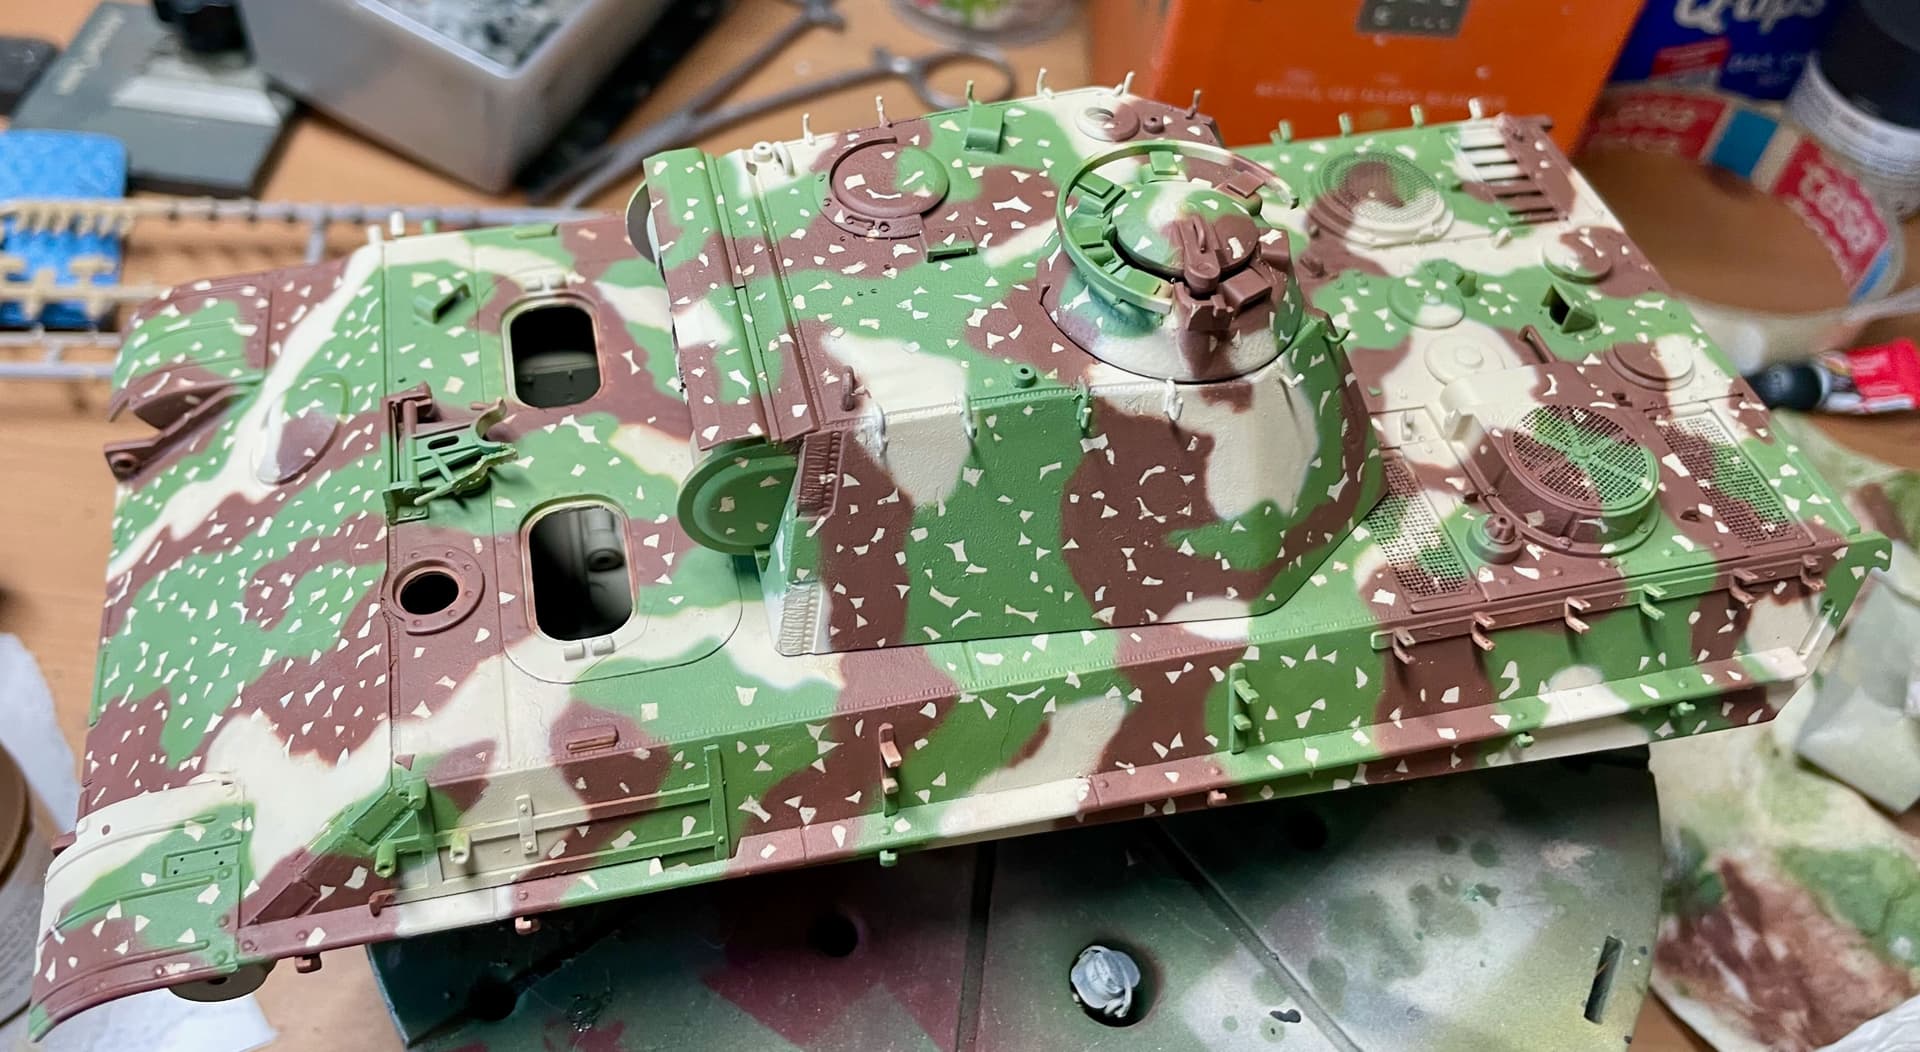
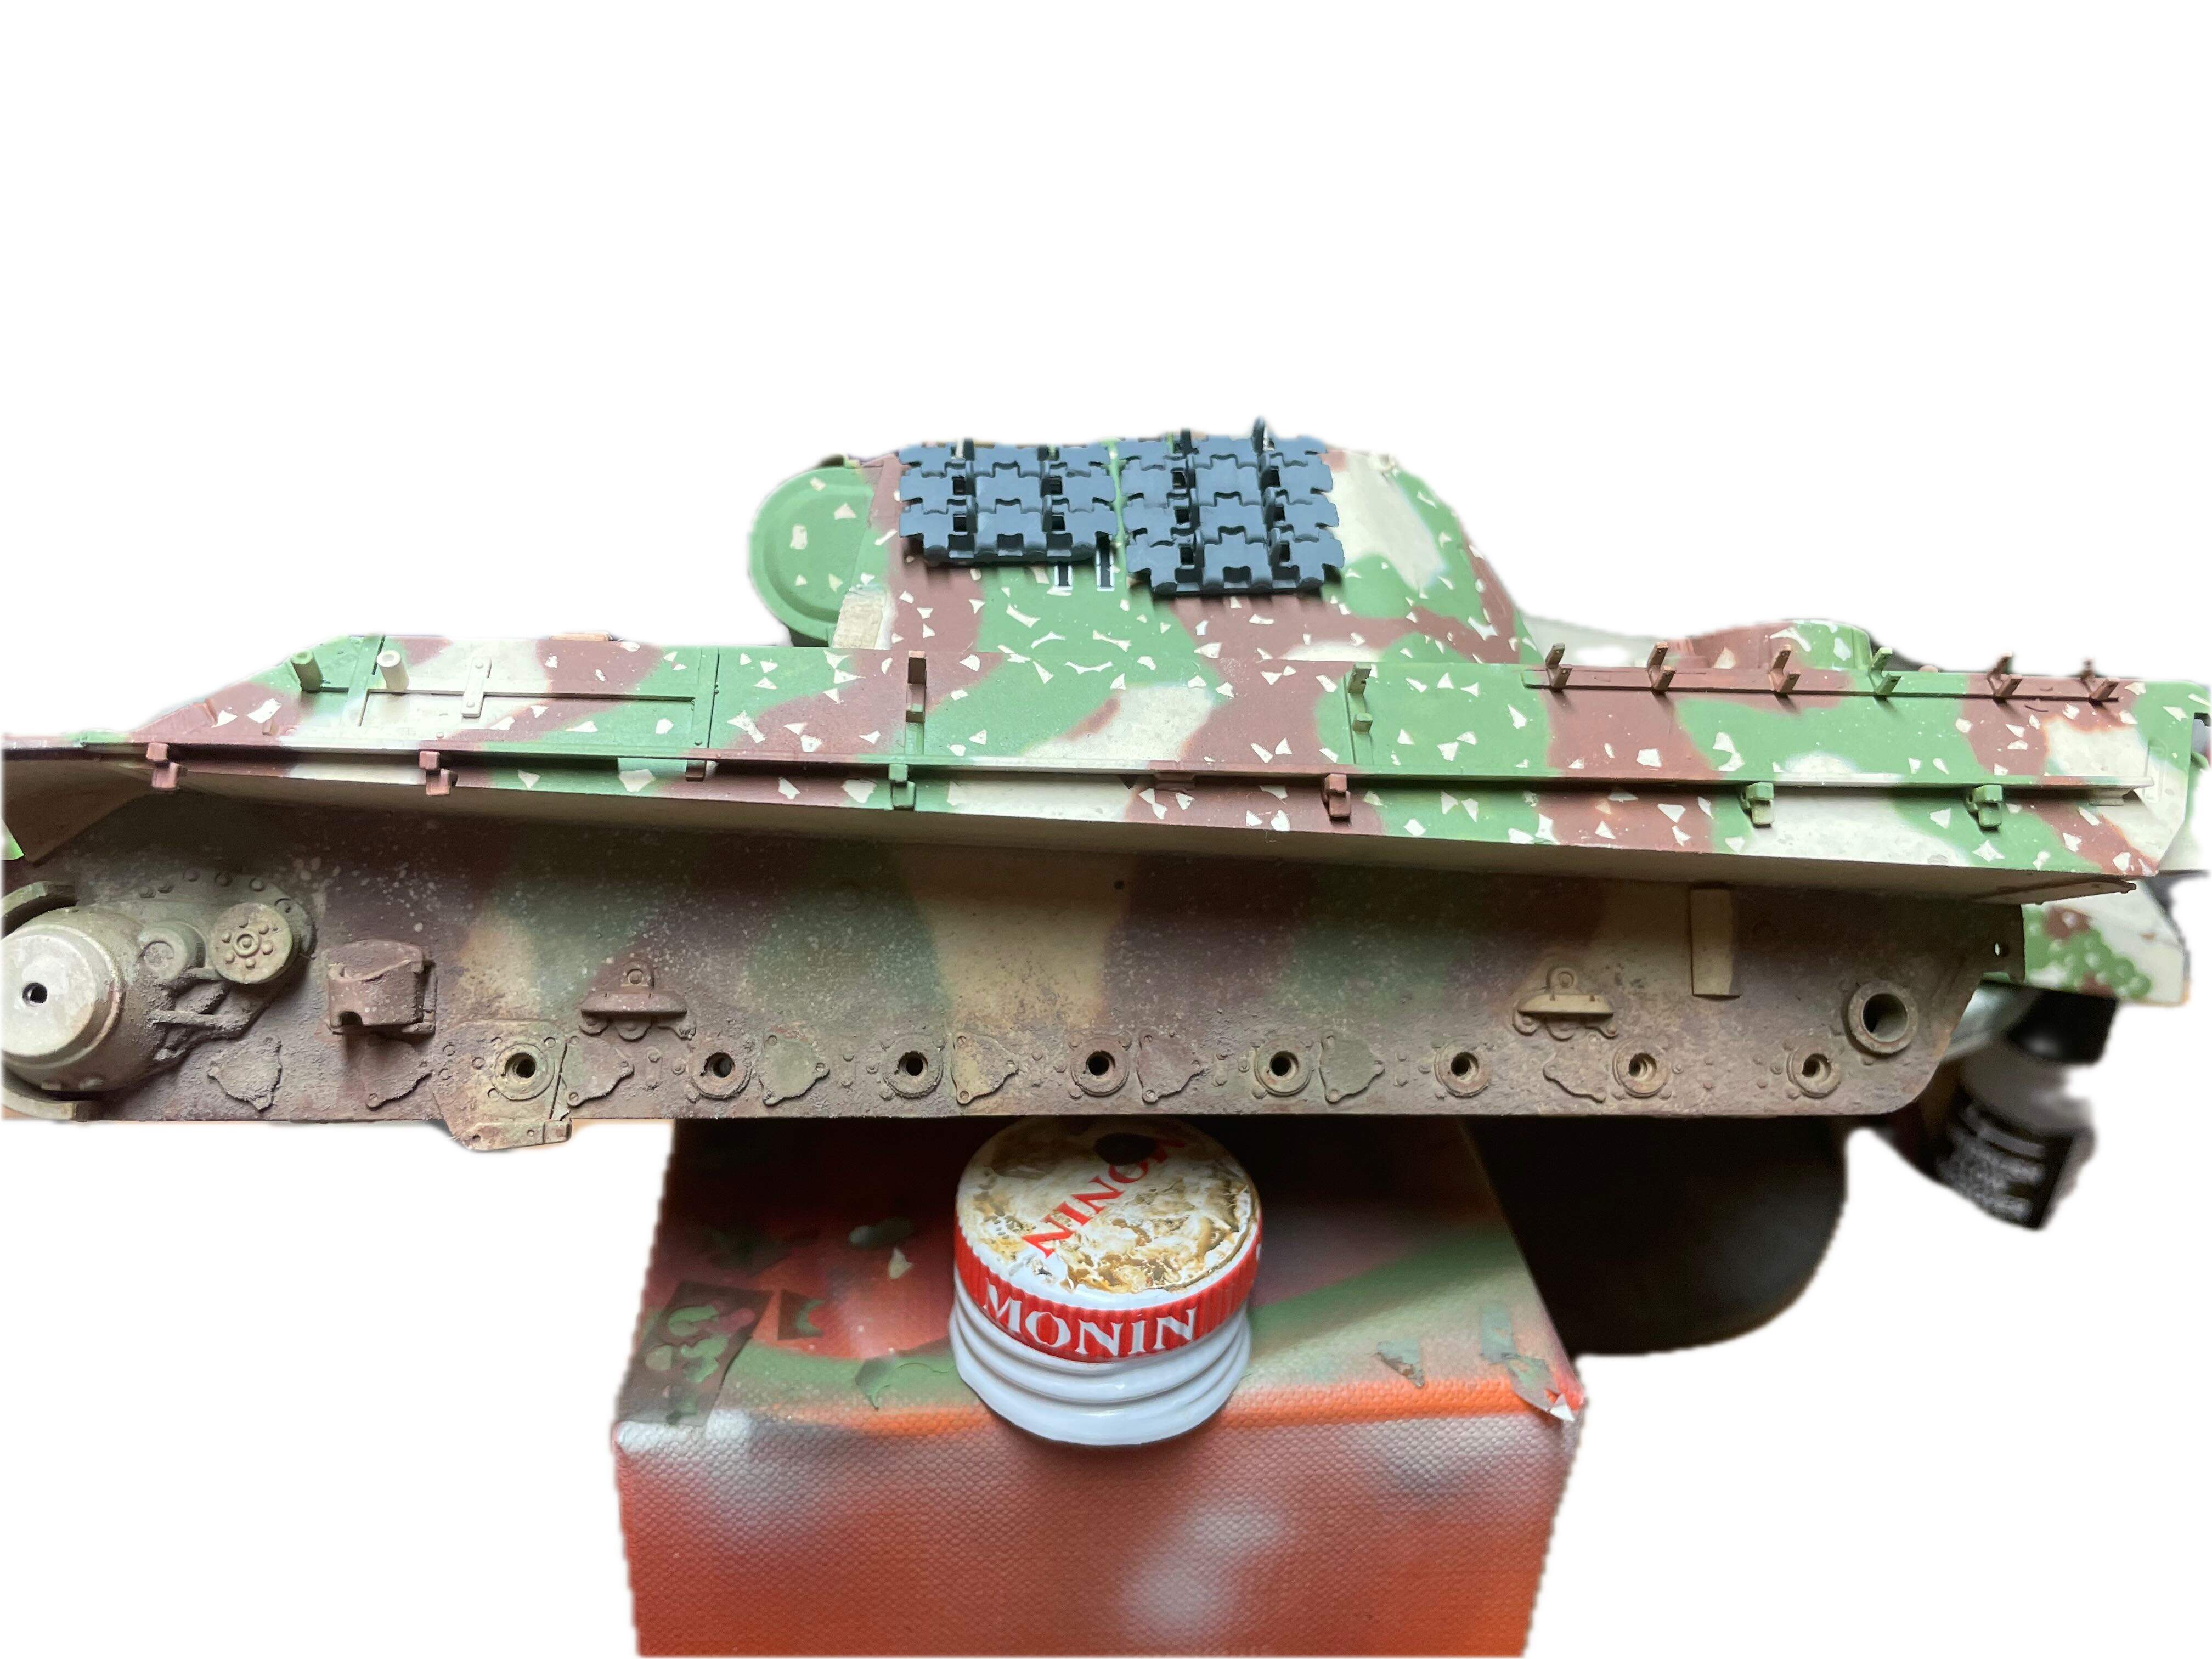
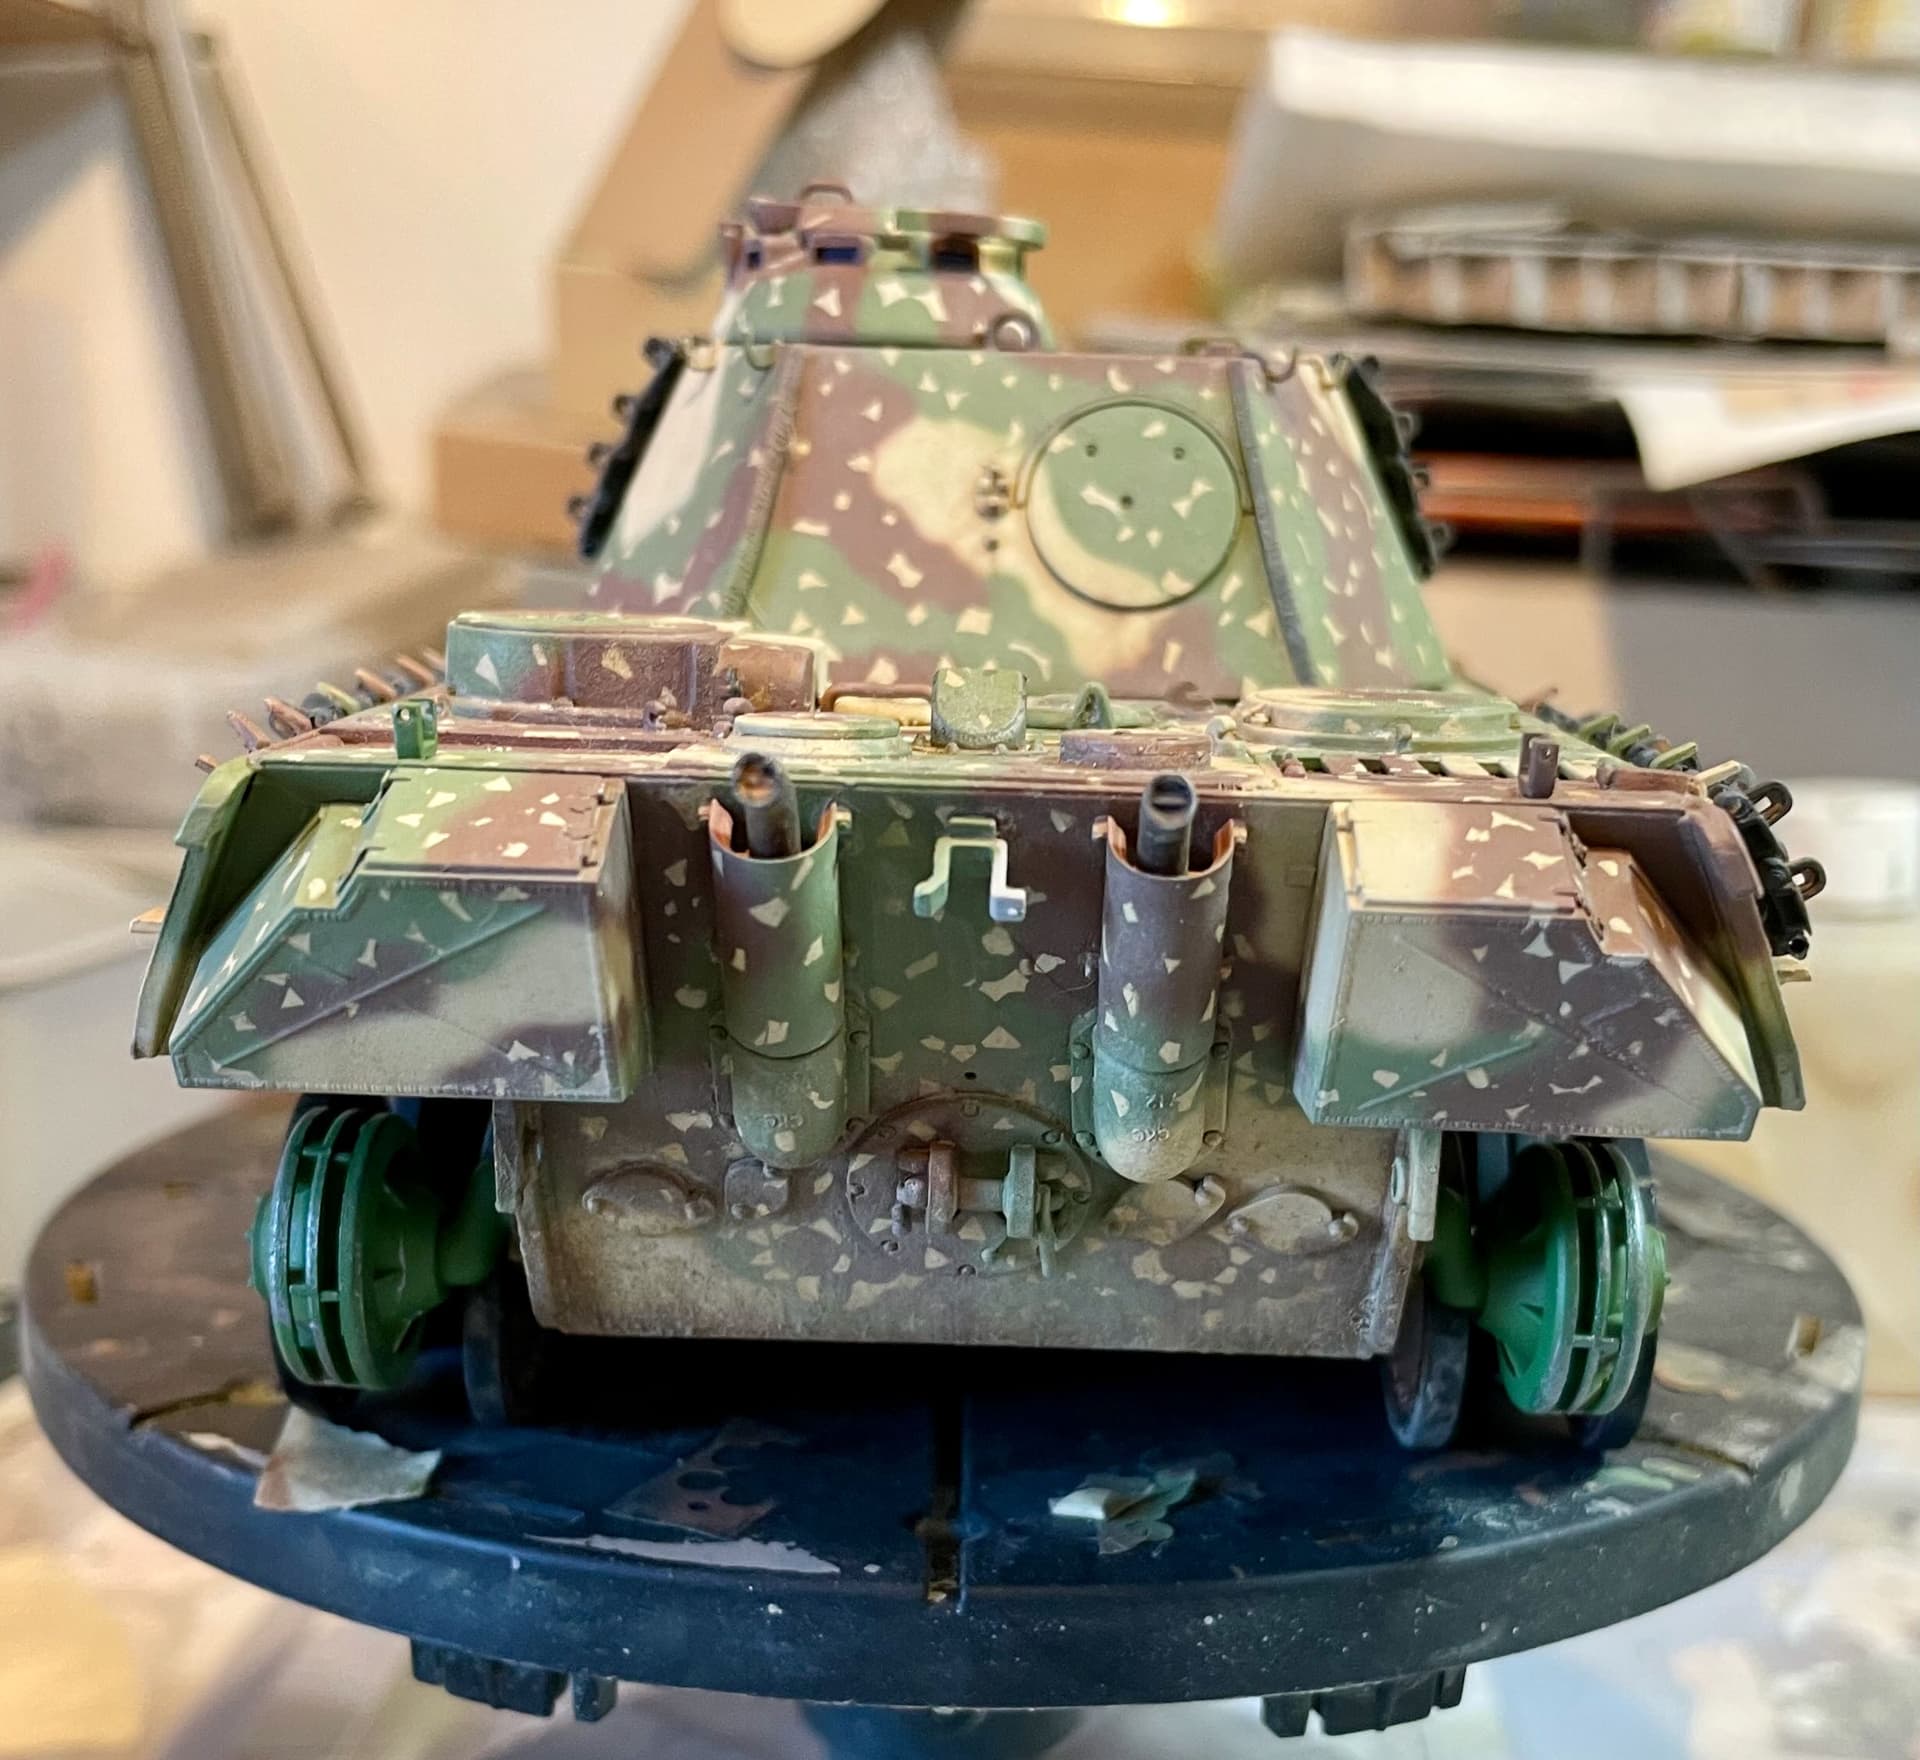
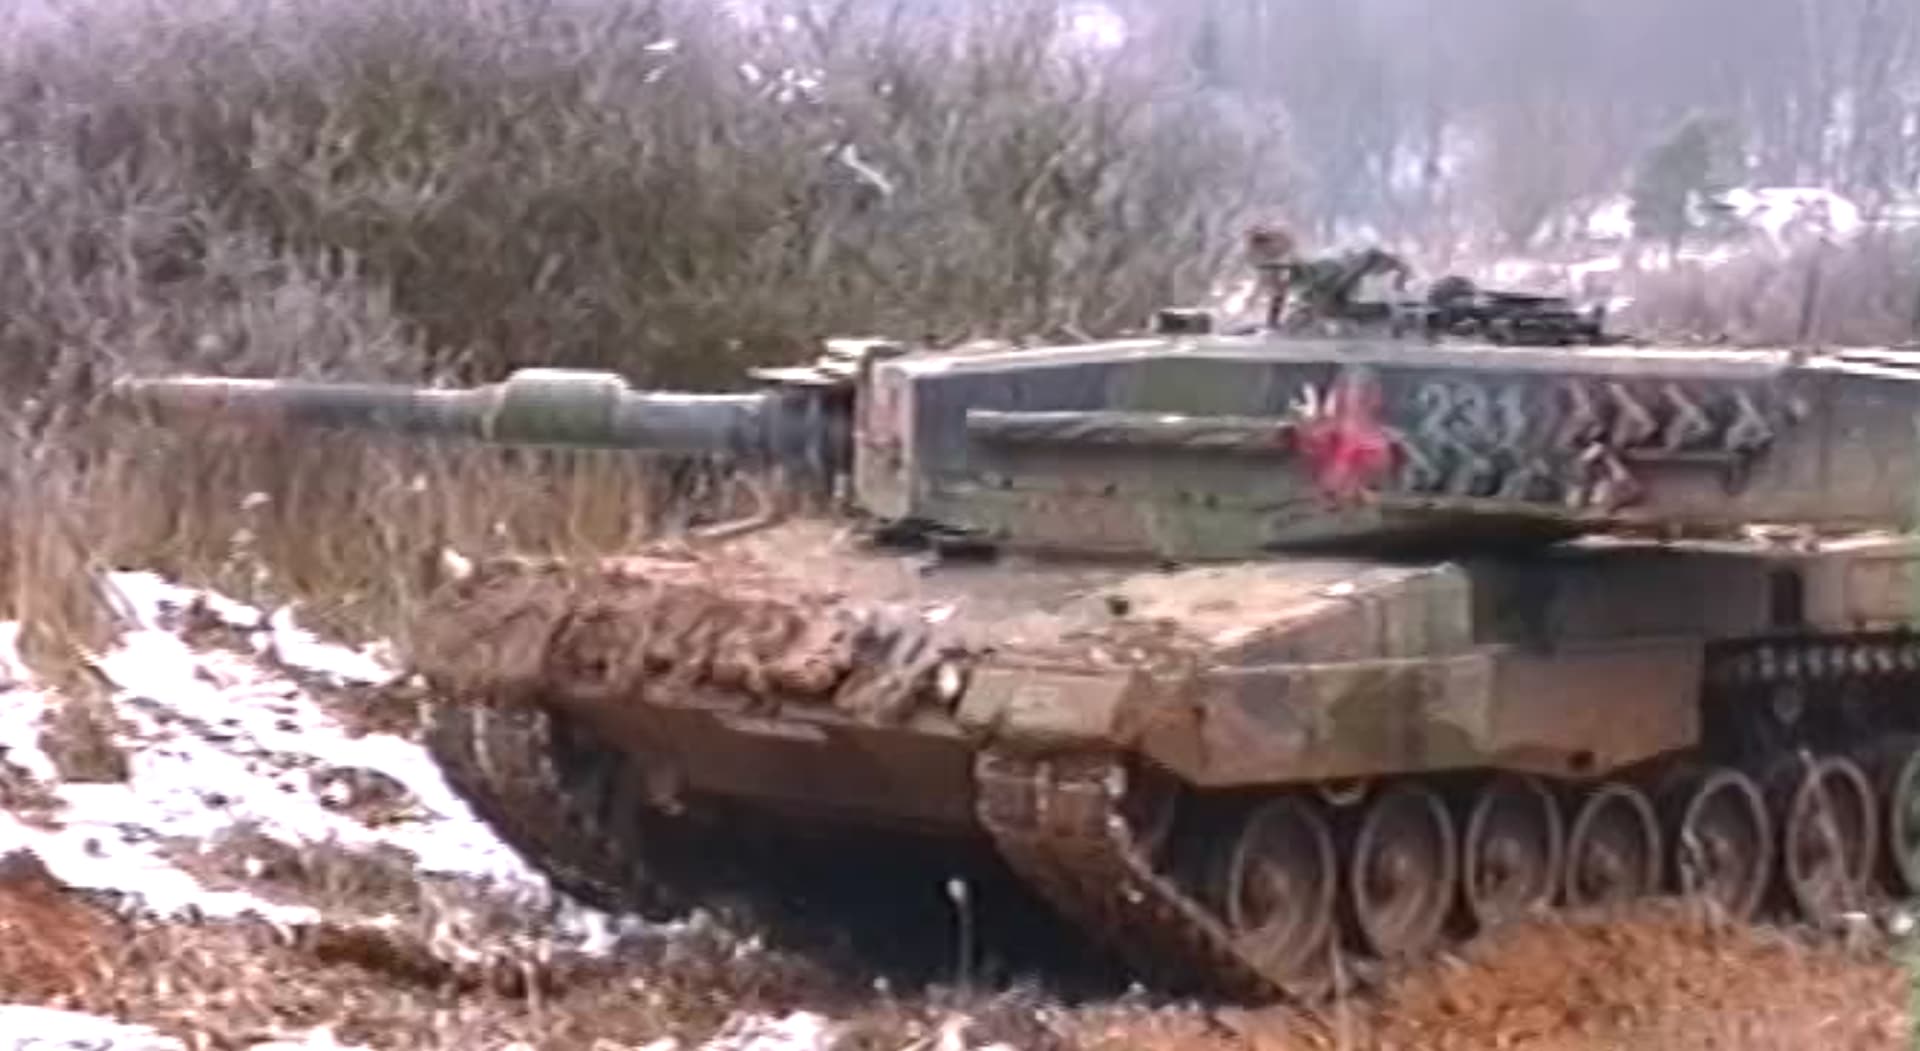
Appearance is still rather " bright", I believe when weathered all colours will have the right match in tone … got the running gear painted too and will start dirtying them up first, I honestly hate doing all those road wheels.
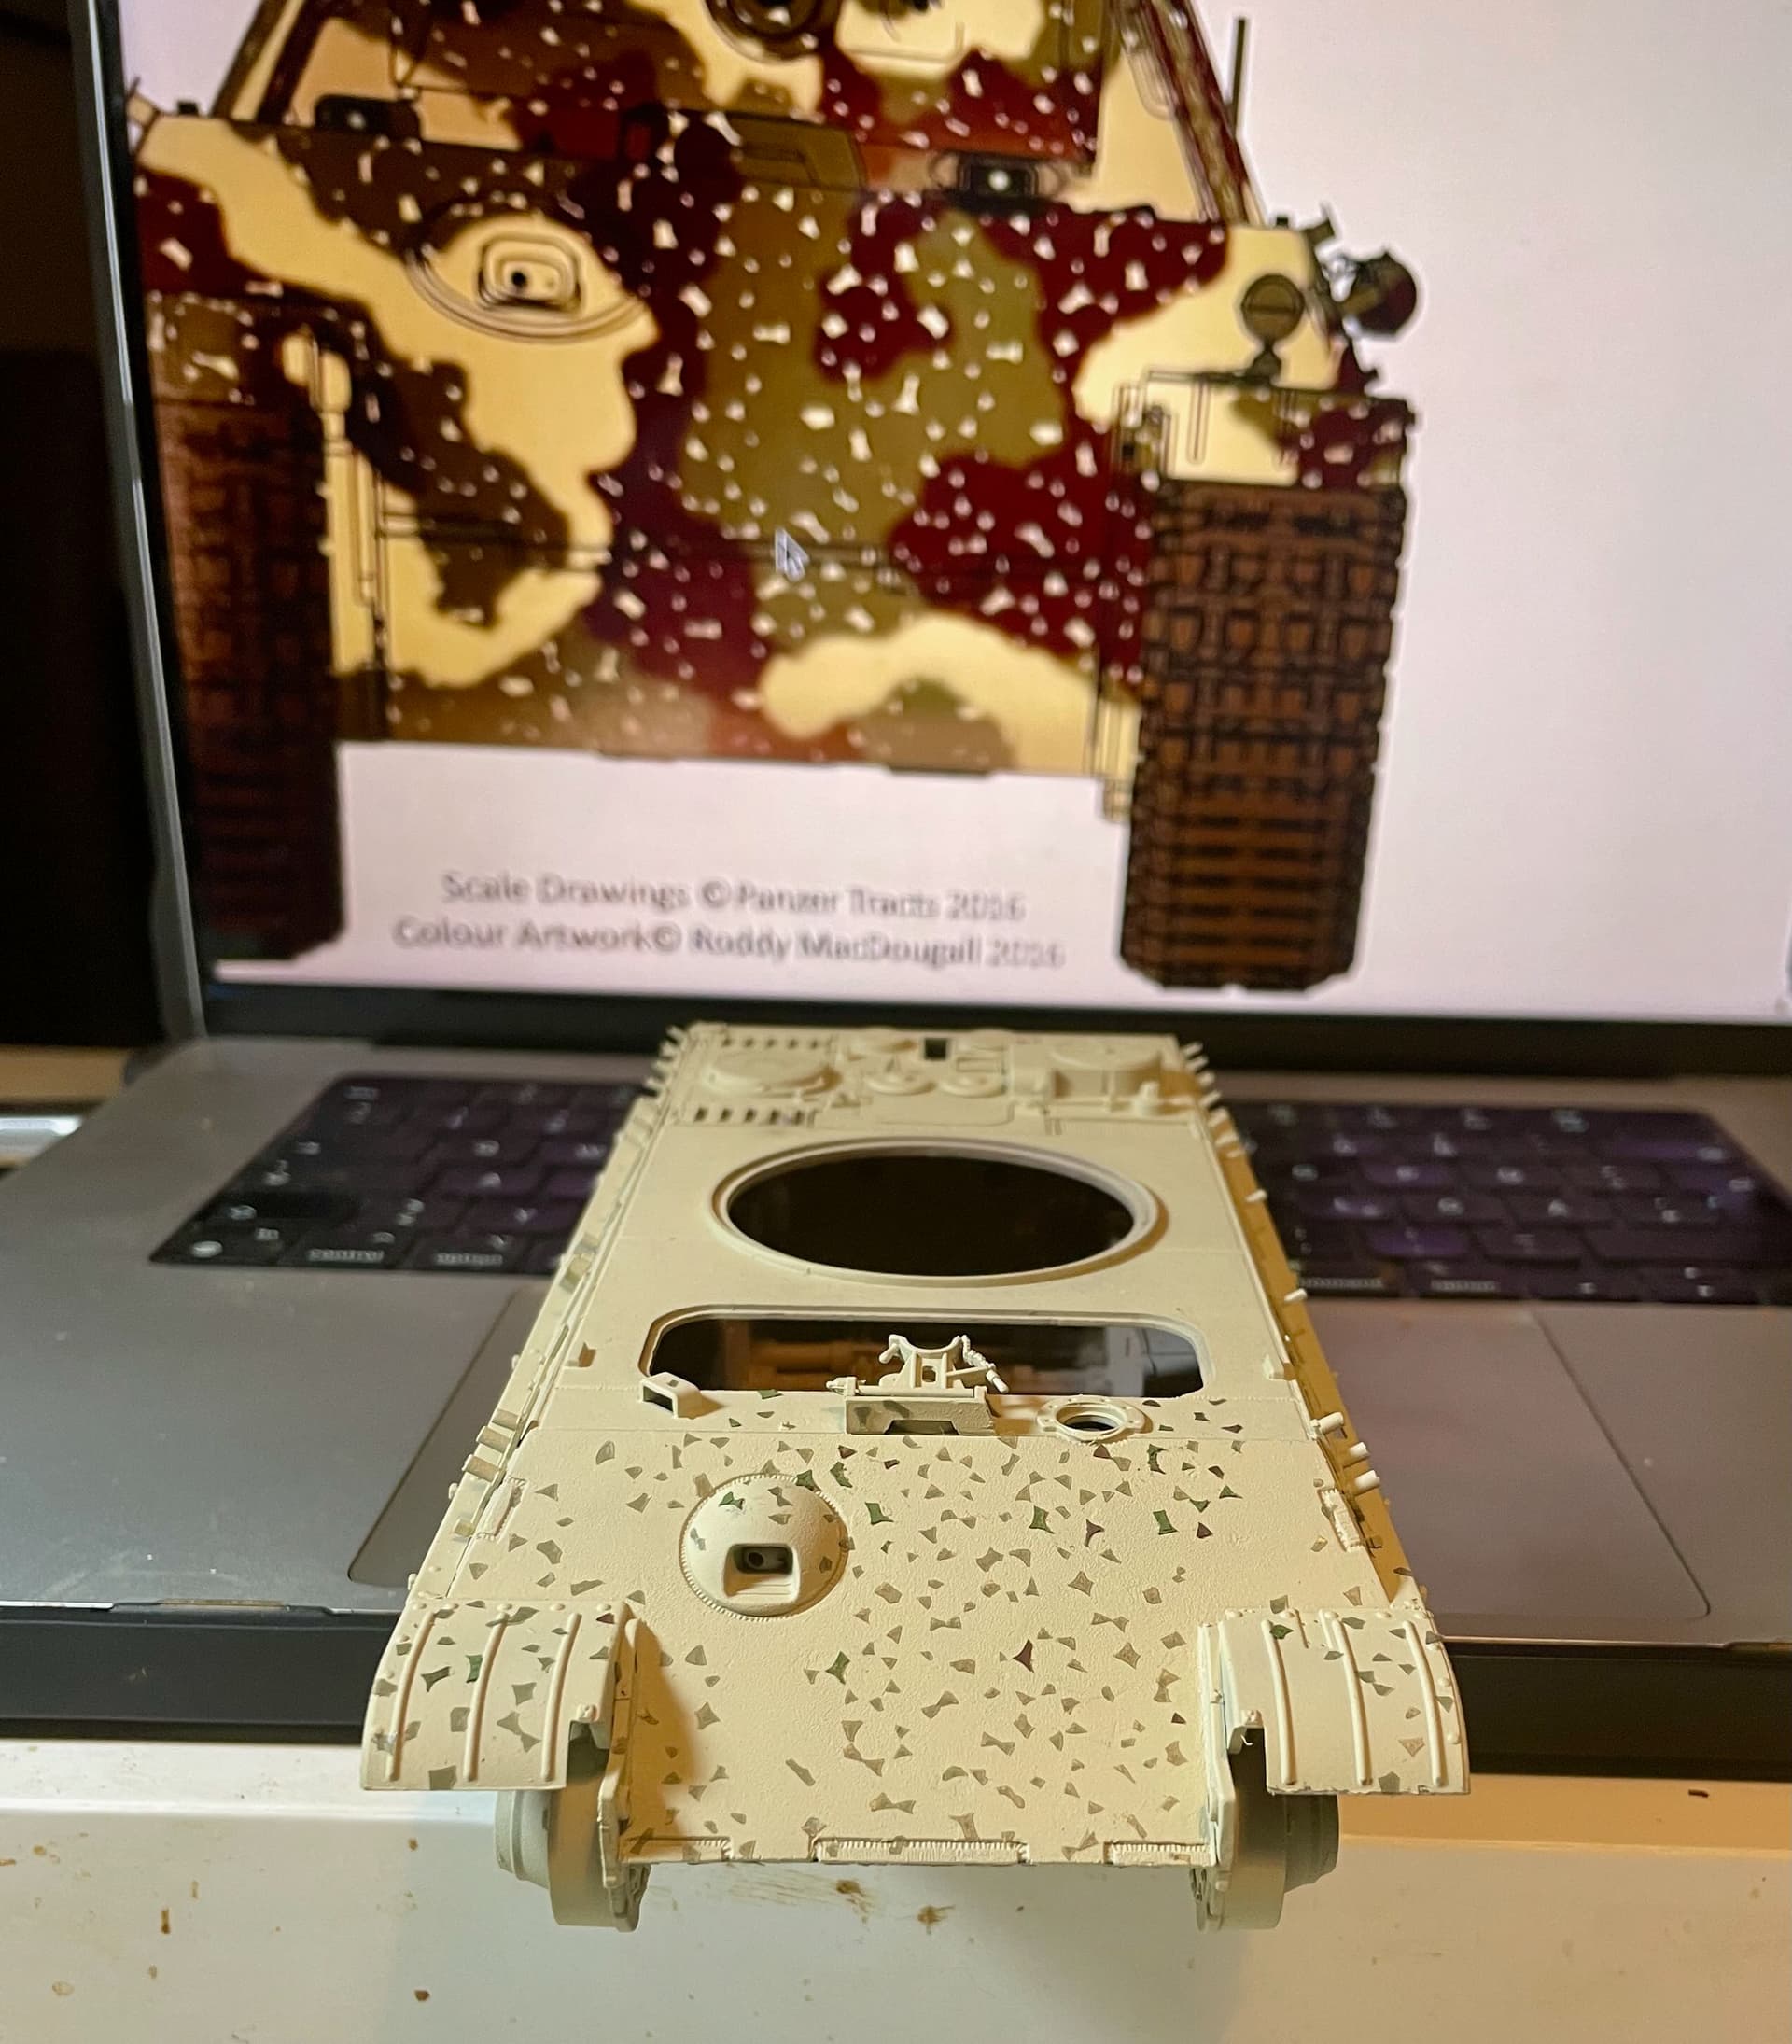
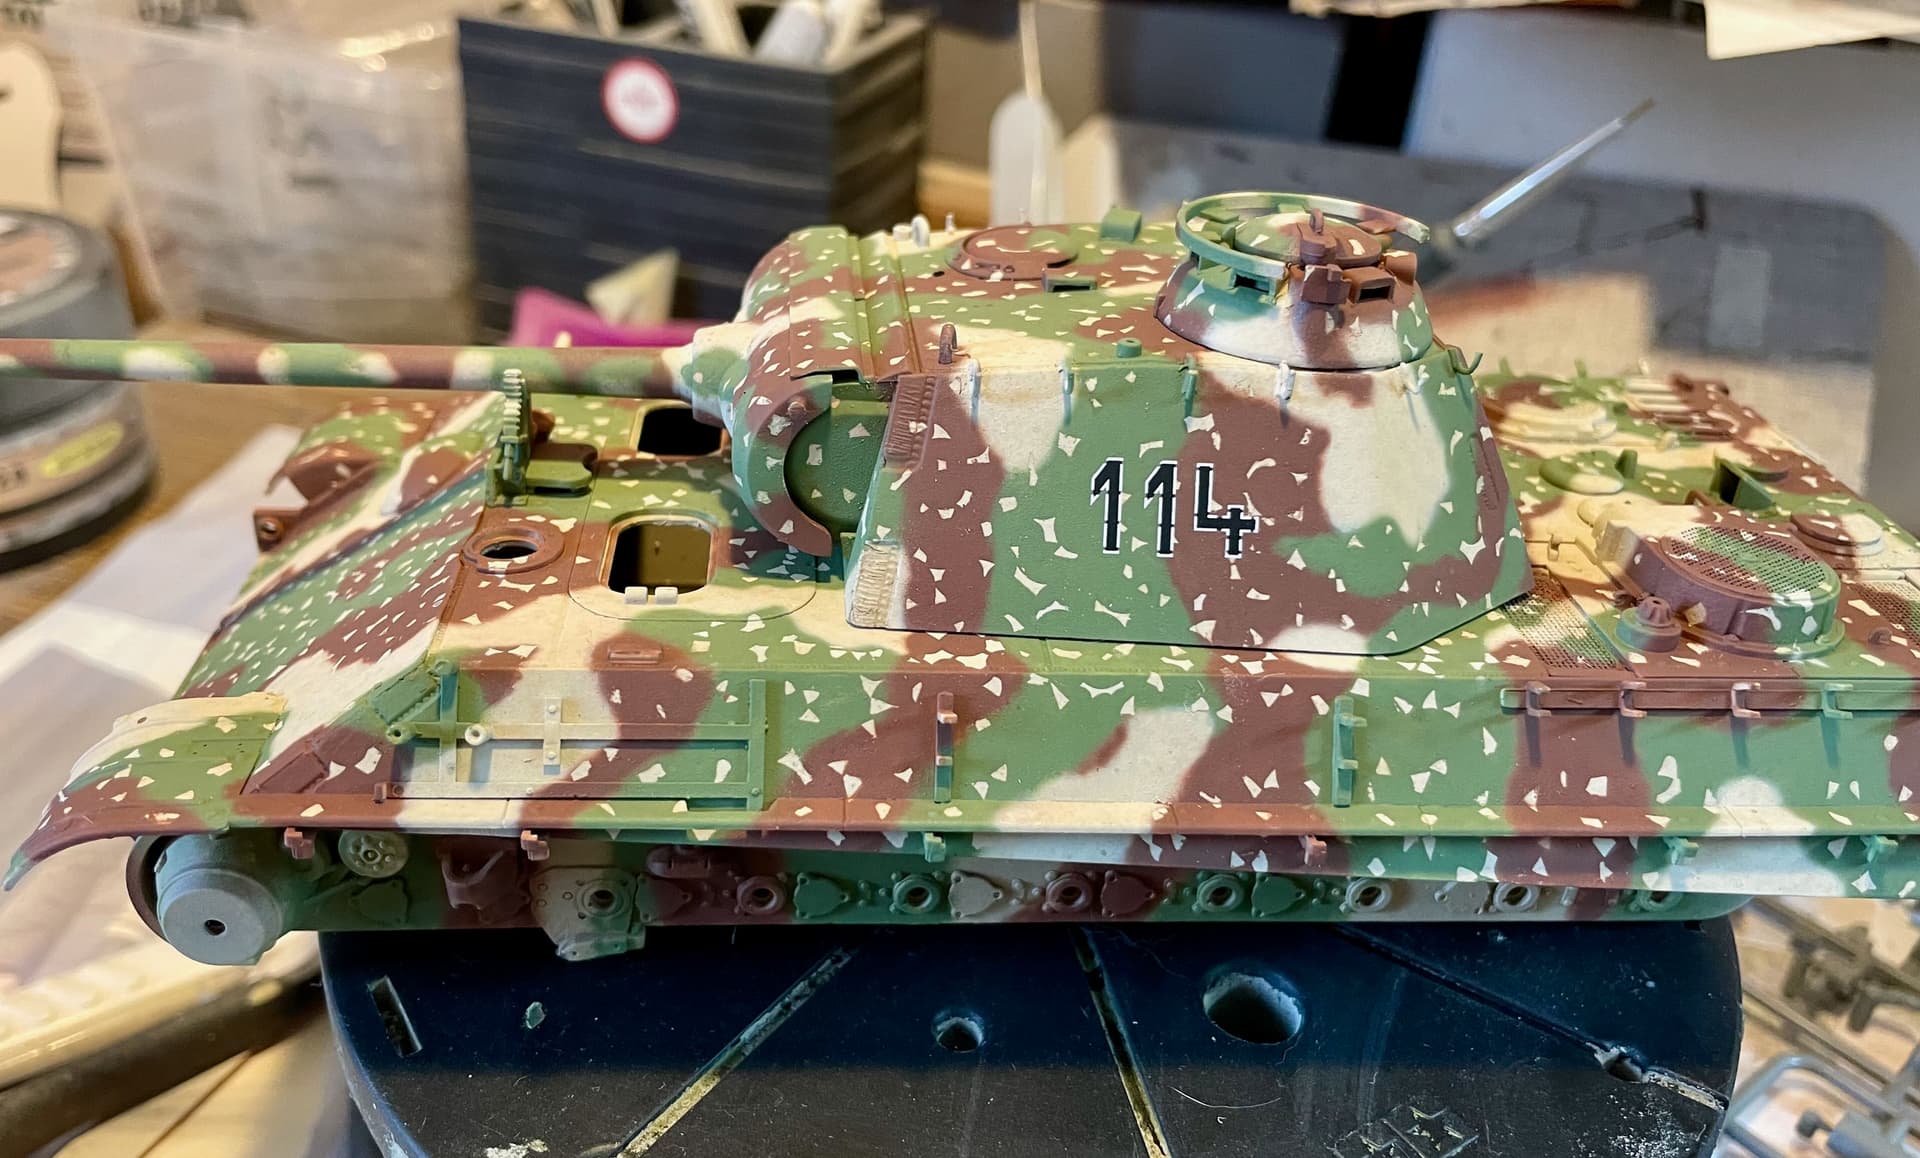
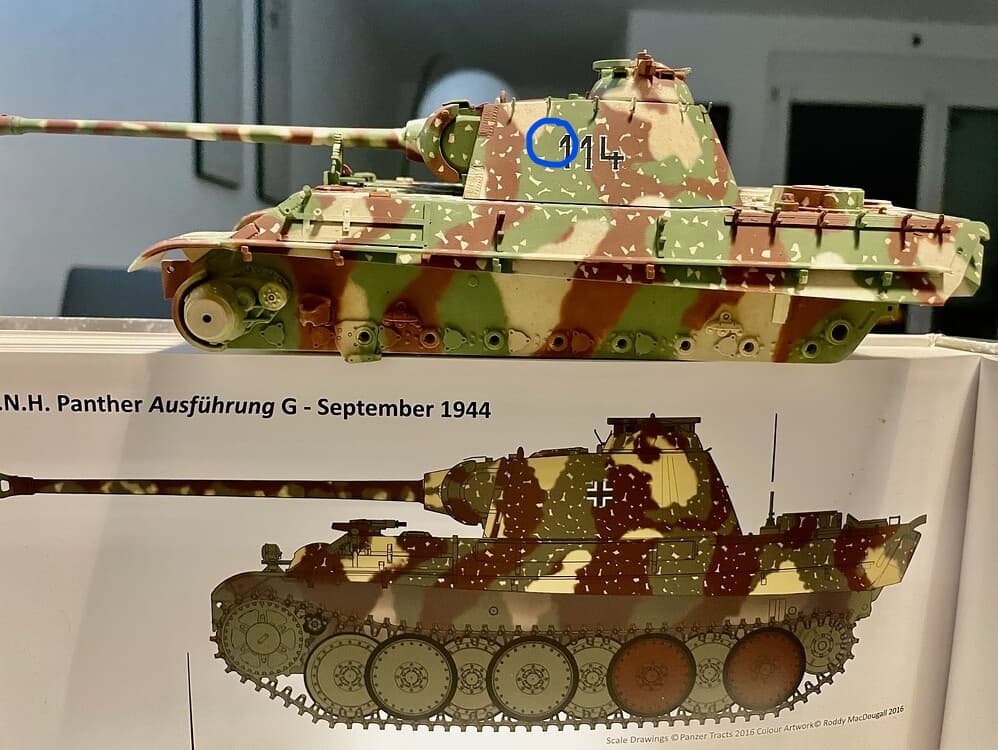
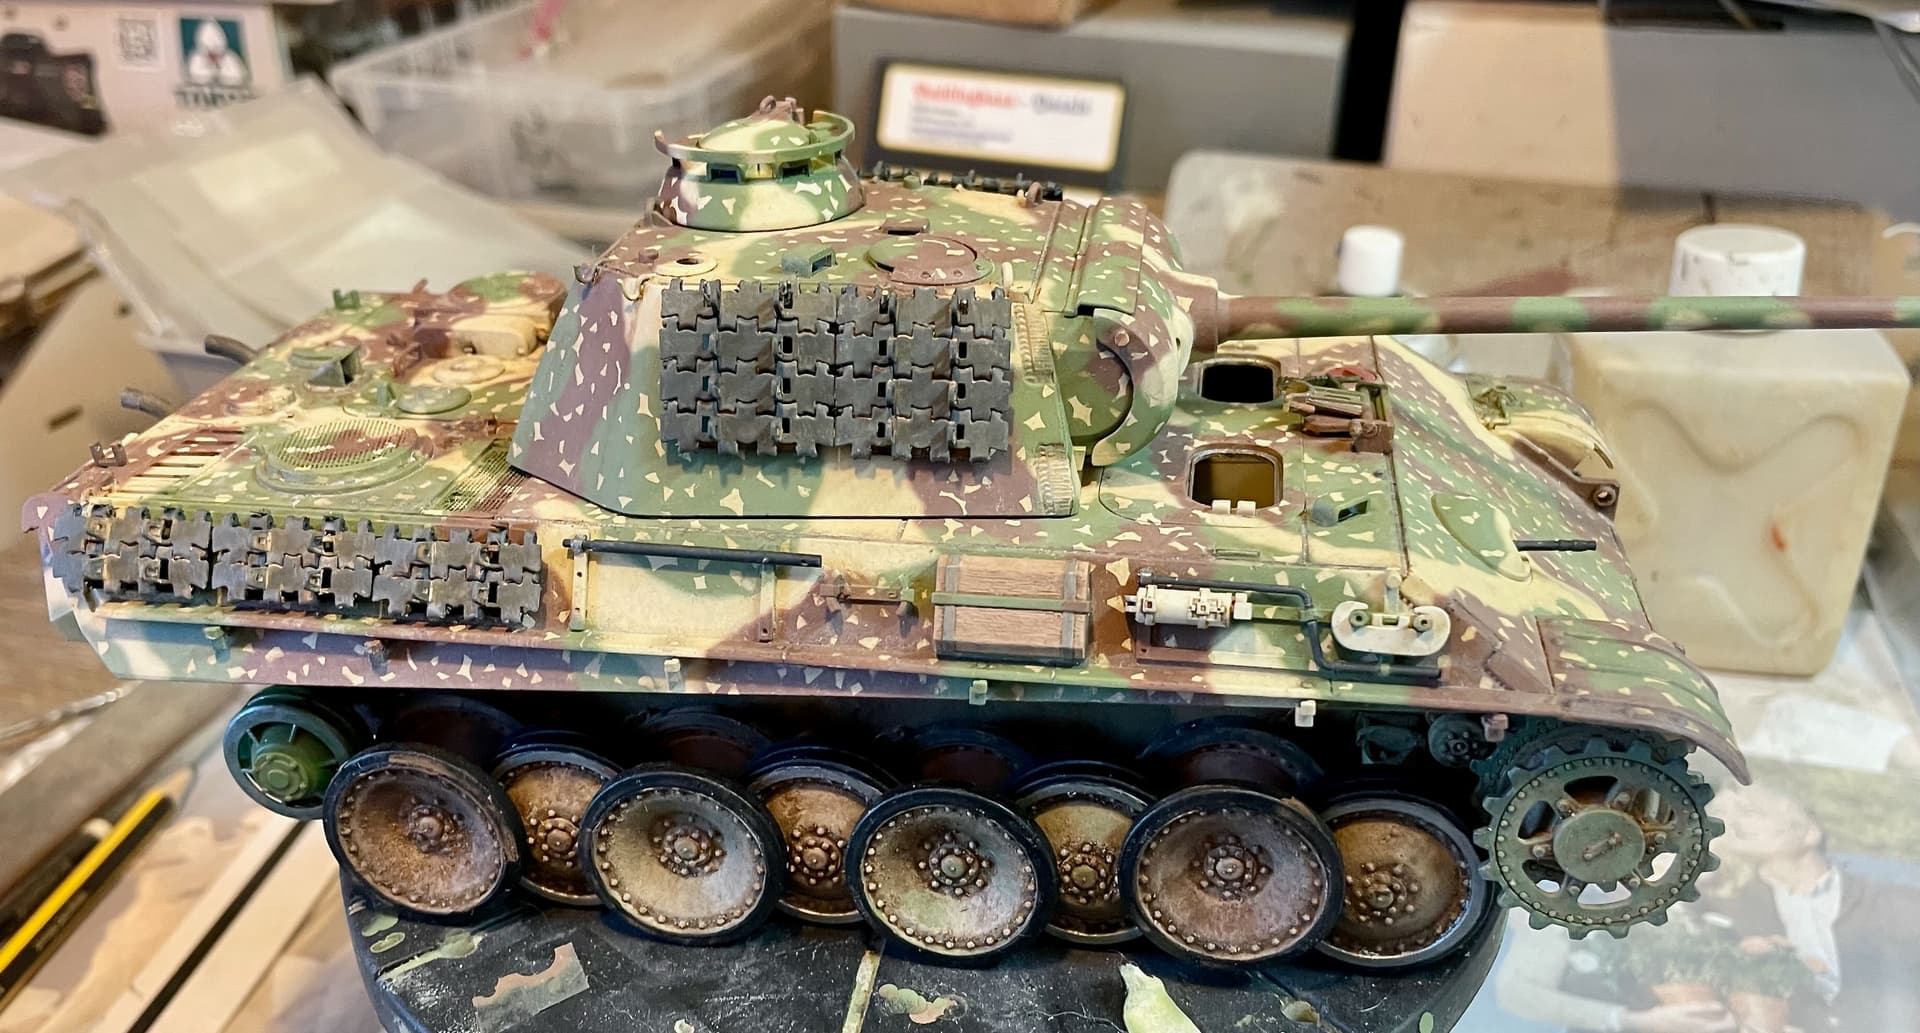
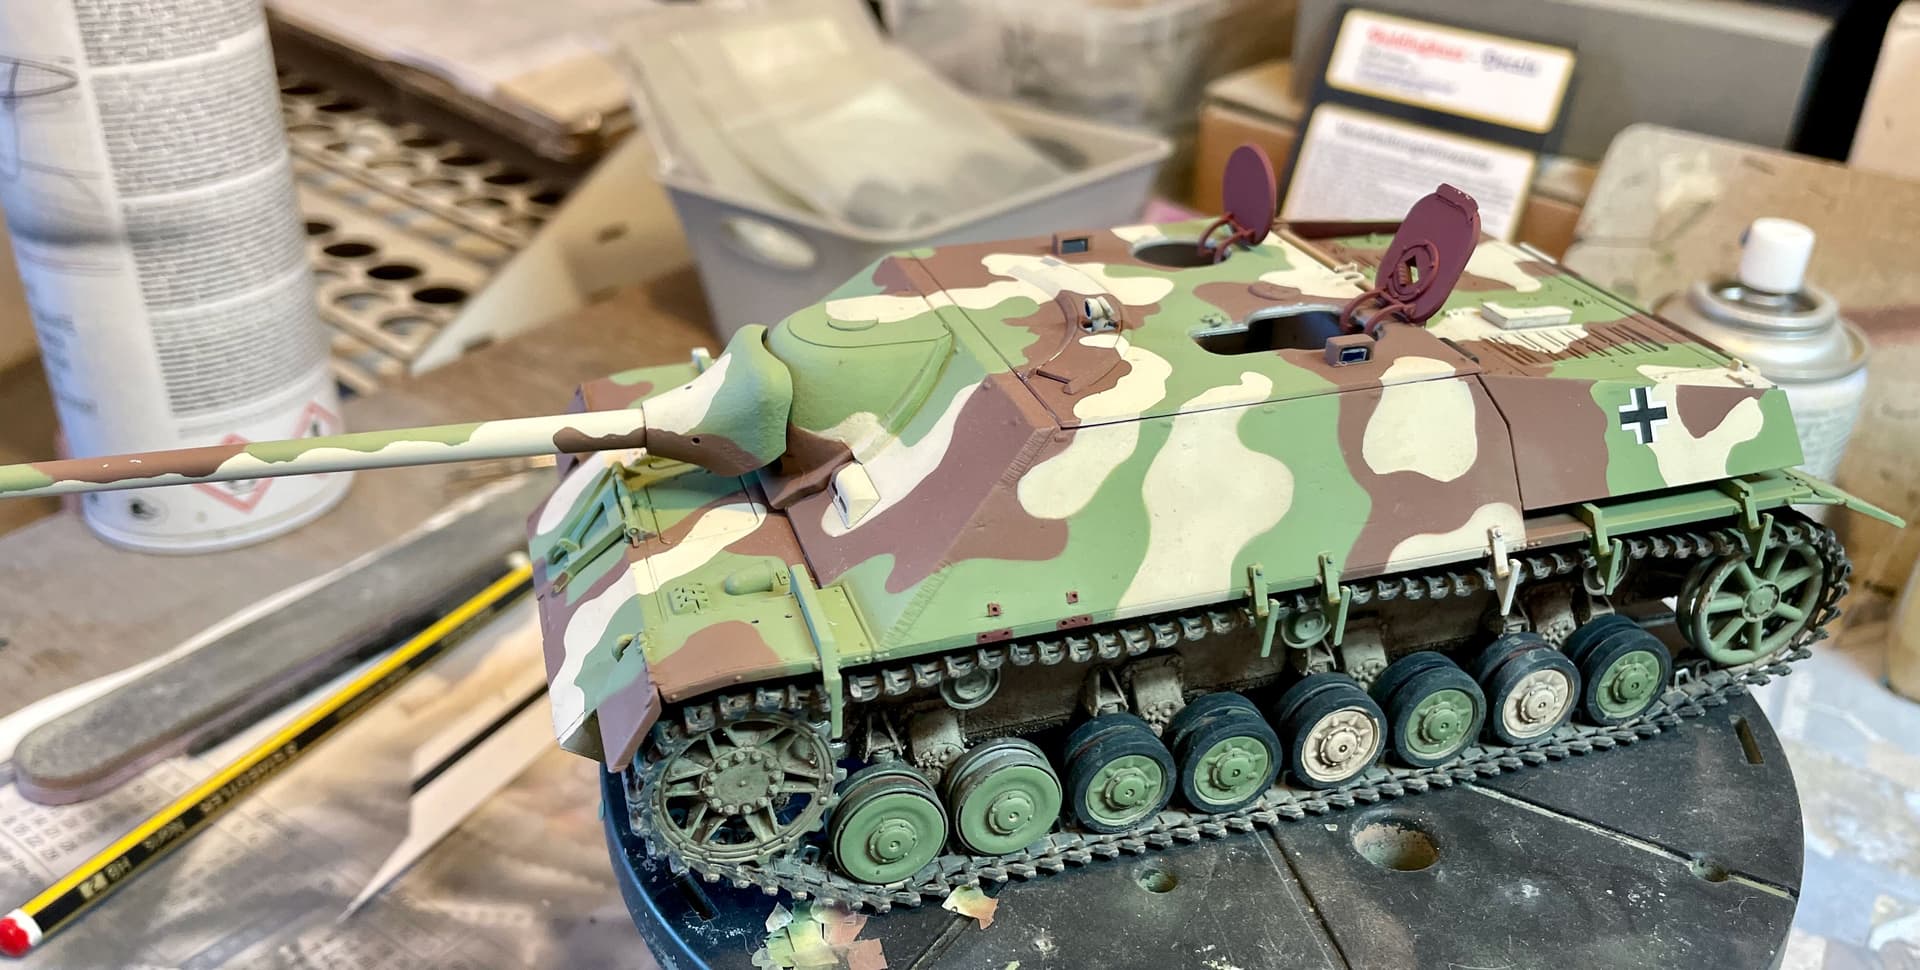
Looking more closely at a better picture of 114 … I had to move the number a little forward as can be identified on the original. Starting to dirty up the lower hull and the running gear.
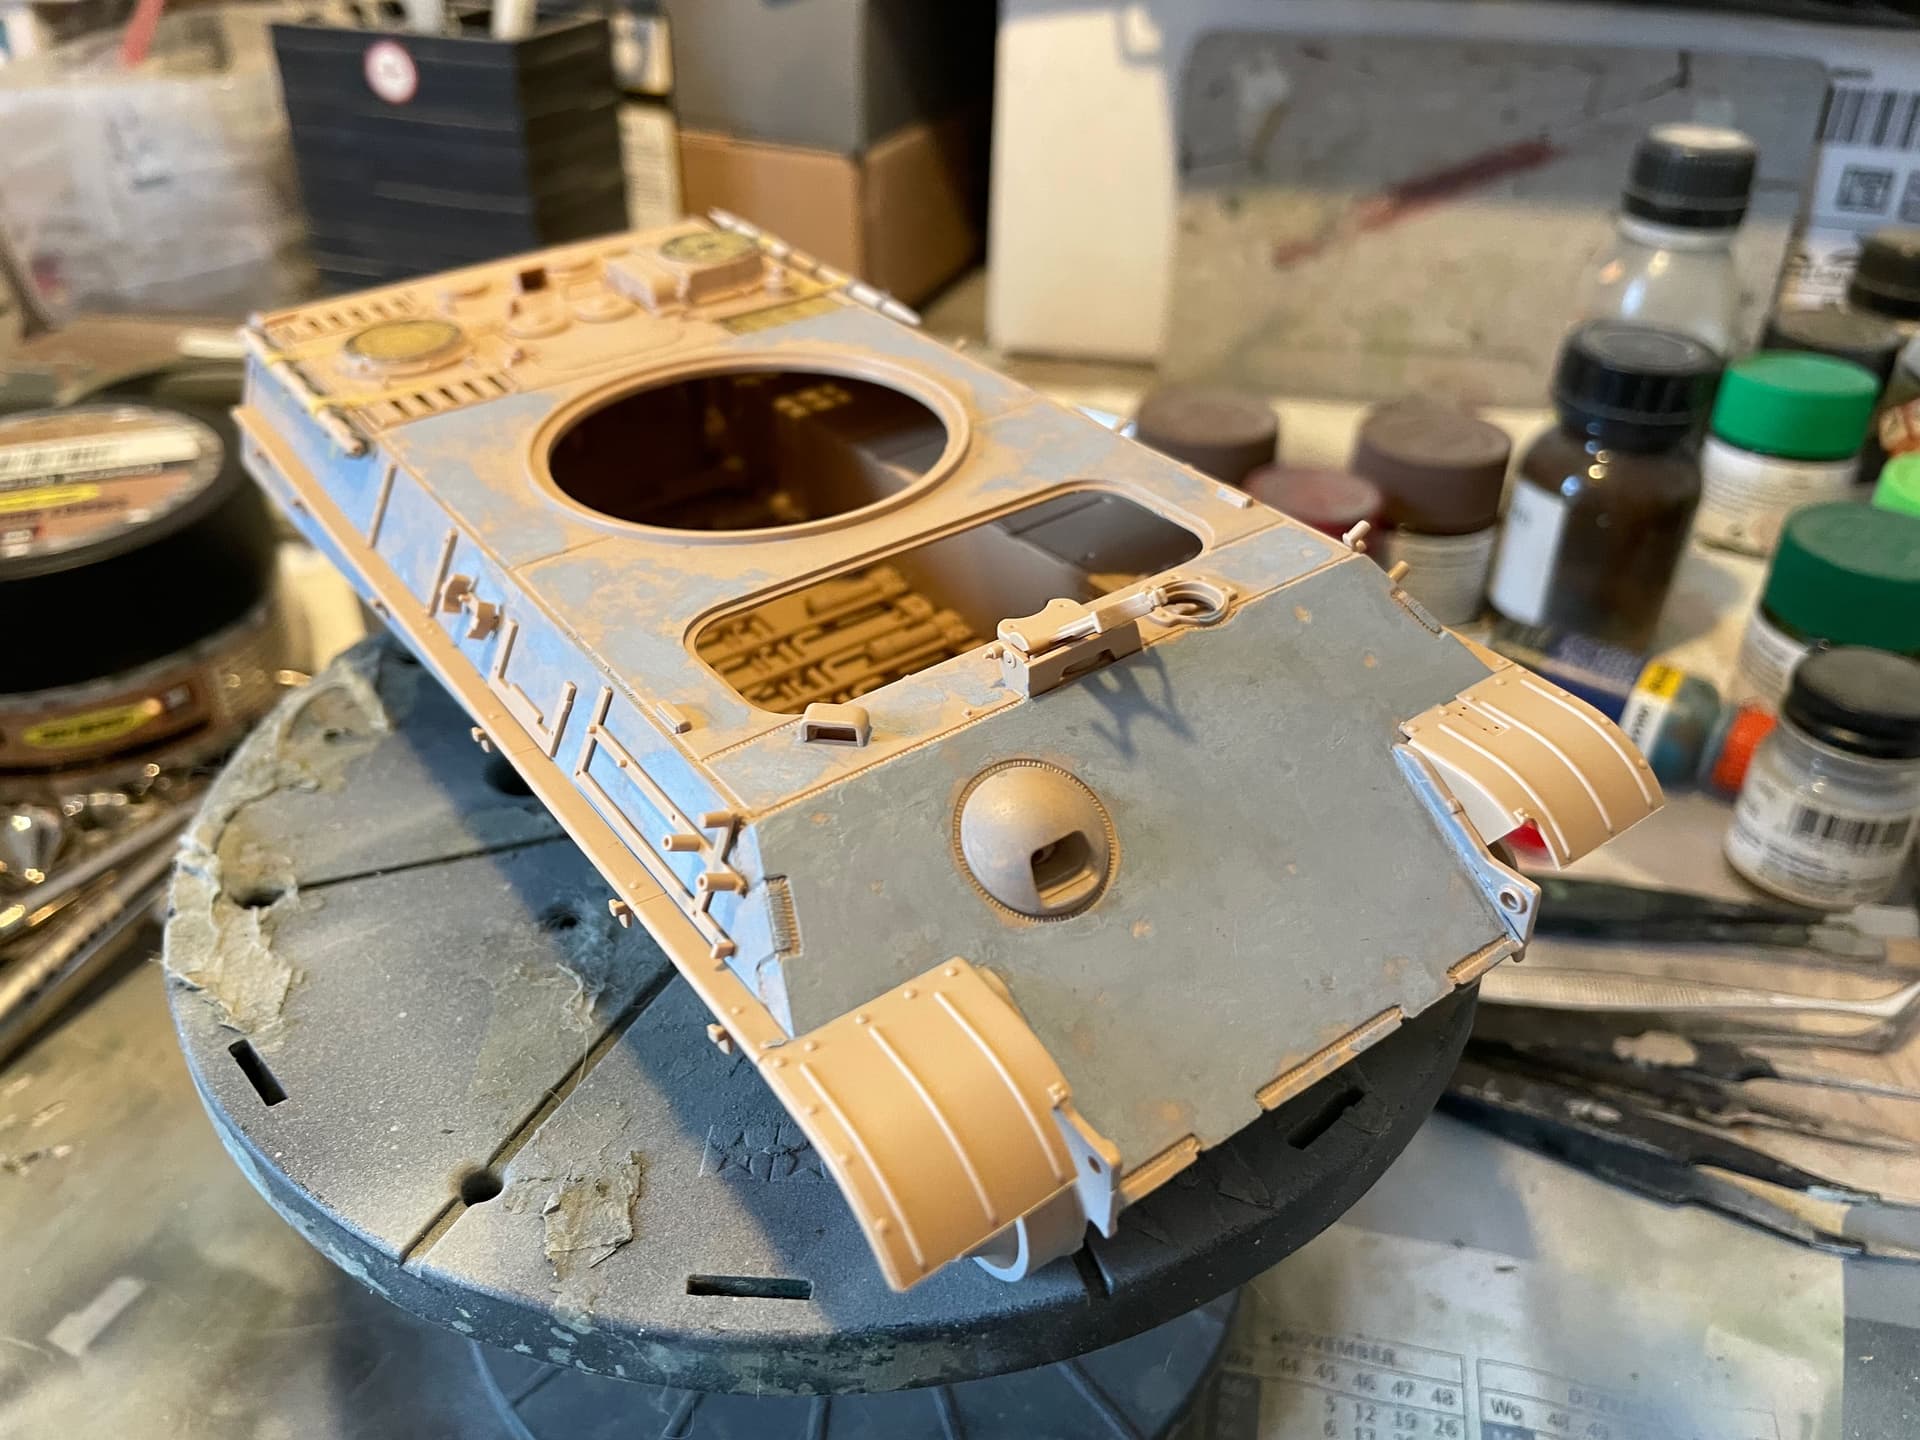
So I did a little work on the 114, running gear on and weathered. Got some tools on and did some basic filters/weathering with oil paints … got most of the vision blocks in.
I do not tend to work on a kit continually, I bring it up to certain stages like the raw build, then the paint job, running gear complete and weathered (I utterly despise doing that). Once I get to an overall satisfying level I gradually add the tools and other items and proceed with a more detailed process of working around smaller specific areas or topics.
When I start with the tools or vision blocks, I tend to do this for a couple of other kits also waiting to be “upgraded”.
So with me it is a rather slower process over months … or years. Figures are usually the last to get finished although I assemble and pre-fit them quite early.