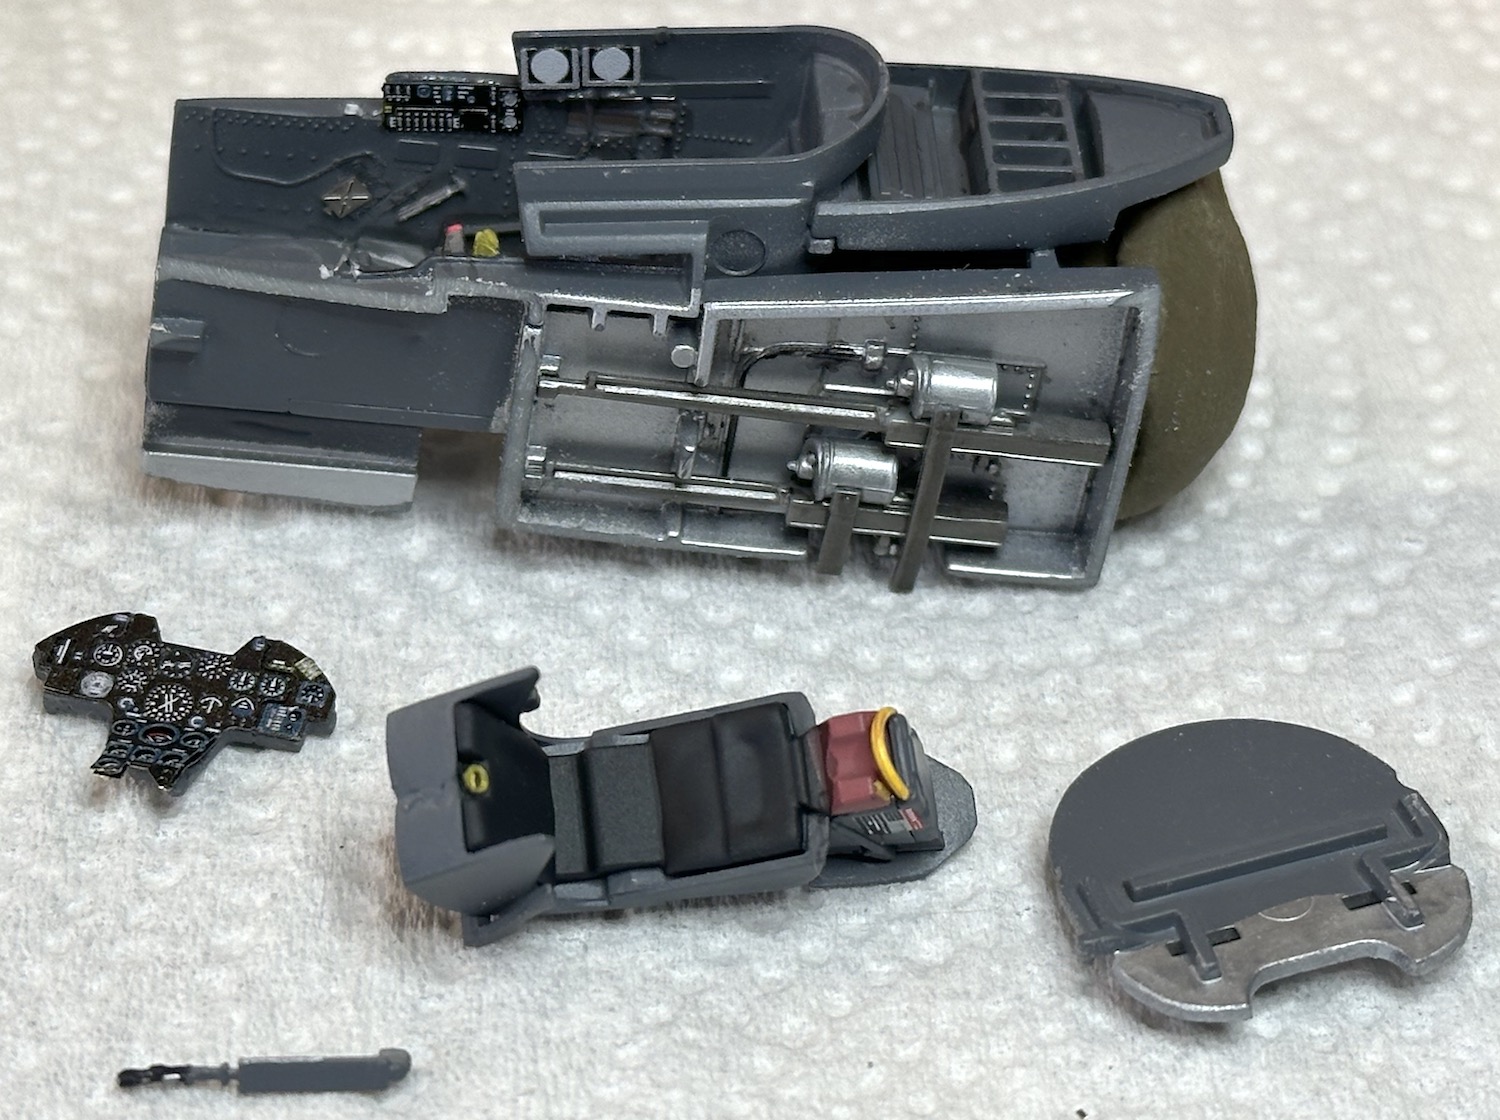
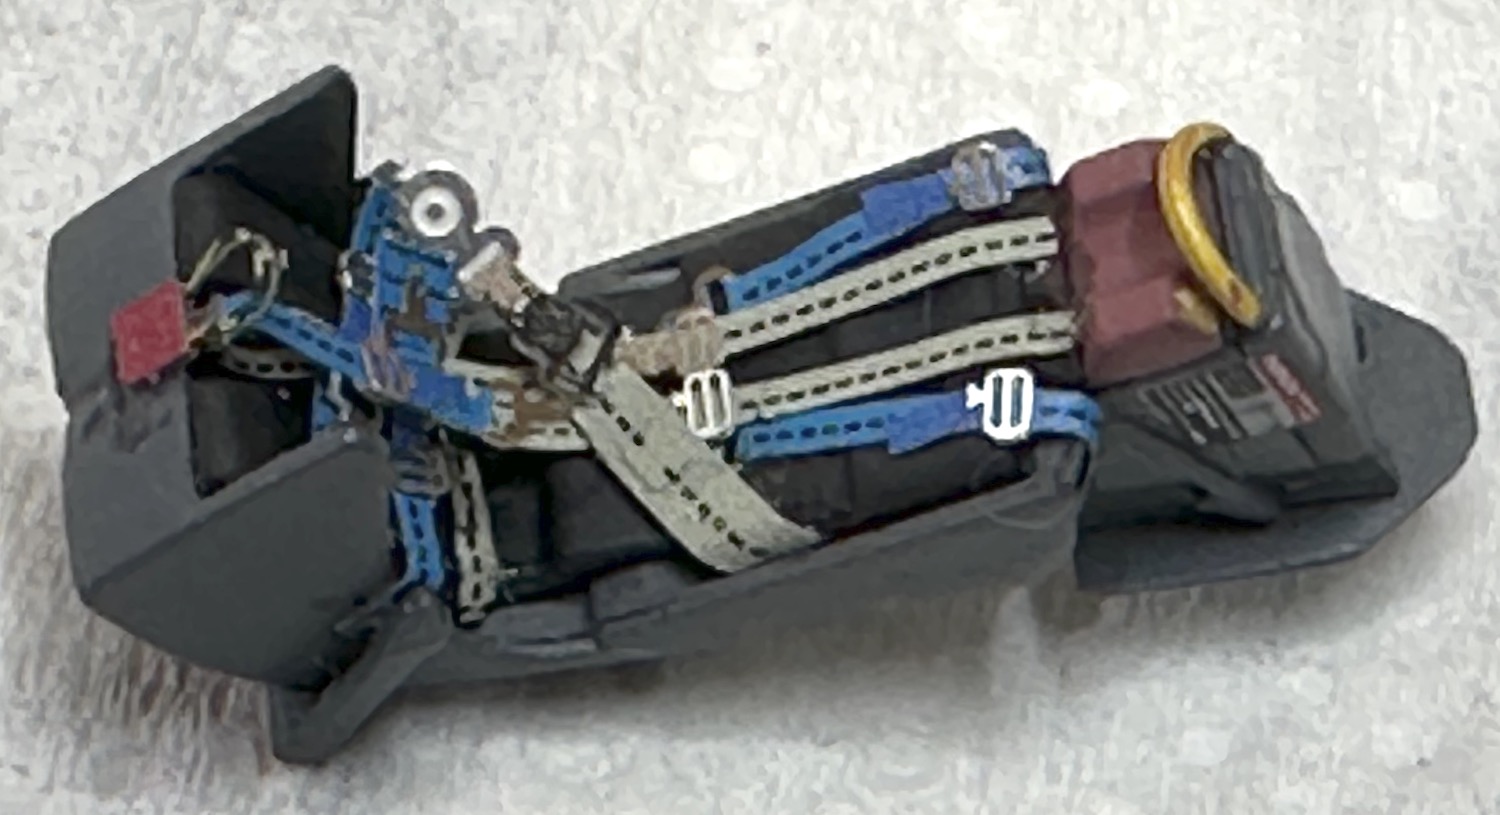
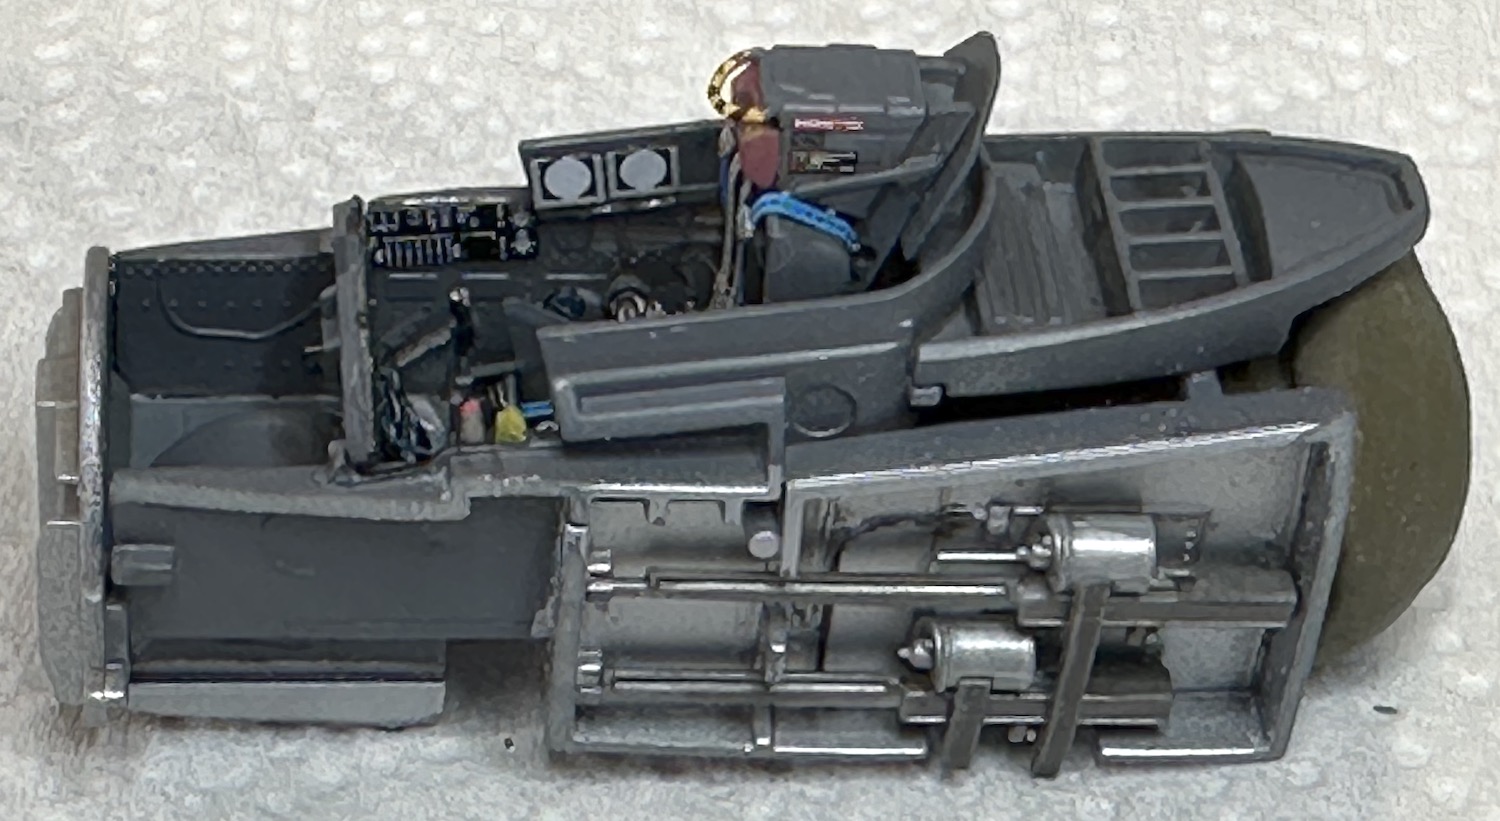
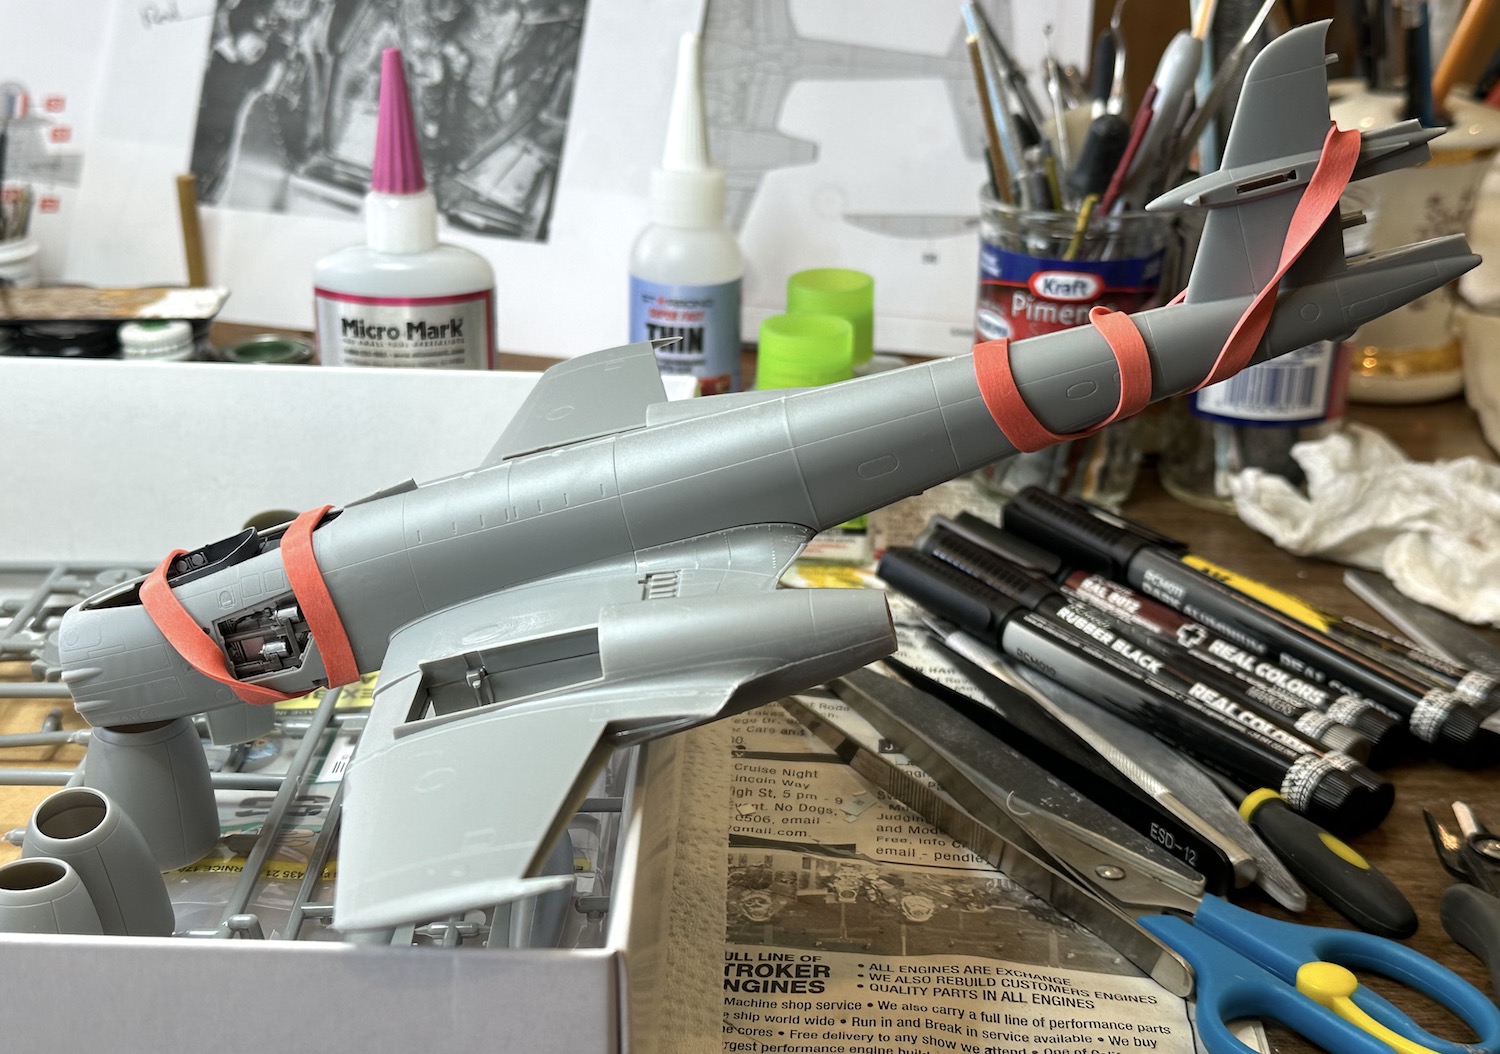
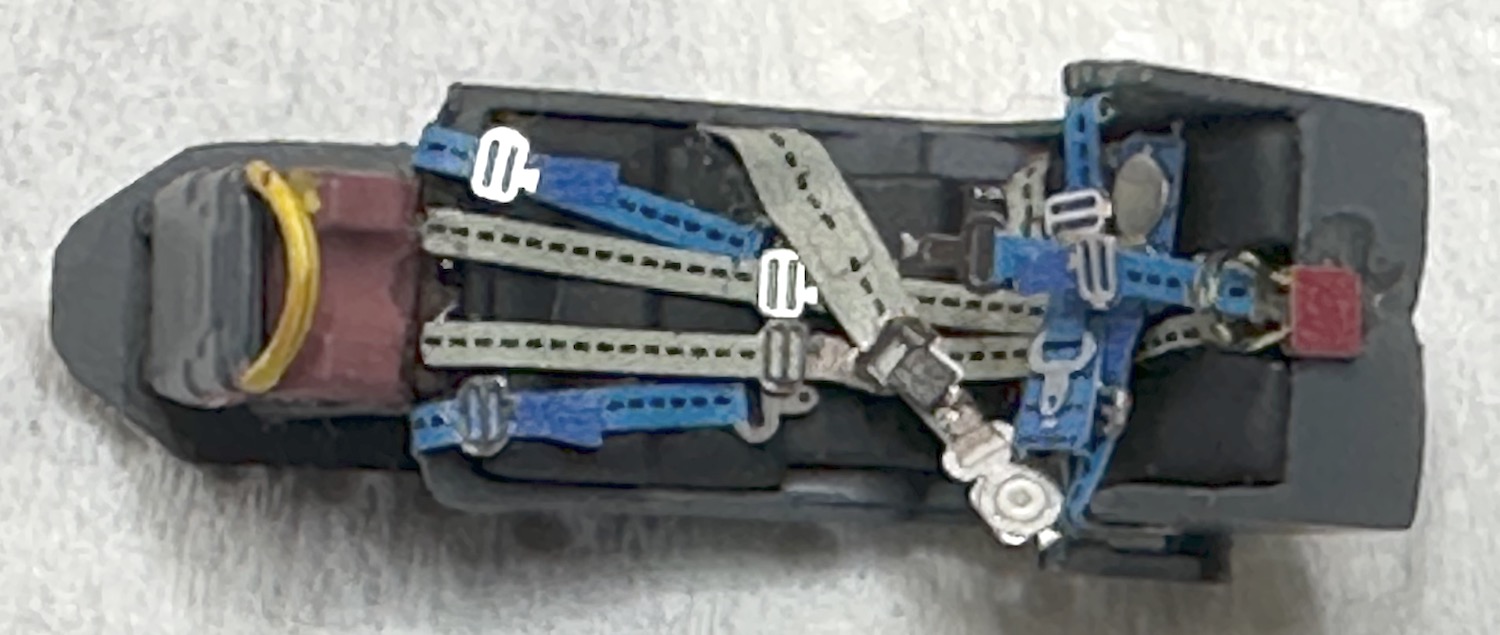
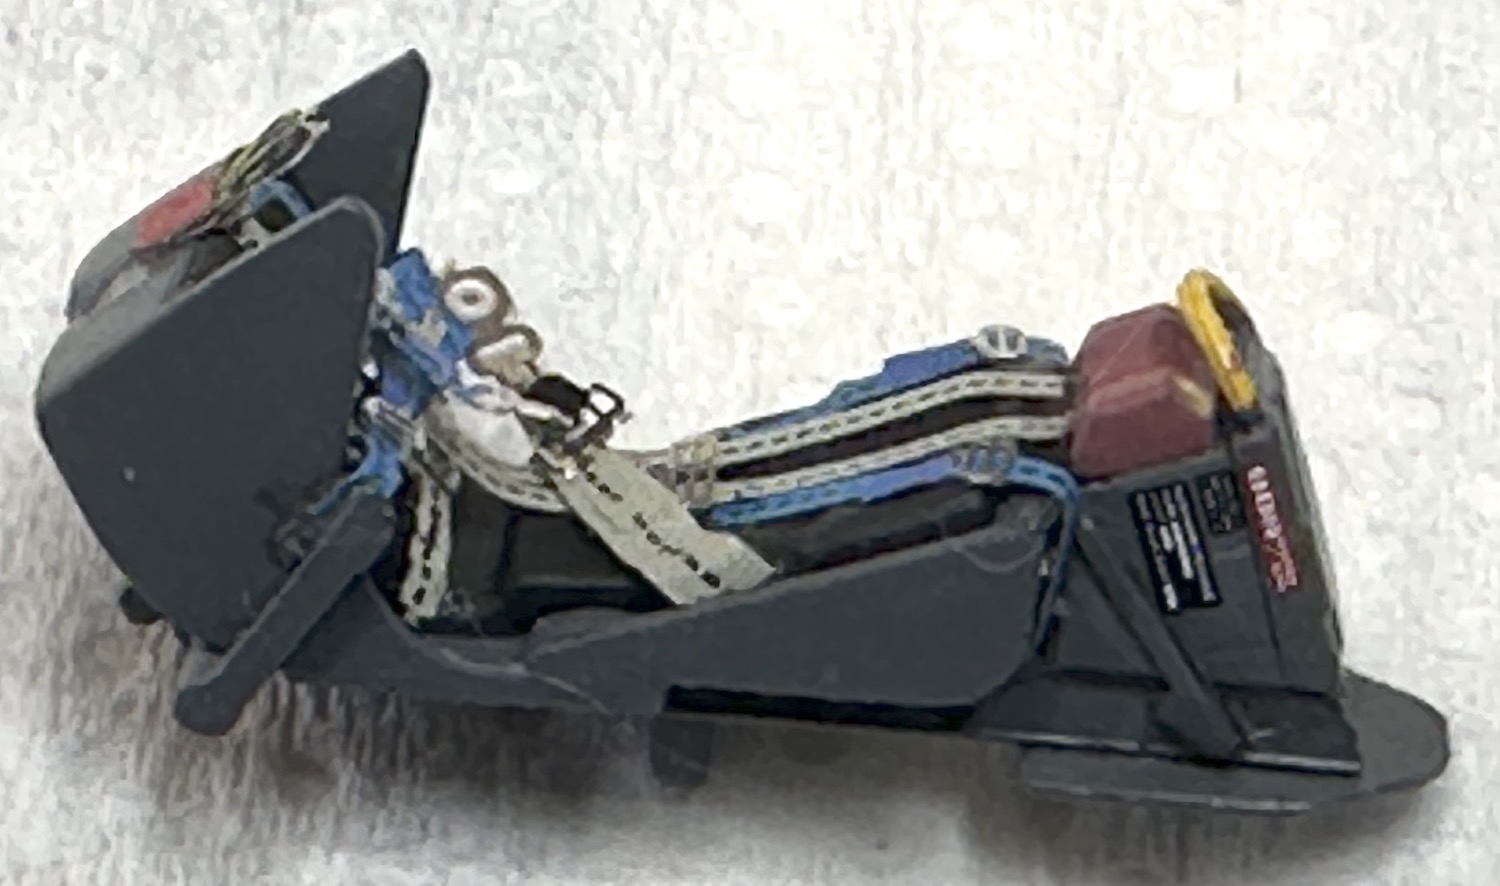
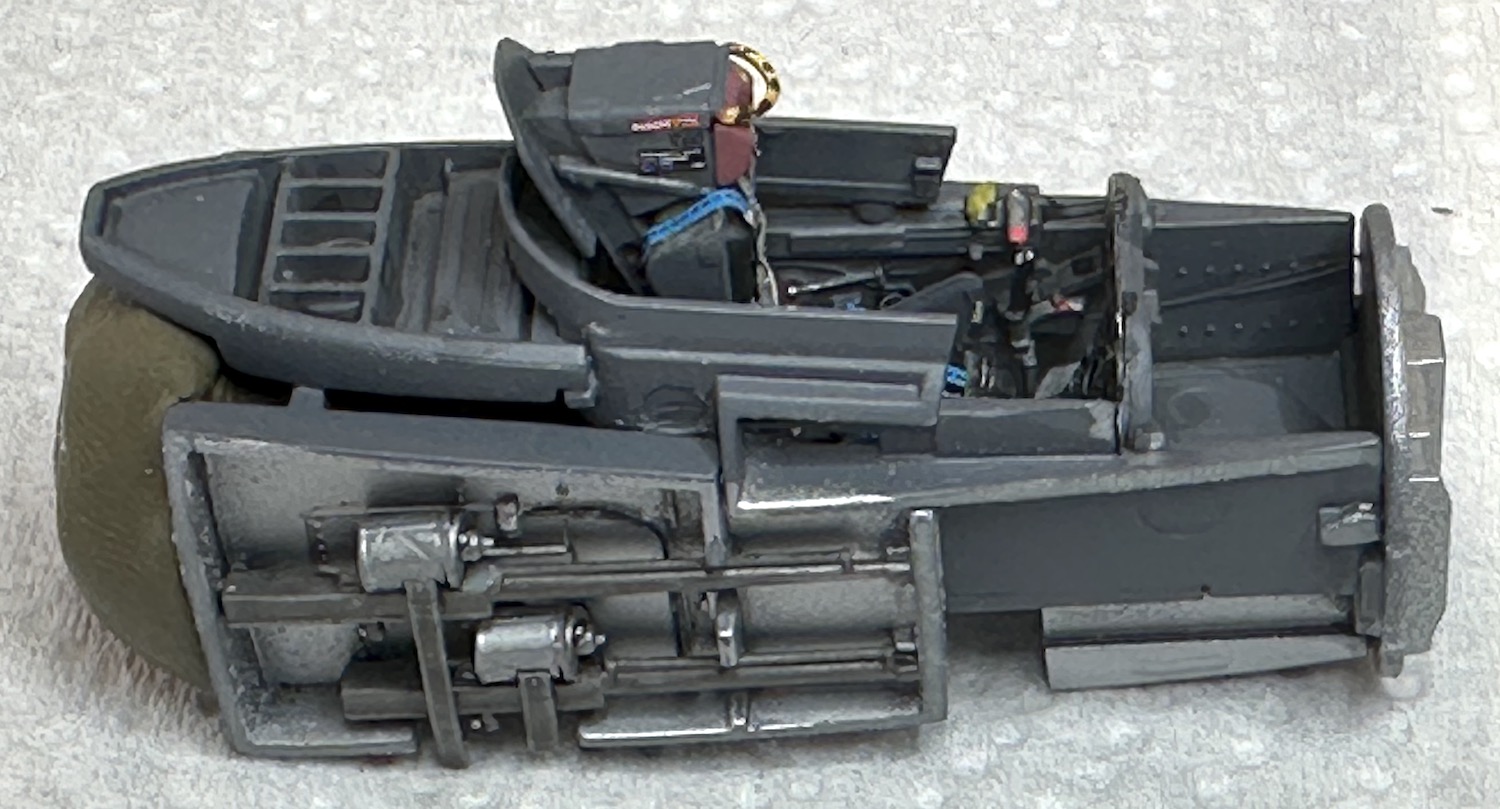
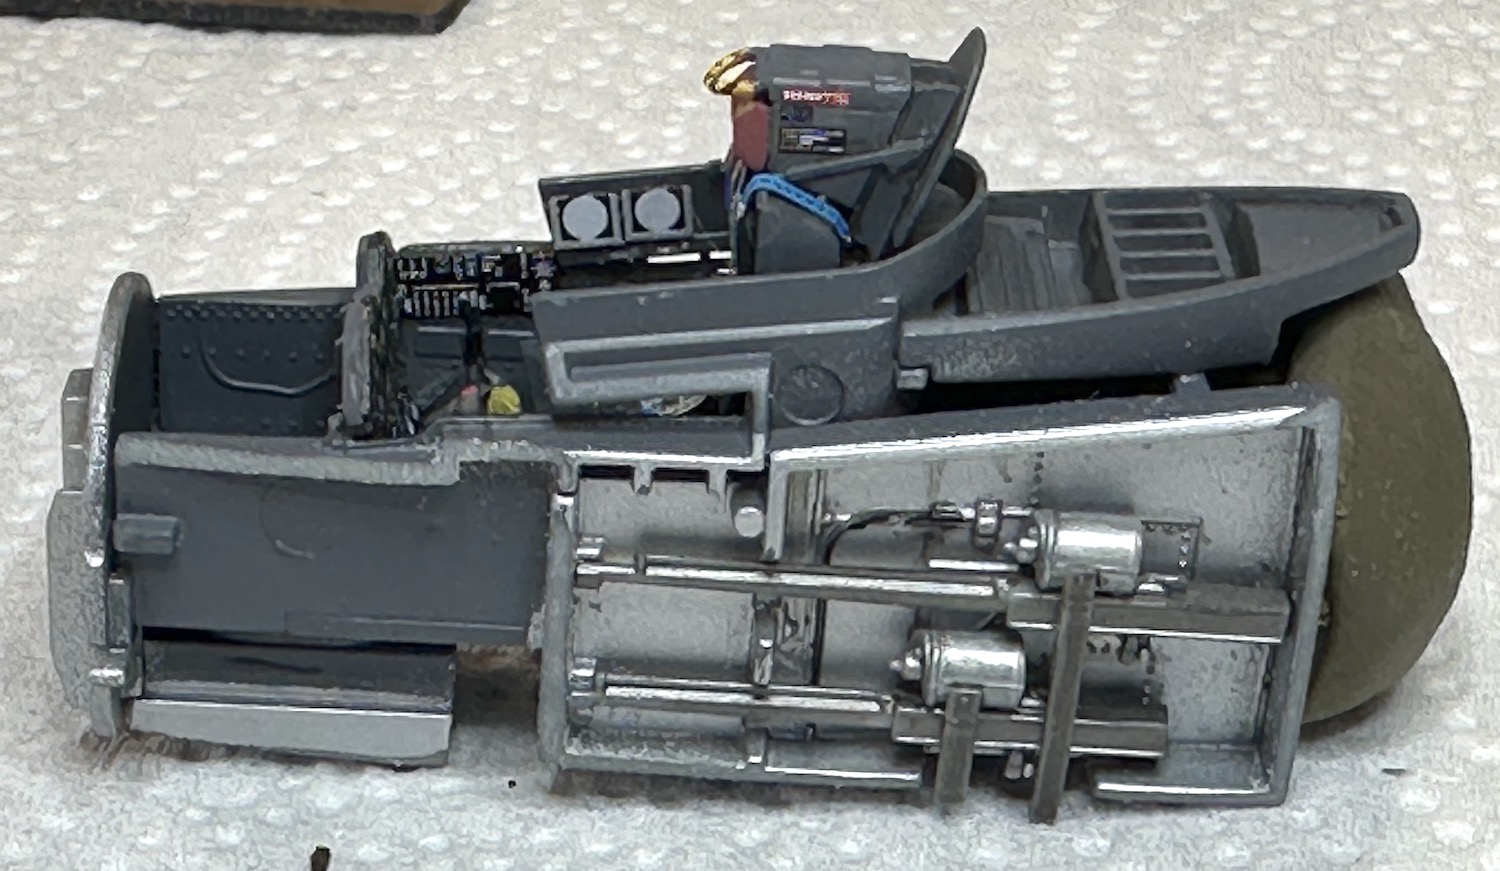
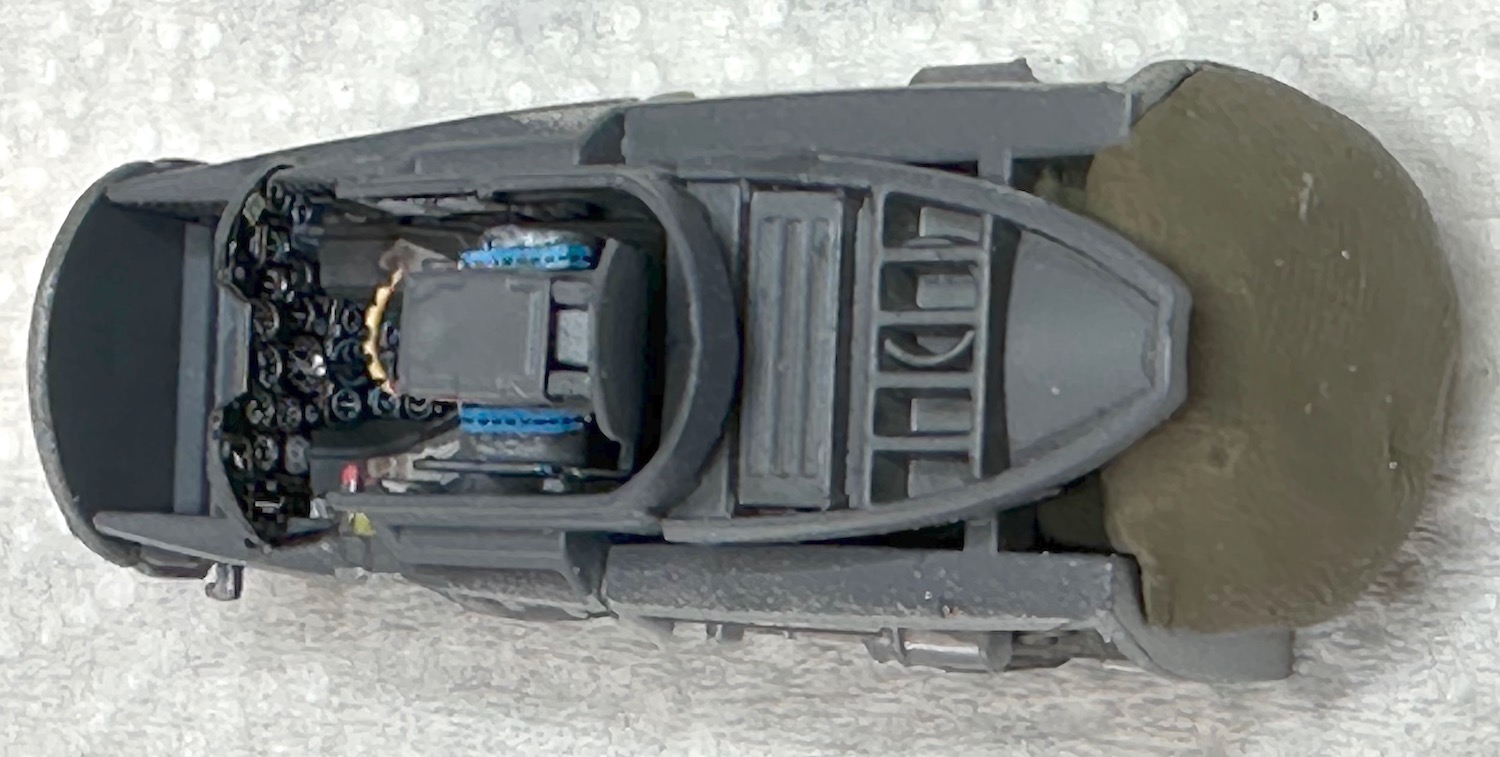
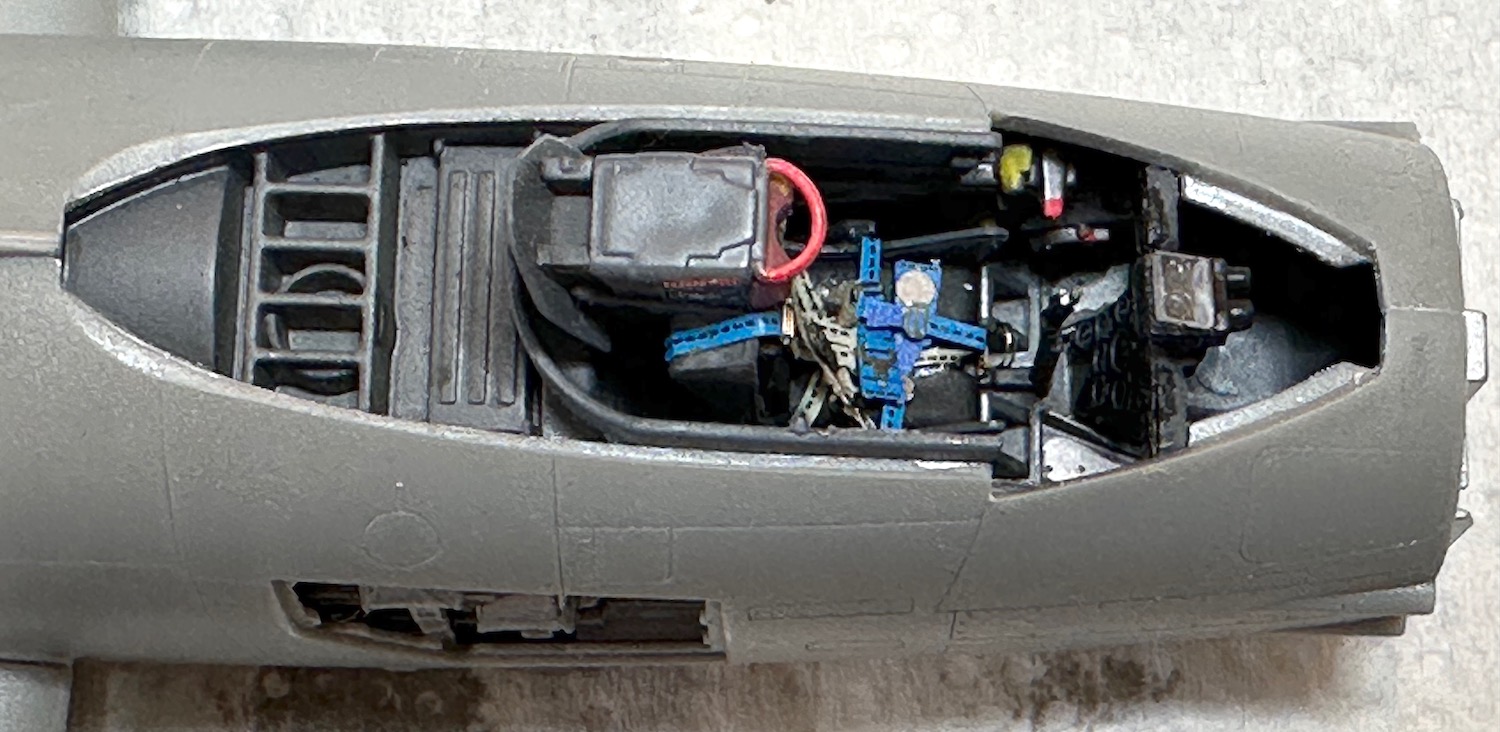
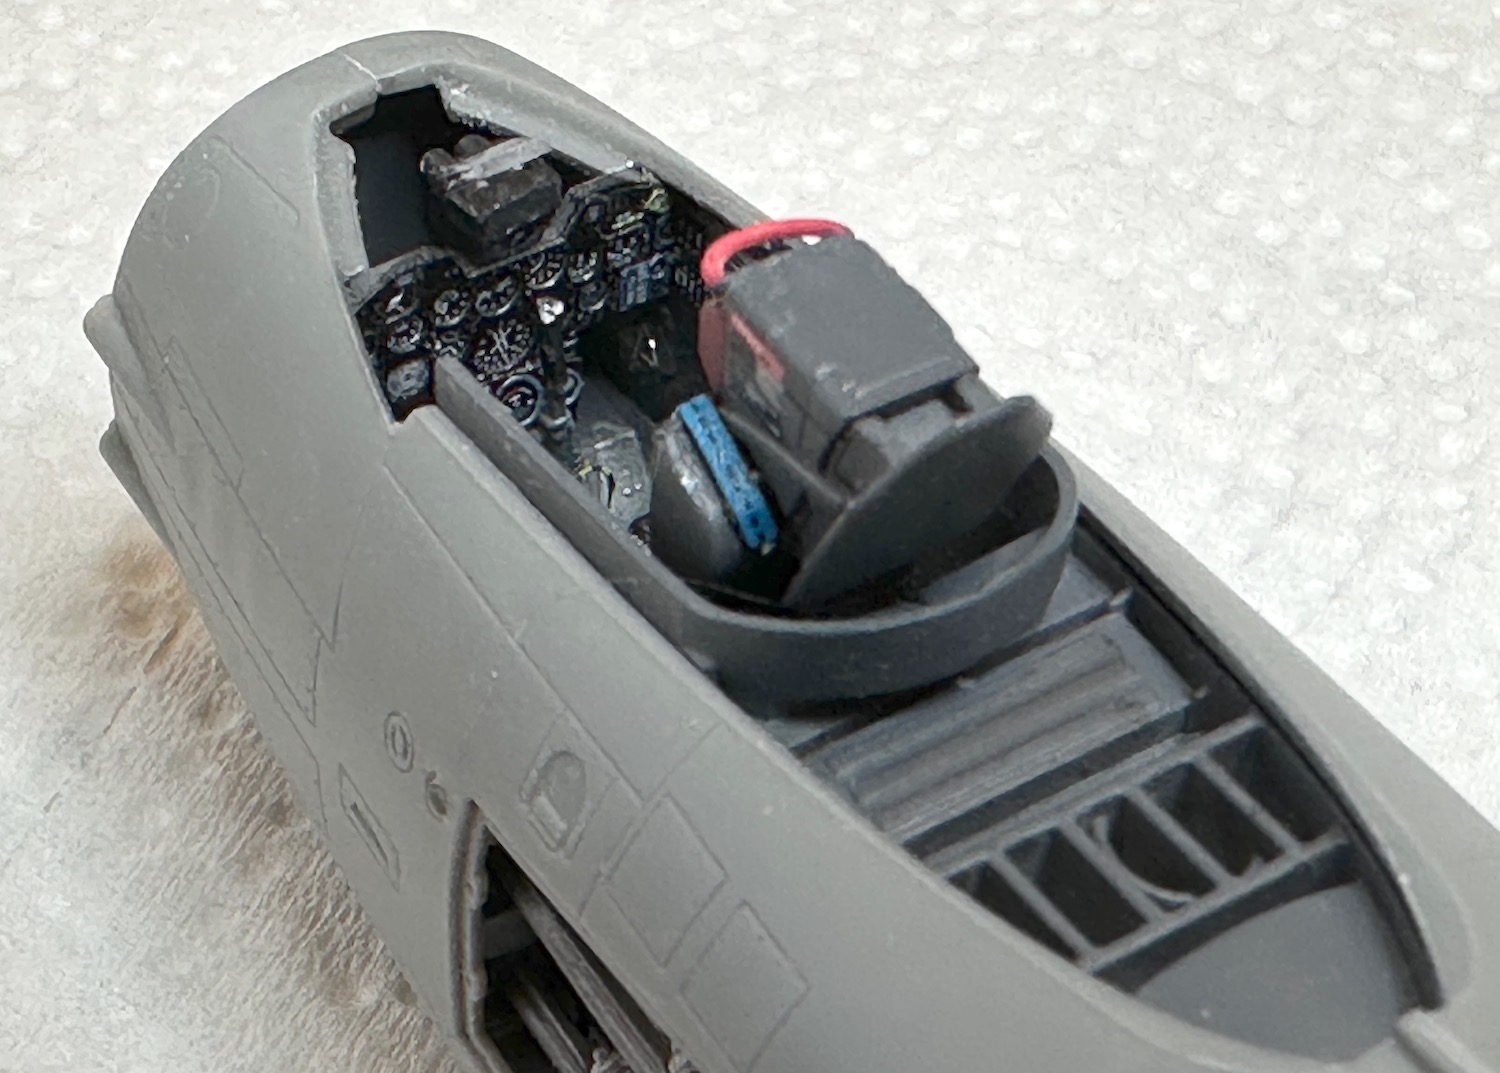
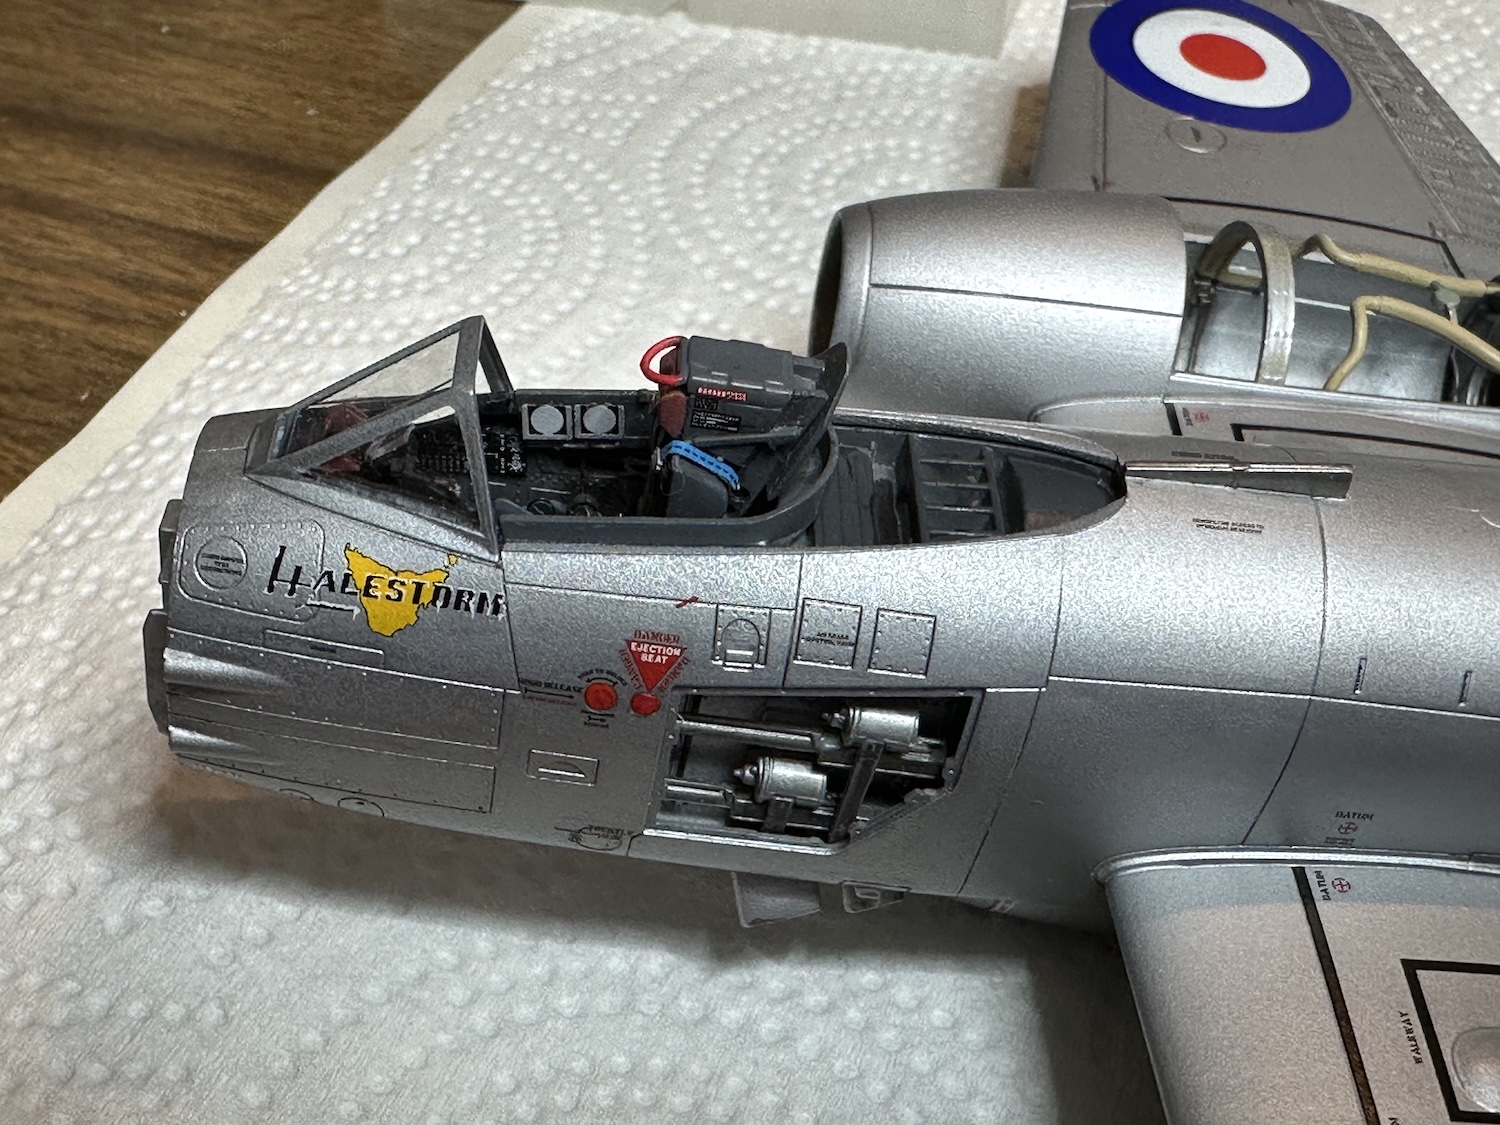
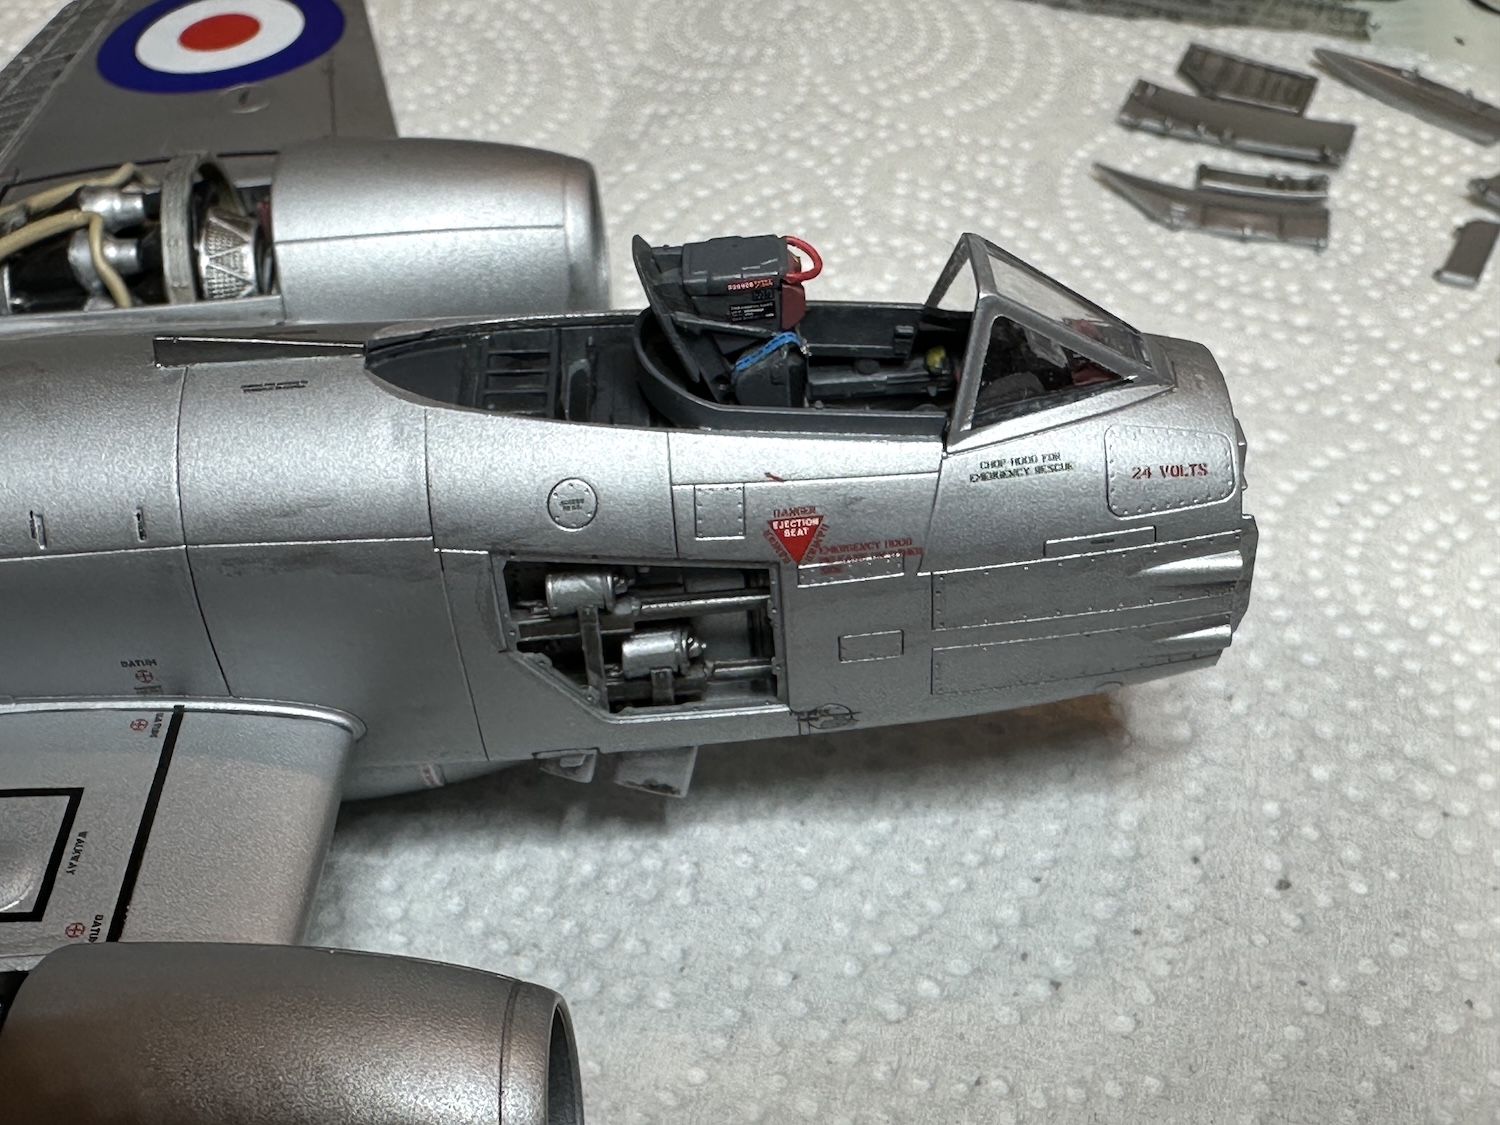
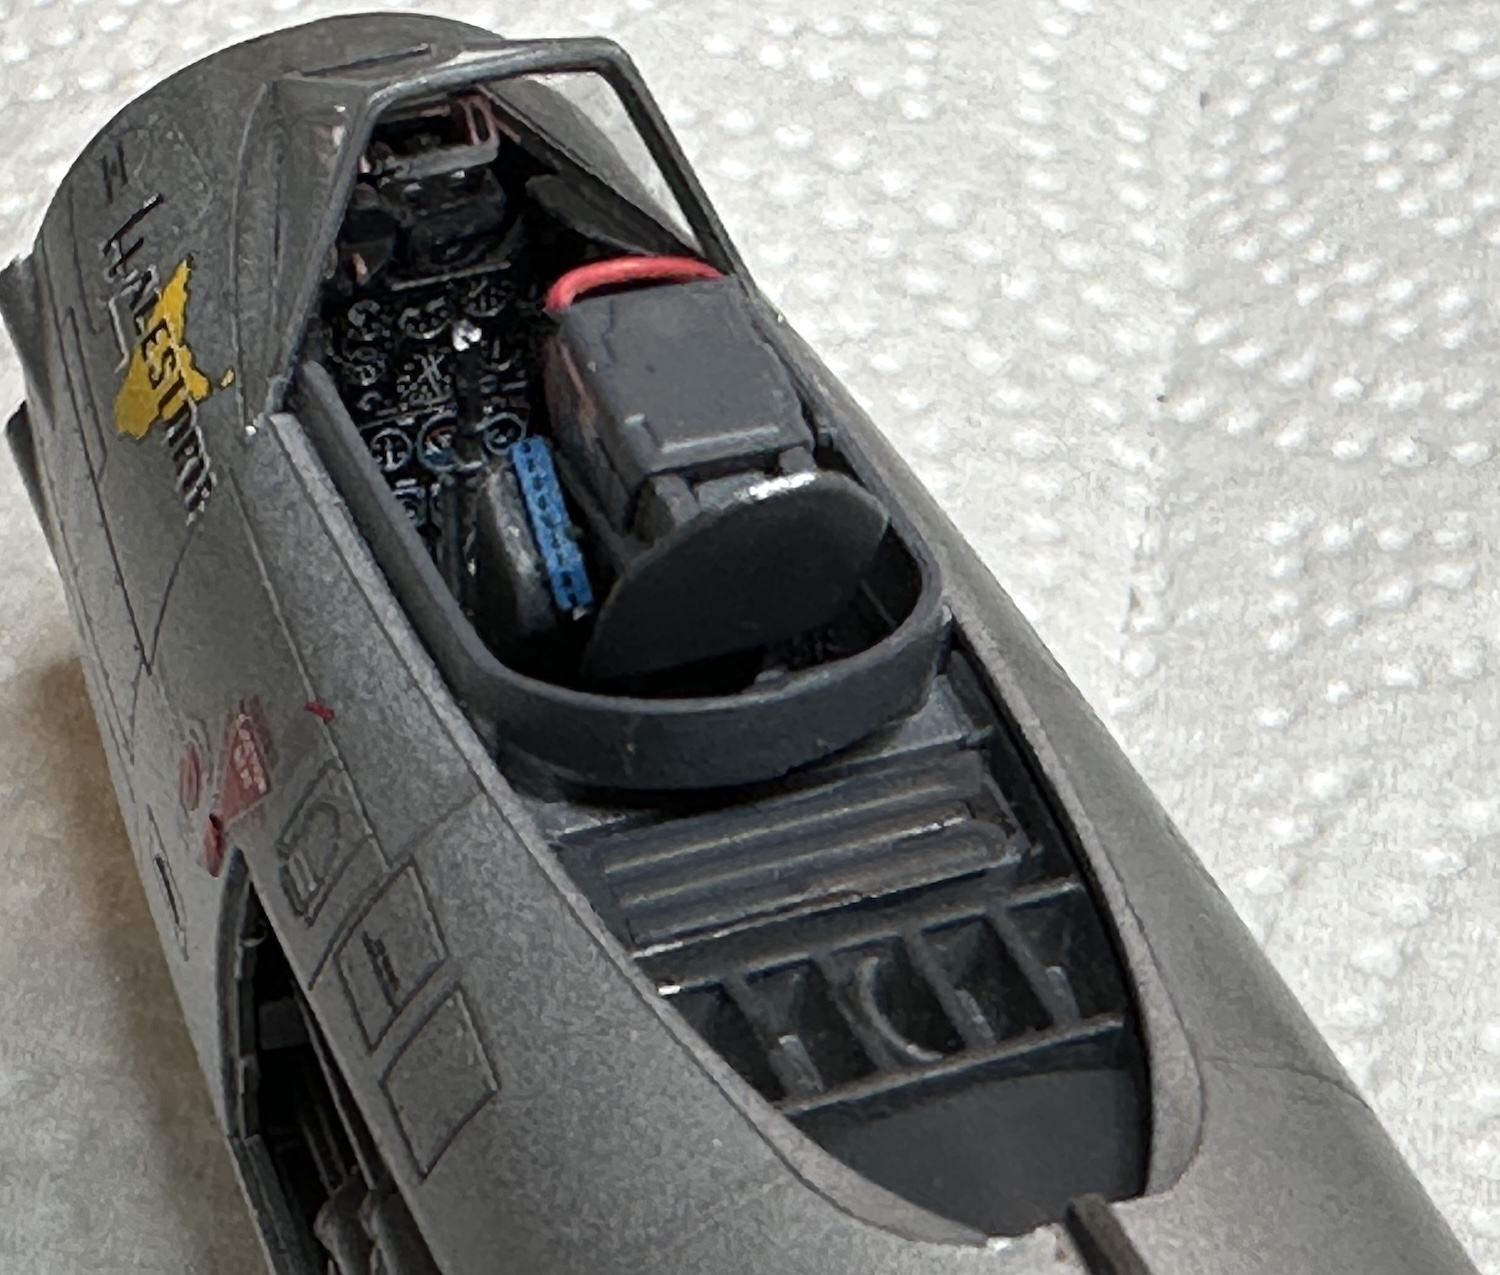
The Eduard cockpit set is really a treat. It has a laminated instrument panel that looks really great. There are far more bits than I used, partially because I had already built the cockpit and could no longer reach everything and partially because some of the PE bits were too fiddly for my skill & patience. The ejection seat with its belts came out really well. I do wish I had waited to install it. It turned out to be in the way in many future operations including trying to fit the canopy. It is just a bit too tall to allow the canopy to close which upset my plans for masking the canopy and using that as a mask to protect the cockpit. We are getting a bit ahead of the narrative though.
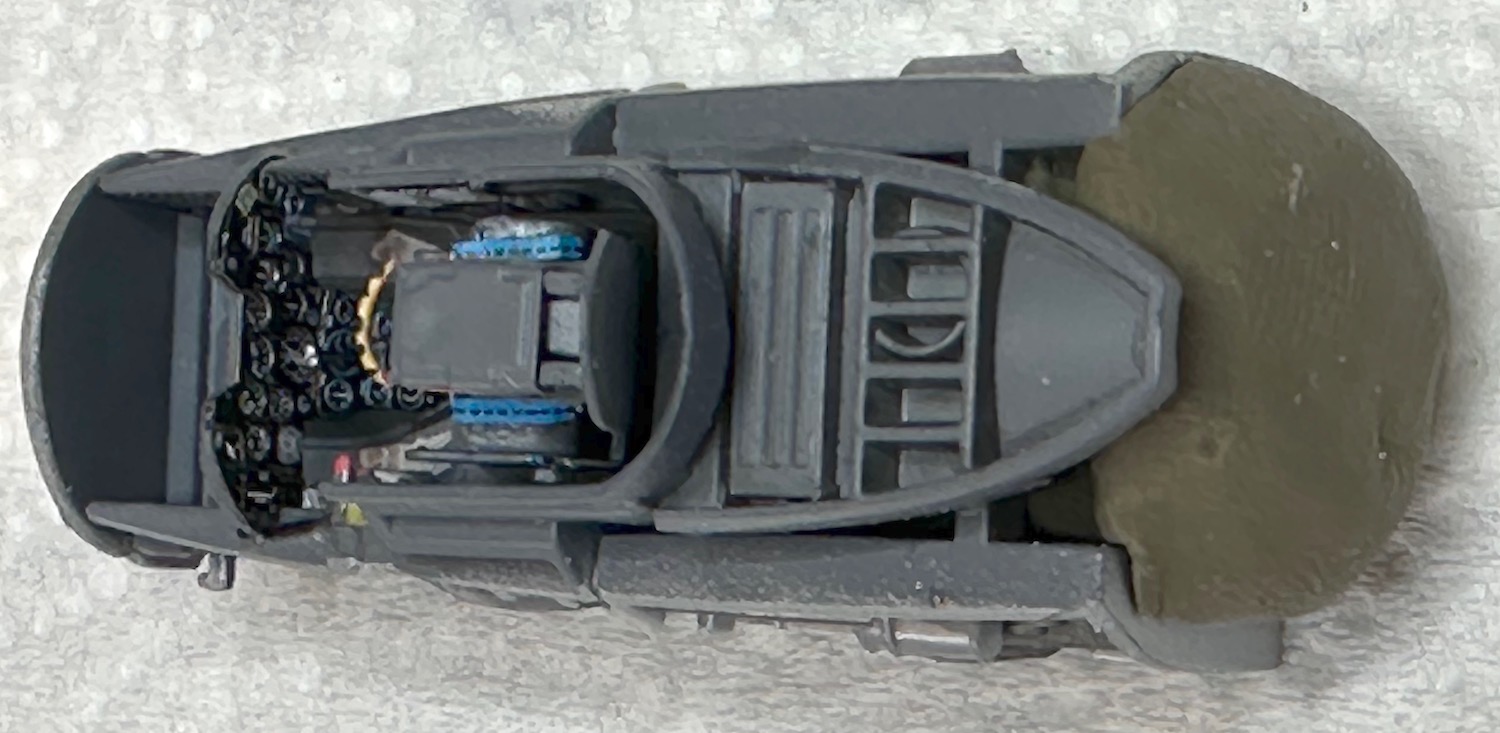
Once the cockpit was built it was inserted in to the fuselage and with some 40+ year old modeling clay was used for a rough & ready weight & balance check. The edge of the box was used as a fulcrum point right where the wheels would touch the ground. With the clay in place, the nose went down. There were still some bits not on the model but I judged (mis-judged?) that the weight of then fore & aft would balance out. Somehow, I got this simple check wrong but that will be a story for a later chapter of this adventure.
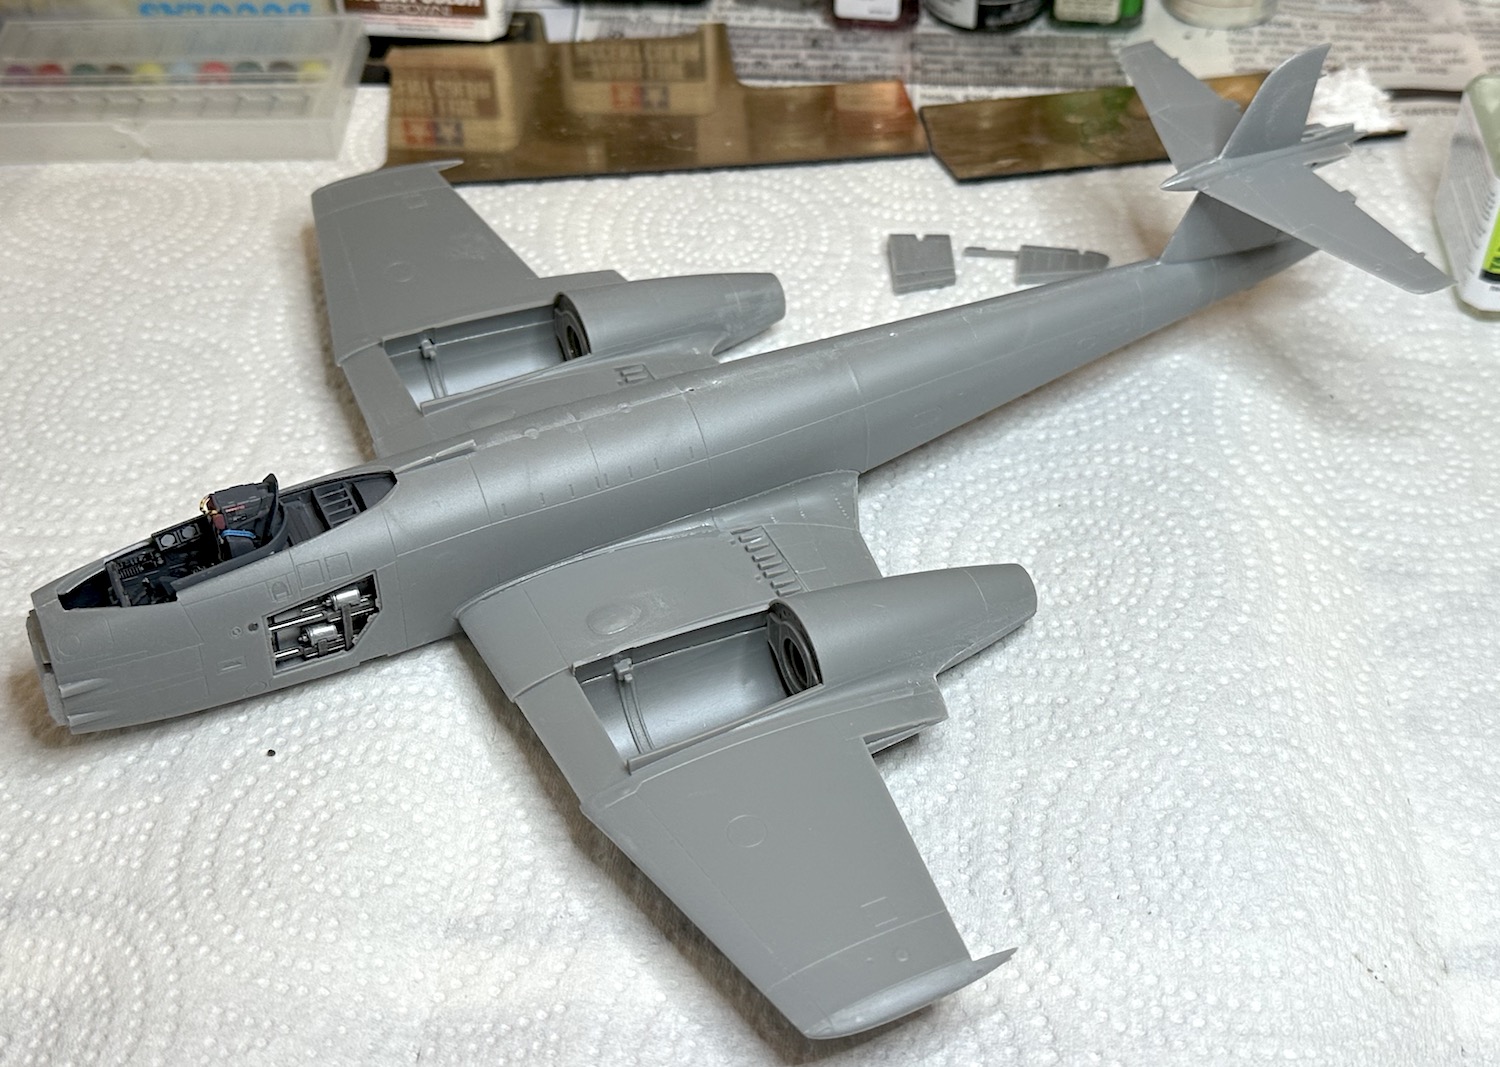
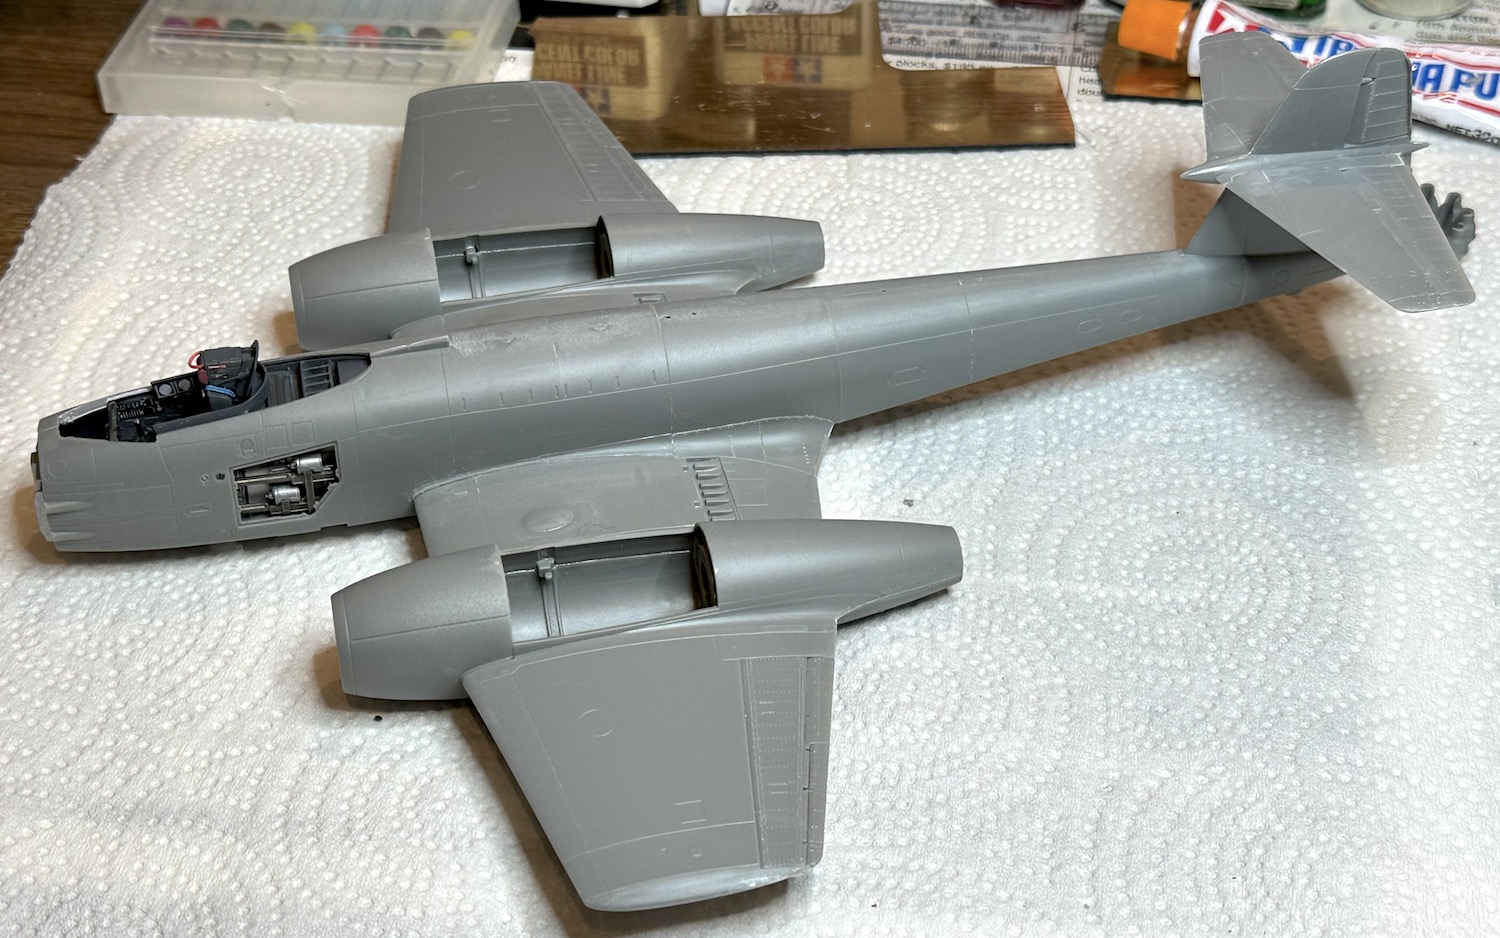
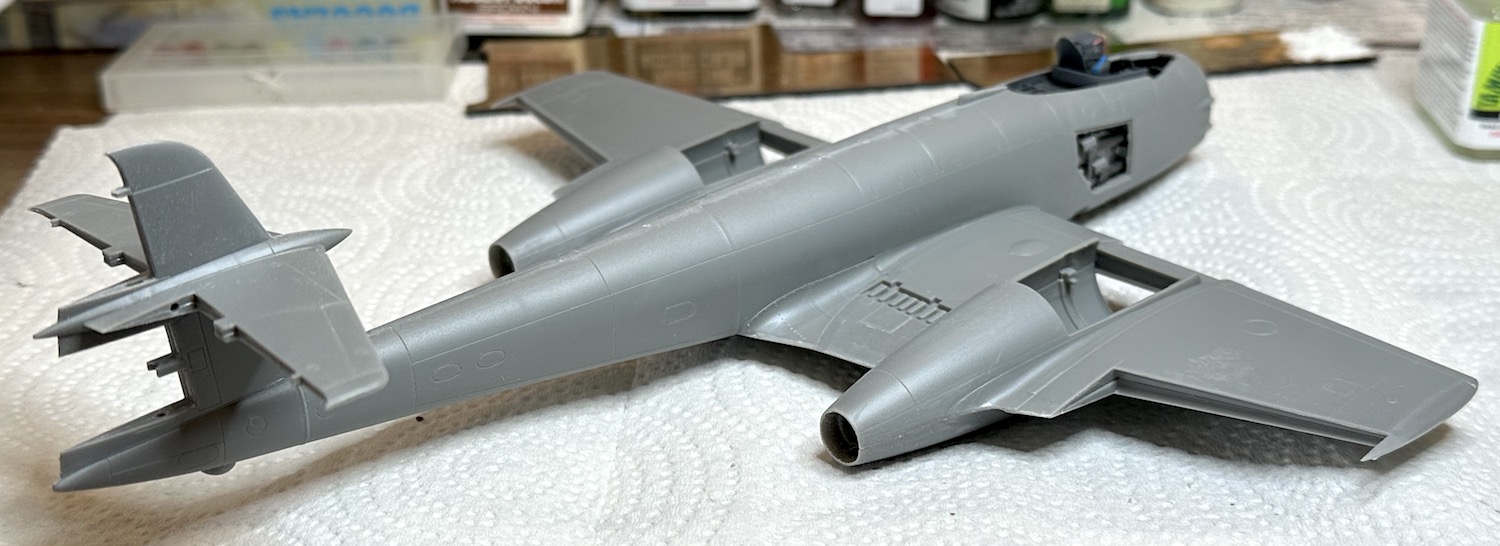
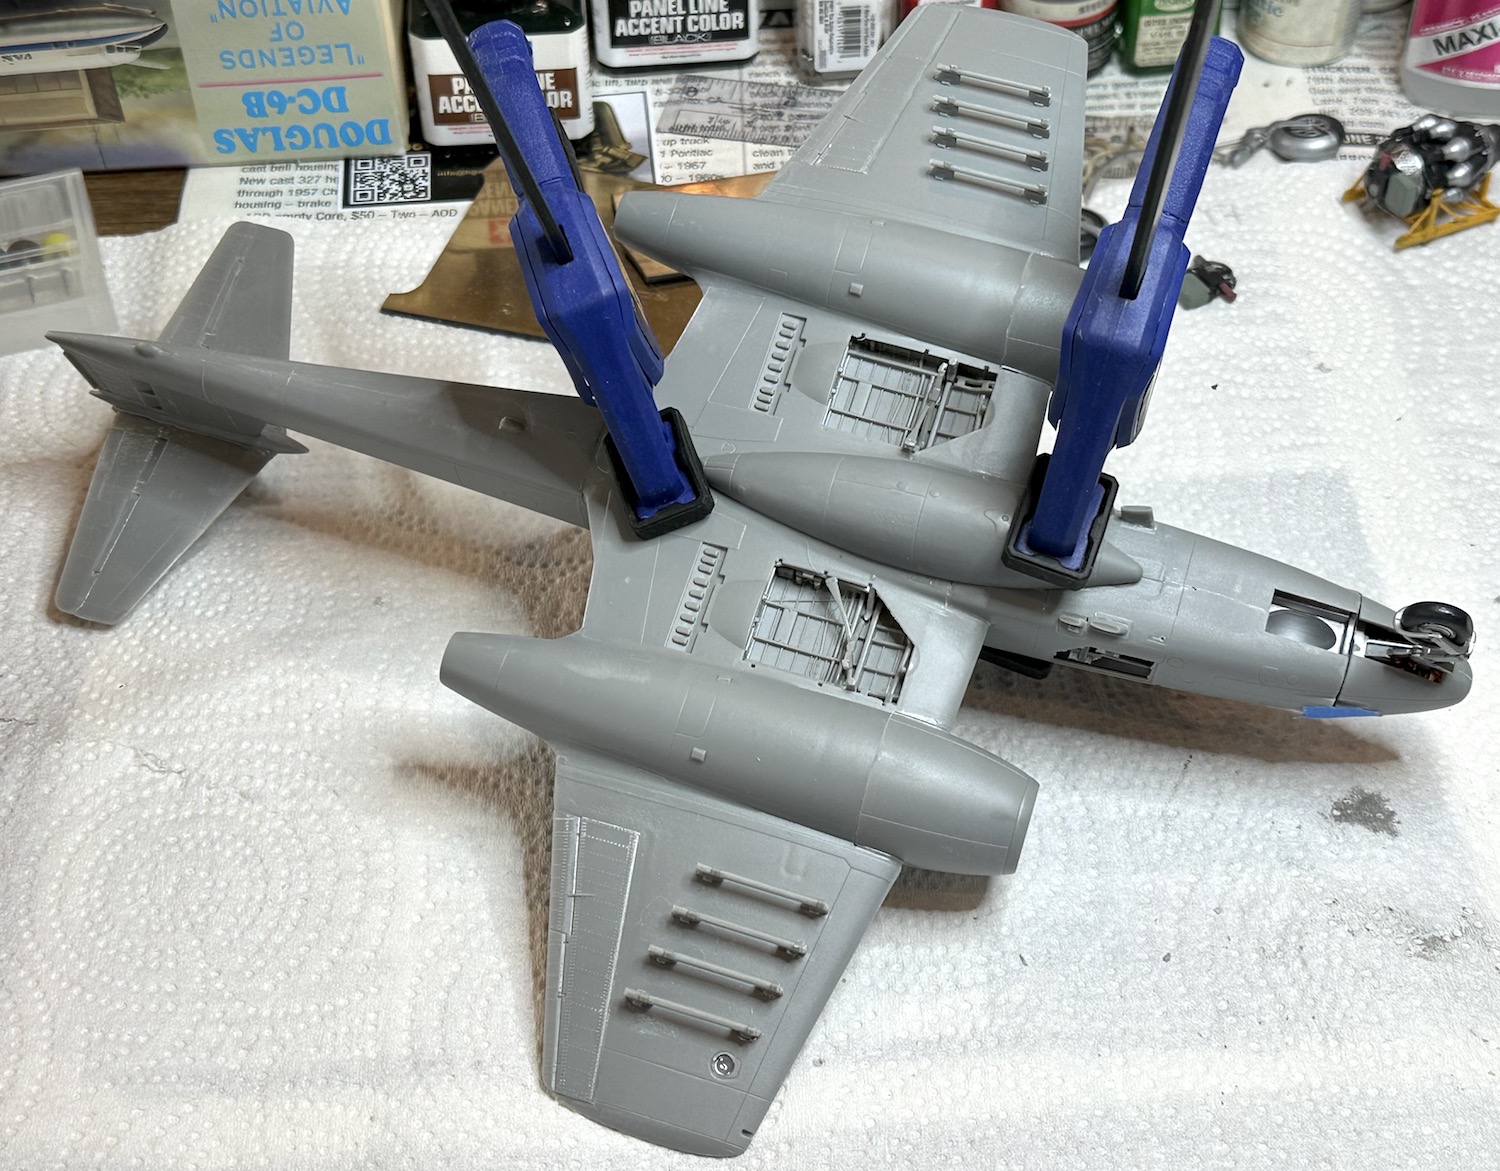
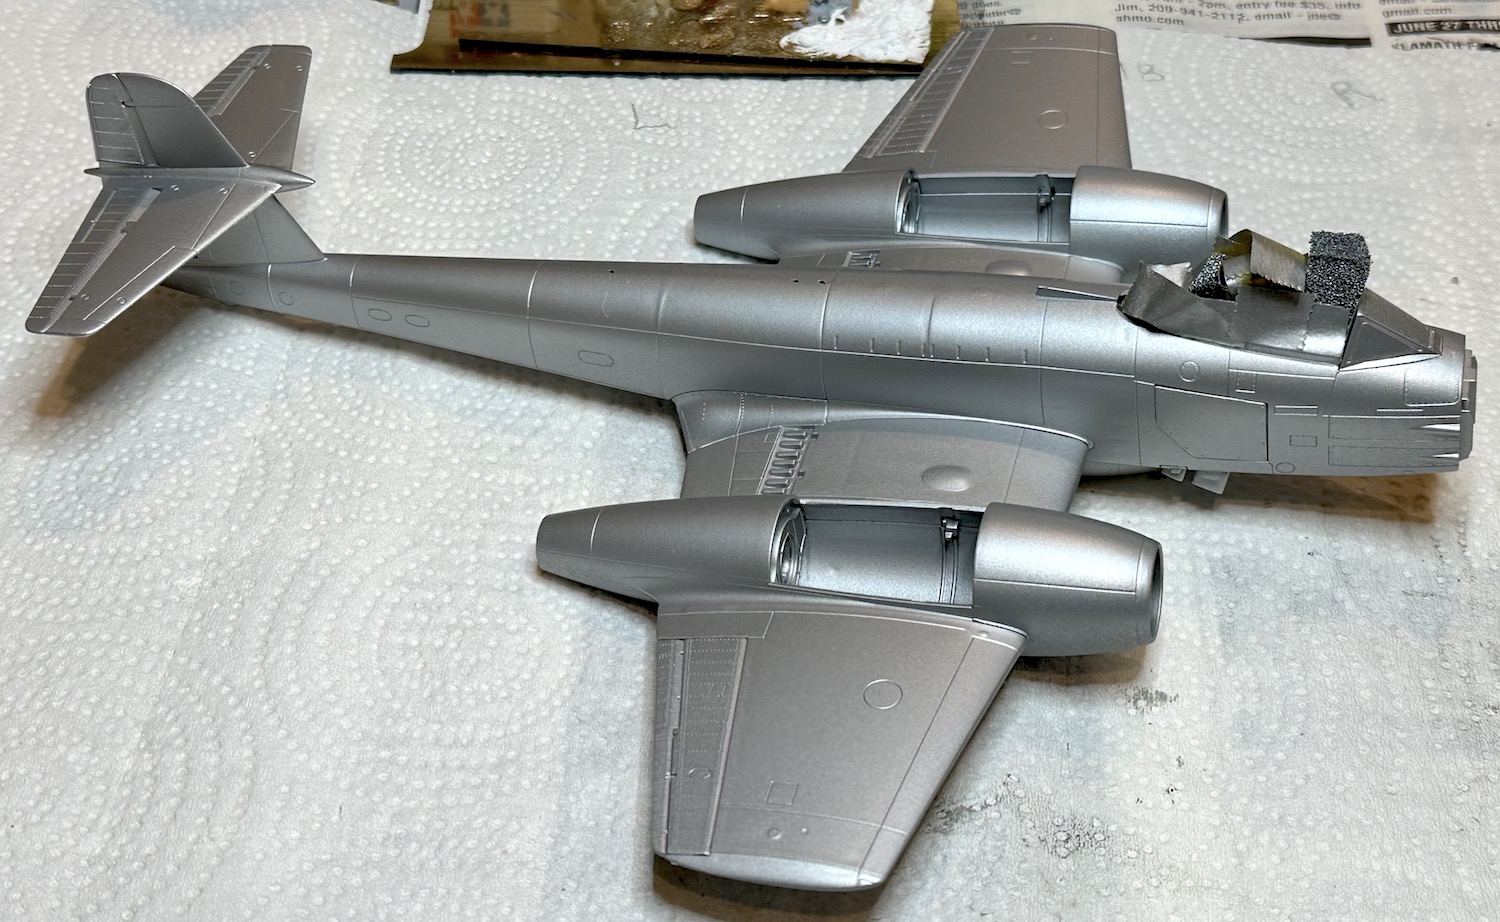
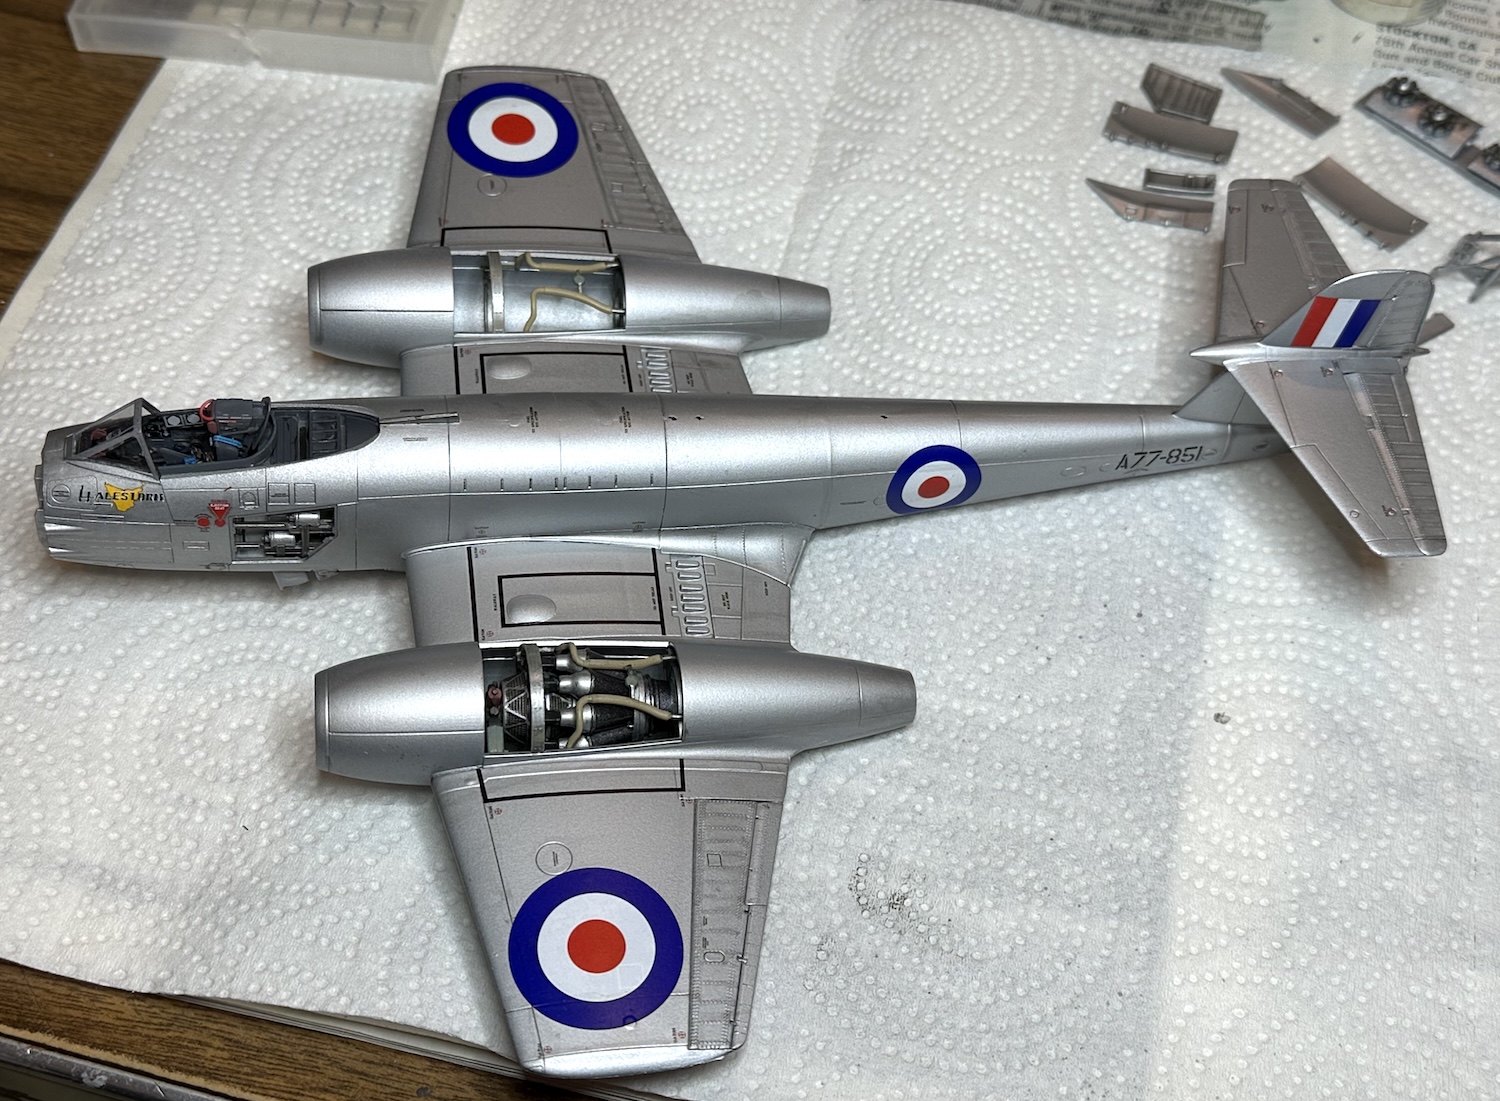
All looked good and it was time to commit to glue the major model parts. The fit of this kit was tremendously good. With few exceptions, there was only minor adjusting required. What joy! Even the engine covers were flawless.
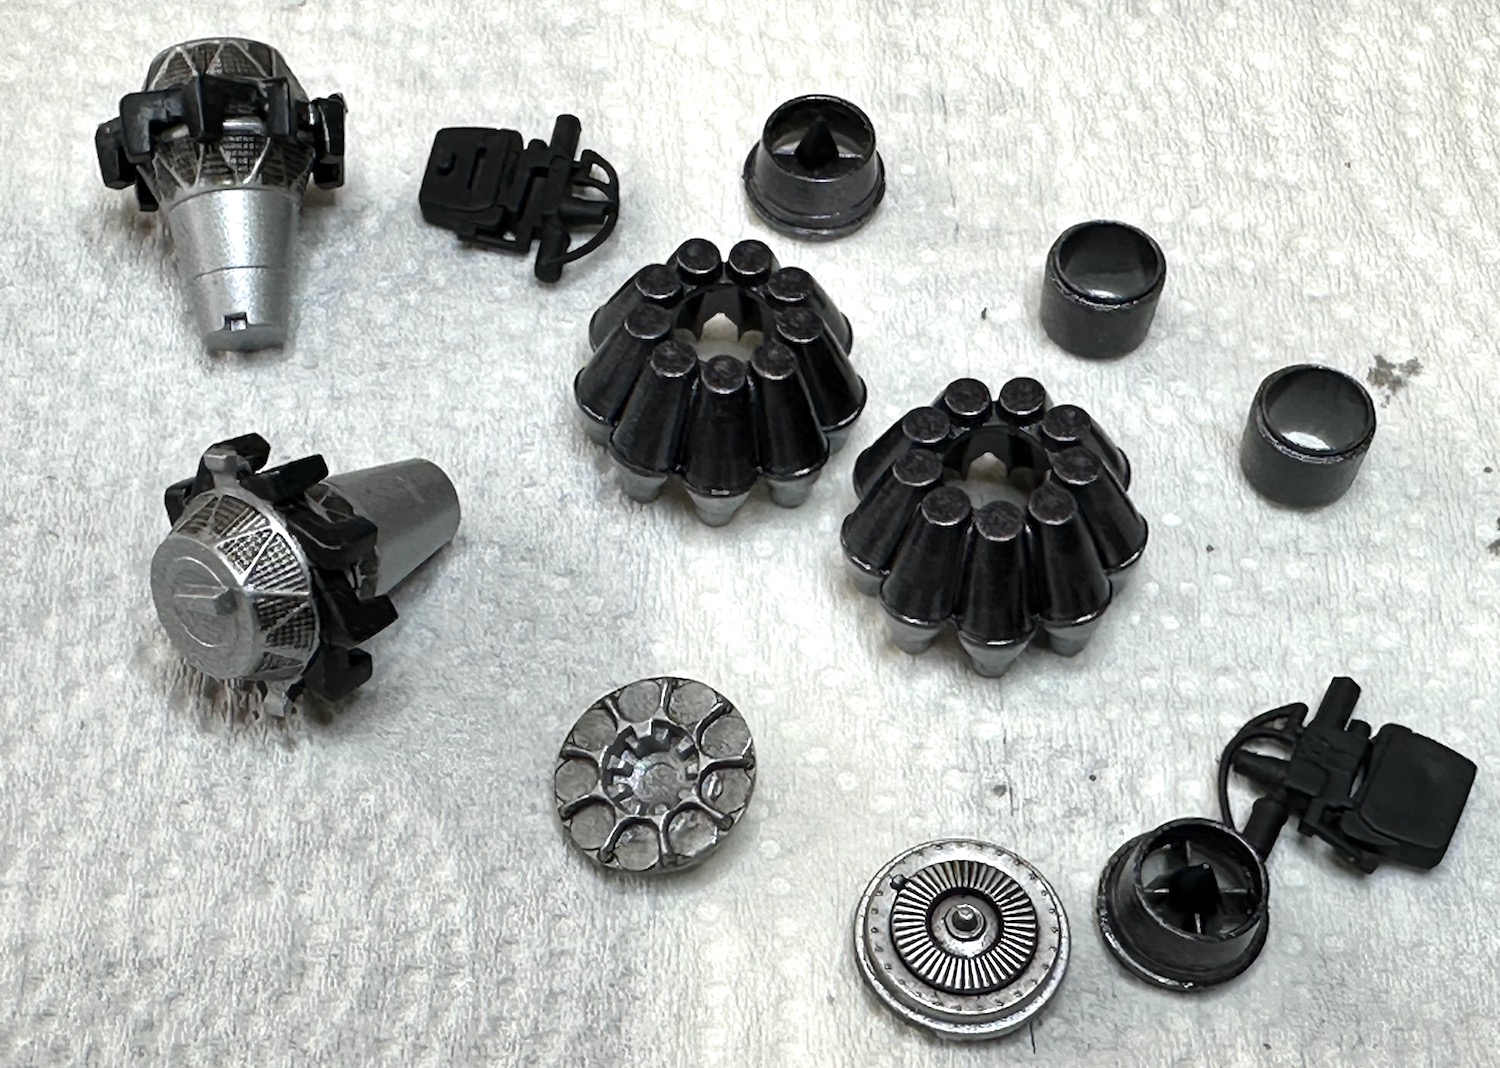
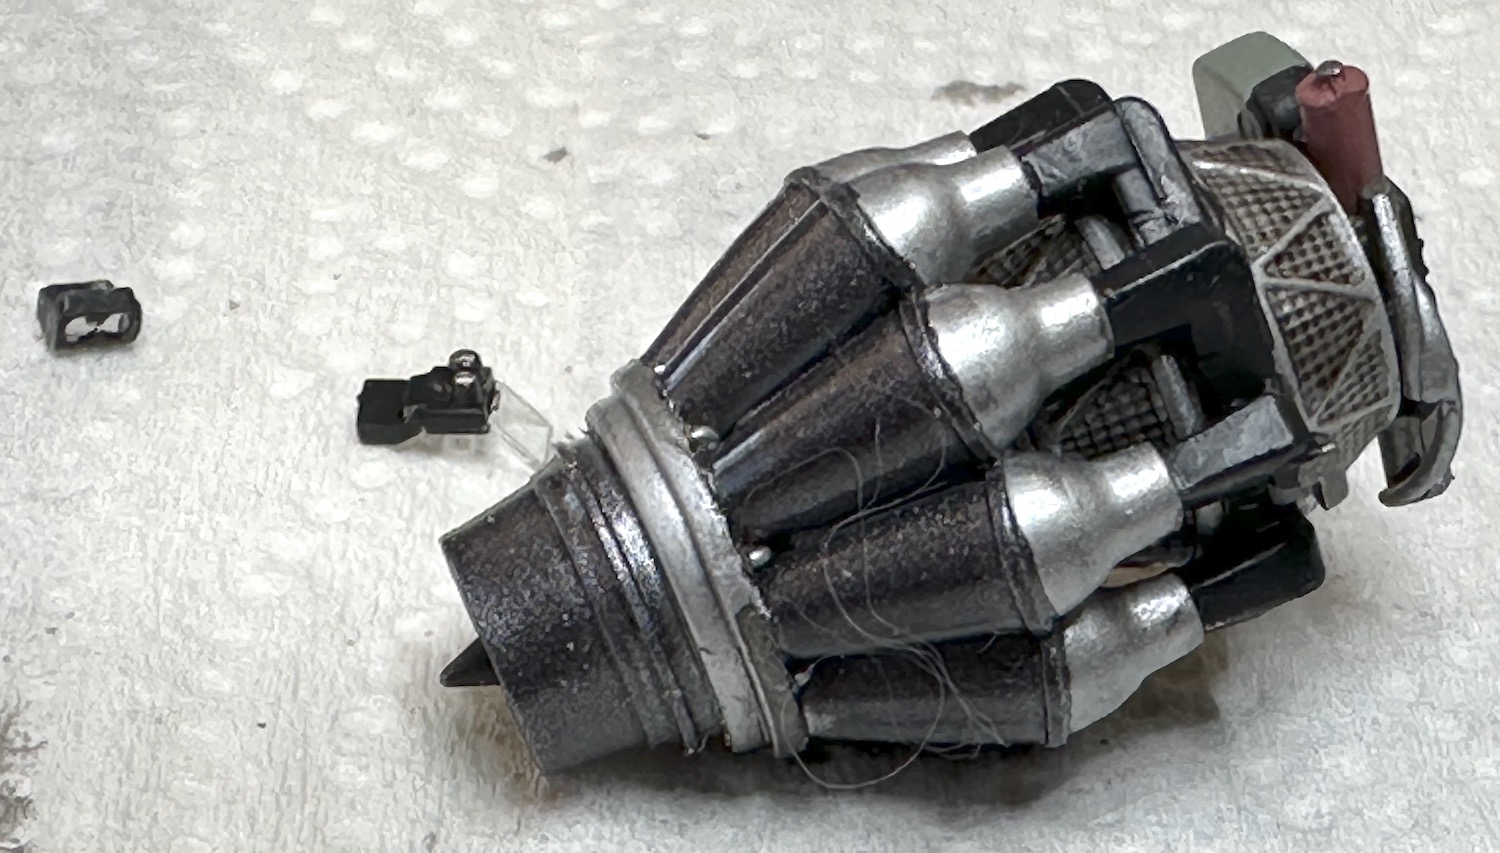
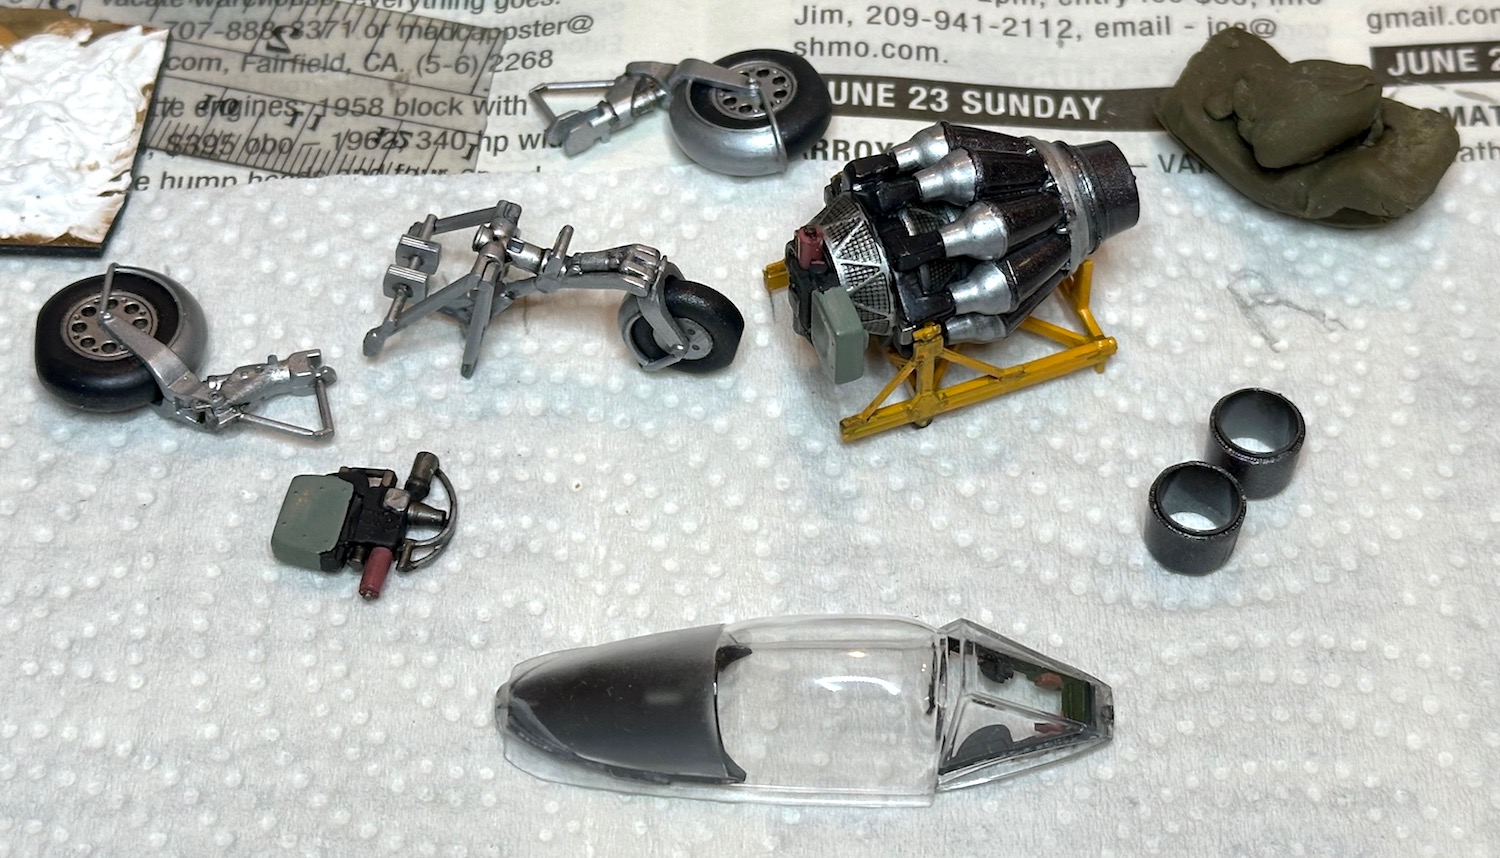
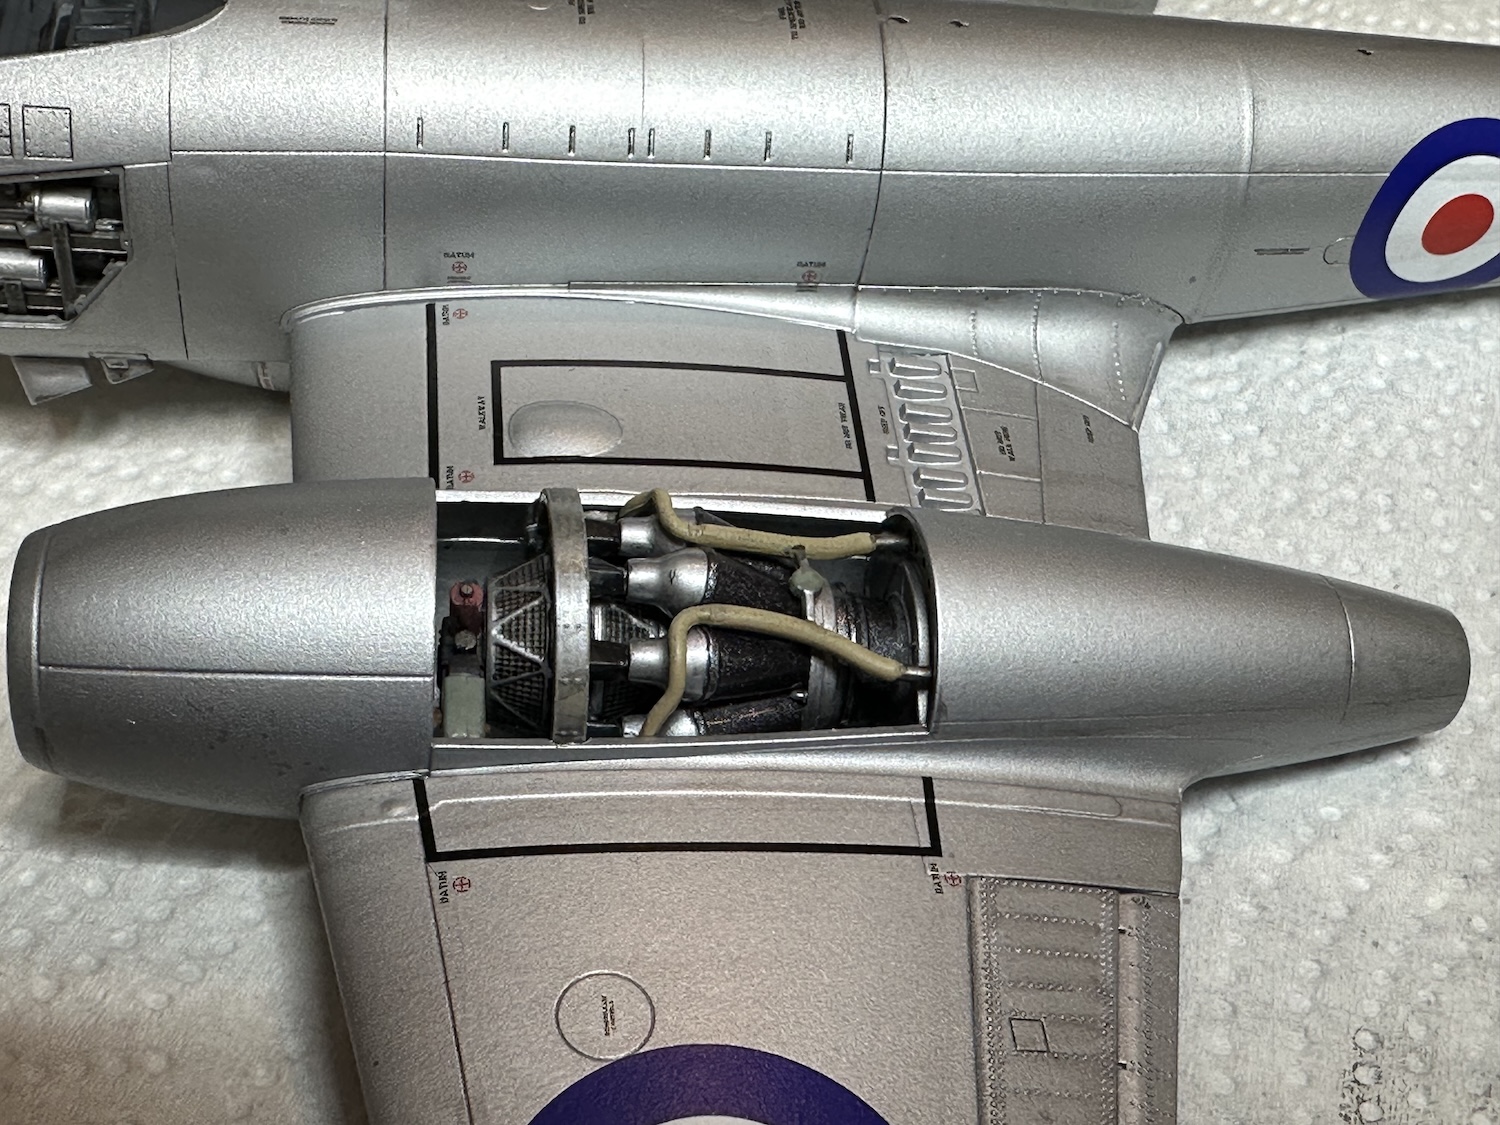
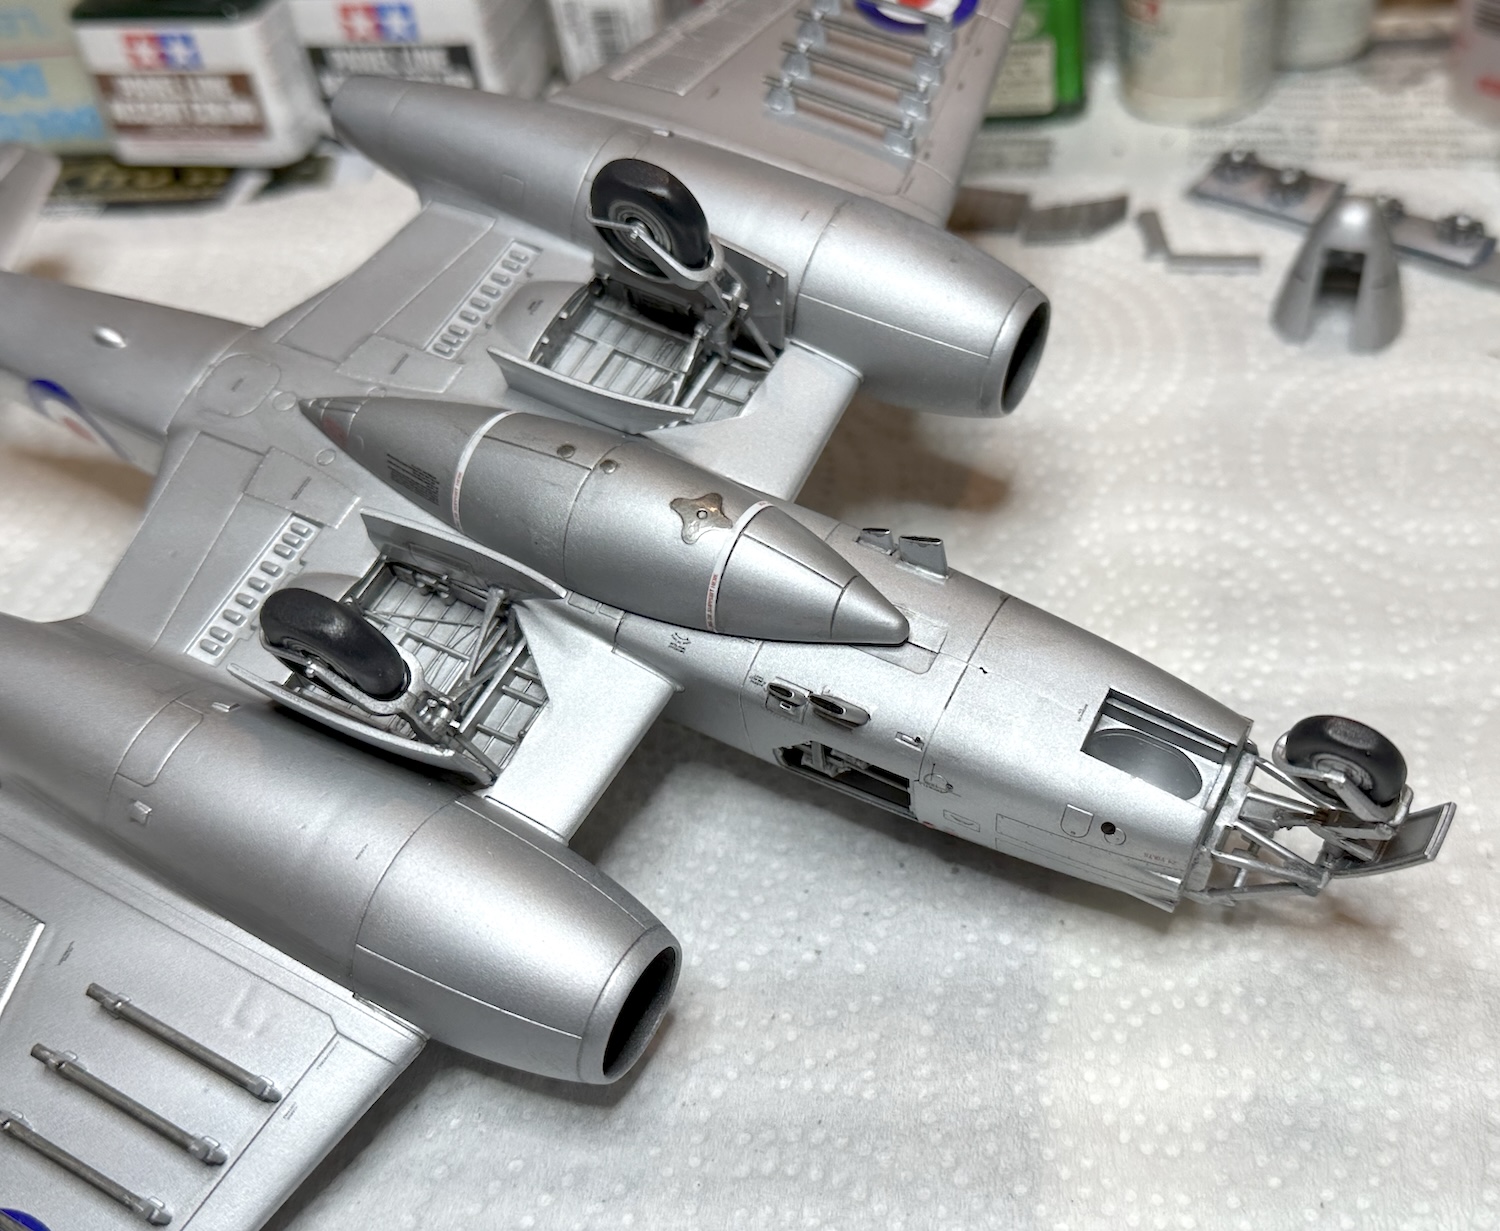
One more post today - the engines a very nice kits in and of themselves. Airfix gives some color clues but many bits needed my fertile imagination to fill in the missing details with what colors I thought looked right.
A bit of fitting was needed to make sure the bits on the top of the mounted engine would snuggle down enough to allow the engine covers to fit.
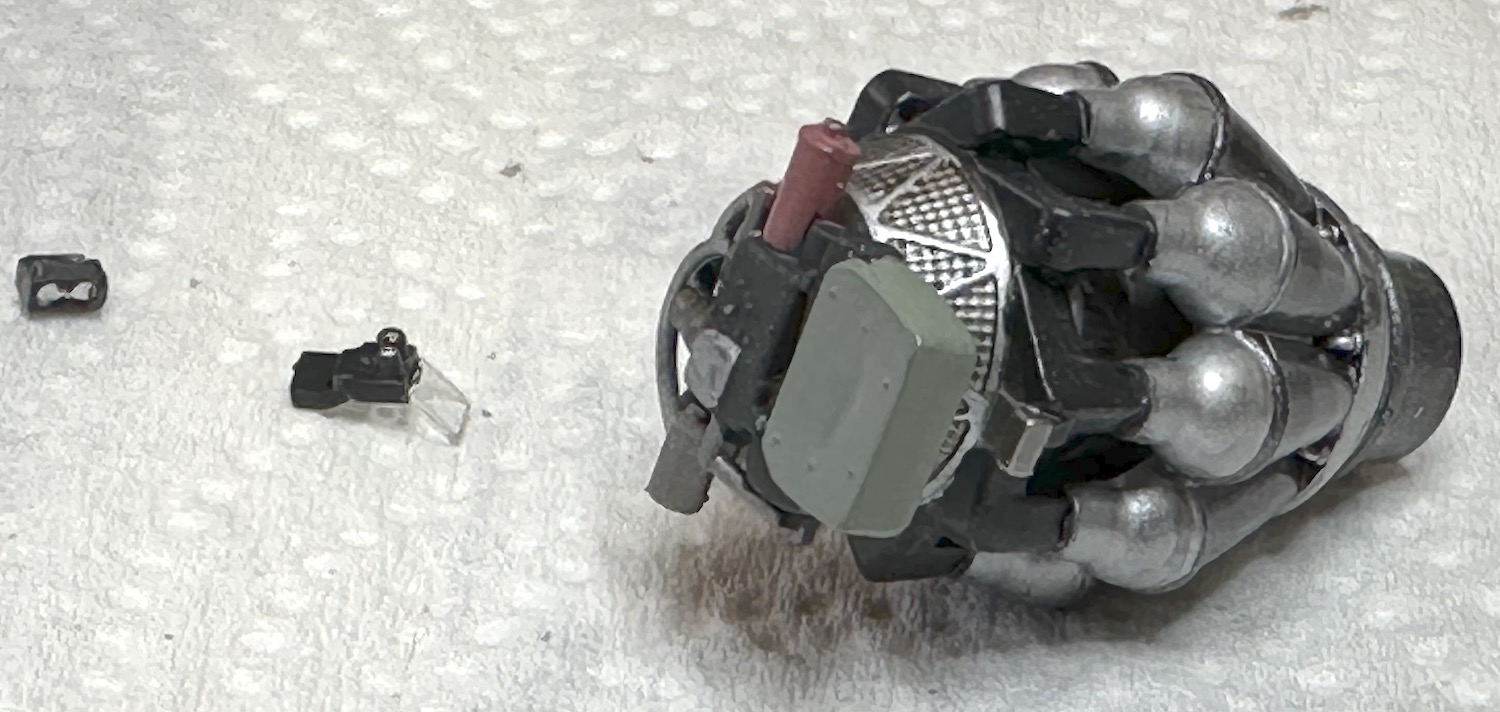
Sharp eyed observers might notice the bits of the gunsight waiting for paint to dry. Also notice the cat hair. Betty Boop makes sure she contributes to all projects.
Paul I’m optimistic, but the instrument panel work isn’t leaving me with high hopes. Still think I’m going to dip into the decal dungeon for the insignia at least.
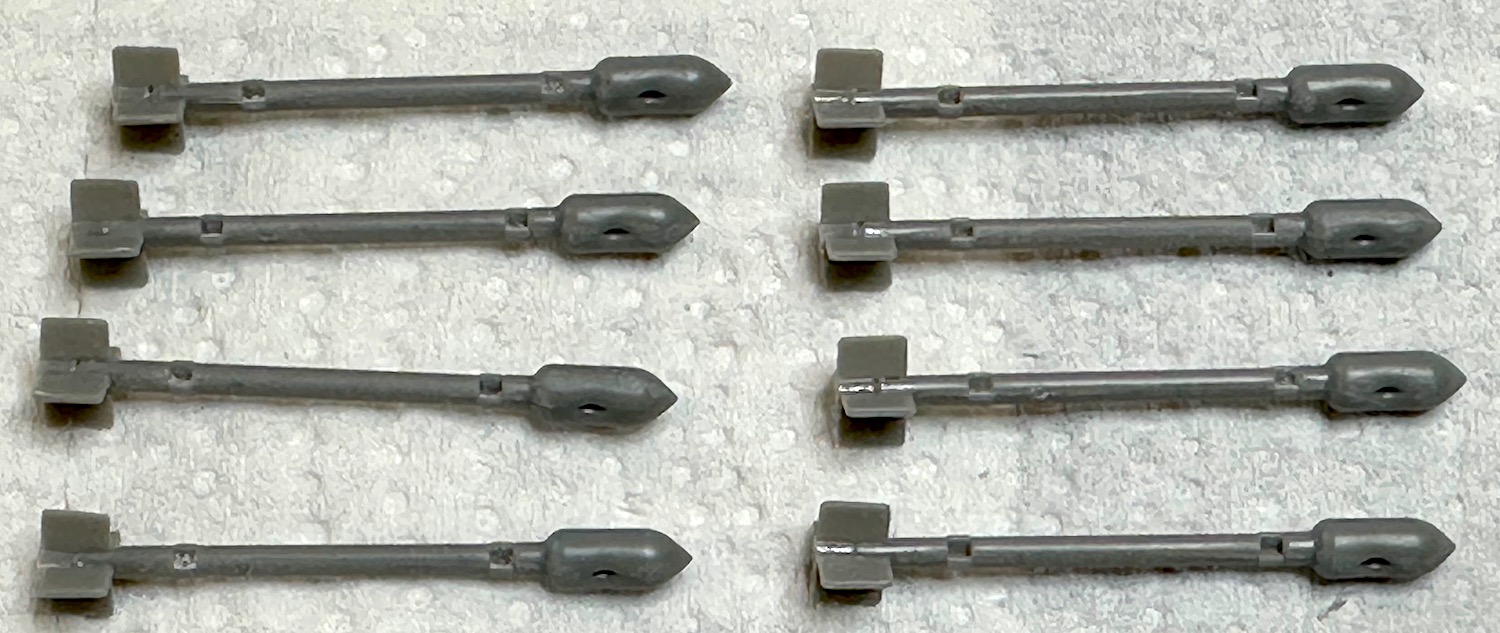
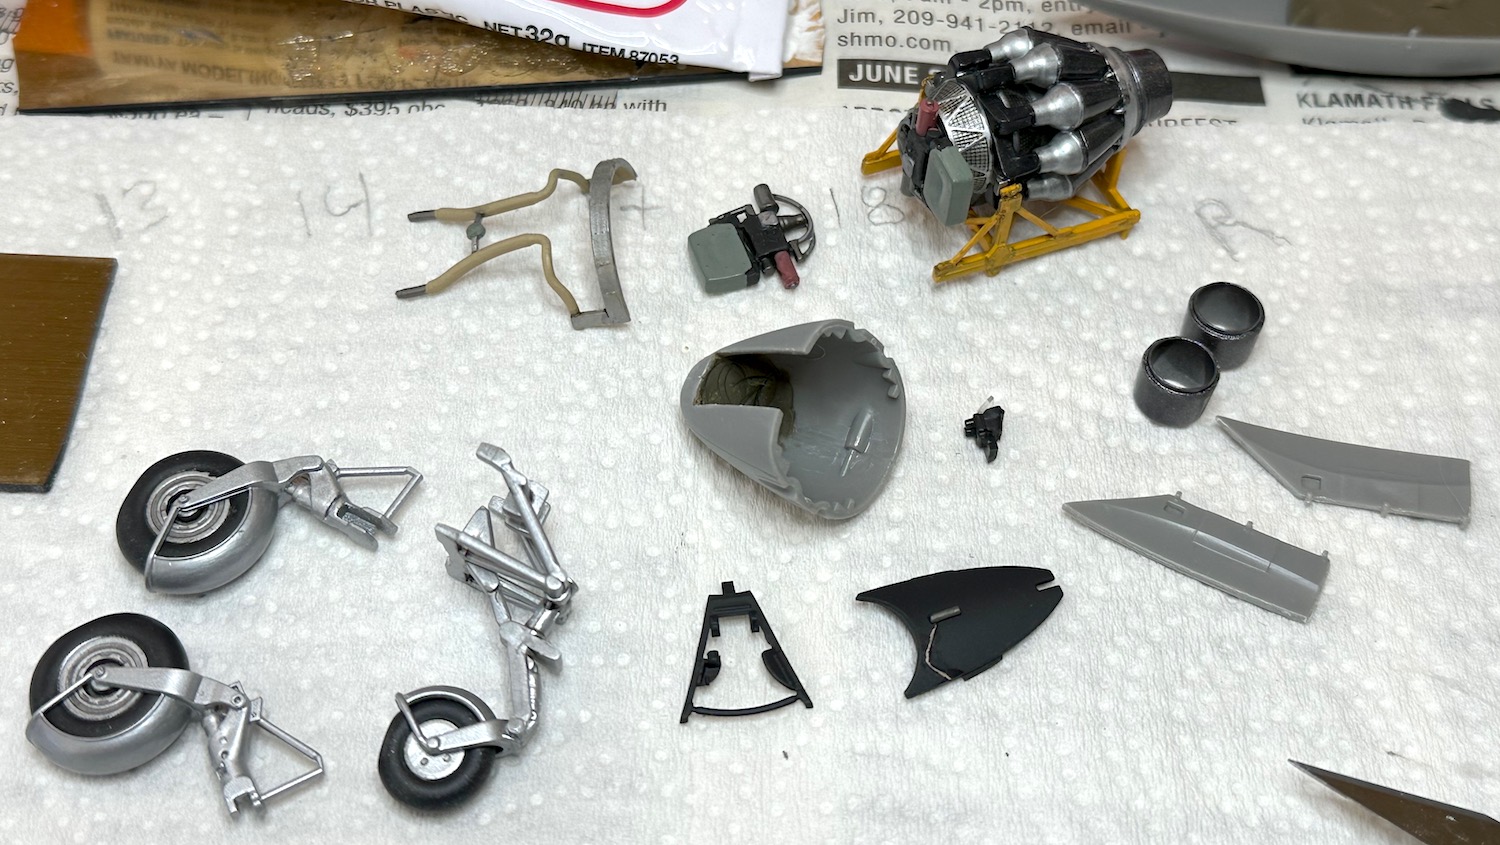
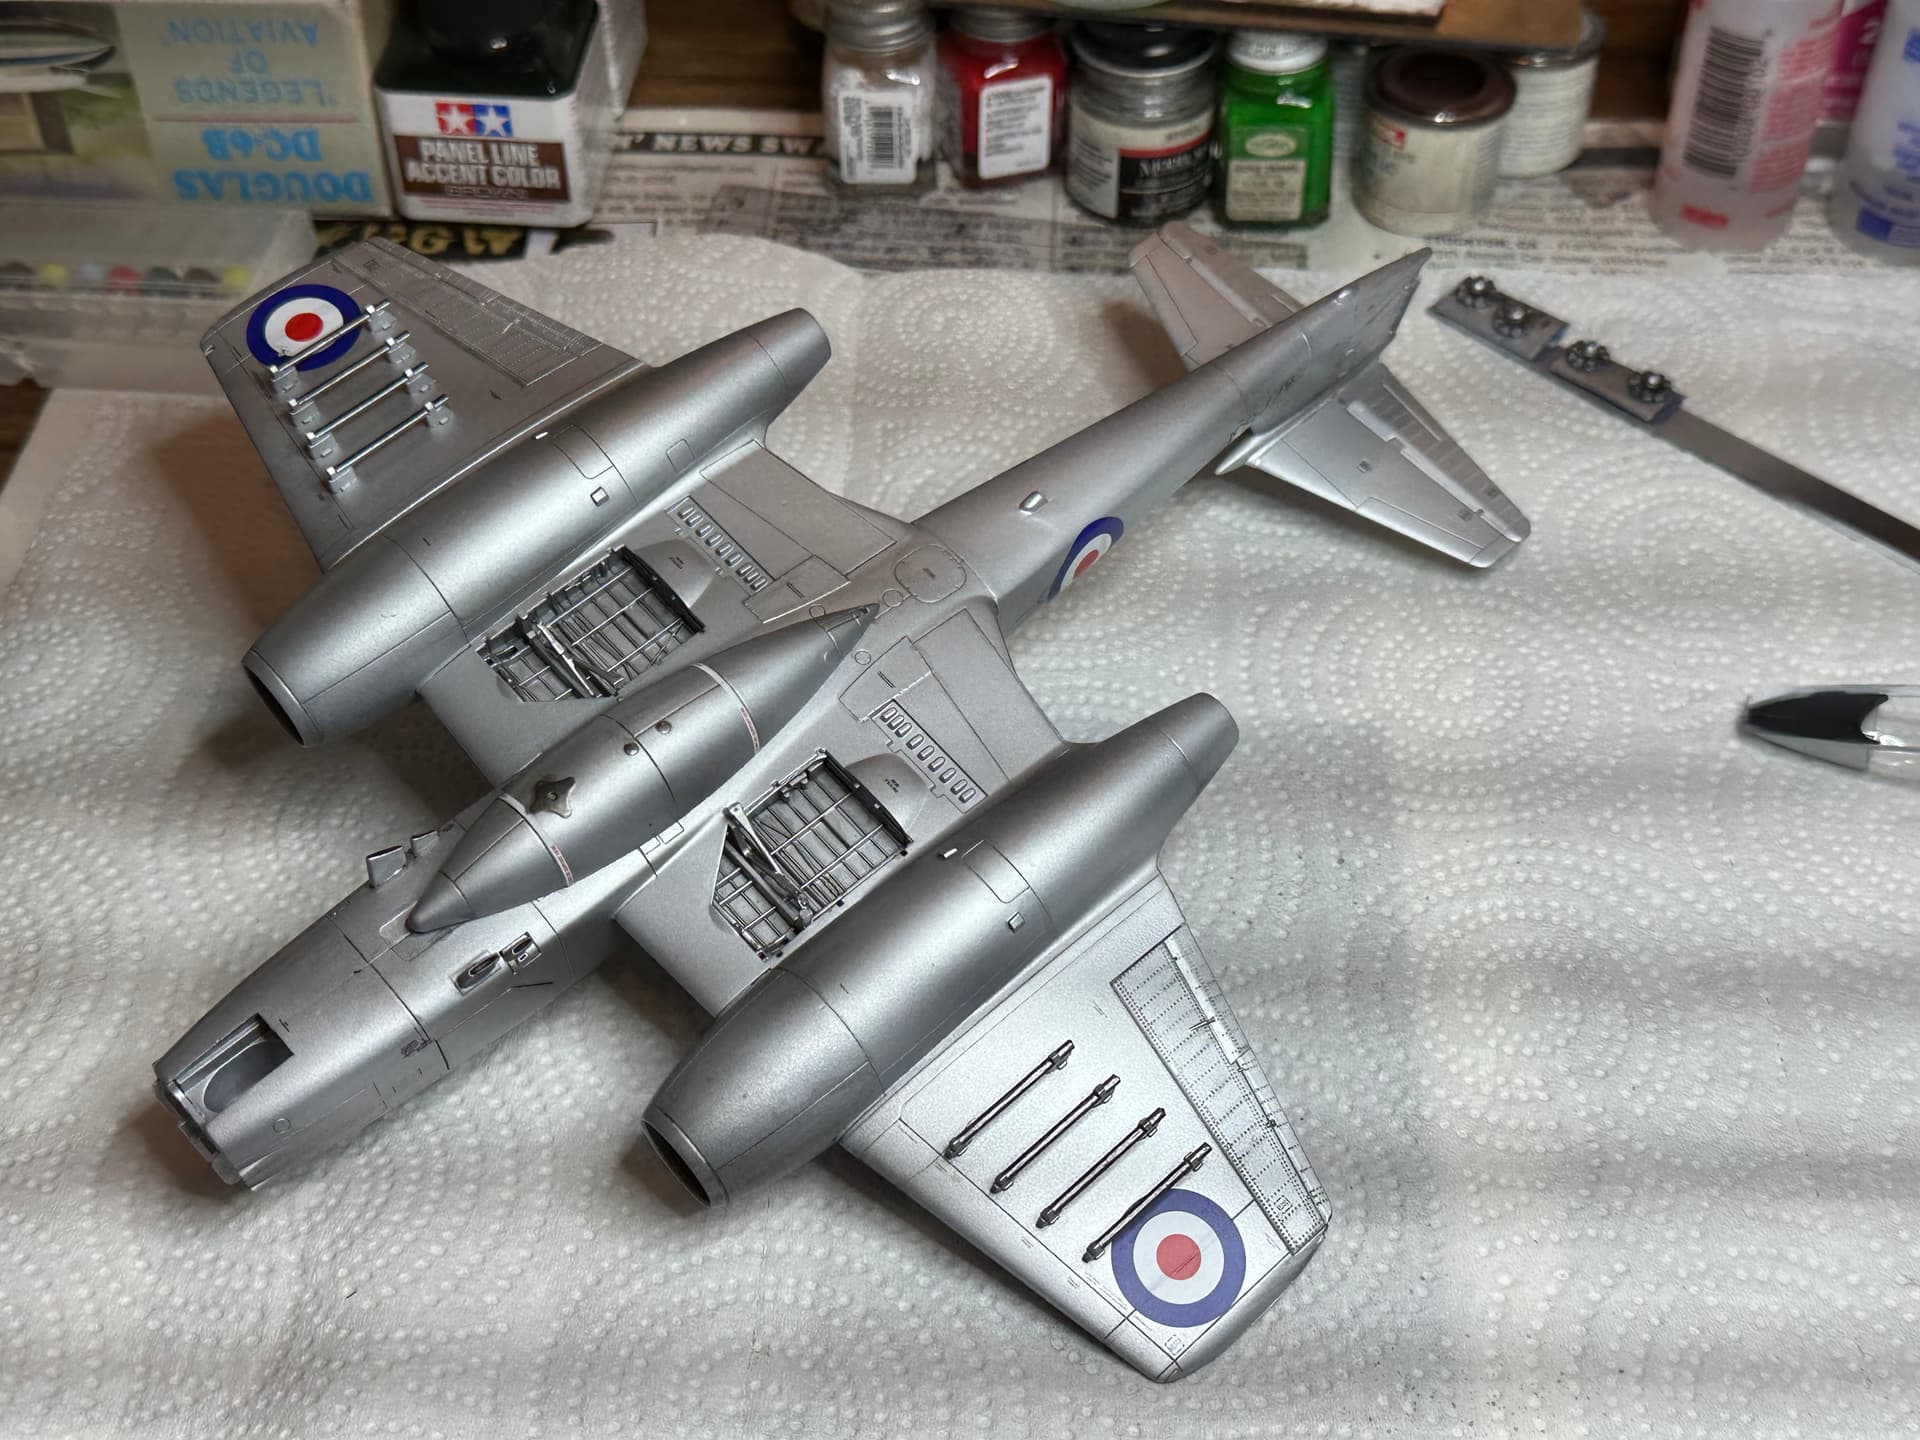
Another report on the Airfix Meteor. While most everything has been great, there are some sinks in places. The rockets all had sinks in the same places. They needed several coats of putty but came out well in the end. I also opened up the rear to simulate a rocket exhaust.
The cockpit with the Eduard PE was a joy to build and is a joy to see nestled in the fuselage. The belts on the seat were by far the most time consuming part.
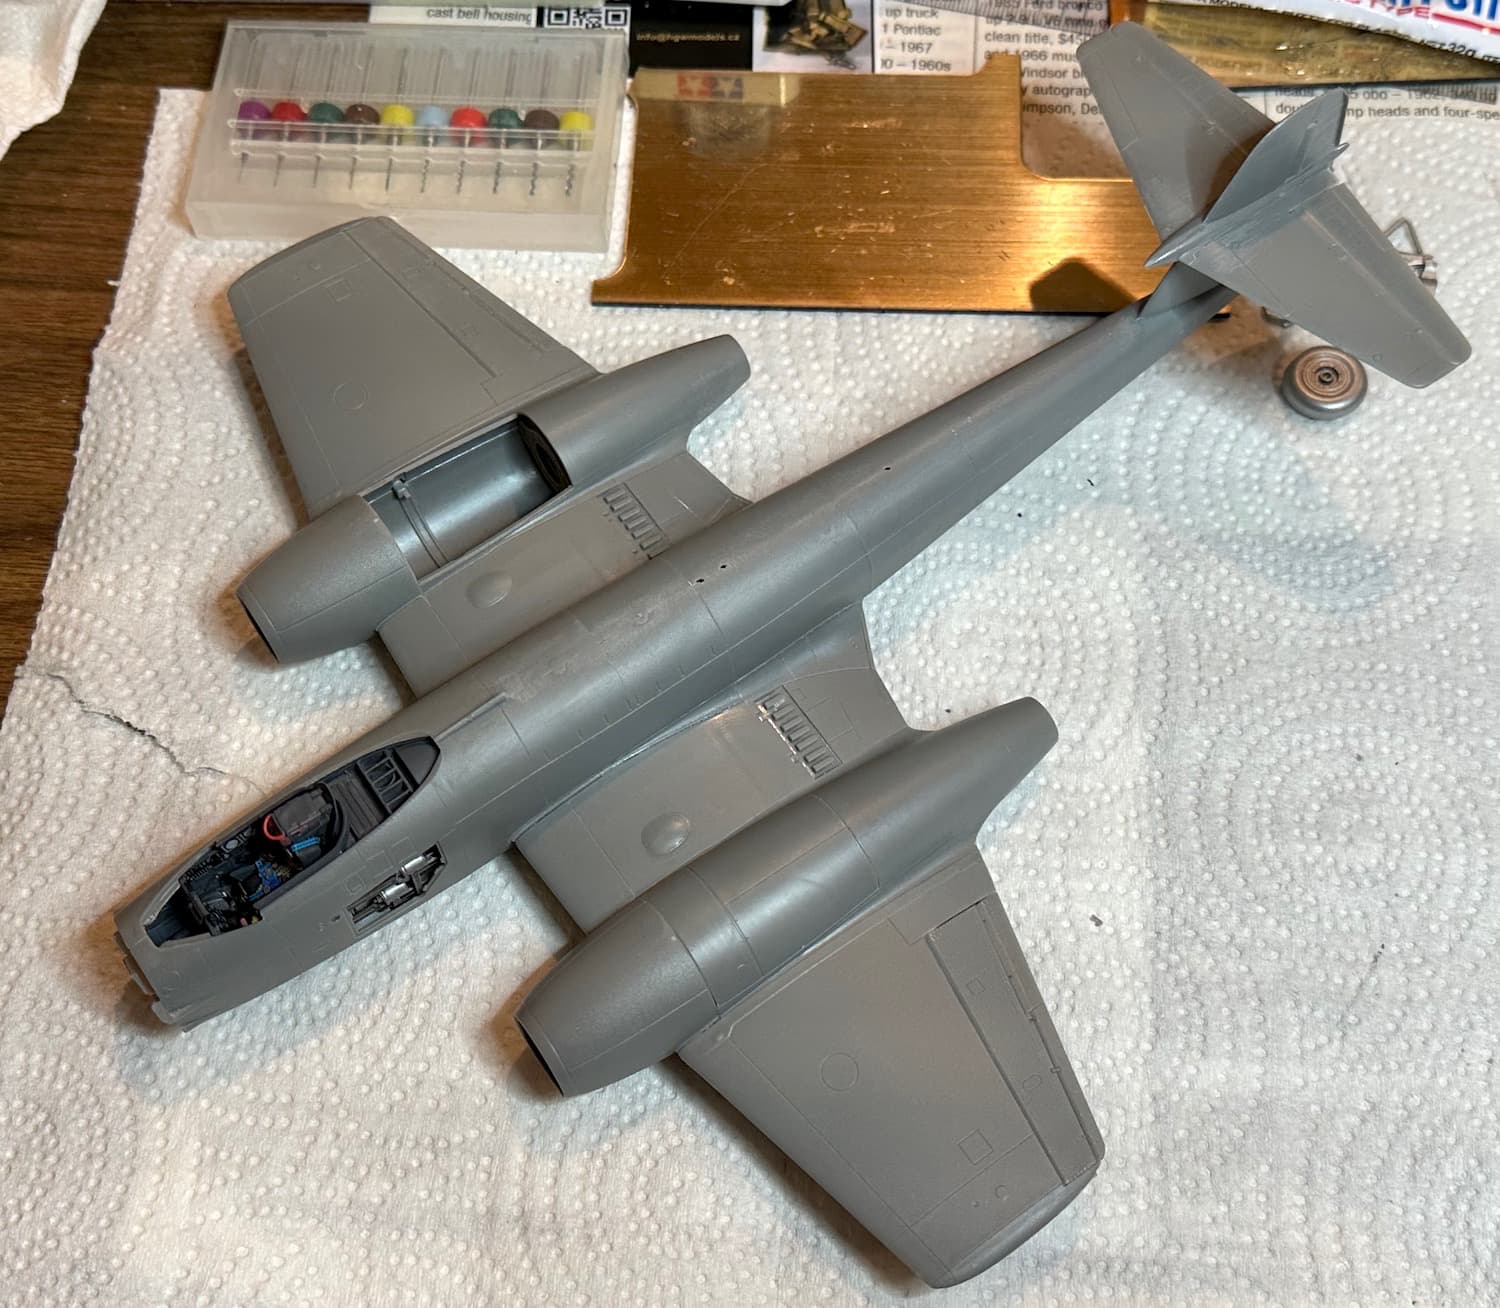
The wheels have fenders just like a British motorcycle of the period and just like the motorcycle fenders, they are one piece. Airfix choose to split them in halves making a smooth result far from certain. Complicating this, the painted wheels needed to be trapped between those halves. The fit was tight and with some light sanding and hand painting with an AK AL marker all three turned out well. The tires, are molded with flat spots so there is no need for aftermarket items.
Between the big balloon tires & the knee action landing gear I have to guess that the designers anticipated rough & soft fields for this aircraft. Considering its WW2 origins, that makes sense.
I committed a number of blunders with this kit. Here is the story, warts & all.
The destructions called for 15 grams of weight behind the cockpit. I had no scale that measured in grams, my ammo loading scale measures in grains and I did not know how to convert grains to grams. No matter, the simple test showed earlier has always worked in previous builds. What could go wrong with a simple balance check?
Well, something did. I reran the check with the gear fitted (but not glued) in place and found I had a tail sitter! Drat, how could this have happened? At this later stage of the build, there were few options left. The nose is tiny with most of it filled with the landing gear truss but I thought I could get a few BBs in there. A half a dozen were fitted and glued and in struggling to ensure that the BBs would clear everything, some of the thin CA glue ran out of the nose and grabbed the truss at the base. I had to get it loose as I did not want it mounted yet and only later found out that some of the glue mingled with some sort of gorp filled in Airfix’s nice tab mounting system not allowing the truss to seat correctly.
I didn’t notice this at the time and spent a lot of time trying to “adjust” the truss to fit in the nose with its by now solidly mounted BBs. I finally noticed the truss was not mounting to the bulkhead correctly and adjusted it in the right places. It’s a bit of a mess but little will be seen once all assembled.
Sadly, the BBs added were not enough to cure the problem, this Meteor was still a tail sitter. The only two options I could see now were opening the belly of the model and adding BBs inside or loading weight into the conformal fuel tank. Modeling clay didn’t add enough weight so BBs were glued into the tank. I carefully sighted along the top surfaces to make sure none of them would interfere with a good fit to the belly of the aircraft. In checking that, the BBs moved and some DID get out of place and were now not going anyplace!
The next step was unpalatable but I couldn’t see any alternative. I had to cut clearance holes in the belly of the model. I used a flat rolled piece of BluTack to locate the holes and after trying several times thought I had it all worked out.
I have mentioned the terrific fit off the Airfix kit. There was one place where the fit was not great, it was this tank. To get a smooth join it was always going to need clamps to make it conform to the belly. With a solid layer of BBs the tank would no longer flex into the correct position. At this point, I was out of options, I was just going to have to go ahead with a flawed project and take another of those painful lessons life hands out. The tank is on and balance seems to be restored but there is a gap.
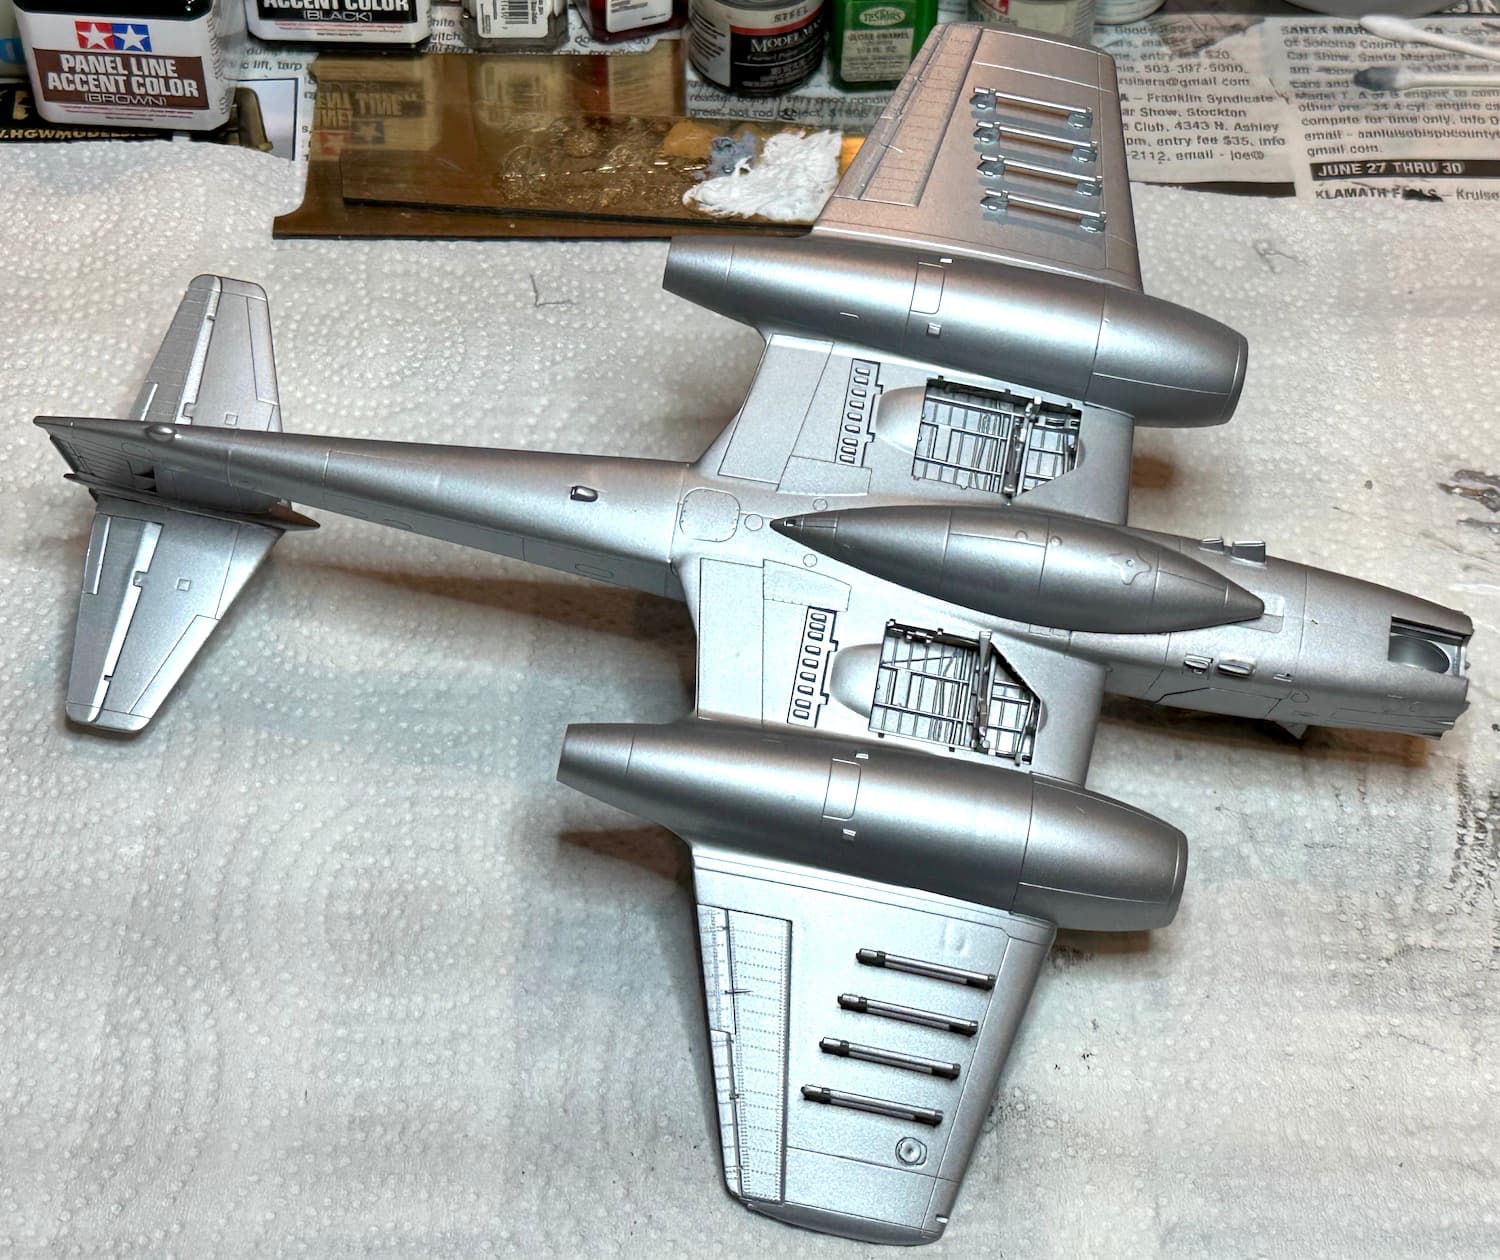
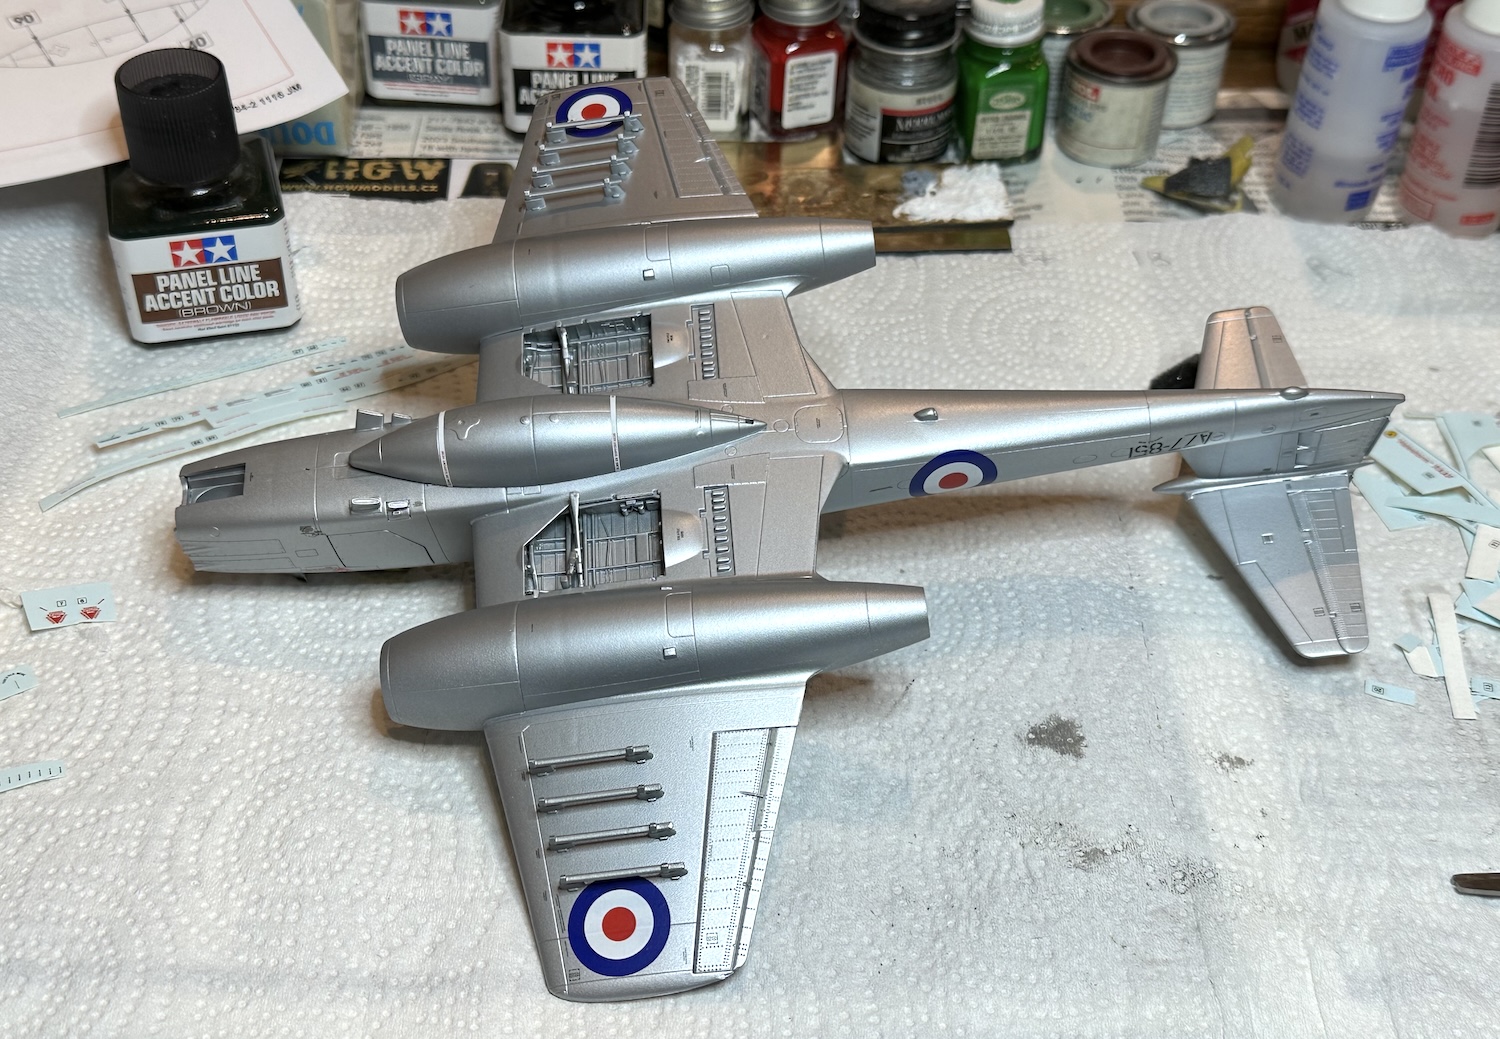
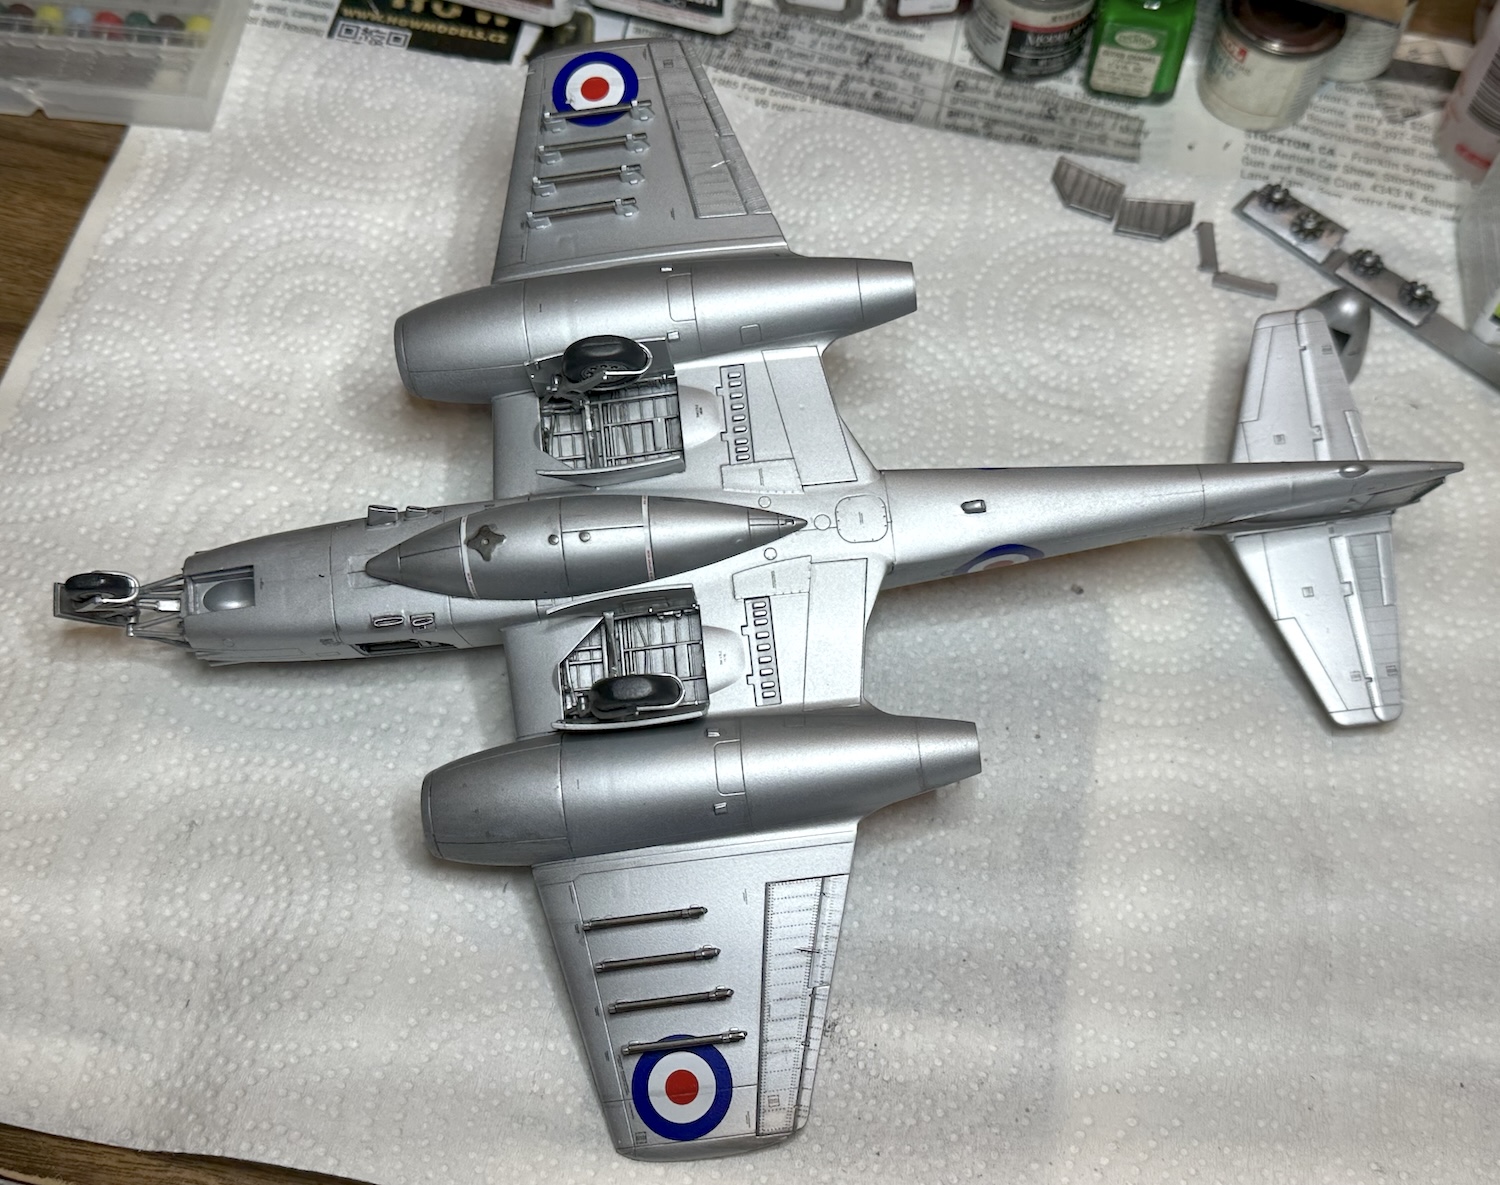
The last two pictures show the kit as it is now with its silver paint and gap.
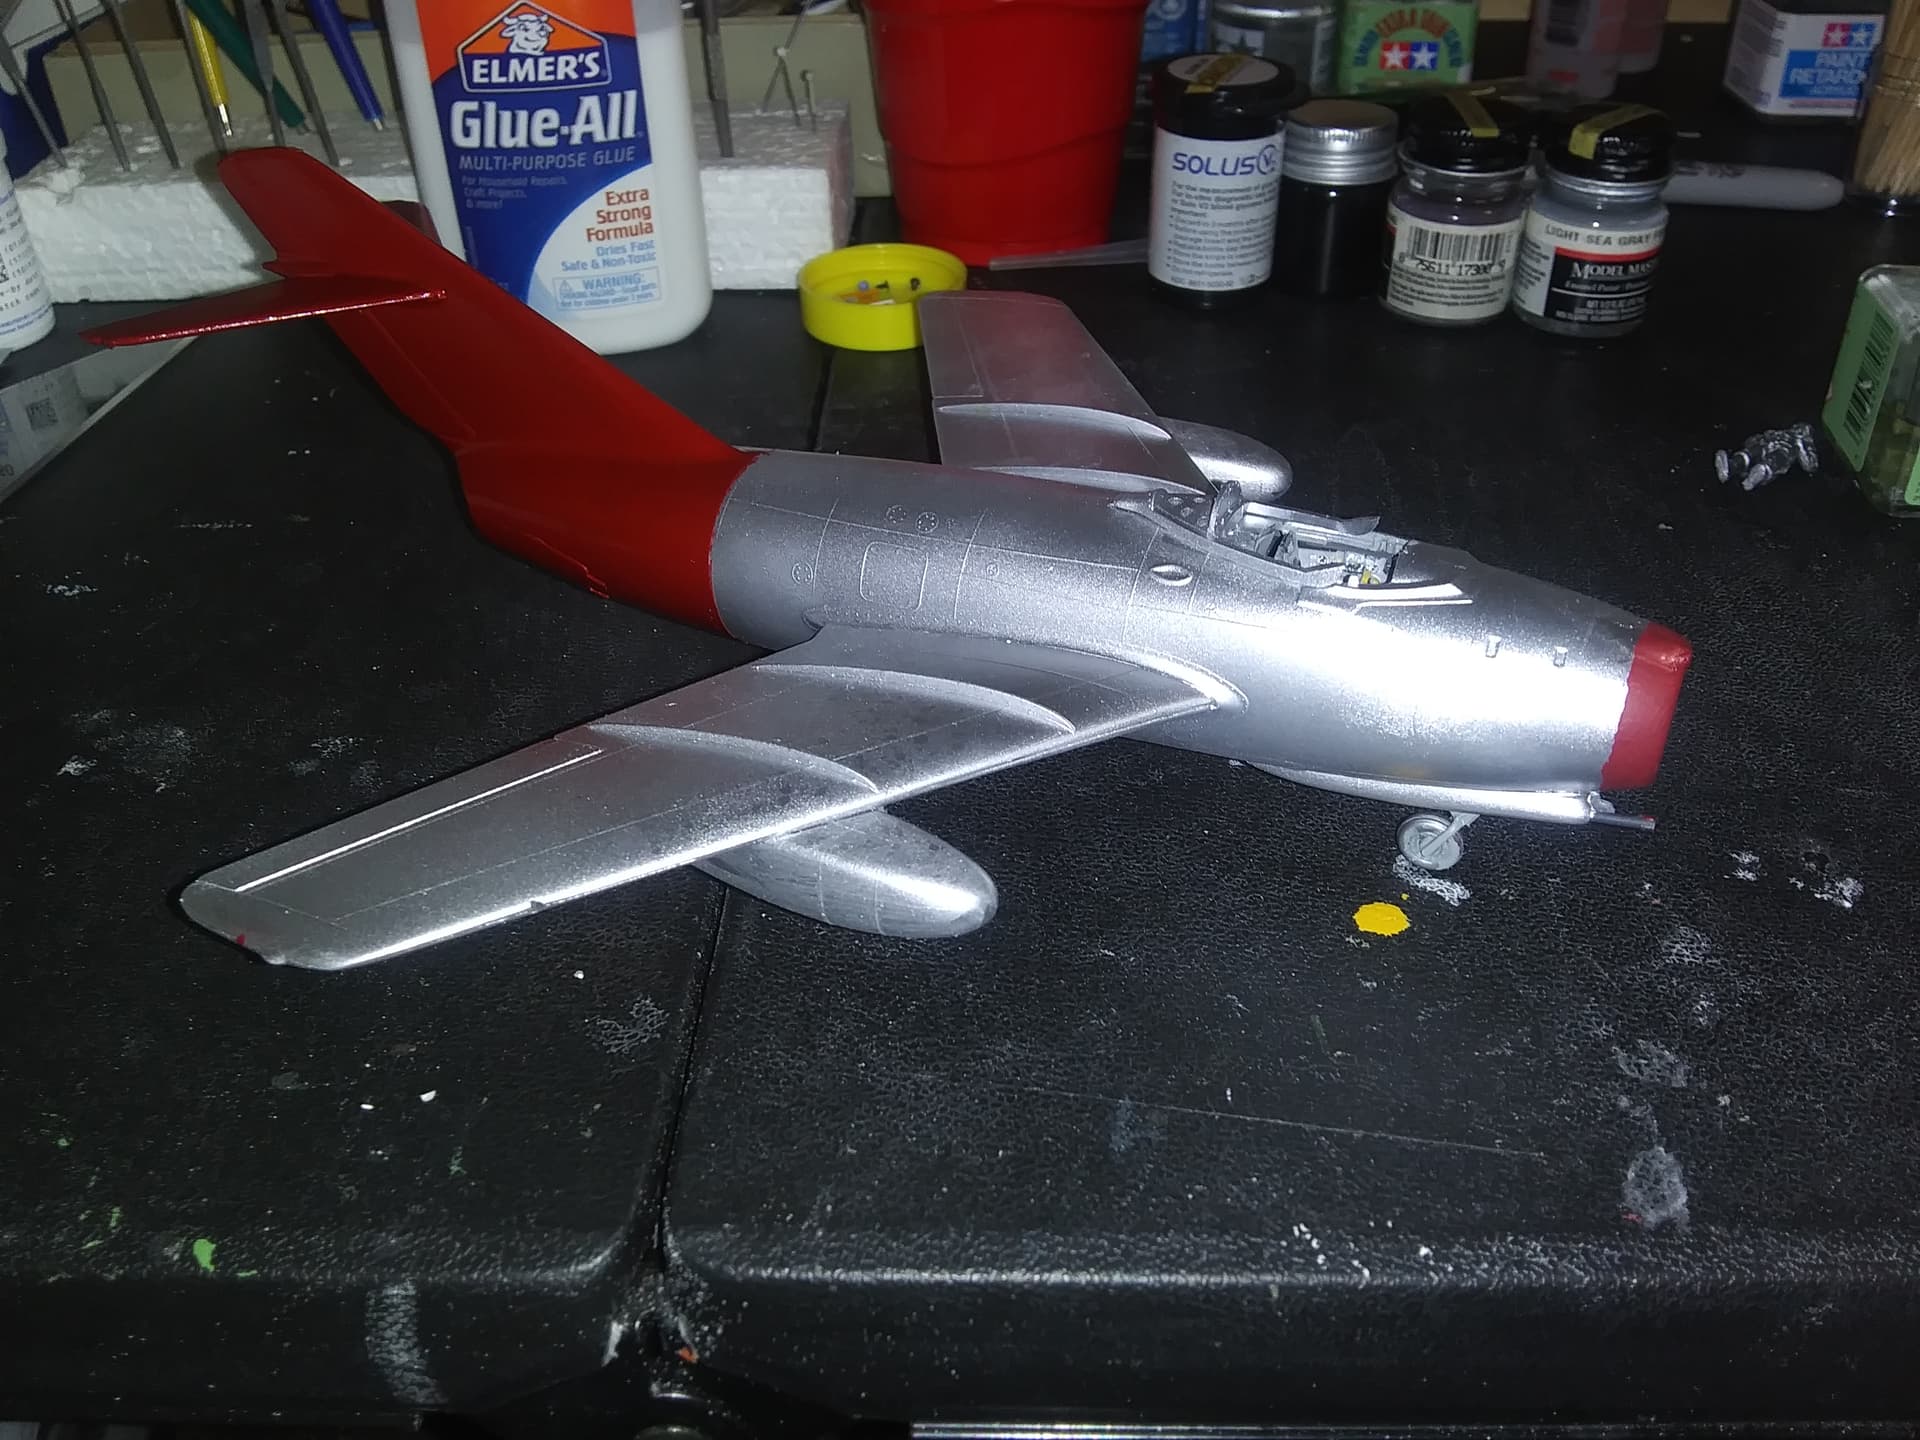
Love those MiG 15s. They were a great performer for their time.
I got some more done on the wonderful 1/48 Airfix Meteor F8. I like to add the decals so they can share whatever weathering and panel line accents are done to the rest of the model. This proved to be a four day ordeal. The major large markings went on easily. The decals were well printed in colors that looked correct to my eye. They took a long time to separate in the water but that was no issue outside of time too wait. With the many, many stencils, this was time well used trying to find what went where.
While the large decals had stuck to the model as they should, the stencils were a very different matter! These teeny tiny decals had little desire to be stuck to this Meteor. They took every opportunity to fall off, stick to my fingers or otherwise misbehave. Quite a number of them abandoned ship, some I found and could replace, others need to be replaced by spares that looked something like the original had. There is at least one that disappeared with no trace and could not be replaced. Oh well!
One trick I used here and there was to take a large bottle cap full of warm water and dilute a toothpick of Elmer’s School Glue in it. This glue is perfectly clear and I often use it for attaching canopies and other clear parts. The dilute solution is brushed into the area where the decal needs to go. The decal is then pressed into place with a soft sponge and they stay put with no trace even under clear coat paint. The two white stripes on the belly tank were done this way.
After the decals were done, I was afraid to handle the model for fear of loosing the many decals that allowed little area to handle the model. I shot it with Tamit=ya semi Gloss clear which sealed the model so it could be treated with washes. These were combat aircraft, but the look pretty well maintained in the pictures so filth was light.
Just a few more pictures to show where the Meteor project is now. The gear was attached last night and a quick test this morning shows that we may still have a tail sitter. There are more bits such as the weighted nose to go on so the jury is still out on that. If it does not want to sit on its nose, I see a nice big wheel well that could be filled with BBs. I would not want to do that but I will not often look at the bottom anyway . . .
Very nice build. For the nose, I suggest using lead fishing weights. You can get them at Walmart in the sports department. They come in small, round ones. They are more dense than BBs, and may suit your situation. They can also be flattened out with a pair of pliers, which allows more to be inserted. I used them on my Mig-15. Good luck!
Thanks Gary, that is an idea that occurred to me too. I had birdshot in mind as it is very small. At $50 odd dollars a bag, I cheaped out and bought the BBs. I have an Airfix Vampire in mind for a future project so sinkers or birdshot will be good options.