Yes! Unfortunately, your picture is about two weeks too late.
Edit: Did not mean to be dismissive. That picture will definitely help for the second one.
Yes! Unfortunately, your picture is about two weeks too late.
Edit: Did not mean to be dismissive. That picture will definitely help for the second one.
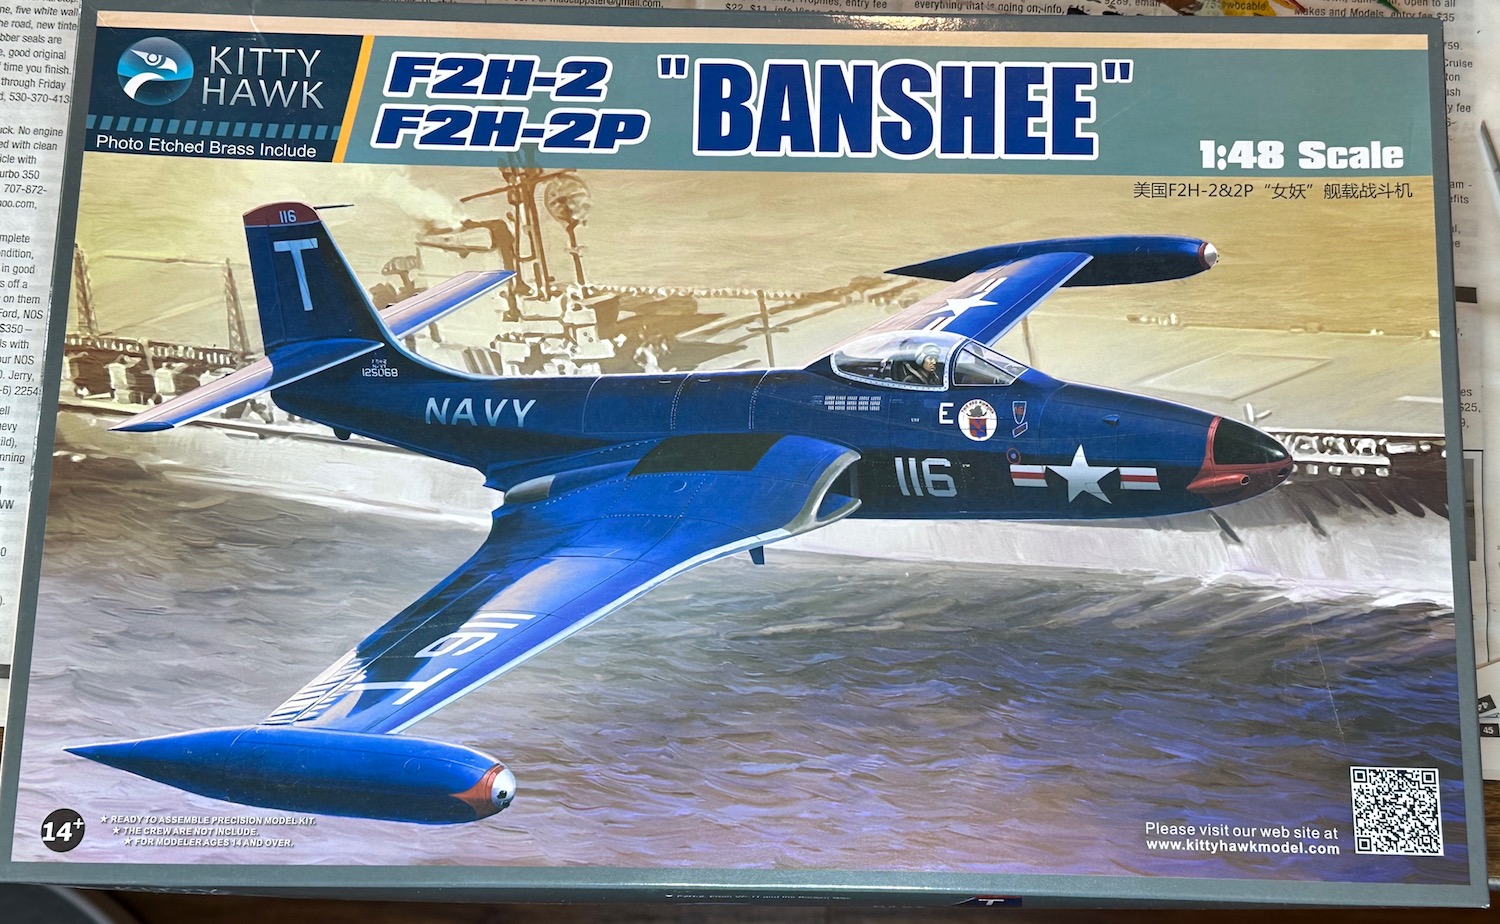
I have been waiting for an opportunity to build the Kitty Hawk F2H Banshee for a number of years. A decent kit had been on my most wanted list and when this one was released I rushed down to my LHS to have a look. It looked great in the box and it seemed to be all I could hope for. I bought it on the spot.
As things happened, I did not get to building it for a number of years. Other projects and a long distance move delayed the Banshee project. This Korean War campaign would I thought, change that at long last.
The kit was not hard to find, it had always been near the top of the stack. I pulled it down and it looked as good in the box as ever. I had a number of Banshee books in stock and ordered a few more. One the later was the Detail & Scale volumne now available in an updated form and printed on demand by Amazon. Outside of the color photos being a bit garish, it is a superb reference. Natch, I turned to the model review section which contained a long article on the Kitty Hawk kit.
My heart dropped as I read the review. There are major problems with the kit, some fixable some not. The worst was the wing center section and engine area which are way out of scale. The illustrations of a built Kitty Hawk kit showed the issue clearly.
Like a spurned lover, I put the kit away in deep storage. Perhaps I will build it someday, but not anytime soon.
Paul
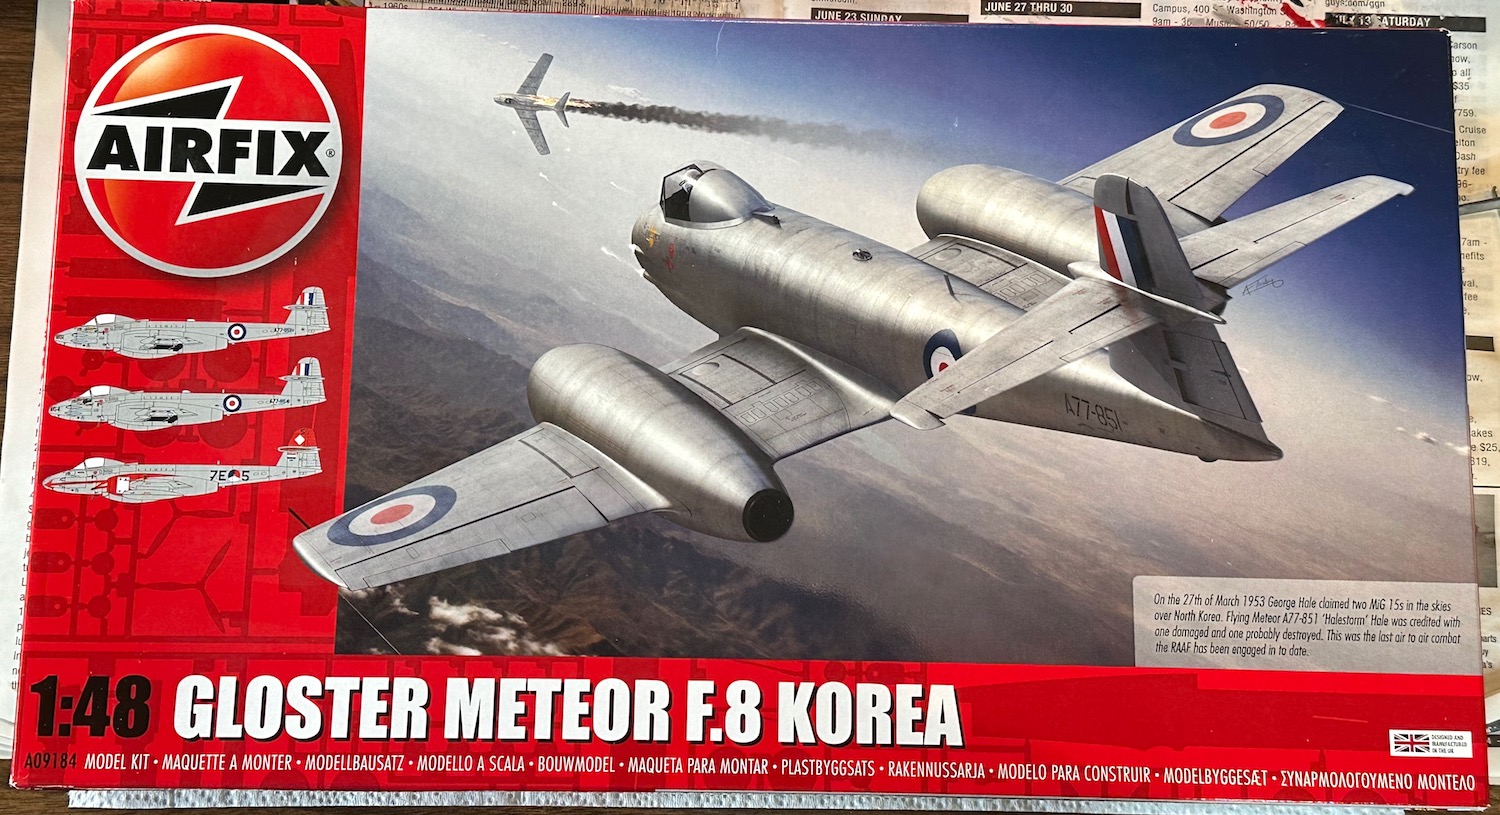
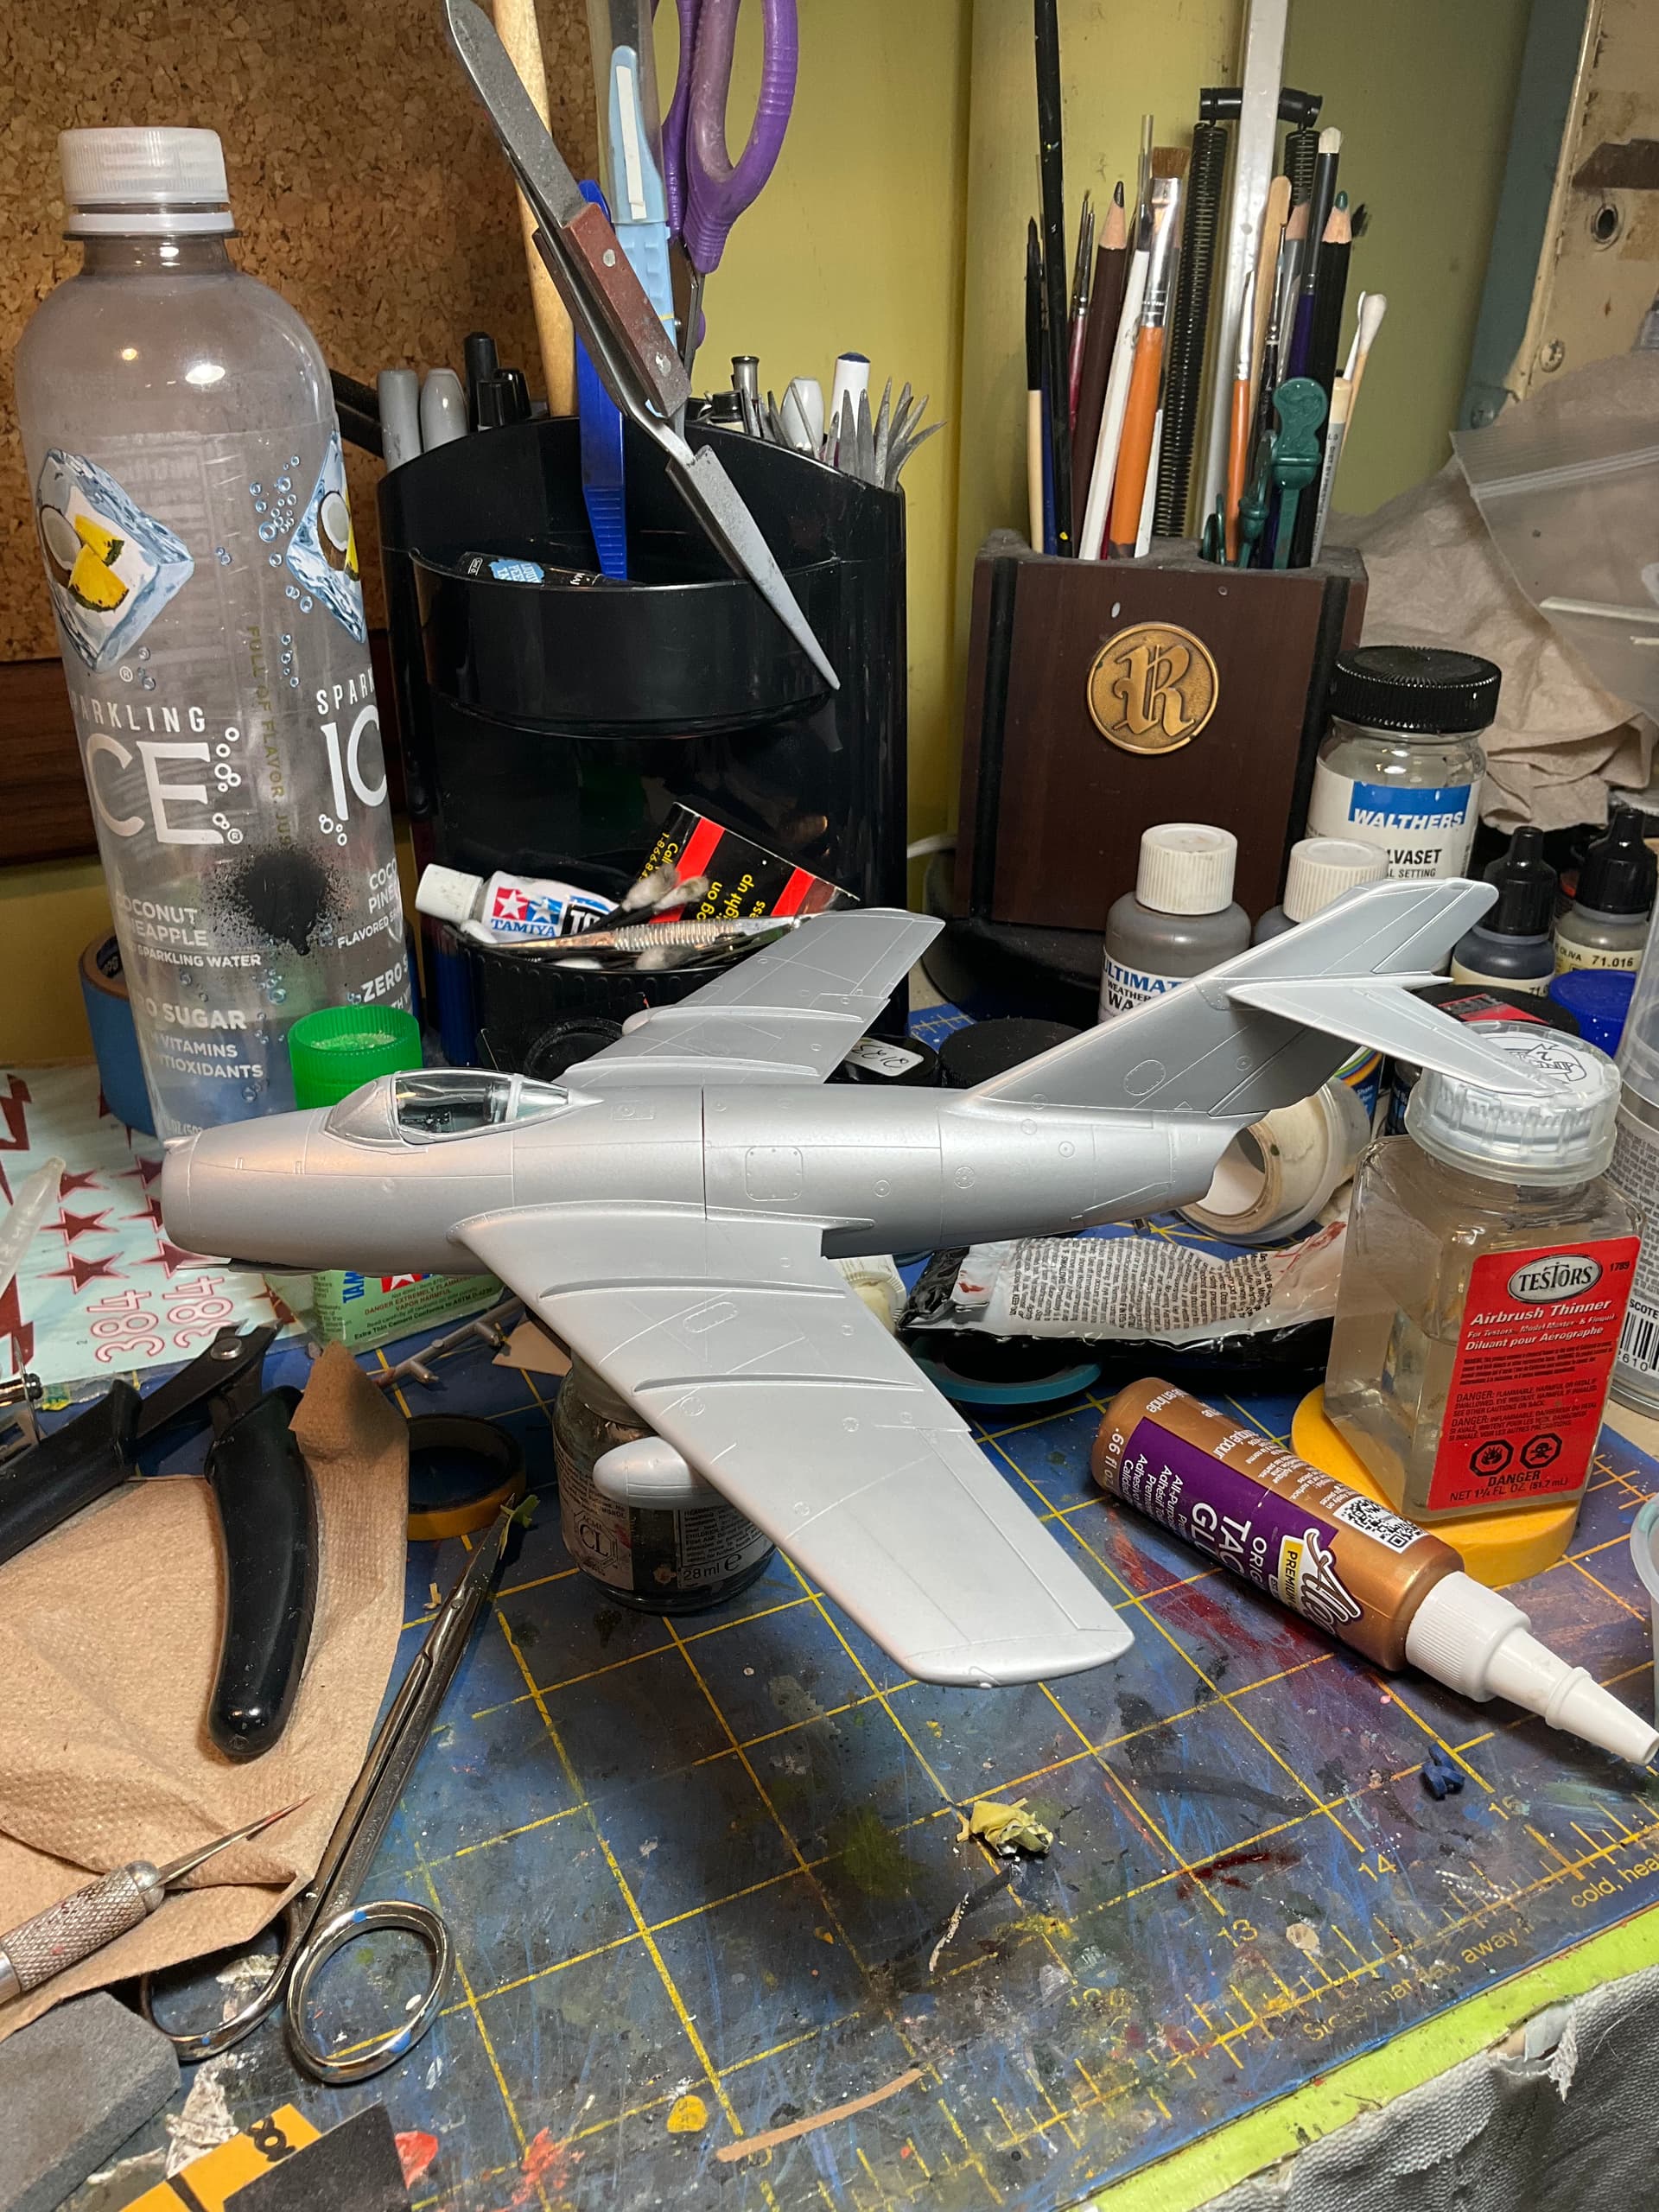
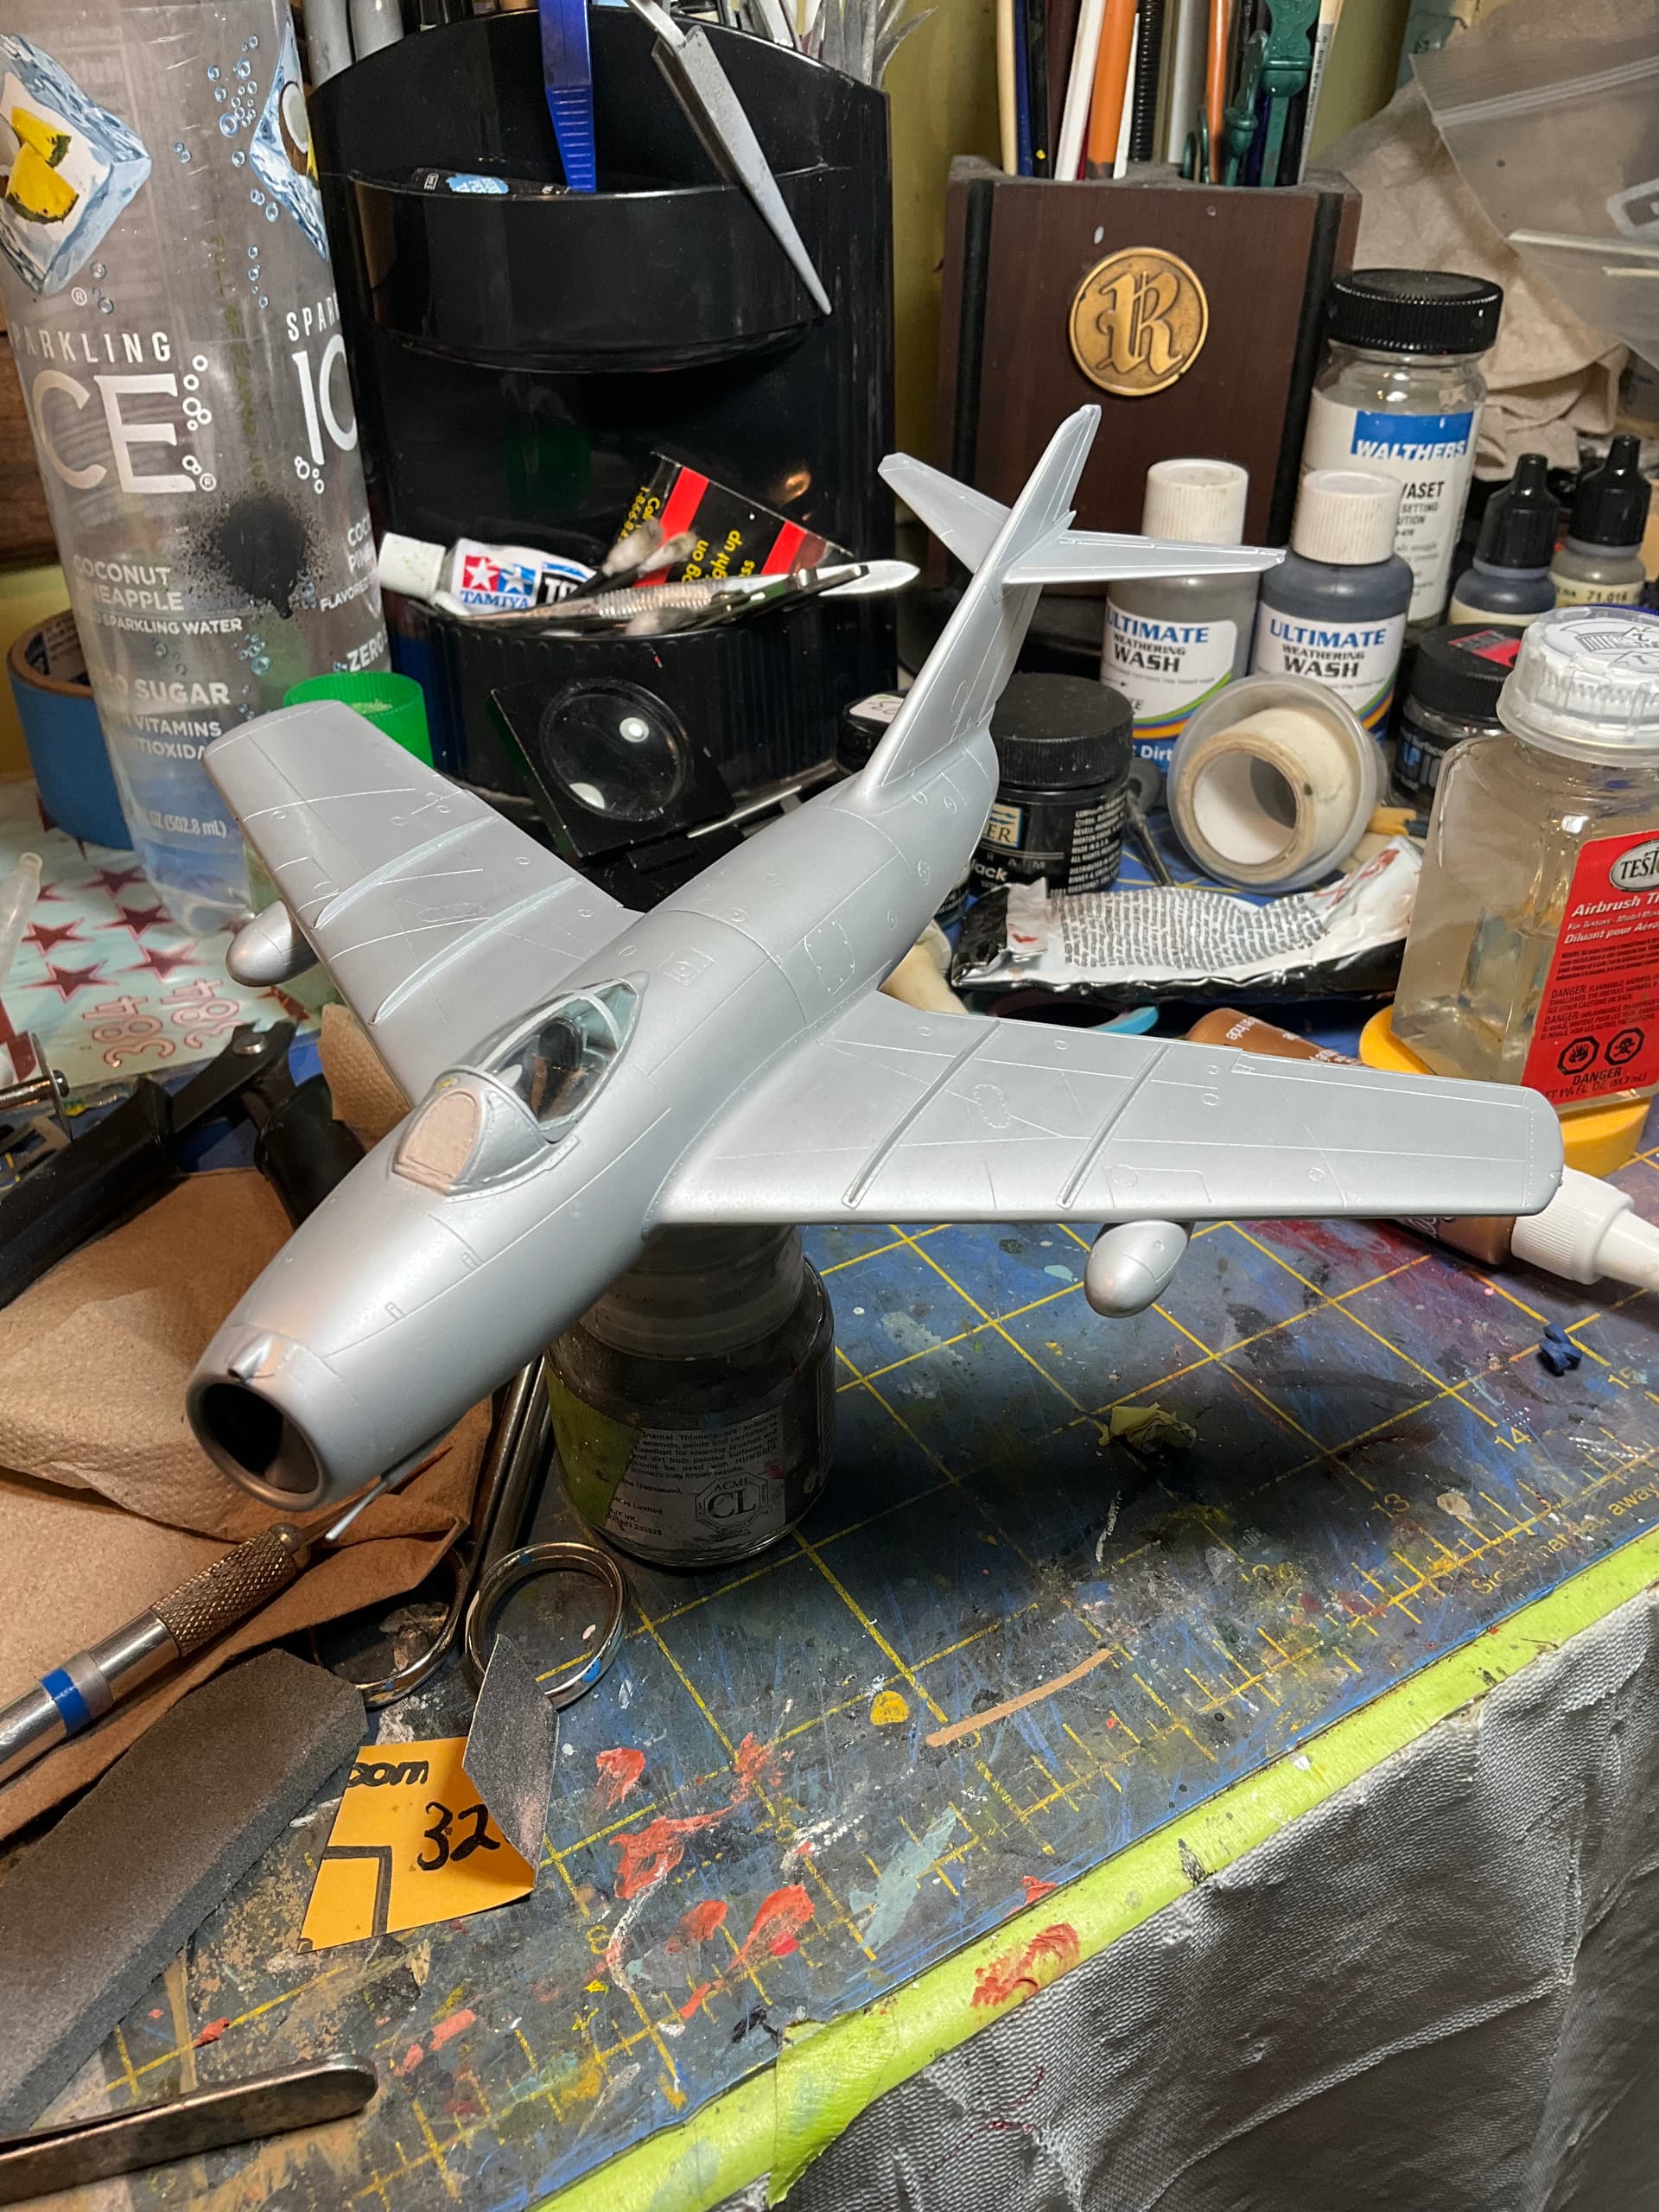
As so often happens in life, dissappointment in one area brings an opportunity in another. I had long wanted to build an all blue AD Skyraider and had an old Monogram kit someplace. While searching for it I stumbled on a new Airfix Meteor F.8 that I had bought some time ago and forgotten. I have been buying a number of these new Airfix kits and they look terrific in the box but I had never actually built one. The poor AD kit will have to wait a bit longer. The Meteor is one cool airplane and this kit looks great, I’m excited to start it.
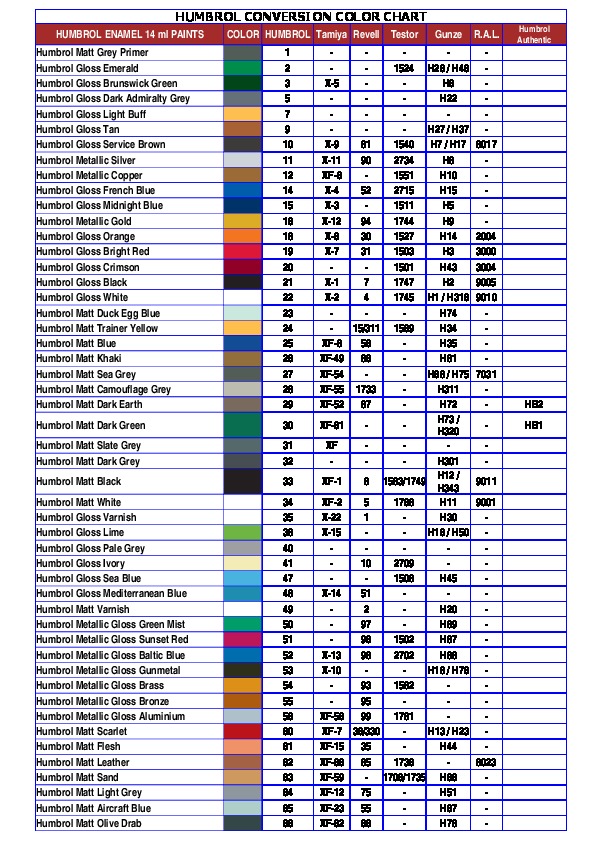
I assembled 3 parts last night and the fit was great, the plastic nice to work with and the detail superb. The only thing I do not like this kit shares with the other new Airfix kits. The color call outs are in Humbrol numbers only. I like Humbrol paints but have bottles from other makers as well. I looked online for a simple Humbrol number call out sheet that I can print out and keep on the workbench but have so far found only limited lists, most of which need a color printer to be fully useful. Does anyone know of a simple number lookup that is fairly complete?
My references on the Meteor are fairly thin, only two volumes, neither of which has any color cockpit shots. I will see what I can find online.
Here is the start of a project that gets my juices flowing almost as much as the Banshee had.
Paul
The cockpit color called for is #85 which the Humbrol sheet I just printed out says is Matt Aircraft Blue which the chip shows as a light shade. Can this be correct? The B&W phots show a dark color and I had thought it likely to have been black.
Paul
My understanding is that post WWII, the RAF switched to black as their standard cockpit color, from the wartime Grey Green color.
Humbrol 85 is Satin Black.
Yes, black is the correct color. It is a great kit, and while mine is currently stalled, I highly recommend it. A couple of suggestions I have are to attach the wing fairings, B12 and 13, very carefully and make sure they line up with the fuselage. I actually glue them in place before I bring the fuselage together. Making sure they are done right will greatly help the fuselage/wing fit. I also glue the nose pieces to their respective fuselage halves before gling the fuselage together to eliminate gaps.
Michael ![]()
![]()
RAF went to an all black cockpit until very late. Certainly up until the Buccaneer and Tornado.
85 is satin black, 65 is light blue. That might be where the confusion might’ve been on the chart.
I like to use a very dark grey with a black wash for shadow. Something like Panzer grey or NATO black work well.
Excellent choice with the Meteor.
Thanks guys, I looked again and the chart I downloaded and printed shows 85 as a light blue which has to be an error. I will look toward a dark grey as suggested with a black wash.
Also, thanks for the tip on fitting the wing fairings. I will keep that in mind as the build progresses. I hope to get in a bit more bench time tonight.
Paul
Looks like the resolution and blurring of the 6 into an 8. I recognise the other numbers, starting at 60 red, 61 flesh etc. All staples of my paint box back in the day.
The ejection seat cushioned surfaces are listed as a #109 which is shown as a medium blue/grey. Does that sound reasonable?
Paul
Little research says the F8 had the Martin Baker Mk2E seat fitted.
Looking at photos, it looks like the body of the seat was black, some a dark grey, and the head rest a dark leather. Either black or dark brown.
In some photos they have blue straps, but have seen khaki too. Wonder if Airfix mean the straps?
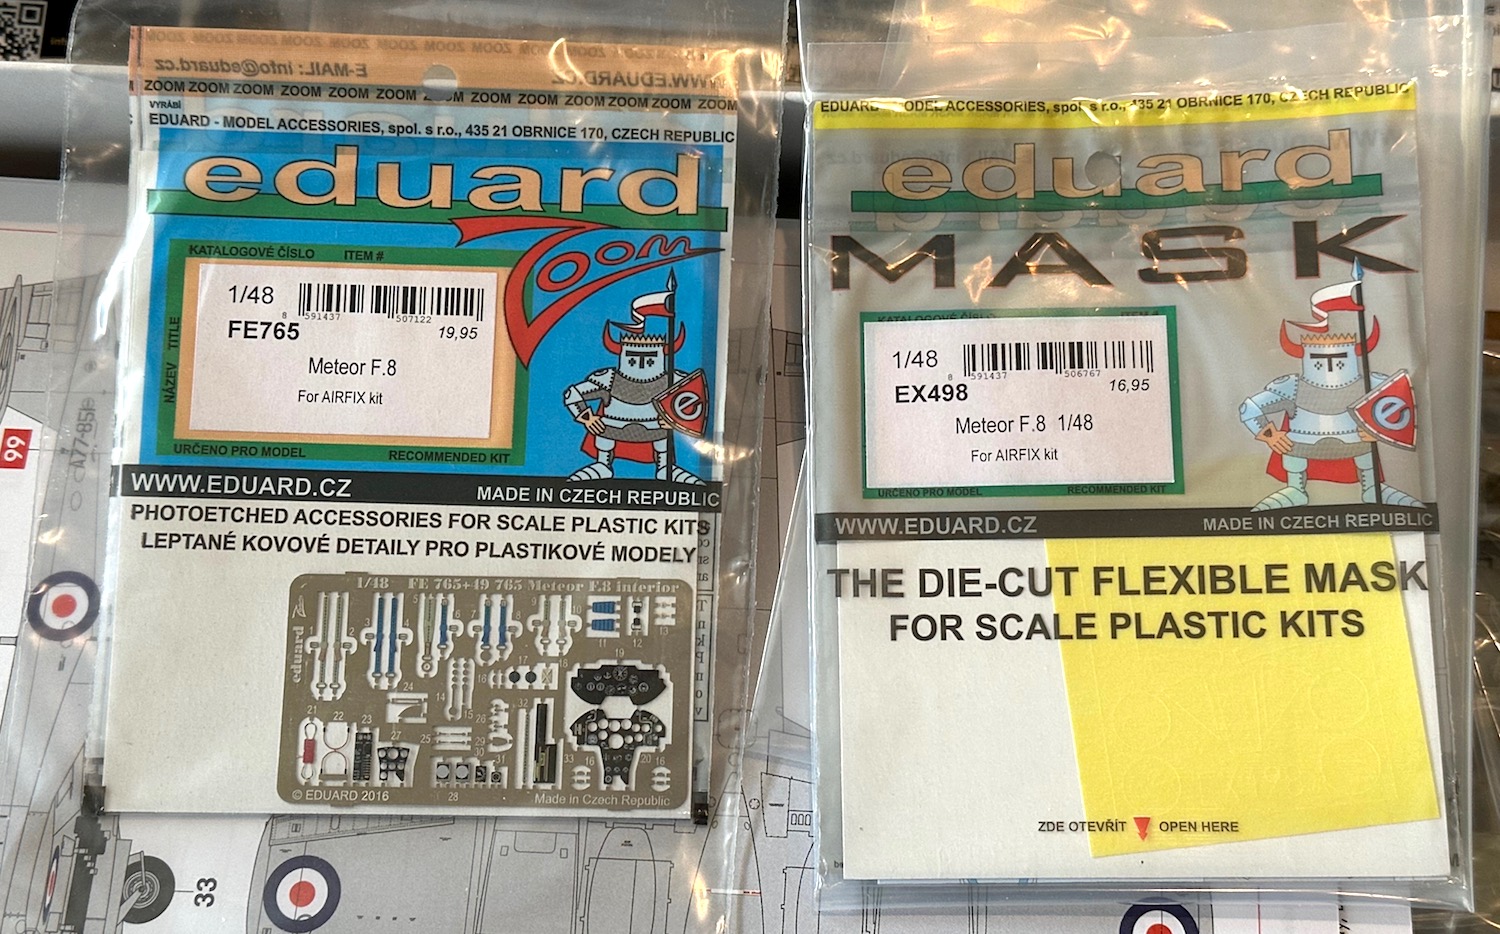
Yes, could be. The PE set has some of the belts blue as shown in the PDF you posted. The Airfix seat has some differences from the picture so I don’t imagine it worth going to a lot of bother about it unless some great period color pictures turn up.
Paul
There could be subtle differences between the seats. It sometimes depended on what aircraft it was fitted to and what the service wanted.
Plus, the plastic seats in kits are never that accurate in shape anyway. They are better than the plastic benches and armchairs we used to get.
This site has good reference info and photos on most bang seats
Thanks guys, I found a number of pictures of the cockpit and seat and printed out some of them on my B&W laser printer with handwritten notes about the colors. As much as modelers would like to have definitive answers about these details, the photos reveal some differences. I’ll work on making this model “typical” and appropriate.
Paul
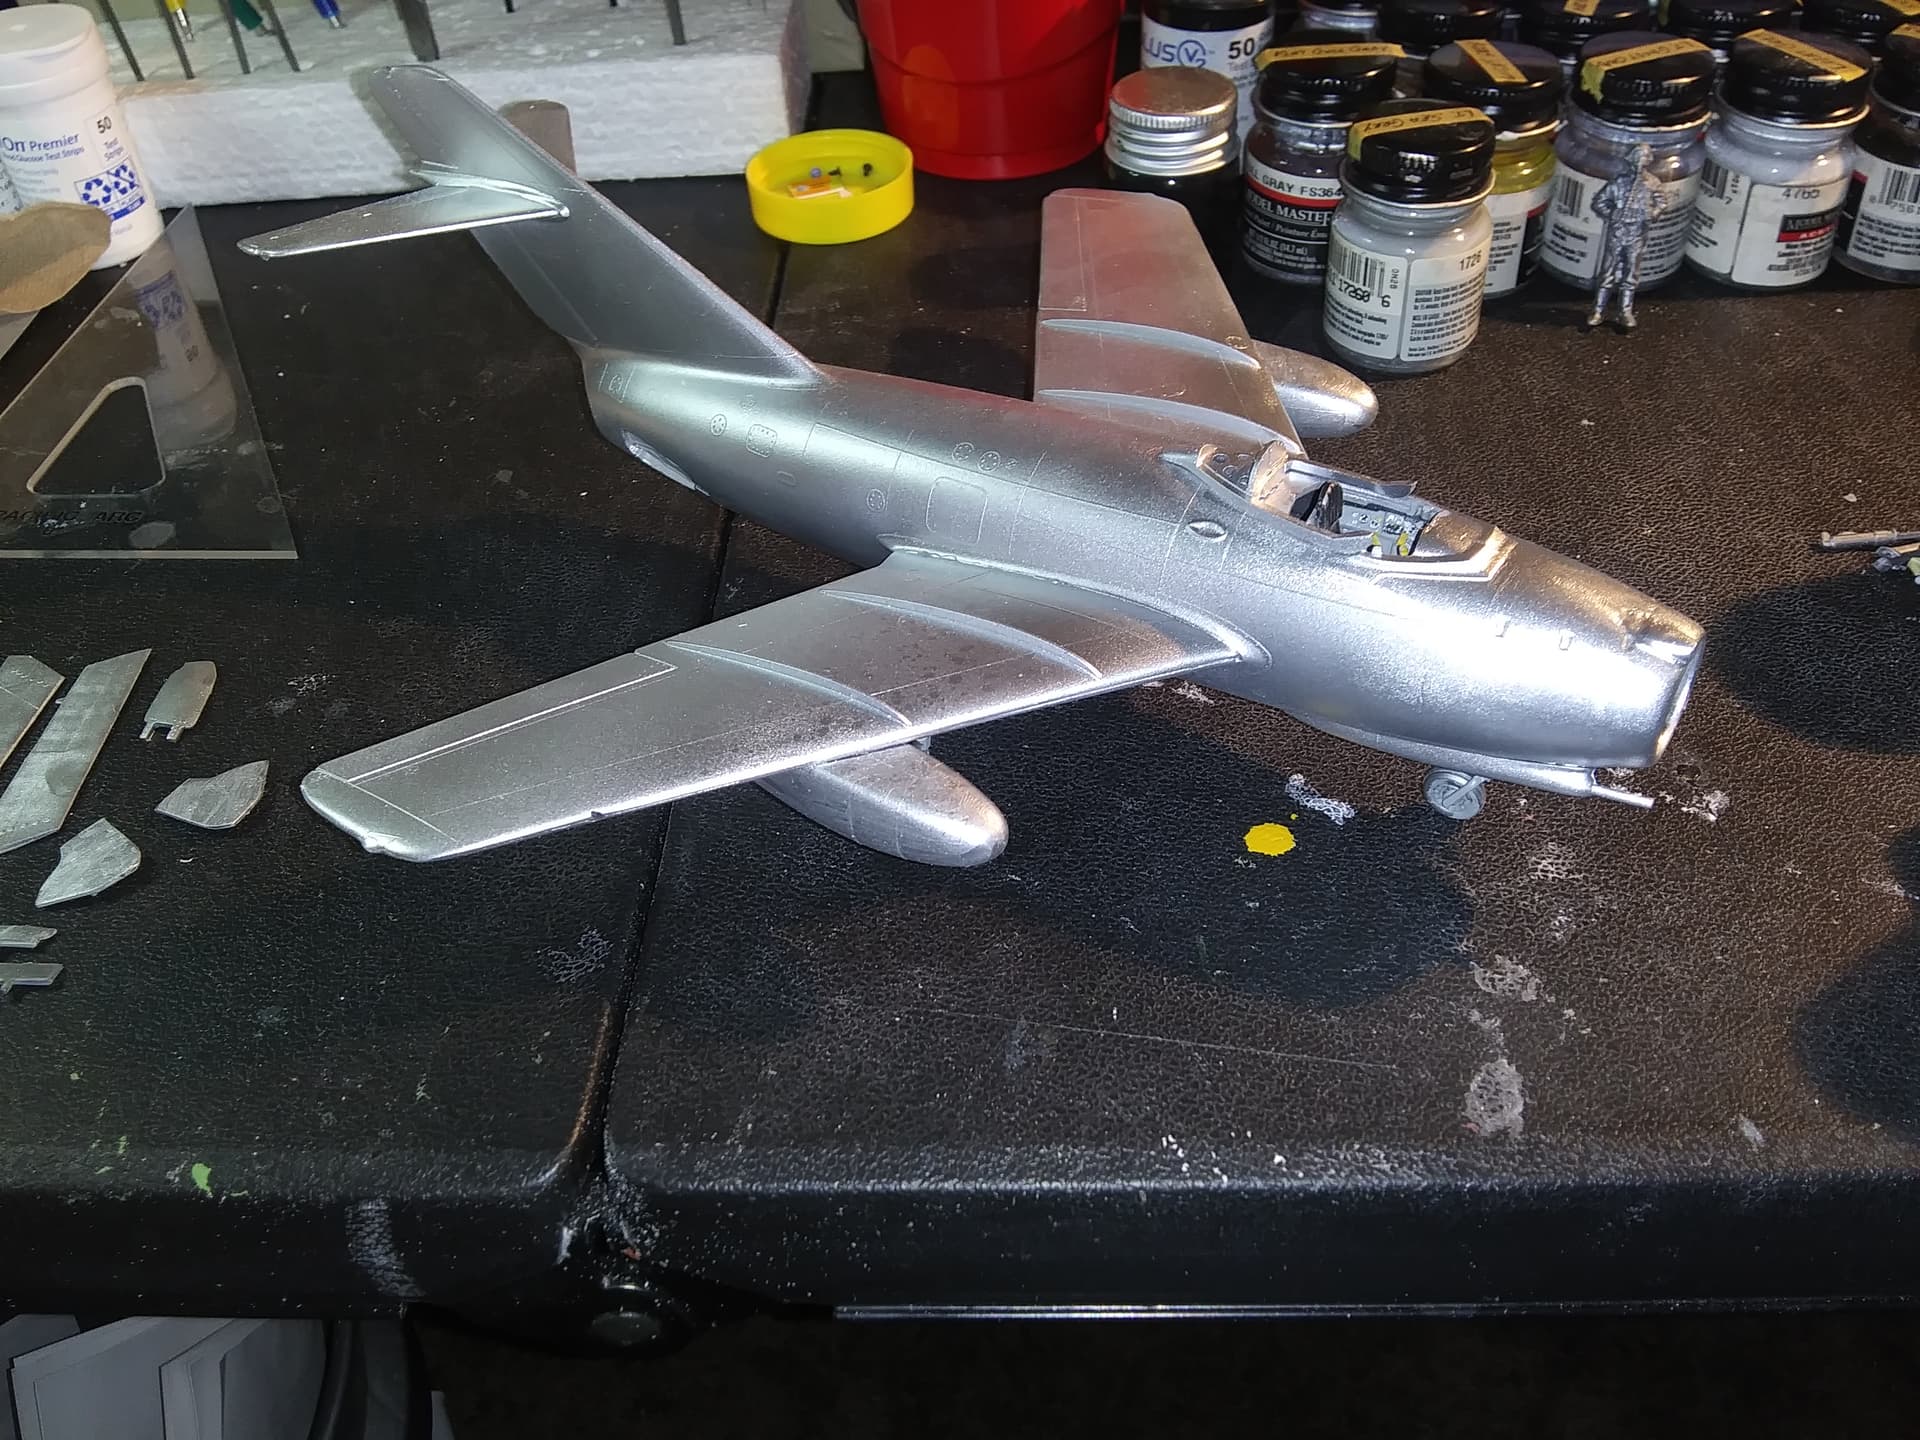
Finally got the plane panted. My own mix of white aluminum. About 30 drops of Alclad aluminum and 6drops of tamiya lip flat white over white primer.
Ordered a set of Iliad Korean War mig decals, While waiting on them I will work on the landing gear
Joe
It’s been a slow month for modeling. I finally finished up the sanding and puttying and put an initial coat of aluminum on the Monogram MIG. She’s up on her wheels, but still needs a LOT of work. Maybe I can finish her up before the end of October, but I don’t want to hold my breath.
I need to finish the landing gear doors as well.
Gary
Hi Everybody,
I’m really liking the builds going on here! Hope to see these get competed. So, I decided to join this some time back, and have finally cleared some bench space, and got my motivation back.
For this campaign I’ll building Tamyia’s 1/48 F-84G Thunderjet! Though I’m a bit leery of the decals as they were printed in 1998. So may have to resort to painting them and hitting the decal dungeon.
More to follow soon!
Till next time be safe, wash your hands with soap and water and above all have fun!
I love the F-84s. I have the Monogram kit as a basis for a conversion to the early F-84 B. Let’s hope your Tamiya build goes smoothly and the decals behave themselves.
Paul
I’m finally back up on these forums after being locked out because my browser was not new enough. I don’t like to update my confusers because they work differently and some stuff quits working meaning I have to spend precious time & mental energy on things I do not care about. In this case, after ten years I finally did the update but it was not advanced enough to get on these forums so I bought a new iMac with the latest system and now am going through the misery of trying to “migrate” files from the old confuser to the other. I now have three confusers on my desk and its a mess.
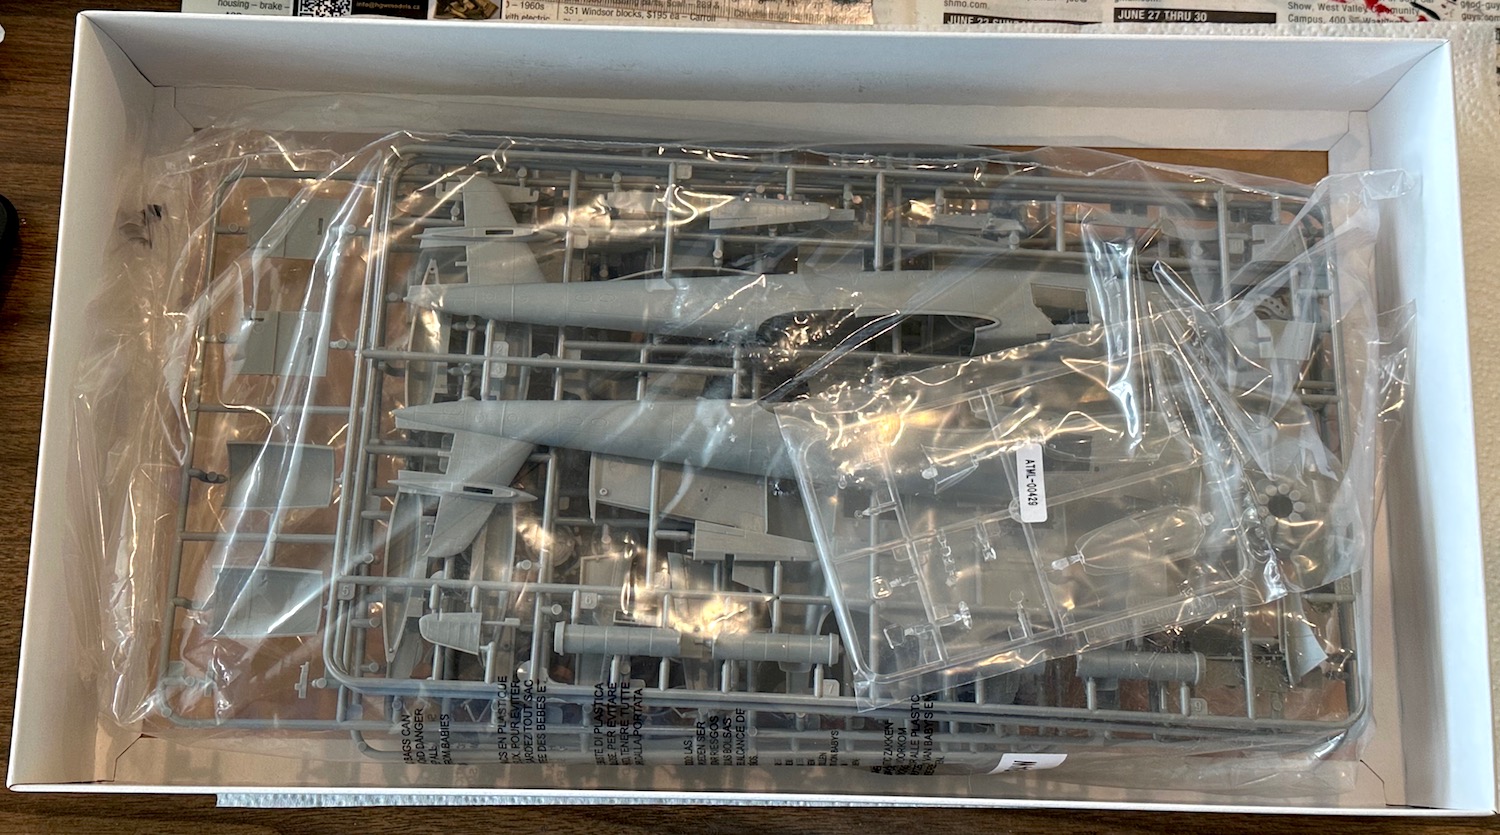
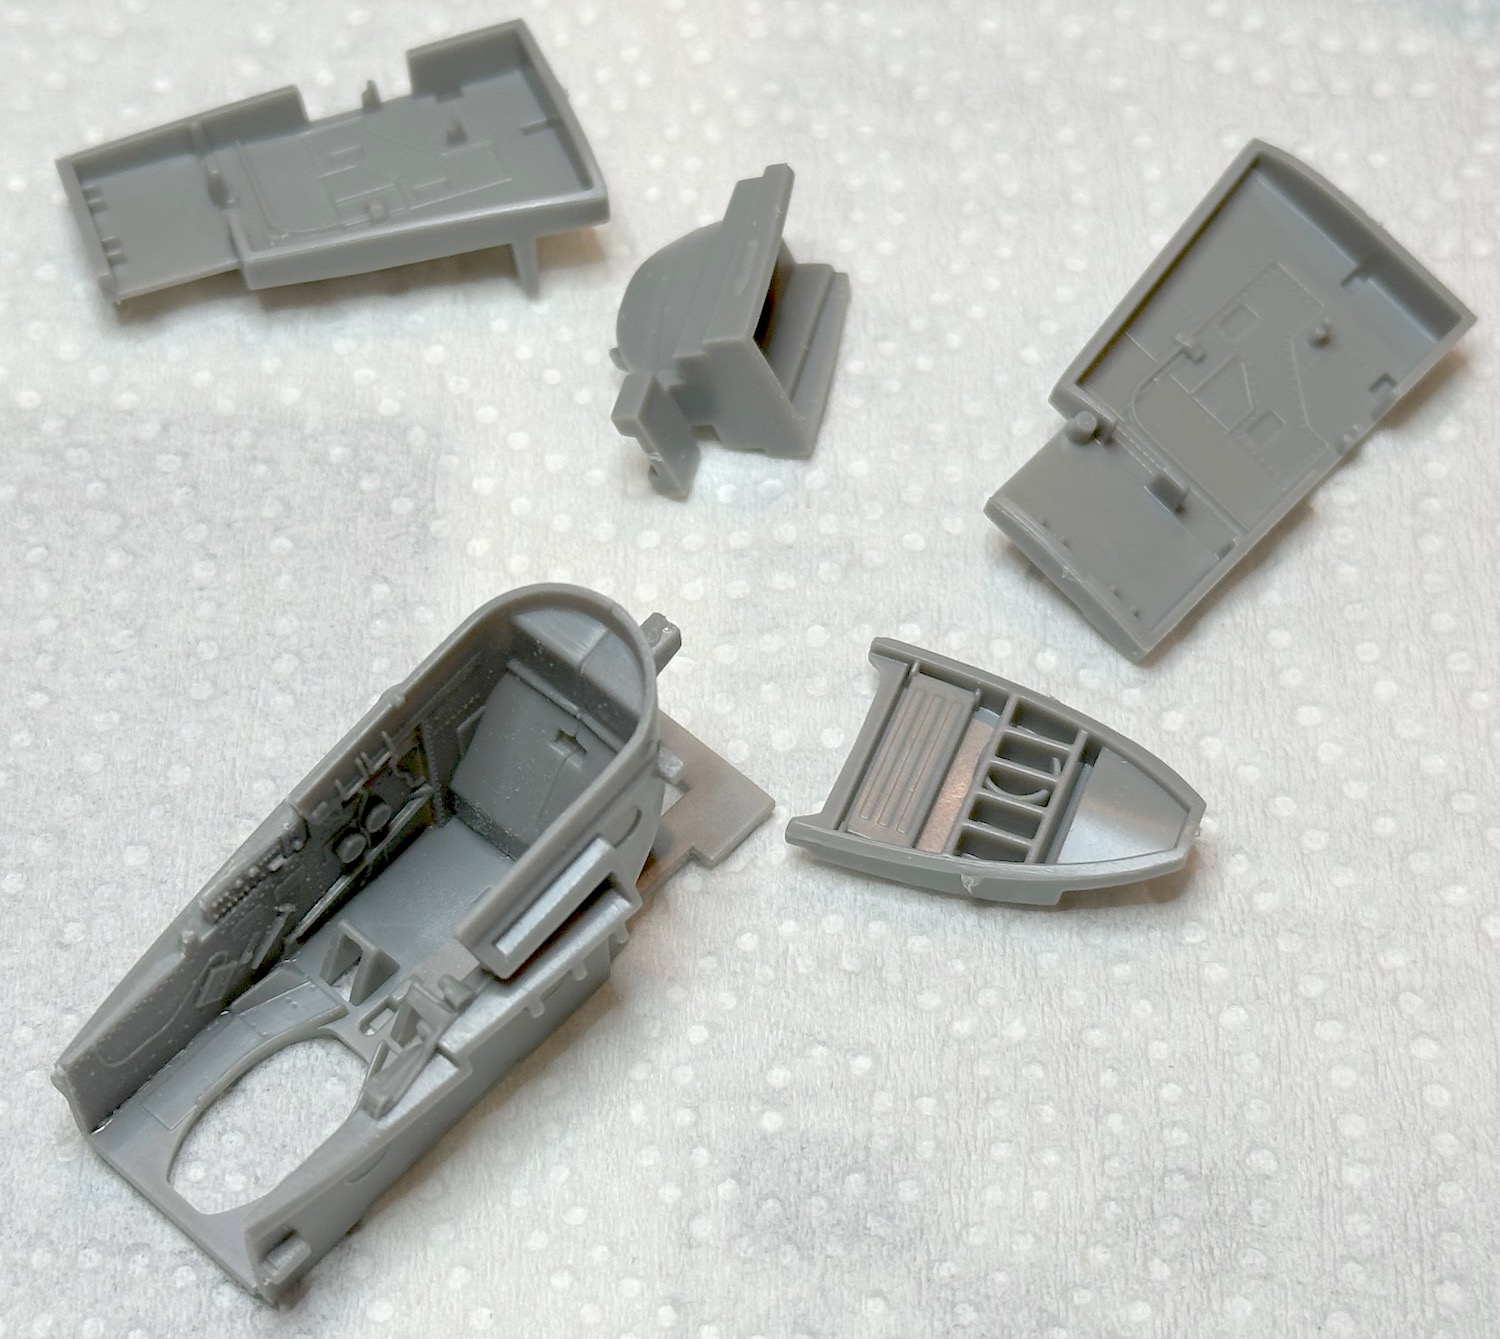
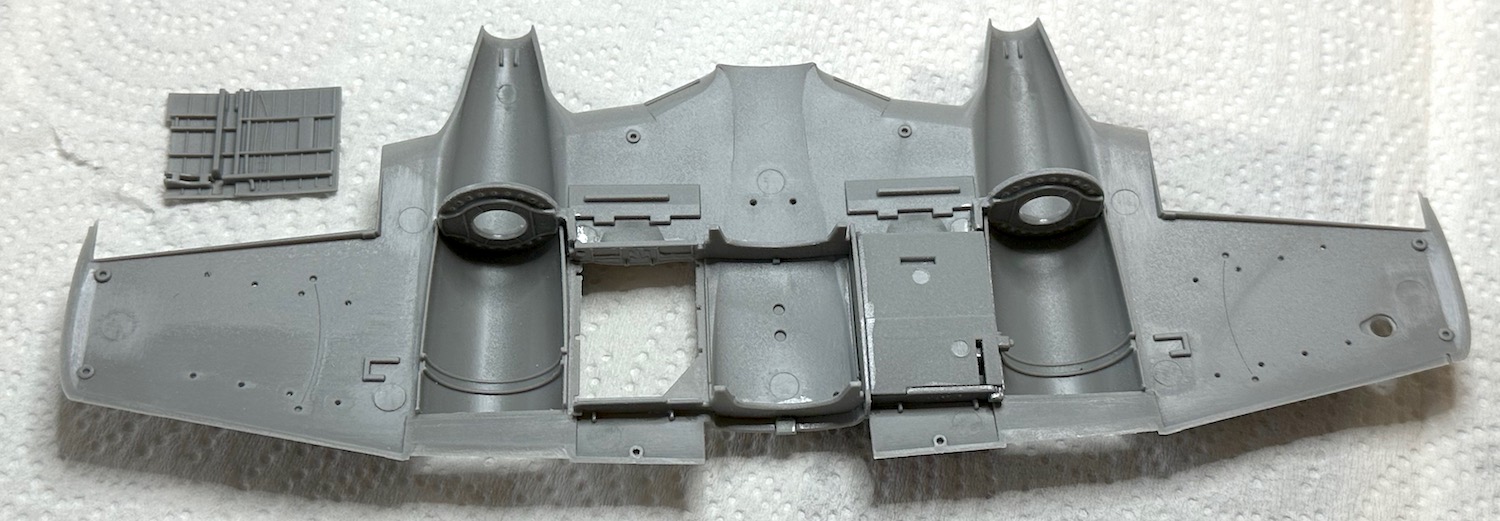
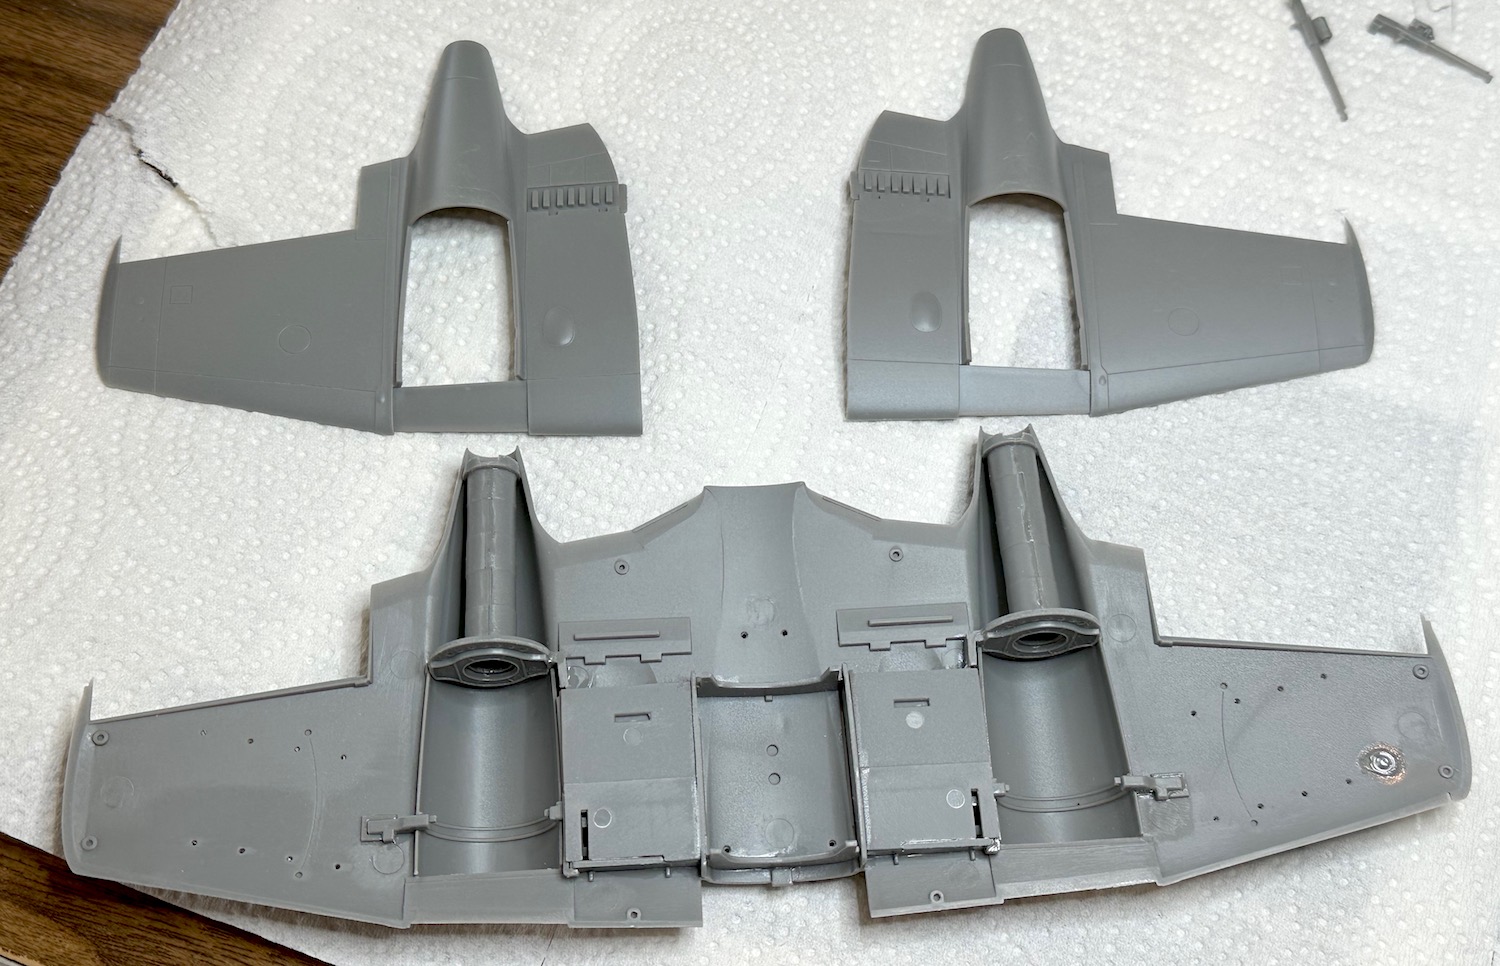
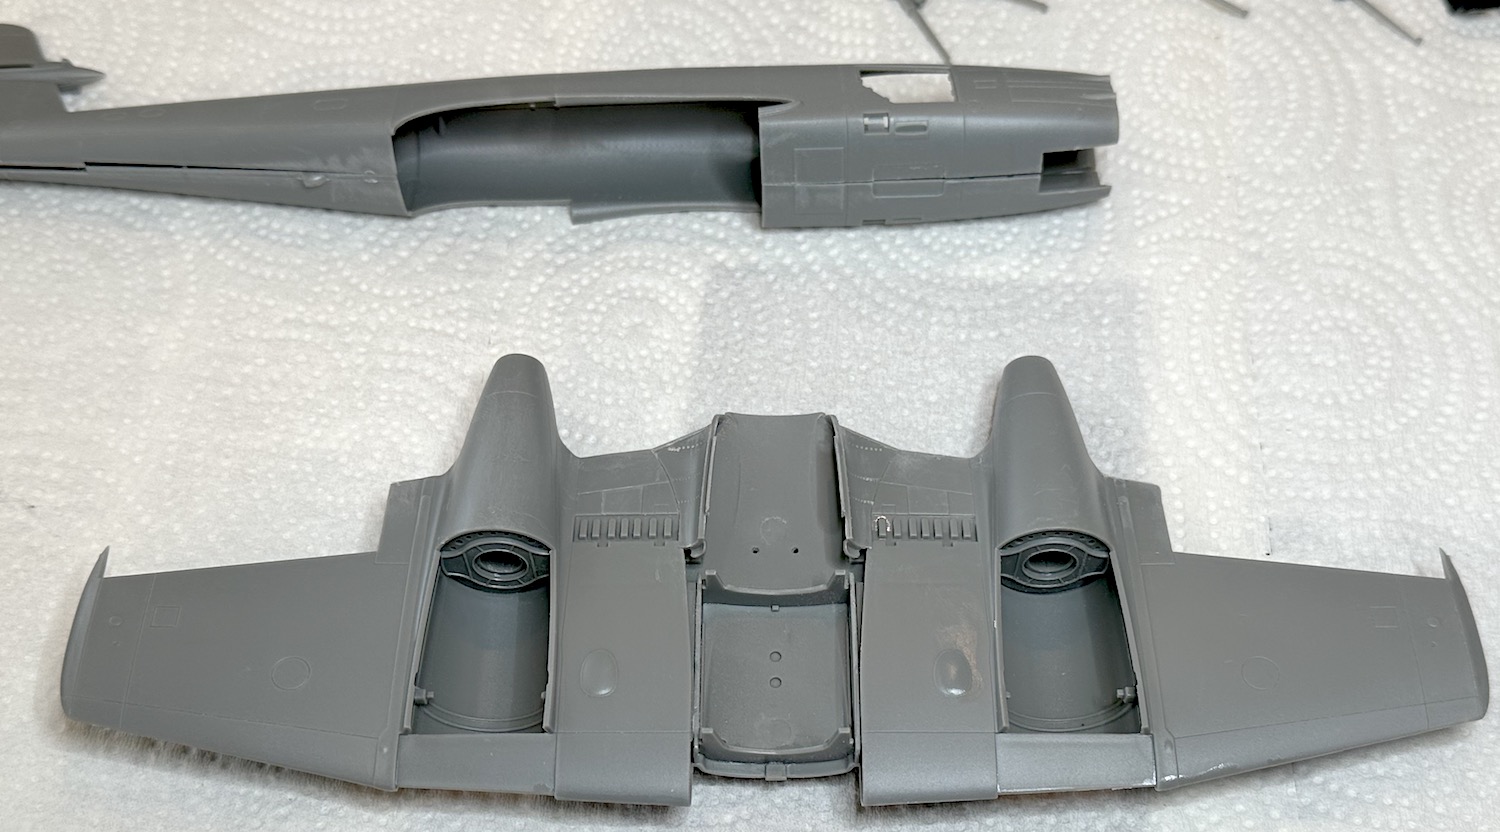
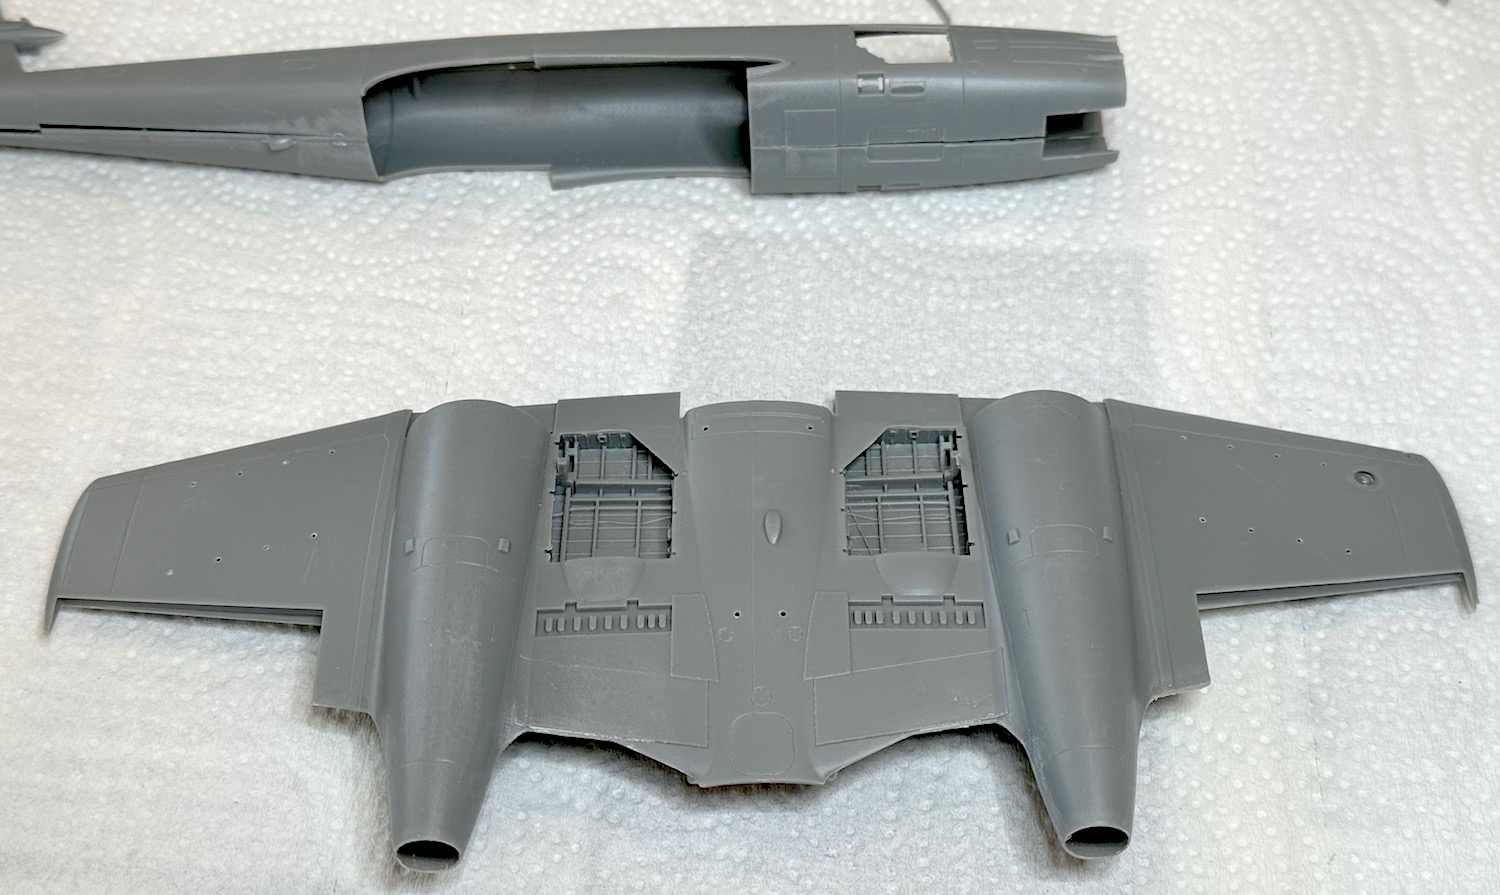
Work on the F.8 Meteor continued but I couldn’t share it until now and only then with the help of a thumb drive. I got in a bit of a hurry and built the cockpit before thinking the process completely through. I shoulda painted and detailed it before assembling it. I was just too excited by the coolness of the Meteor and the excellence of the kit to want to stop and think about things. My bad!
I love the way the wing builds. It has two spars and boxed wheel wells, very nicely done. There were two parts in each well that should have been added before the finished, they are landing gear & gear door linkage and some hydraulic piping. The destructions call for them to be added at a later stage when it is hard for my fat fingers & thumbs to reach the area.
Paul