“Hay”-ate there, Frank. (Ok, that has to be the stupidest attempt at a pun I’ve ever made. ) I’ve still got more than 6 months to dive in. We are stuck in a sorting-packing-moving nightmare but I am trying to Winkle out some sanity time and work on some kits. So many Japanese subjects I want to build. I finished my Frank before this campaign started, and my Jack was part of the radial engine campaign, which I failed to complete.
Nice work so far. Looking forward to seeing this one complete.
I think the modelling gods don’t want me to finish any Japanese planes, had a bunch of wood from a shelf above my hobby bench fall down and knocked one of the landing struts from my Raiden into the ether…![]() . Trying to source a spare sprue from Hasegawa…
. Trying to source a spare sprue from Hasegawa…
That is really too bad to hear
Oh no!!! That’s awful ![]()
Which model is it, 1/48th or 1/32nd? Give me a few days and I’ll look for my Hasegawa Jack. If you want, I’ll send you the landing gear.
That reminds me. Do any of you have hasa
Hasegawa’s 1/72nd Jack? Years ago I reviewed resin detailed sets for it: cockpit; weapons bays; control surfaces. I will probably never get around building one in 1/72 and super detailing, so if anybody out there want these, you can have them for the price of postage.
Oh that would be awesome! It is the 1/48 scale one, let me know and I will send you my mailing info. I don’t have any of their 1/72 stuff I’m afraid.
Cheers,
Colin
If you don’t hear from me in a couple of days or so, email me and or PM me. I’m busier than a one legged cat trying to bury poop on a frozen pond and some things are becoming out of sight out of mind.
Thanks Fred, will do!
Hadn’t provided a recent update on the Tamiya Type 1 75mm gun I’m working on for this campaign. I guess like a lot of you all, I’ve been splitting my time between a variety of modeling projects. I’m gearing up for the AMPS 2023 show with a Pacific War theme and am currently working on an M3 Academy Stuart with an MB M3 Satan conversion set and a Fine Molds Type 97 Te Ke. However, I was able to break in and get some progress on the Type 1 75 mm gun. I was able to work on updating a few parts, though my scratchbuilding skills are still 'under development, still able to achieve some pretty decent results.
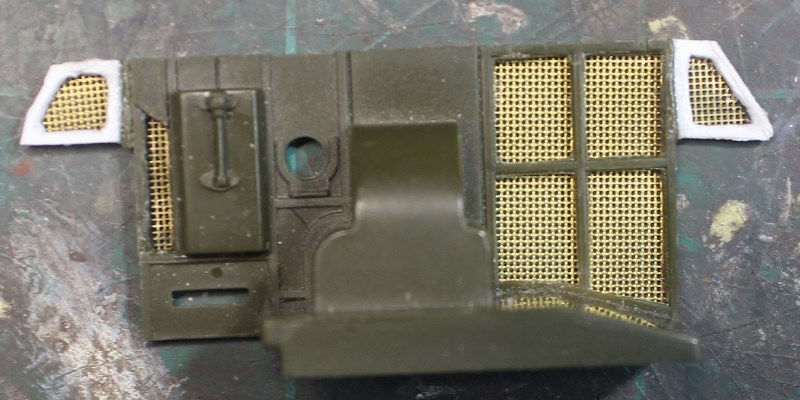
I was able to find some good screening material to replace the molded in screens on the original kit. It looks a bit crude, but that’s where my abilities are at the moment.
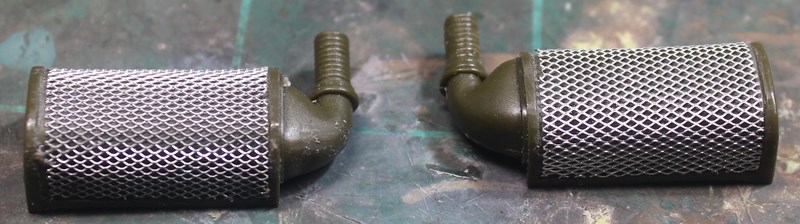
I found some good screen material at the IPMS Nationals in Omaha this year and was able to do an okay job on the mufflers. After sanding down the molded on detail on the original, the screen fit in great with a bit of super glue to keep it all together.
I think it does improve the overall look, so we shall see when paint and weathering is applied.
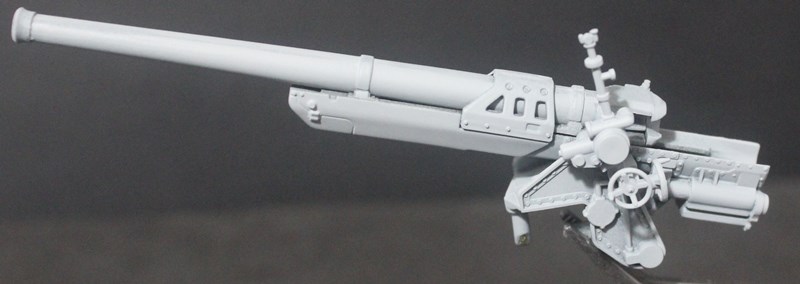
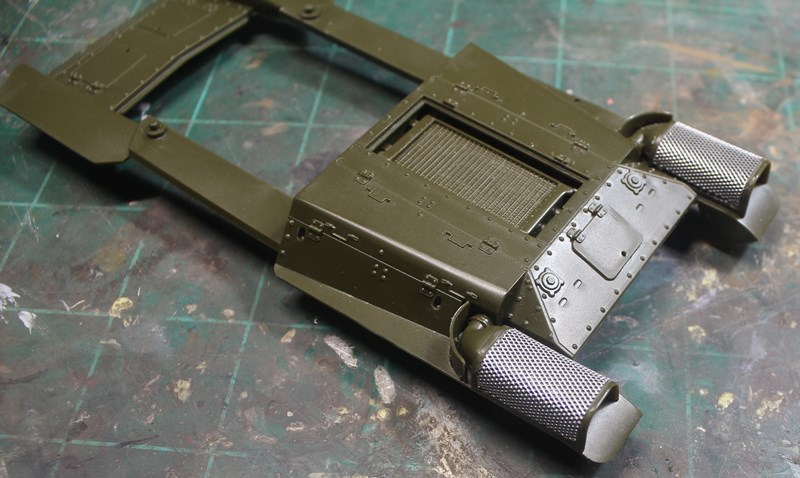
These parts are primed and ready for the paint shop.
I’ve still got a few smaller details to add to the open casemate as based on old interior pics taken from the one in Aberdeen Proving Grounds.
I really enjoy all the entries in this campaign. Hope everyone as a great Christmas season with family and friends and can spend some time on the modeling bench during that time.
Cheers!
chuck
7 Likes
Chuck,
The work on your Ho-Ni self propelled gun looks fantastic. Plus the additions of mesh detail to parts has improved the overall look of the kit. Keep up the excellent work my friend.
Hey, I’m going to jump on board with this campaign. I have a couple of kits lined up already. I’ll be posting soon. Happy modeling.
Bill
2 Likes
Chuck, great work on the screen parts. Really adds some nice detail.
Bill, looking forward to see what you come up with. I have a ton of things lined up as well. Now it is time to research and decide.
Thanks Panzerman. You and the gang have been my inspiration all along. Having seen what you and the others scratchbuilt presses me on to try different projects. Hope you and the gang are doing well. And I’m glad you are joining in this campaign; it will be a real treat to see what you enter. Cheers!
Thanks SGTJKJ.
Most appreciated. Still cutting my teeth on some scratchbuilding projects, but slowly seeing some improvemen. Hoping to see your work in the near future. Cheers!
Hi Panzerman, welcome to Kit maker network. Lots of good people here. I look forward to see what you build for the campaign.
I’m sure whatever he builds will be pretty amazing.
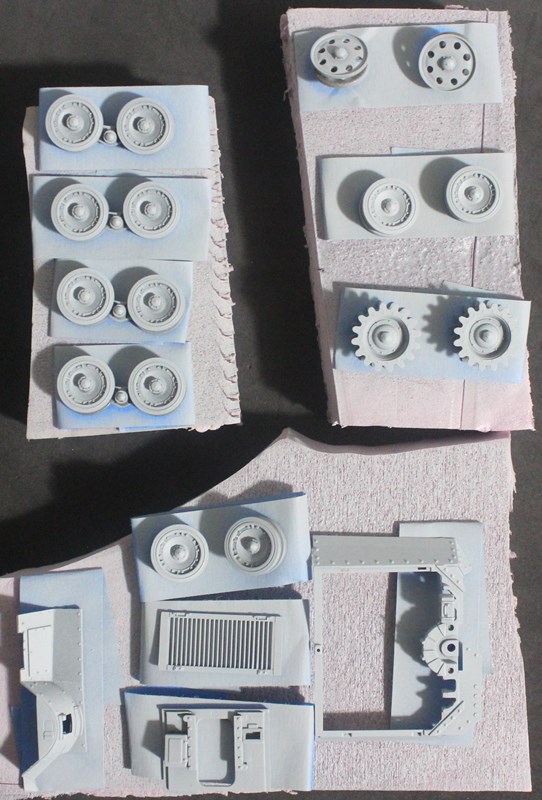
Well, here’s my 1st entry to this fun group build. The King of Battle is one of my favorite modeling subjects. That made selecting the Fine Molds, Japanese Mountain Gun kit a “No-Brainer”. The kit looks nicely detailed, plus it has crew figures. Oh, before I forget. Thanks to Hetzer44 and JPTRR for the warm welcome to the Campaign.


6 Likes
Panzerman, I am so looking forward to this one as I have it in my stash and delayed putting off building it. Let us know how the detail is and how construction (parts fitting) goes. Looking forward to what you may add in the way of missing details or producing a better detailed part. I will be able to use that intel in my build of this kit. Cheers!
hetzer
1 Like
Adding a few more pics of my scratchbuilt details to the Ho Ni Type 1 75mm gun from Tamiya. Again, the kit is quite nice for being an open-top and having been produced in the mid '70s. The interior details I’m adding are based on a few pics of the interior of this vehicle when it was at the Aberdeen Proving Ground, Maryland a number of years ago. The interior was in bad shape, though there were enough details left in the fighting compartment to help enhance this kit. I have a few Japanese armor resource books, most notably the Tank Power series, and while they provide excellent texts, in-action pics and good color plates, it didn’t contain any Ho Ni 1 fighting compartment pics.
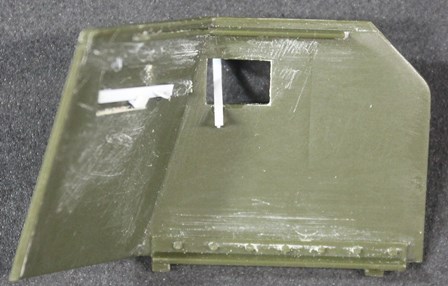
The above pic is the right side interior casement wall. The white are sheet plastic that replicate the viewing port handles. The viewing port handle to the right is in the propped open position.
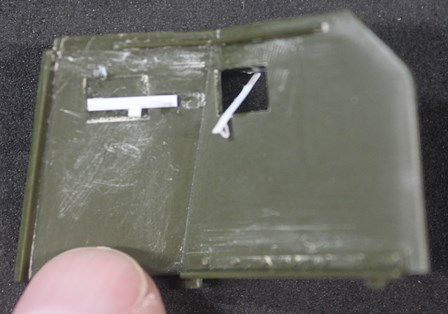
Another pic of the right side interior casement wall. The Aberdeen Proving Ground pics I’m using appear to indicate the port handles were flat, not round as I would have thought. The little loop on the end of the handle are on all the remaining port handles and my guess would be they are some sort of ‘stopper’ to hold the vision port in the open position. Yeah…I know if that’s the case, then the loop should be on the outside of the casemate wall. However, there was some missing details in the original Aberdeen pics so there may have been a latch on the interior for the loop so the crewman didn’t have to expose his hand when closing the port.
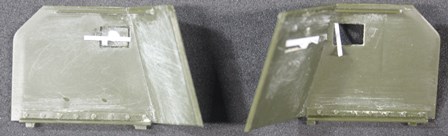
And the two together. Now on to the few interior missing details in the casemate.
Hope everyone’s project is progressing well and you are all doing well.
Cheers!
chuck
P.S. I actually found a few more interior pics, but only of the interior upper wall sides and those handles look a little different from what I added. Different wartime manufacturer? Or my mis-identification of the pics I used for making the ones pictured above?
3 Likes