They are like Cockroaches… they’d survive the Nuclear holocaust.
2 Likes
I agree!!!
Sacrifice MUST be made to the Gods… Better you than me! ![]()
![]()
Hi Everyone,
Wow! What a great array of really good builds going on here, and we’re halfway there, I can think it’s only going to get better!
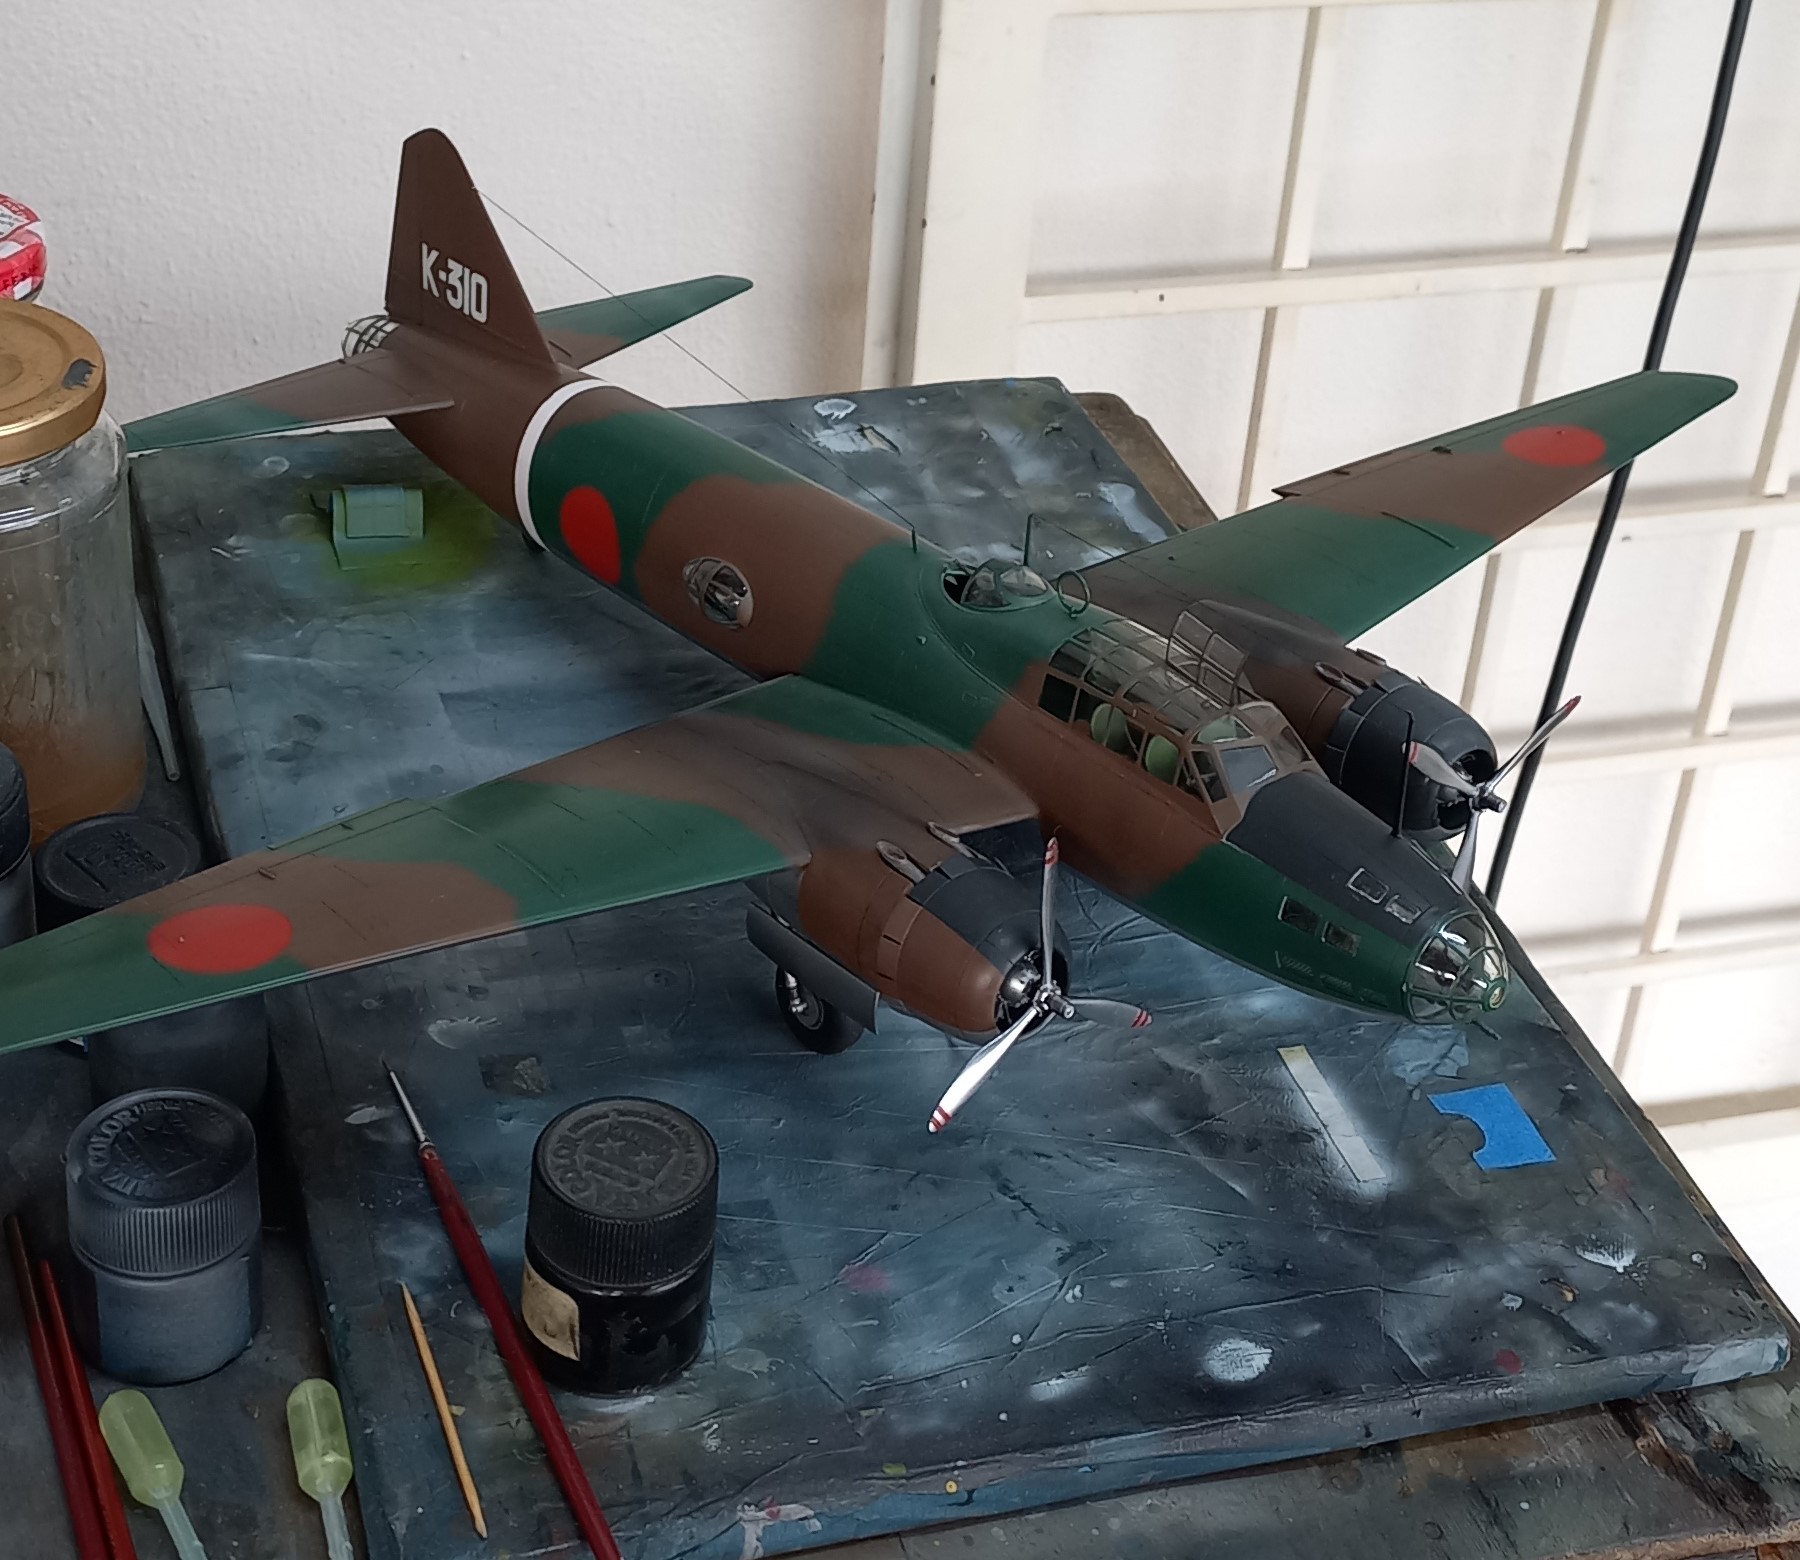
Since my last update, I’ve managed to complete the G4M Betty! So, without further ado here’s the final construction and presentation.
I applied the only exterior decals used, the tail number. The kit decals went on fine, and settled down nicely using Mr. Softener.

I then clear coated the area and applied a wash of burnt umber oil. I also added exhaust streaks from the engines to past the stabilizers with black, white, and burnt umber oils. I really liked how this turned out, as it presented a used, but not worn-out bomber consistent with what was flown on the mission.
The kit came with a set of Mosket exhausts which are beautiful, unfortunately for me I didn’t test fit them prior to installing the engines and didn’t have the heart to risk the paint job, so I went with the kit exhausts. These were painted burnt iron and look just fine.

I then unmasked everything, attached the landing gear (Tamiya did a great job making this a very easy process!). With the underside complete, I flipped her over and focused on the upper side. This included the open canopy window and the aerials. With the aerials secured I rigged the bird with EZ-Line checked everything over to see if anything was missed.
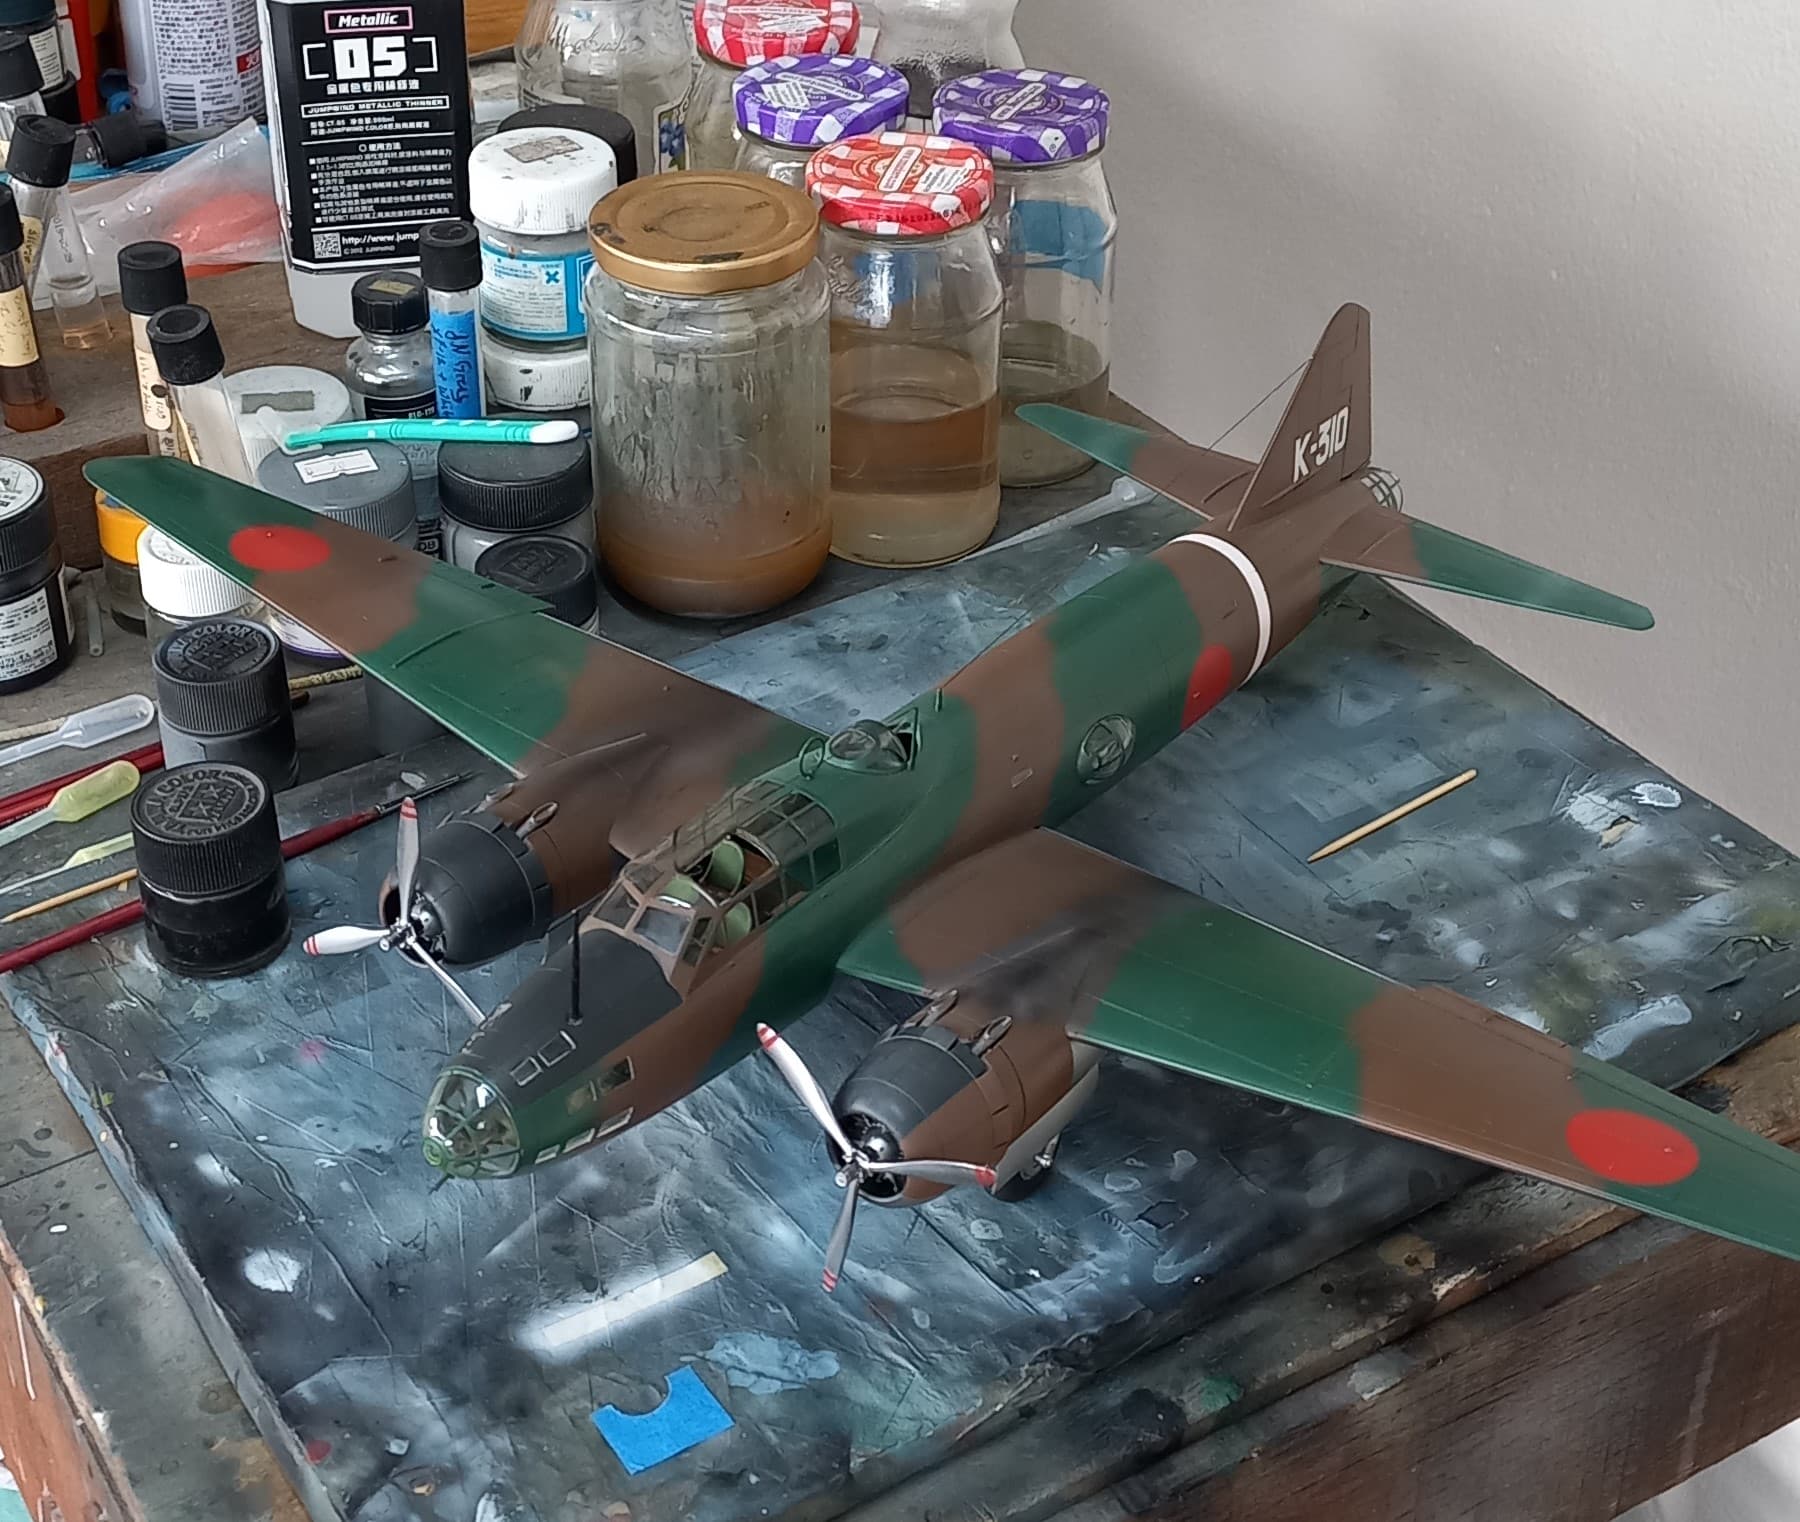
The last thing done was the props which went on without a hitch, and then she was dusted in preparation for her photoshoot!

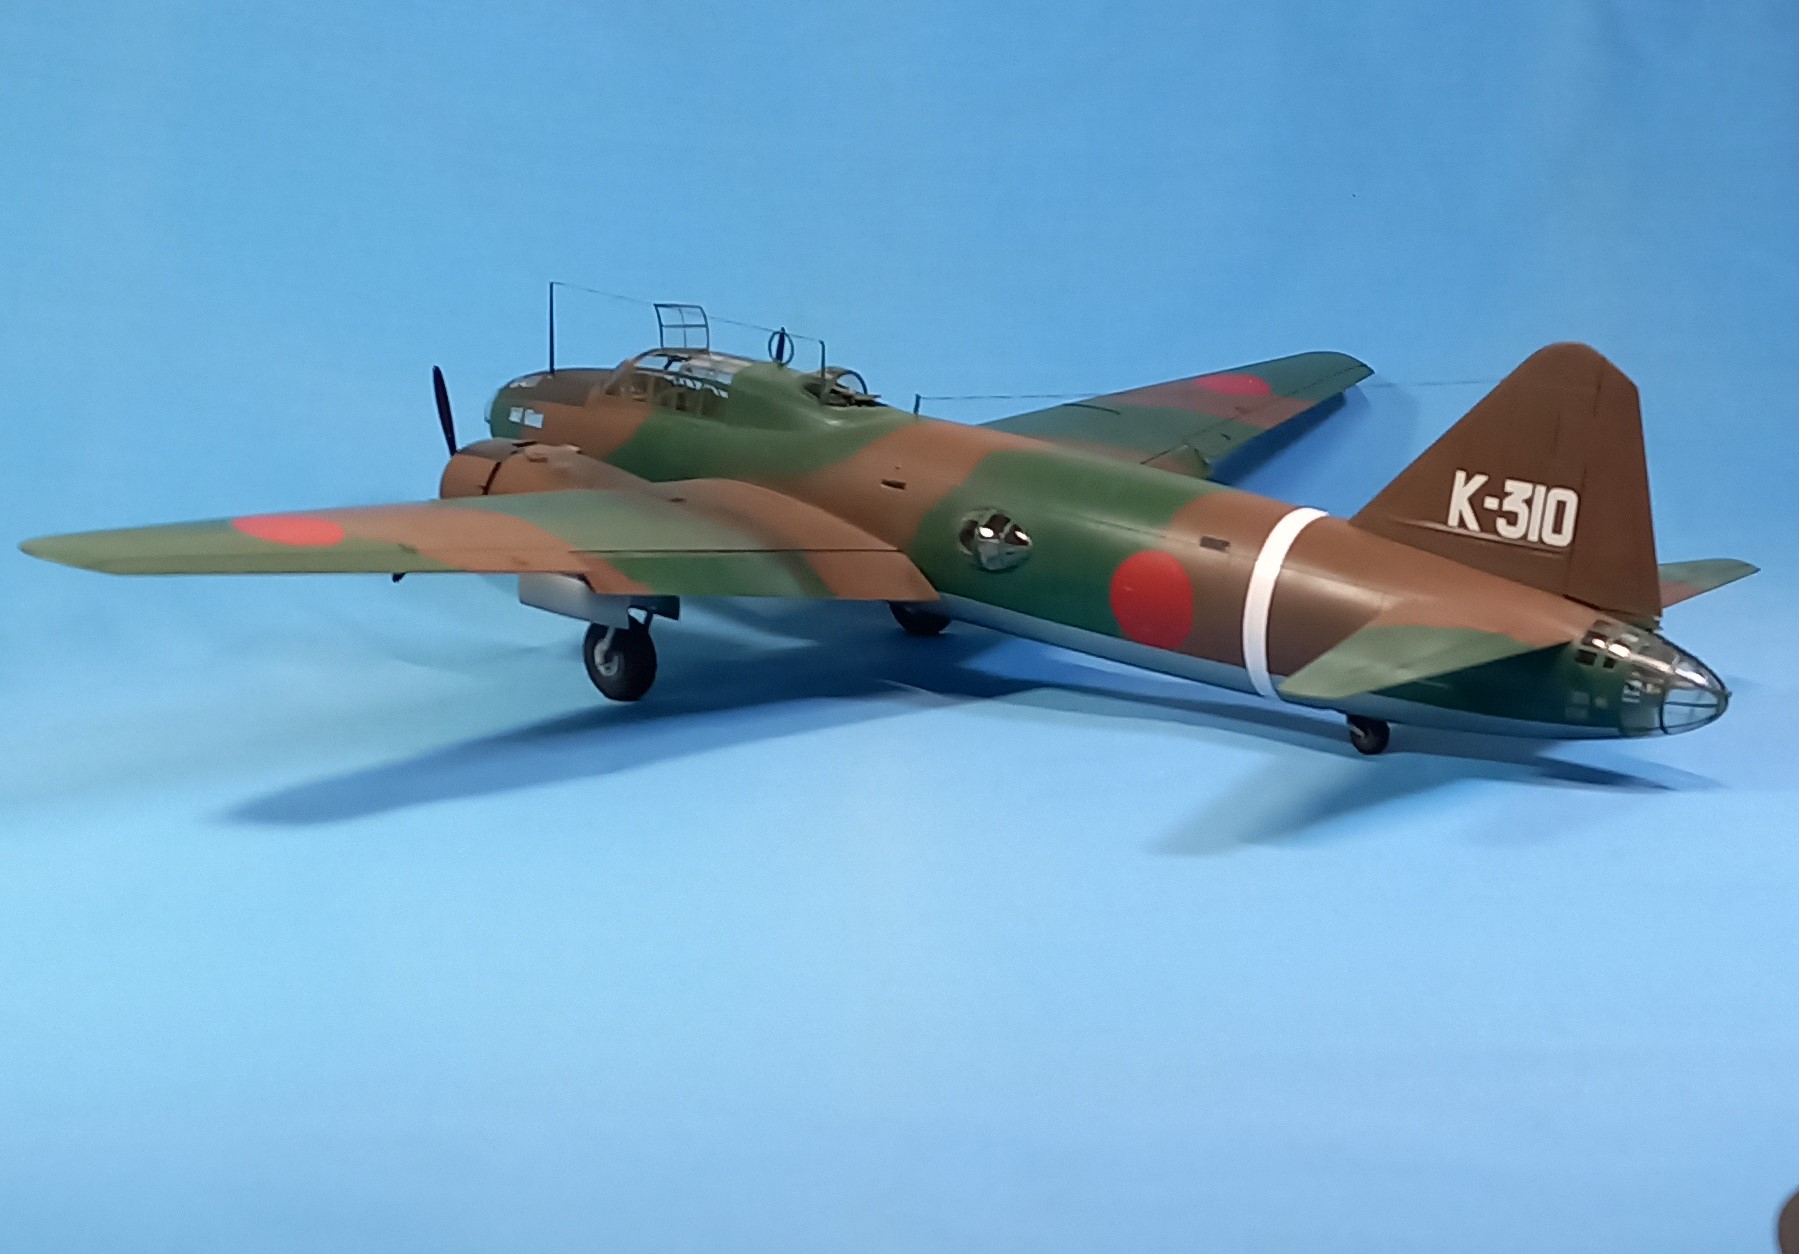

Even with all the glass closed up, looking in one can see all the detail on the inside just fine, the open window really adds to bring the interior out.
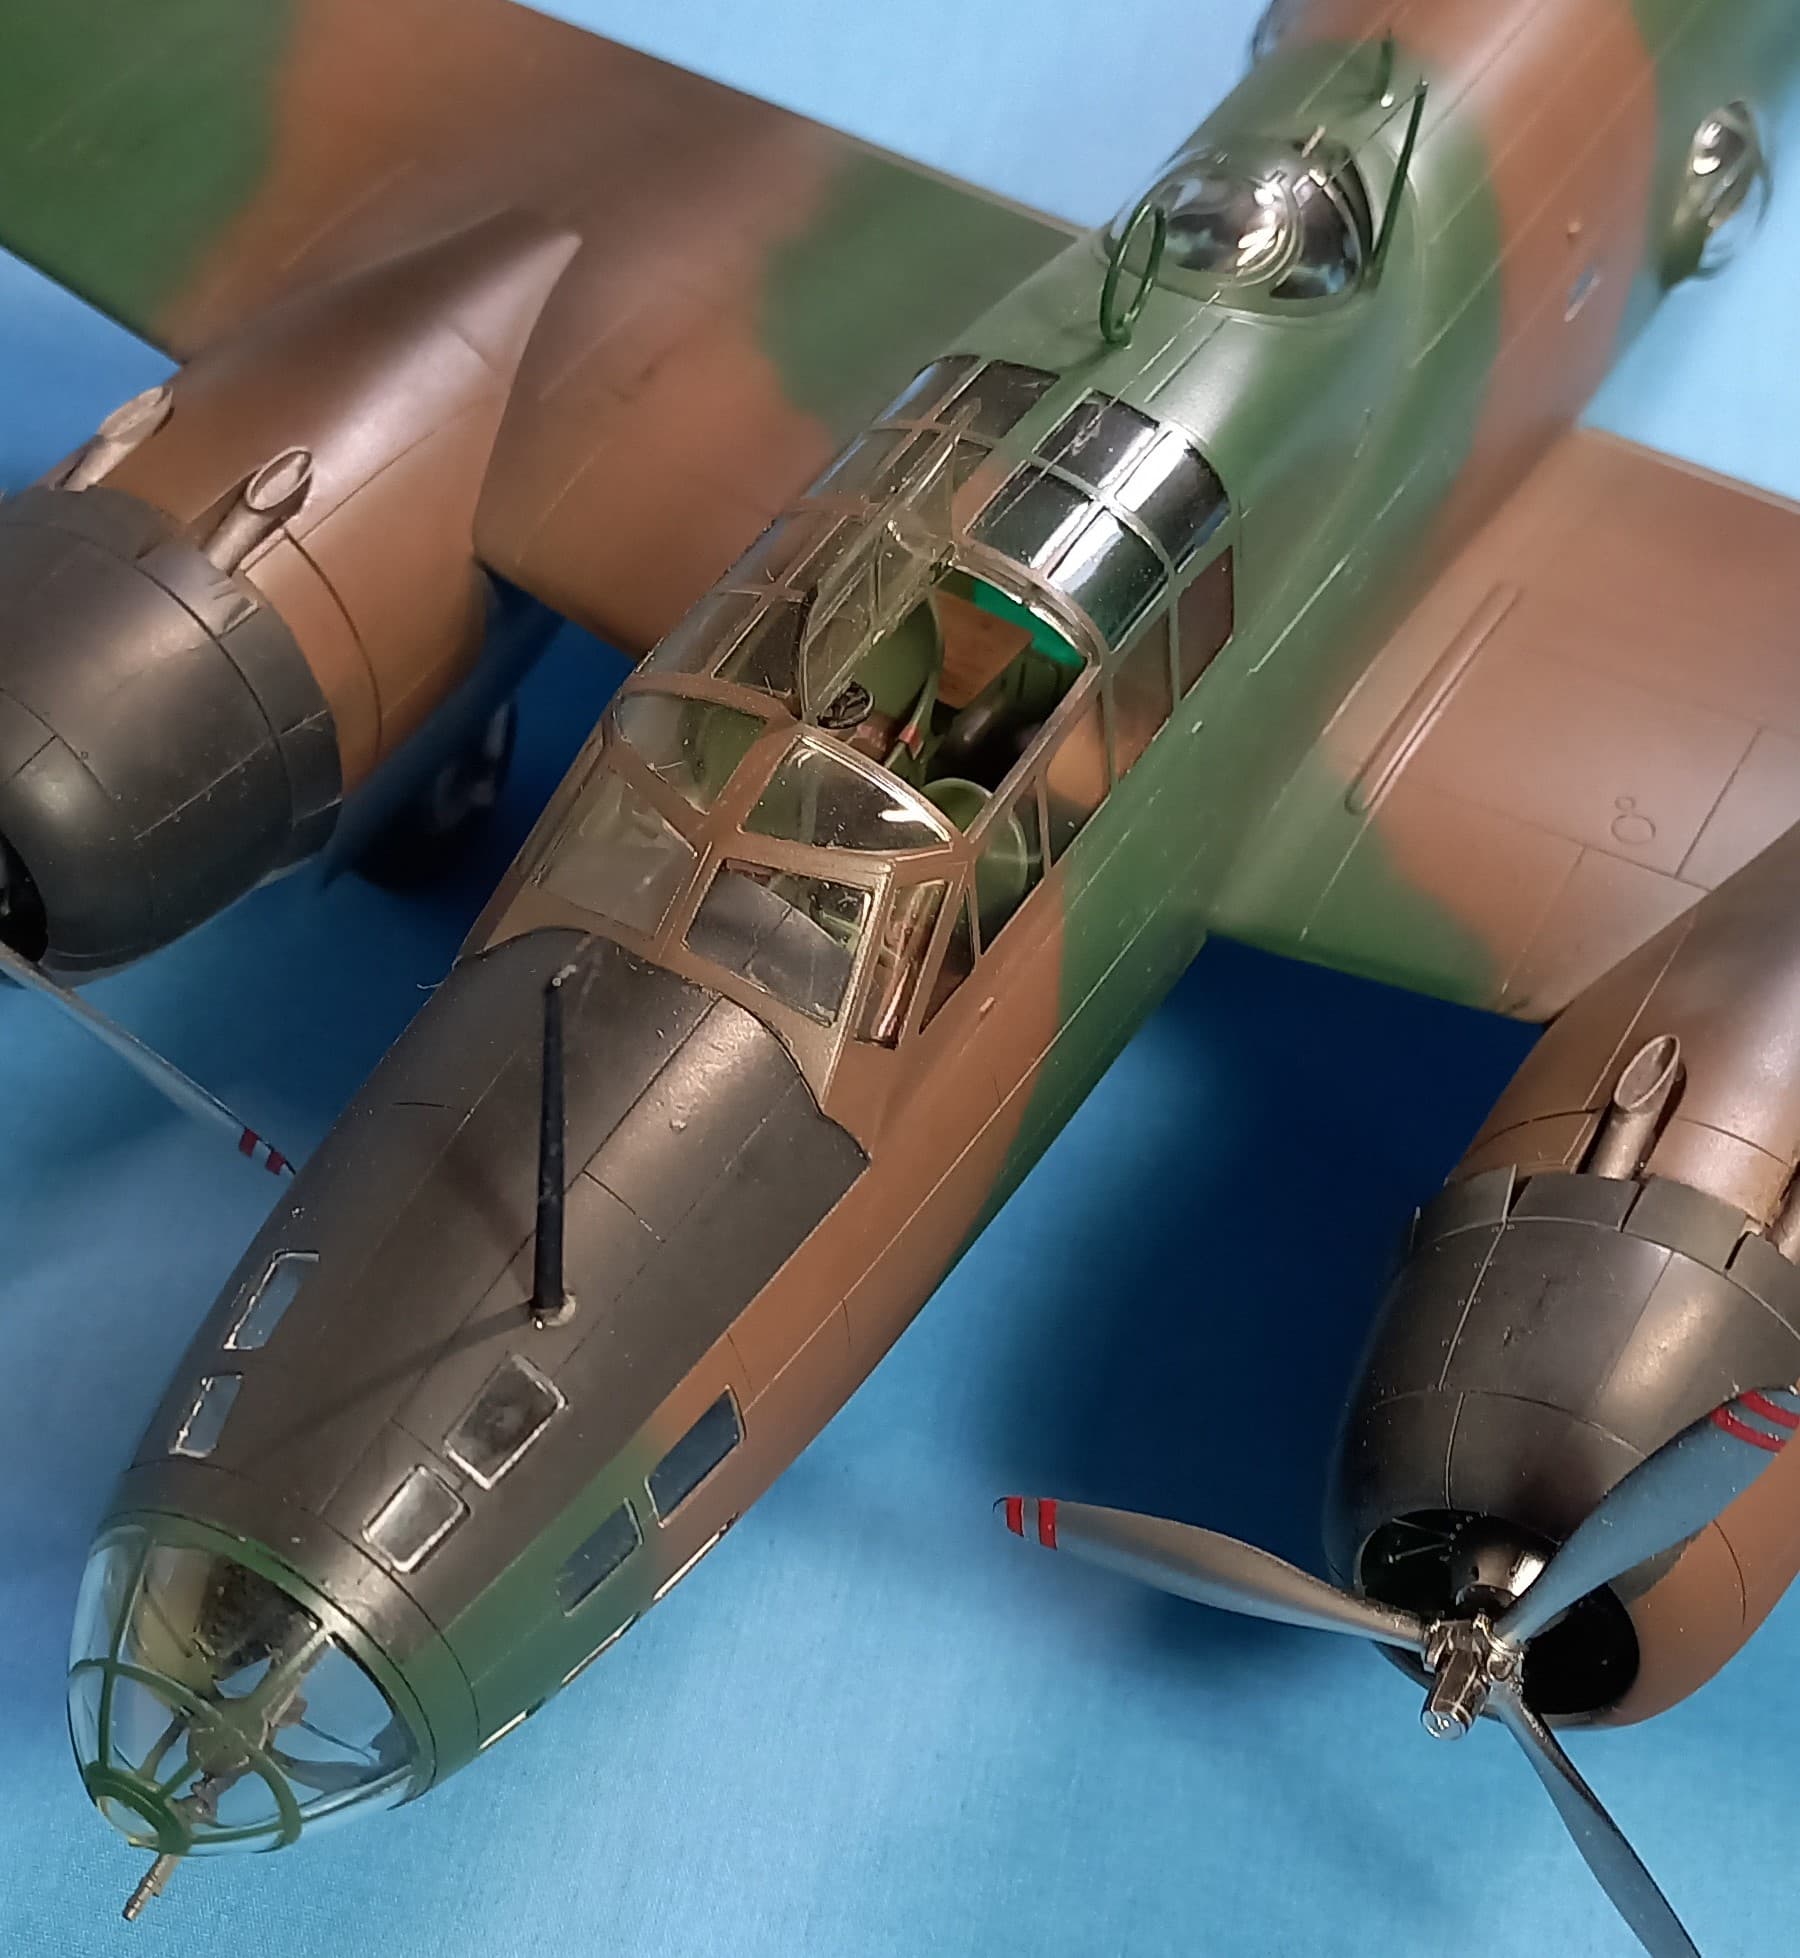
Tamiya really did a bang-up job on this kit! Despite its size the overall presentation is accurate and a pain-free build. I recommend this to anyone looking to build a big twin engine bird for the first time, to experienced models looking to expand their horizons lots can be done with it. Now it’s time to move onto the Zero dual build, coming to this site soon!
Stay safe, have fun, and Happy New Year!!
13 Likes
Nice progress.
What a great job on the Betty! Your build & your pictures do it proud.
Paul
1 Like
I just got the new ICM Sally in in 1/72. I have no references on this aircraft that show the interior. I wonder how chose it would be to the Betty? It is IJA rather than IJN but both built about the same time . . .
1 Like
Great build. The Betty looks stunning!
1 Like
Aloha,
I started this kit after receiving it in early December, unaware of this campaign. I assembled the cockpit components and the engine while waiting on the correct paint colors. Am I OK to join this campaign, or have I completed too much? OK either way, just let me know. Thanks.

Happy Modeling,
Zon
That is a clean build!
1 Like
That isn’t too much assembled and no paint is down. I’ll allow it in the campaign!
1 Like
Excellent! Thank you.
Happy Modeling,
Zon

Hi Paul,
Did some checking on the Sally for you. In 1/72 from what I see of the ICM kit the interior detail looks pretty good. They even give you an instrument panel decal, granted 1/72 scale has gotten much better at small detail. I suppose there’s always room to add more do dads, but it looks pretty good. The Sally was built by Mitsubishi, so the interior color will be easy as Tamiya and Mr. Color have exceptionally close color matches. Good luck!
Group, I have four sets of CMK resin detail and replacement parts for the 1/72 Hasegawa Jack. Here’s the review of one of them, and if you go up to the top of the page where it says more reviews, it’ll bring all the CMK reviews on Aeroscale, and near the bottom you’ll see my cluster of four different reviews - Cockpit set, wheel and gear cover, control surfaces, and armament sets: AeroScale :: CMK 1:72 J2M3 Raiden Cockpit Set Review
FREE TO A GOOD HOME, except you pay shipping and handling.
1 Like
Hi Everyone,
Thank you all for the wonderful compliments on the Betty. Like I said, it’s a really good kit, a great one for the beginner looking to expand on multi-engine birds. Best of all, it was a really fun build, and the paint scheme was much better than the standard green over metal or grey.
In keeping with one of my New Year’s resolutions, I resolve to be a bit more proactive with my updates. In the past I’d get a bit ahead of myself and then become remiss in posting. I’ll try harder to not do that as much!
So, as things lately have progressed in my builds, it appears that I’ve fallen into a dual build mode. Mainly to clear shelf space, as I have too many kits! A problem that I’m sure nobody else has. I also have an inordinate amount of Imperial Japanese aircraft that I’d like to complete before I retire to the great hangar.
That said, here comes the builds that I’ve dubbed “A duel of the Zero’s”. Since I am most way through my personal tribute to the 80th anniversary of the Battle of the Coral Sea, I chose to do Hasegawa’s A6M2b type 21 “EII-102” flown by CPO Tetsuzo Iwamoto off of the Zuikaku.
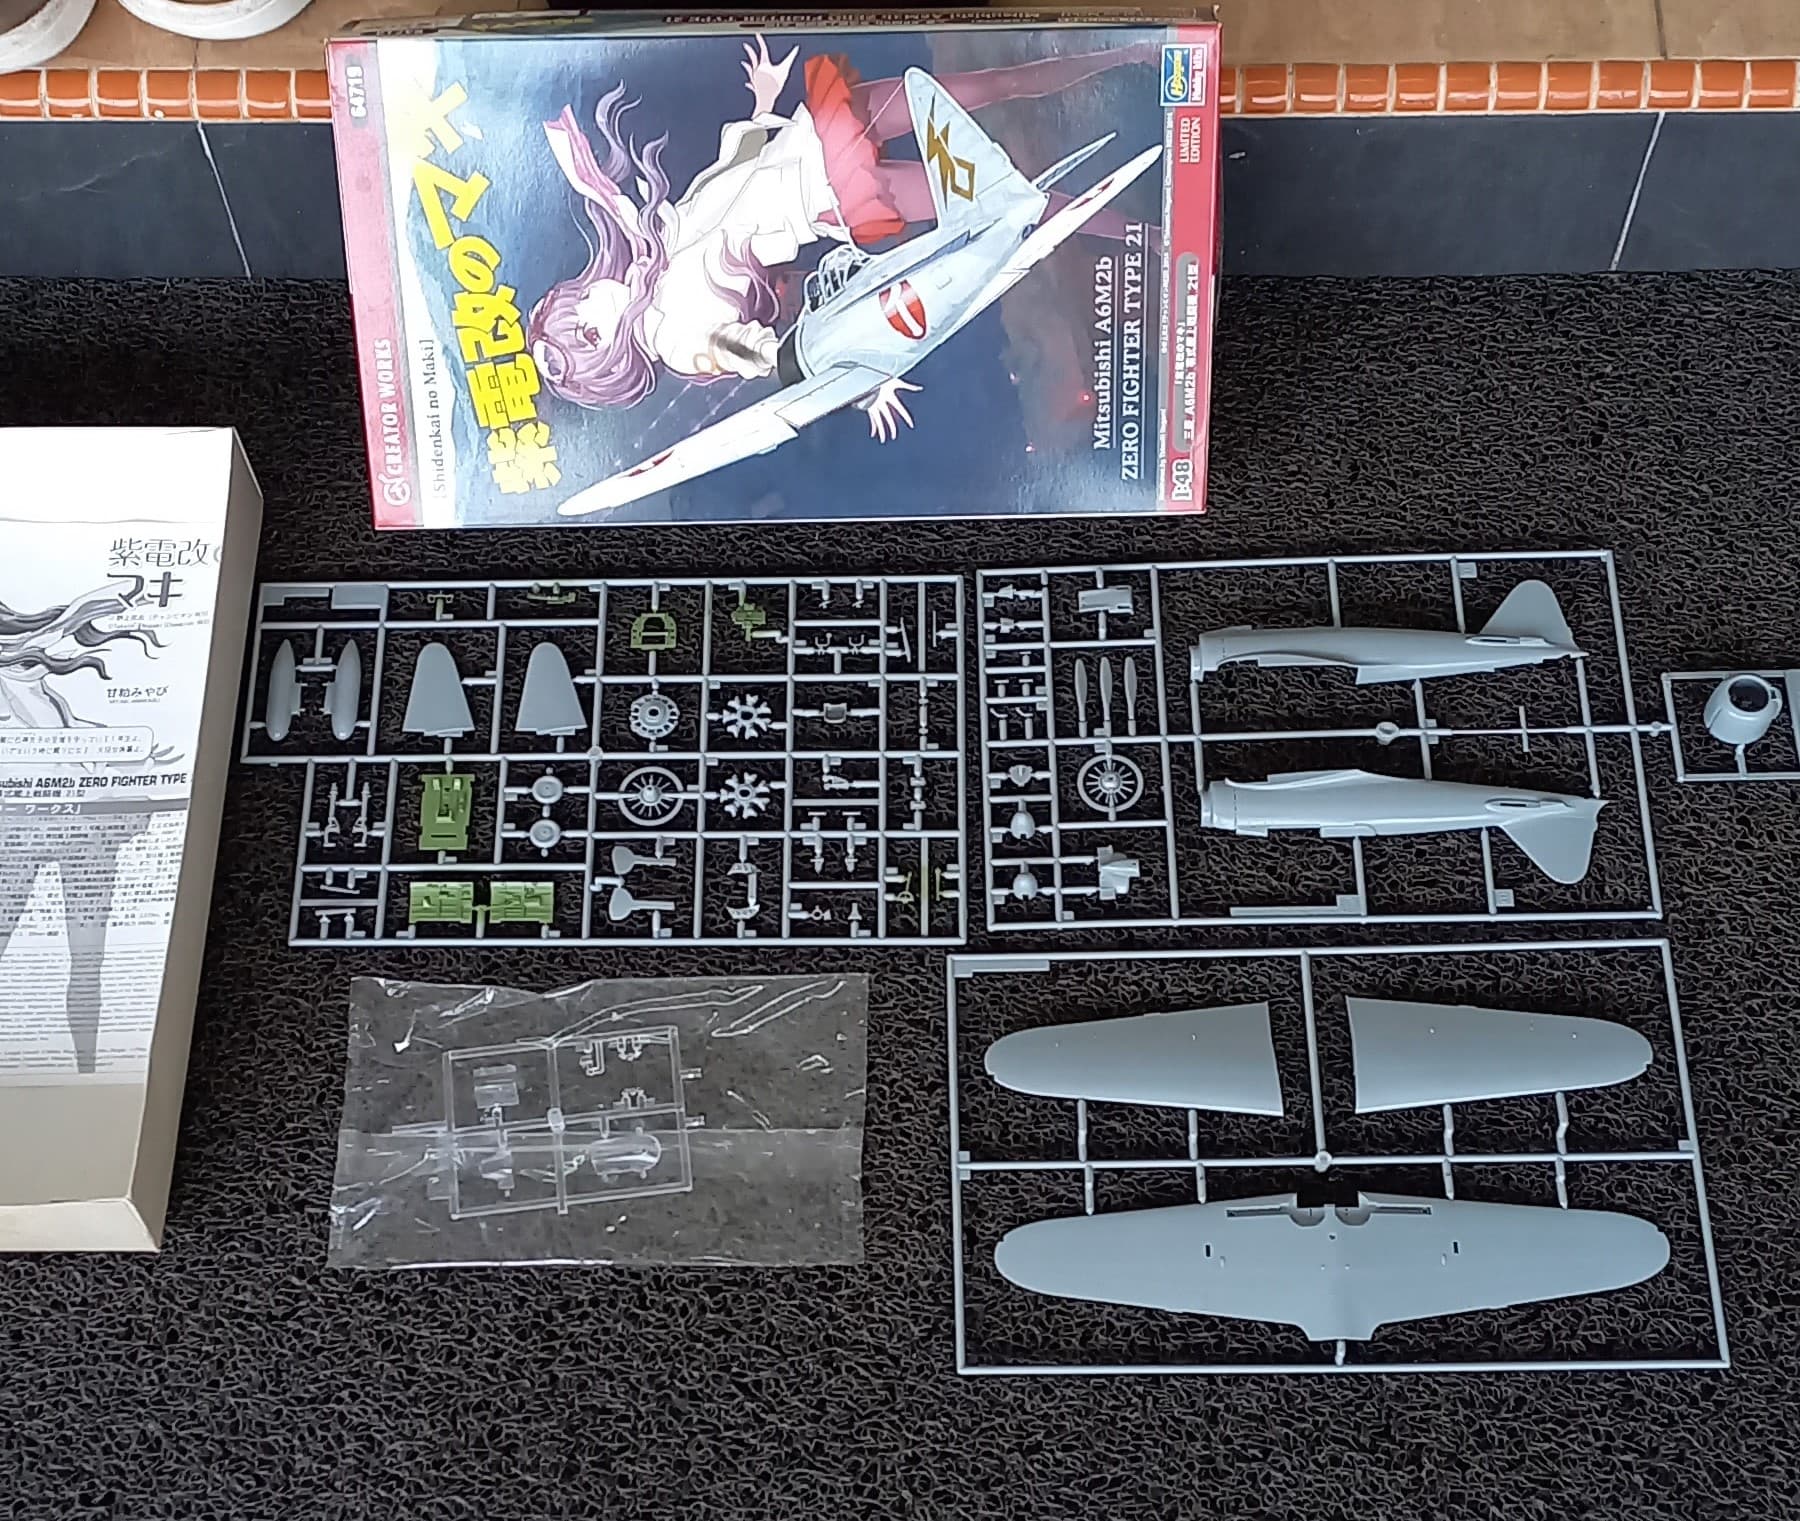
As I got things ready to go, I decided to paint as much of the interior parts as possible, including some left over aotake from the Betty build, it’s a different shade compared to the blue paints offered by Tamiya or Mr. Color, and fun to mix things up as there’s really no standard for this color.
The other Zero was Hasegawa’s A6M5b Type 52 Otsu, Otsu is the designation of different armament from the production variant, in this case the replacement of one .30 Cal for a .50 Cal machine gun firing through the cowling.

Again, I painted the interior parts up prior to beginning construction using the same aotake. This would also be oddly enough my first Nakajima built Zero, not sure why after all this time it’s the first one. I also decided to display the flaps in the open position, despite the only time one sees them open is during landing or maintenance. regardless, I figured that it would be good to include one with them dropped for the collection, plus I had a lot of aotake left over!
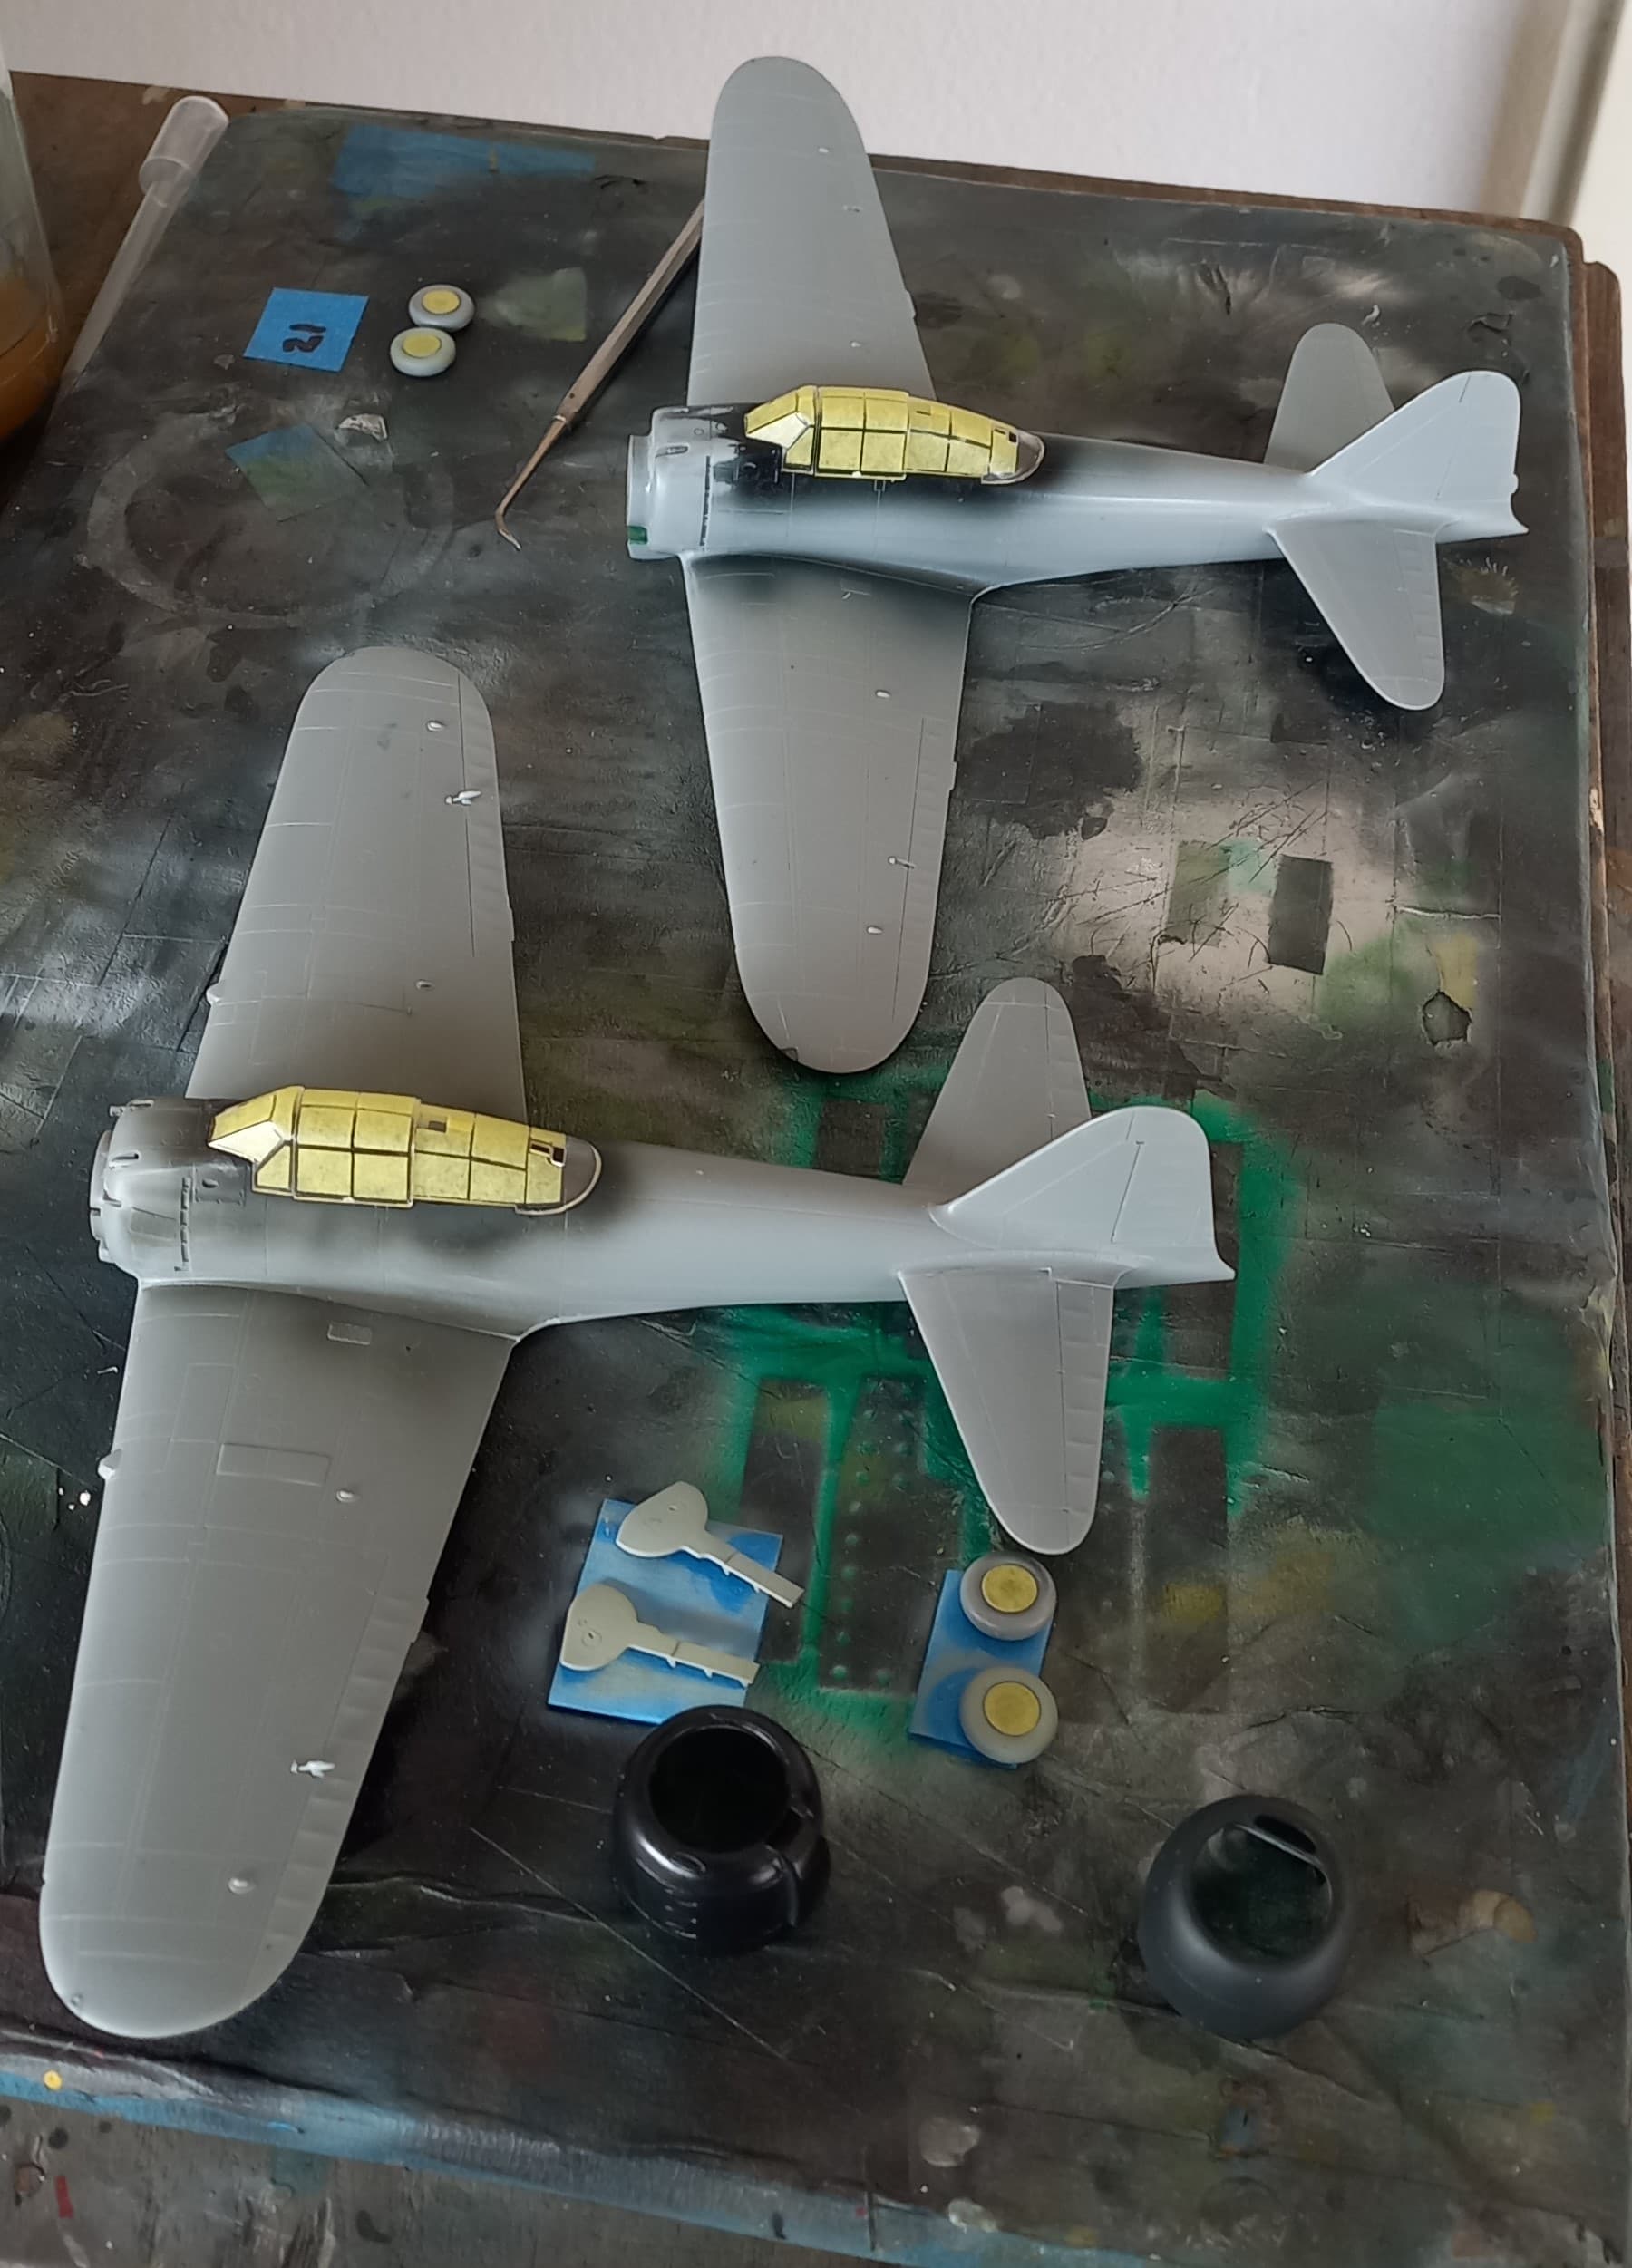
Since both kits share an identical cockpit, the first order of business was to work on the seats. Hasegawa does a nice representation; however, they are too thick, requiring sanding and also having the lightening holes drilled out completely. I think it makes a nice touch when one looks inside.
Kit supplied on the left, sanded on the right.
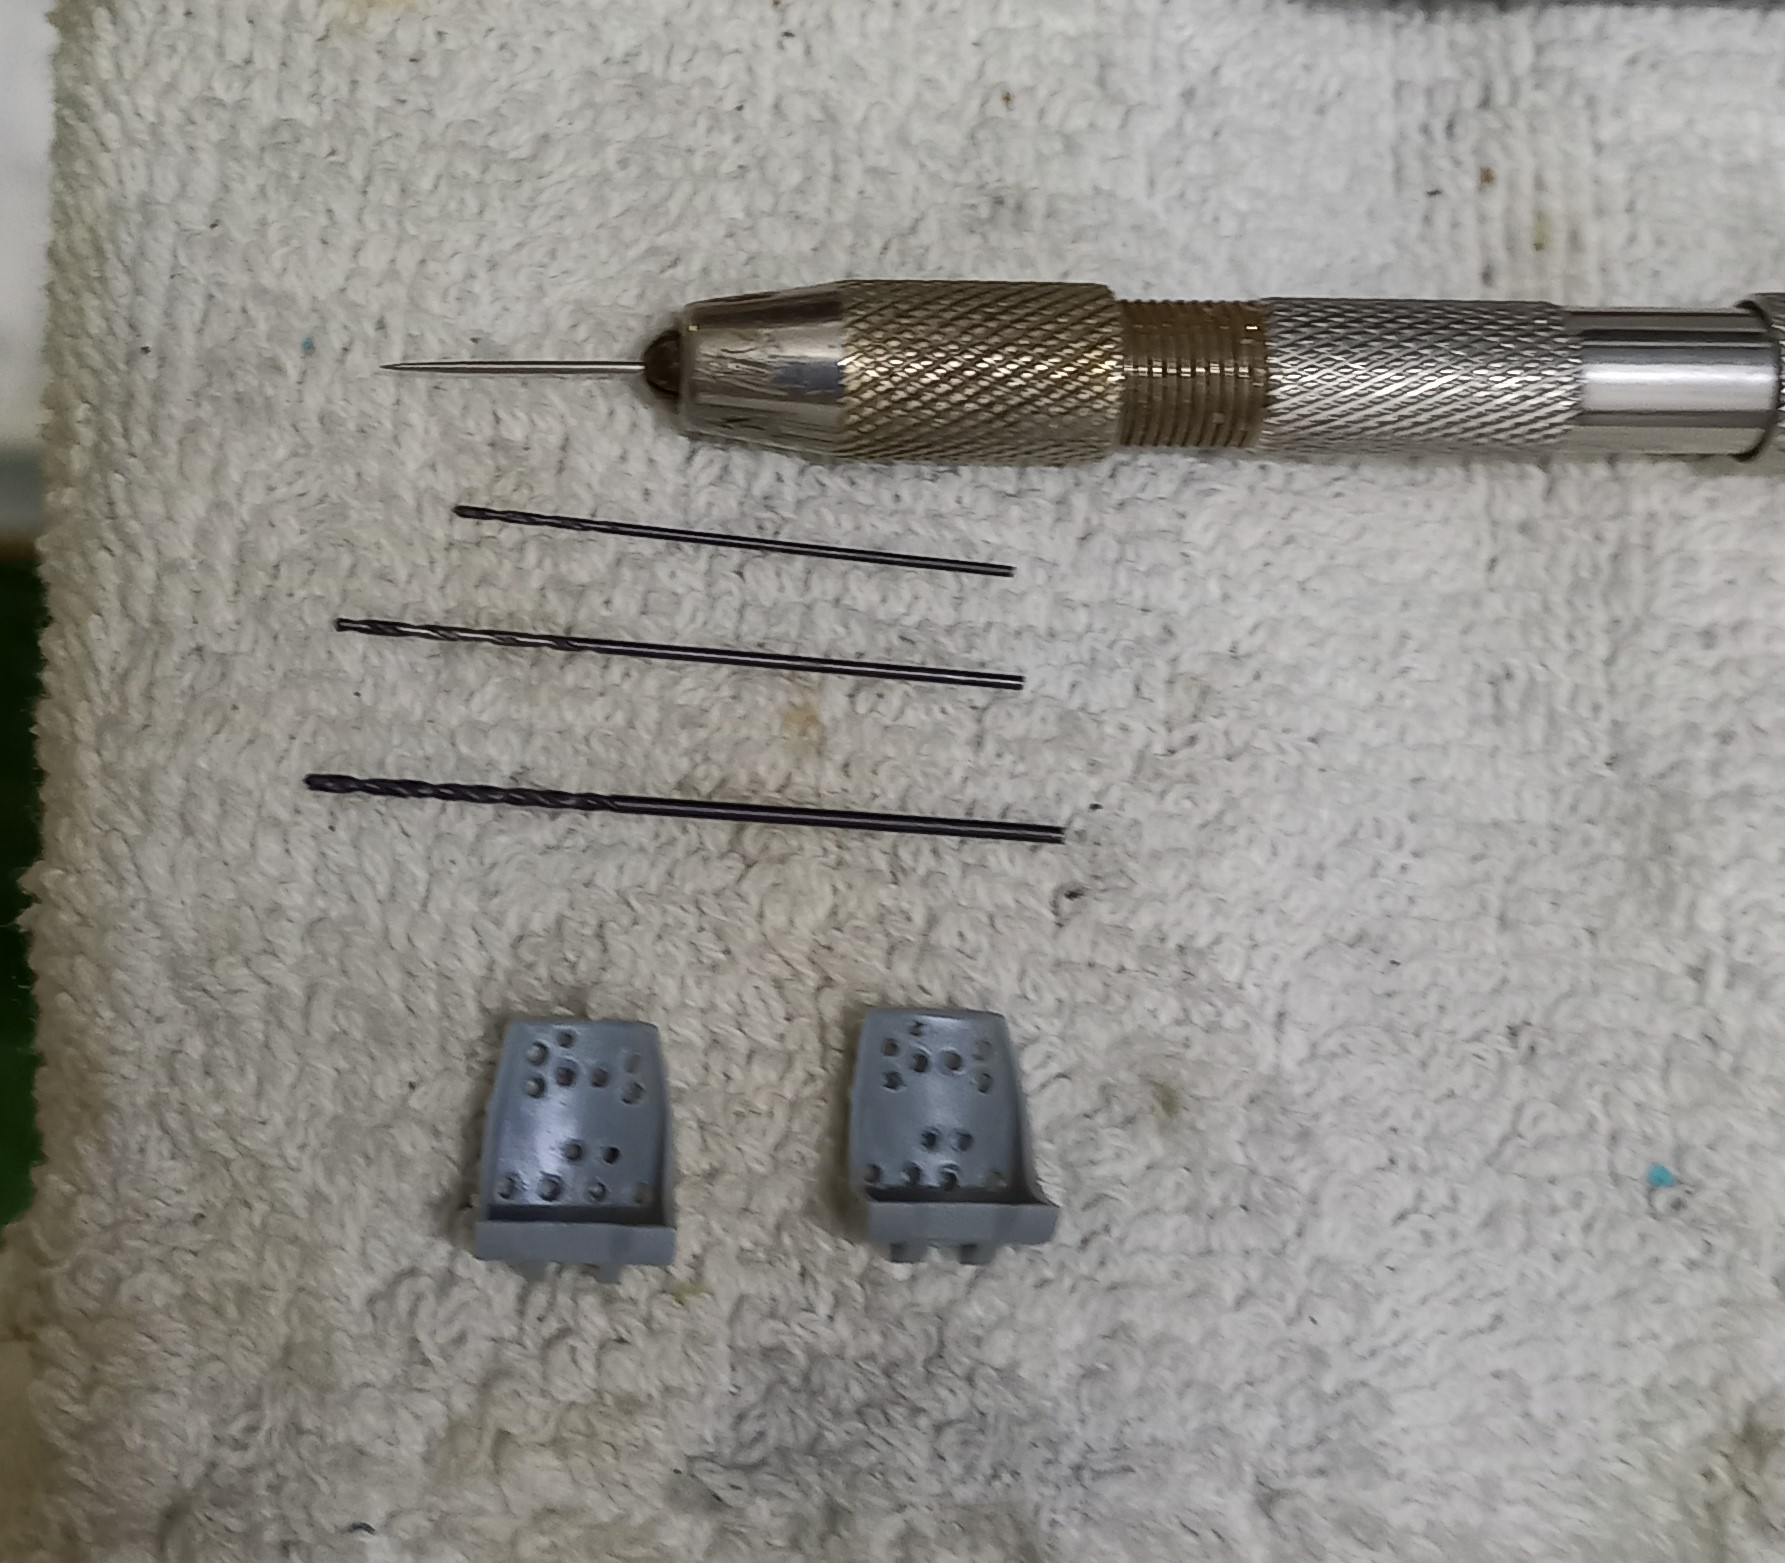
After drilling out the holes, I painted the seats their respective interior color and added a set of Eduard IJN seat belts. I chose to use the leather belts for the type 21, and the cloth ones for the type 52. I figured that production and resources would necessitate the cloth belts on the later production type 52, plus it was a bit of builders’ discretion.

Construction continued onto the instrument panels, the supplied decals are nice and fit well. I have found that if one cuts the carrier film away from the print of the decal the fit is enhanced more, and application is much easier as one won’t have to fiddle with a stubborn decal. Using a new blade, a straight edge, and clean glass the decal need only be scored through the carrier film. Note, that after the decal has been wetted and ready to apply use a wet brush to push the unprinted carrier film away from your project work.
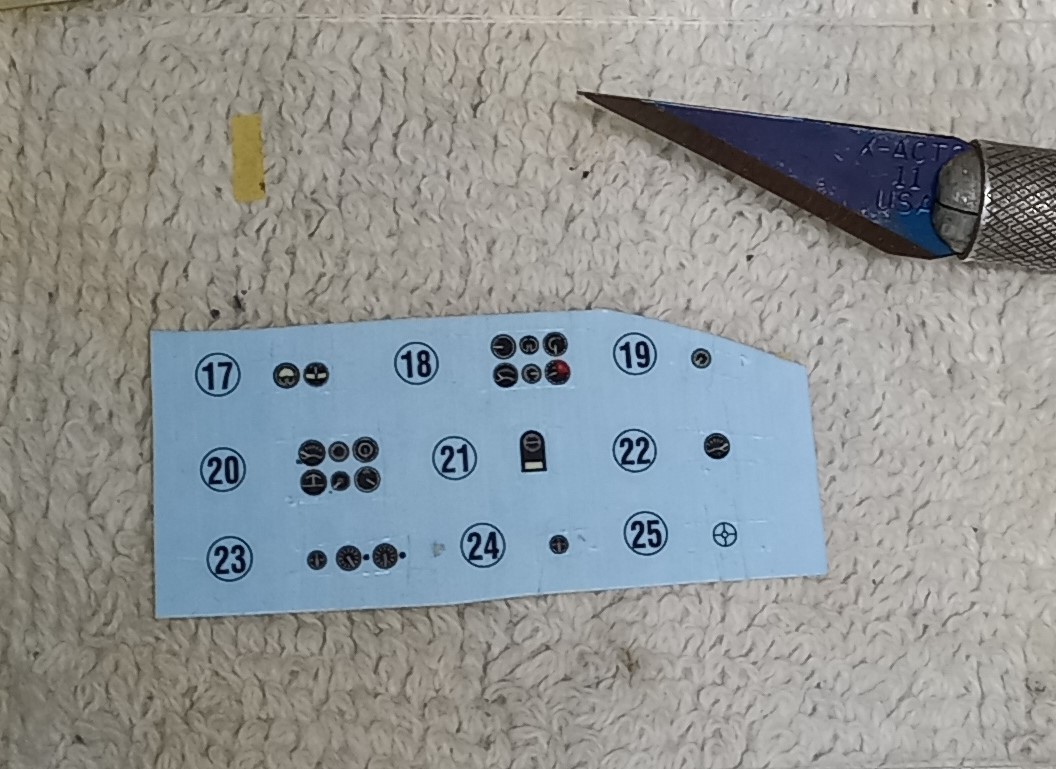
After painting the instrument panel, glossing with straight Future, the decals were applied. Using Mr. Softener, they snuggled down nicely. I’ve noticed that the typically thick Hasegawa and Tamiya decals of old seem to settle down much lower using this product leaving good results. The instrument panels turned out very well, sadly I wasn’t so great with the center decals, my guess is, that during the swabbing excess water from under the decal I inadvertently caused them to slide further than I noticed (guess my eyes aren’t as good as they used to be!).
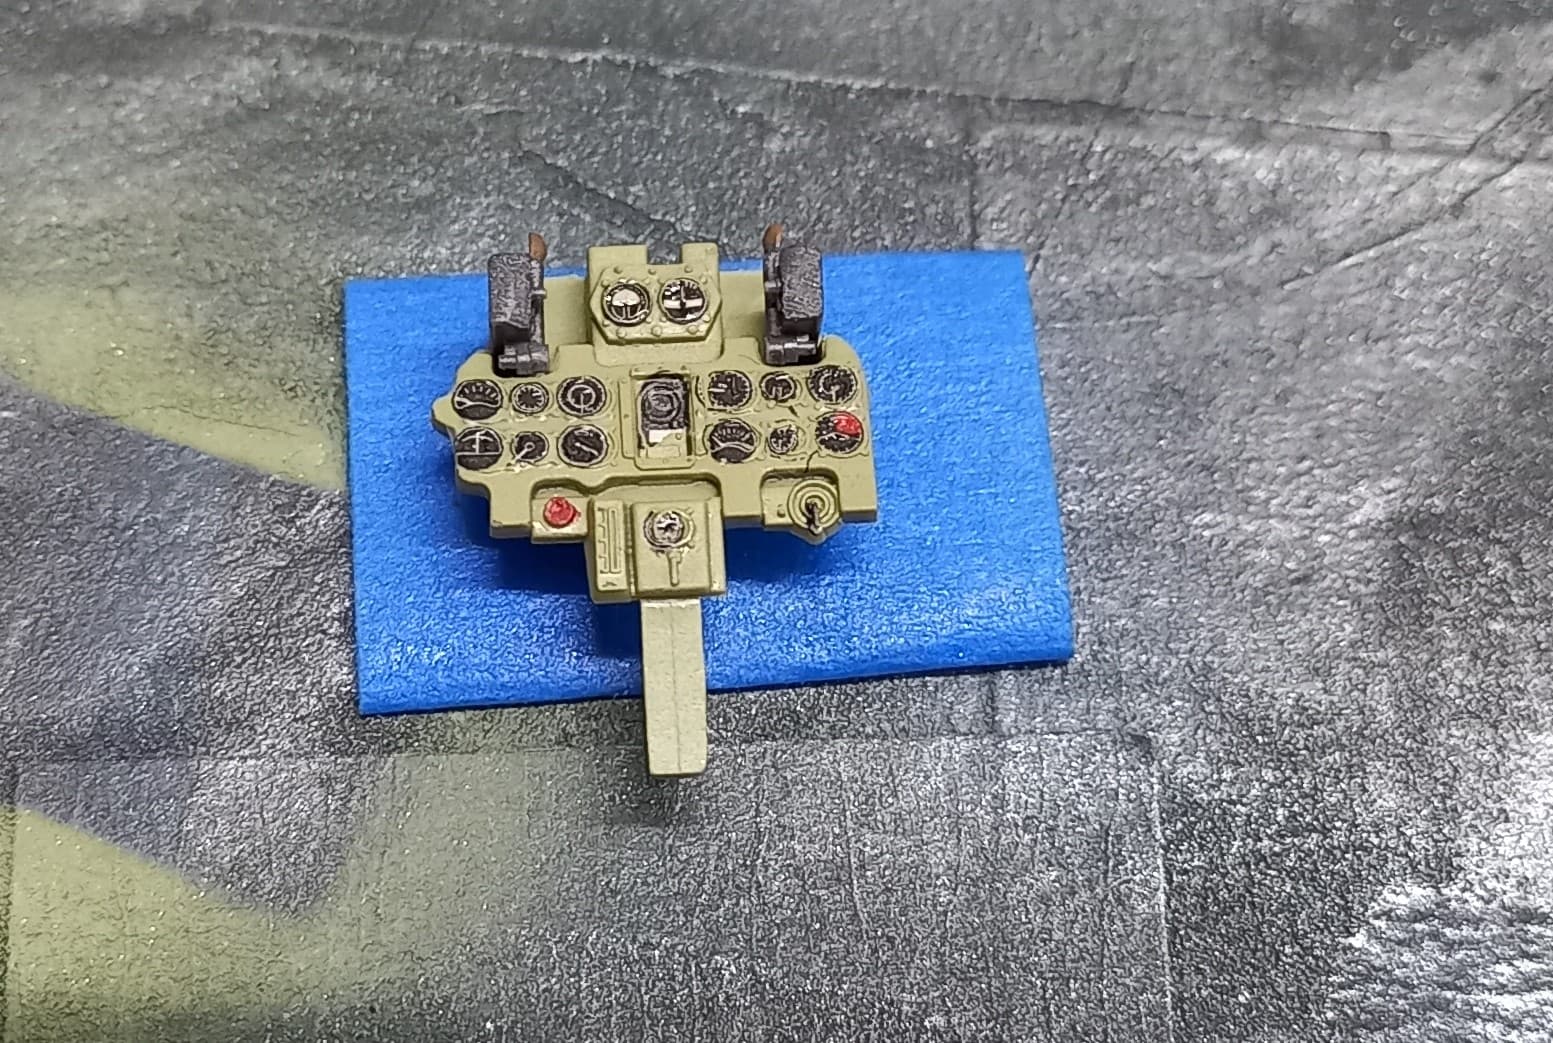
I then assembled the cockpits, adding a fuel line made from a high E guitar string running through the fuel valve boxes to the right of the seat on the floor of the cockpit. I did this by simply drilling a hole through the box and running the string through the hole and give the appearance of the fuel line running through, a simple added detail that is visible once done. Here’s the Mitsubishi cockpit prior to weathering. I also somehow lost the control stick to the small parts black hole, and was replaced using the .50 cal barrel from my Devistator build. Once done, it’s barely noticeable.

After some weathering, I closed up the cockpits, and proceeded on with the build.

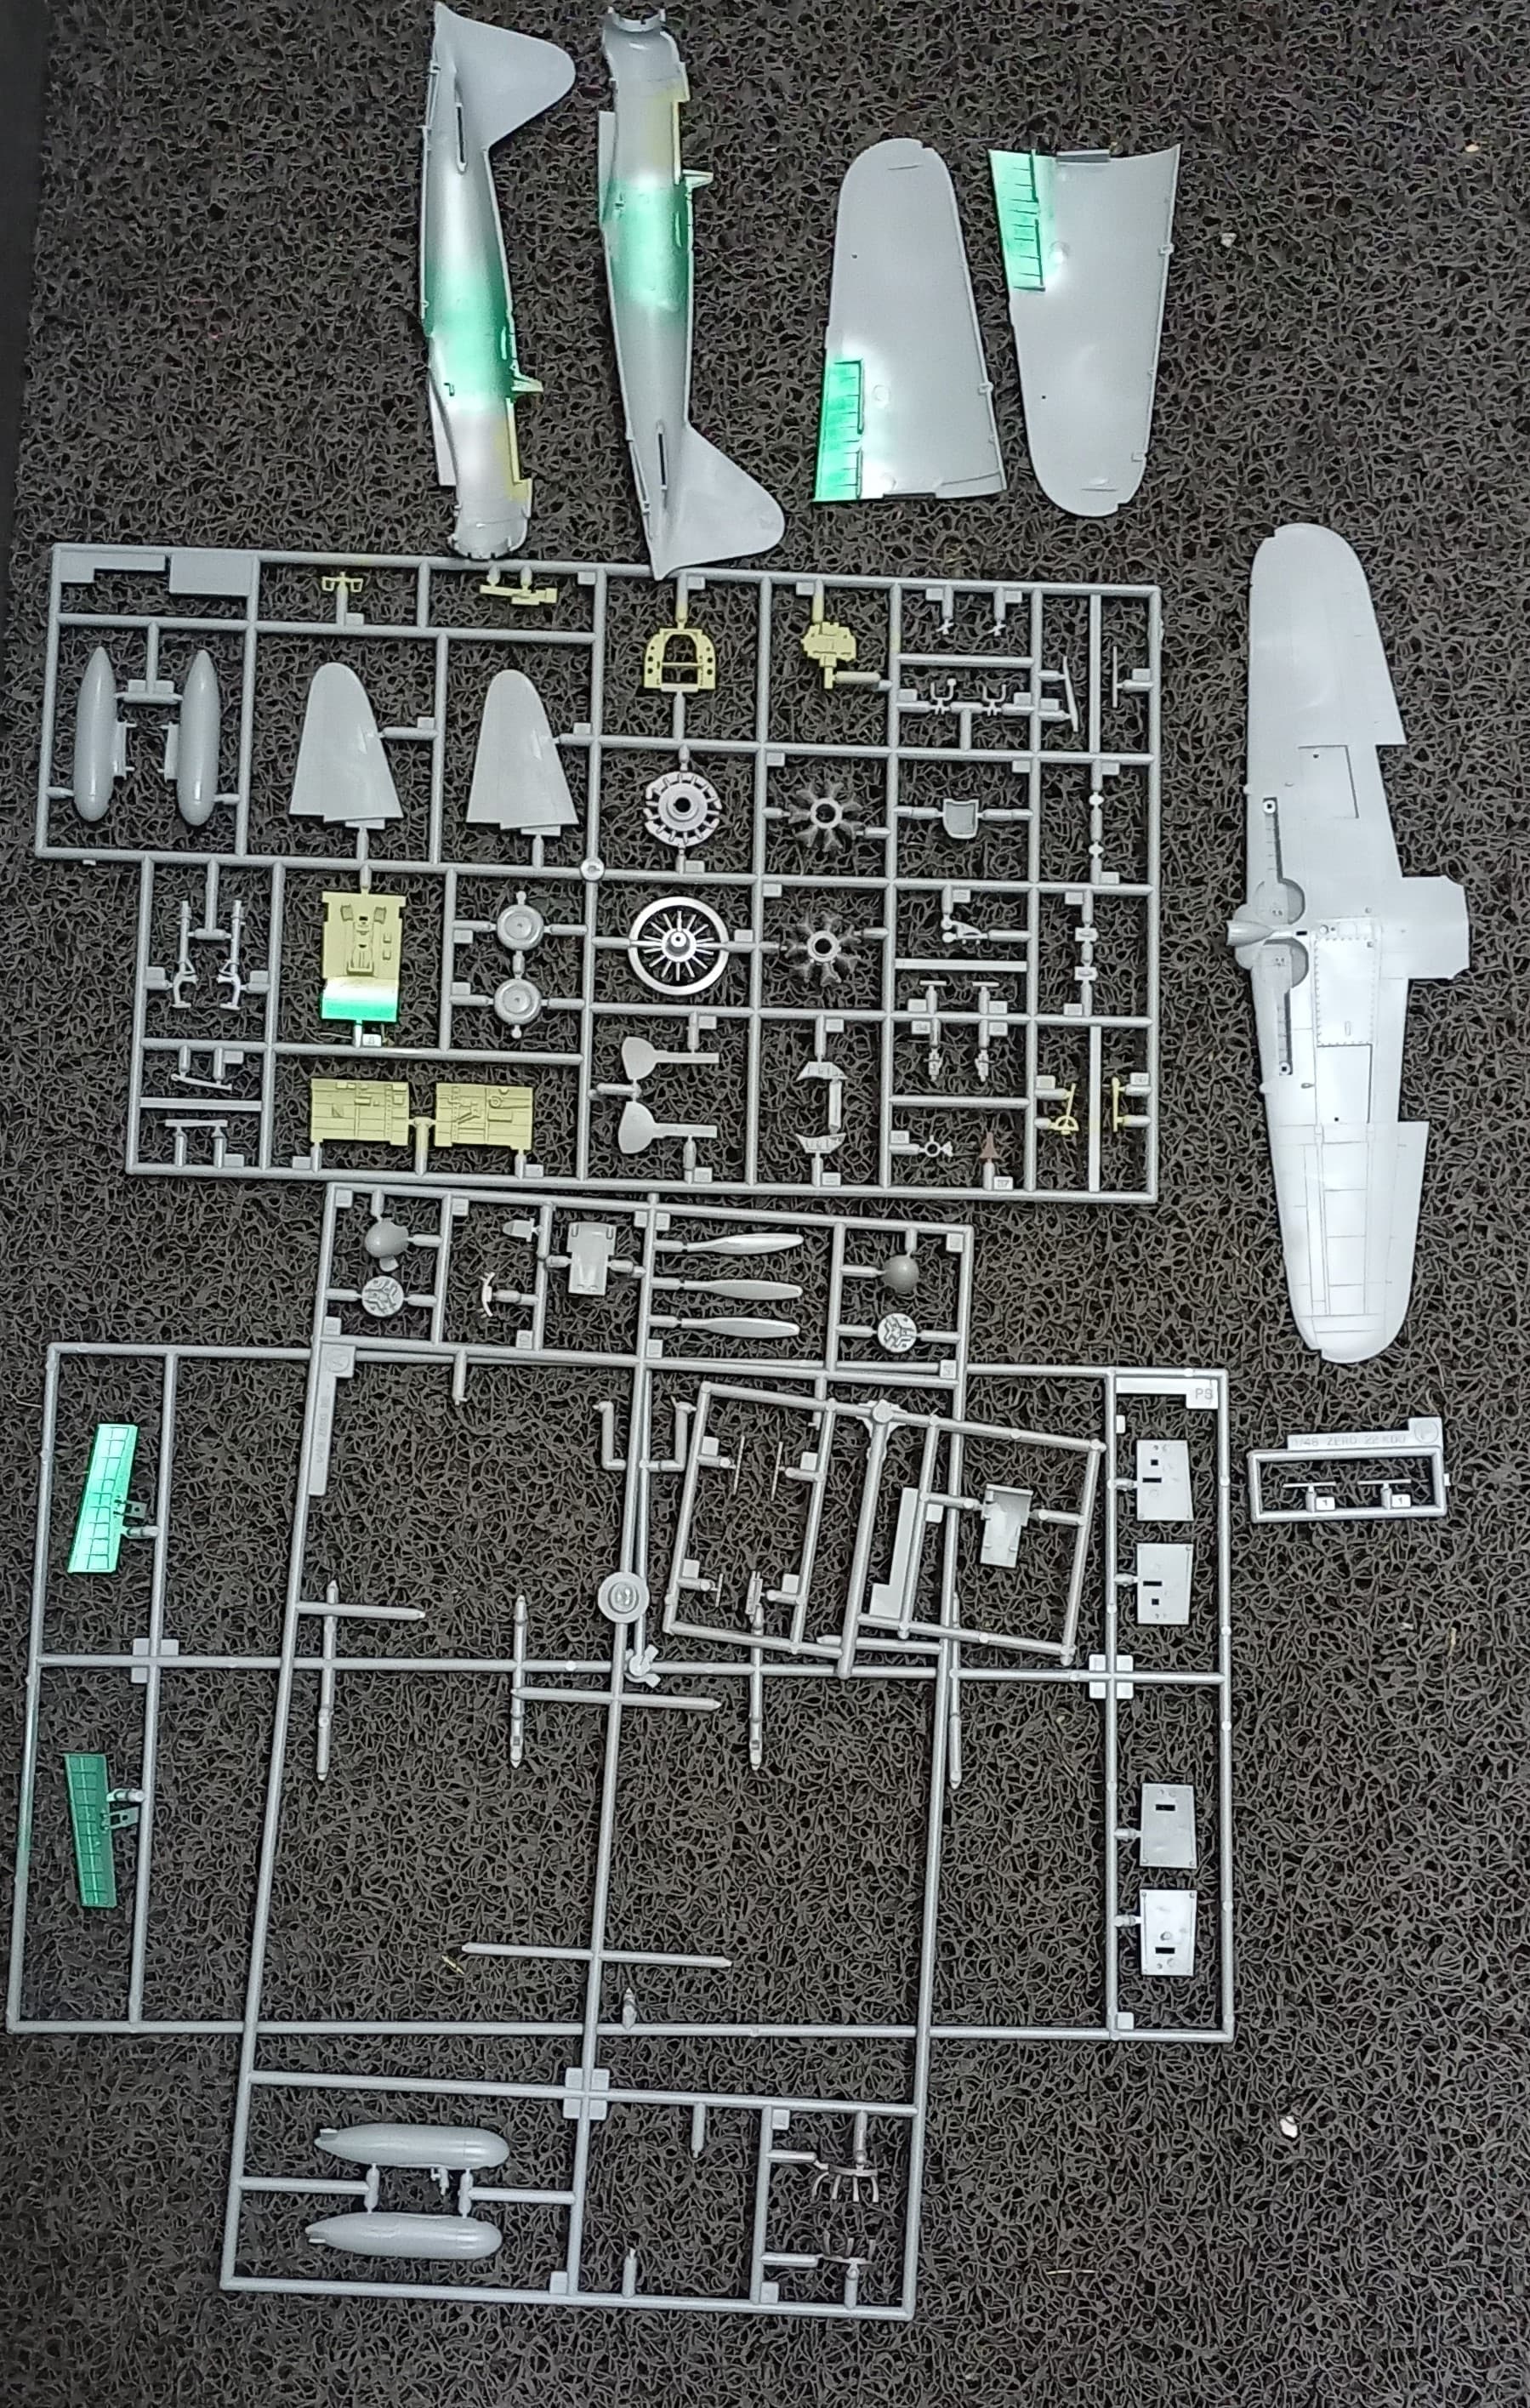
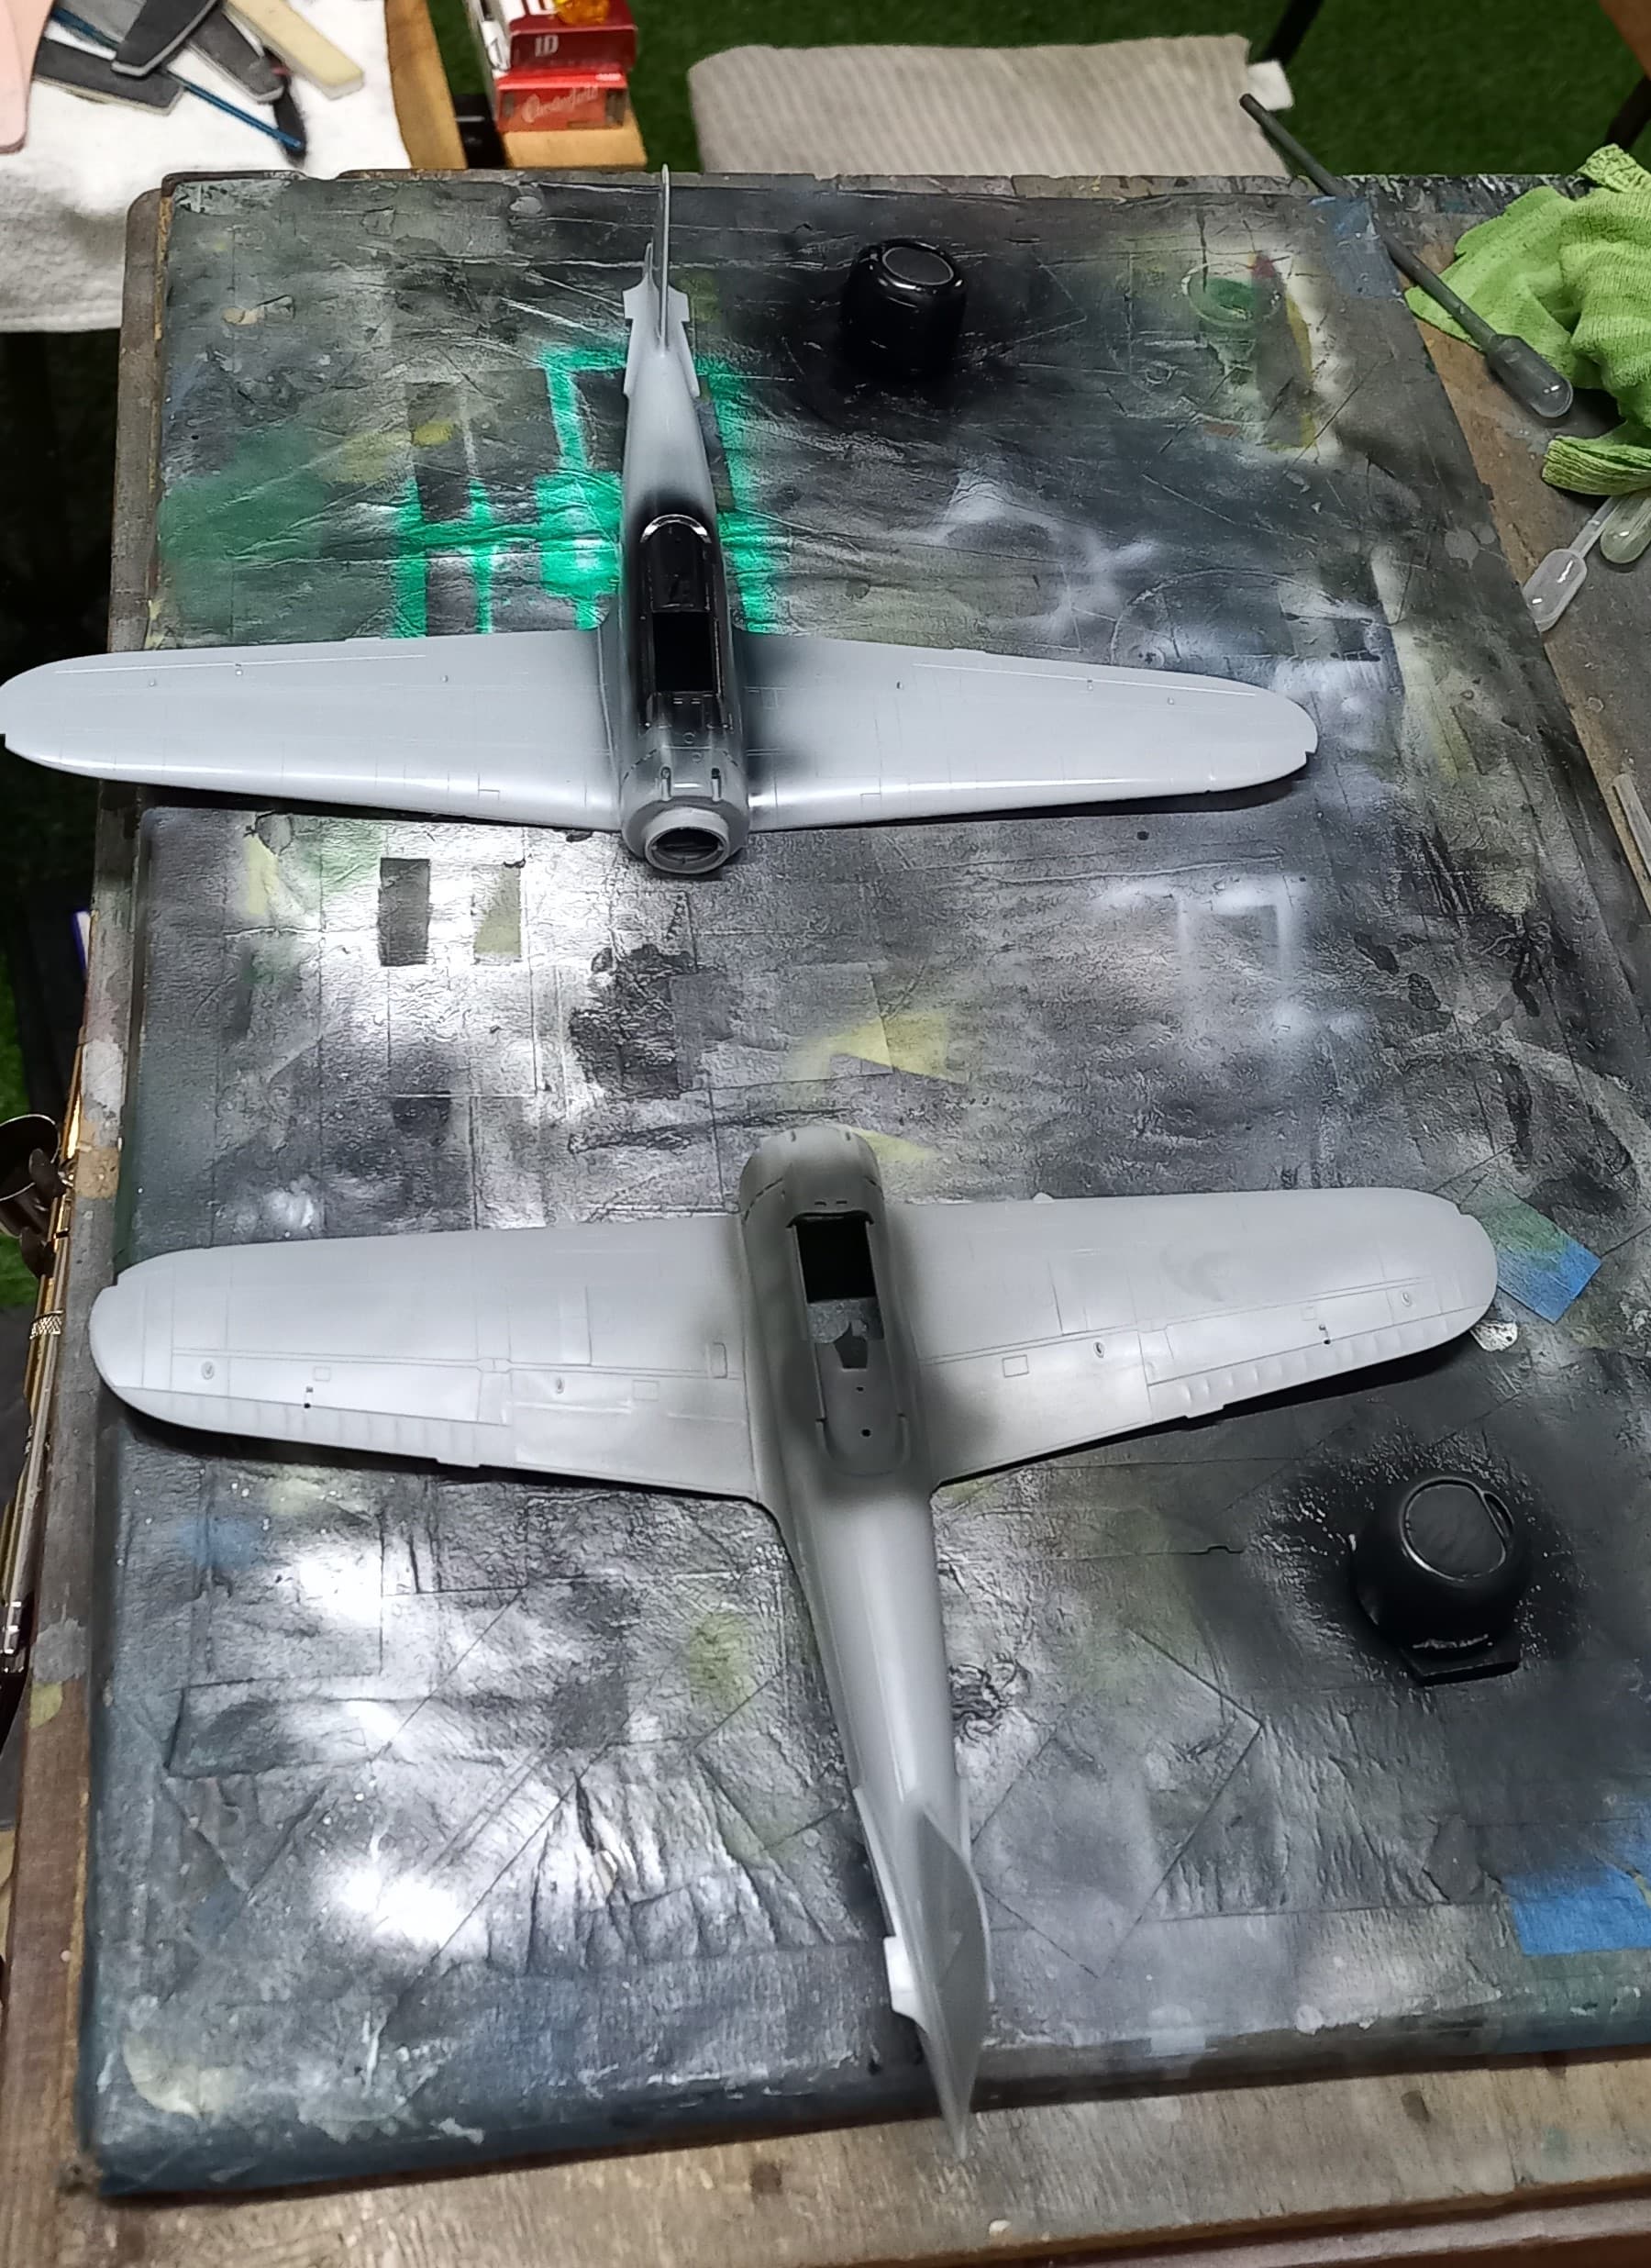
Next, I glued the fuselage halves together, these fit nicely, and then a departure from the instructions. There’s a good lip on both the fuselage and upper wing join, enough to allow for the upper wings to be attached cleanly and avoid any gaps at the fuselage/wing join. Here one can see the small paper clamps used to get the wings and fuselage properly aligned, take your time aligning things and you’ll have a wonderful time saving reward on any seam work!

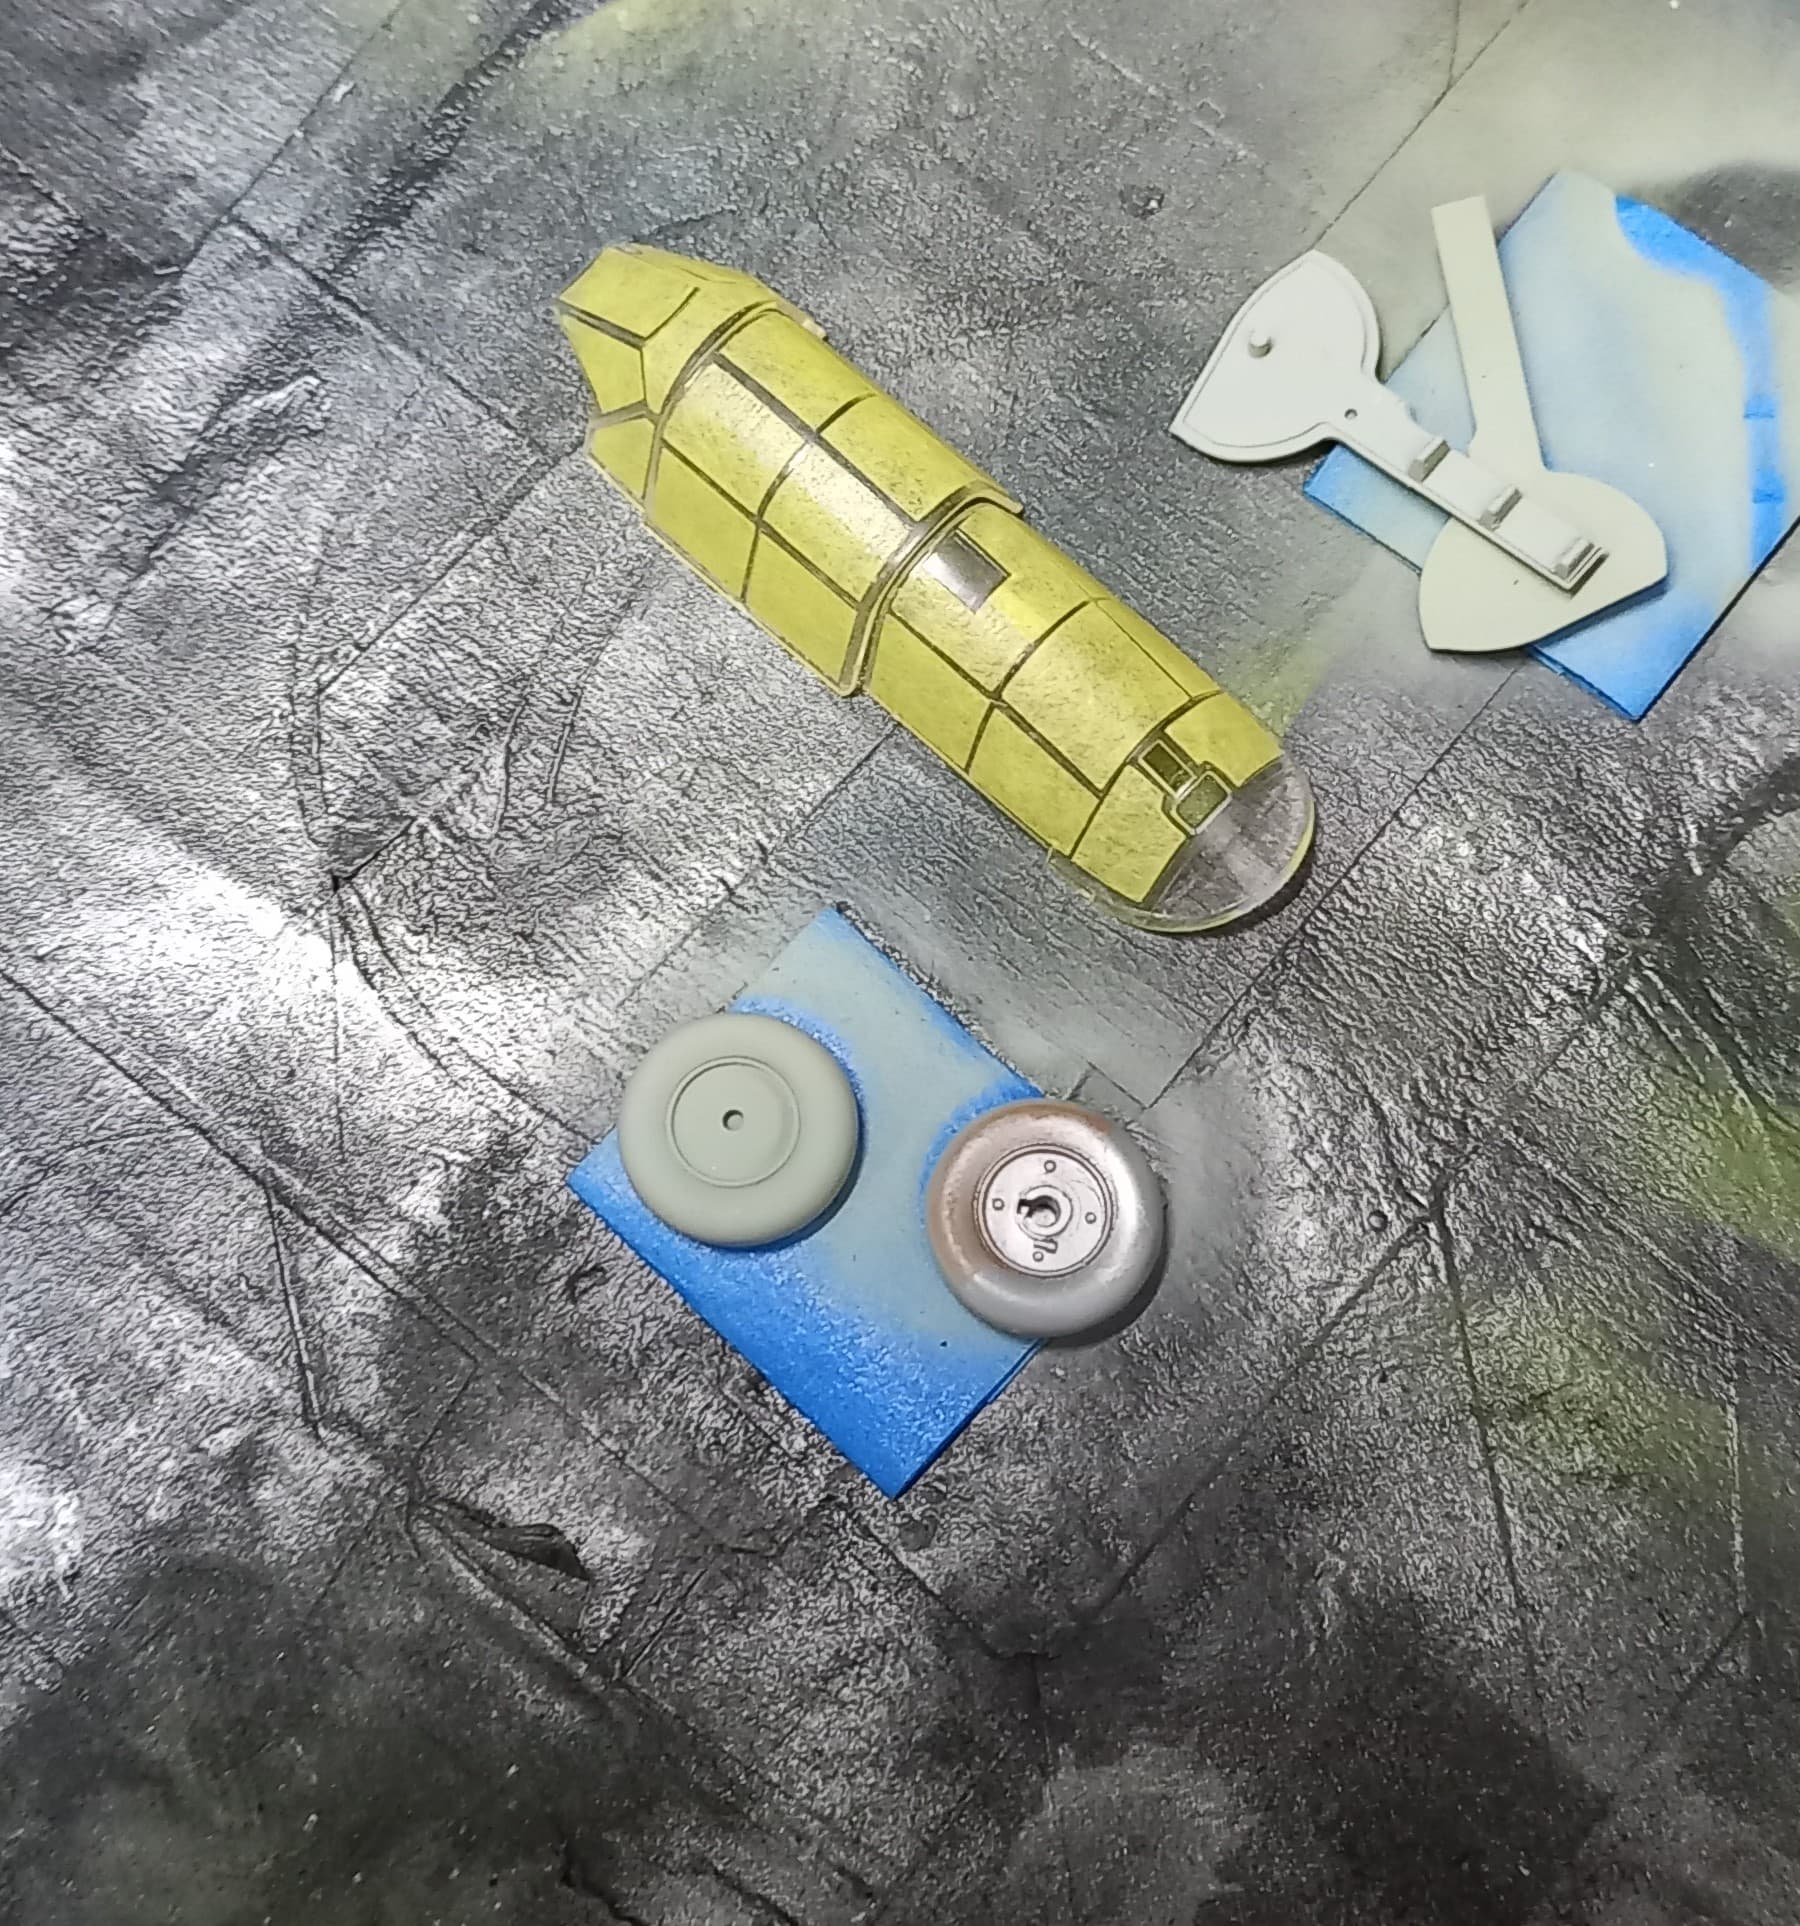
While those were drying, I took the opportunity to get some of the little stuff ready to go. Masking up the canopies and wheels, assembling the props, landing gear, etc. I will add, that when I have a large greenhouse canopy, I’ll splurge for the precut canopy masks as they are well worth the time savings, for these builds I used the Eduard set and quite pleased with their performance.
With the wing fuselage area done, it was time to paint the upper deck around the canopy areas. From a modeling perspective Mitsubishi and Nakajima Zeros are slightly different. Mitsubishi has a bluish tint to the black (made with 75% black, 25% blue) with fading the blue became more apparent. Nakajima used a black that tended to fade more greyish (NATO black is a great candidate). Since the type 21 was about 6 months old for this rendition I didn’t fade the black/blue with anything, and the type 52 would be relatively new I did the same (no fading). I also used this painting session to paint the outside of the engine cowlings in their respective black as well.
Then it was time to add the cockpits, which Hasegawa makes easy by sliding them up from the underside of the model. Once dry I add the gunsights, and then attach the canopies. I prefer to open the canopies on my builds, so the sliding portion was lightly tacked in place using white glue. Any gaps around the canopy is filled using white glue.
Then it’s time to add the lower wing! There’s a noticeable step at the rear of the wing/fuselage join that has to be delt with, in this case several applications of Mr. Surfacer 500, though I’ve used any filler in the past, as any work here will require some small rescribing. Not a lot of work, but a necessary evil on a lot of older Hasegawa kits.
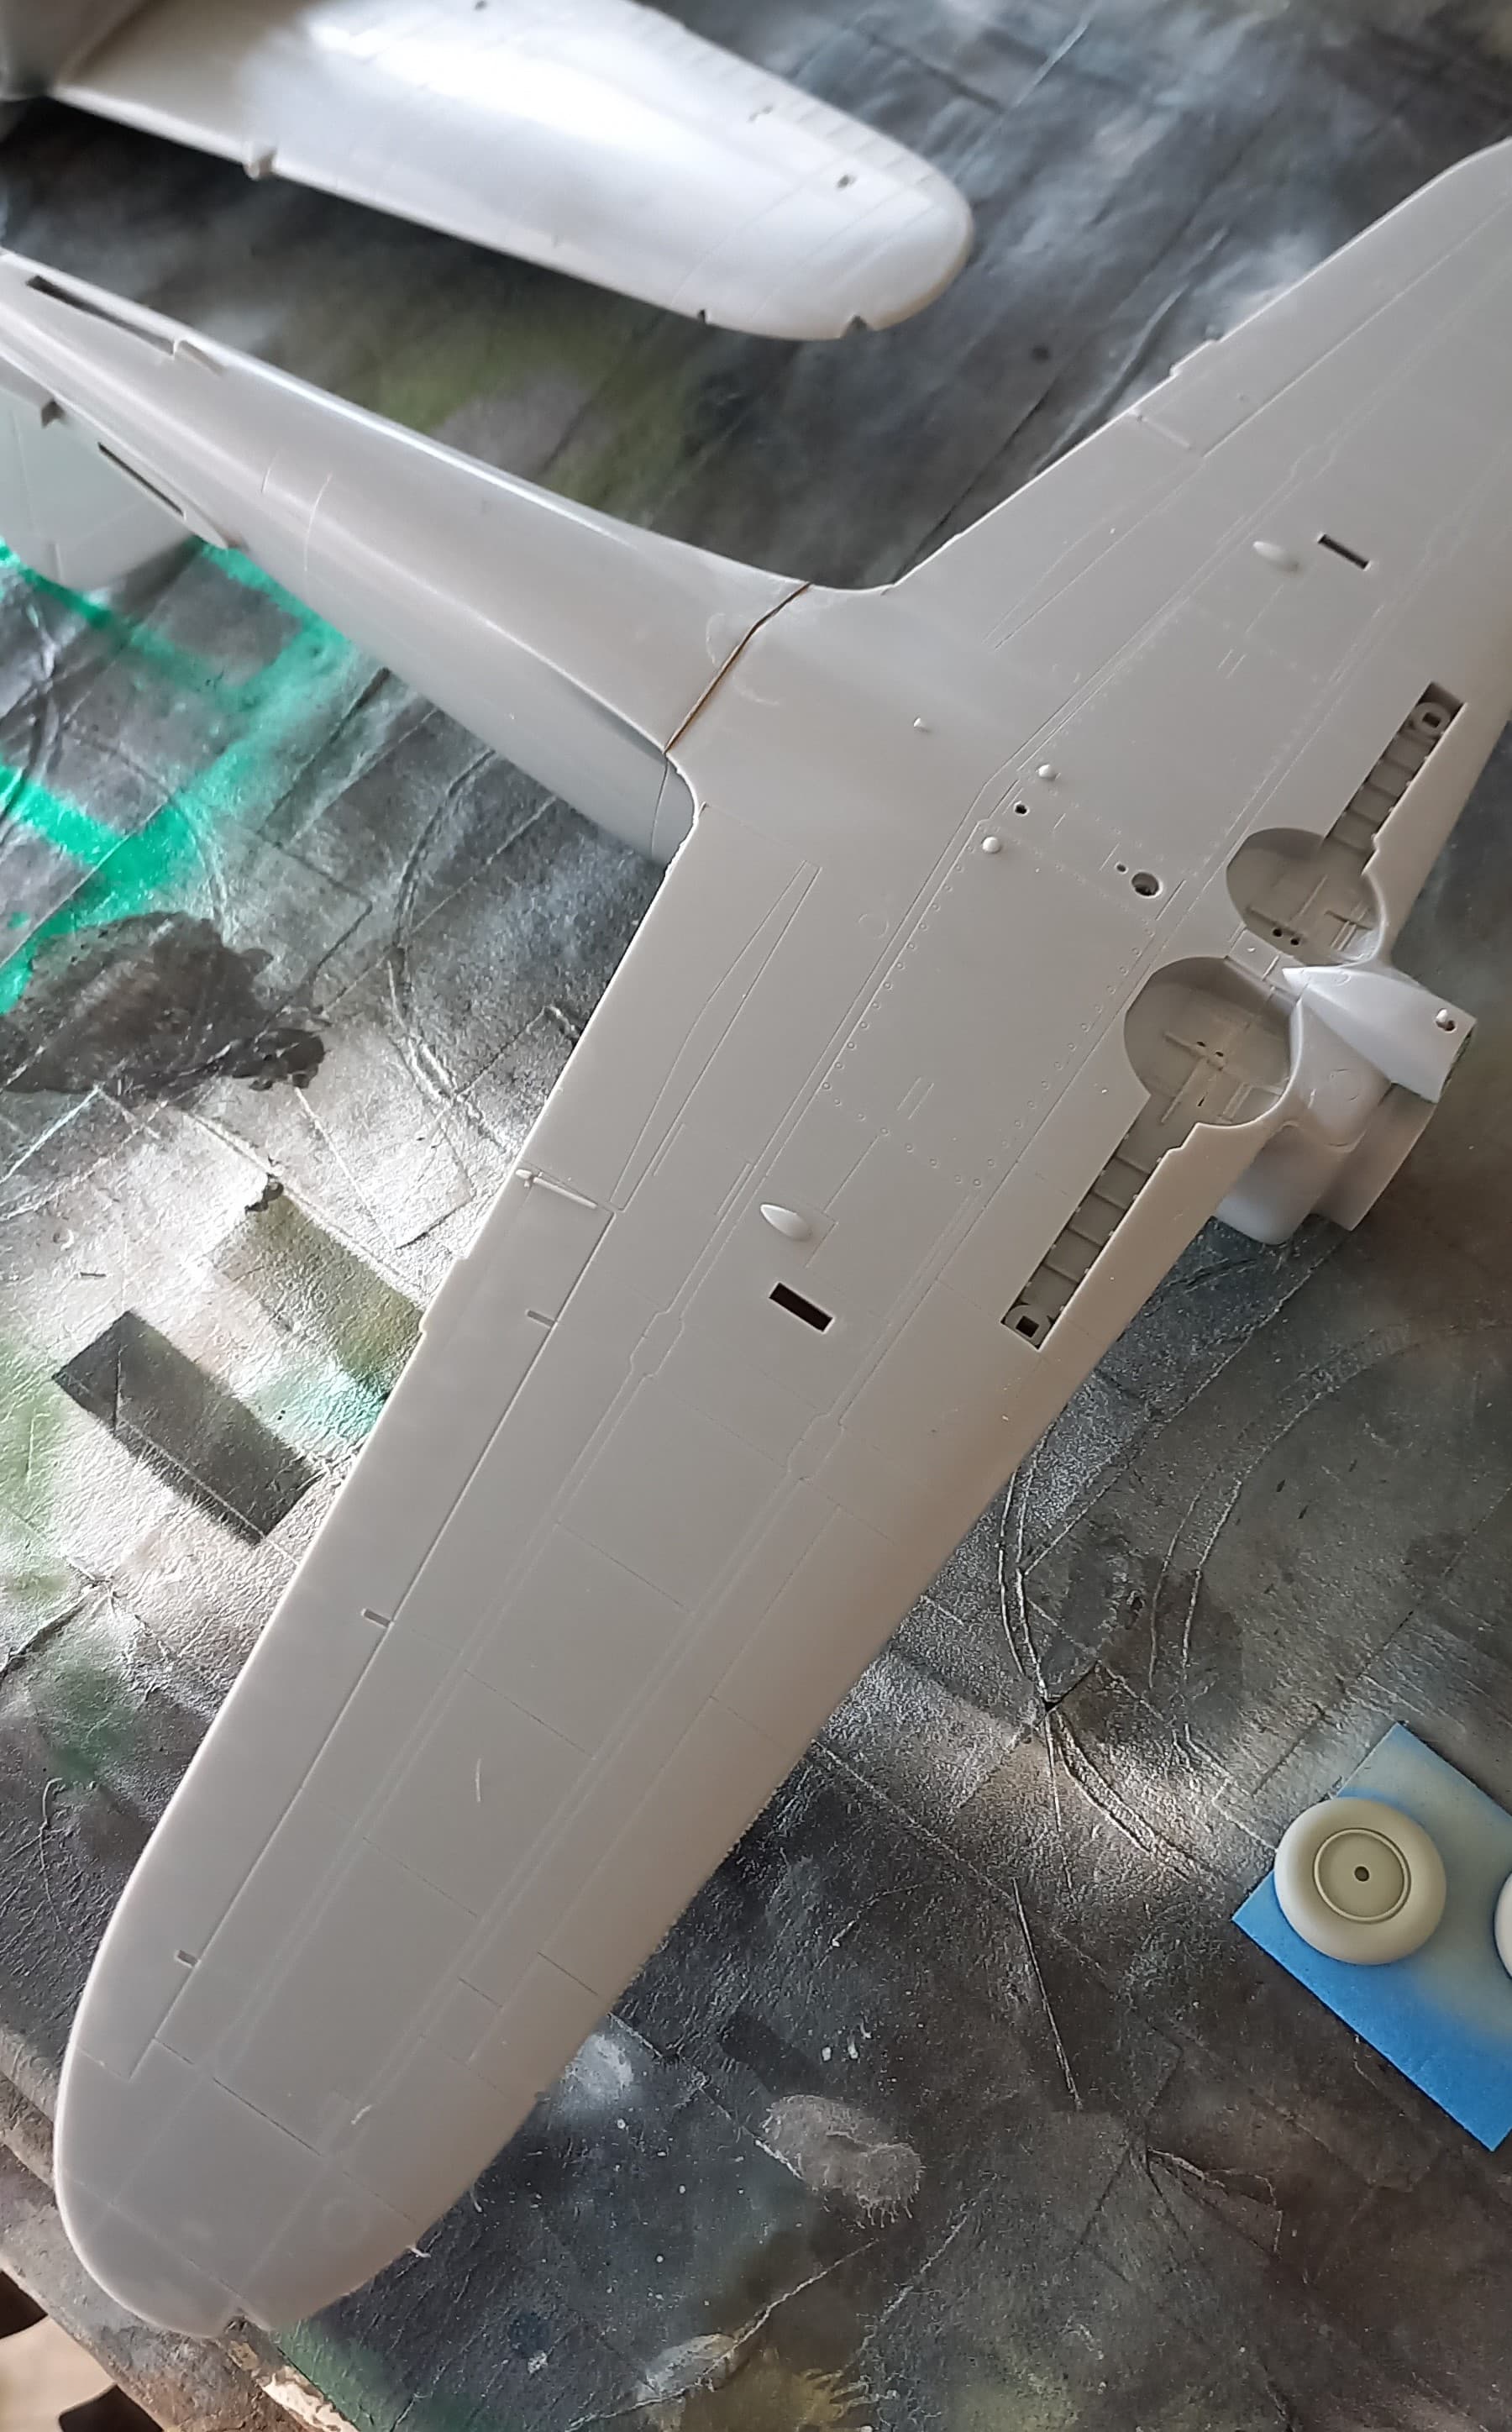
Then I finally add the tail assemblies, in this case stabilizers and for the type 21, arresting gear, and for the type 52 the gear cover supplied. Once cleaned up, a final check for seams, gaps was made in preparation for the painting section. And this is where the build was seperated into their individual builds.
Up next, the paint jobs!
9 Likes
Looking great!!
In case anyone is interested, Sprue bros has the Zero, Zero, Zero dual pack Eduard Zero on their lightning deal
Hi Paul,
I look forward to seeing your Sally build up. I have the older Revell Sally that’s tempting to build. I might enter it into this campaign.
About Sally’s interior. I asked Nick Millman, webmaster of Aviation of Japan. He kindly replied the following with permission to post it here ( he’s really good about that):
Early Sally interiors were painted in the dark greyish-blue (No. 3 ‘ash indigo colour’) throughout, giving a ‘gloomy appearance’ according to Ichiro Hasegawa. A well-known colour photograph on the cover of ‘Front’ magazine of a crewman exiting a Ki-21 shows this colour clearly on the inside of the rear door. It’s a tricky colour to get right as it can go too grey or too blue! Whether this changed with later variants of Ki-21 I’m not so sure but an interior photo of the rear fuselage of a Ki-49 shows either natural metal or aotake.
This dark blue-grey opaque metal primer was introduced in the revised aircraft painting regulations of 5th Feb 1936 to replace the previously applied aotake for internal crew areas. Colour photos suggest it was applied as a primer to other exposed internal areas such as wheel wells, etc. The Army aircraft painting regulations of 14th Jun 1943 officially discontinued aotake from all other internal metal areas to save on paint and speed production but it appears that cockpits and crew areas were subsequently painted in a variety of colours, including grey-green and a yellowish-green colour, the so-called ‘Nakajima interior green’.
The ICM Ki-21 being an early version should have the dark blue-grey interior.
He also provided these cover samples.

Hi Everyone,
I hope everyone is having a nice start to the new year! Let’s be hopeful that it’ll be a good one.
On my duel of the Zero’s, after the main construction of both the Type 21 and Type 52, I opted to split the builds as I moved to the painting, following the laying down of insignia and stripes and priming. Since the Type 52 is a Nakajima built Zero, I decided to go with that one first, and as I move along, I’ll try to point out some general differences that the average modeler can use to help differentiate the Mitsubishi vs. Nakajima Zeros.
The type 52 Zero was really the last major overhaul made to the design, in answer to the introduction of US Navy’s newer fighters of the Hellcat and Corsair specifically. The major changes were a one-meter shorter wing, that also had a thickened cord to increase the maximum dive speed, a thrust exhaust pipe with redesigned cowling and associated piping. The wing cannons were also changed to belt fed type 99-2 model 4 20mm cannons (making a noticeable difference in the bulges below them). There were also defensive measures added, fire suppression extinguishers for the wing fuel tanks, and other items that were an improvement albeit, a small one. All these changes resulted in a plane that was a tad faster (24 km/hr), could dive a little steeper. Despite the changes, the IJN continued to fiddle with the armament, specifically the 7.7 mm (~.30 Cal) nose guns. In this example one of the 7.7’s was replaced with a 13 mm (~.50 Cal) machine gun, located on the starboard side. When changes to armament were made the designation “Otsu” was typically used.
While collecting projects prior to moving, I picked this kit up at a great price and opted to build it pretty much out the box. This would also include painting on the insignia and using just the stencils and tail code kit decals.
The first order of business was to lay the paint for the insignia, and the yellow ID strips on the leading edge of the wing. I started with an initial coat of white (Mr. Color), then added the red (Mr. Color 385, IJN red), note that insignia red is also a close match to the hinomaru color.
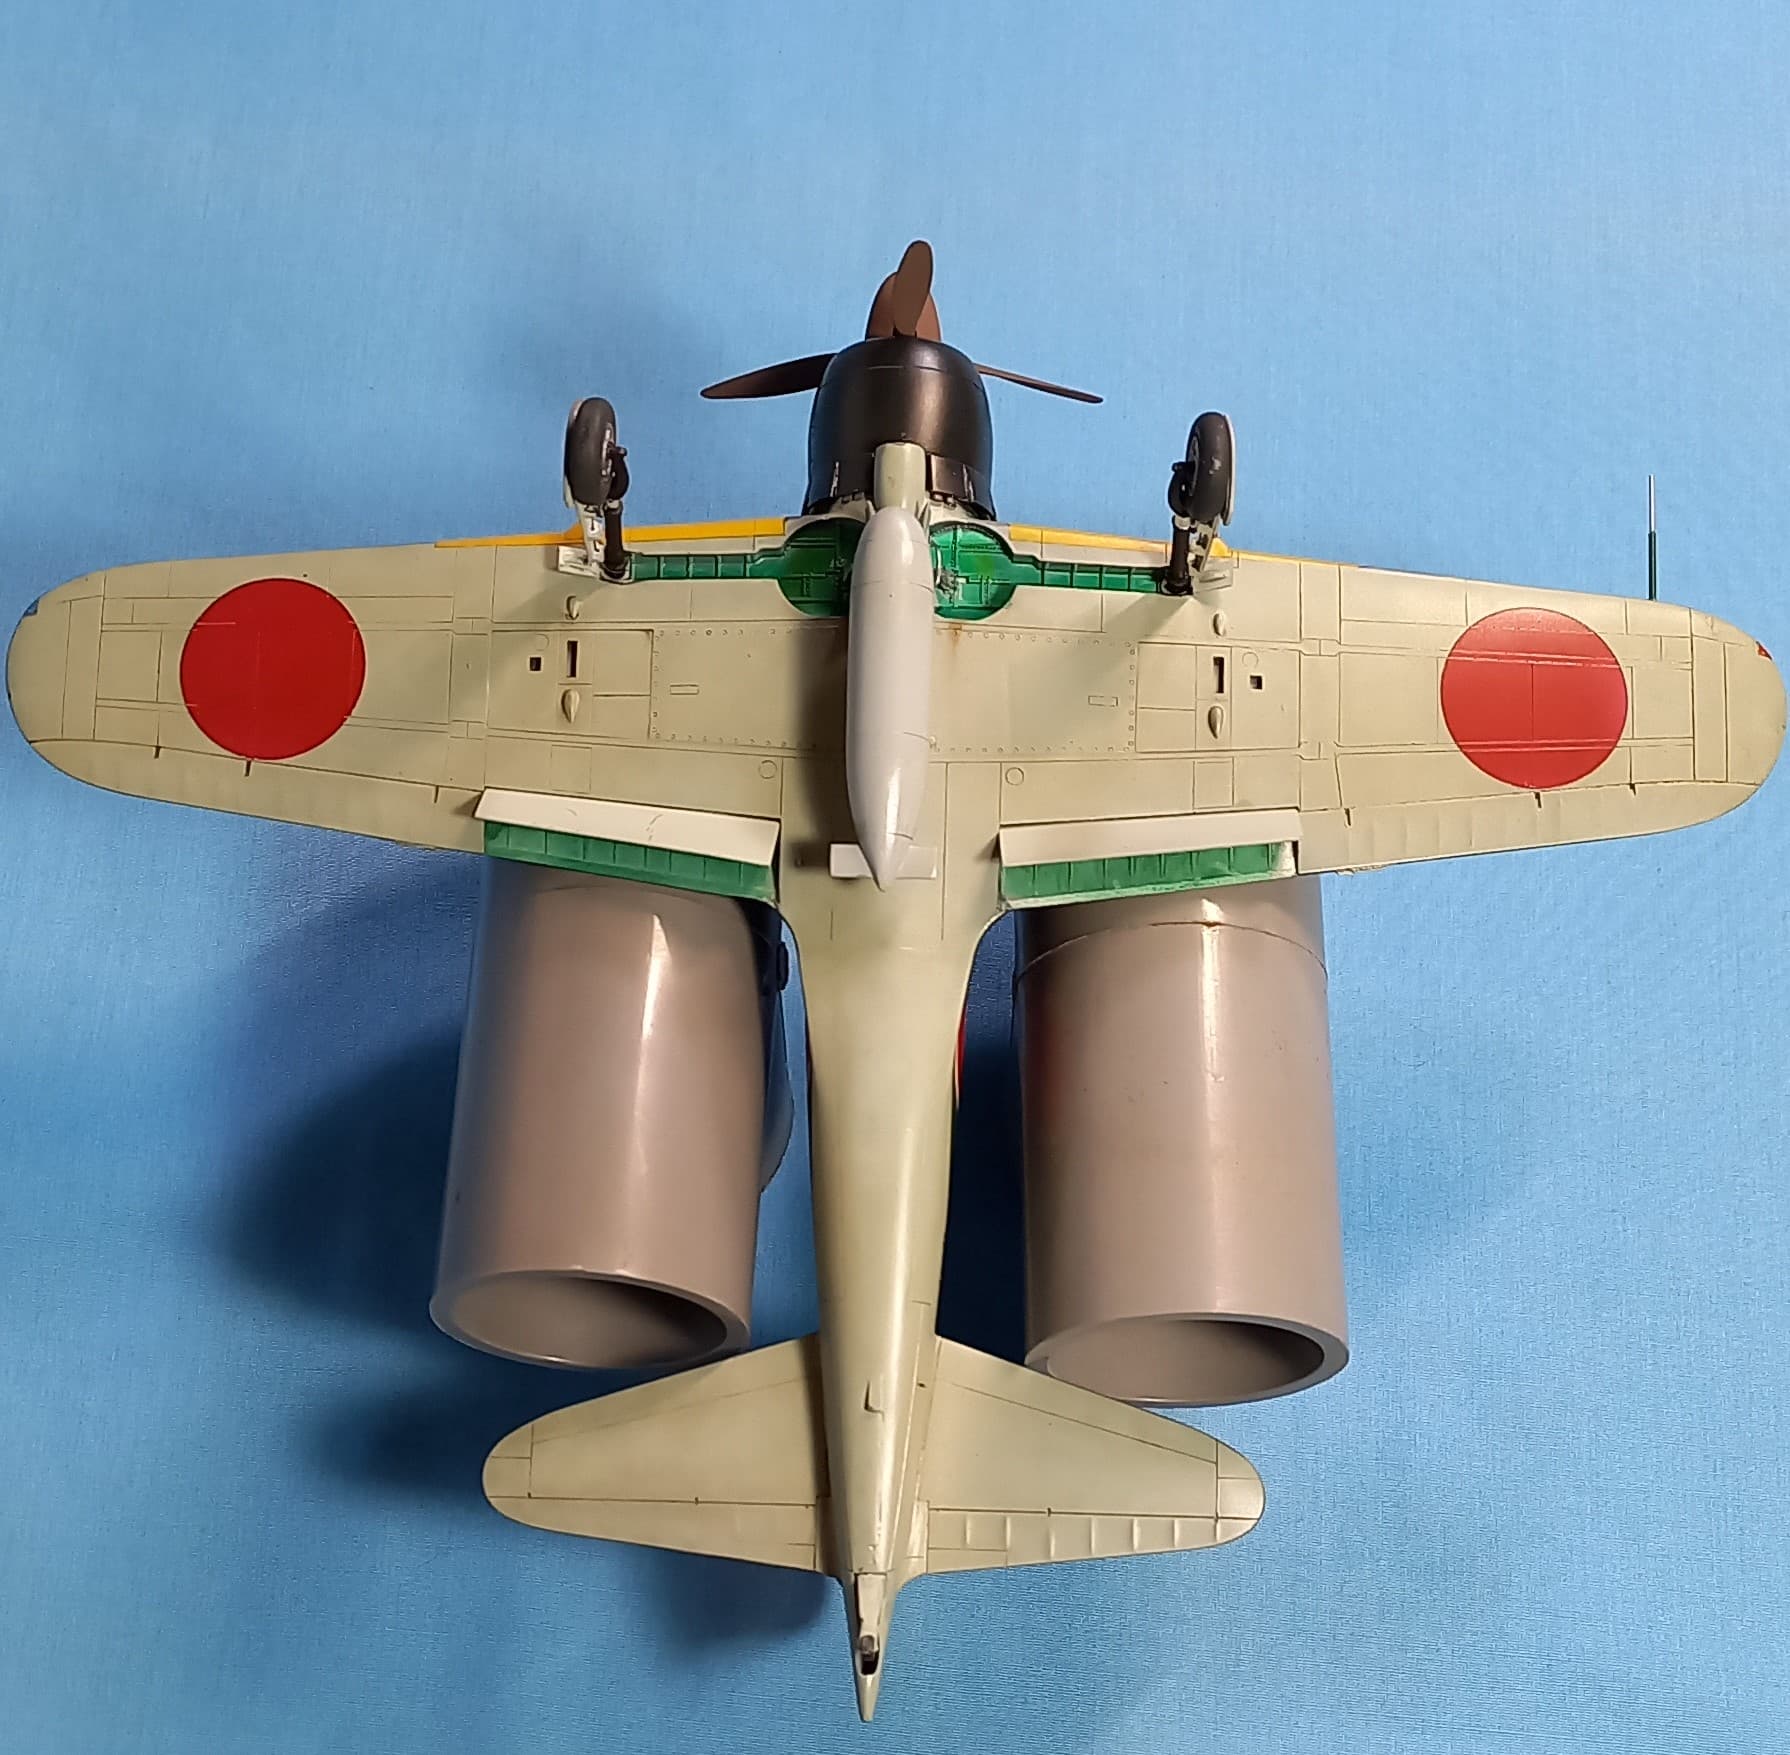
Type 52 is at the top of the photo
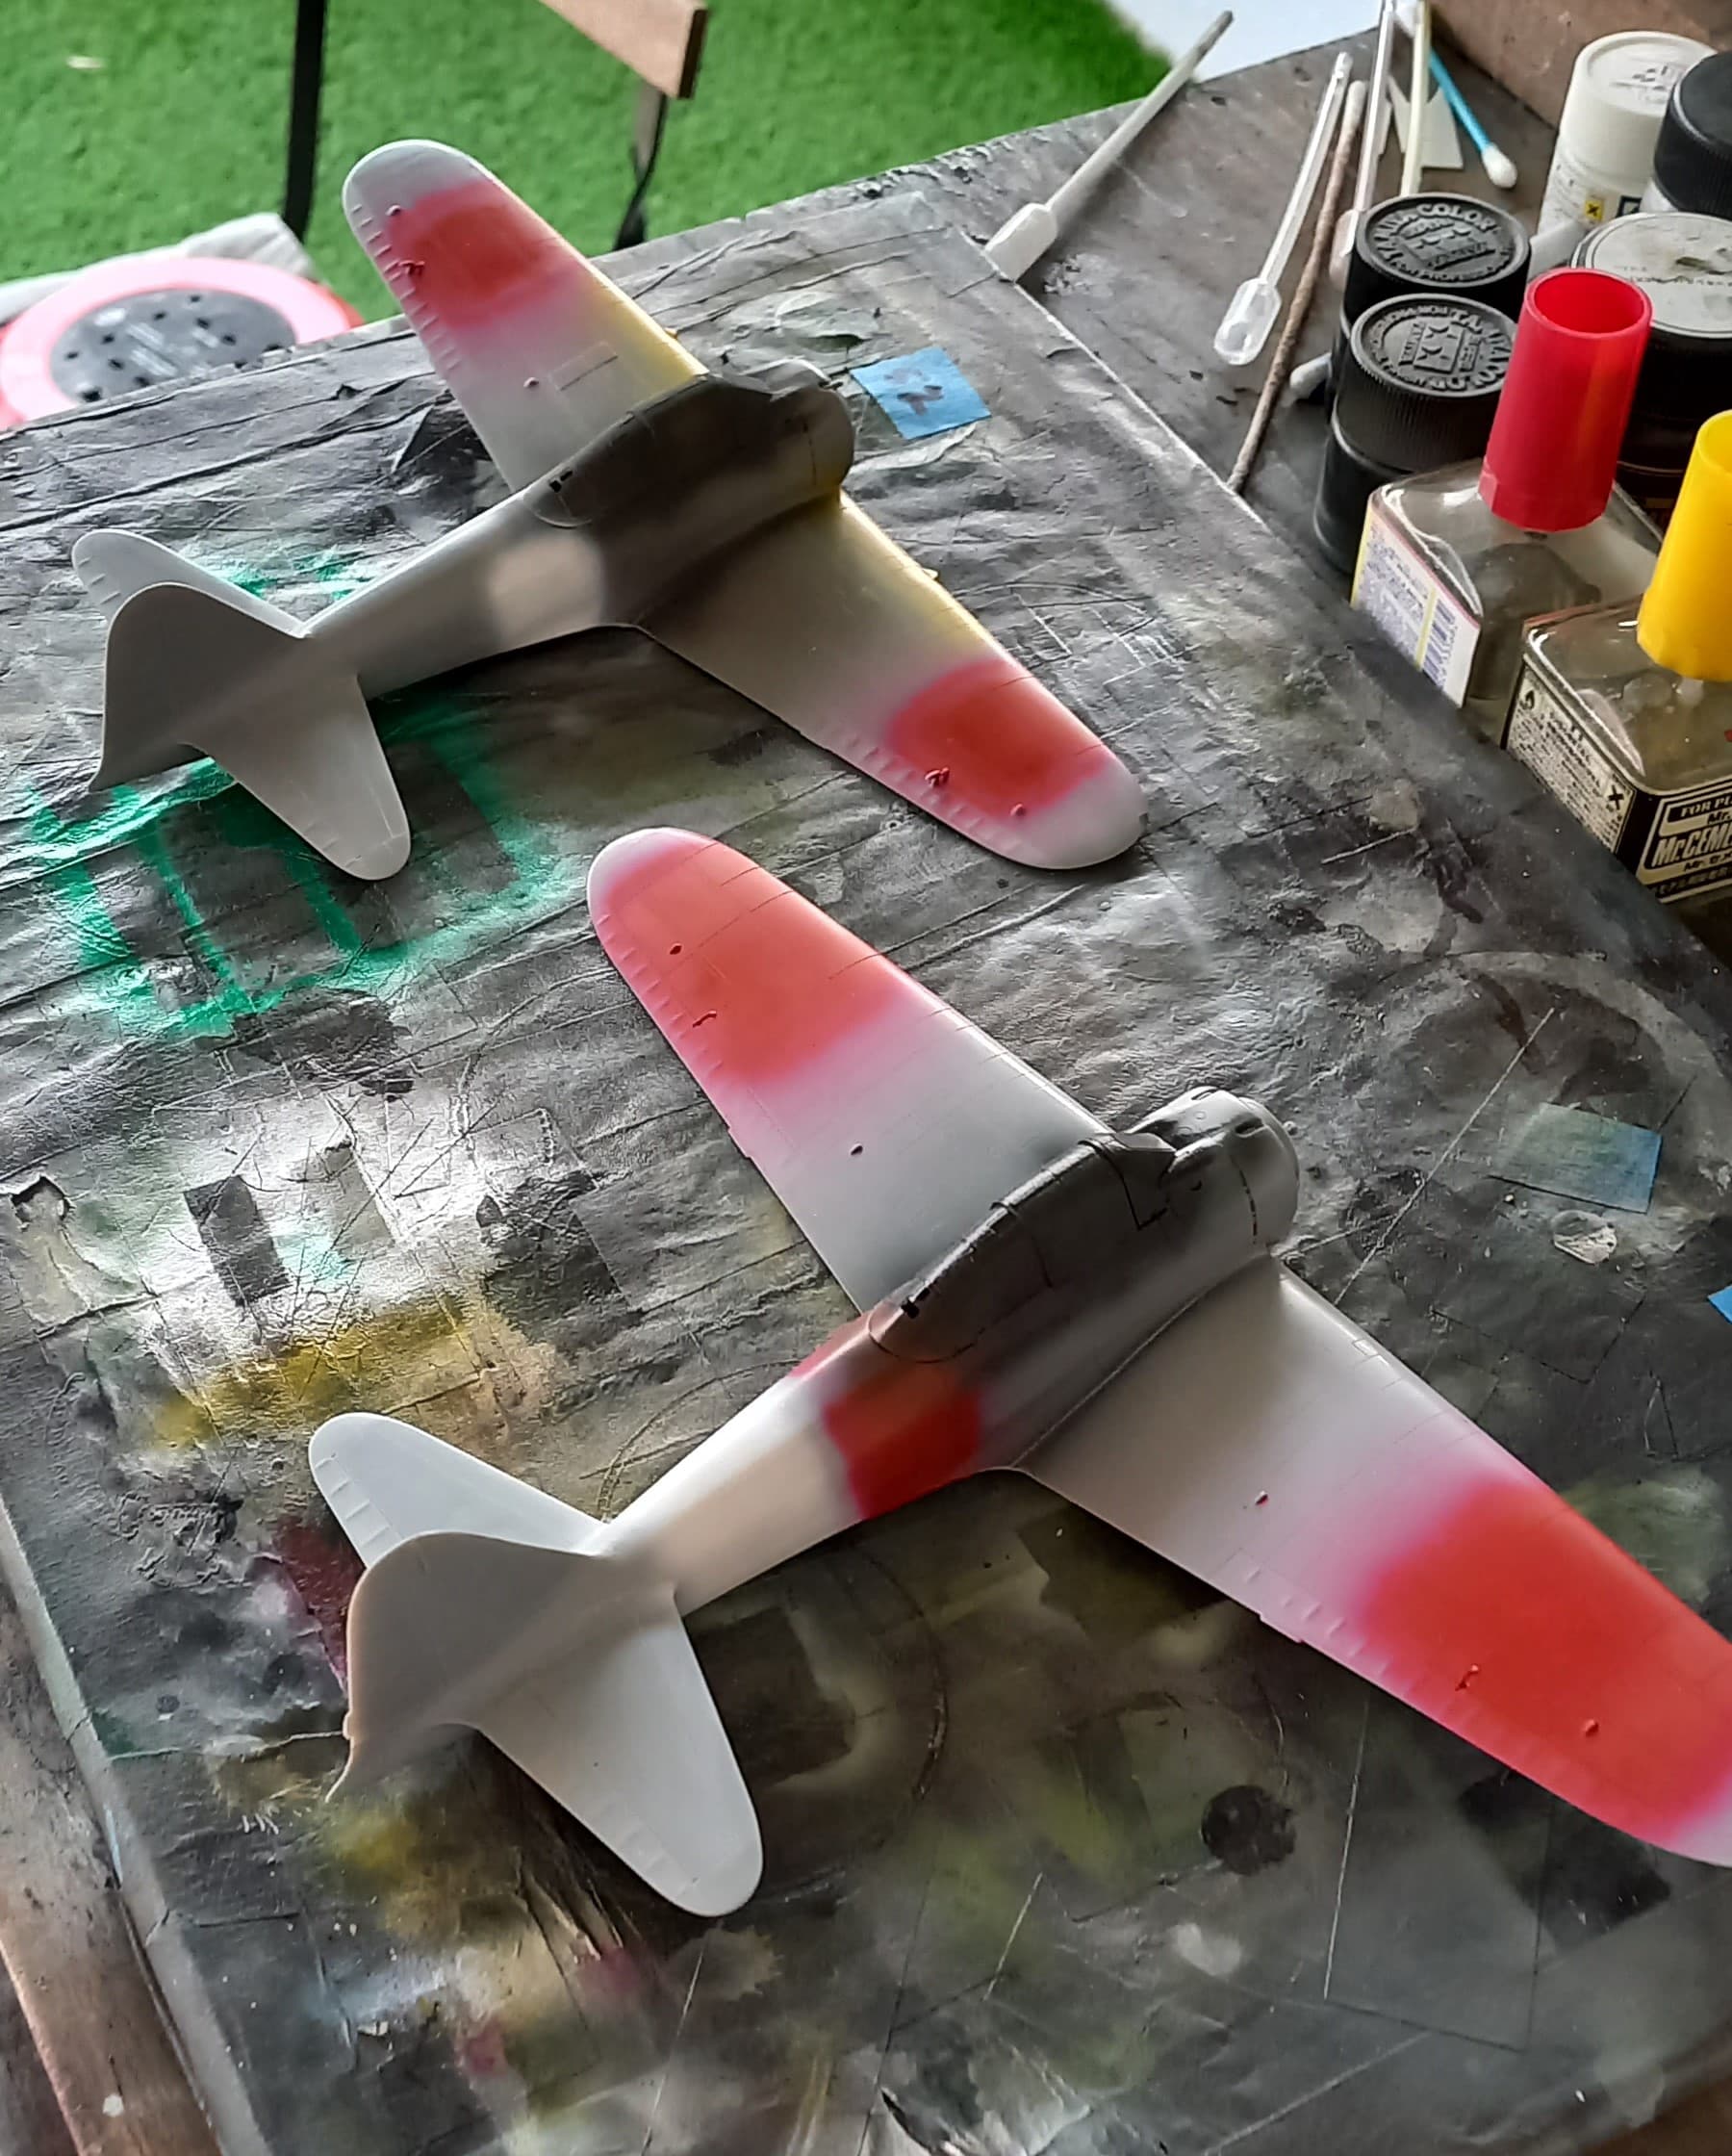
I then proceeded to cut frisket paper into the appropriately sized circles based off the decal sheet. This includes the circle that outlines the hinomaru for the fuselage (oddly difficult to do with my less than banner razor compass) which I sealed using some liquid mask. The yellow ID wing strips were masked off at this time as well.

I then primed the airframe using Mr. Color gloss black, in preparation for a black based paint job.
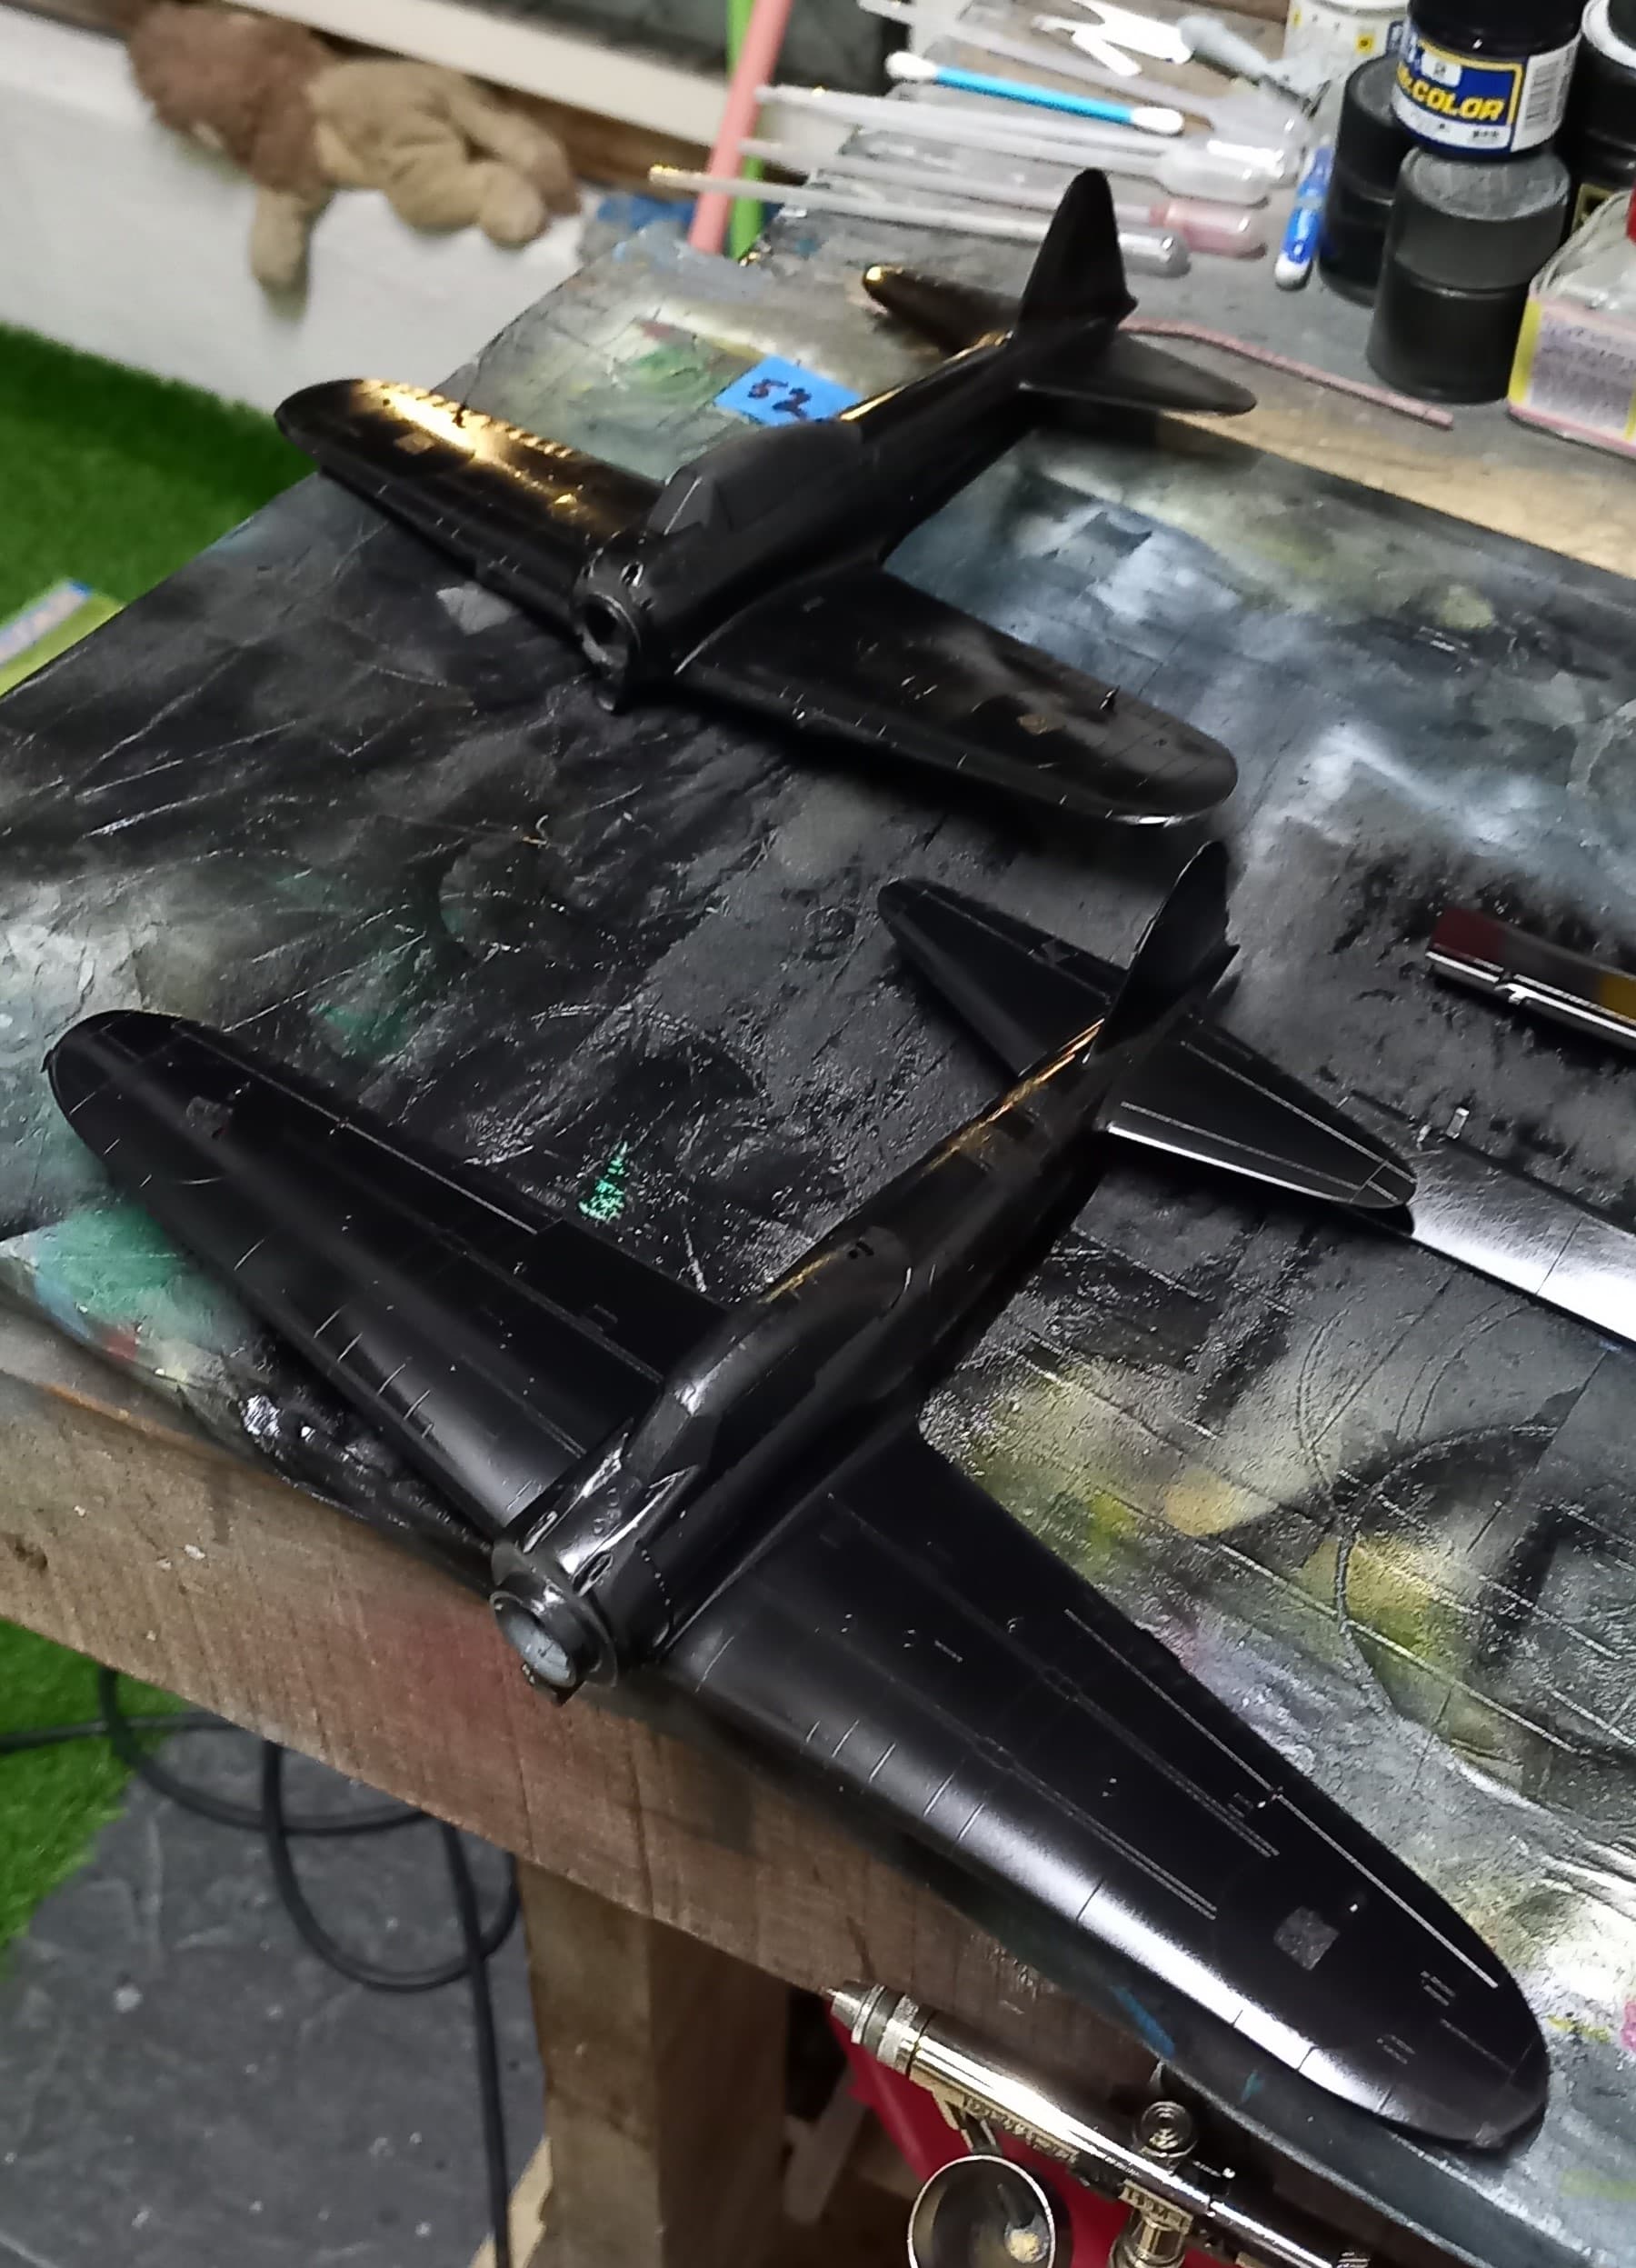
Next up the undersides were painted JN grey (Tamiya XF-12). Once dry, the undersides were masked off such that the grey extends up from the base of the fuselage to the bottom of the stabilizer. This is one of the most obvious differences between Nakajima and Mitsubishi built type 52 Zeros. This was then followed up with the uppers getting a nice coat of IJN Green (Nakajima) Mr. Color 15 cut with white (2:1). Note that Tamiya’s XF-70 is a great representation of Mitsubishi green. I then removed the masks, revealing a nice paint job! I then did a clear coat and decals.
A note on the Nakajima built Zero’s regarding another obvious difference is the landing gear areas. As a general rule, all the landing gear struts were painted gloss black, with the oleo’s left in their chrome color and the torque links and outside wheel hubs painted silver. Mitsubishi built Zero’s wheel well and covers were the same color as the airframe. Nakajima Zero’s had and aotake applied to the wheel wells and the crescent shaped wheel cover. Also, the actuator for the crescent shaped cover was gloss black.
Hasegawa makes adding break lines a breeze. The outside portion includes where the line can be attached by drilling an appropriate sized hole, and then drilling out the same size hole through the three attachment points on the main gear cover. For these builds I used some charcoal grey jewelry thread, unfortunately it appears I didn’t take pictures, sorry.
The rest of the build was straight out of the box, using EZ-Line for the aerial. I didn’t really weather this one too much, just some oil stains around the exhaust, as this would have been a relatively new plane.
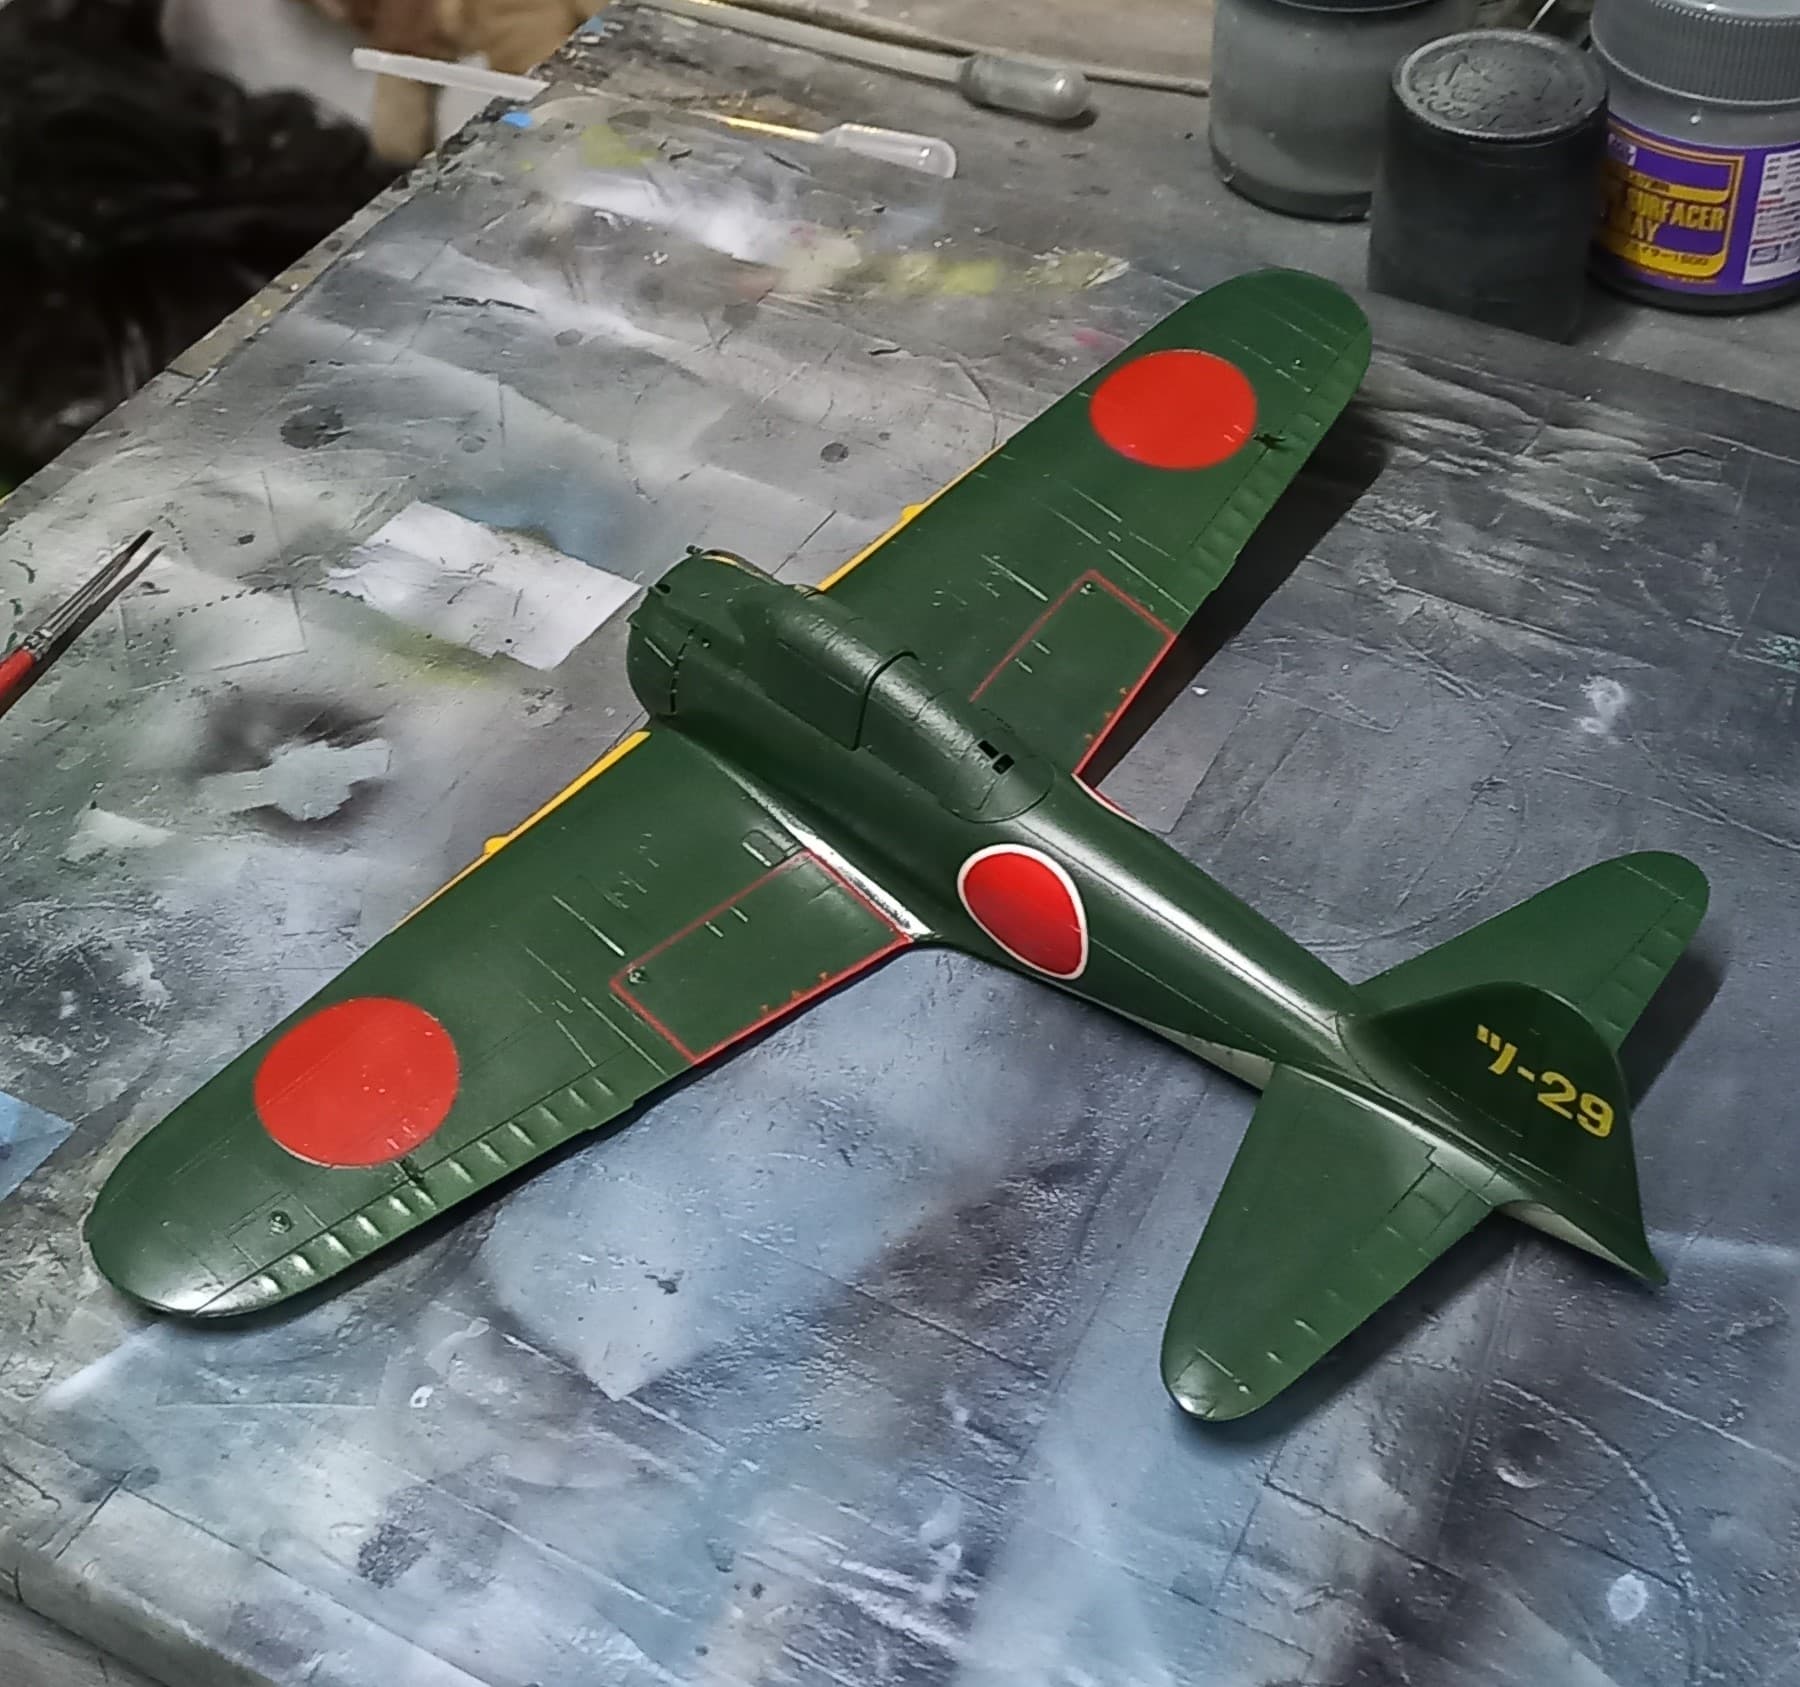
Without further ado, here’s my rendition of a Nakajima build A6M2b Type 52 “Otsu” Zero from the Tsukuba Naval Air Group, circa October 1944.

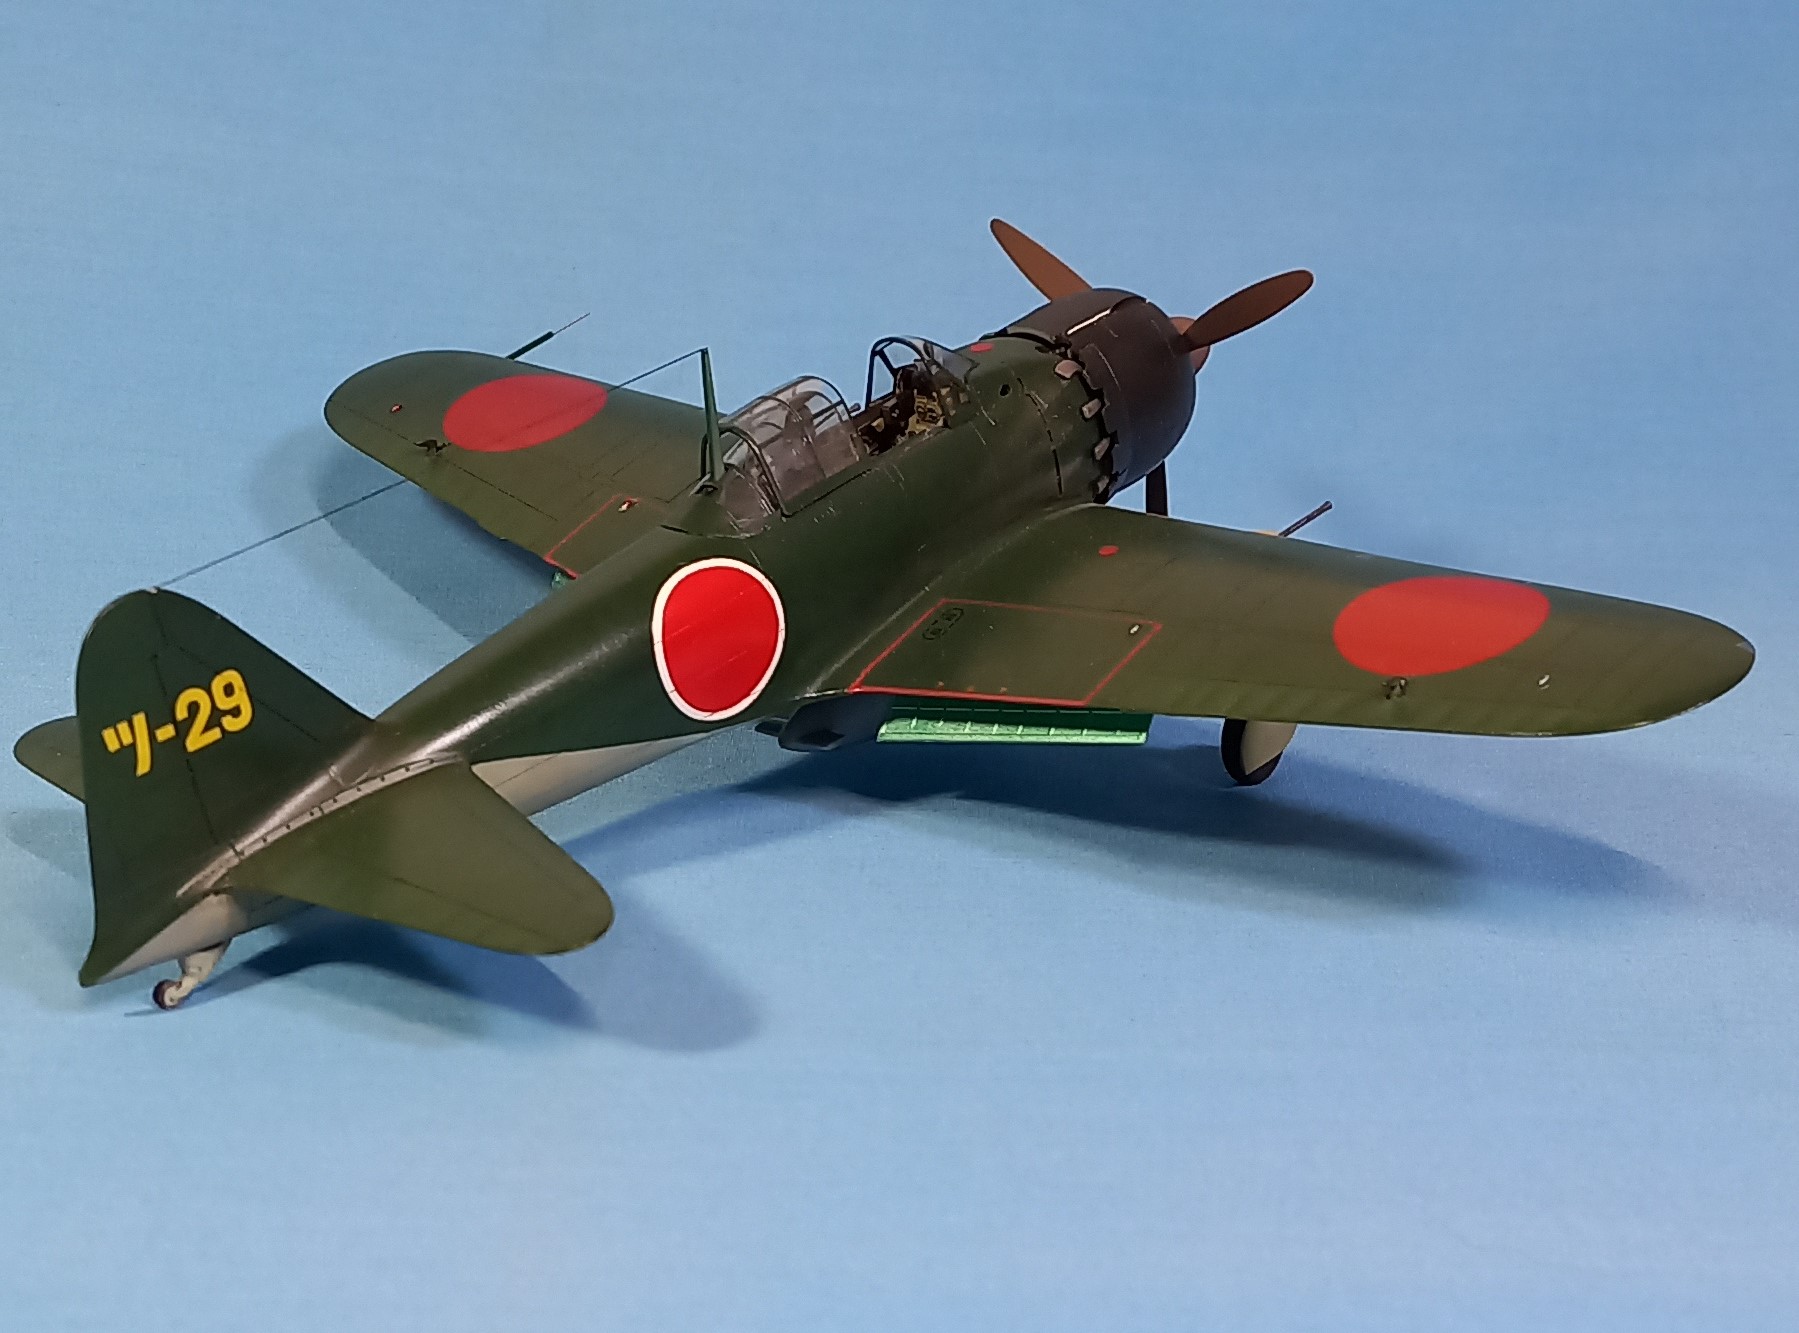

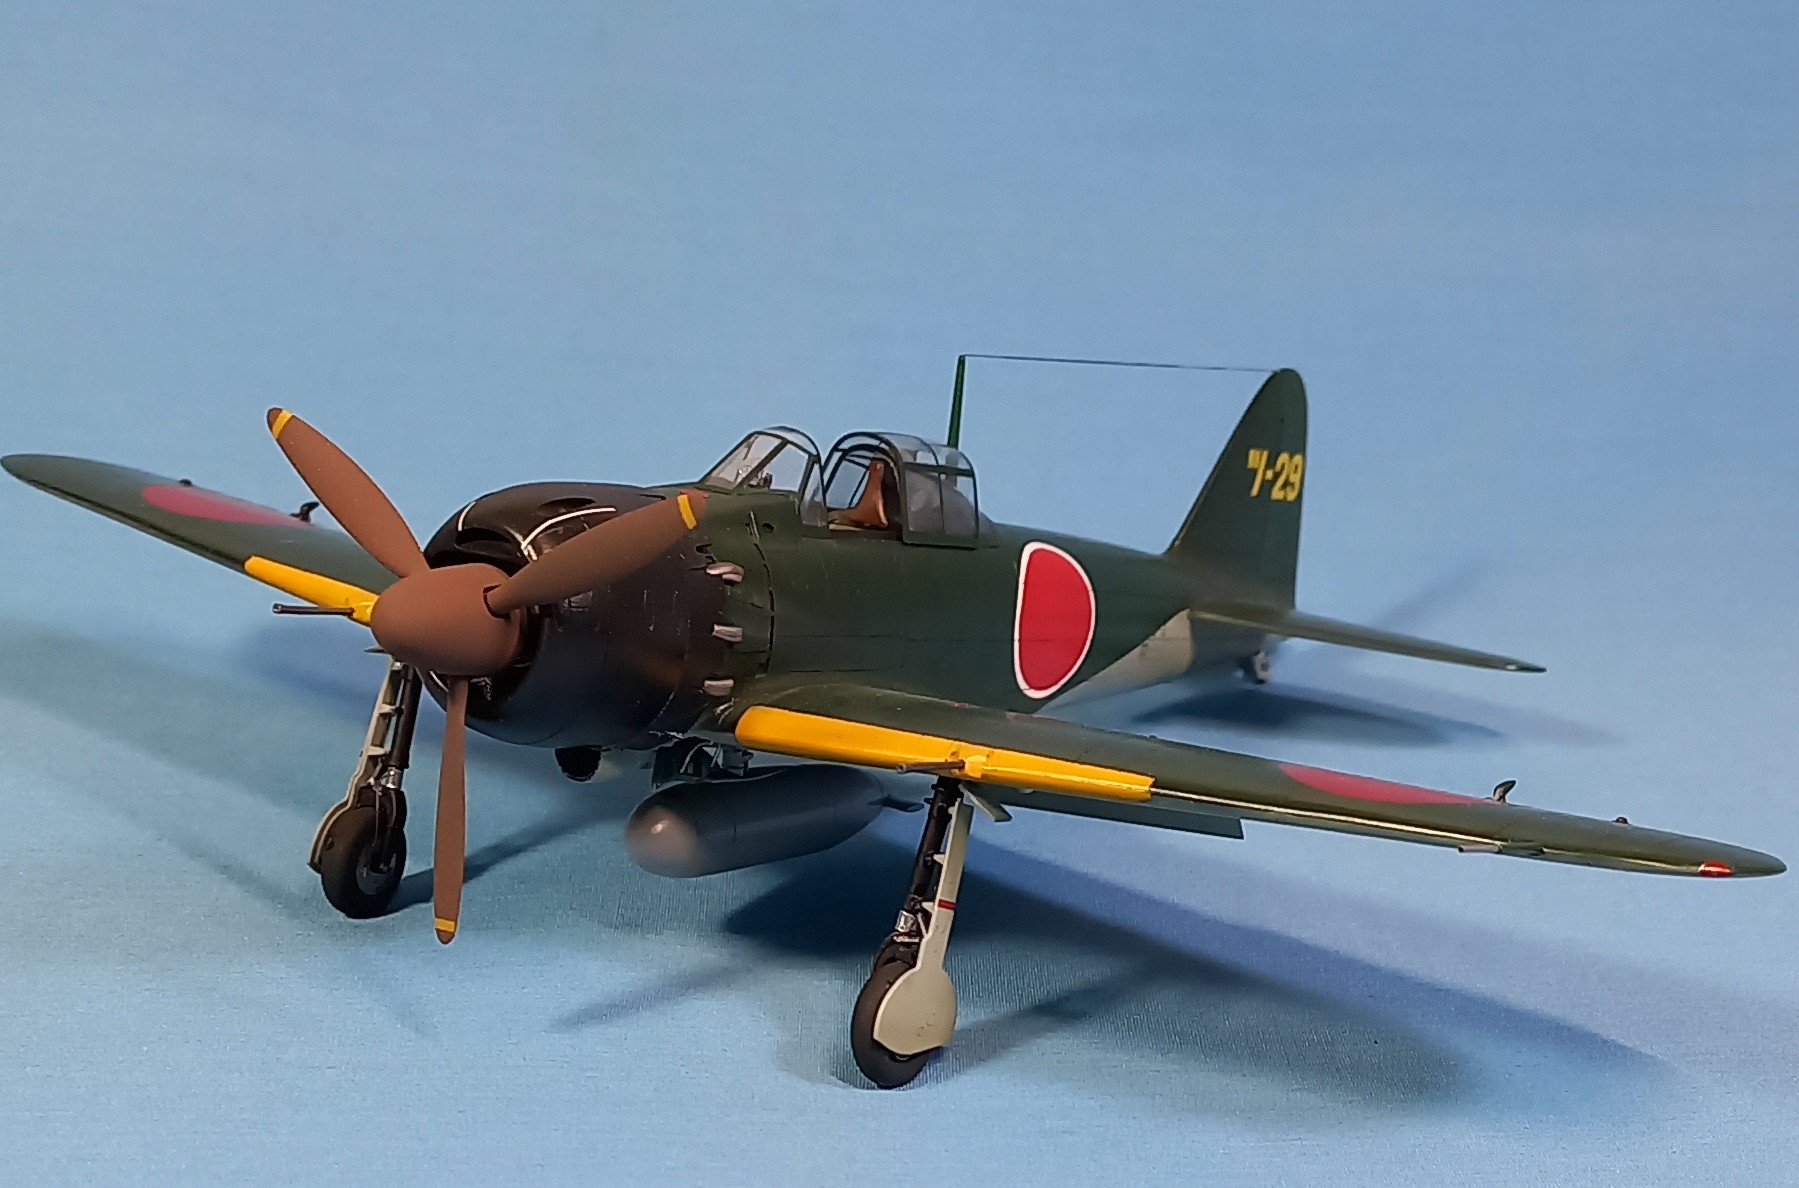
This is a very nice kit of the Zero, which has held up quite well over time. Excellent for the beginner, and many possibilities for the experienced modeler. Coupled with an affordable price tag, and a plethora of aftermarket details available one can’t go wrong with this one. Though, if you manage to lose the pitot tube a replacement can be made using some tubing and a 21 gauge medical needle! I hope you all enjoyed this, be safe and have fun modeling!
8 Likes
Thanks to both John & yourself for that input on the Sally interior. Knowing that the Japanese ARMY & NAVY frequently were of two very different minds about things made me a bit chary about using the Betty info on the Sally even though they were rough contemporarys and both built by the same company. The info from Nick Millman is very interesting and it would be more fun to do something a bit different. The Sally has a LOT of glass and a mask set makes good sense. Hopefully the aftermarket will provide one as they are not included with the kit.
I may not even build the Sally for this campaign. I have my eye on the Mikromir Kaiten II kit which looks to be a fun build that would fit right in with some of the other small submarine models in the display case.
3 Likes