Land of the rising sun

My entry arrived today! FineMold’s IJA Artillery Type 41 75mm Mountain Gun.

Pretty crisp details with no flash and just the normal seam lines which are rather small.

I’ll probably give it a small start come tomorrow (my M577 is finally moving along nicely).

Mike

6 Likes

Looks like a decent kit. How are the figures?

@Scouteyes Here is a review of the kit with good photos of the figures.
Fine Molds IJA Inf. GUN

1 Like

They seem pretty nice Scouteyes.

Mike

Thank you Fred. :slight_smile:

Mike

I started on the barrel and cradle and figured that was good for now.


The “Gun Barrel Grinding Tool” (gotta love that name!) is pretty useful for cleaning seams on cylindrical parts. It’s also designed to bend wire grab handles. Some how I managed to get two (barrel markings on one side and handle markings on the other).

Things progressed quicker than I thought, so I did some framework. The sight is really fiddly for only three parts but thank goodness FineMolds has drawings for how the parts are supposed to align! :sweat: The barrel and cradle are left apart to facilitate painting. There are a few ejection marks on the trail arms that will need to be cleaned up. No flash at all, just some seams to work on.

First use of the Zoukei Mura nippers - oh, I like!

Mike

4 Likes

Hi Everyone,

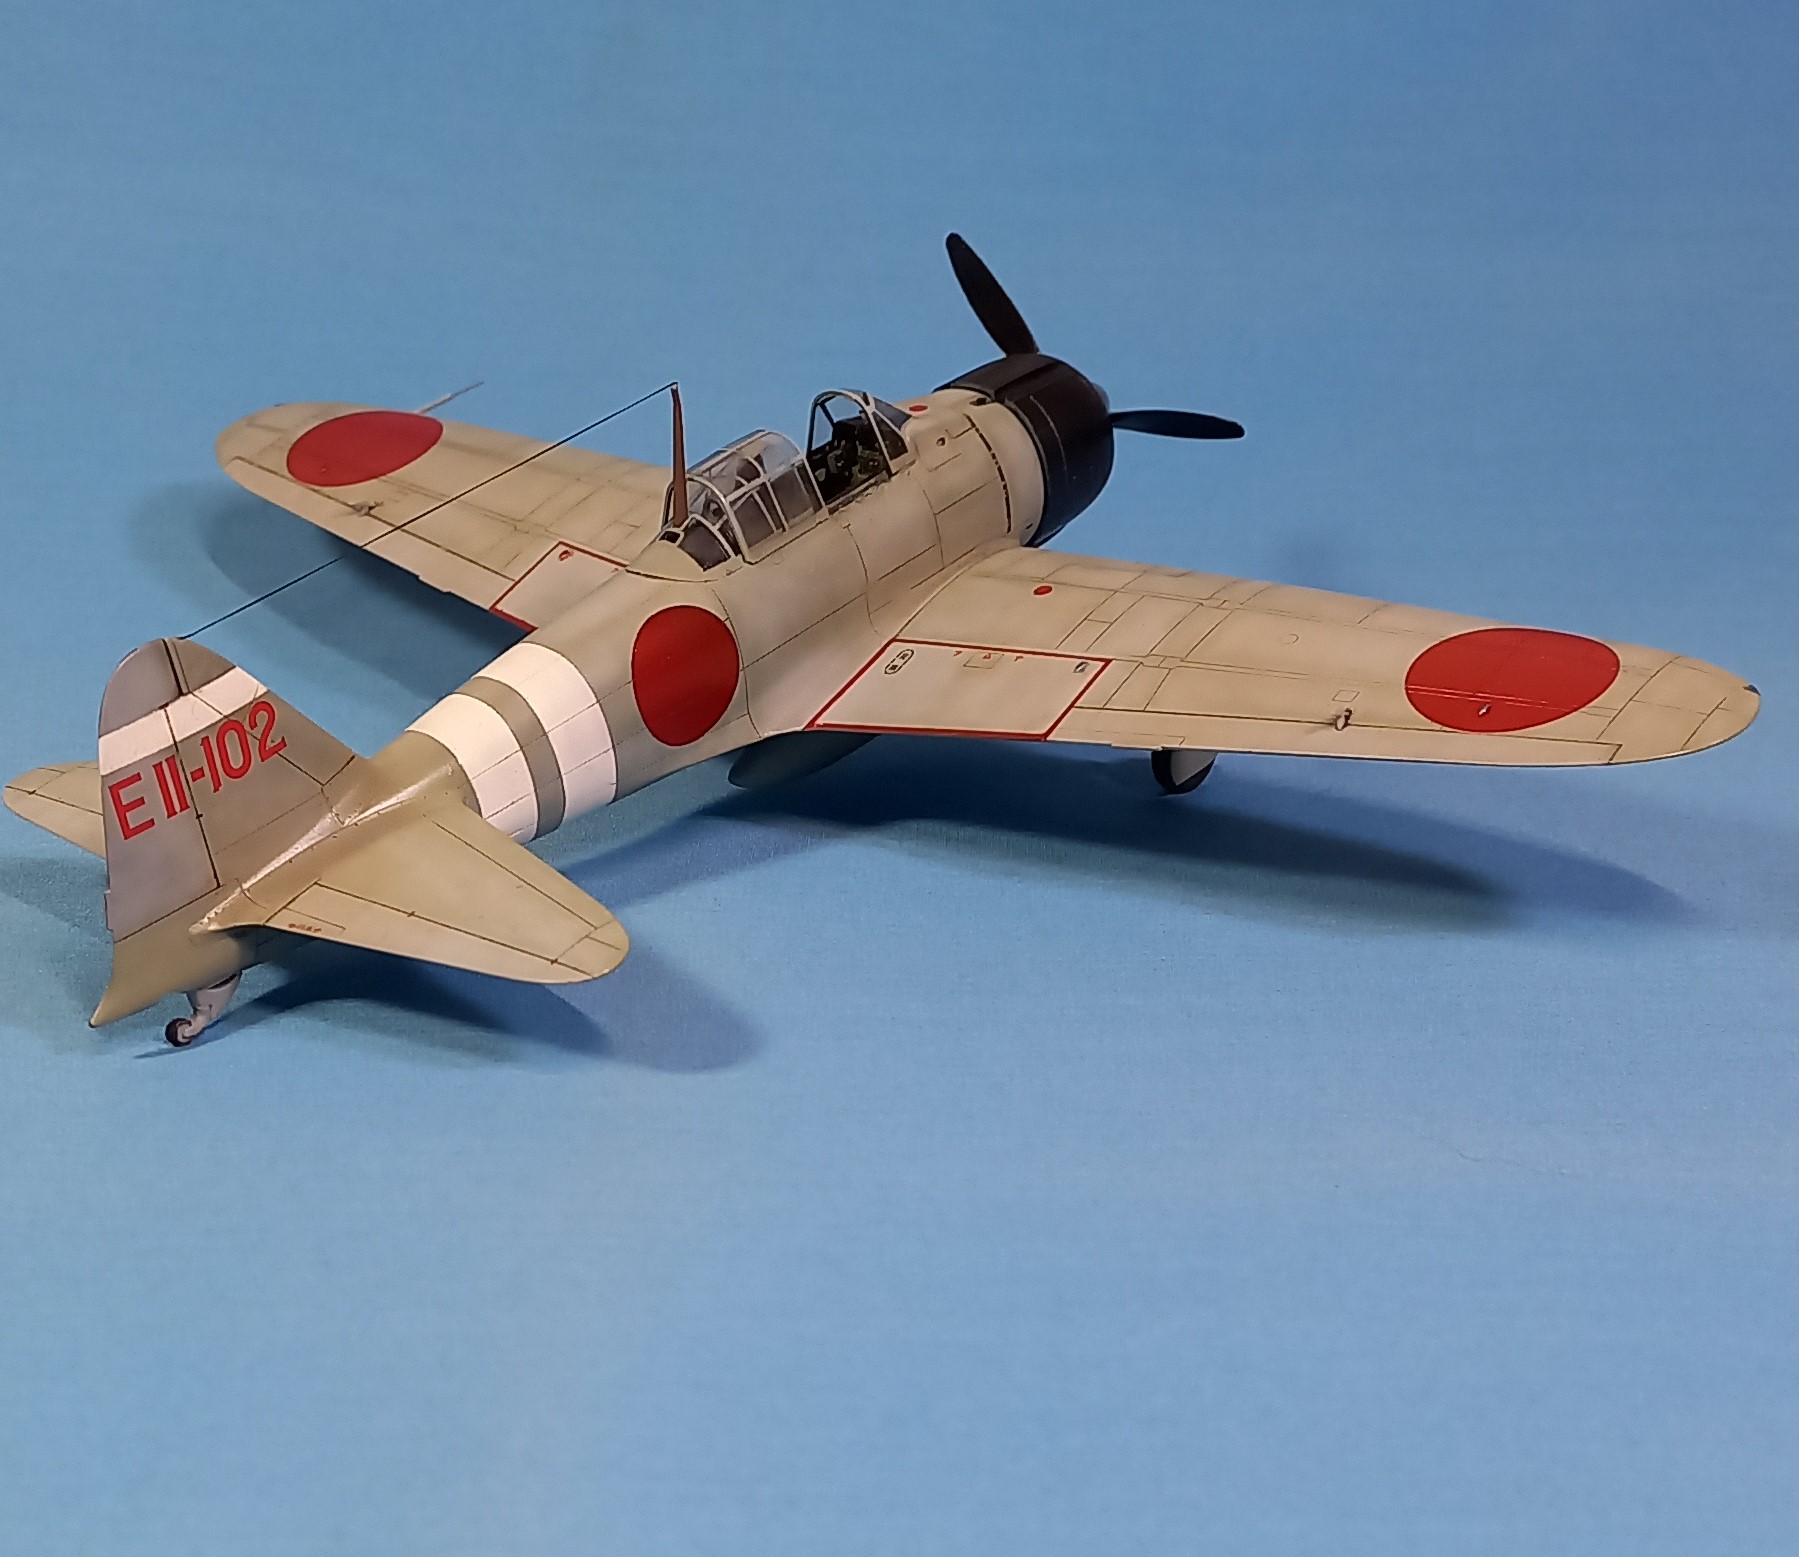
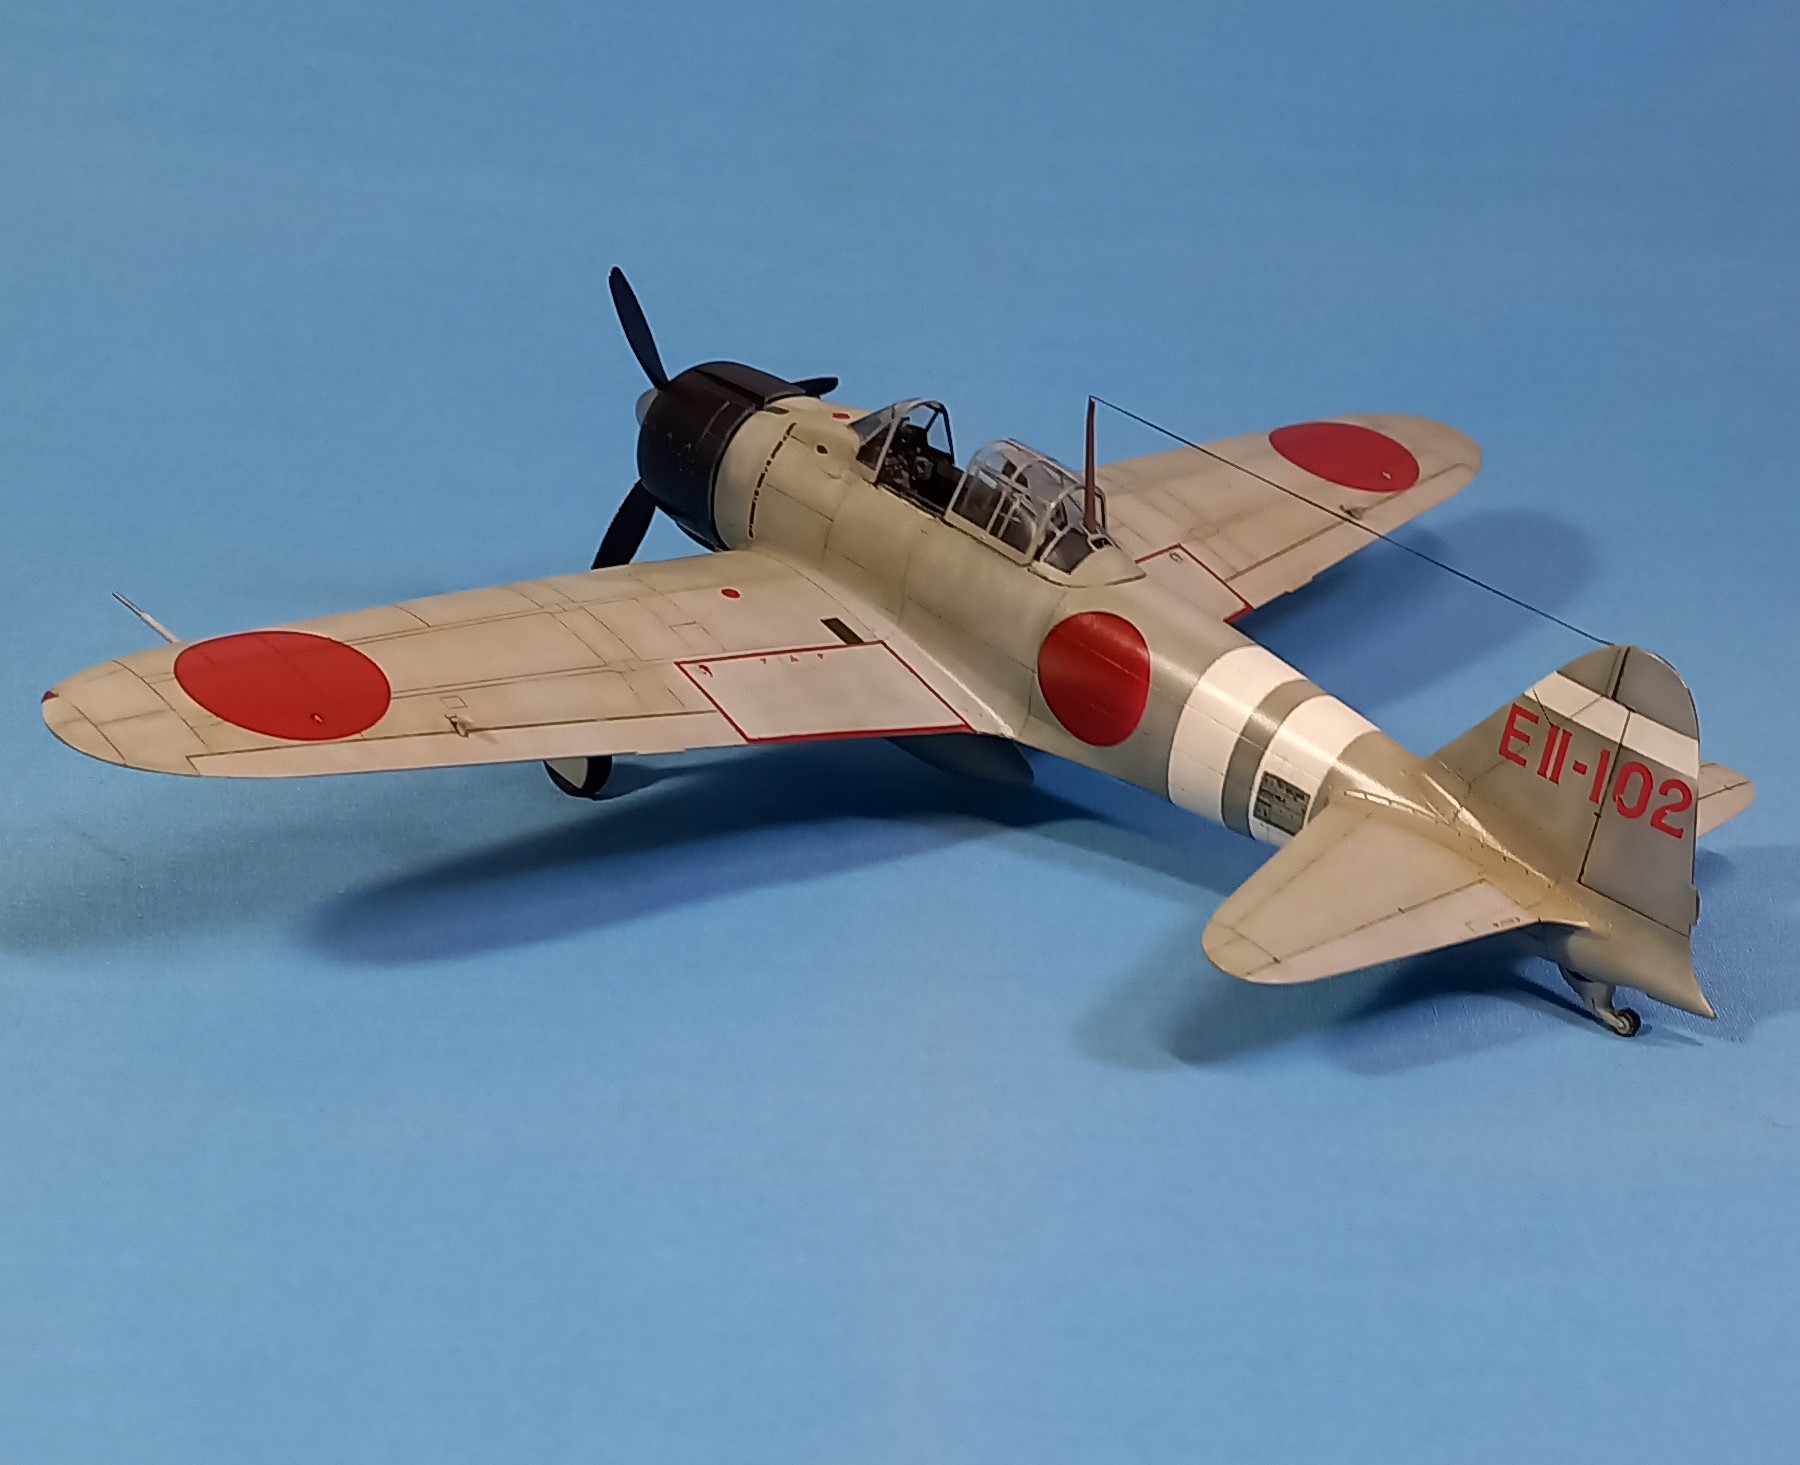
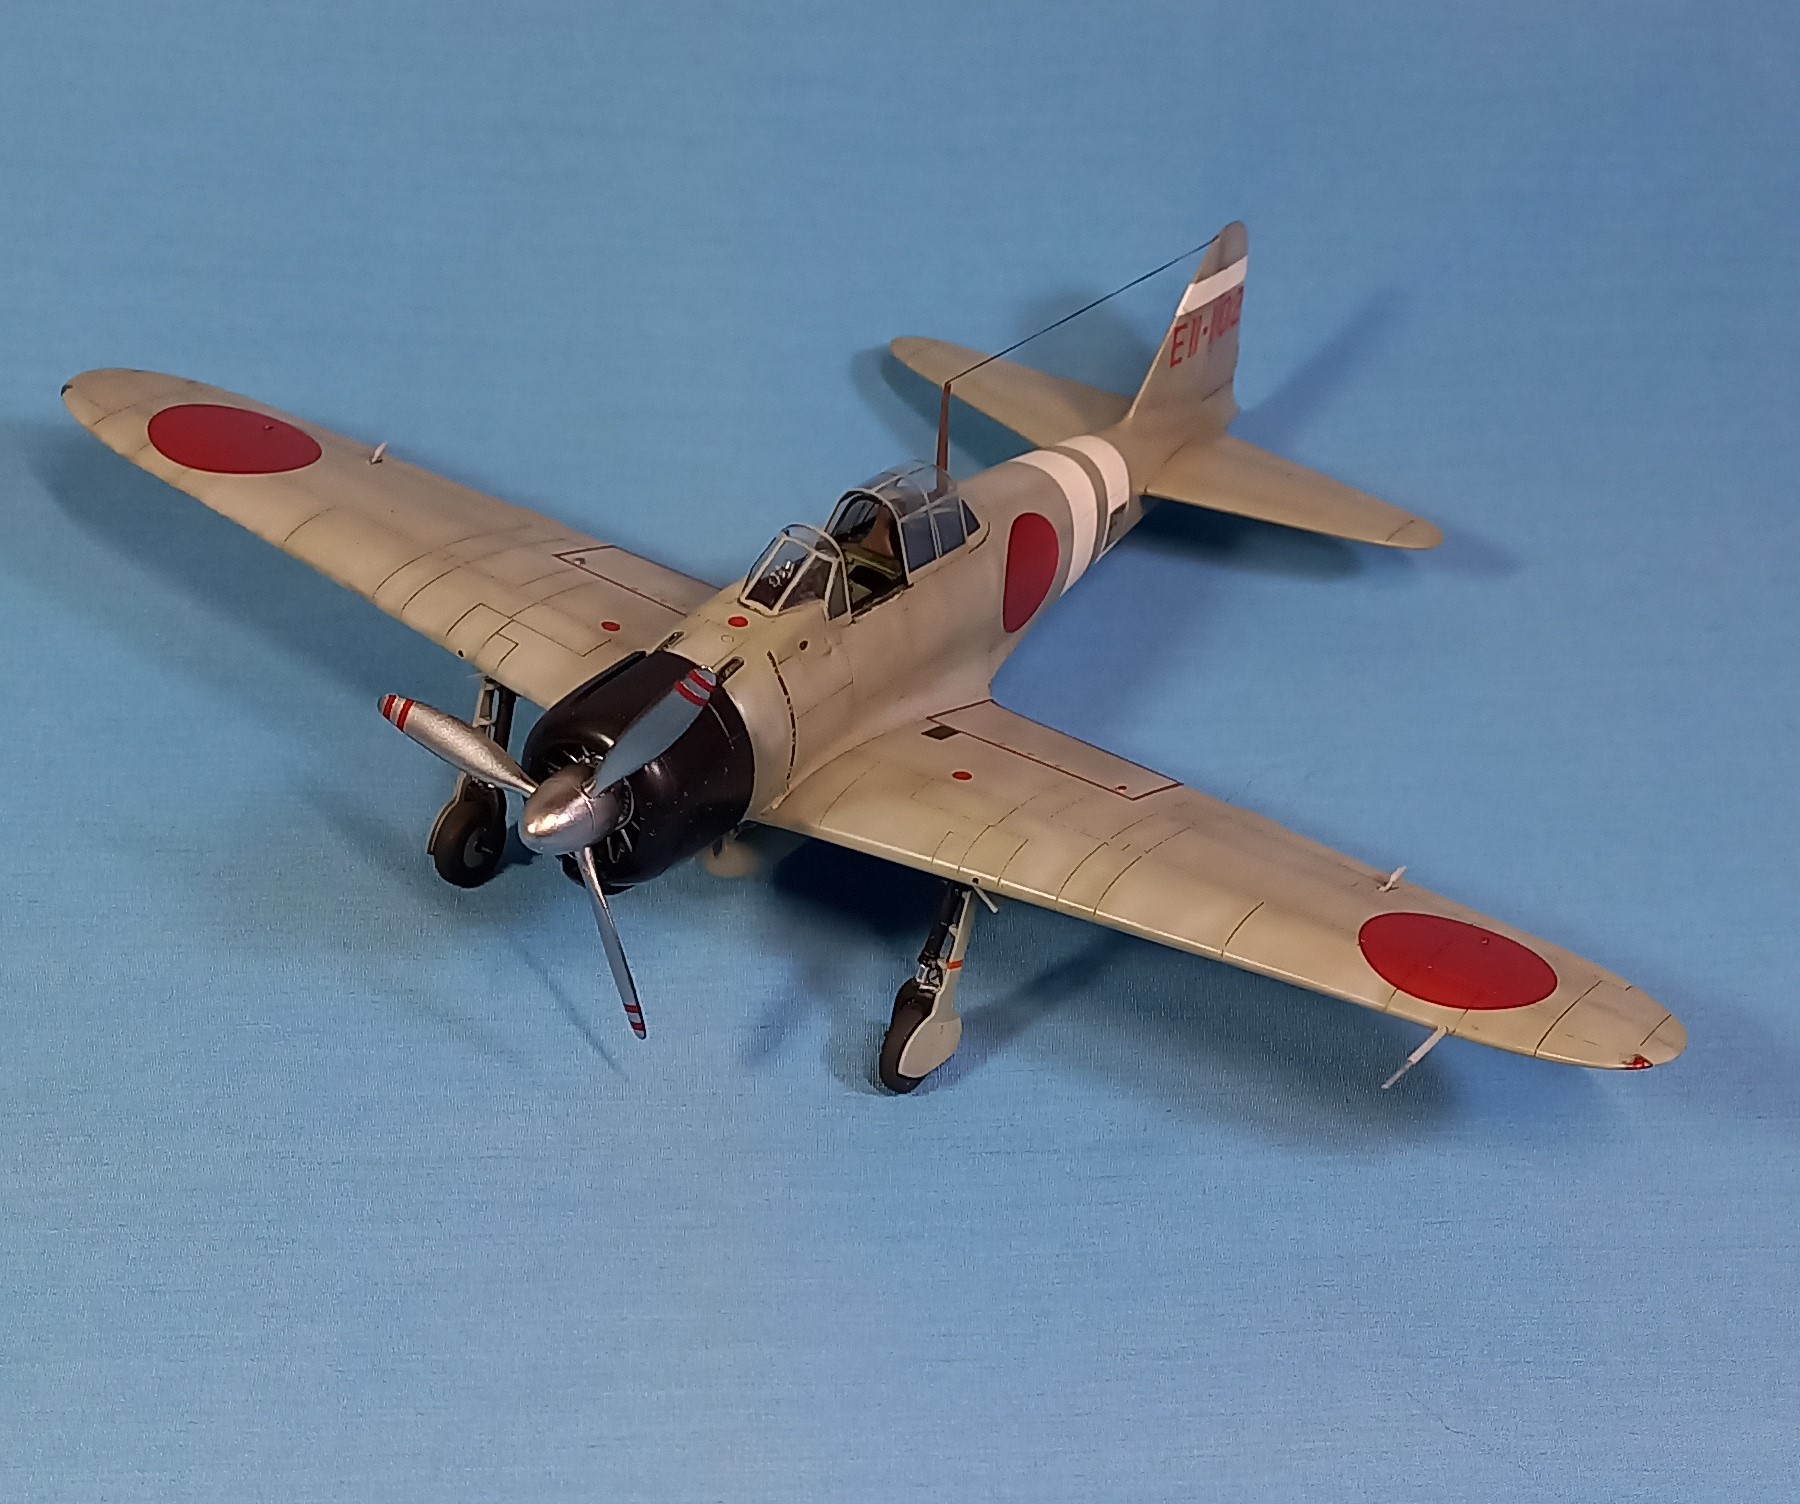
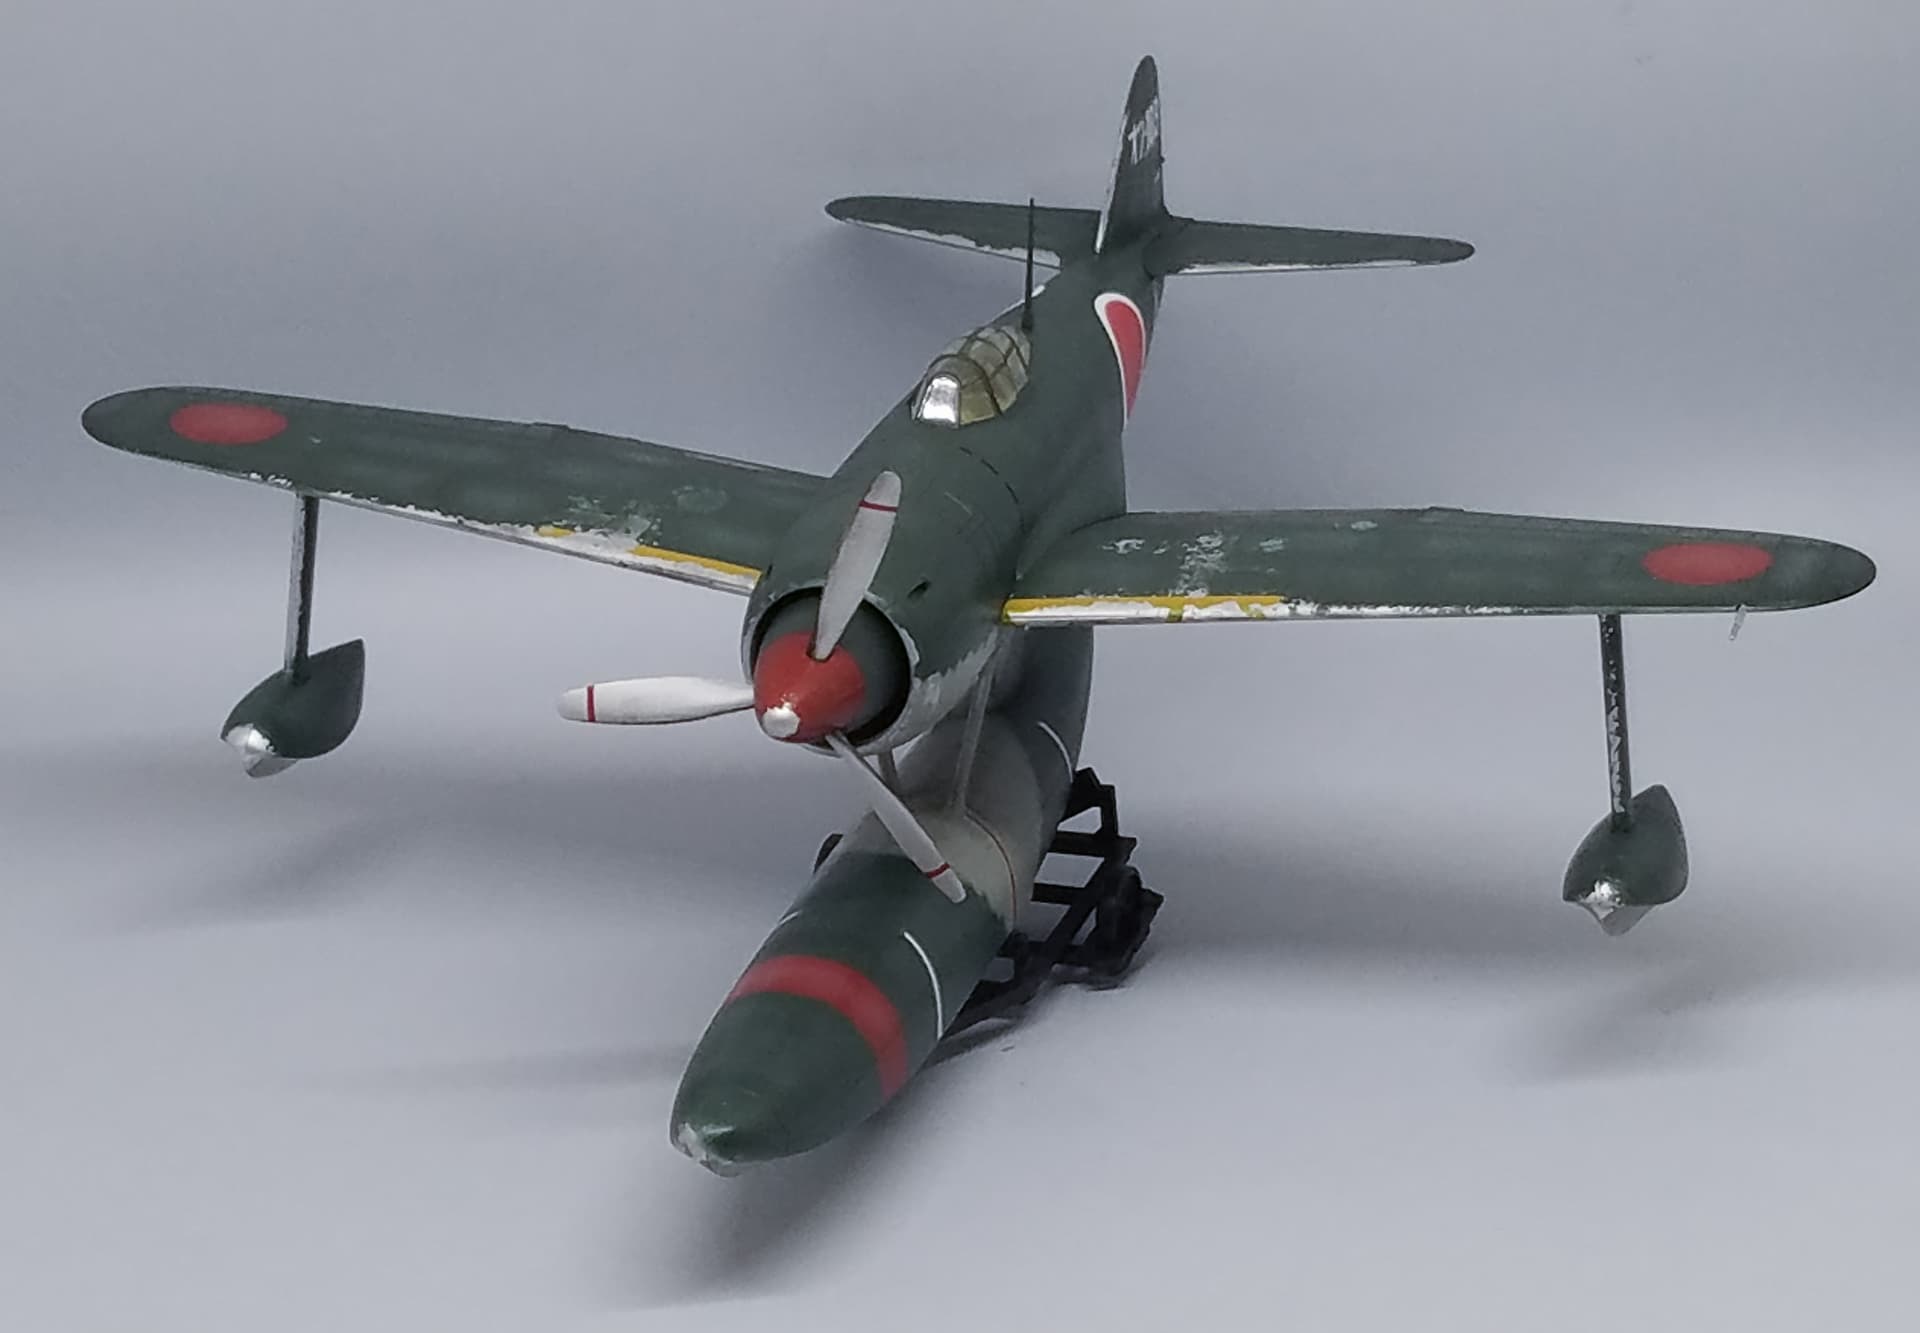
The Type 21 Zero was the true production model of the original design with the inclusion of folding wing-tips for carrier operations. As such, in my opinion the best variant per the original design IJN requirements. Range for its time was unheard of, speed and firepower, made it the most advanced fighter in the Asia/Pacific theater when introduced. These pluses of range, speed and firepower would be offset by the design sacrificing any defensive weight (armor, sealing fuel tanks, etc.), while most aircraft of the time had these deficiencies, the IJN overcame them with having highly trained pilots, something that the attrition of war would nullify in a relatively short period of time.

As part of my personal tribute to the 80th anniversary of the Battle of the Coral Sea, I focused on the primary combat aircraft of the battle, all from one ship on each side. For the US it was the USS
Lexington, and the IJN it was the Zuikaku. I decided to model Tetsuzo Iwamoto’s mount from the battle, which would be the same plane that he flew during the Pearl Harbor attack. This would mean a Zero roughly 5 - 6 months old, where per reports the nice green/grey color began to oxidize and turn to more of a grey. For this build I tried to replicate this weathering.

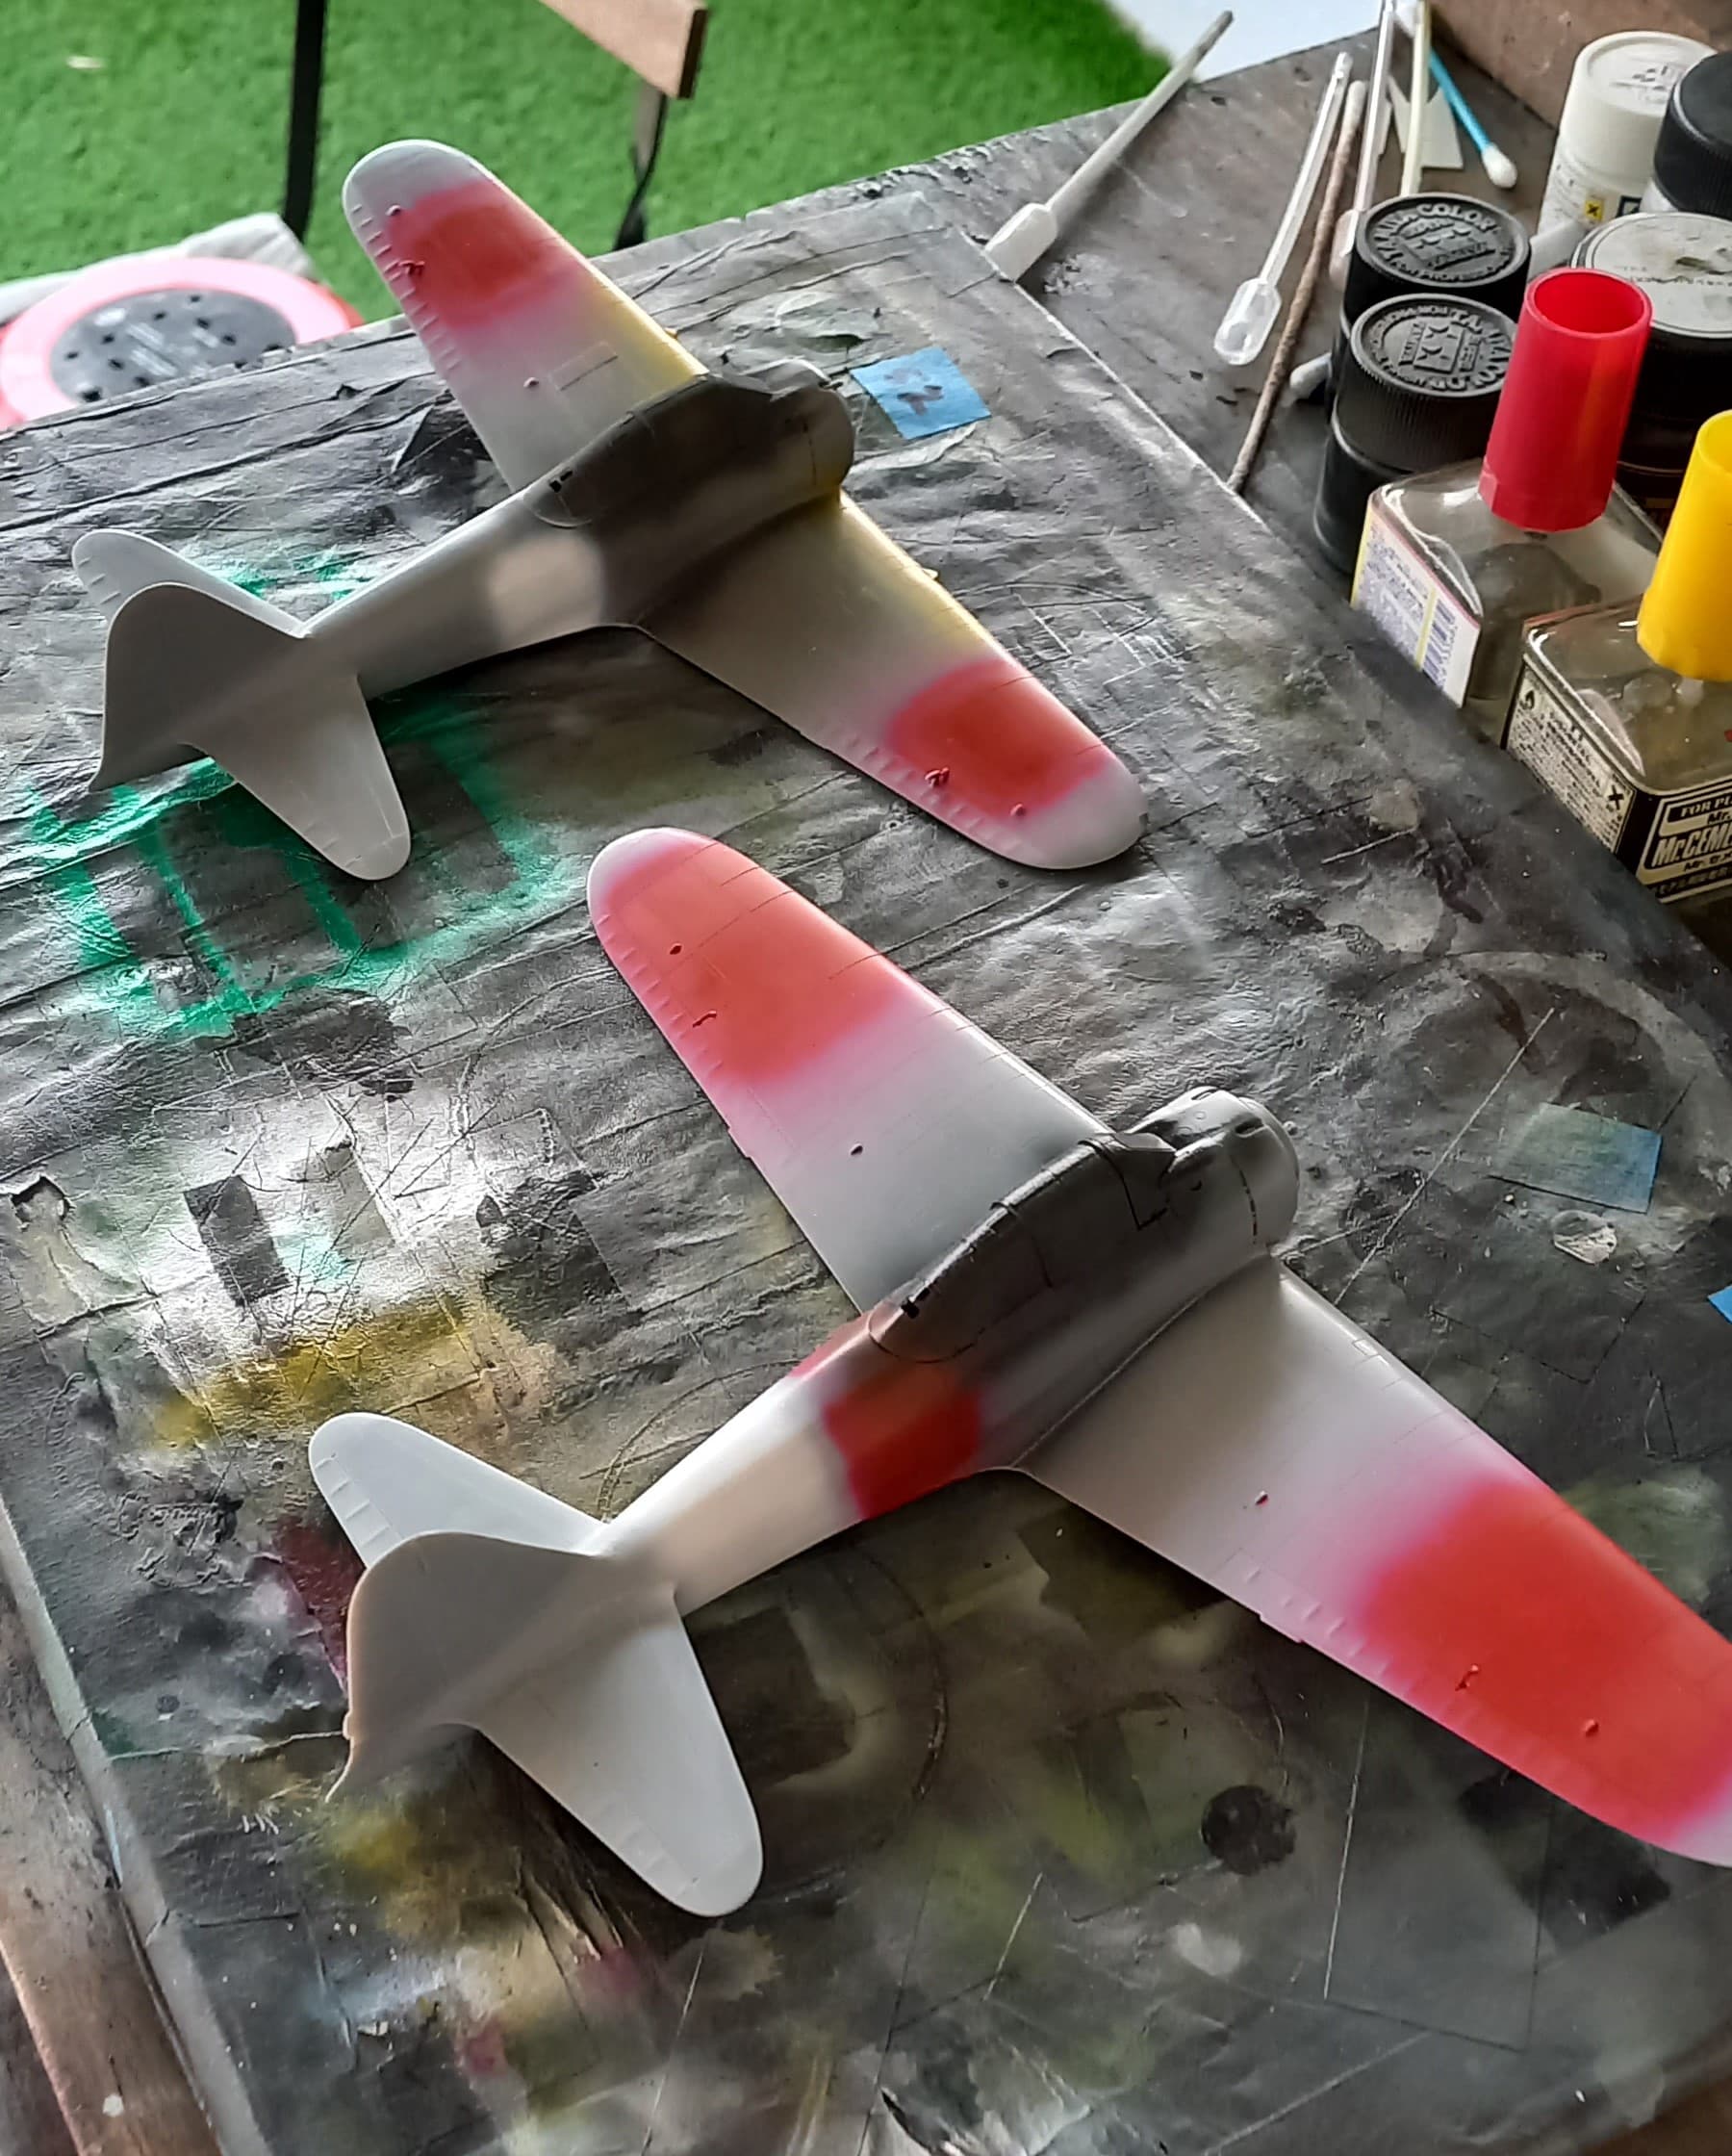
As with the Type 52 build the first order of bussiness was to lay down the insigna and marking colors white and red.

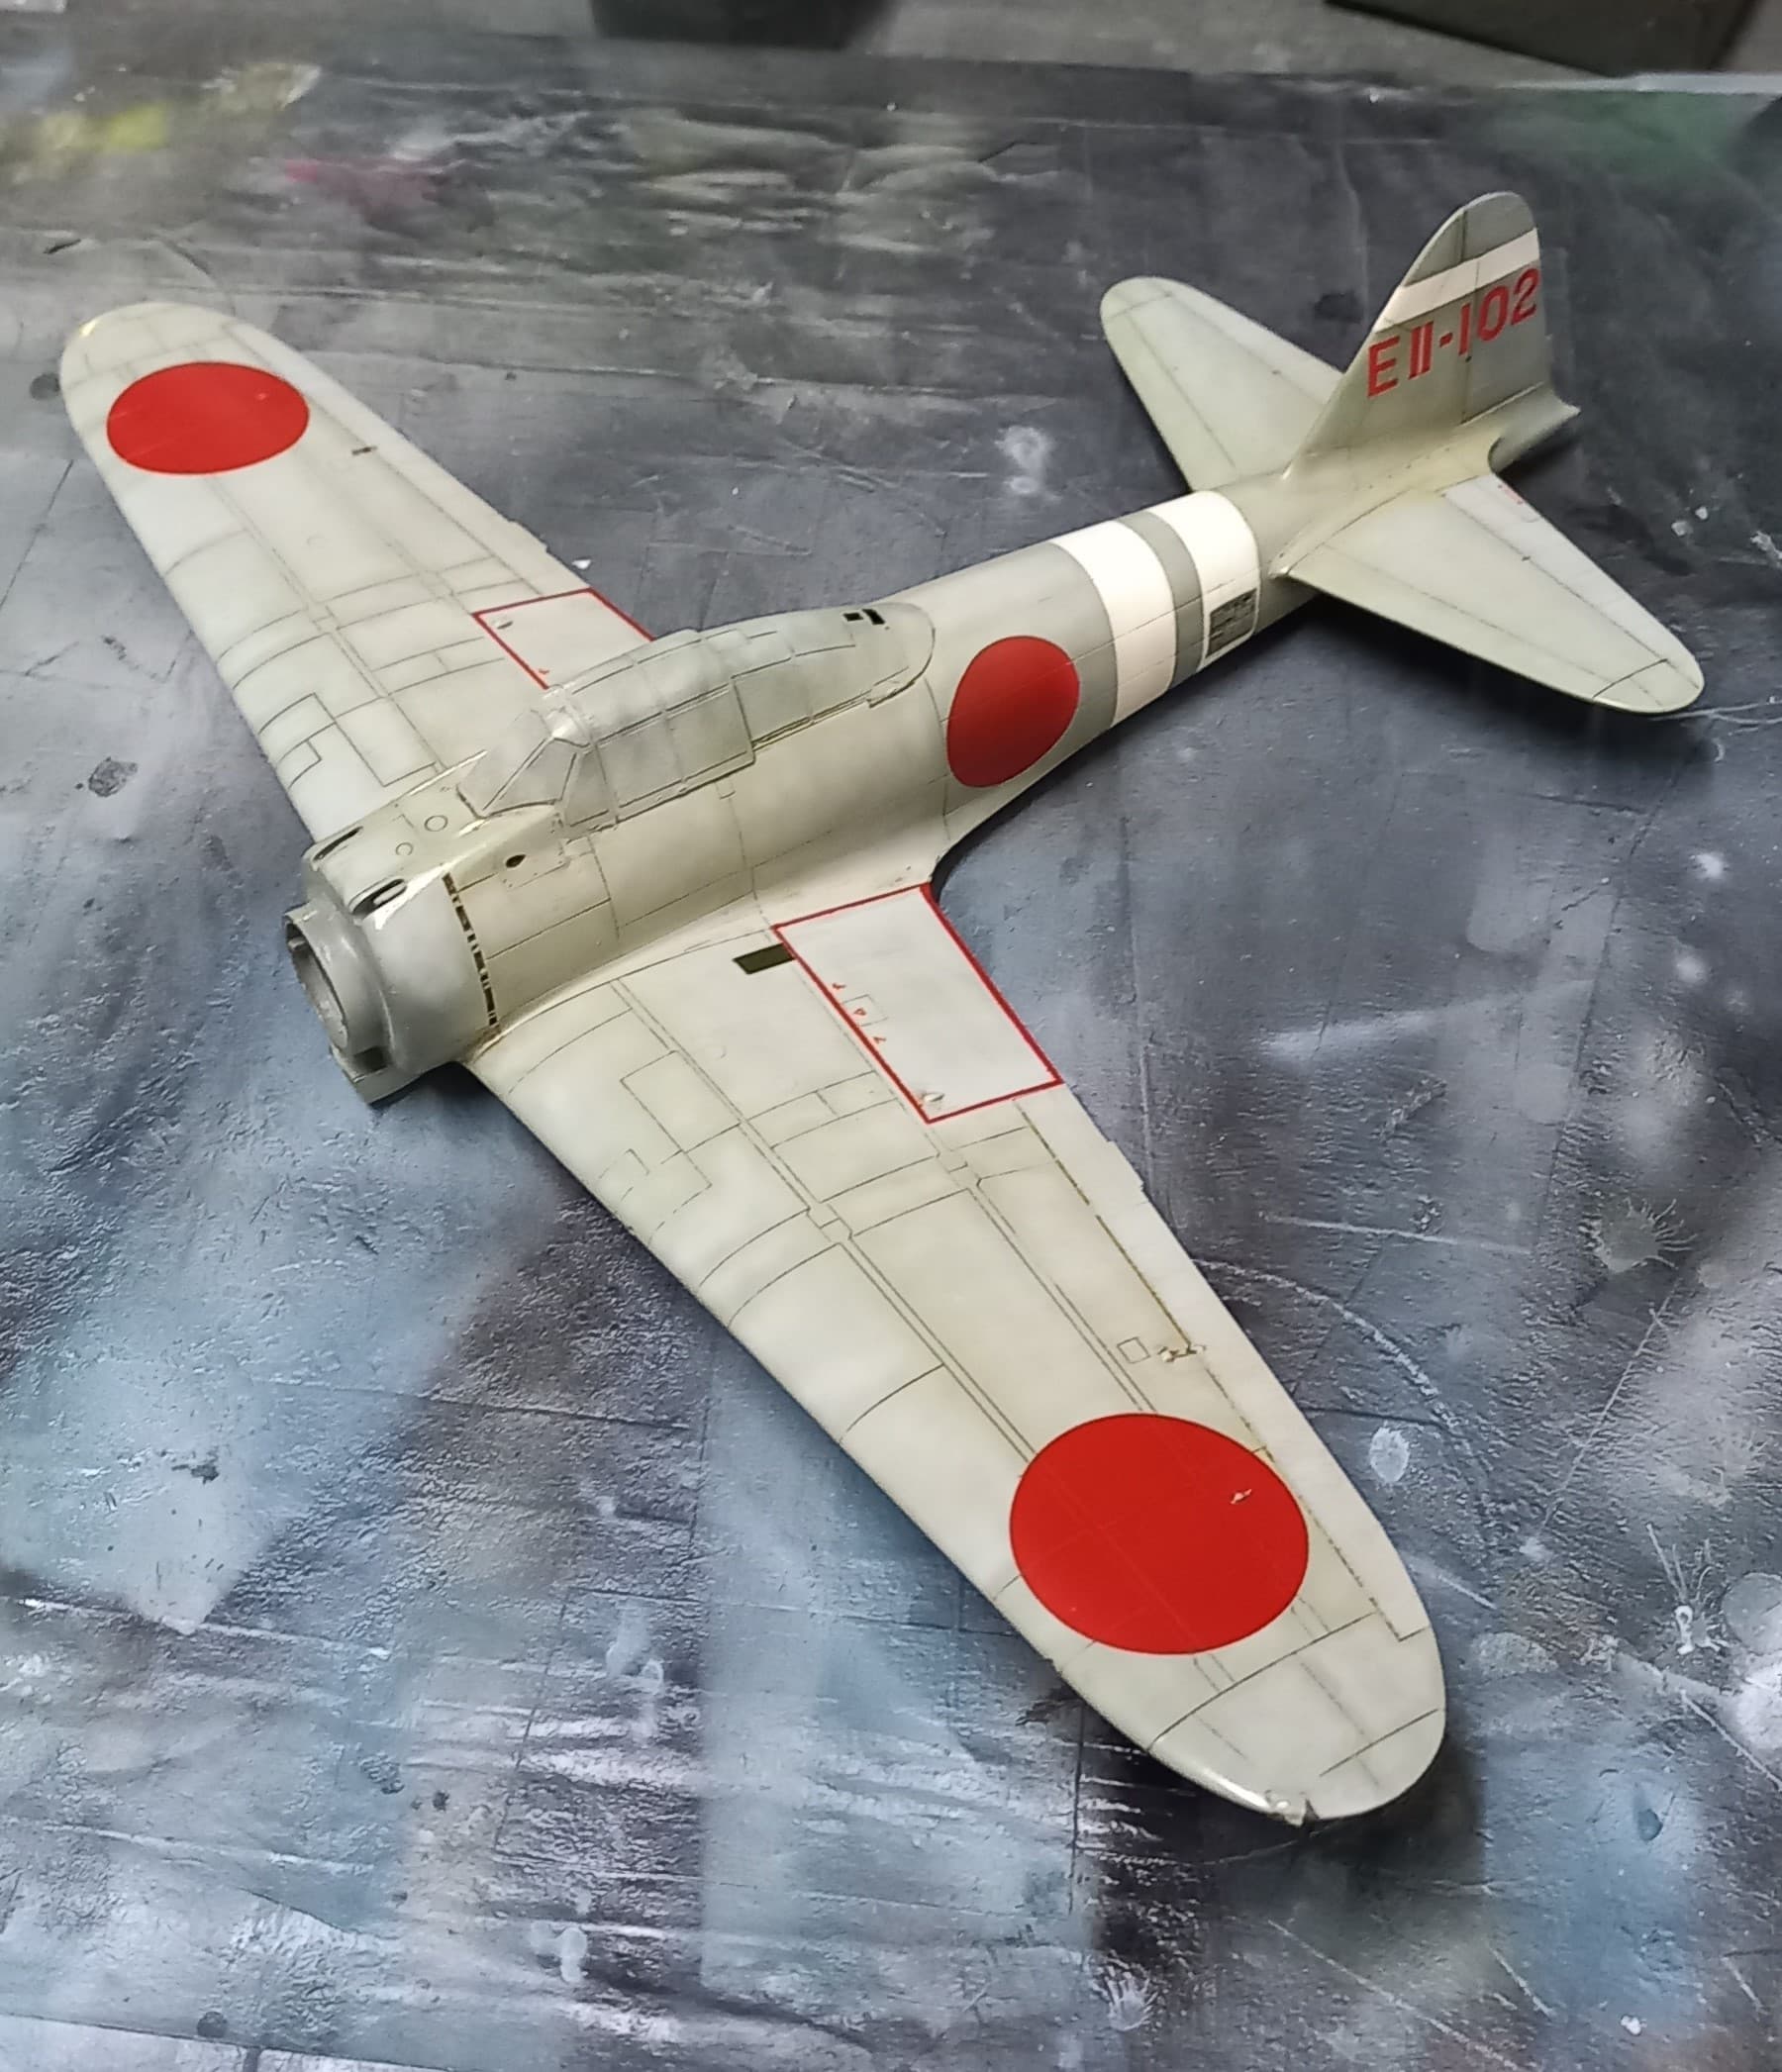
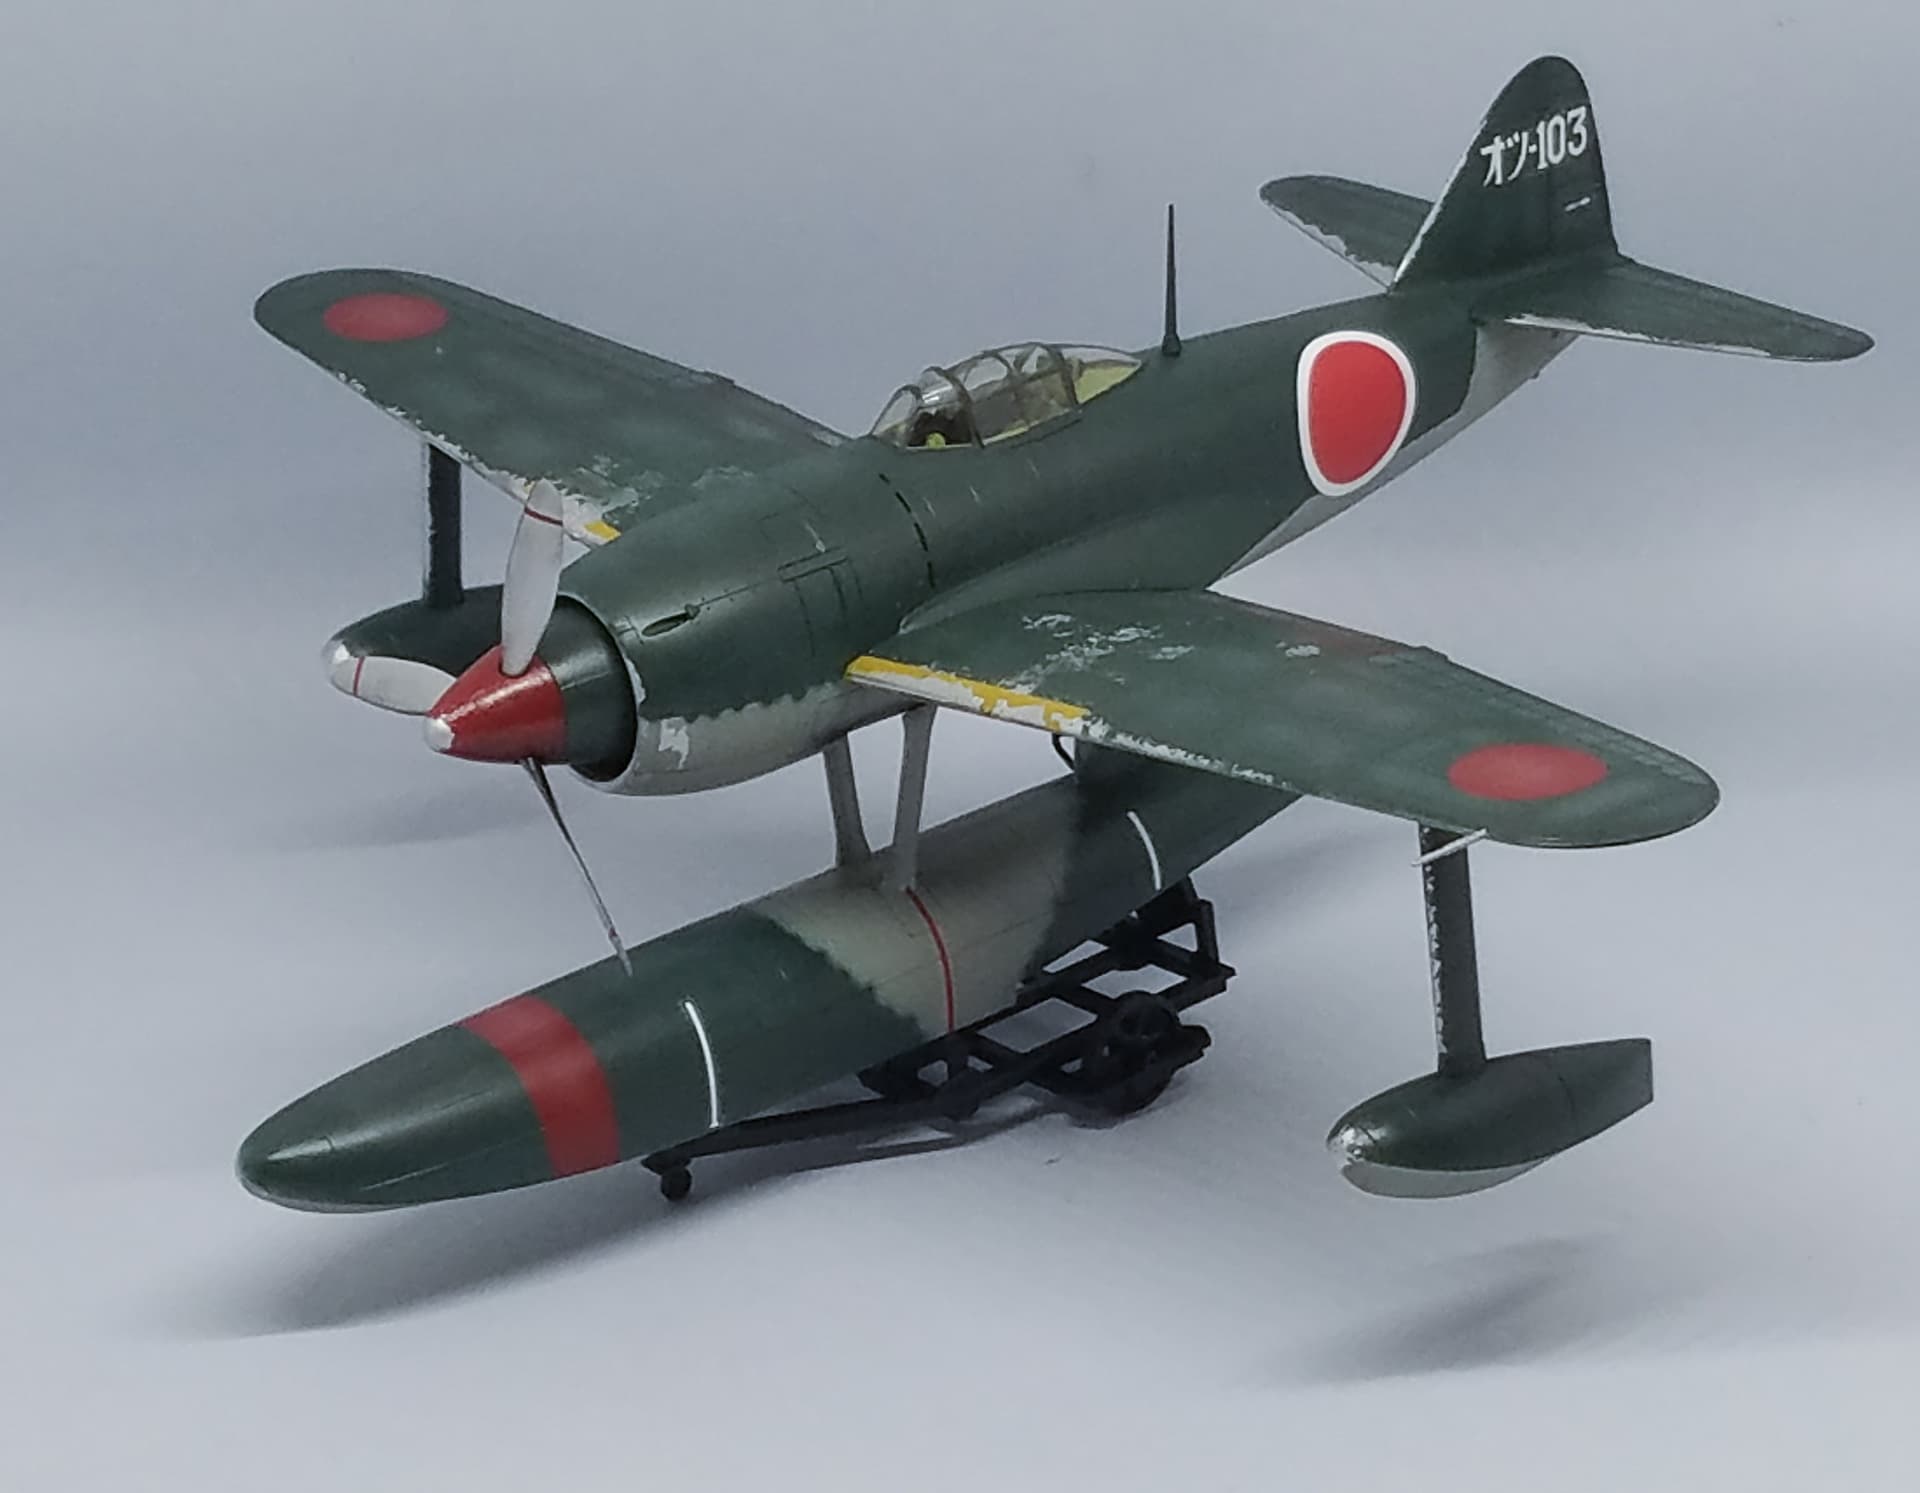
Type 21 in the forefront:

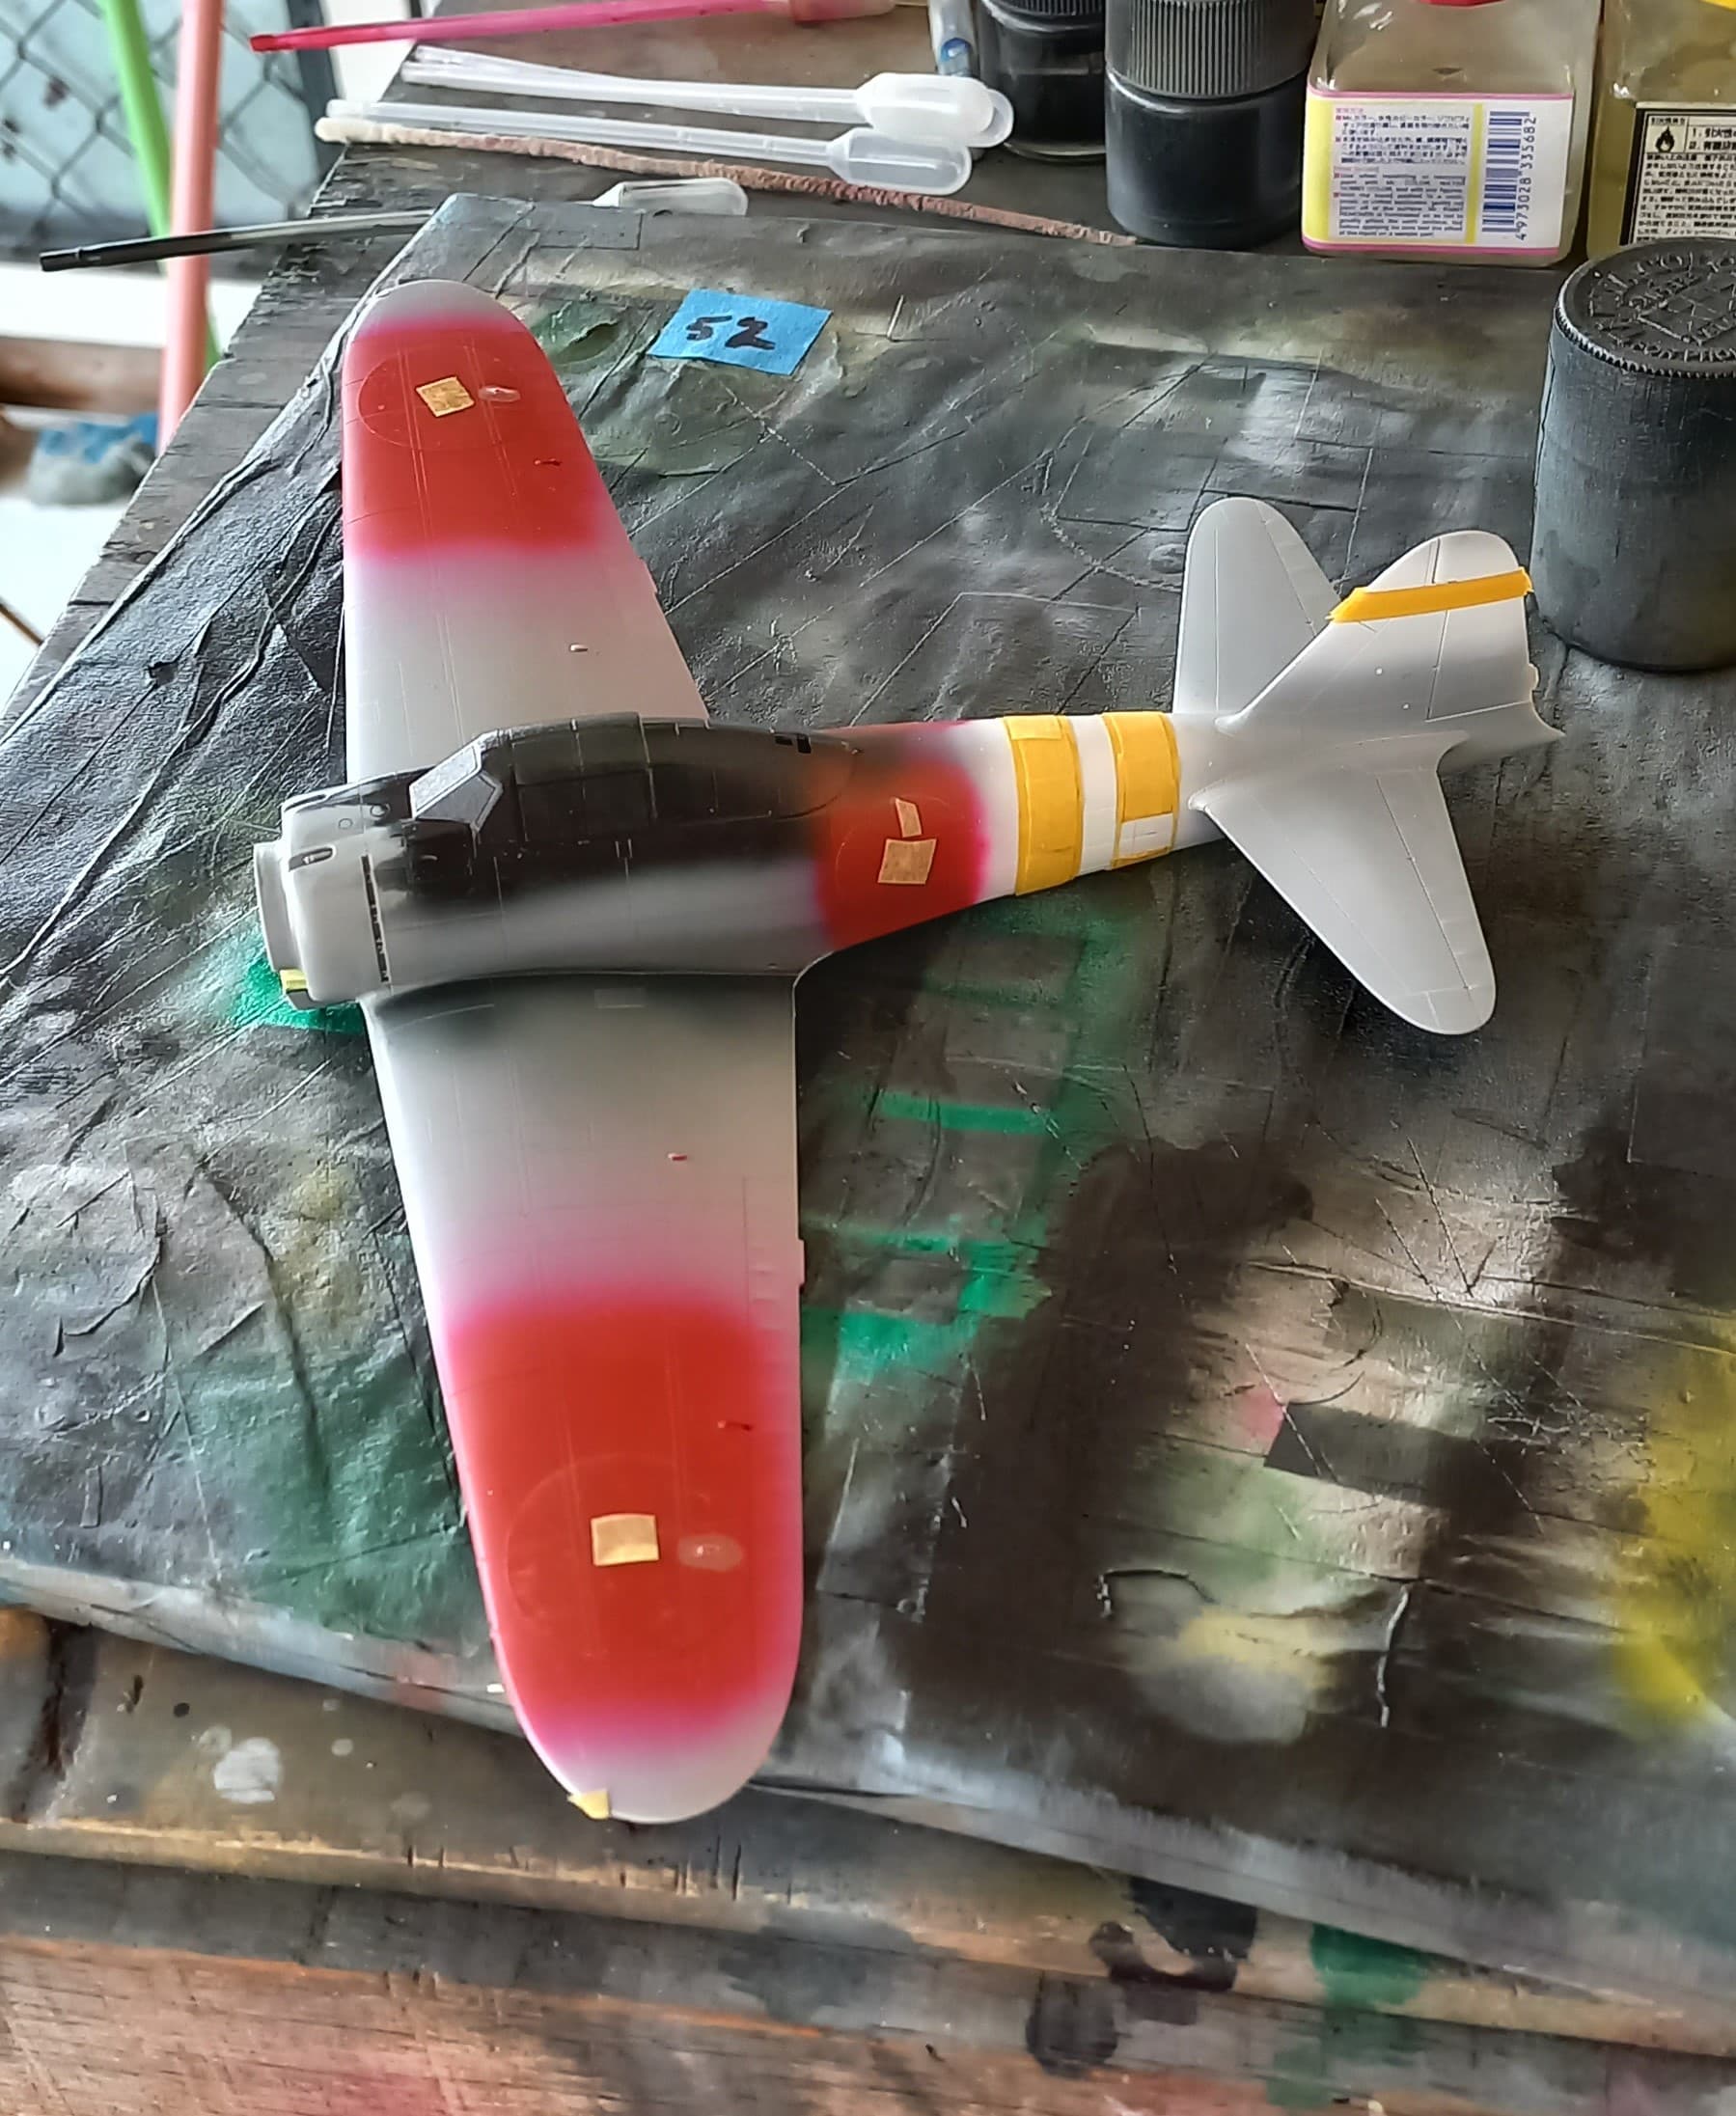
Next, I masked off the hinomaru’s and stripe areas.

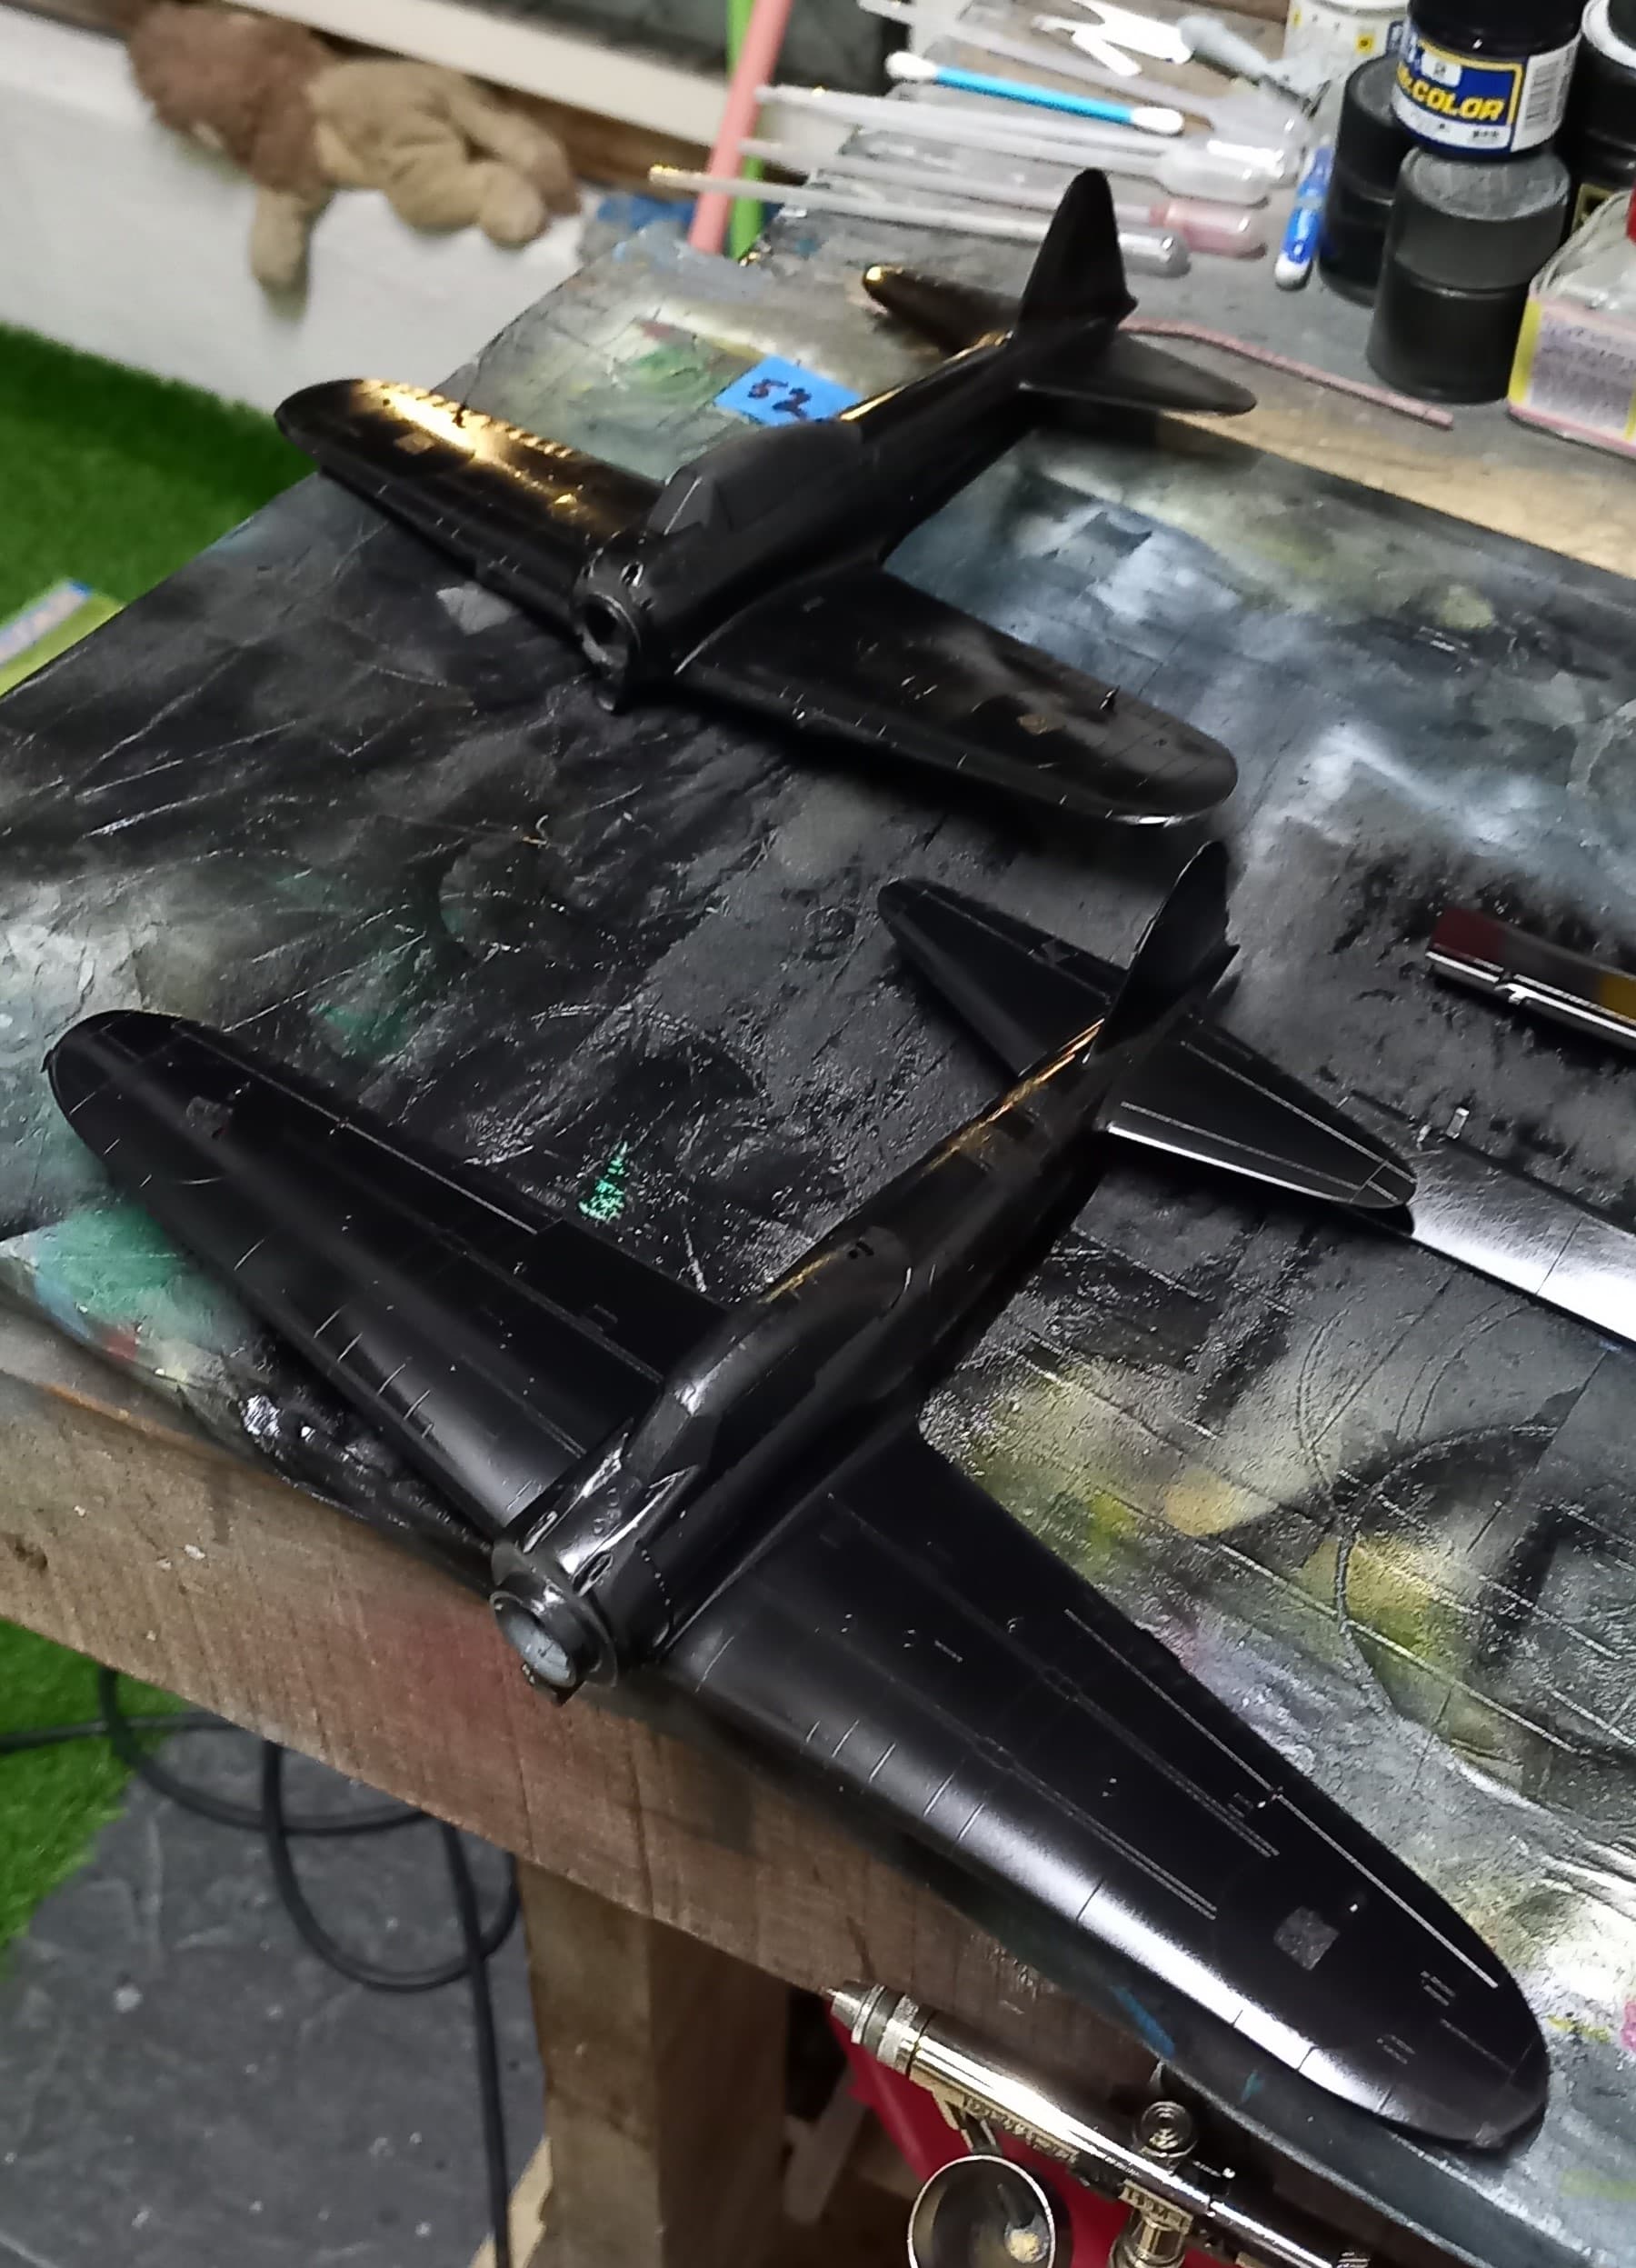
Then I gave the bird a base coat of gloss black. In the past I’ve used a dark brown base coat, but feeling a bit adventurous, I chose black to see if it would make obvious differences in weathering effects.

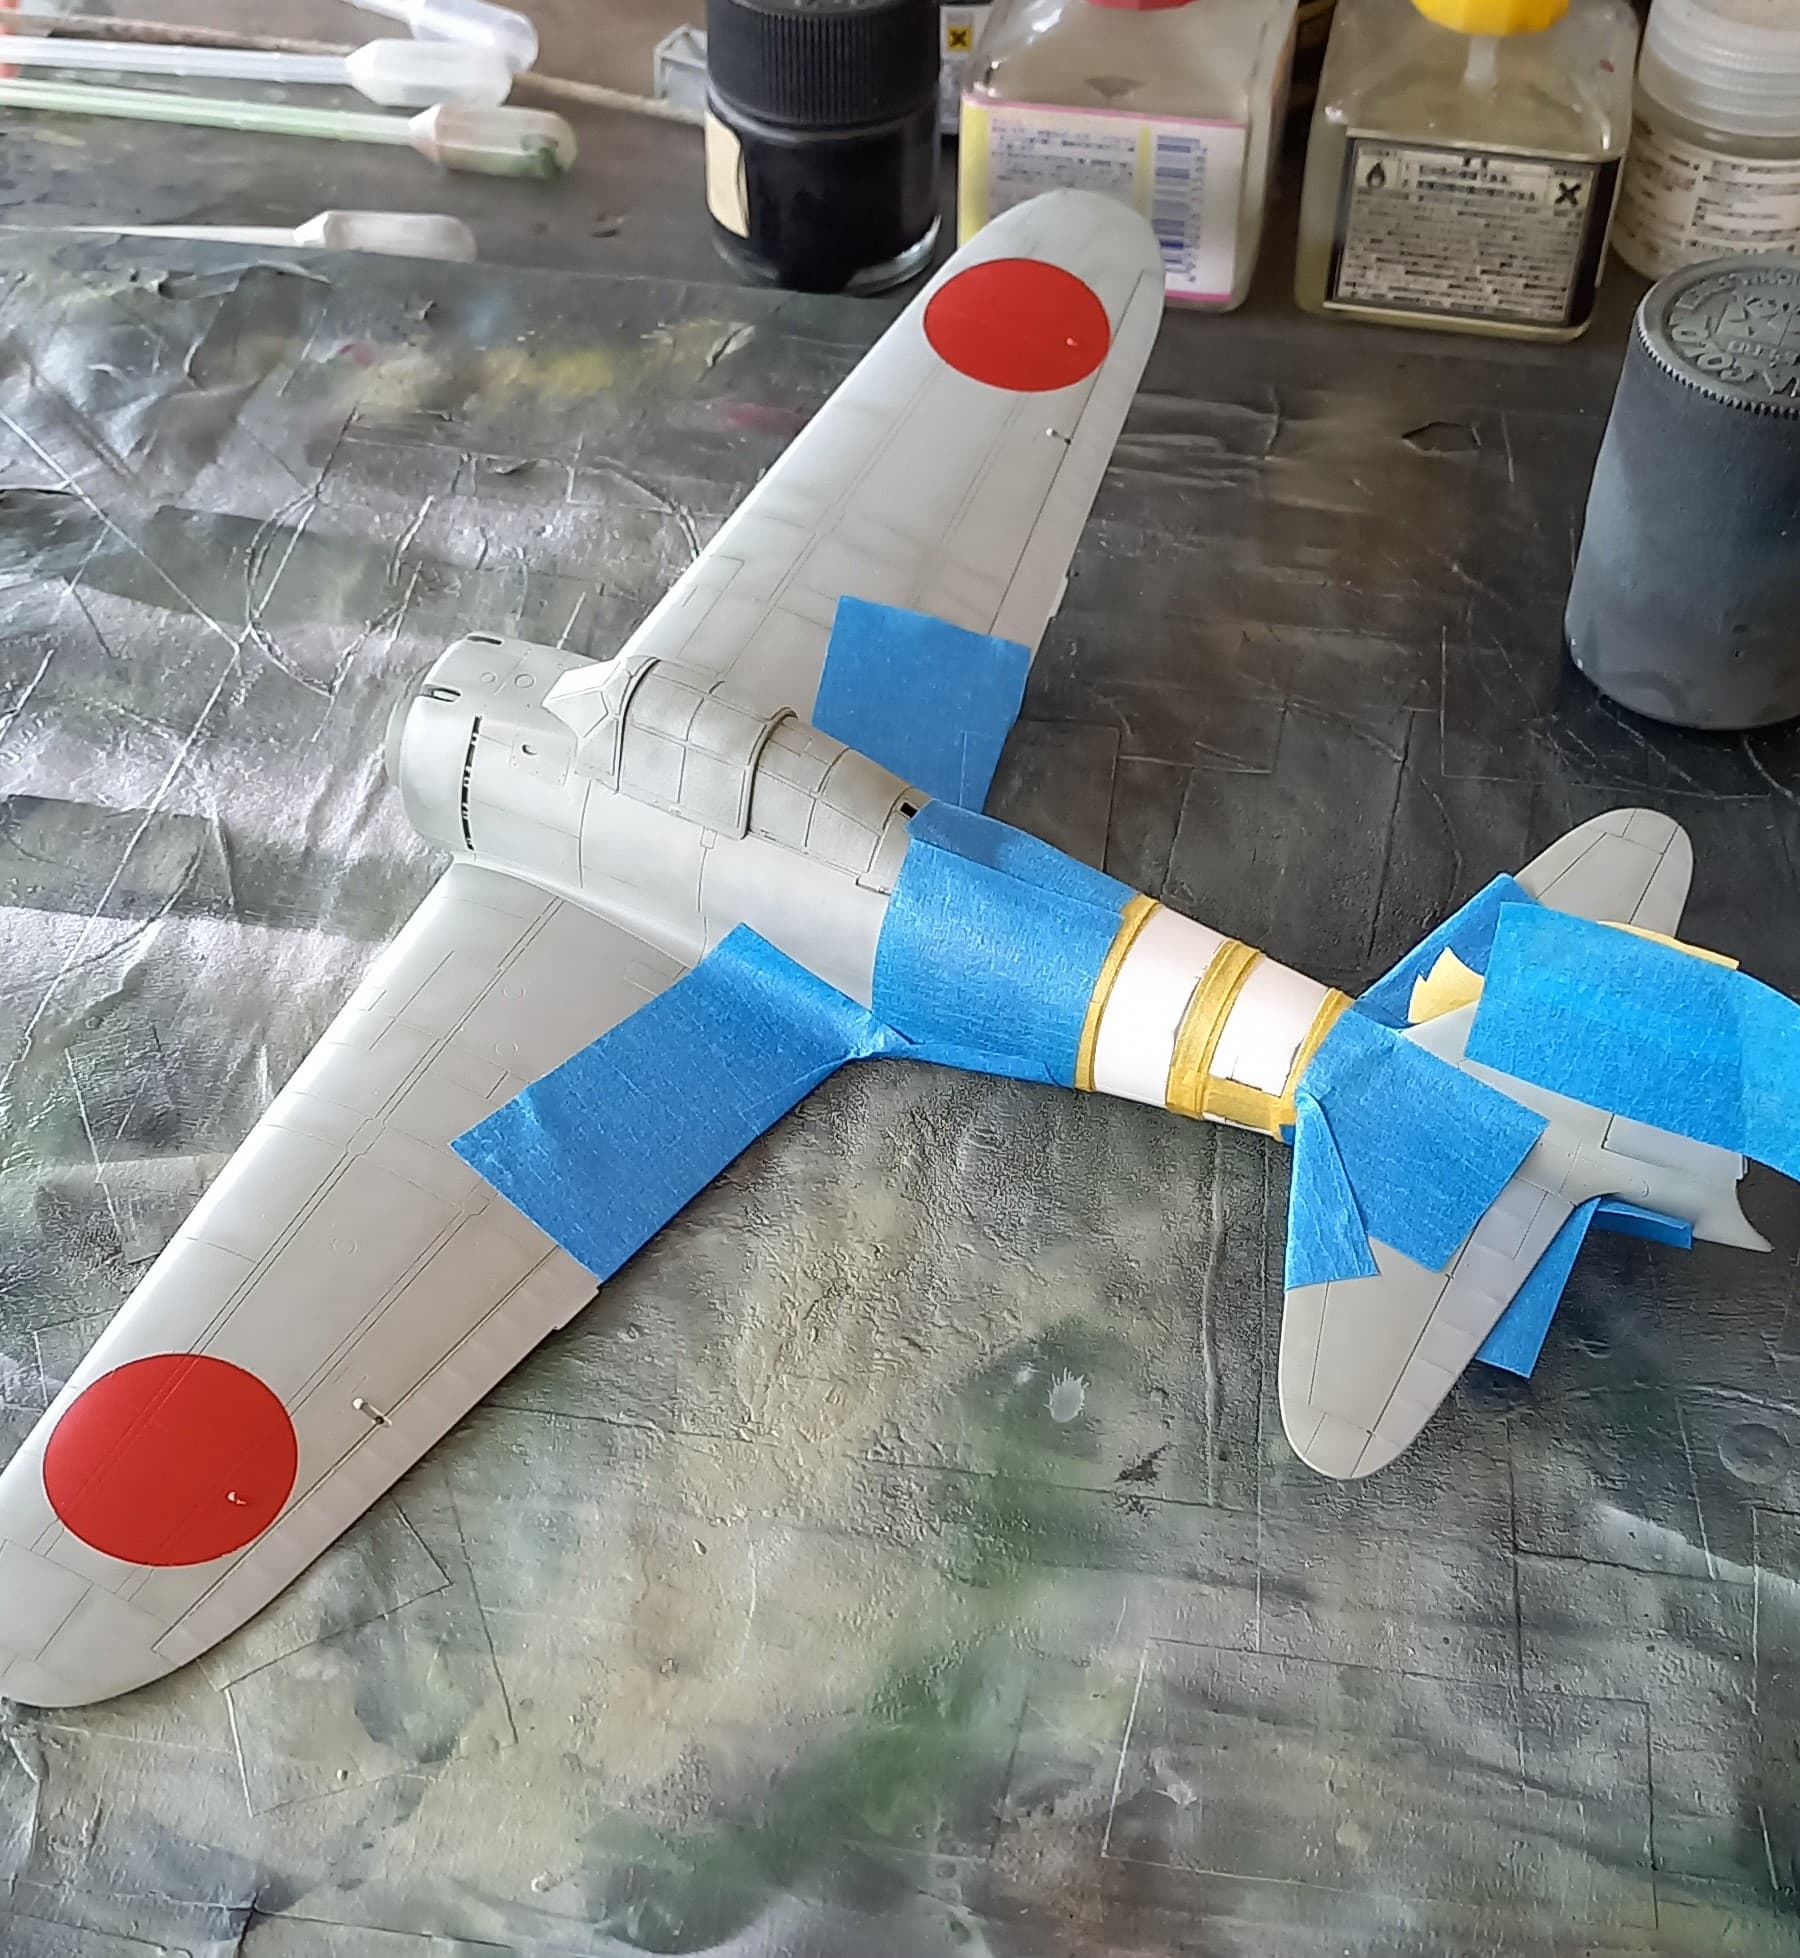
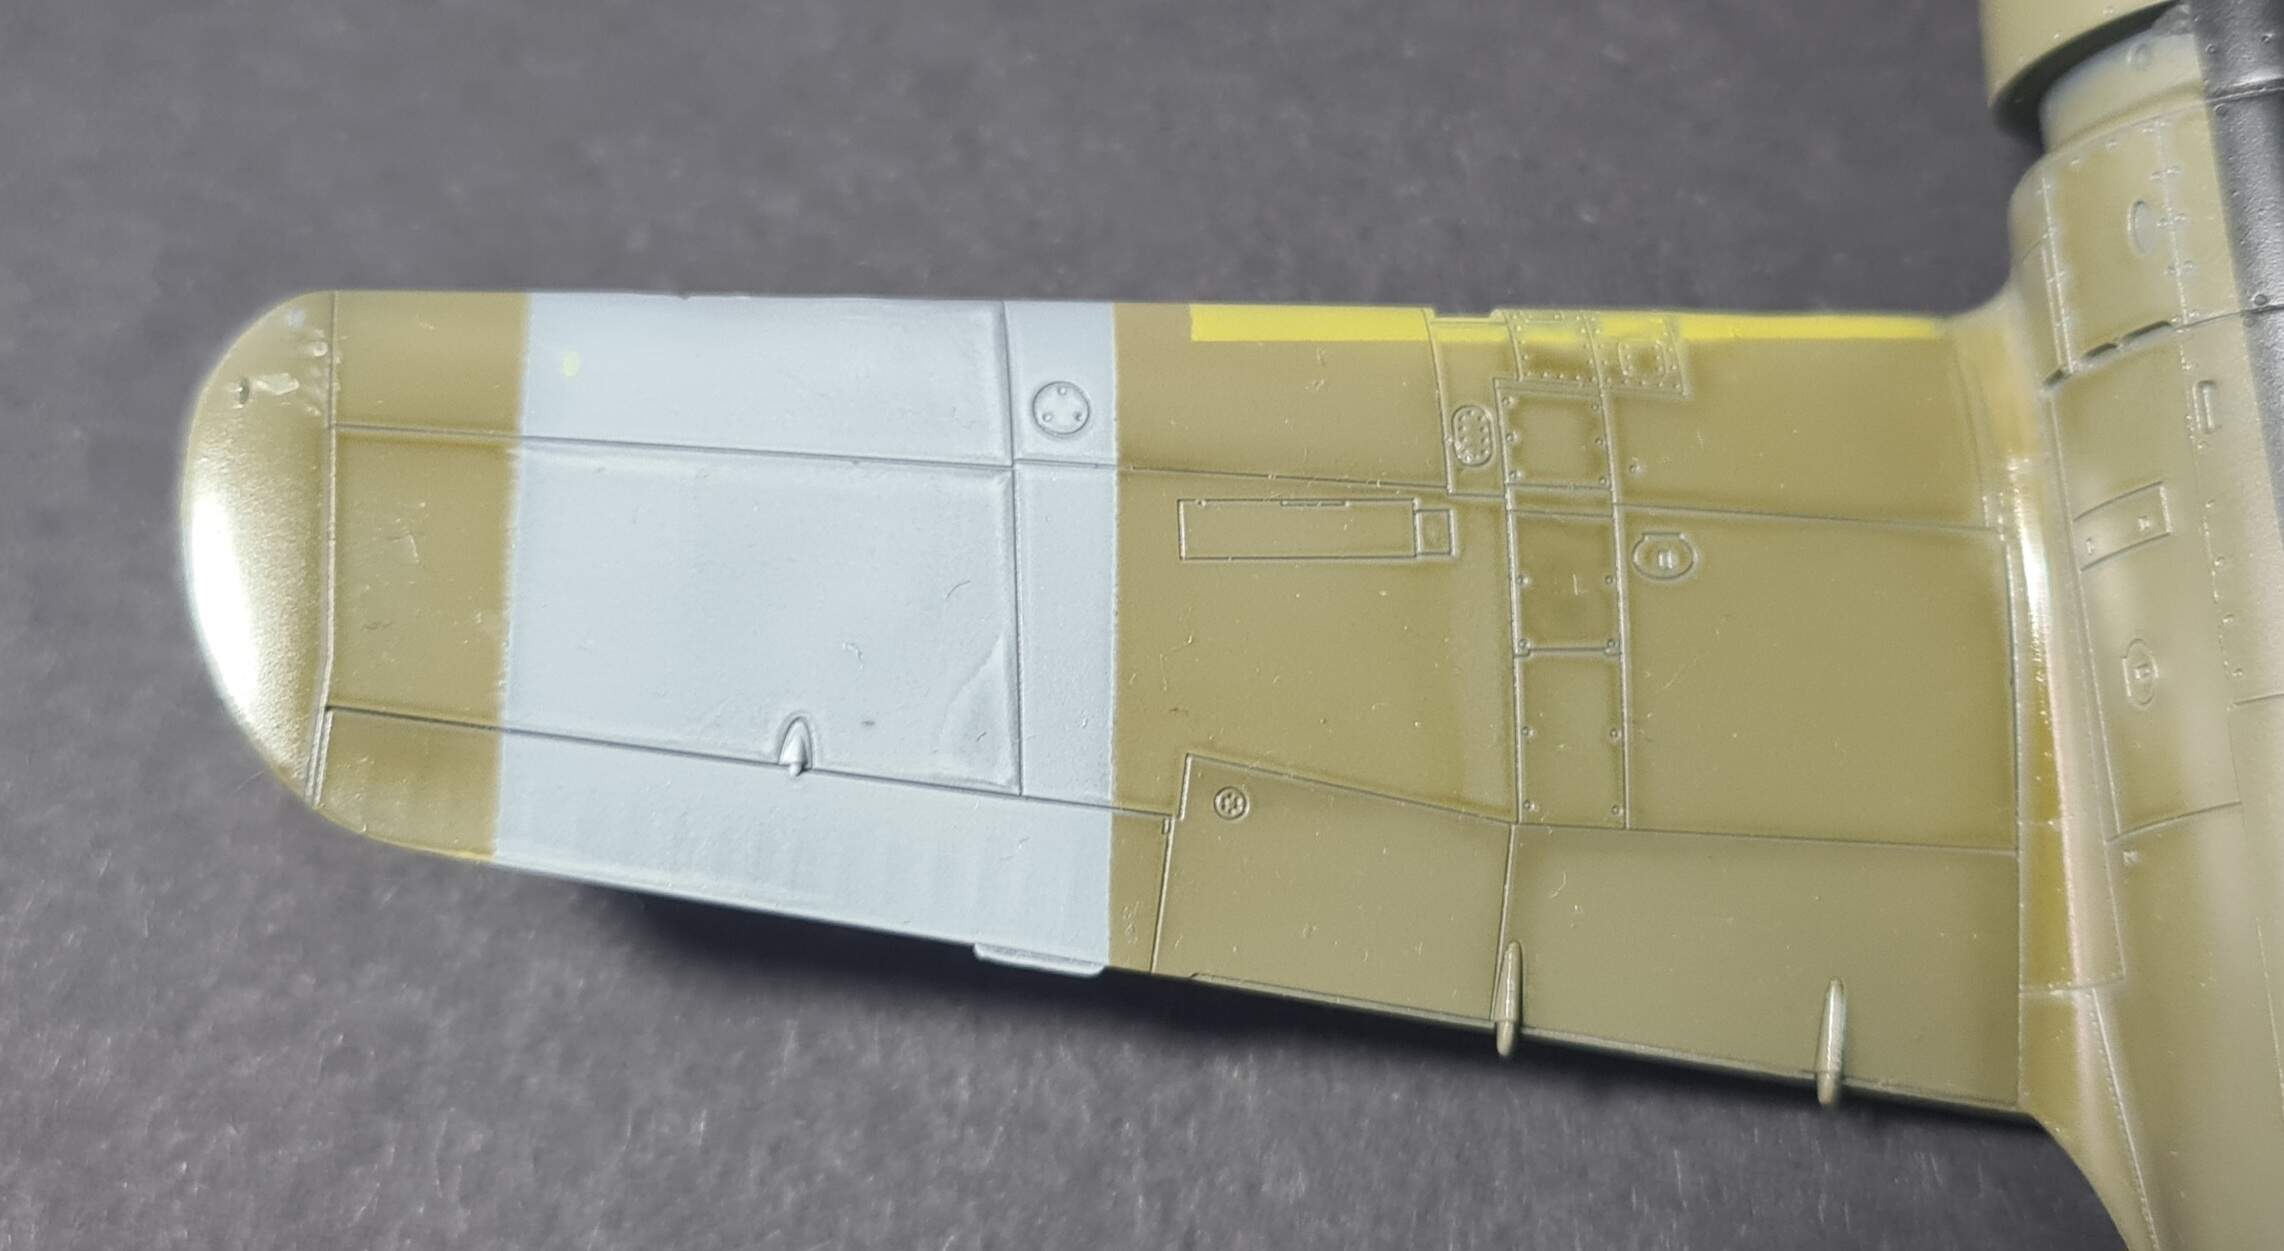
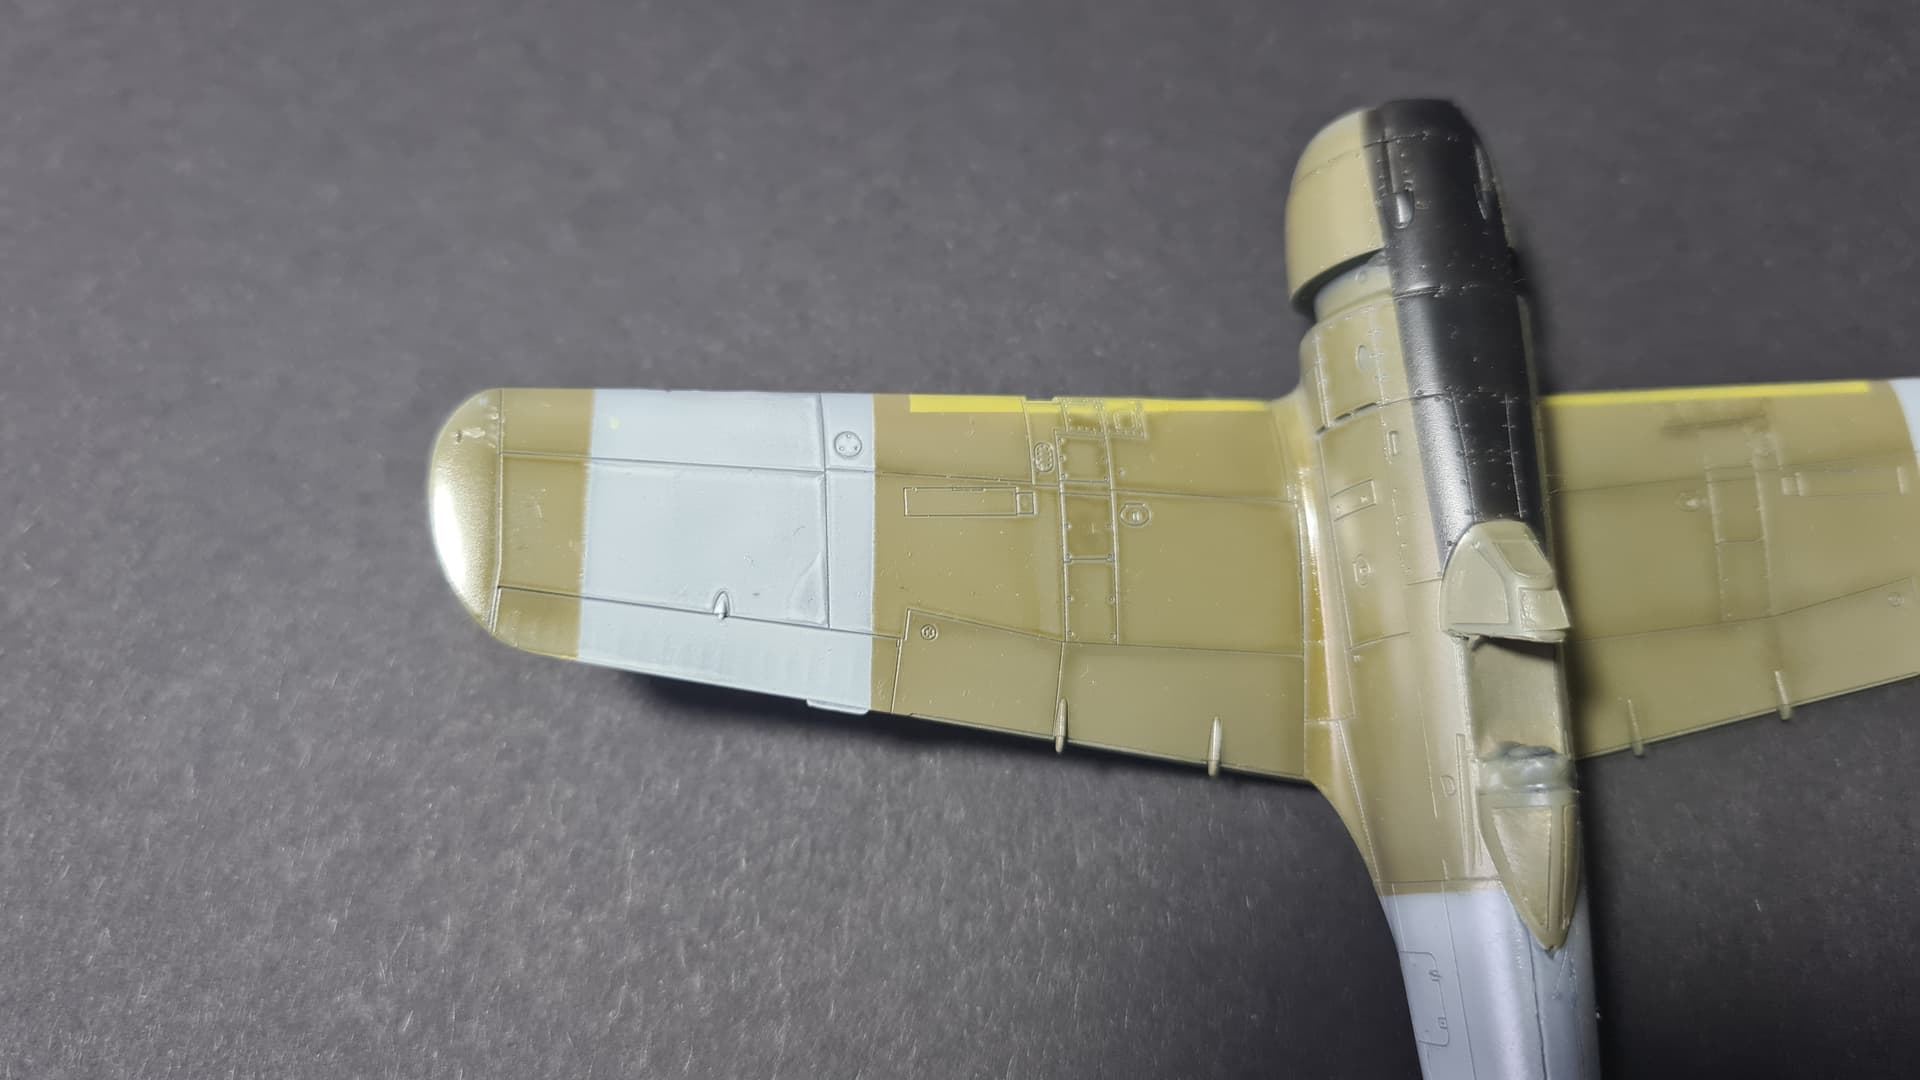
I then proceeded to play with white and IJN grey mottling, and gave it a light overcoat of JN grey, Mr Color 15. There is a slight difference between Mr. Color and Tamiya JN grey, with the Tamiya having a slight greenish hue to my eyes, hence the choice of Mr. Color. After removing the masks, I re-masked to clean up the stripes on the fuselage to assure a nice demarcation which would include the “window” for the planes data/specs markings.

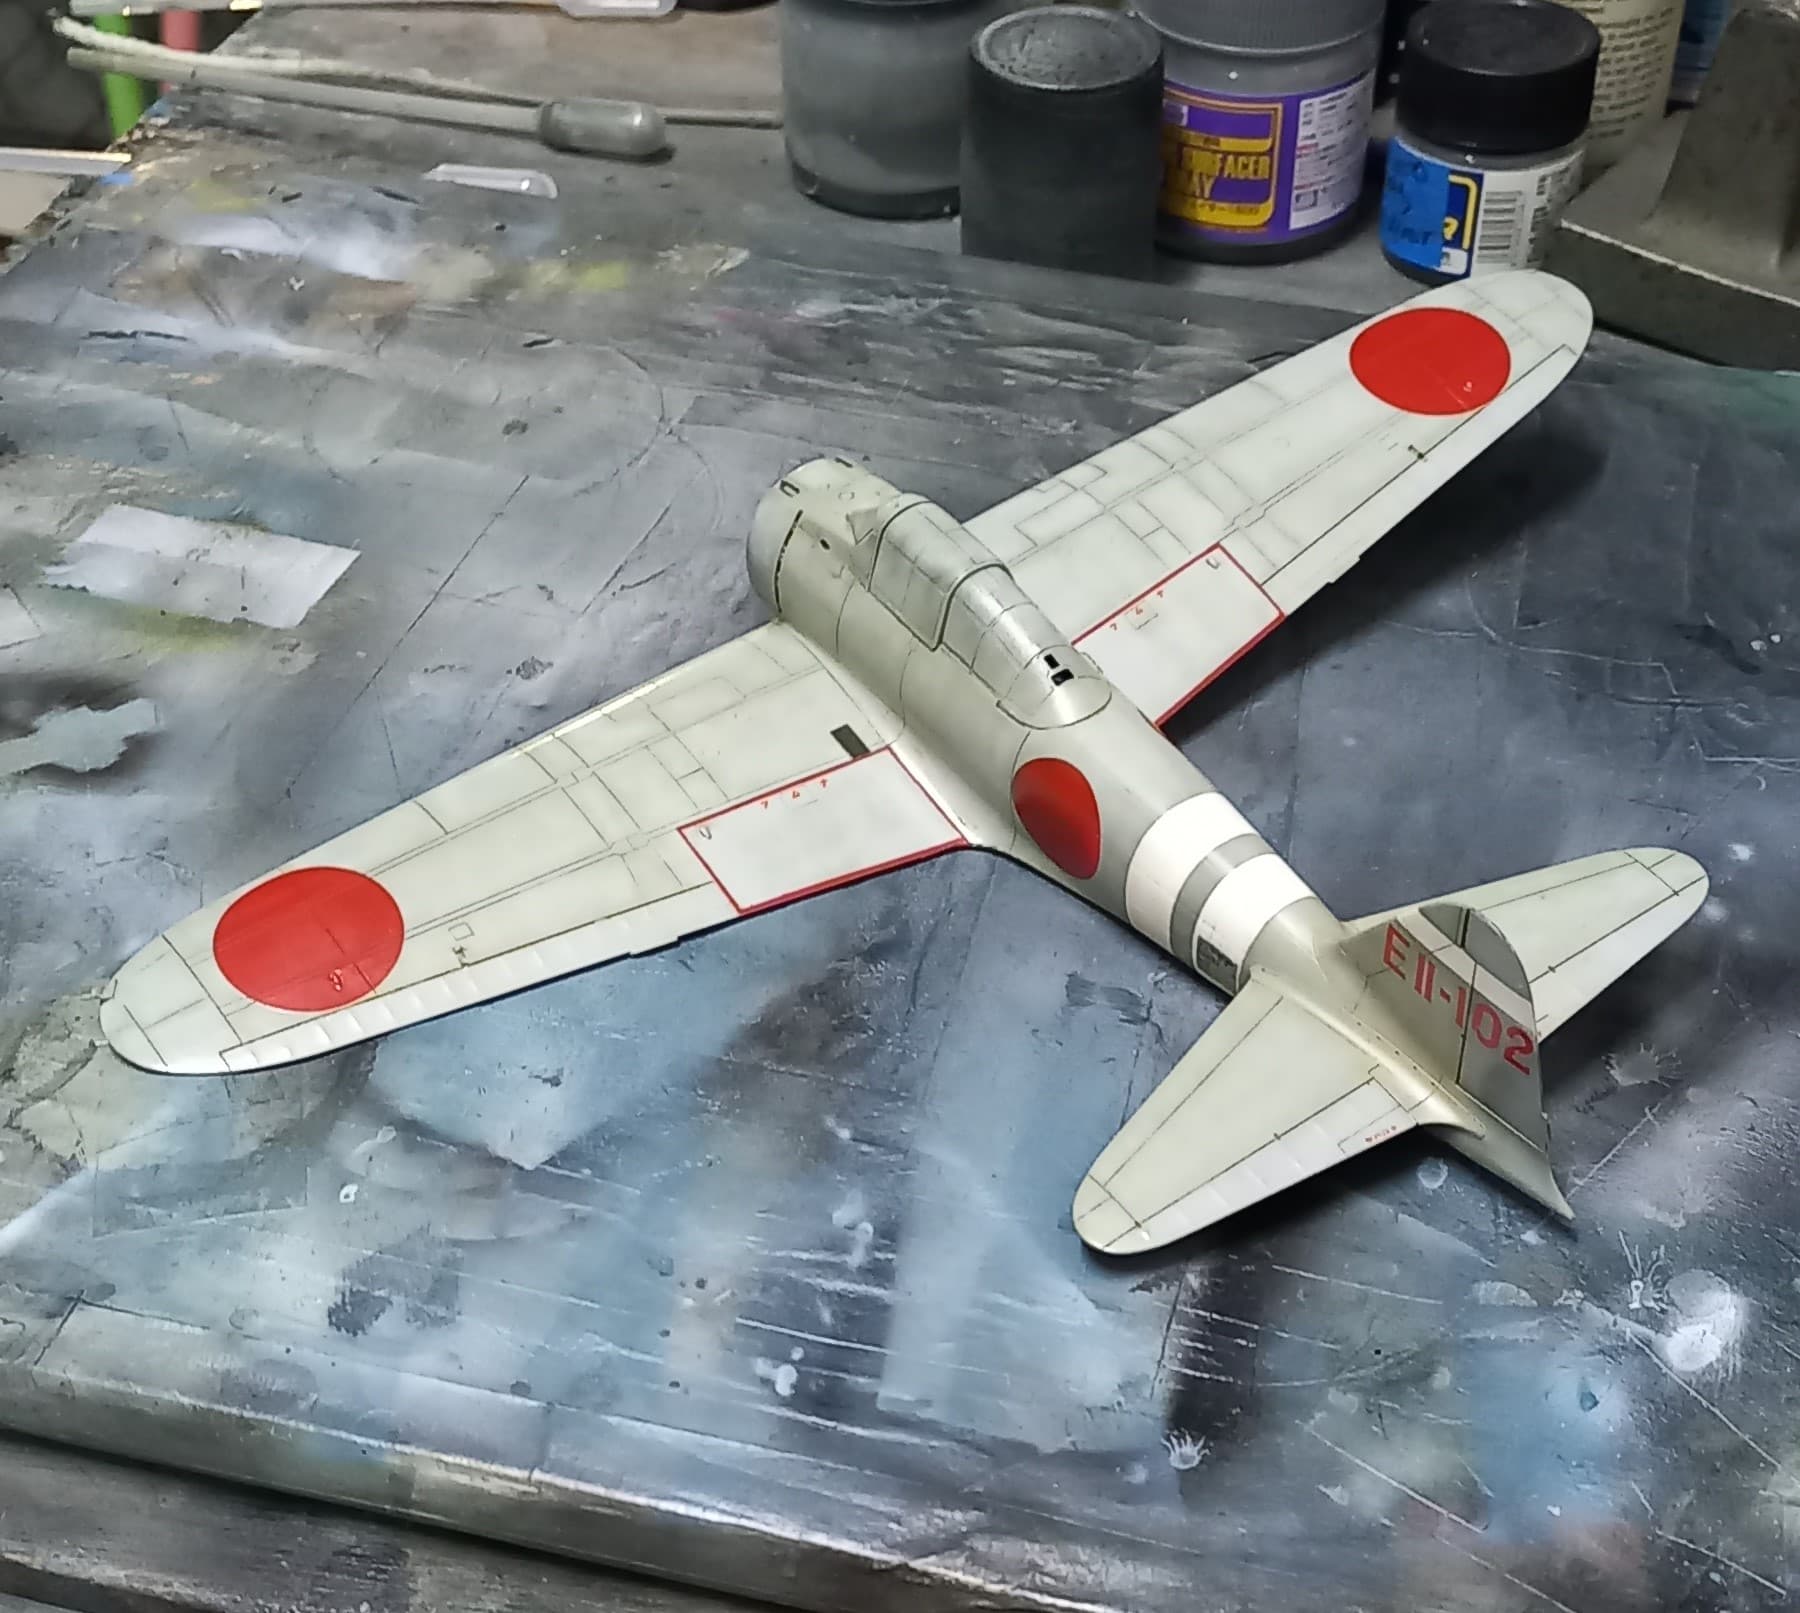
While this looked fair, based on photos from the battle of Celyon I felt that there should be a bit more green/grey added. Using Tamiya XF-76 I proceeded to highlight the panel lines, and then blended everything with a very dilute JN grey.

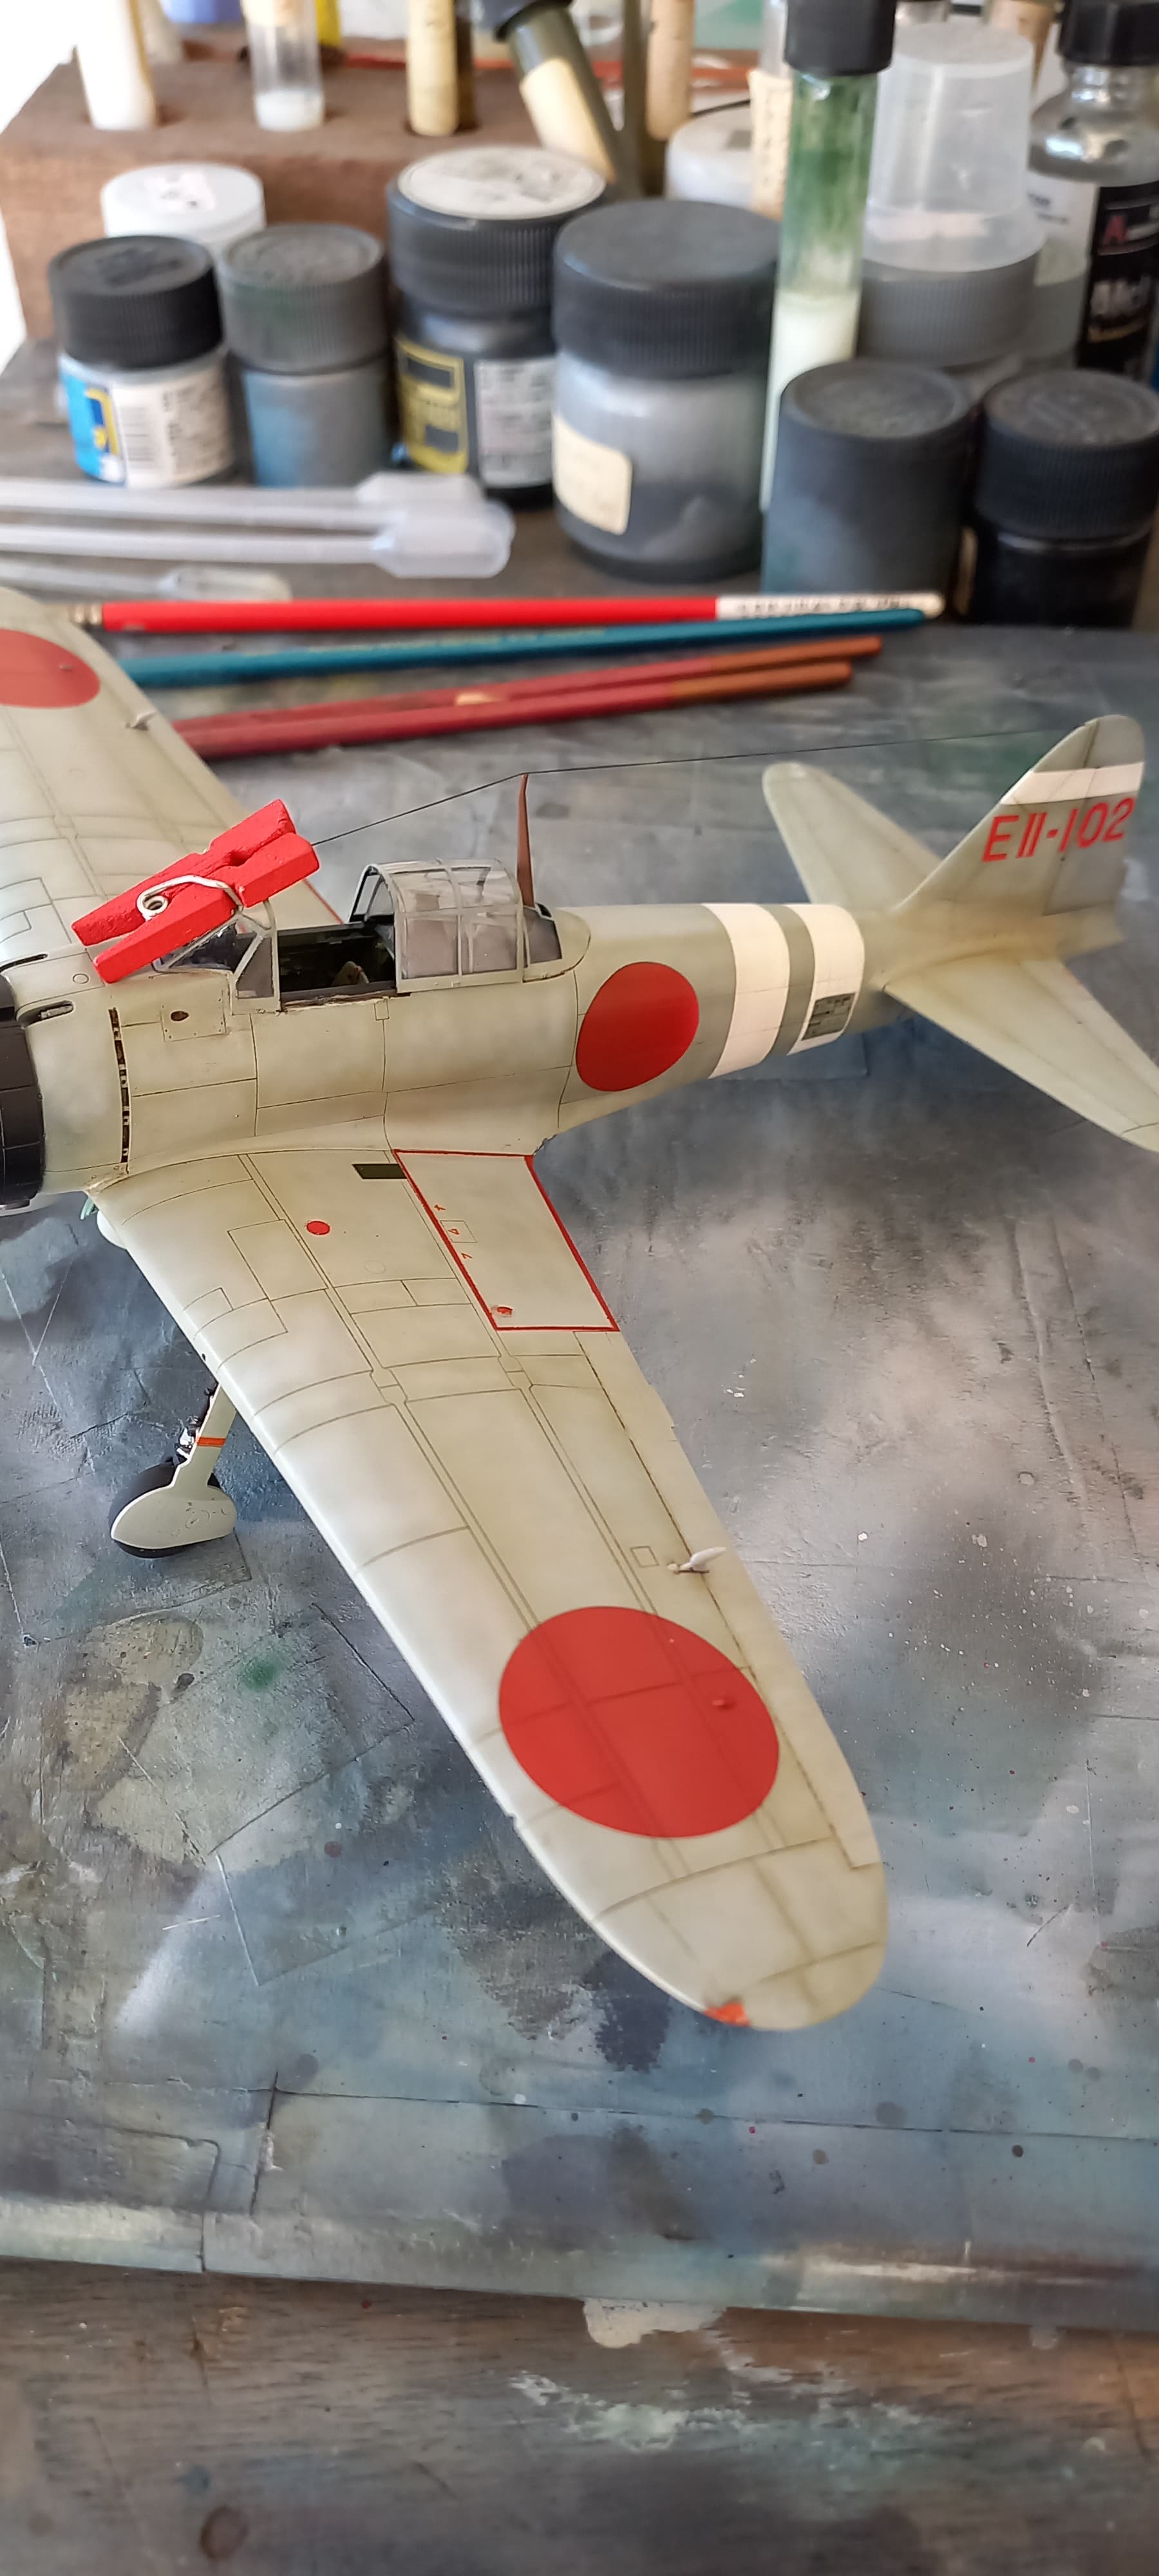
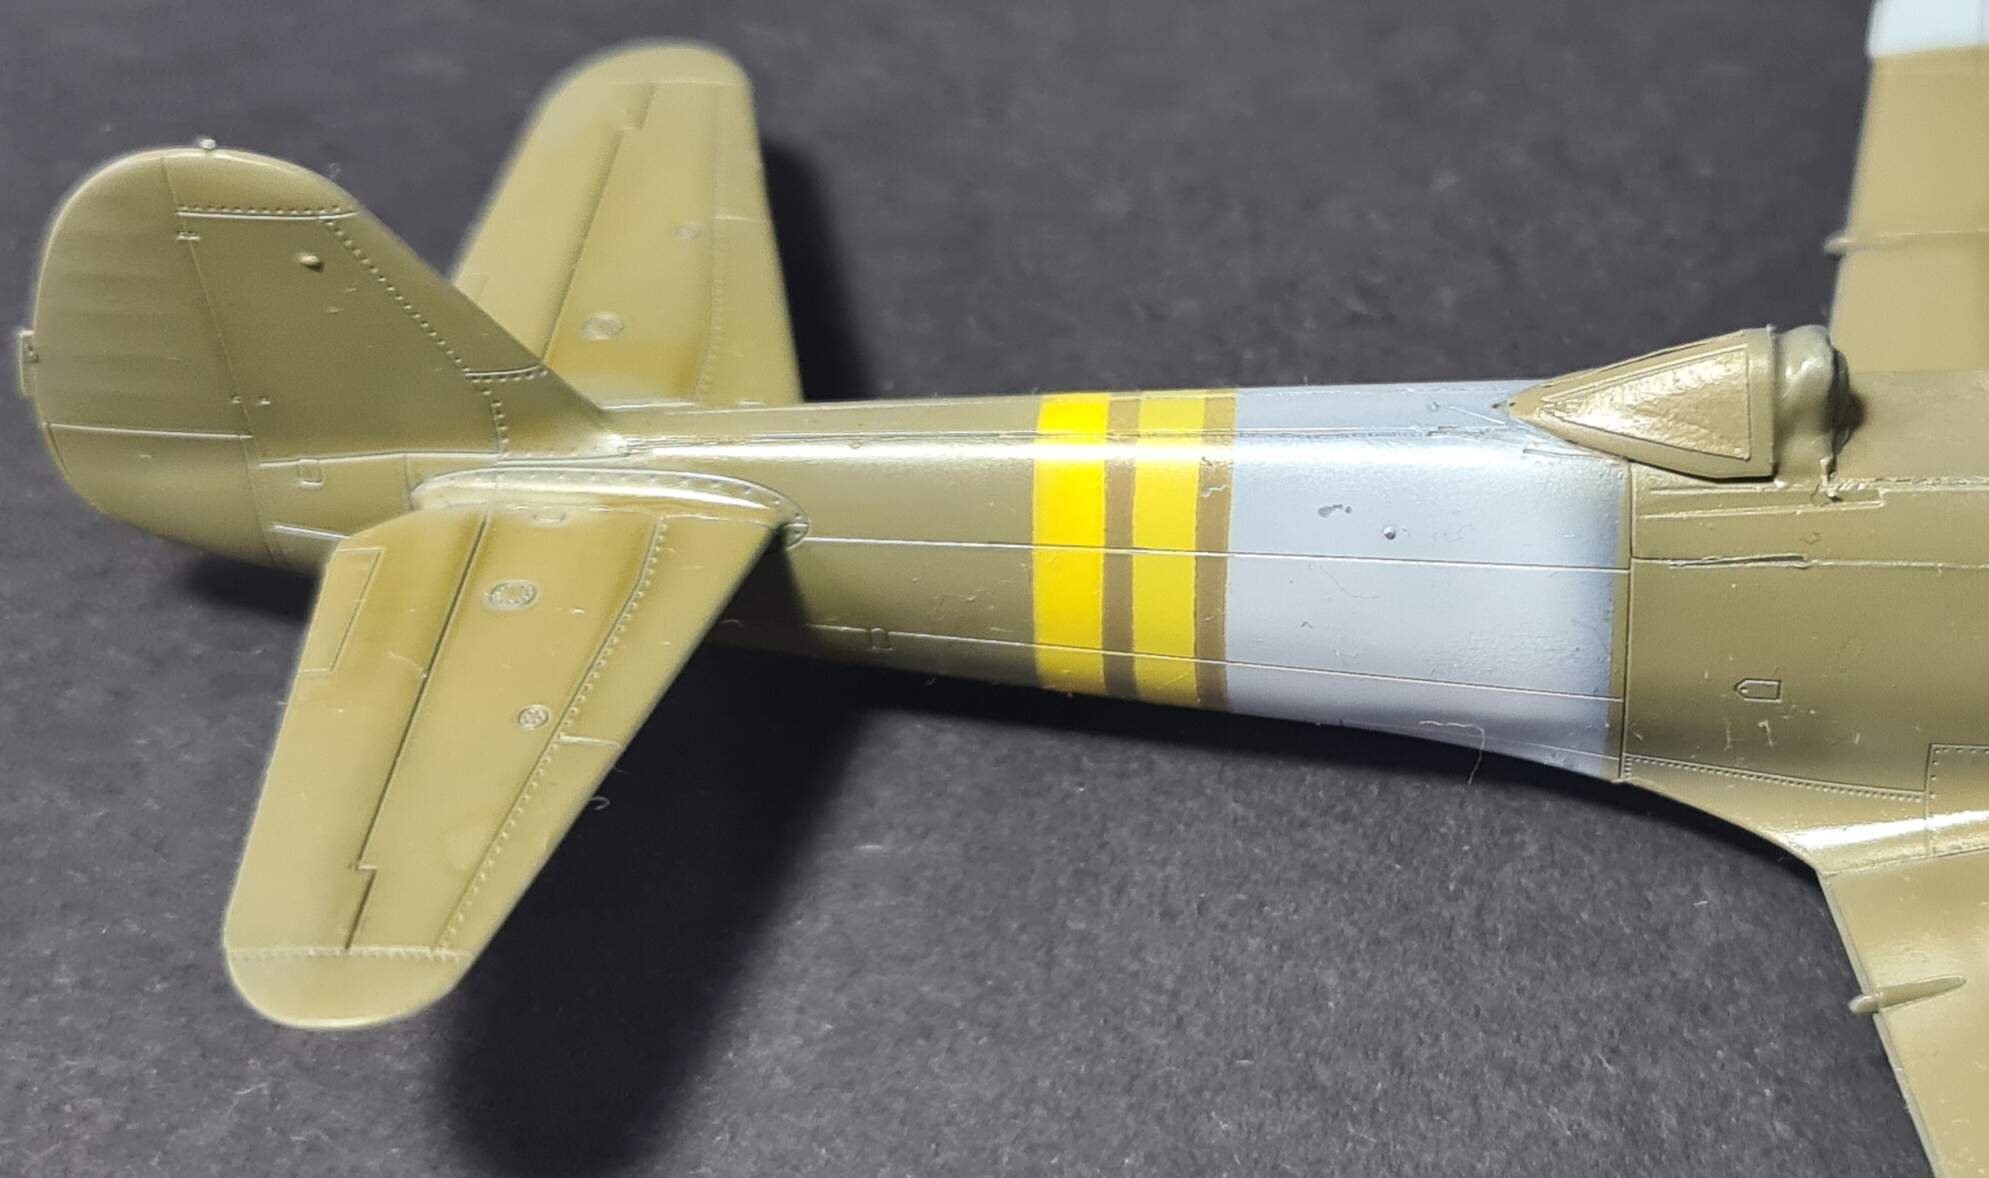
I cobbled together the tail numbers, data information, “no step” and crew chief data decals from the dungeon and was pleased with the outcome. This was followed with an oil wash of burnt umber and some slight streaks.

All that was needed was to add the landing gear complete with brake lines, arrestor hook, and aerial using EZ-Line.

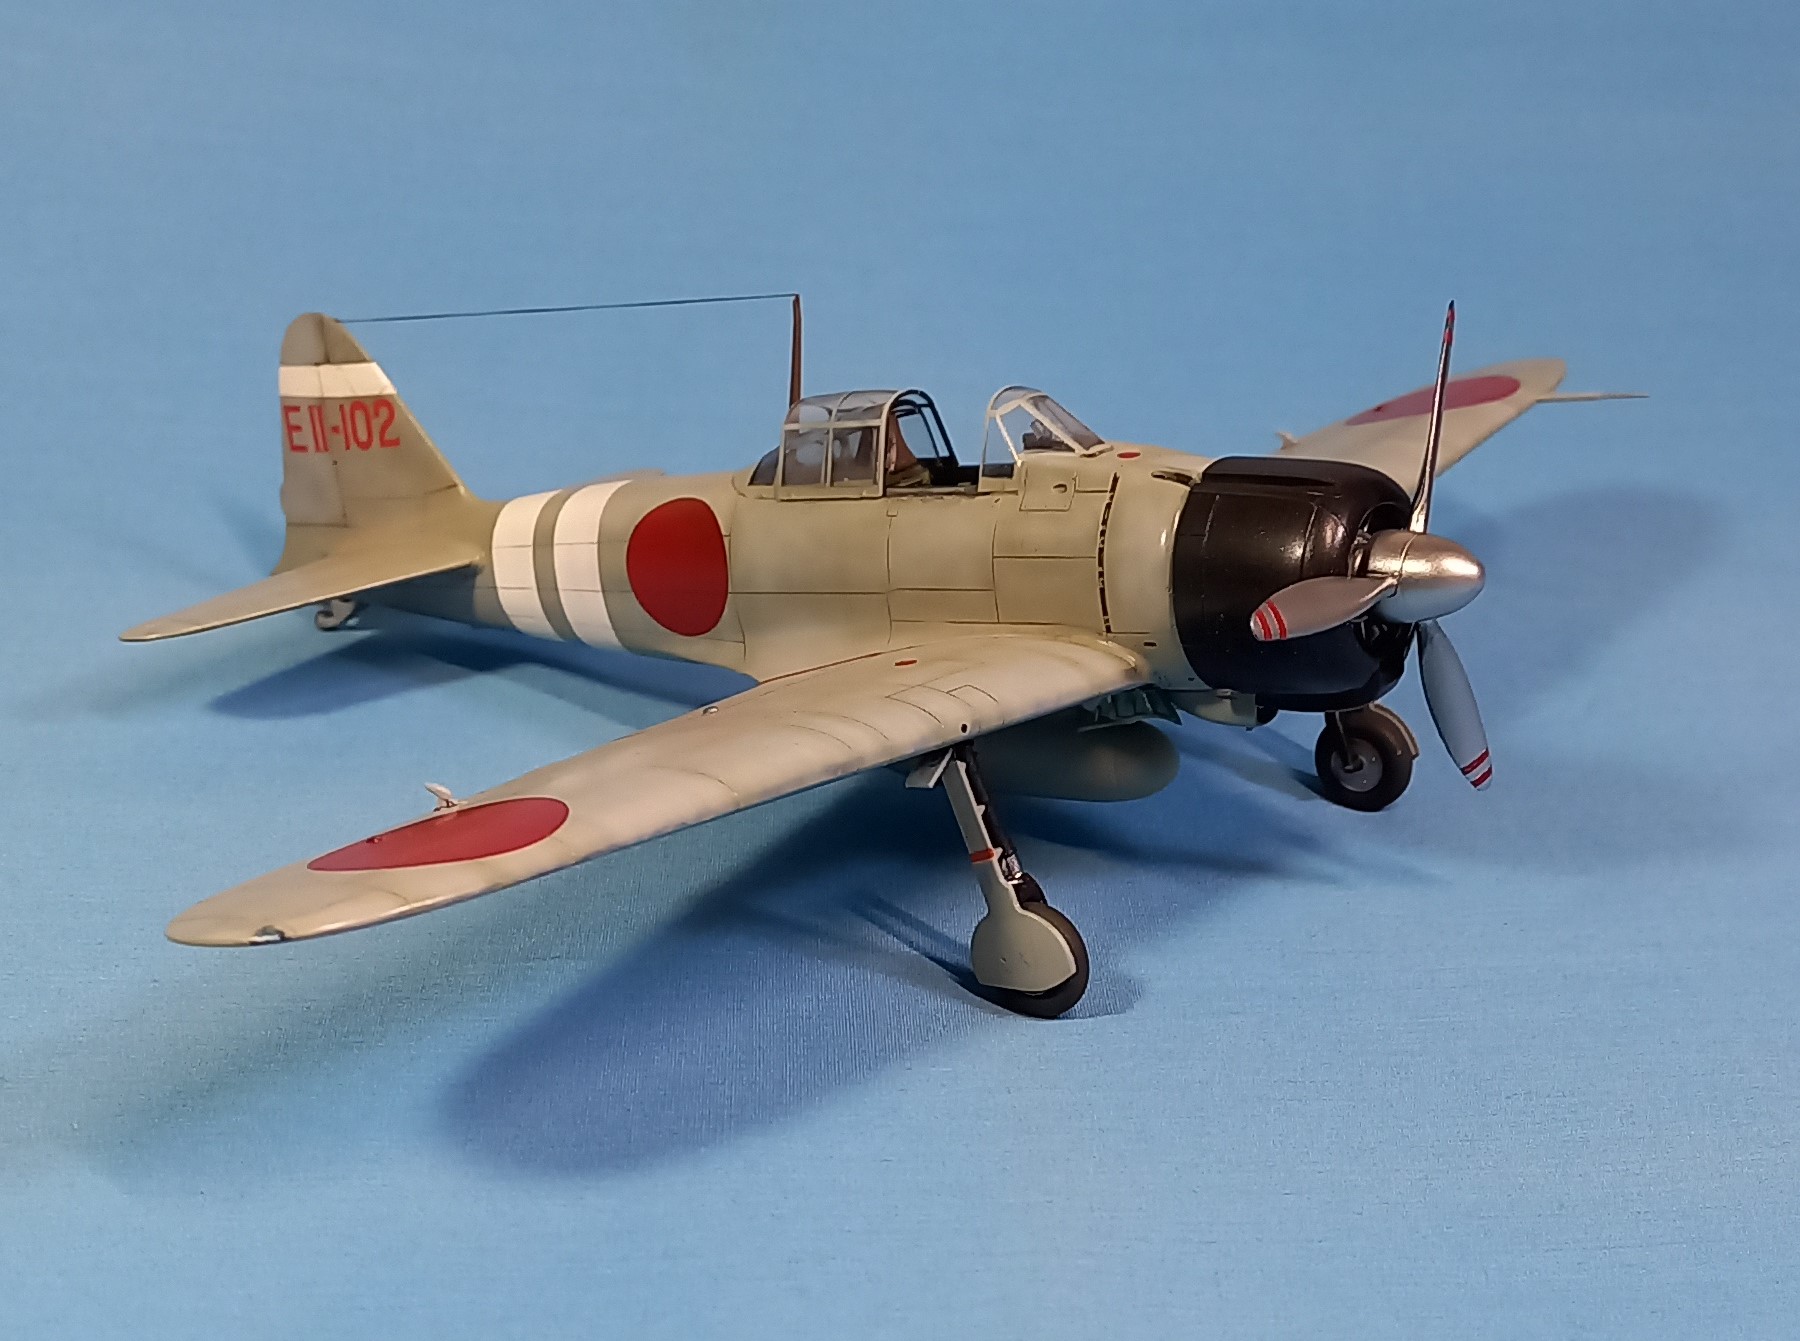
I then added the prop and called her done!

I was very pleased with the outcome, it could be my best rendition of a Zero yet. The Hasegawa kit while some say long in tooth really does result in a wonderful representation of the Imperial Navy’s premier fighter during the early stages of the Pacific war. I highly recommend it to all modelers. I hope you enjoyed, and it’s onto some more birds from the Land of the Rising Sun!

13 Likes

great work on the “Betty”. :+1:

1 Like

Absolute superb!

1 Like

Brilliant!

How about some ‘double the pleasure, double the fun’ and post a pix of Iwamoto’s mount with your Zeke 52? :grinning:

Hey fellow group builders,
I finally got caught up on all the recent postings. High caliber works that inspire and give impetus to do better.
hetzer44/ Thanks for the nice comment, Chuck. Great job on your interior detailing. The driver’s side controls look marvelous. Keep up the super work my friend.
JPTRR/ Thanks for the kind comment. This is a great kit. Good fit and excellent detail.
RadekZ/ The paintwork on your Hayate is terrific. Nice subtle panel line shading.
FlyingSauerkraut/ Your Kyofu looks awesome. Nice paintwork and realistic chipping effect.
john41492/ Great job on your Betty bomber. I like the camo paint scheme. It’s also cool that you can see into the cockpit area so well. Lots of nice details to see.
Zonarch/ Welcome to the group build. Nice kit. It should be a pleasure to build…being a Tamiya kit. Have fun.
Mrclark7/ Welcome to the fun group build. You got 2 nice versions of the Zero to build. Looks like a lot of fun.
john41492/ Excellent work on your new projects. Love the detail work you did on the cockpits. Both builds turned out marvelously.
TacFireGuru/ Great minds think alike. Looks like you and I are doing a buddy build of the same kit. It will be interesting to compare the two when we finish.

1 Like

Here’s my update on the Japanese 75mm Mountain gun. The gun is assembled and I got to work on the figures.


Just started base coating the figures. I switched out the hands on the NCO. He’s holding binoculars and the other hand has a watch now. Next up will be shading and highlighting. I’m having a blast.
Bill

2 Likes

Gentlemen, I’ve got my field gun assembled and painted, and I have the figures assembled, but I never finished painting them. You guys are an inspiration. Even though I’m not going to enter it as the campaign, we may have three of these kits soon. Hey, is that constituted battery?

My Kyofu is finished !

8 Likes

Nice @panzerman1 I am no fan of doing figures, but I just might do these. :sweat:

The gun parts awaiting primer. I’ve ordered a couple different IJA Khaki colors - one for the gun and (perhaps) one for the figures. My guess is the gun parts will be primed tomorrow and then I’m in a “Check Fire” until the paint arrives.

Mike

The tofu, I mean Kyofu looks great.

It is quite unusual in proportions compared to other float planes. A nice addition to your collection.

Unfortunately disaster happened to my Hayate… I must’ve flooded surface with gloss varnish and paint dissolved in some areas…

I wonder how I can recover from this problem without repainting whole aircraft. Retouching only white areas might not work - olive drab is also affectected especially on wing area.

I’d really appreciate any suggestions here as I dont want to throw it away to shelf of shame.
Cheers’
Radek

Radek, frustrating when things like this happen. I’m looking at your pictures on my phone and can’t see what happened. Except that for the right fuselage home defense band edge. Otherwise I cannot see what went wrong. If the varnish dissolved the pain and made it look blotchy or uneven, that actually could work for a late war Japanese fighter.

1 Like

I agree, I cannot see many issues. I do notice a slight eating through of the white in the ID band. Please don’t put it on the shelf of shame. We are often our own worst critics. I still think it looks great! Maybe you could add aluminum paint to the problem areas? Japanese aircraft often had paint wear!

1 Like

Looking on larger screen. Are the problems where it appears the paint is thinner on a wing tip and along the horizontal stabilizer? Or where it appears the pigments loosened and resettled darker along panel lines? It looks like the practice of pre-shading.

If so, then I think you have accidentally created a more authentic paint finish on a late war IJAAF Ki-84. Well done - serendipity! I agree with Mead93 and would not throw this away. Unless you are like me - you do not want to be like me - and bothered because you know it is not what you were intending, it has immense potential without repainting it. Add some bare metal like Mead93 suggests. Look at Nick Millman’s post about Hayate paint; he also has reviews of Ki-84 decal sets with commentary about the finishes, of which “Frank” had many:

Yet More Hayate Thoughts ~ The Non Standard Schemes Part One

1 Like