I’ve always liked the blue and green aetoke.
1 Like
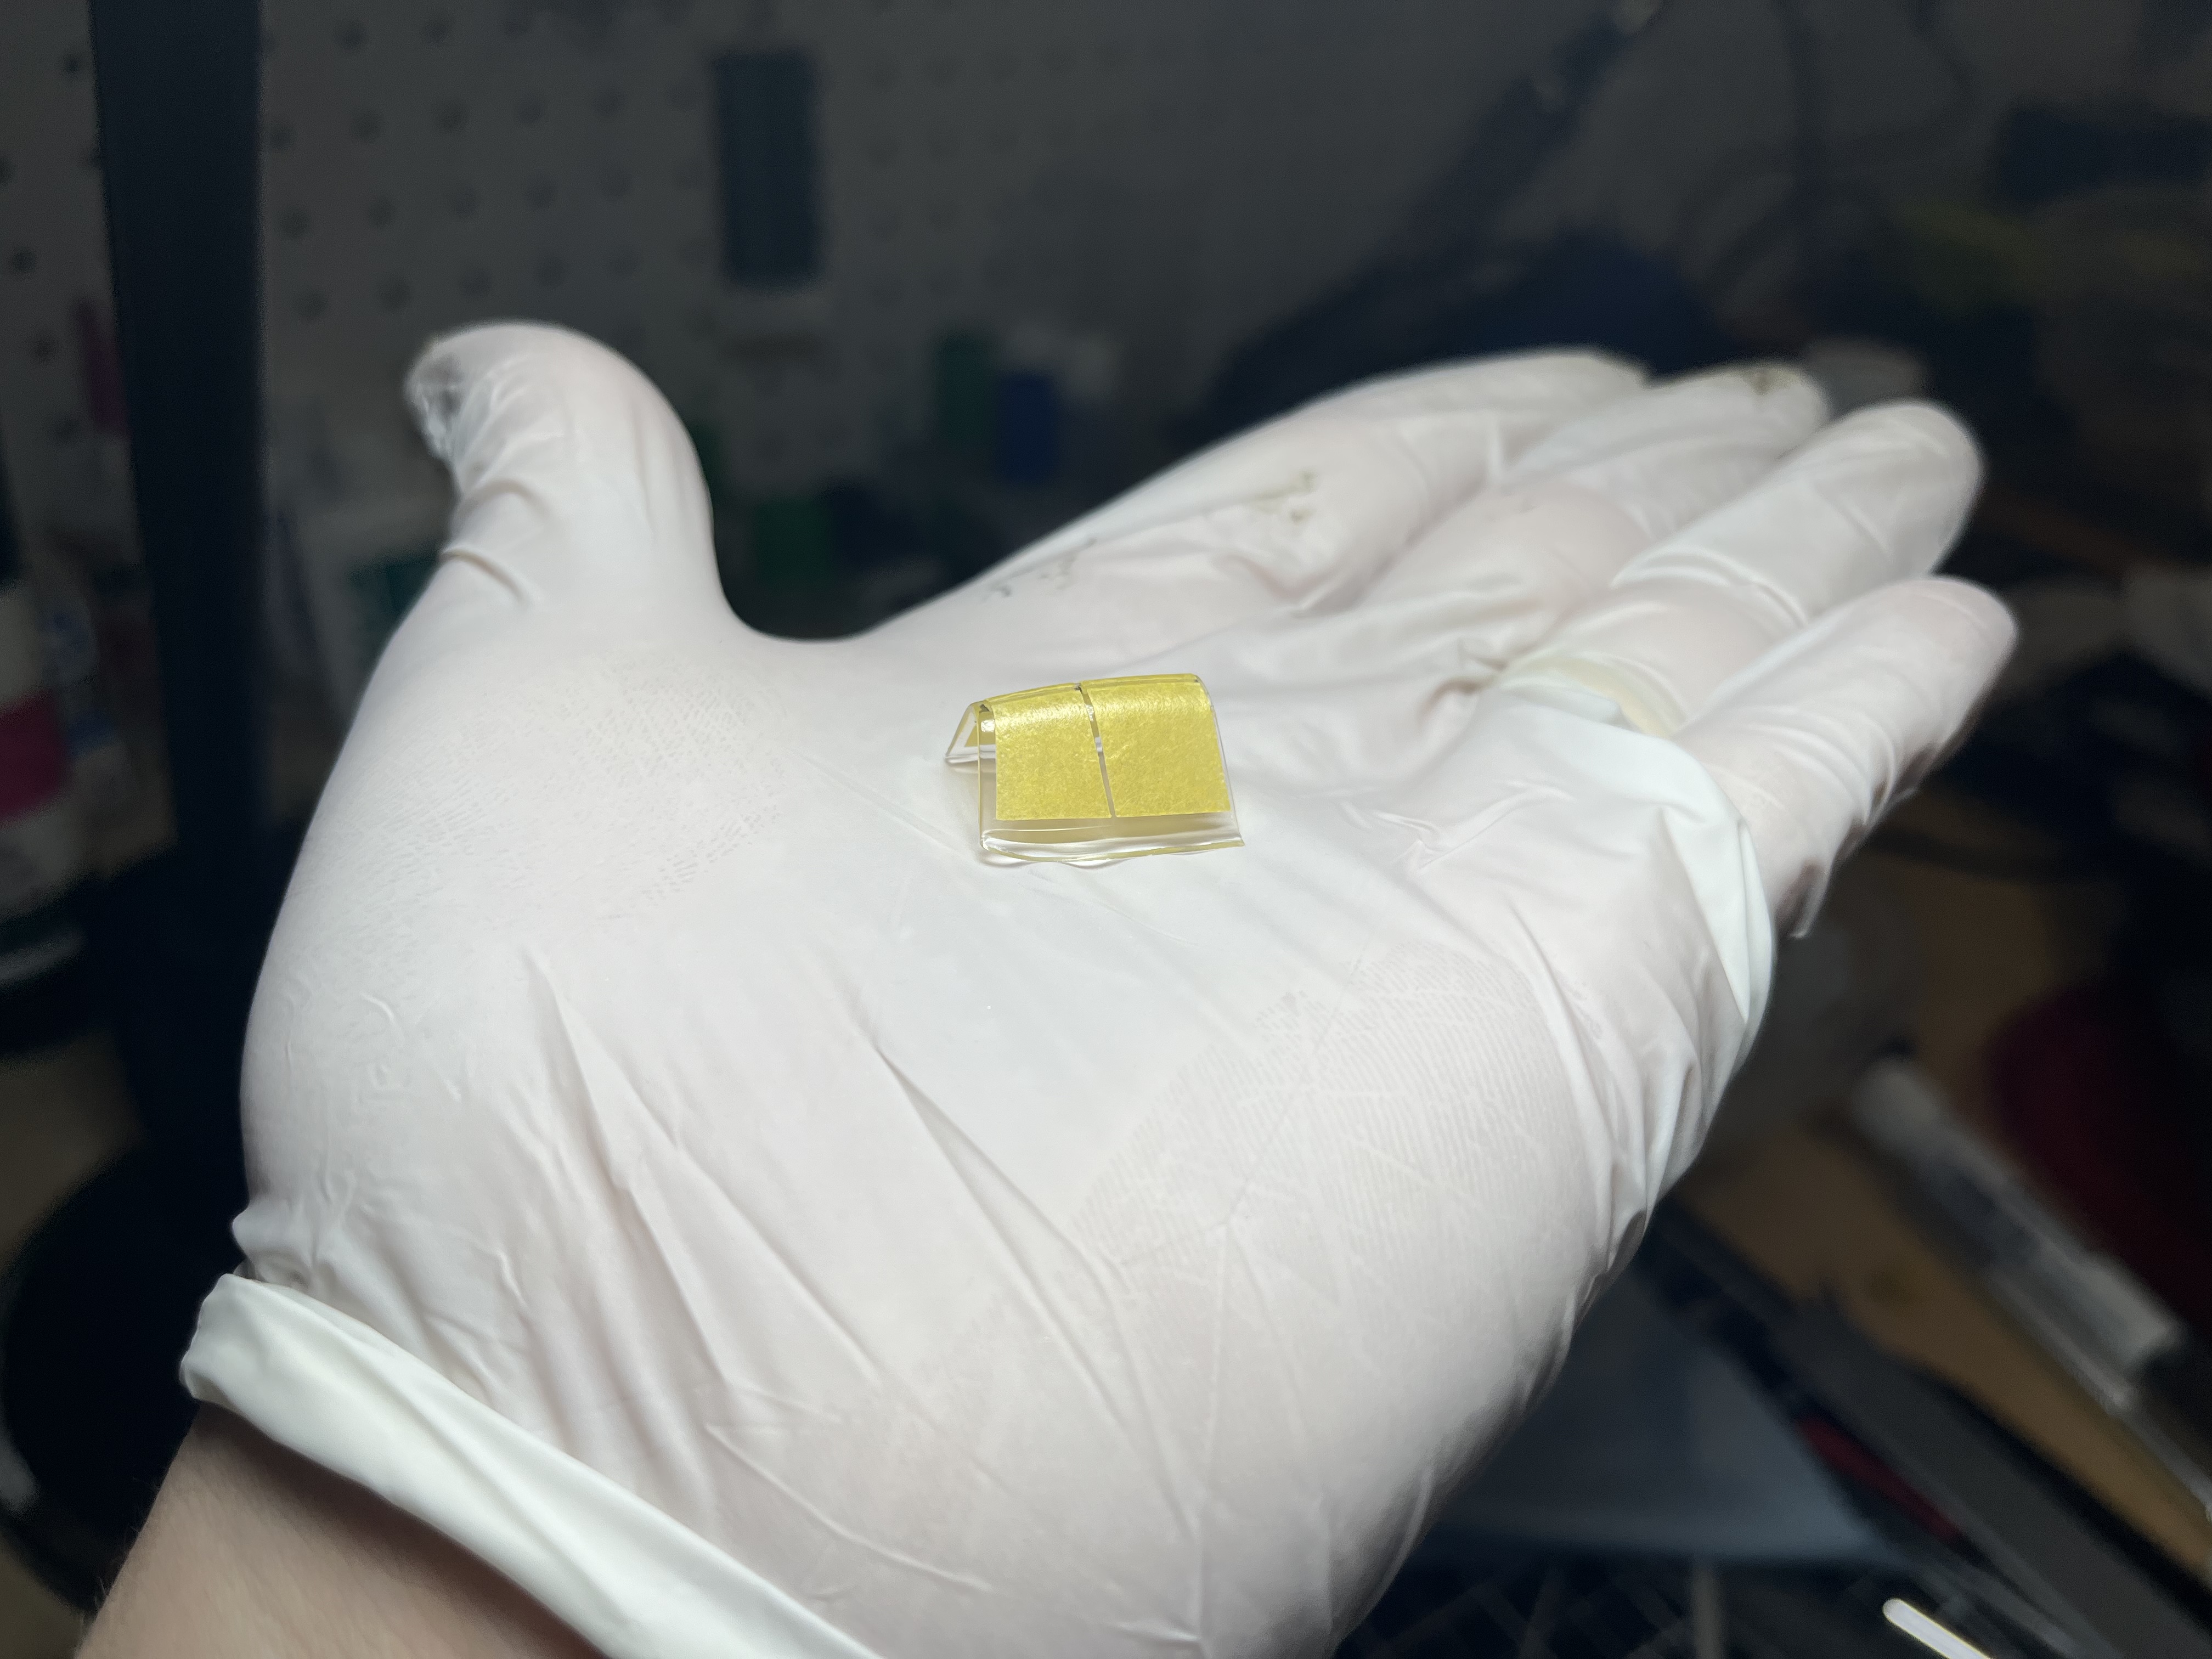
I actually like it too. I was a bit concerned it wouldn’t turn out. On the Ki-84 I left the flaps and wheel wells in natural metal and it turned out great. I was worried if I didn’t get the aotake color right, it would look silly. I am pretty happy with how the color turned out though and think it will complement the overall color scheme well. I think a wash and some dull cote will tone it down a bit as well, right now it is super glossy, forgot how glossy tamiya clear paints can be
1 Like
While the aotake cures I got to work on starting to spray the markings for the Ki-84. I am going with this scheme

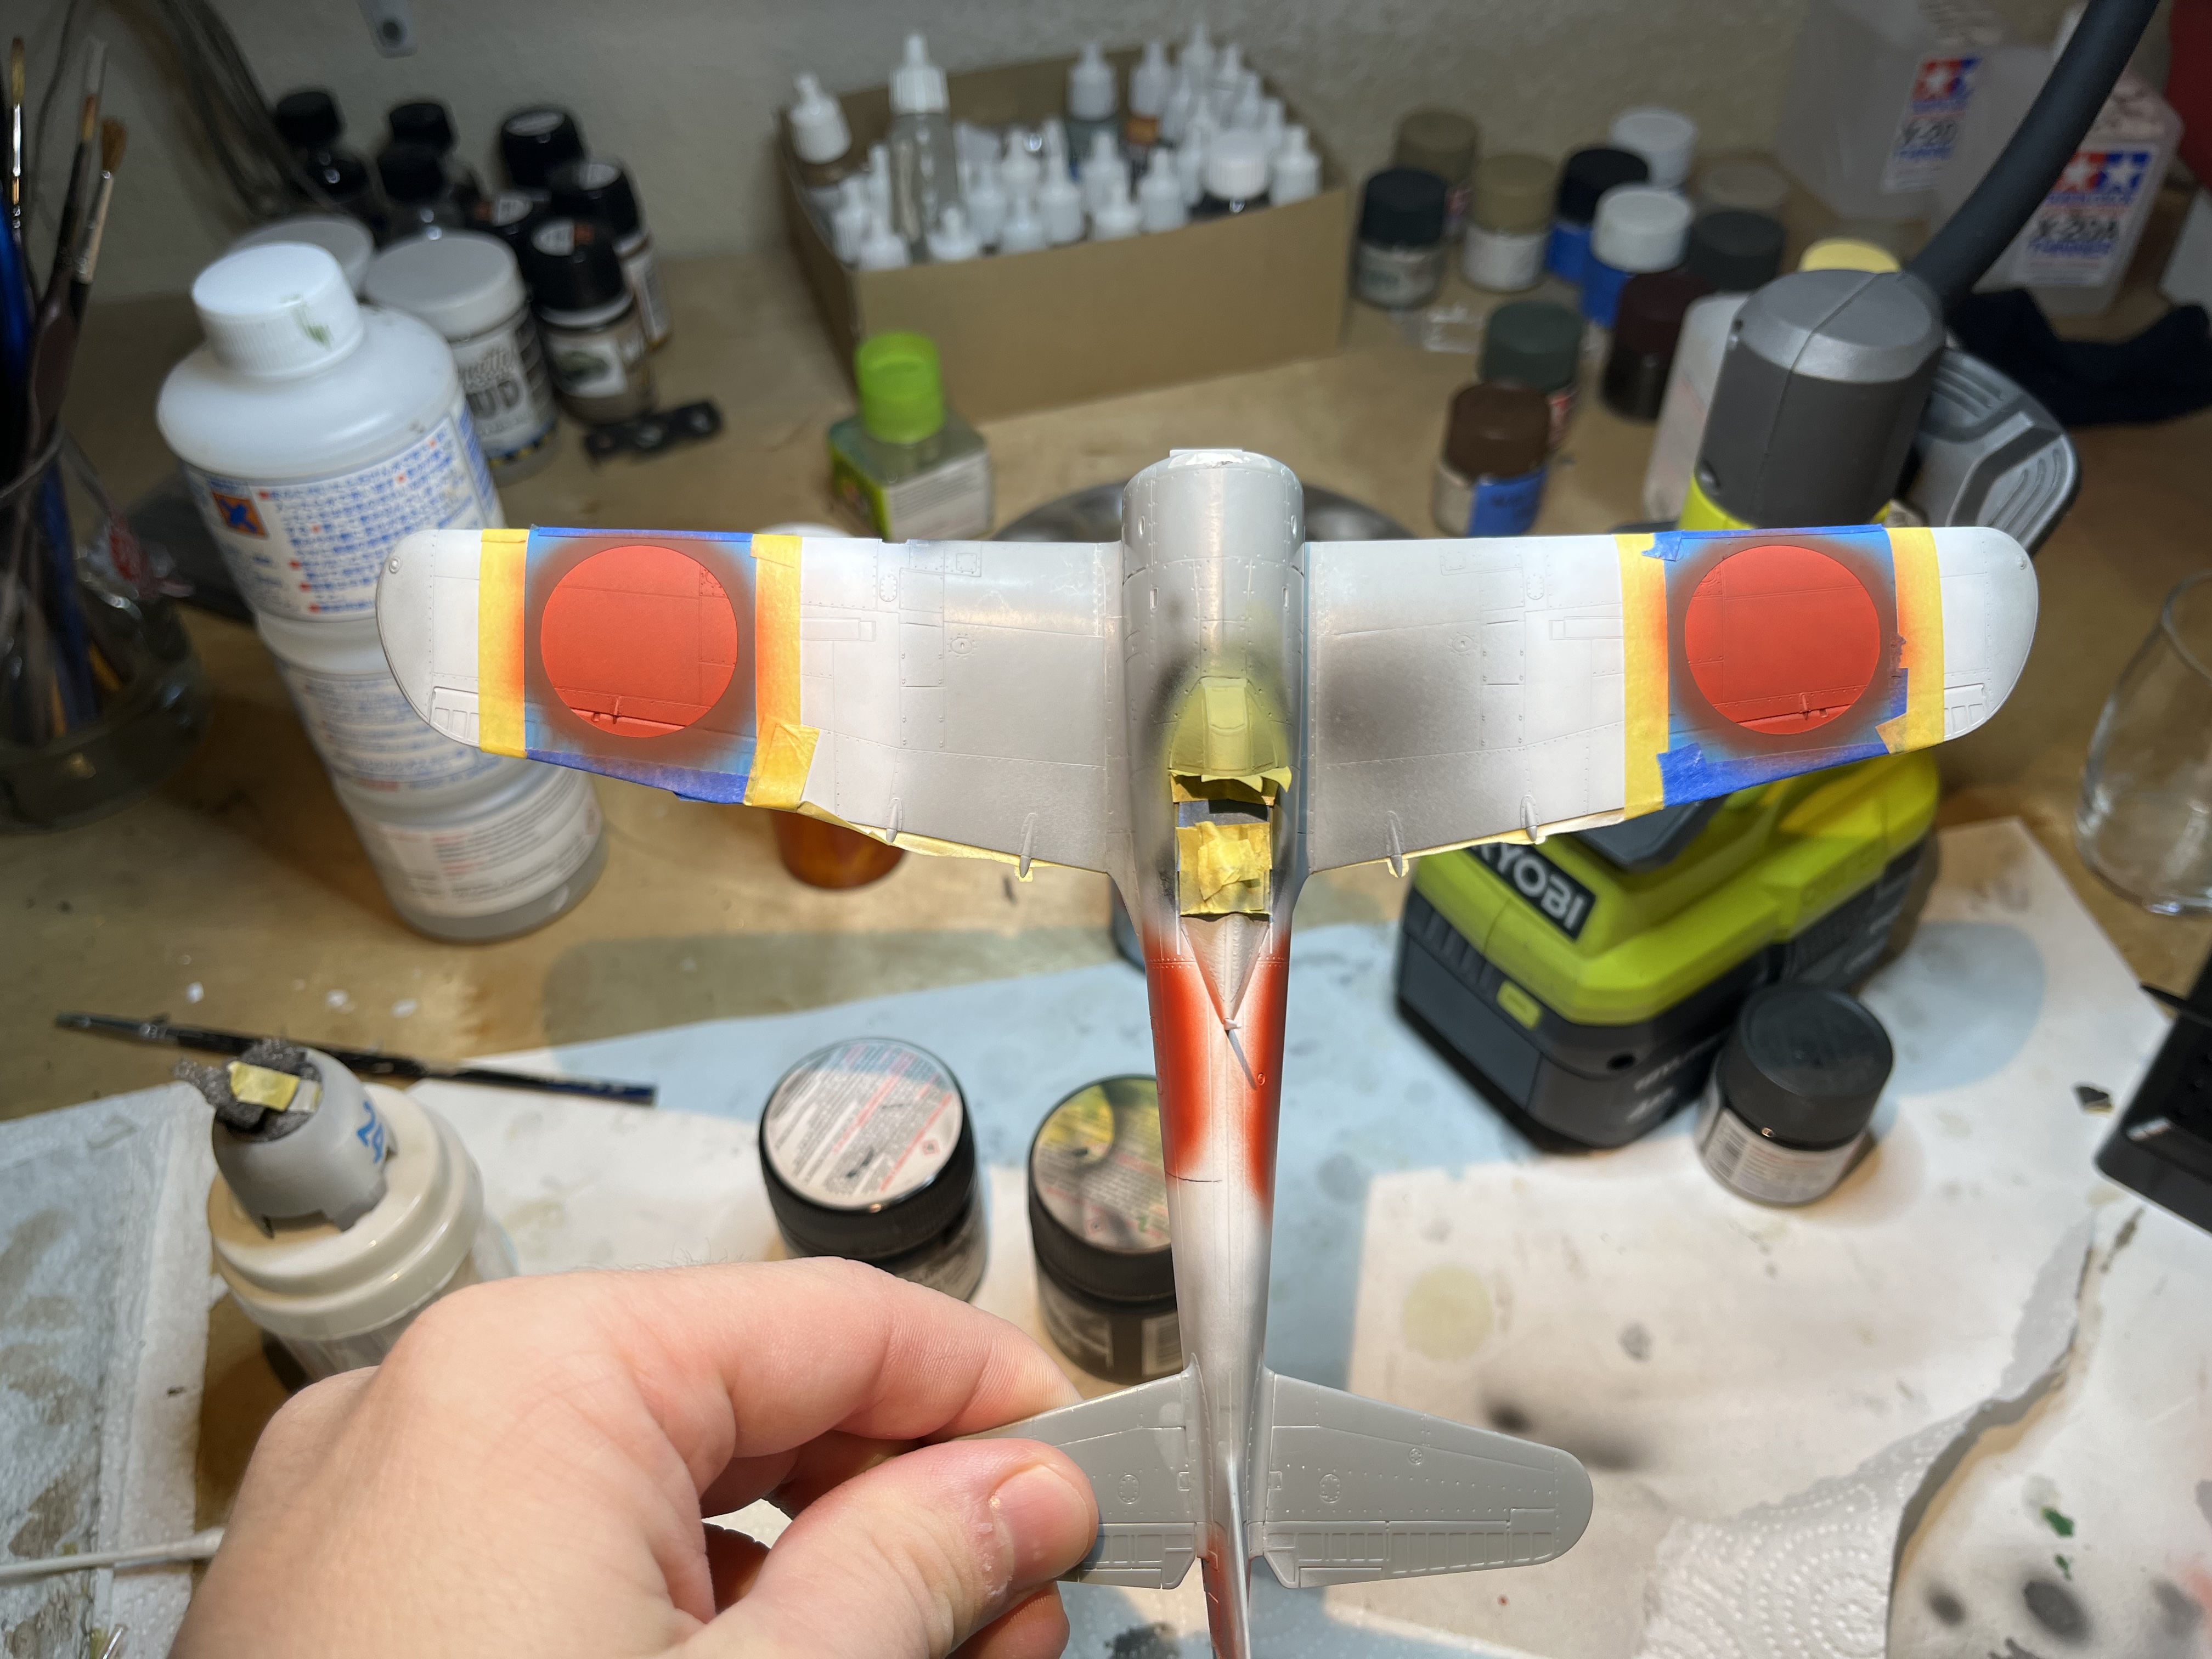
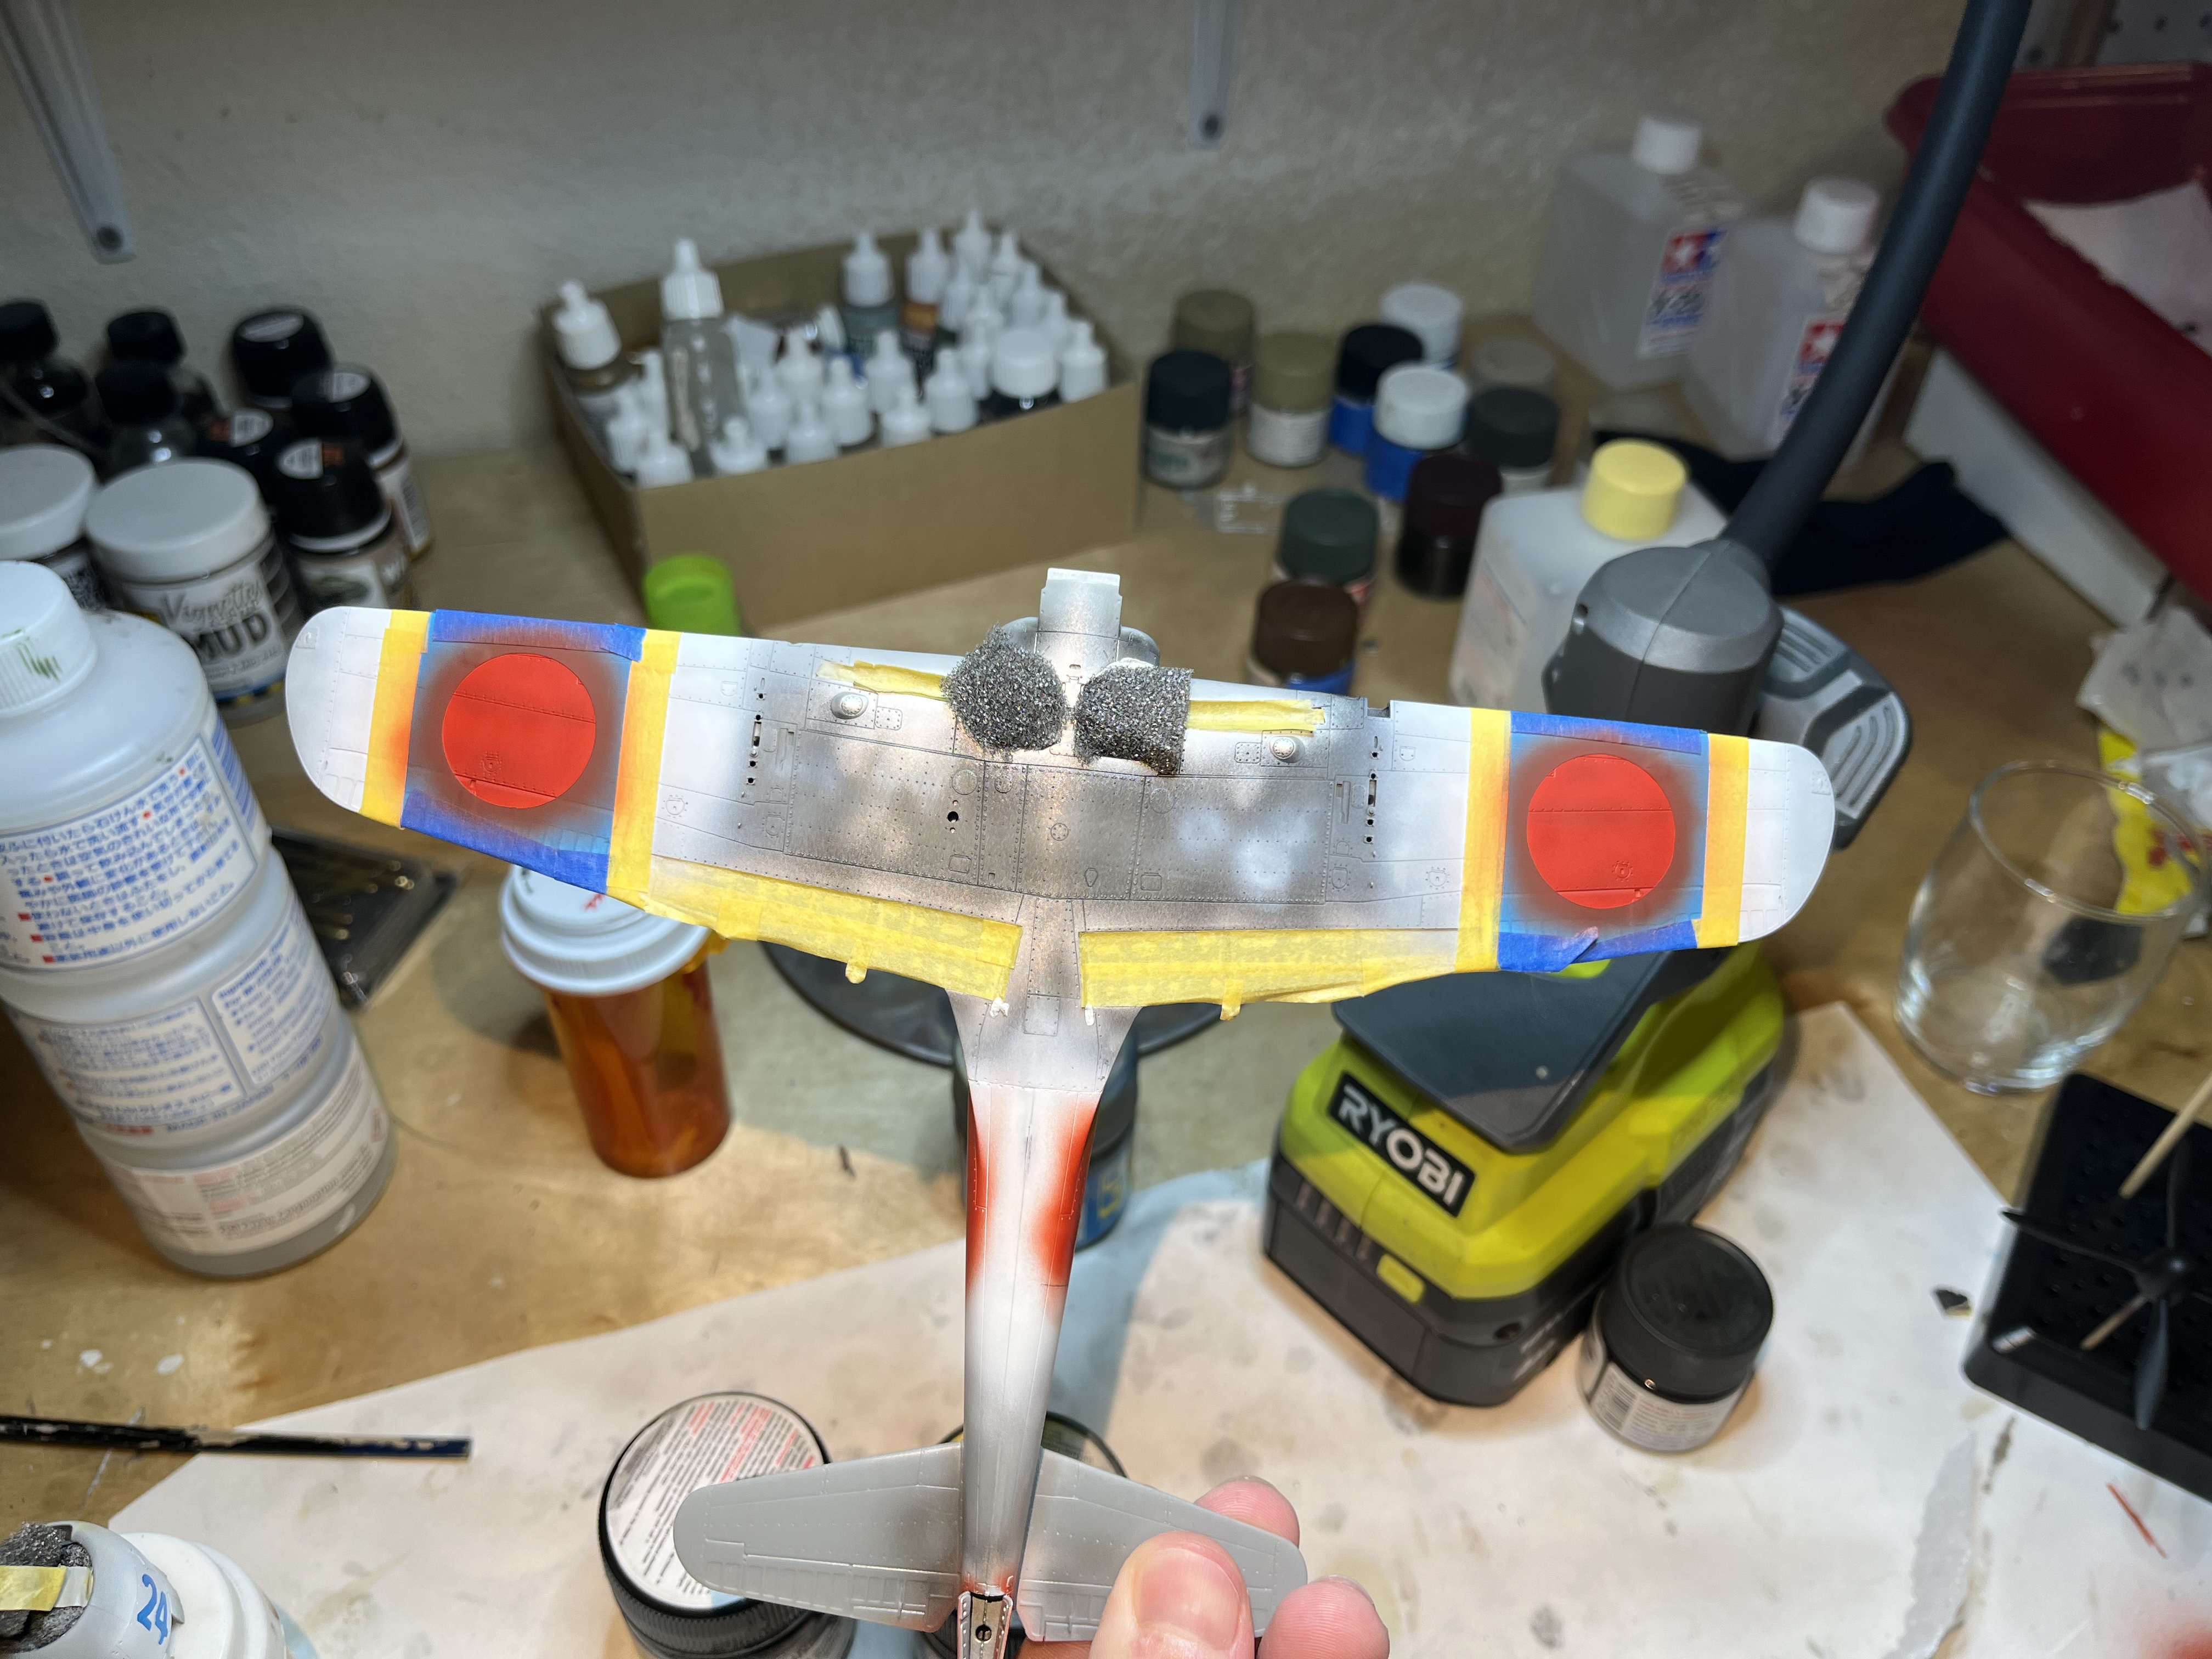
Got the wing and fuselage ID bands down. As well as the cowl and tail white. I started with a base of sky grey for a bit of tonal variation. Then a blotchy white making it more opaque on panel centers followed by an overall white. I also sprayed the yellow for the Hare insignia on the cowl. Once dry I’ll apply some cricut masks, then spray the hinumaru
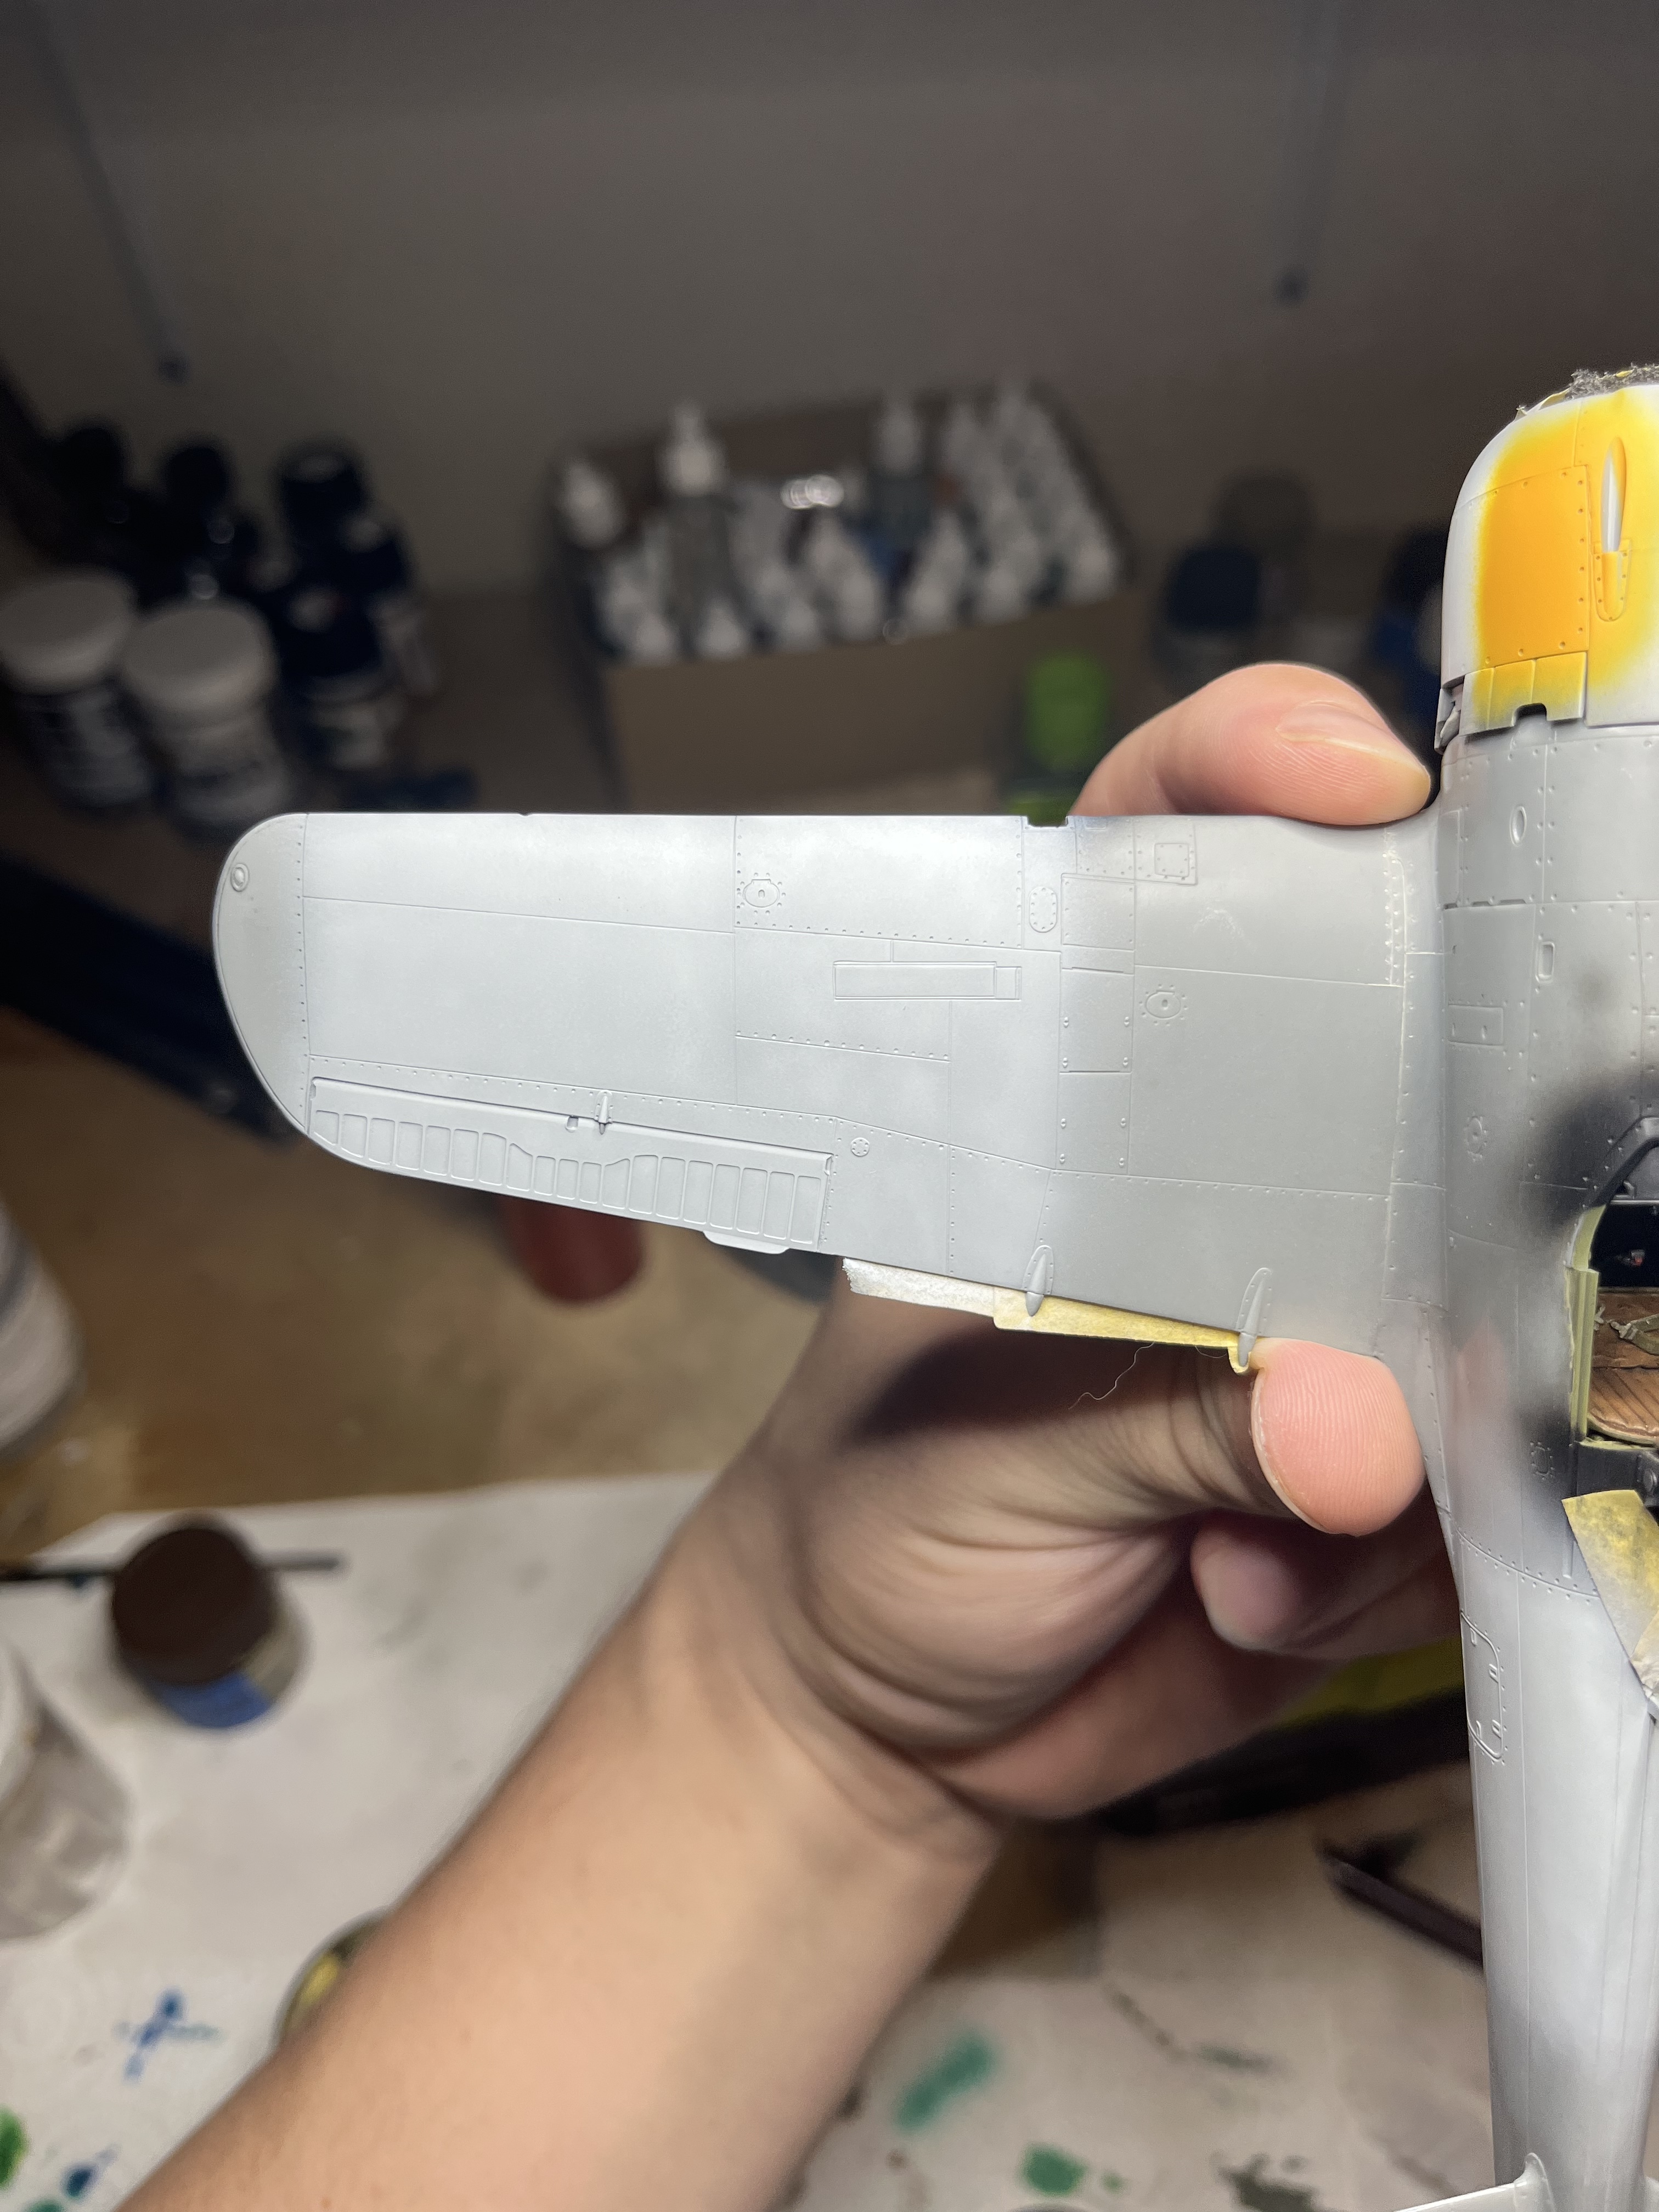


Looking at the photos, the white might need another blend coat
4 Likes
Time to catch up with everyone’s builds.
Gary_Kato / Making good progress on your AA Gun build. Love that detail.
JPTRR / Thank you for the compliment. Yes, box art can definitely mesmerize. I’ve bought many a kit due to the alluring box art. Hahaha!
Mead93 / I hope you are feeling better. You are making terrific progress on your builds. Great masking job. Cool scheme for the KI-84. Is that a gazelle or a rabbit on the cowling???
Getting tons of inspiration from everyone’s projects. Keep having fun fellow modelers.
Bill
Update time for the Banzai Charge diorama. I’ve actually finished the diorama, but I need to get caught up with my progress photos.

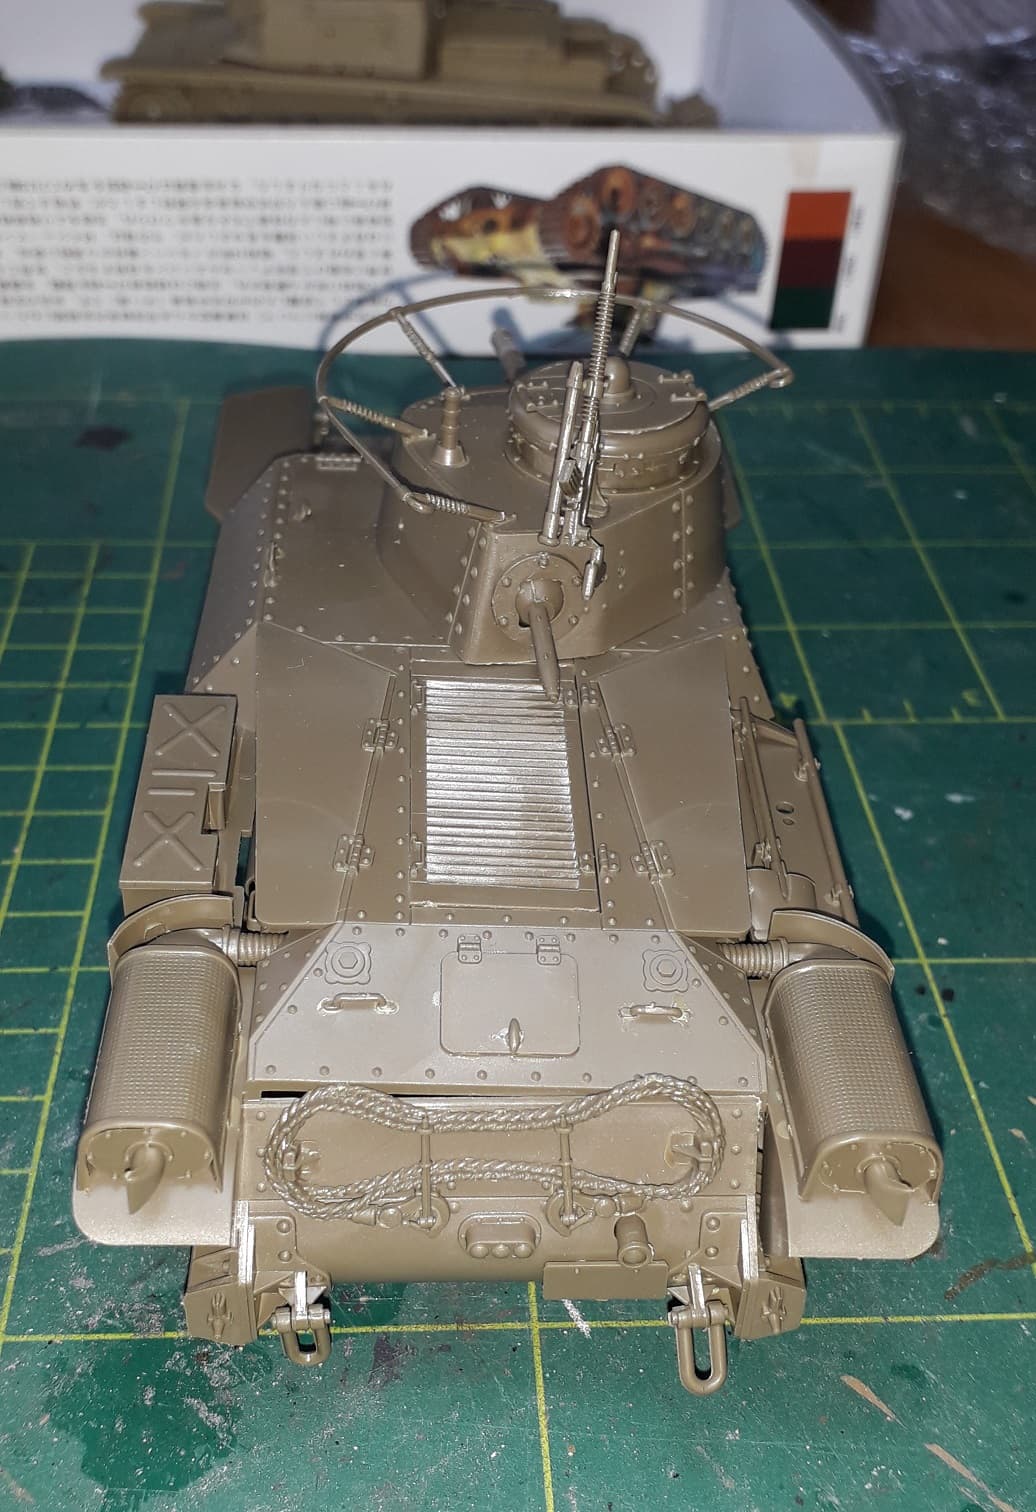
All exterior work is done on the hull.

Replaced a lost hatch and added a MG gun and more sturdy mount.

Initial paintwork is done.

Last detail bits are being readied for attachment.
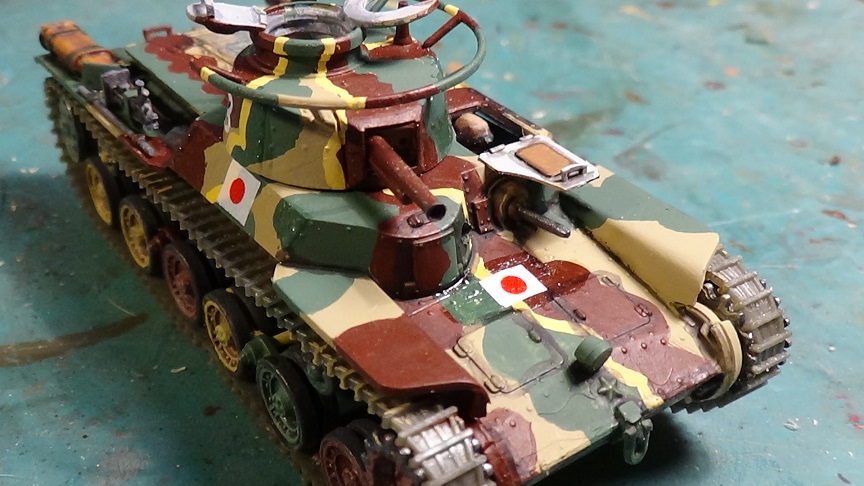
I scavenged up some decals from my spares box.
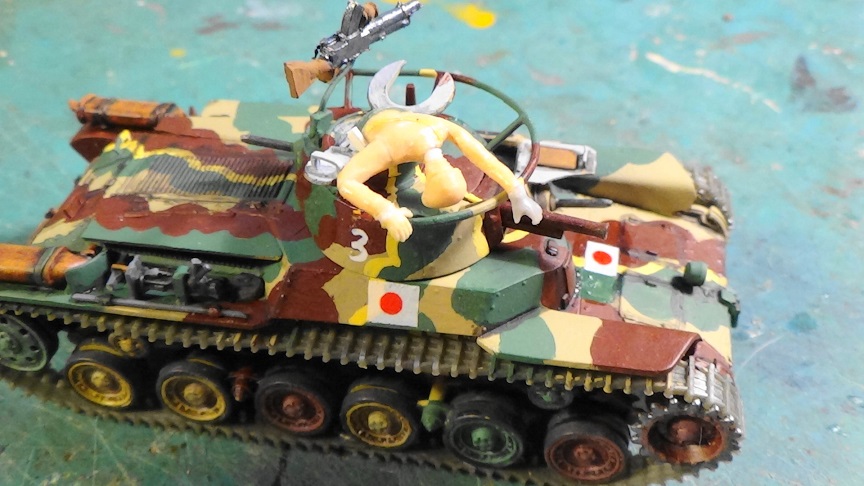
Made a Kaput Tank Commander. Poor Hariheto.

Tank Commander painted.

Added wire mesh guards to exhausts.
That’s all for now. Thanks for viewing. Good luck to every one on their projects.
Bill
6 Likes
Coming along nicely! Japanese tanks and their schemes are so interesting!
Thank you! Yea I think the Ki-84 scheme will be quite colorful! The home island ID bands are neat! It is a hare on the cowl! Though I can definitely see how it looks like a gazelle
1 Like
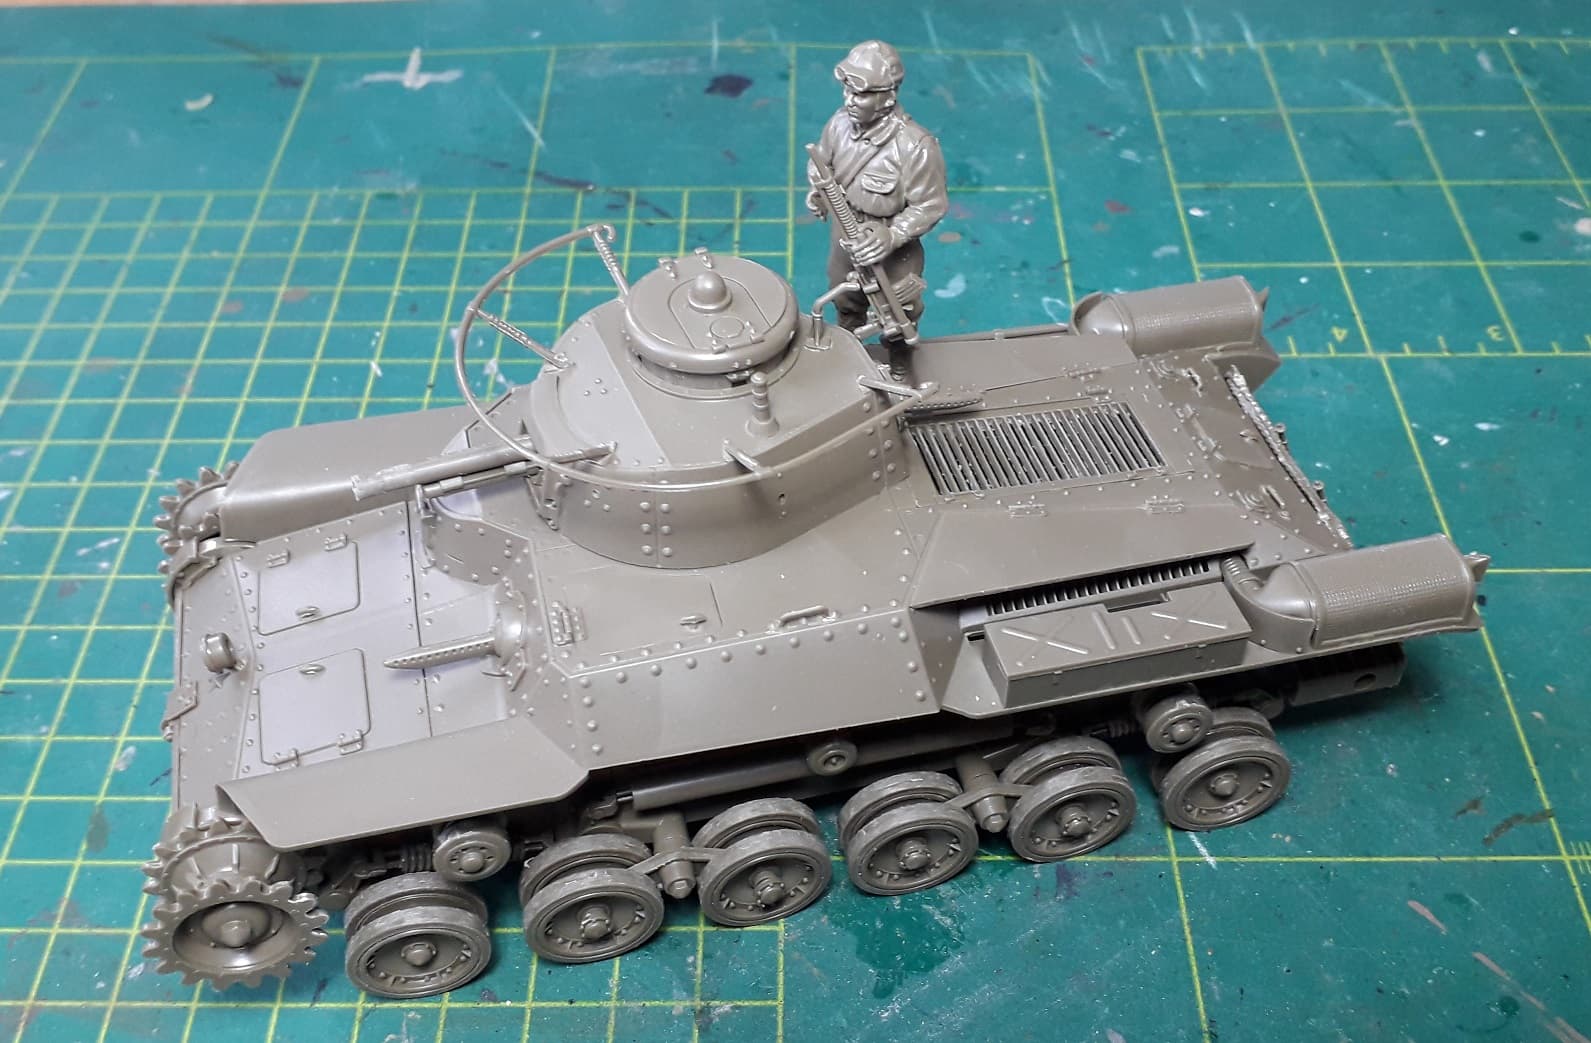
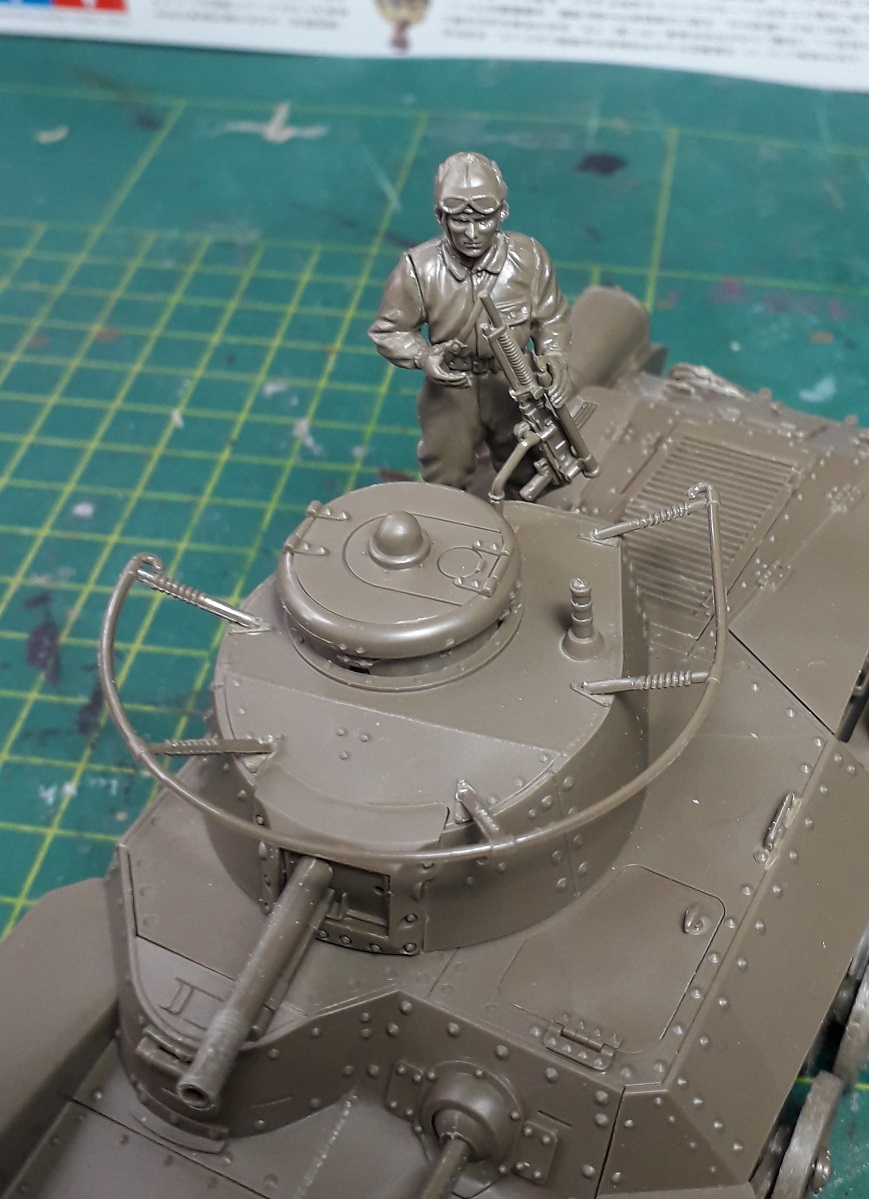
I assembled my japanese “tin can”.
It went together very well. Even without glueing there’s practically no gaps to fill. I had to scrape and sand the louvres of the enginedeck, since they were mostly closed due to flash, but no matter how much or gently I did this, the plastic still frays.
The officer I wanted to show as a whole. Love the figure and did not want to hide most of him. So he gets a more glorious pose; holding the gun, while watching for the enemy. Still some minor gaps to fill and then… paint!

8 Likes
Well done, on the mountain gun Mike. I’ve got that kit and am planning on building it once this campaign is over. Did you encounter any issues with the build?
Thanks,
chuck
1 Like
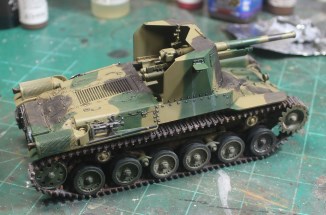
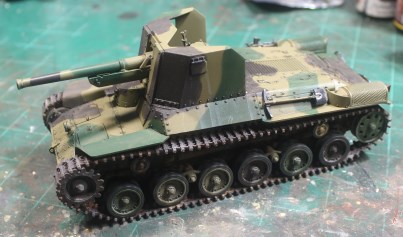
I’ve been building away on this campaign while working on other model projects, but hadn’t posted in a while. I’m almost finished with my rendition of the Tamiya Type 1 75mm IJA self-propelled gun. Though is a very early kit from the 70’s, the detail throughout holds up pretty well by today’s standards. I added a bit to the driver’s area and a few very small details in the fighting compartment, per old Aberdeen Proving Grounds photos of a sparse interior.
I’m starting to paint the crew figures and do a bit of touch up on a few small details and a bit more weathering, but I’m pretty close to finishing this one up. There are many builds in this campaign that provided inspiration and amazement at the work done. I hope everyone who started this campaign can finish.
Cheers!
chuck
7 Likes
Nice construction work, Ron. Looking forward to the finished project.
Cheers!
chuck
1 Like
Looks fantastic
1 Like
Didn’t get nearly the amount done that I wanted to. Dishwasher crapped out so spent a good chunk of Saturday installing the new one.
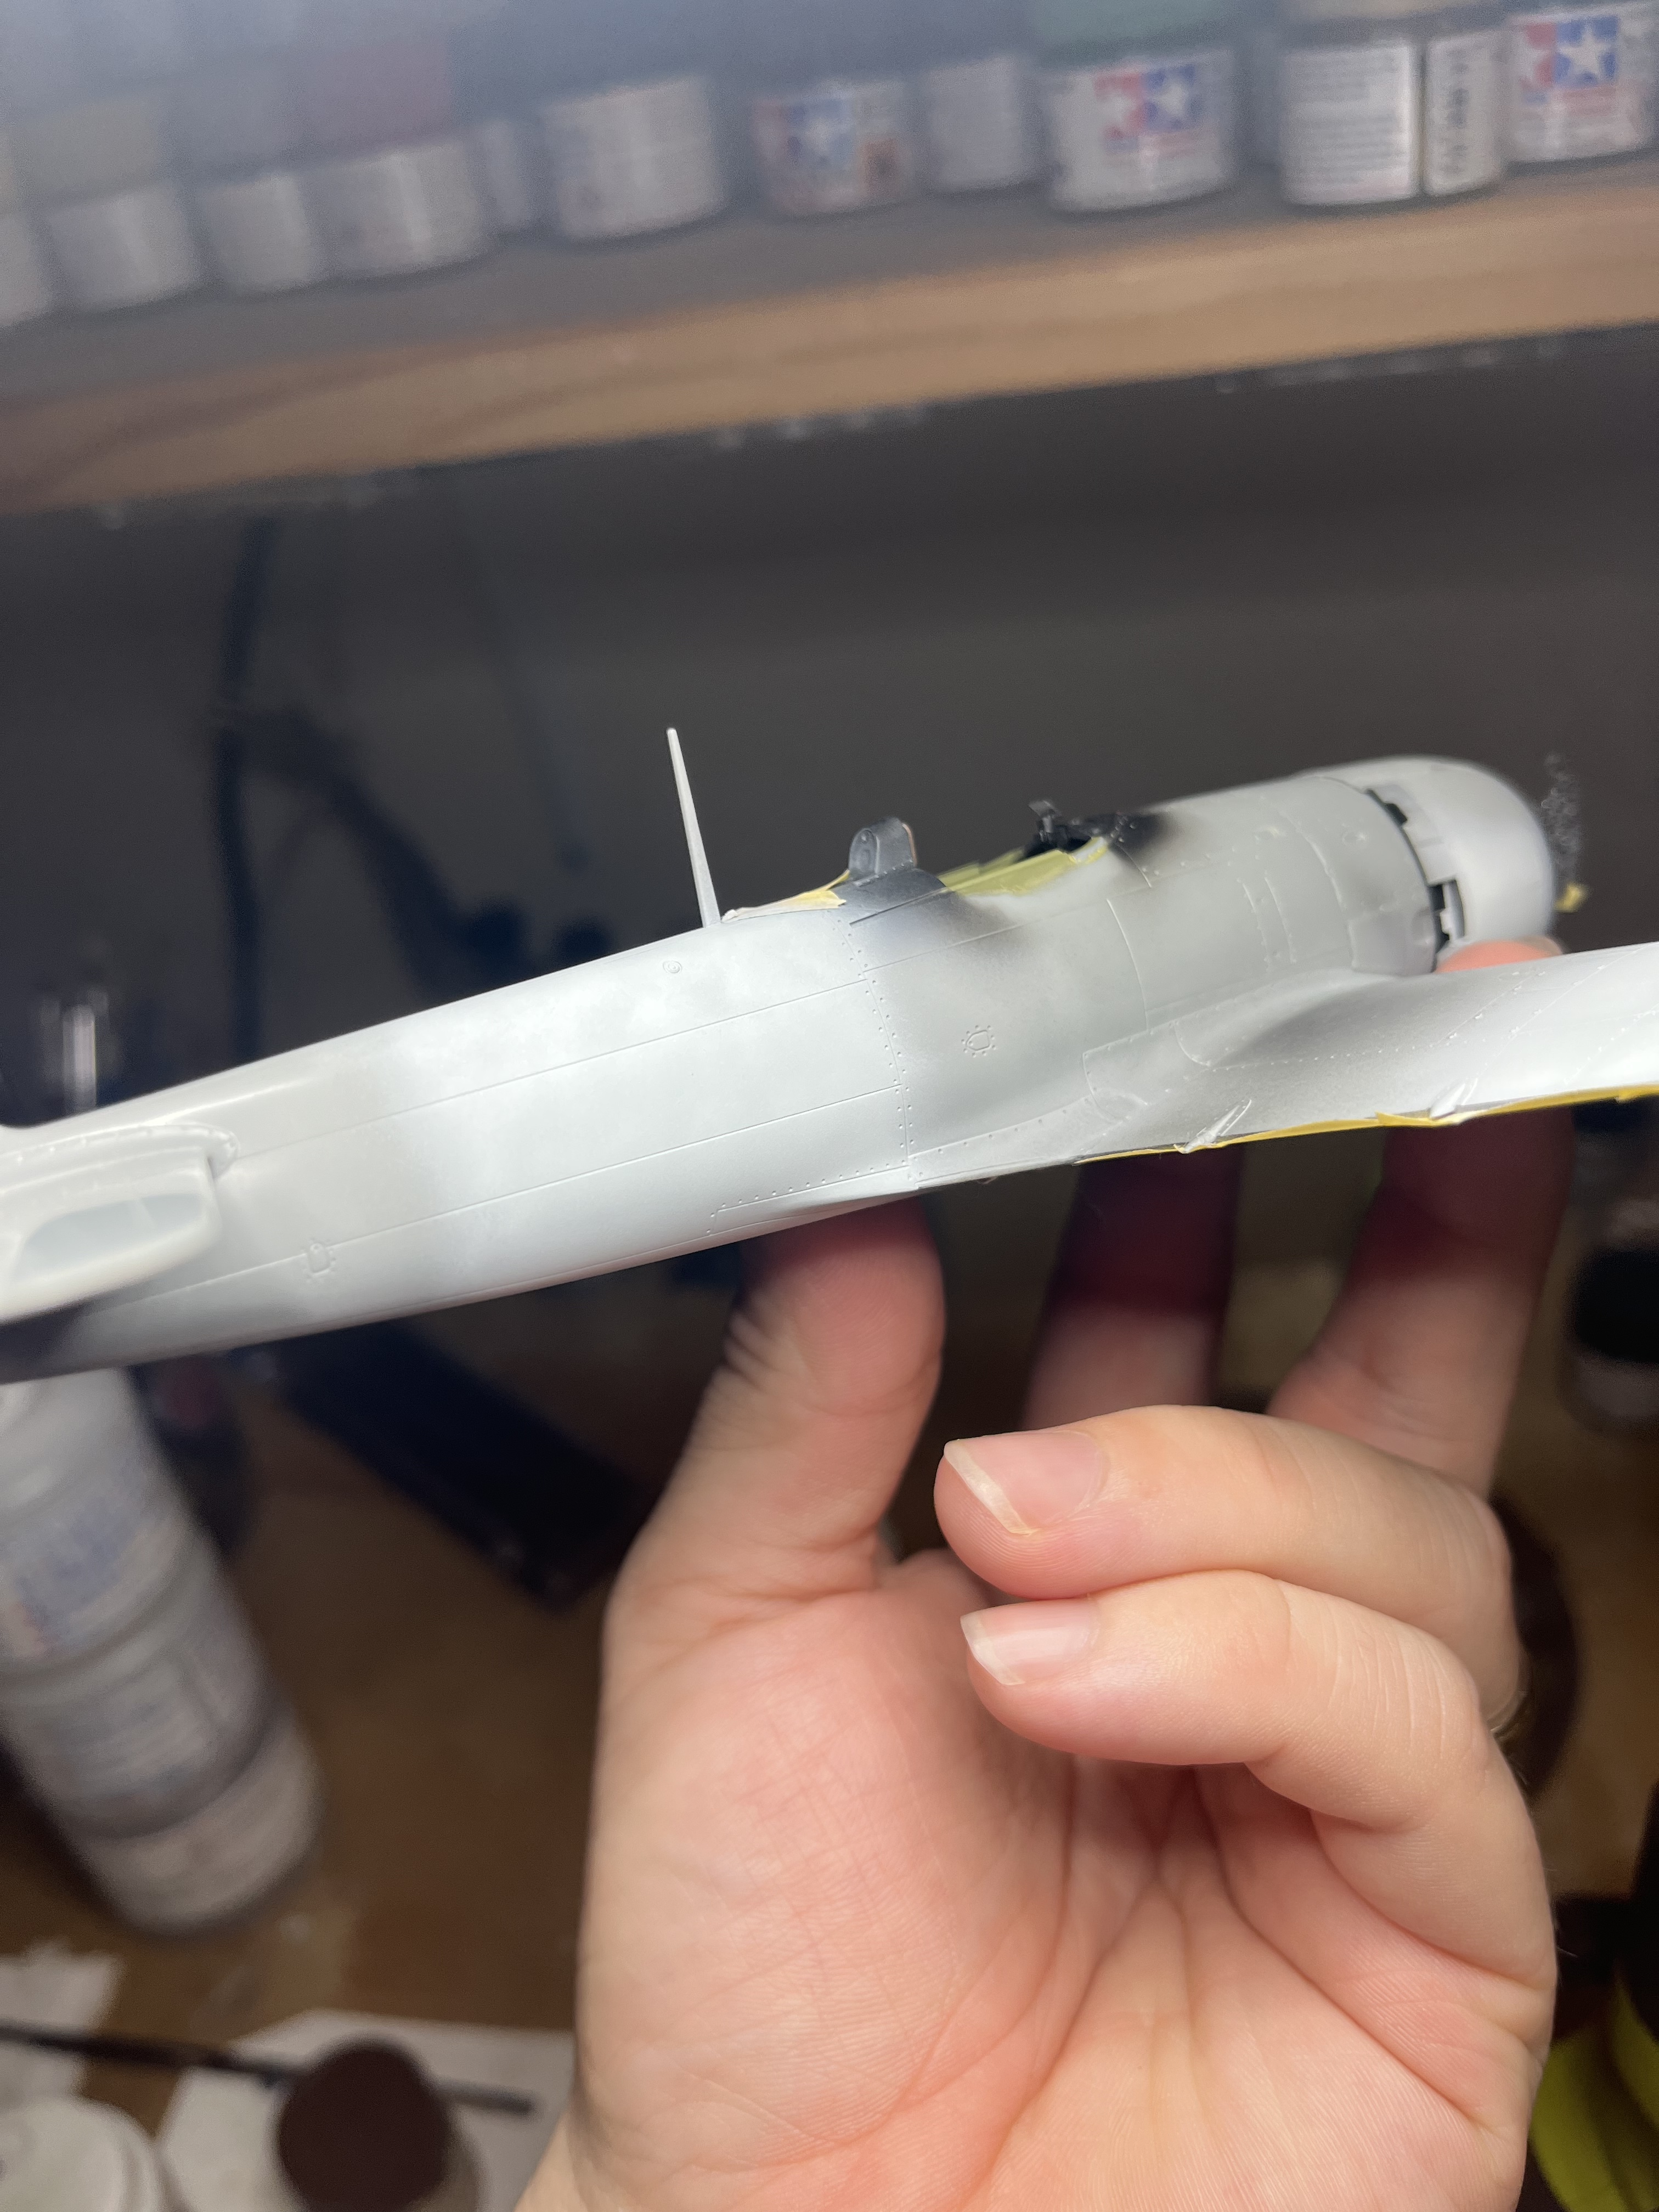
Fortunately the replacement Ki-84 canopy showed up from @JPTRR! Got it polished. Mask and glued on. These dead design masks are fantastic. Fit is perfect.
Started masking for the hinumaru.
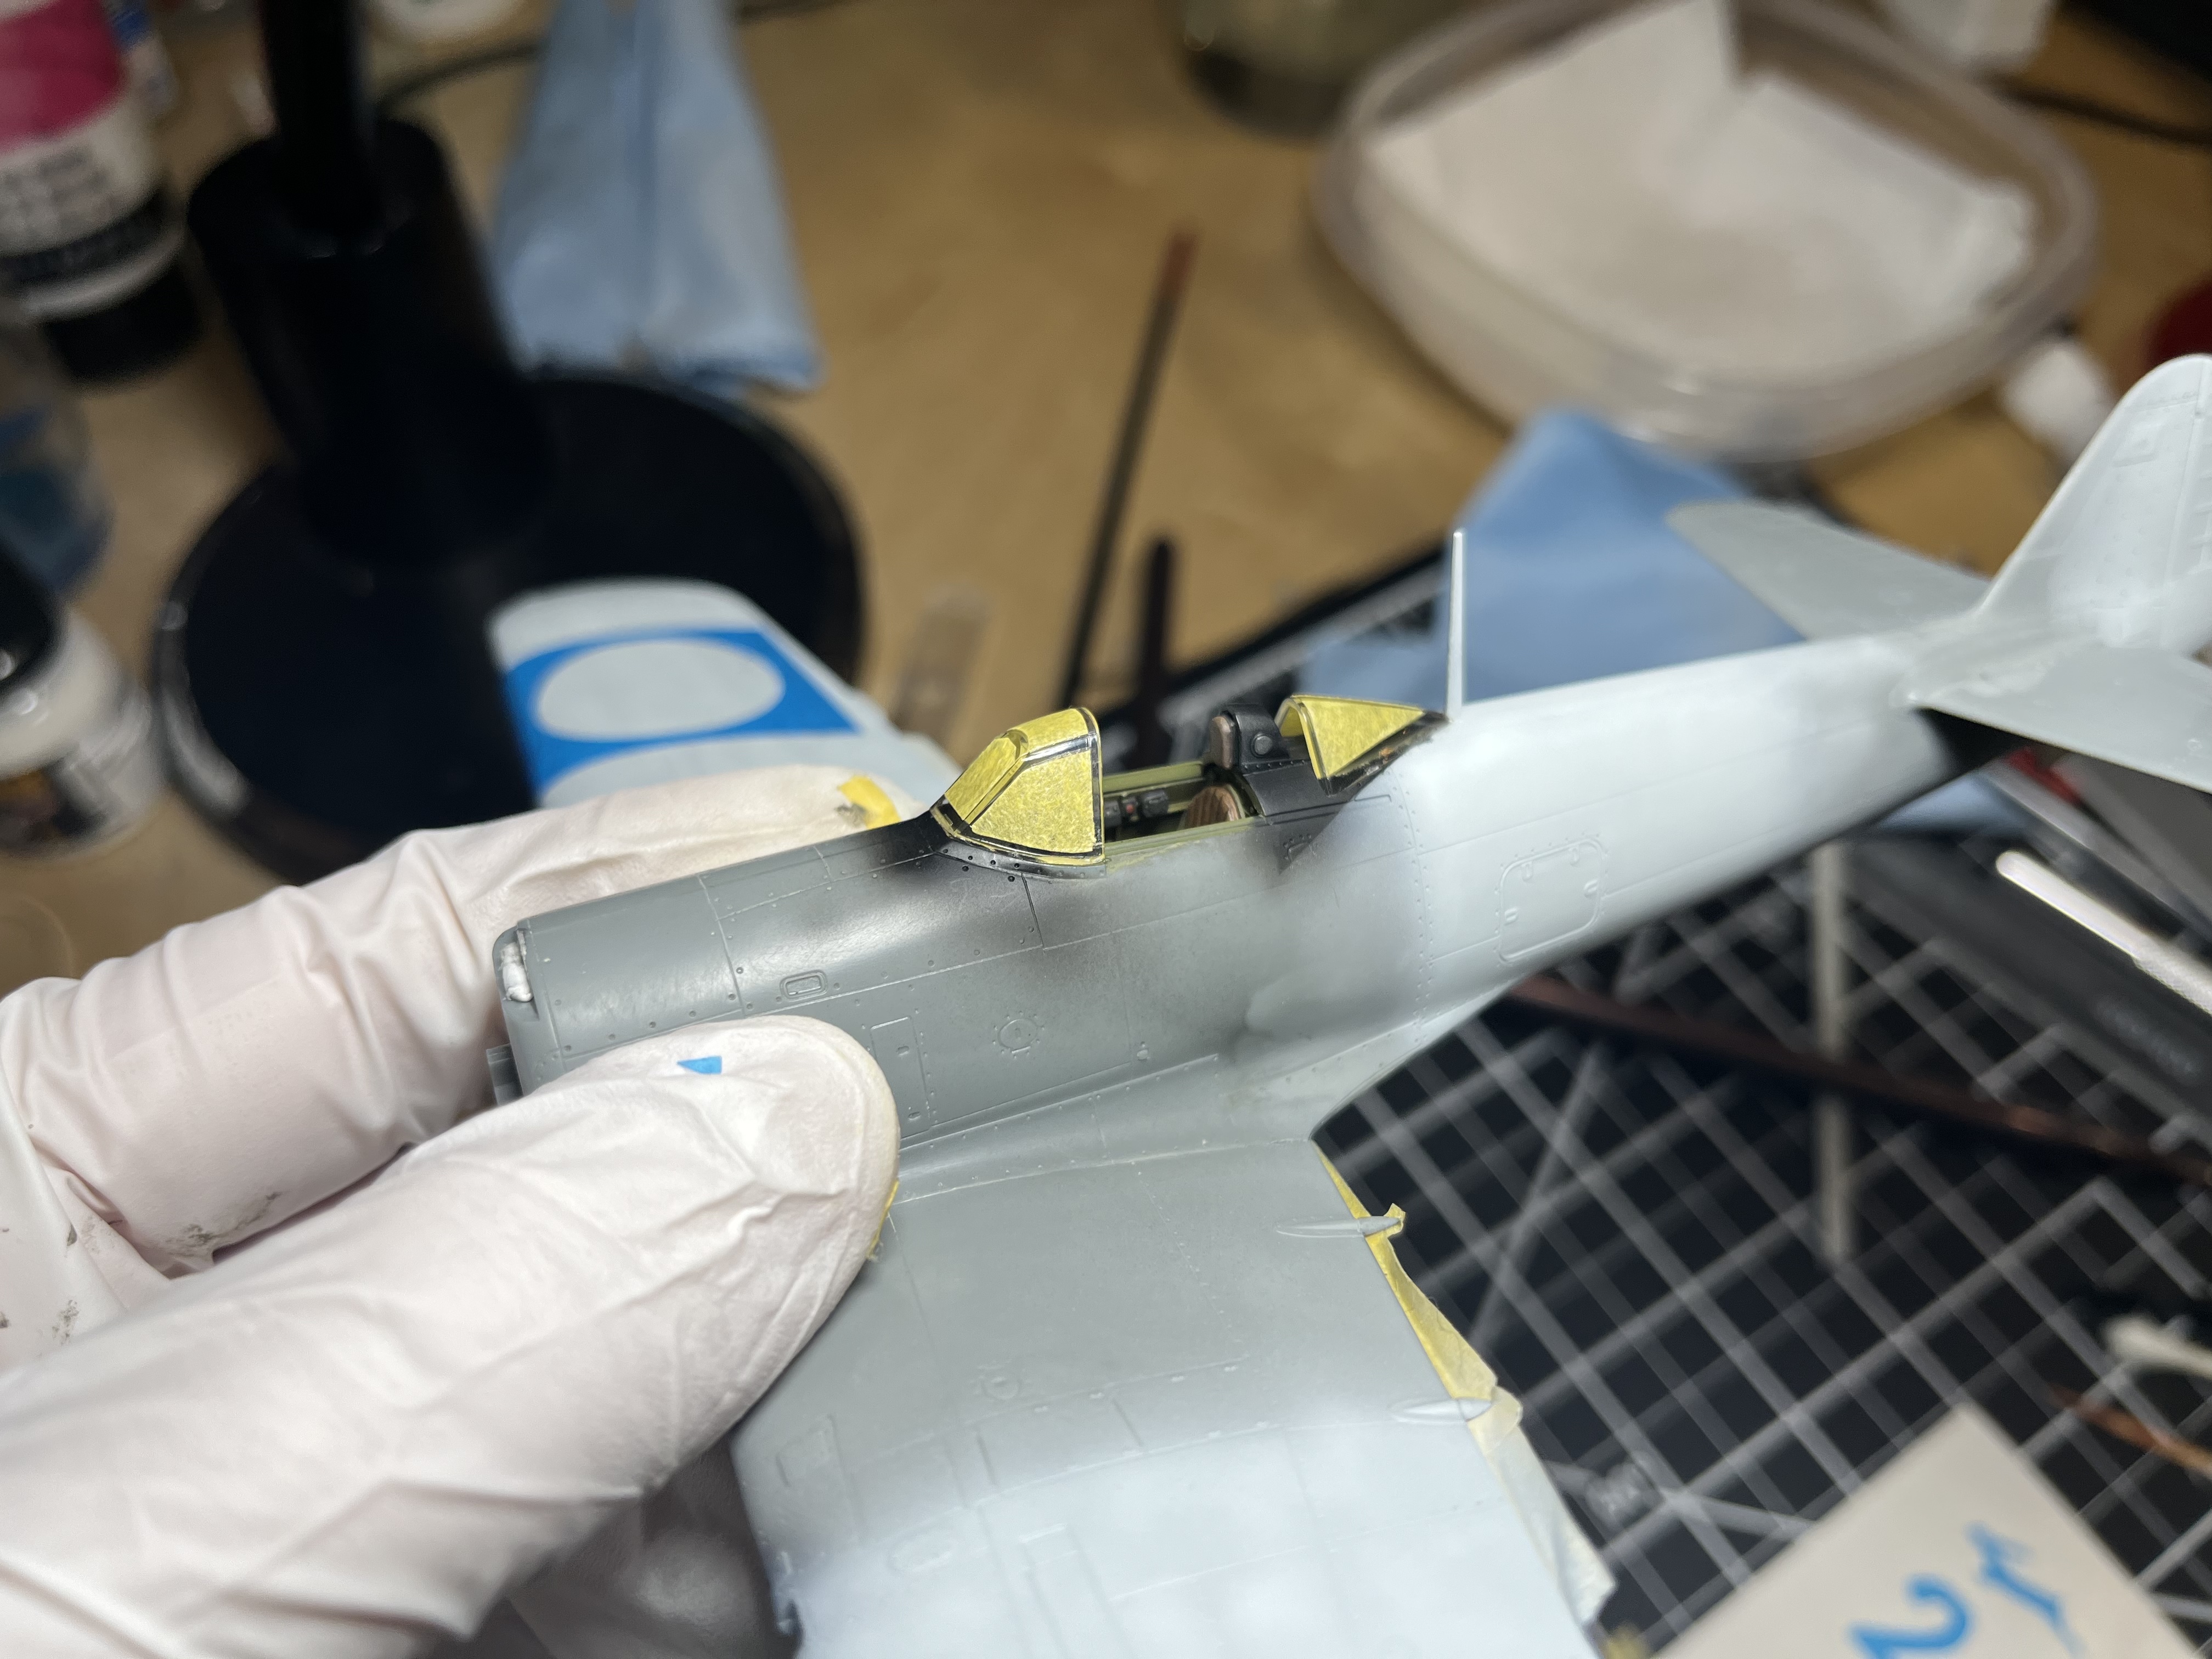

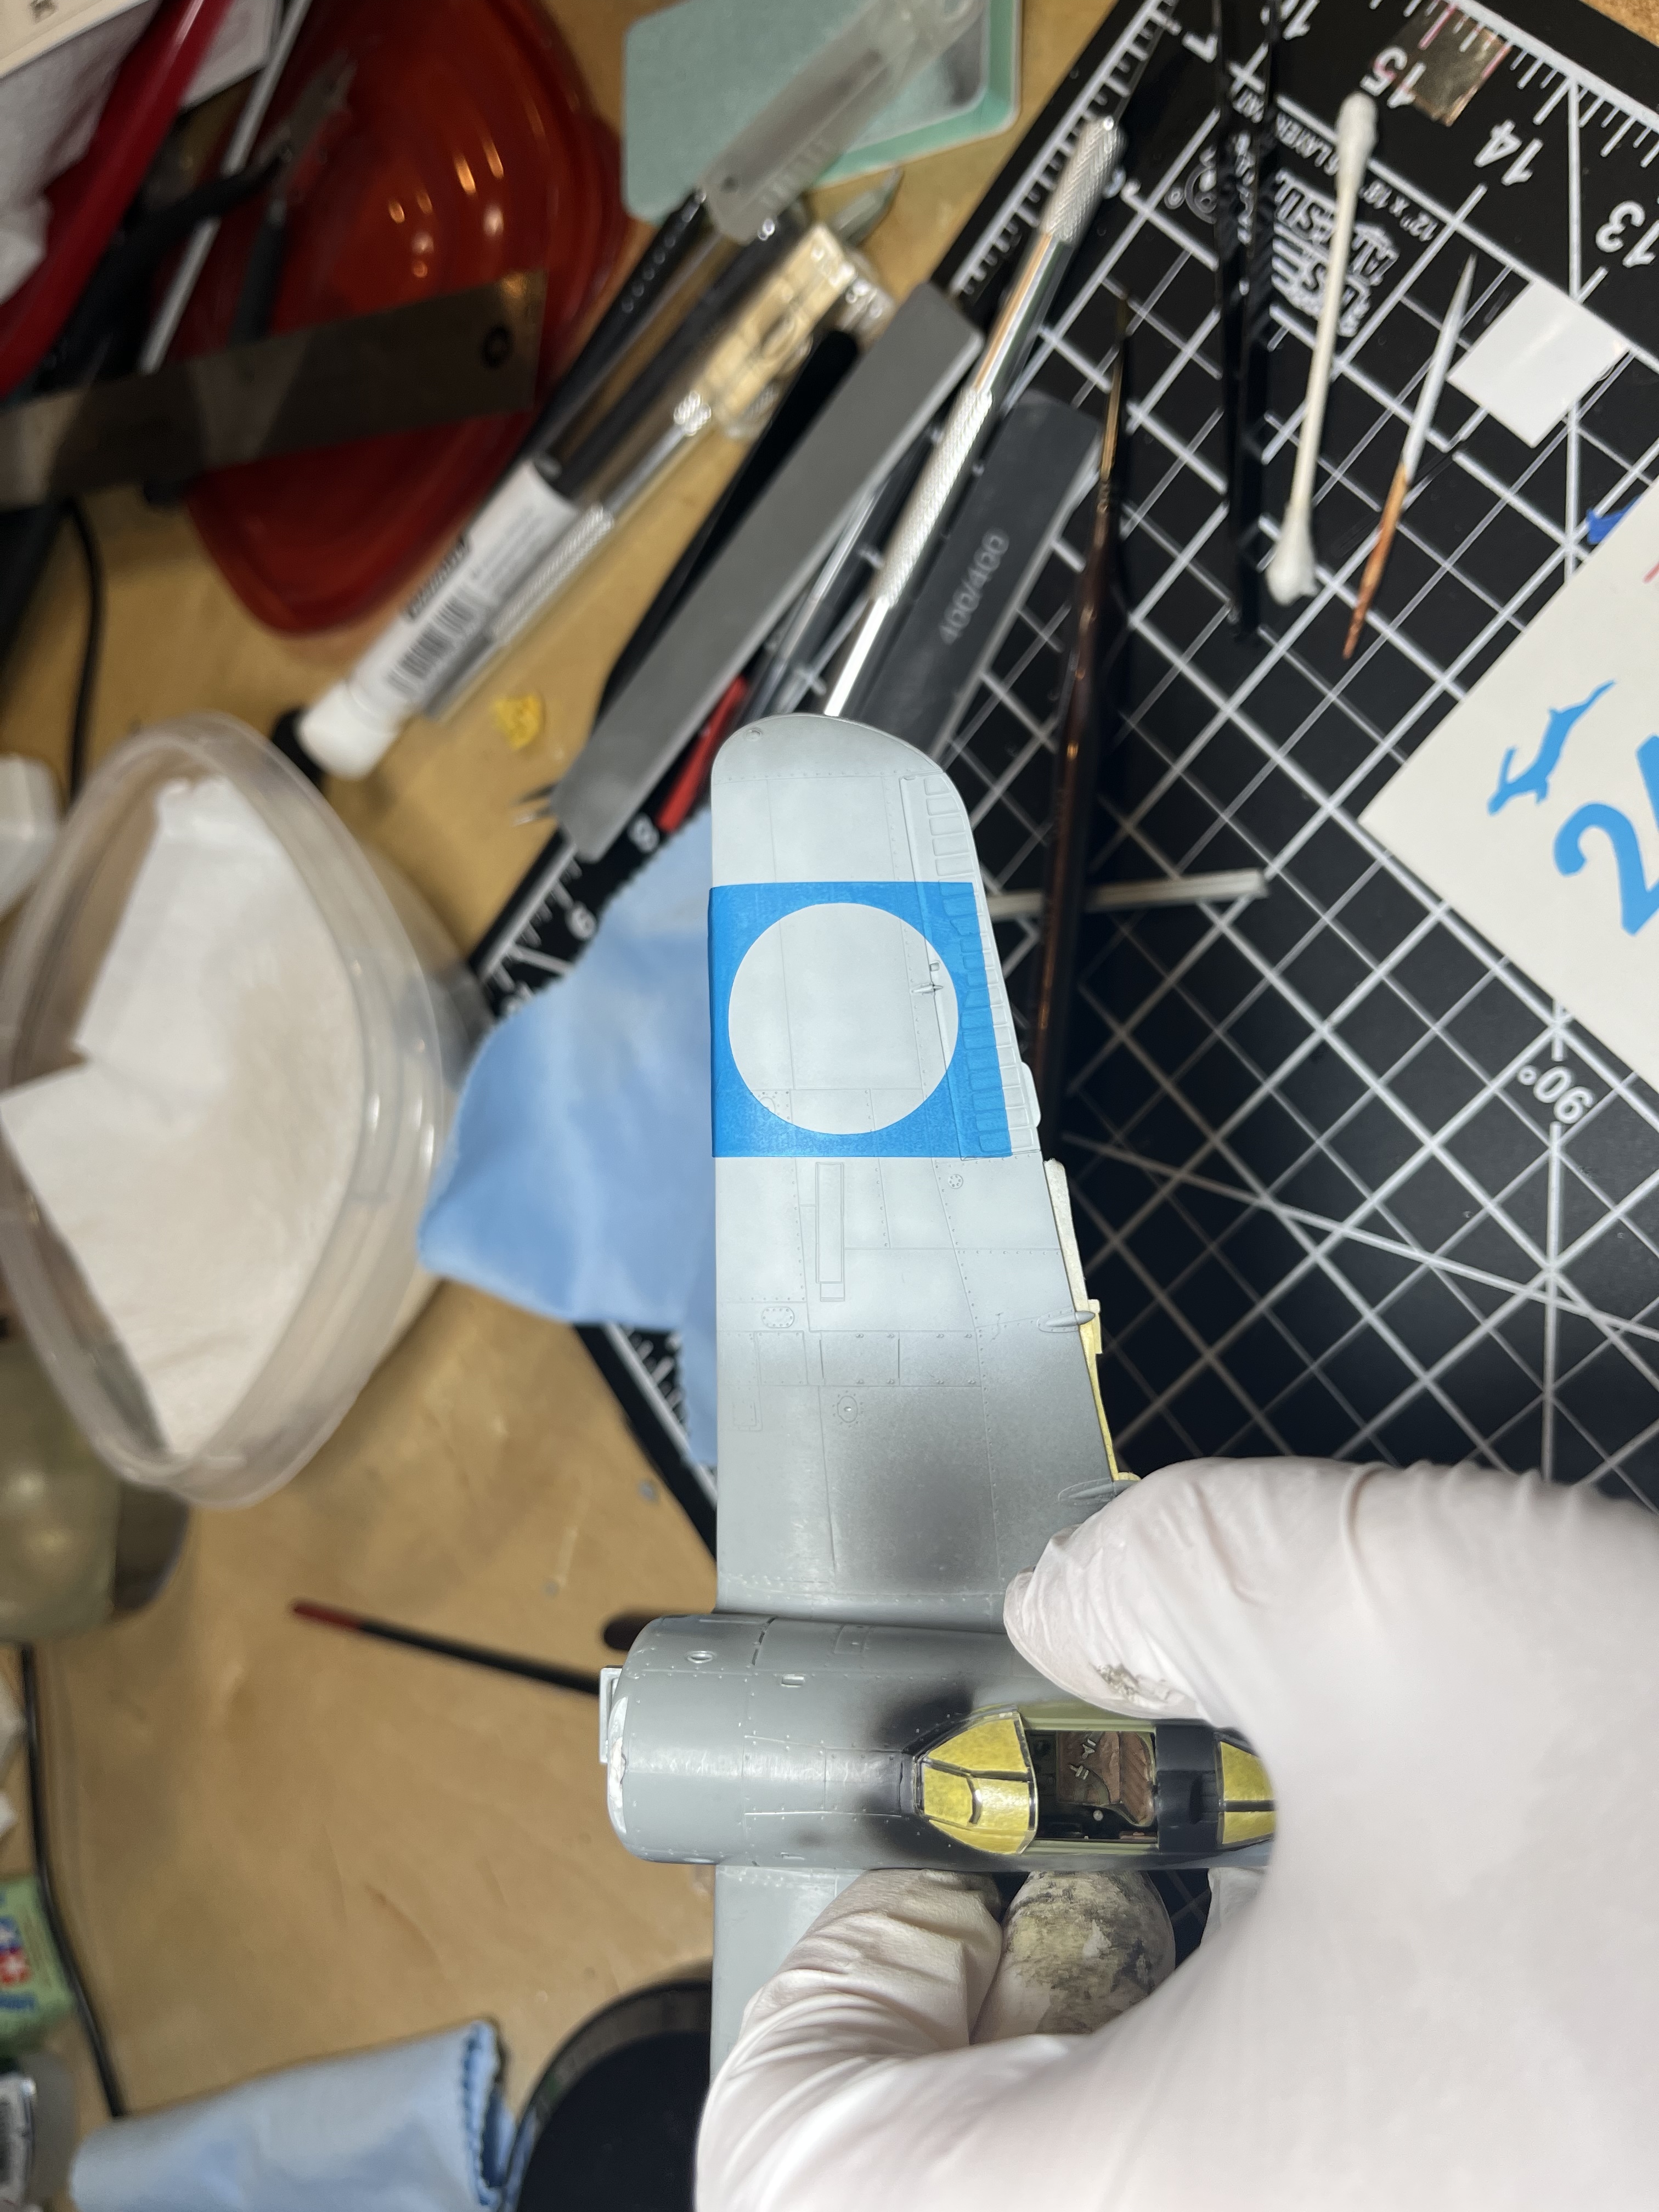
Masks I cut were a tad short, debating if I want to spray the hinumaru and roll with the vinyl masks and just add tamiya tape to the section I’m short on, or, spray the hinumaru, peel off the outer vinyl and then mask the squares with tamiya tape. The challenge with the second method is making sure the circle is centered in the outer white square. But the vinyl masks are harder to keep parallel to the wing root
7 Likes
Quick catch up before I post my final on the Banzai Charge diorama. Getting down to the crunch-time. I still have a 3rd entry underway. Yikes!!!
Mead93 / Thanks for the nice comment. Yep, it’s a rabbit. Hahaha!
RonW / You’re doing a great job on that vintage Tamiya kit.
hetzer44 / Chuck, wonderful job on the Ho-Ni. Love the paint scheme.
Mead93 / Top shelf work on the masking of the Hinumaru. Painted on looks better than decals.
Good luck everyone on finishing their projects.
Bill
1 Like
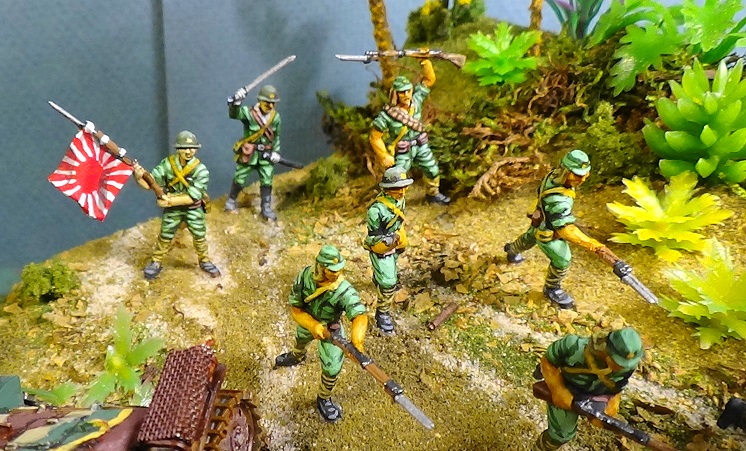
Final reveal of my Banzai Charge diorama.

Somewhere in the Pacific, a group of exhausted Japanese troops make the final sacrifice for their Emperor. Banzai!!!

The base is styrofoam covered with air dry clay.

The ground work is Woodland Scenics turf and craft store moss.

The palm trees and various plants I got off of Evilbay.
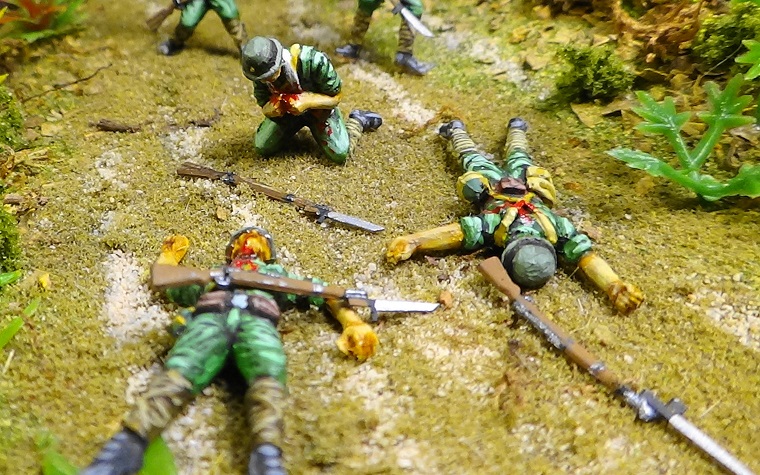
I’m pleased with how the converted casualties turned out.
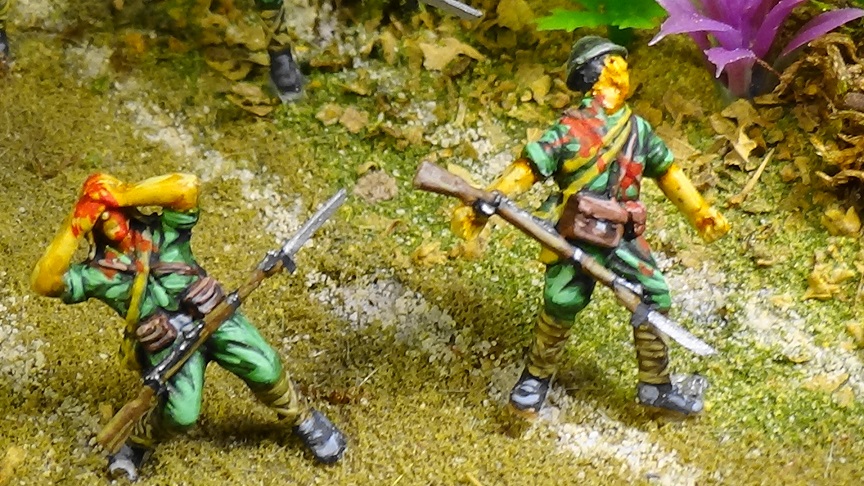
I tried to keep the gore to a minimum.
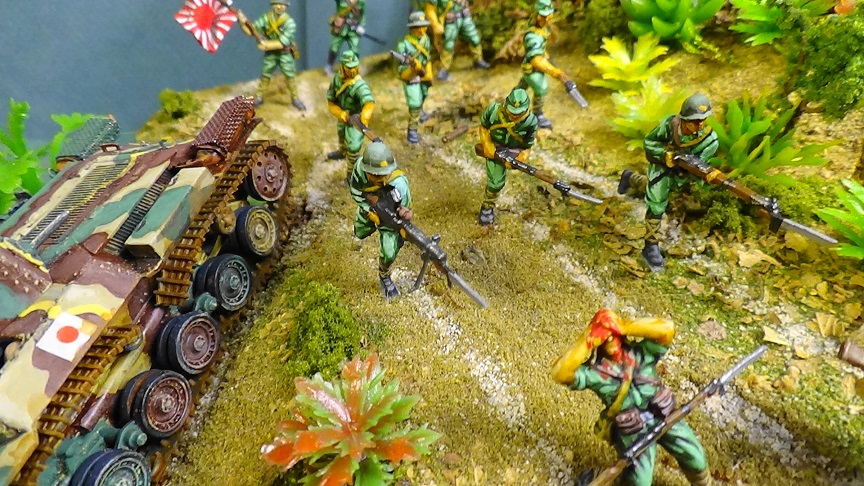
The scene evokes a sense of desperate fanaticism.
The great thing of doing a 1/72 scale scene is the space saving involved.

Having their armor support knocked out fueled their suicidal decision.
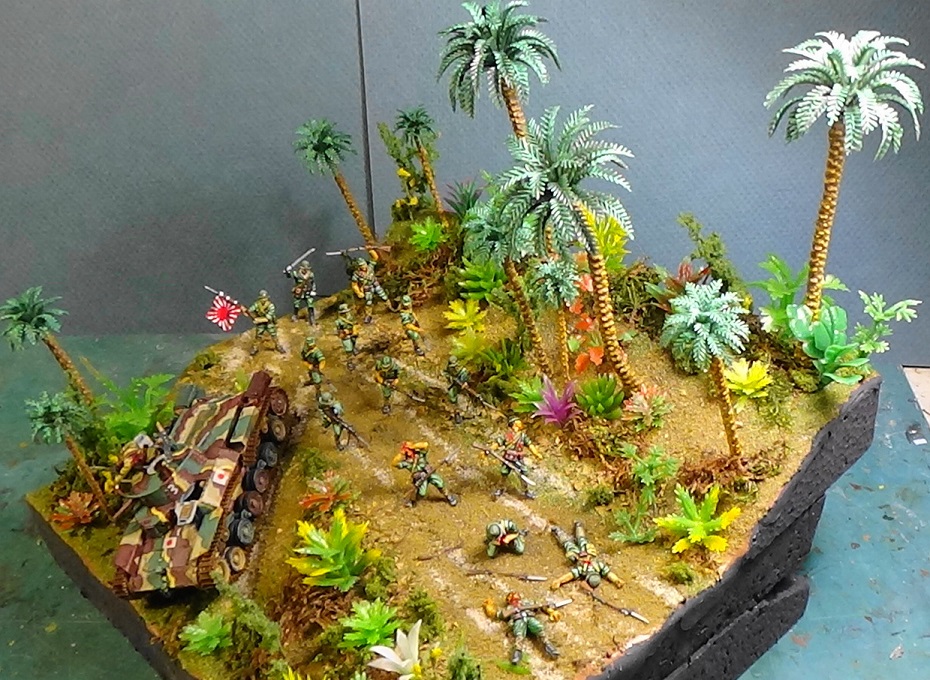
Banzai Charge is finished.
Thanks for viewing. I’m having a blast on this campaign. Happy modeling.
Bill
8 Likes
Very cool! Love the composition!
1 Like
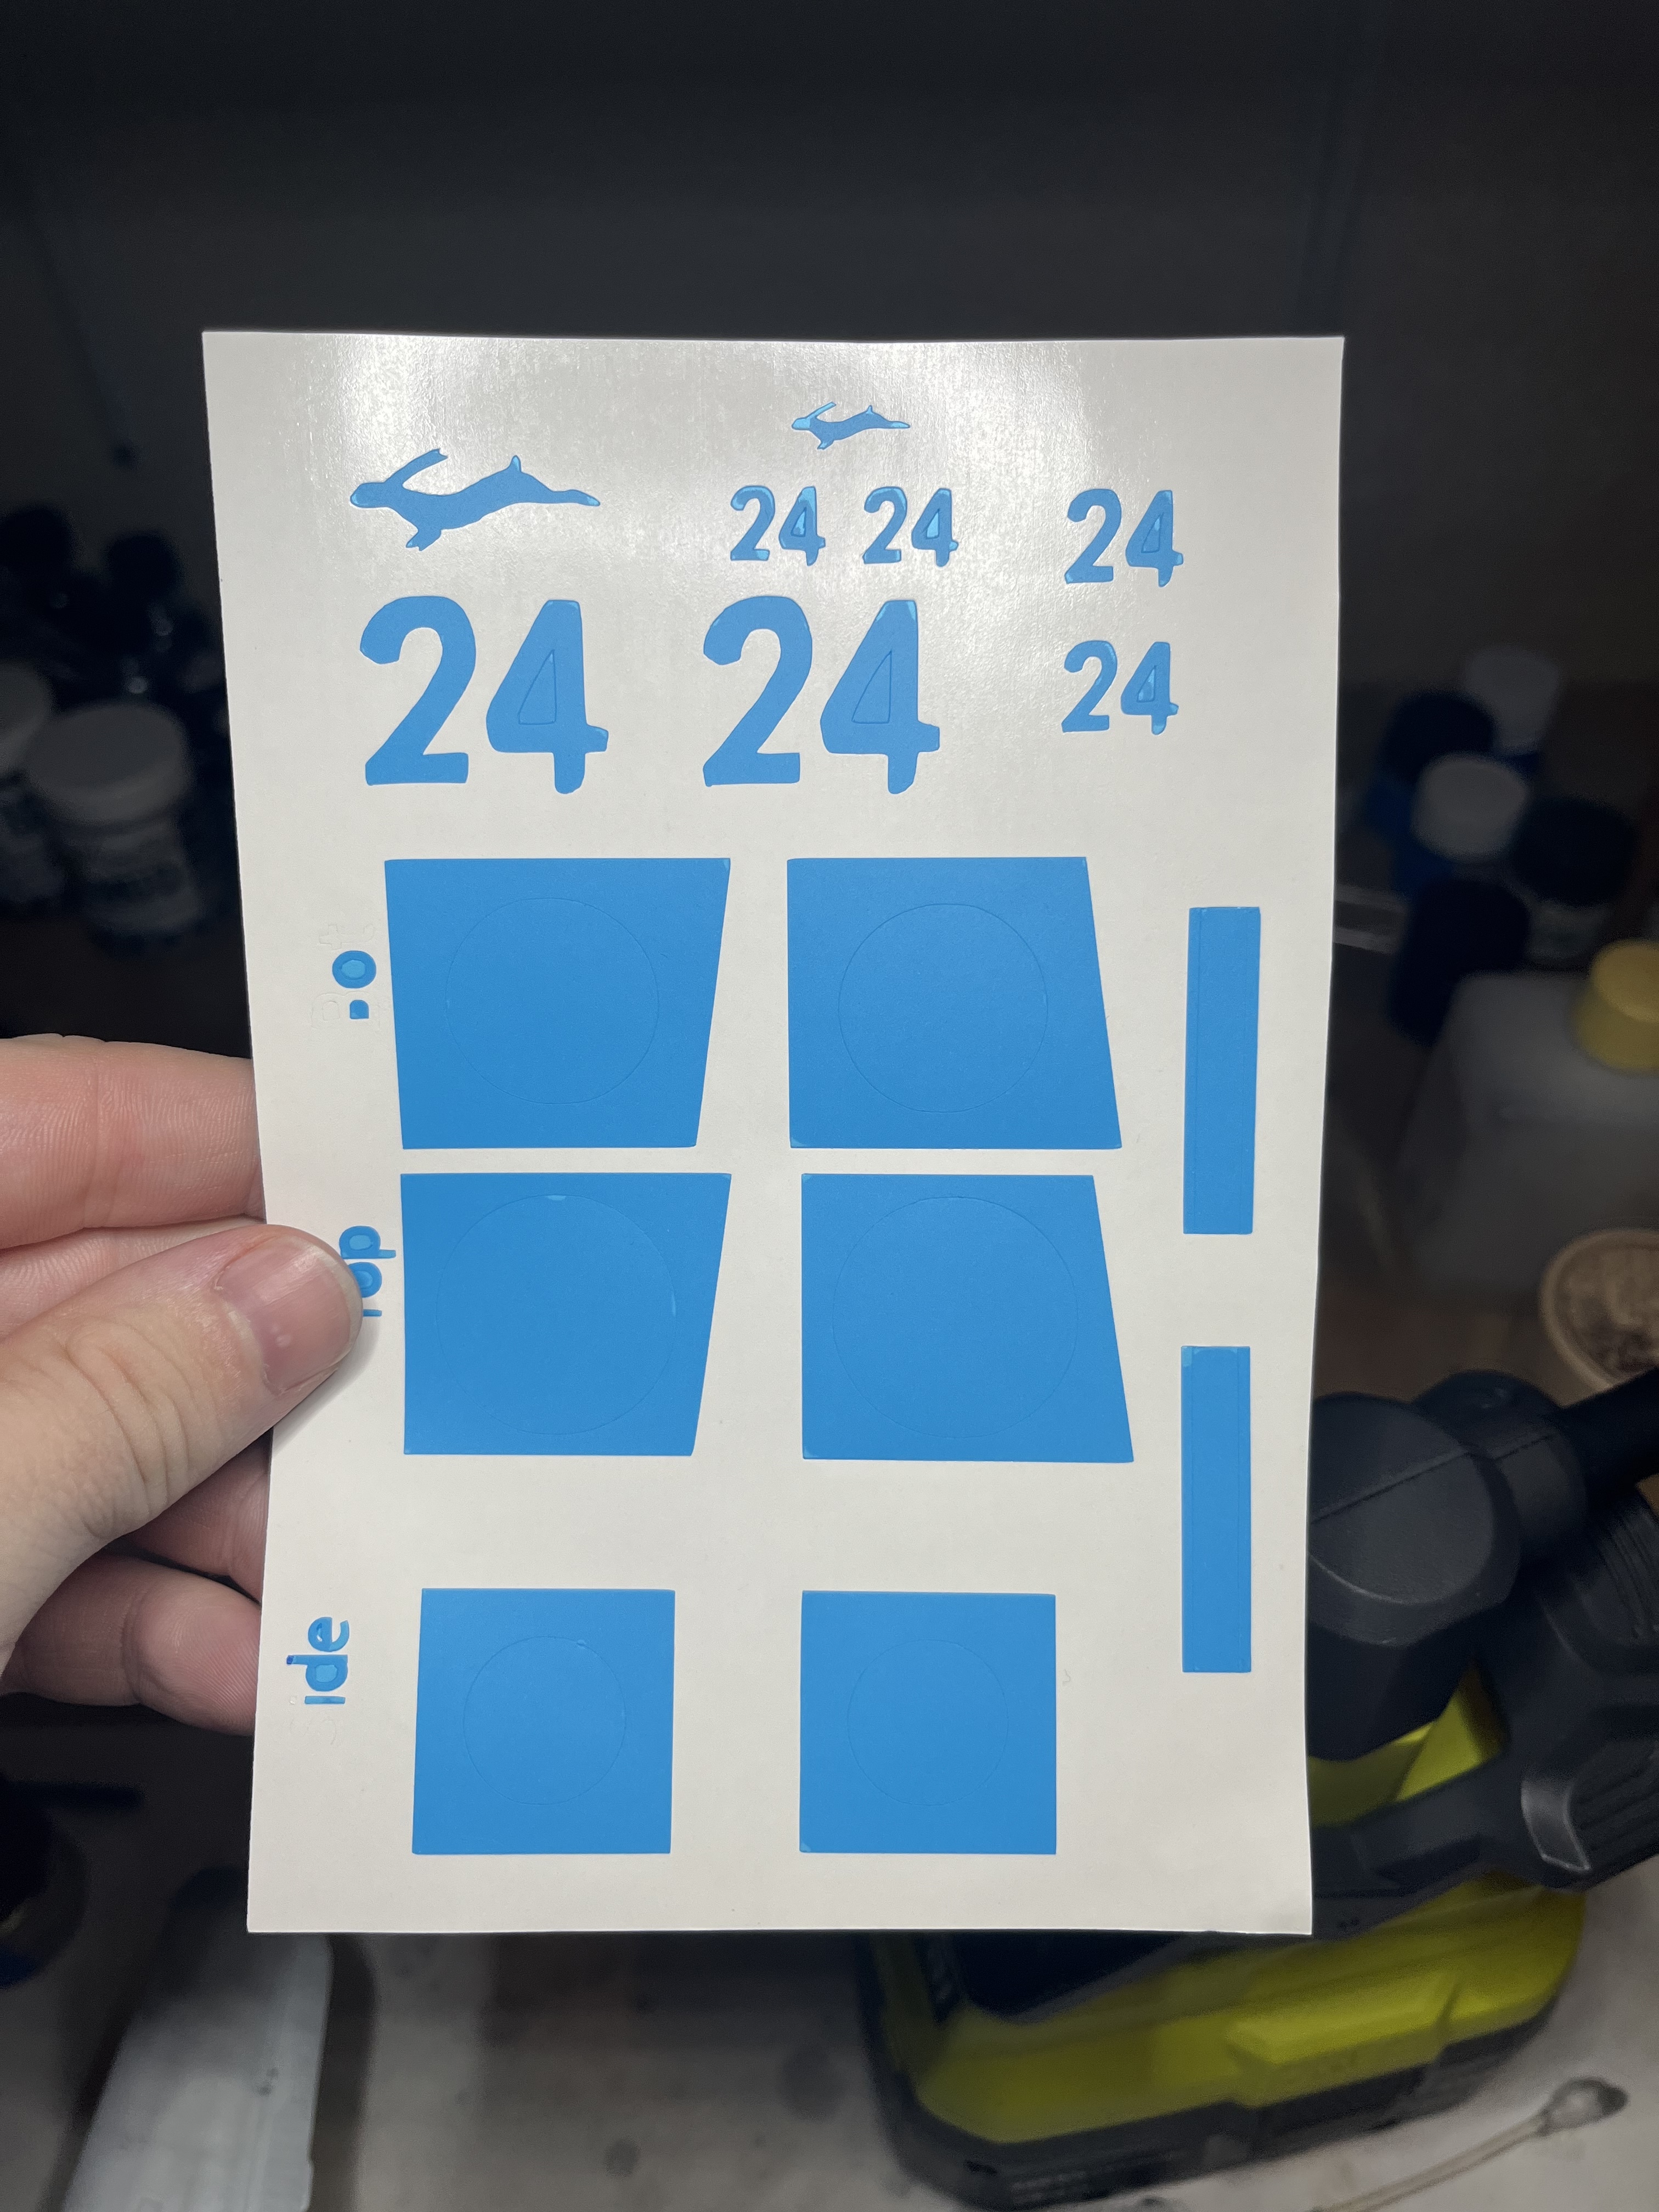
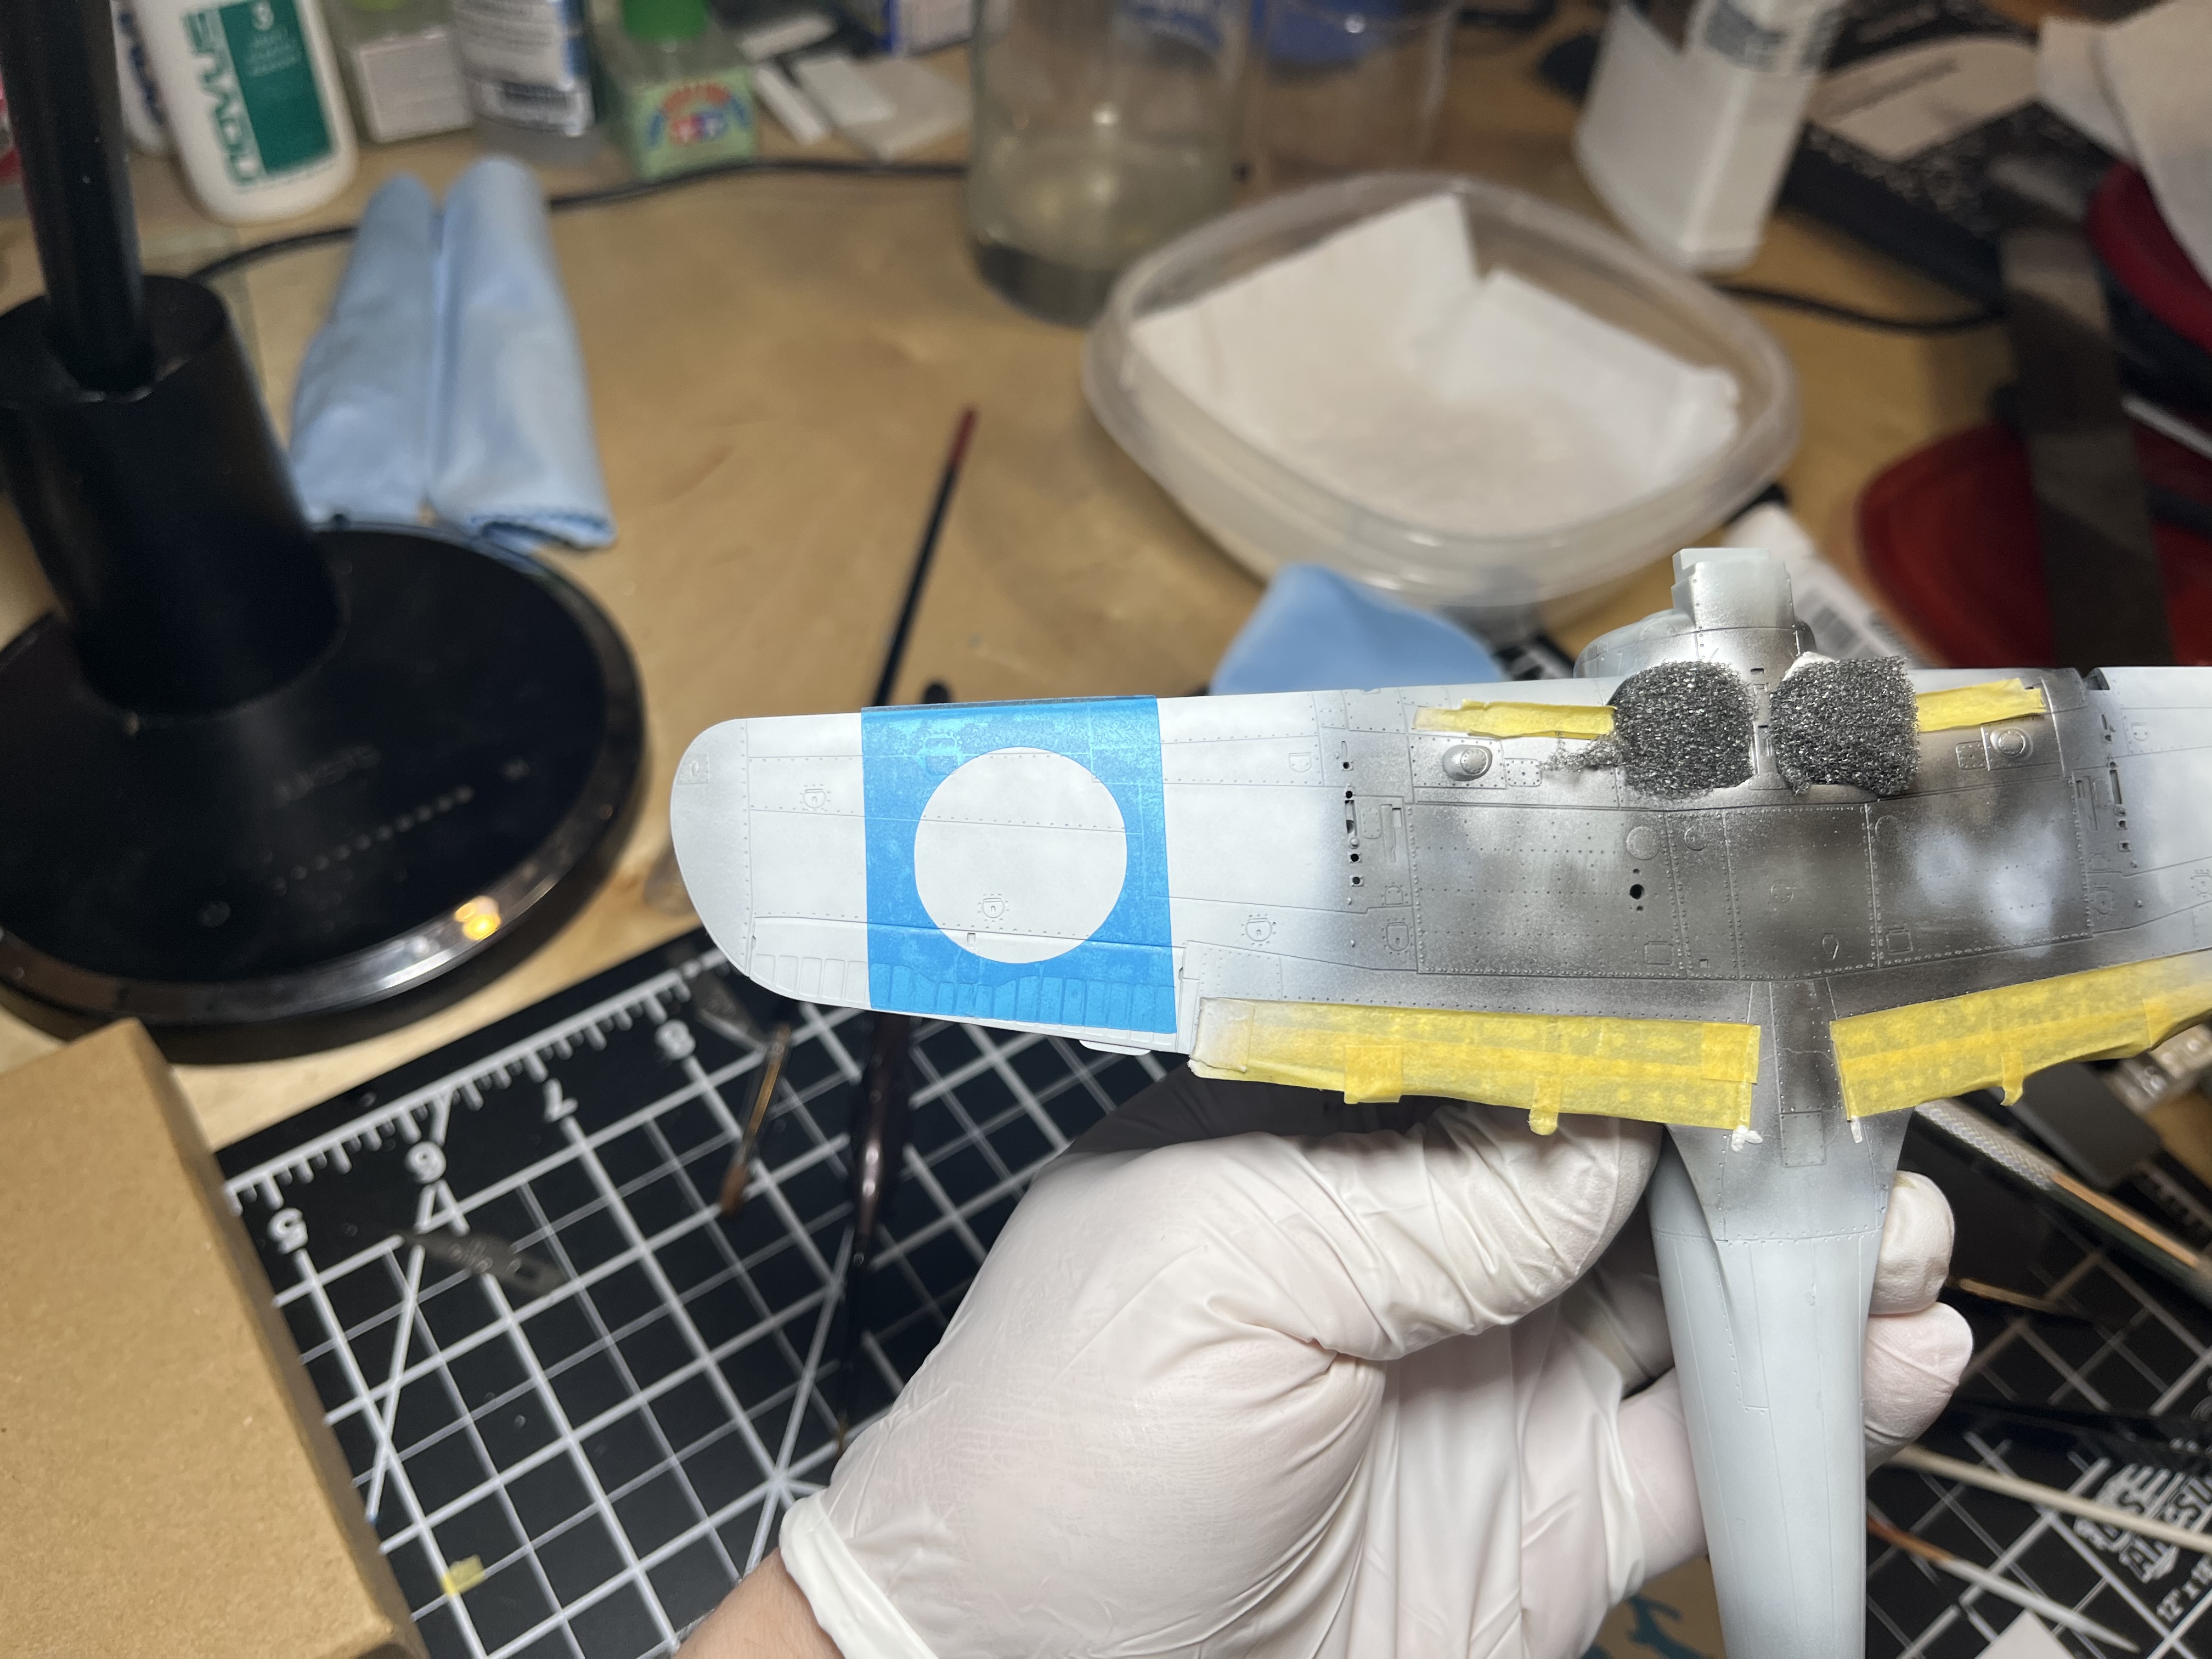
More progress on the Ki-84. Got the canopy masked, and all the markings on. I found a method for getting the ID bands in and straight. The wing tip panel line is parallel to the wing root. Or close enough. Two strips of 6mm tamiya tape parallel to this line got the mask close enough to where it need to be.
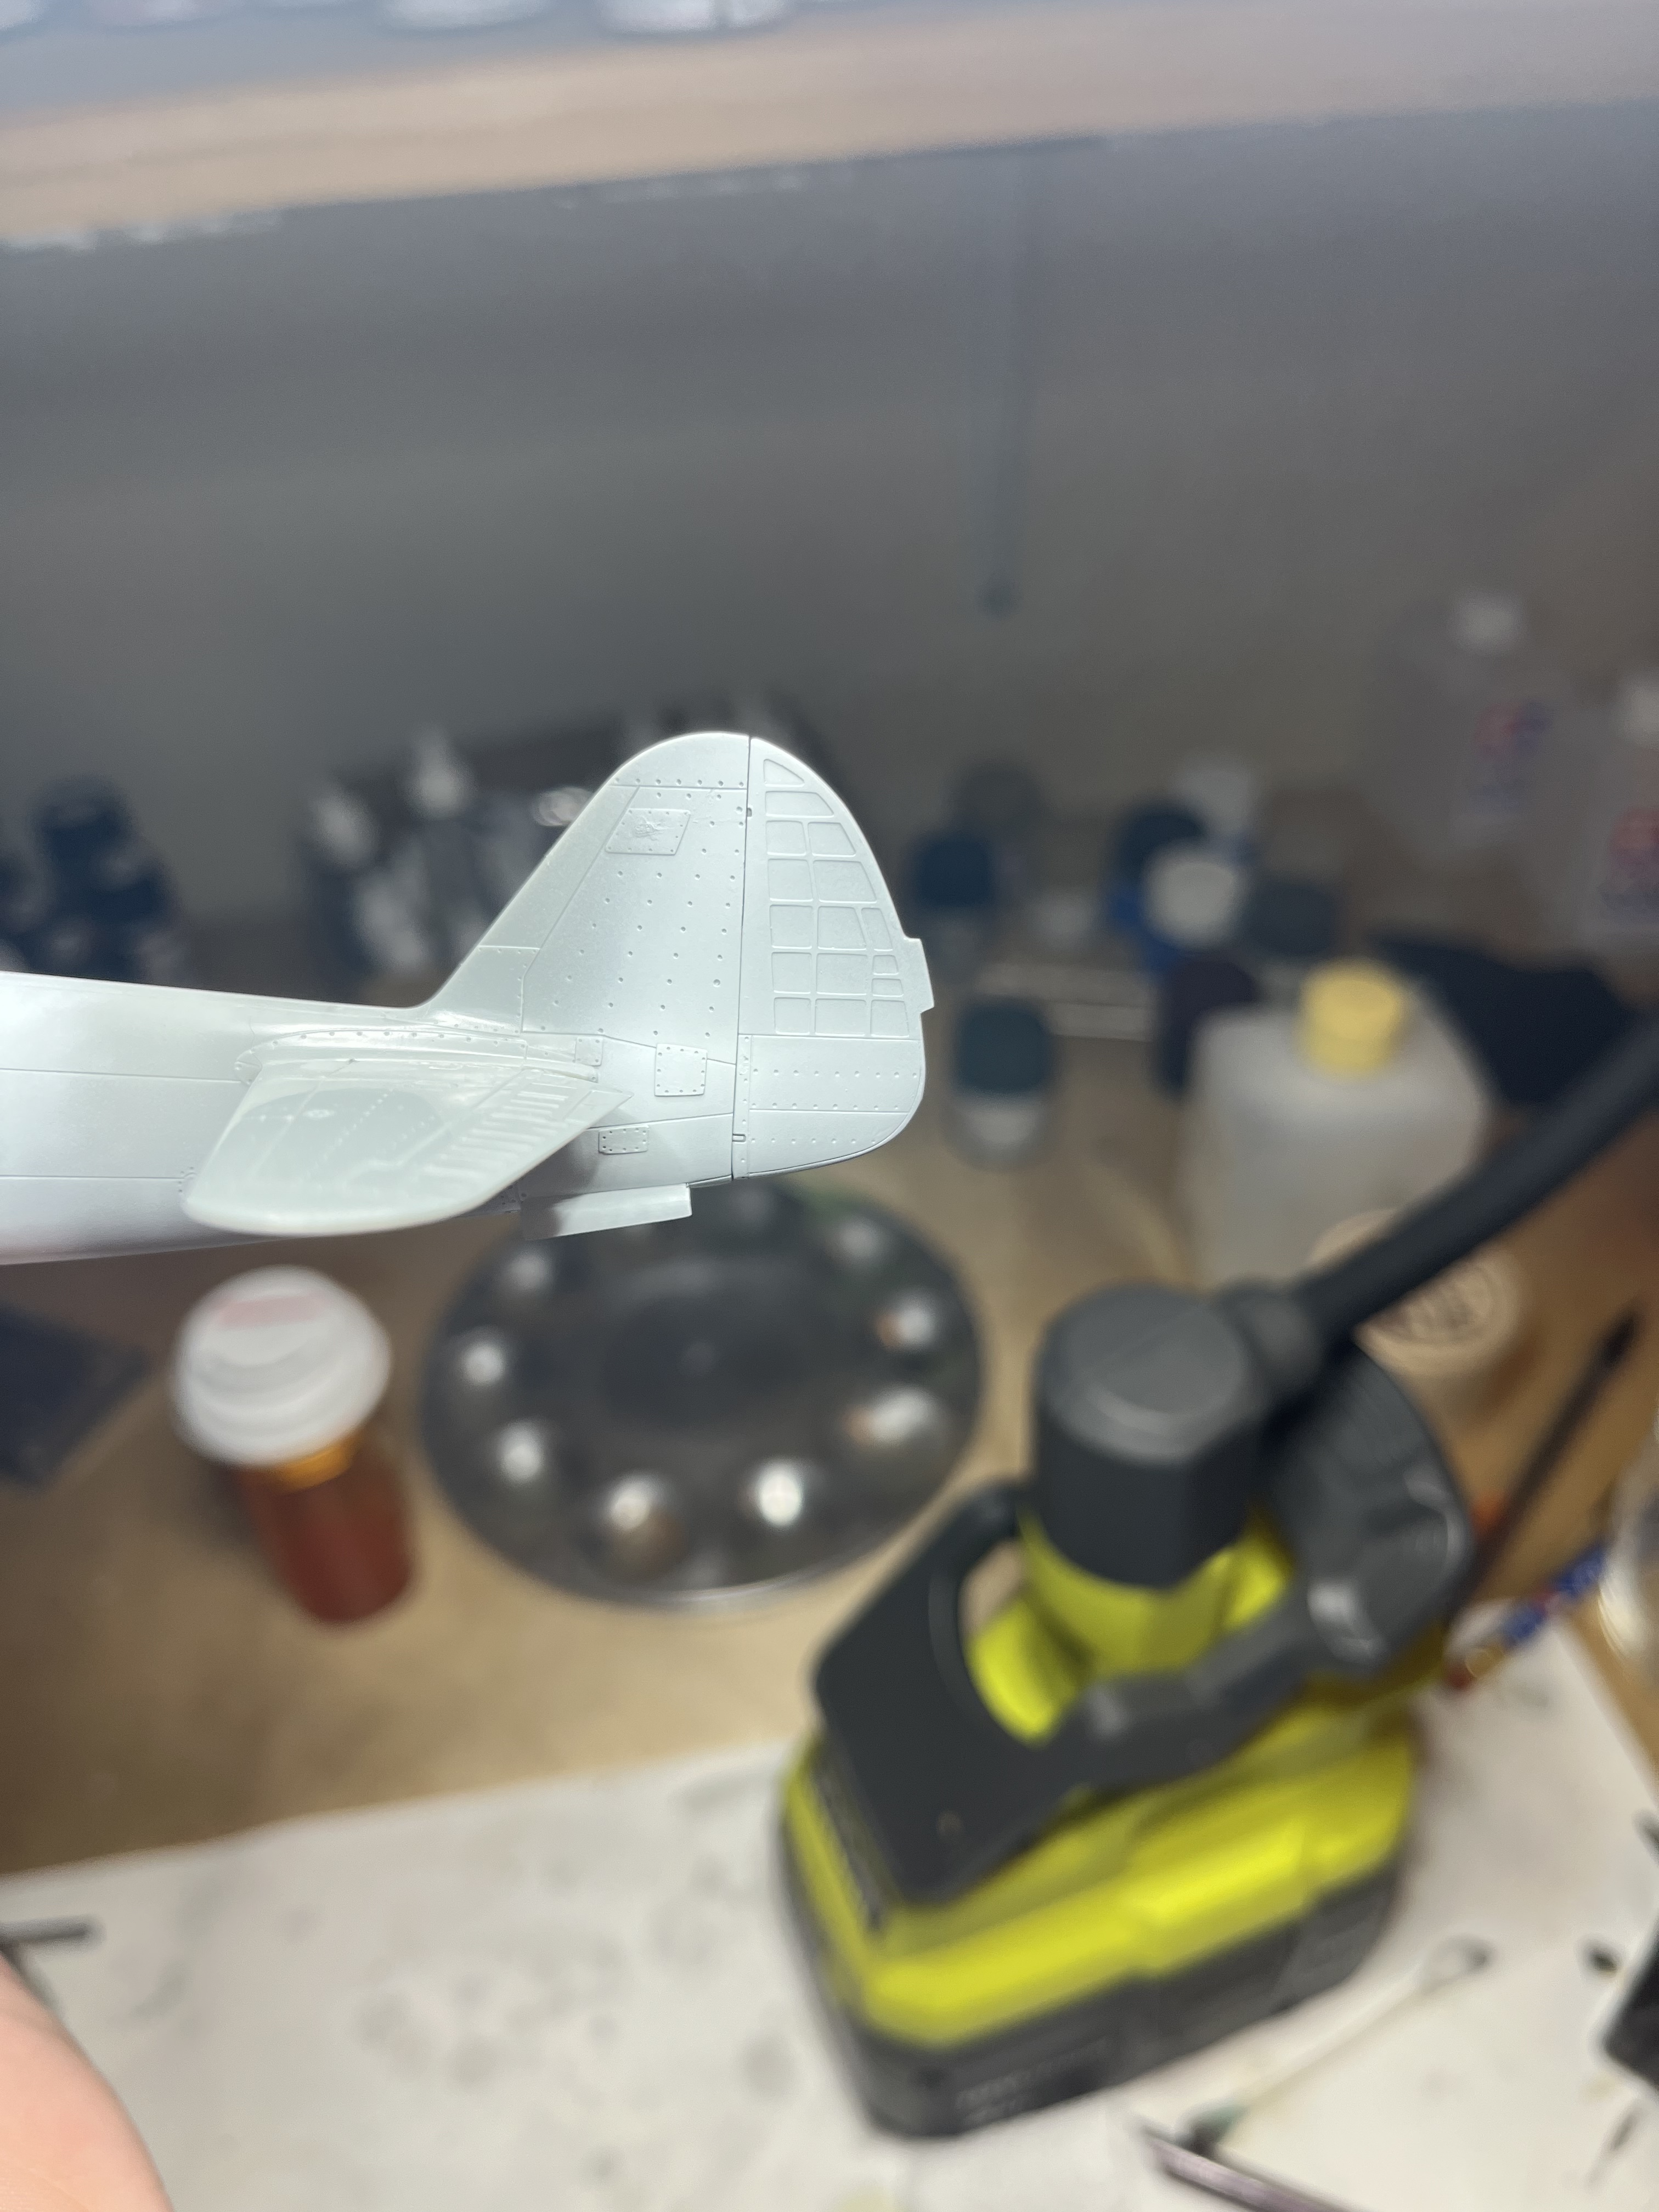
The fueslage side ones didn’t work. Too much curve which distorted the mask, so instead I painted the red, I’ll mask the circle and then go back over the white are with grey then white. I’ll use tamiya tape to mask the white ID band.


Once the red dries, I’ll mask it off, re paint the white in the fueslage and tail stripe and then reprime and begin the base coat which will be an aluminum under coat, white olive drabish top sides and great under sides. I’ll weather this one quite a bit as it will be a late war B-29 interceptor
8 Likes
Beautiful diorama, William! Love the composition and the excellent details on both figures, tank and landscape!
1 Like
Time to catch up on the comments.
Mead93 / Thank you for the compliment. You are doing top notch work on your model. Painted on looks the best.
SGTJKJ / Thanks for the kind comment. I appreciate it.
Well I have a 3rd entry underway. Down to crunch time. Hahahaha!!
Bill
1 Like
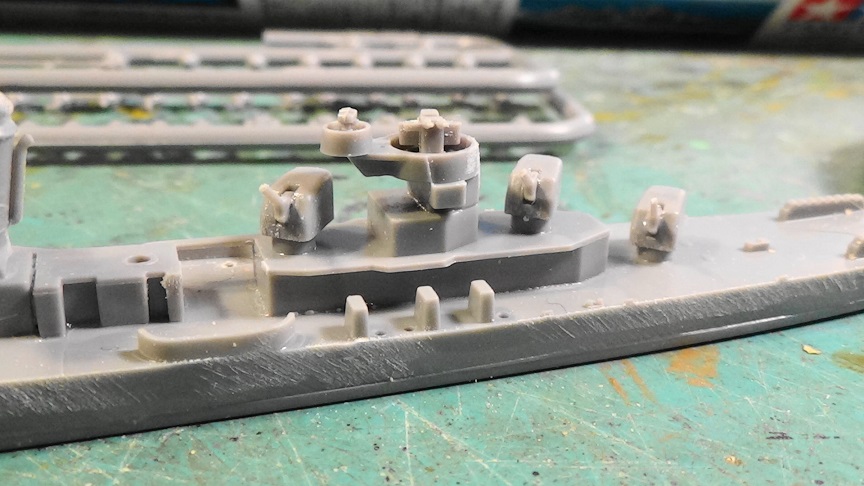
Here’s my 3rd entry for the campaign. Ohka Attack diorama. It will be a box diorama with an Ohka suicide rocket plane attacking a U.S. Destroyer.

A Shake n Bake Tamiya kit. No problems foreseen.

Great detail as expected from Tamiya.

I’m using the Ohka from this nice Hasegawa kit. Image copyright Scalemates.

Not a high part count, but nicely molded. It even has the transport trolley.
That’s it for now. More updates to follow soon. Thanks for viewing.
Bill
5 Likes
Update #1. Ohka Attack box diorama.

I angled the guns upwards to conform to an aerial attack.
I did the same for the rear gun batteries.

I added a missing 20mm gun position at the rear.
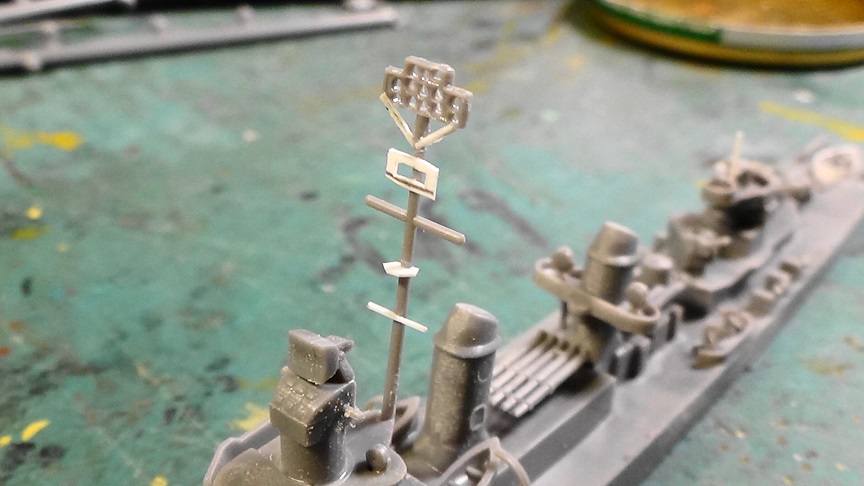
I added some details to the main mast.

Main construction complete.
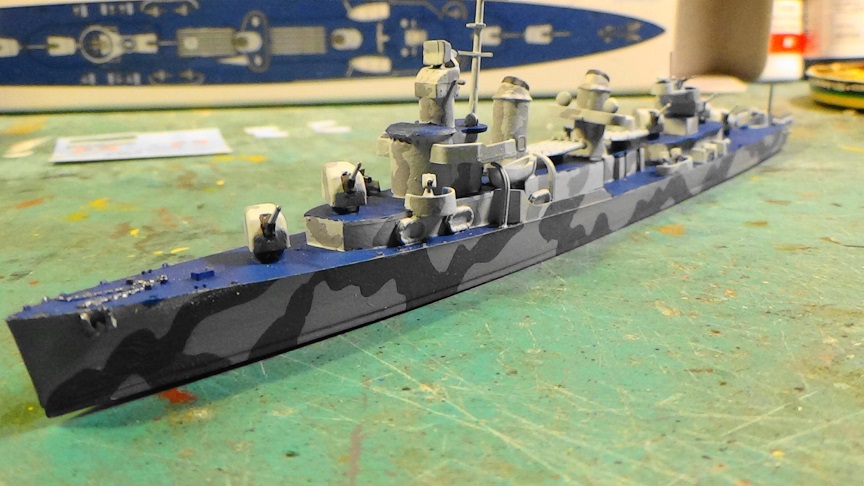
I painted it in the kit provided color profile.

Last minute detailing. I added missing supports and bracing. Also added missing hatches.

Work on the Ohka. I added a pilot figure(from my spares). Also added side wall detail to the cockpit.
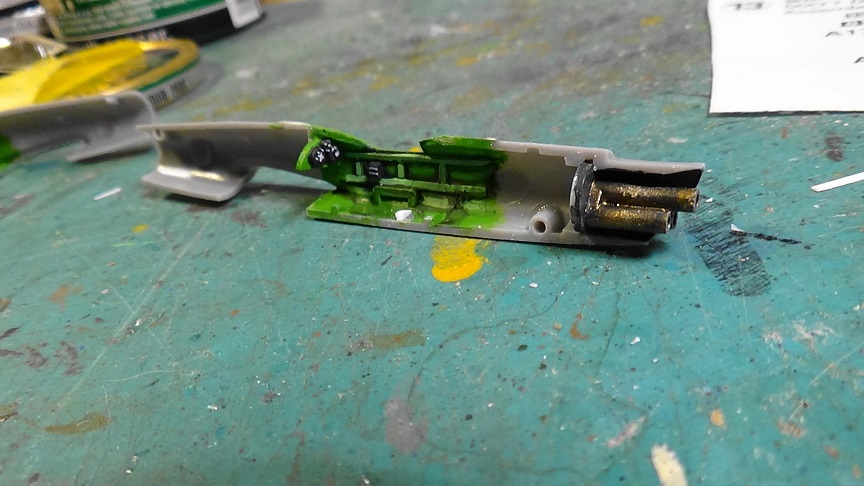
Painted cockpit and rocket exhausts.

Painted pilot figure…ready for installment.
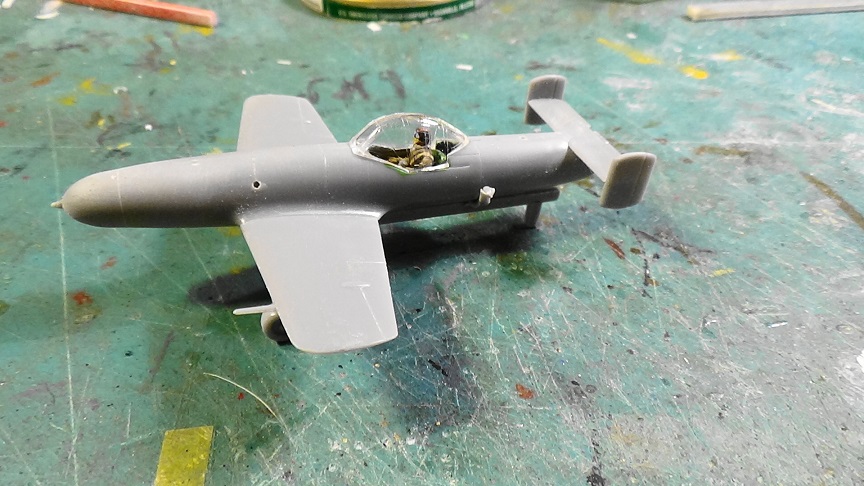
Ohka construction done.

I added a sighting device. Styrene post and PE gun sight.
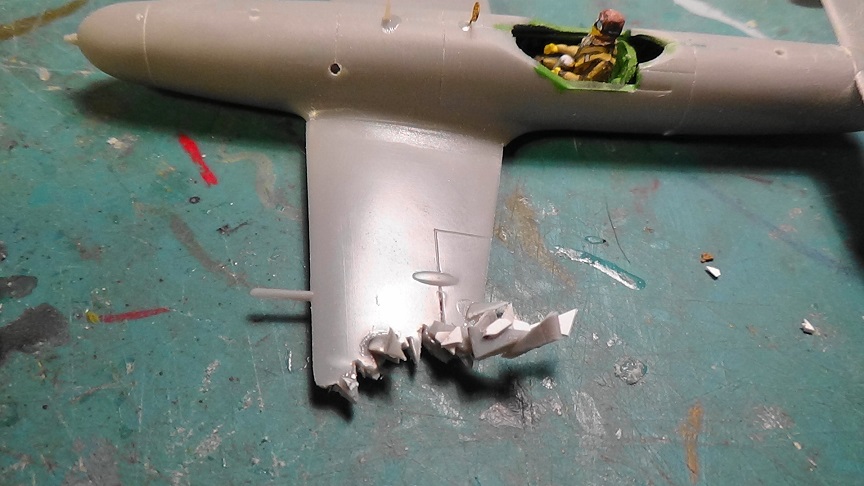
Added Flak damage to left wing.
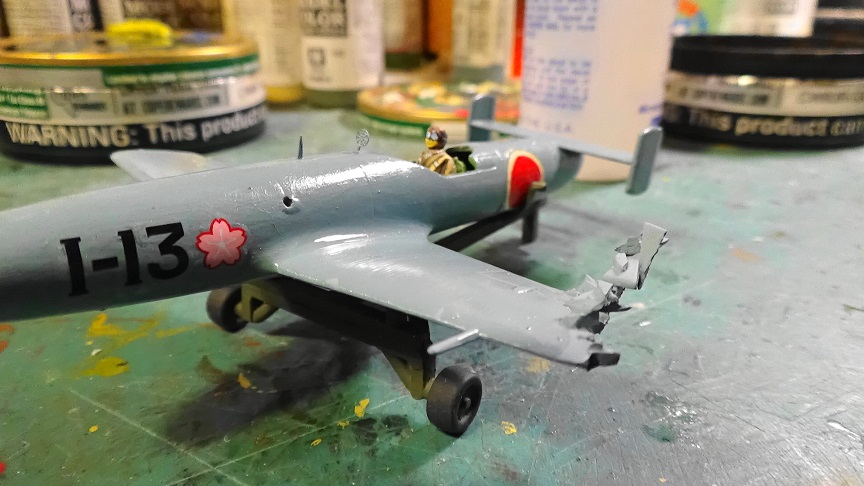
Ohka painted and decals applied.
Next I’ll be making the box diorama with waterscape and flak explosions. Thanks for viewing.
Bill
10 Likes