Nice job Tomas!
Thanks for your comments Fred, Peter and John!
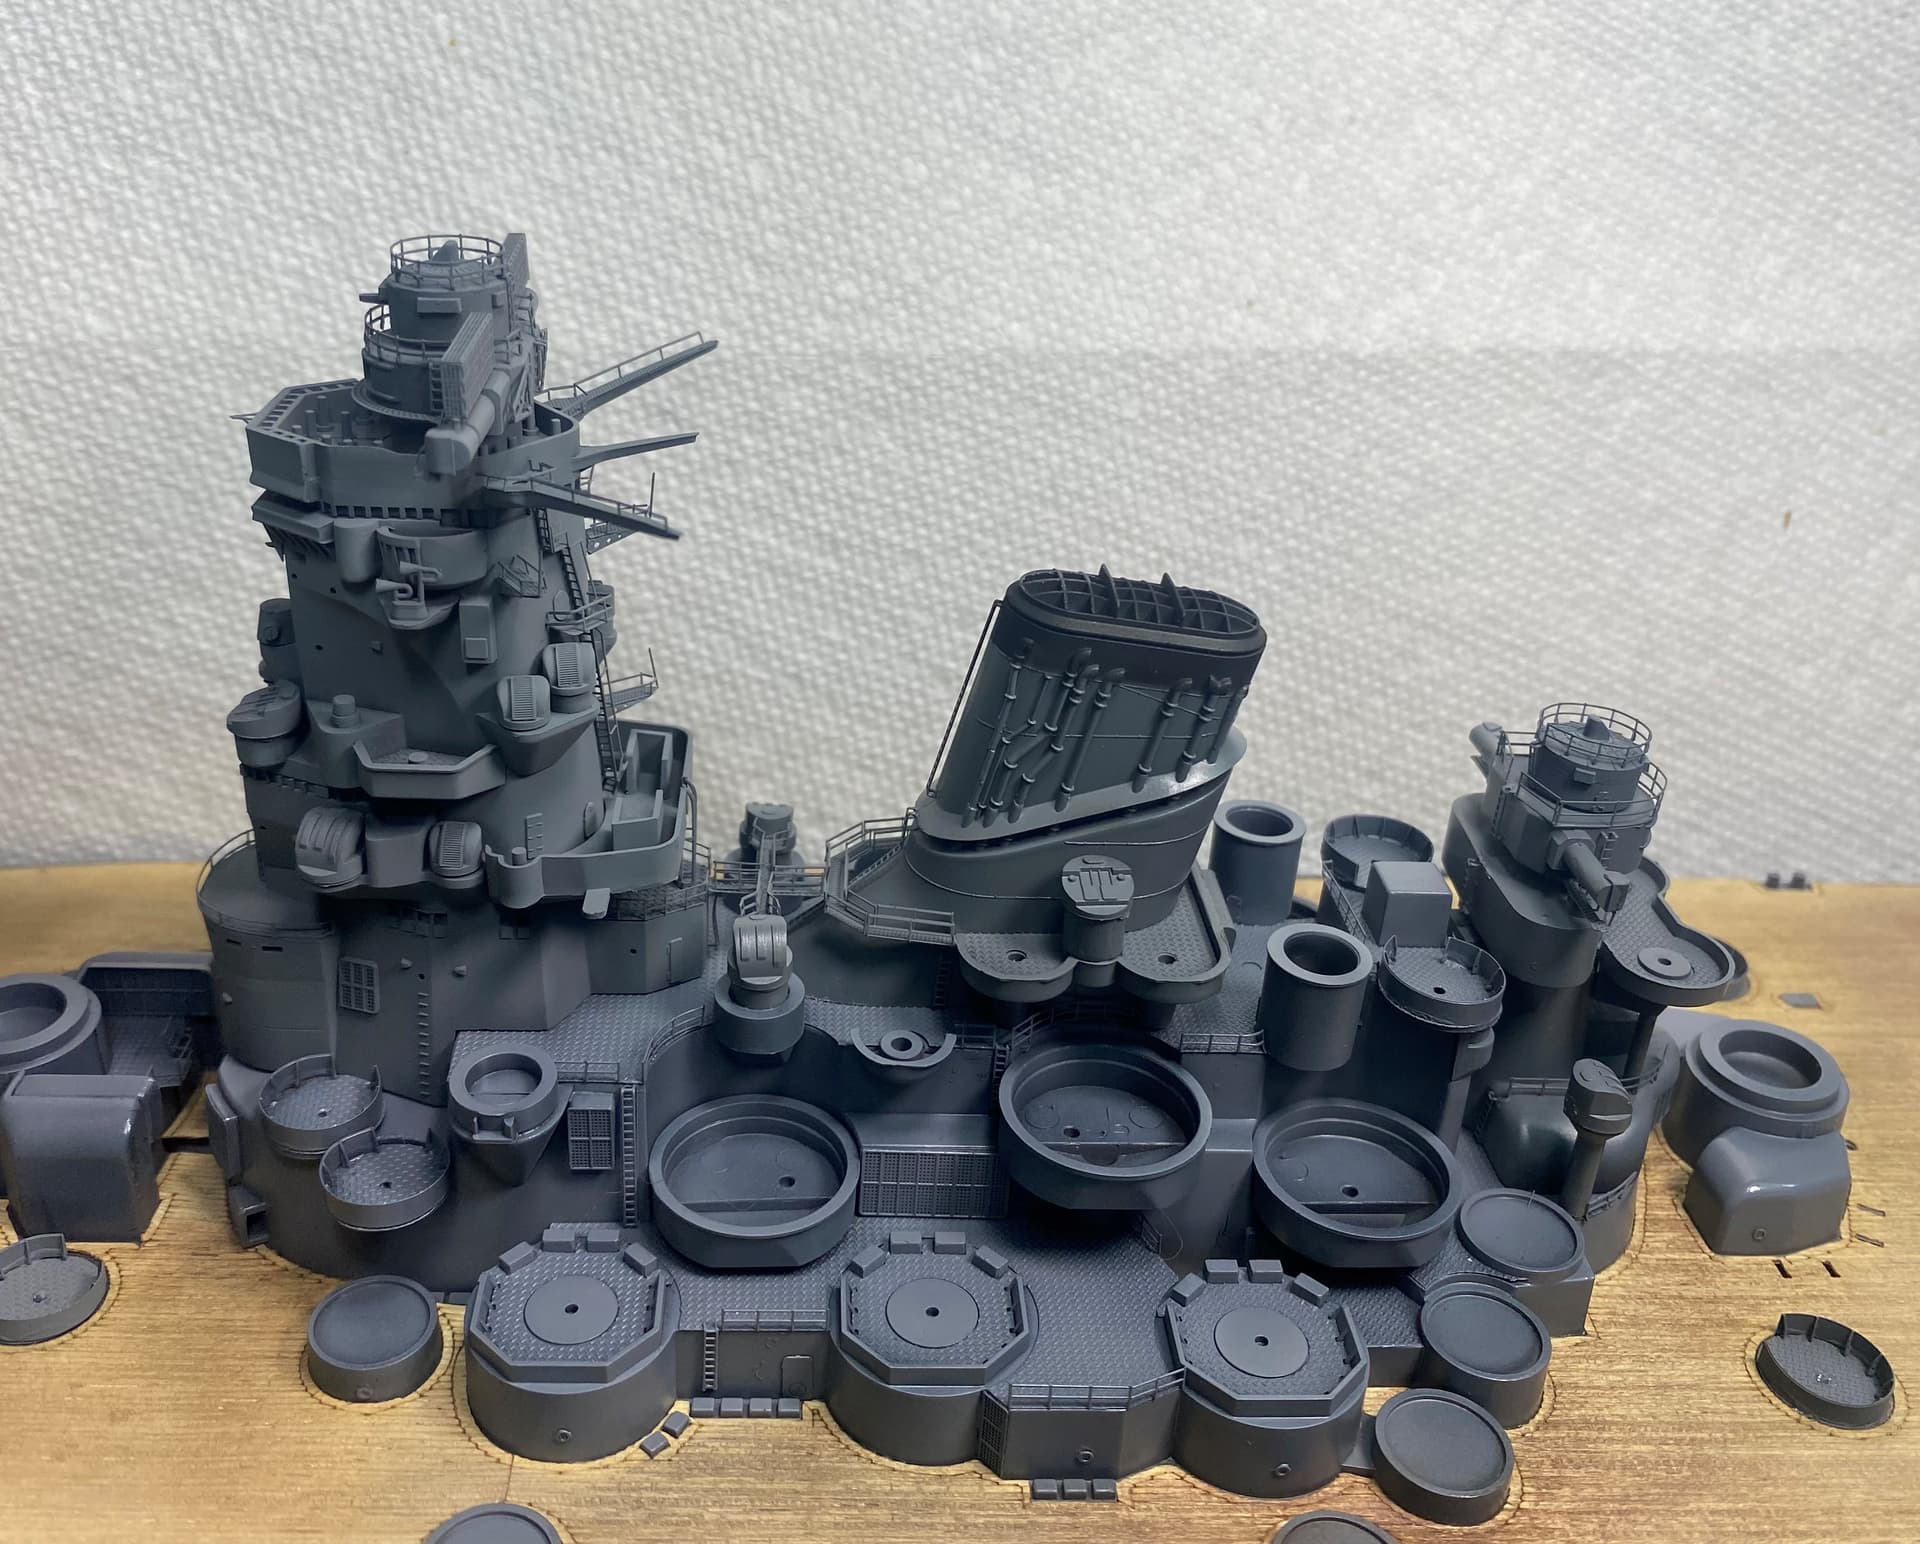
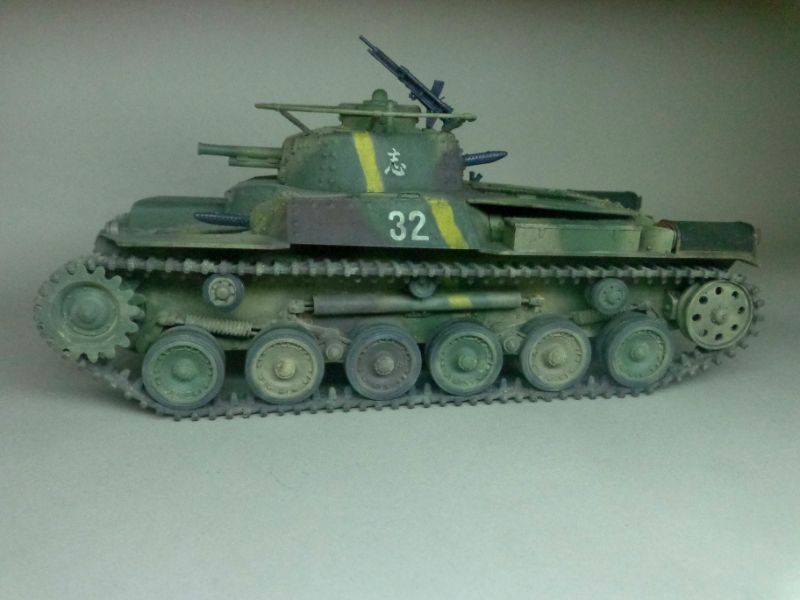
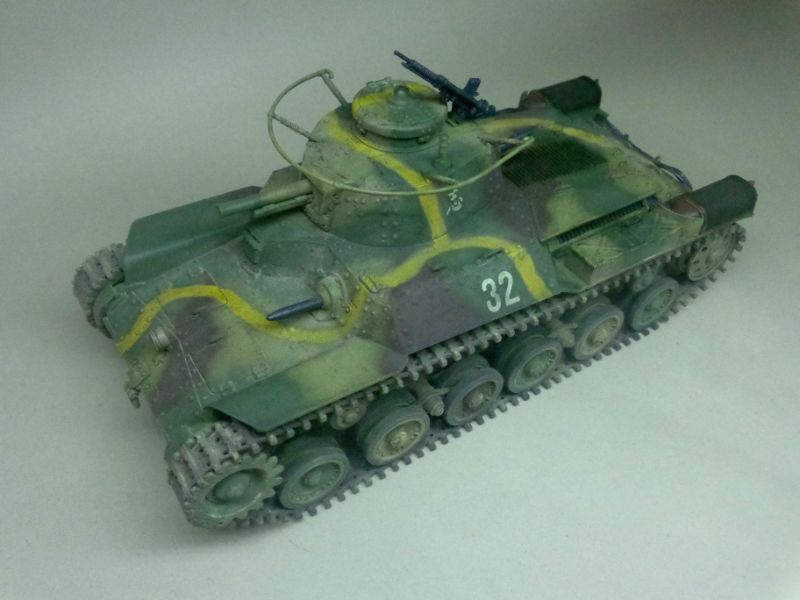
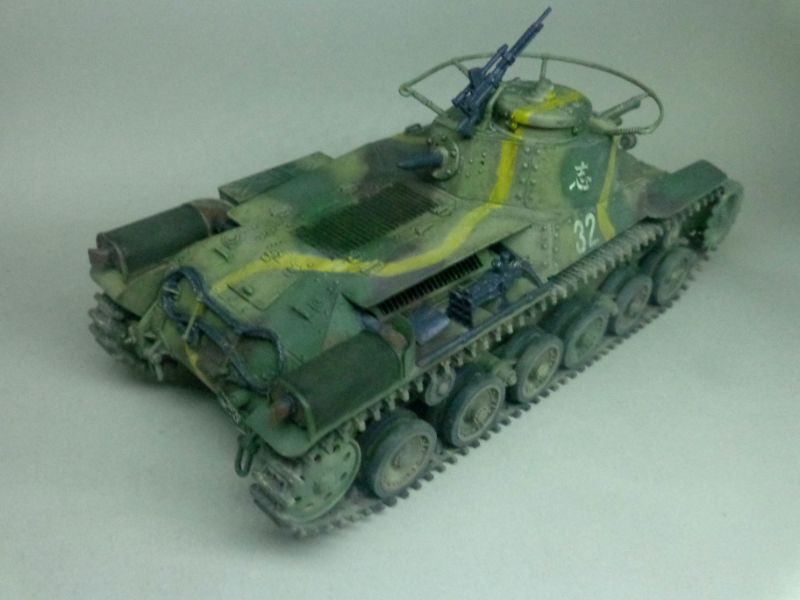
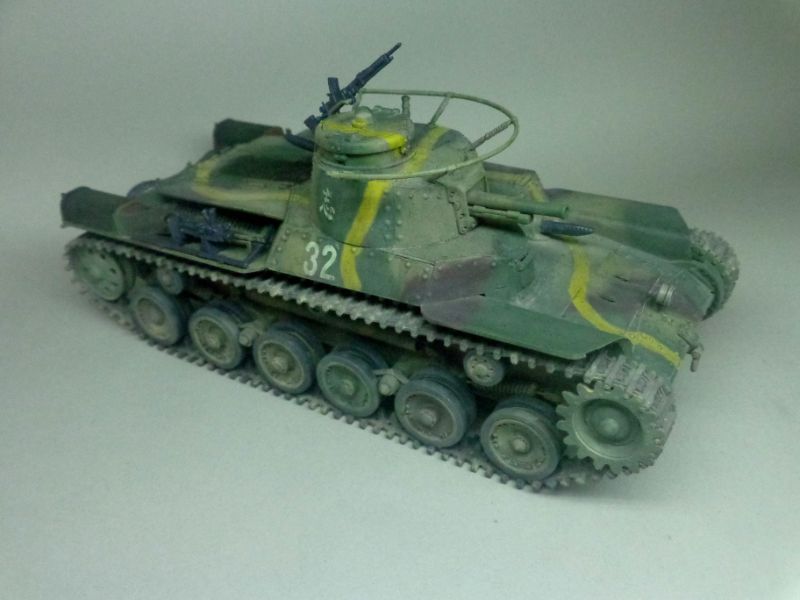
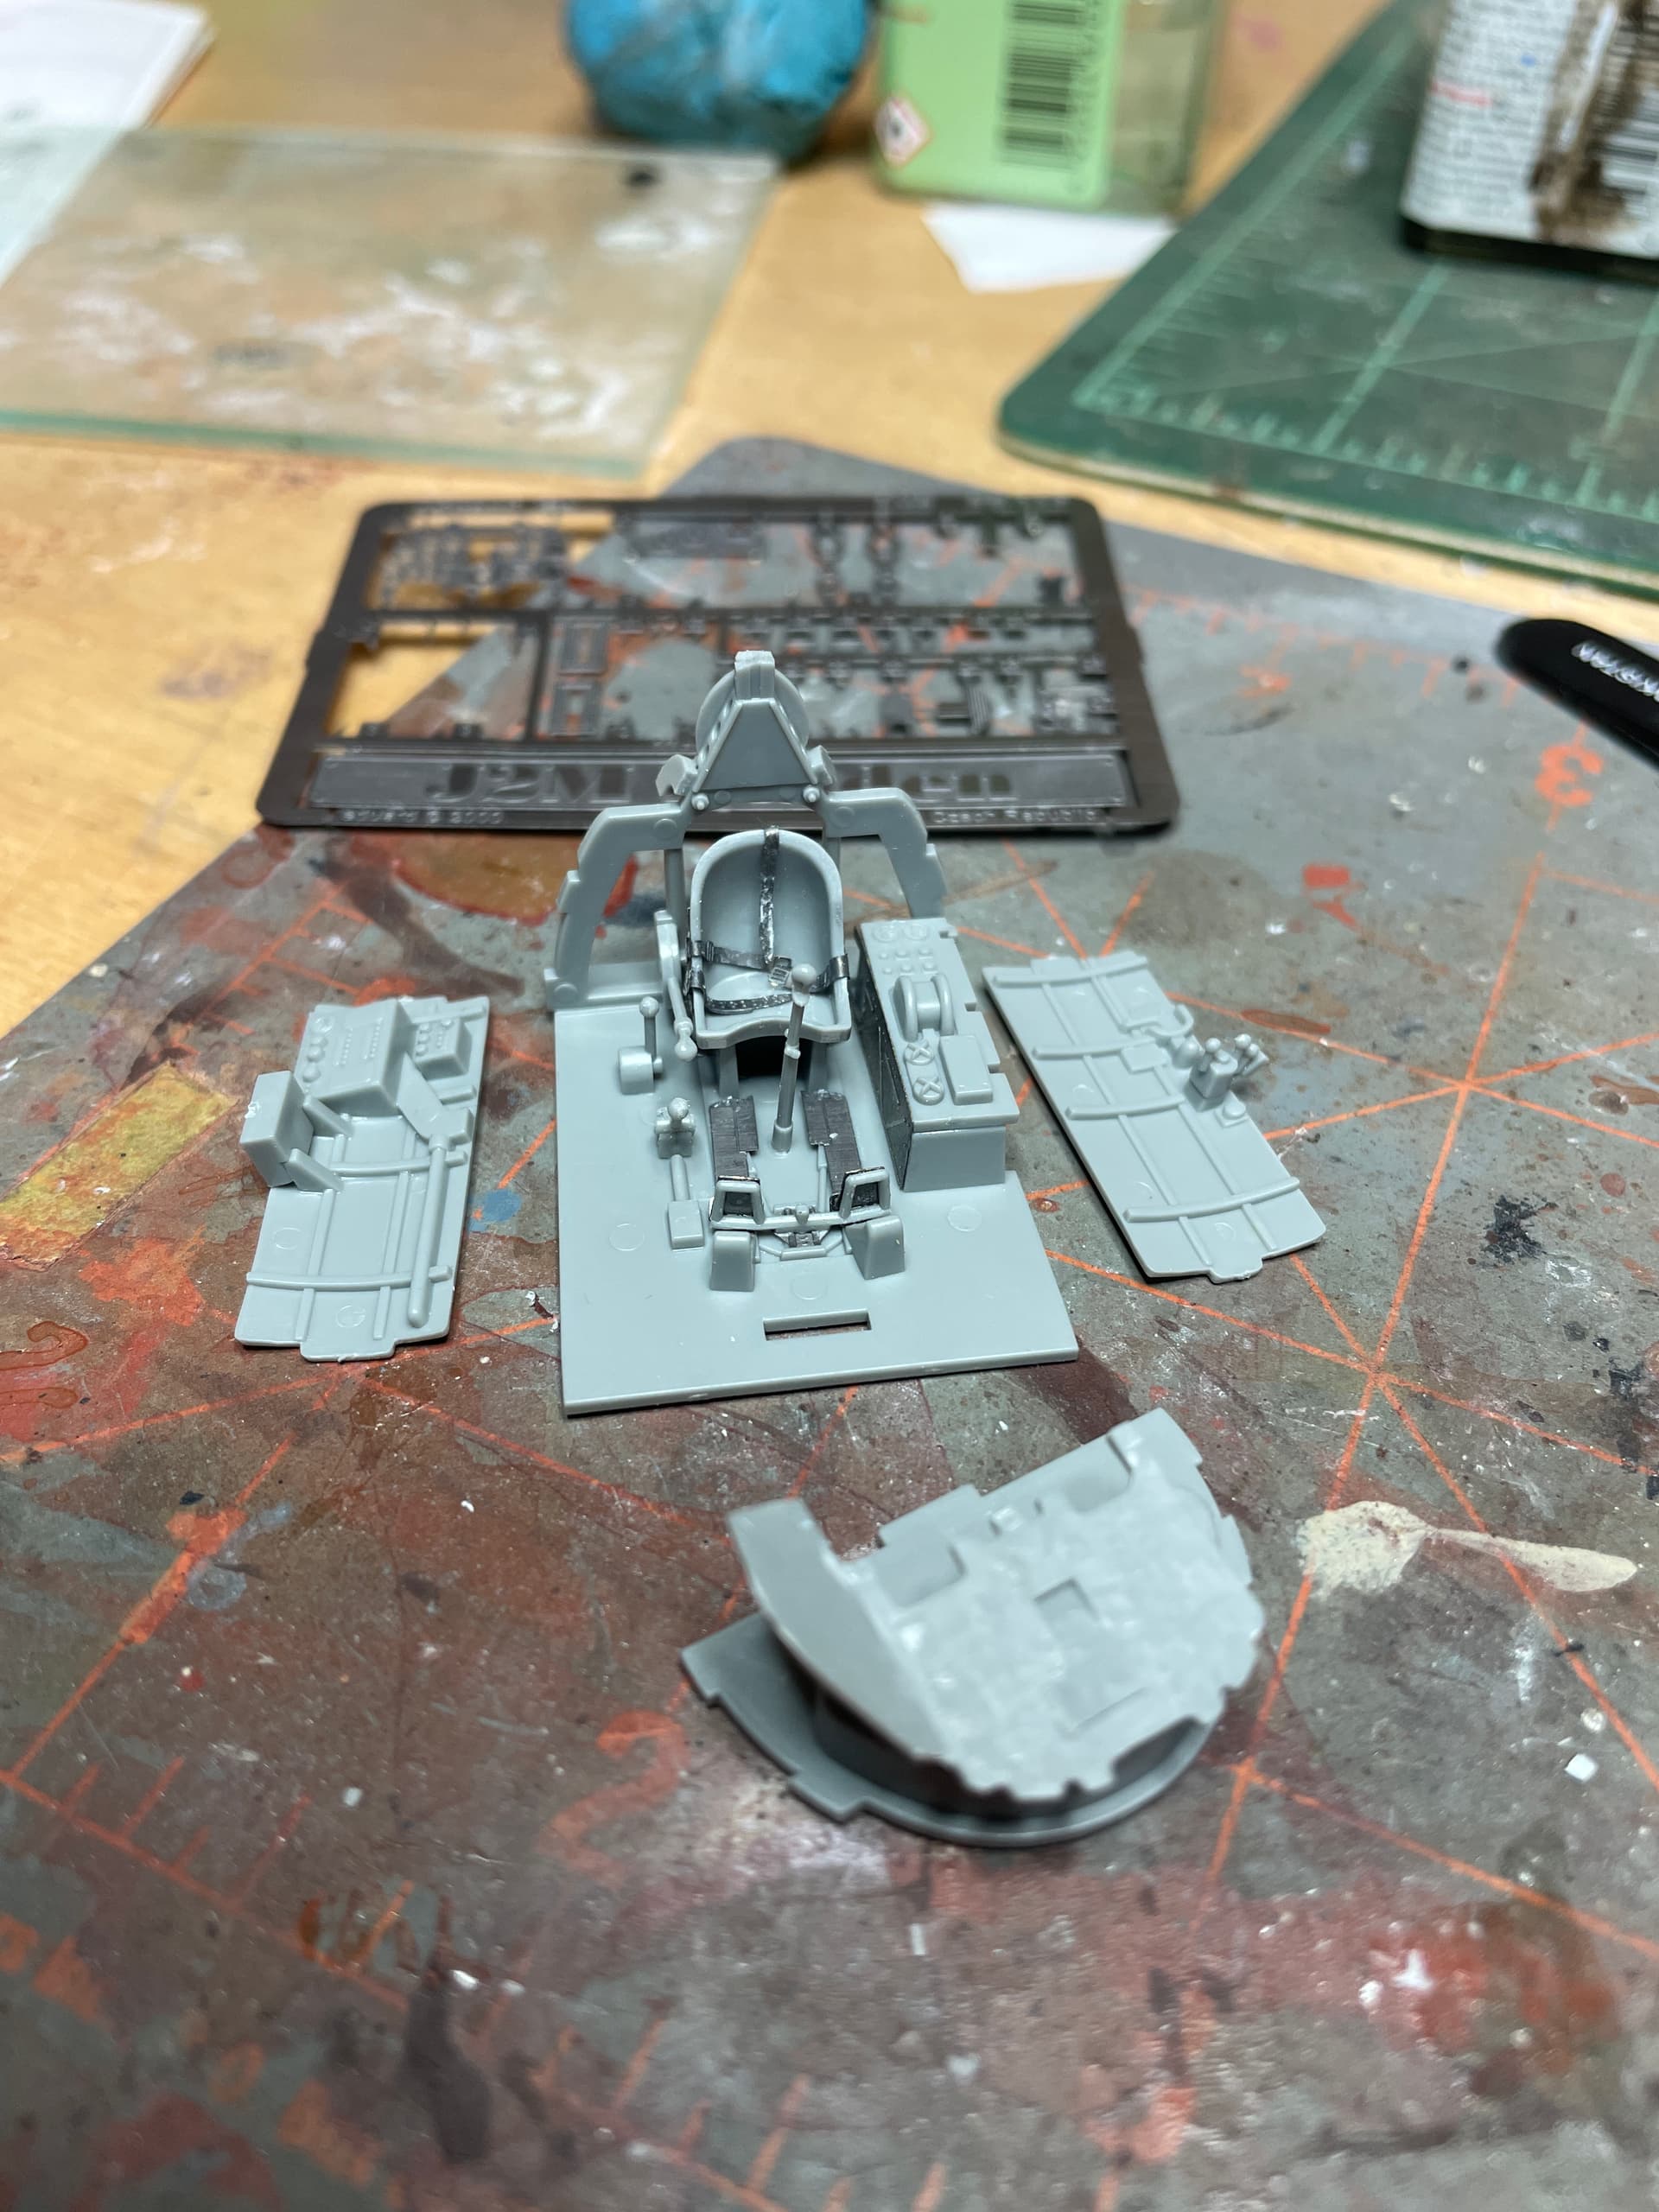
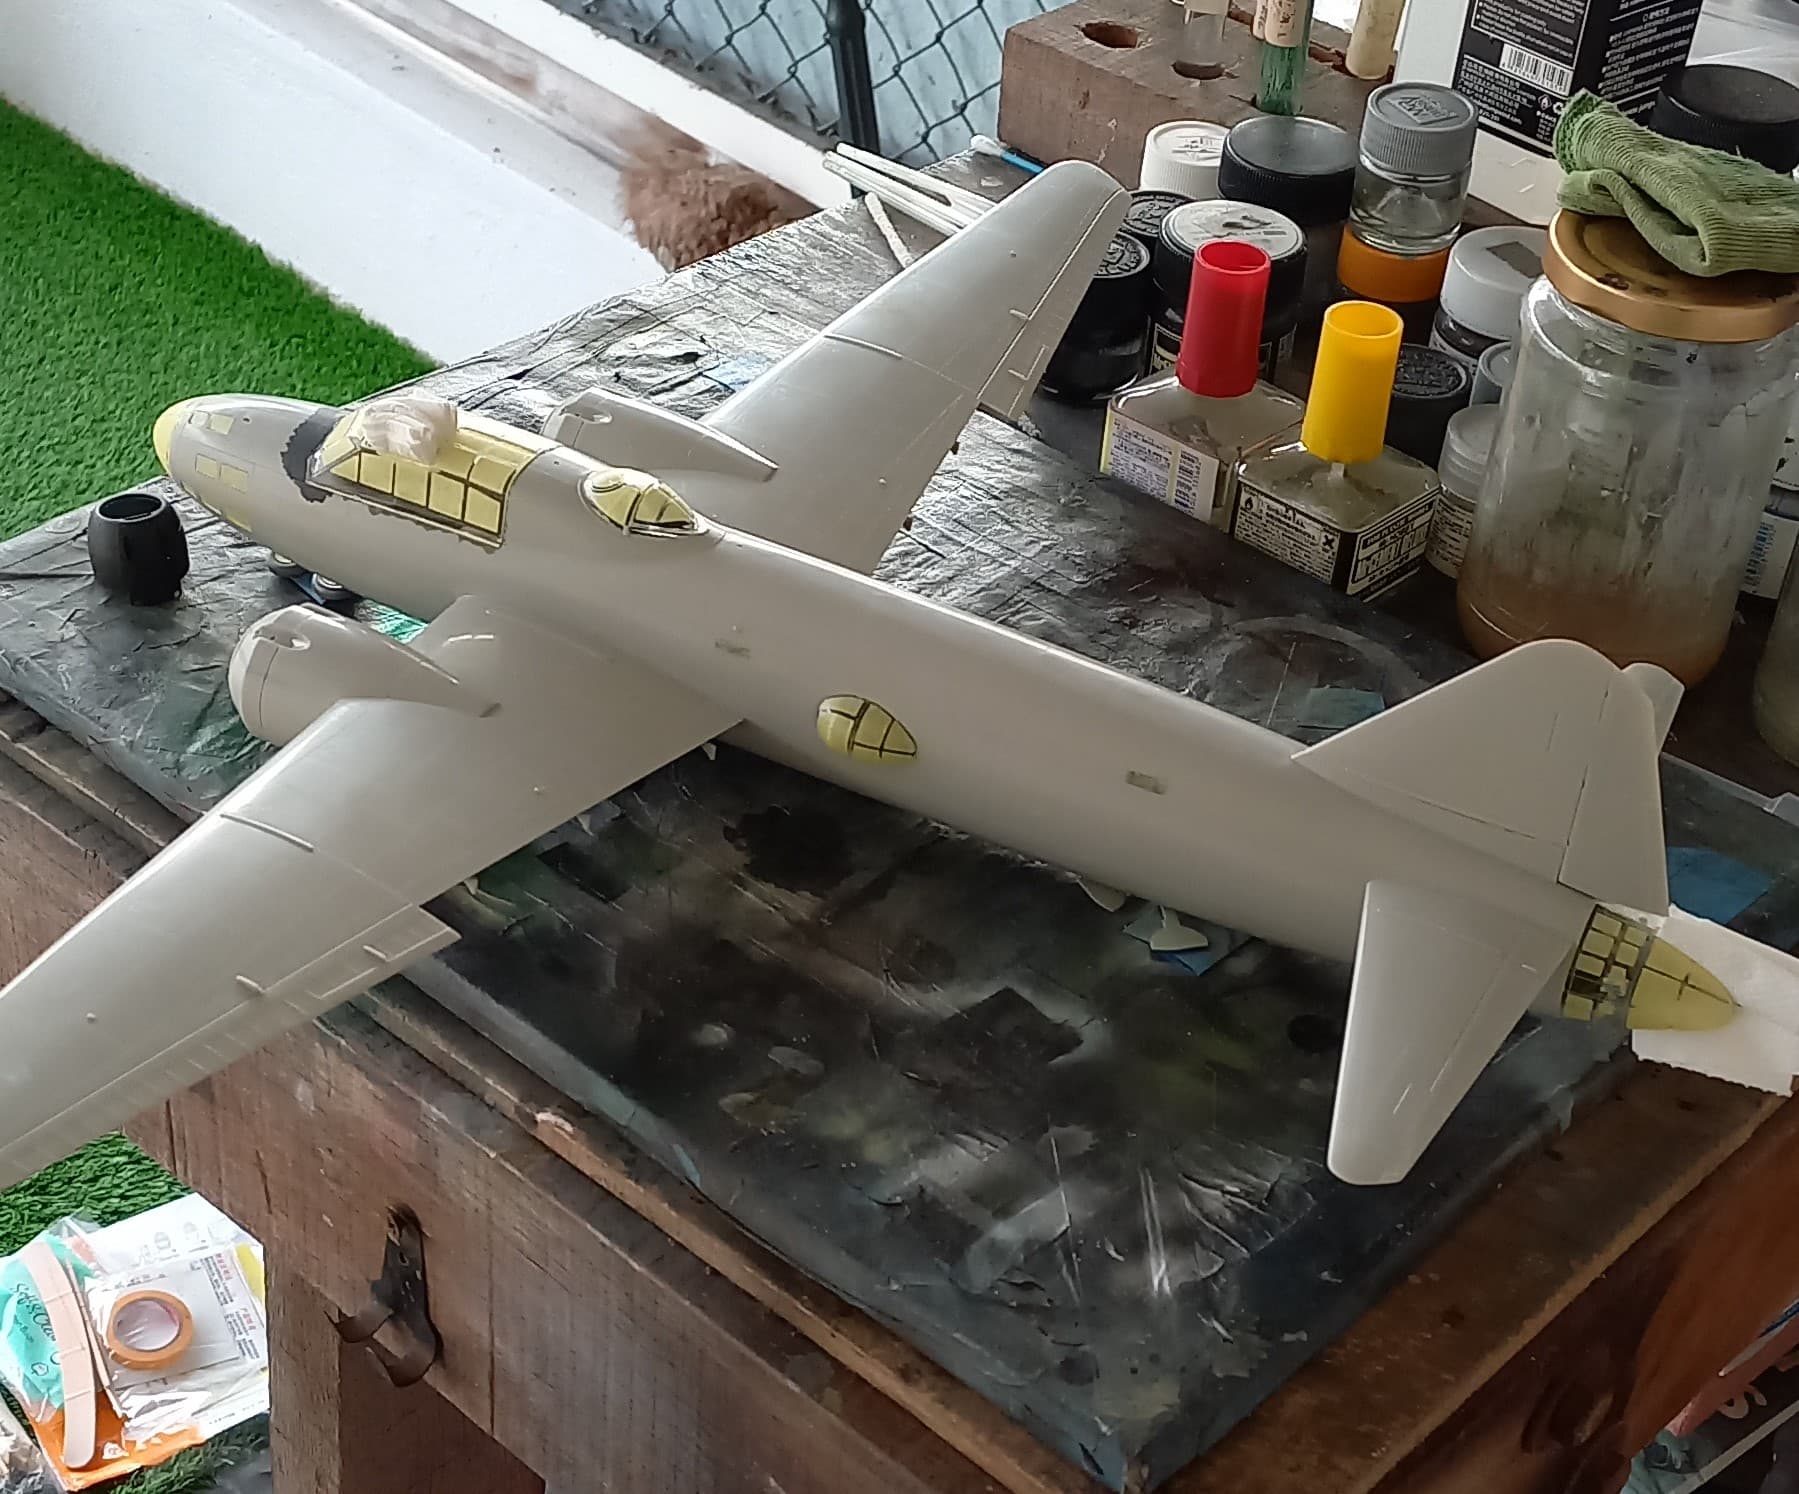
Time for decals, oils and painting details.
This is the result:


8 Likes
Looking good, Tomas!
1 Like
I agree! It does look good!
Top rate Type 97
1 Like
Thanks Jesper, John and Fred!
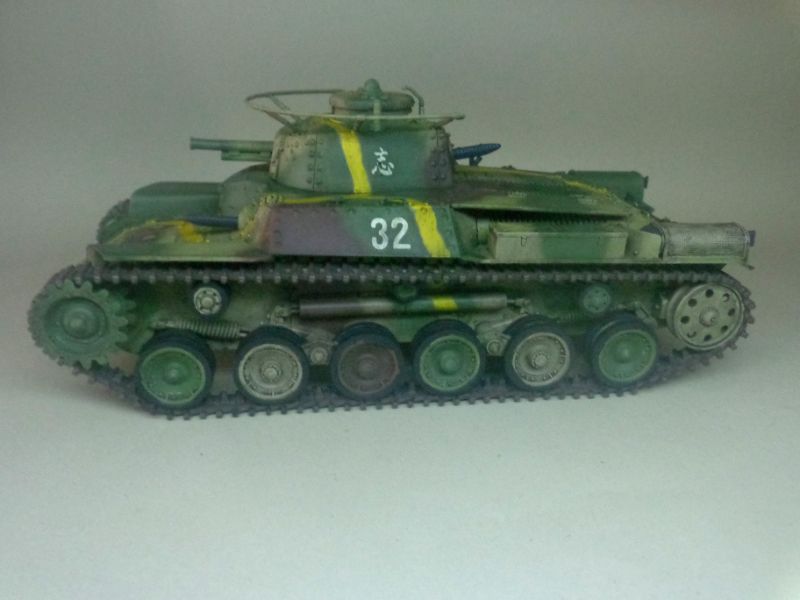
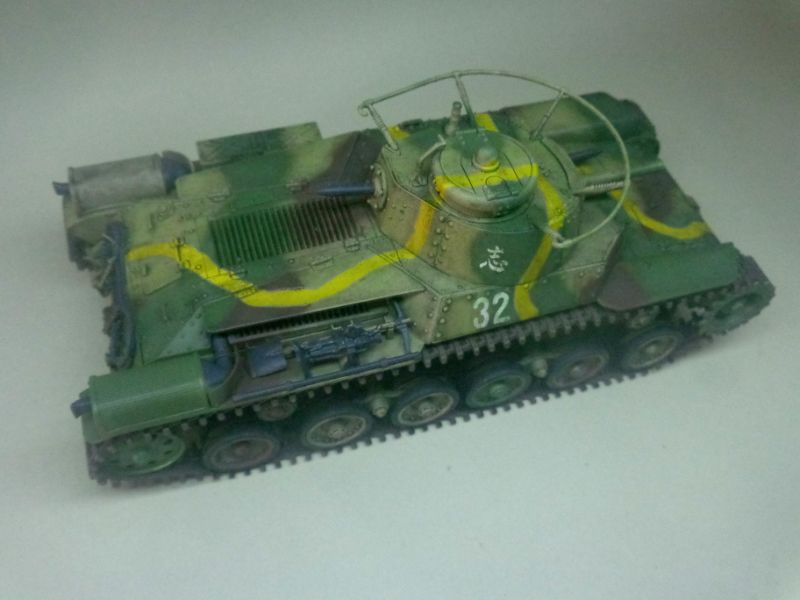
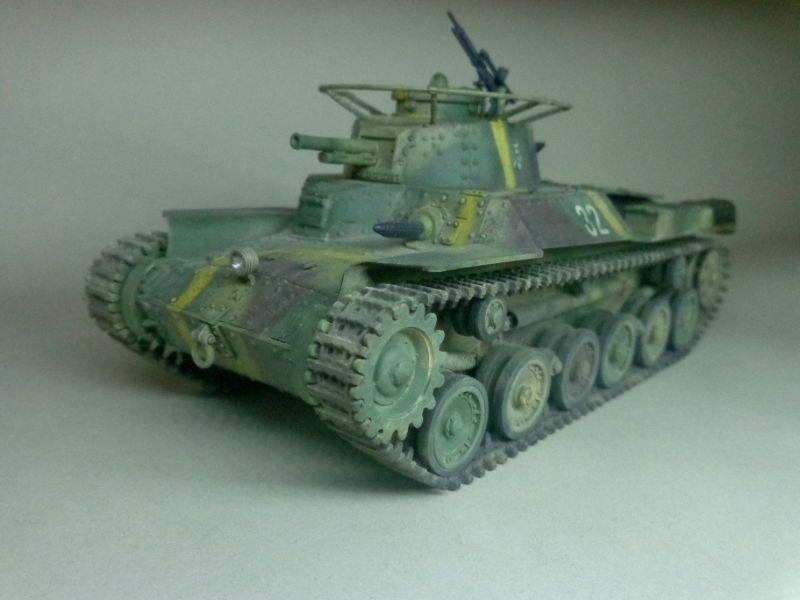
I`m calling my Type 97 finished. I added some dust and other details.
This Tamiya kit is nice, cheap and easy to build. As Peter said, great relation between quality and price. Especially if I compare it, for example, with my expensive Dragon Tiger I that brought deformed DS tracks…
Now, the images:


8 Likes


Great choice! I have this kit too, crackin start
Hey Colin, great choice, it’s a great kit! If you don’t know this, then do this right now!!
In Step 3 you will notice a part that is to be attached on the lower wing between the wheel wells, its part number is not on the instructions. This part is G2. Write this on the instructions now, or simply glue the part in now. If you miss this and happily build along, once you glue the wings on, you’ll be surprised to find a large square hole in the gear bays that will be a pain to fix. Ask me how I know! If you didn’t know this, you can thank me later. Happy building.
2 Likes
Thanks for the info John!
1 Like

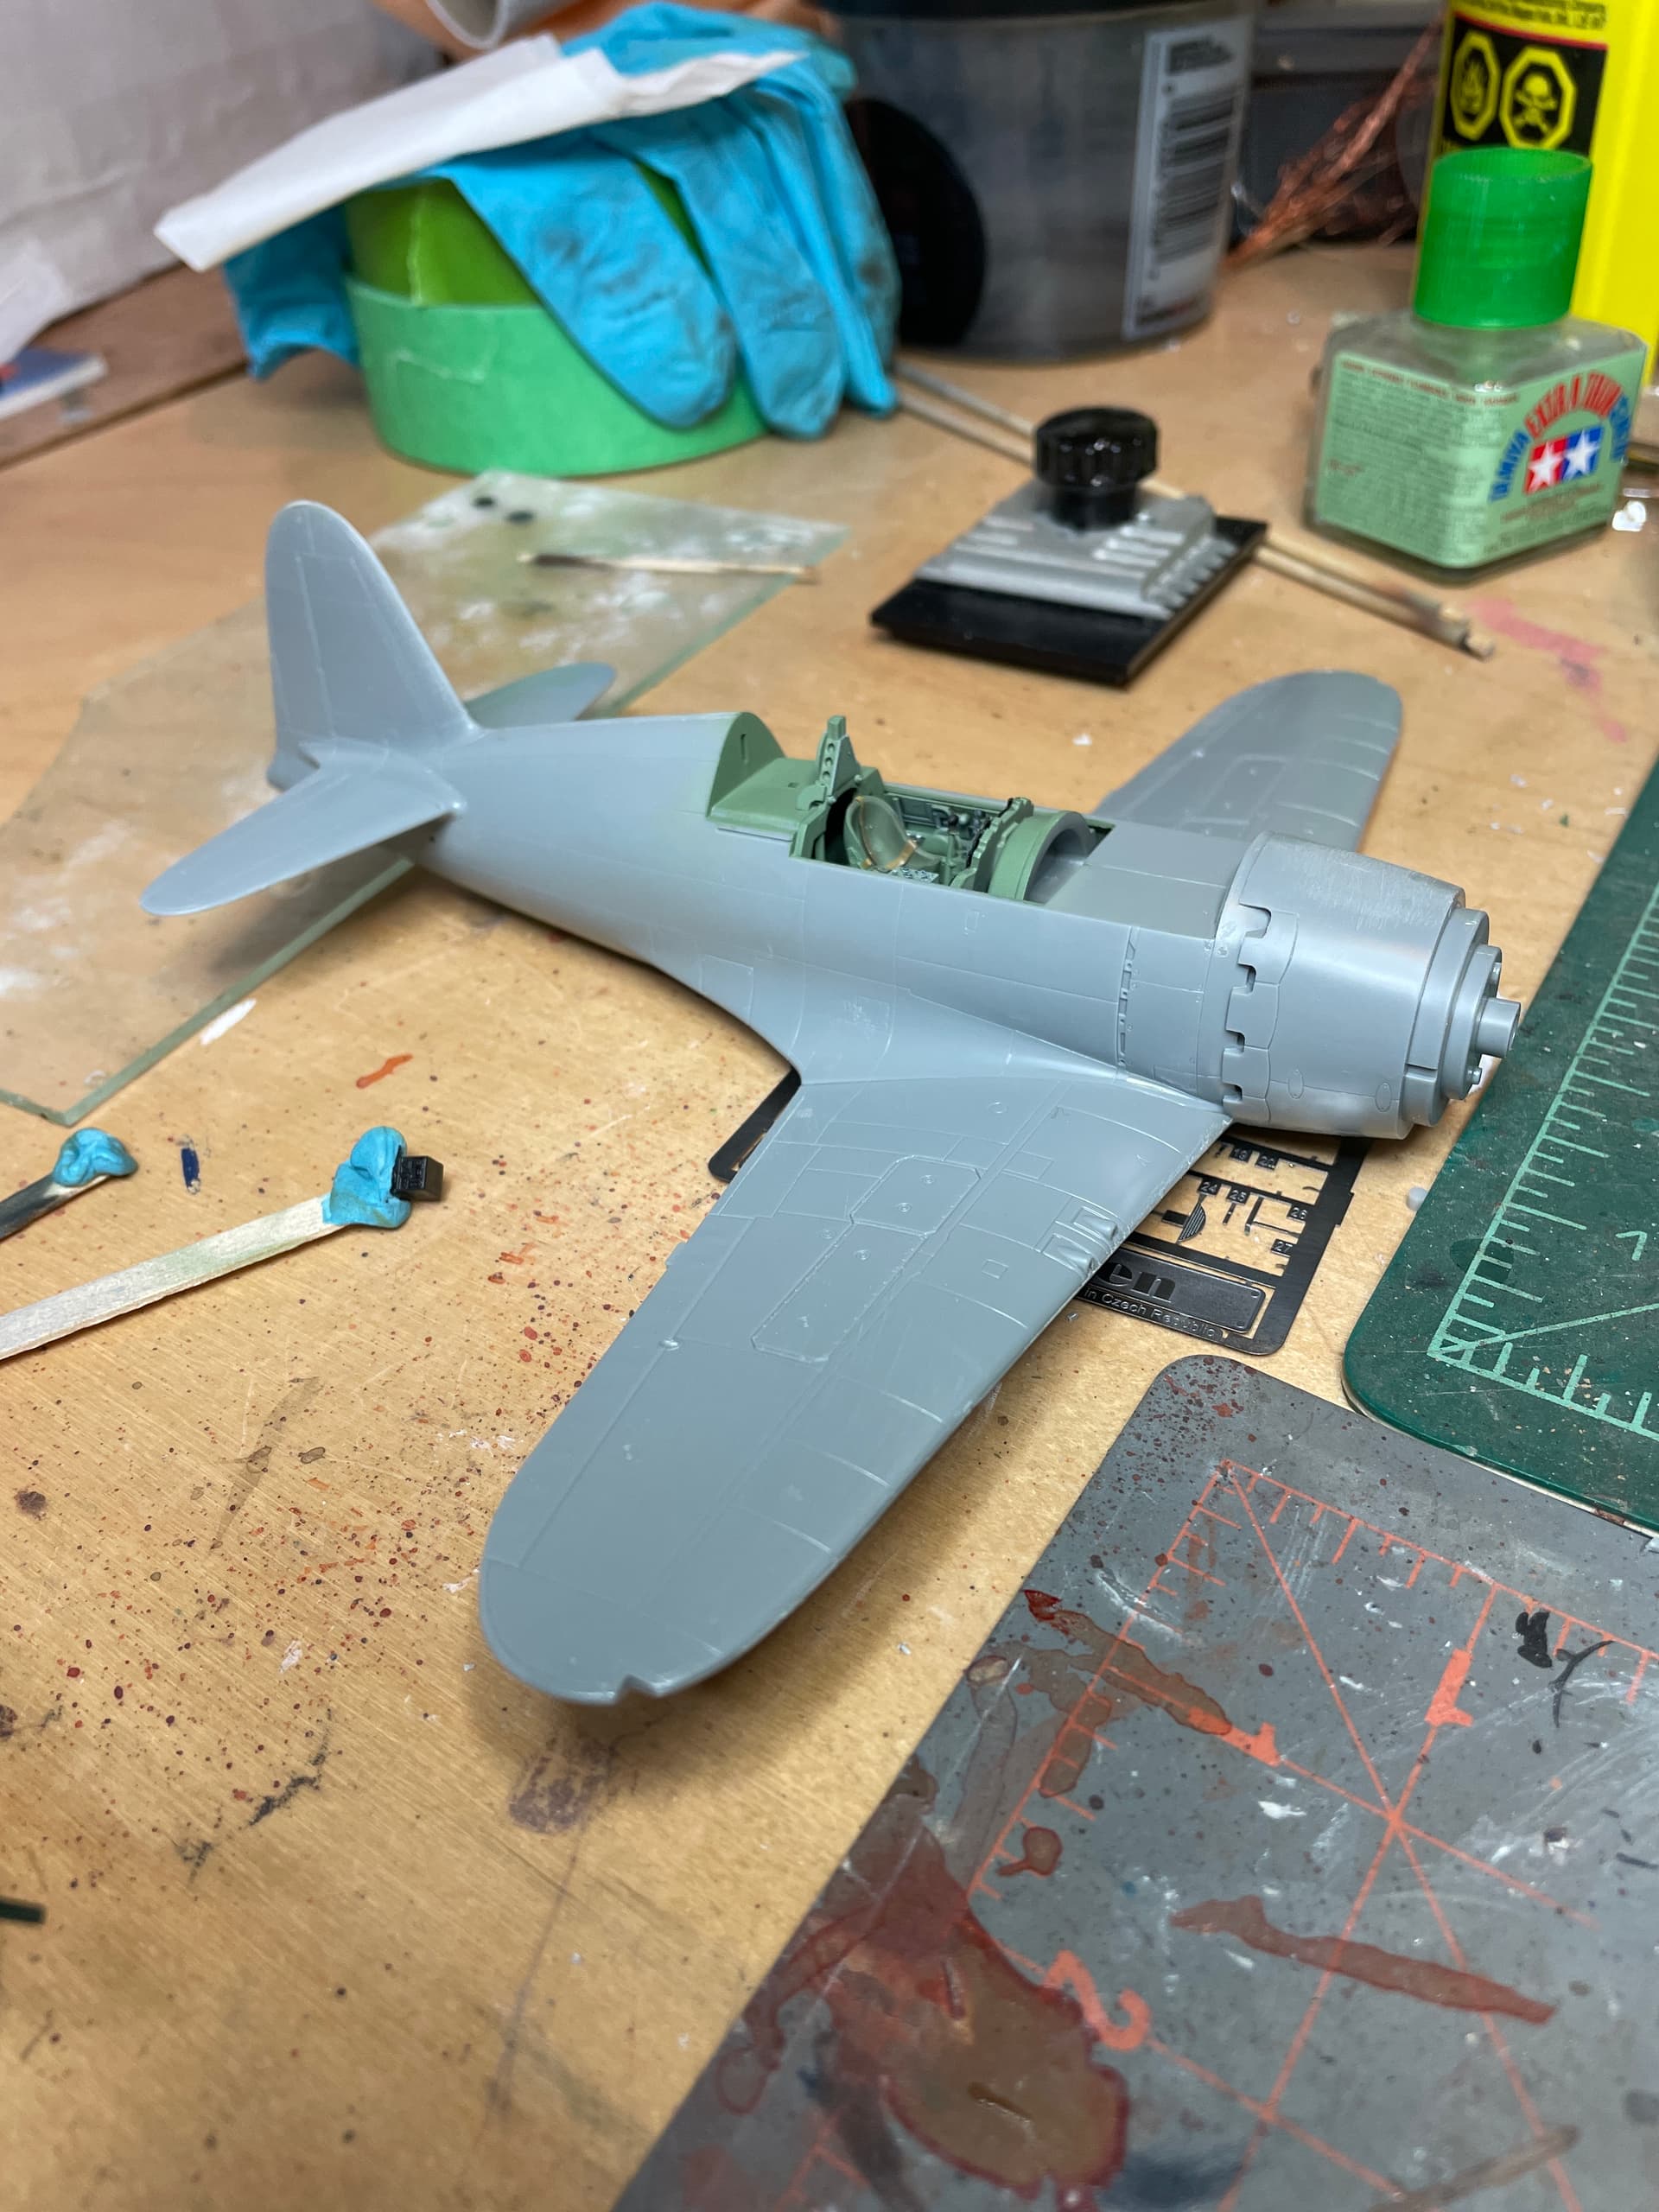
Fuselage together and wings on, everything is fitting together nicely, gonna be a quick build I think, just waiting for masks to arrive.
3 Likes
Looks fantastic! Making nice progress
Hi Everybody,
Colin, you’re really tearing it up! Looks good so far.
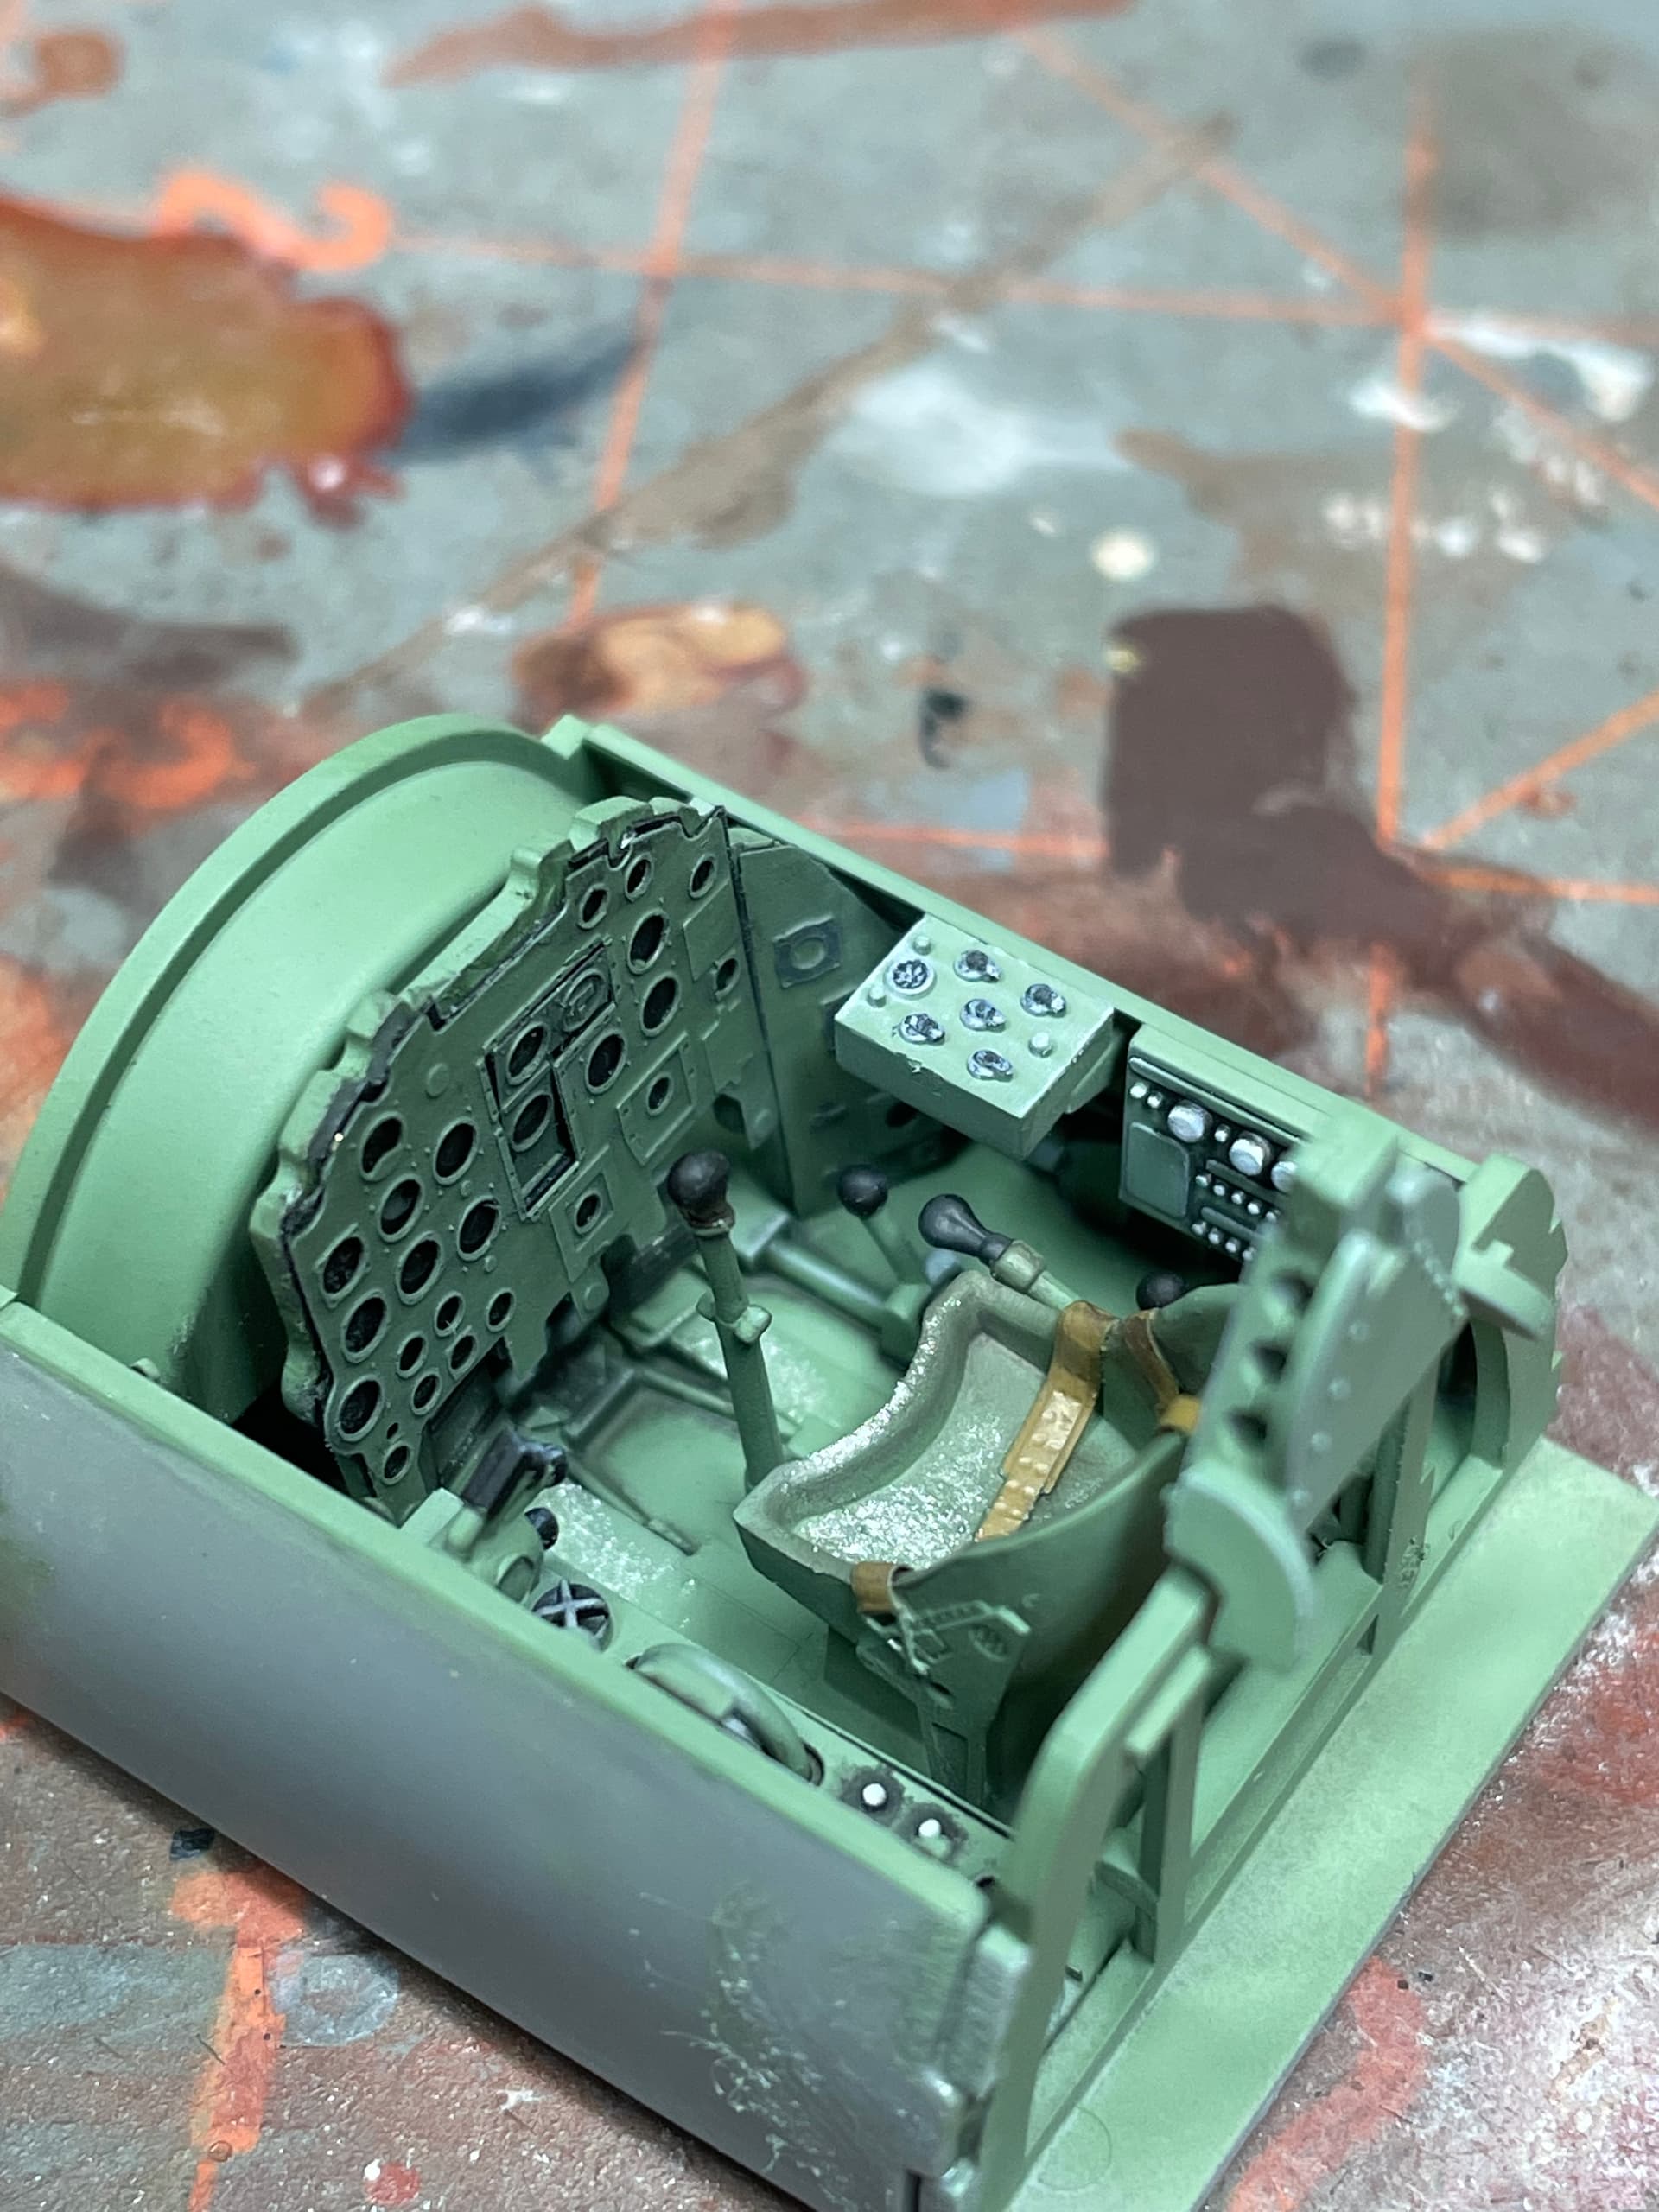
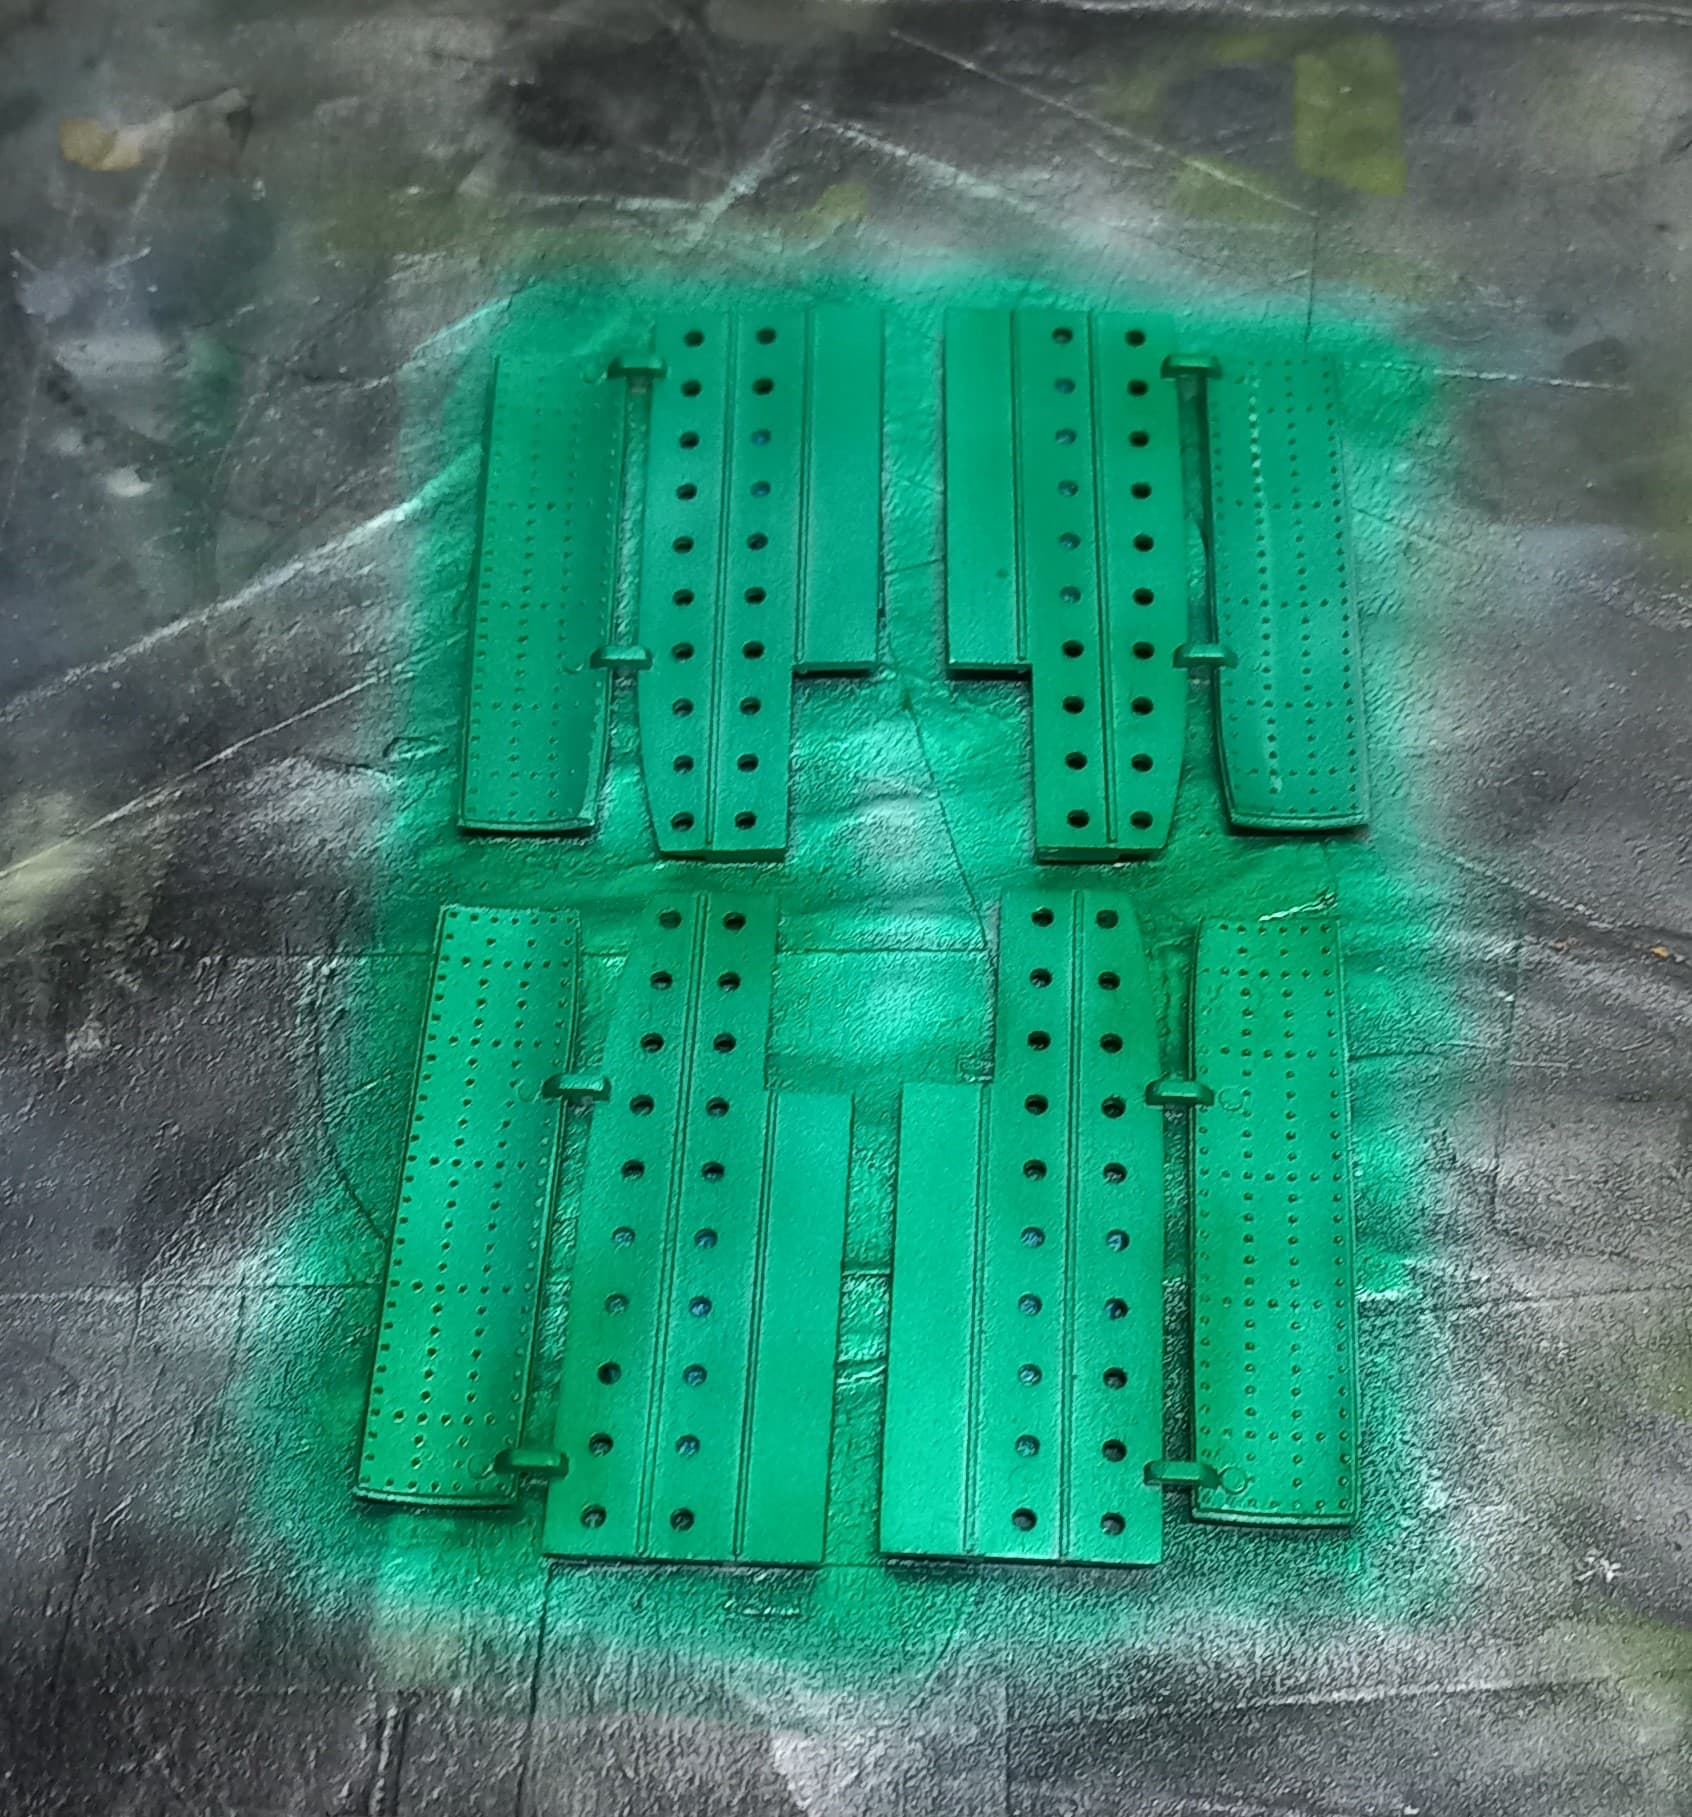
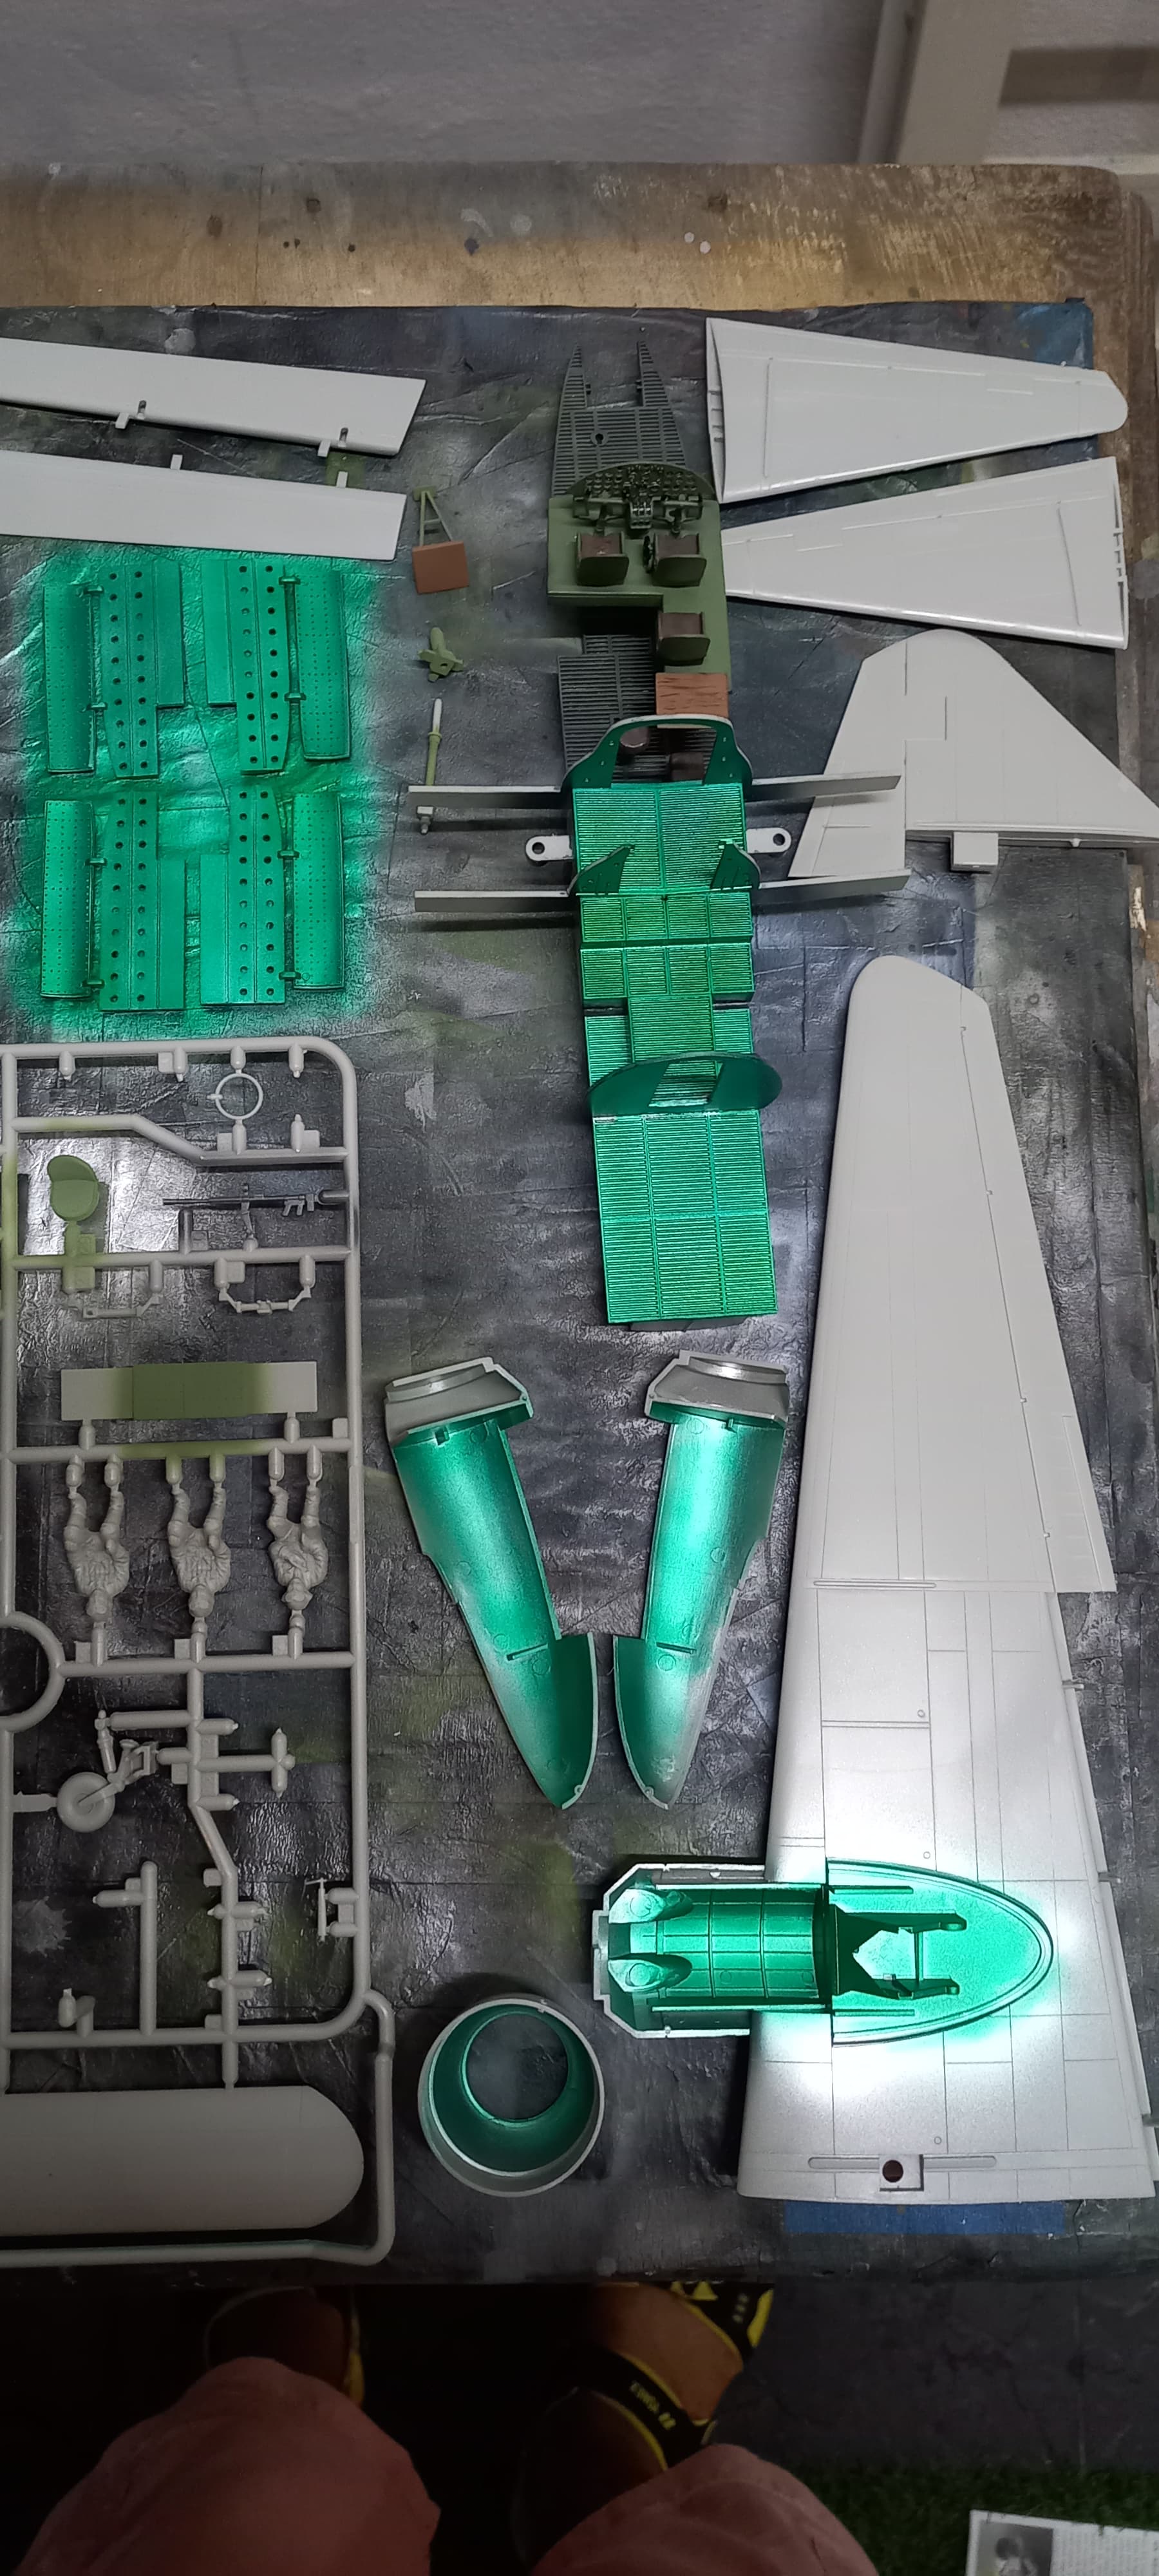
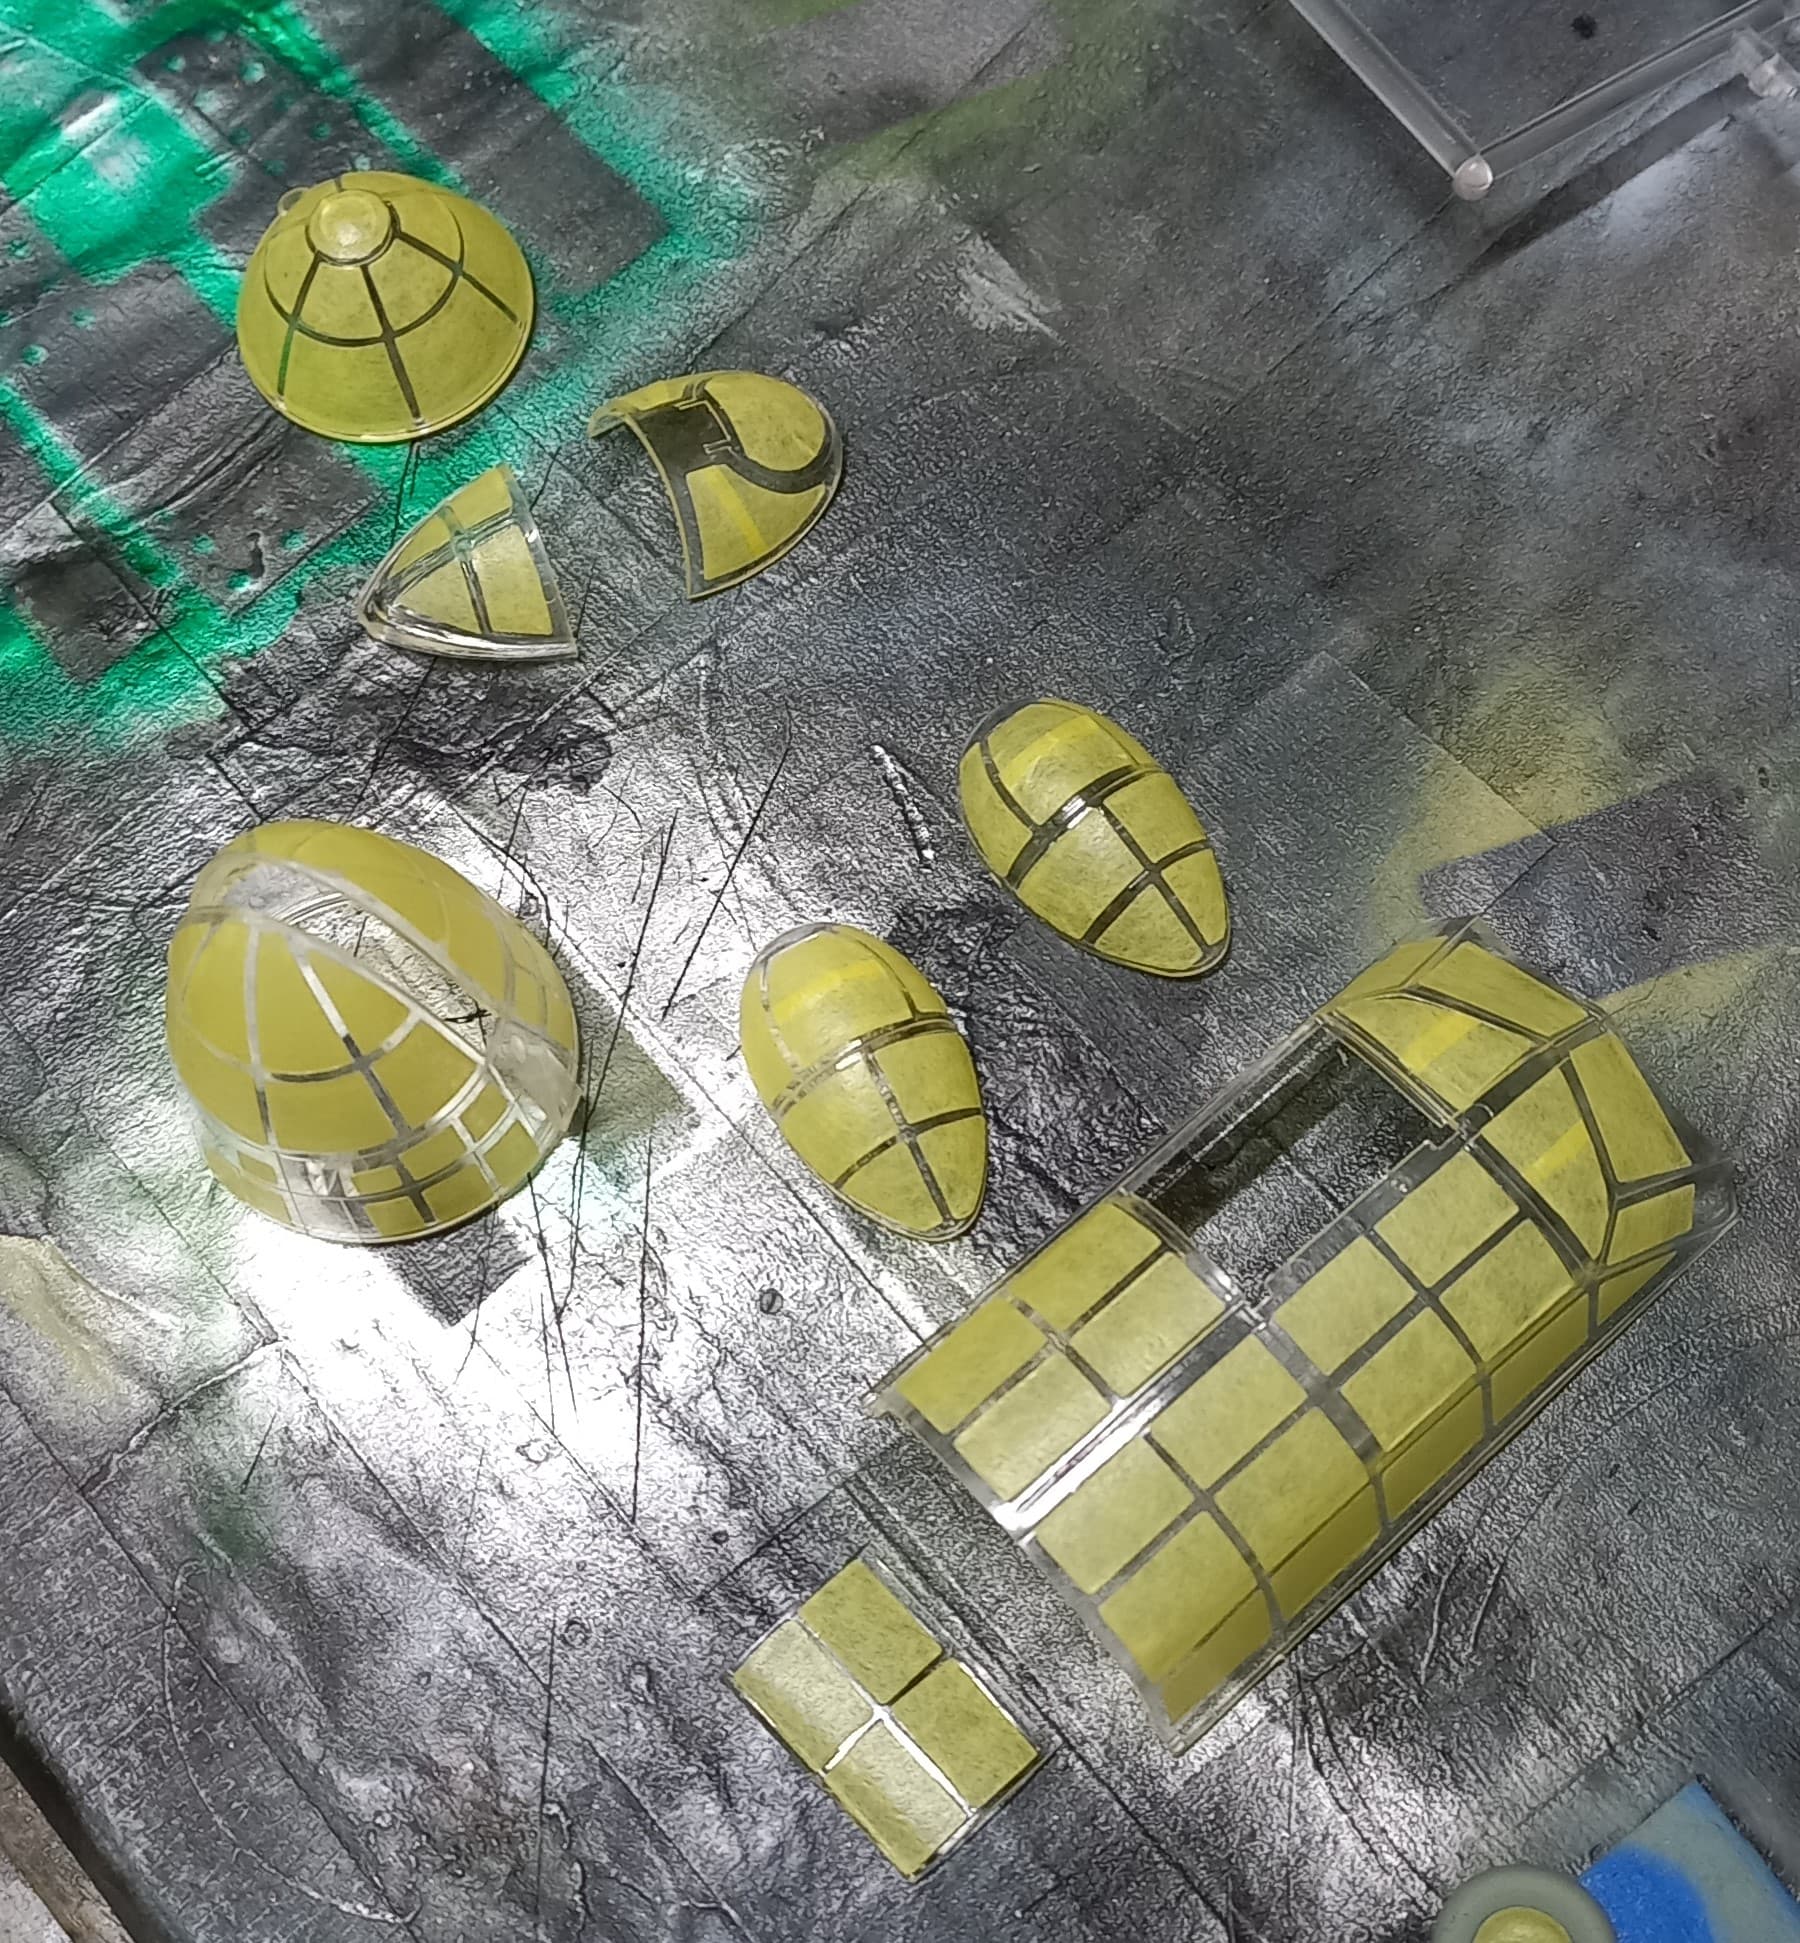
In my last G4M update I went over all of the interior painting of the fuselage. So, it is fitting that I continue from there. Satisfied with the fuselage and having a good mix of clear blue and green on hand I opted to go ahead and do the wheel wells on the wings. This is one big bird, despite being a twin engine one.
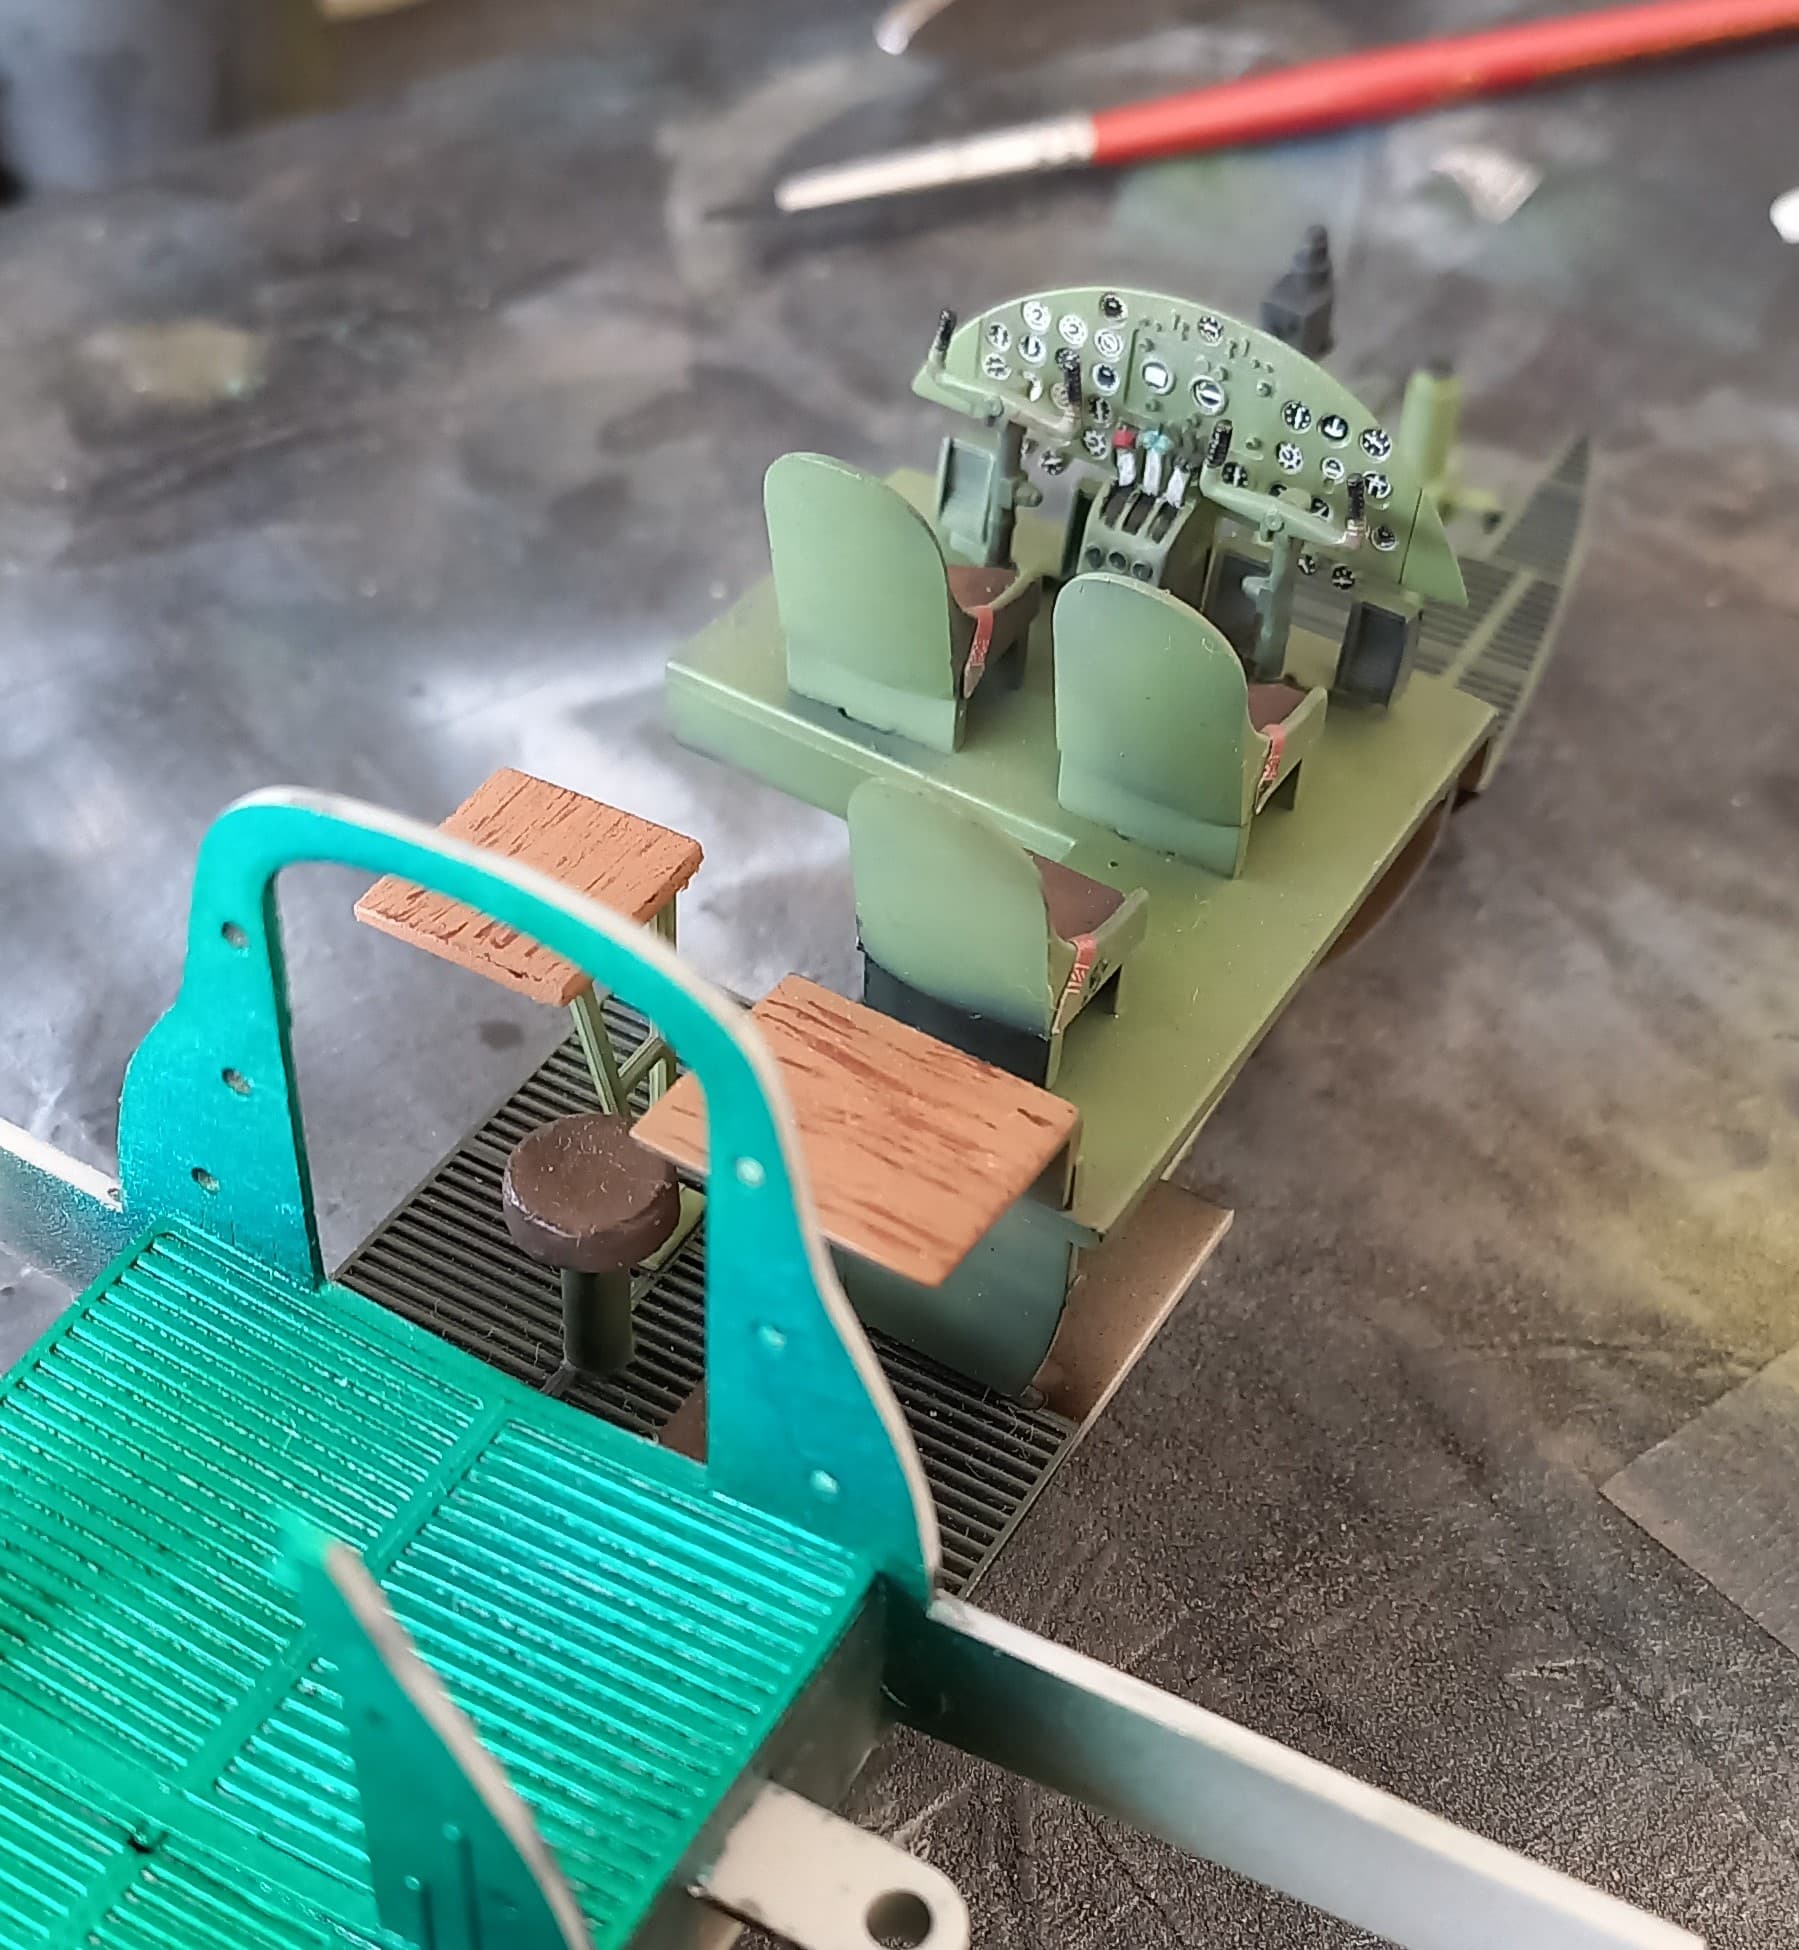
I then turned my attention to the interior, gluing the seats, tables and radio in place. Once the seats were properly painted, I added a set of belts from Eduard, which really stand out and give the seats a little more realism, no shoulder harness on this one.
Next was some test fitting to make life down the road a little easier, and fit was surprisingly good for something this large.

One fun little thing I did was to do a little extra work on the tables that were going in for the navigator and radio operations areas. Since these areas will be highly visible under the canopy, I opted to paint them with Mr. Color wood, and then using a stiff brush streaked some Hull red onto the wood color to give the impression of real wooden tables. Not sure how accurate this really is, but hey, it looks pretty cool!
Next up was gluing in all the fuselage components, a relatively easy task.
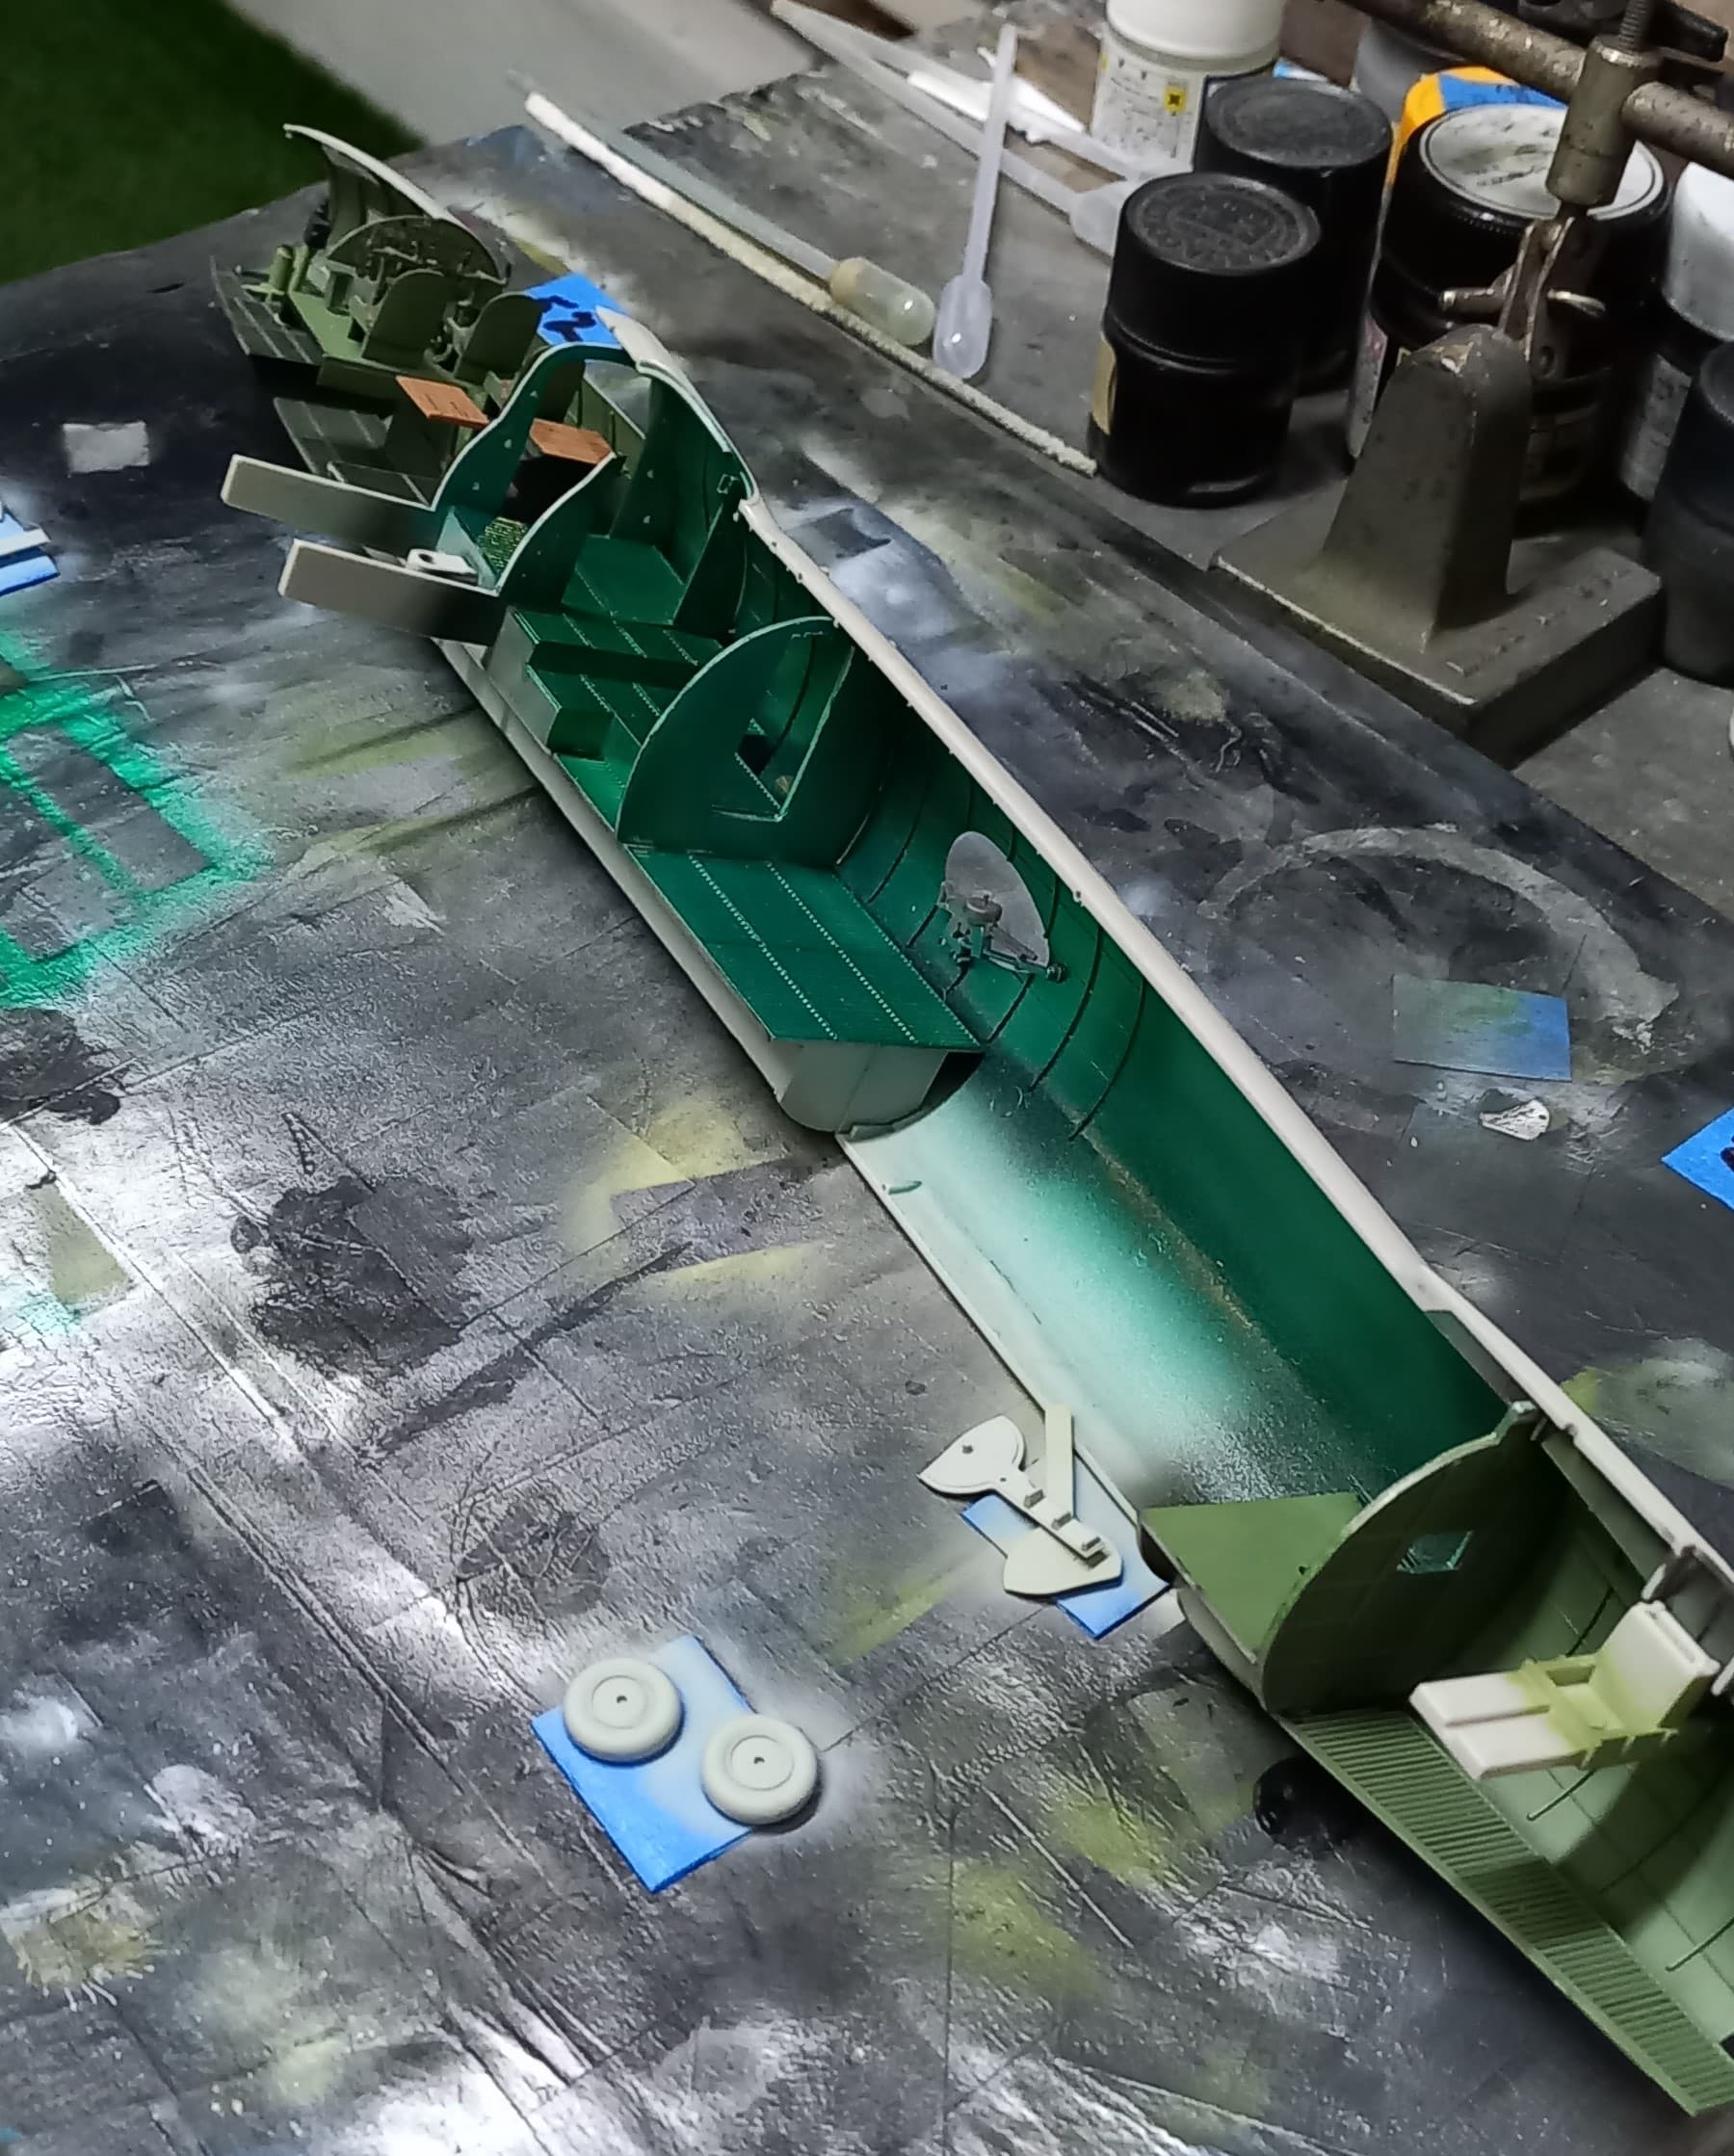
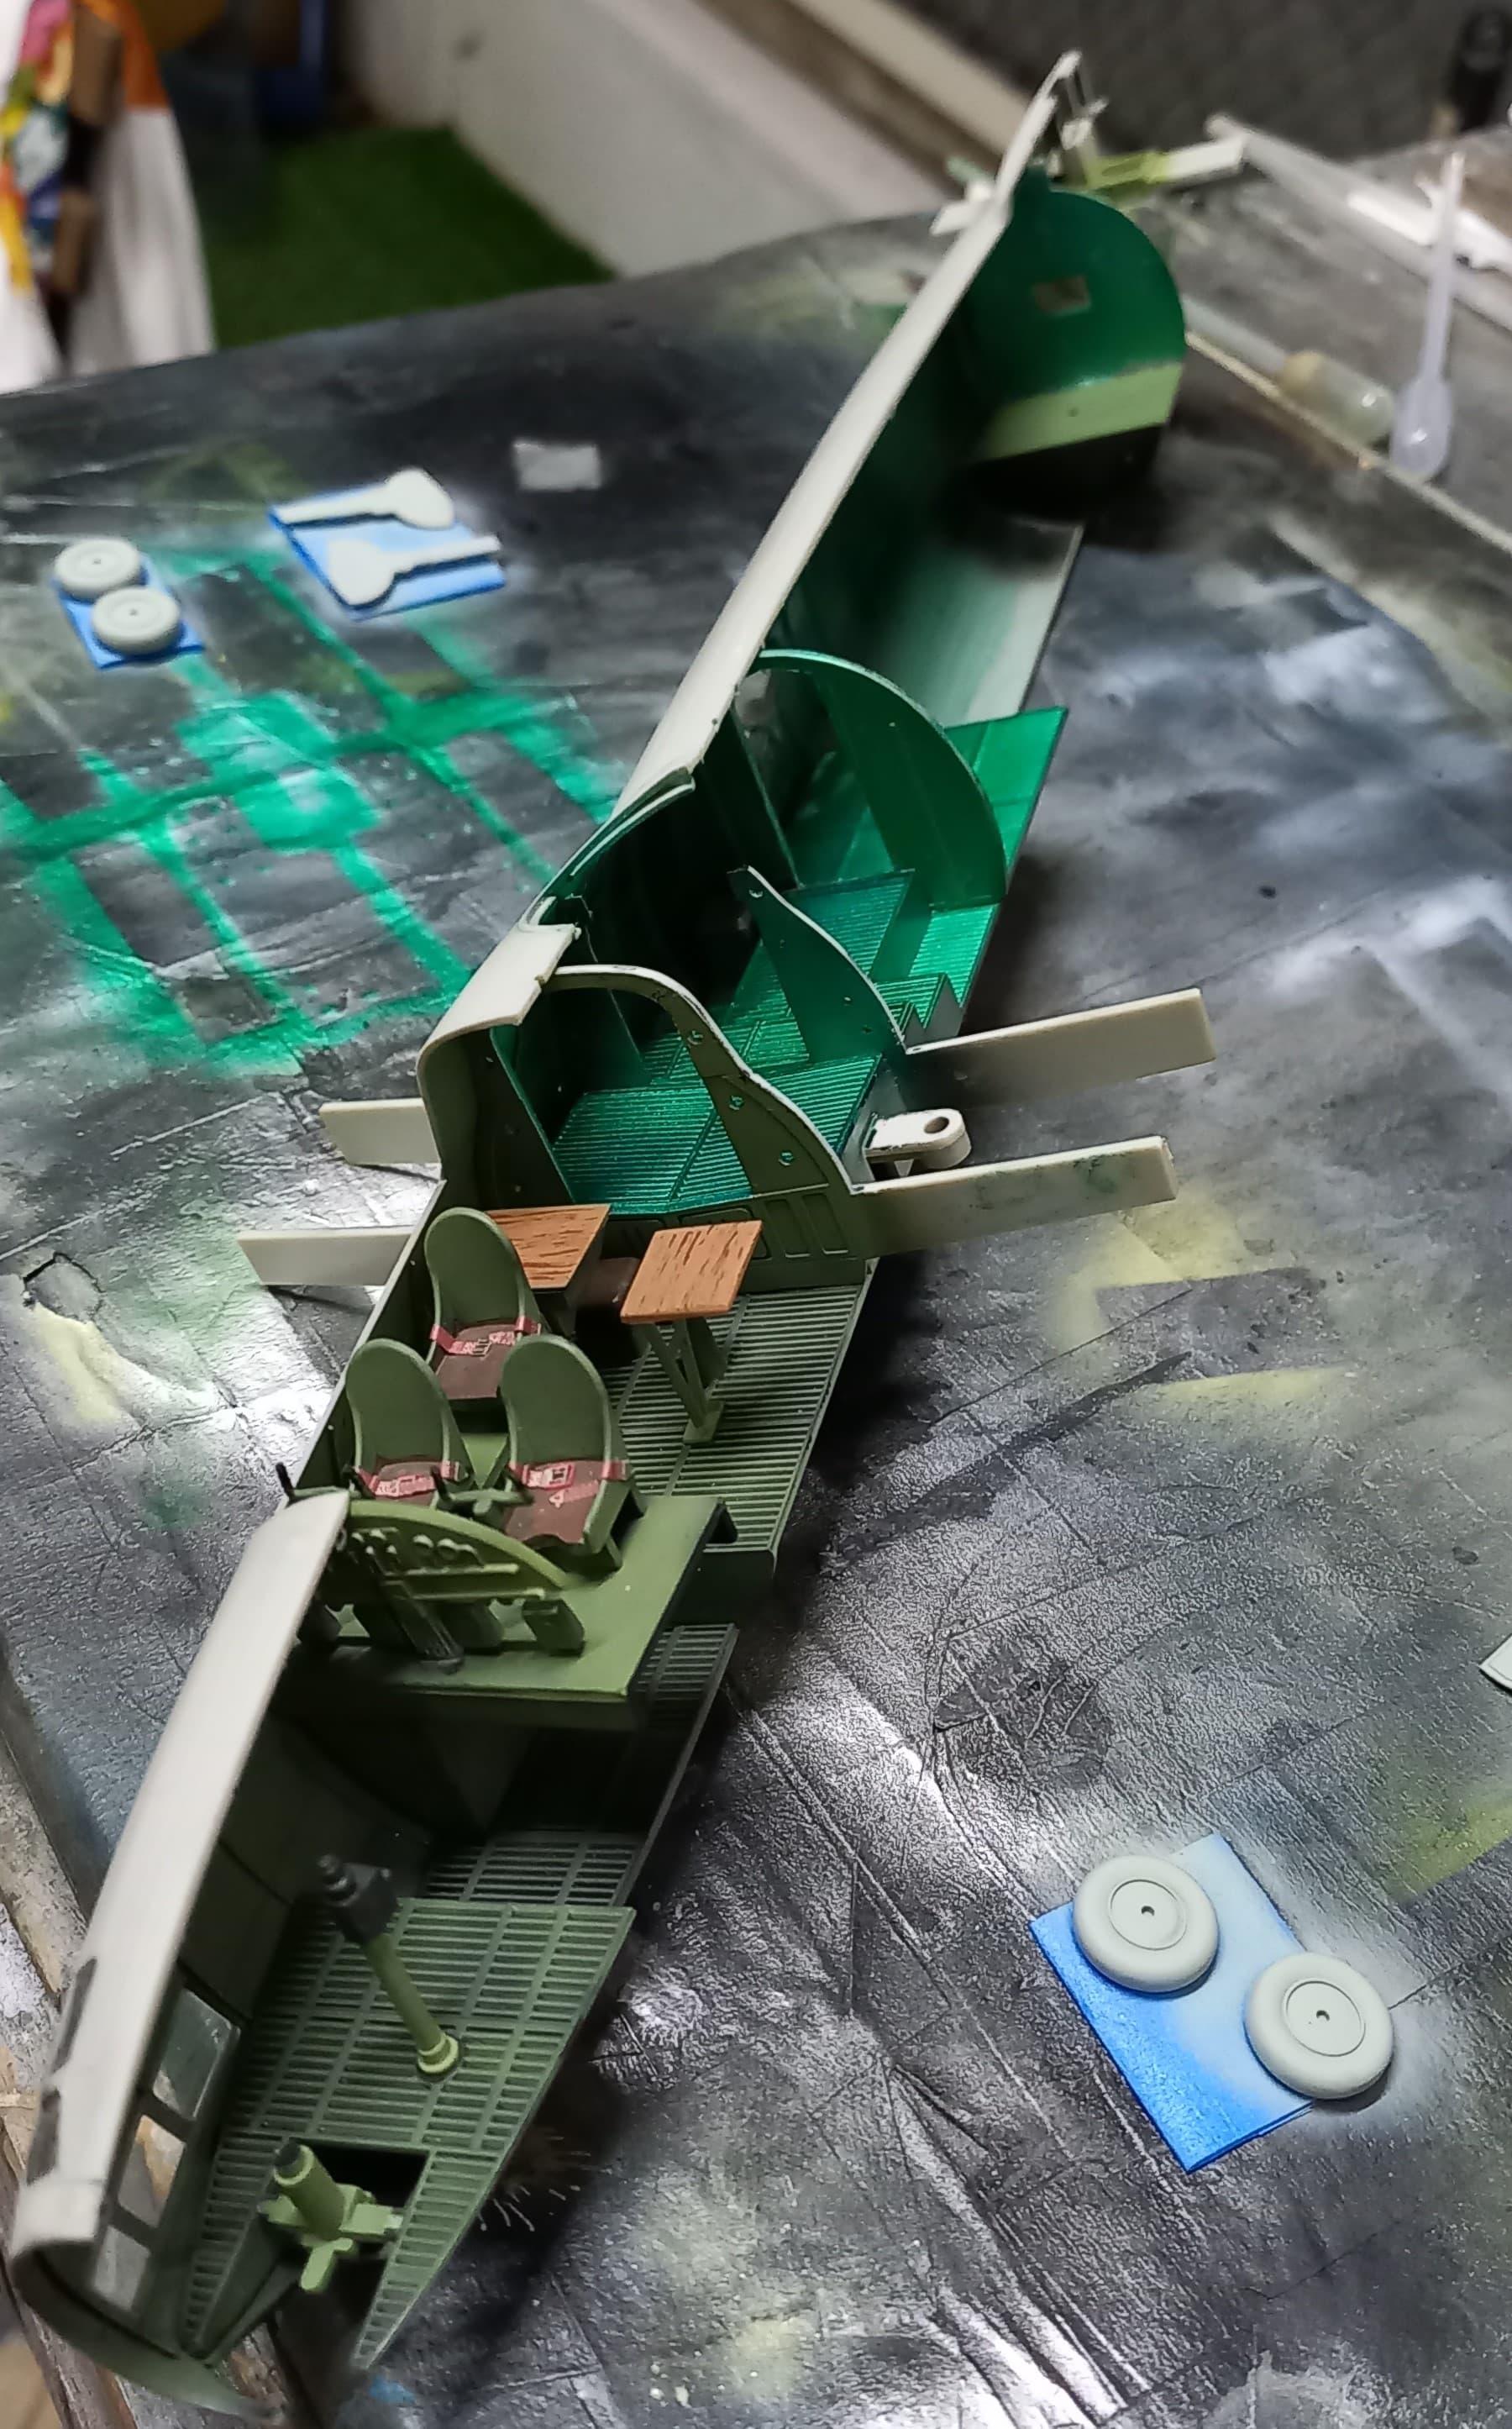
Then it was time to glue the cigar shaped fuselage together. I took my time here, as I didn’t want any steps to be created, so I started at the back-end bottom, then back-end top going to the side blisters, and then moving forward in a top then bottom manner. Things turned out pretty good!


I forgot to mention that there was a watch out for my next build of this bird, in that the forward top glass pieces didn’t really want to fit snuggly, which lead to some rework and delays in production. This was remedied with white glue and small amount of Vallejo plastic filler. Done right this will not impact the clear parts, which apparently, I did!
One of the joys of a good weld job of this size is when I see the plastic ooze coming out of the seam.
Reading this seam, told me that it closed up nicely with the exception of the nose section, which I’d have to remedy with some superglue. All in all, this thing fits so much nicer than any of the big Monogram kits I’ve done. Granted this shouldn’t be a surprise, it is after all a Tamiya mold.
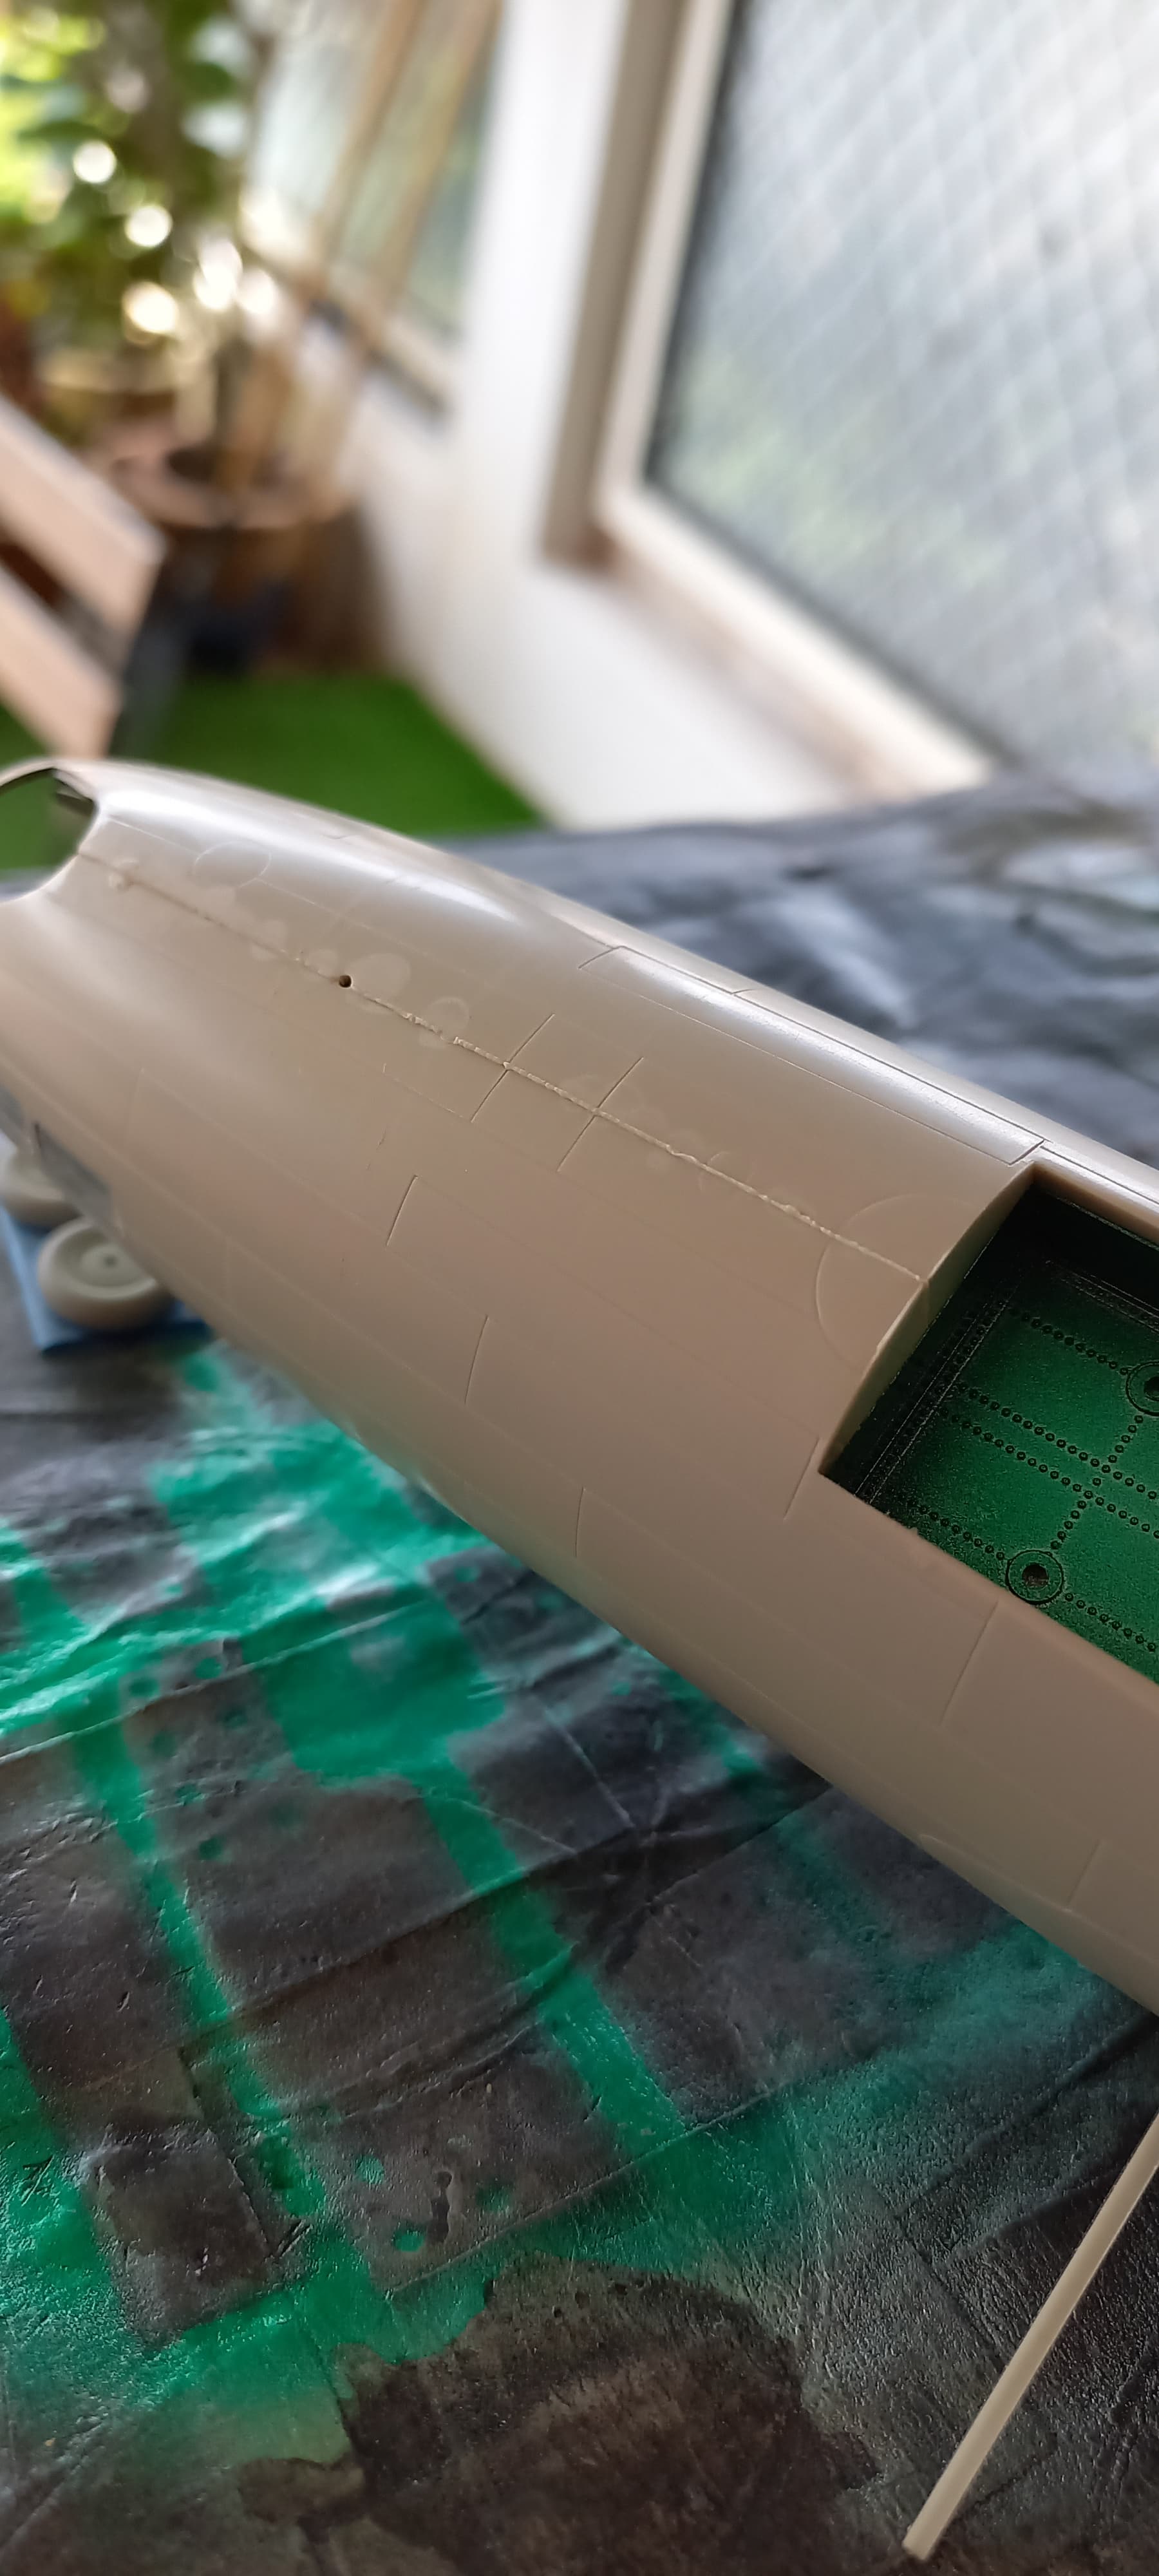
First after everything had dried, using a scalpel, I carefully scrapped off the ooze weld seam.
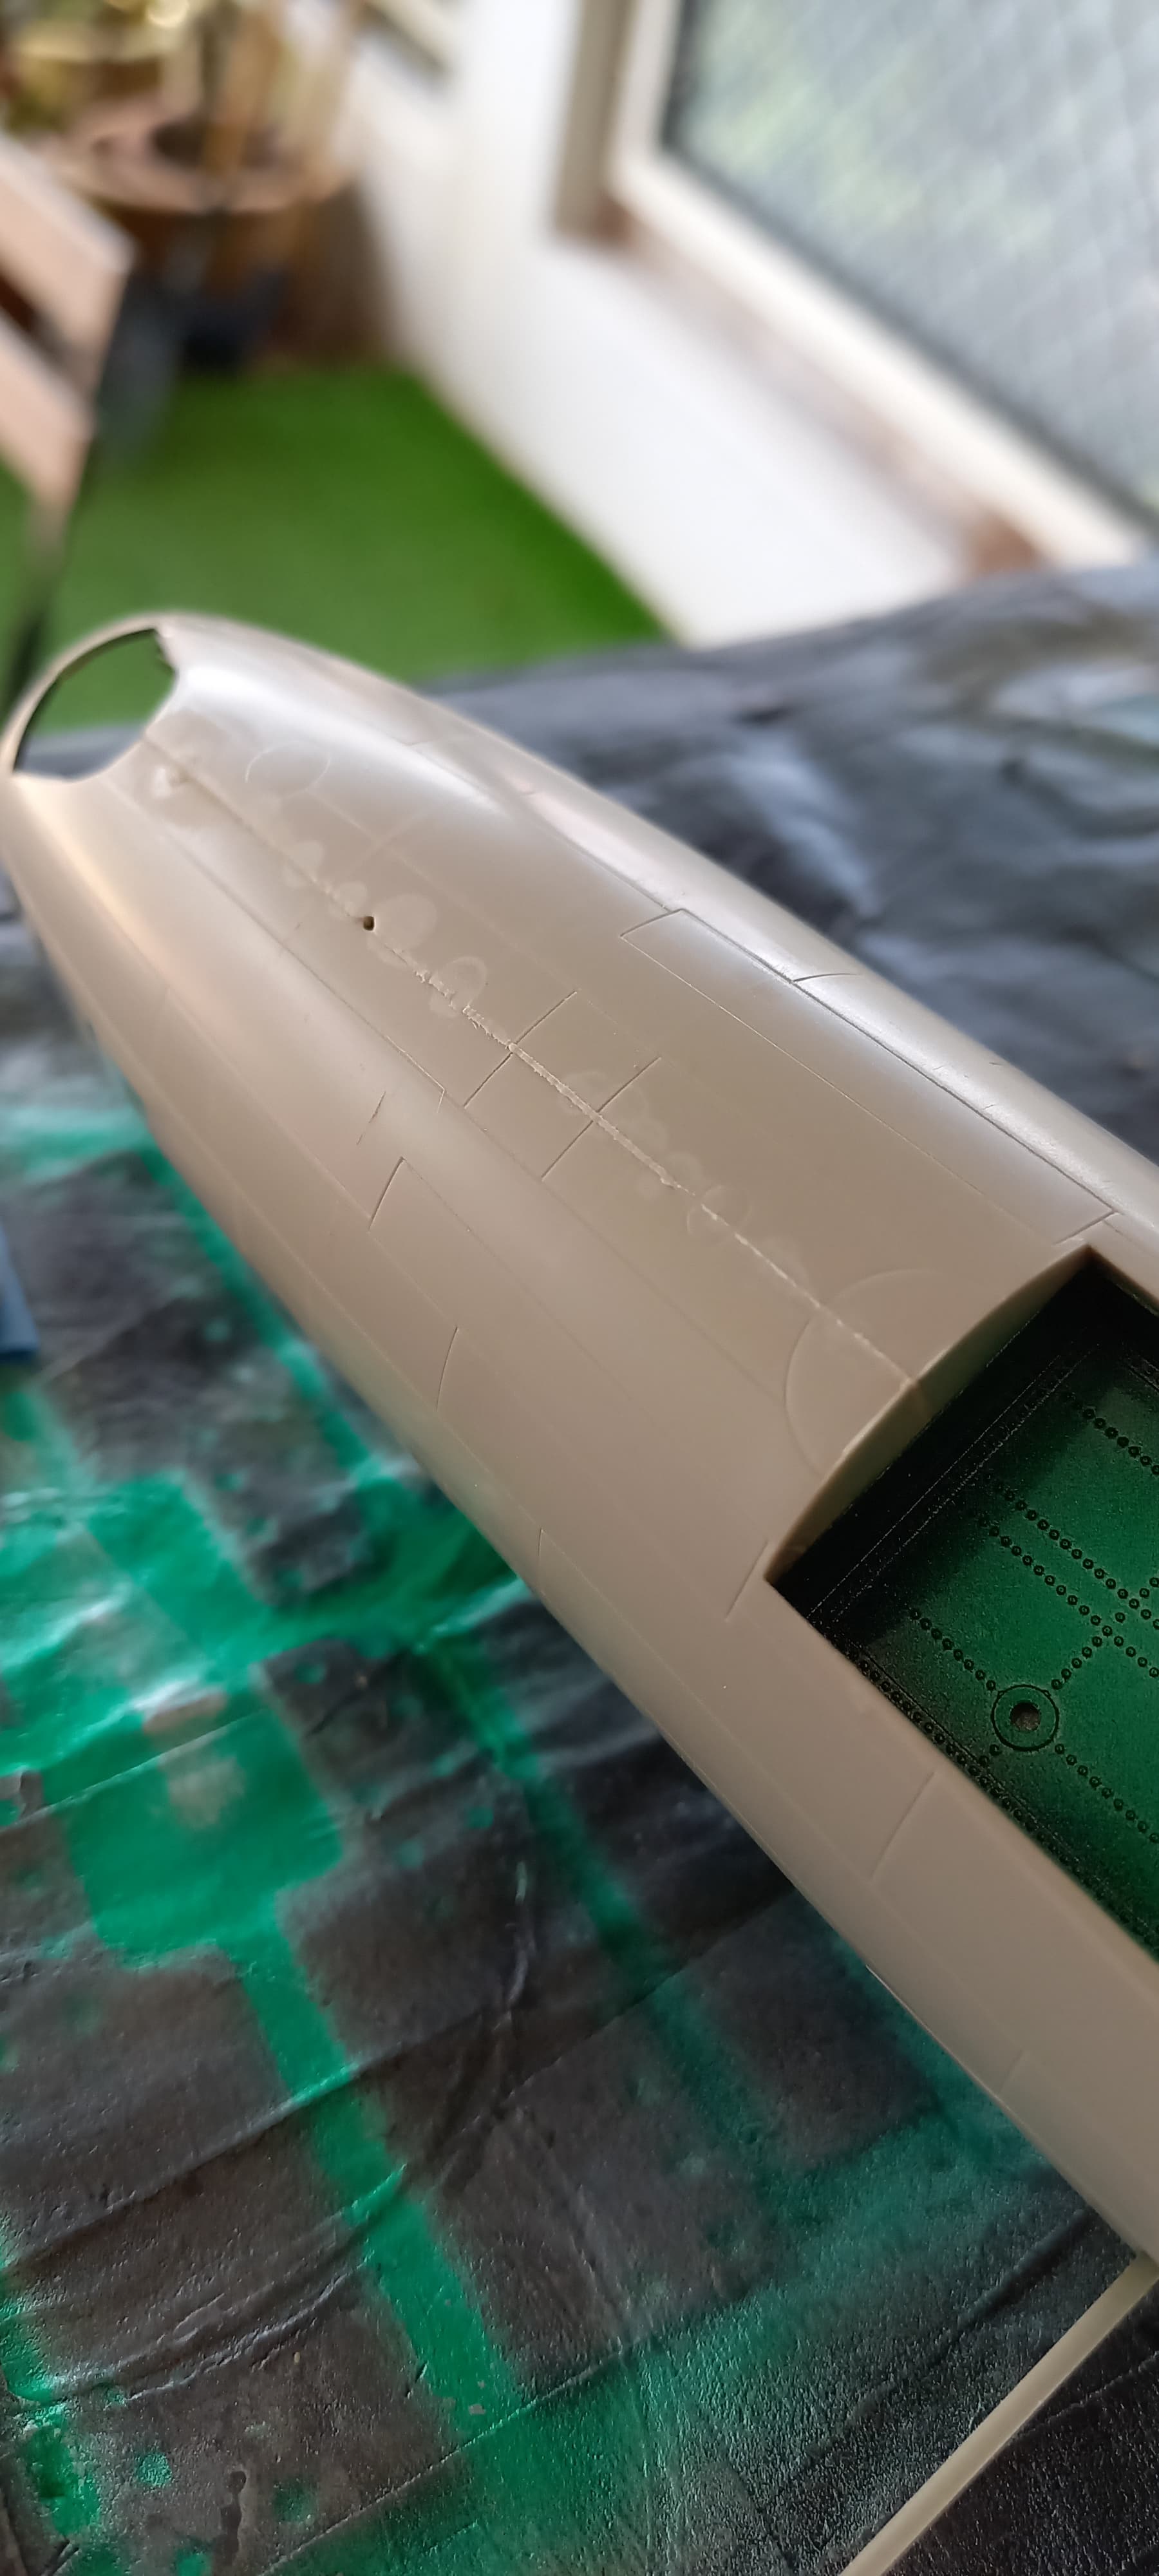
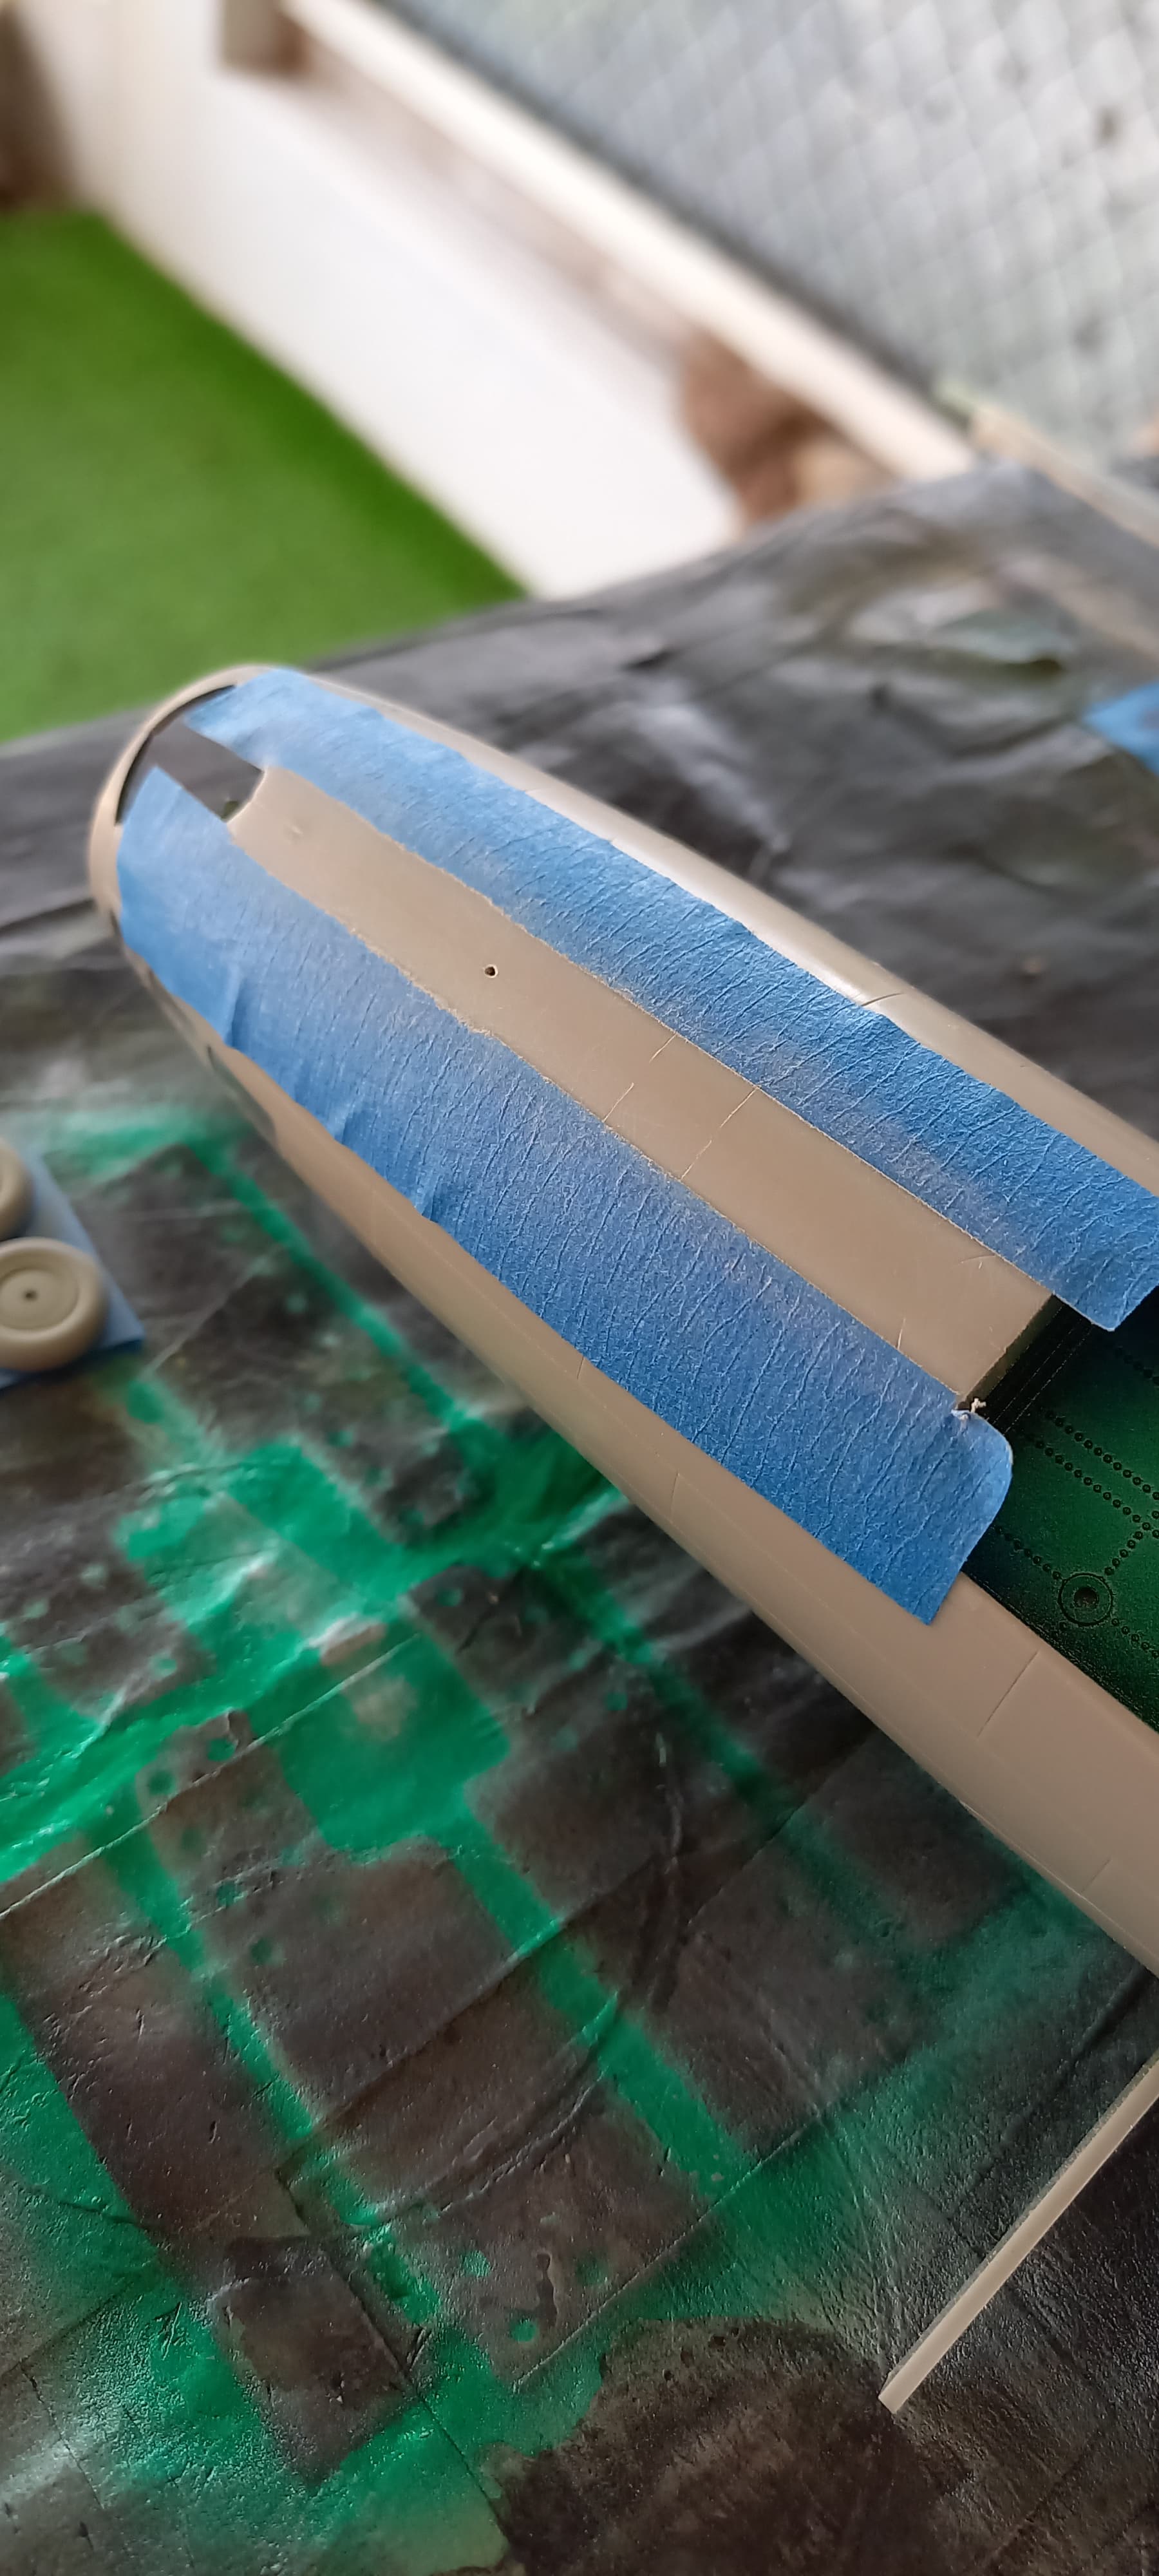
Then taped off the area to avoid damage to the finely engraved panel lines.
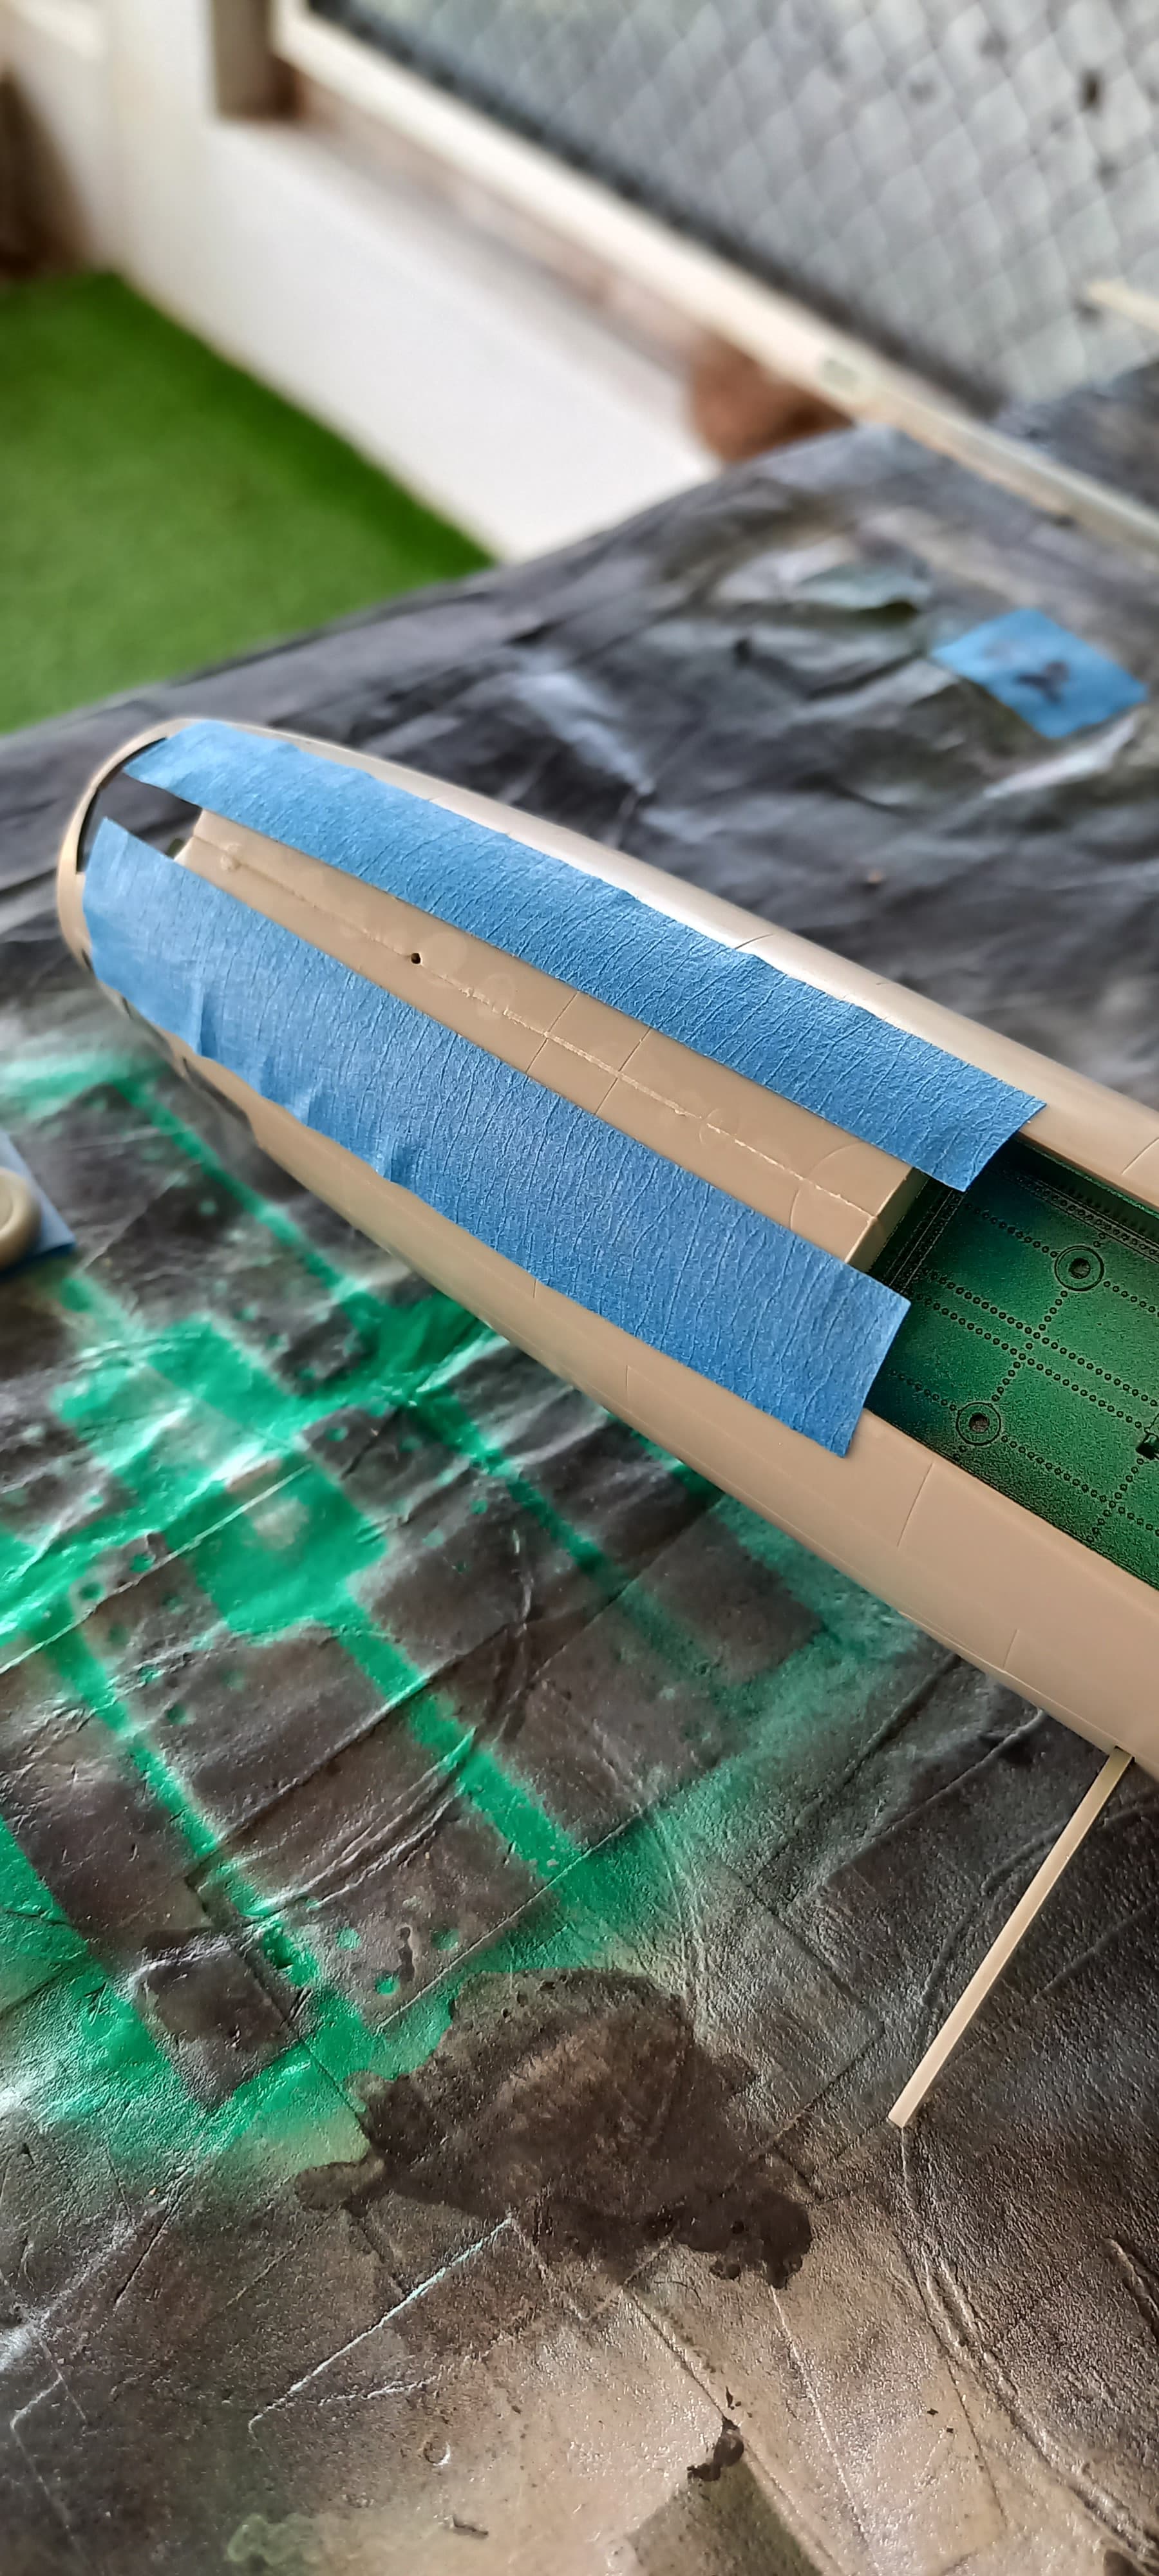
Followed by sanding, 400, 600 then 800 grits.
Then filling the nose area with superglue and sanding smooth, this took 2 applications. Finally, any lost panel lines were replaced.
Satisfied with the clean-up, it was time to move onto the bomb bay area. G4M Betty’s bays were different for each type of mission and the doors really weren’t doors, but a panel. Recon was to have the area completely closed off, torpedo missions had a hole cut such that it was larger than the torpedo, and for bombs, the panel was left off.
Since I was going to do a Betty that flew with the Kanoya Naval Fighter Group K-310, flown by Lt. Haruki Iki from the raid that participated in the sinking of the HMS Prince of Wales and Repulse, I opened up the bay panel for the torpedo. Tamiya did us modelers a nice favor by having the outline engraved, which makes this an easy affair with an engraving tool and a needle chucked in a pin vice.
This was then glued in place, and the area cleaned up. Ironically, I stole the kit’s torpedo for my B5N2 Kate, so this area will represent the bird in post mission configuration, and I’ve opted to show it with the flaps in the lowered position as well.
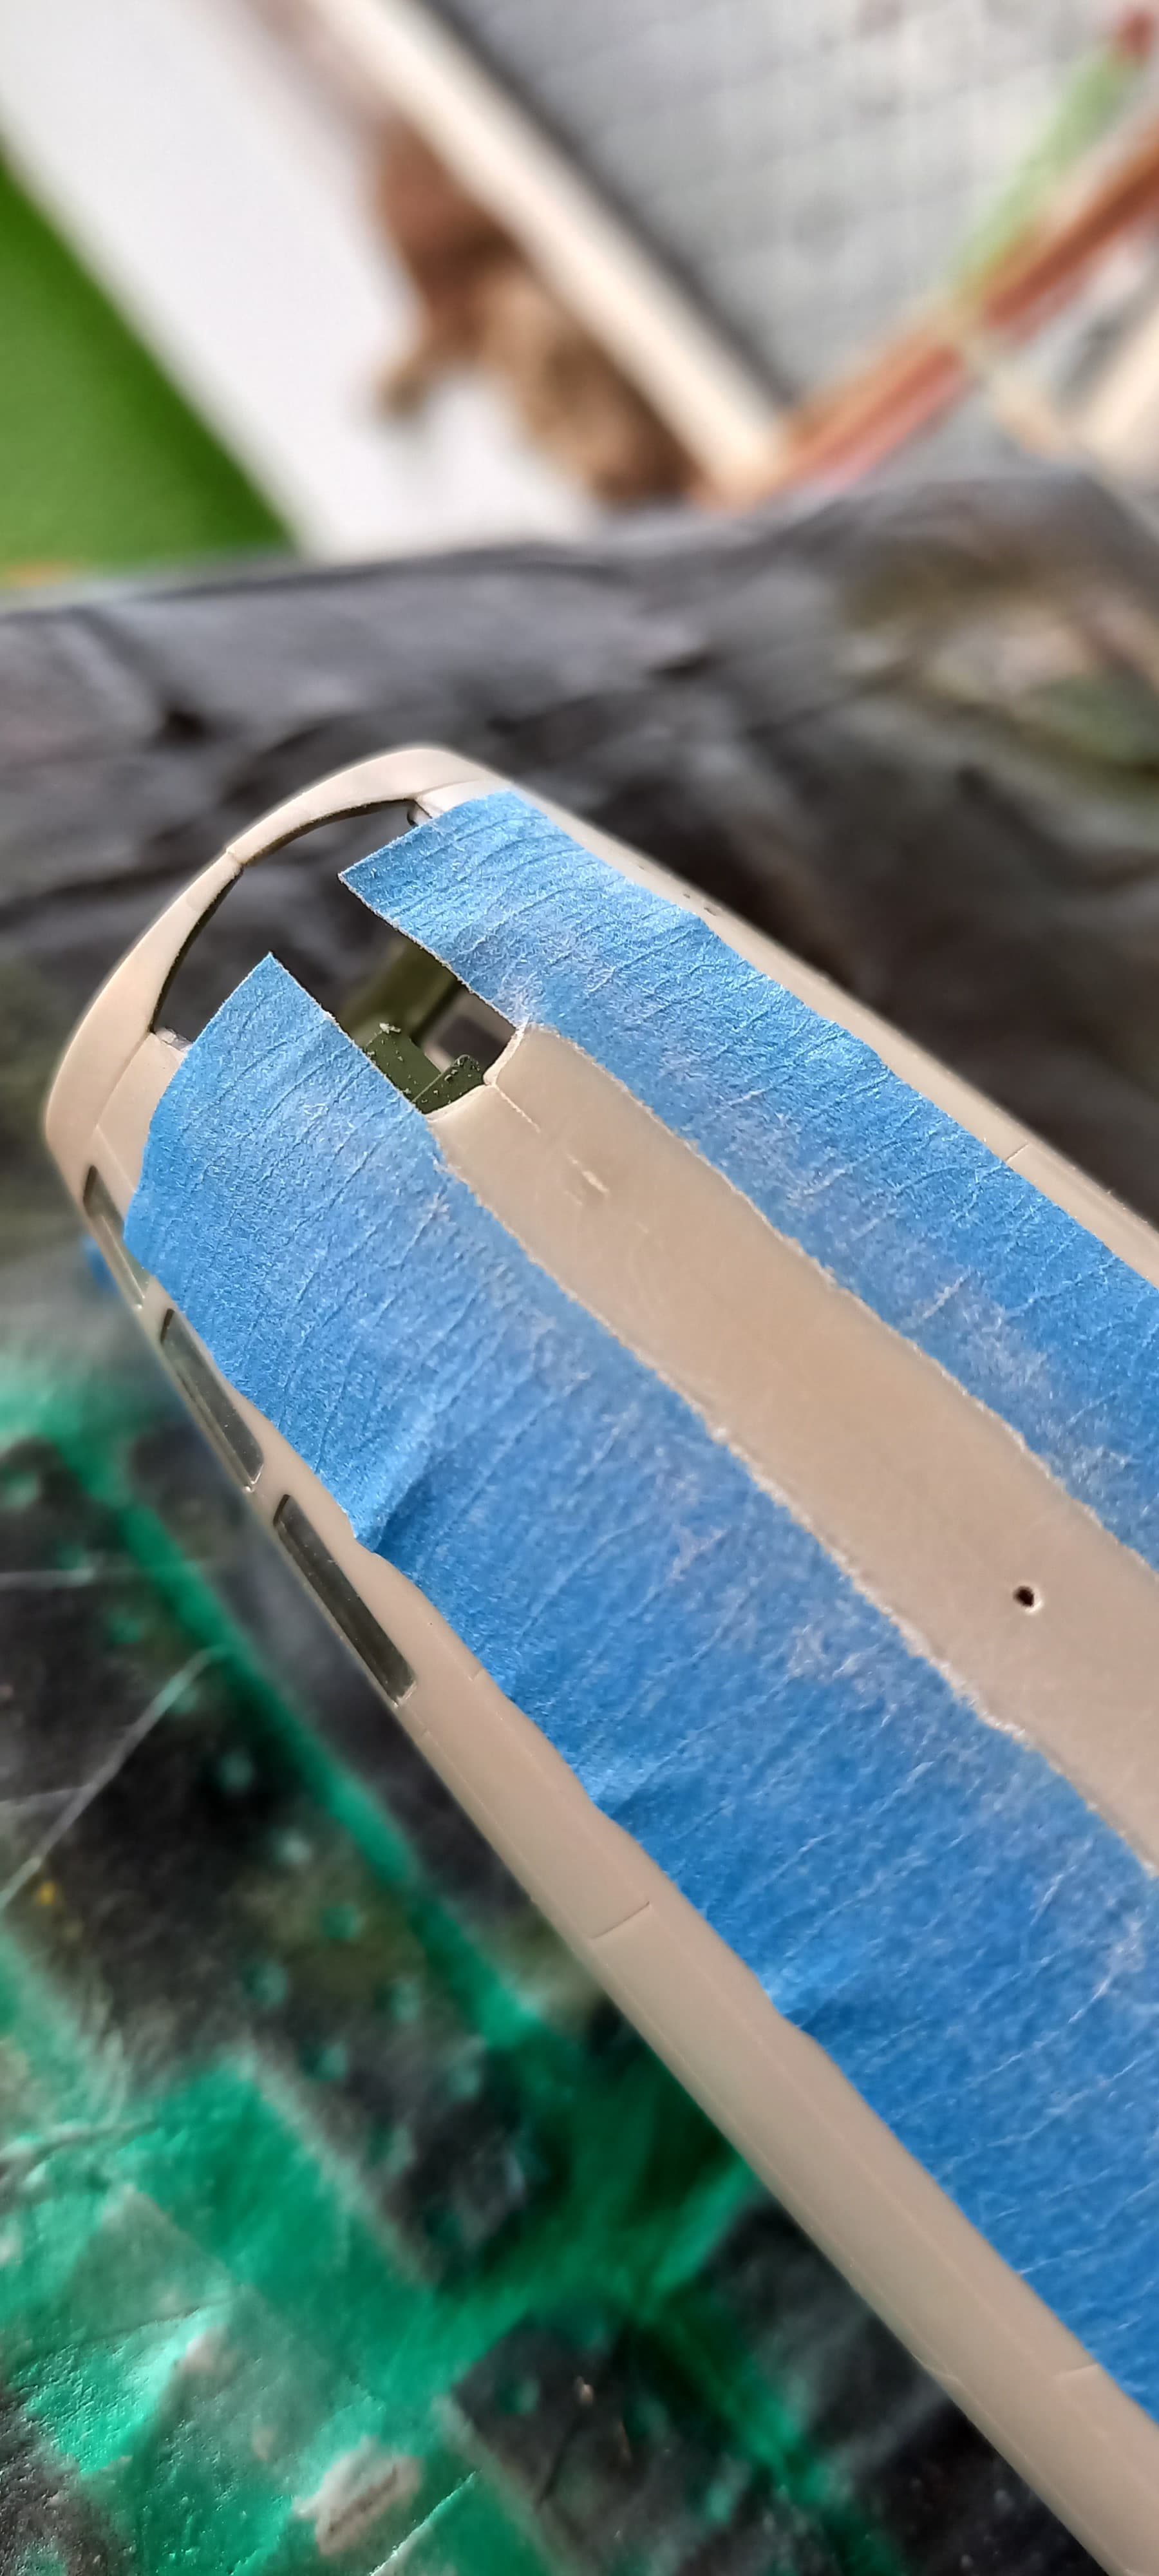
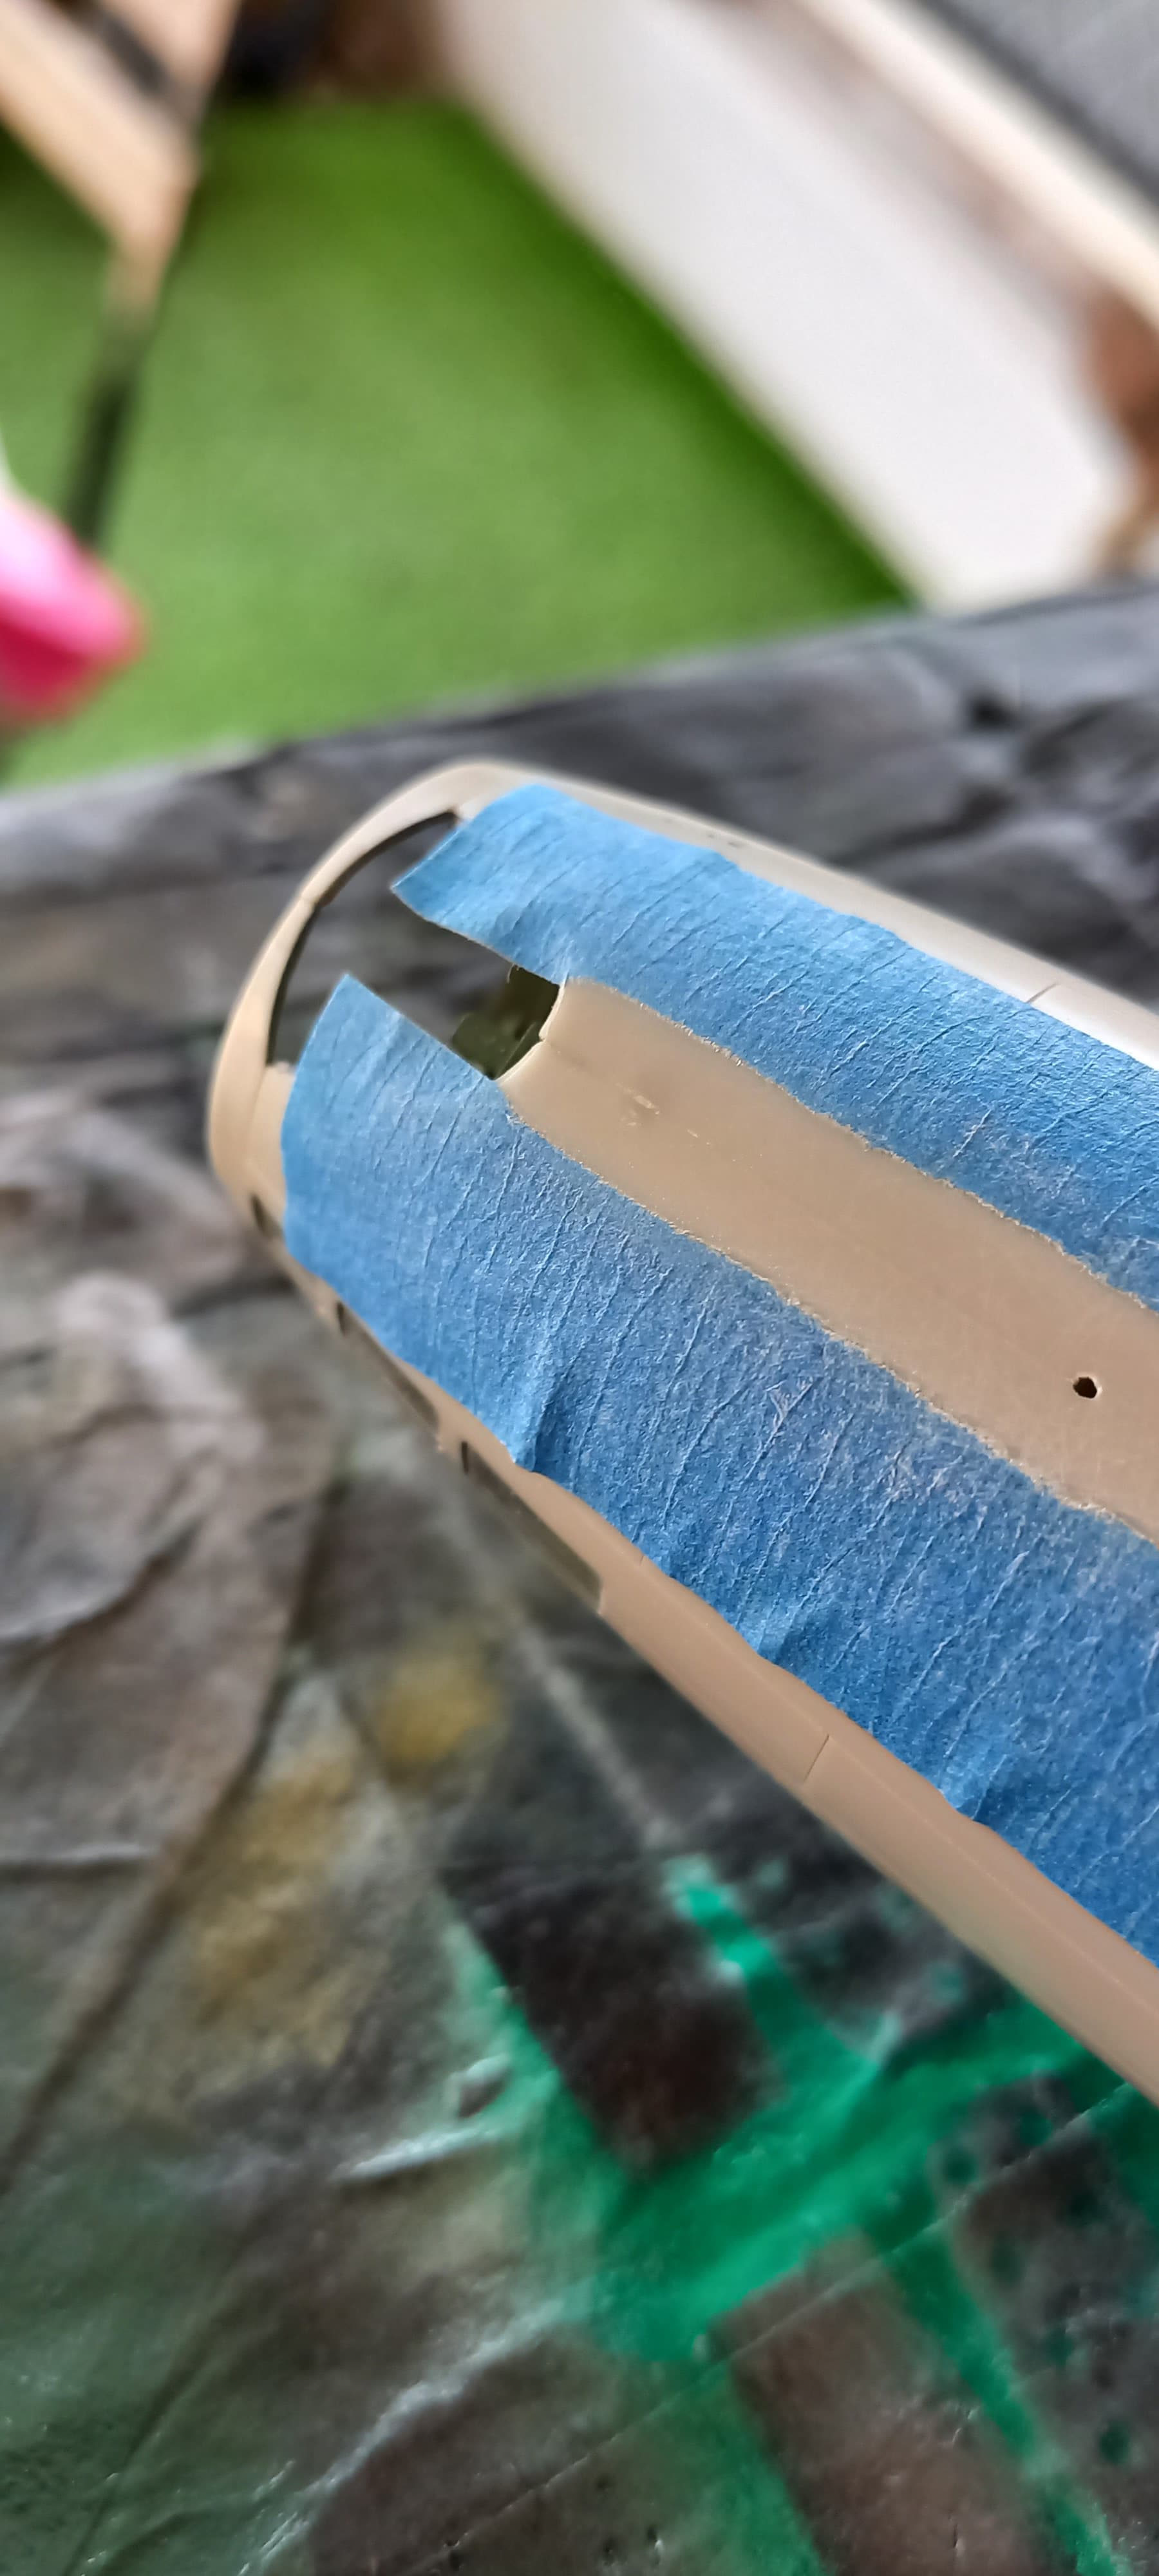
Construction continued at a very accelerated pace, so much so that when I went to take pictures the airframe was done! When it comes to aircraft with large amounts of “greenhouse” glass and canopy’s I encourage folks to splurge for the Eduard mask set, this includes all glass and wheel masks for a good price, and the time it saves along with the frustrations involved are well worth it!
Wrapping up the airframe construction, I installed the tail gunner’s area, and then prepped the big bird for painting.

Way too much fun the ordinary modeler, this kit builds up quite nicely! Since the plane I’m doing didn’t have much in the way of markings, I decided to paint the insignia and stripe, and will only use the tail number from the kits decal sheet, although the decals look good, this is something that I want to do. So, my next update will be painting this thing in a two-tone camo scheme. Till then have fun modeling!
12 Likes
Looking great! That is one big bird! You’re doing great job!
Curious what mix you used for the green?
The Betty looks great so far, John! ![]() Lots of masking …
Lots of masking …
I have that kit also somewhere in my stash. Must have a look at it … ![]()
1 Like
Thanks for the compliments, it’s a good kit which certainly makes the builder look better! Torsten, regarding masking, you ain’t seen nothing yet!
Mead, the aotoke color is pretty simple to do, just takes a little more time than using the mixed stuff that many paint manufacturers make, which tend to be on the blue side. Realize that aotoke is/was a protective anticorrosion paint, much like zinc chromate. It was colored so that the manufacturers knew if the metal had been treated, since it’s pretty easy to tell the difference between bare metal and a blue green color! First, I use something that will mimic the natural metal finish (aluminum) though it doesn’t have to be perfect since it’s inside, I’ve tried different shades of silver with good success using Tamiya X-11 chrome aluminum, and Mr. Color chrome gun silver. The goal being to get a bright shiny metal color at the lowest cost! Then I take clear blue and clear green and mix them to get differing shades. In this case it’s a 1:1 mix of the clear blue and clear green. I also dilute my paints to 1:4 (1 part paint, 3 parts thinner) using Mr Leveling Thinner, and then airbrush. Haven’t tried hand painting, but if I were, I’d start at a lower dilution, like 1:1 and go from there. Hope that helps!
2 Likes
Fantastic! I have all the colors on hand to make that work and need to make the aotke for my Jill build
1 Like