Yikes! I know that feeling! … Looks really good on the model, though. ![]()
—mike
@phil2015 phil The colour, believe it or not, is BS.28 Silver Grey. Mike wasn’t kidding when he said that colour would surprise some people.
The mix is Tamiya 7 x XF21 + 1 x XF4 + 1 x XF19.
It is the weathering that really gives it that dusty washed out finish…
Interesting. I picked up the AK real color Silver Grey hoping for a washed out green. It is very yellow.
Hello all,
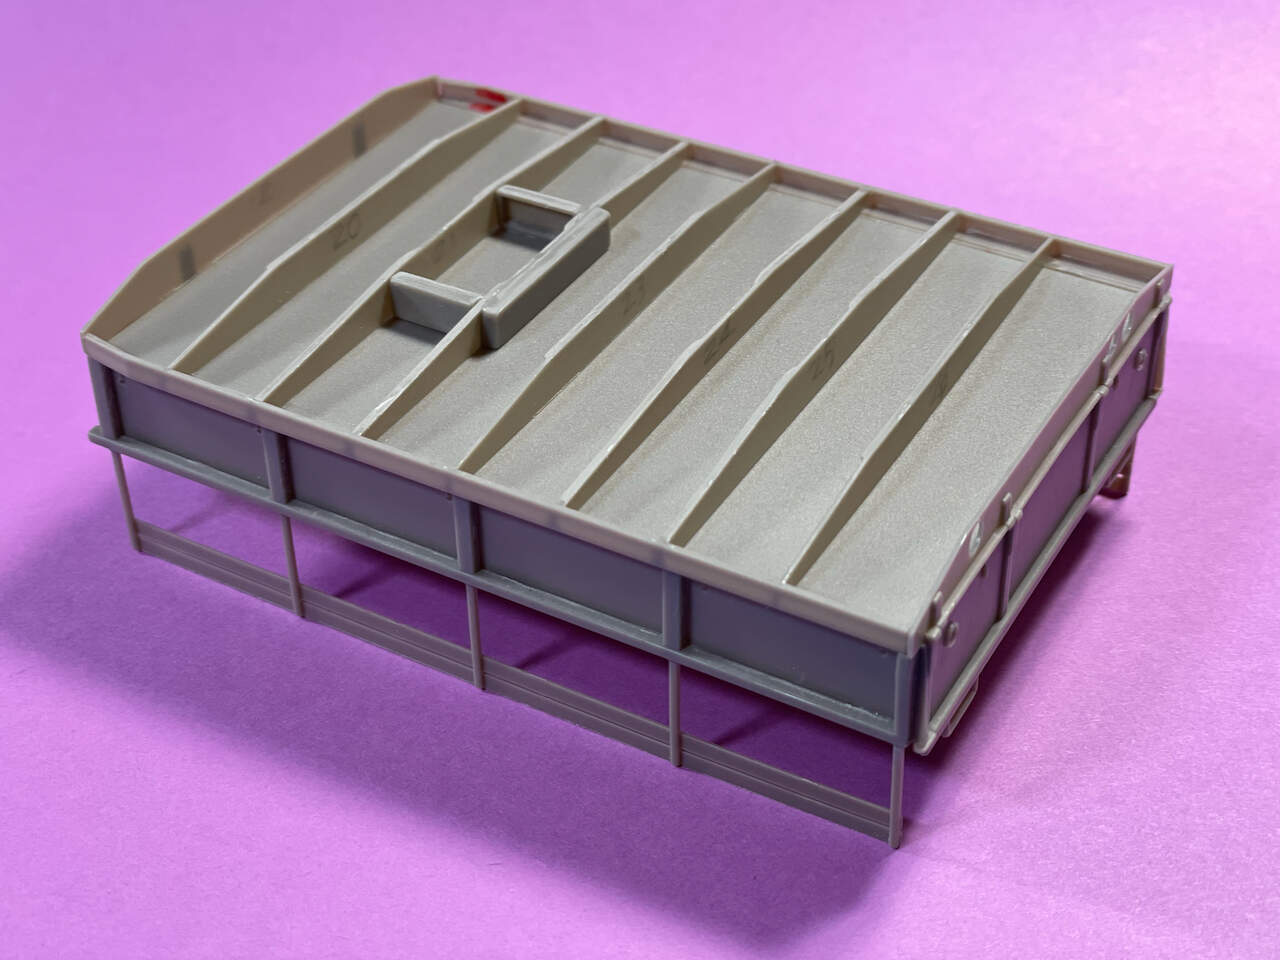
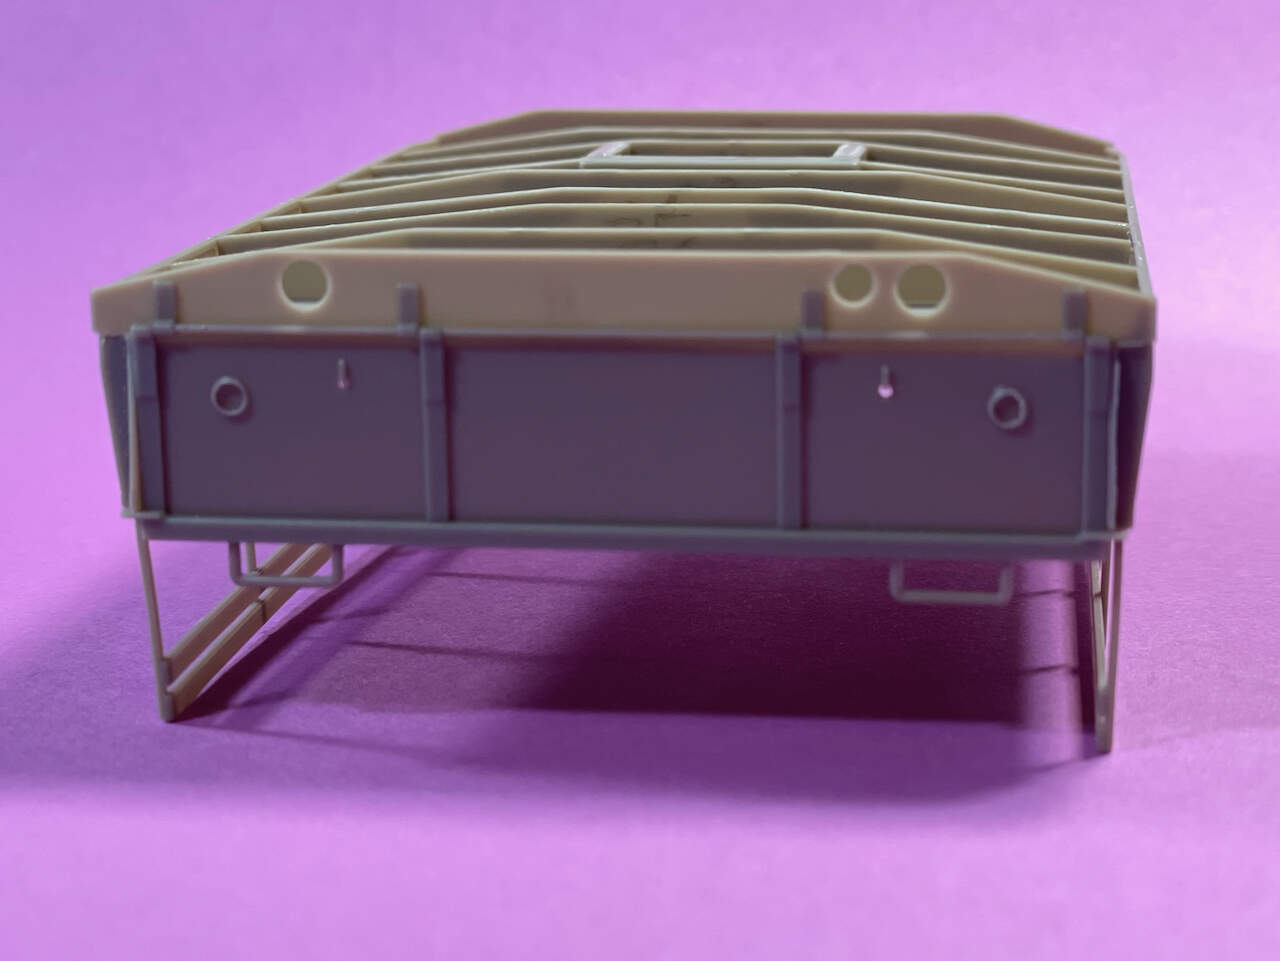
Here’s some more work on the Diamond T.
While letting glue set on several sub-assemblies, I skipped-ahead to the cargo body. At first, instructions were a little confusing, but they began to make more and more sense while dry-fitting, taping and tacking the body parts together. After a break to mentally reset, I came back a second night to finish-off this little Jenga puzzle. 

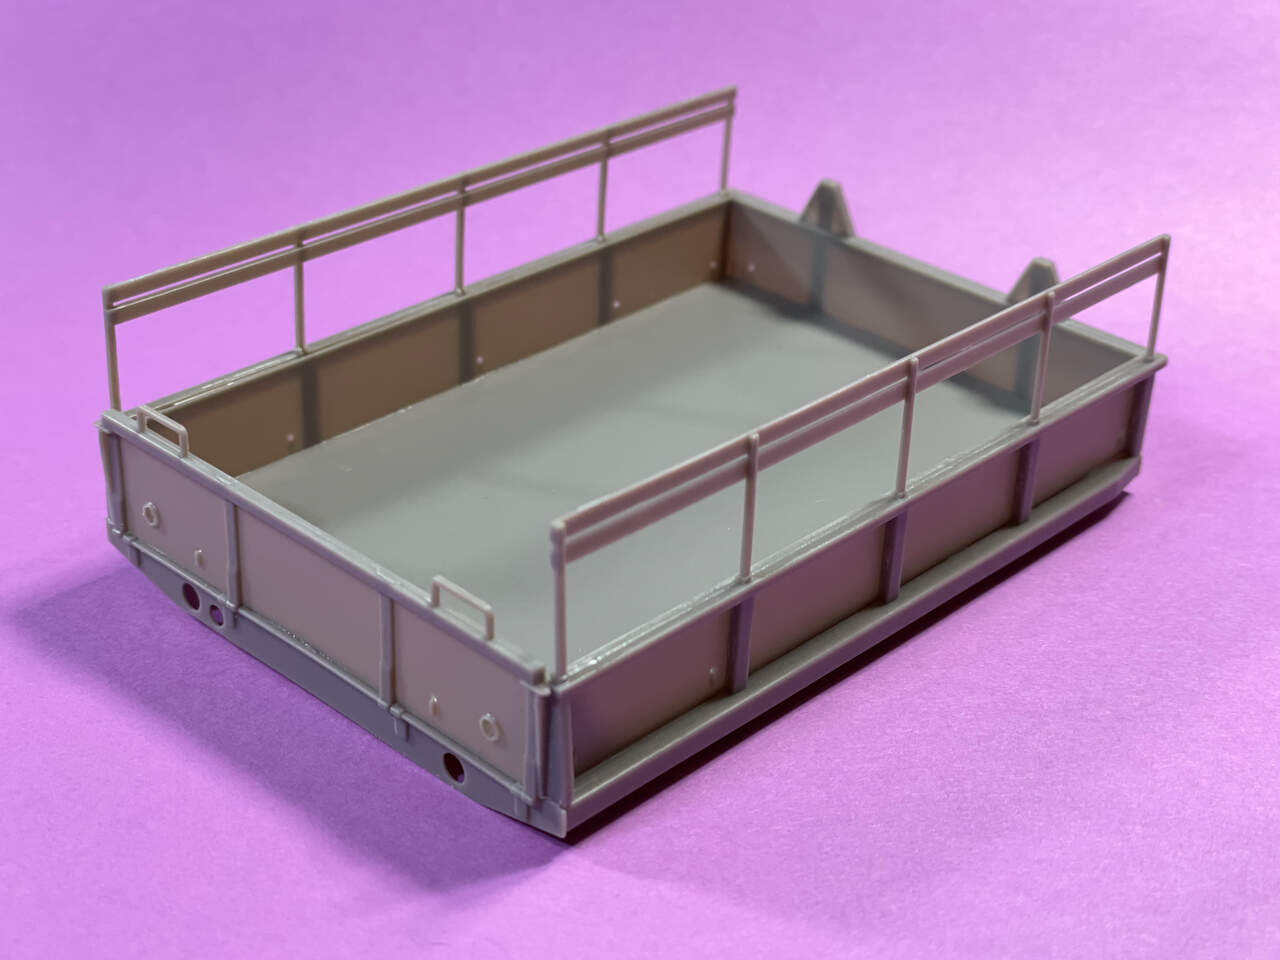
Floor ribbing fit was actually quite good and only required very slight trimming to the ends.
.
Cheers!
—mike
3 Likes
This formula is pretty good. Side by side with the AK real color they aren’t much different. The AK color tends toward more of a lime color. Not sure why I thought it was very yellow before - I guess a lot of it has to do with what it goes down next to.
When I say pretty good, I’m trying to get that washed out green you see on Iranian Chieftains. I don’t have that many pics but it looks like early in their conflict they were some shade of green. I guess I could do them later when they are in more of a sand yellow color, but I want the green version.
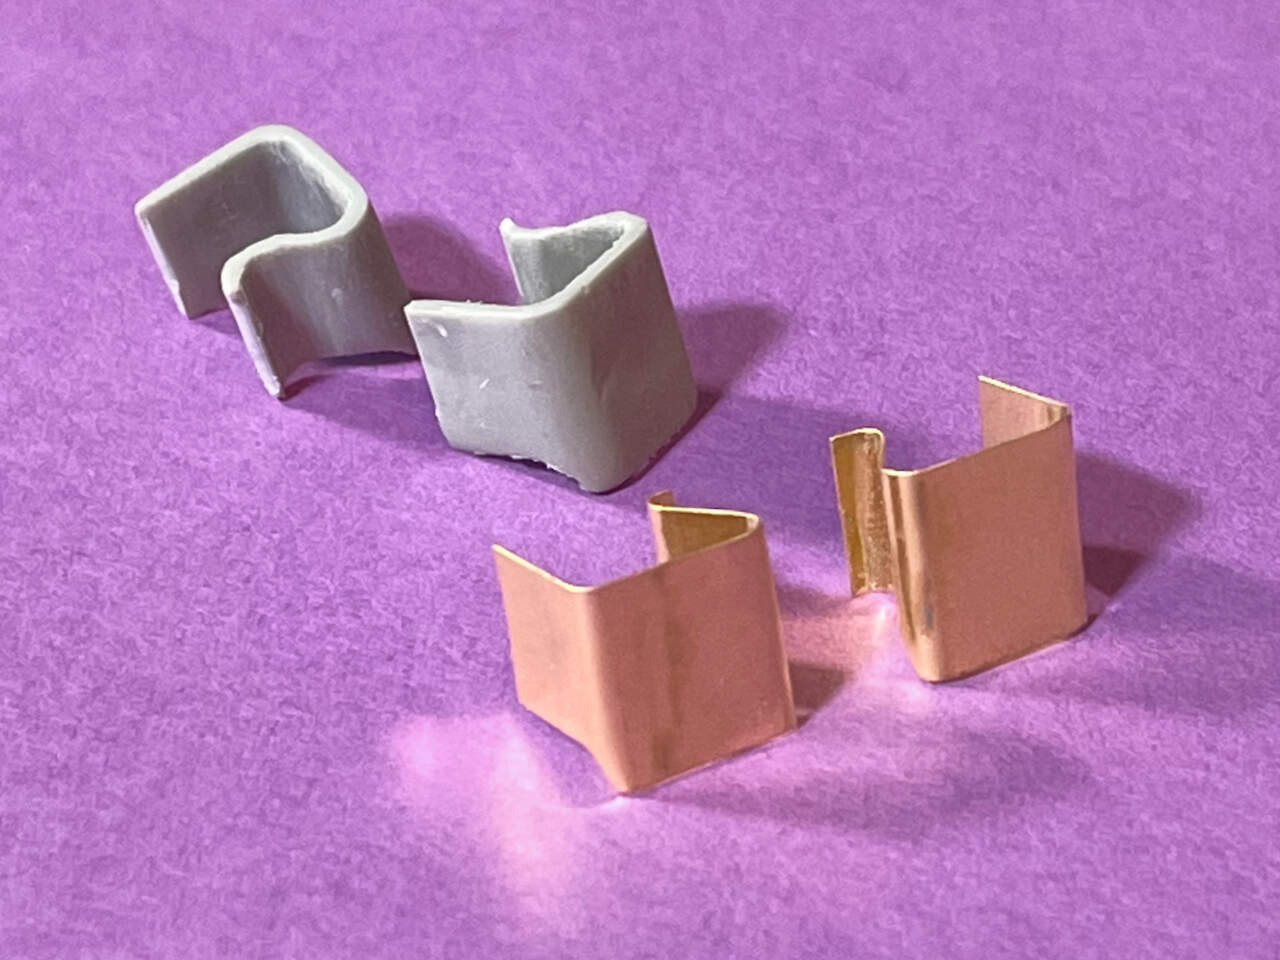
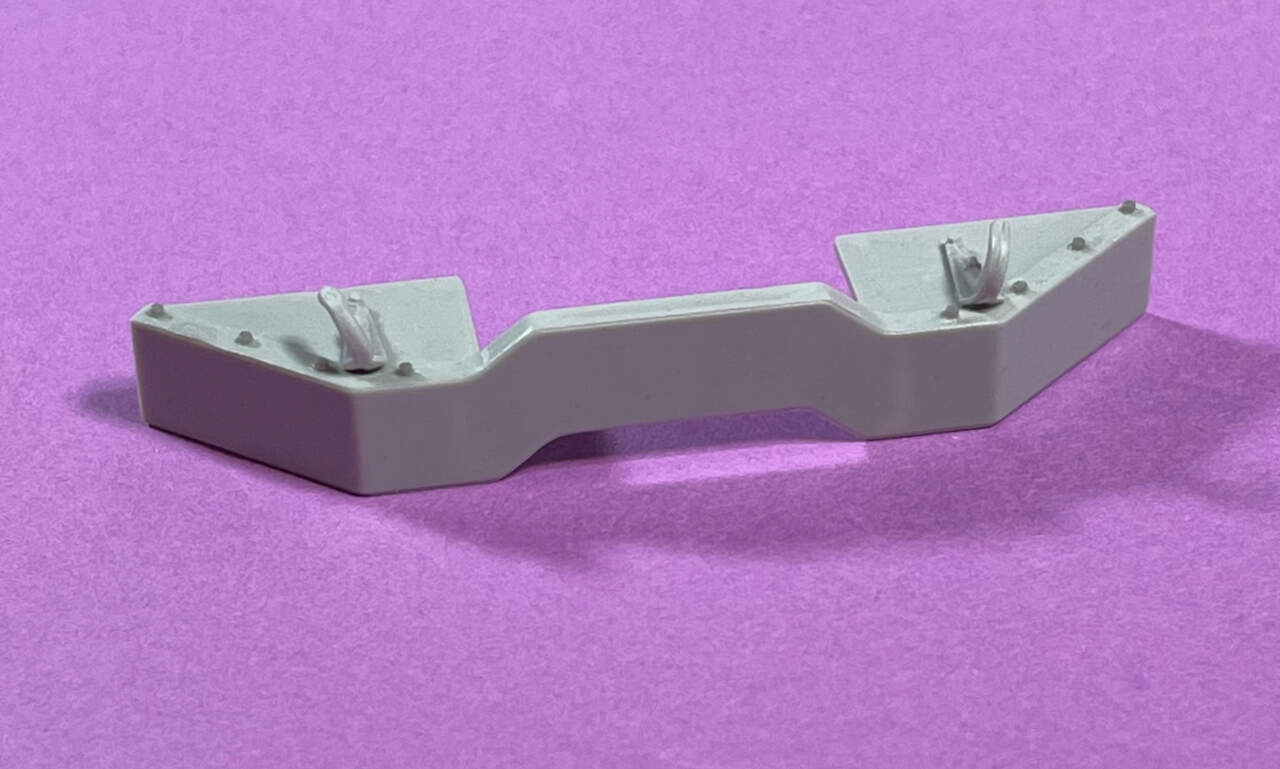
Last night, I realized I’d paid good money for aftermarket, so I gently ripped the old rear bumpers from the frame and some hours later bent-up the new PE set. LZ Models (35443) Detailing Set for Diamond T 968 Cargo.
I added resin bolts to the front bumper. MENG (SPS-005) Nuts and Bolts Set A (small 0.3mm).
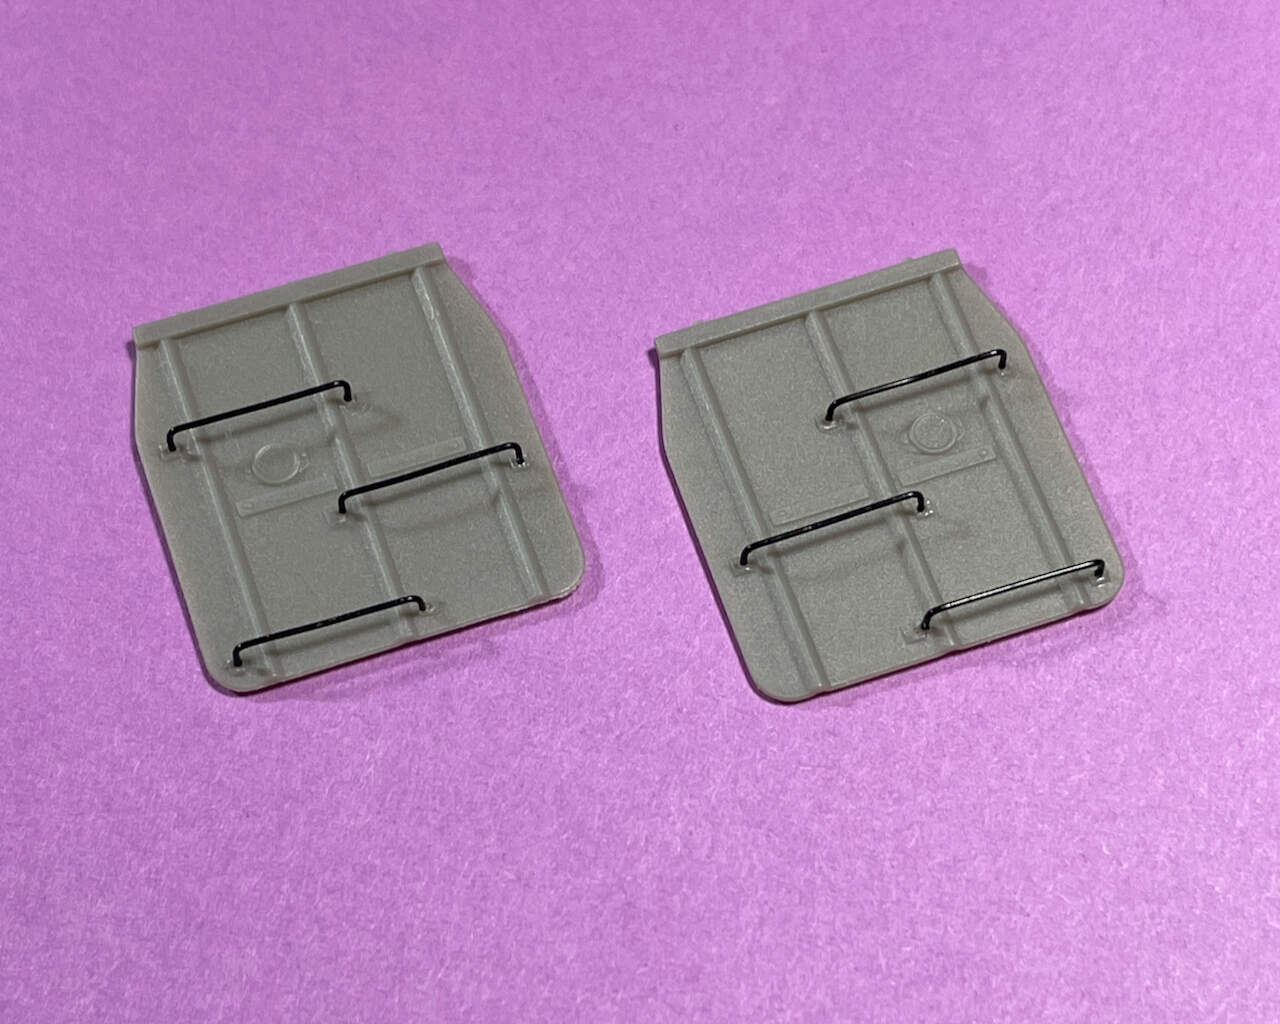
Today, I went to town on grab-handles. I used UTC Ultra Wire (MED) and a Micro-Mark bending tool to make quick work of this task.
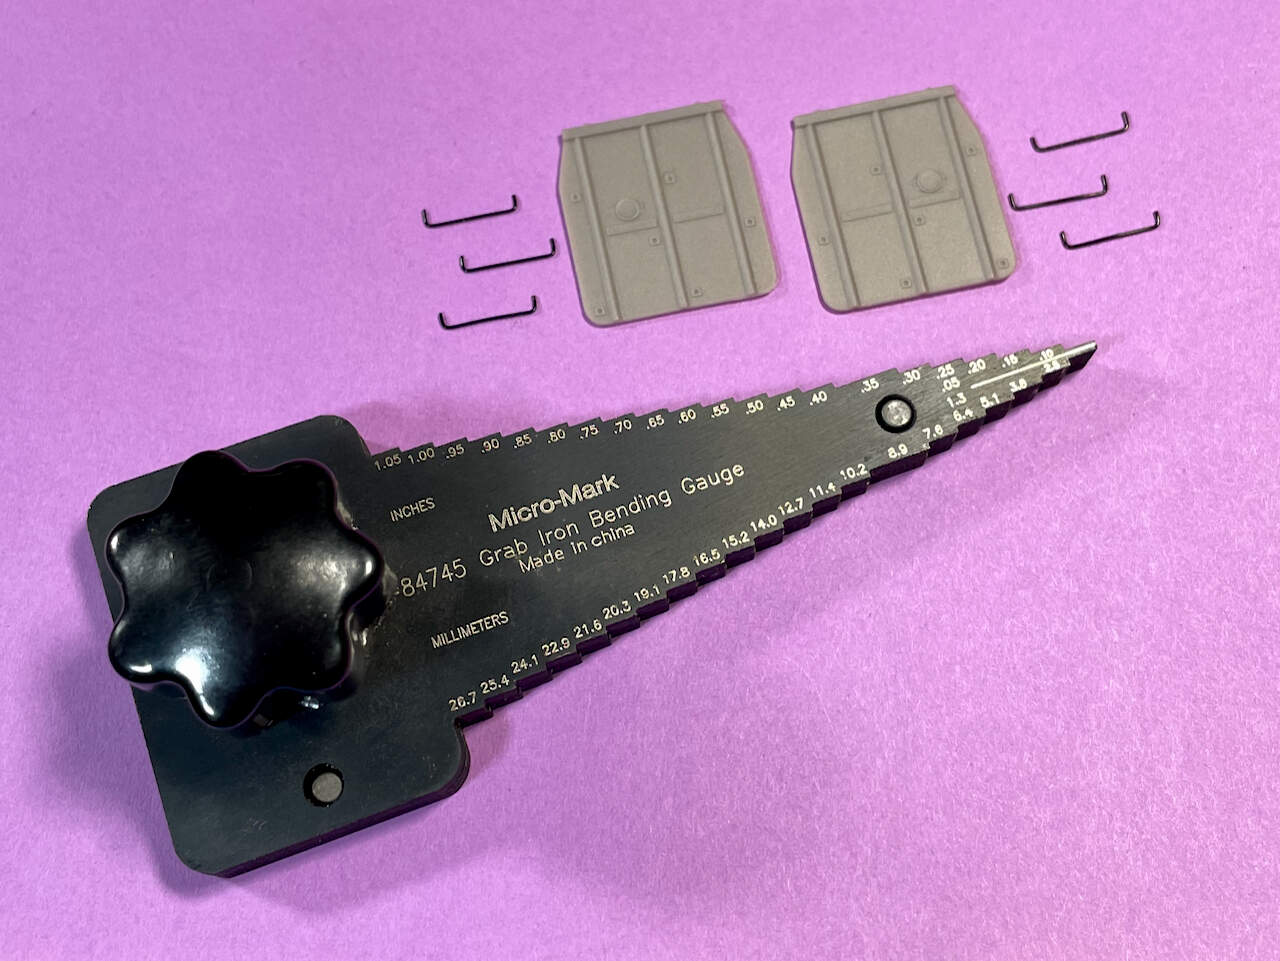
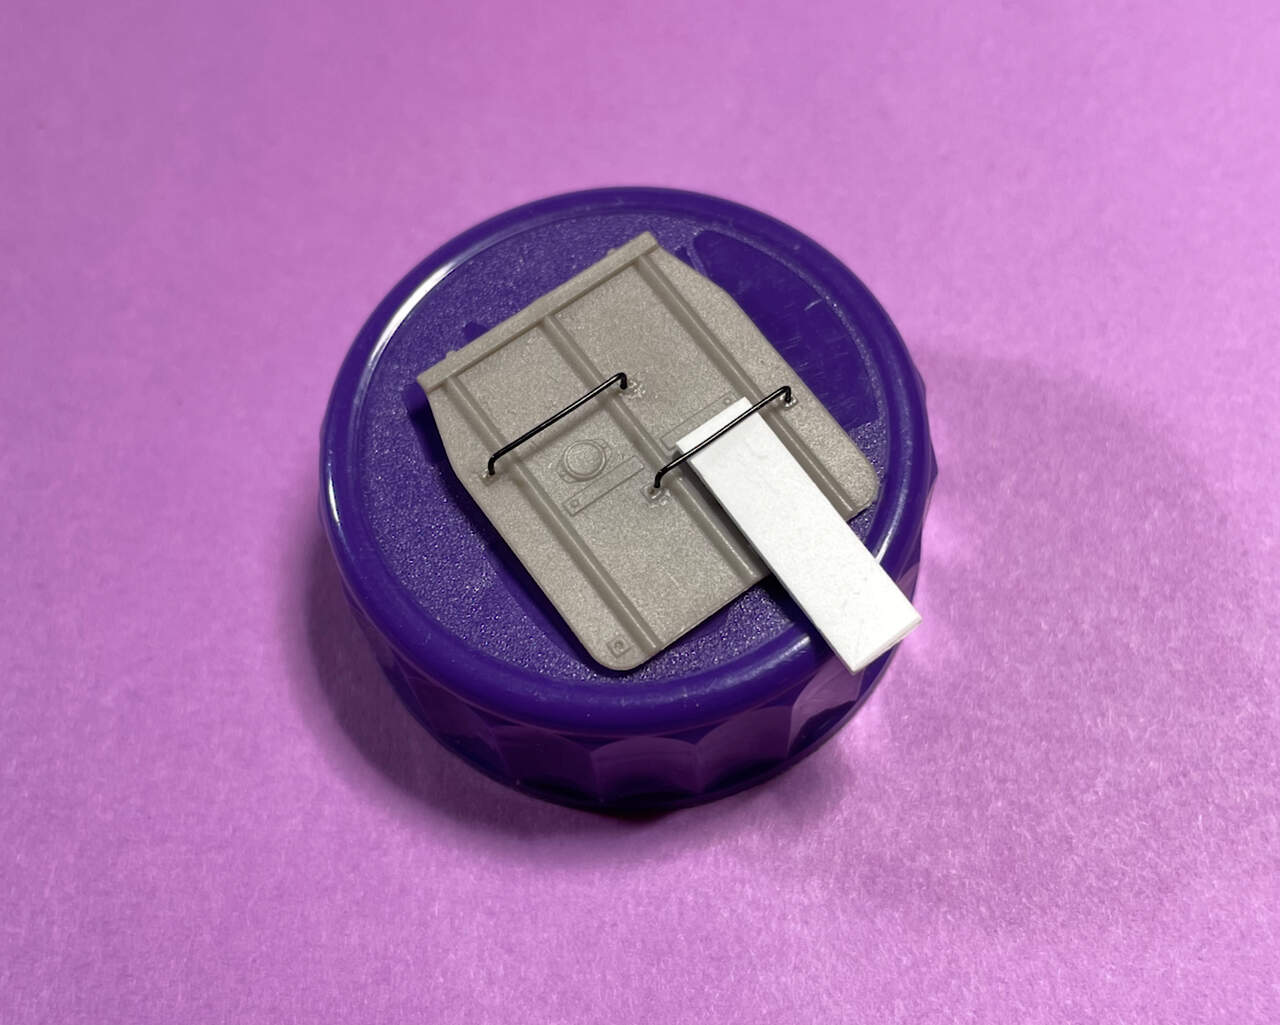
Ever have one of those days where the CA won’t set quick enough, where gravity is heavy, thus causing parts to flop over as soon as you release the tweezers? Normally, I would have drilled holes and glued the handles from the back. However, there was opposite handle detail on the backside, so I got jiggy with my grab-handle anti-gravity jig!
Cheers!
—mike
PS: Let me know if I’m posting too much. Blah, blah, blah.
 …
…
4 Likes
You are not posting too much. Love the anti-gravity jig.
1 Like
REALLY like the paint shades on this little Honey Digger. Just my two cents but I think it looks great as is, a light dusting to tone down the red and she’s done!
Cajun
Never too much Mike. I’m loving what you are doing and tips like anti-grav may help others. I do have the similar kit, so this is all very valuable info.
Appreciate the comments. I’ve just done some restrained chipping and a pin wash so far and then as suggested a bit of light dusting and hopefully she’s there.
1 Like
Looks awesome, Michael. I need to get one of those grab bending tools as well! 
In case anyone would like to contribute a Studebaker gasoline tanker, here’s how it can be kit bashed from ICM and Hobby Boss offerings:
http://panzer-modell.de/berichte/studebaker_us6/studer.php
Peter
Later this year, I am planning on using the Tamiya CCKW and Italeri water tanker for a different look and also the ICM Studebaker with shapeways conversion for a semi truck.
Ryan,
Were CCKW trucks part of the Lend-Lease Program? And beware - Studebakers did not have banjo axles.
Peter
1 Like
Peter,
I am not sure but this website suggests so. My builds will not be part of this campaign (too many other builds in front before the deadline) just following along. I am aware of the banjo, Tom might make a Studebaker set but until then I have something if need be and I have other CCKWs that can use the banjo so no wasted parts.
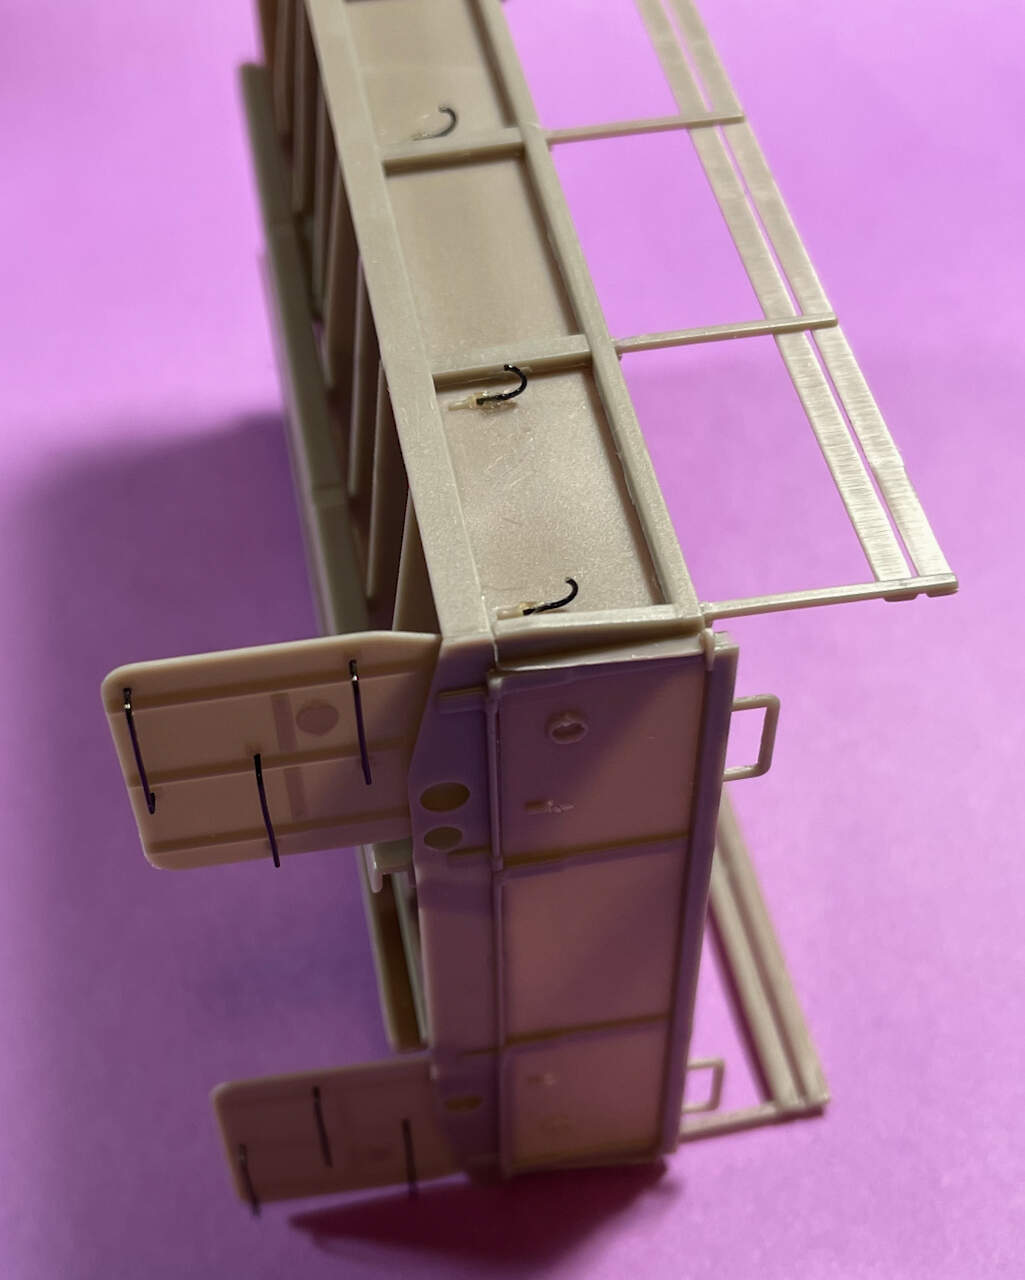
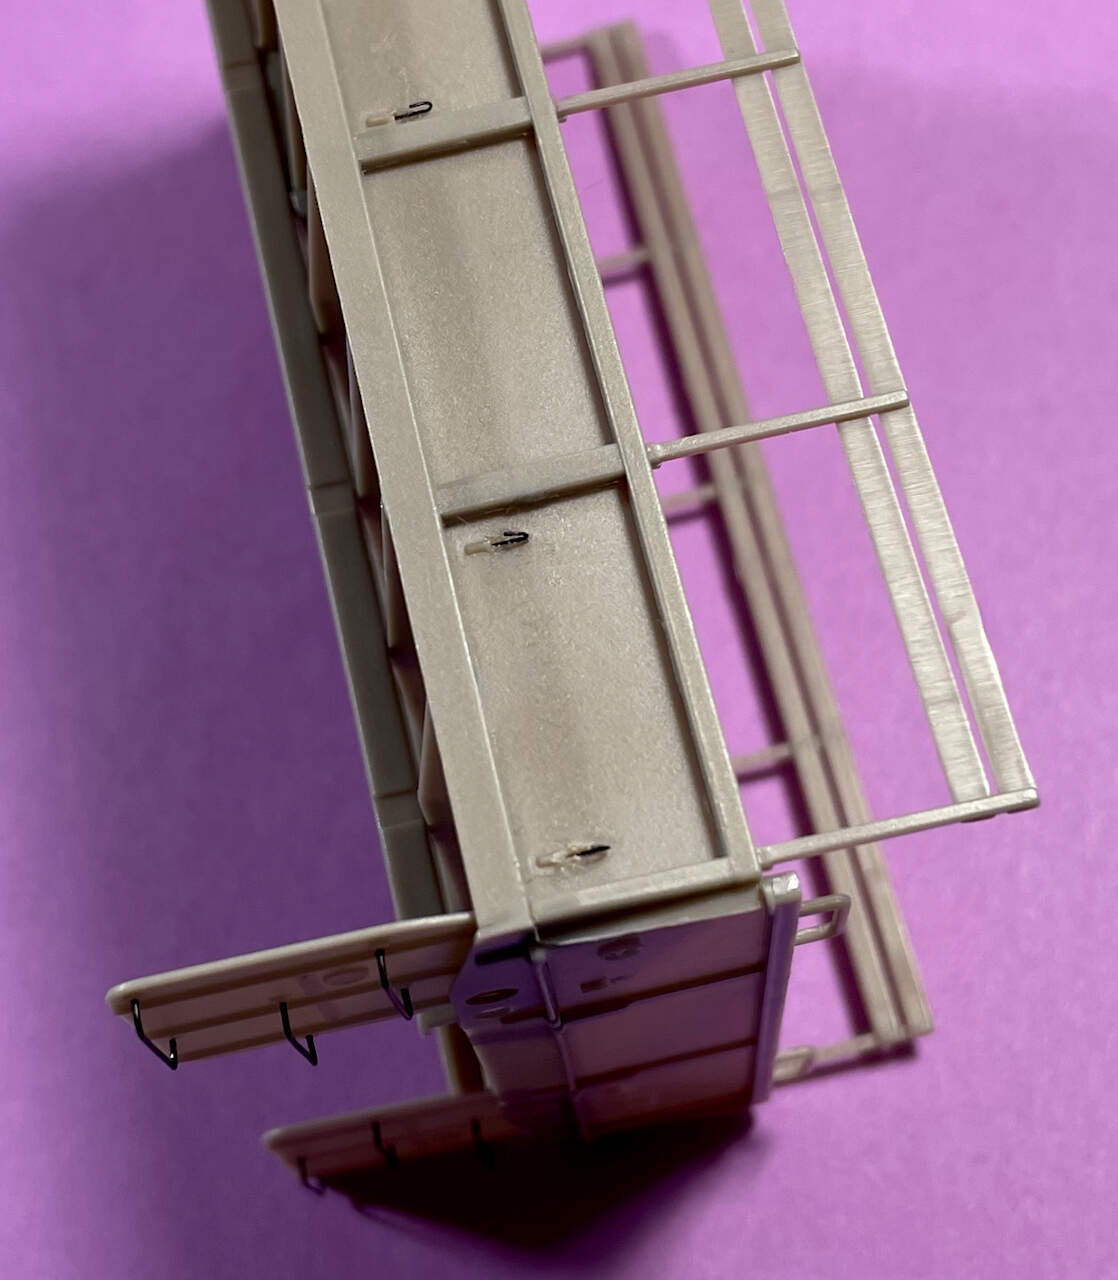
Round No. 1 (left). These tarp hooks look terrible — way out of scale. Round No. 2 (right). Another day, another session with smaller gauge wire — better, I guess? Maybe they’ll pass after paint?
Happy and safe holidays!
—mike
2 Likes
Hi Mike diamond-sharp detailing there, looking real good. Those hooks look OK, maybe a tad too open…but I wouldn’t want to try closing them! Whatever photo refs say, hopefully I’m wrong. Your CA/A-G episode reminded me of the time I was CA’ing a brass bracket & realised it wasn’t sitting down into its locating slot. As I quickly tried to force it down with the point of a blade it slid off & the part vanished with an almost audible “boing” as I blinked. Hunted high & low for it, no luck. Much later, in the bathroom brushing my teeth, glancing up in in the mirror…yep there it was, glinting near the top of my left ear. Stuck fast. 
 Oops forgot to say Happy Xmas
3 Likes
Hi, Tim! The nice thing about bending these tedious little hooks: Once I got into assembly-line mode, I just kept going when I plinked one… or two… or three… And as it turns out, the smaller gauge wire is much easier to work with (go figure!), so there will be a slight tweak as you’ve suggested.
Happy CA-Mas and a Joyous Glue-Year to all!


—mike
But wait, there’s more…
The aftermarket headlight guards became a scrappy mess, so I salvaged whatever I could to combine the original and PE parts together. Note: The outer guards and their brackets have been thinned-down quite a bit.
The foot board bending went a whole lot smoother.
With merely a hint of an X-Acto blade nearby, one of the rearview mirror rods broke-apart from the sprue… brass rod and Evergreen channel to the rescue!

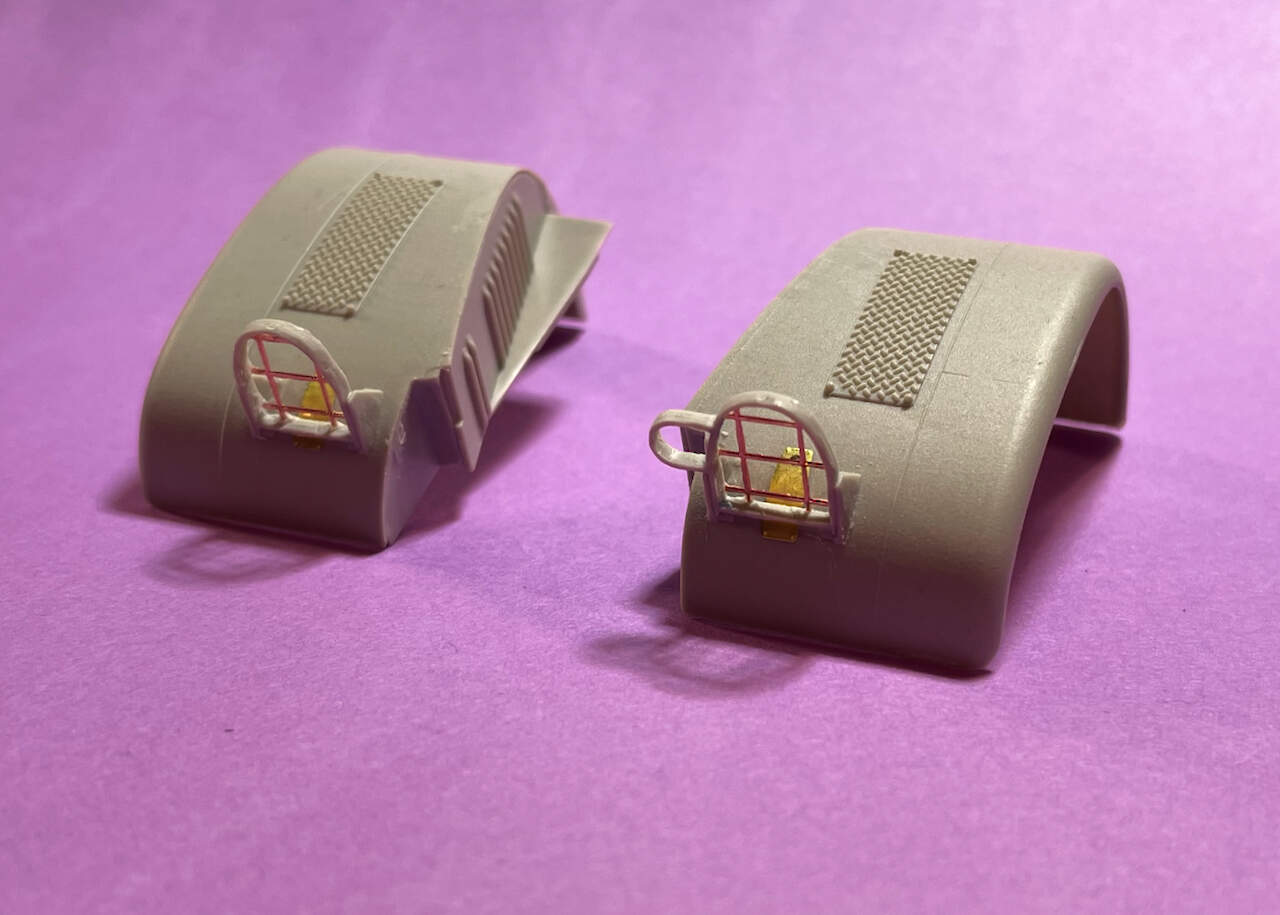
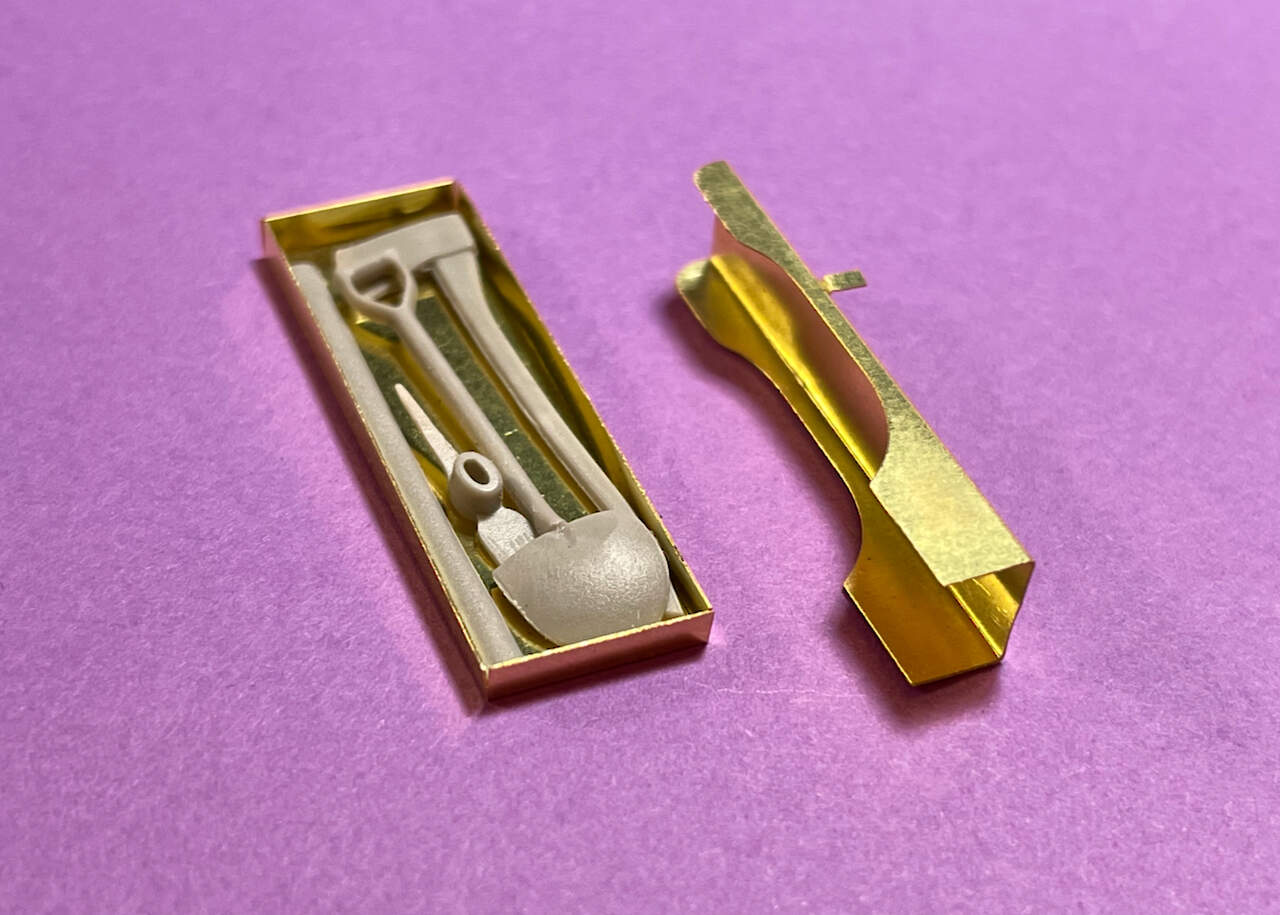
Pioneer tools and gun rack.
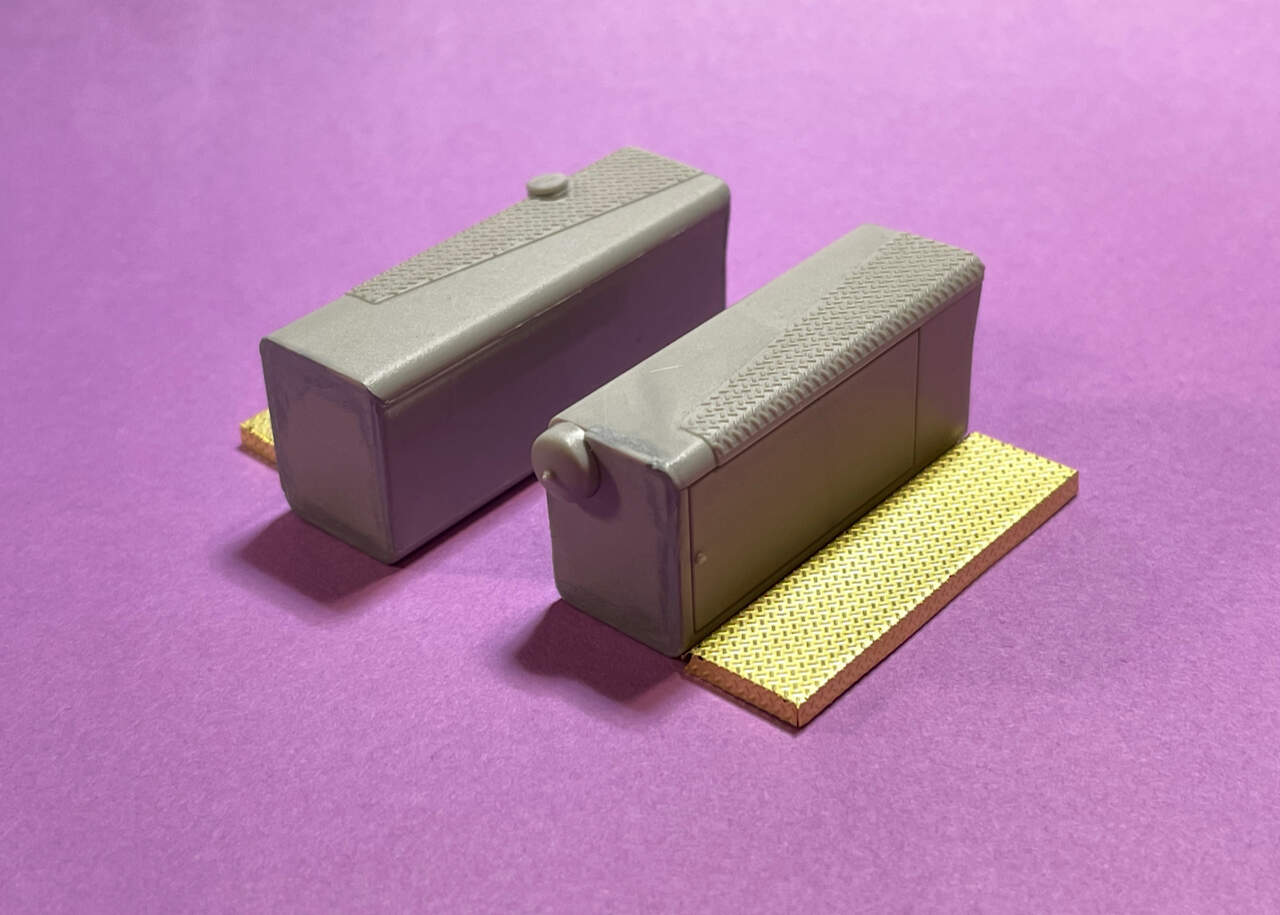
Fuel cans and racks.

Cargo body mud flaps and brackets.

 Note: There are two different bracket lengths. The longer of the two needs to go on the outer side of each flap. I only noticed this while attempting to position the flaps onto the cargo body.

The rear wheel hubs are permanently attached now. The wheels are dry-fit and clamped for alignment.
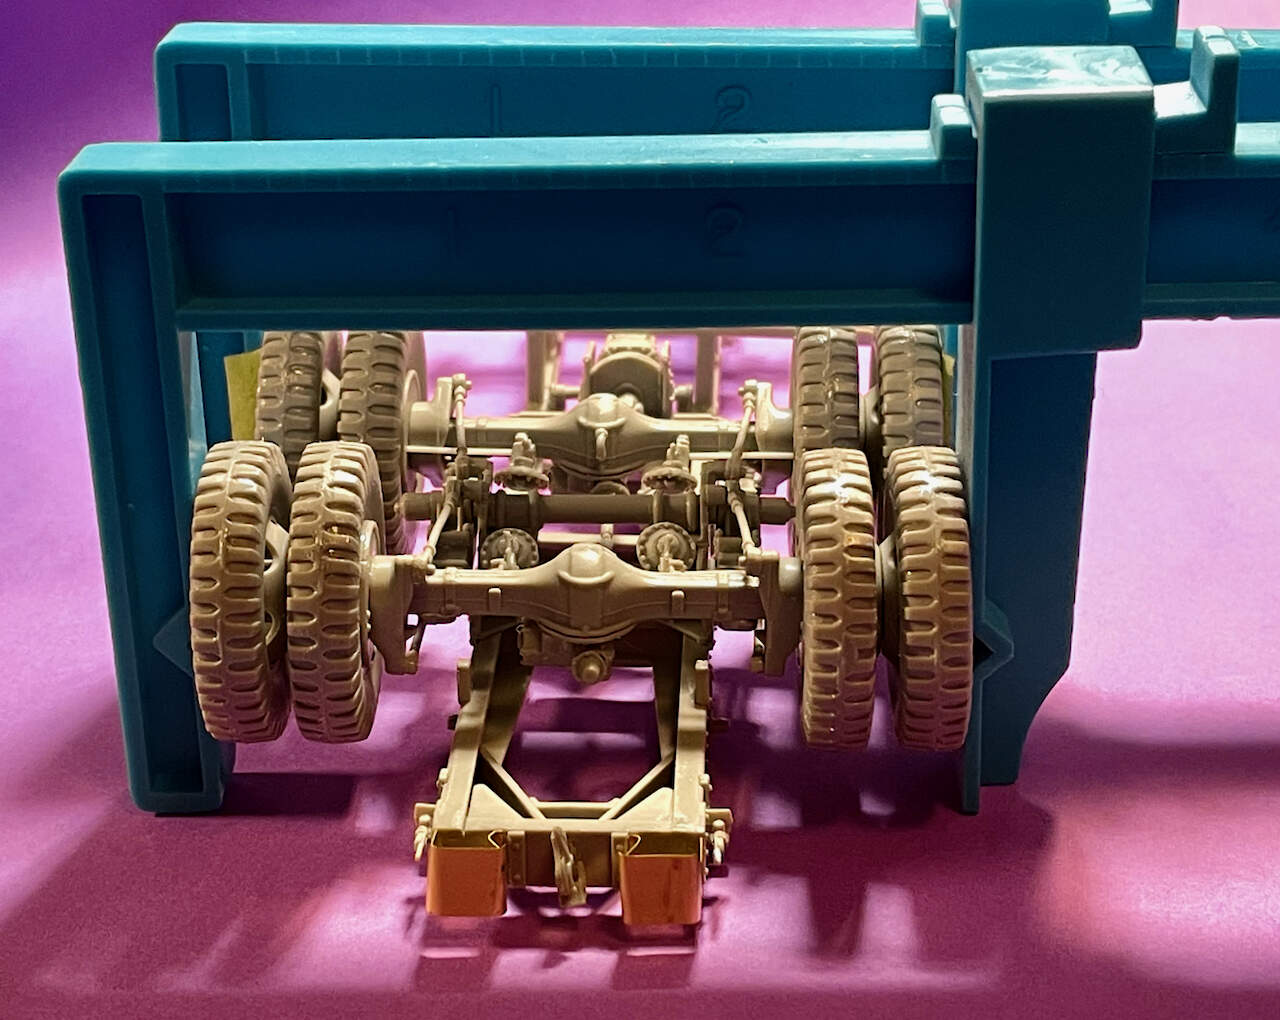
With all of the sprues stripped clean, all I have left are several sub-assemblies to whirlwind together.
Note: Speaking of clean sprues… there was no tow hook included in the kit — not even mention of one in the instructions — just drawings of an empty spool throughout.🪝
Hope you’re all enjoying the holidays.
Cheers!
—mike
5 Likes