@SGTJKJ - love the idea - cant wait to see the end result
David
@SGTJKJ - love the idea - cant wait to see the end result
David
Thanks, David. I might chicken out in the end, but it would be a good candidate as it crashed due to engine failure, so I do not have to add combat damage. We will see ![]()
Craig, looks great. Is this a 3D printed kit? Are you building the whole submarine or just the middle part? What is the scale?
uhhhmm… I plan to do the whole thing @ 1:16. I’m not sure how viable that will be as a kit though. It would be super pricey. The hull would be about 30"… I guess more sensible would be 1:24. That comes out at 500mm (20").
Wow, that sounds fantastic in either scale! It would be a very impressive model.
Looking forward to see more. ![]()
Craig - would love to see this come to fruition - hope you decide to pull the trigger on it
David
Hey all,
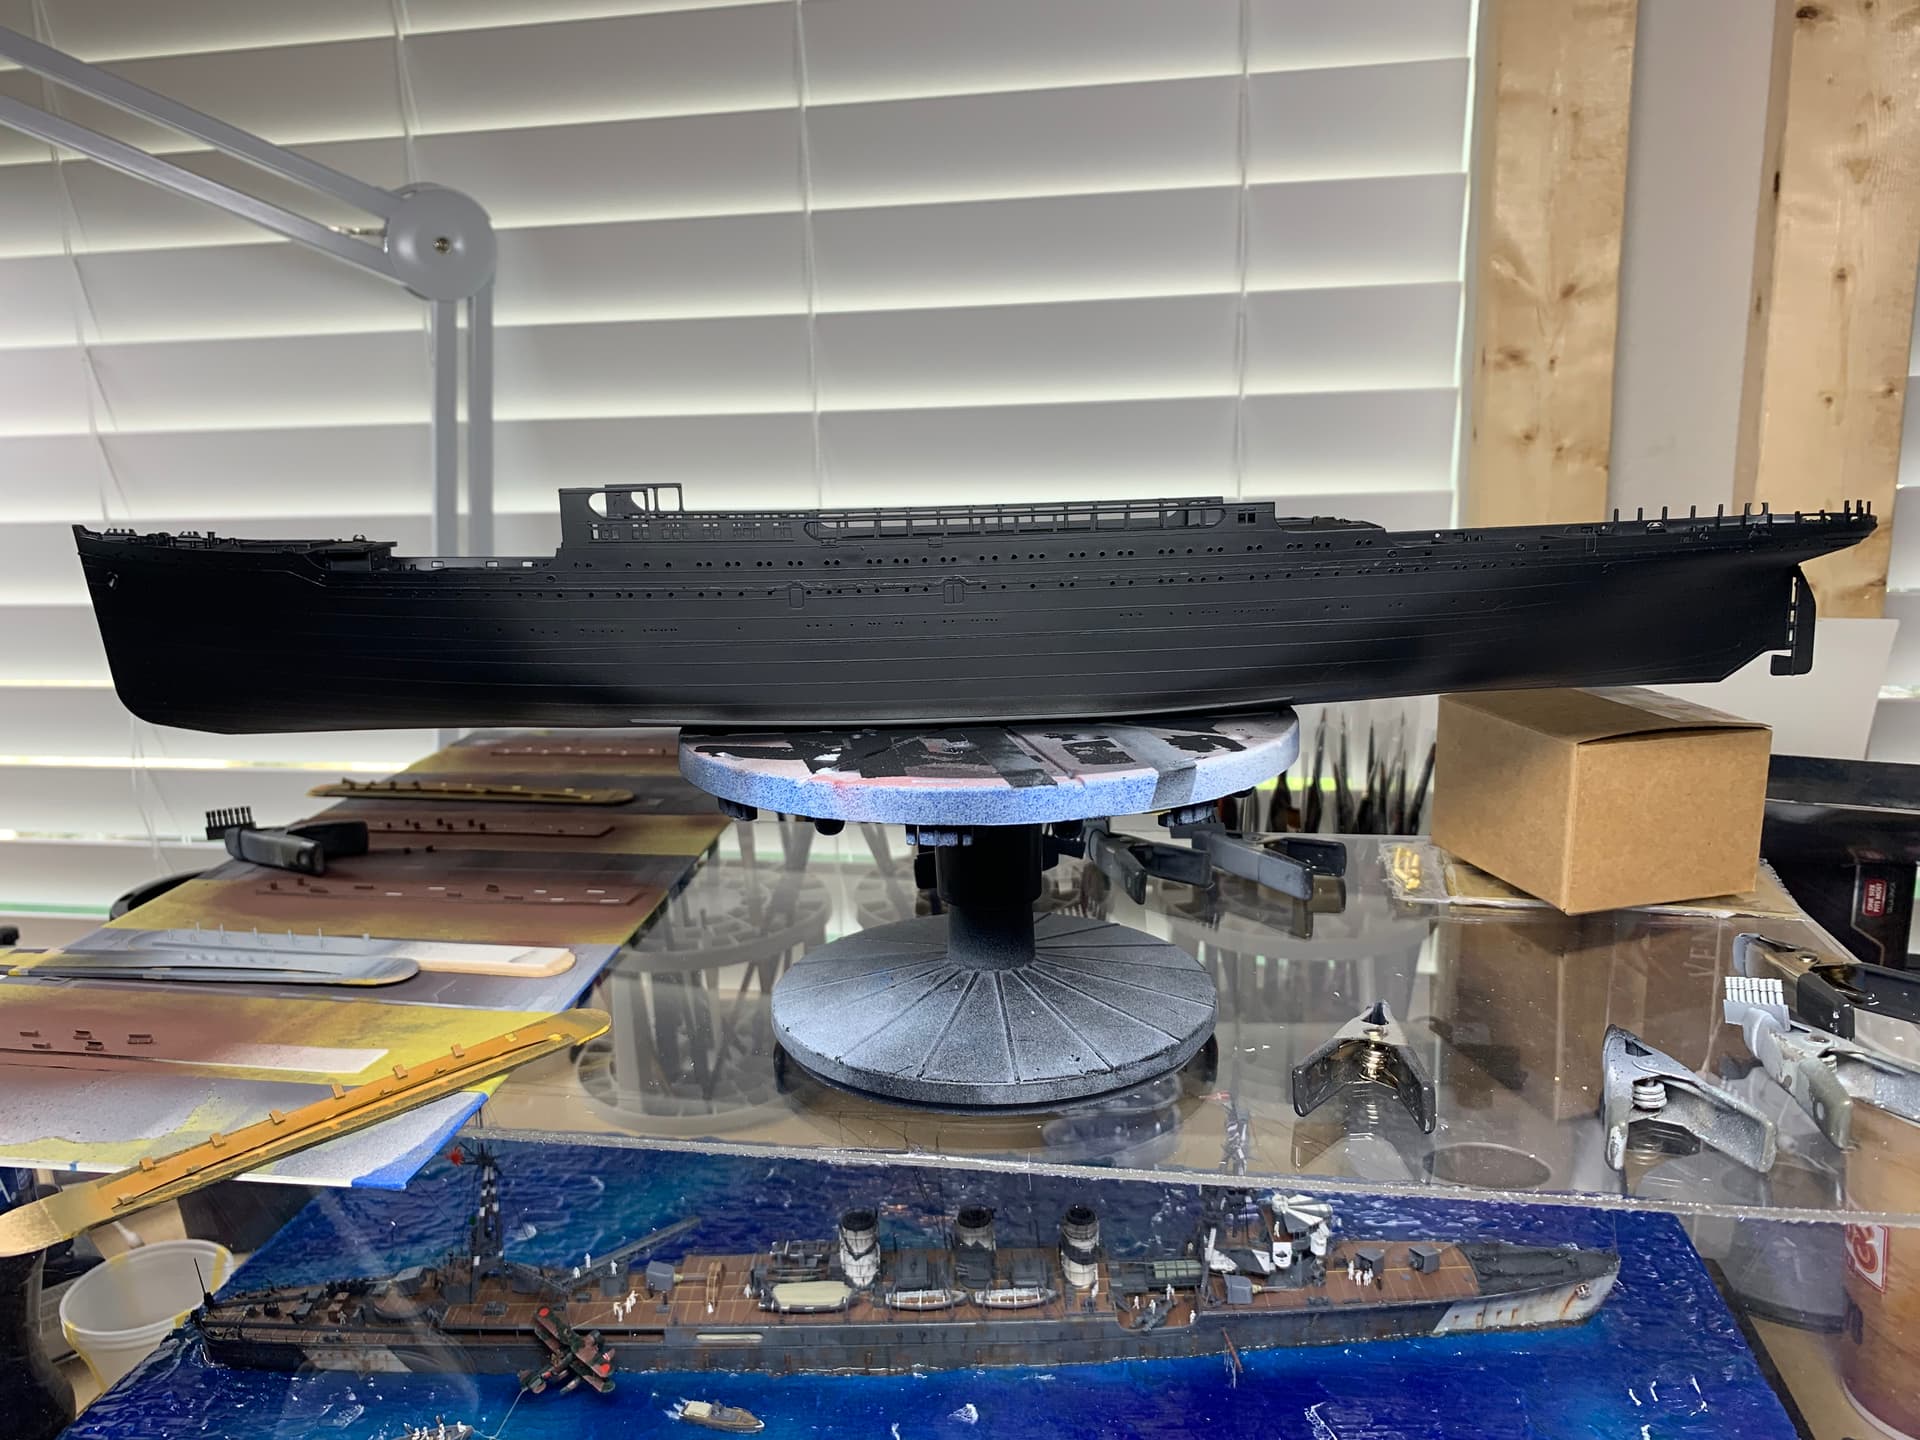
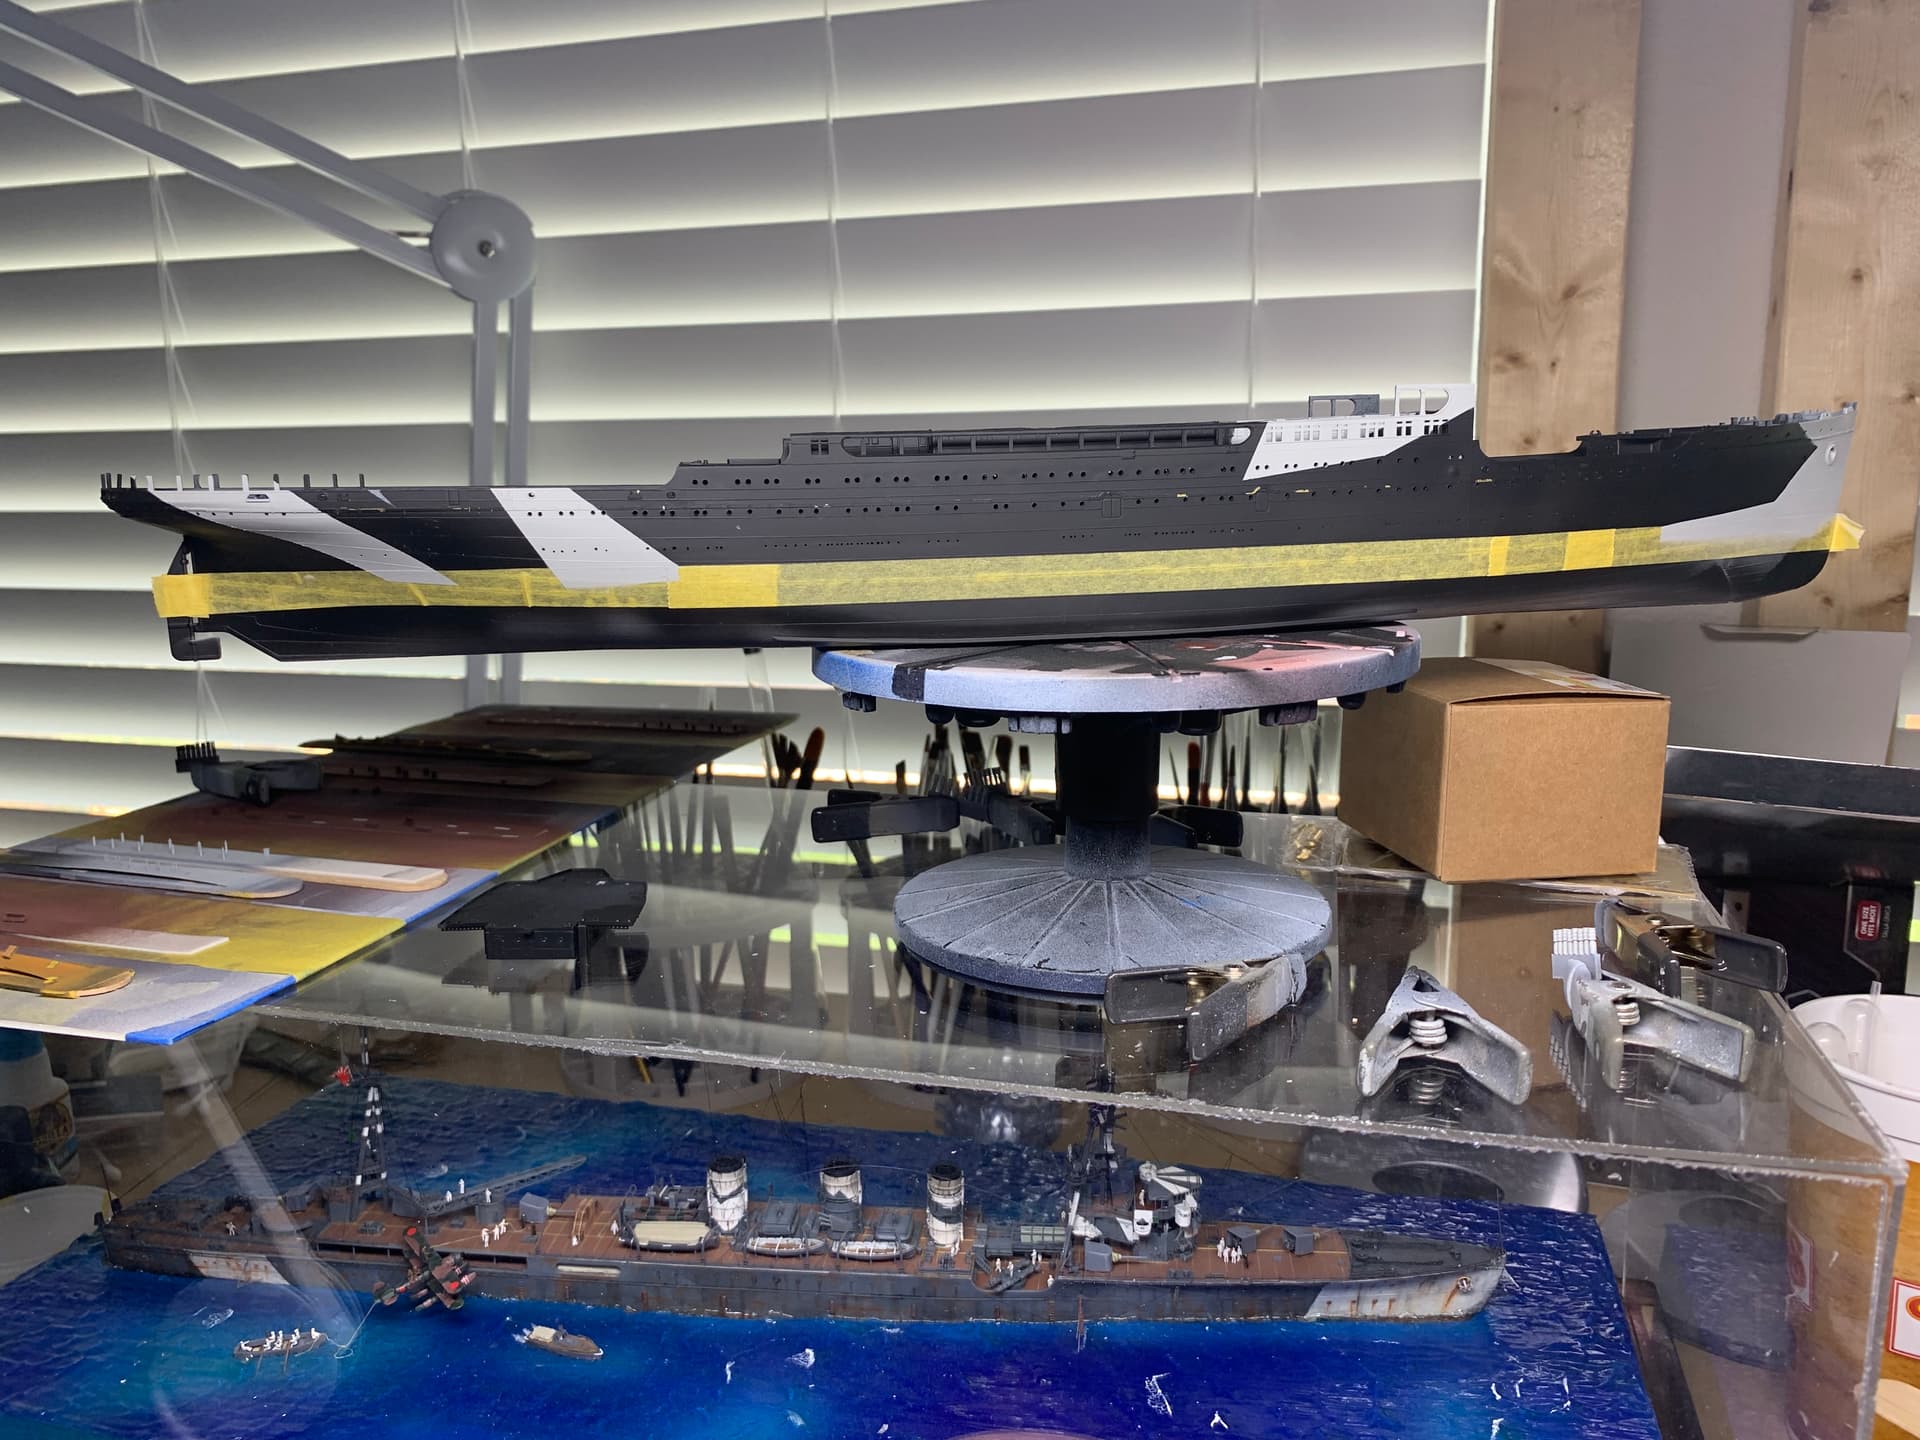
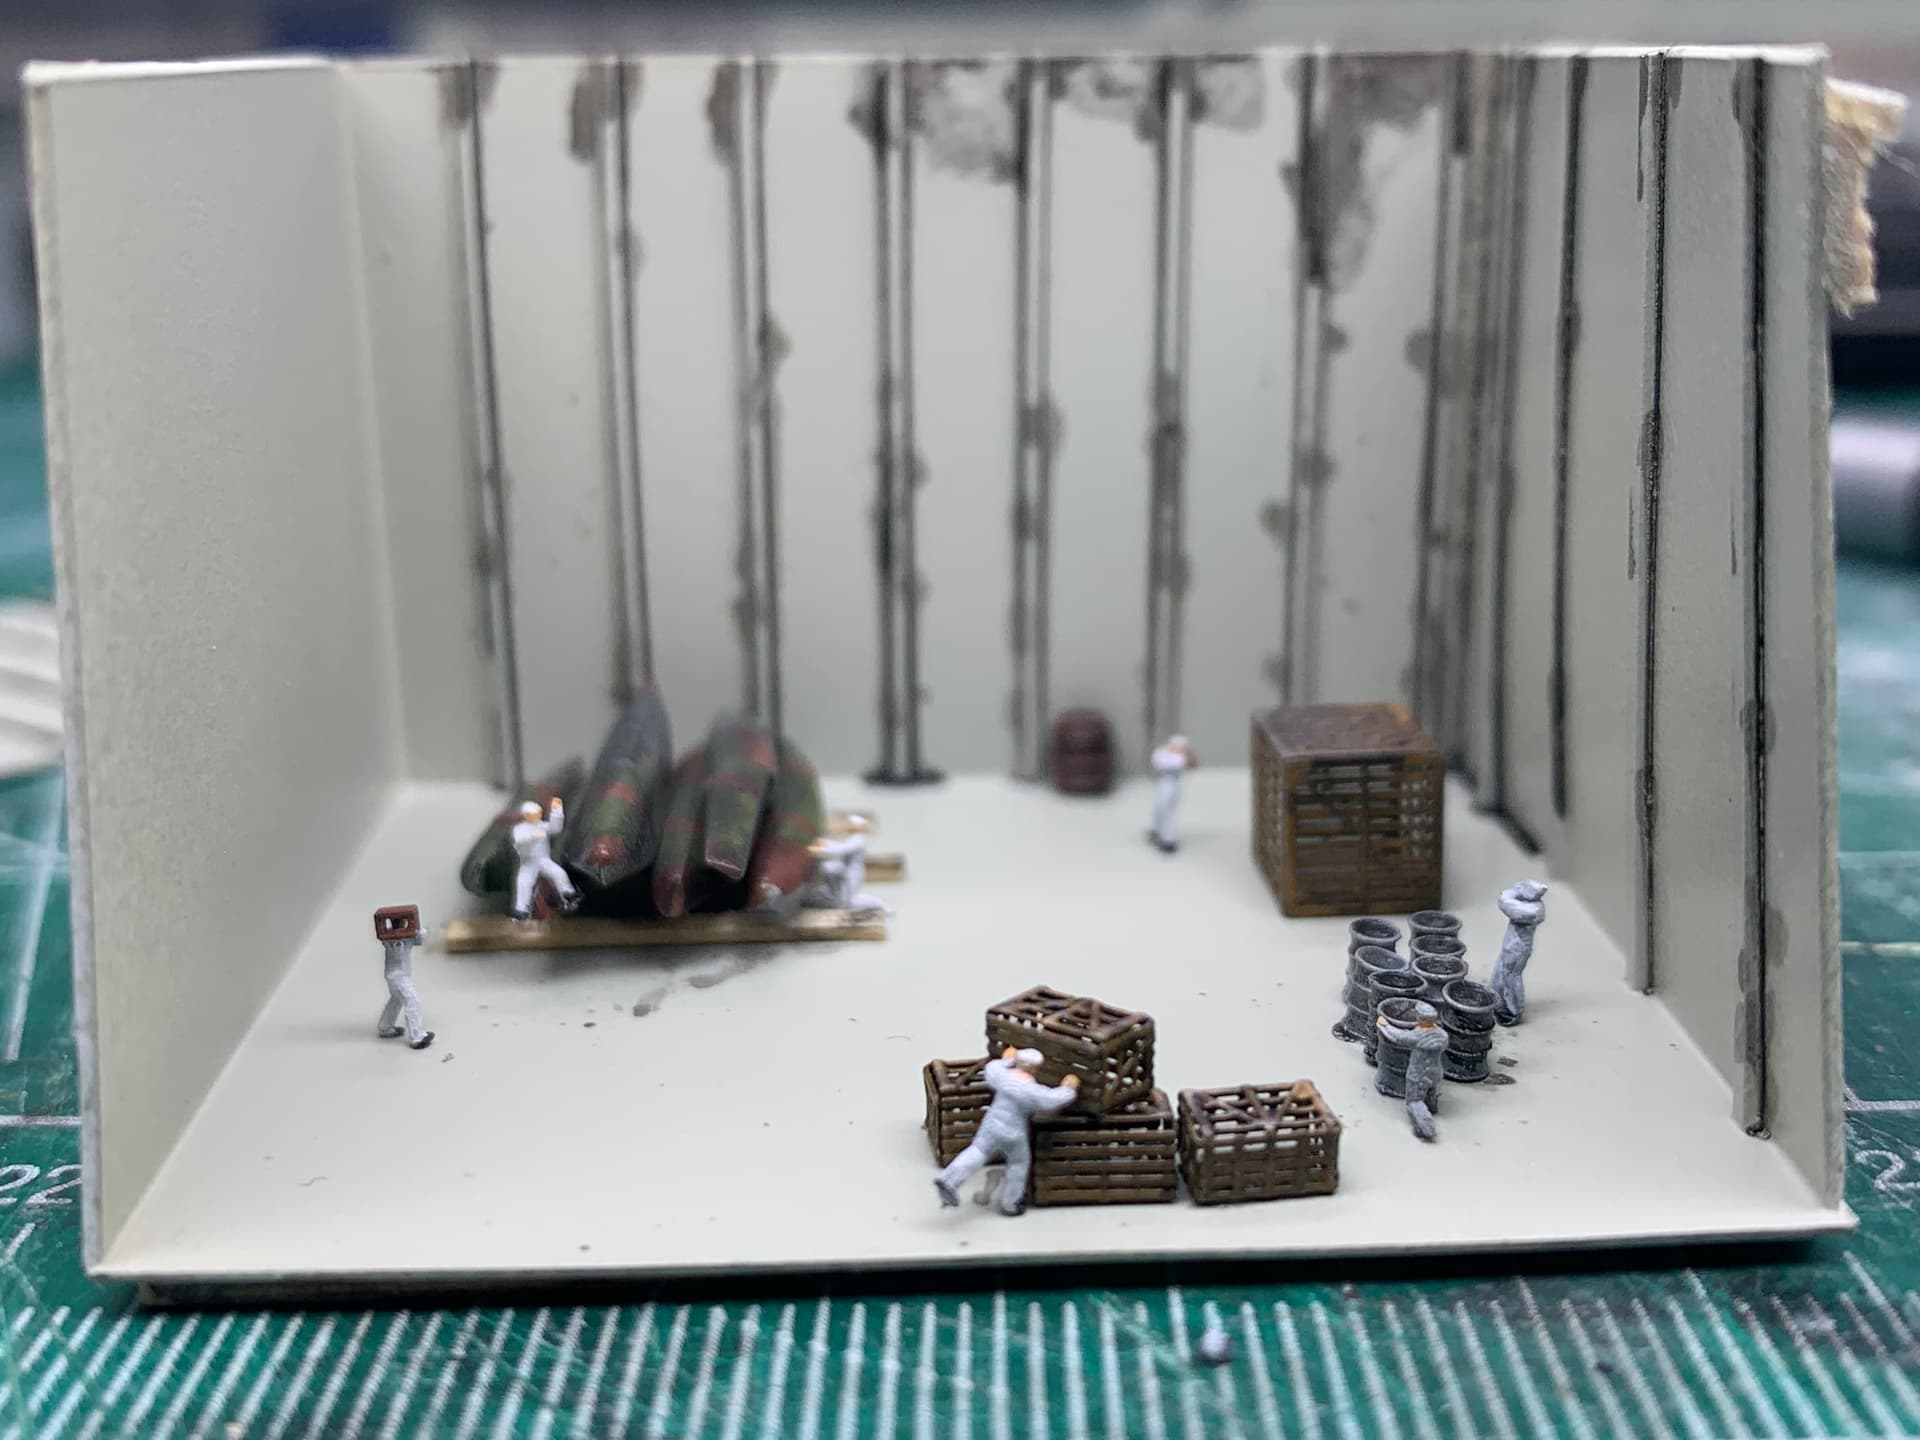
As the organizer for this campaign I have been pretty remiss in posting updates. So here are some pictures of my build of the IJN Submarine Depot Ship Heian Maru.
David
Beautiful work, David.
So you paint the complete hull, then add the wooden deck, then paint the super structure separately? I am a total novice when it comes to big ships, so have wondered the sequence of when to add the wooden boards.
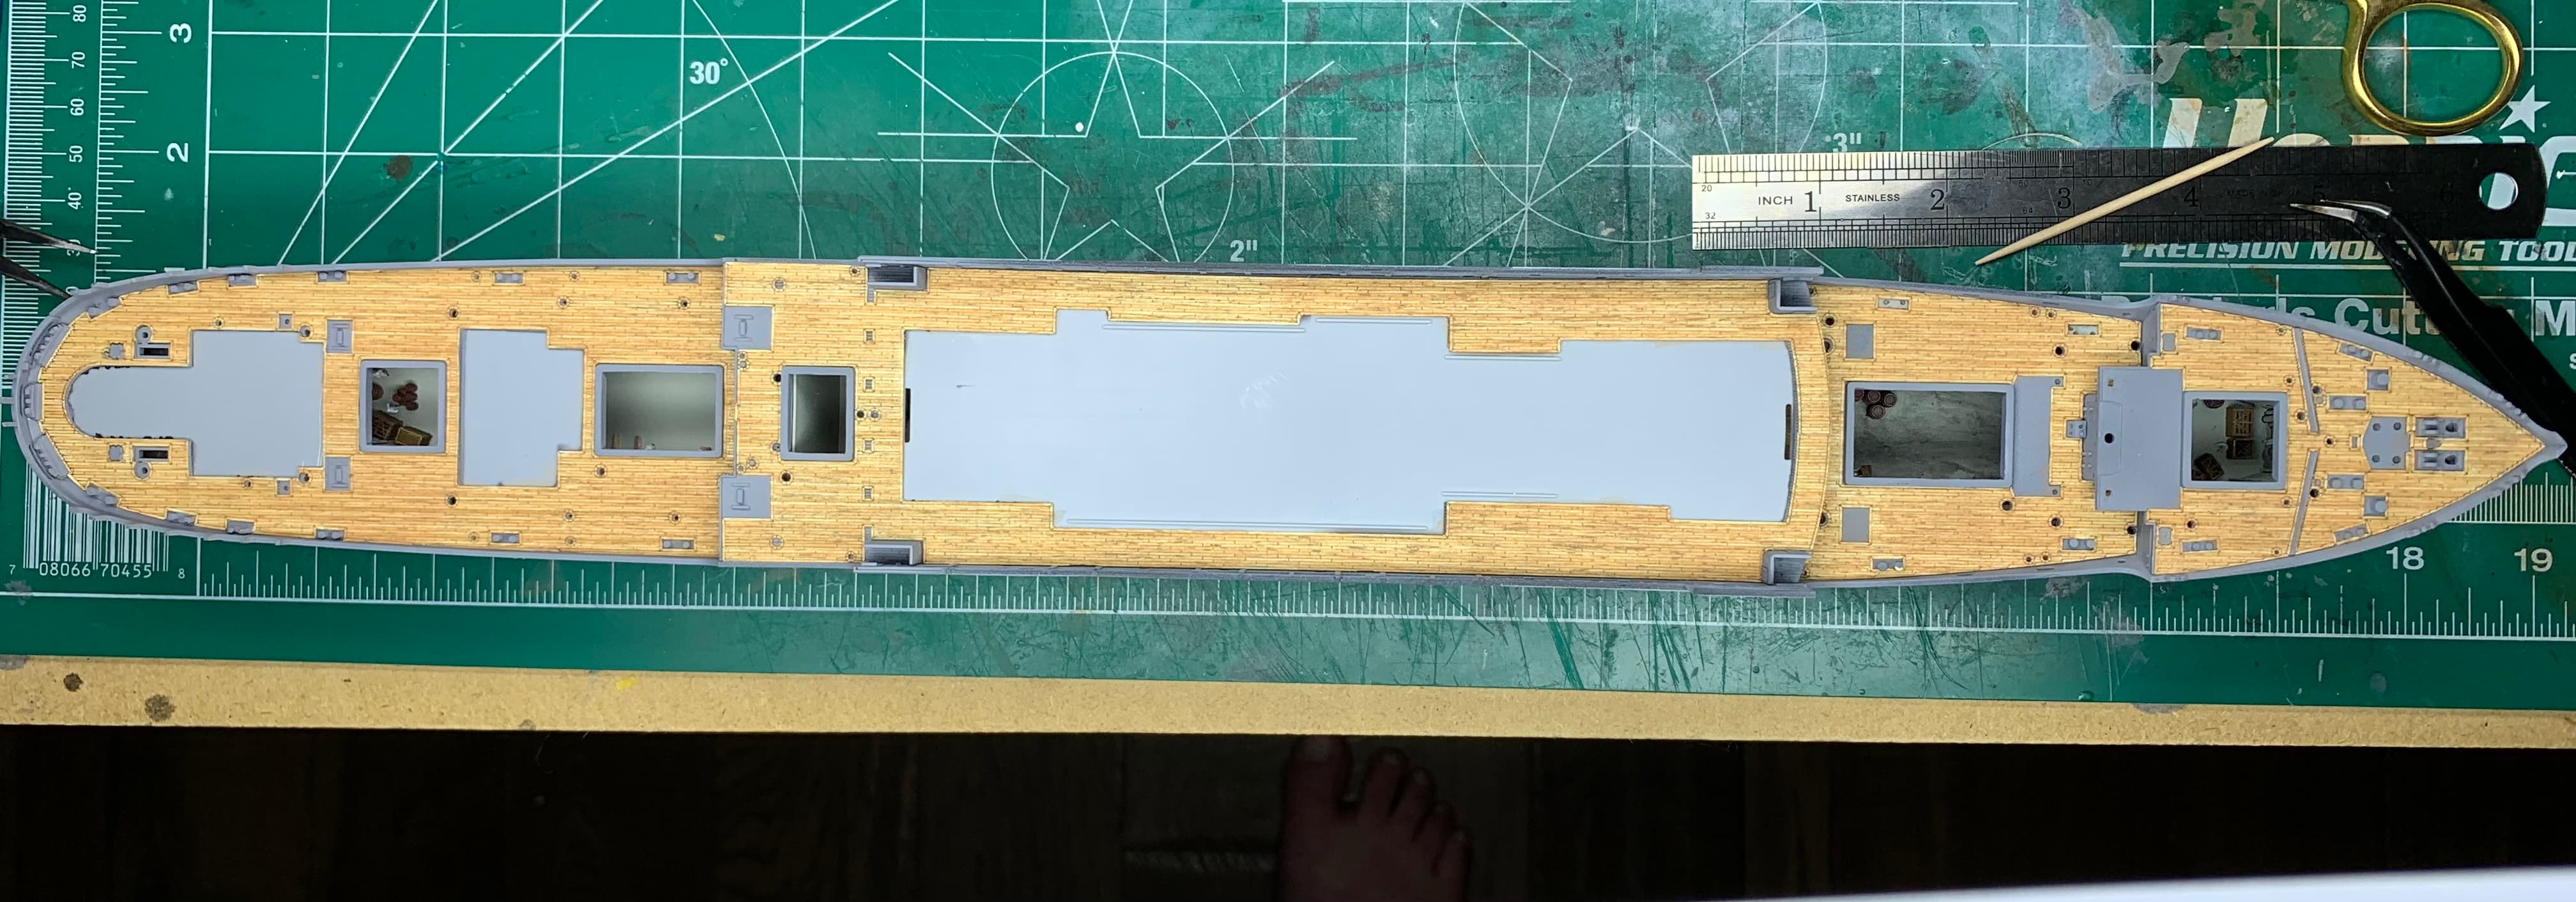
Yes sir - i always work bottom to top, in board to out board. With regards to the wooden decks - I always apply a layer of paint, it catches all of the molded detail that is not removed for after market - then I apply a thin layer of white glue and then apply the wooden deck
Most wooden decks are self adhesive but I find that a thin layer of white glue holds better than just the adhesive.
David
David, thanks for the insights. Very helpful ![]()
![]()
Hi Everyone,
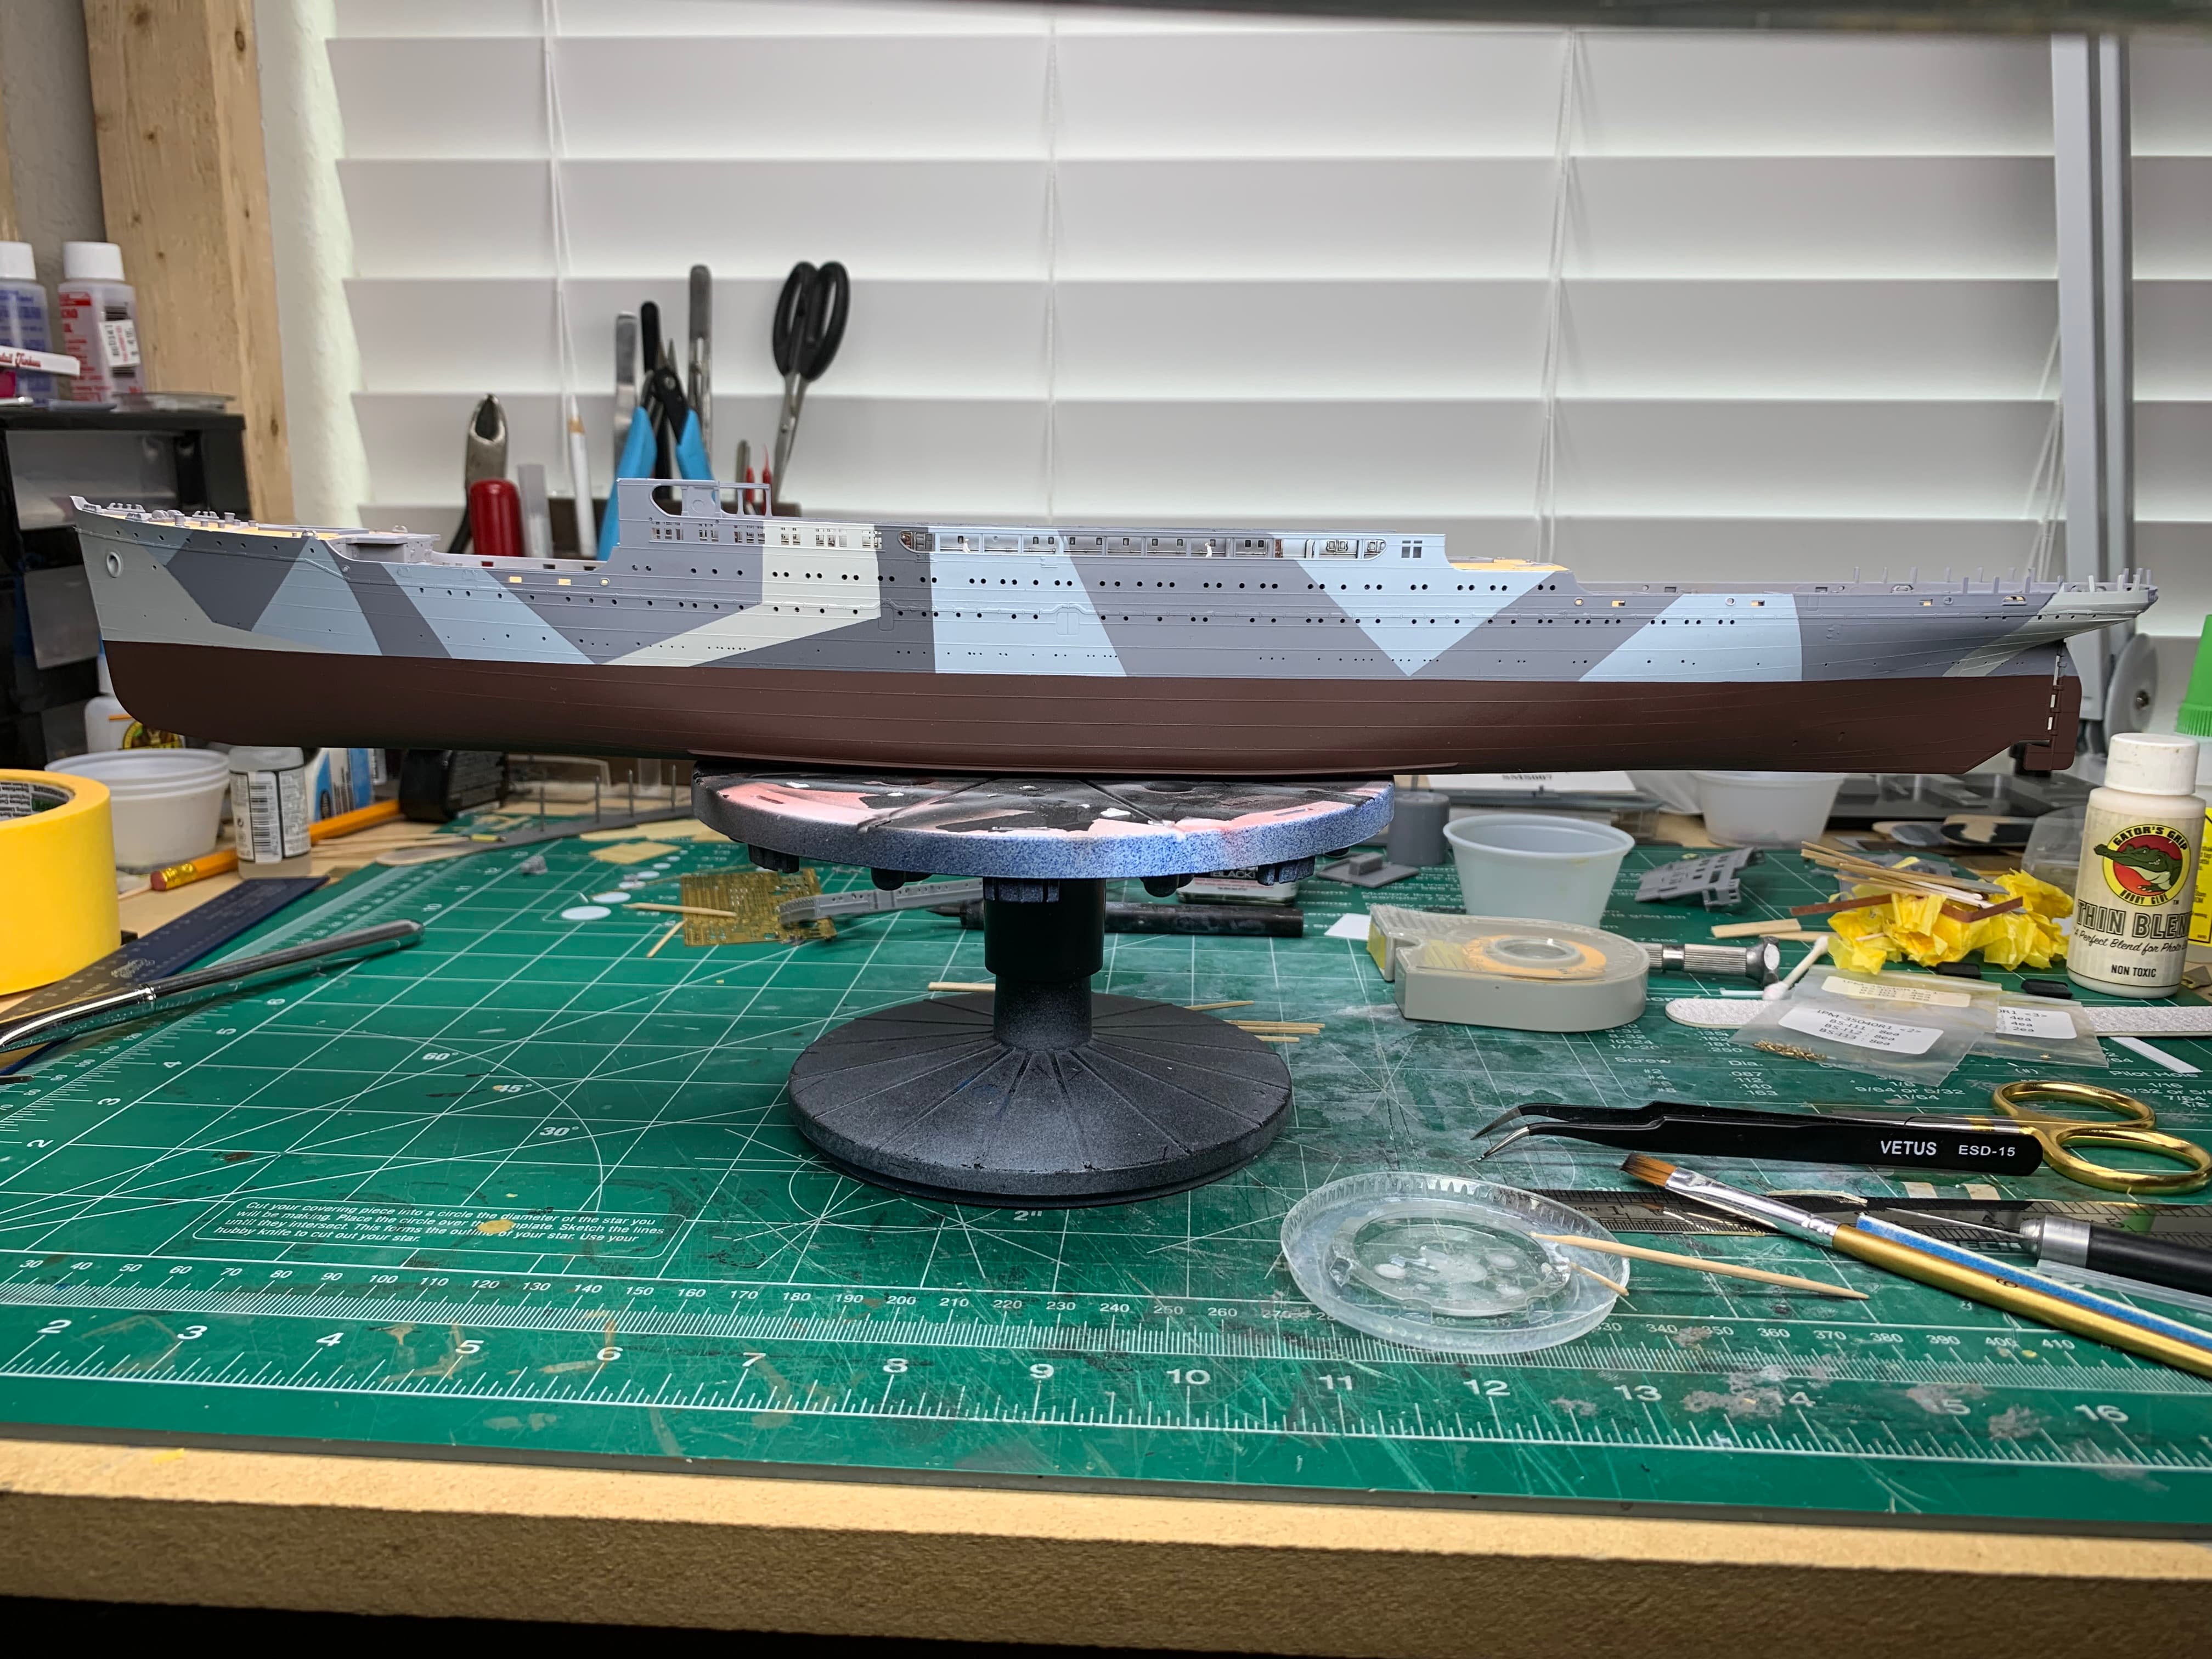
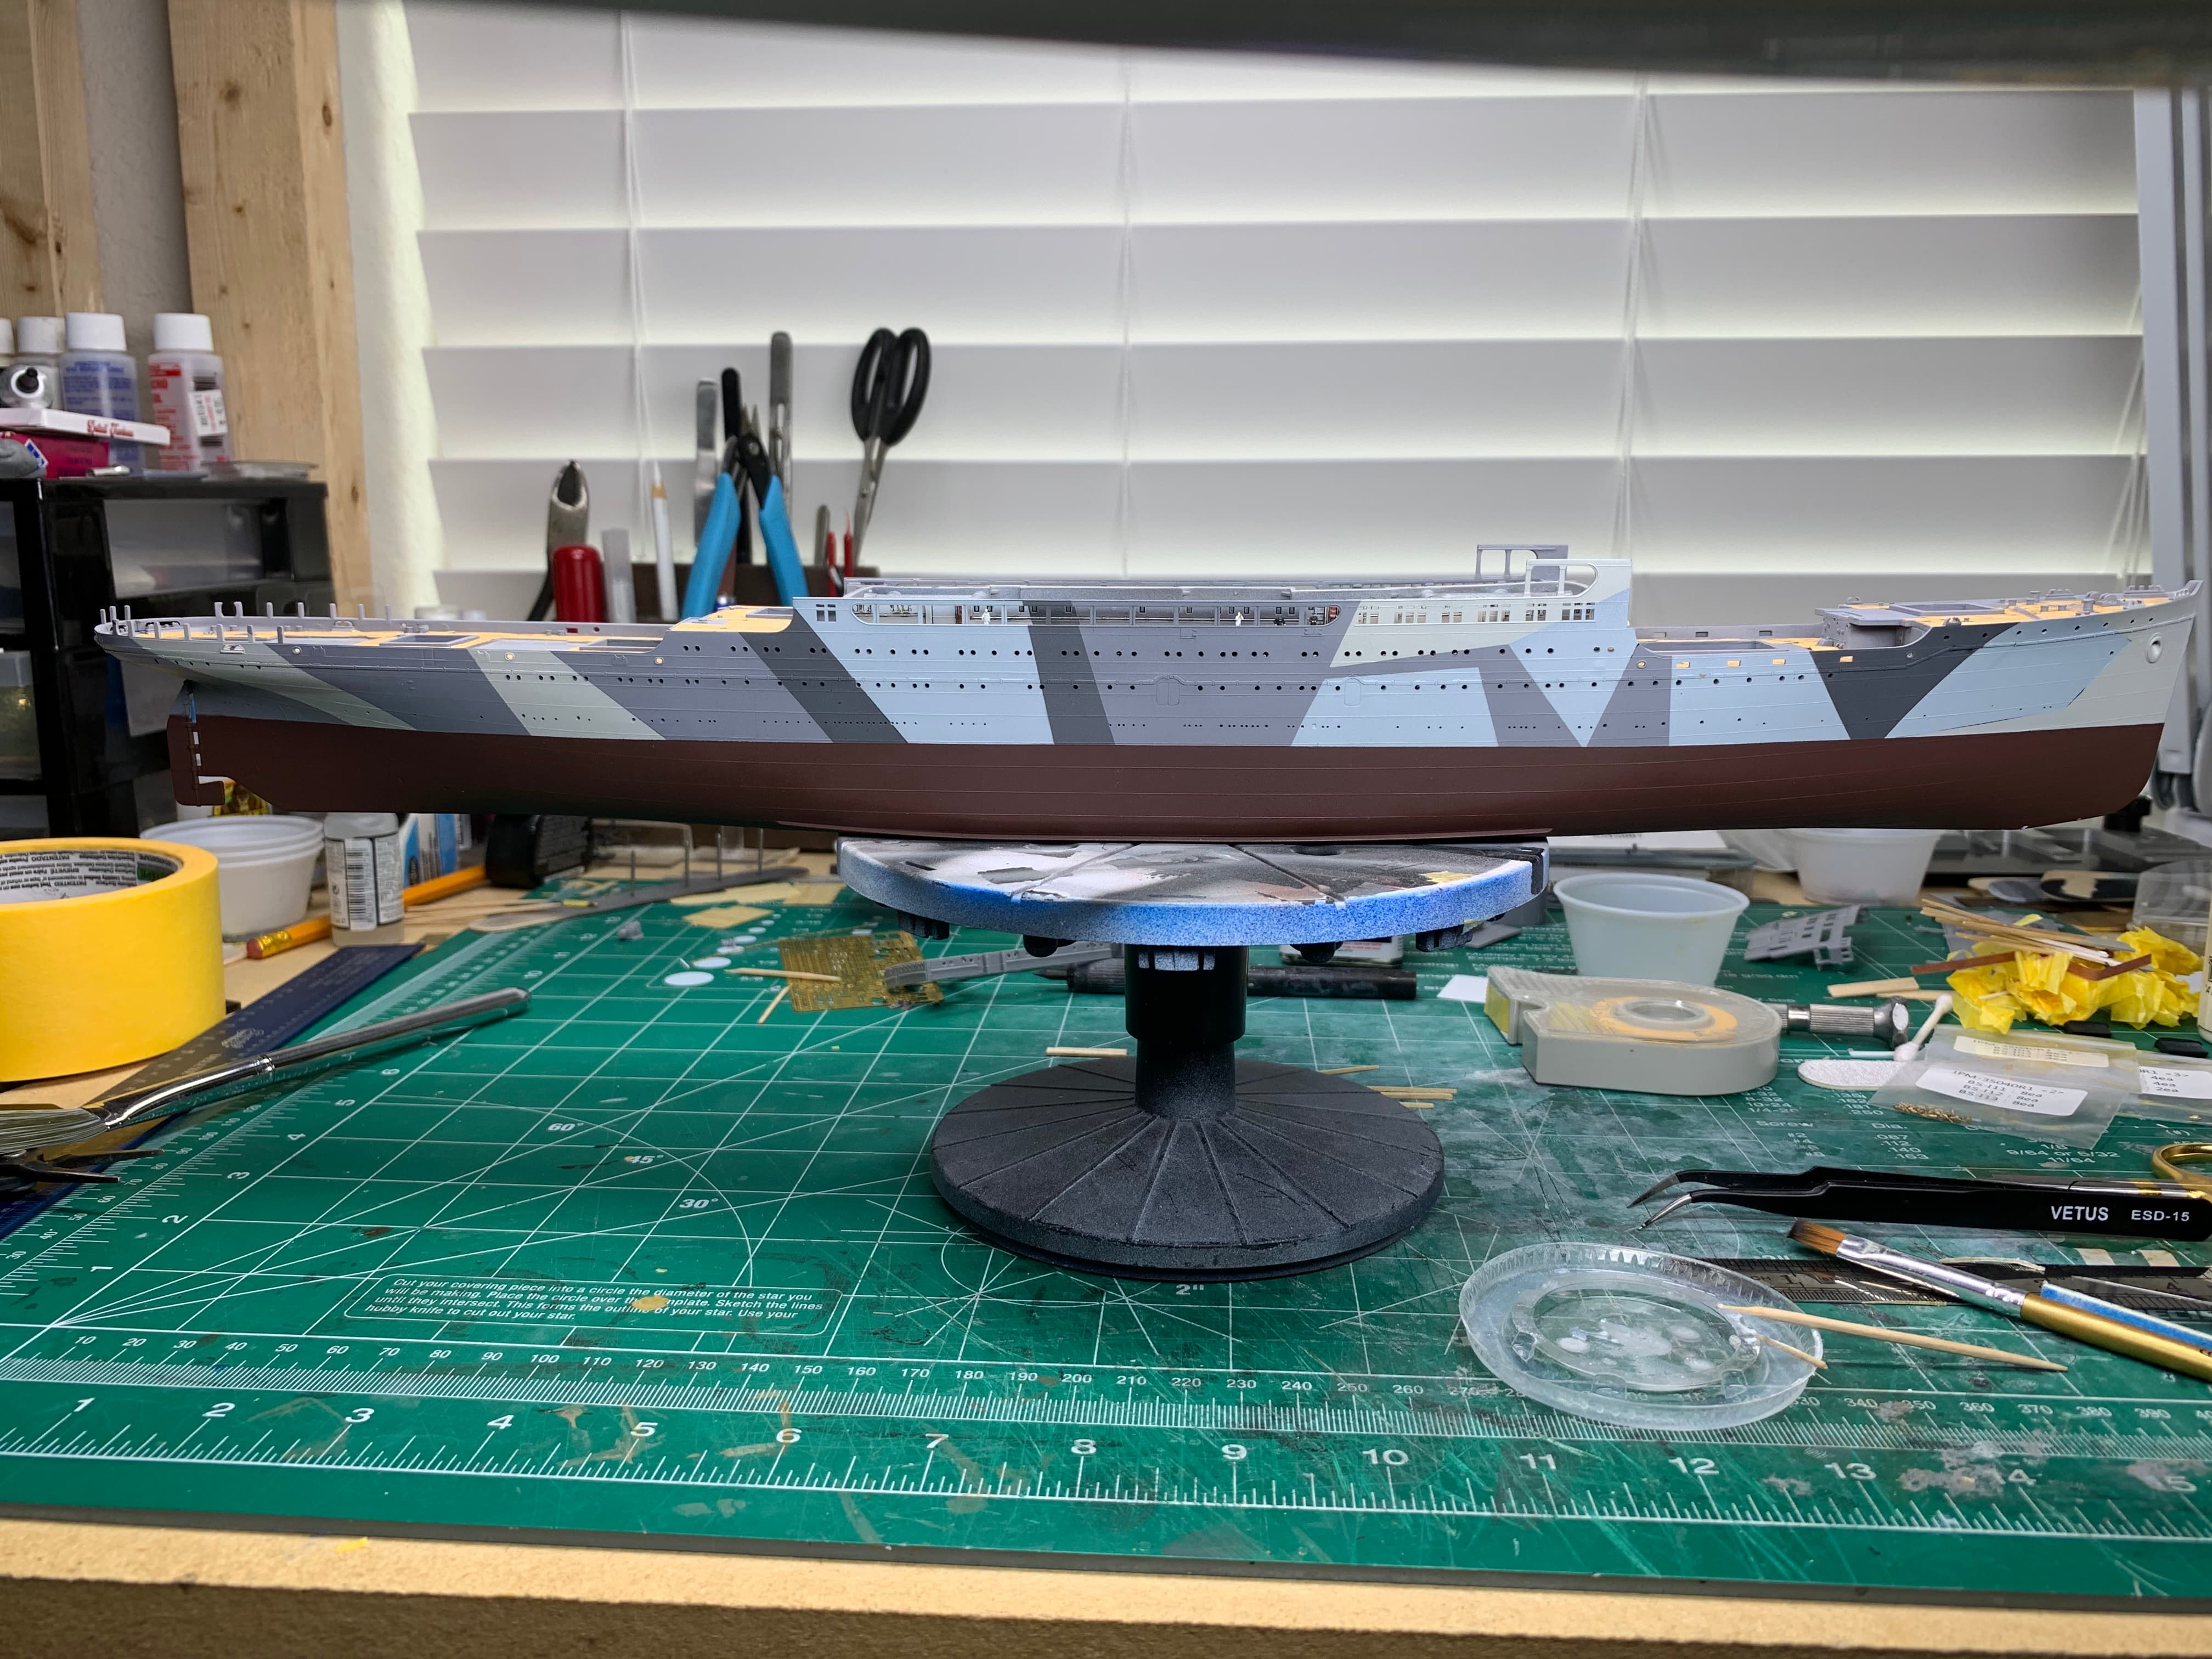
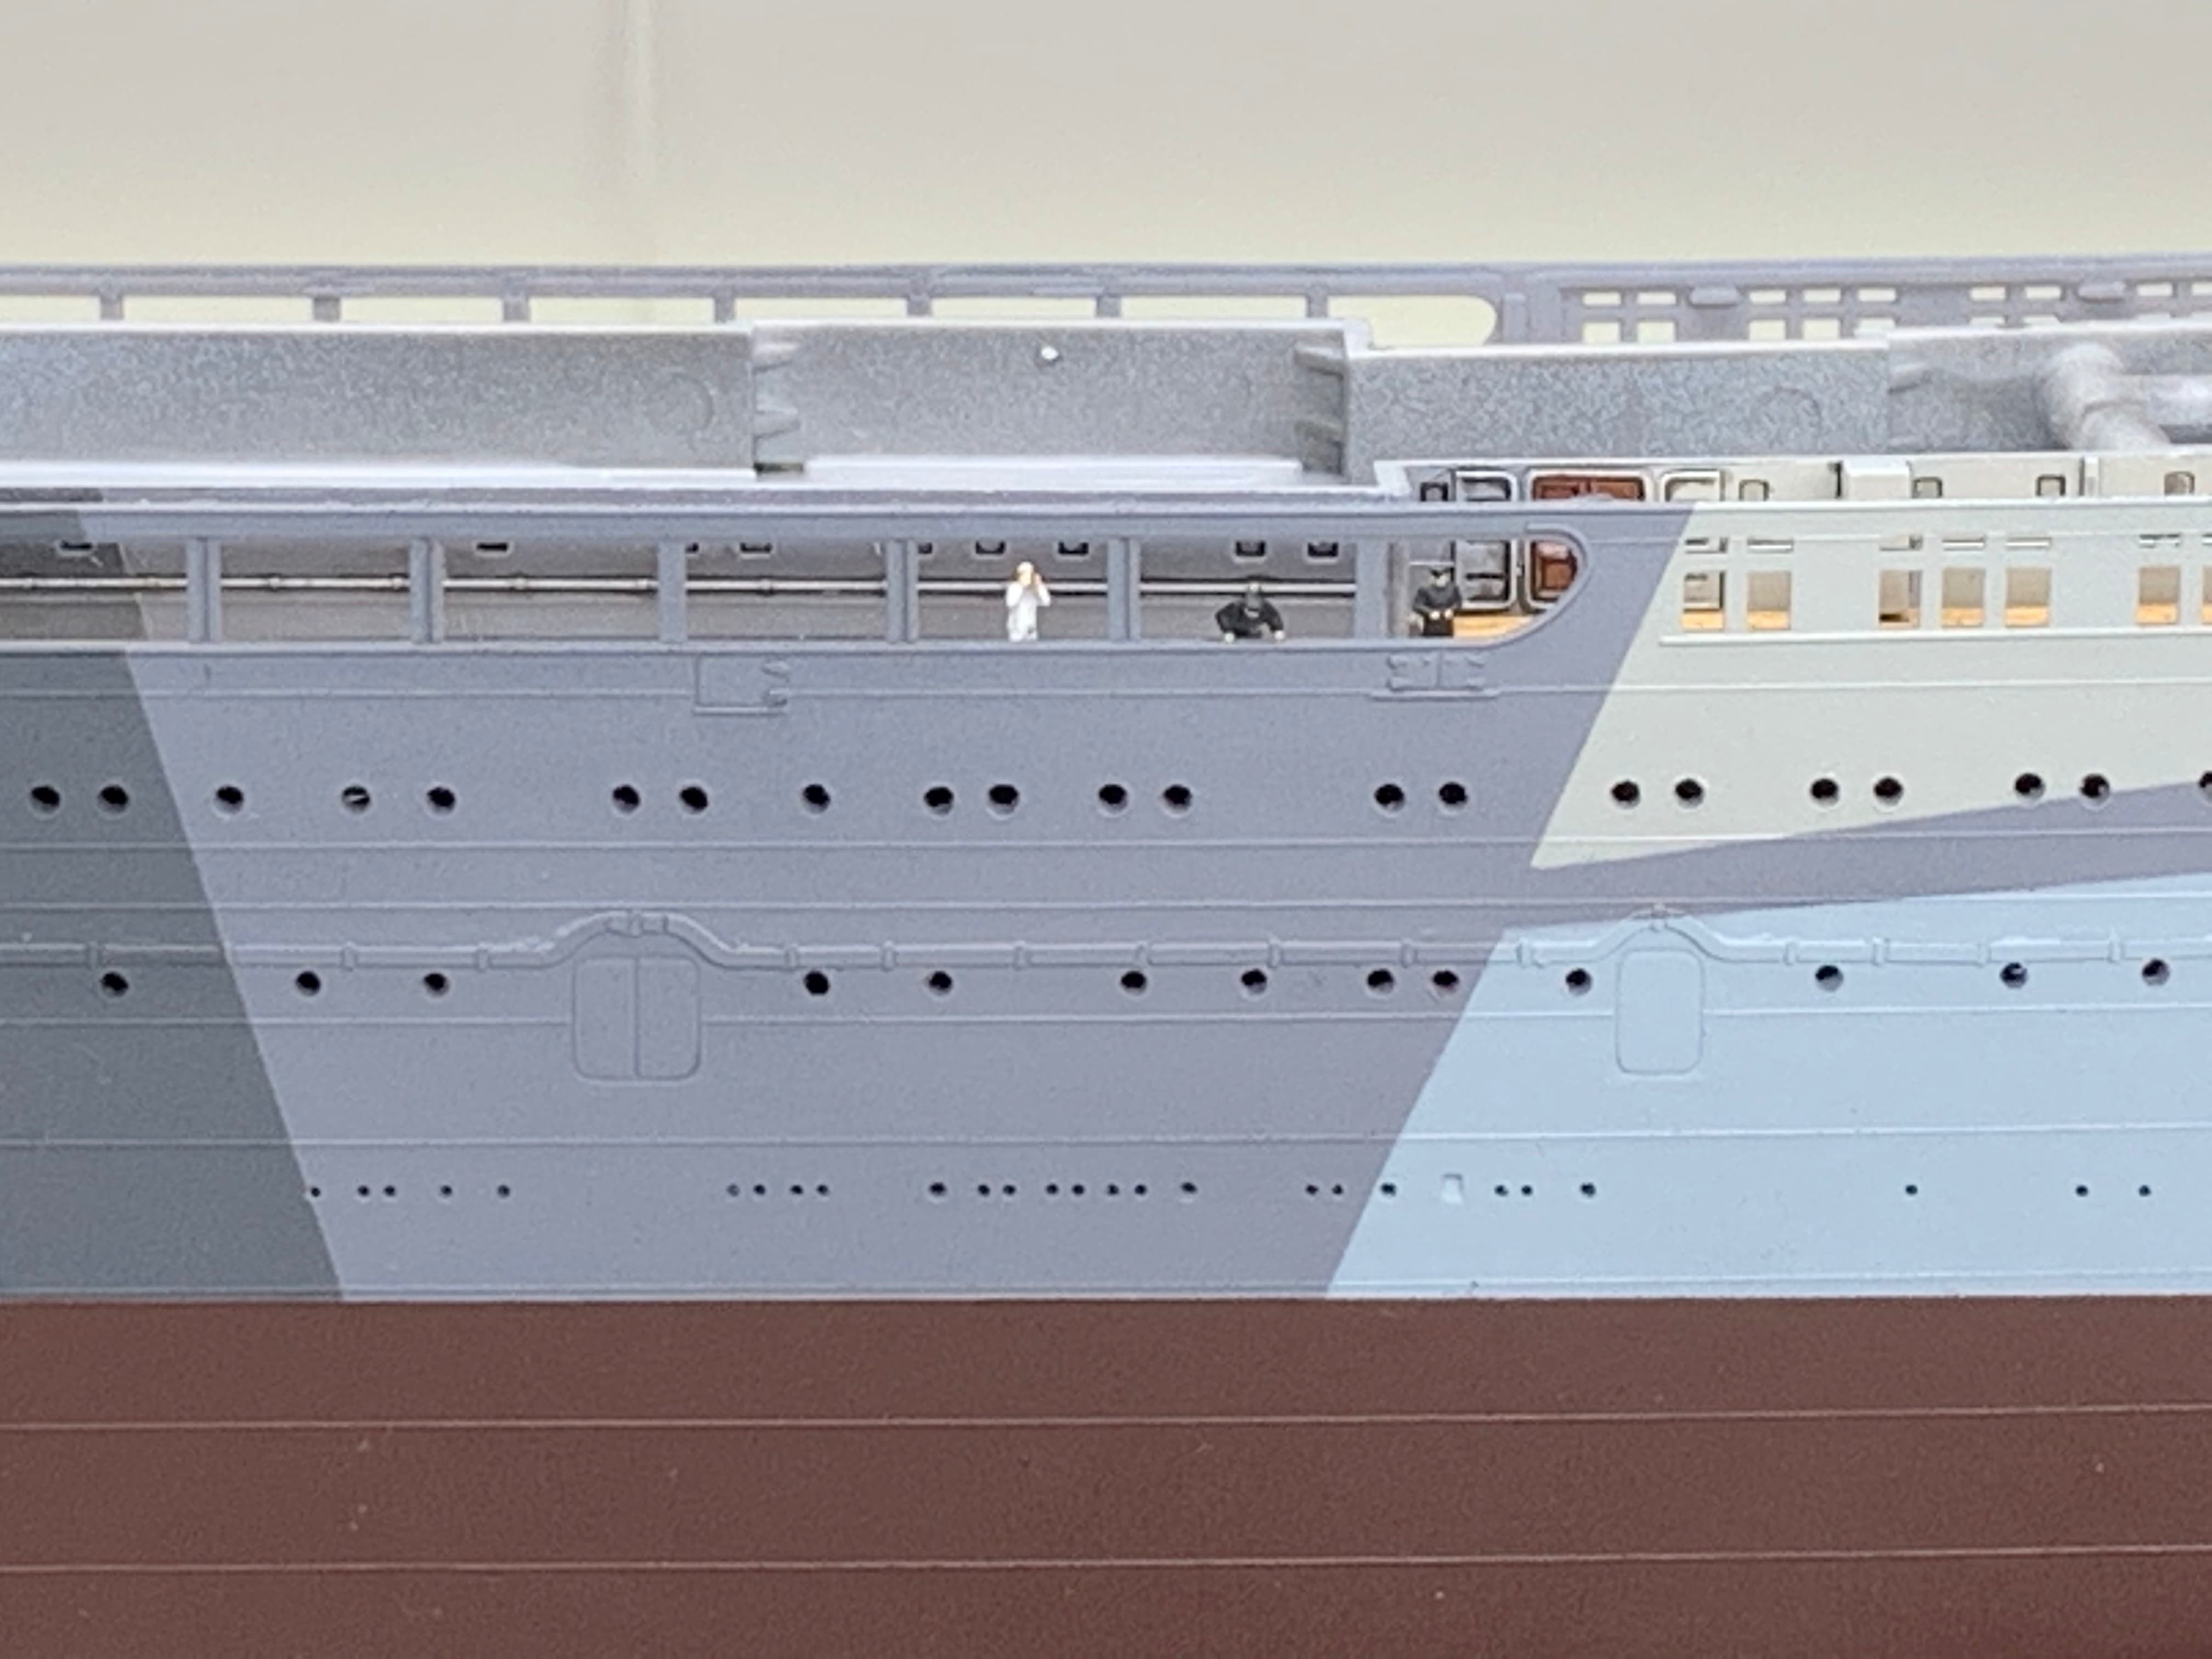
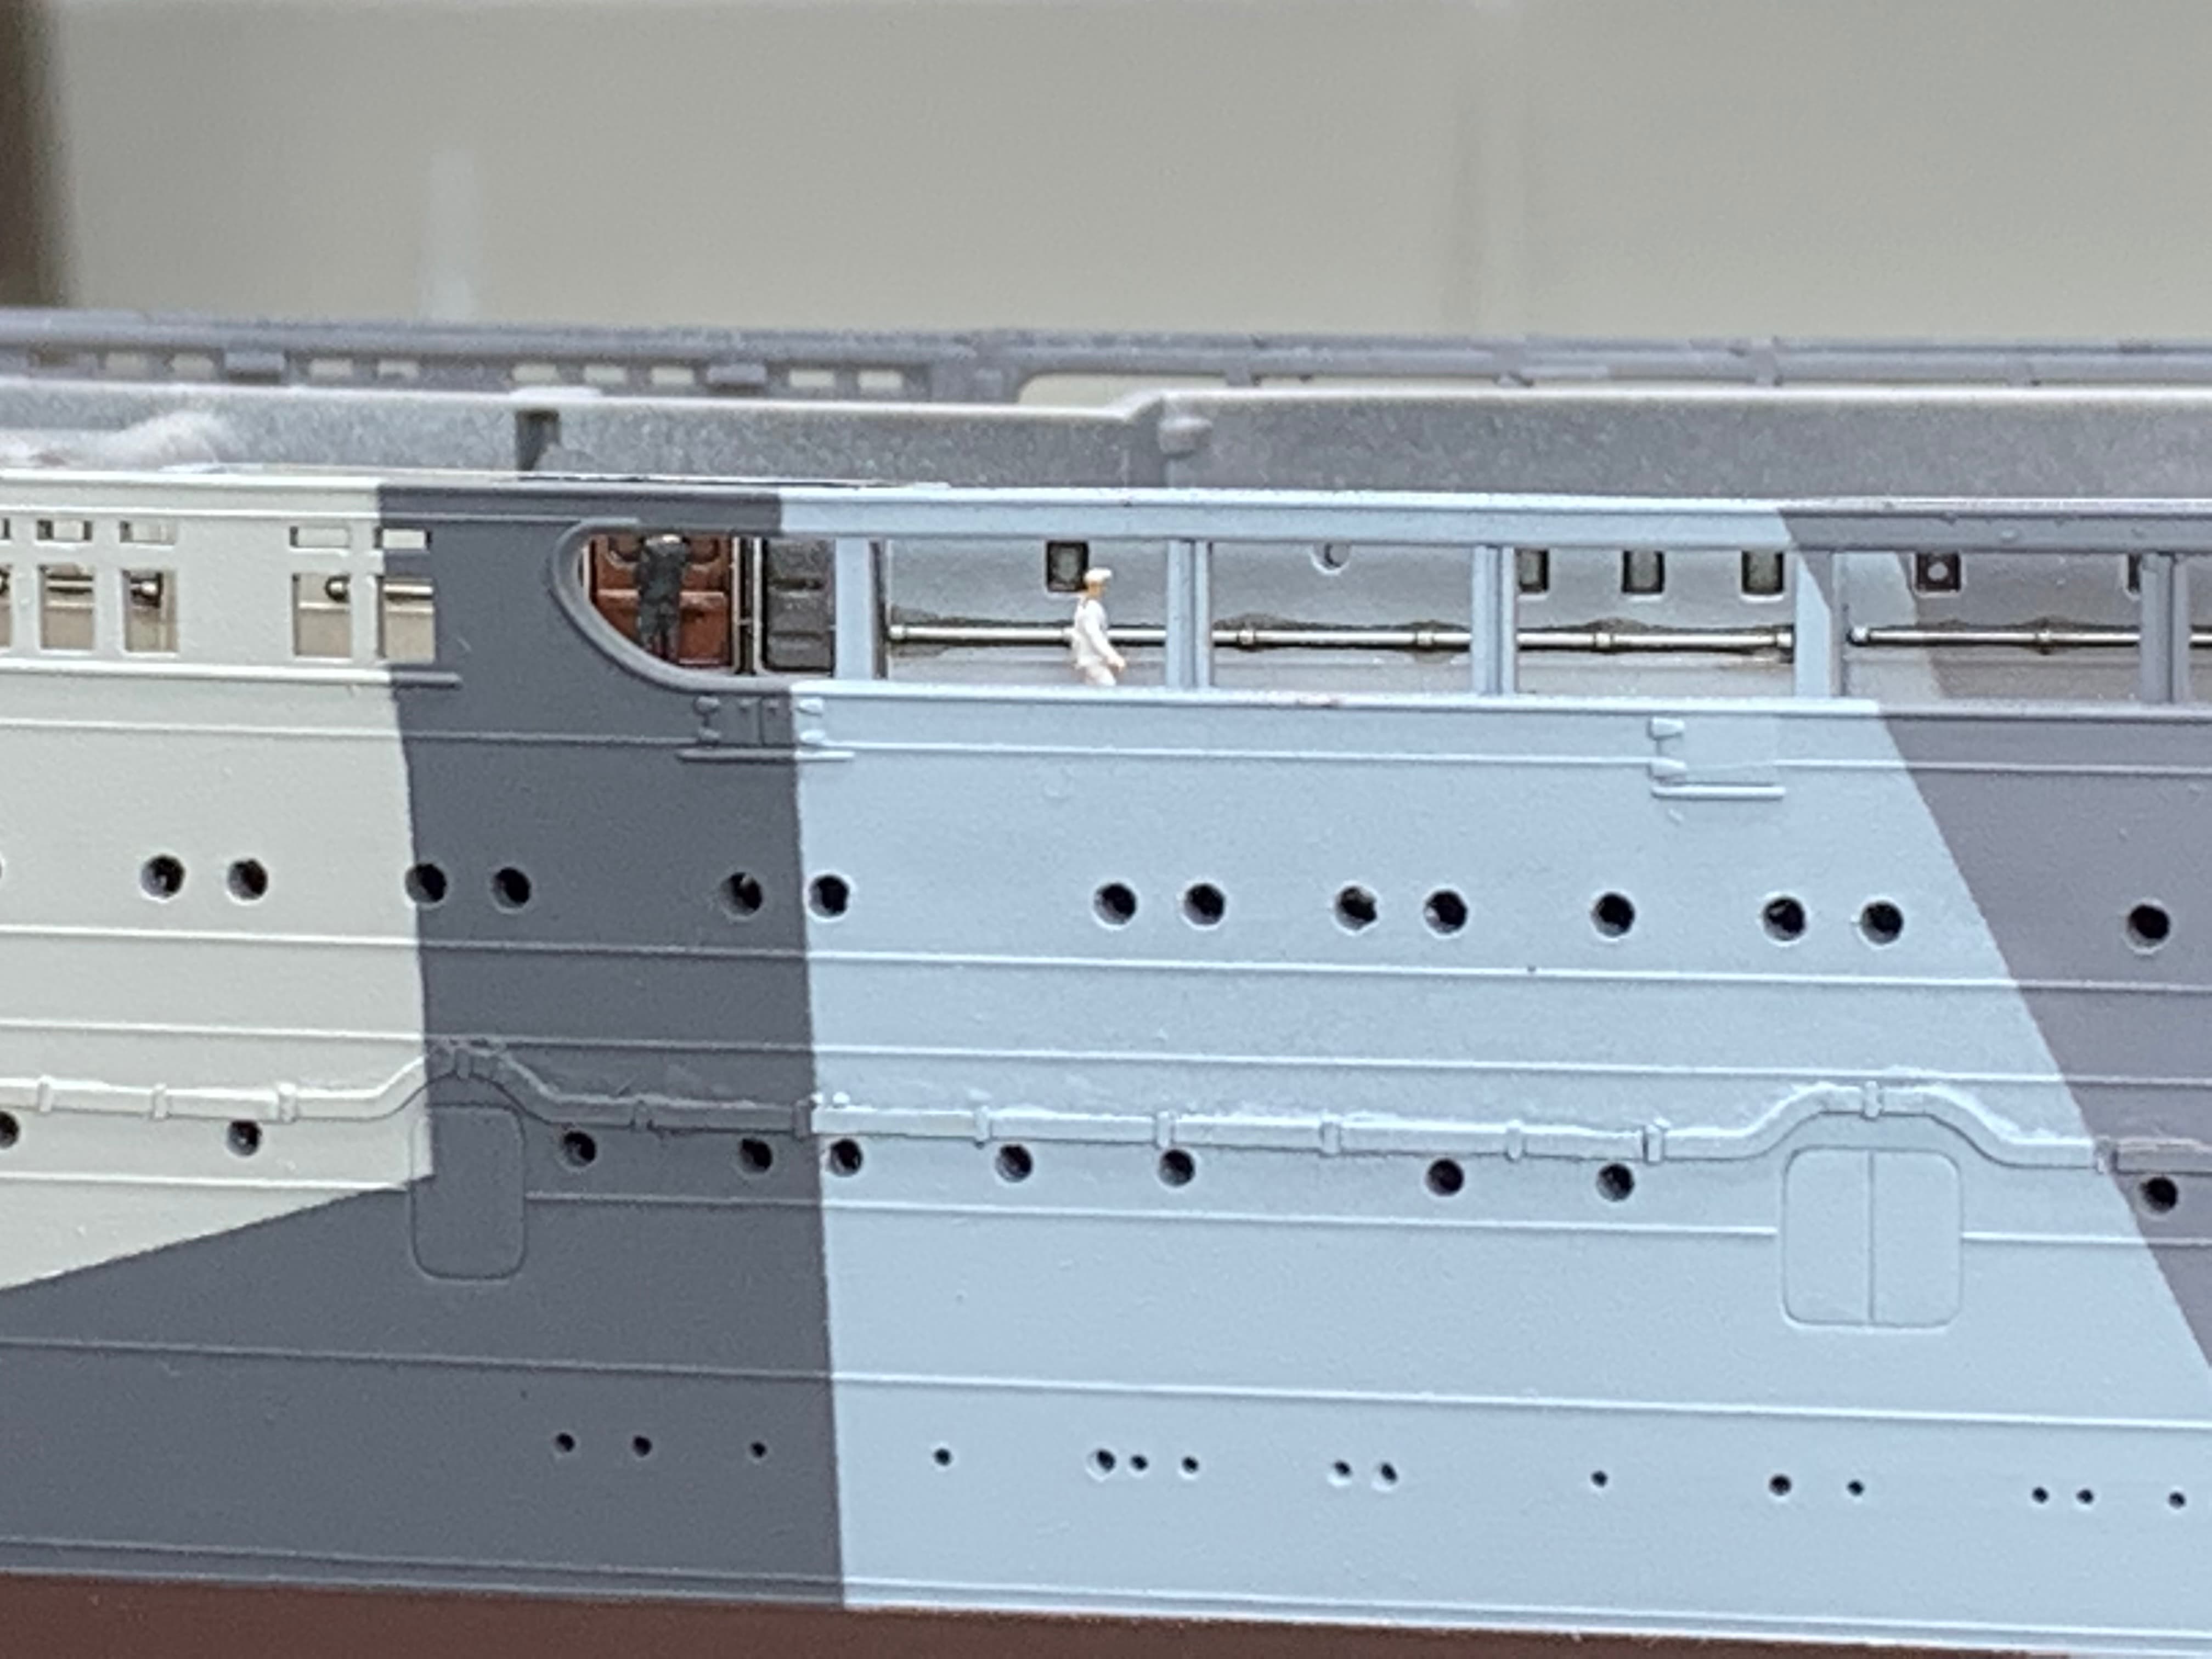
David, a tip o the hat, great work! I’m a big fan of INJ seaplane tenders, and to see one in 1/350 with the level of detail is very pleasurable, love the snoozing seaman!
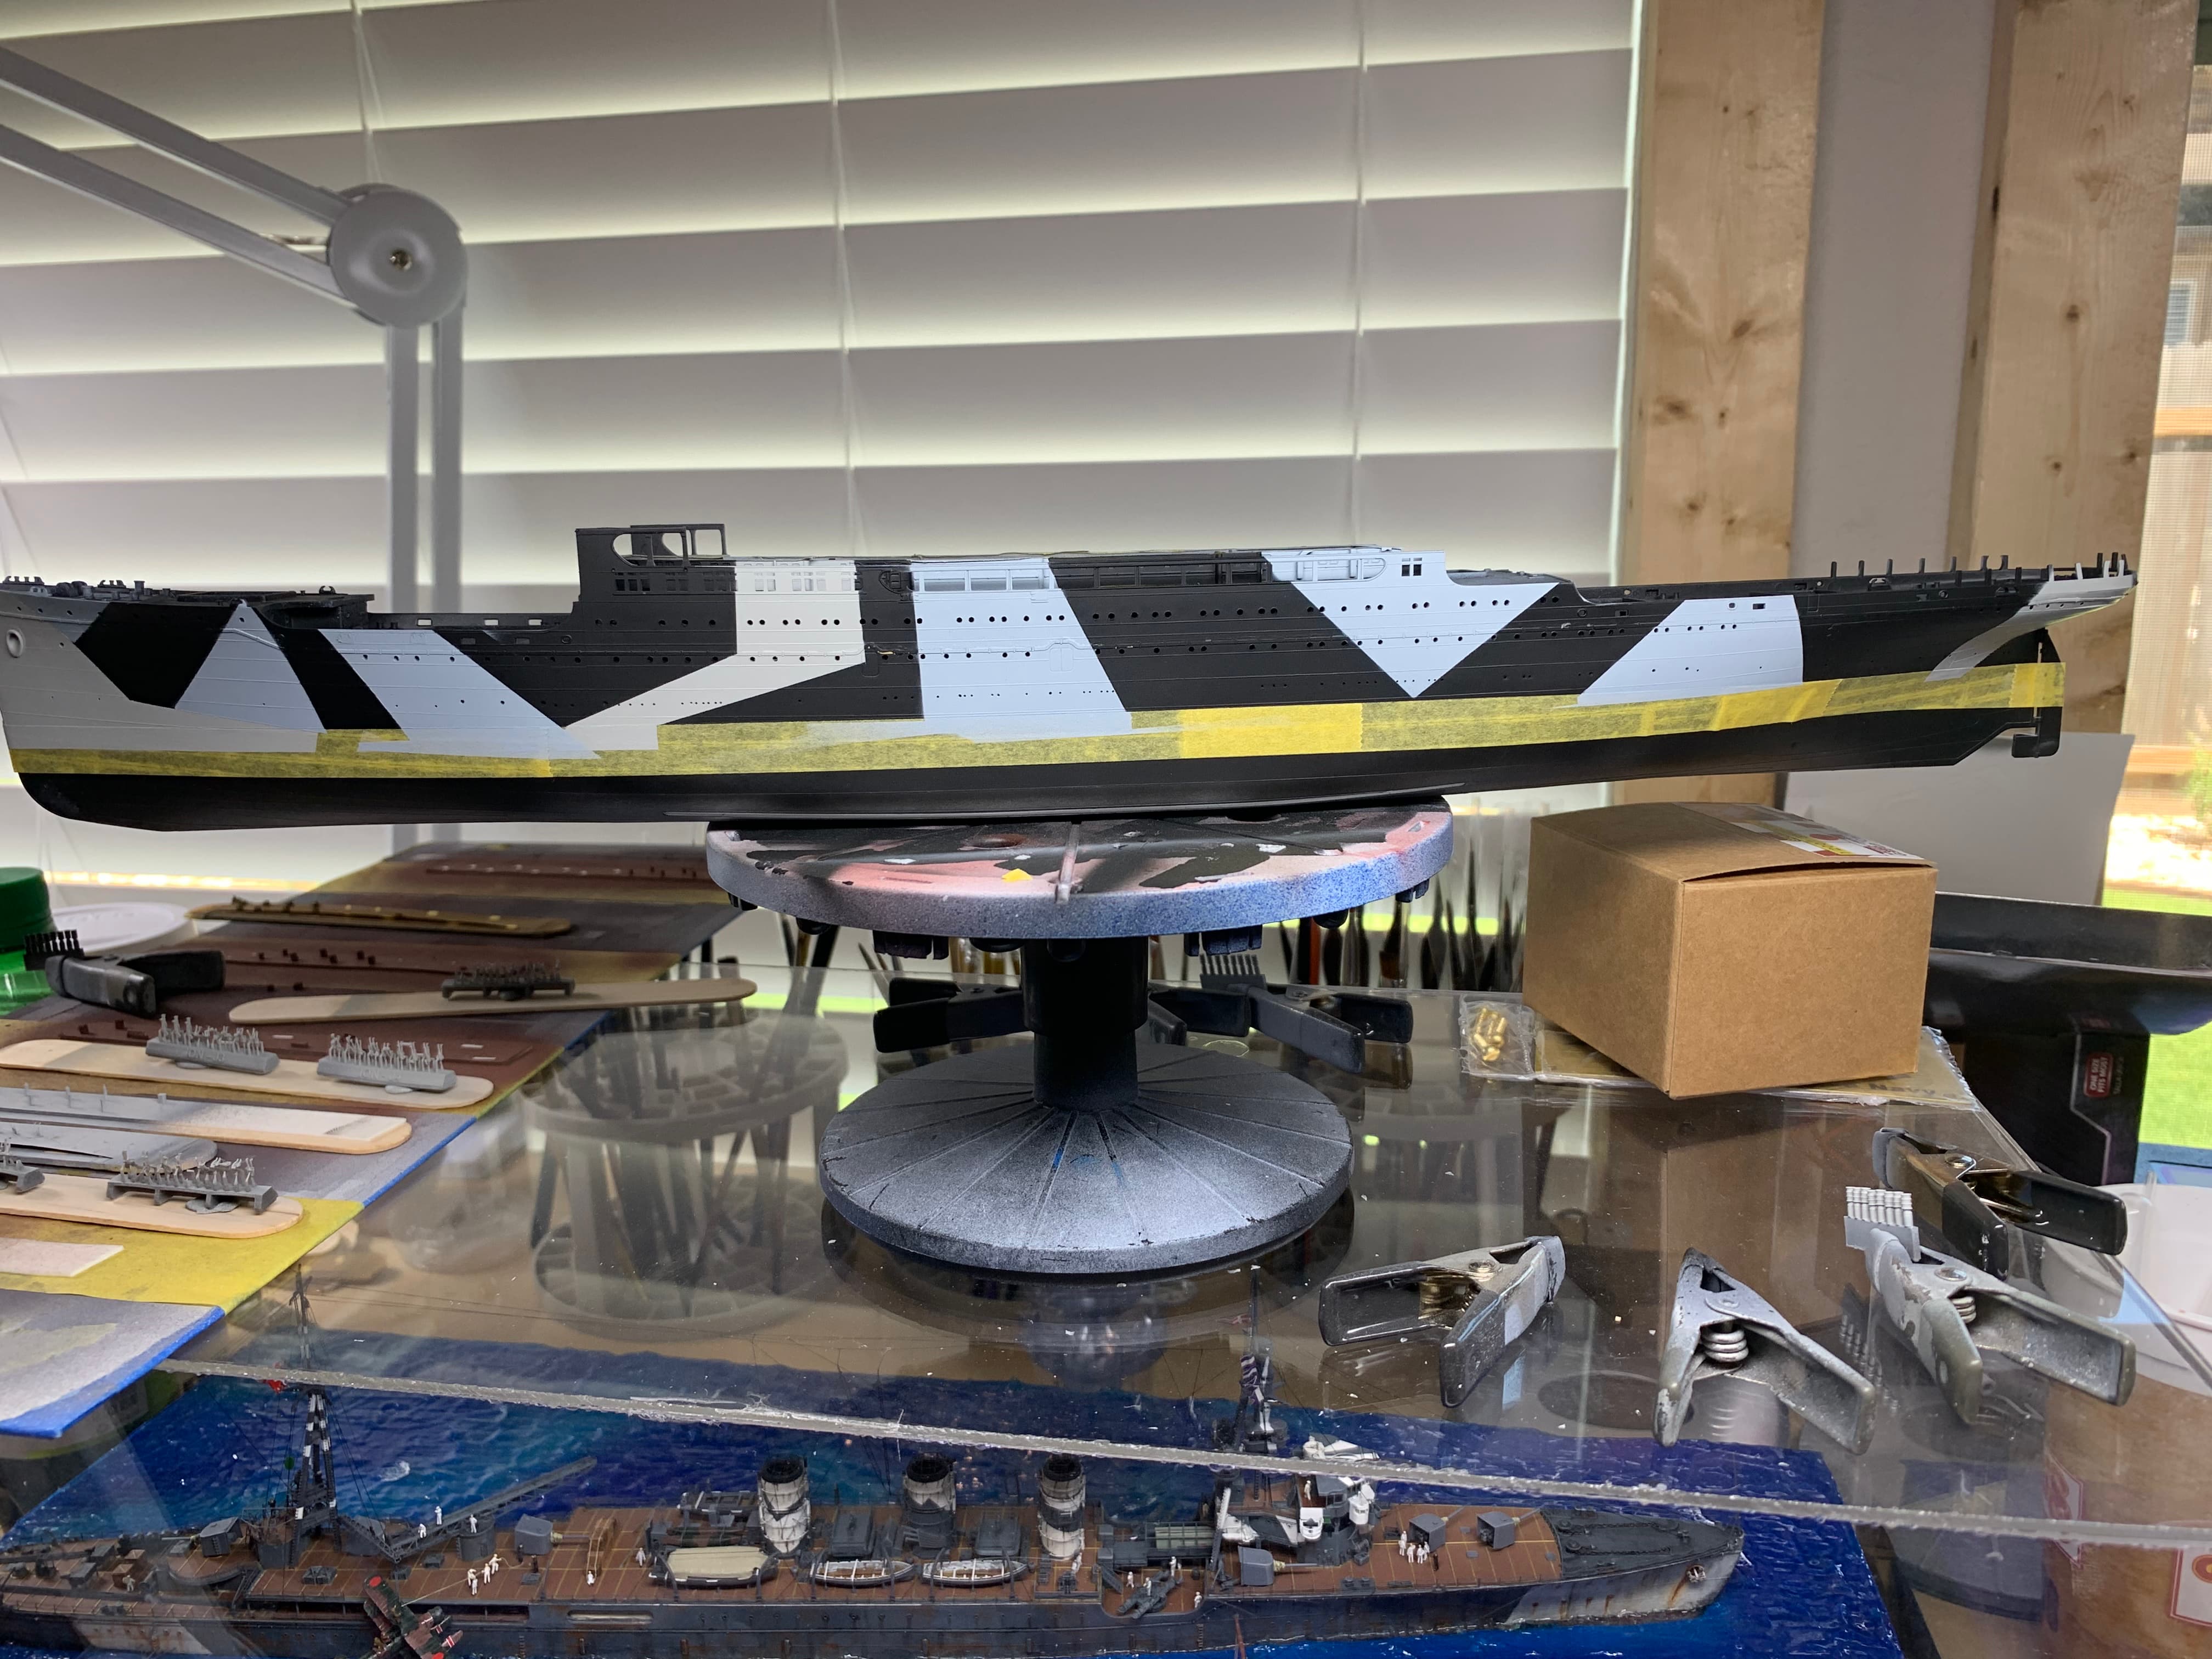
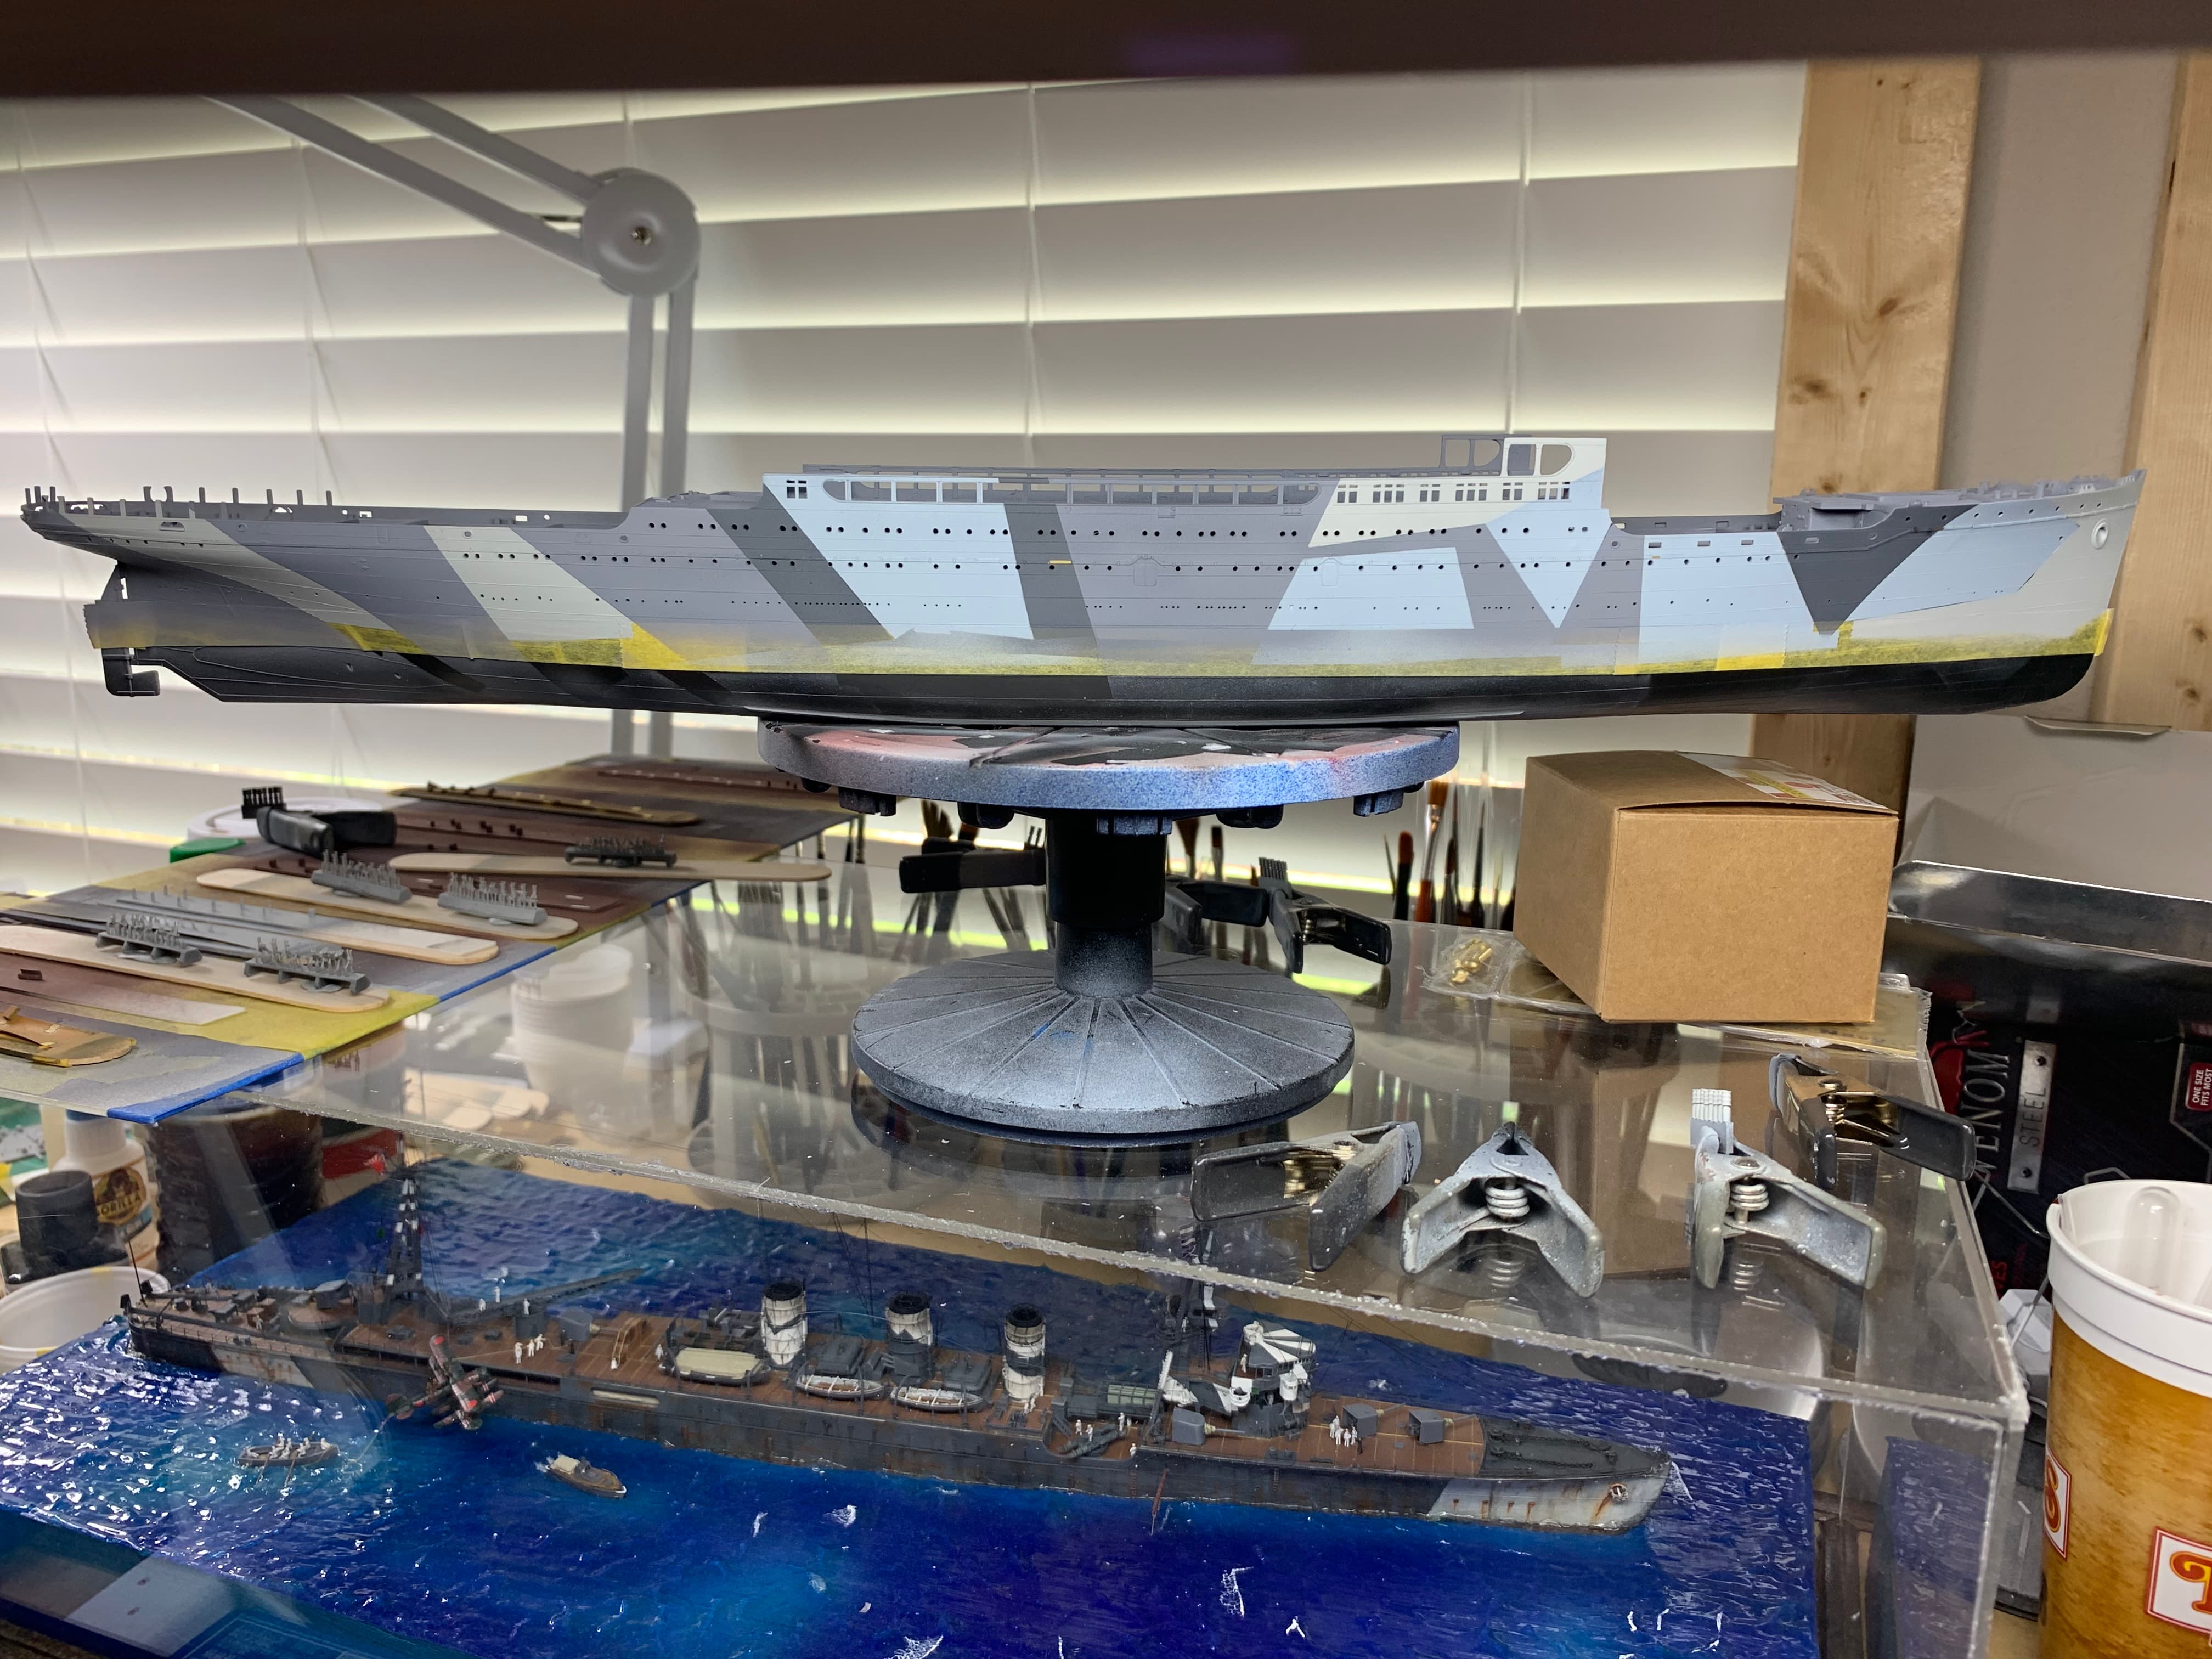
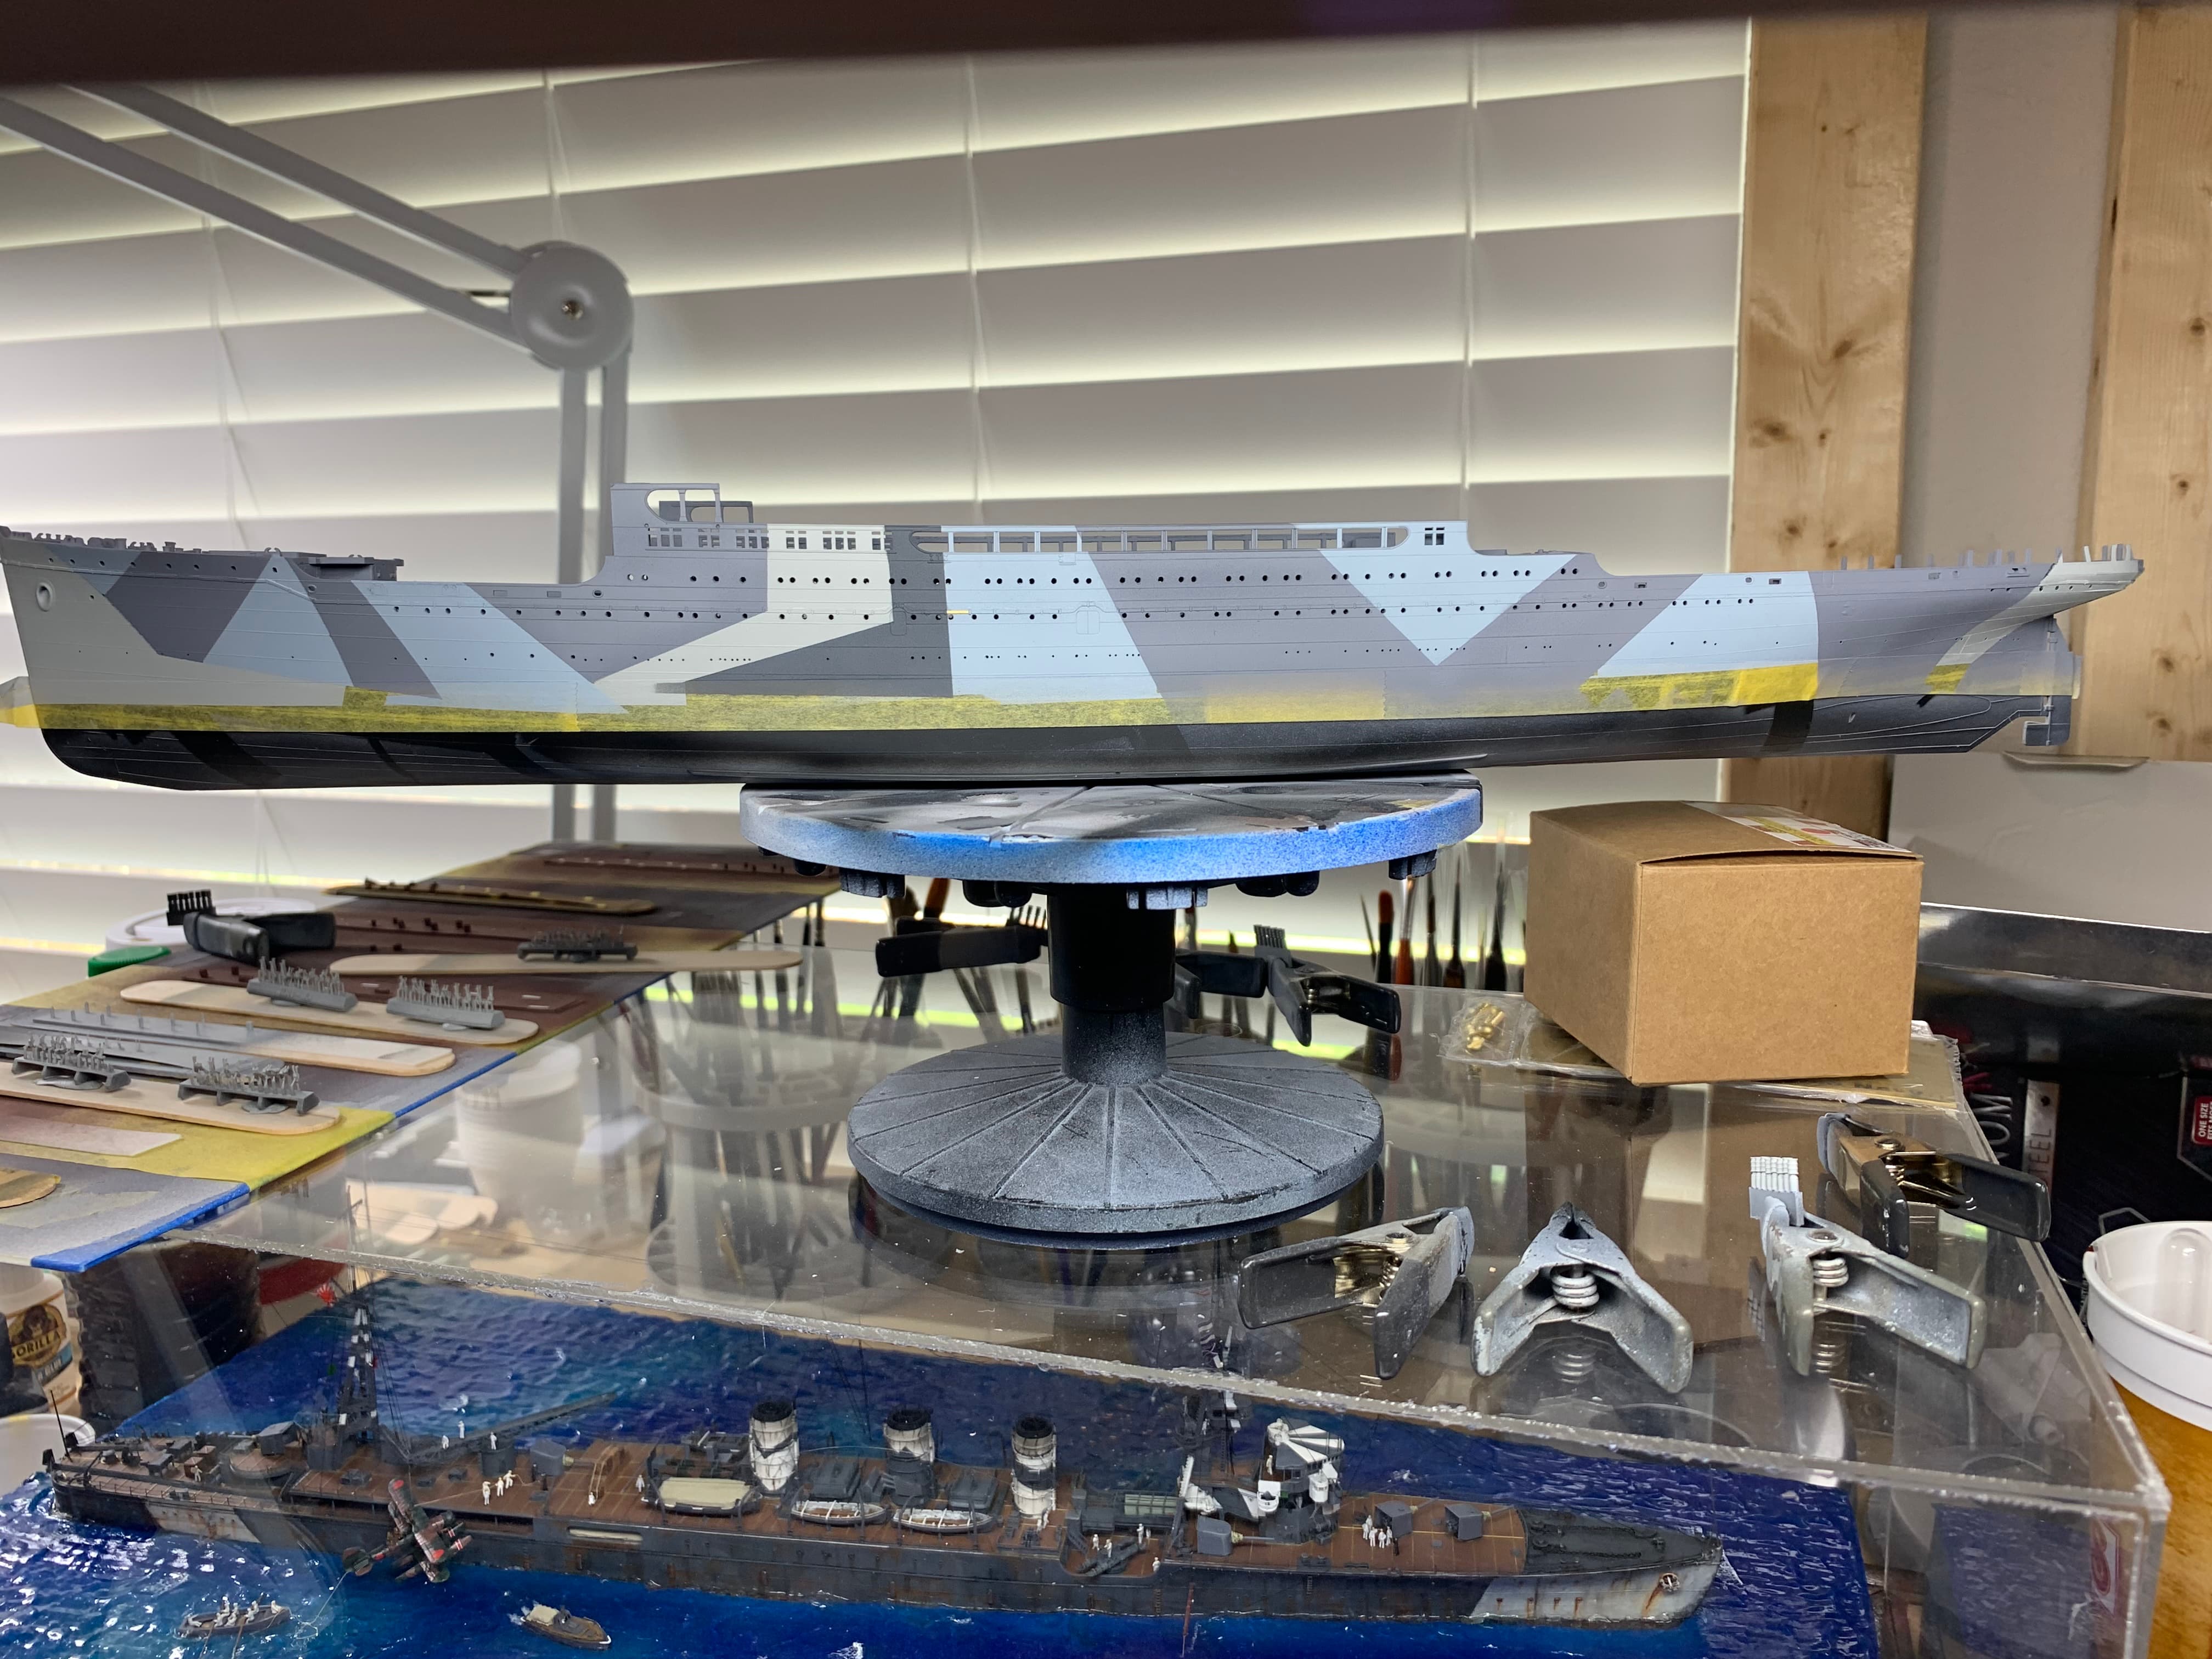
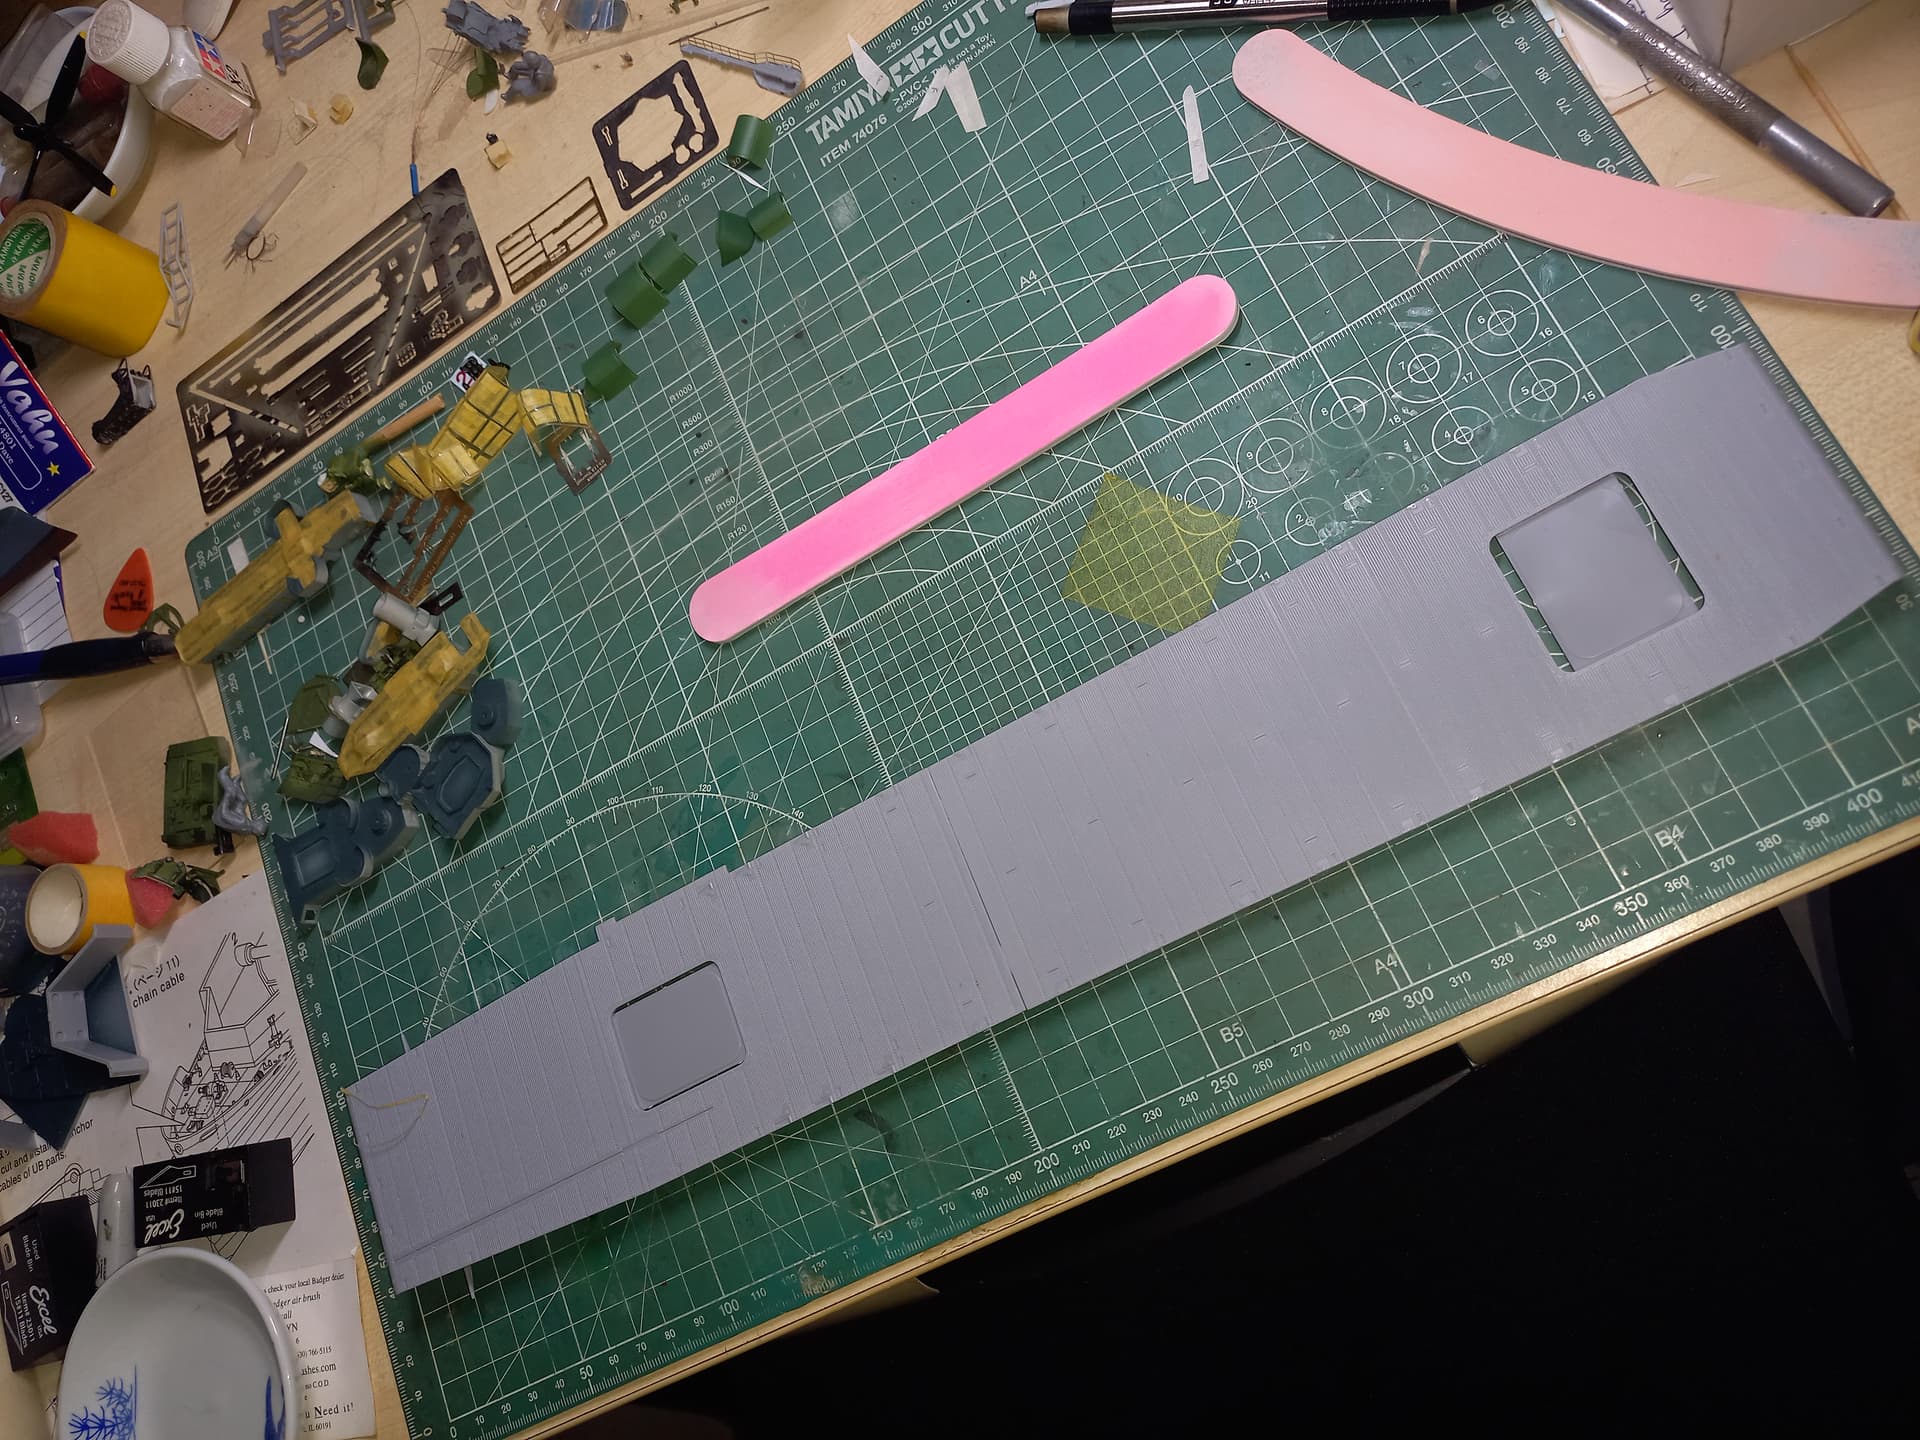
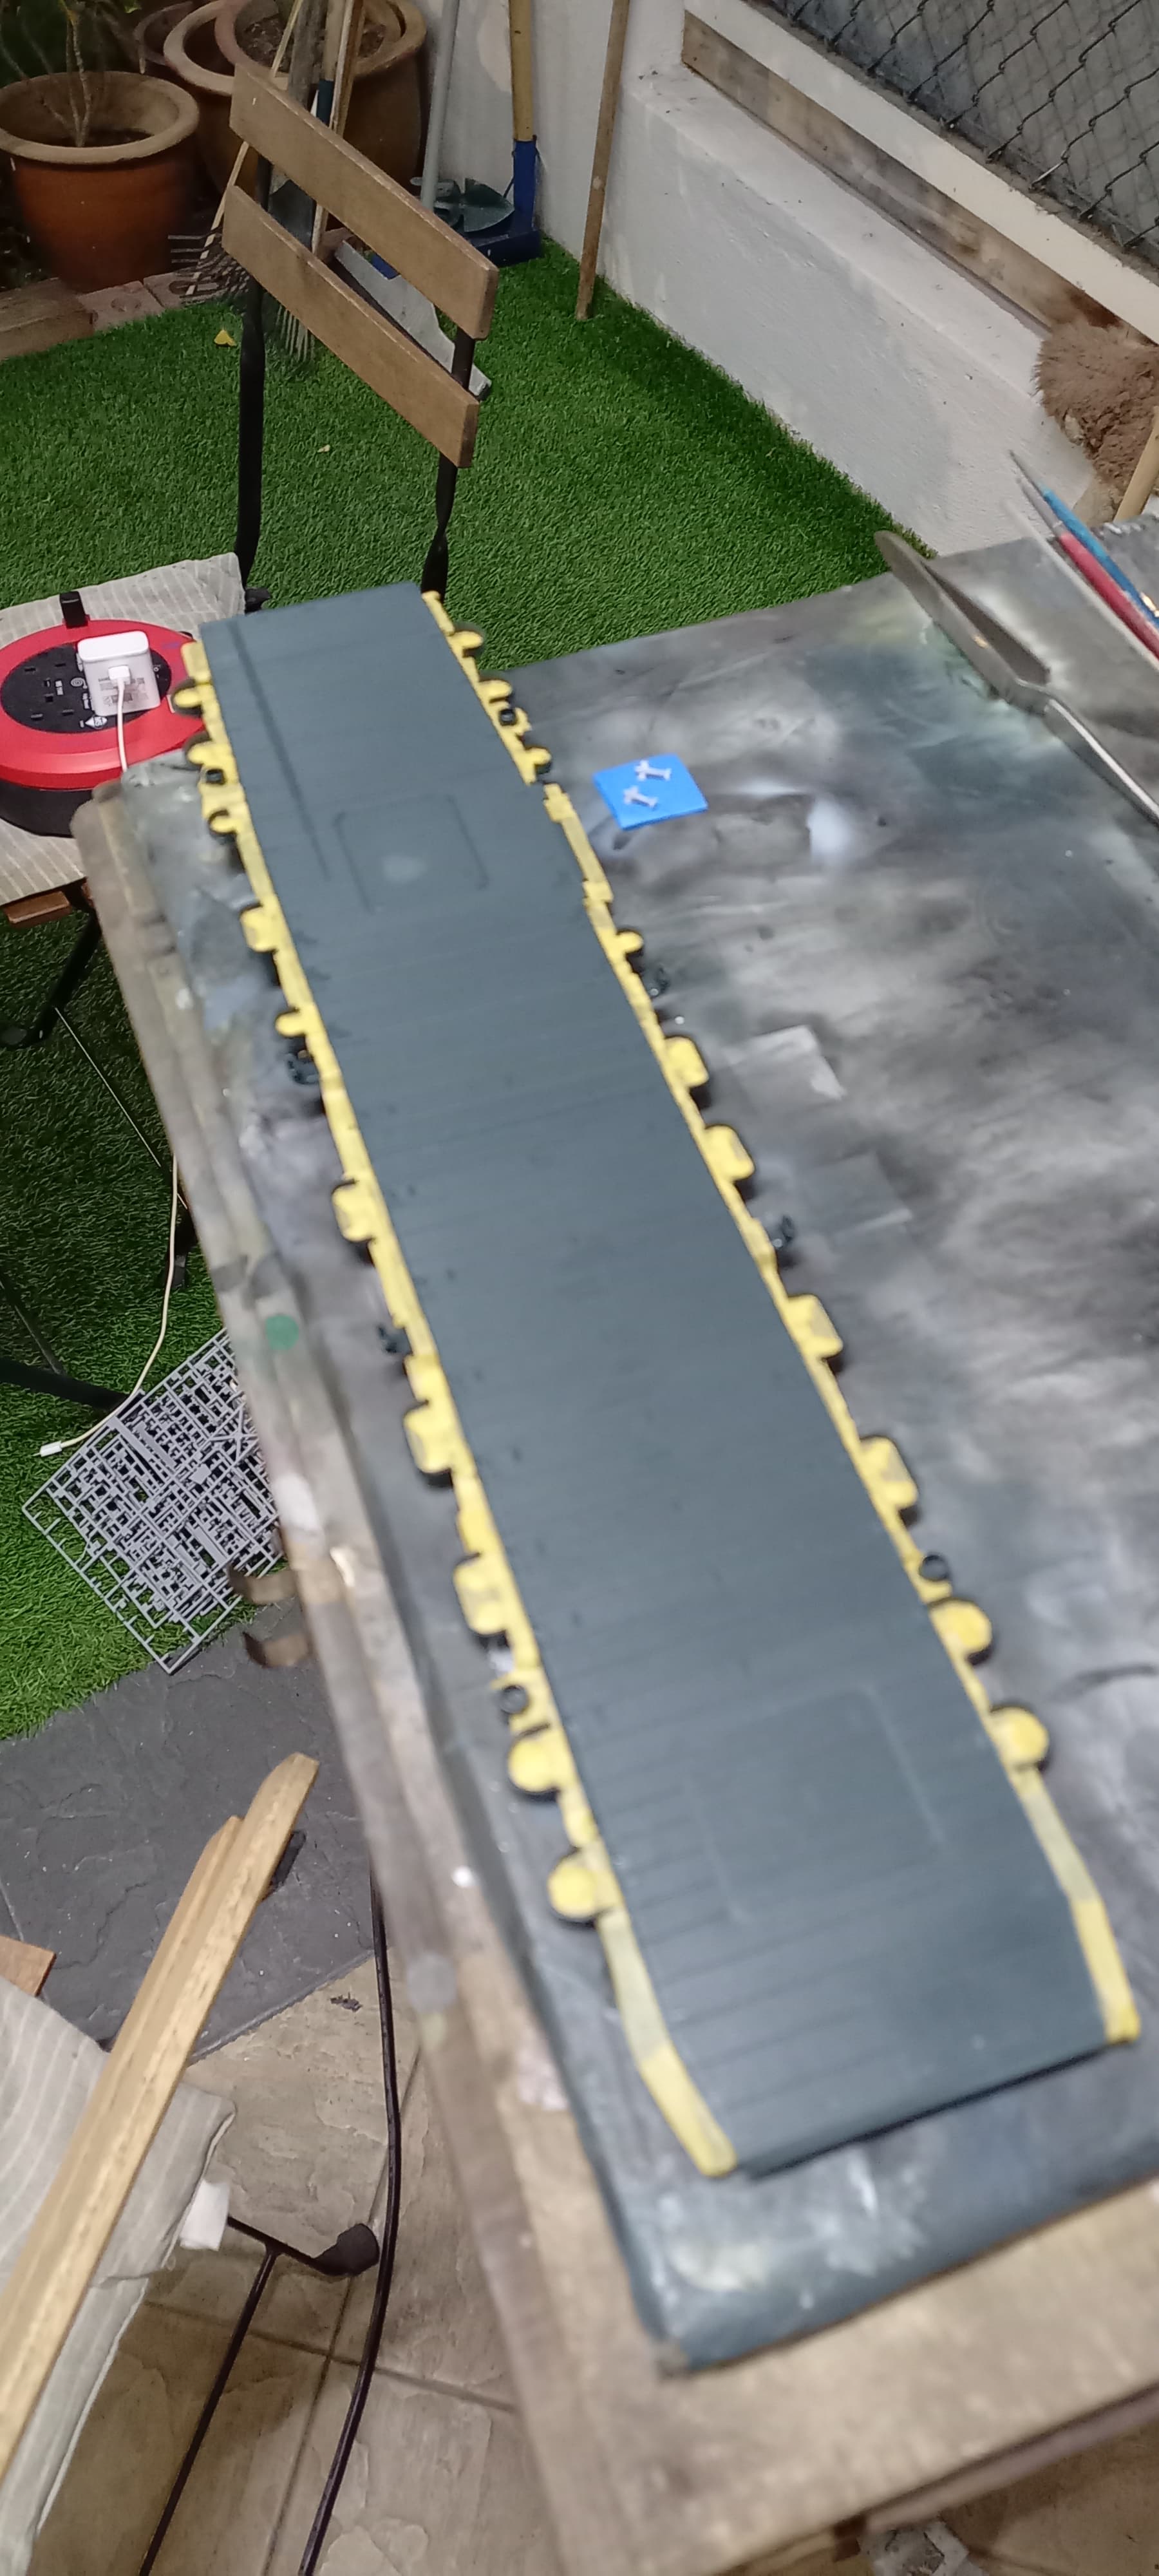
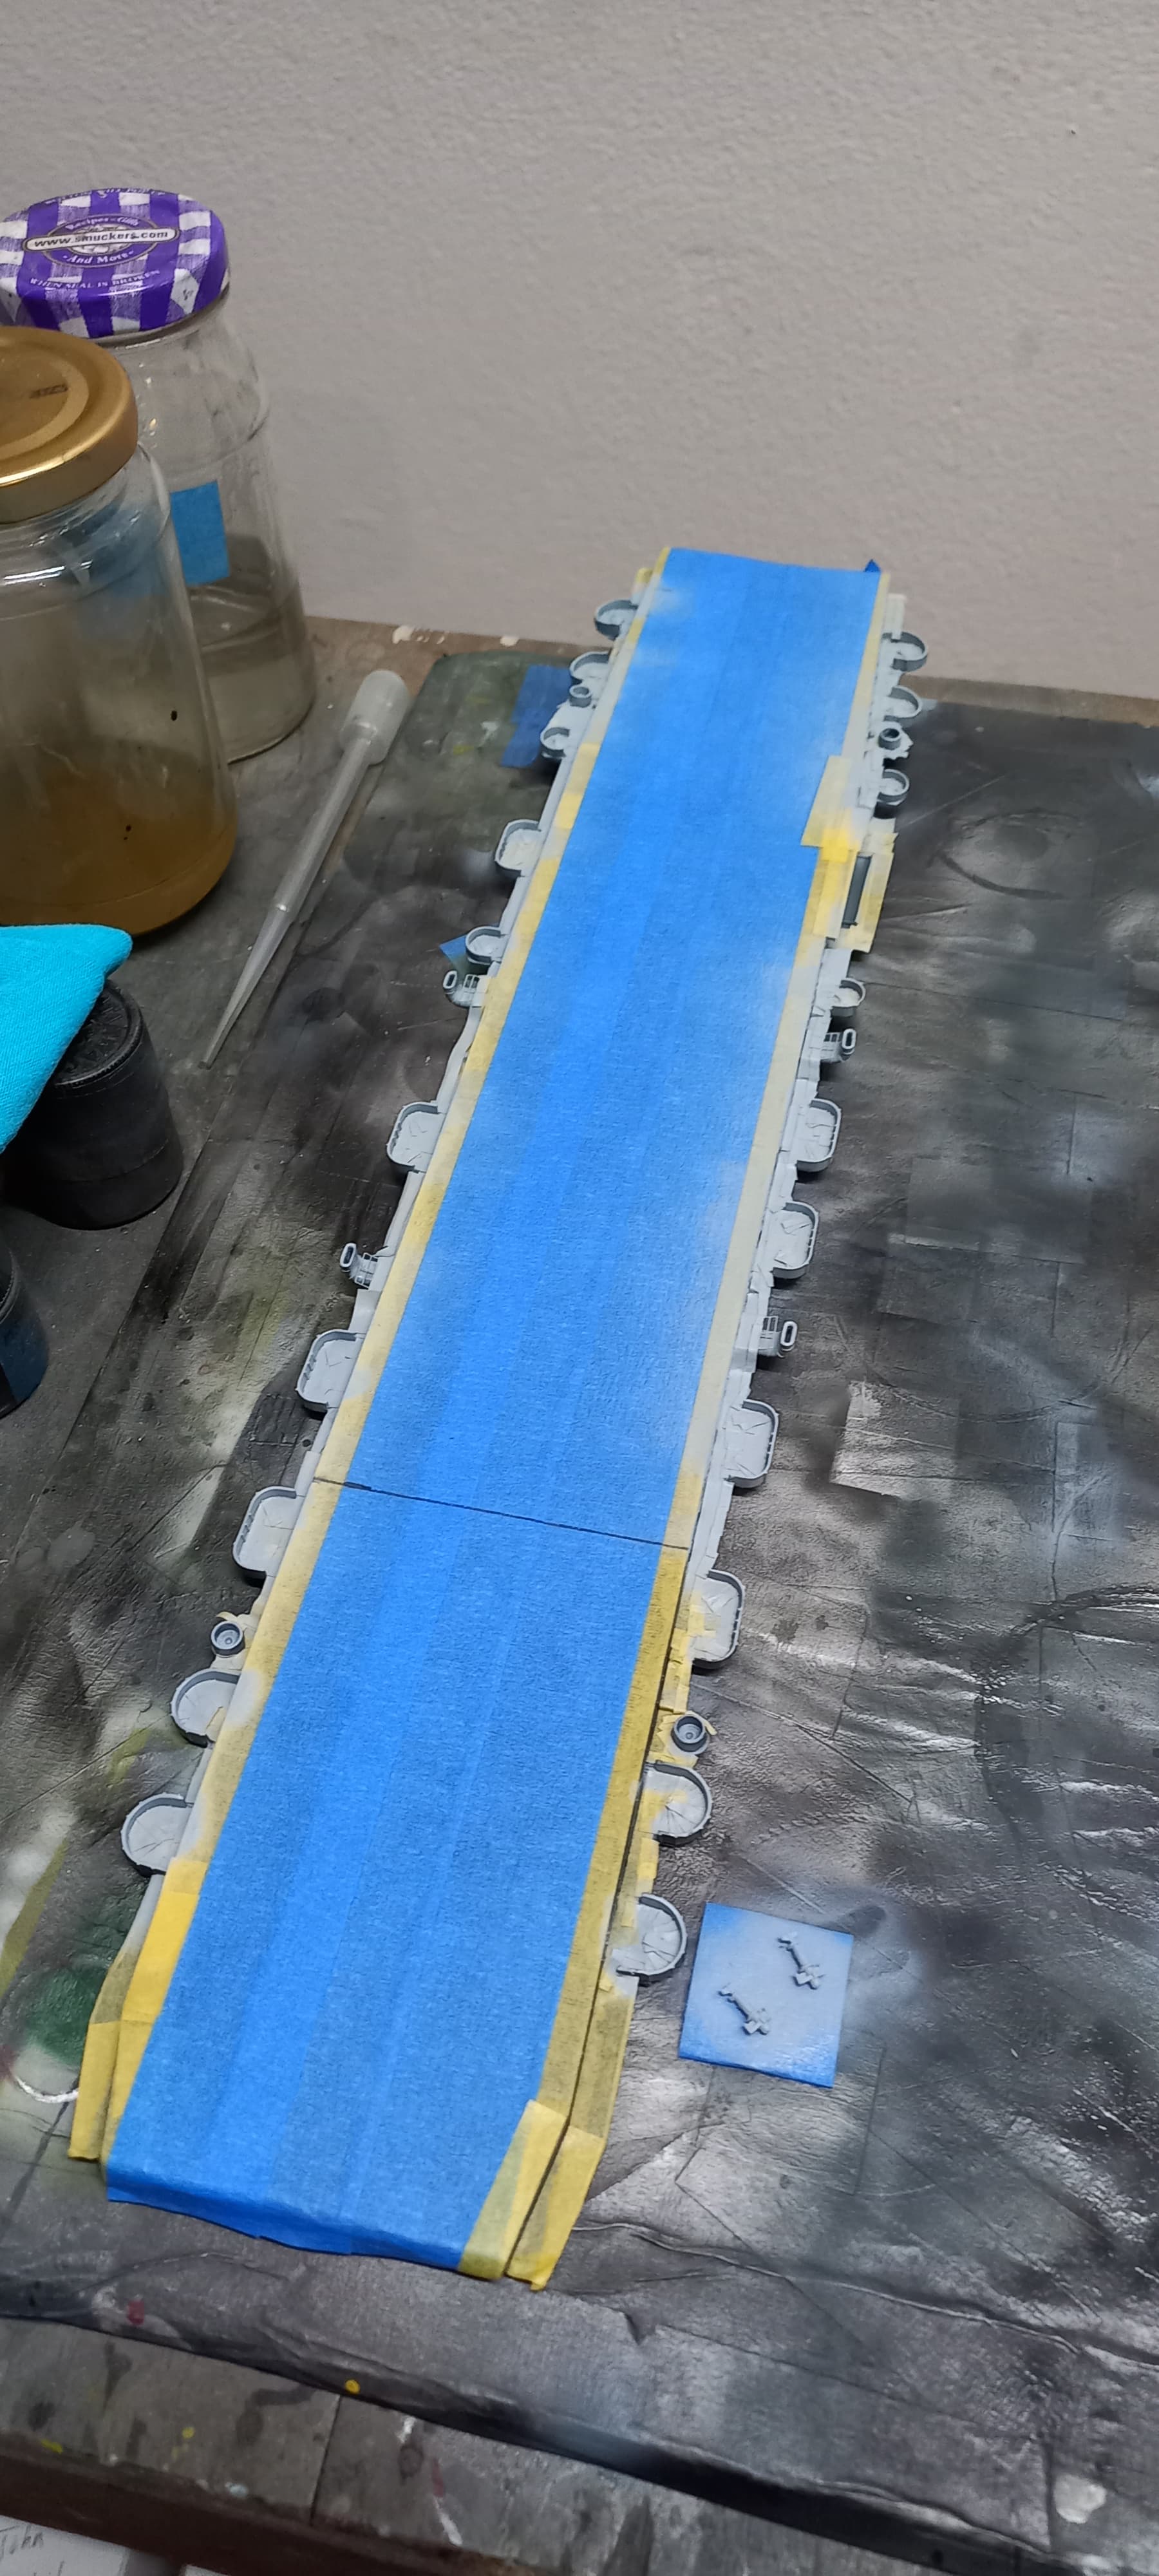
I’ve been a bit lazy in doing an update on my USS Gambier bay. I’m thinking when you have a crew of sailors painting the Measure 32 camo scheme is much easier than doing it in /350! I managed to replace the kit’s catwalks with the PE, and overall this turned out quite well. I painted the deck in 5N blue and will come back to weather it.
The deck went together well, though I wish I’d done a better job at dealing with the seam. I was a bit stand offish for fear of destroying the detail of the deck. A fear I’ve overcome given the scale and what we really see.
After painting the catwalks and superstructure detail floors the pretty blue, I masked it all off. A tedious job, but not as bad as I initially thought. Once I got going, it turned into a bit of a game and before I knew it I was done!
I finished the colors, and discovered that he flight deck will need some grinding underneath on the PE as it’s interfering with the attachment, not a big deal, and nobody will notice.
Next up will be the deck with it’s decals. I’m not too worried as I’ve dealt with Hasegawa decals and am comfortable with them
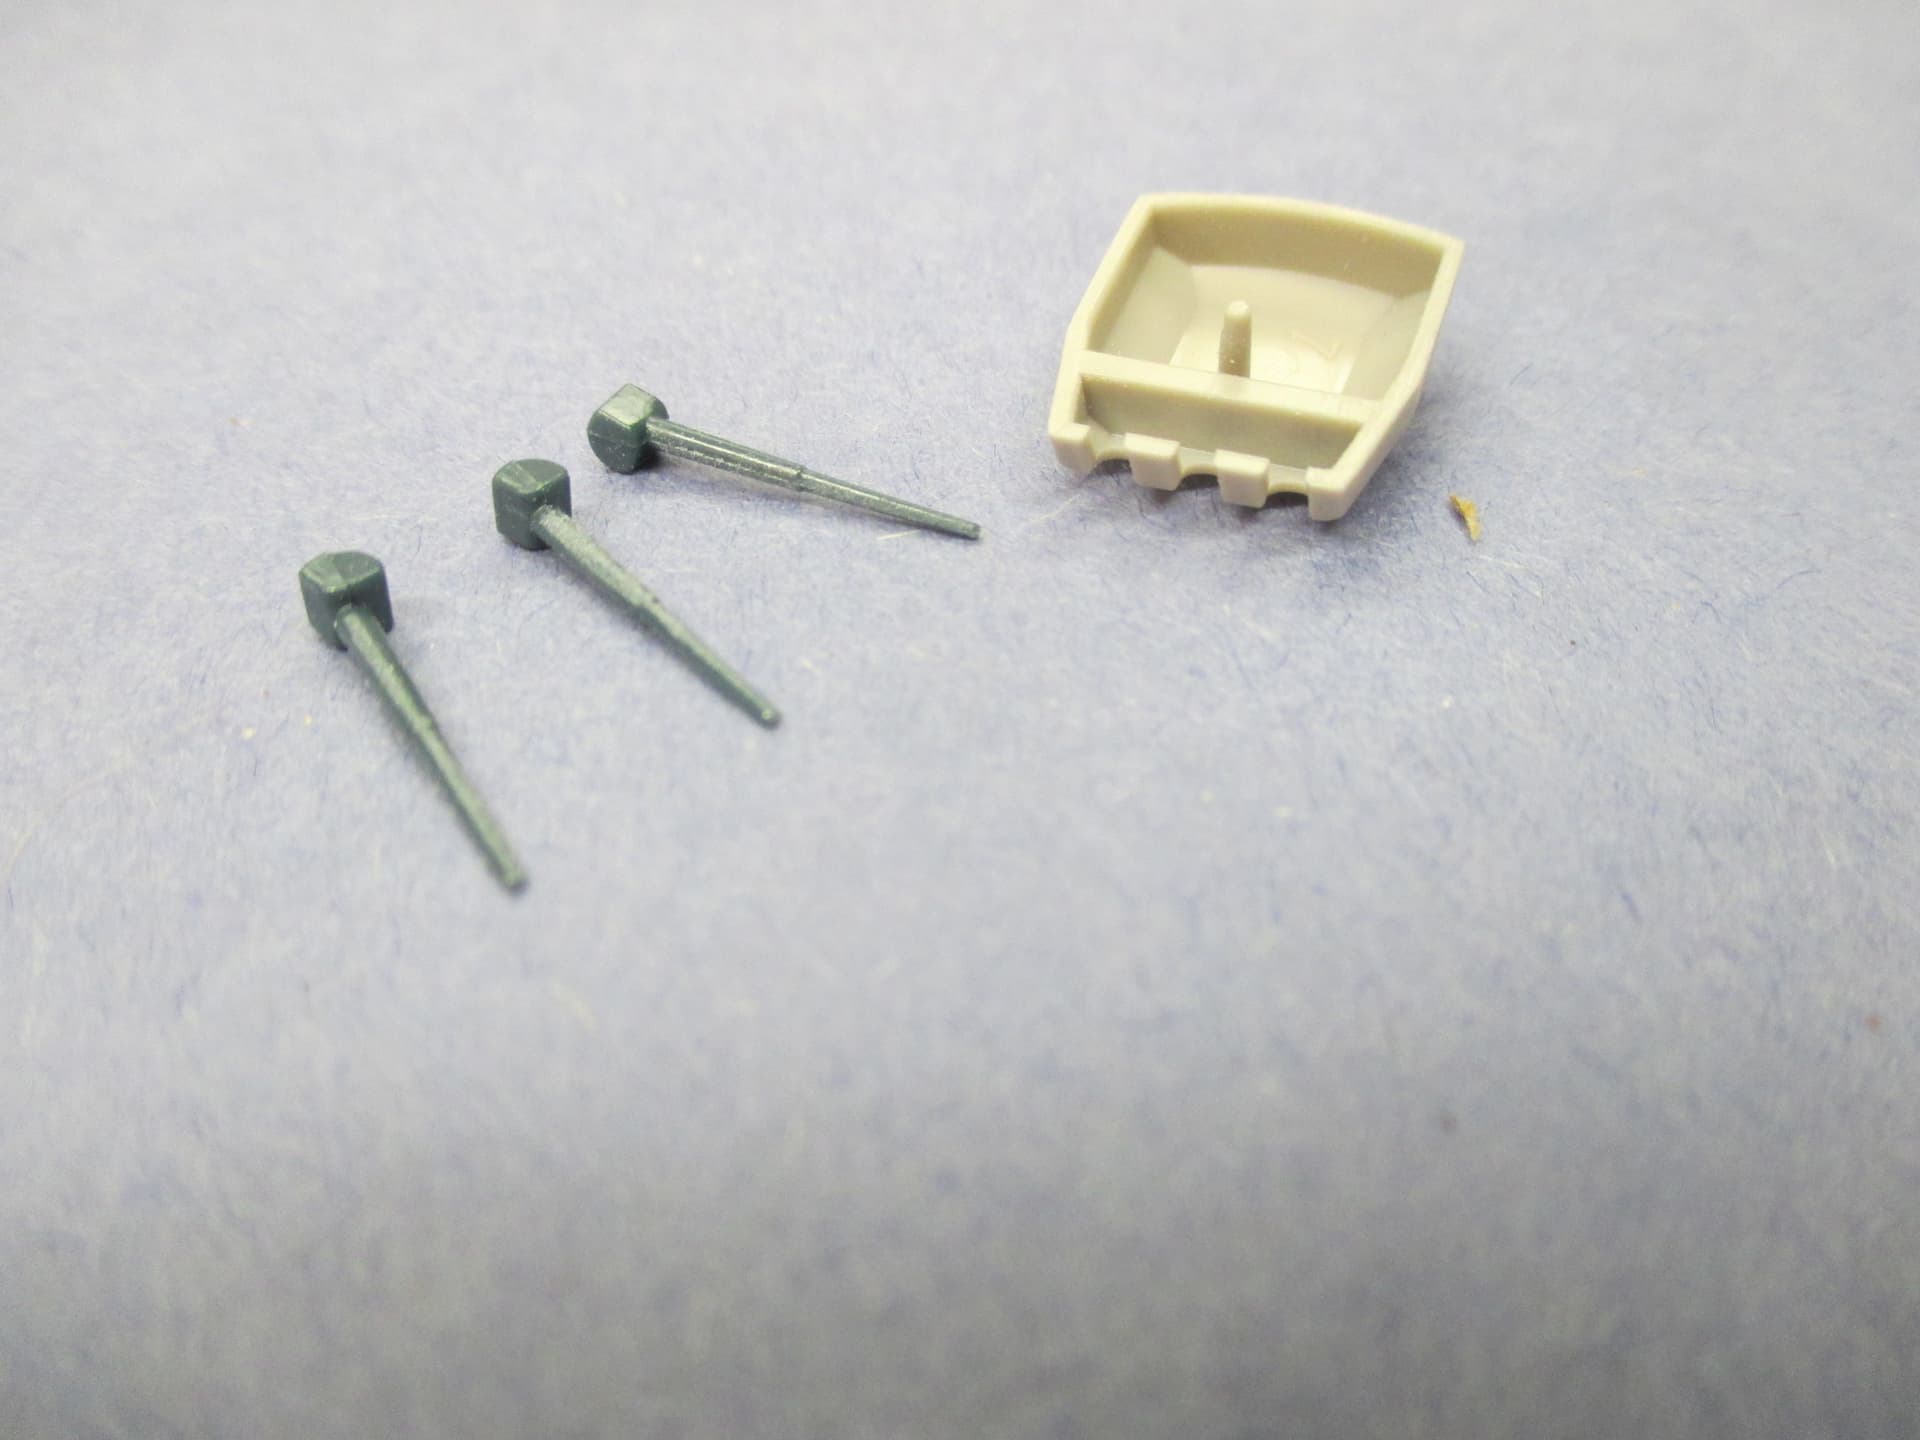
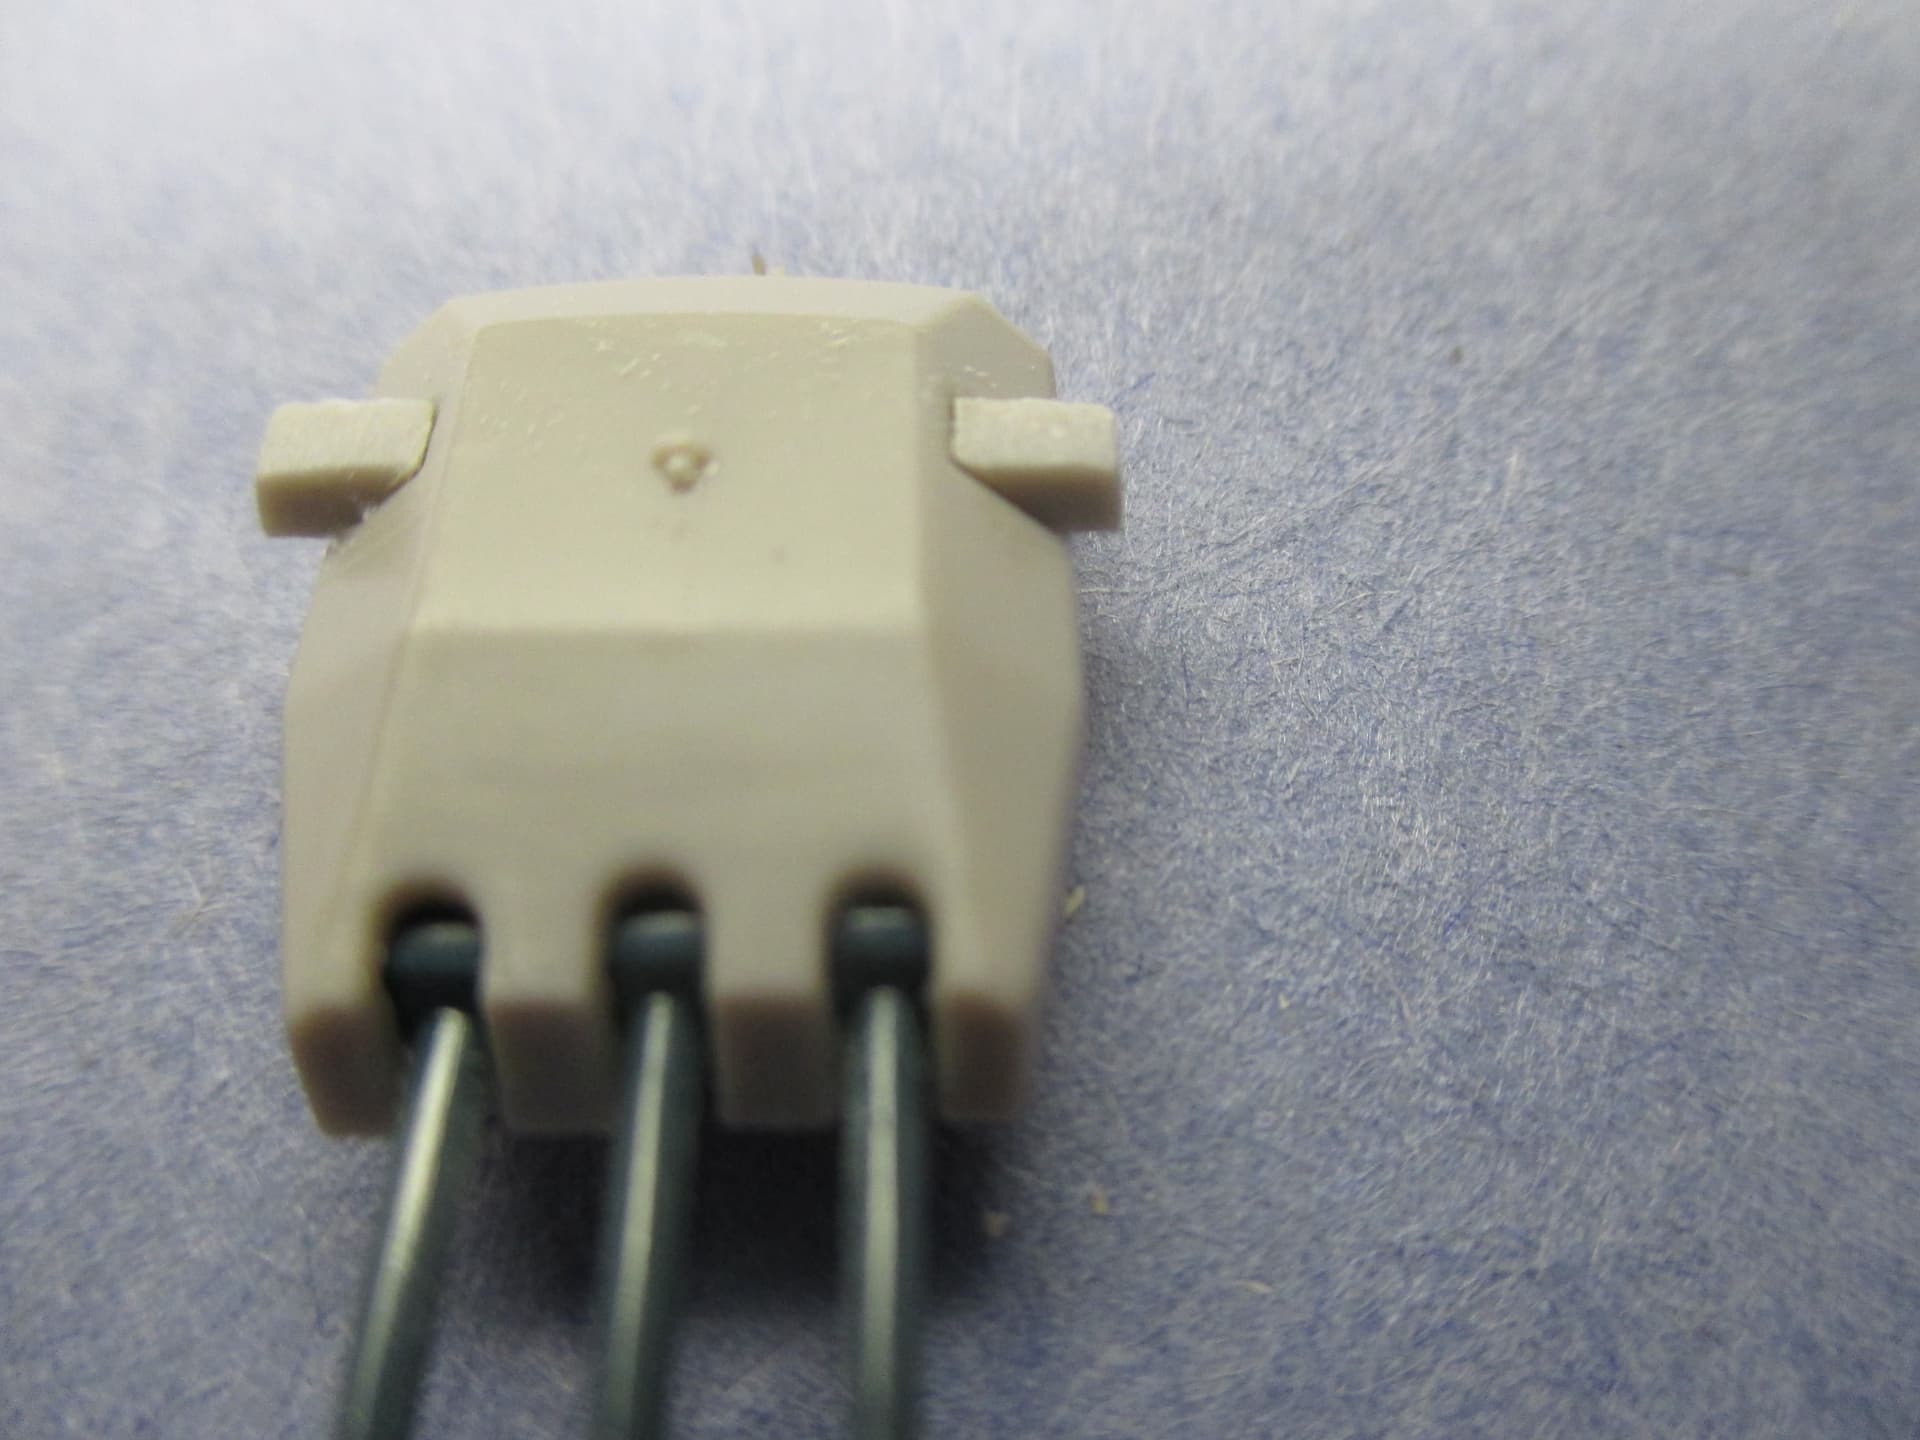
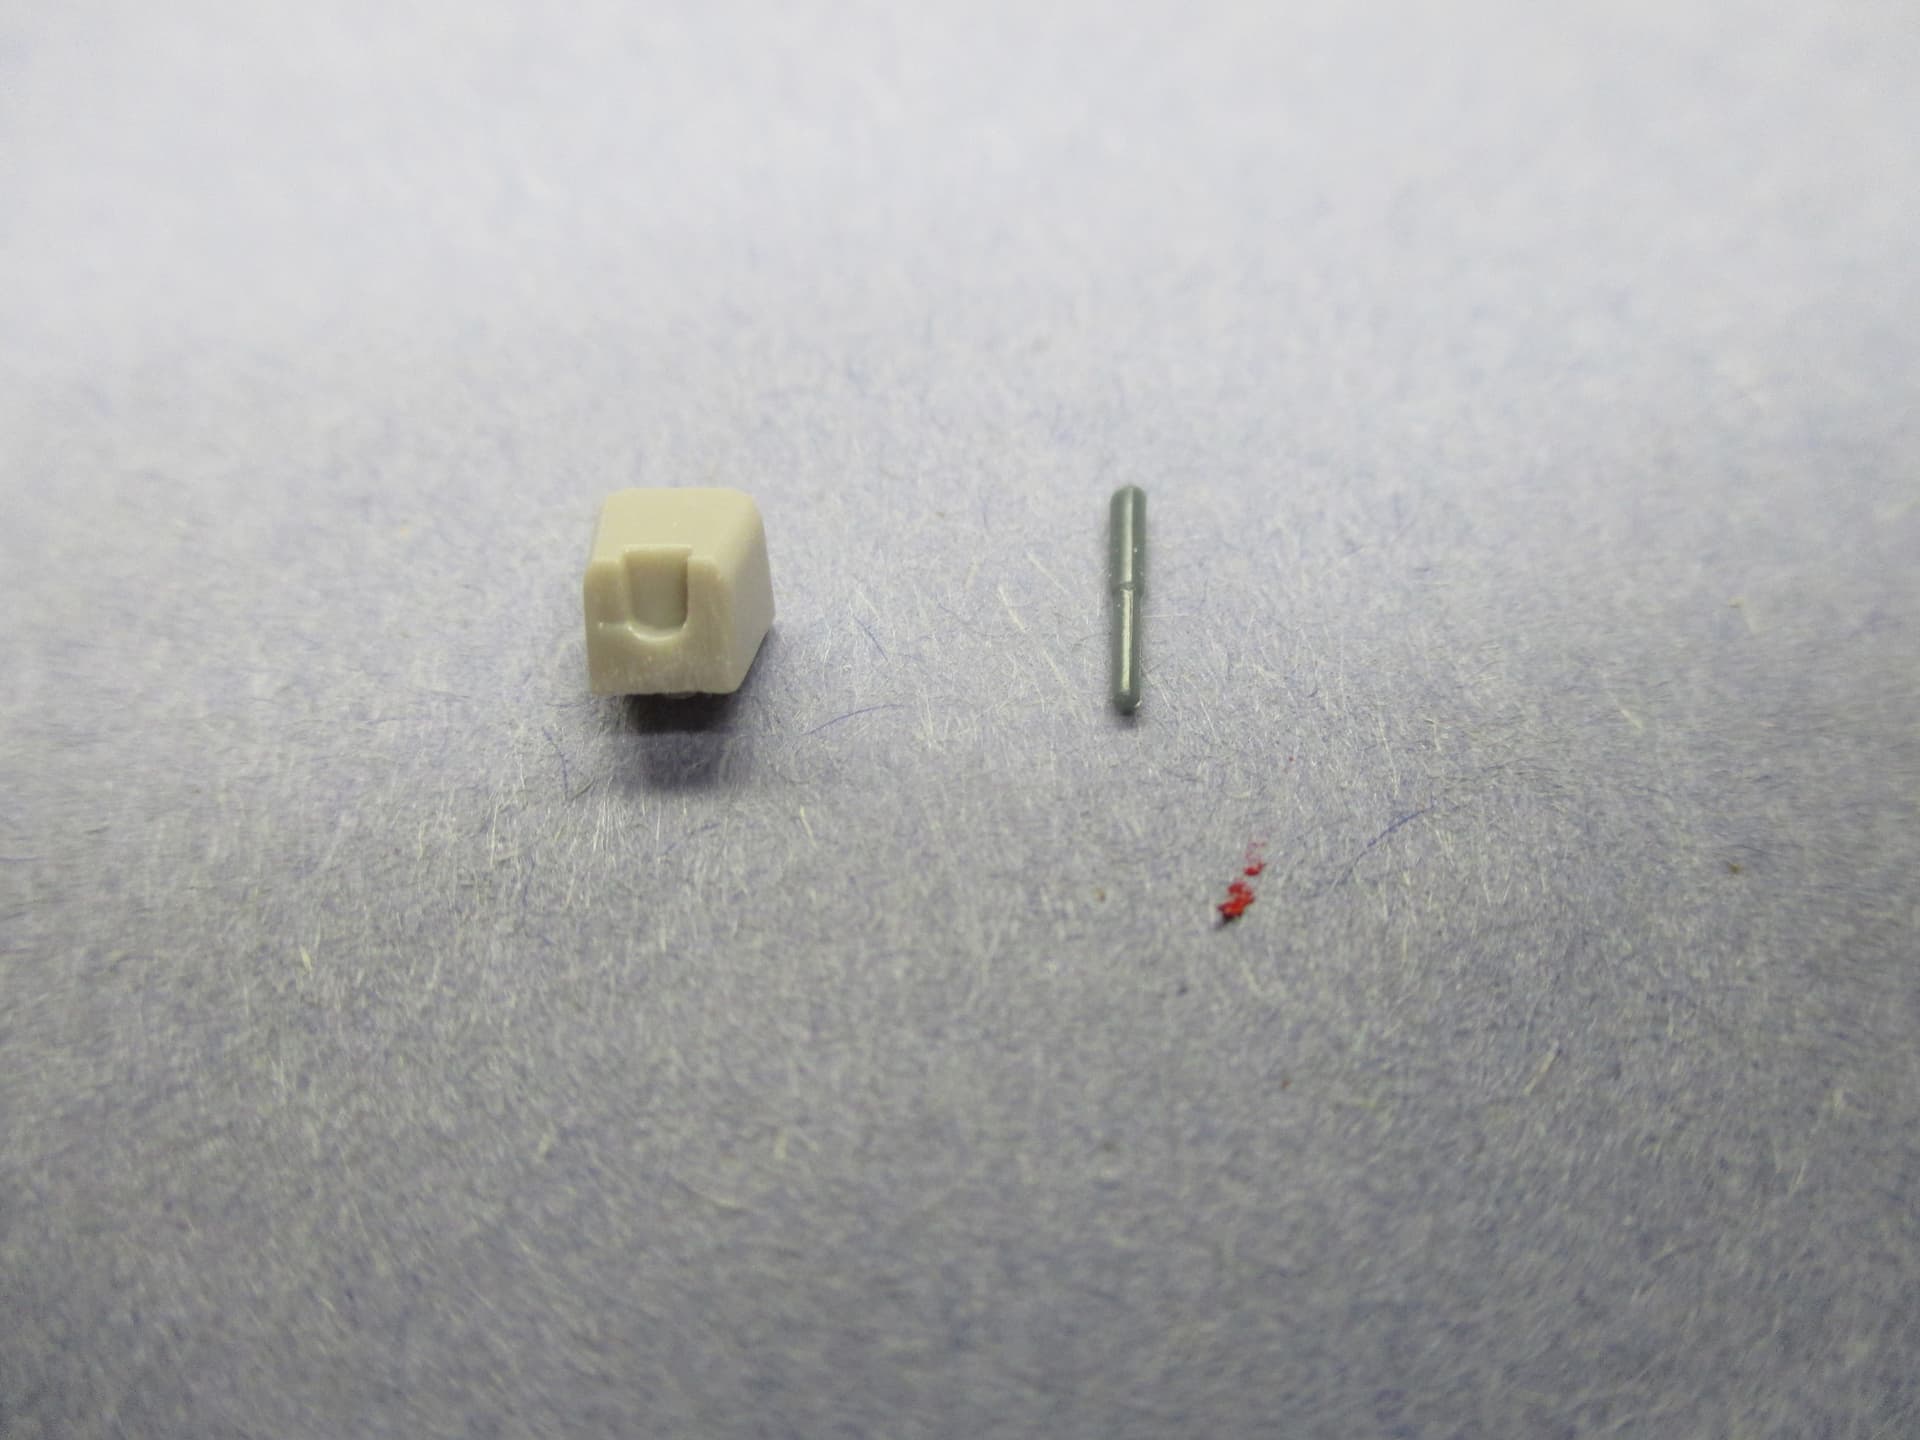
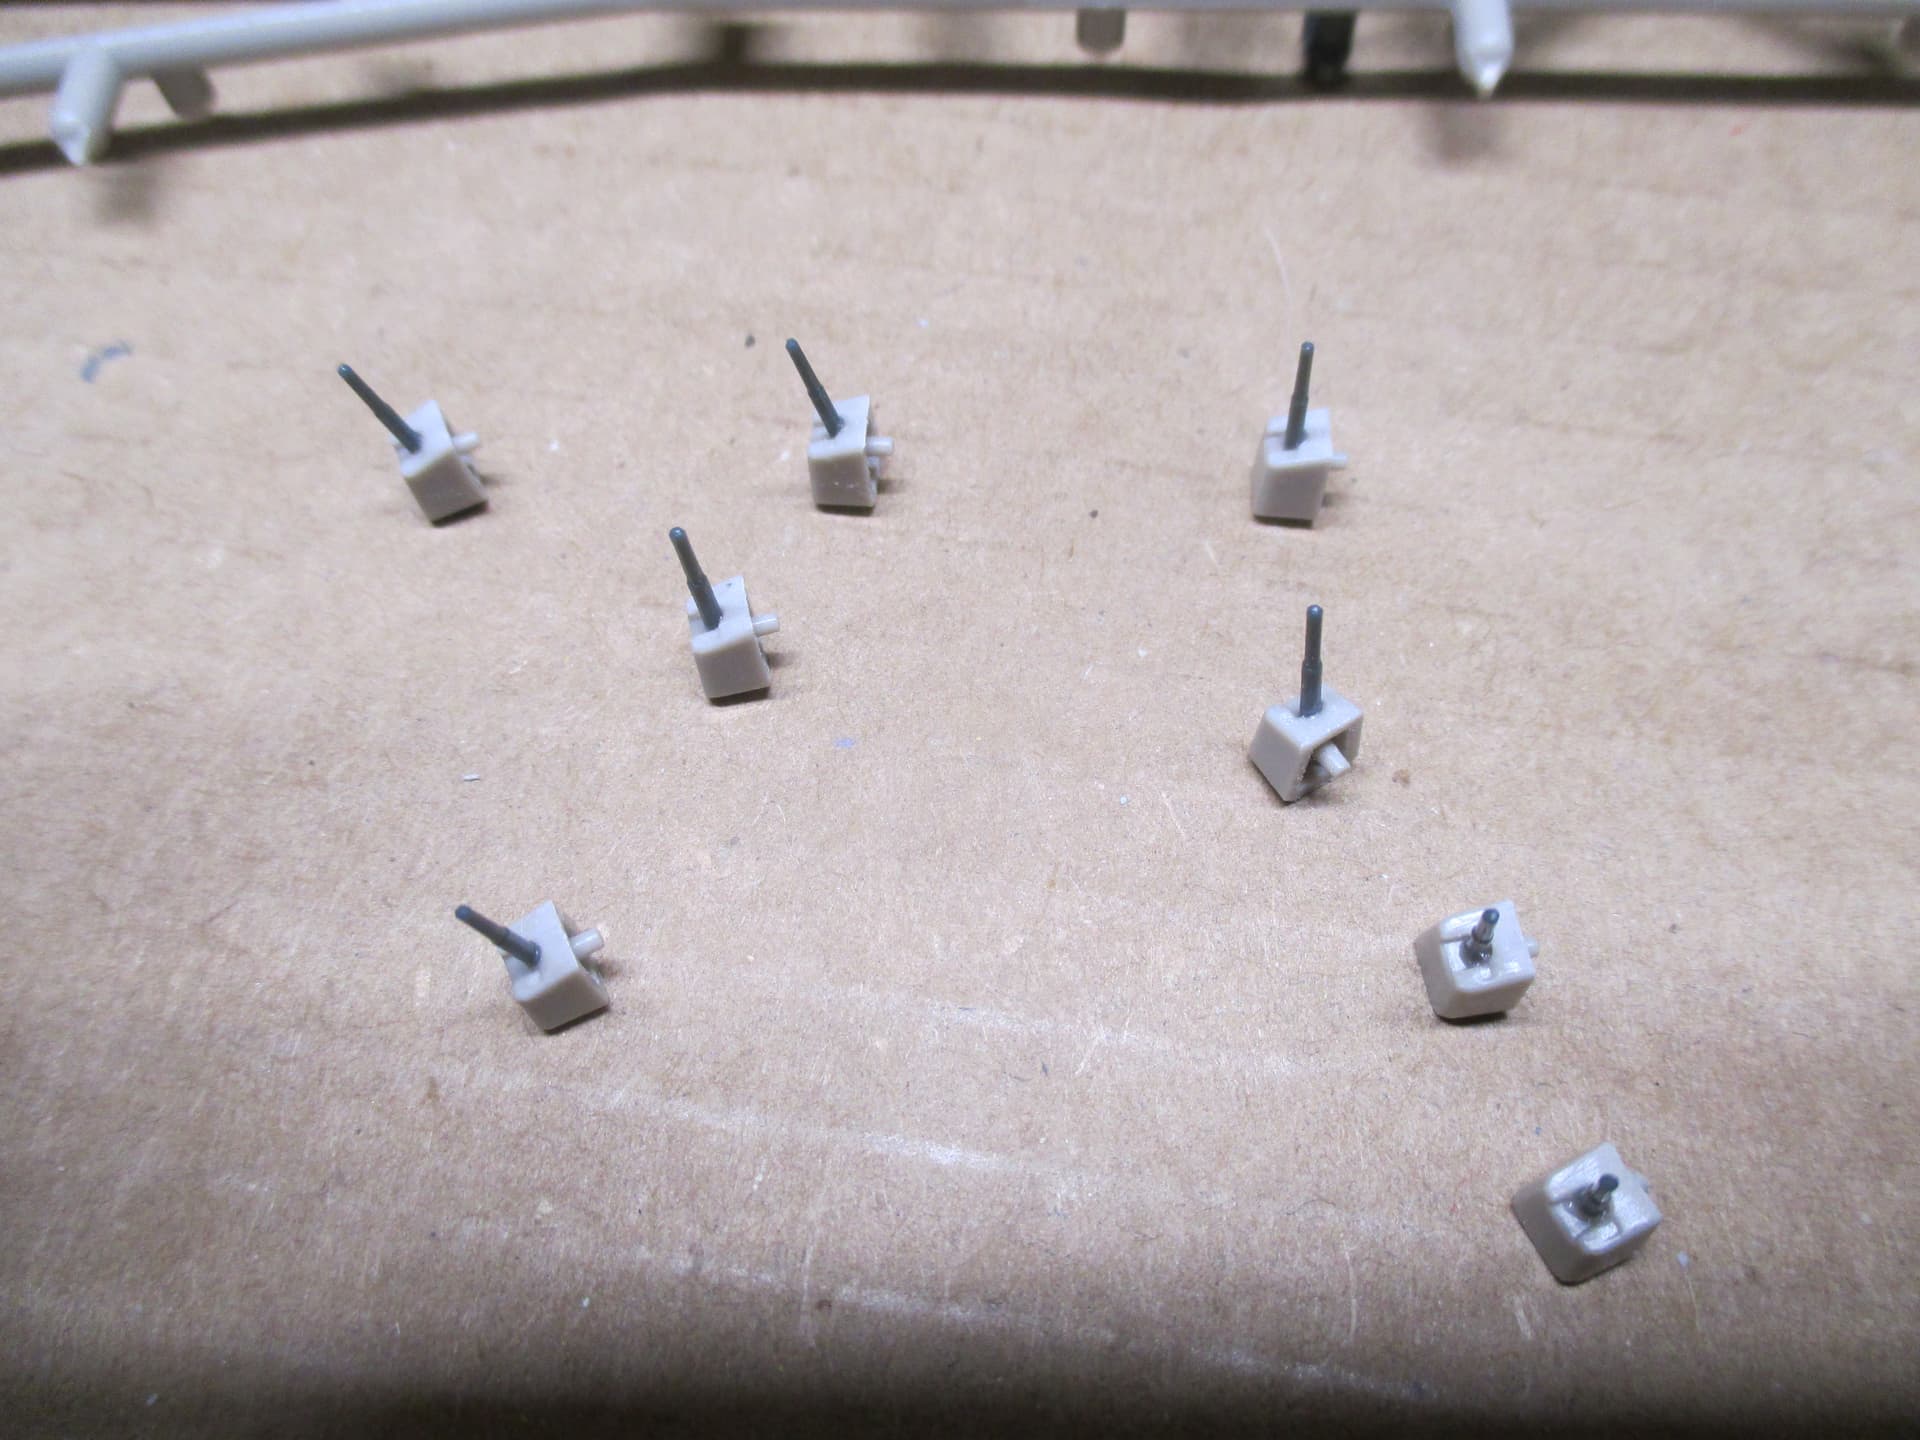
I do have a major concern regarding the dual 20 mm cannons! These are turning into a project killer. I’m at the point of discarding the PE with the exception of the guardrails and gunsights. I’ve done 3, and no real method as of yet. Any help from the community here would help. Usually after three, I get a method that works, not this time, I’m sure I’m doing this all wrong.
Sadly I don’t have a method for you but I will say sometimes you have to cut your loses to save your sanity. Sometimes that tiny PE is just too fiddly. There is a reason all the 20mm on my USS Missouri are plastic with only the gunshields in PE and why the 20 x quad bofors took me 6 months to complete.
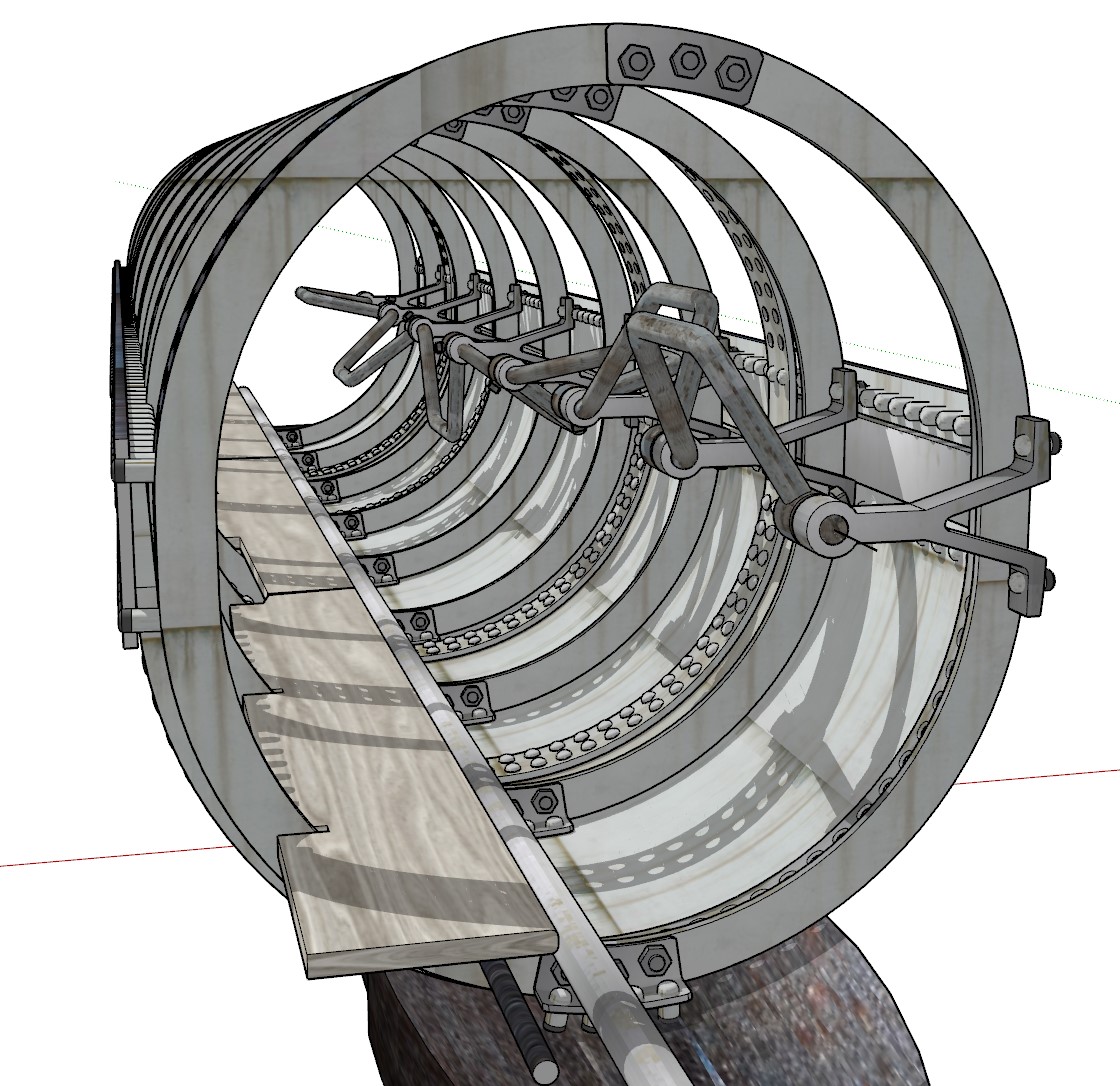
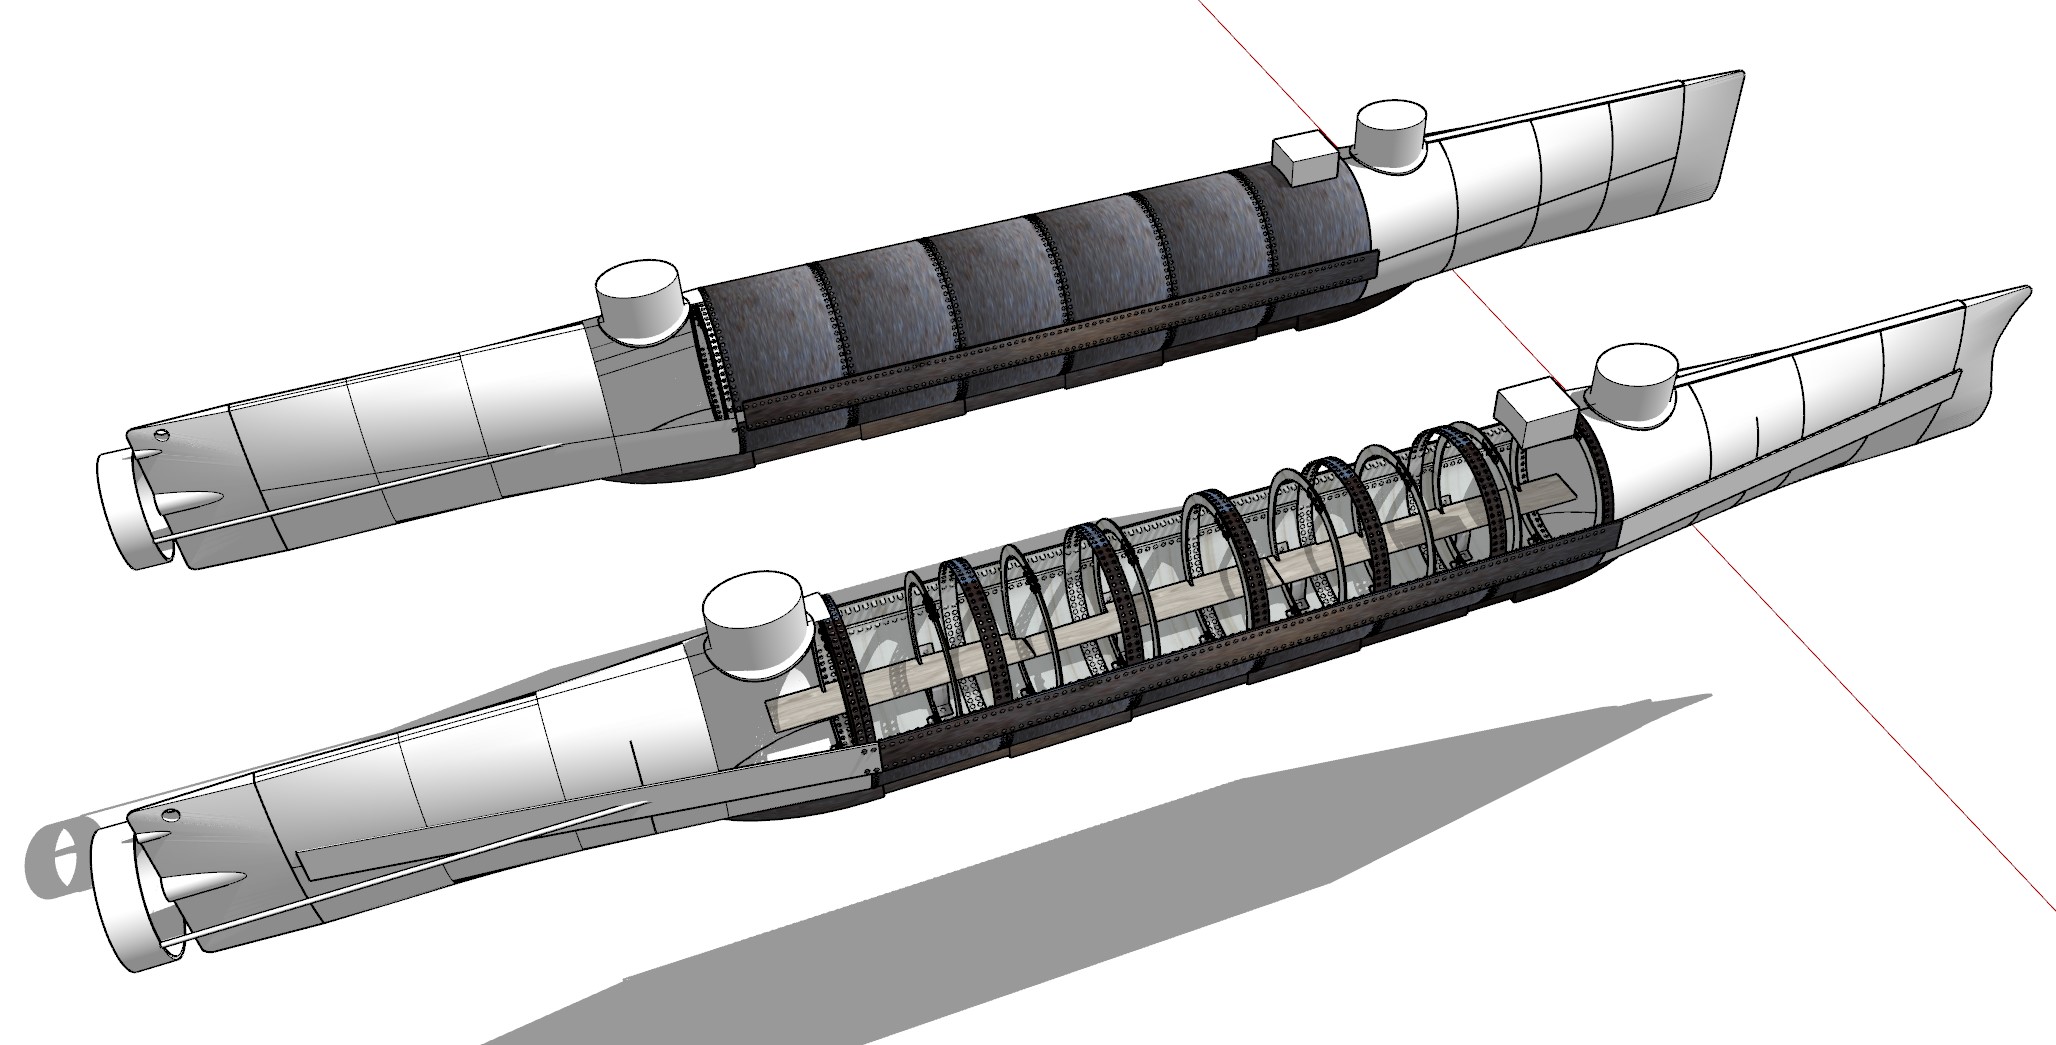
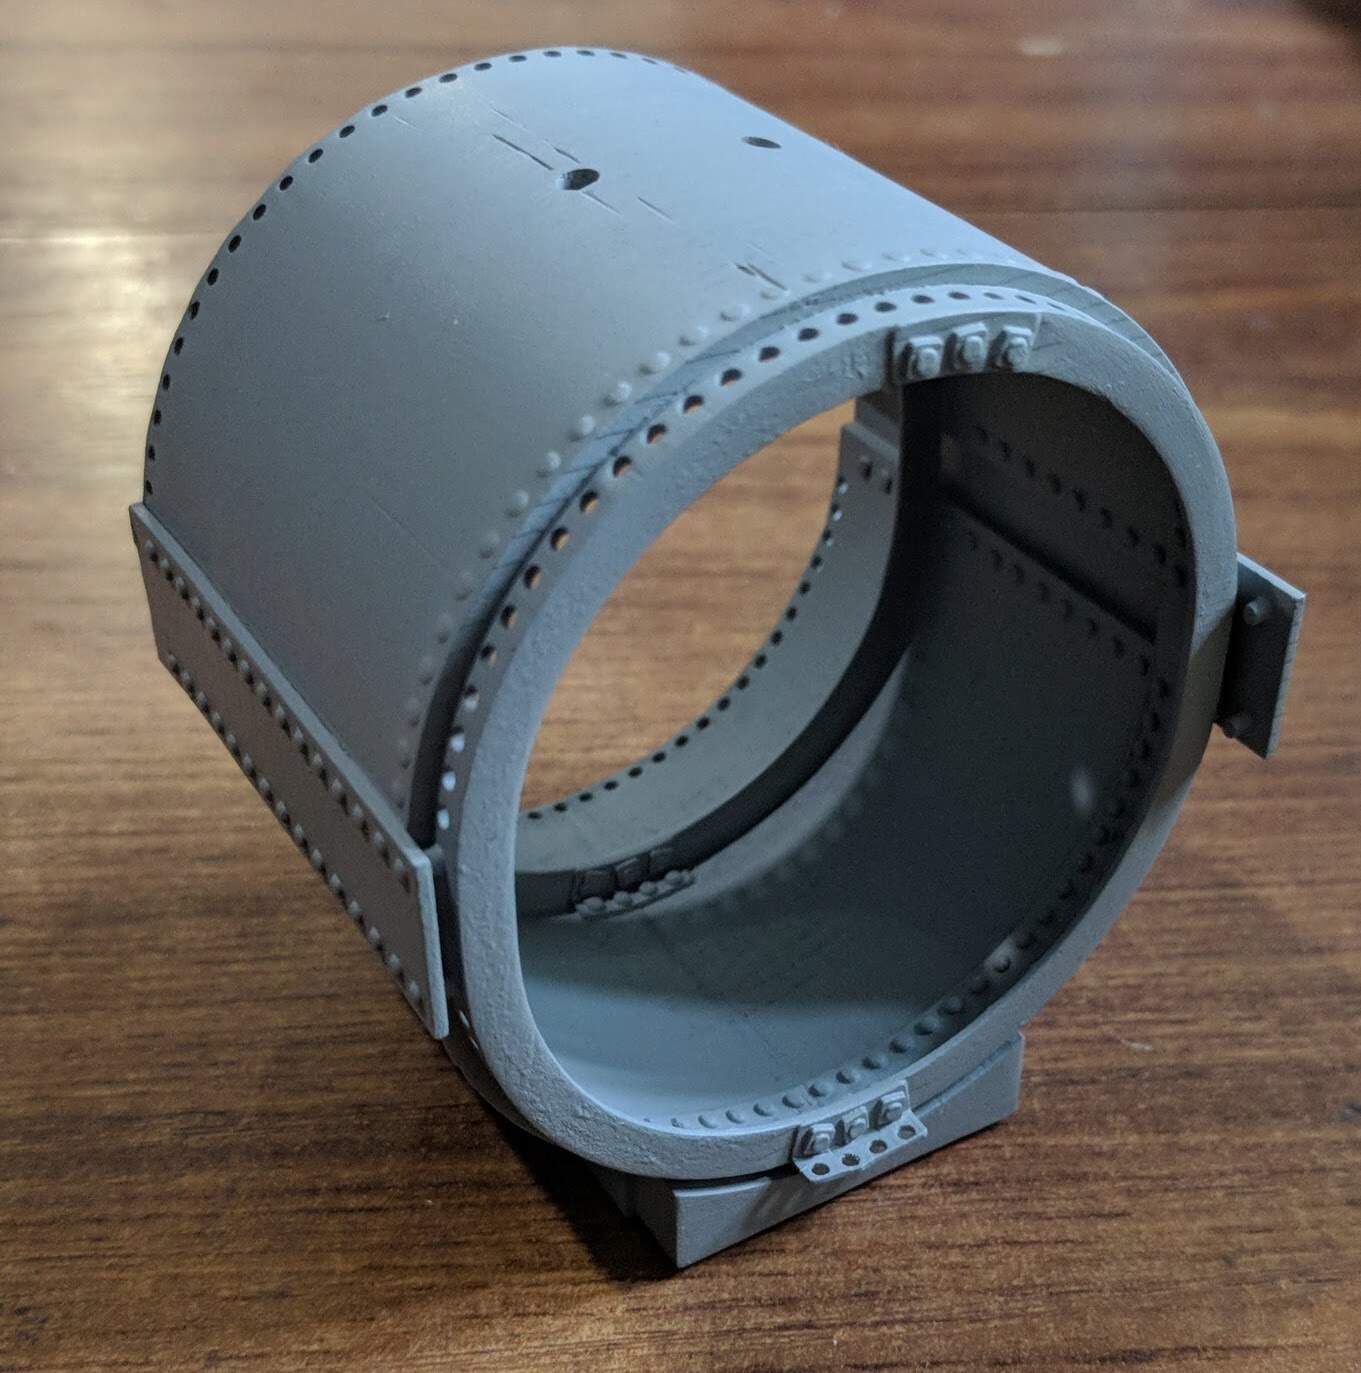
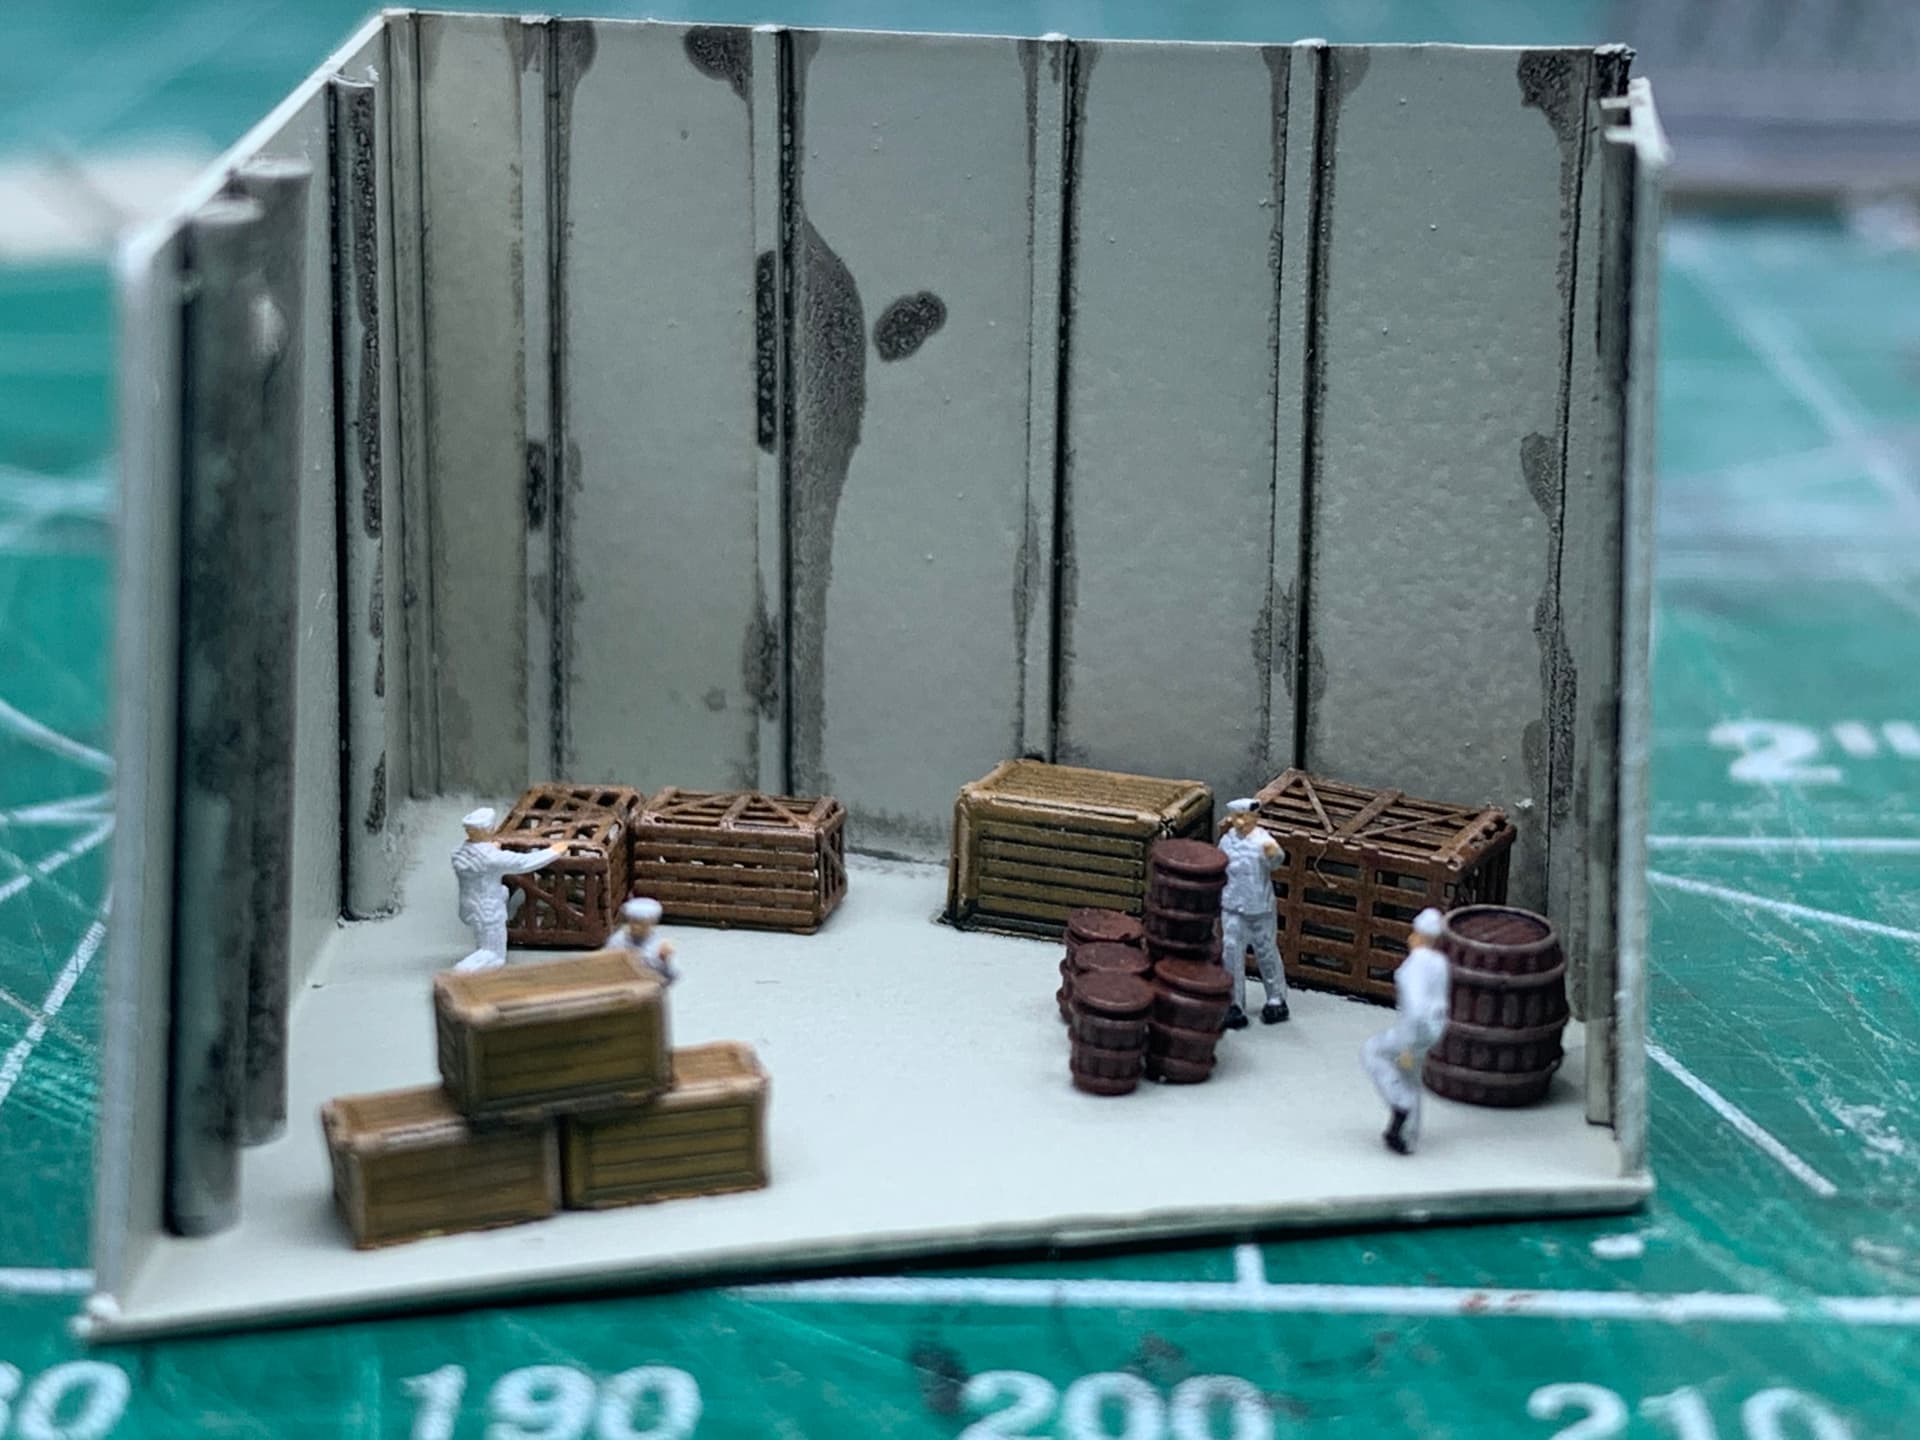
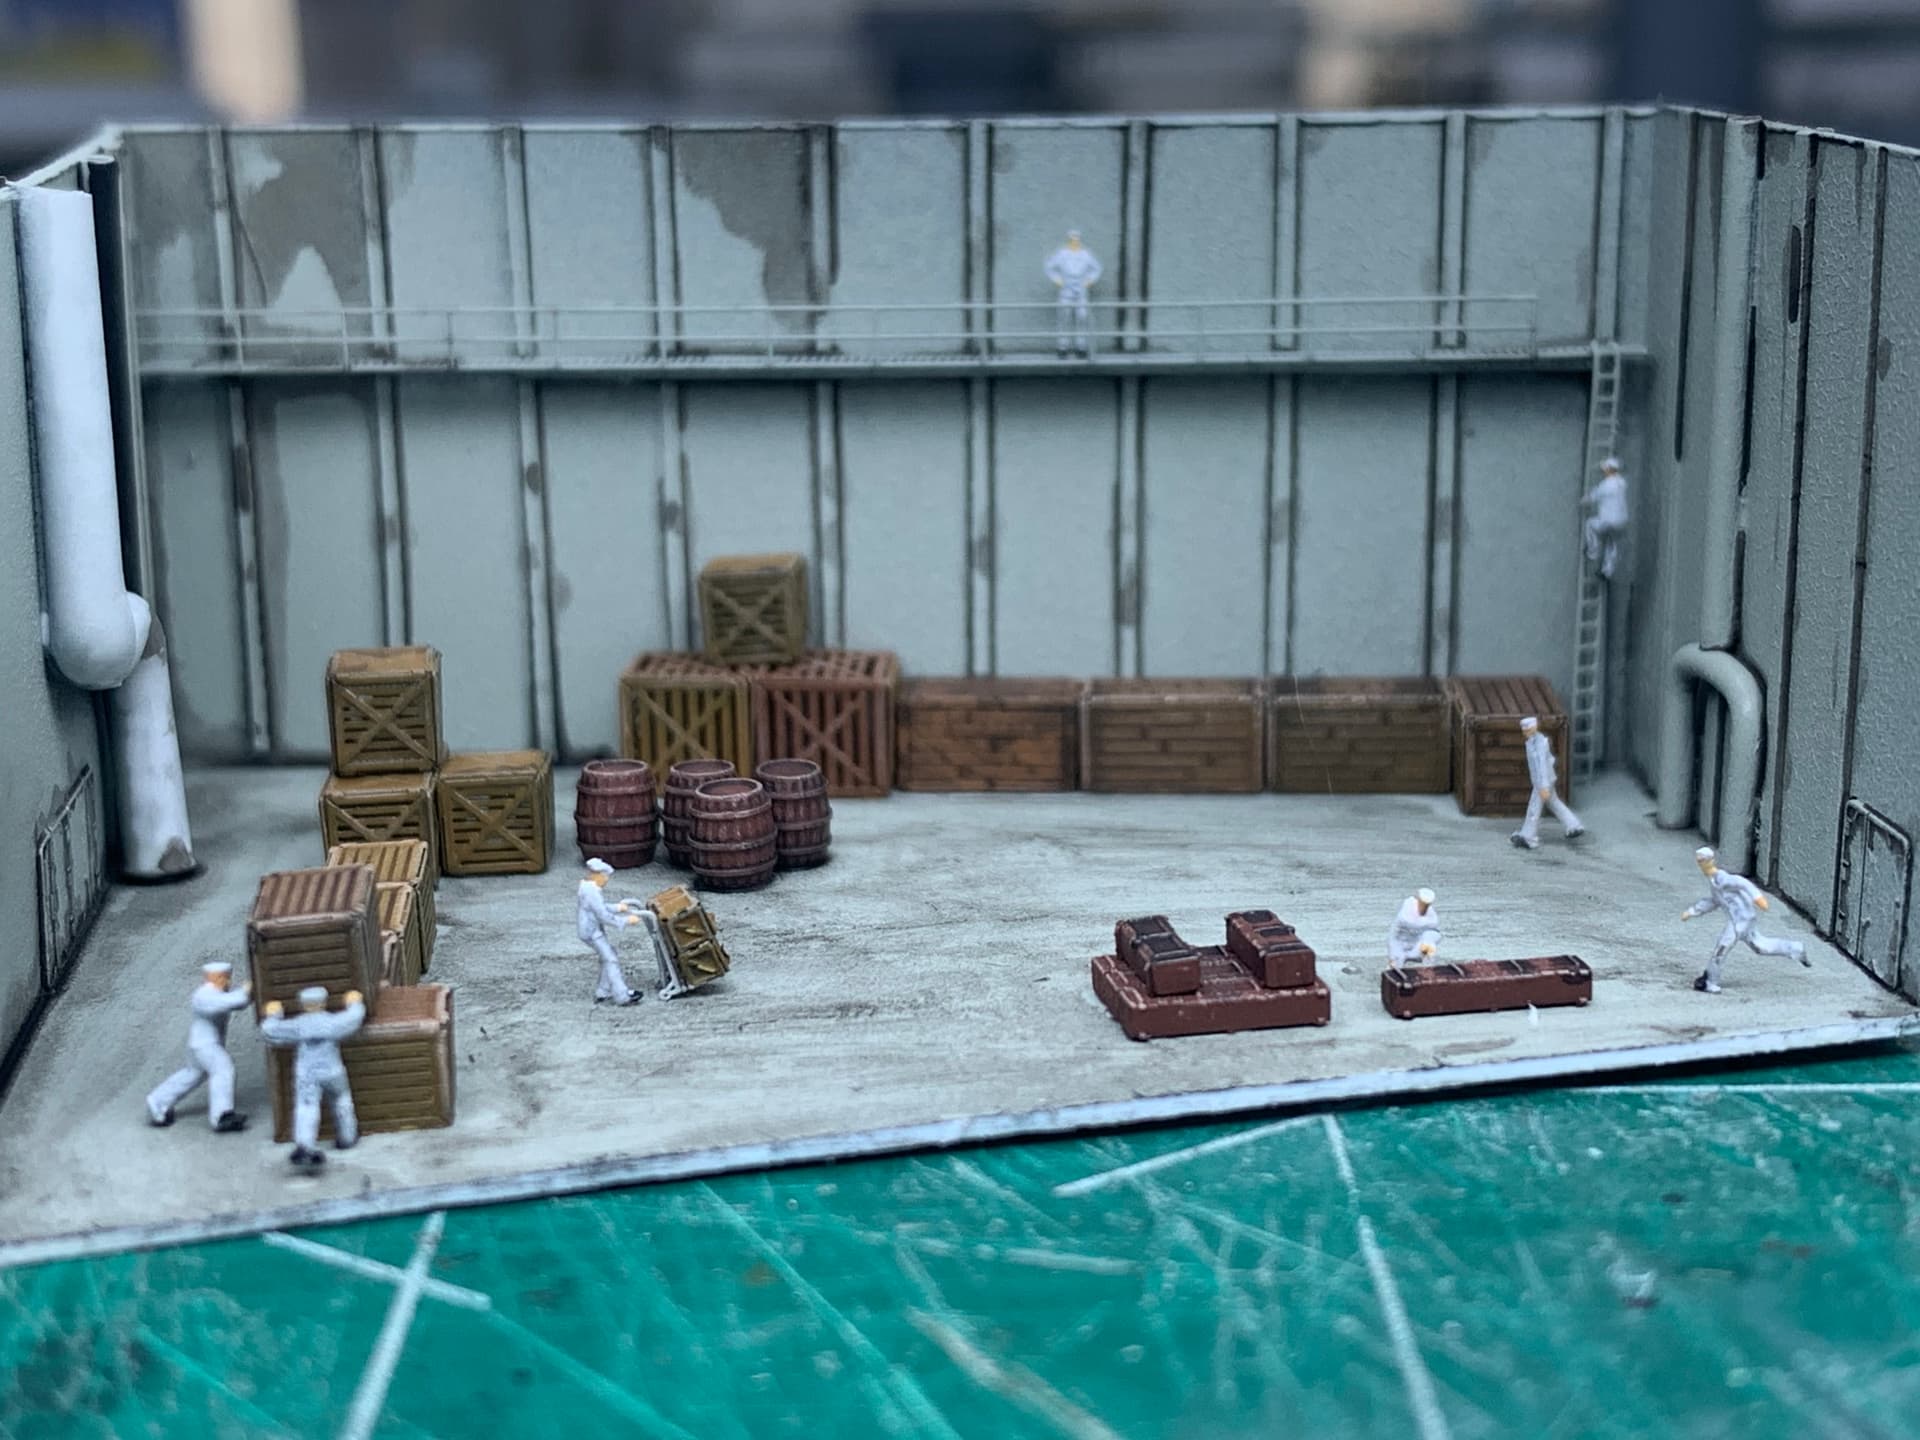
Getting started on my build, the USS Scorpion using the Mikro Mir 1/350 Skipjack kit and a replacement 3D printed prop.


The USS Scorpion was a nuclear powered Skipjack class sub that was lost with all hands on May 22, 1968 in 9,800 feet of water about 400 nautical miles South West of the Azore Islands.
Currently nervously staring at me brass 20 mm oerlikons wondering how the heck I am going to build them
The 3D printed guys are nice in this respect
You should try Black Cat qual 20mm’s! They are 3D printed with amazing detail and are only one piece!
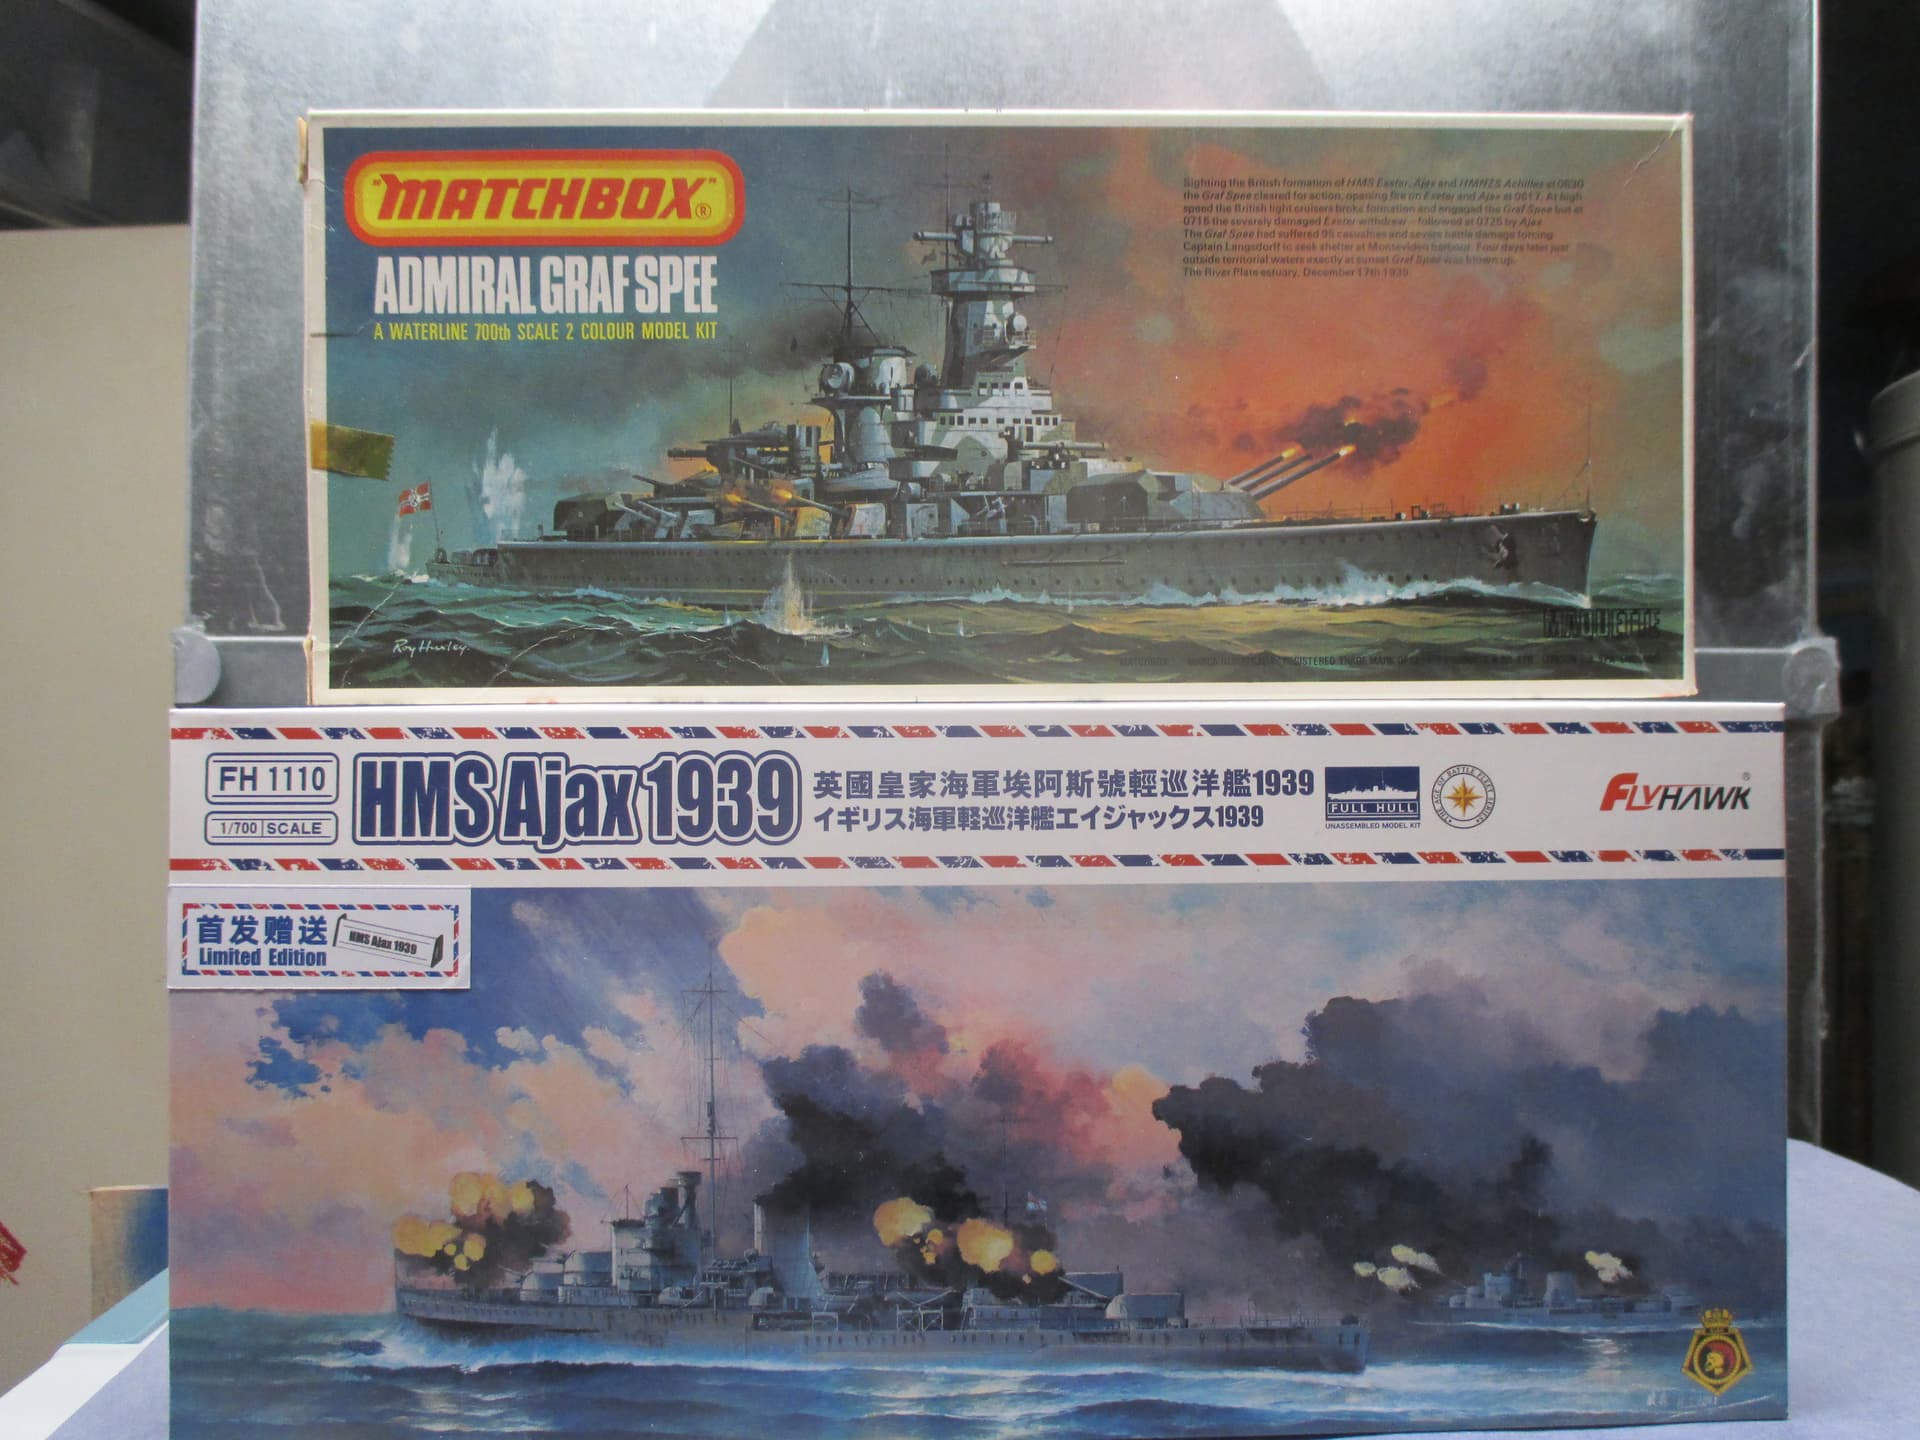
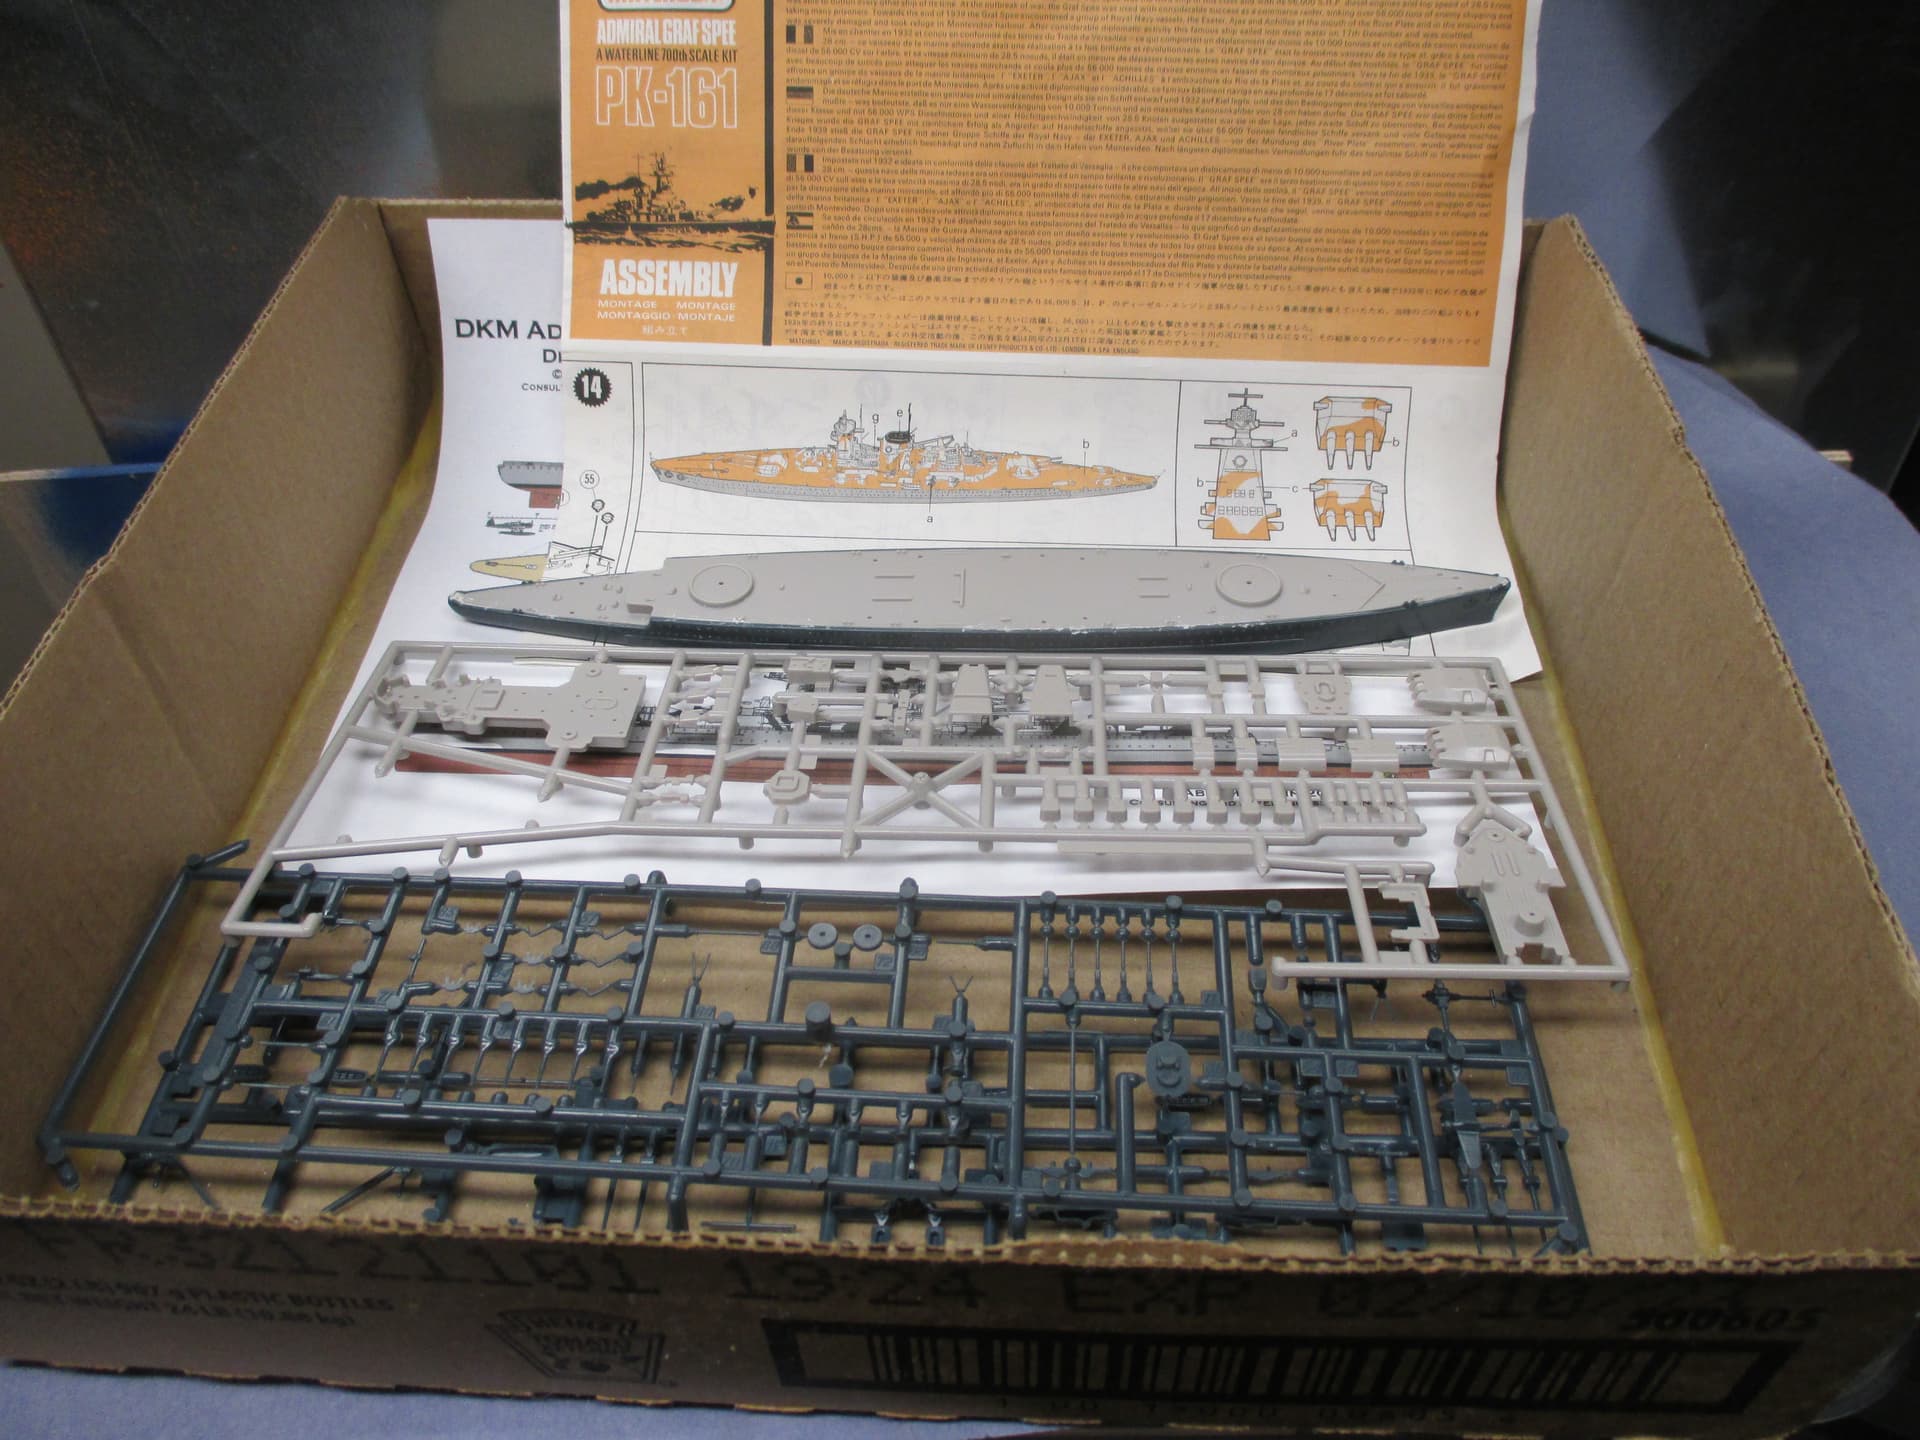
My contribution to the “Lost to the Deep” the Graf Spee. I will be building it concurrently with the Ajax. They do go together. I have no real interest in the Spee and only bought it because it was less than a dollar back around 1979. I know there are newer kits of the Spee but I"m not interested. I do plan to improve it with bits from my spare parts stash.
Cool choice, Stevie. I bought the same matchbox kit for nostalgic reasons a few months back. I will follow your build with interest.
Assembled the hull then sanded off the blob in front of the anchors. The blob was supposed to represent (I believe) the von Spee family crest that the ship carried . From photos the crest was painted on a plate but that plate certainly was not the 2+ scale feet in thickness of the blob. Photos taken at Montevideo show the plates still there but over painted with the hull comoflage color.
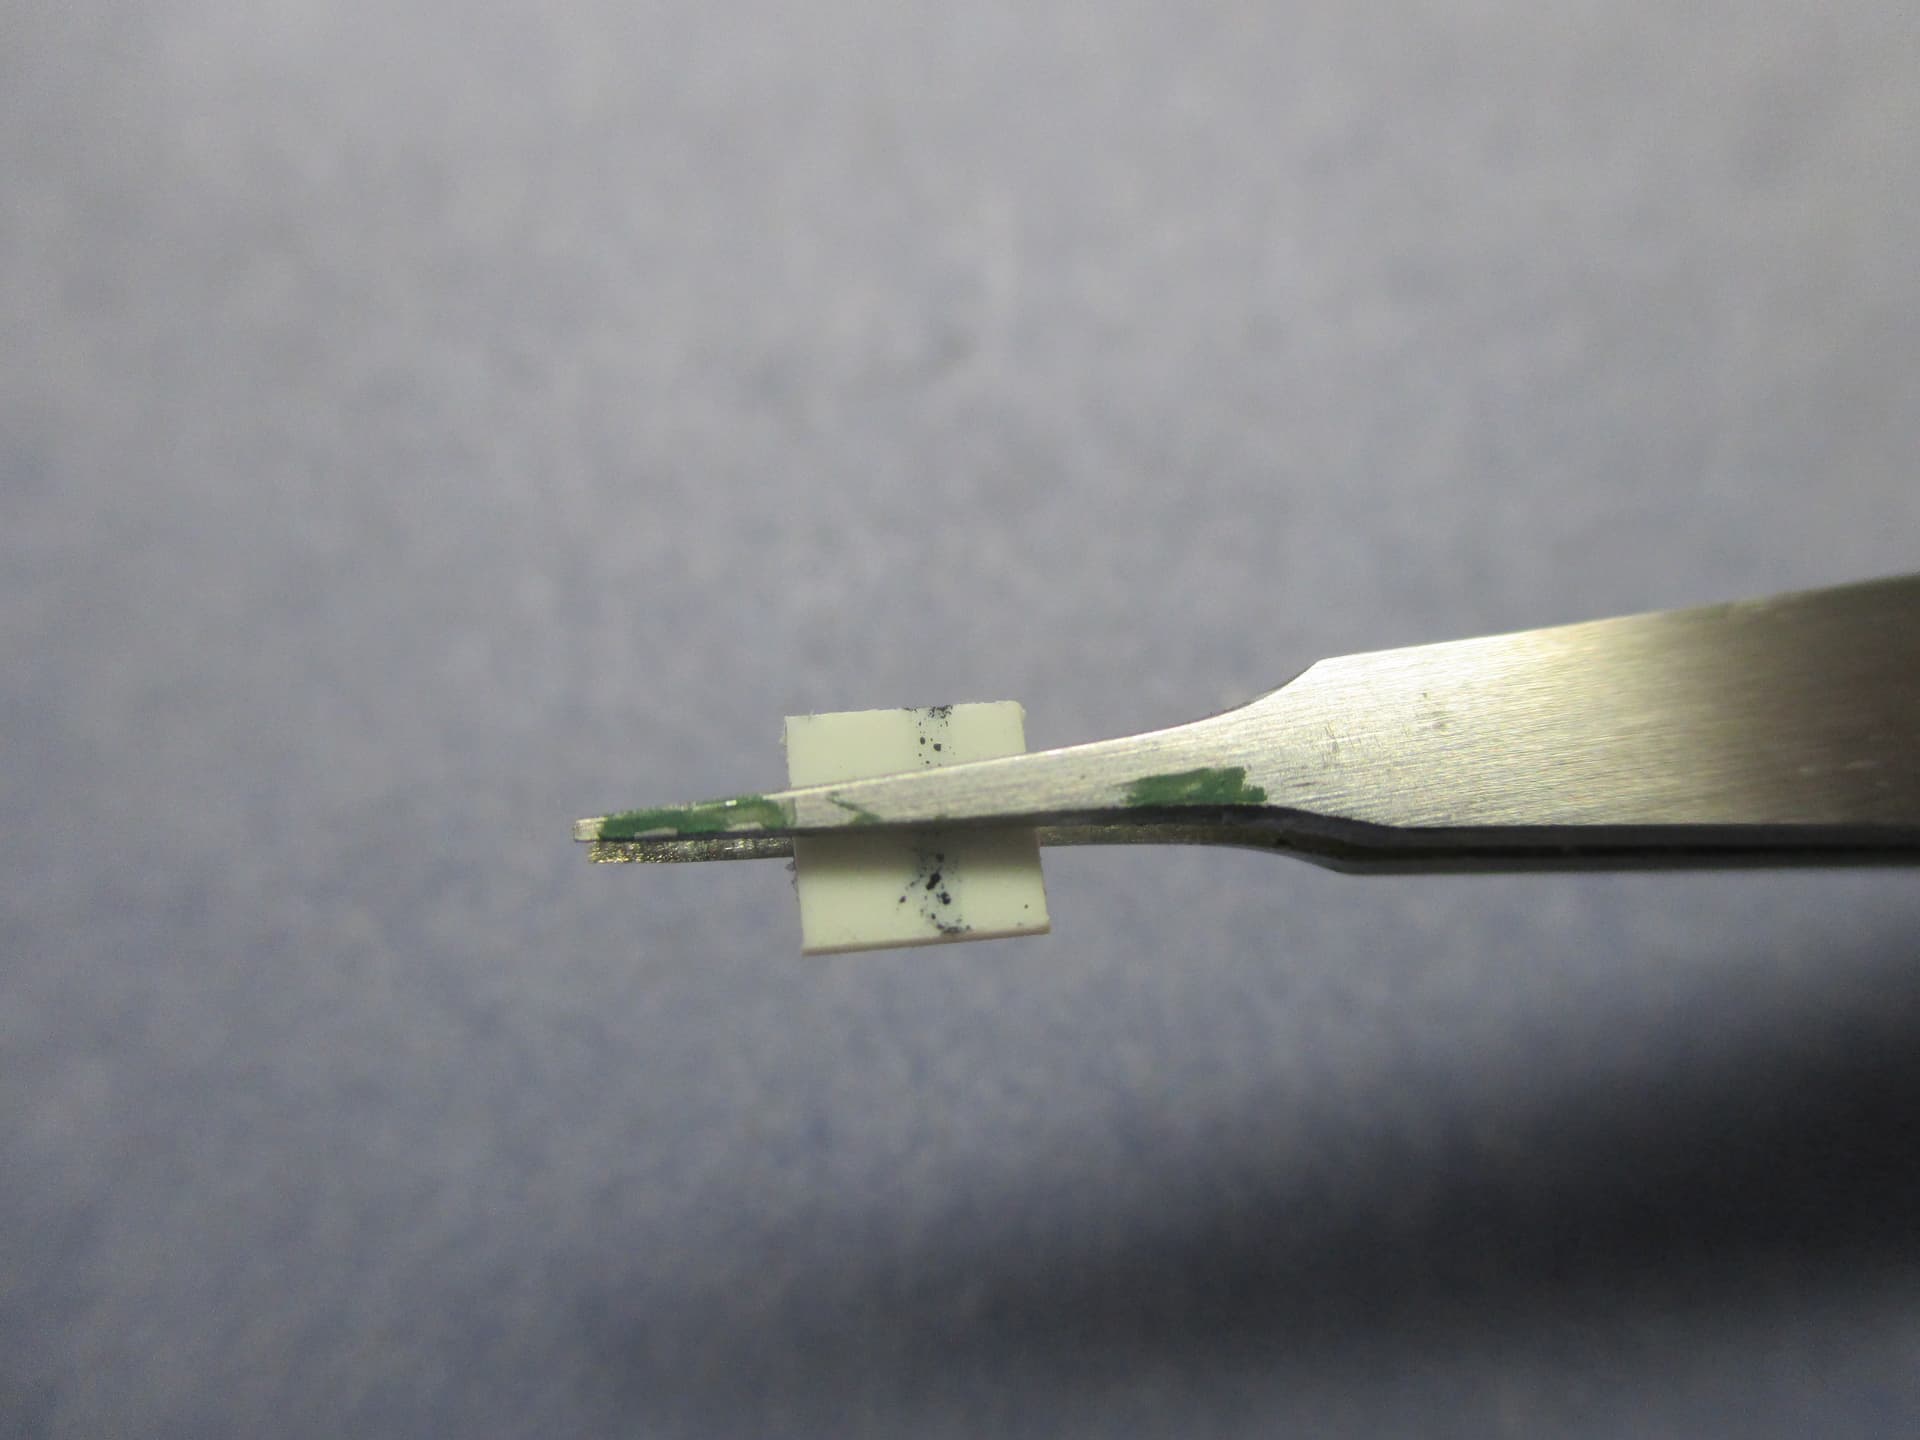
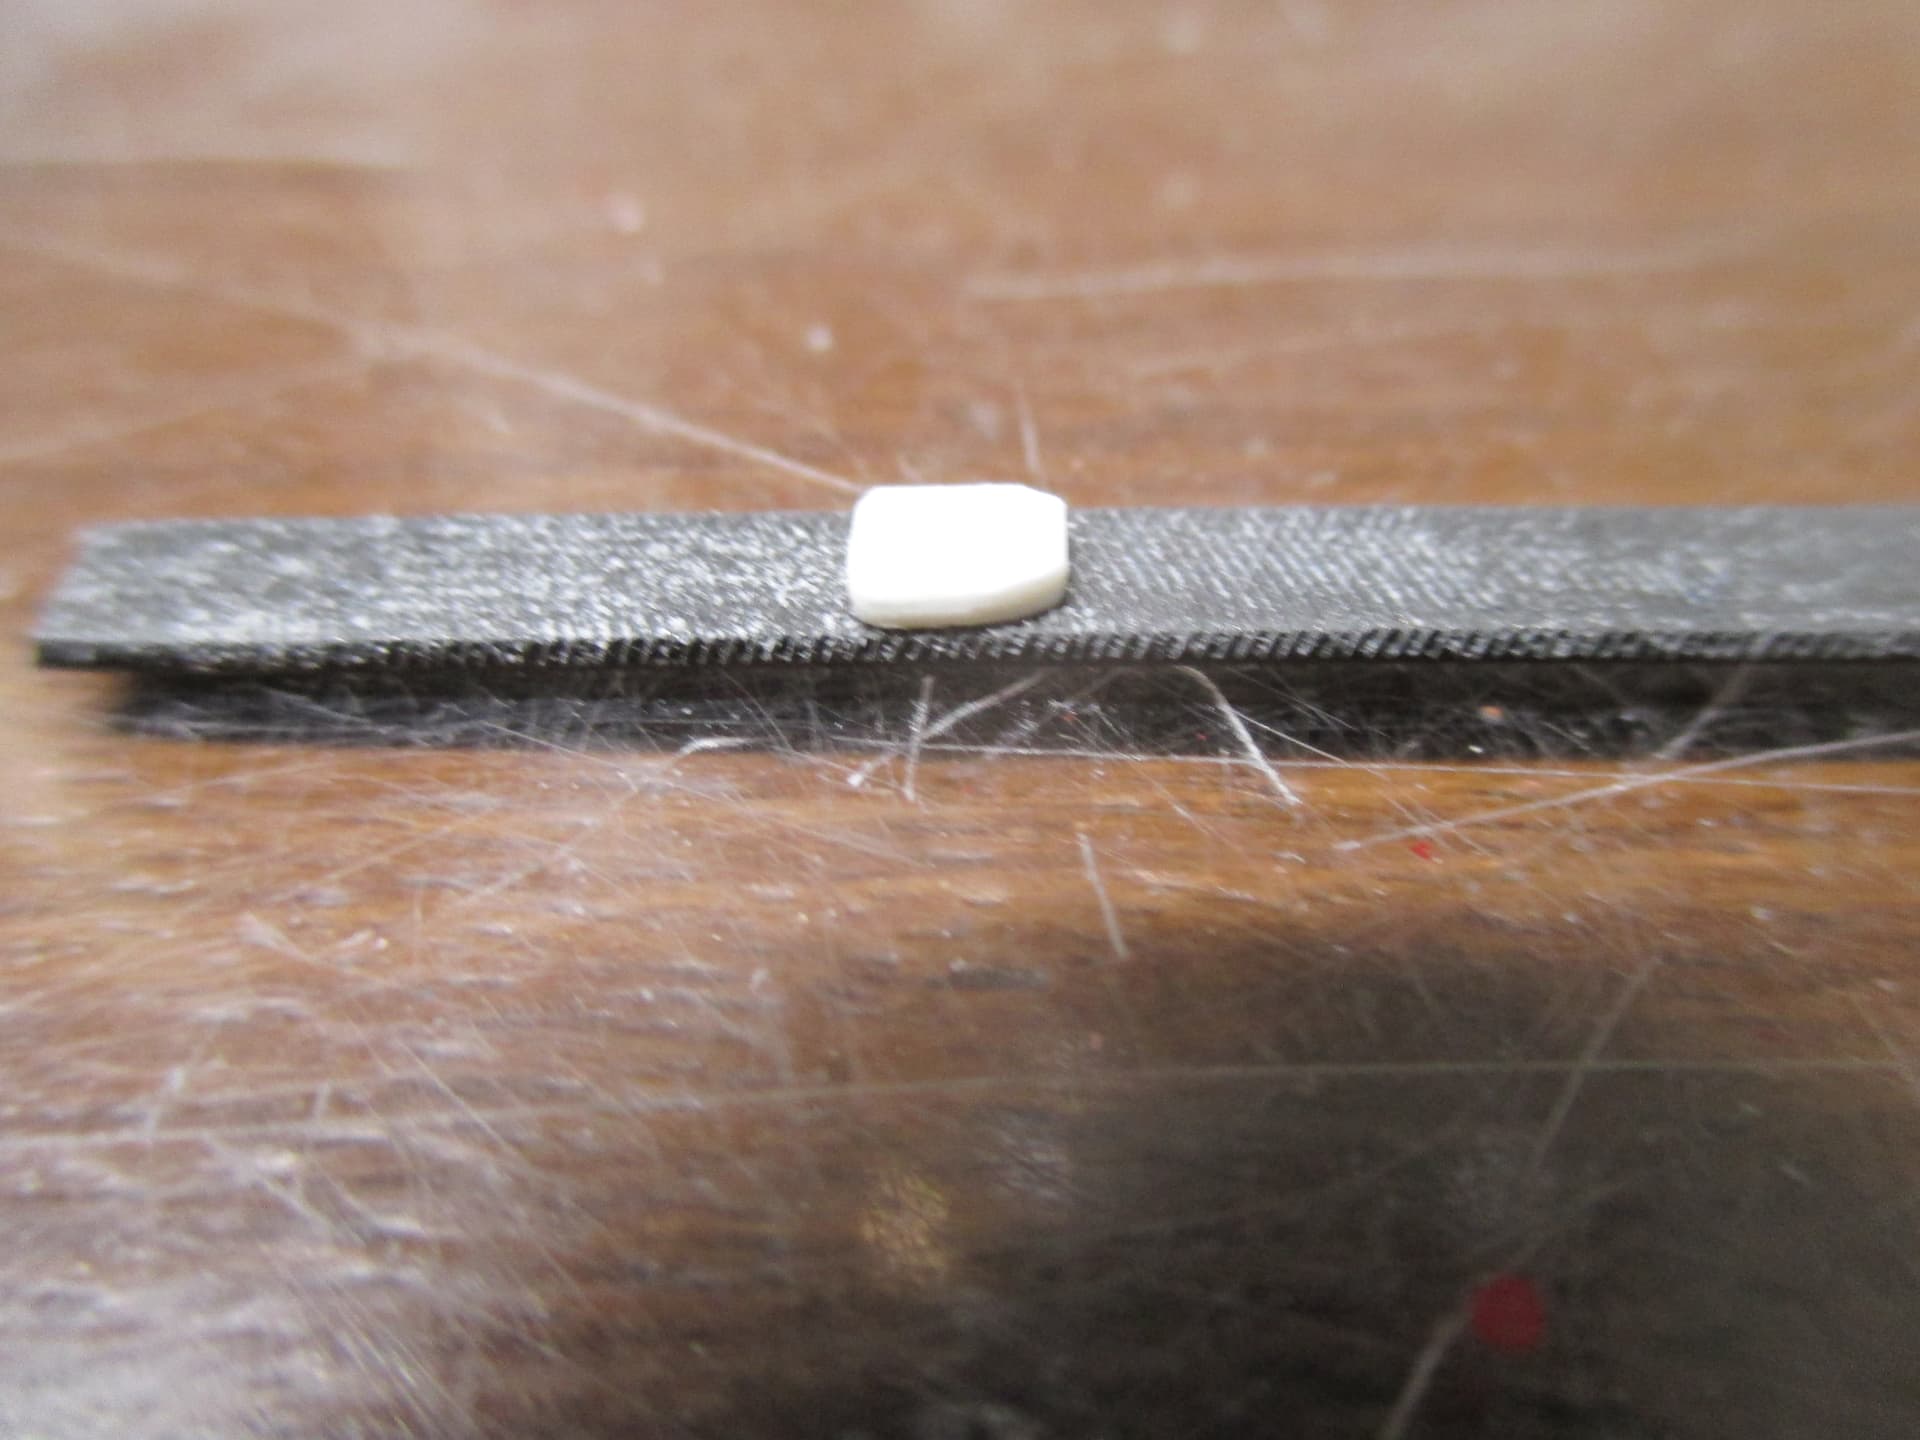
Cut a couple of rectangles out of .01 x .25 plastic, glued them together with school glue, and filed them into a vague shield shape to replace the blobs I sanded off the bow. I’ll use them to replace the blobs