No. They were on hand in case the Germans used chemical weapons, but we never used them. I don’t believe they even got issued to troops/weapons/guns.
There was an incident in Italy, Anzio IIRC, where a cargo ship filled with chemical munitions was sunk in the harbor, exposing lots of US service men to Mustard agent. Huge mess.
Ken
2 Likes
Thanks Ken, I kinda figured that. I’ve been doing some research and while I couldn’t find anything detailed, the answer was no pretty much.
1 Like
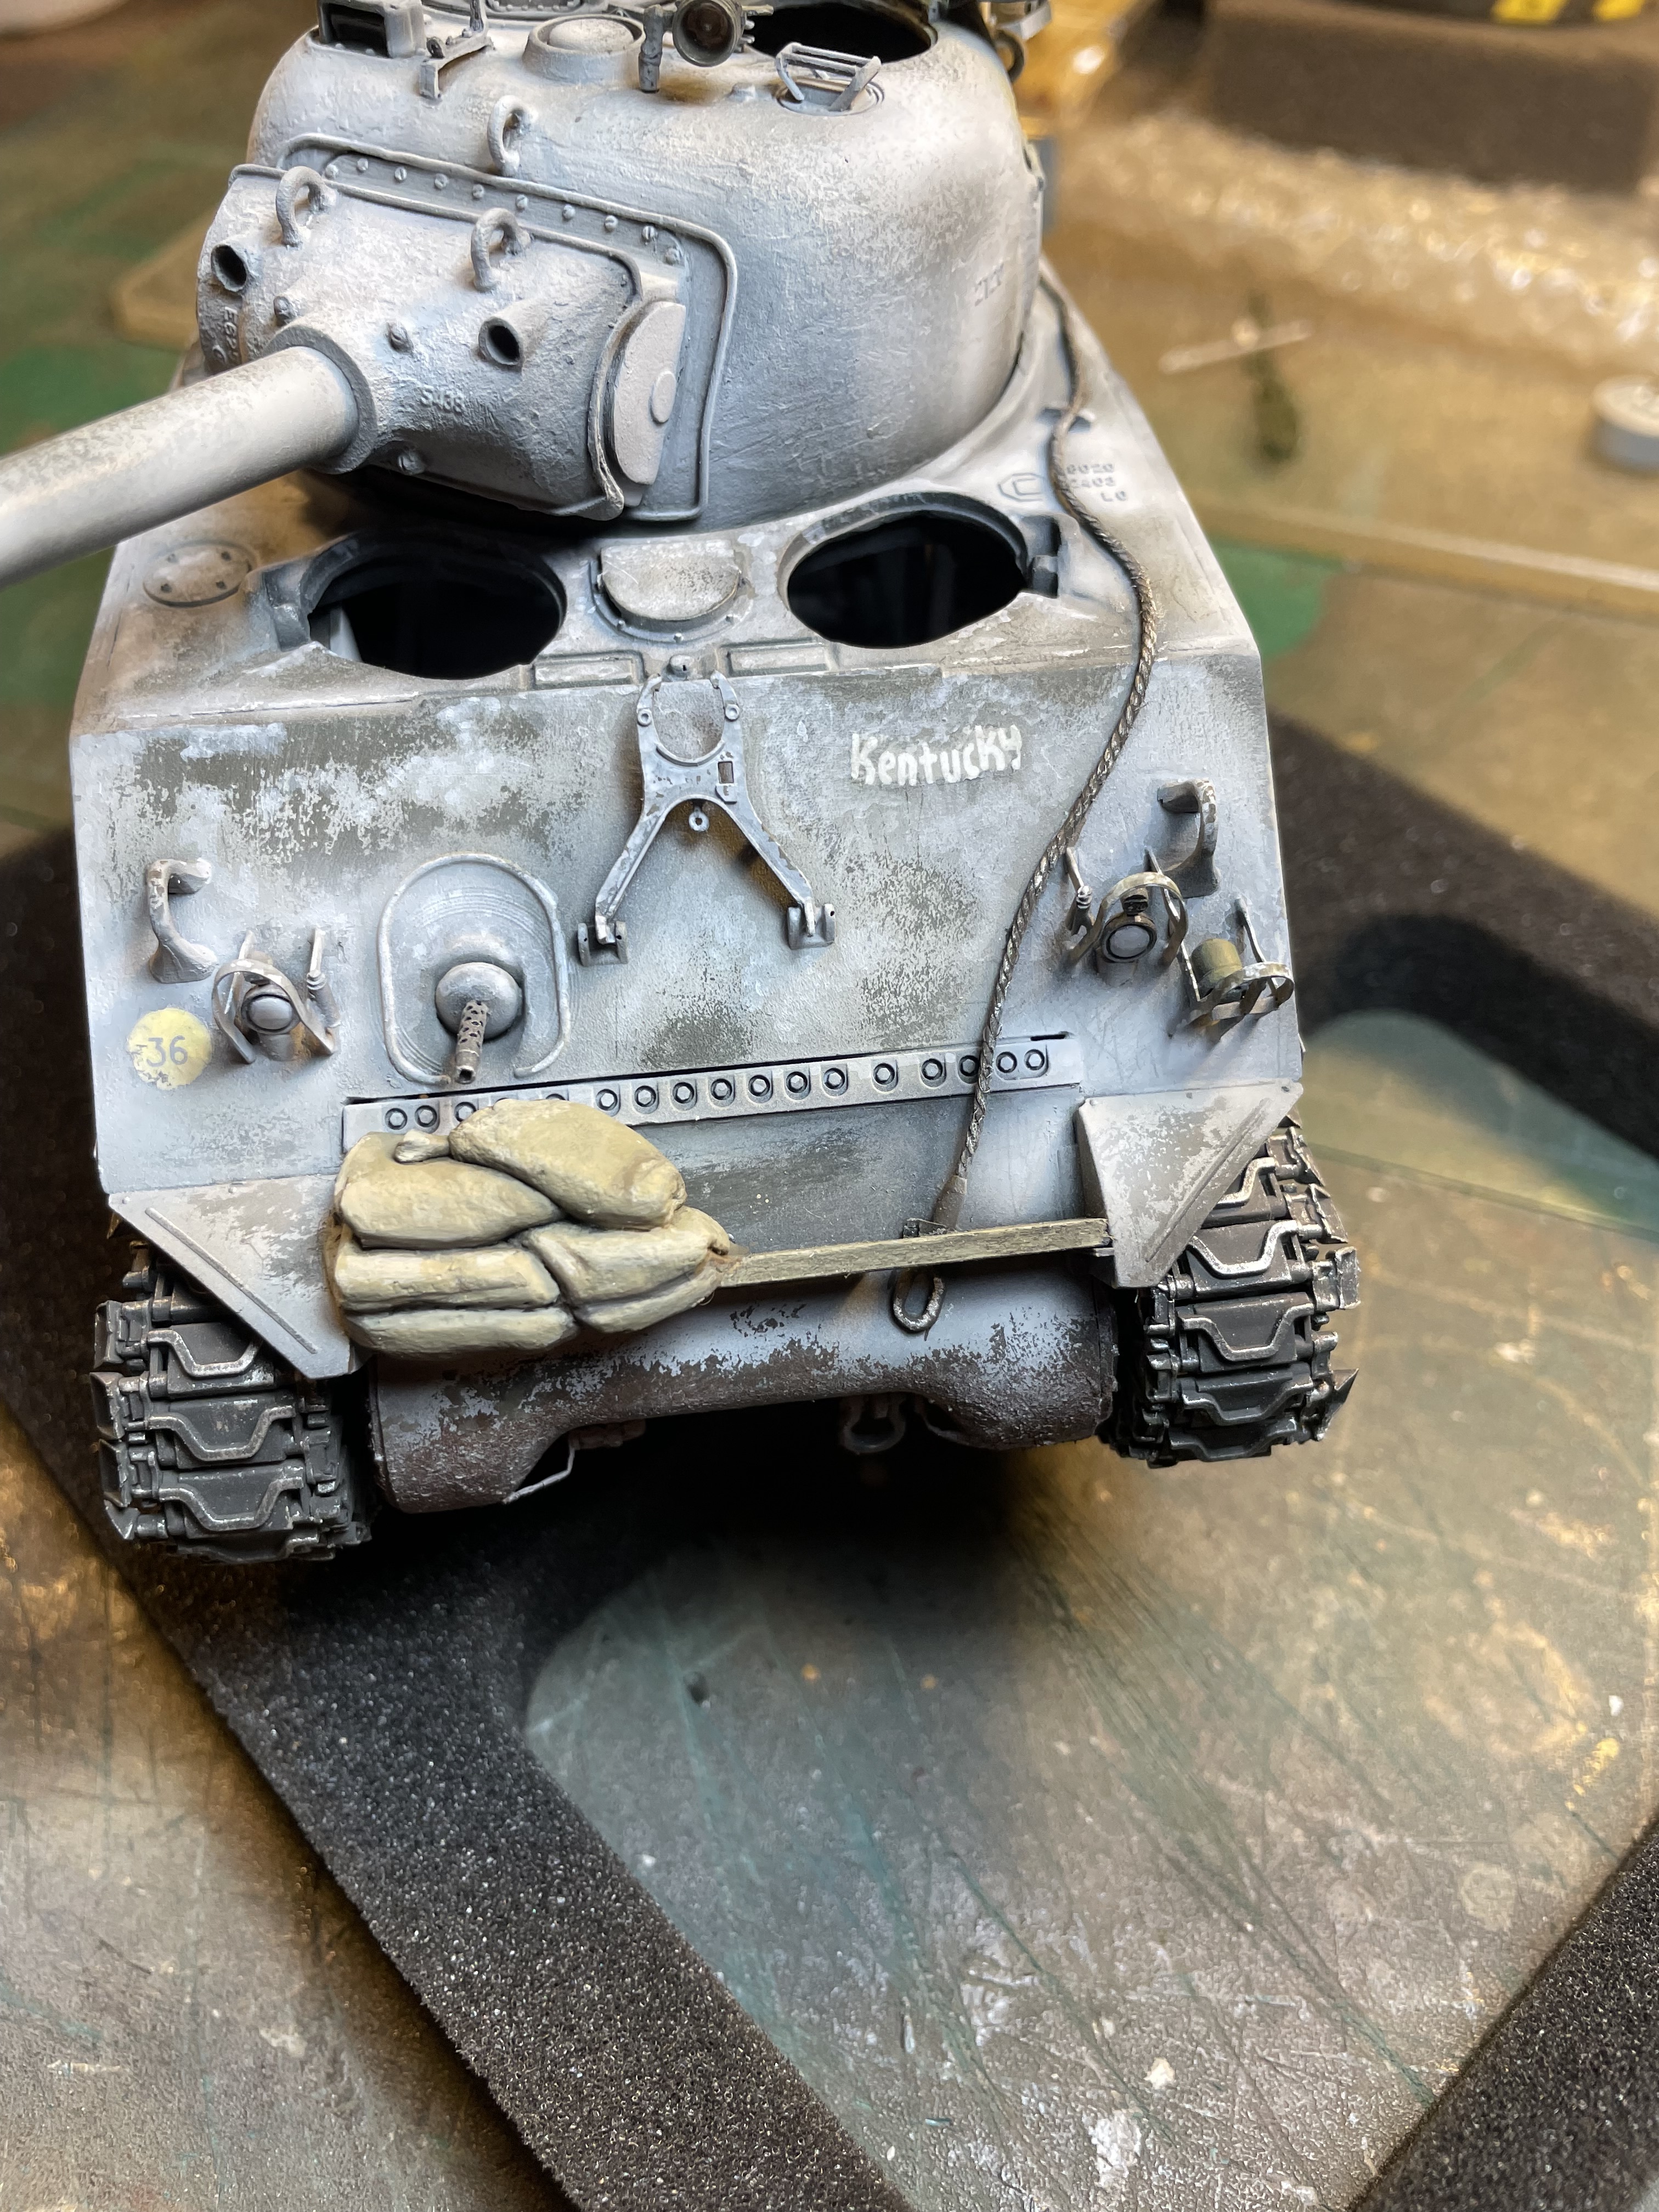
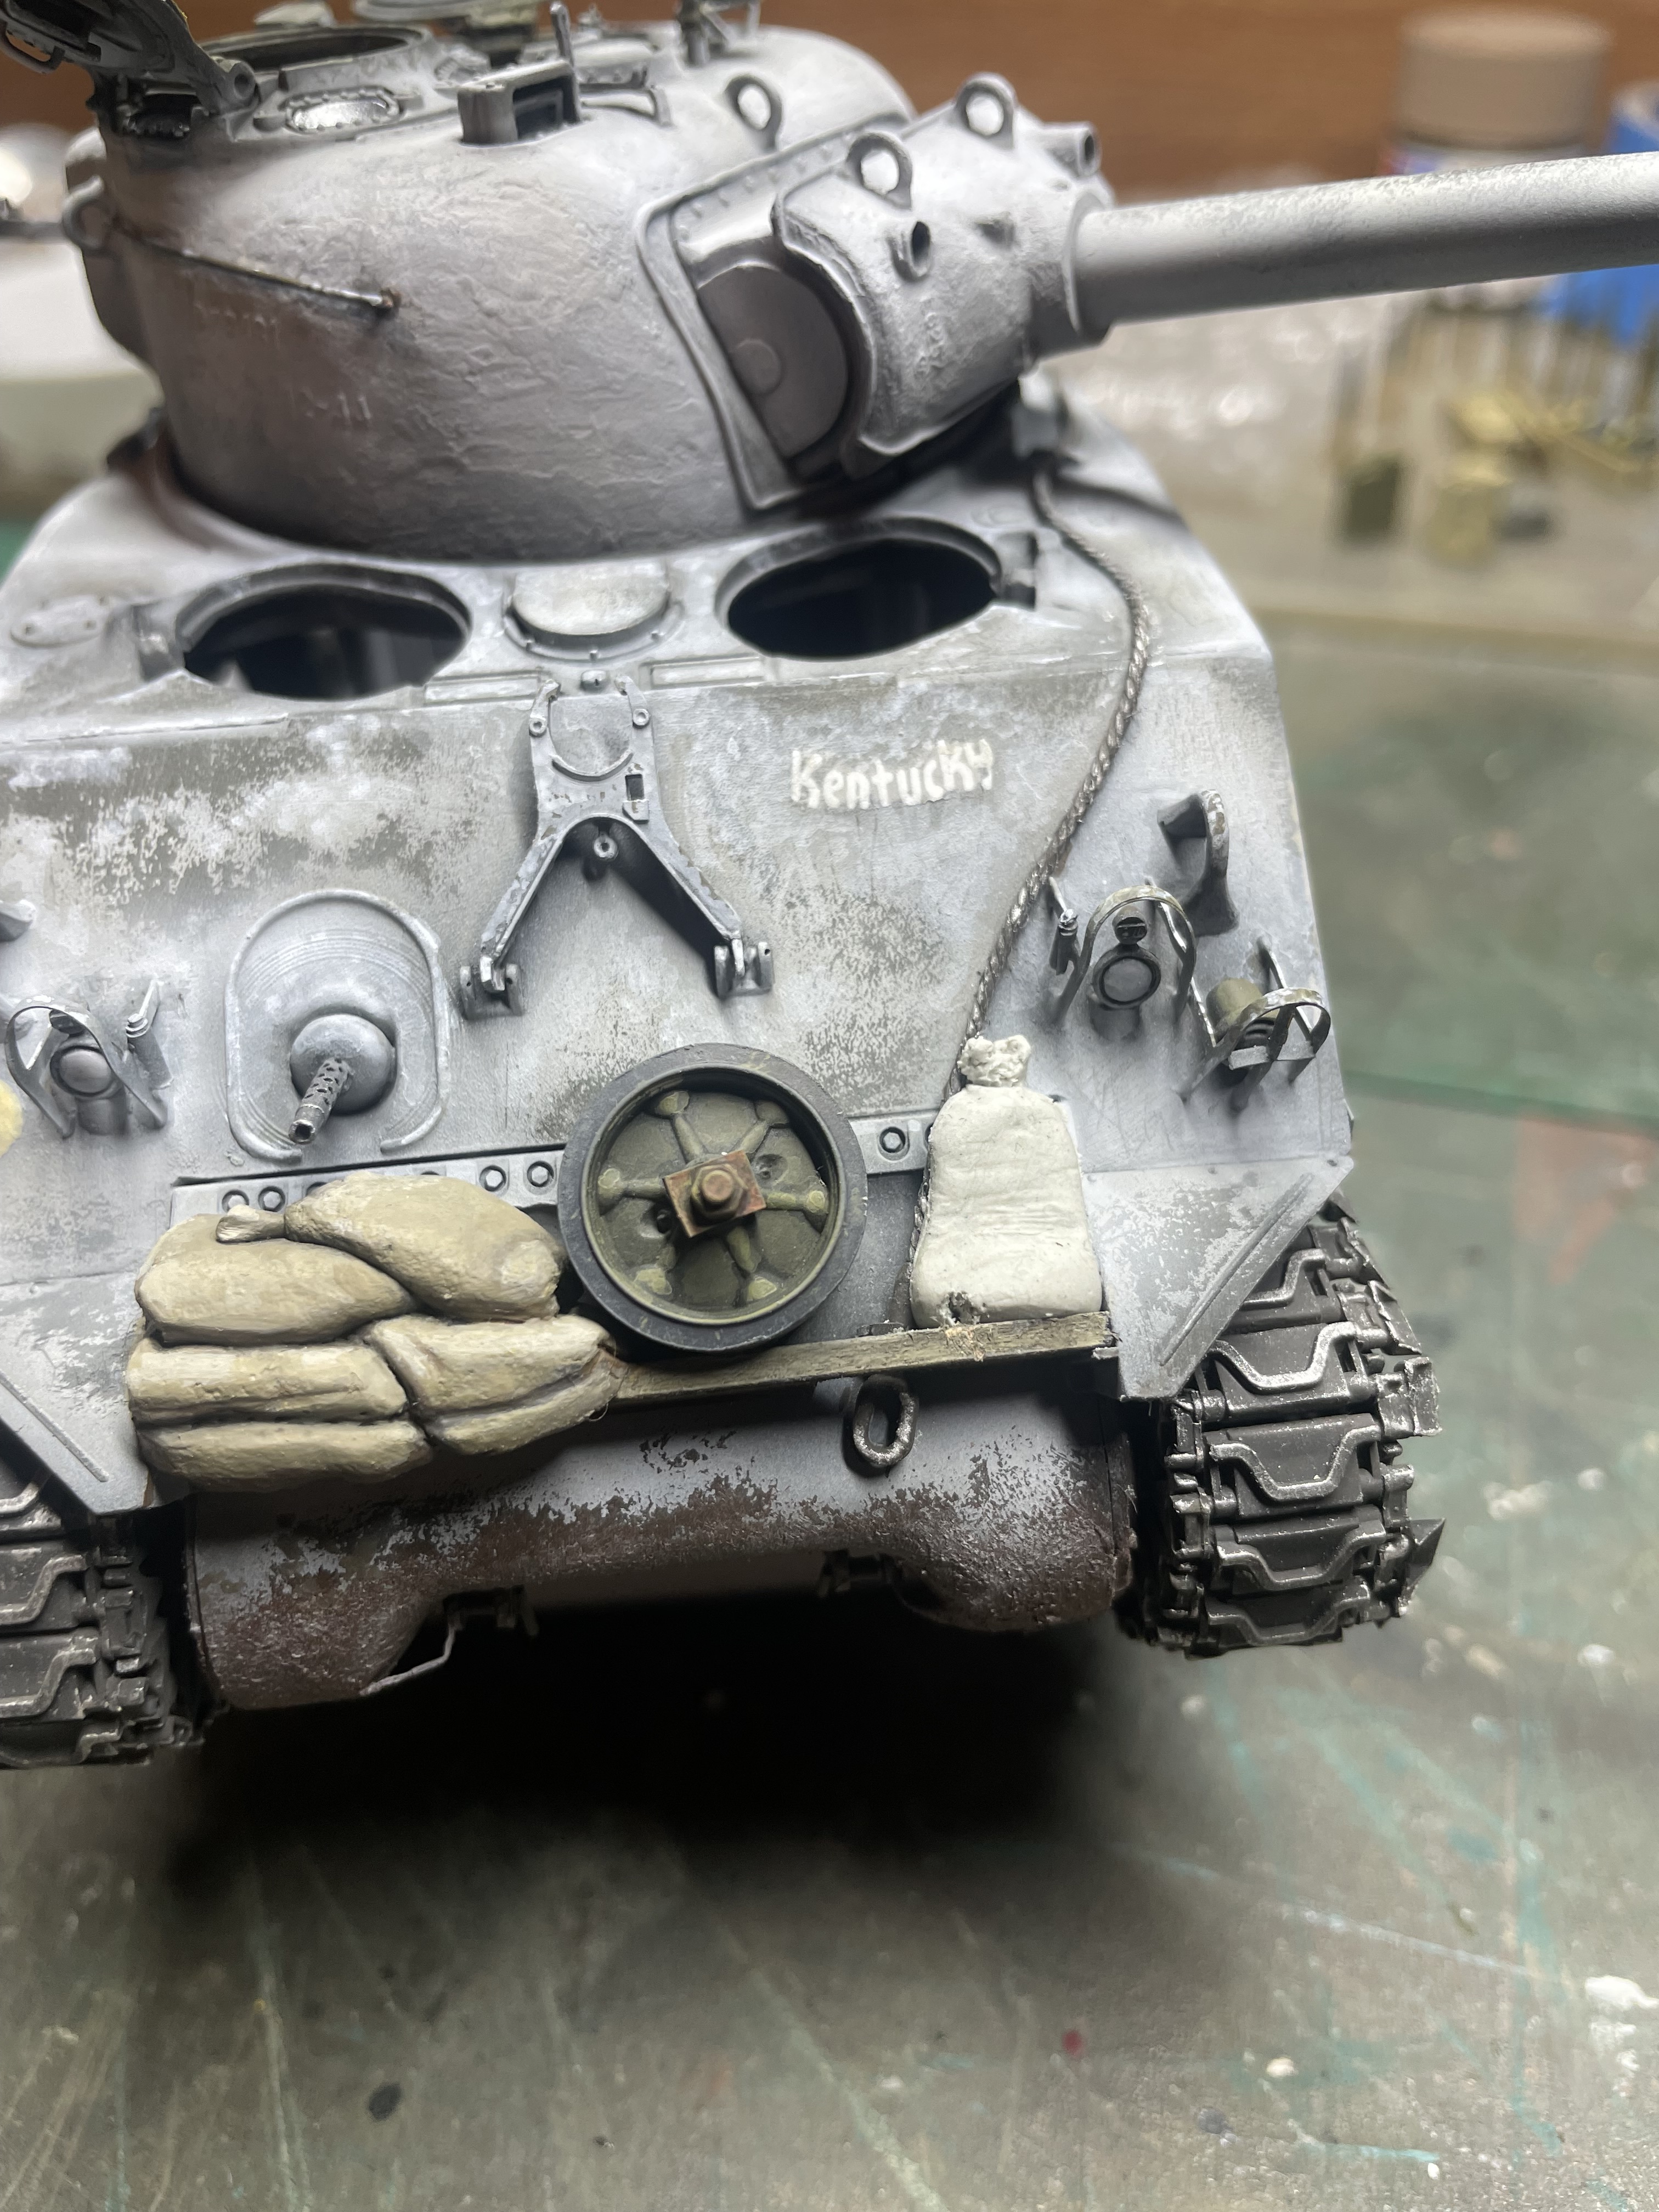
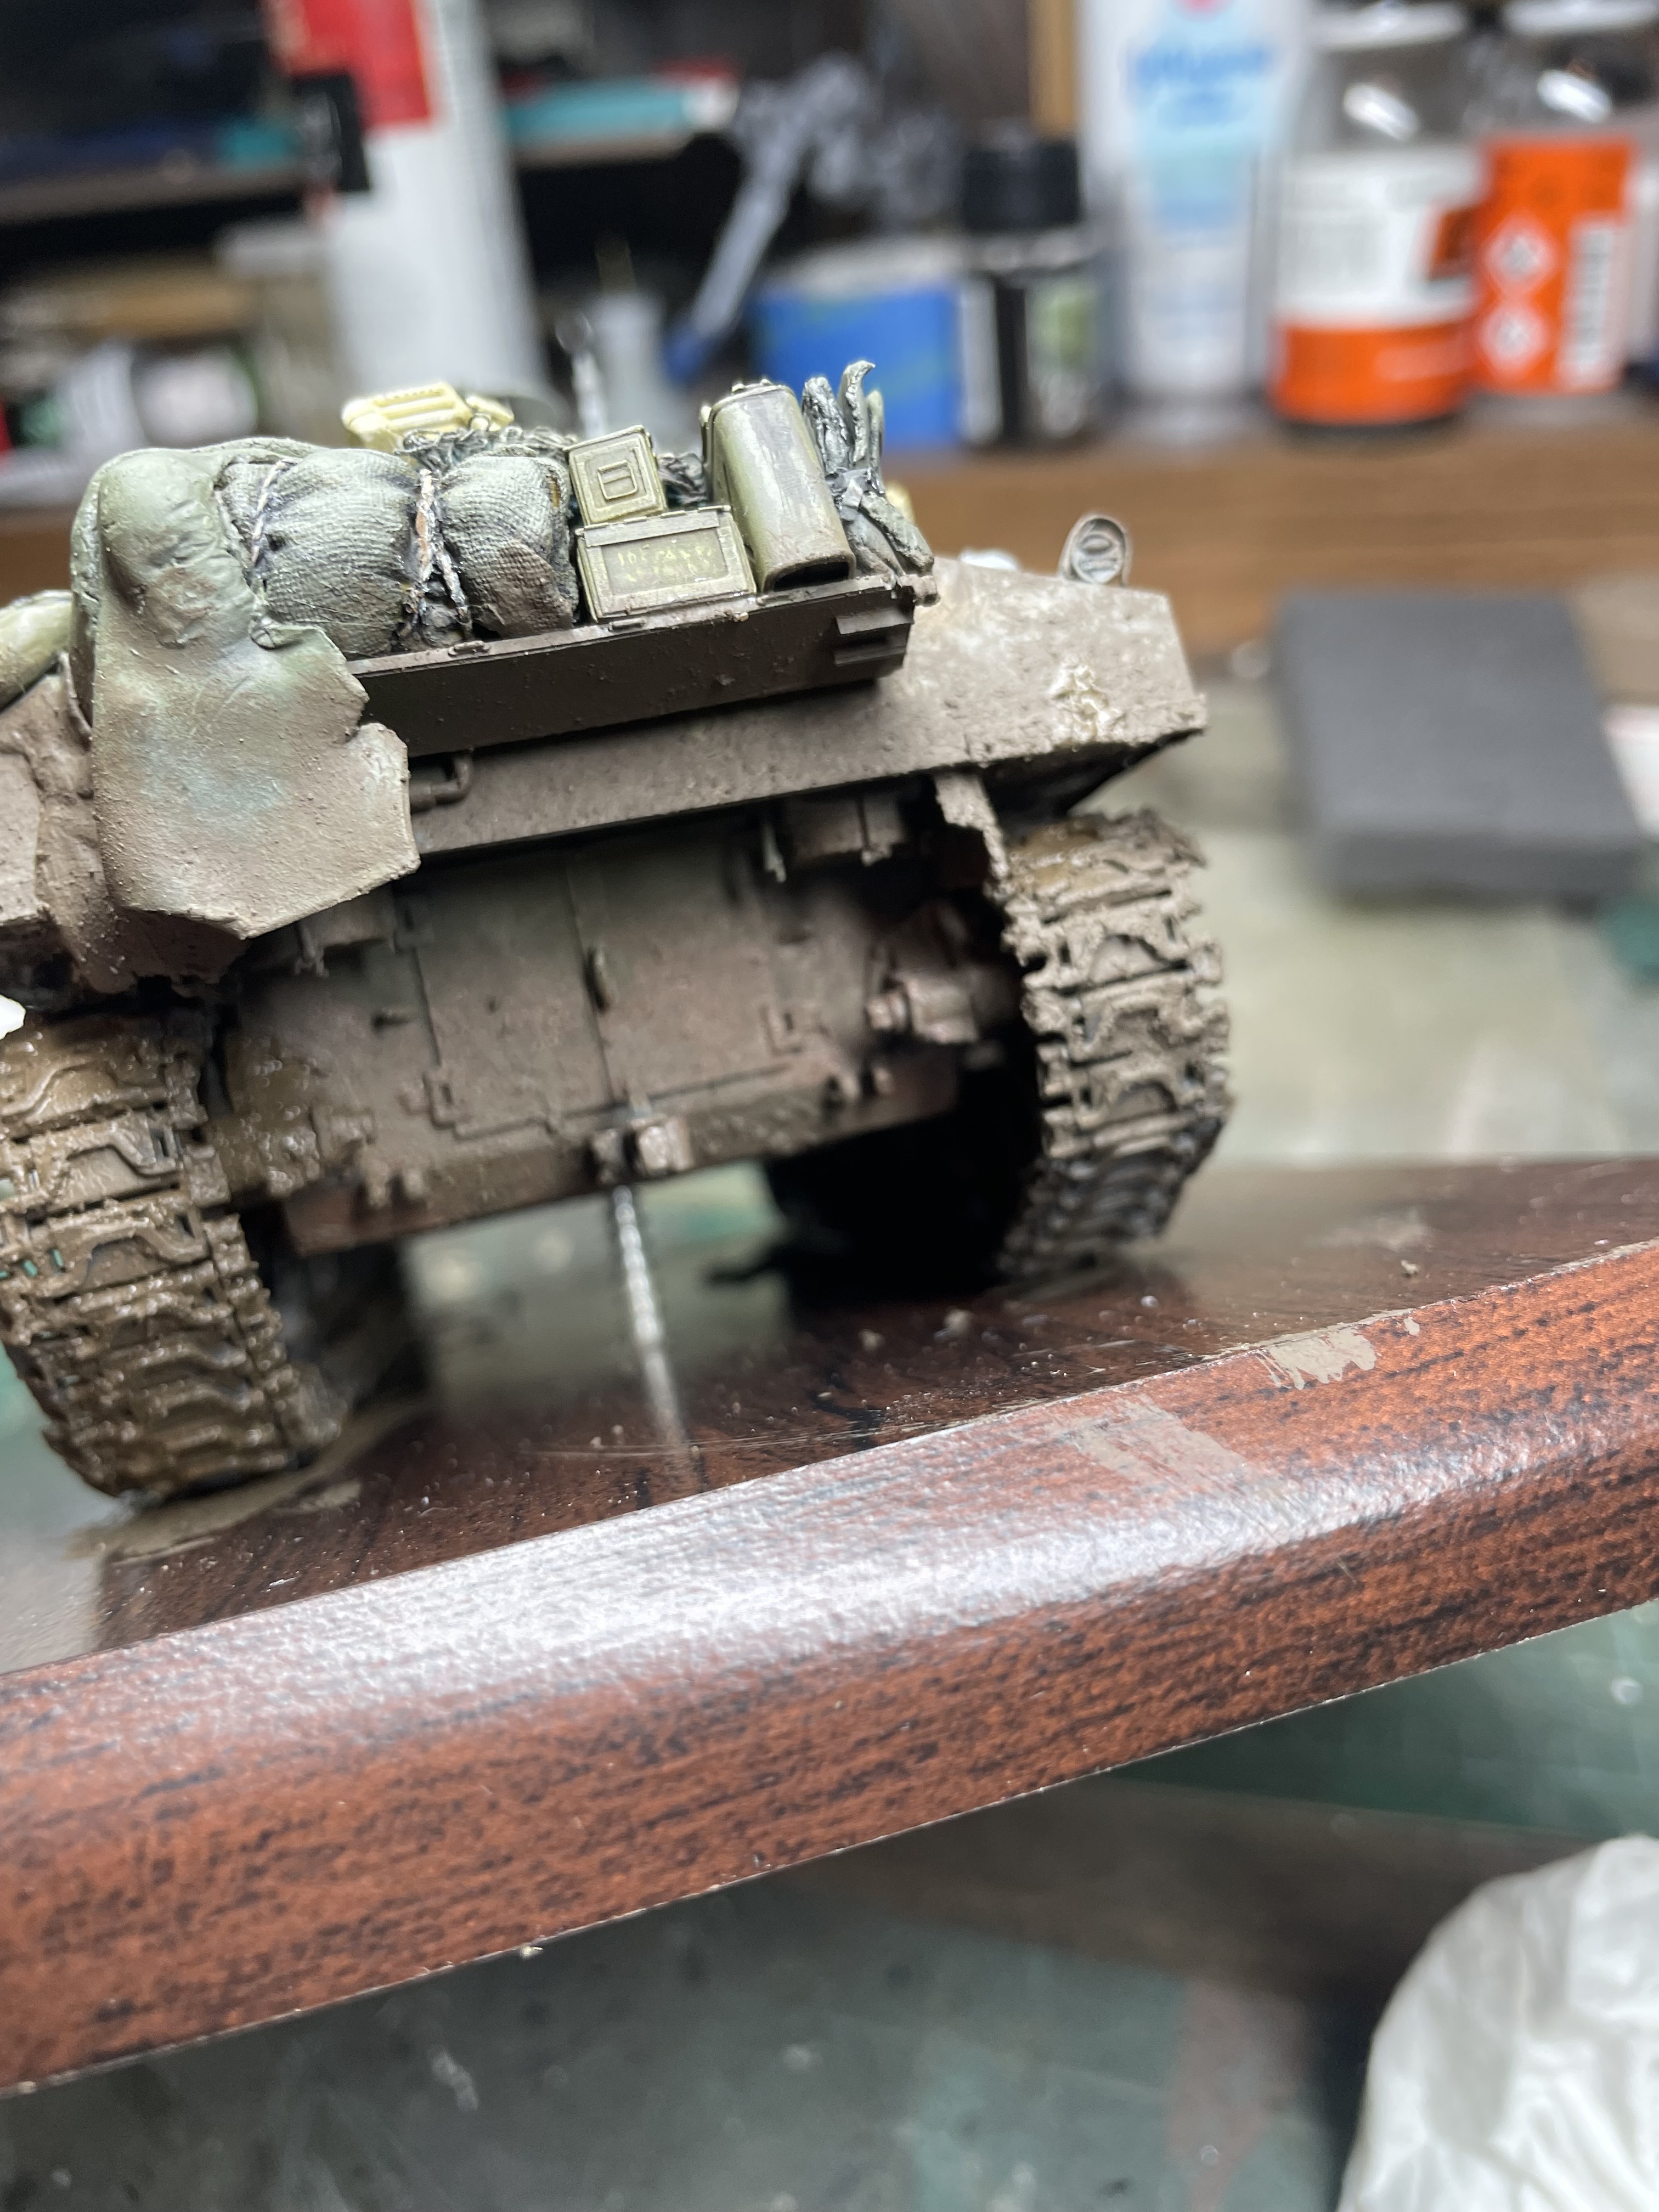
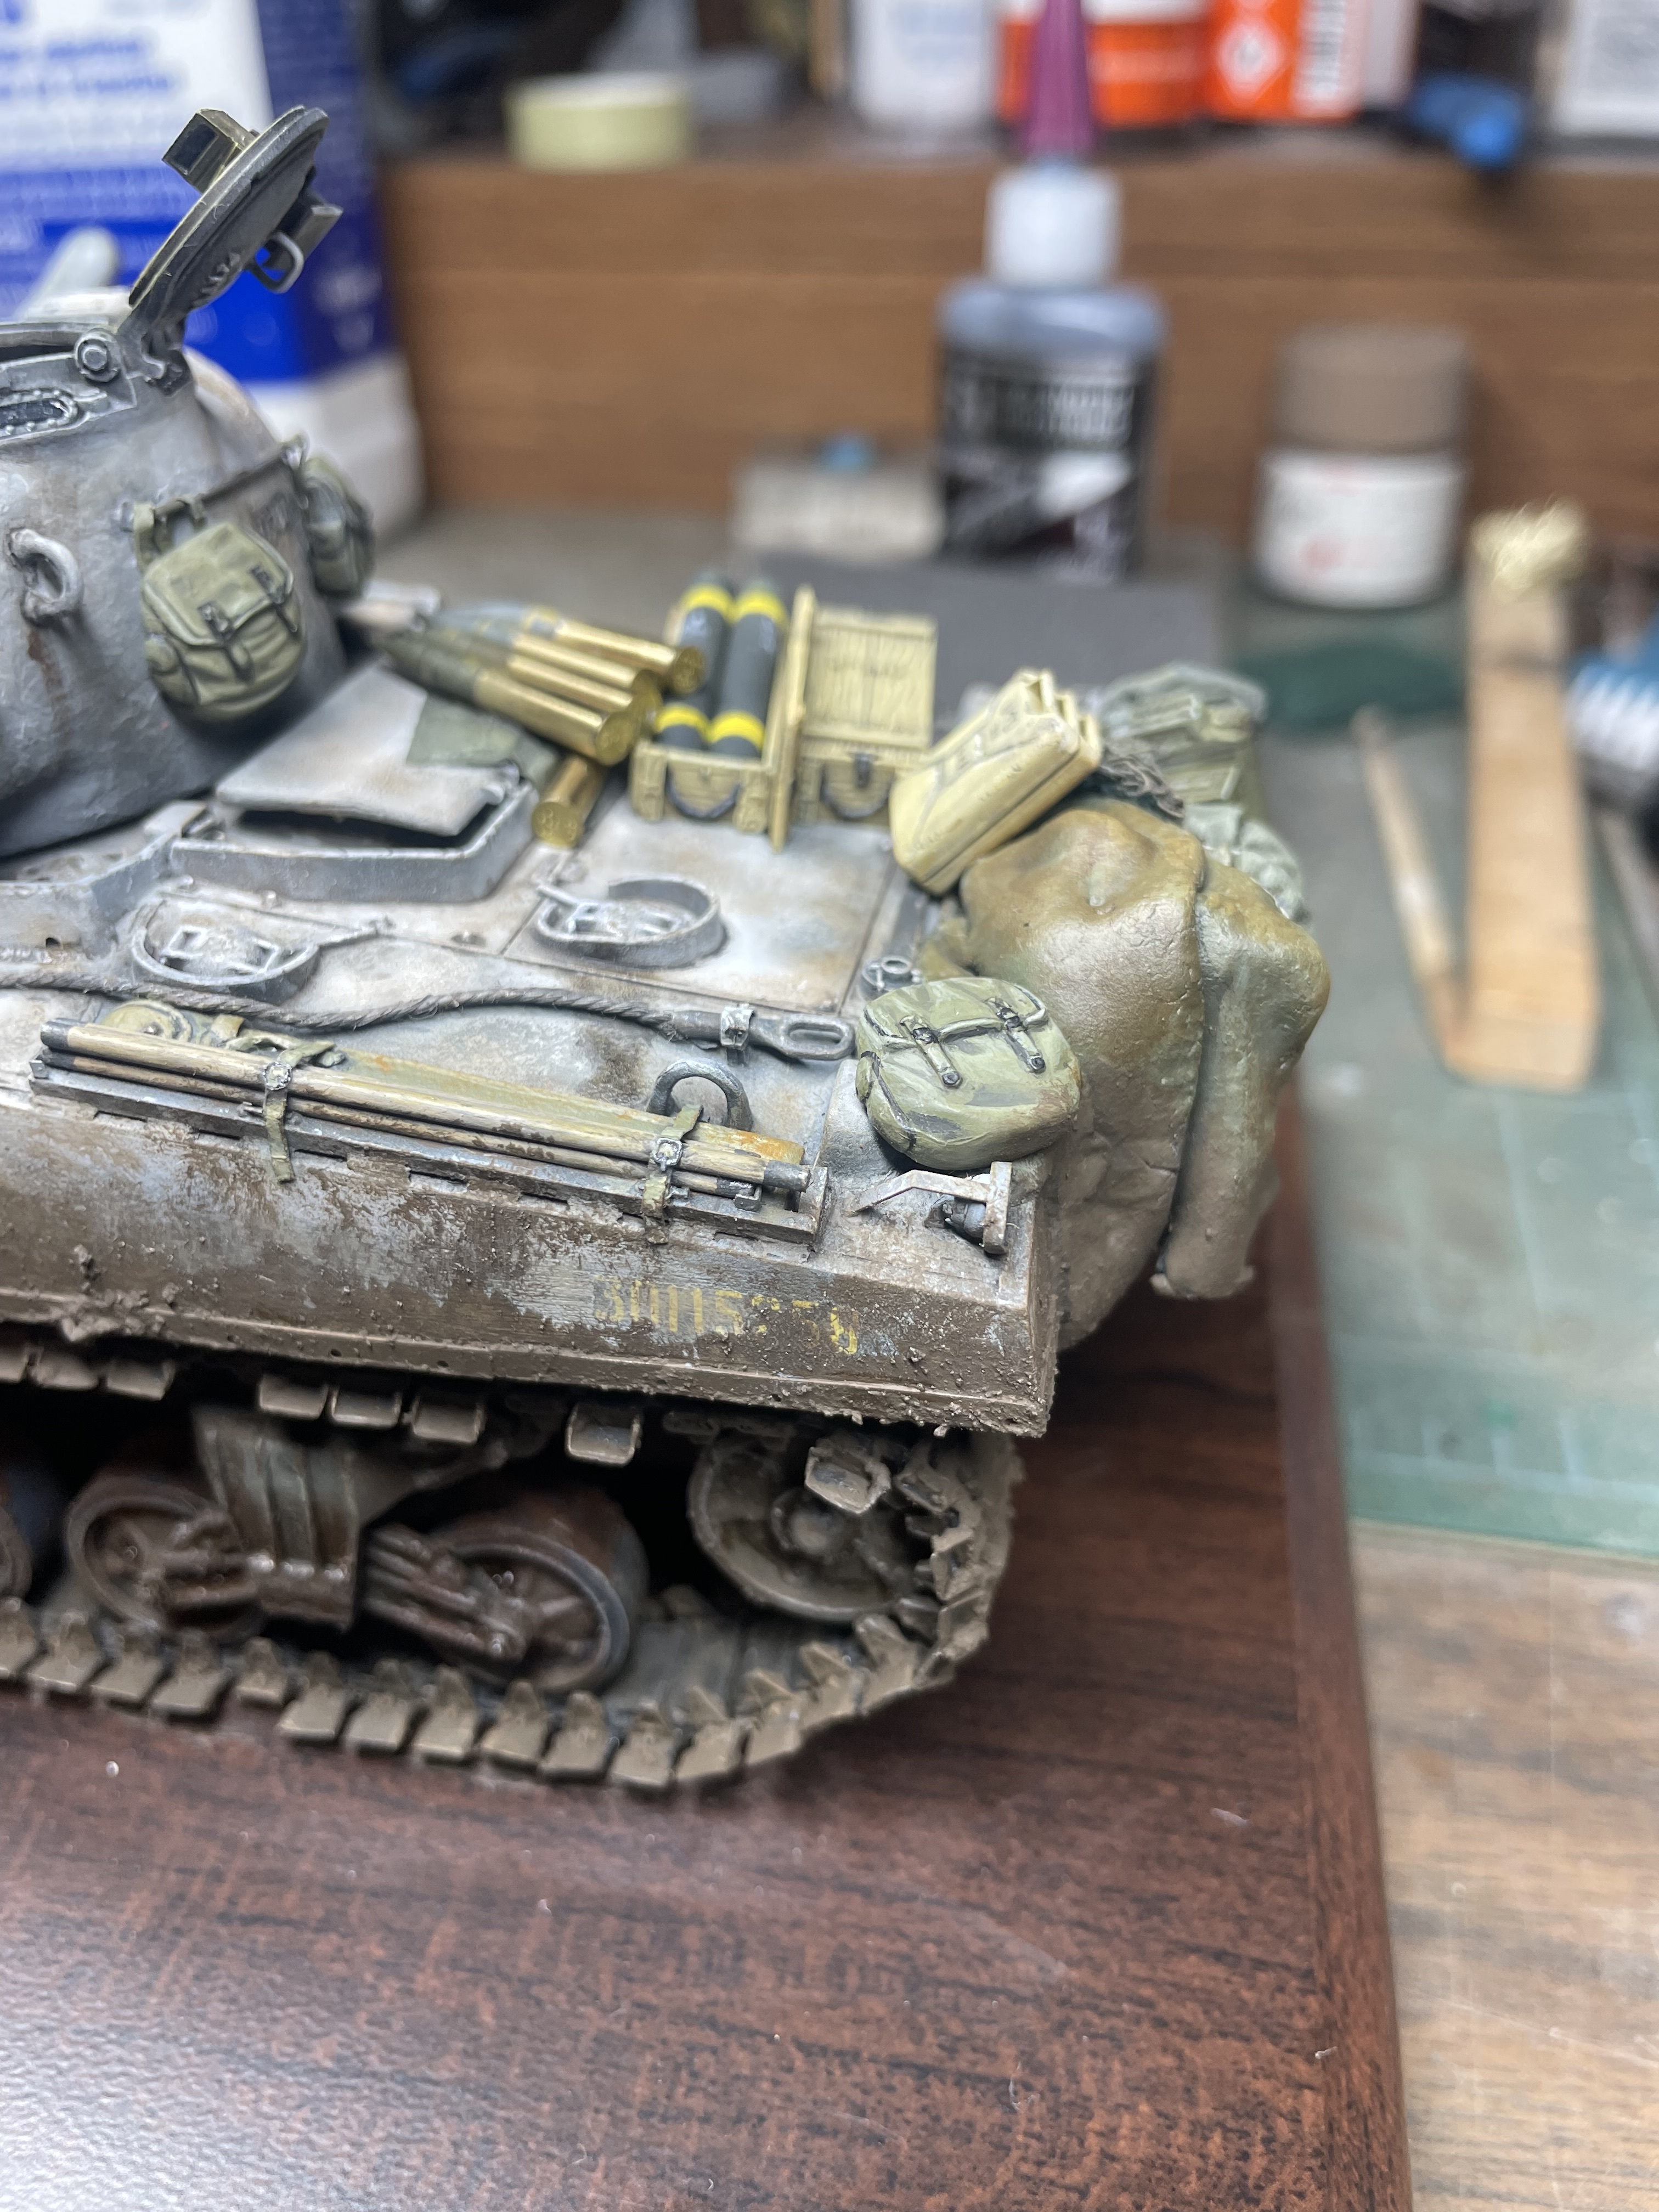
Finally some updates. I used a set of sandbags from value gear, but they were meant for a German tank. So I modified them a bit by adding a few sandbags on the bottom to get it to fit better.
I also put a spare road wheel on the front . I’ve seen so many in reference pics I thought I’d add one. I made a small plate to hold it in place and used a bolt and nut from Meng.

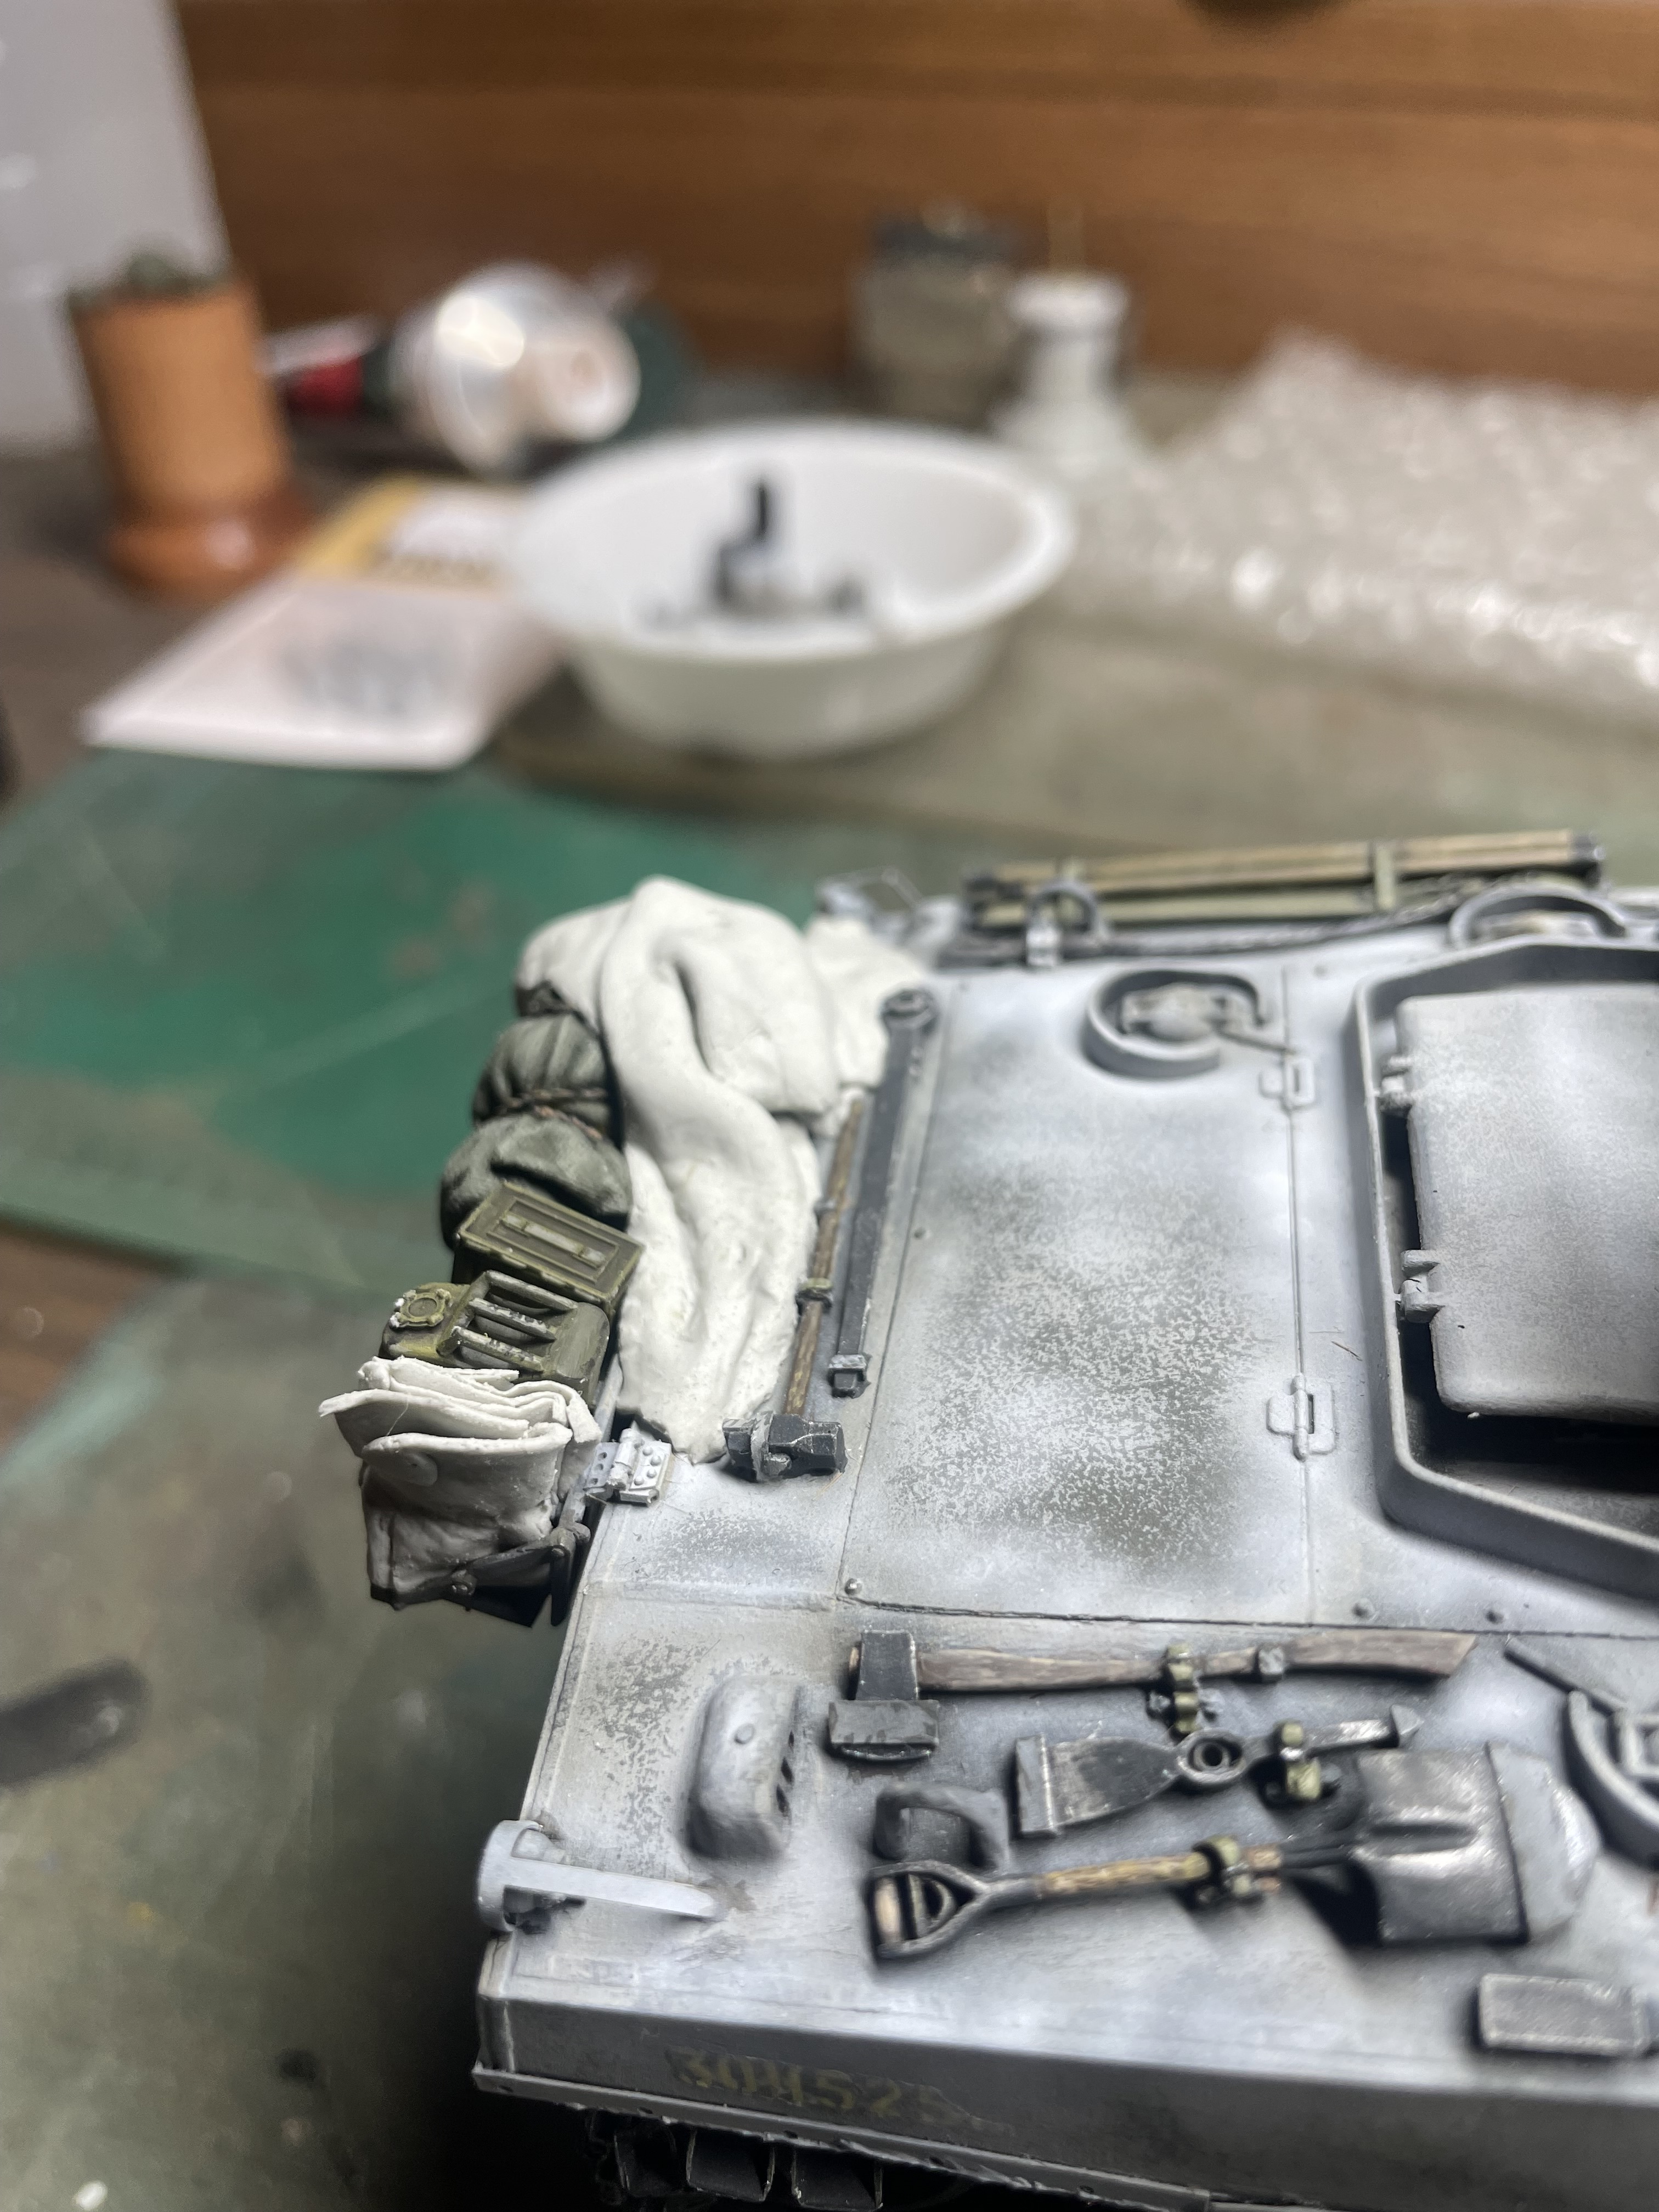
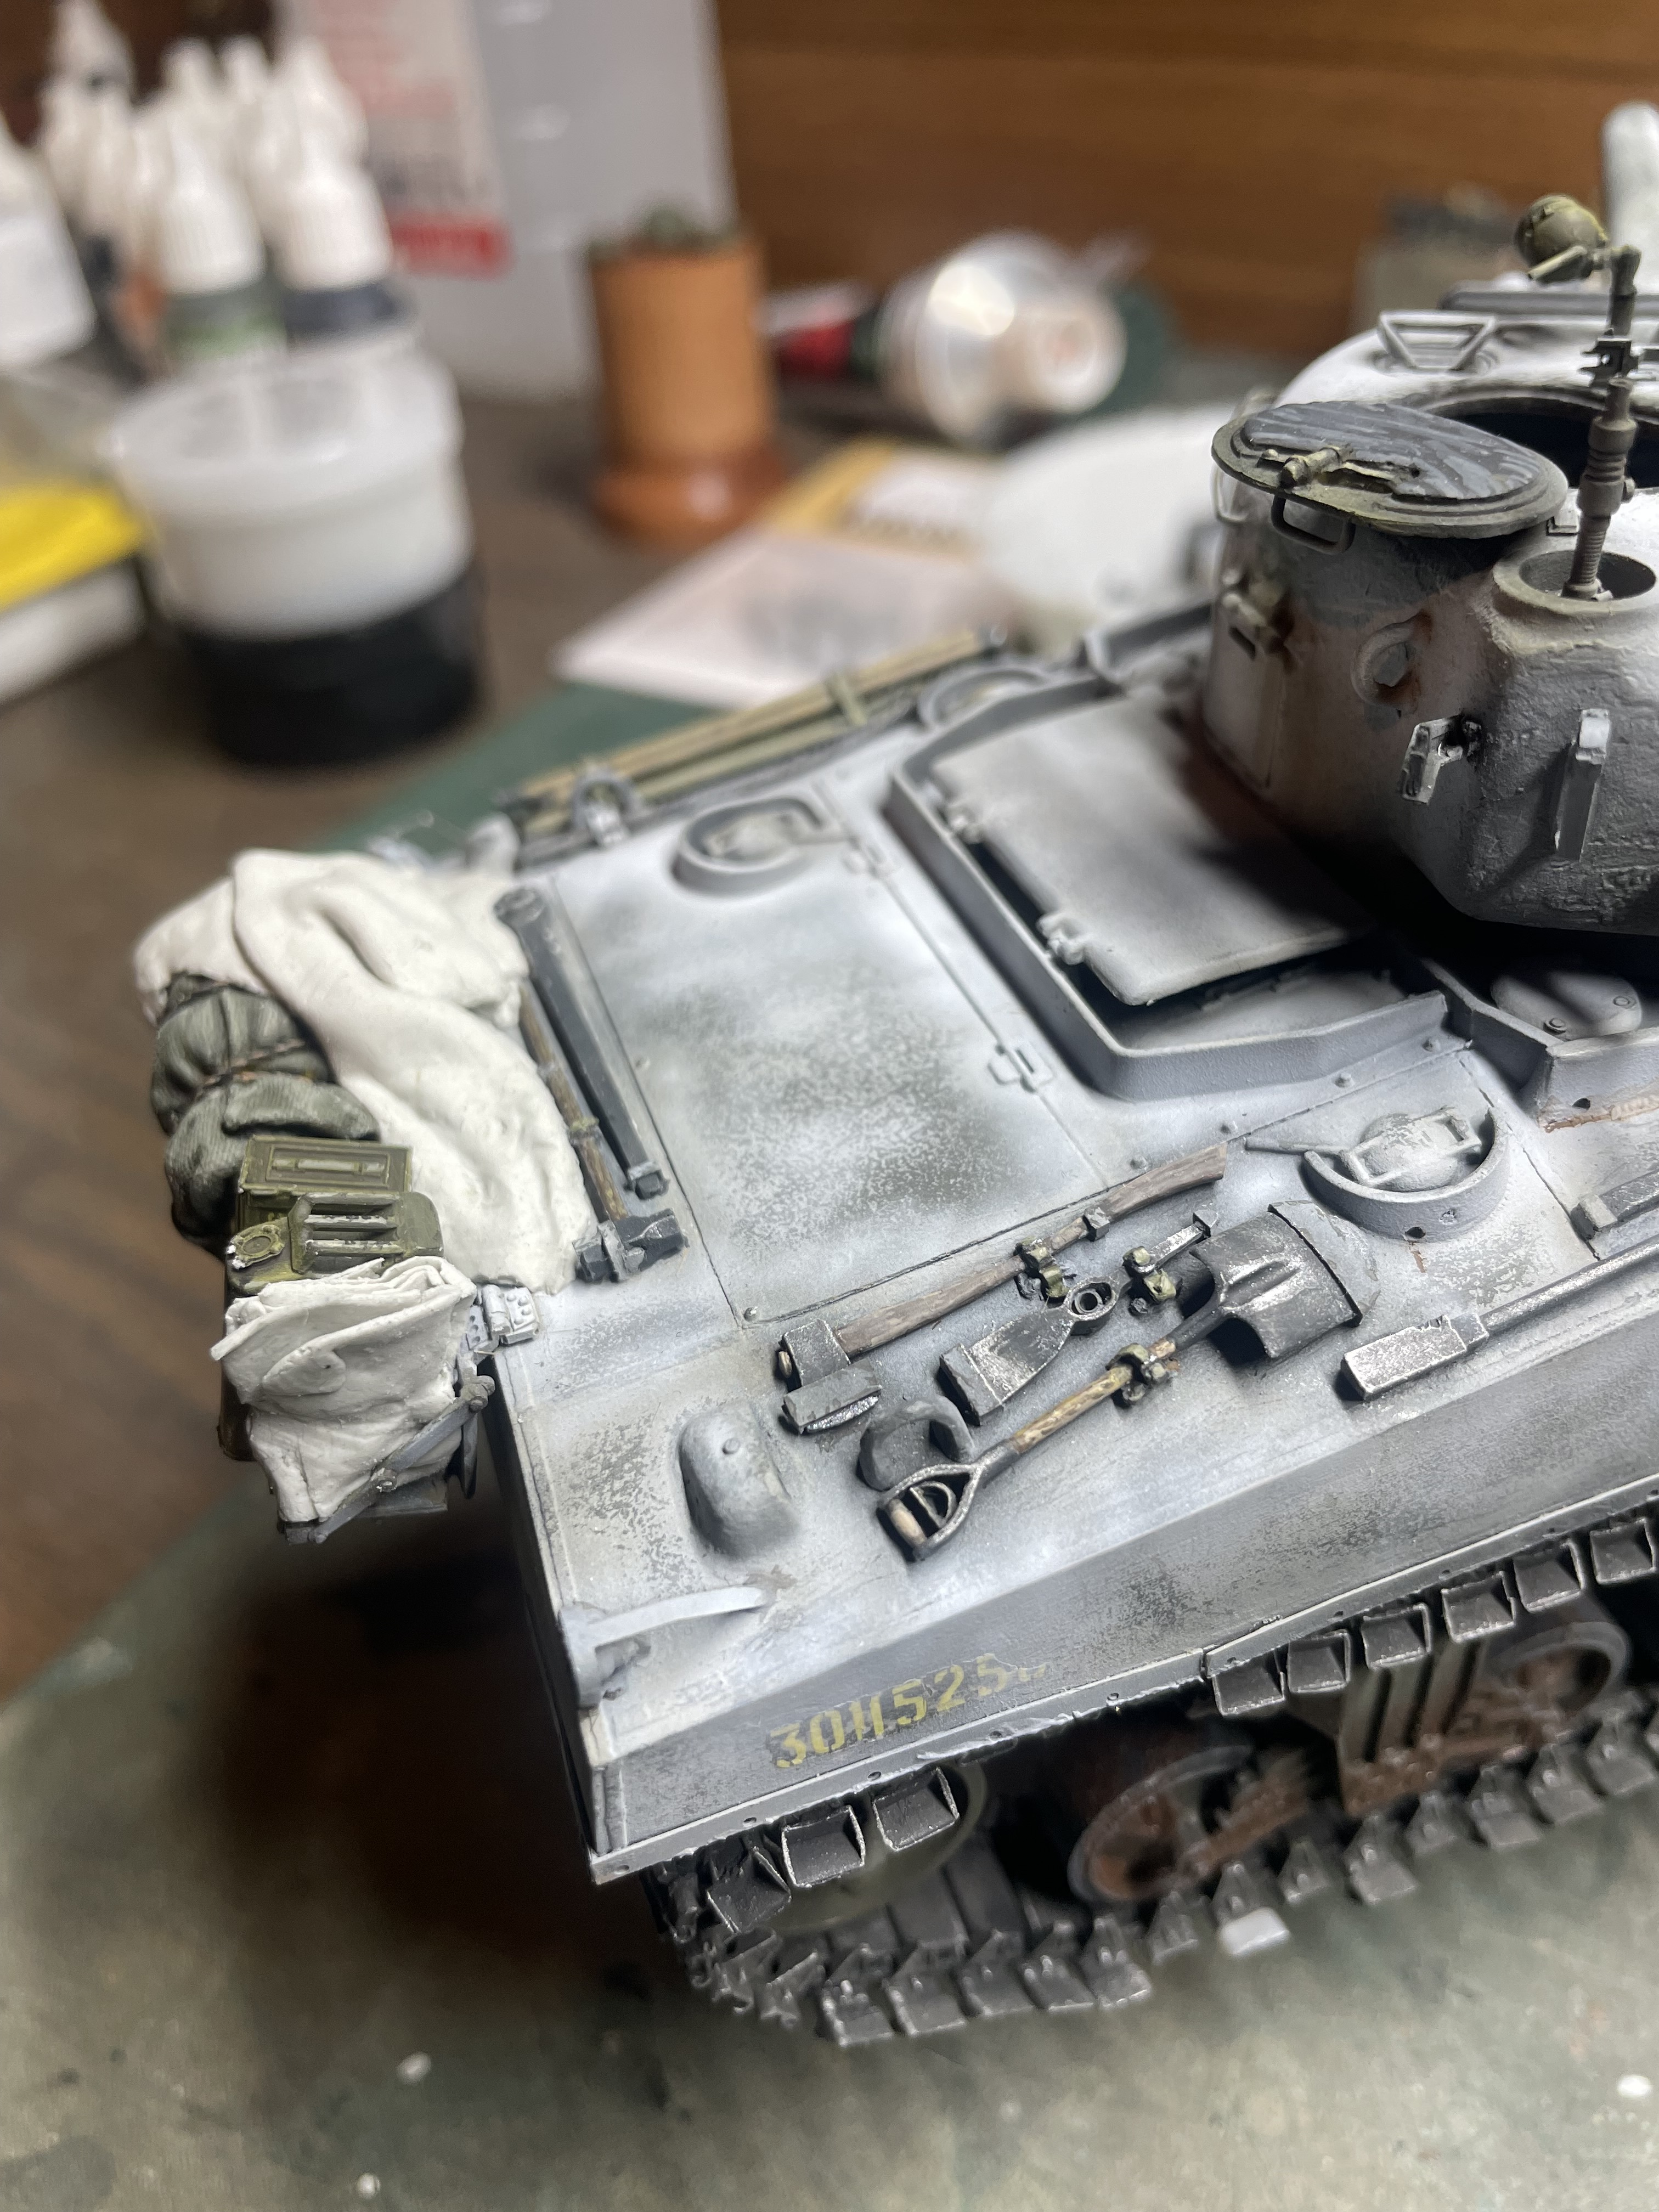
I also added some bars along the sides of the turret for hanging personal gear like back packs. Seems many late war Sherman’s did this. I have the back packs ready to paint and add with lead foil straps.


I’m in the process of painting the extra gear for the rear of the tank along with tarps from apoxie sculpt. Getting there!
6 Likes
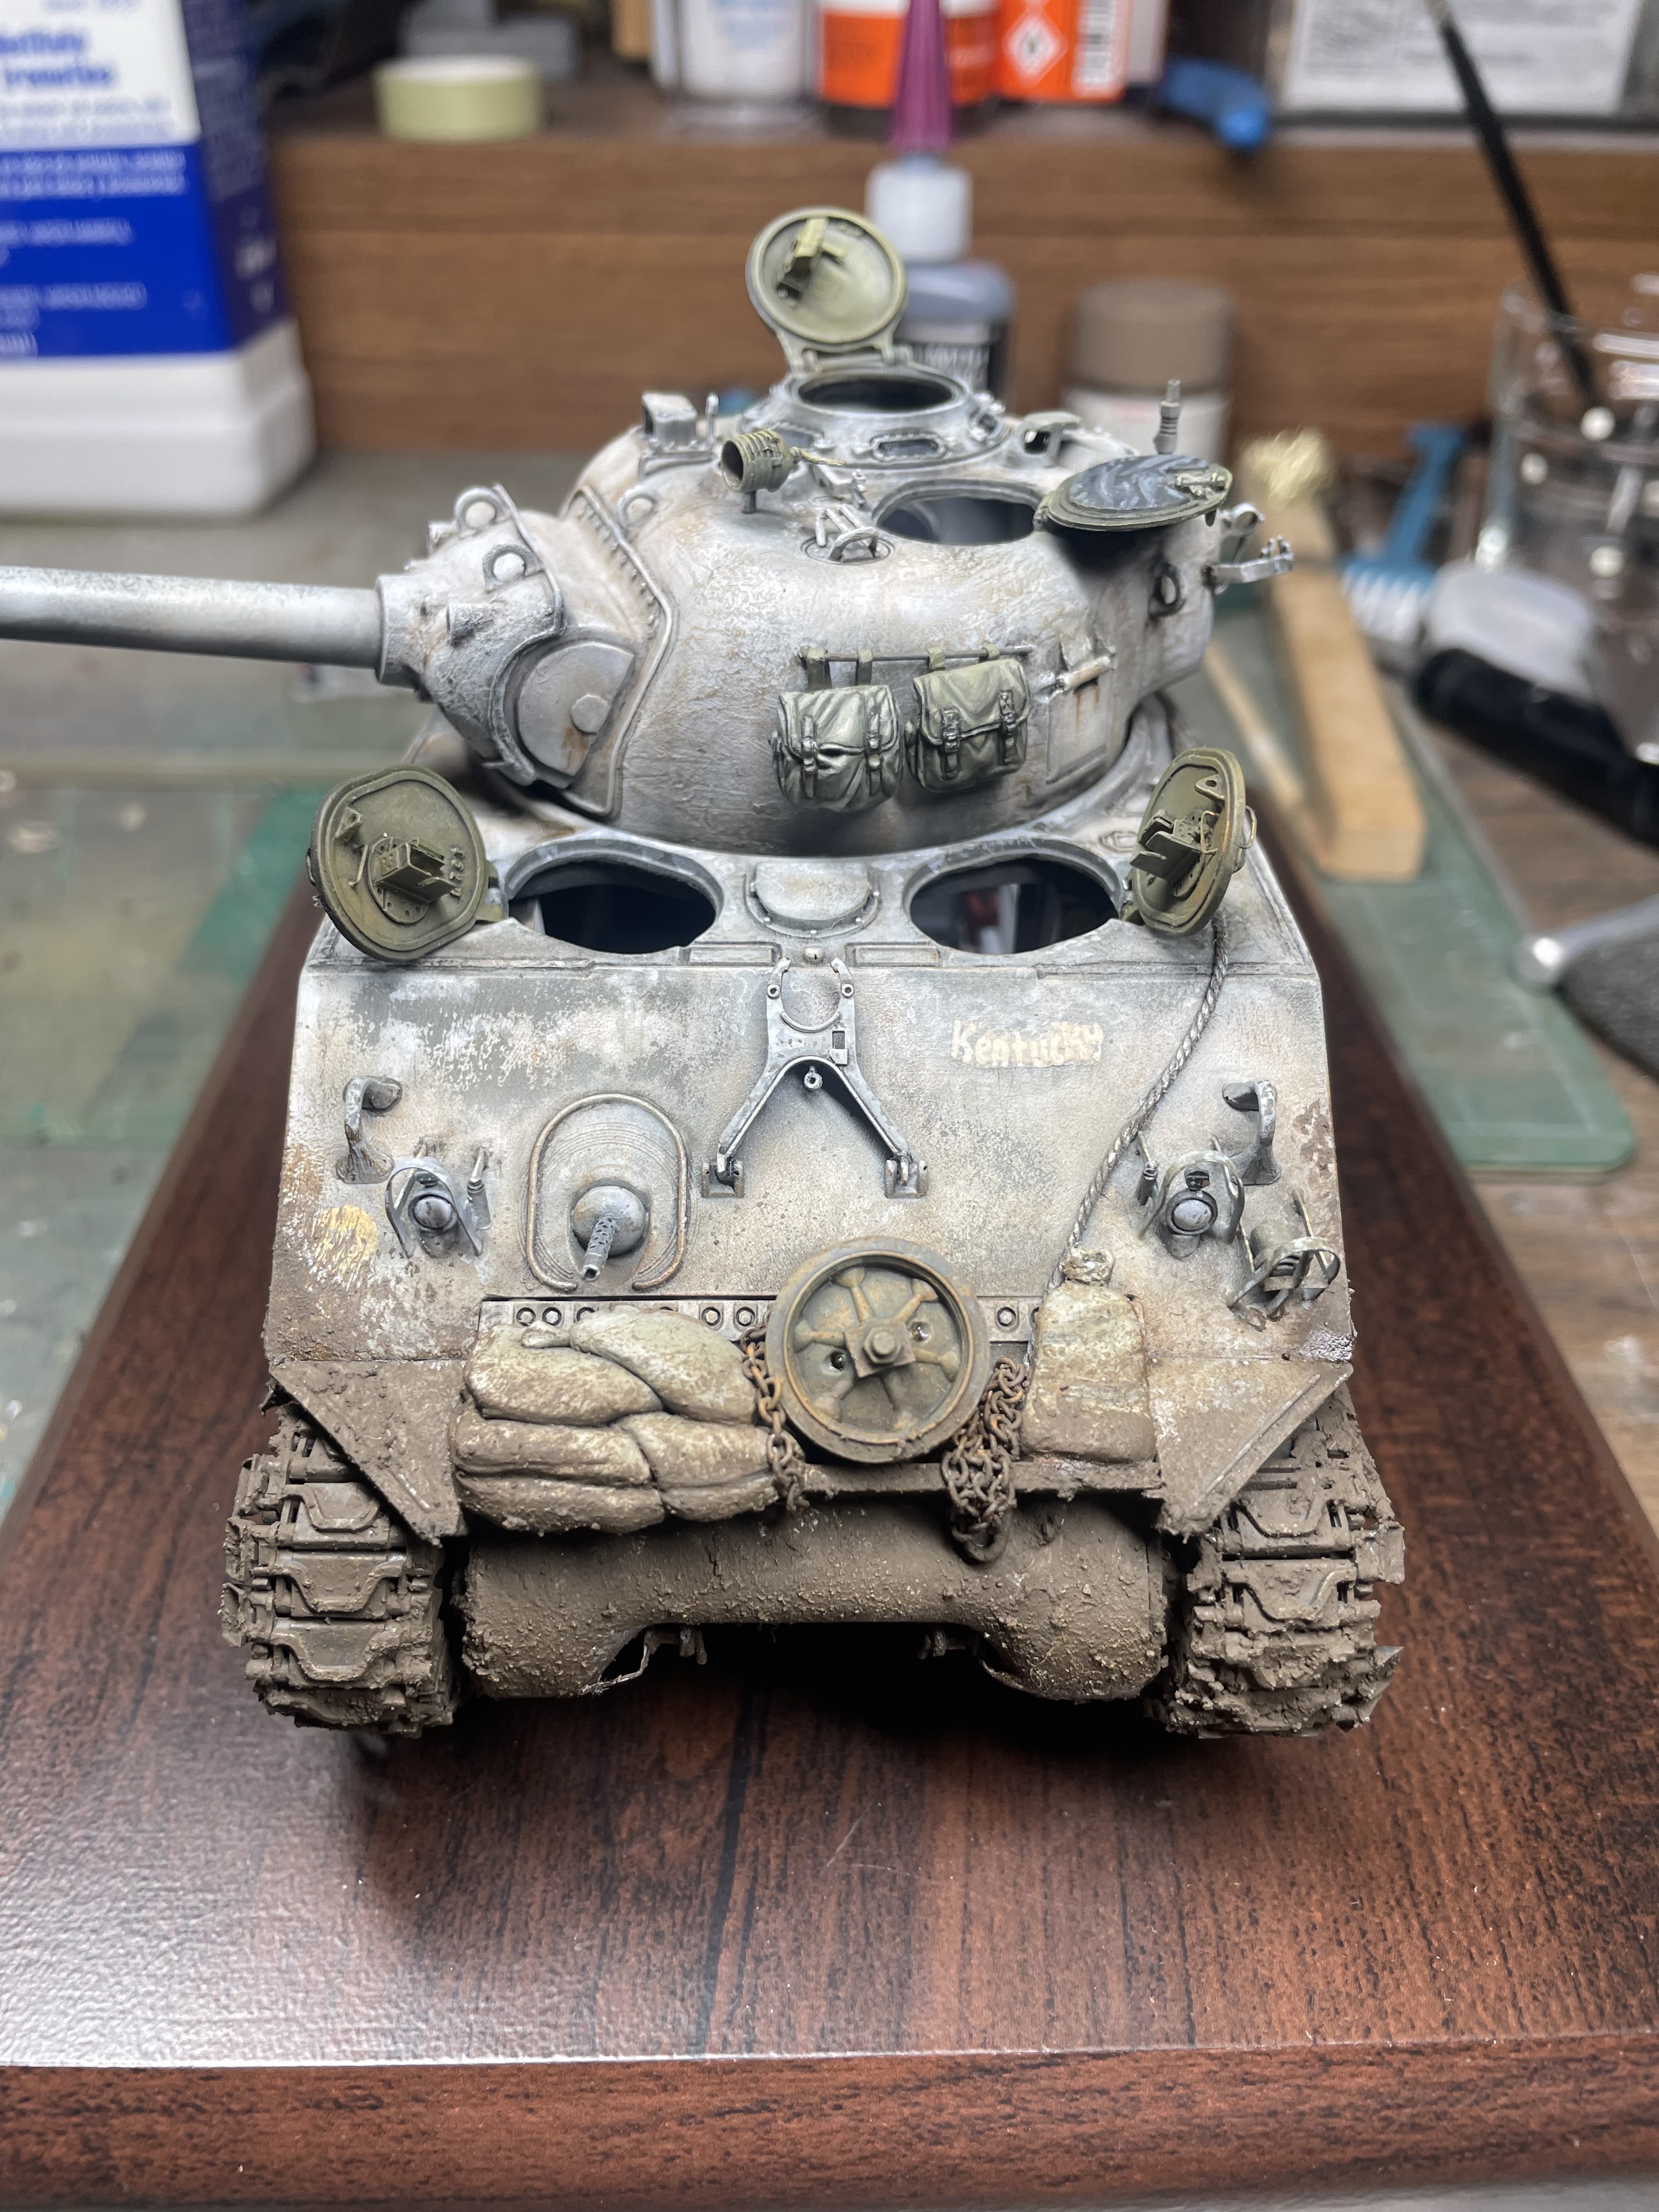
Coming along nicely. Just one thing I just noticed: the D-clasps on the towing lugs seem unlikely to me. Since this tank has the double towing lugs, it was intended to have an L-shaped pin go through both of those lugs, so that a tow cable could be quickly connected by pulling out the pin, putting the cable’s eye between the lugs and pushing the pin through. Later, they would have a T-shaped attachment on the inner lug (the one that doesn’t have the step on it) on each side, for even quicker attachment of the tow cable.
See Sherman differential covers on the Sherman Minutia Website for pictures ![]()
3 Likes
I noticed that too late Jakko. I don’t know why I put those on there. I could probably cut them off if I’m careful. Thanks for the heads up!
2 Likes
There. Just gotta drill holes and put pins through.

No need to drill holes: cut a bit of plastic rod to fit between the tow lugs and add handle on the inside from plastic strip.
2 Likes
I’ll try that today , good idea
2 Likes
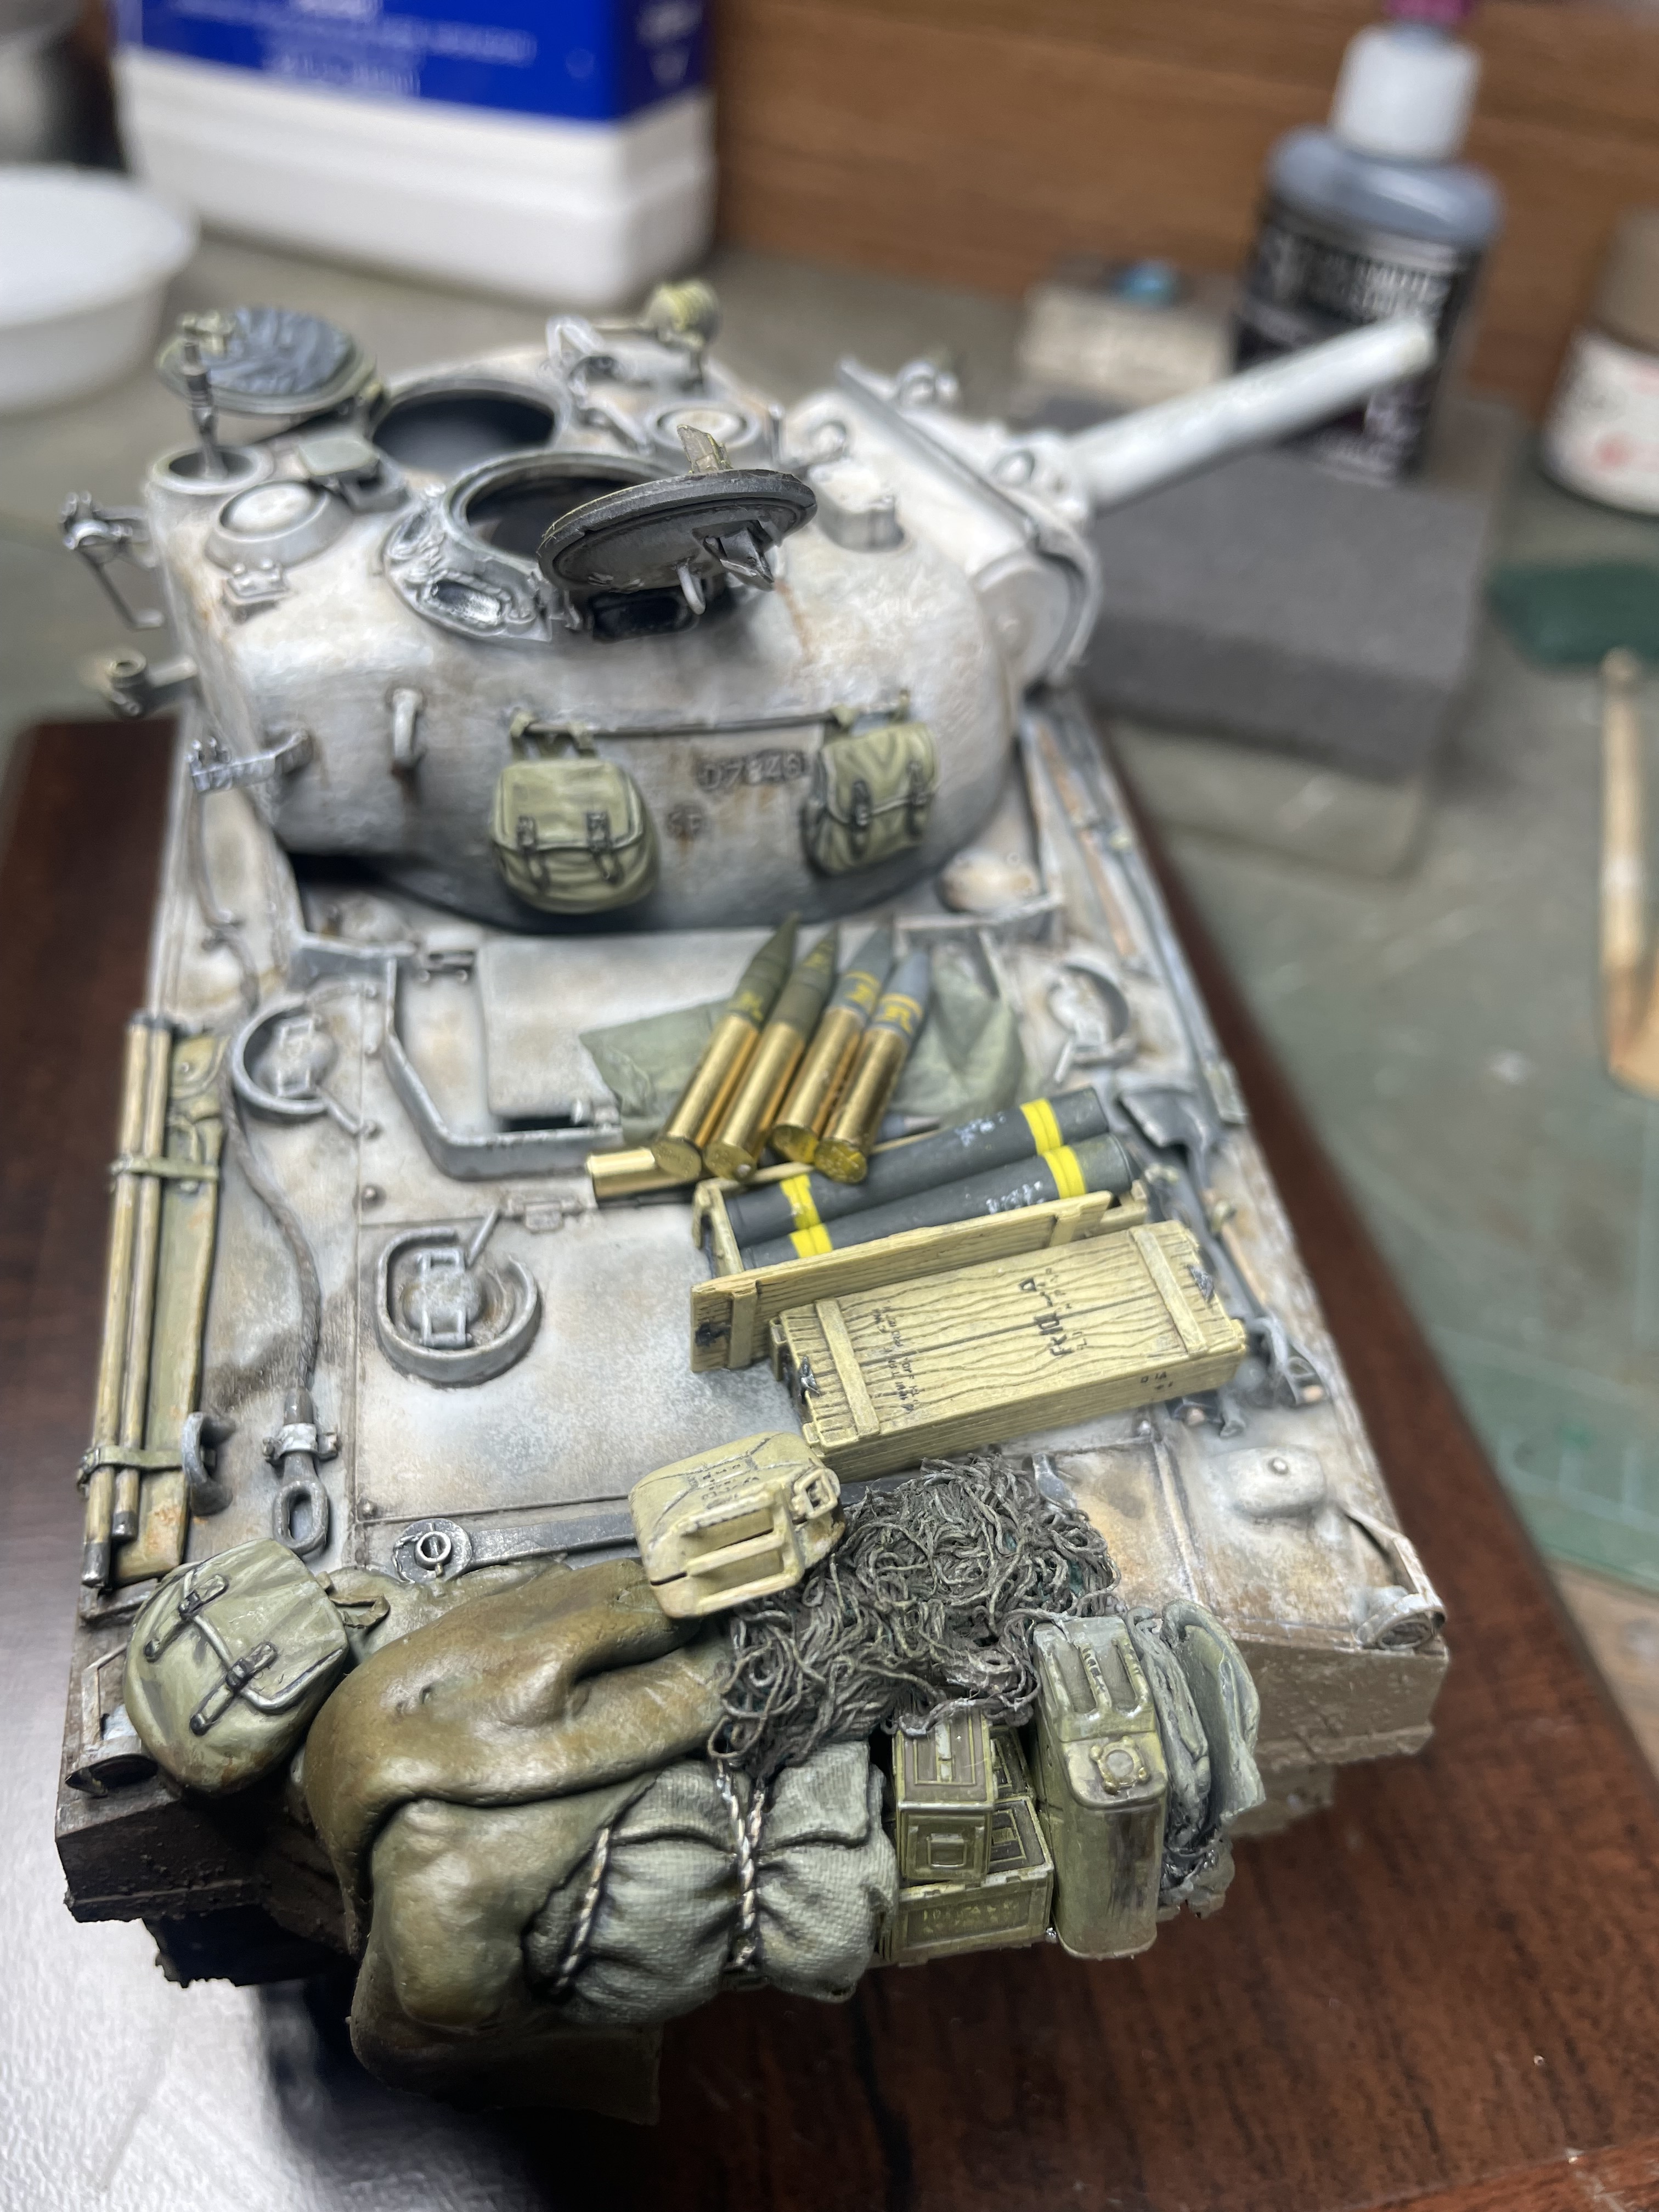
Some more progress. I sculpted a tarp for the back deck and just draped it over the extra gear. I’ll make ropes and leave them lying around. I made a sand bag for the front as well.

10 Likes
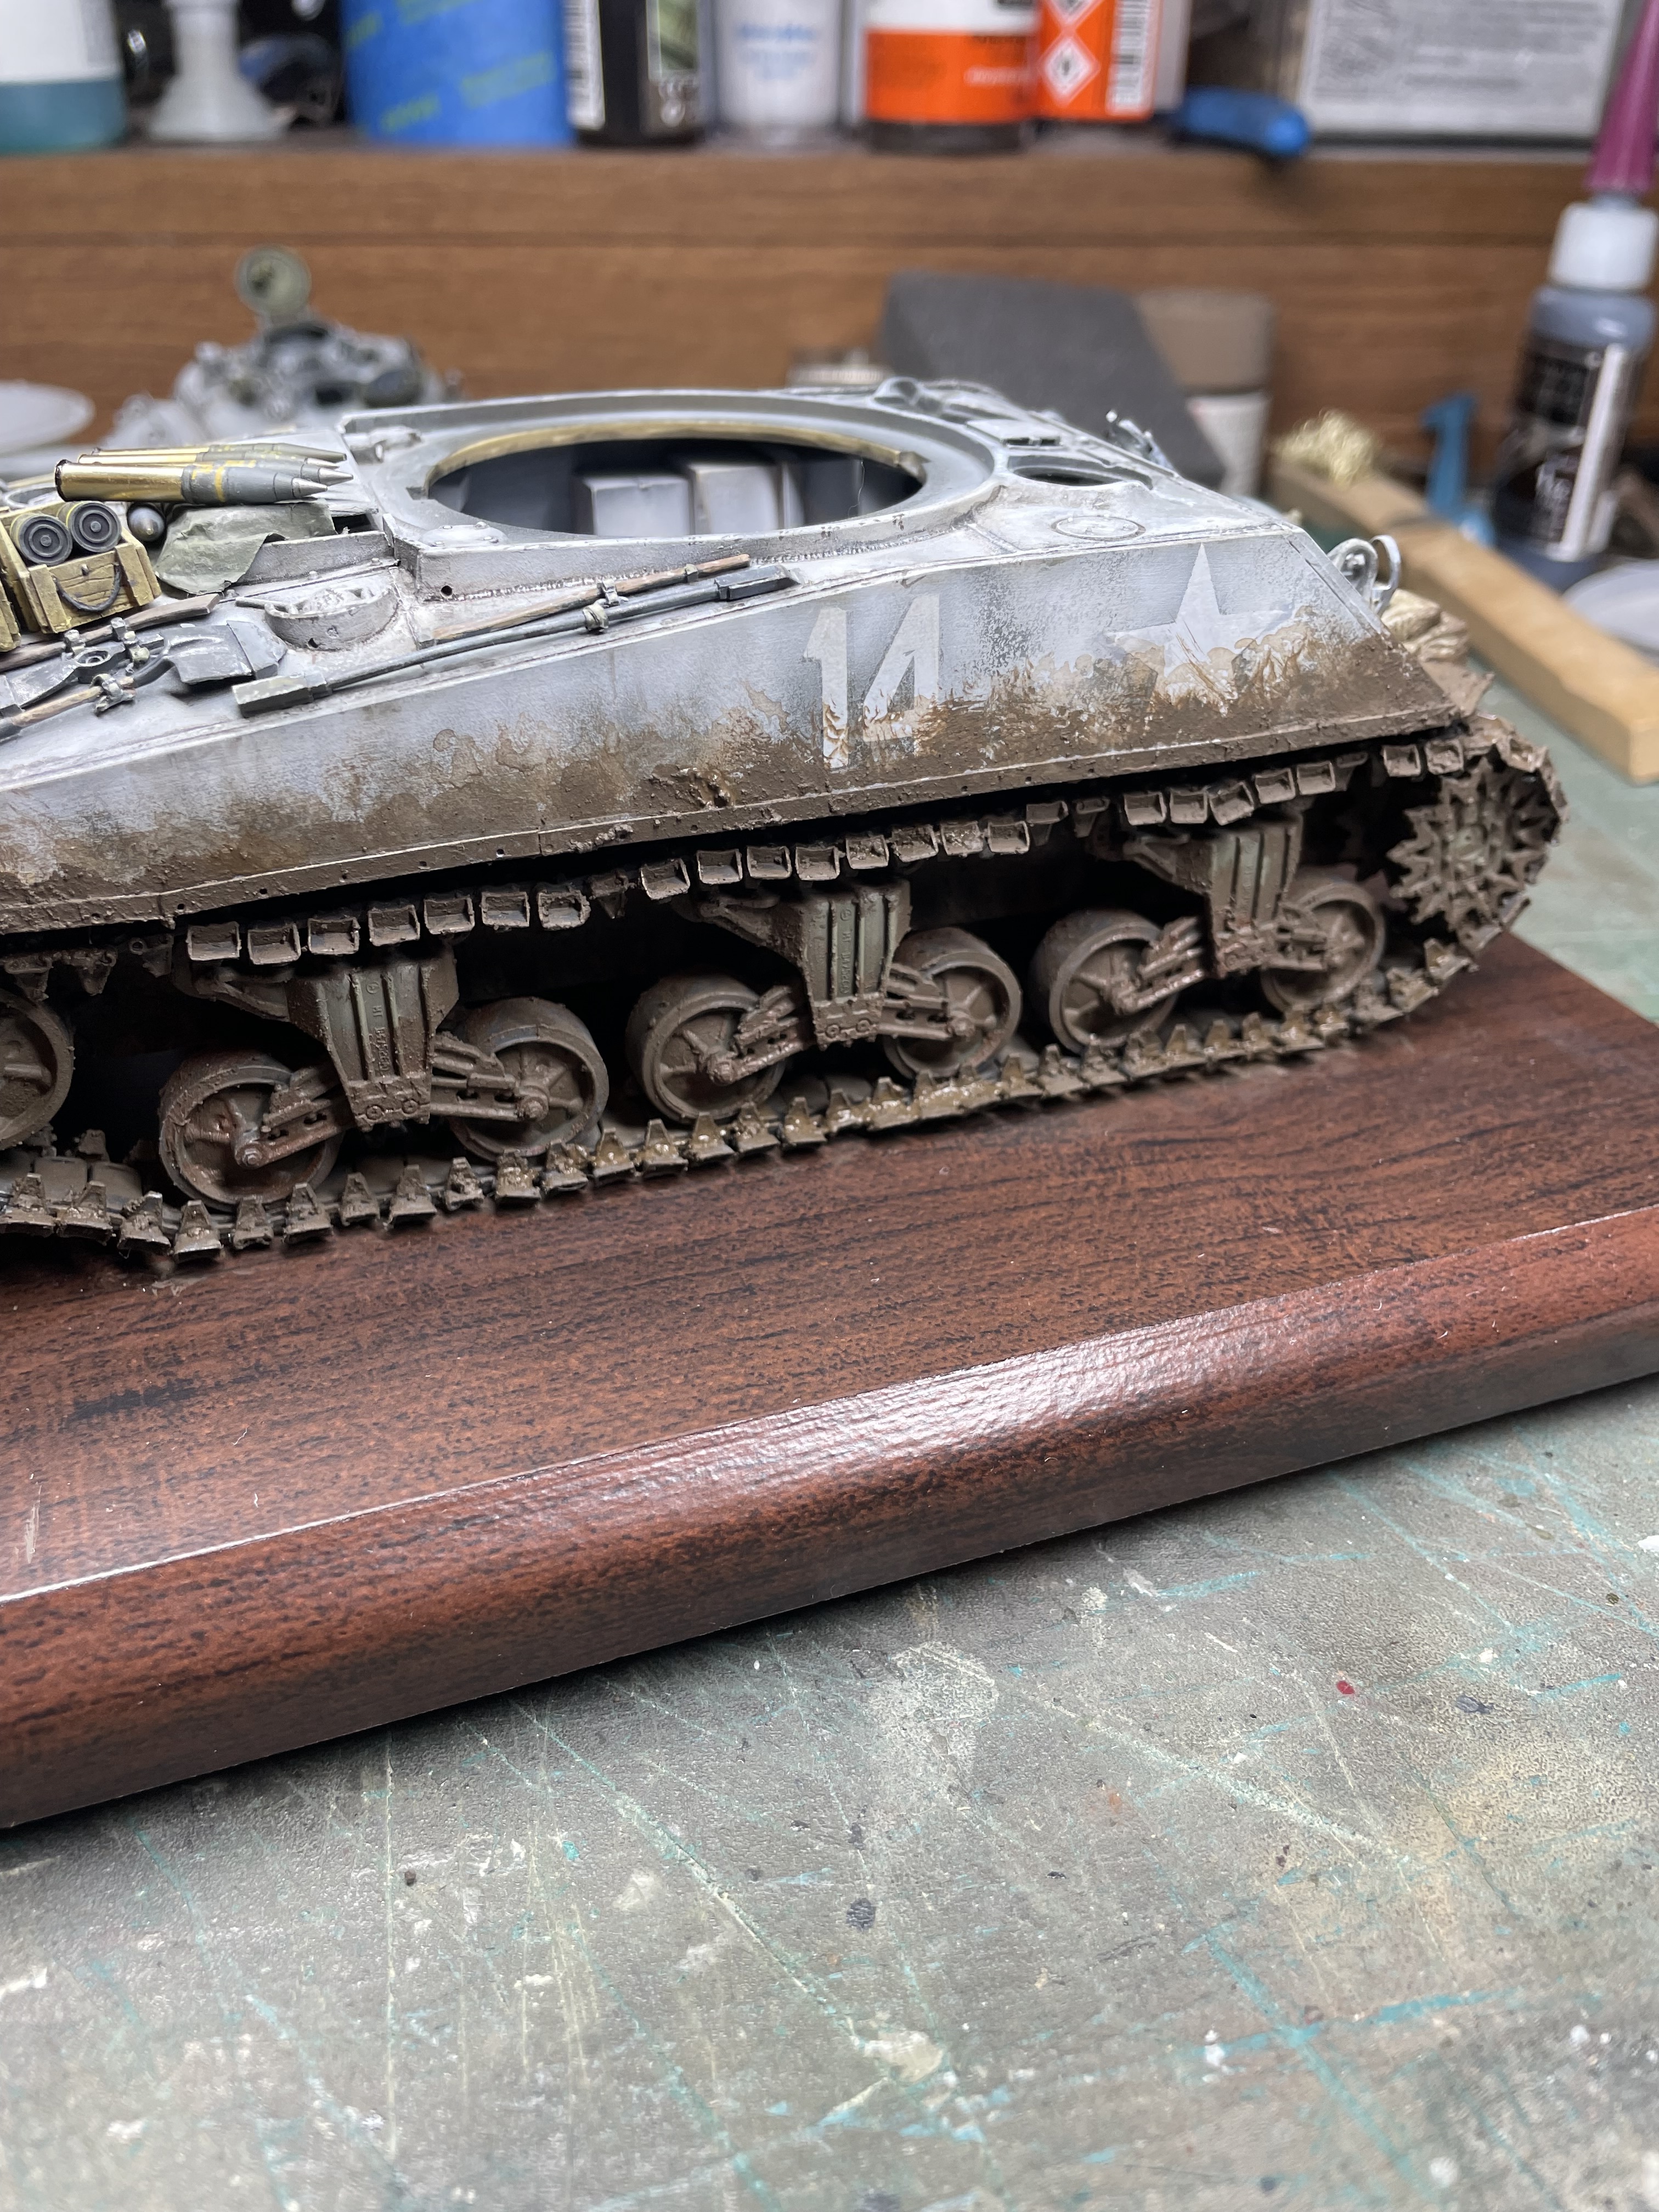
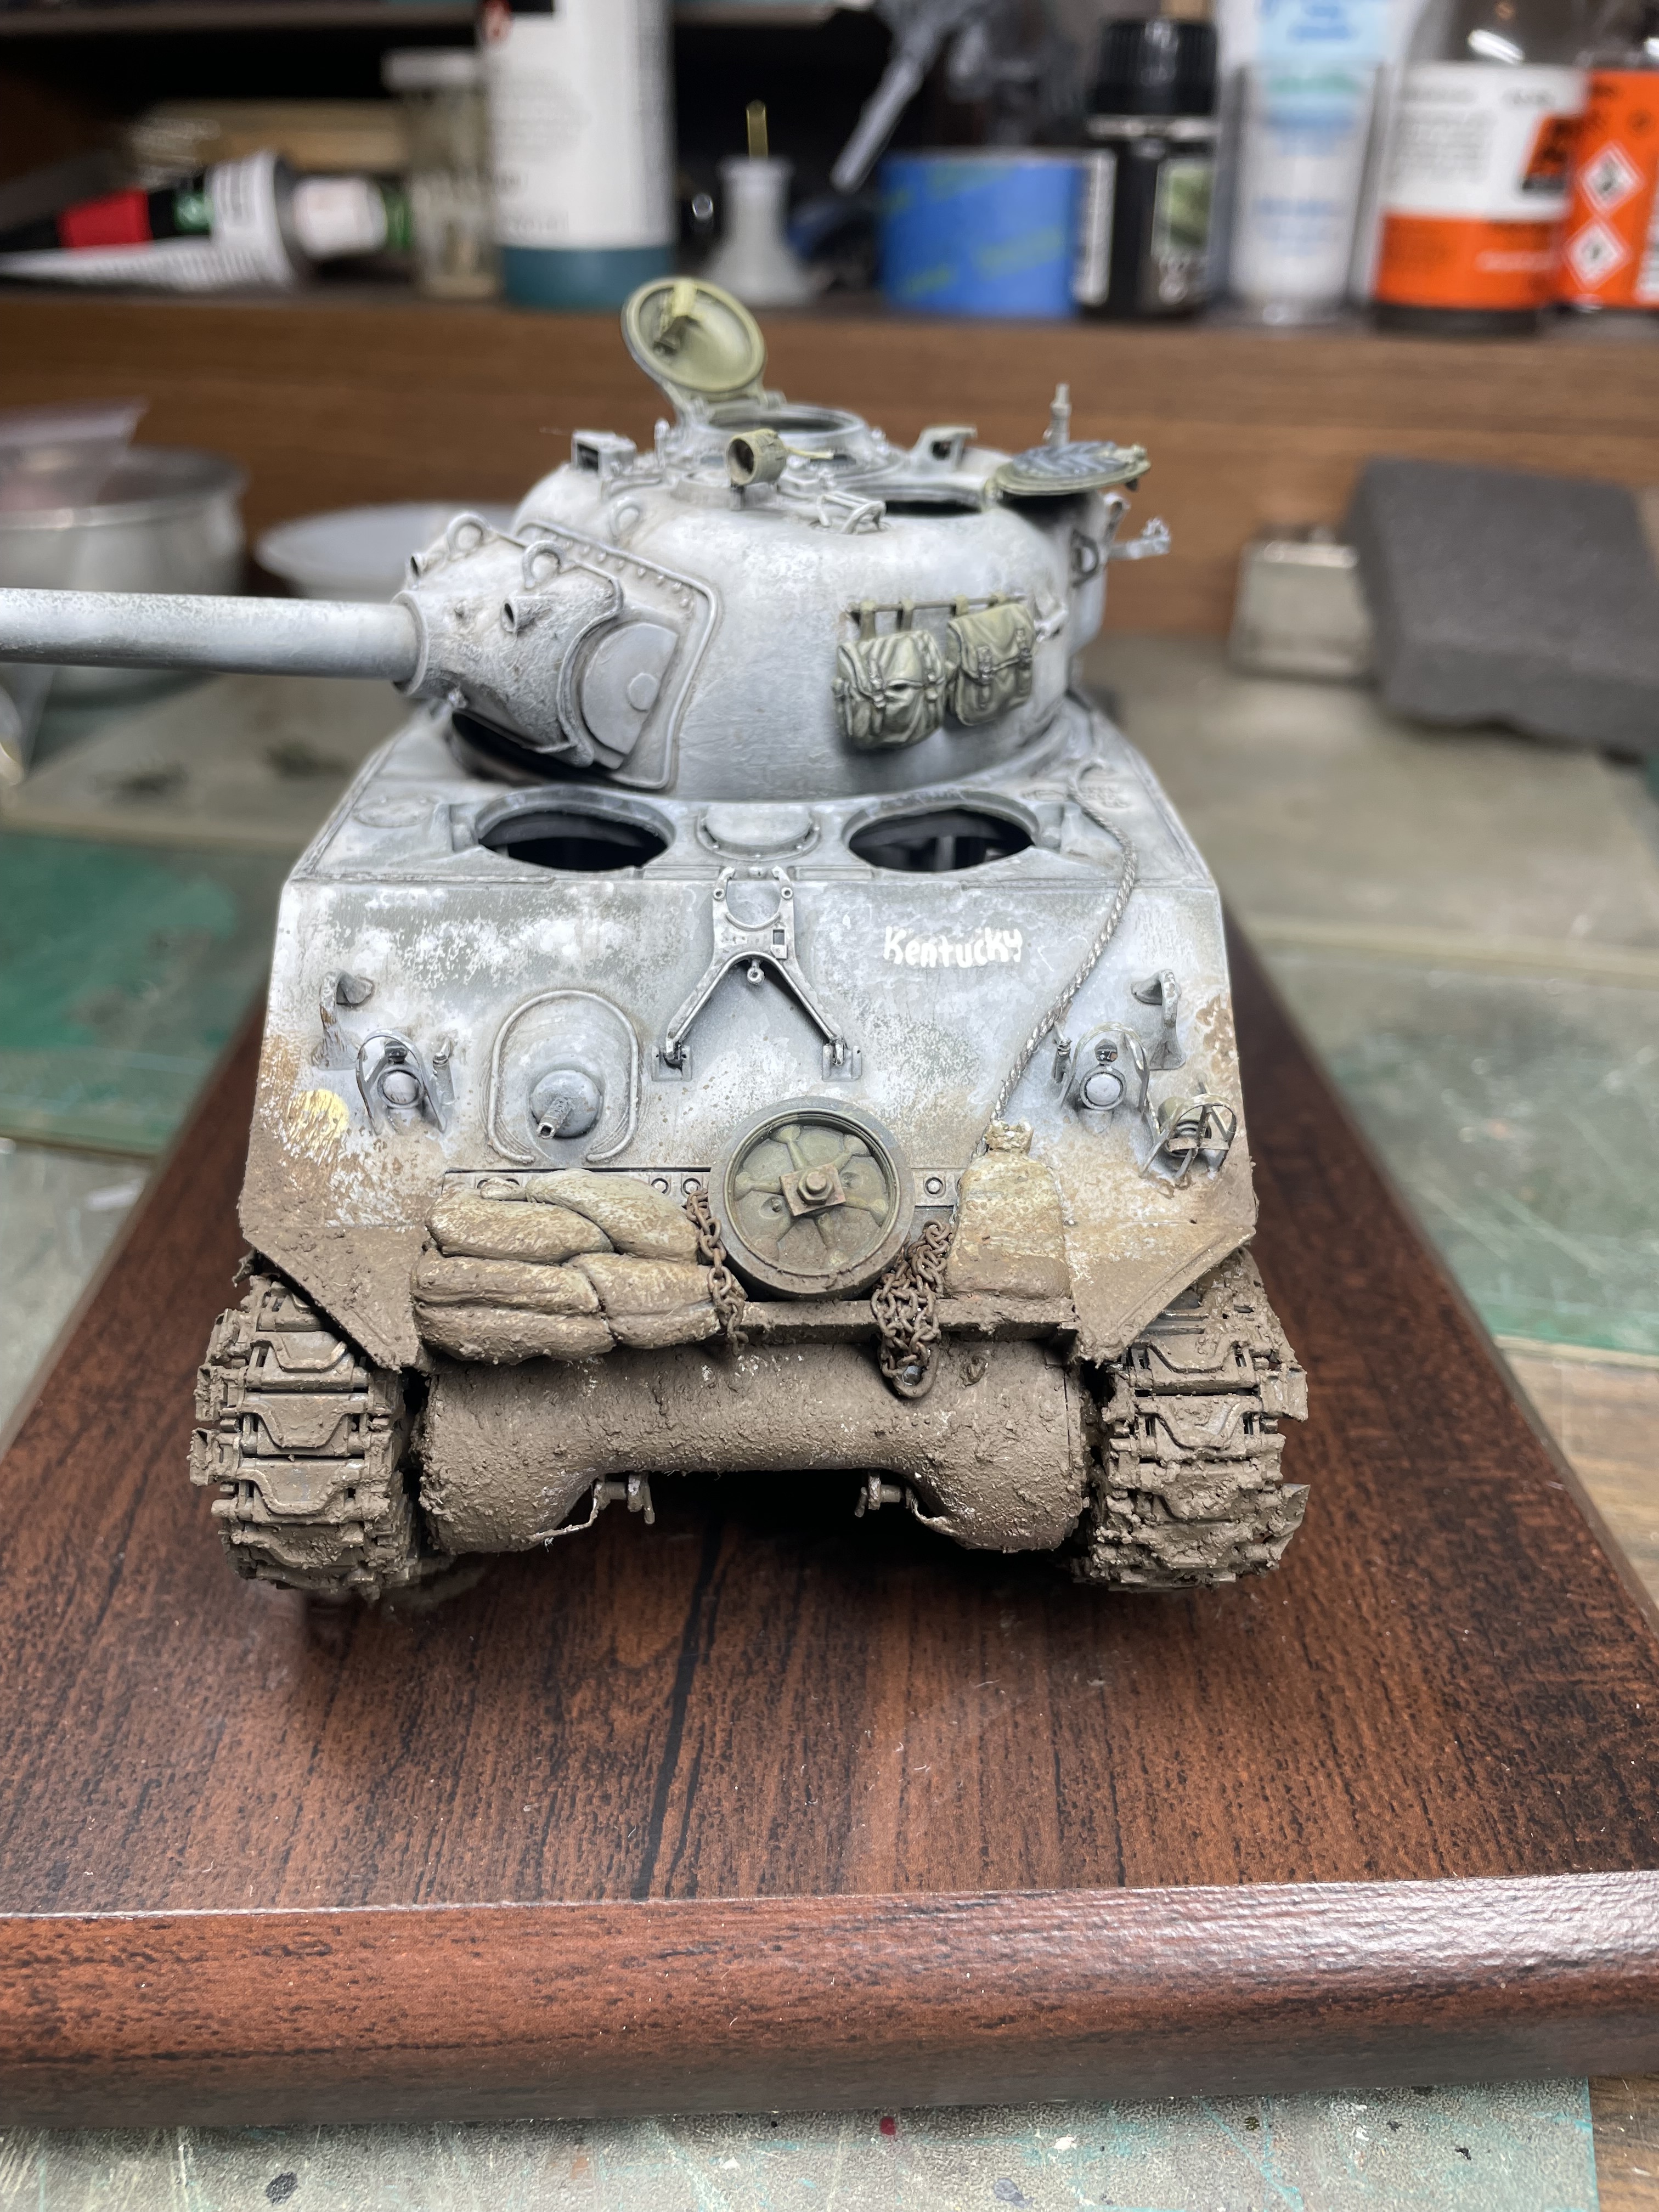
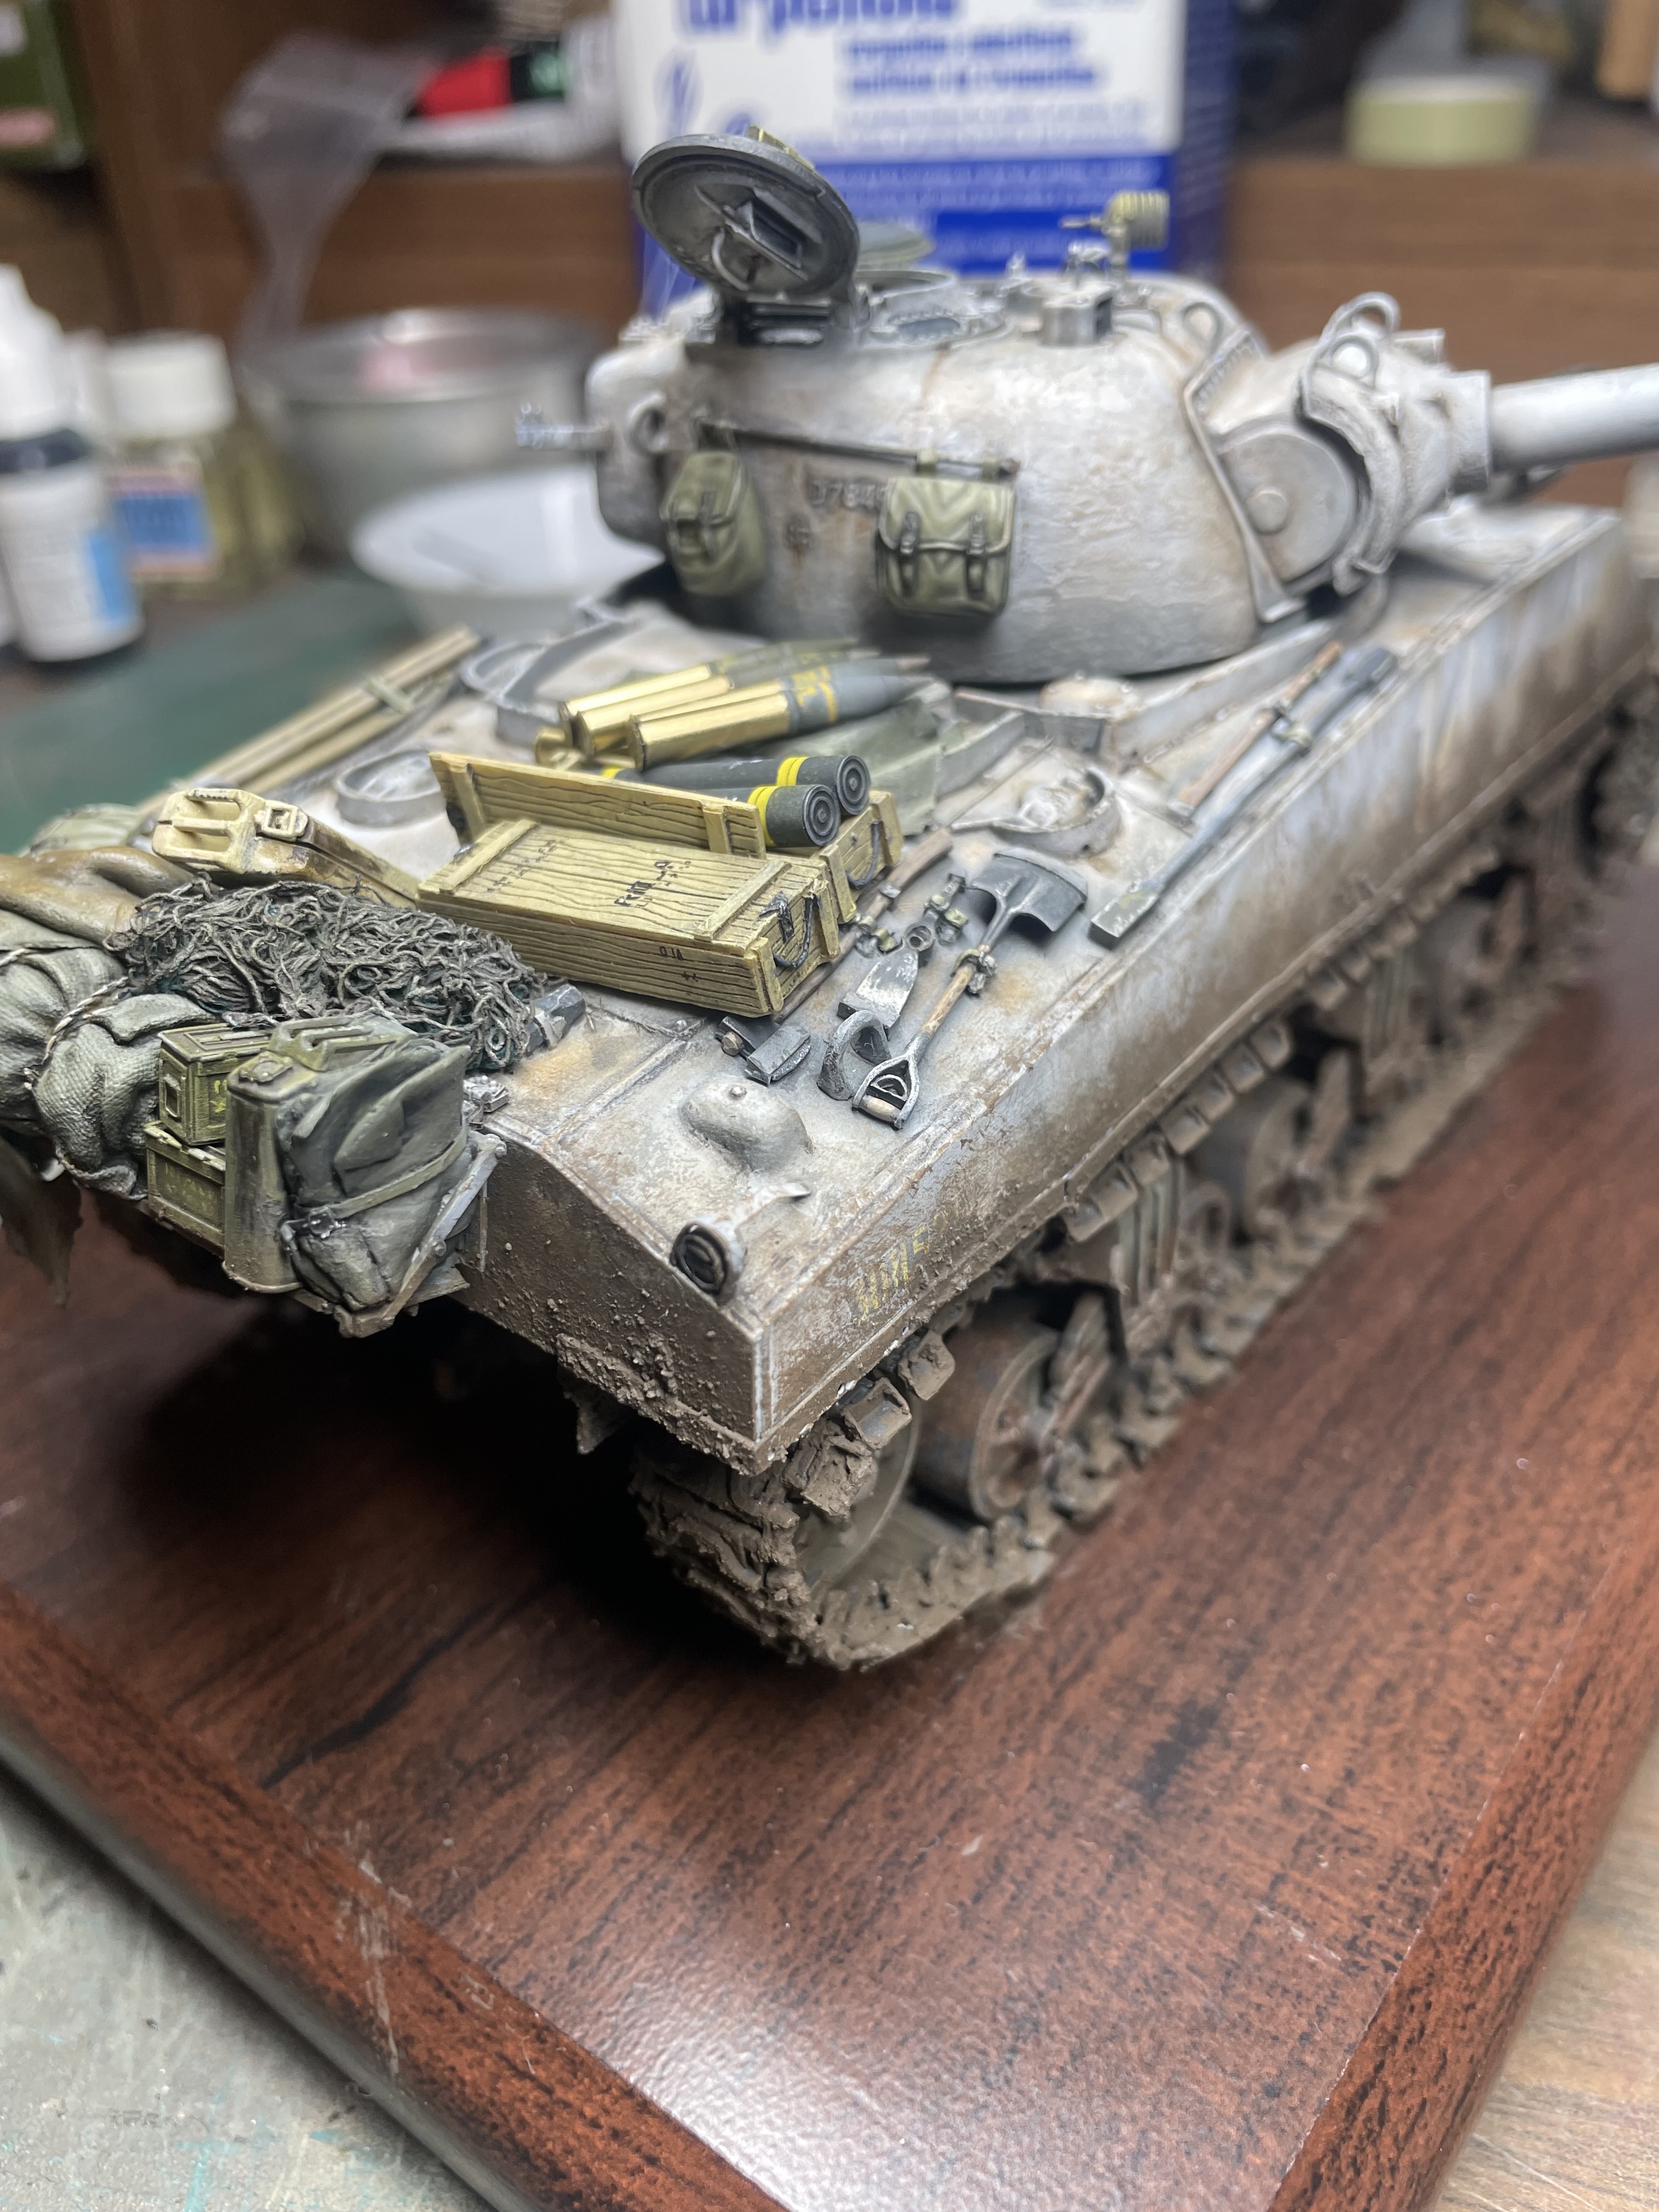
I finally got around to doing some weathering. Now I usually weather my models heavily but this is extreme for me, and the first time I’ve added heavy mud to a vehicle. Also the first time I’ve done a winter white wash. I learned a lot. Firstly, don’t use Tresemne hold # 4! It took a lot of scrubbing to get the white Tamiya paint to lift off. I even took off the OD base coat in a few small places. I have to say, these paints are quite durable for the amount of scrubbing I did. I threw away my bottle of # 4 and bought # 3 for the next project I do in winter white wash. I used AK dark terrain for the mud. Initially I used acrylic gel and pigments on the first layer just to try it. The stuff worked very well and dried rock hard. Then I went over it with the AK stuff. I dabbed it on with an old groundwork brush I use. It thins with water and also dried rock hard. I went over it with some black washes and light mud highlights to bring out some of the details from the running gear and lower rear hull engine doors etc. This is the first step in my heavy weathering. I’ll post the rest of the pics later when I get home from work. Comments welcome!

5 Likes
Looks really fantastic Richard! Your mud effects are outstanding. I use Aqua Net regular hair spray myself. Works perfectly. And it’s cheap.
2 Likes
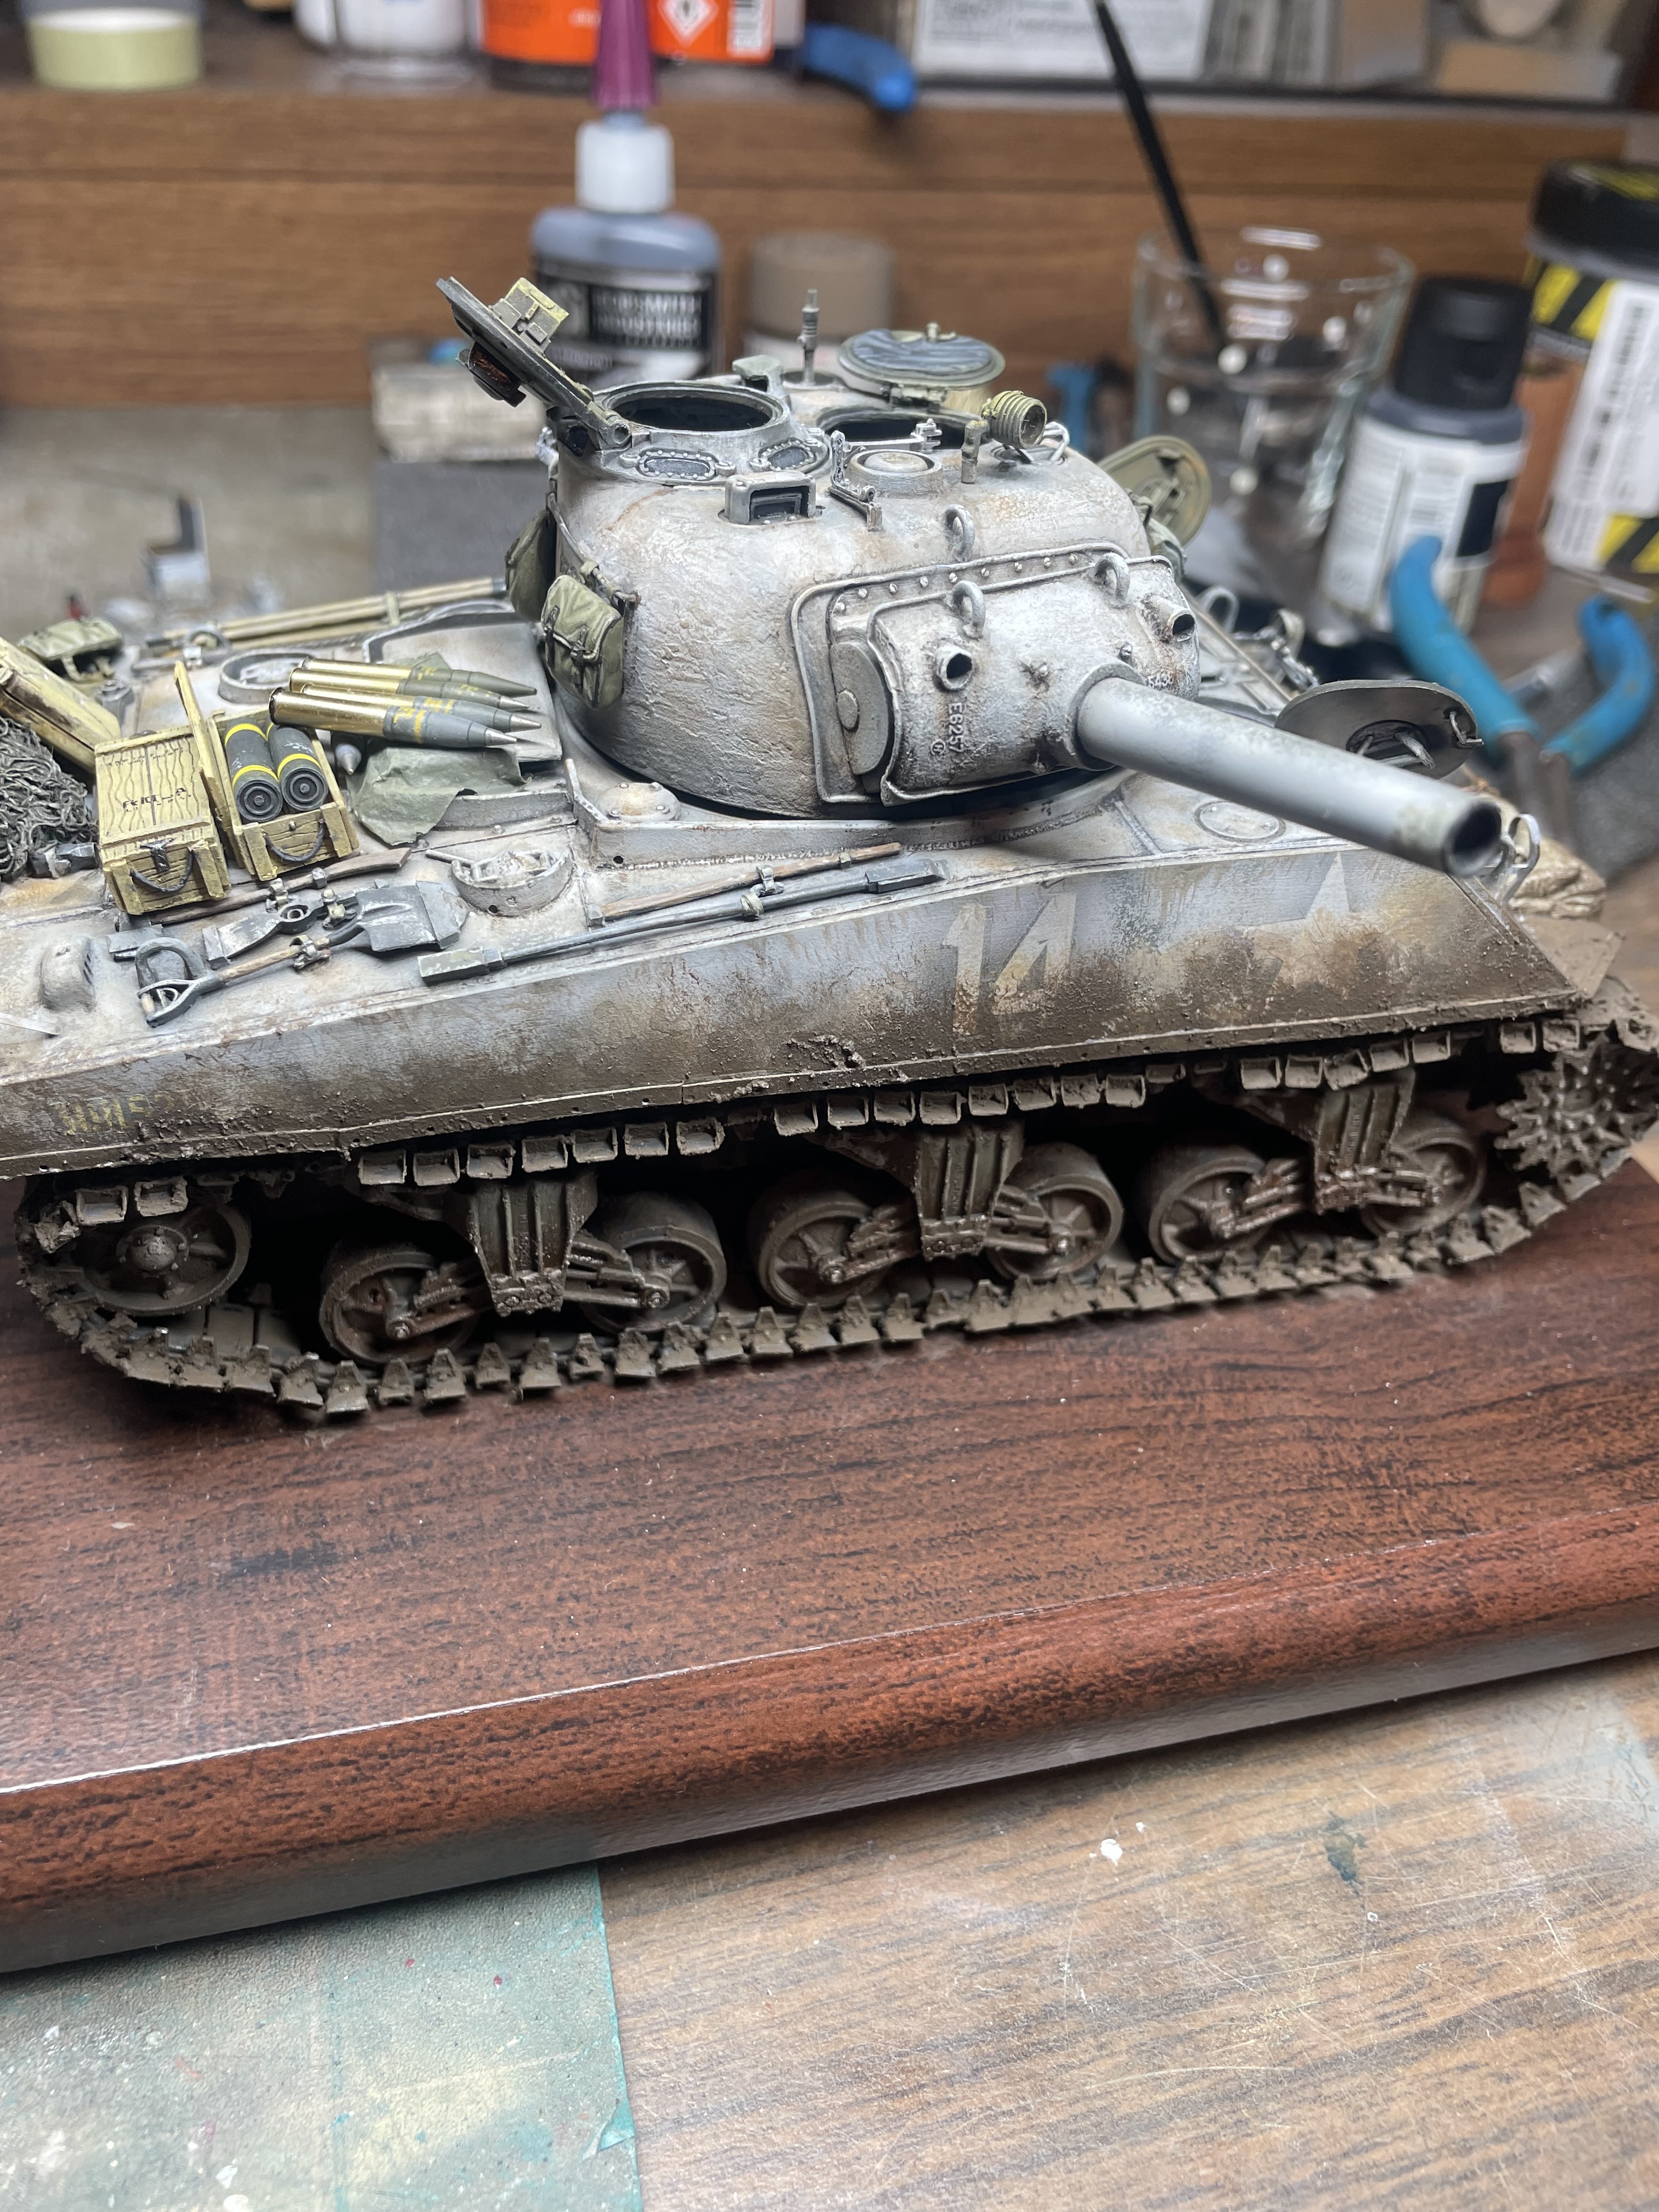
Thanks Matt. I did a lot more to the upper hull and turret this past weekend. I used the excellent abteilung 502 set of oils to apply mud on the upper surfaces but only lightly. I didn’t go too heavy on the turret either. I’ll post pics later.
2 Likes
That looks fantastic.
2 Likes
Thanks Ralph, I hope to wrap this thing up soon.
1 Like
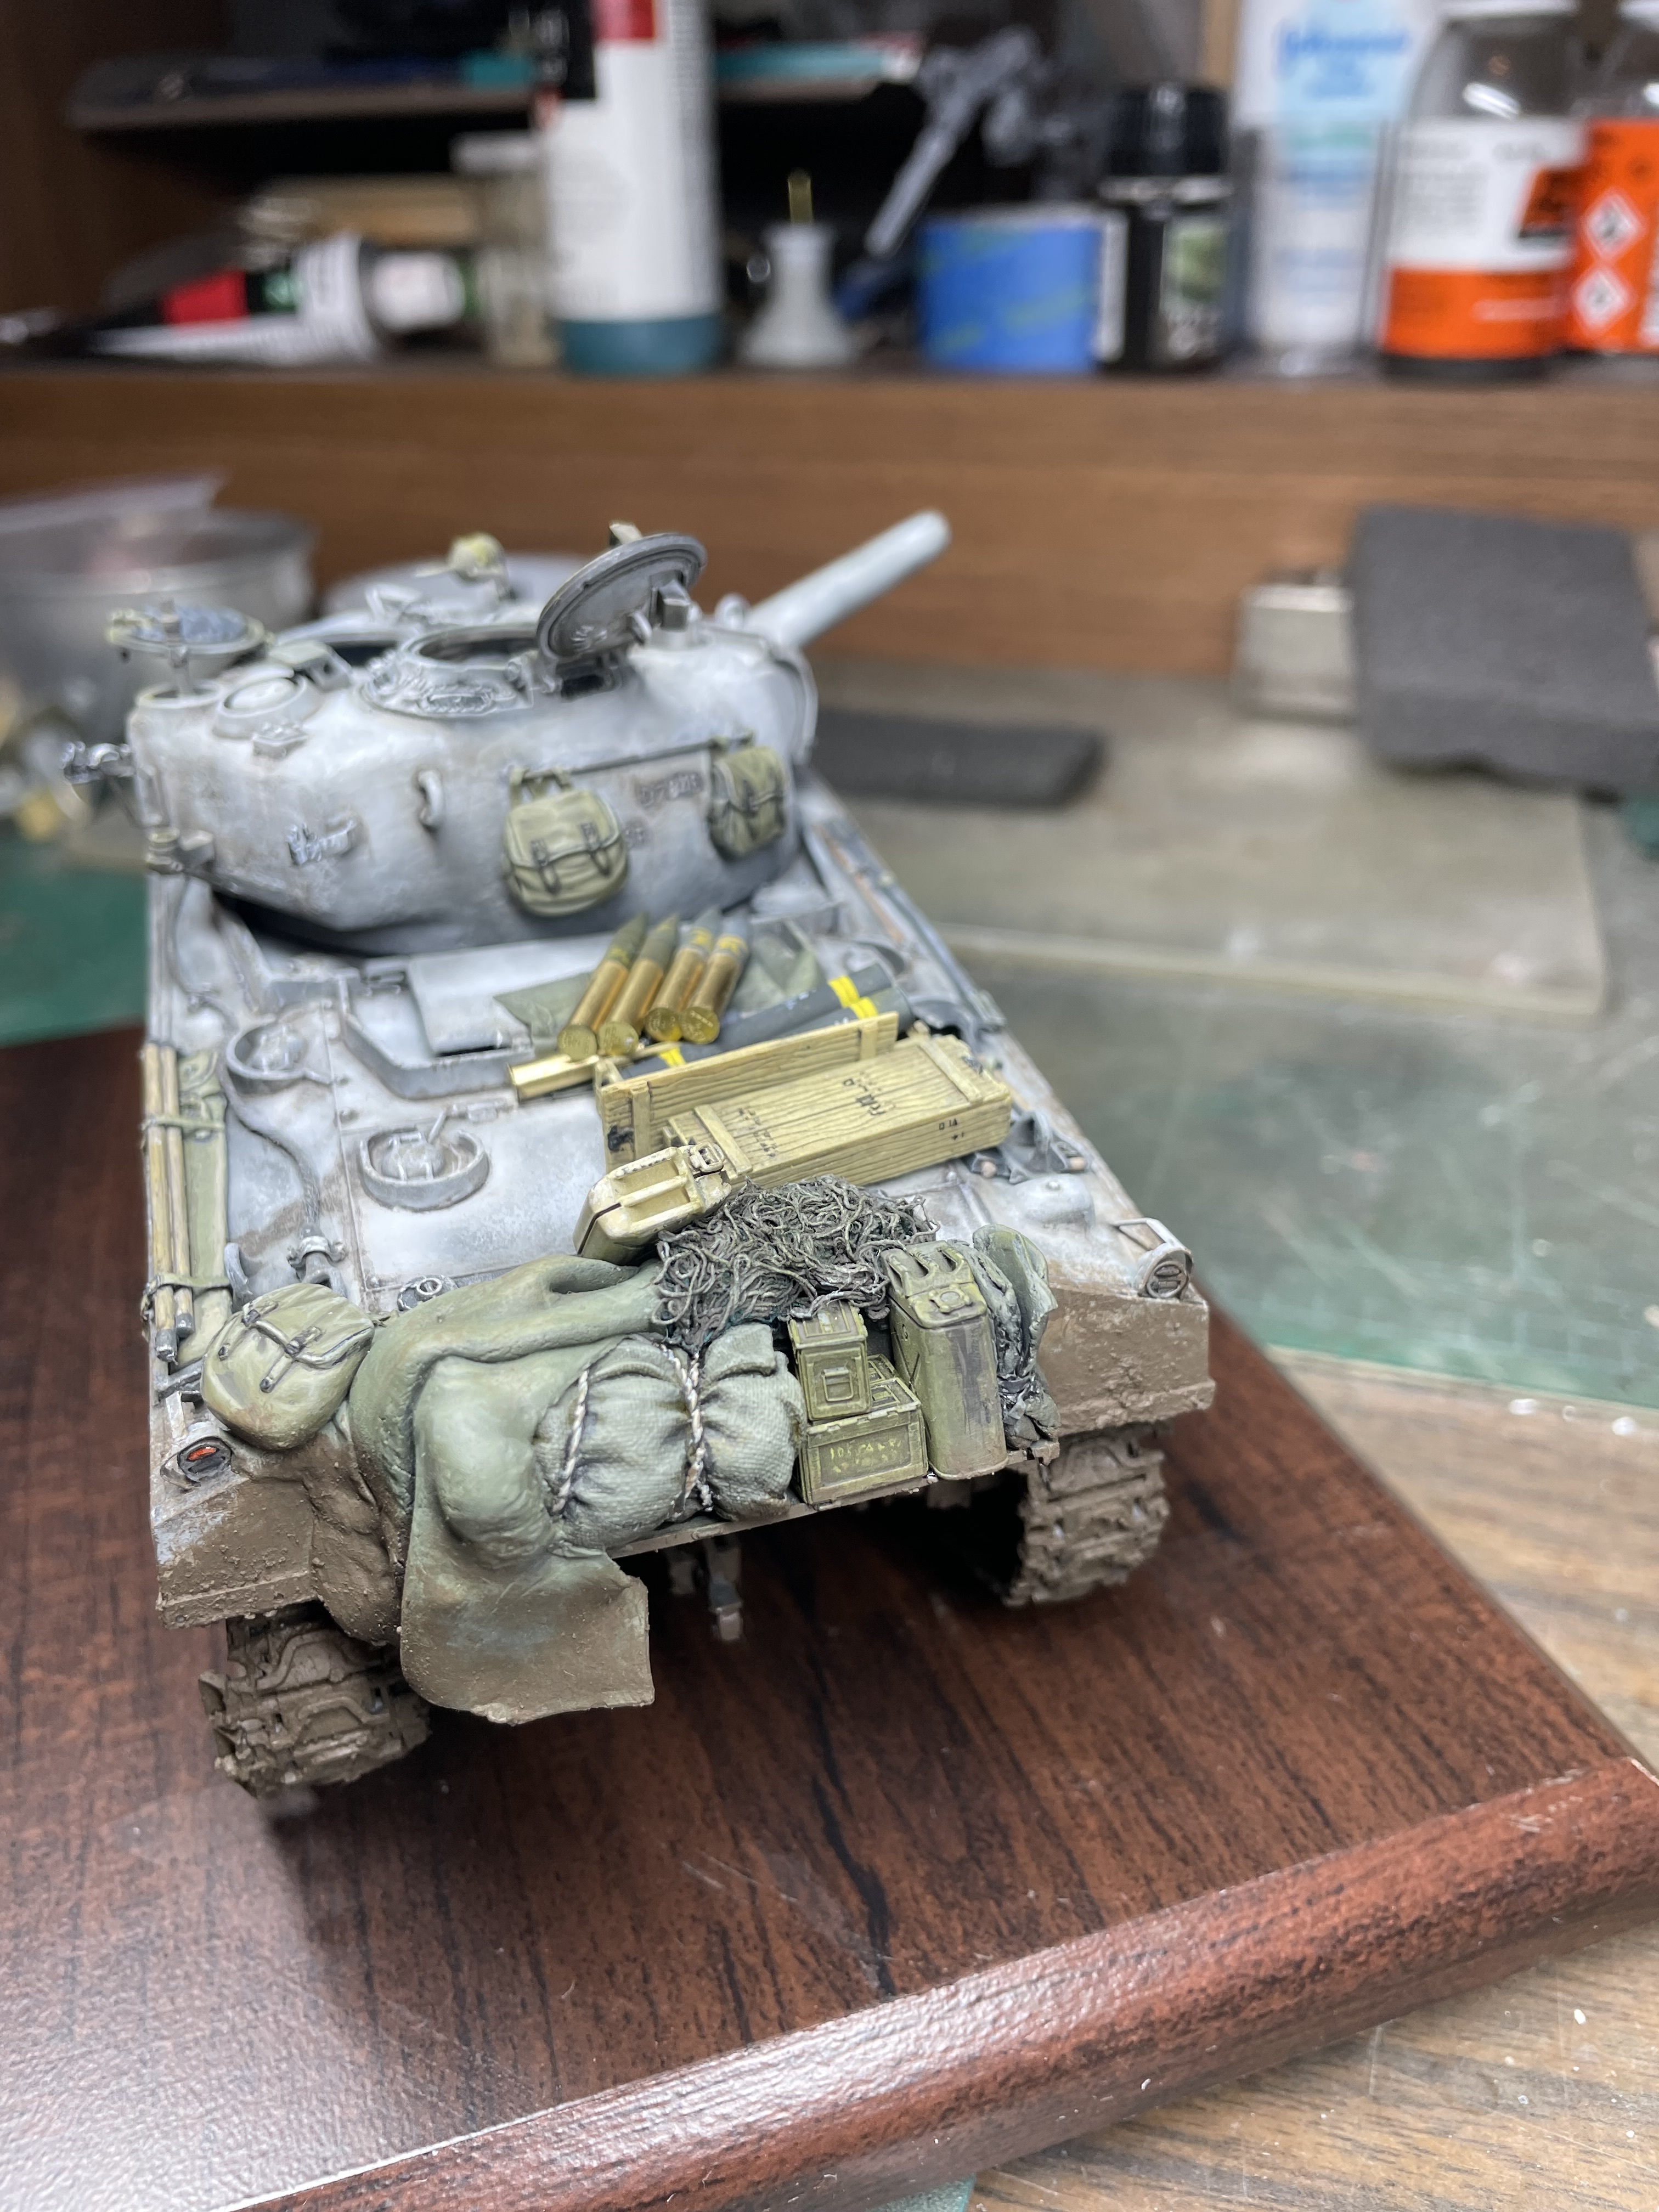
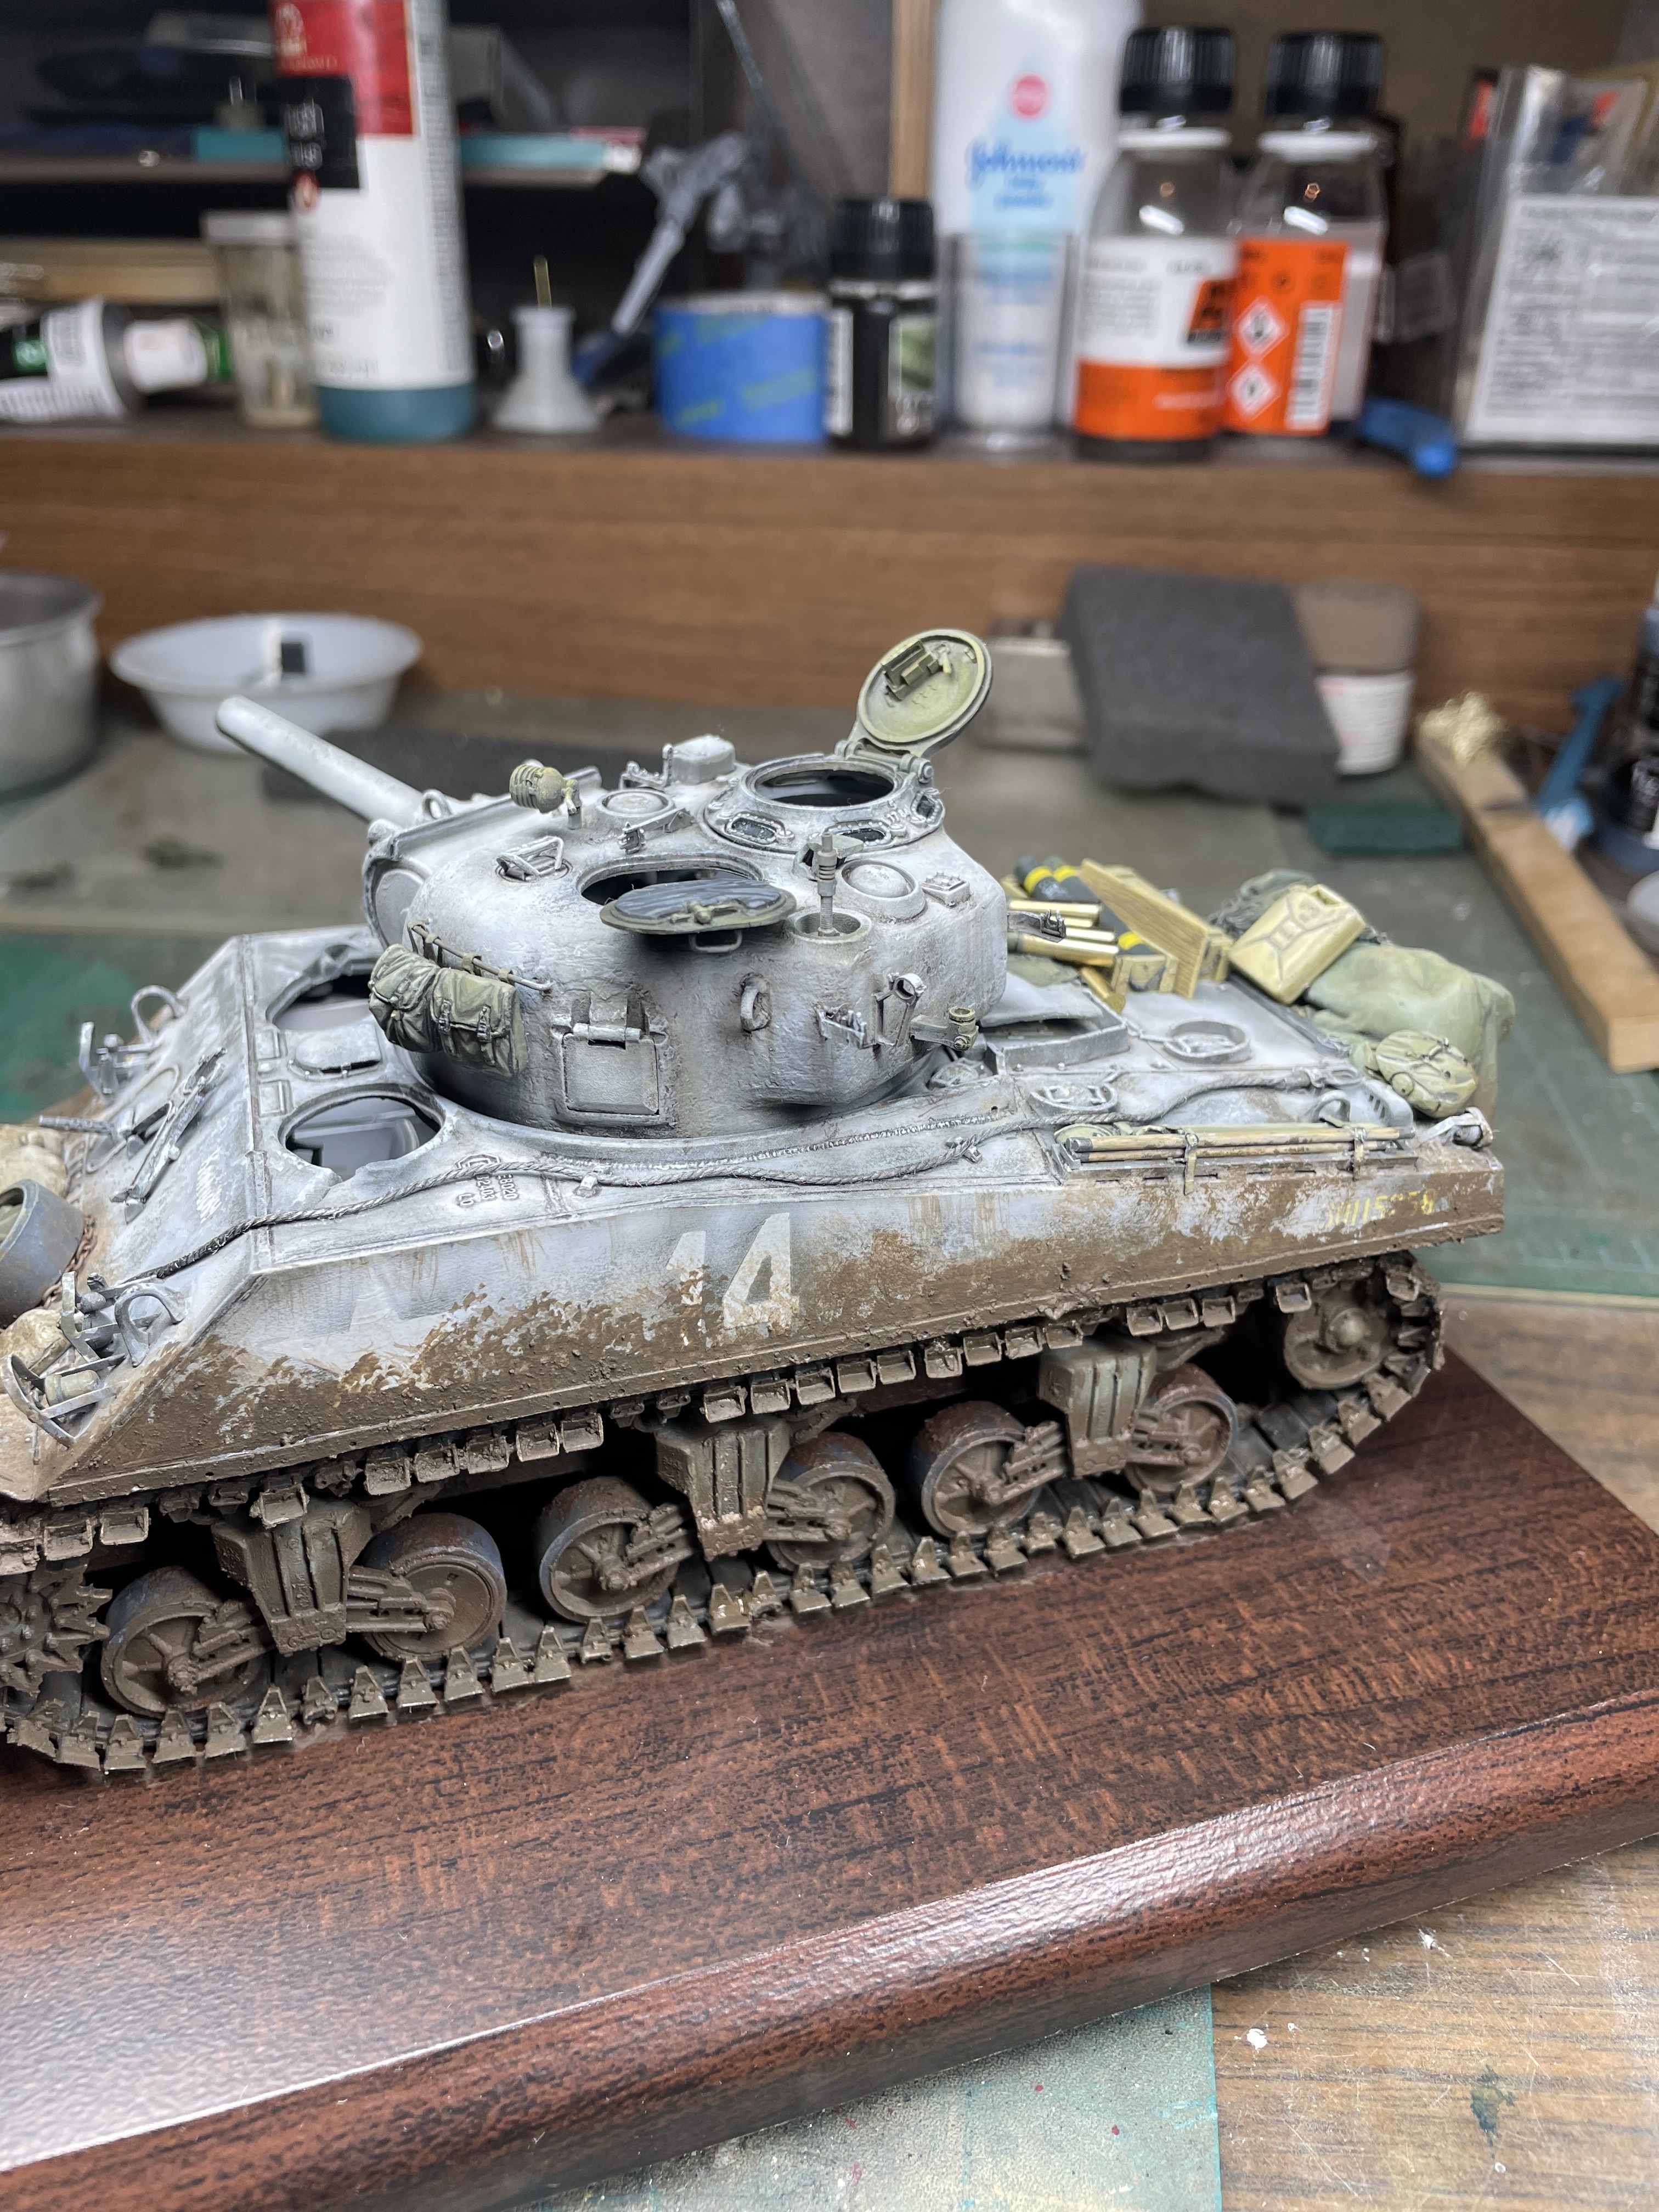
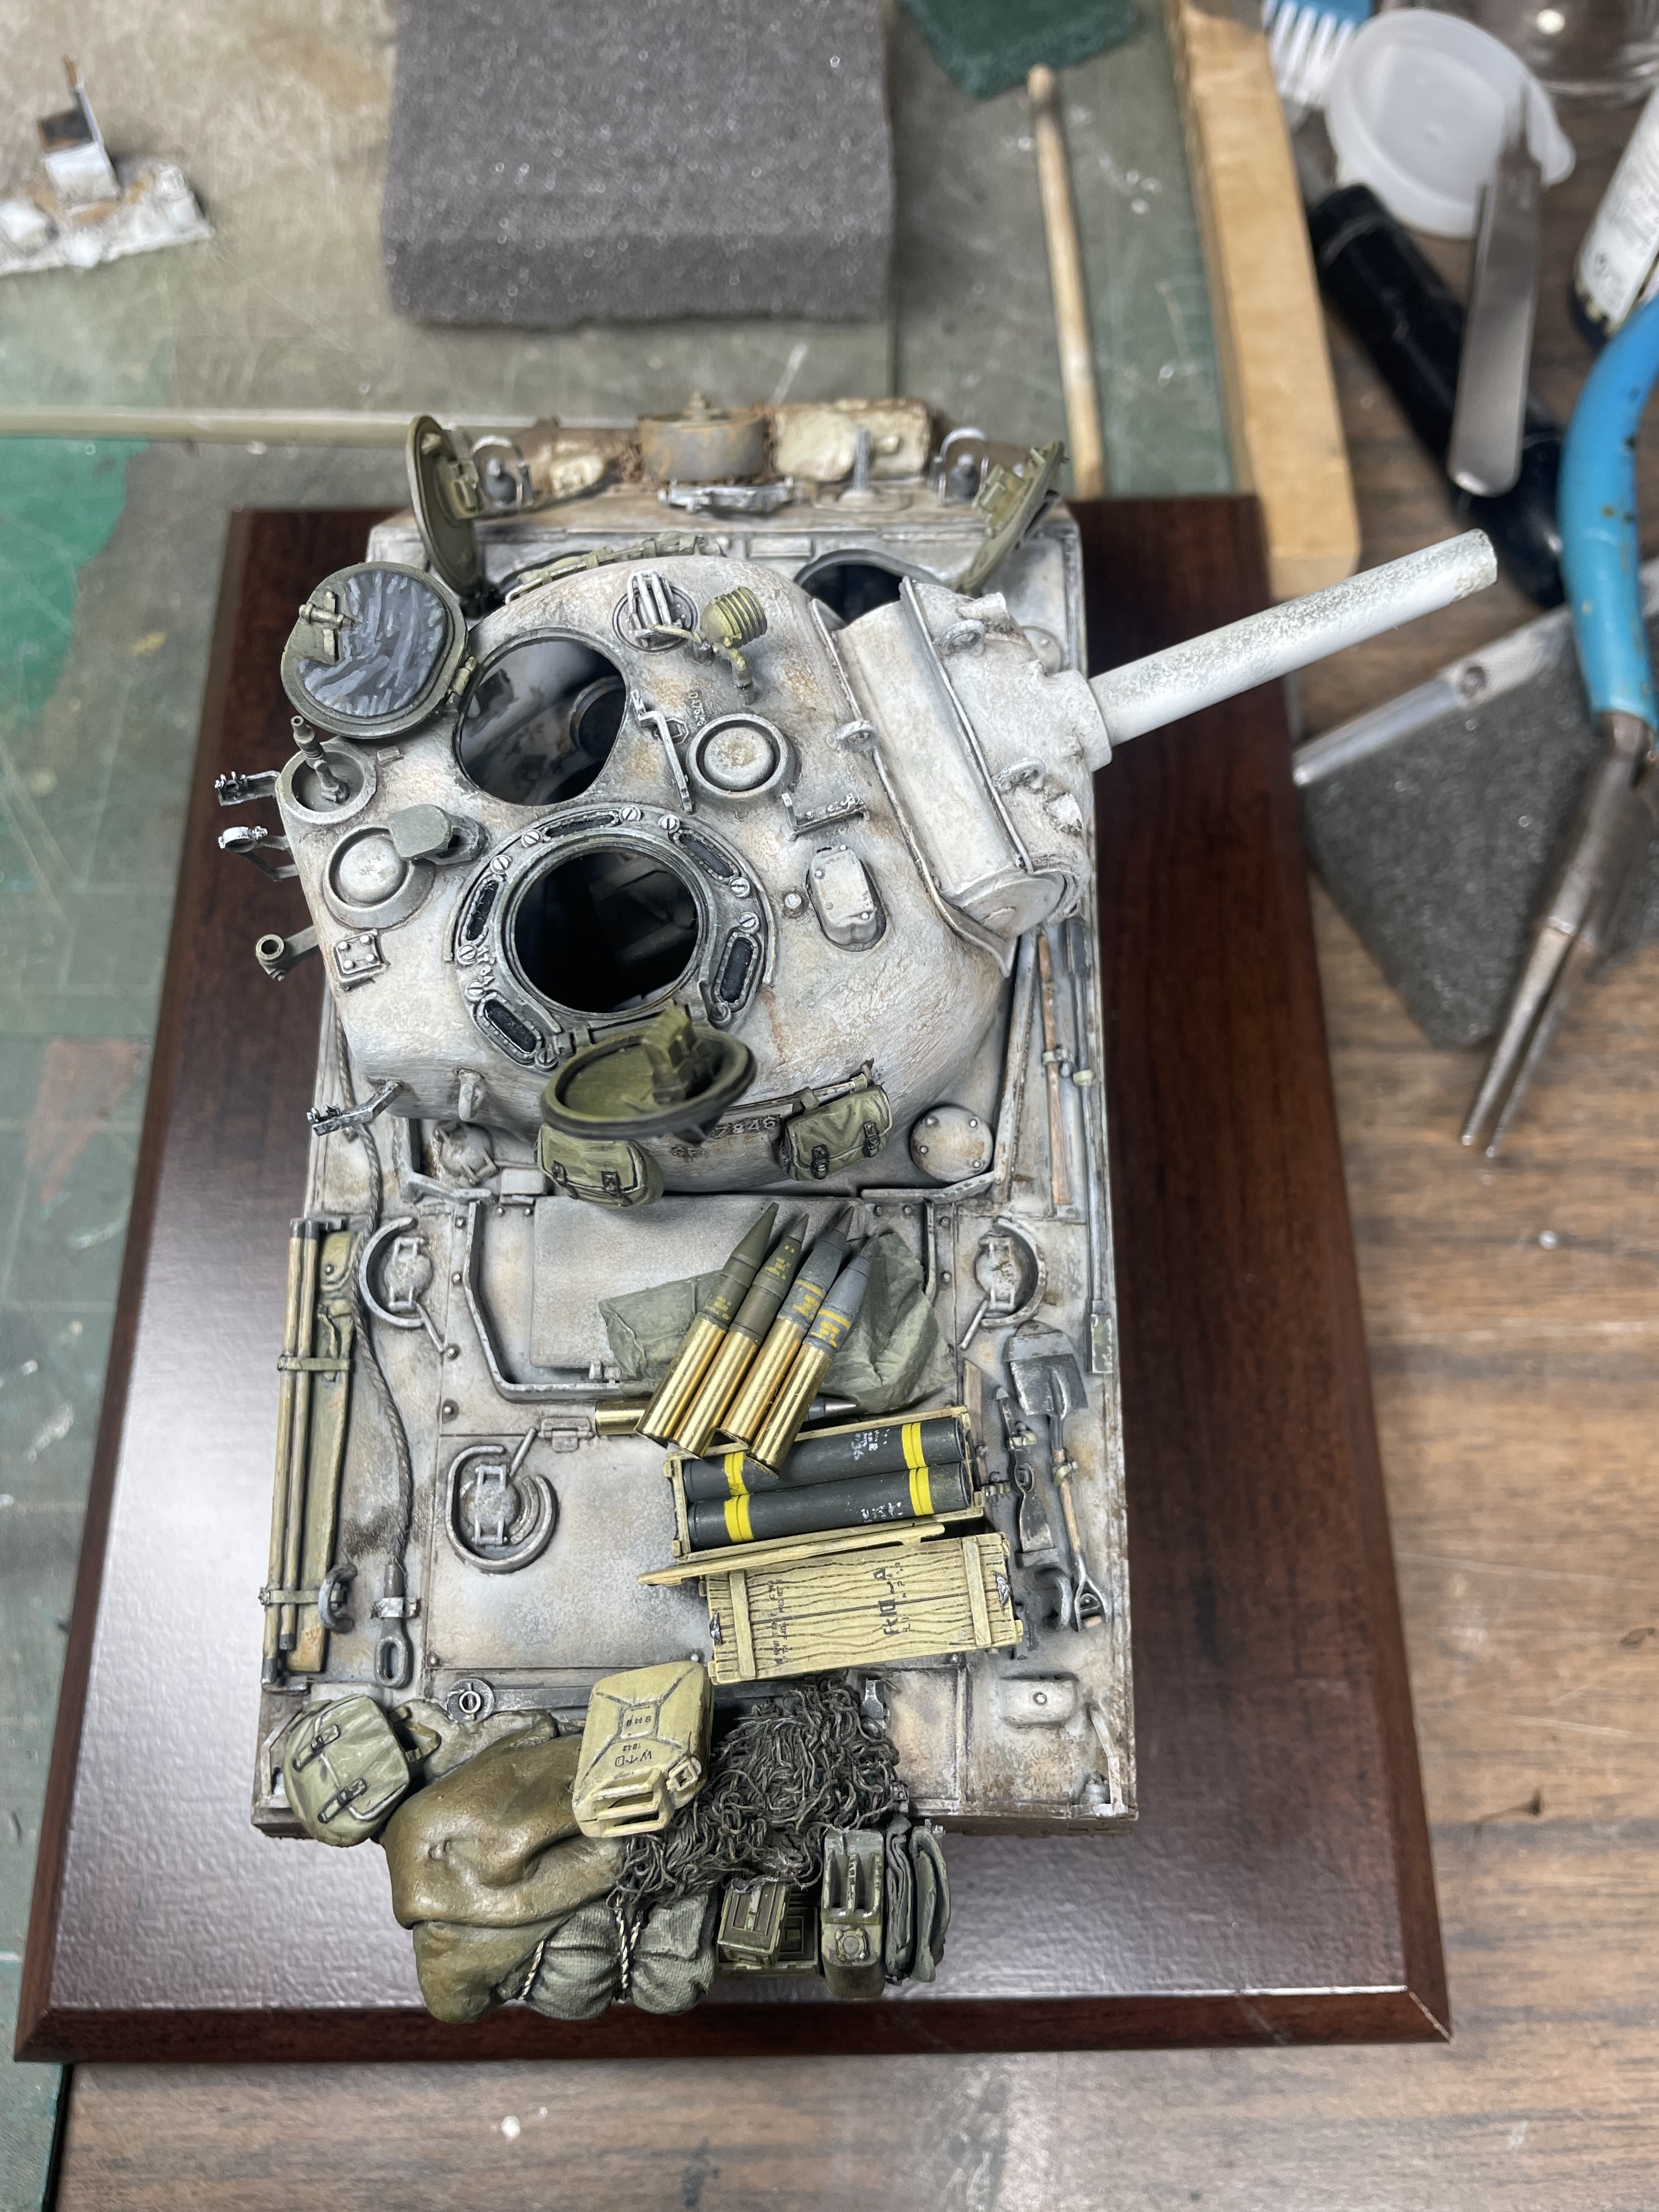
Here are some pics with additional weathering on the upper hull and turret. I added the hatches to the hull, just gotta add the .50 cal, the turret half floor had to be attached, and I’m waiting for bent antenna bases to finish this up. I still need to add tie down rope to the rear stowage as well.

9 Likes
Love the painting and weathering!
1 Like
Thank you Jack!
1 Like
I have a 105 Sherman RC in 1/16 scale from Tamiya and that was a cool build something about the 105 is just more special than any other.
1 Like