Thanks Gino, I took all the usual steps. They’re really visible in the flash of the pic, but much less so in shadow.
I’ll have to do something-sanding?
Thanks Gino, I took all the usual steps. They’re really visible in the flash of the pic, but much less so in shadow.
I’ll have to do something-sanding?
Sanding will destroy the decal. I would take a new #11 xacto blade and prick the decal so it has holes where it didn’t set well. Then I would do the solvent/set again and see if that does it. Usually, the issue is a not smooth enough surface under the decal and the solvent/set can’t get fully under big decals. I find future can sometimes leave a bit of flat areas. That is why I only use glosscote as a base for decals.
I’ll give that a try. What I meant about sanding was to sand the decal off completely (be tricky on the back one) and find new decals. I think maybe @Arch-Stanton mentioned this.
Your method sounds less extreme!
Question on the decals: Did you also put Future UNDER the decal before applying the decal? Apply wet decal while Future is still wet then top coat the decal with more Future and allow to dry.
Skip the Solvset as it is totally unnecessary. (And inaffective.)
Finish off with a final coat of your matte clear to hid the shine of the Future. (I find that Tamiya Matte Clear - TS-80 rattle can is the absolute best for this job. Applied very dry.)
Others will disagree but dont knock it if you have not tried it. (Trick taught to me by a long time, very successful competition modeler with LOTS of trophies hanging on his wall.)
I can offer beaucoup photos to prove this system works like a charm!
In a word no. I’ve seen a few vids on Future, but obviously missed this little gem!
Following the vids, I airbrushed 2 light coats of Future and set used Microsol ( the blue one ) under the decals.
They all settled well except the bigger ones. Gino’s explanation covered the “placing onto dried Future doesn’t always work” issue, as have you. But from another angle.
Only last night I was pondering throwing the near-full bottle out, now I can keep using it - but properly.
Quick question. Do you sealcote the whole model first, then wet the decal areas?
Thanks for your advice.
My answer to your last question might possibly surprise you as it flies in the face of everything this group has been taught . . .
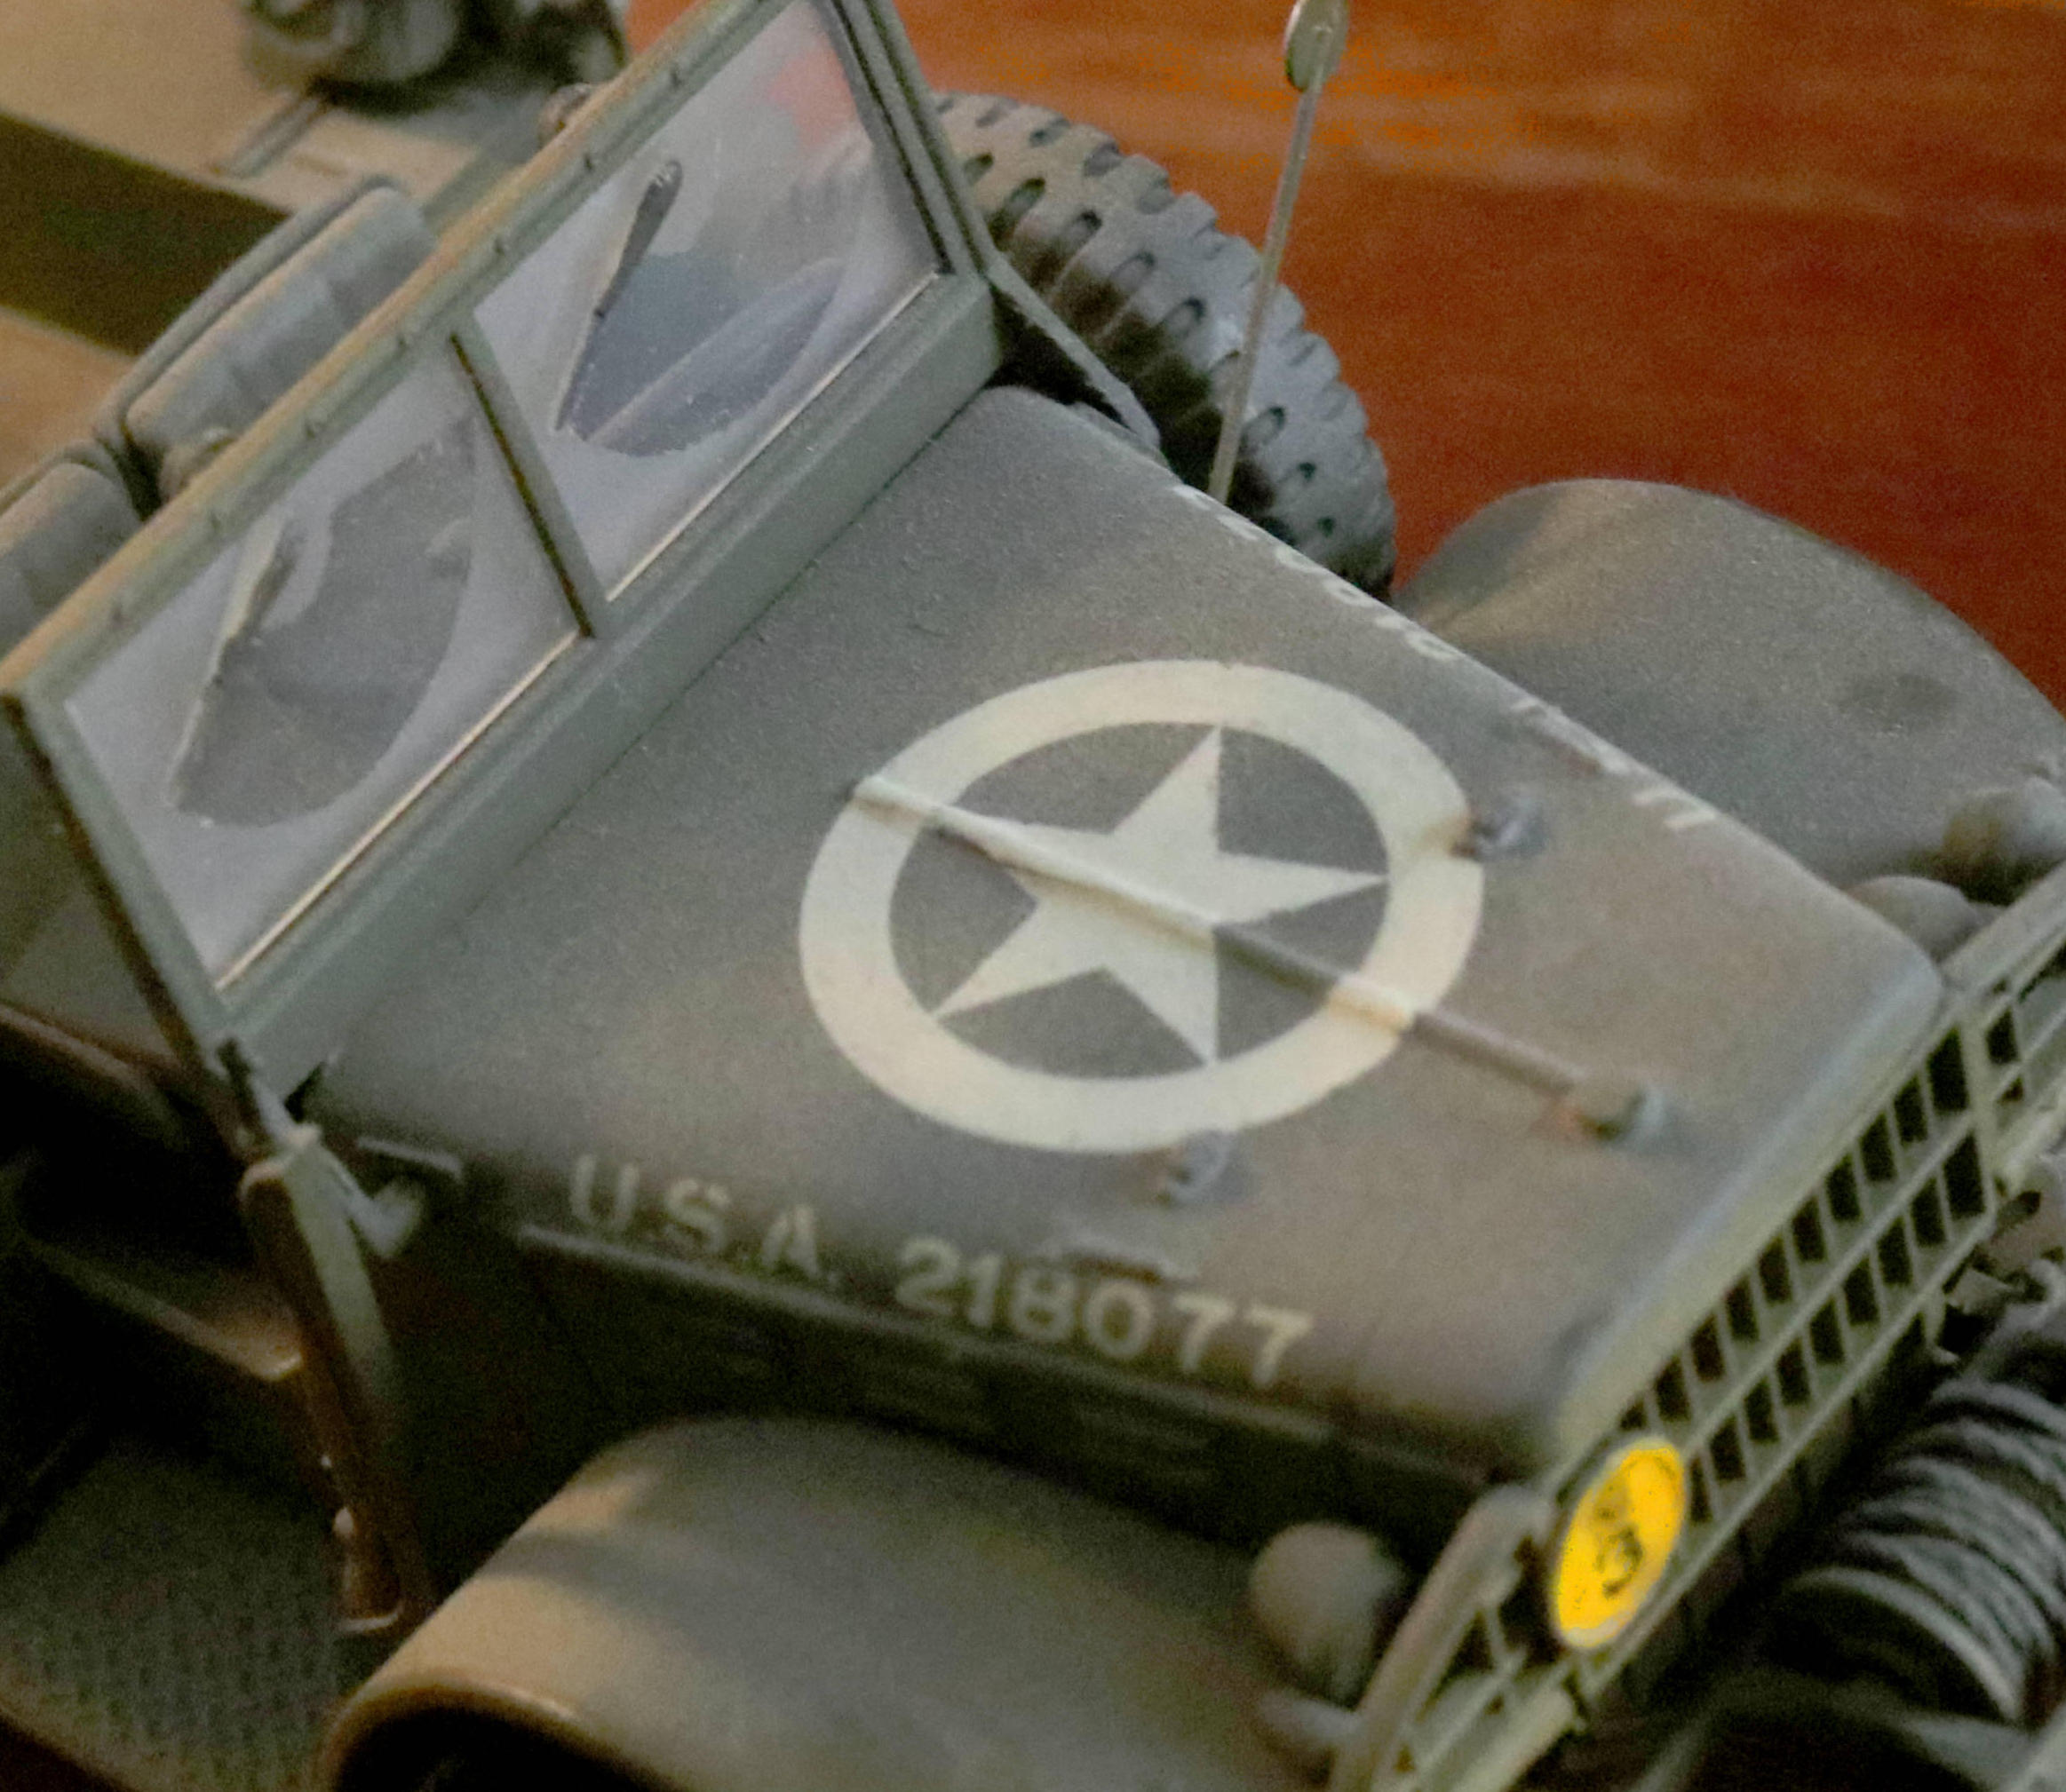
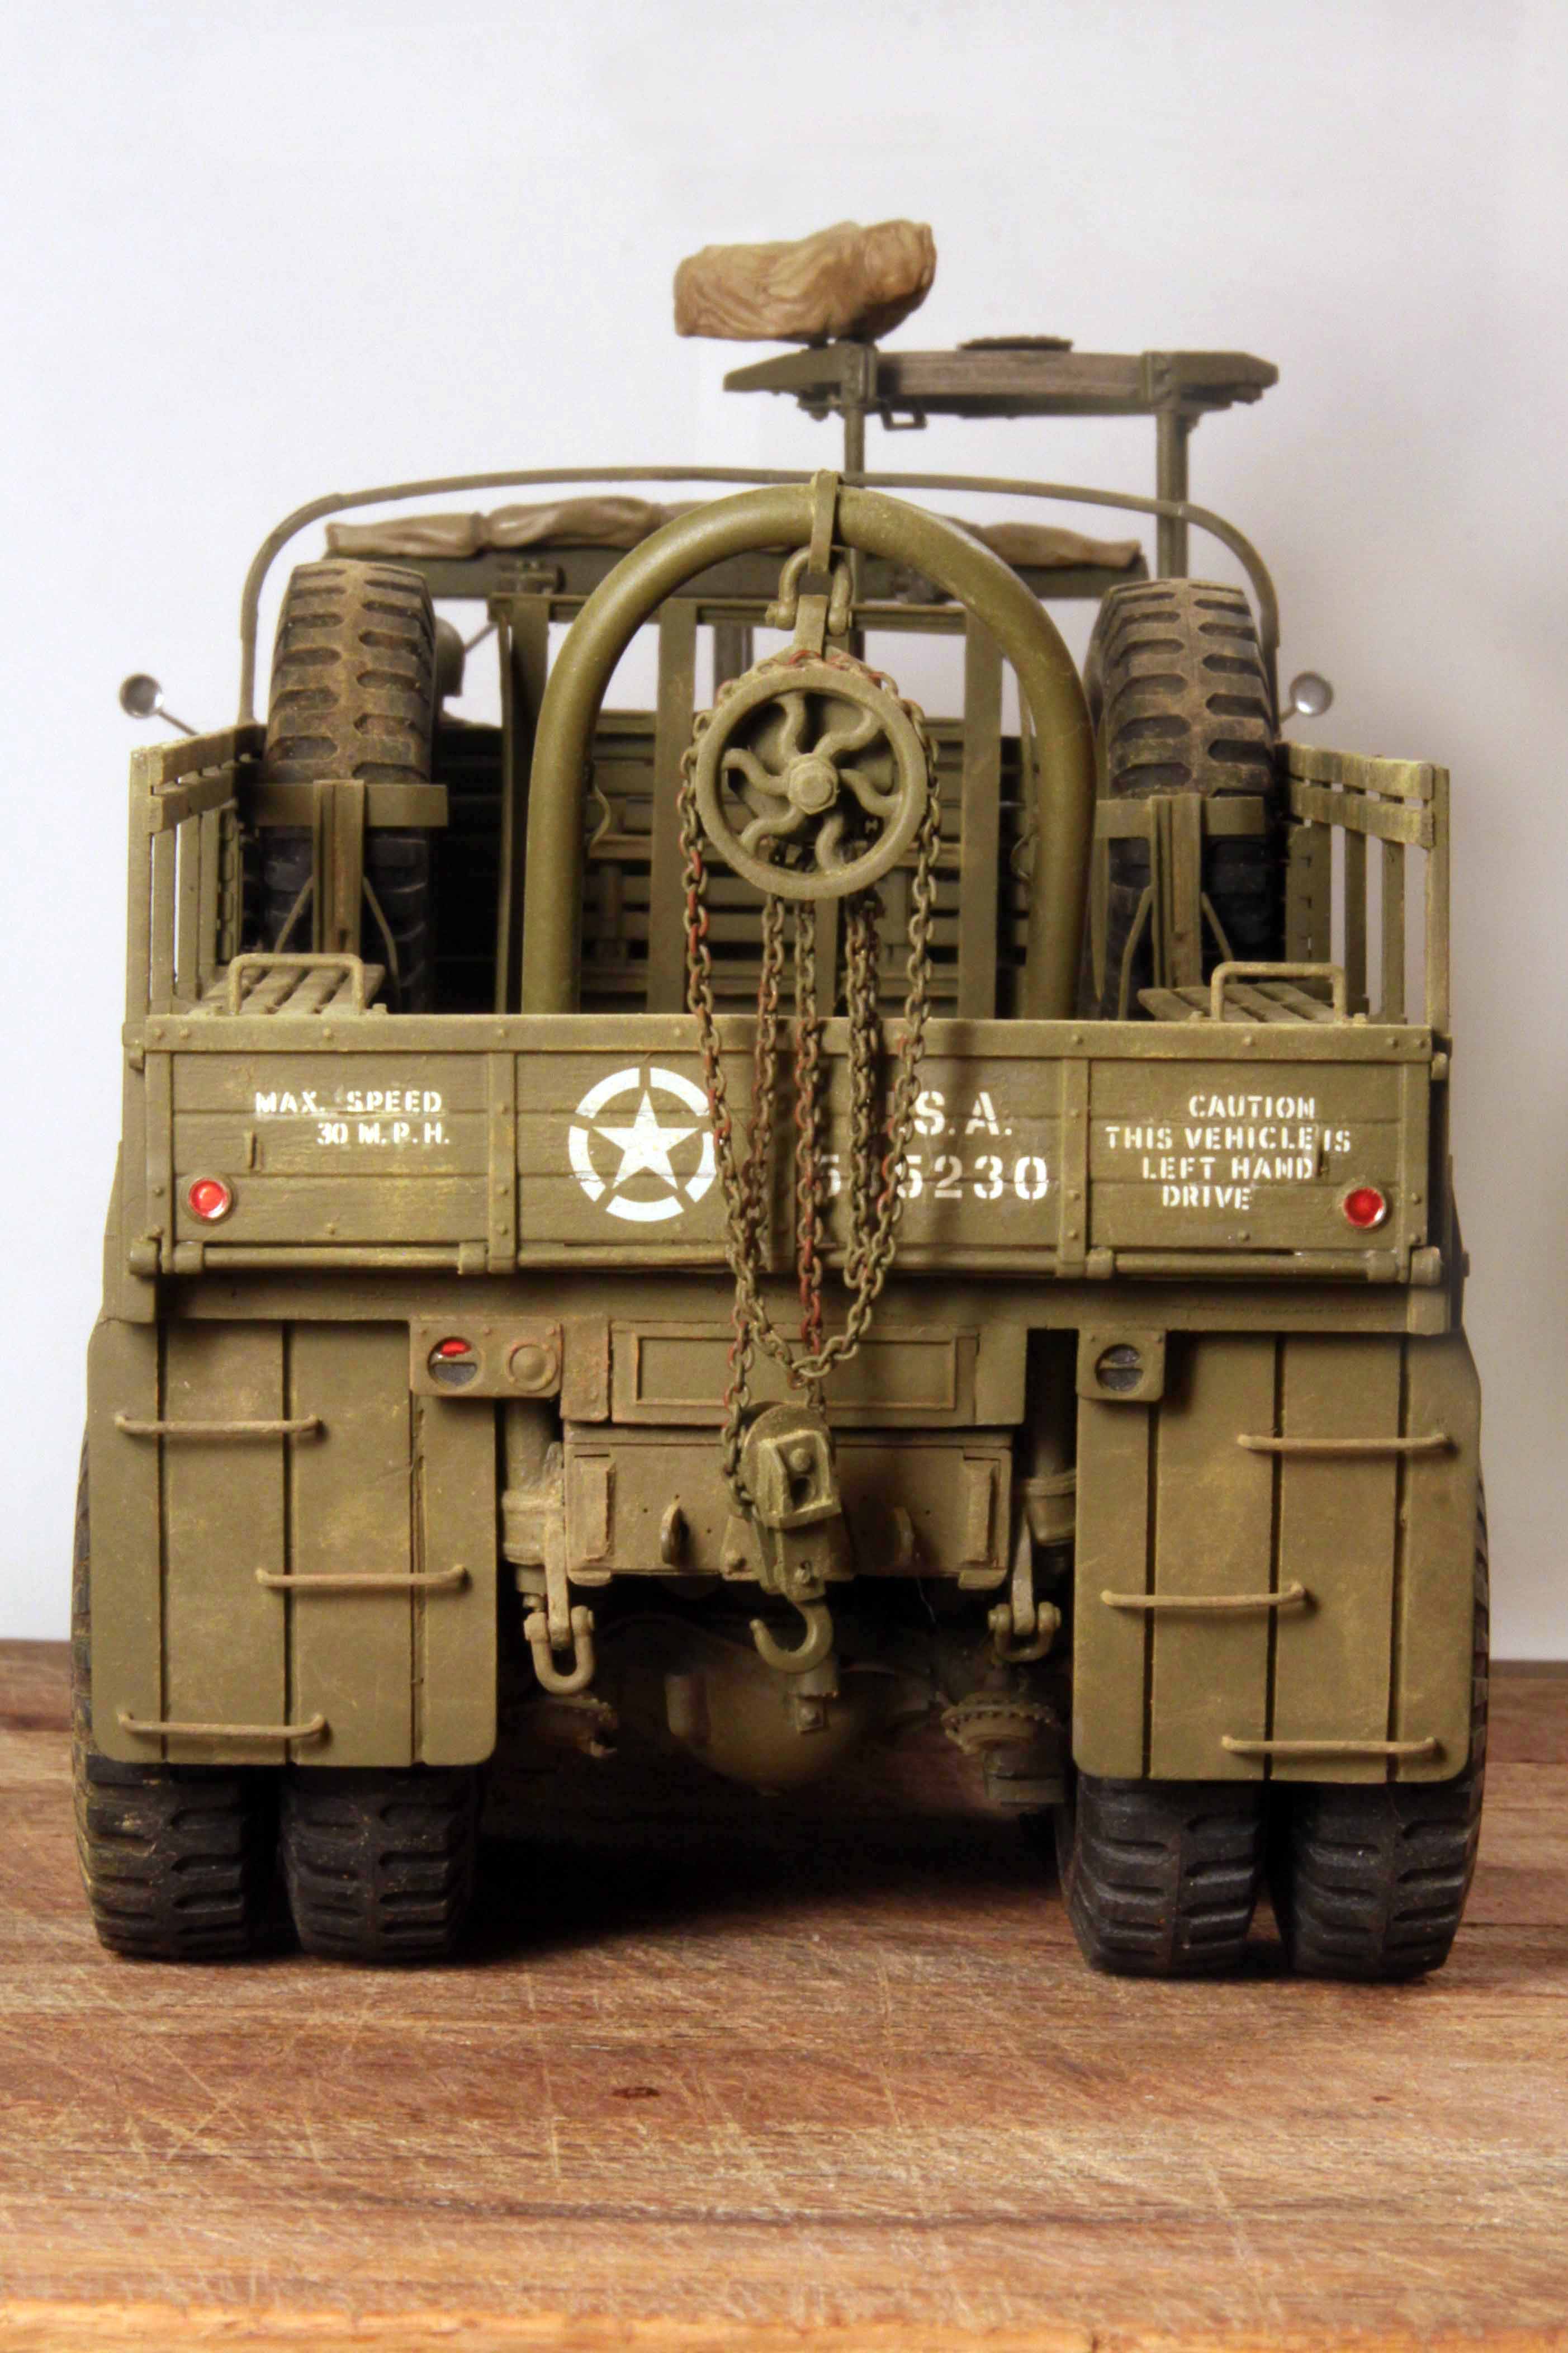
I spray the model with Matte Clear (Tamiya TS-80) BEFORE applying the decals!
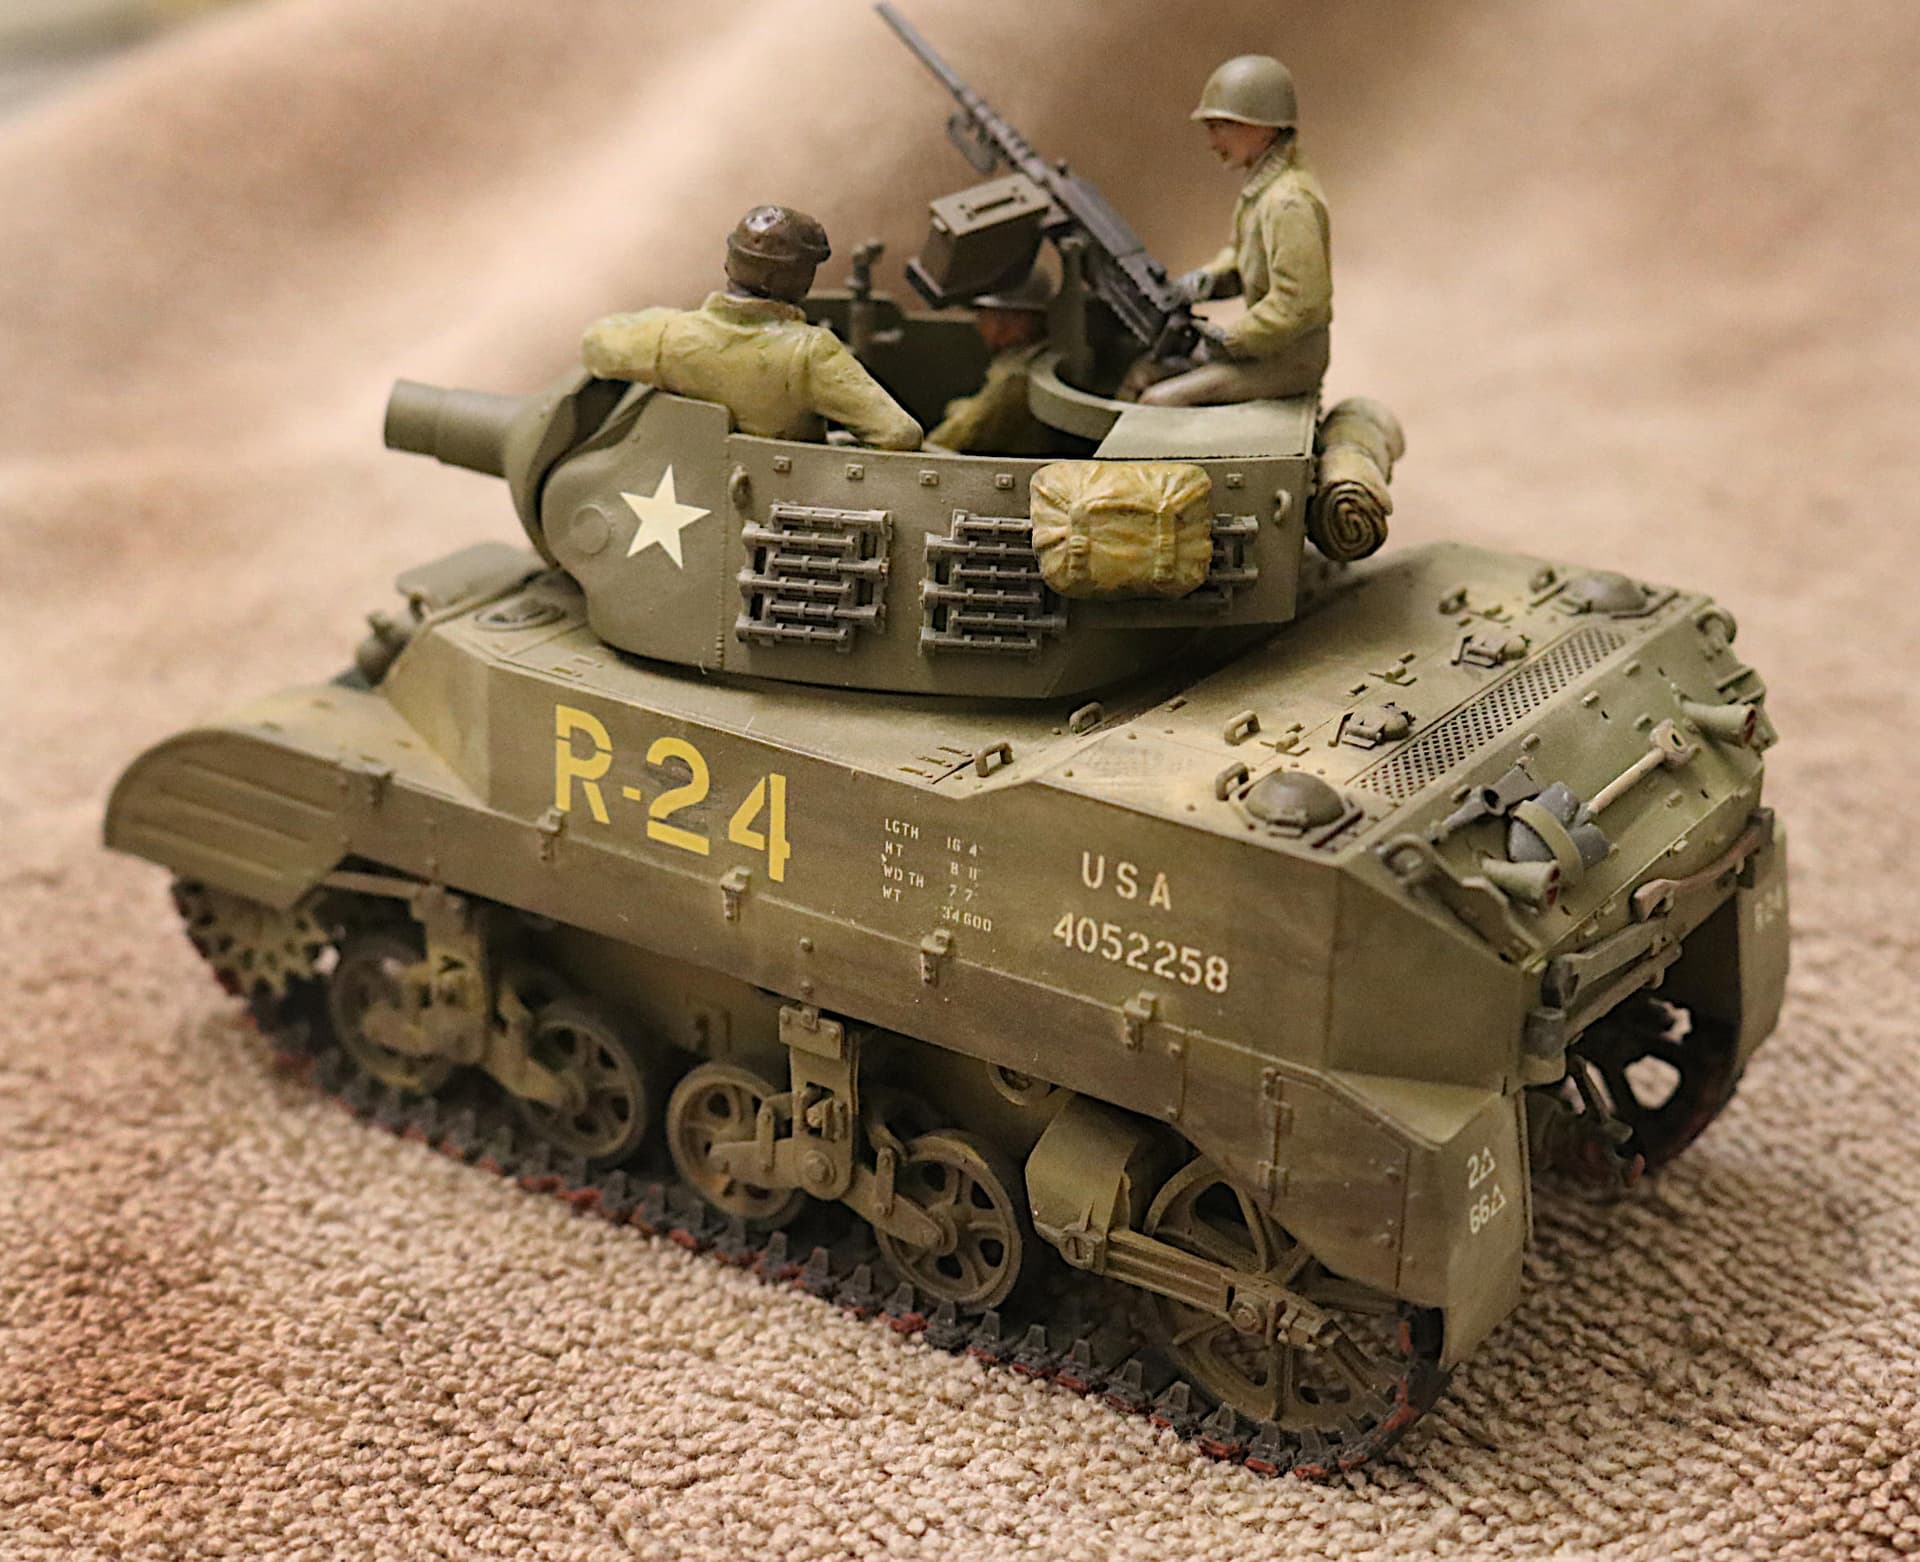
I spray it on very dry to give the decal a slightly rough “toothed” surface to adhere to. I then BRUSH ON some Future just in the area where the decal is to be applied and while the Future is still wet I apply the water soaked decal. As this starts to set I will apply another top coat of Future to completely entomb the decal.
(This also does wonders to build a tiny transition curve/ramp between the model surface and the edge of the decal film, usually making the edge disappear entirely.)
I allow this all to dry completely (overnight) and then go over the decal area with several more coats of Matte Clear to hide the shine of the Future.
I try to preach this technique far and wide on this site but usually I get responses like “no way”, “old fashioned” or “Solveset is better.”
So to those folks that scream NO, I just say “whatever is working for you keep doing it!”
BUT . . if you are having problems successfully applying your decals then you MIGHT just want to try it my way! *
*Not really even my way. This technique was taught to me by Monte Kelch of Cincinnati. He is now retired from modeling at age 83 but the man has way more “wood” hanging on his walls and more first place trophies than I will ever hope to have!
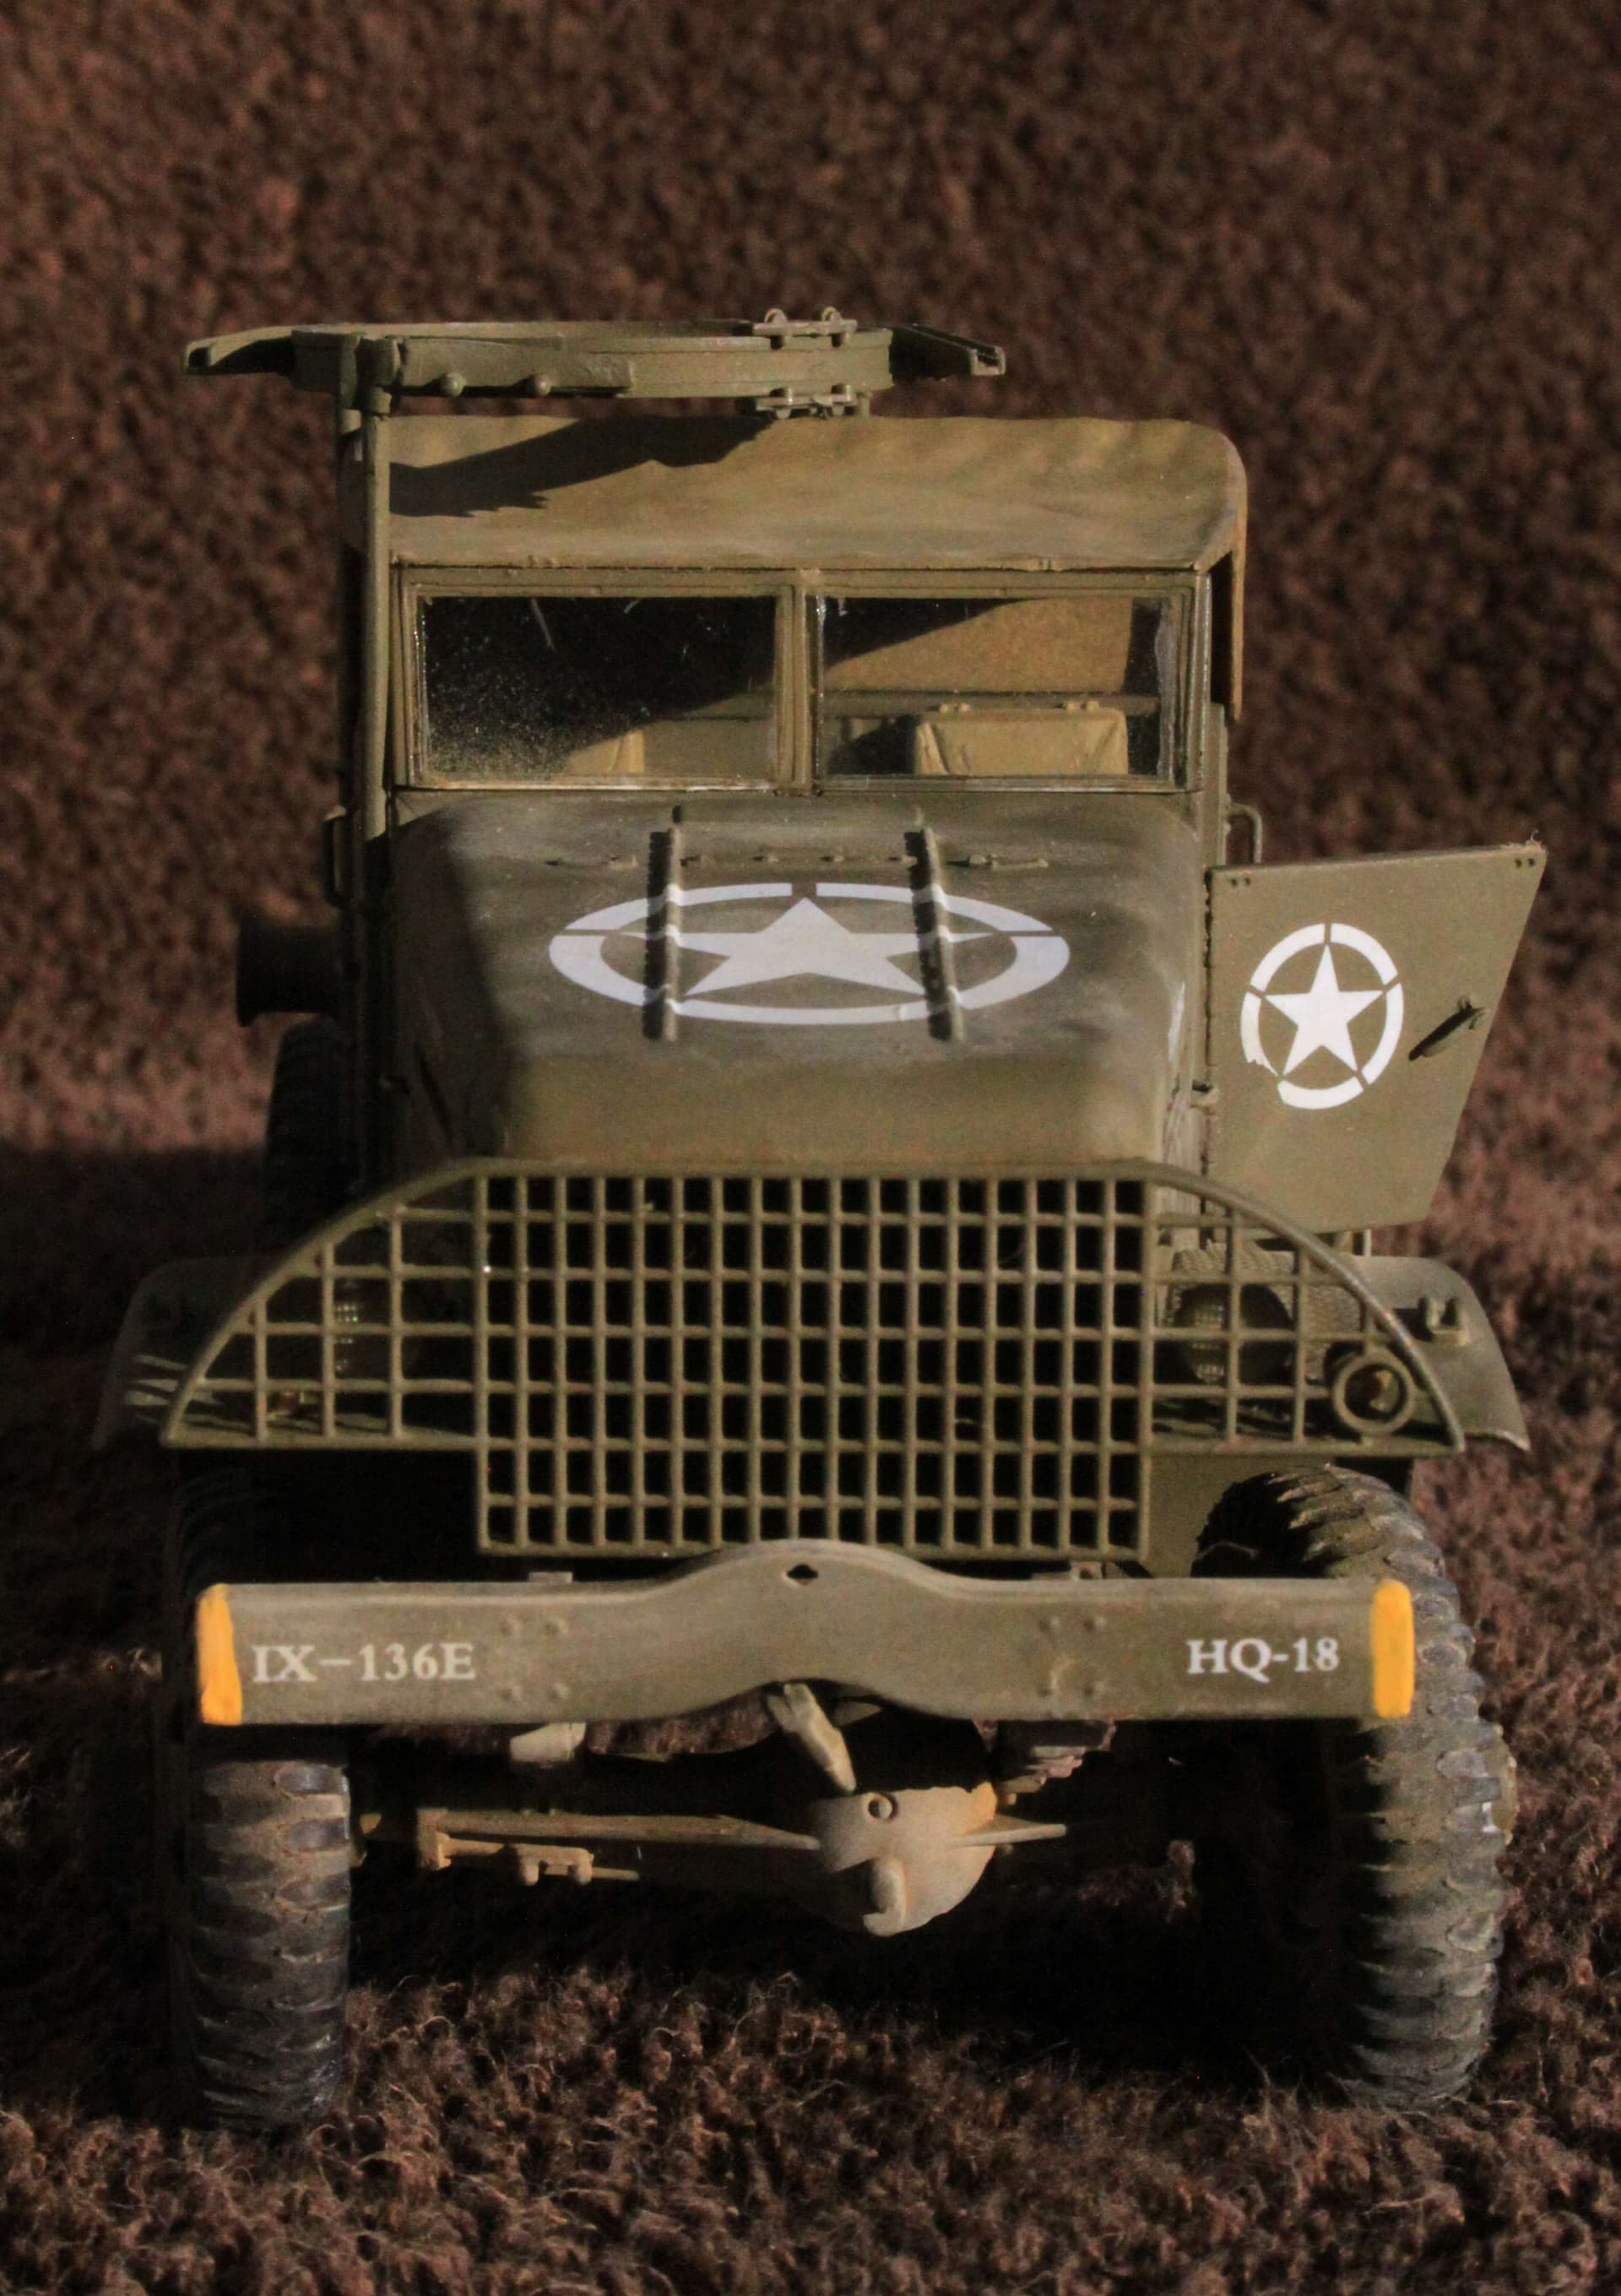
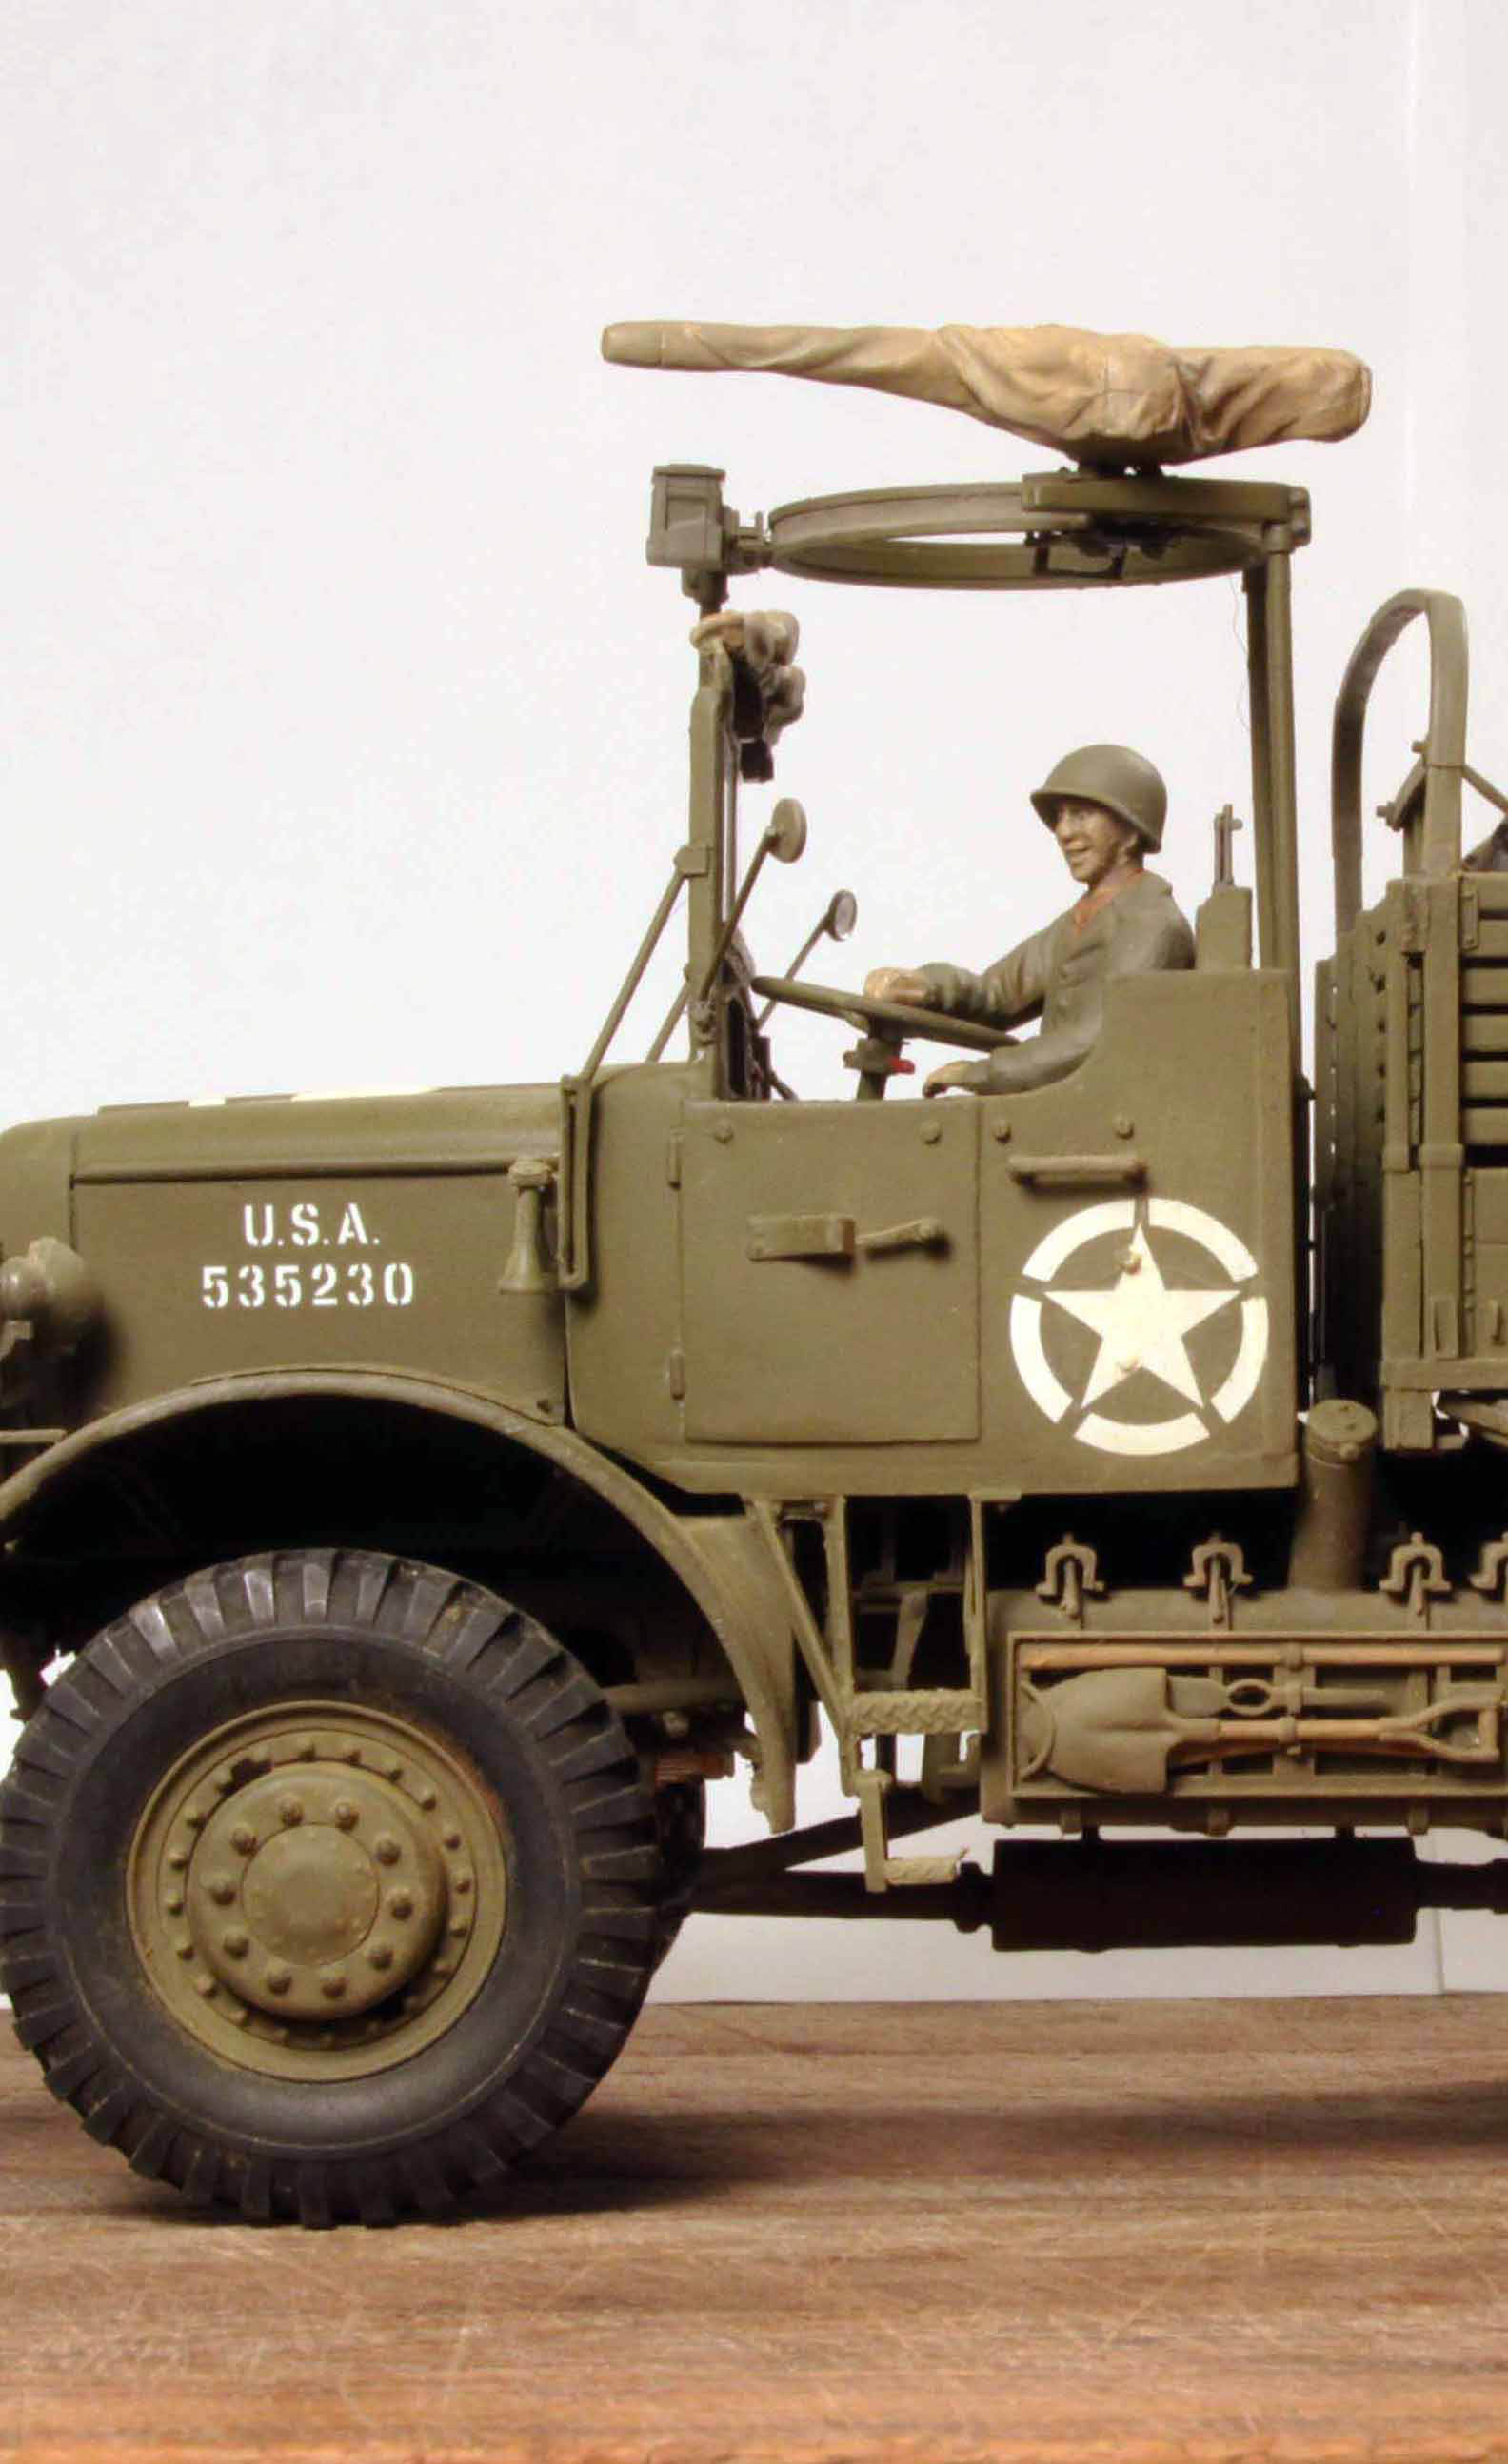
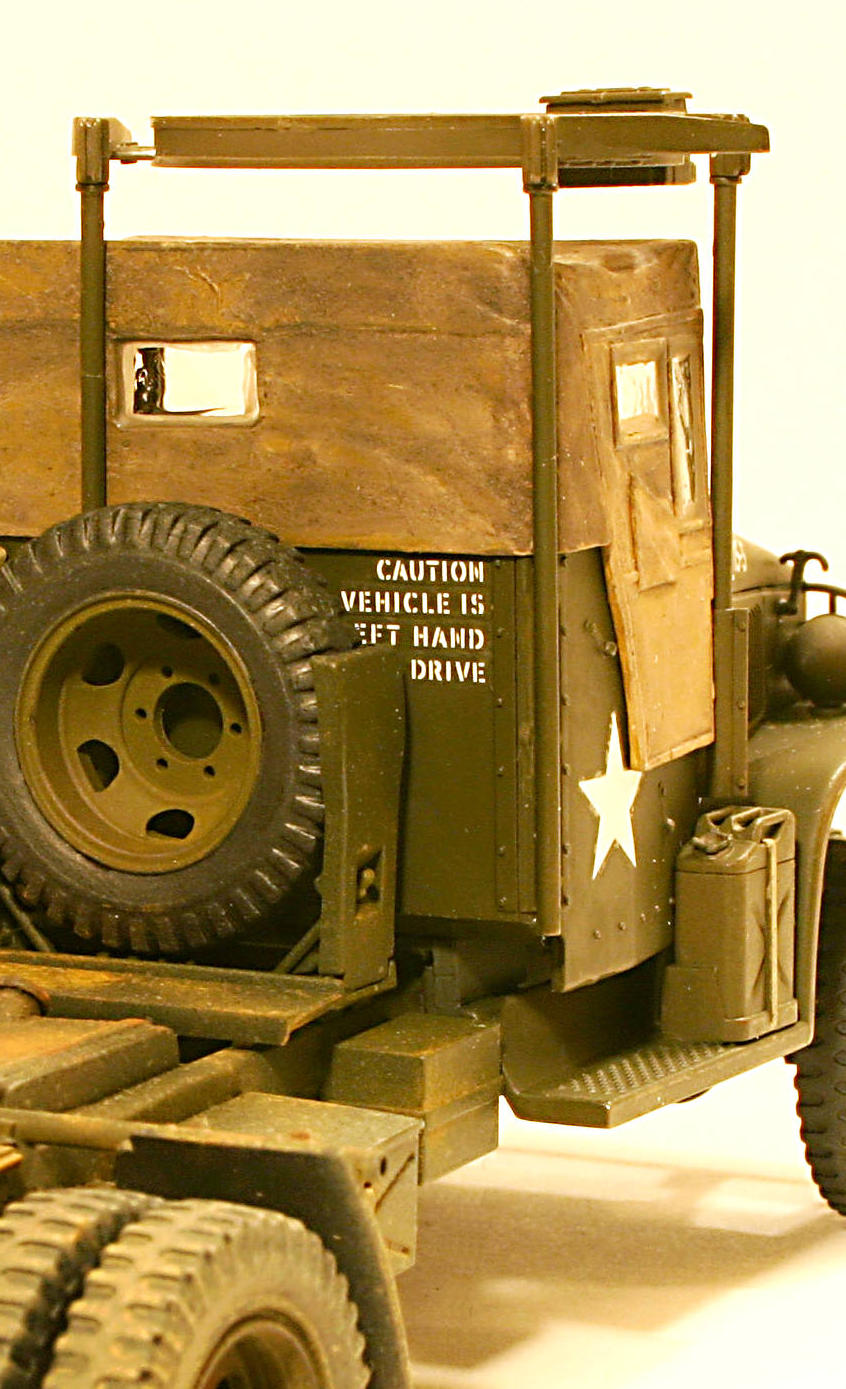
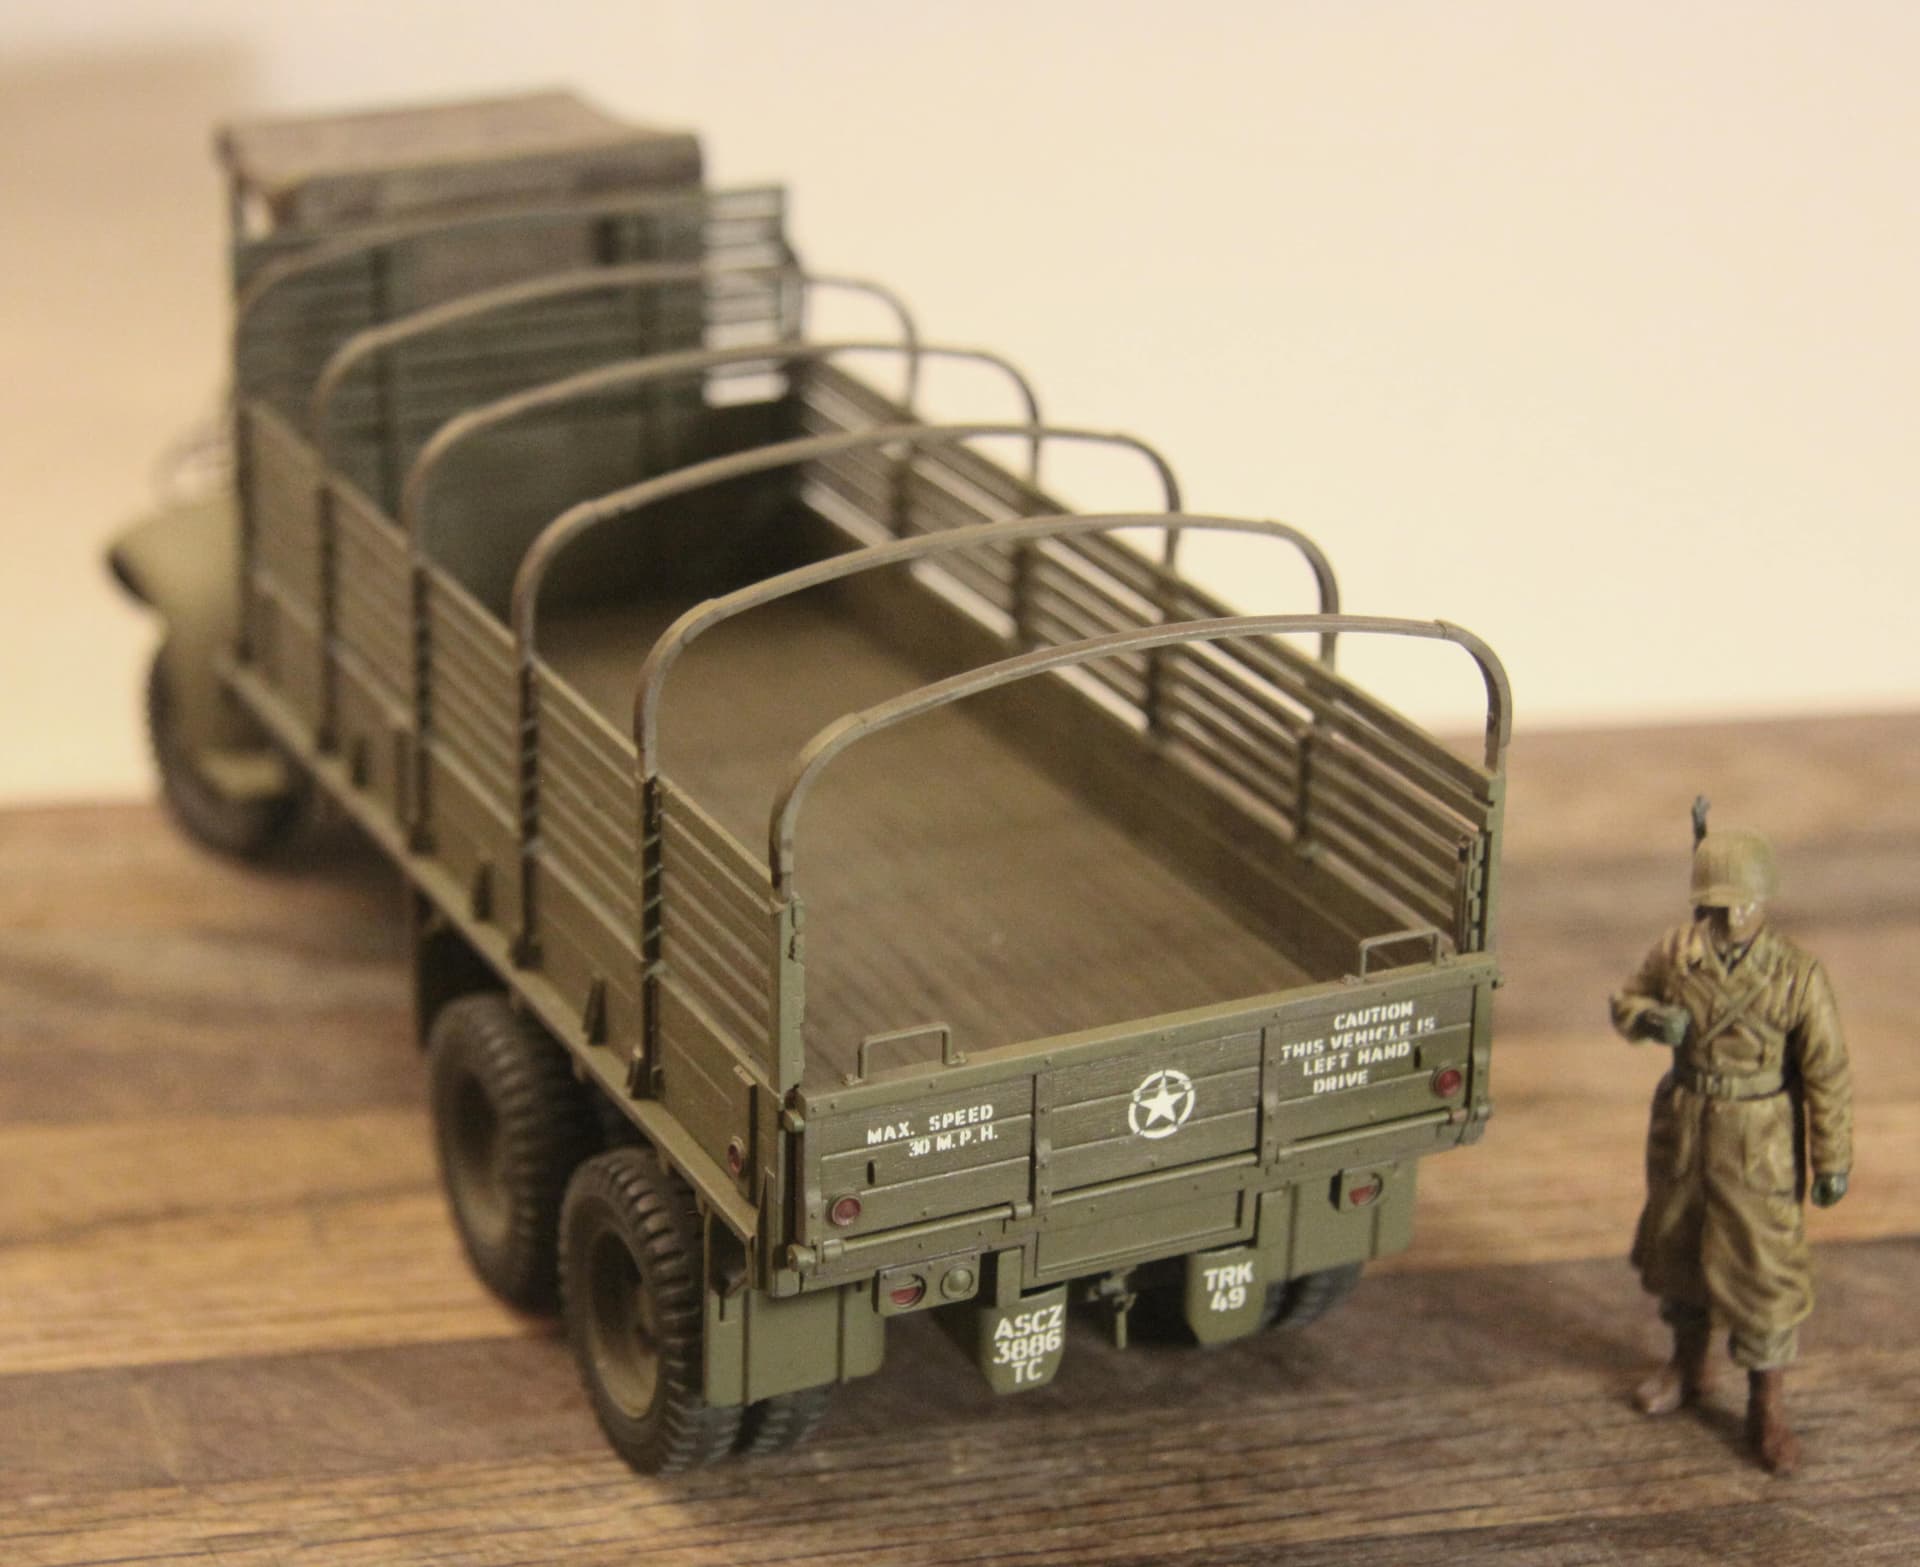
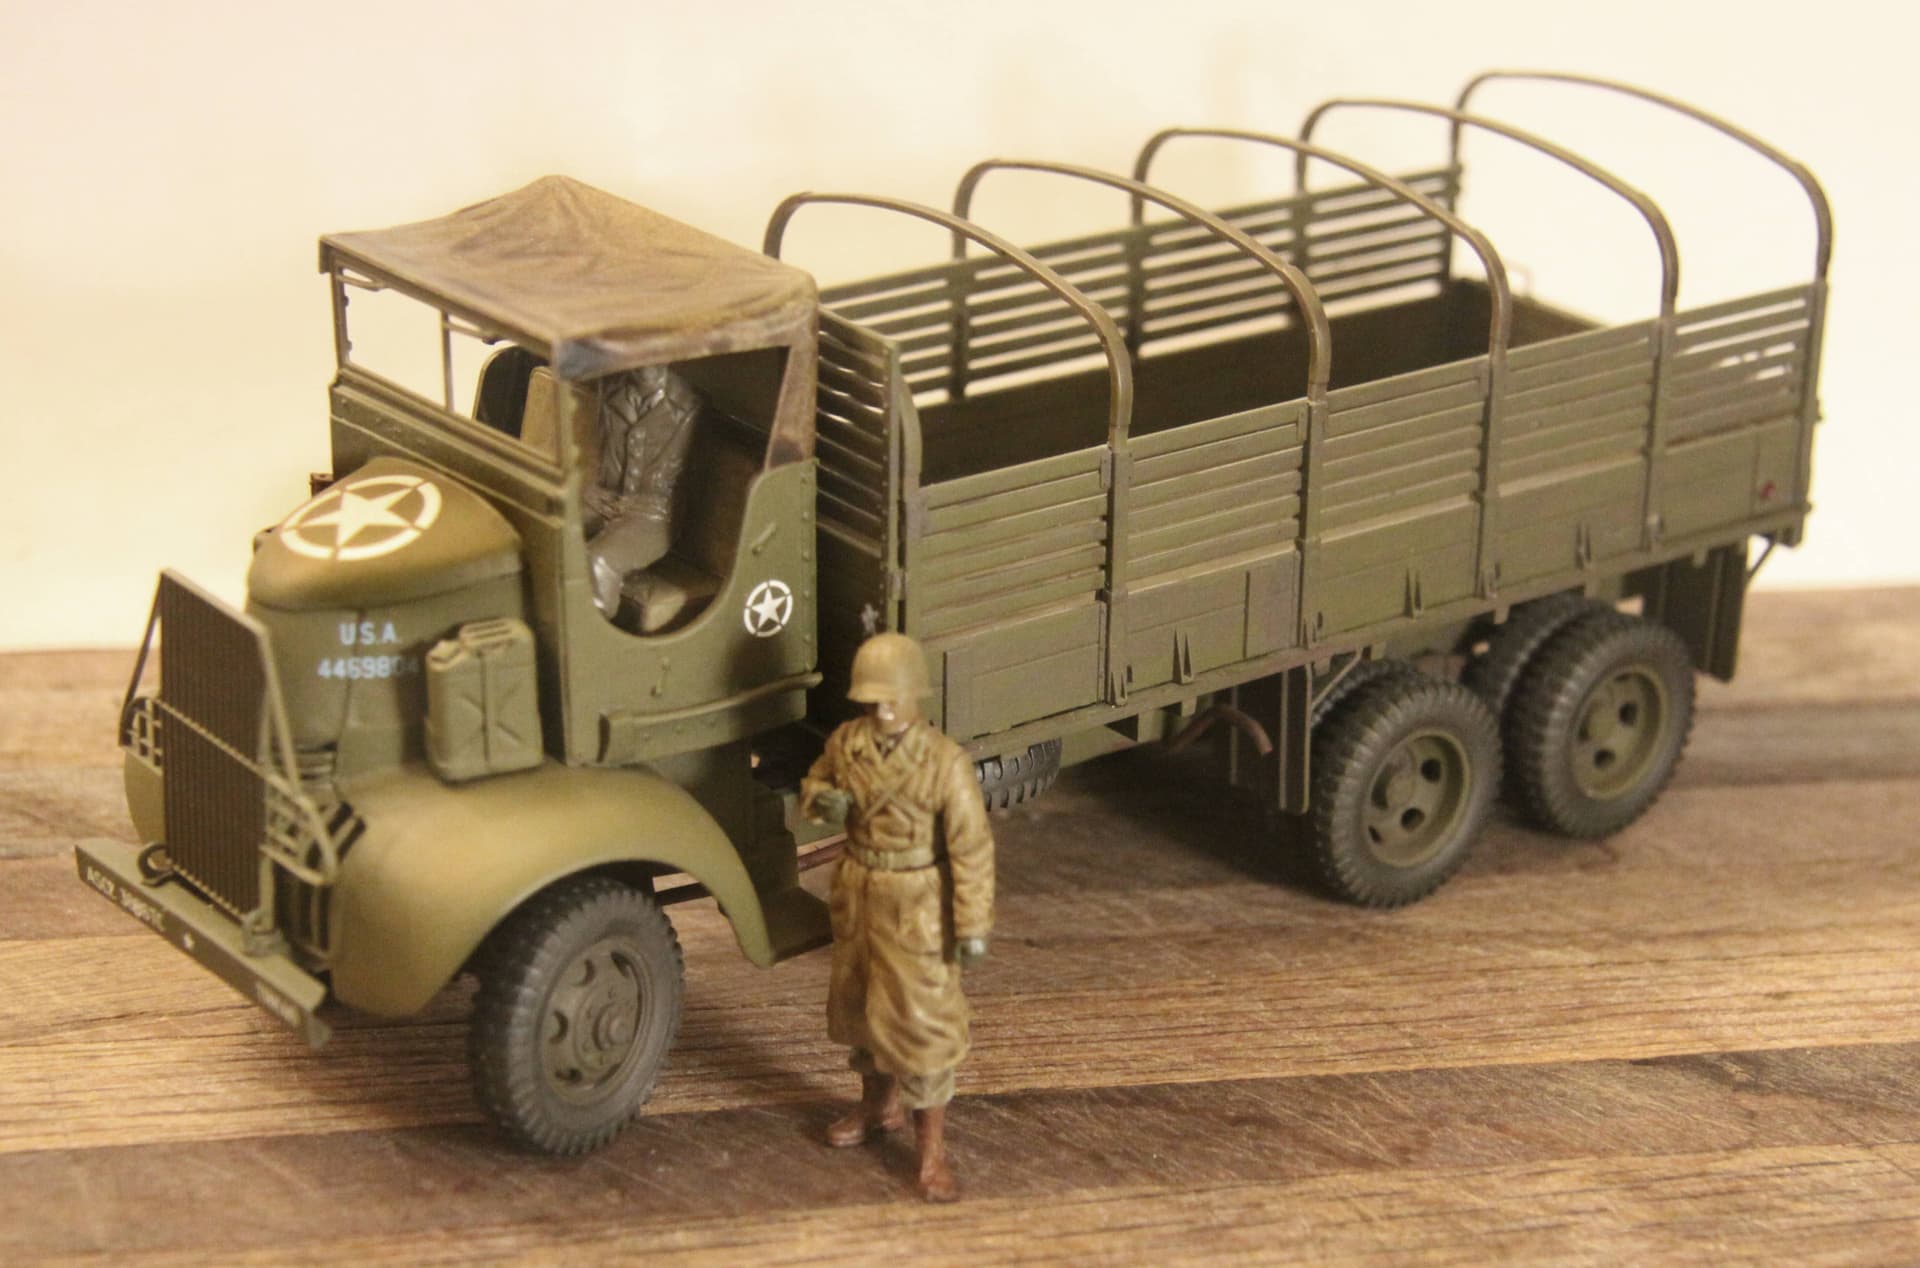
Honestly NOT trying to beat a dead horse here but simply trying to exhibit unassailable proof of the technique.
Hope the decal tips helped. Show us some more pics when it is fixed.
I have done one step further I put down a drop of future (Depending on the size of the decals) where I want it and slide the wet decal right onto the wet future. Let it dry and the future will suck the decal right down as it dries.
Three coats onto the carefully-sliced decal, brushed on from all the right angles.
Still shows up from some angles. Time get the angle grinder out?
It looks pretty good to me; up to you though. I bet once it is weathered, you won’t even notice it.
Thanks. What do you suggest for weathering?
I would treat it like any other desert vehicle. A couple washes of different sandy-brown colors and a couple dry-brushes of similar, but different colors. Sorry, its not scientific, but it works.
I was thinking the same thing: A little dusty pigment weathering and you will never notice any problems with the decals.
They look dang good from my vantage point!
Thanks for the advice 165spc, and the compliment. One question; The tanker is flatcoted with Testors, can I still apply washes/filters over top of dullcote?
Everything I’m seeing on YT suggests enamel over gloss varnish.
What to do?
(Heavyarty/ Gino please feel free to jump in on this)
Yes. I always apply washes over flat coats and prefer how they look.
I agree with Gino.
Thanks guys, I used MM sand diluted for the first wash. Dried a bit cloudy in the corners but should clean up. The web says to leave for a week between coats.
Your take on this?
First, stop watching the “YouTube Experts”.
A week for the wash to dry is B.S. I apply subsequent washes as soon as the first is dry. I usually completely weather a vehicle in a day.
Understood. I’ll be back at the bench tomorrow morning. Will try a darker second wash in patches, and then some dry brushing to blend the two.
I’ve been building this since mid September.
I suggest you also try pigments, a light sand/dust color would be good. (I use soft oil pastels but NOT colored chalk.)
Examples using pastels:
Using a somewhat stiff, wide (1/4 inch) bristle brush. I scrub the pastel stick in order to release and pick up the dusting powder off the pastel stick. I then scrub the pastel powders into the tooth of the matte clear. This makes for an ALMOST permanent application with no need for an additional clear overcoat.
One thought/Suggestion/Warning Here:
When I look real close at your big flammable decals I see tiny speckles where it has glazed away from the tank surface below.
My advice would be to NOT use any sort of transparent washes over this. A transparent wash is a filter. A filter will darken the good areas of the decal to the same degree it darkens the speckles so no matter how much you apply you will still see the speckle dots.
The pastel dust is microscopically opaque so it will to some degree help HIDE (cover over) the speckles rather than just making everything darker. It is just like a lady (or man - being full on PC here) putting on a makeup base to hide skin blemishes.
Not at all sure I am making my point clear here???