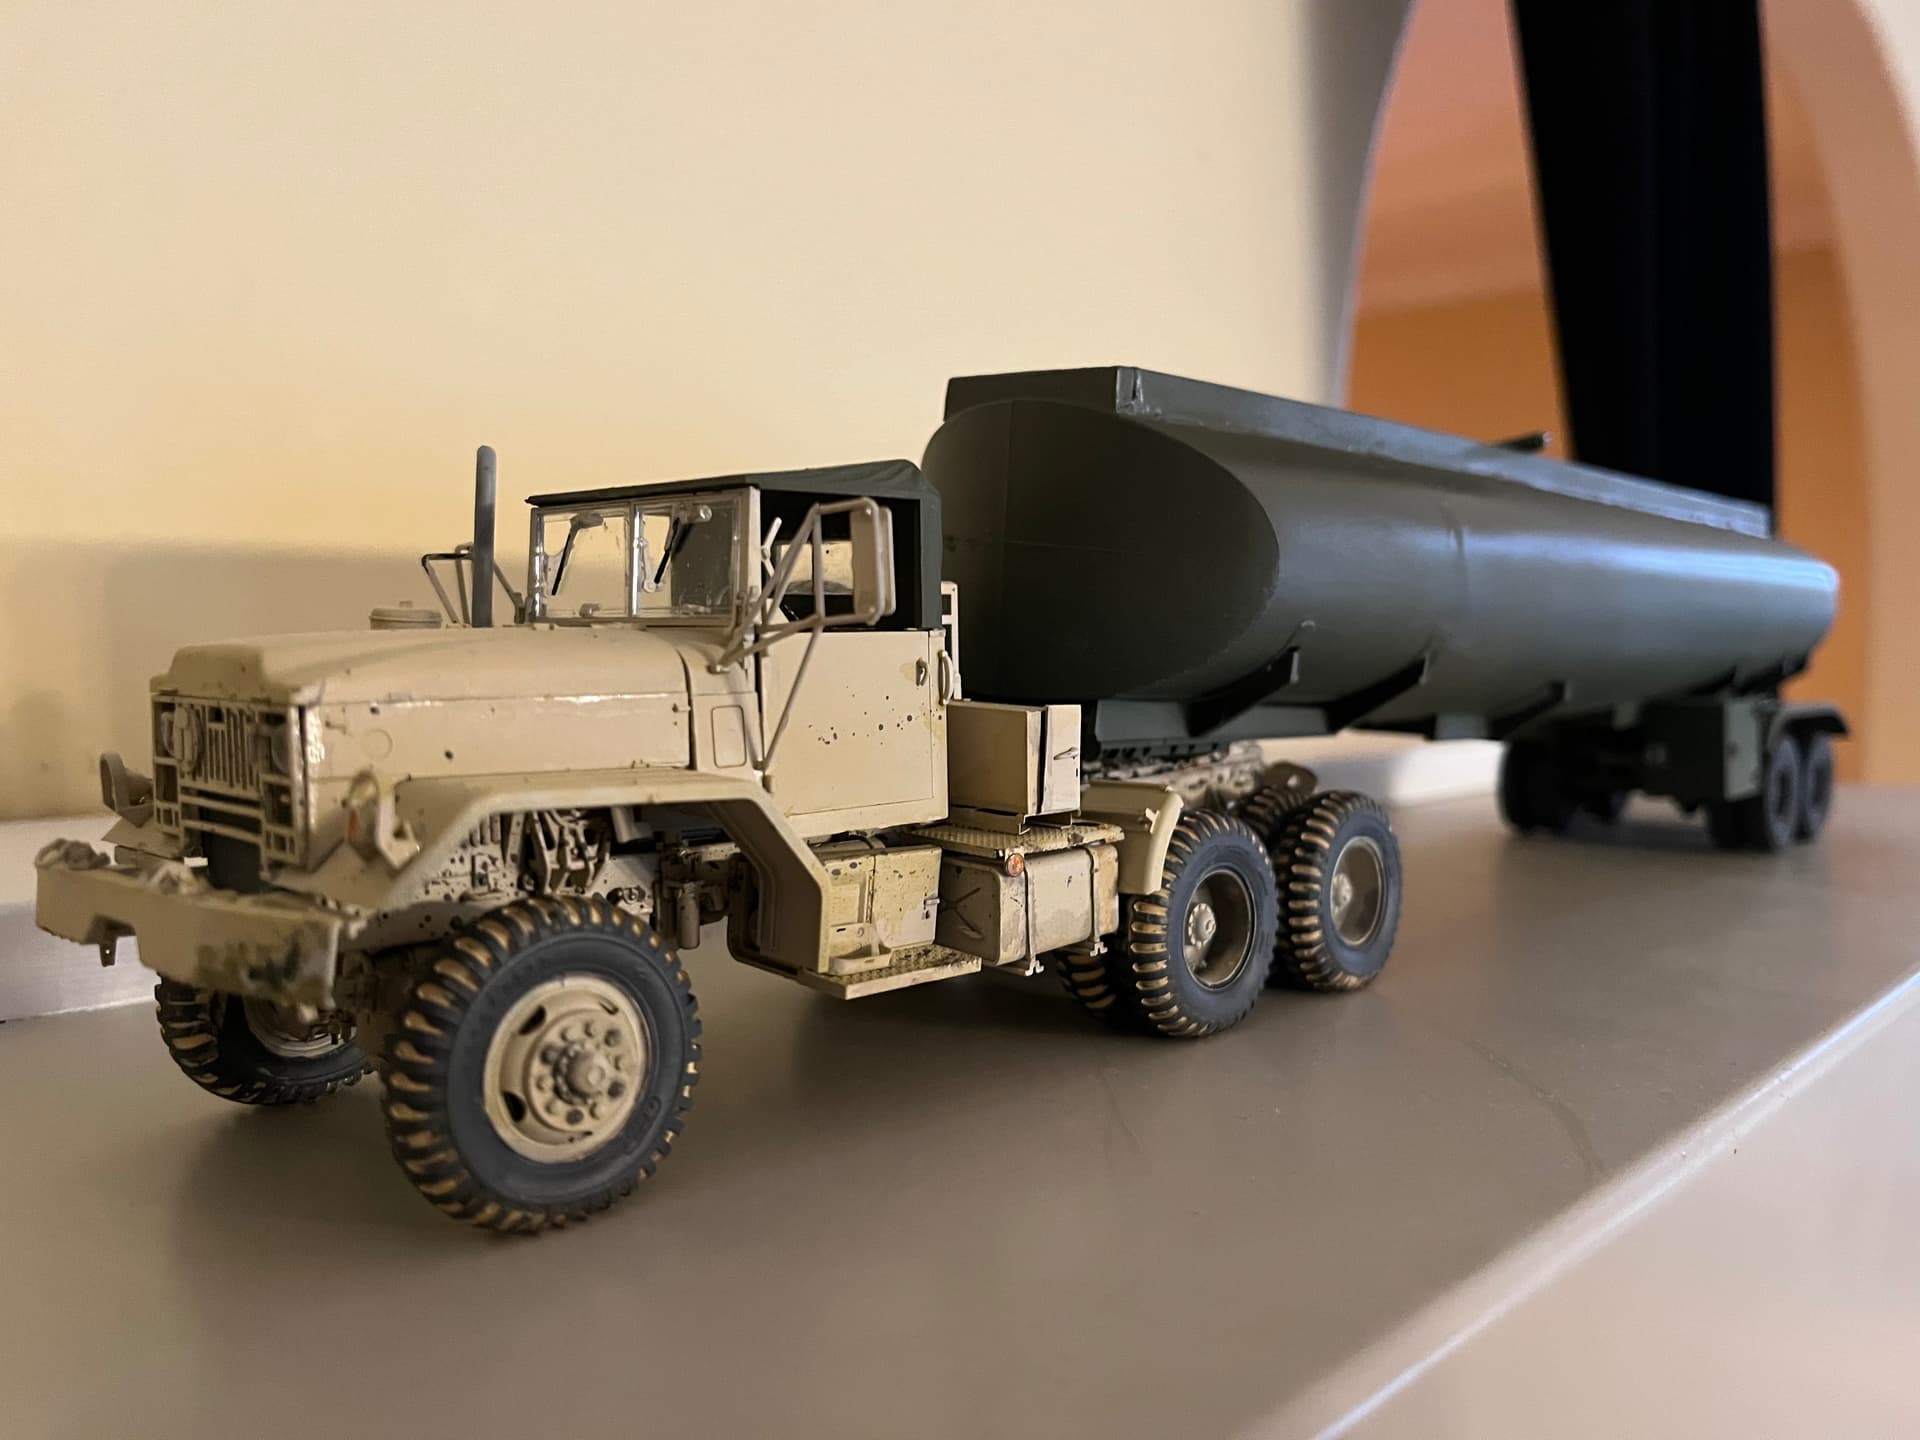
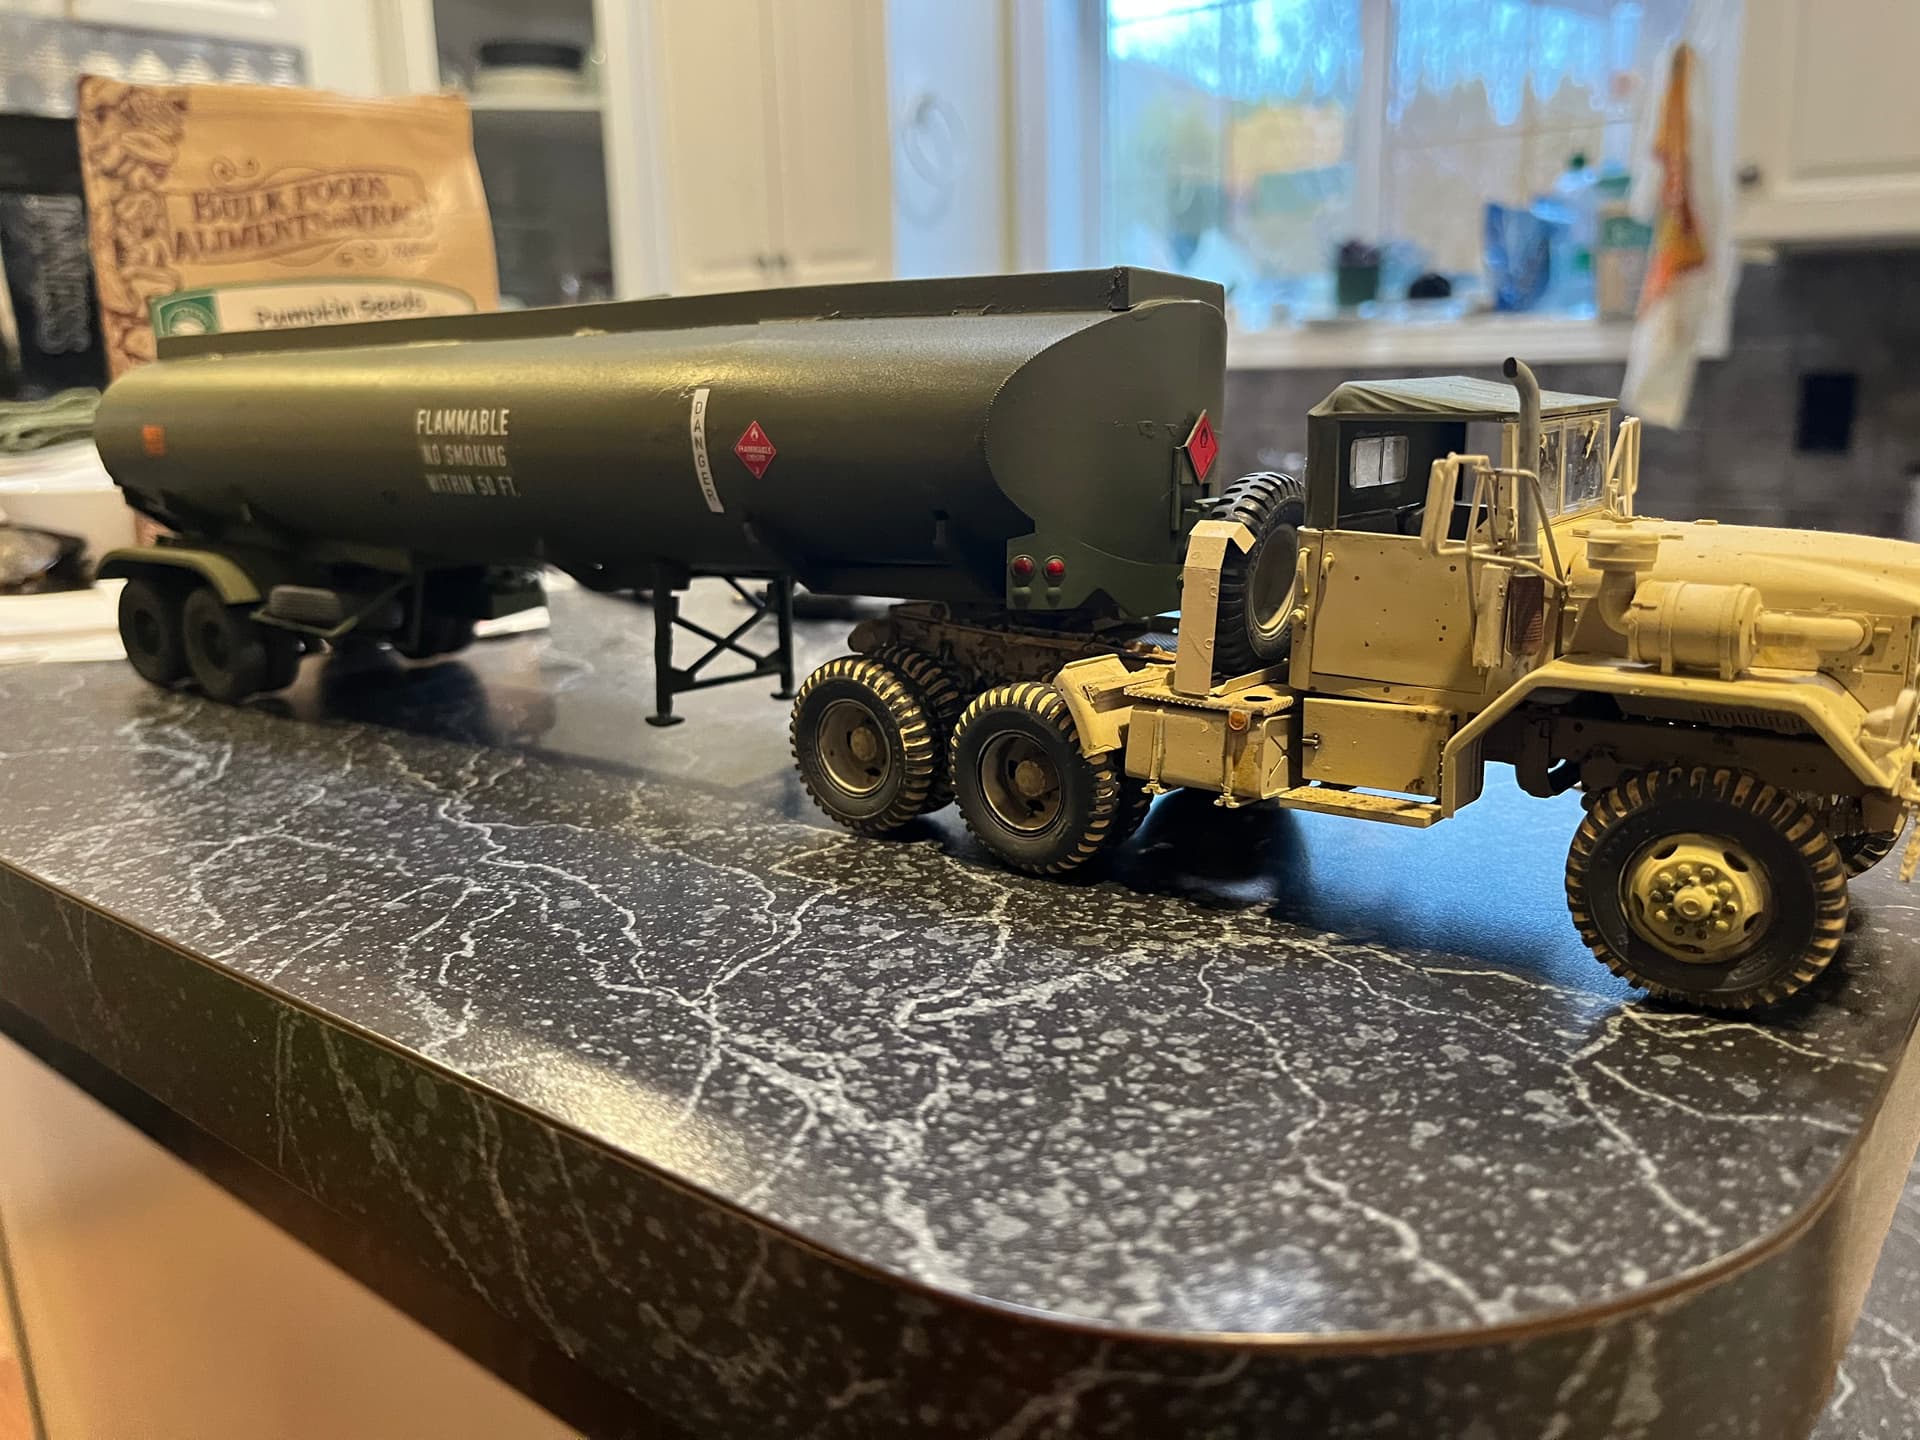
You mean this M125? Ten ton truck used for towing artillery pieces, lovely looking wagon.
I’ve pre-ordered for end January.
You mean this M125? Ten ton truck used for towing artillery pieces, lovely looking wagon.
I’ve pre-ordered for end January.
I ordered the tractor version of that truck, also pre-ordered for a January release.
The M123A1 is your tractor. Mine arrived last week, it’s a beautiful looking kit, full engine and tranni…………
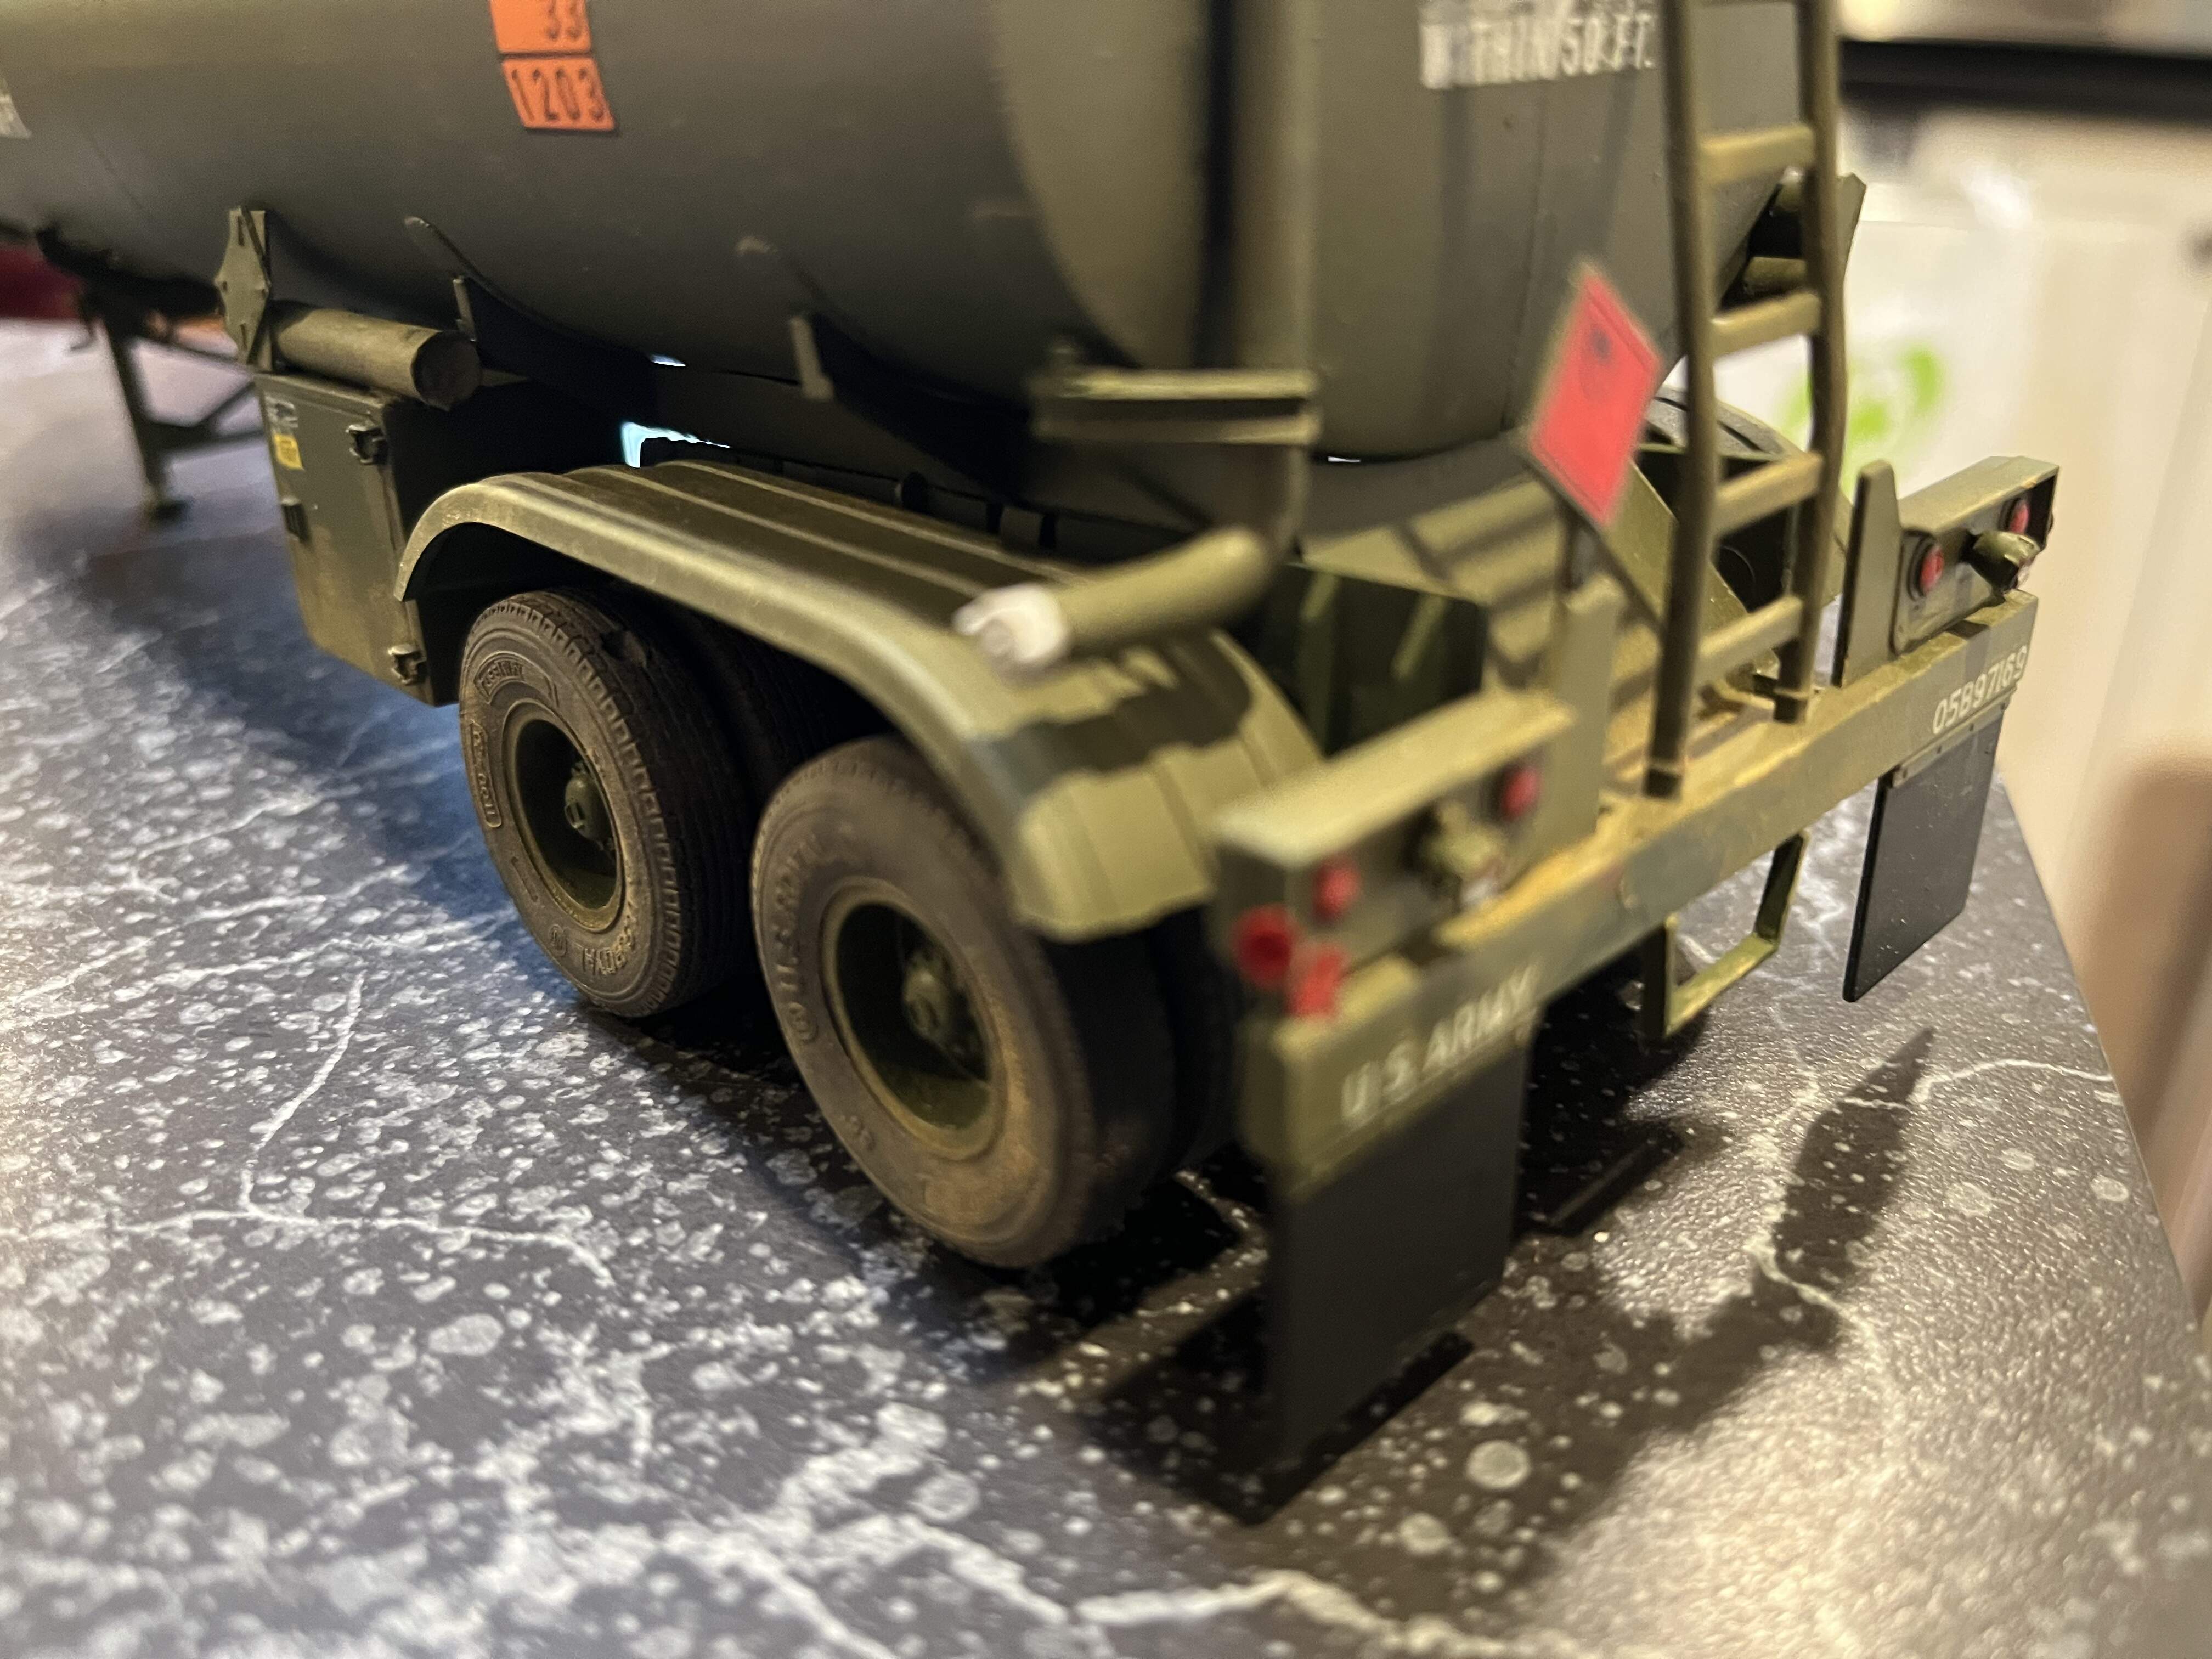
Back on track, the holidays have, understandably slowed progress, but the tanker is coming along, tool box and drain valves in place. Next the landing gear, decals, weathering and flatcote. Then onto the rest of it!
Love the camera on my new phone. Its showing up the paint gap below the M52’s hood side panels. Oh well!
Looking good so far.
Thanks Gino, A ways to go still - as you’d know.
Saw this on their website. Is the E model, with its twin winches, a newer model, or just a variant?
ETA Its the newer model, Mack-built.
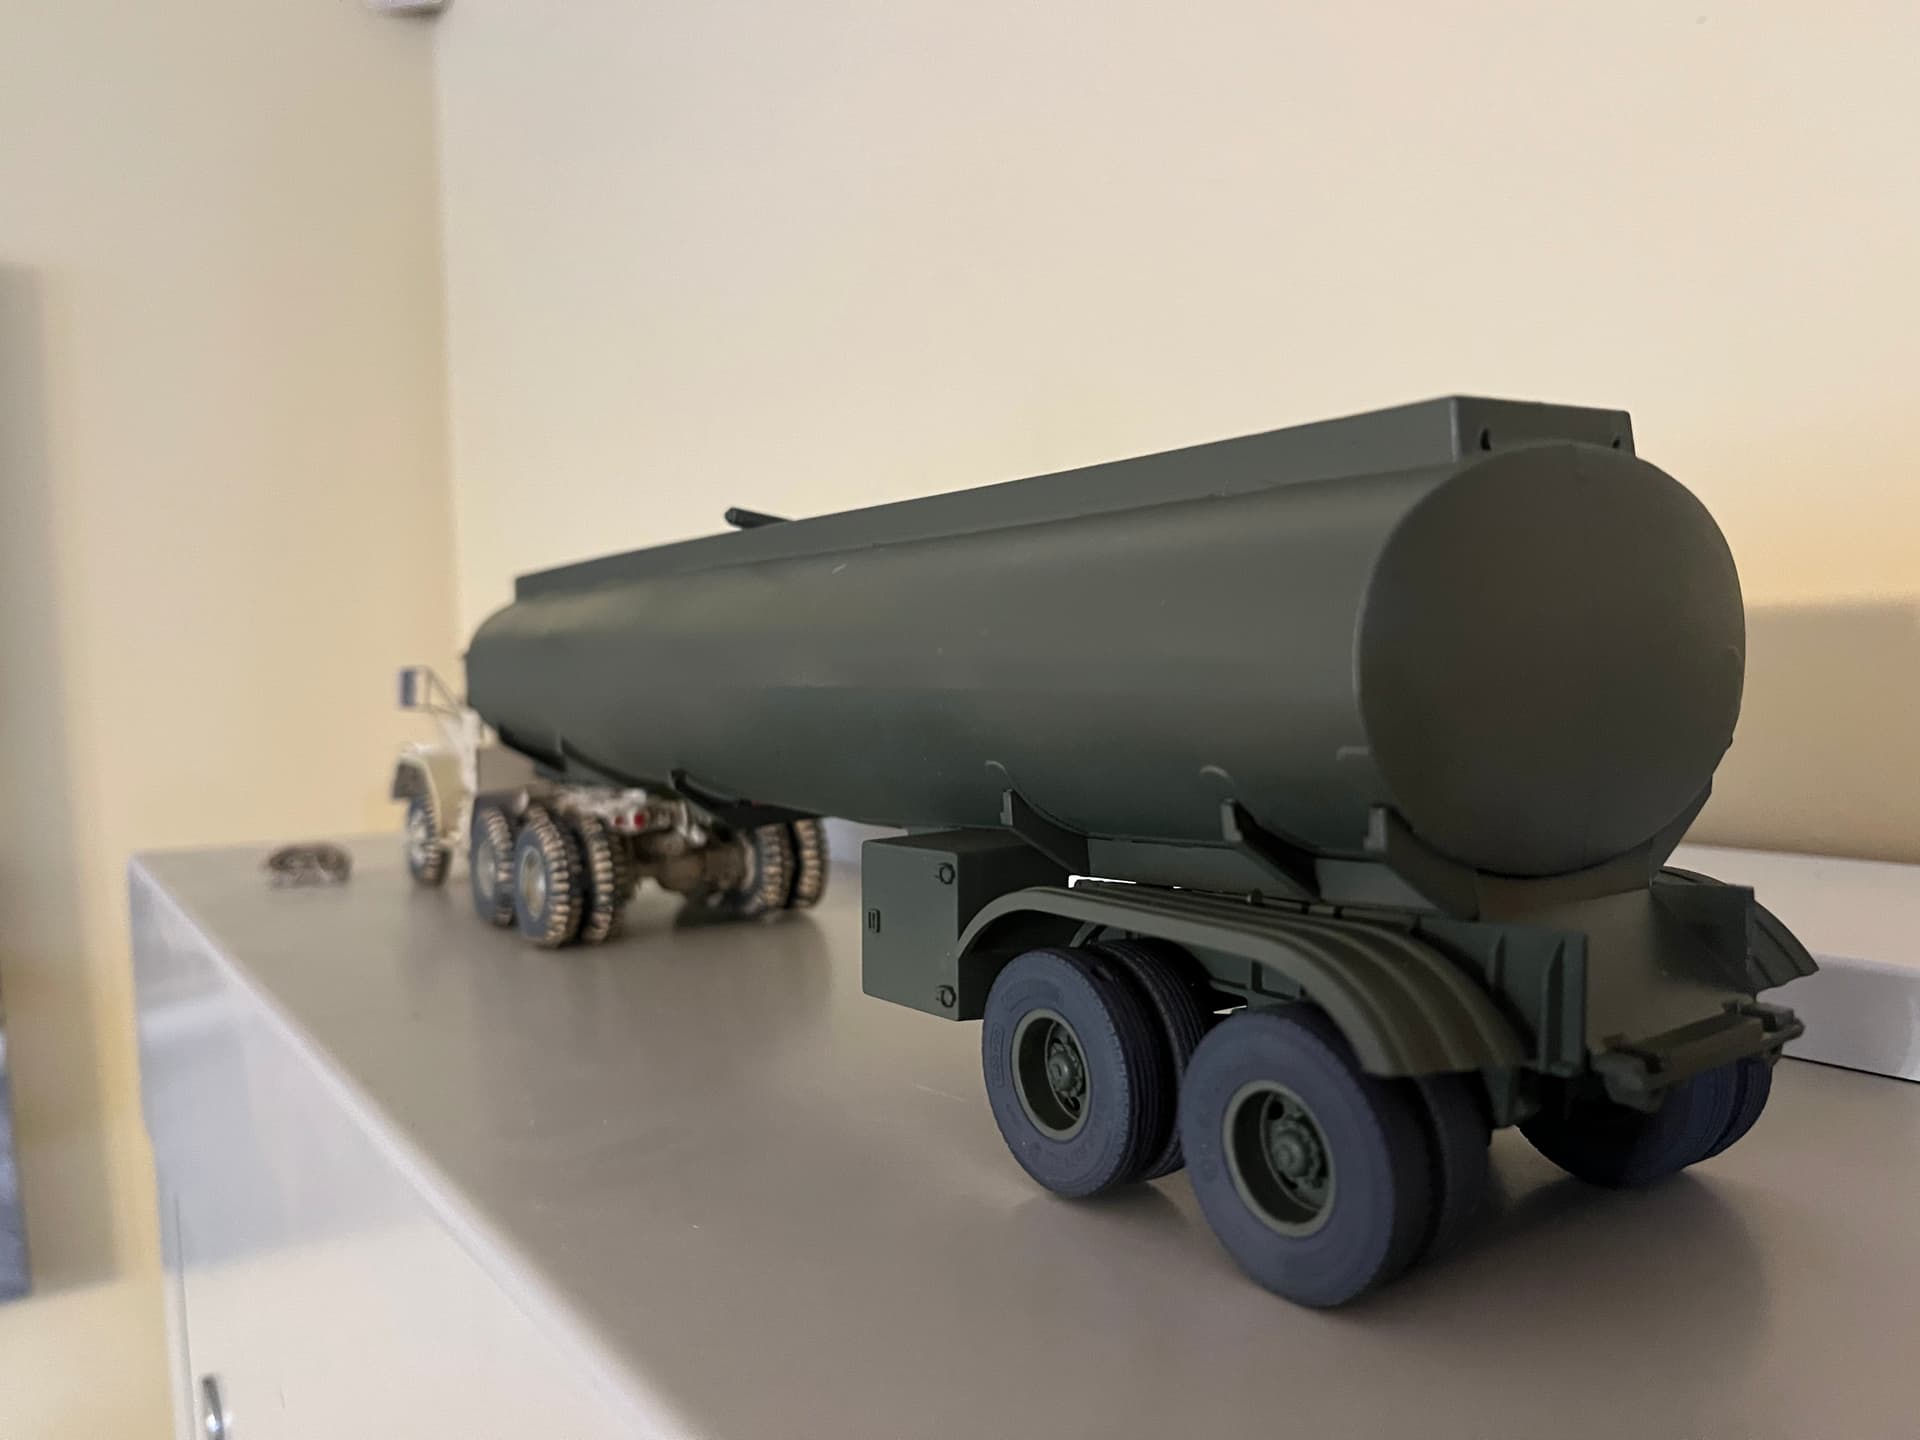
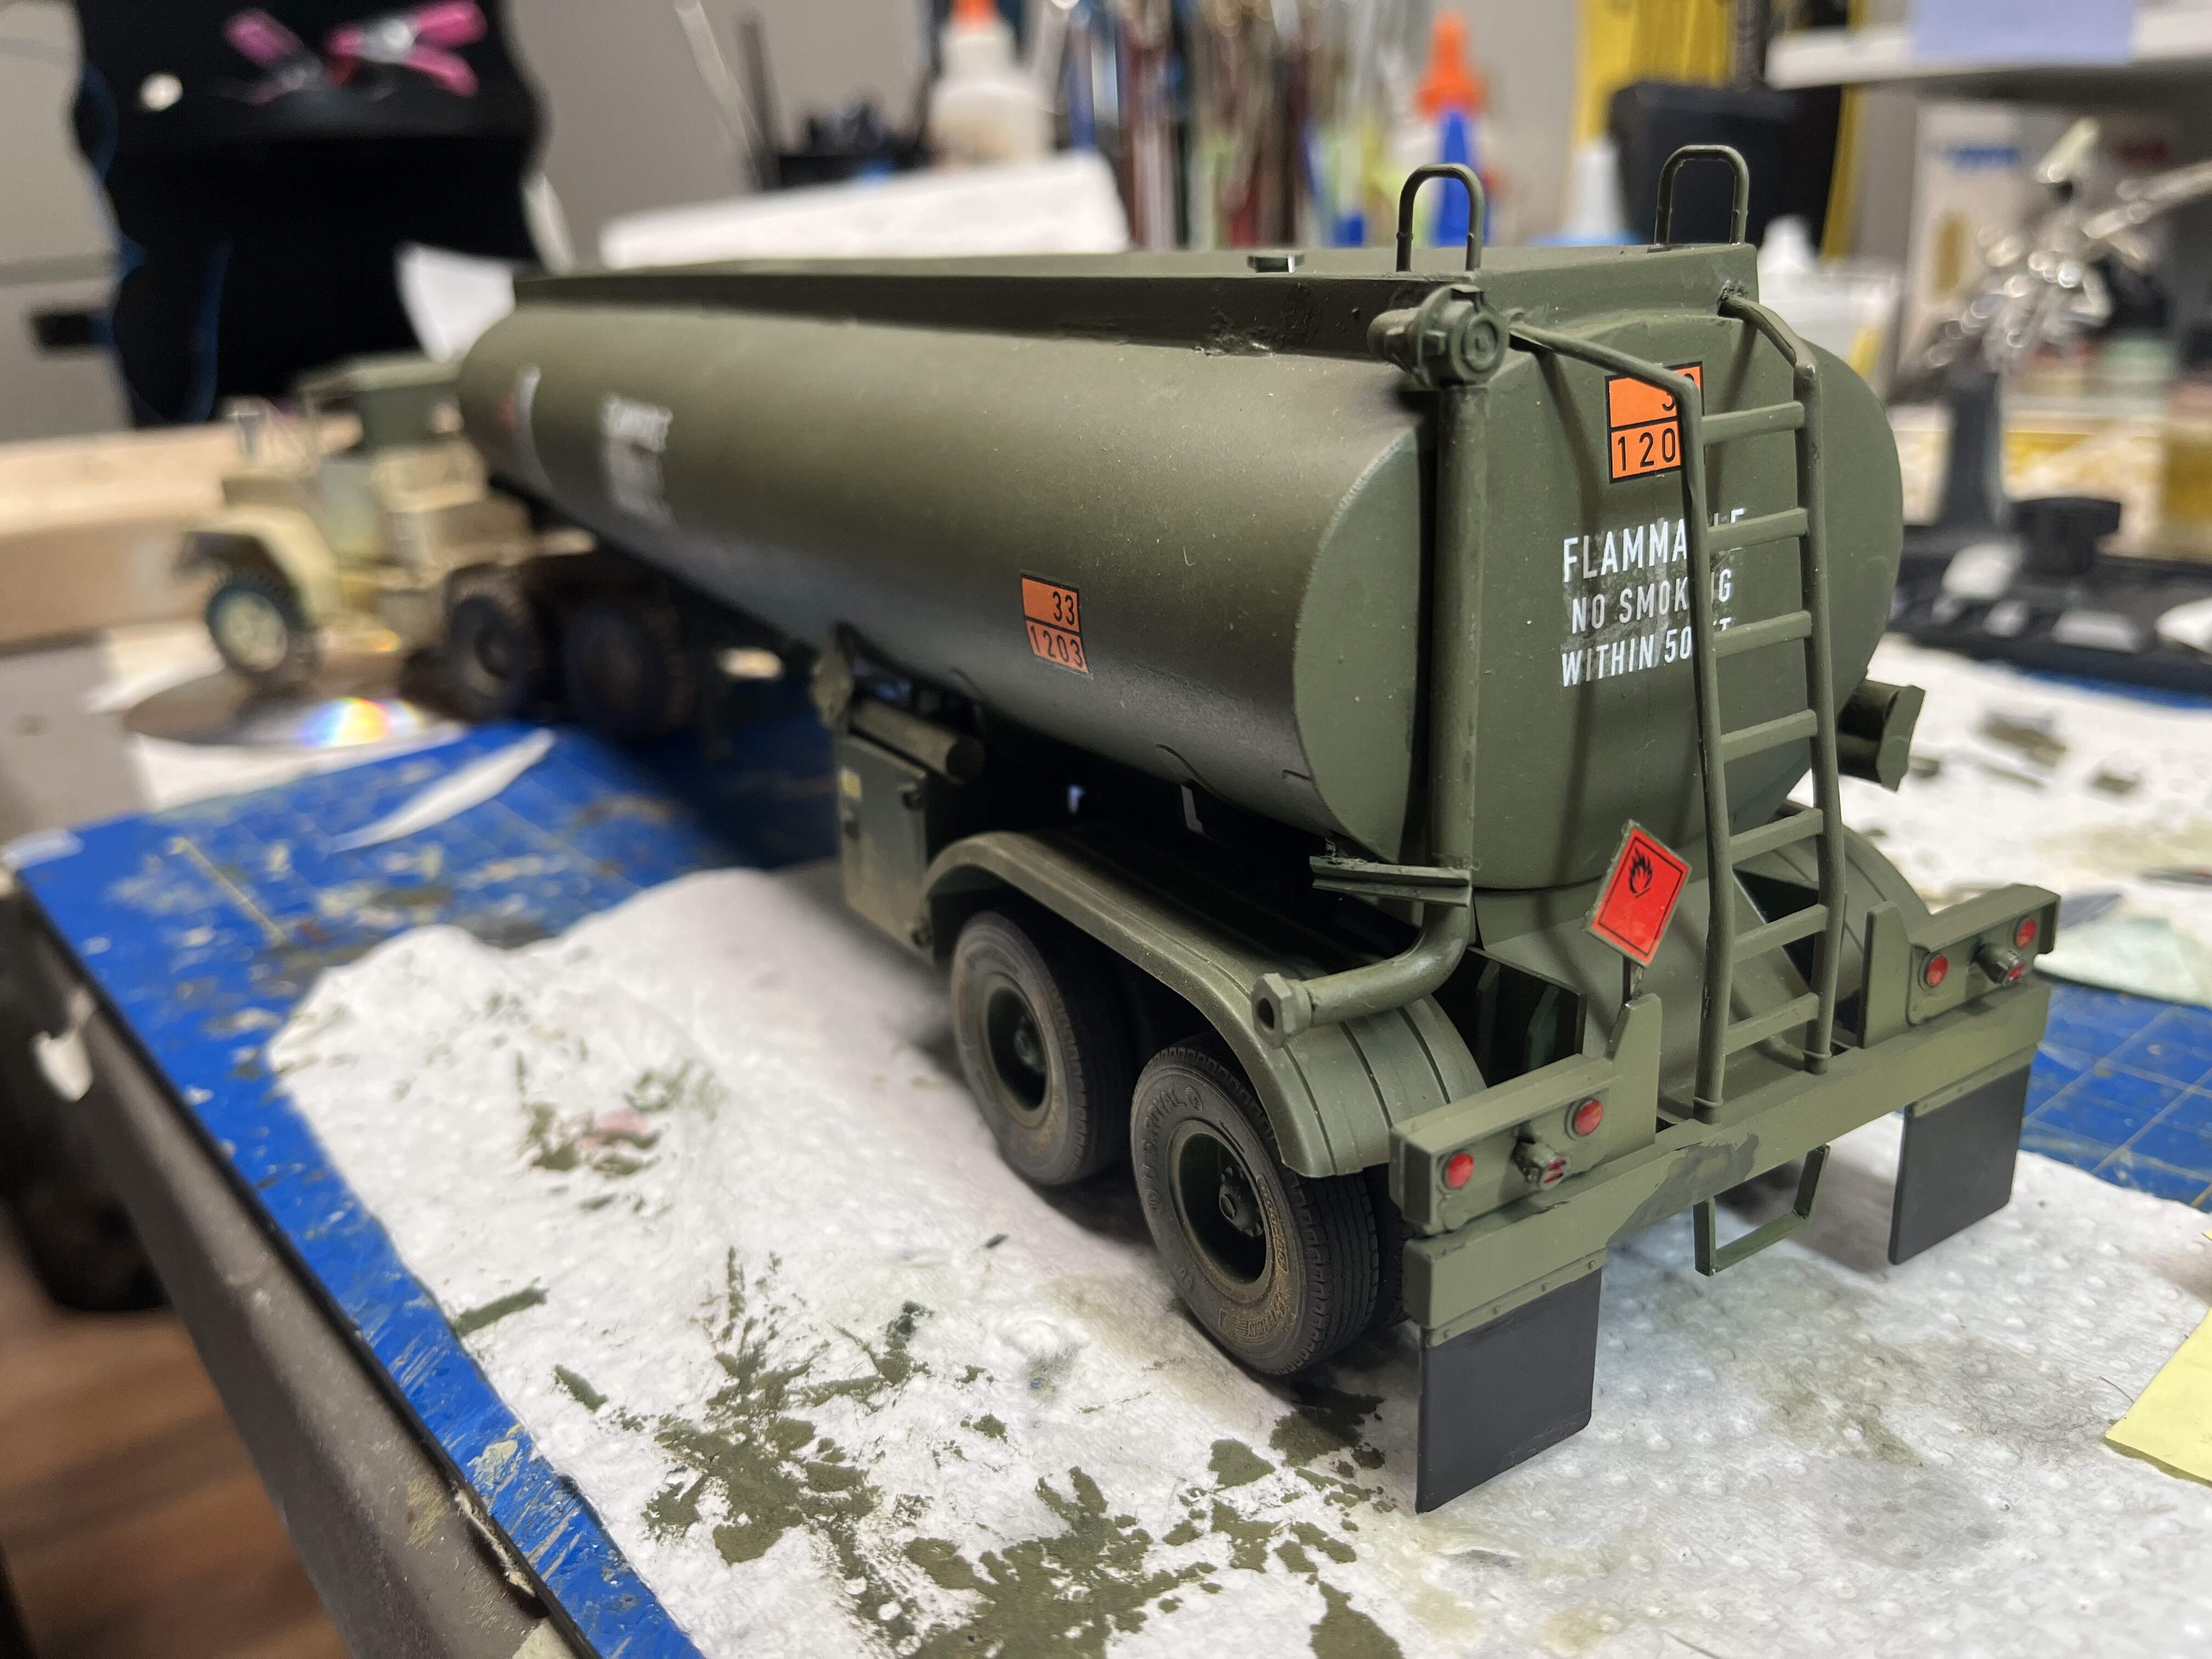
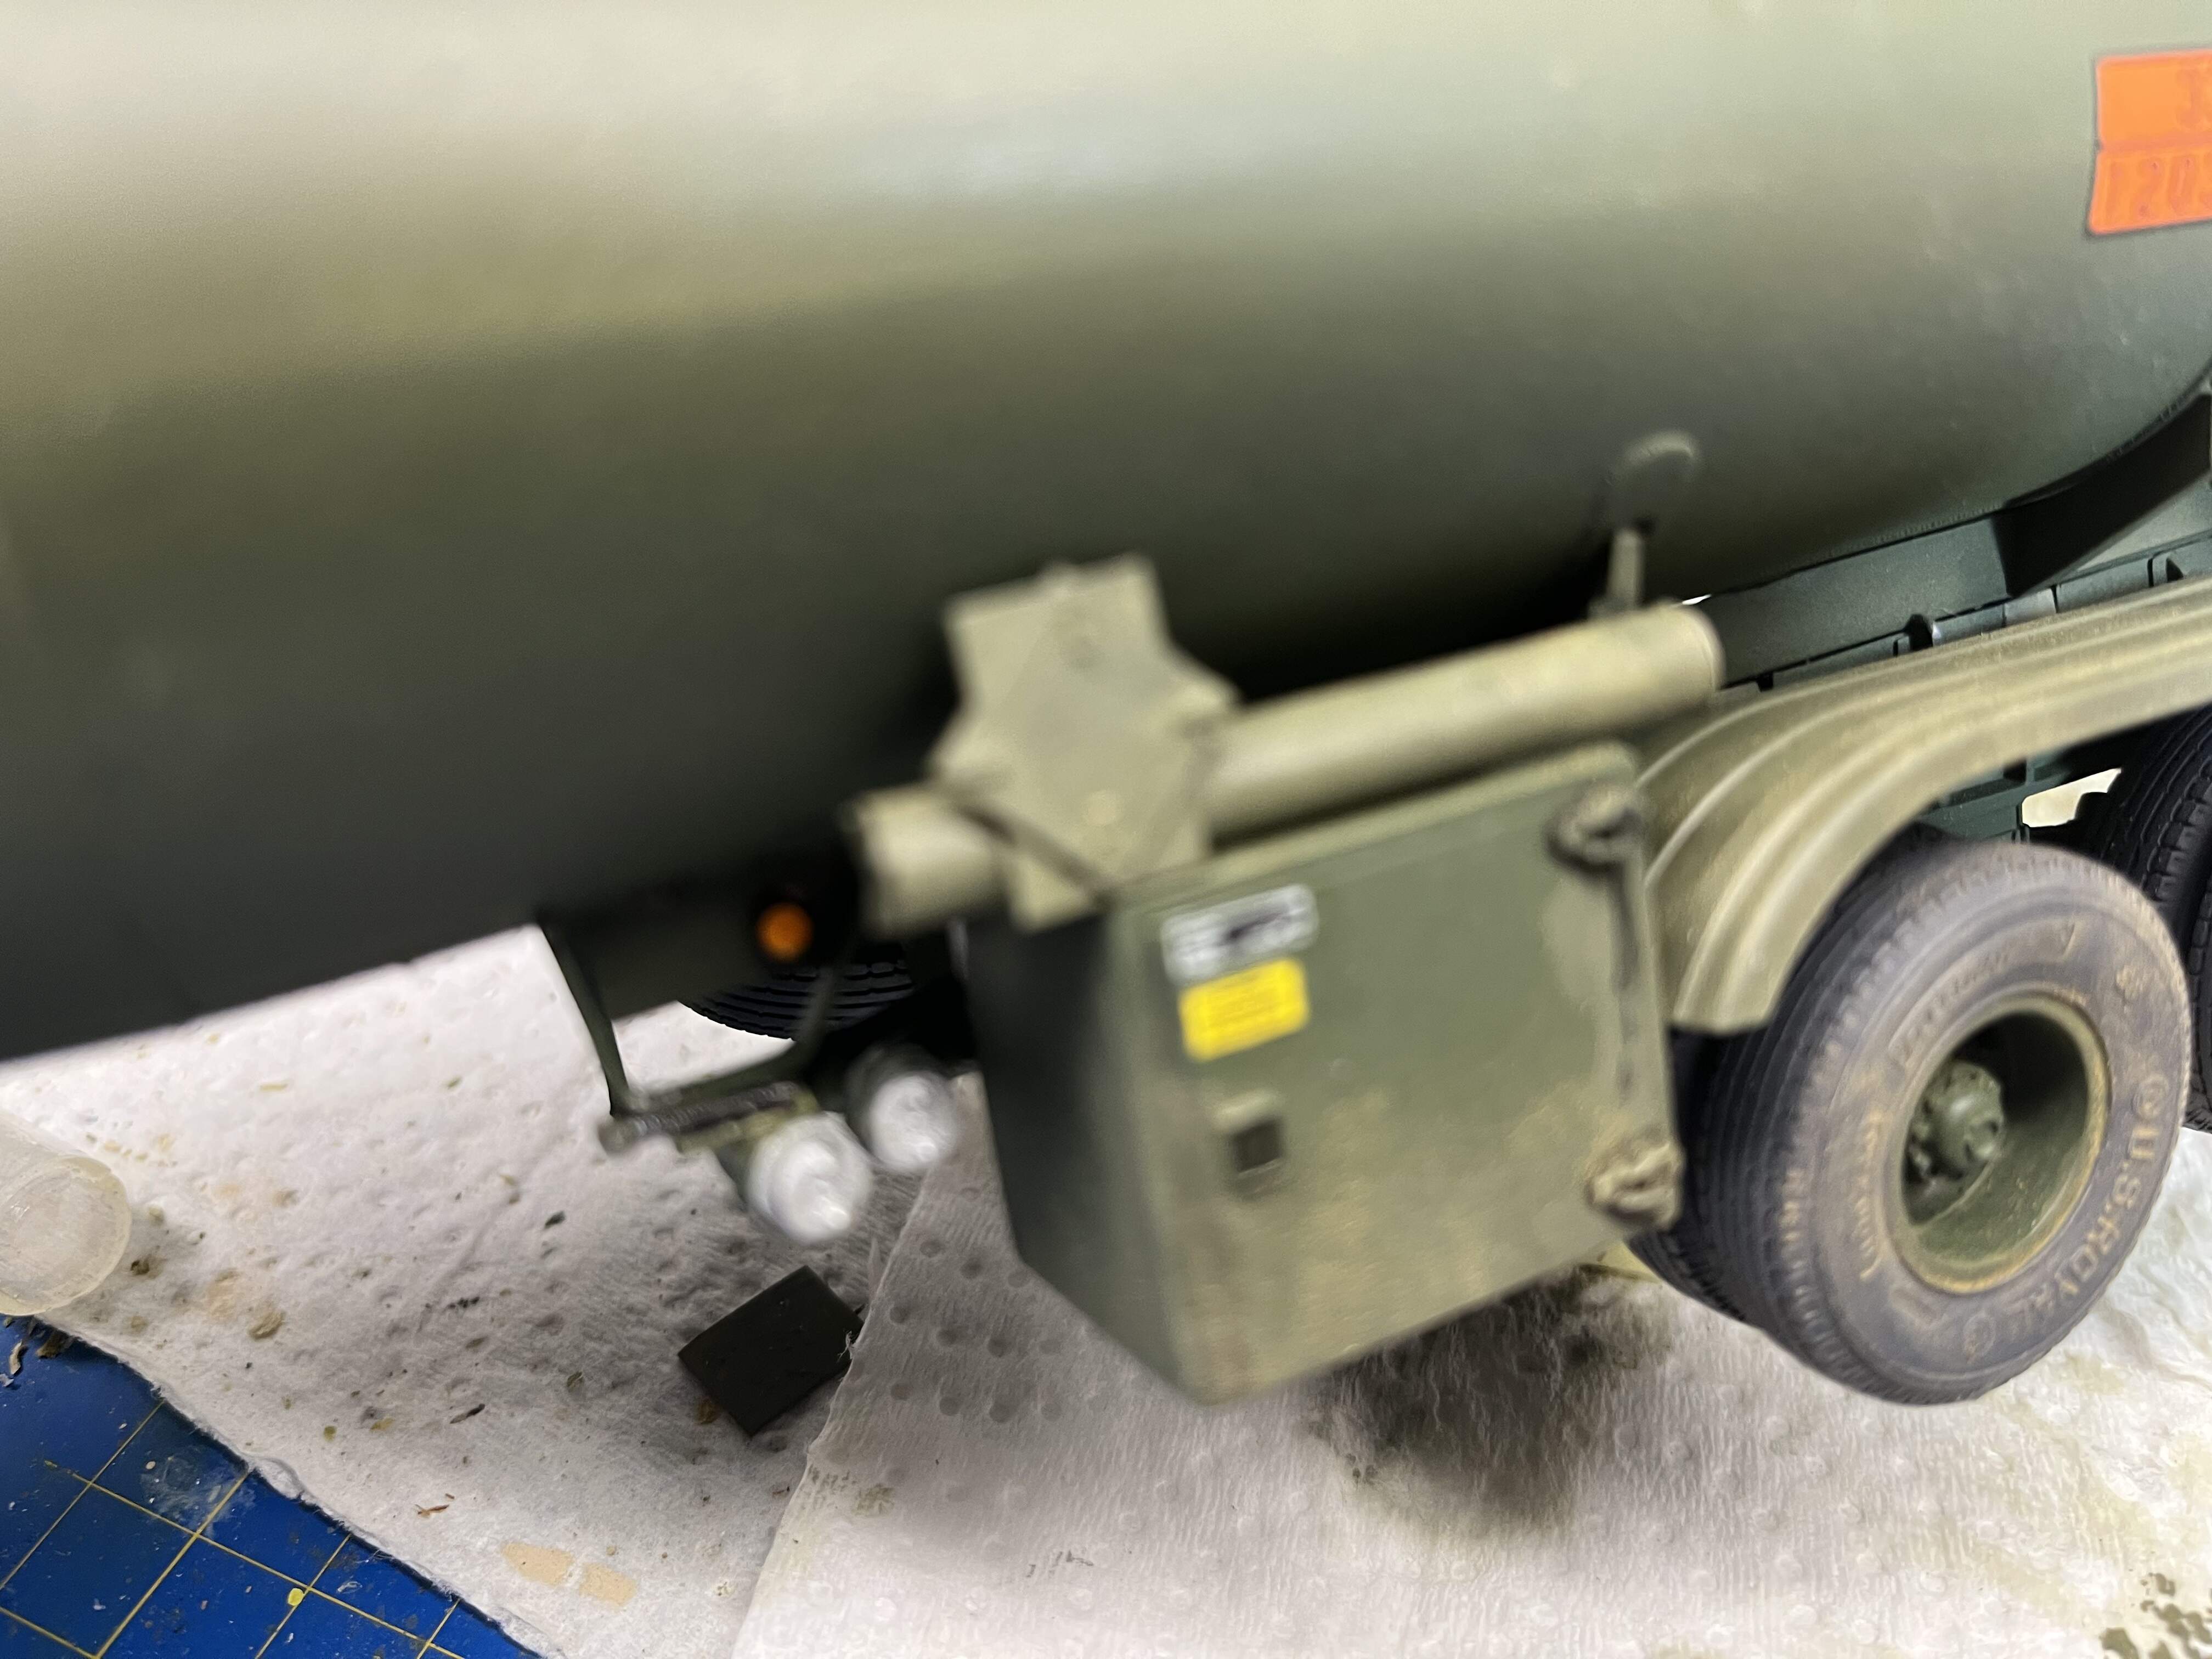
Moving on, the landing gear, winch and drain pipe support bracket are in place. I scratched the spare wheel carrier today but it needs trimming and paint. Carrying on tomorrow with the hose boxes on either side.
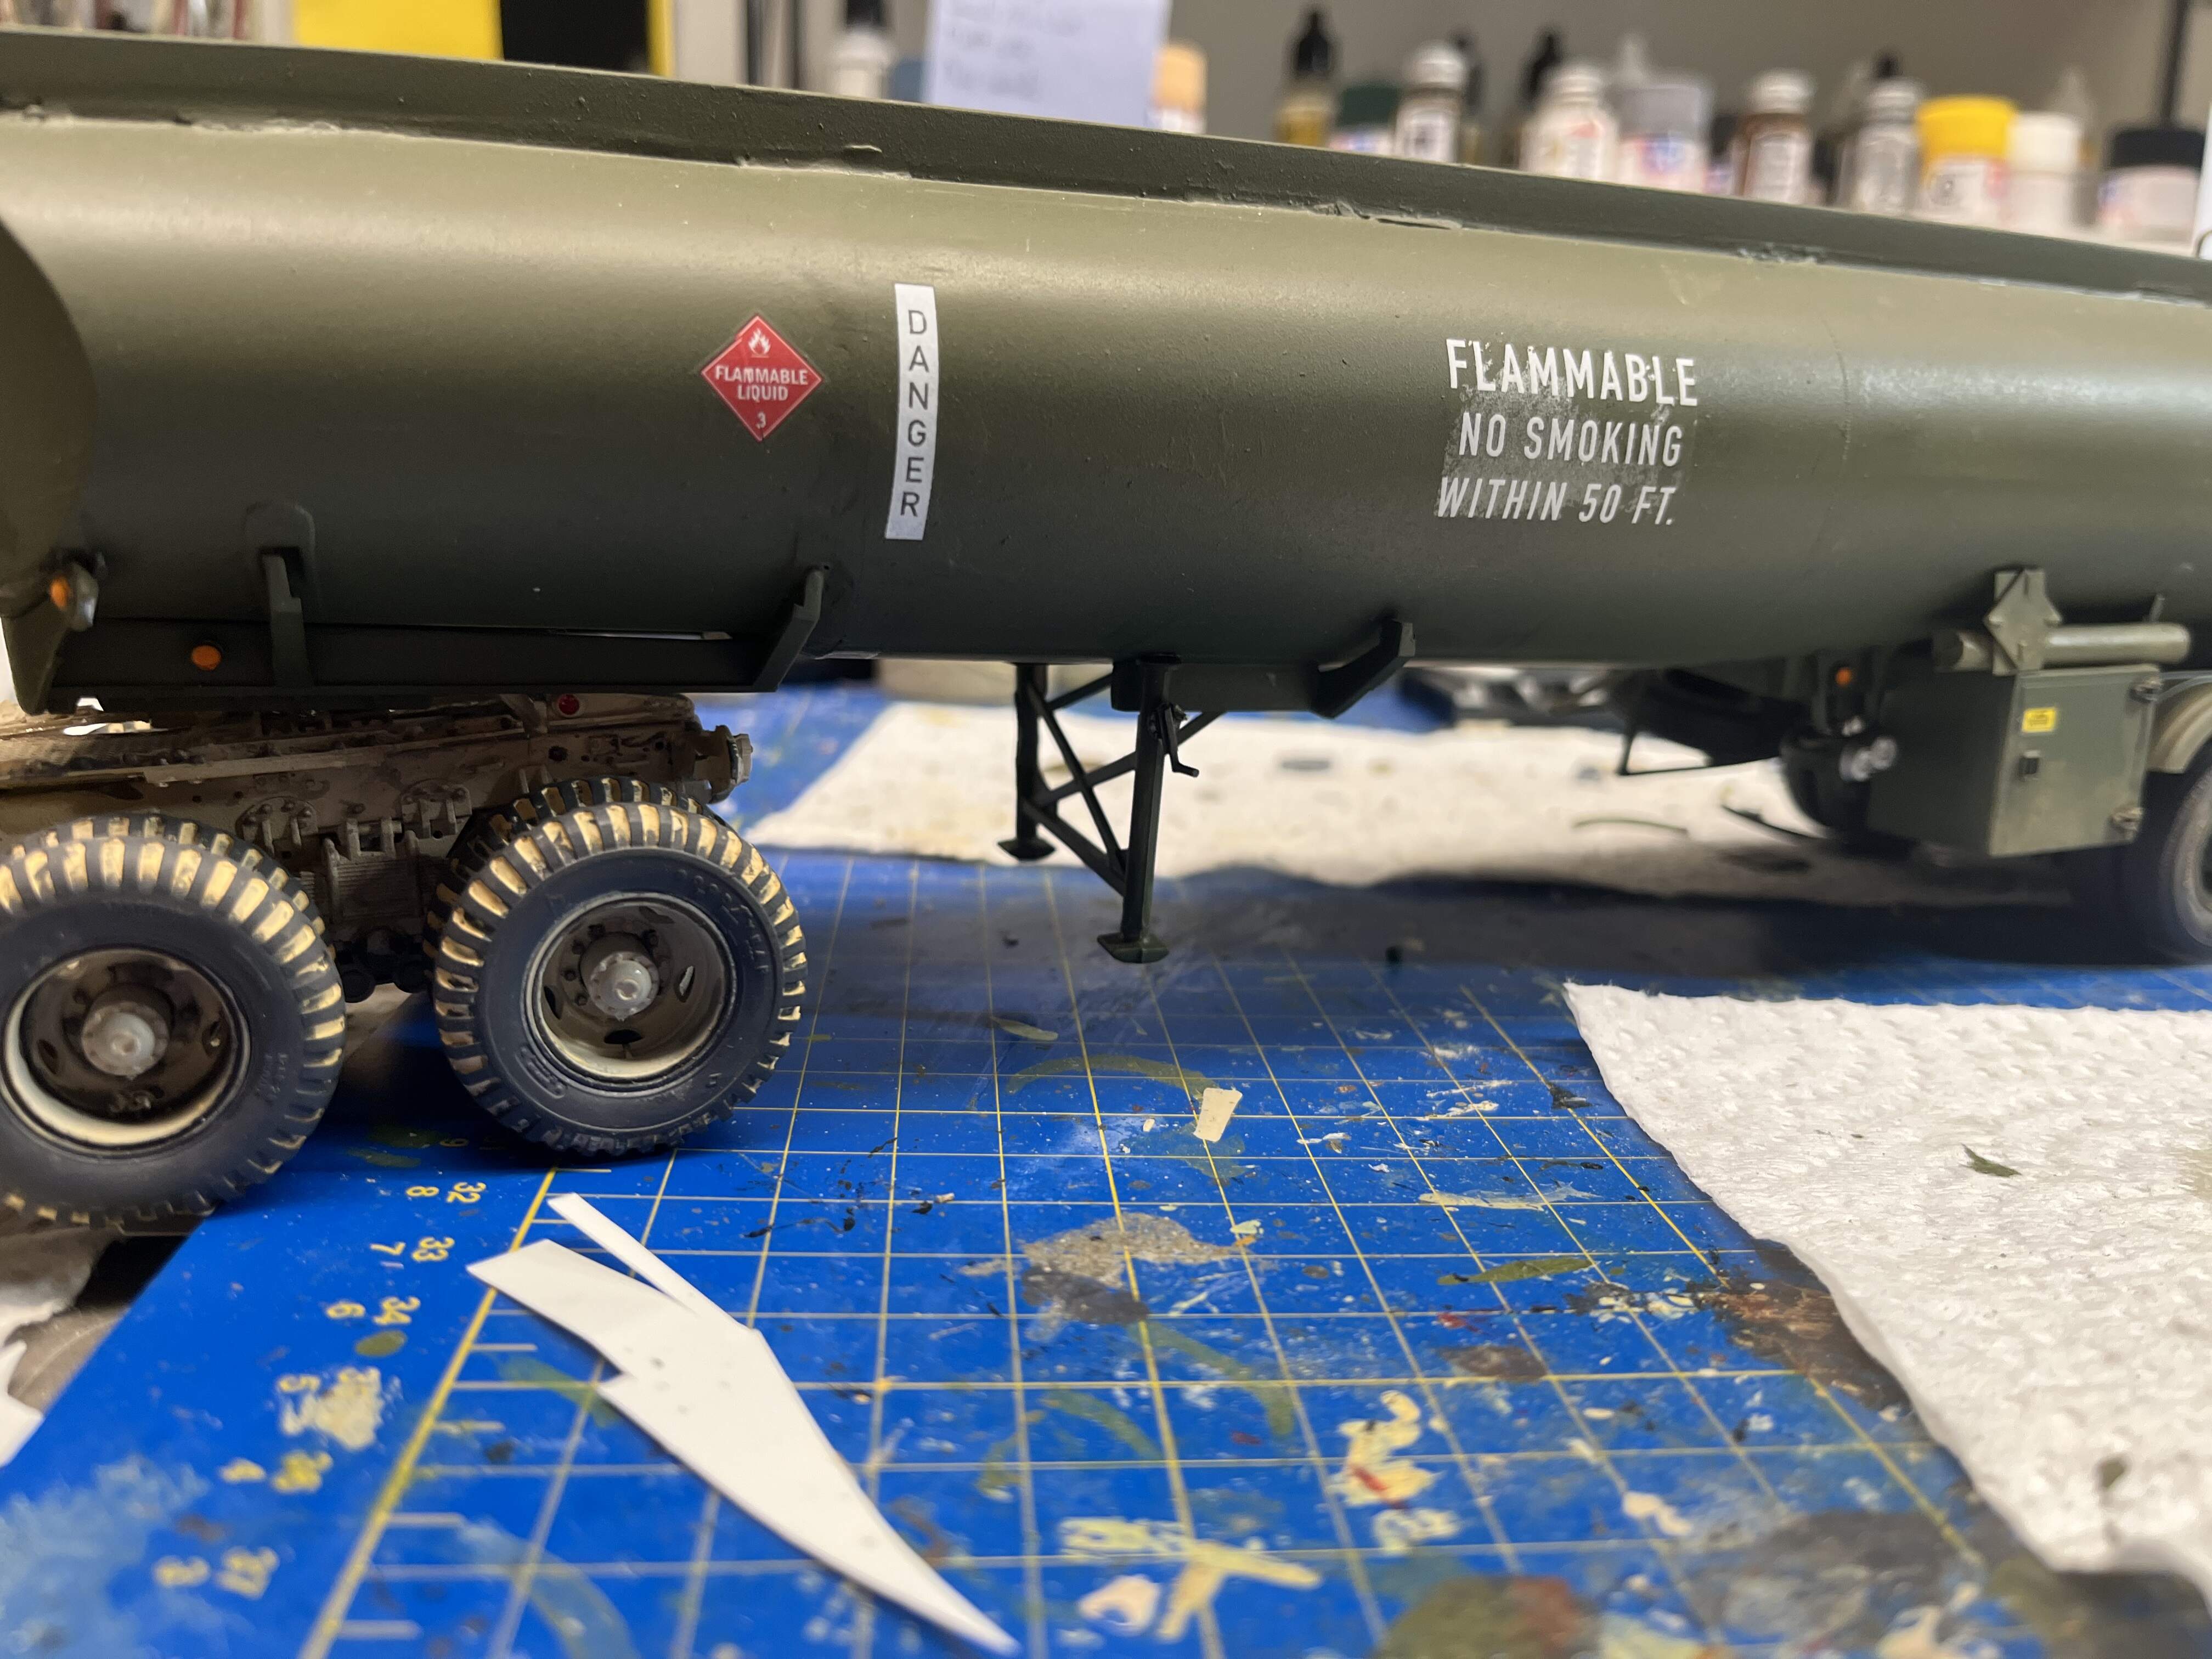
Some progress. Decals from Star and Germany over Future gloss cote. Spare carrier in place, next is flatcote, pipe work and hose containers, then on to the rear panel, ladder etc.
That’s looking good.
Thanks Arch. Its been quite a journey but thanks to Gino for his trailer build log and guidance on the project to date
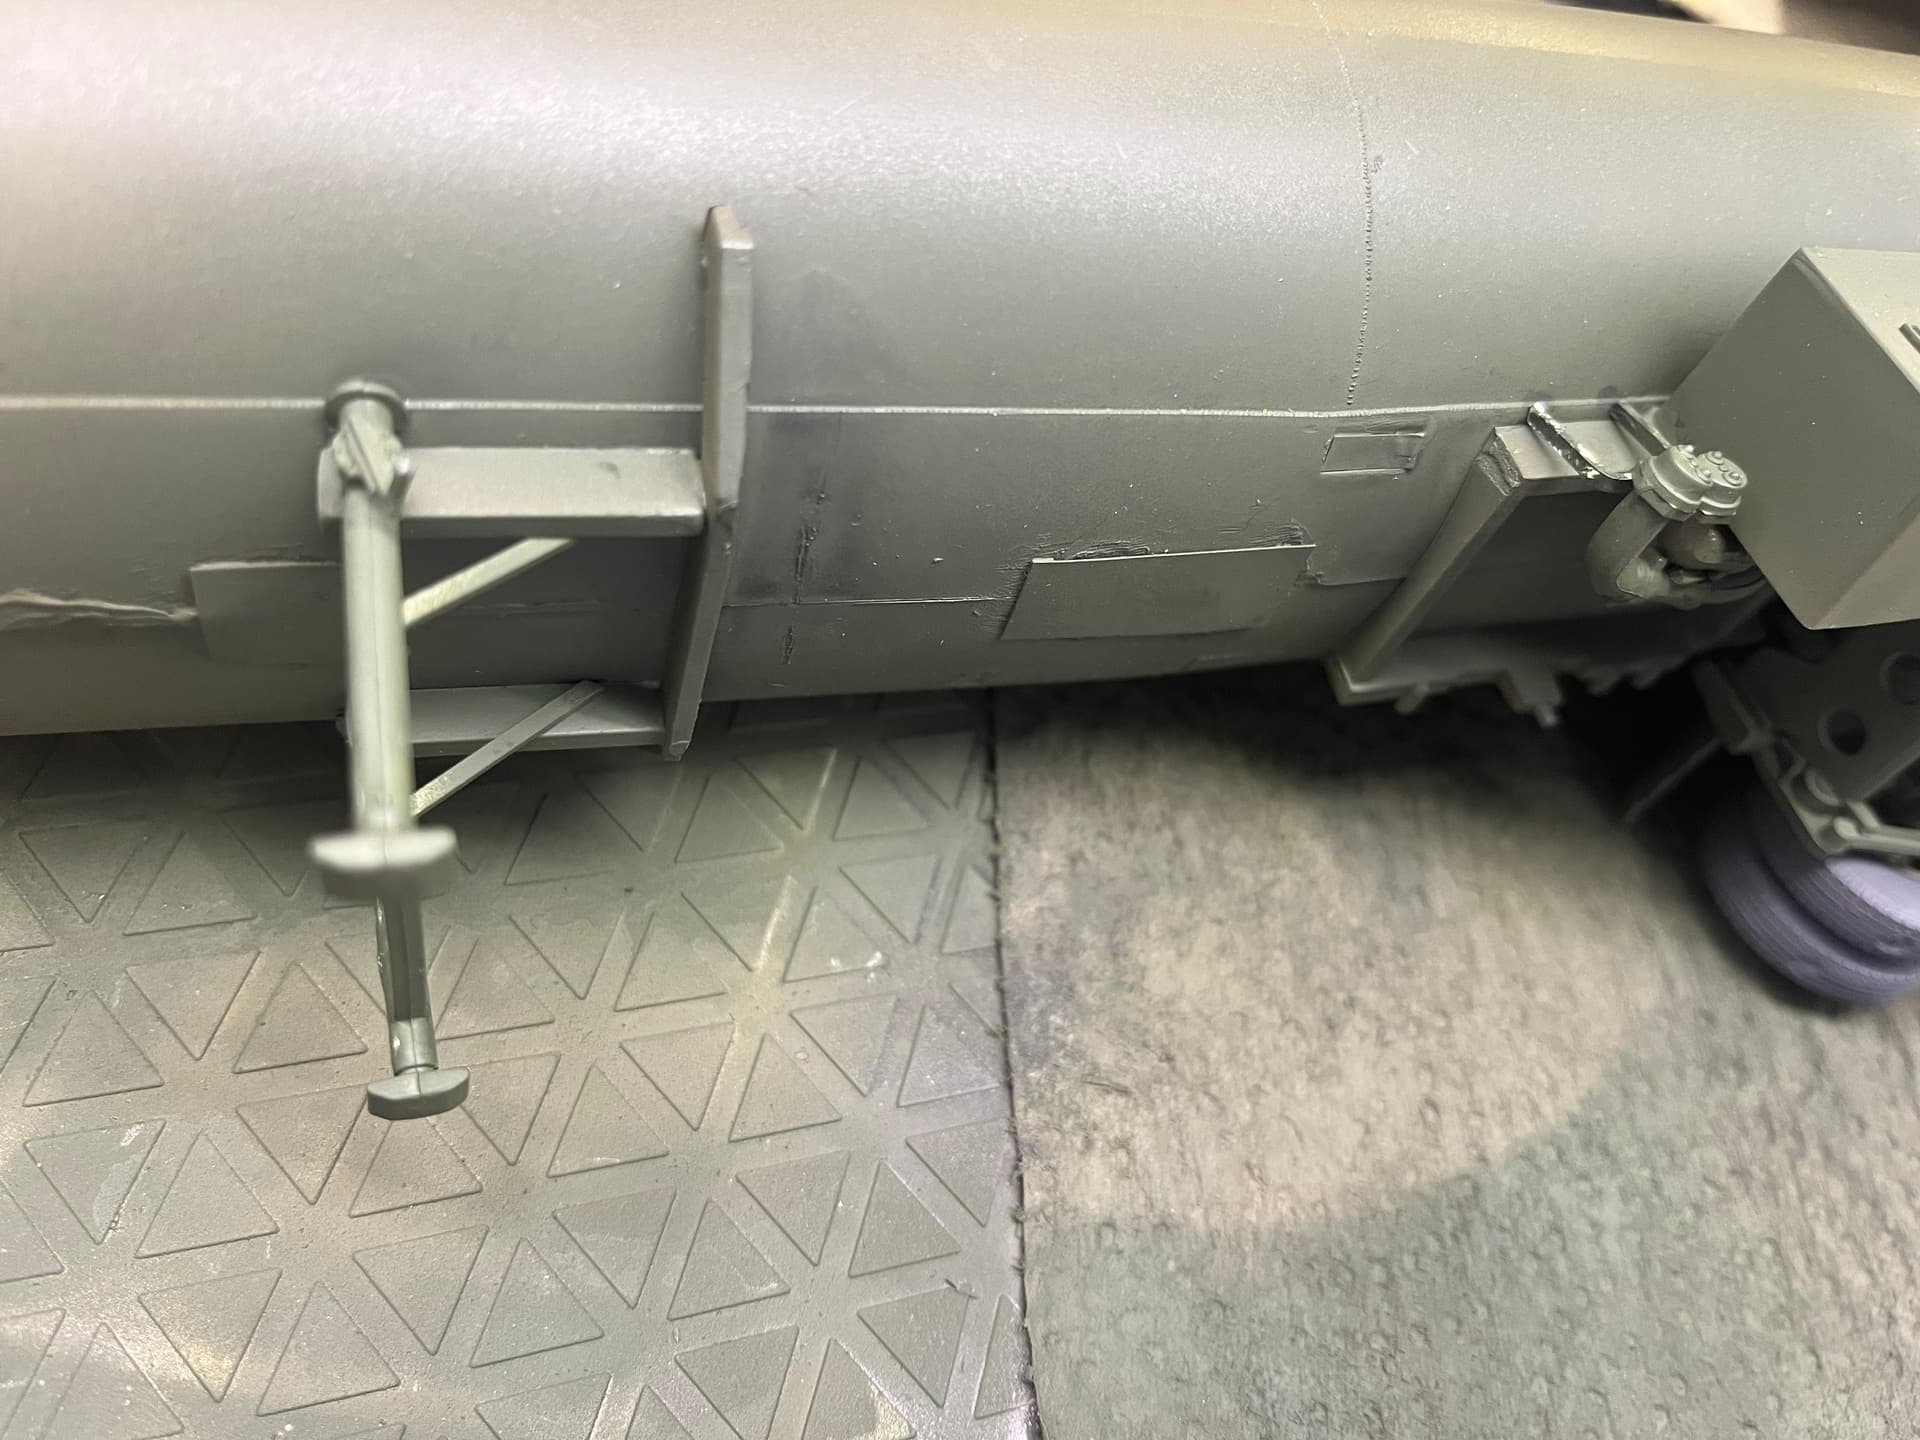
Drinking straws for hose containers? On we go!
Looking good.
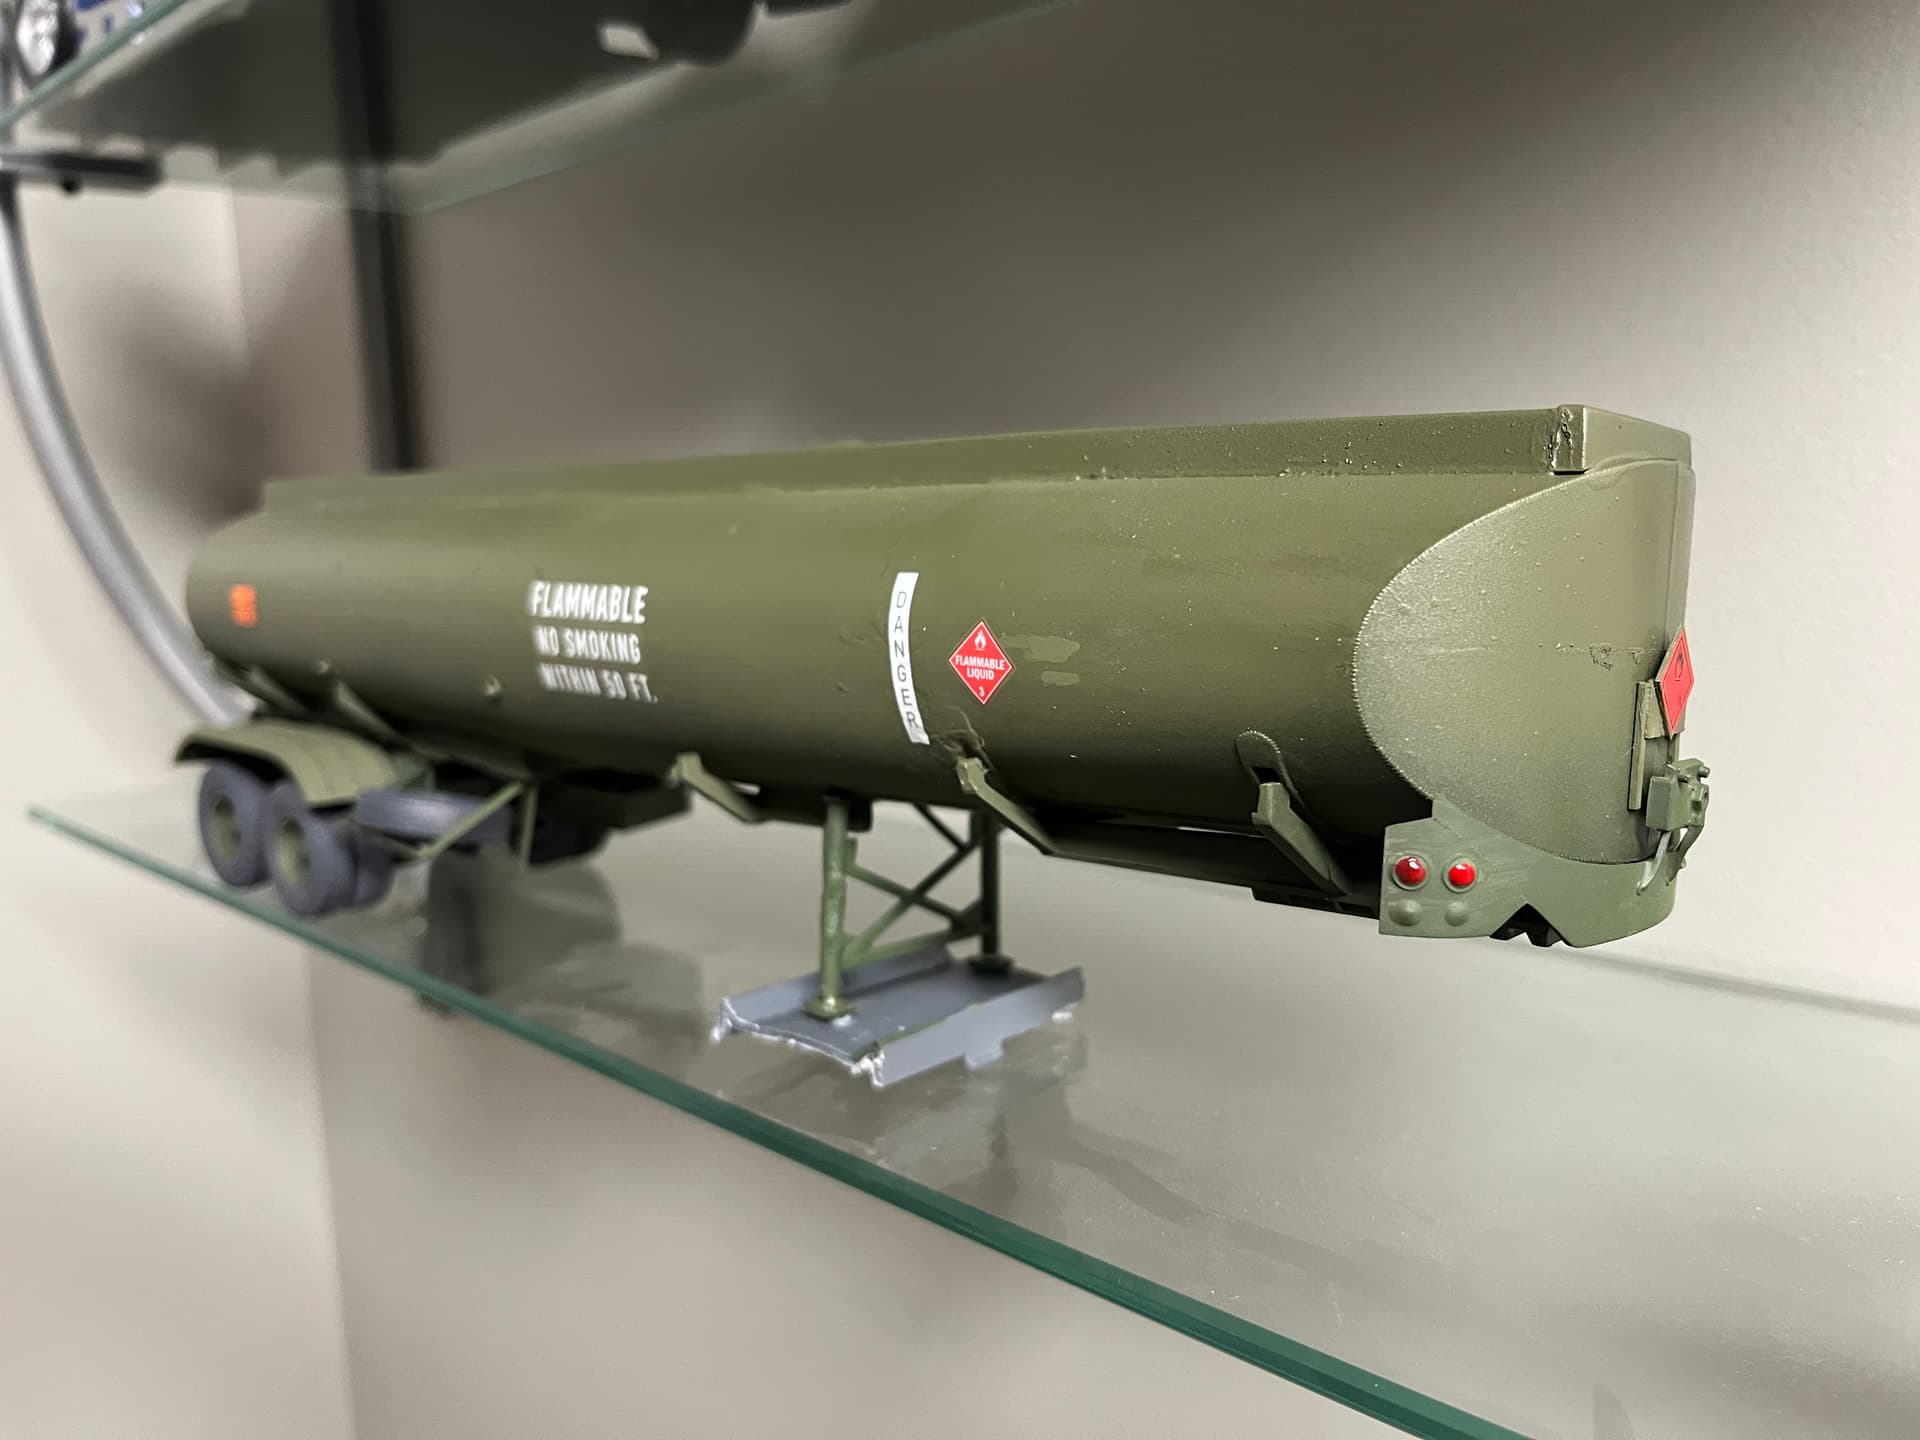
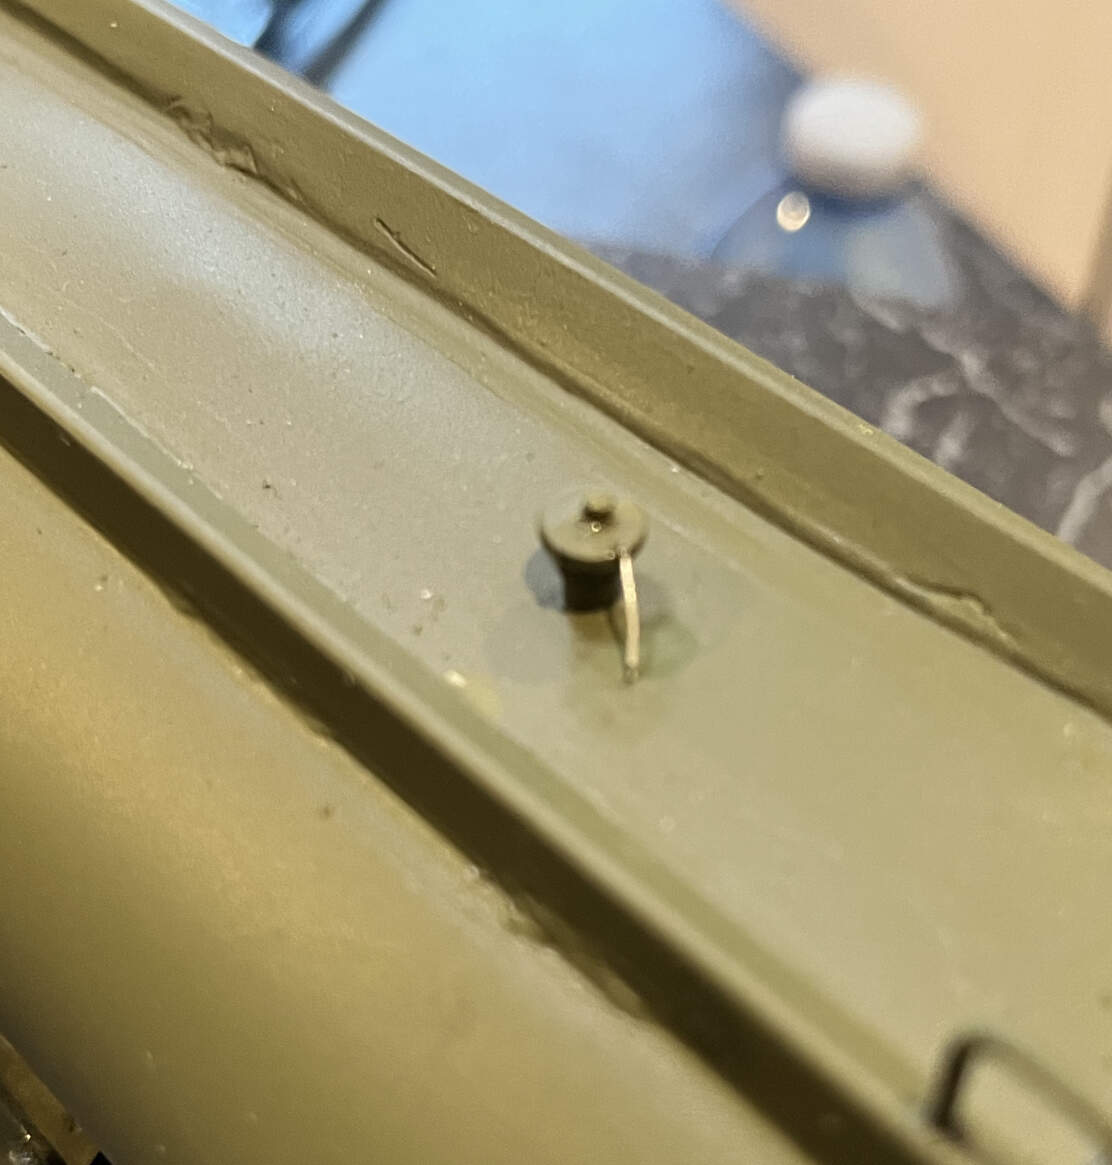
Hey Gino, hope you like my fuel trailer? Its done apart from brake hose hookup and those “+$$#&, “flammable” decals that didn’t settle.
Looking forward to seeing it.
I posted this on another thread in error. Dont know what went wrong with the “Flammable, no” decals; 2 coats of Future, Microsol before and after. Testors dullcote to finish….
Looks really nice. Have you tried decal solvent and set on the “Flammable” decals? I had no real issues with them.
Thanks Gino, I took all the usual steps. They’re really visible in the flash of the pic, but much less so in shadow.
I’ll have to do something-sanding?
Sanding will destroy the decal. I would take a new #11 xacto blade and prick the decal so it has holes where it didn’t set well. Then I would do the solvent/set again and see if that does it. Usually, the issue is a not smooth enough surface under the decal and the solvent/set can’t get fully under big decals. I find future can sometimes leave a bit of flat areas. That is why I only use glosscote as a base for decals.
I’ll give that a try. What I meant about sanding was to sand the decal off completely (be tricky on the back one) and find new decals. I think maybe @Arch-Stanton mentioned this.
Your method sounds less extreme!
Question on the decals: Did you also put Future UNDER the decal before applying the decal? Apply wet decal while Future is still wet then top coat the decal with more Future and allow to dry.
Skip the Solvset as it is totally unnecessary. (And inaffective.)
Finish off with a final coat of your matte clear to hid the shine of the Future. (I find that Tamiya Matte Clear - TS-80 rattle can is the absolute best for this job. Applied very dry.)
Others will disagree but dont knock it if you have not tried it. (Trick taught to me by a long time, very successful competition modeler with LOTS of trophies hanging on his wall.)
I can offer beaucoup photos to prove this system works like a charm!