I got a bit more done on the Char 2. As an experiment, I tried a Krylon clear gloss and it worked very well. It went on without drama and dried quickly. After sitting overnight the wash went on just as it should. Now its sitting waiting to get good & dry waiting for the next step.
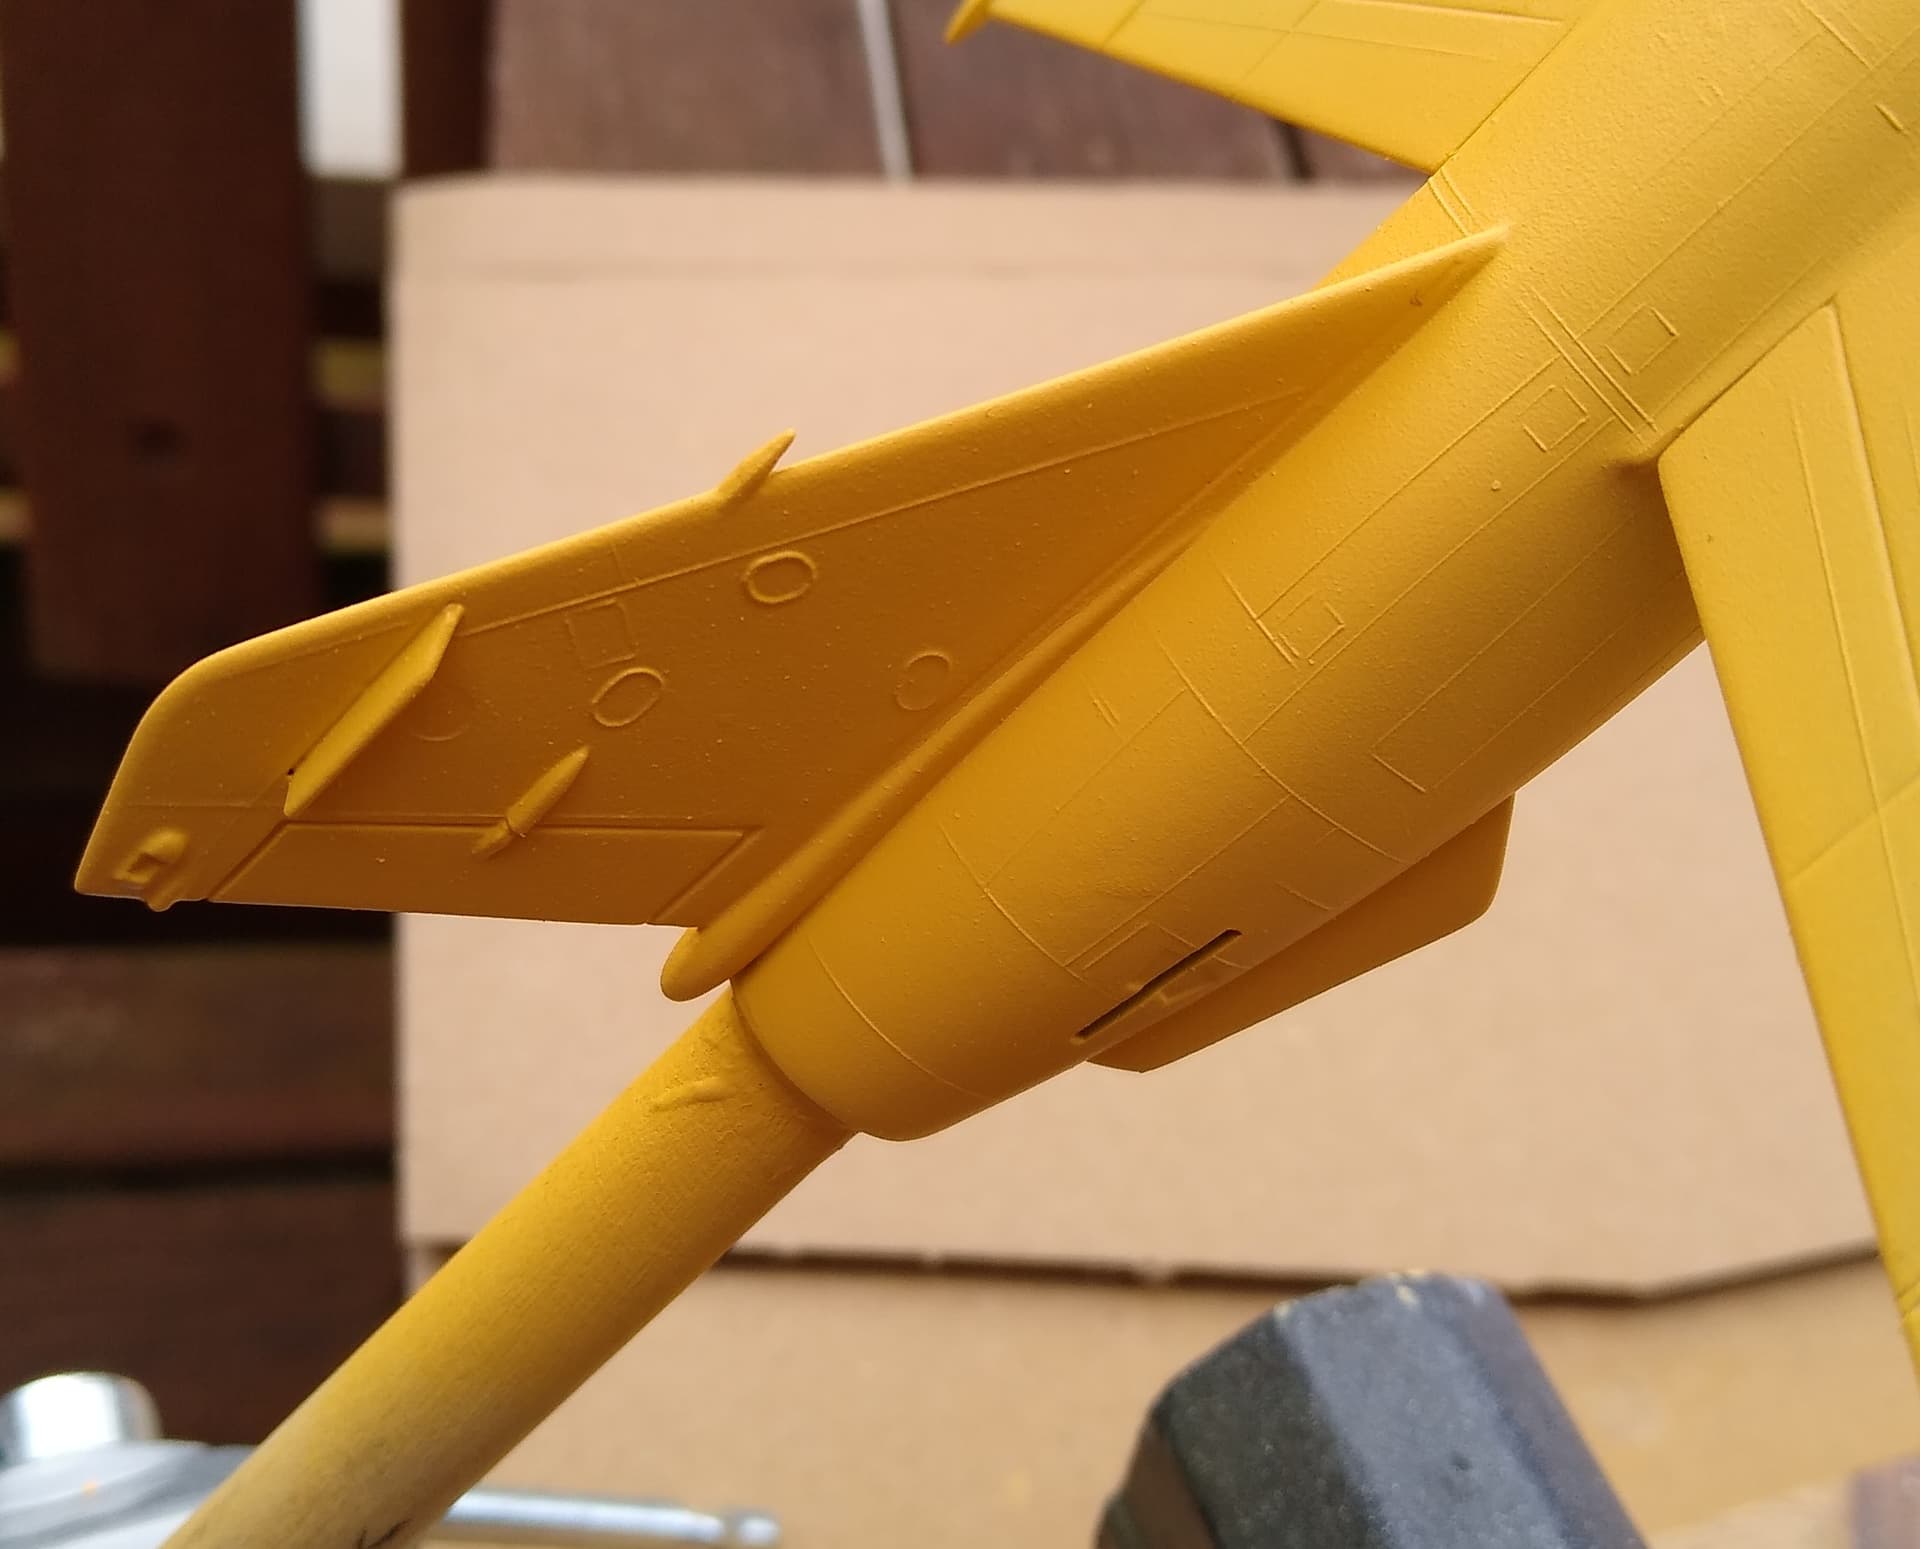
Thanks guys, the pale beige is definitely one I’ll use for the base. I’ll remember this next time I have to paint anything yellow.
Paul, unfortunately it was the kits part. The plastic is quite hard and brittle in places (something I’ve found quite common with vintage Heller), so I don’t think it took much to chip it off. A cover will definitely improve it anyway as there’s no depth or detail to the part
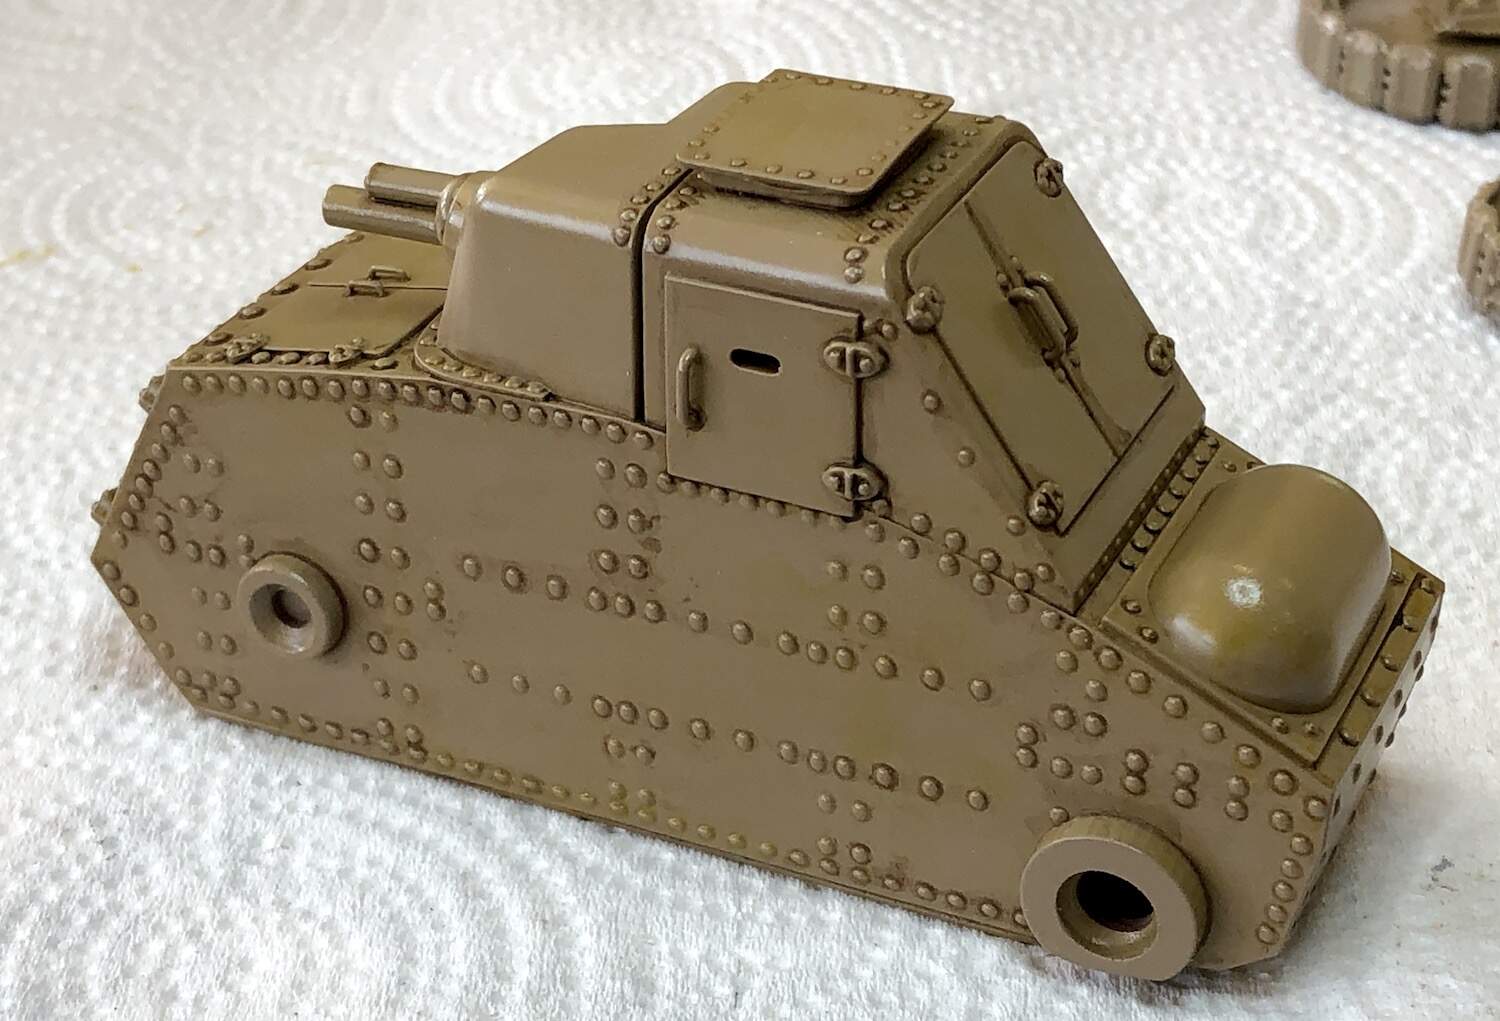
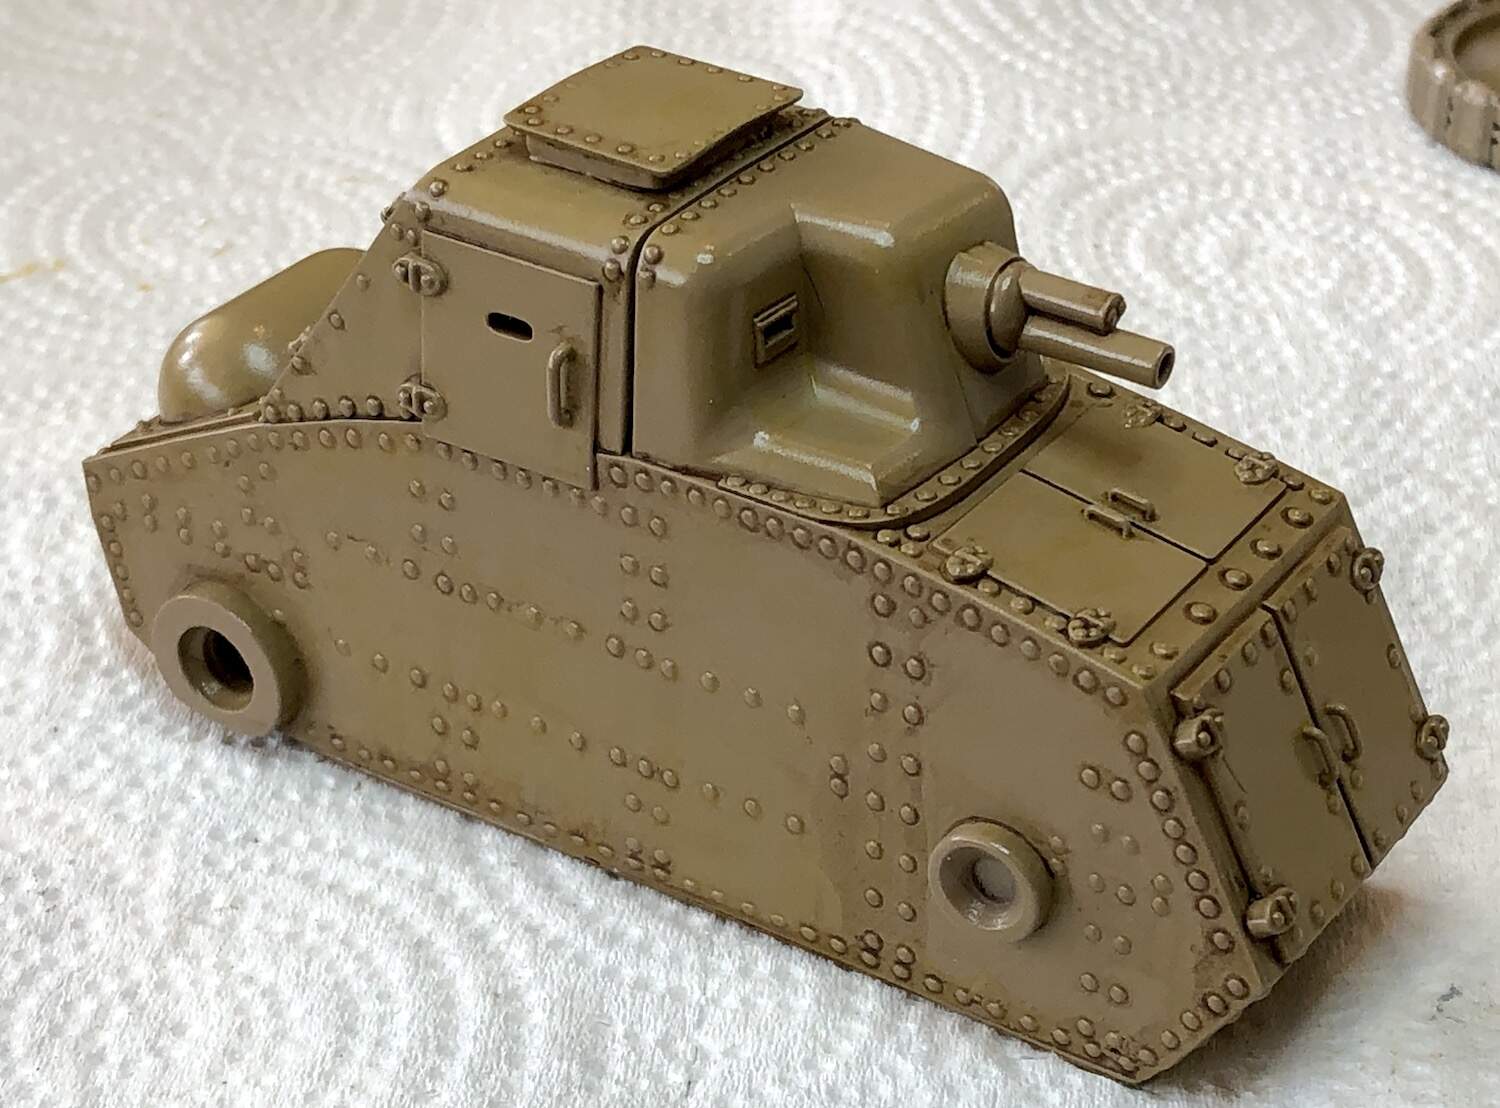
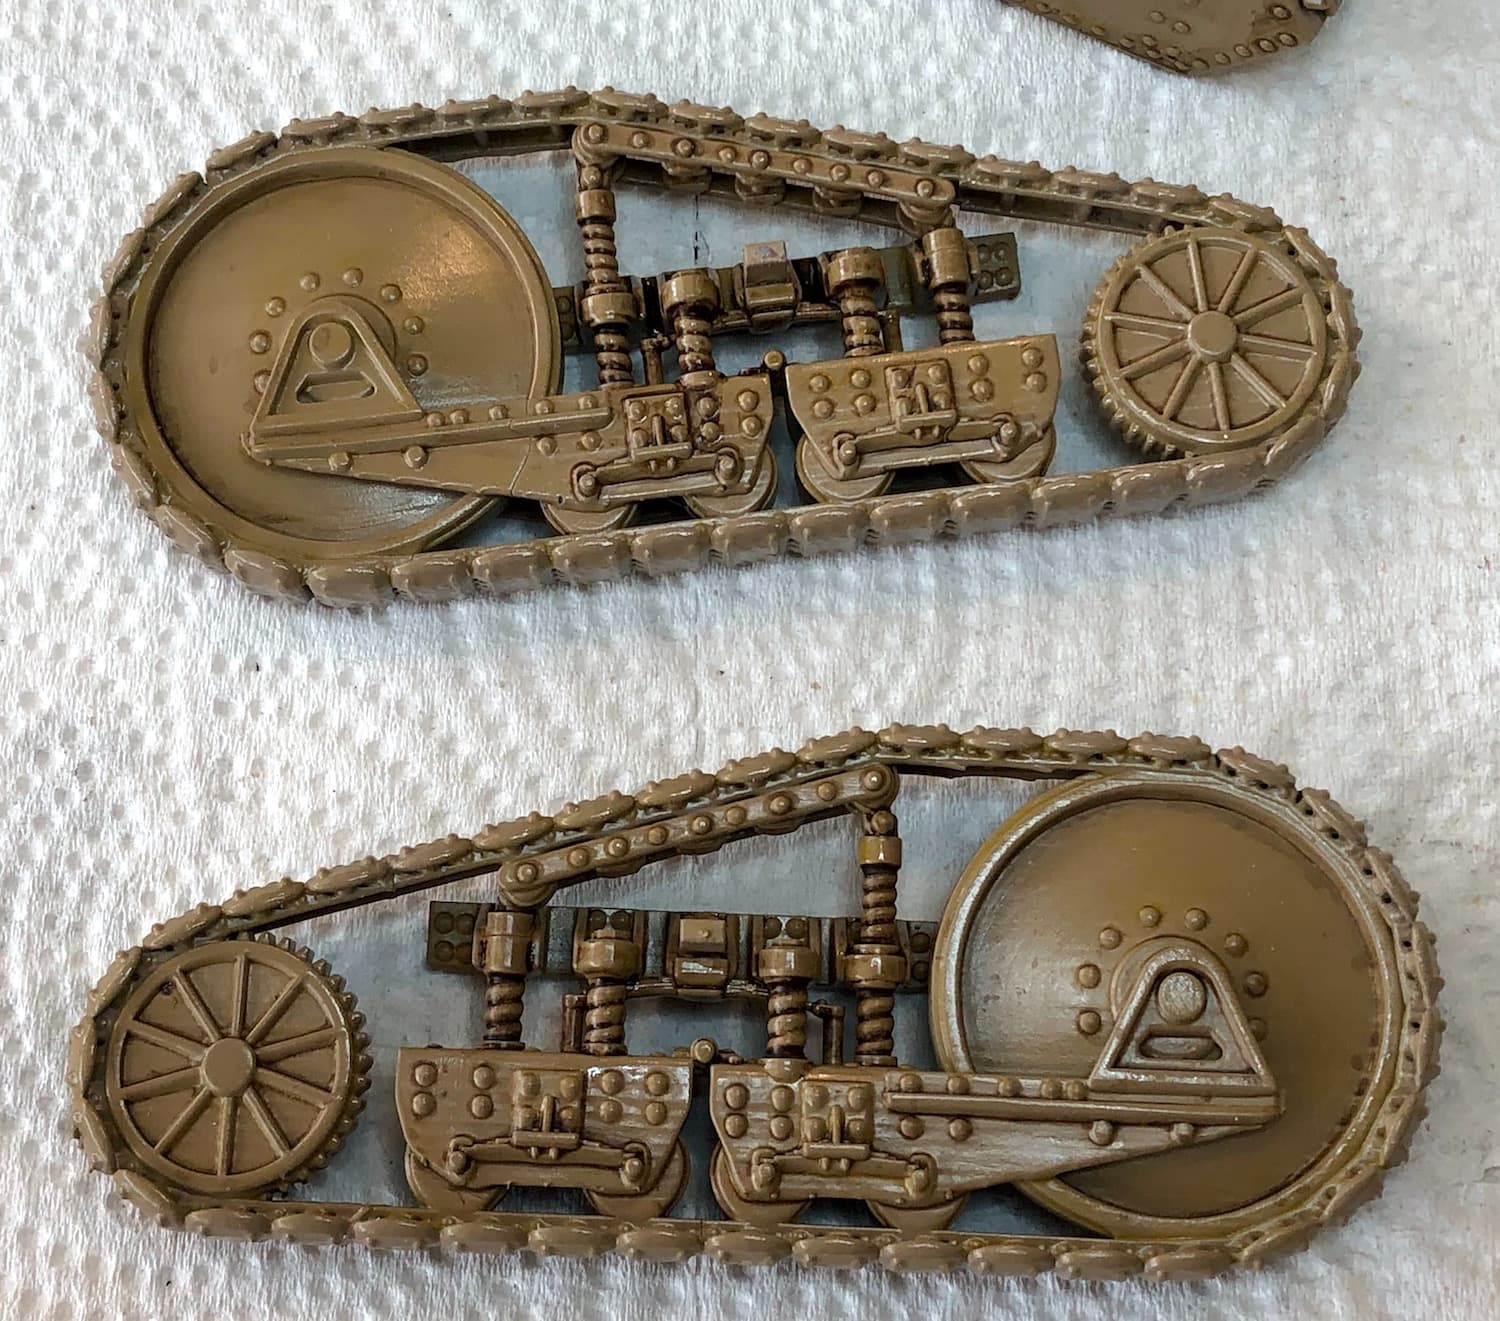
The Char 2 is looking great under some paint. Quite a squat and heavy looking lump of metal!
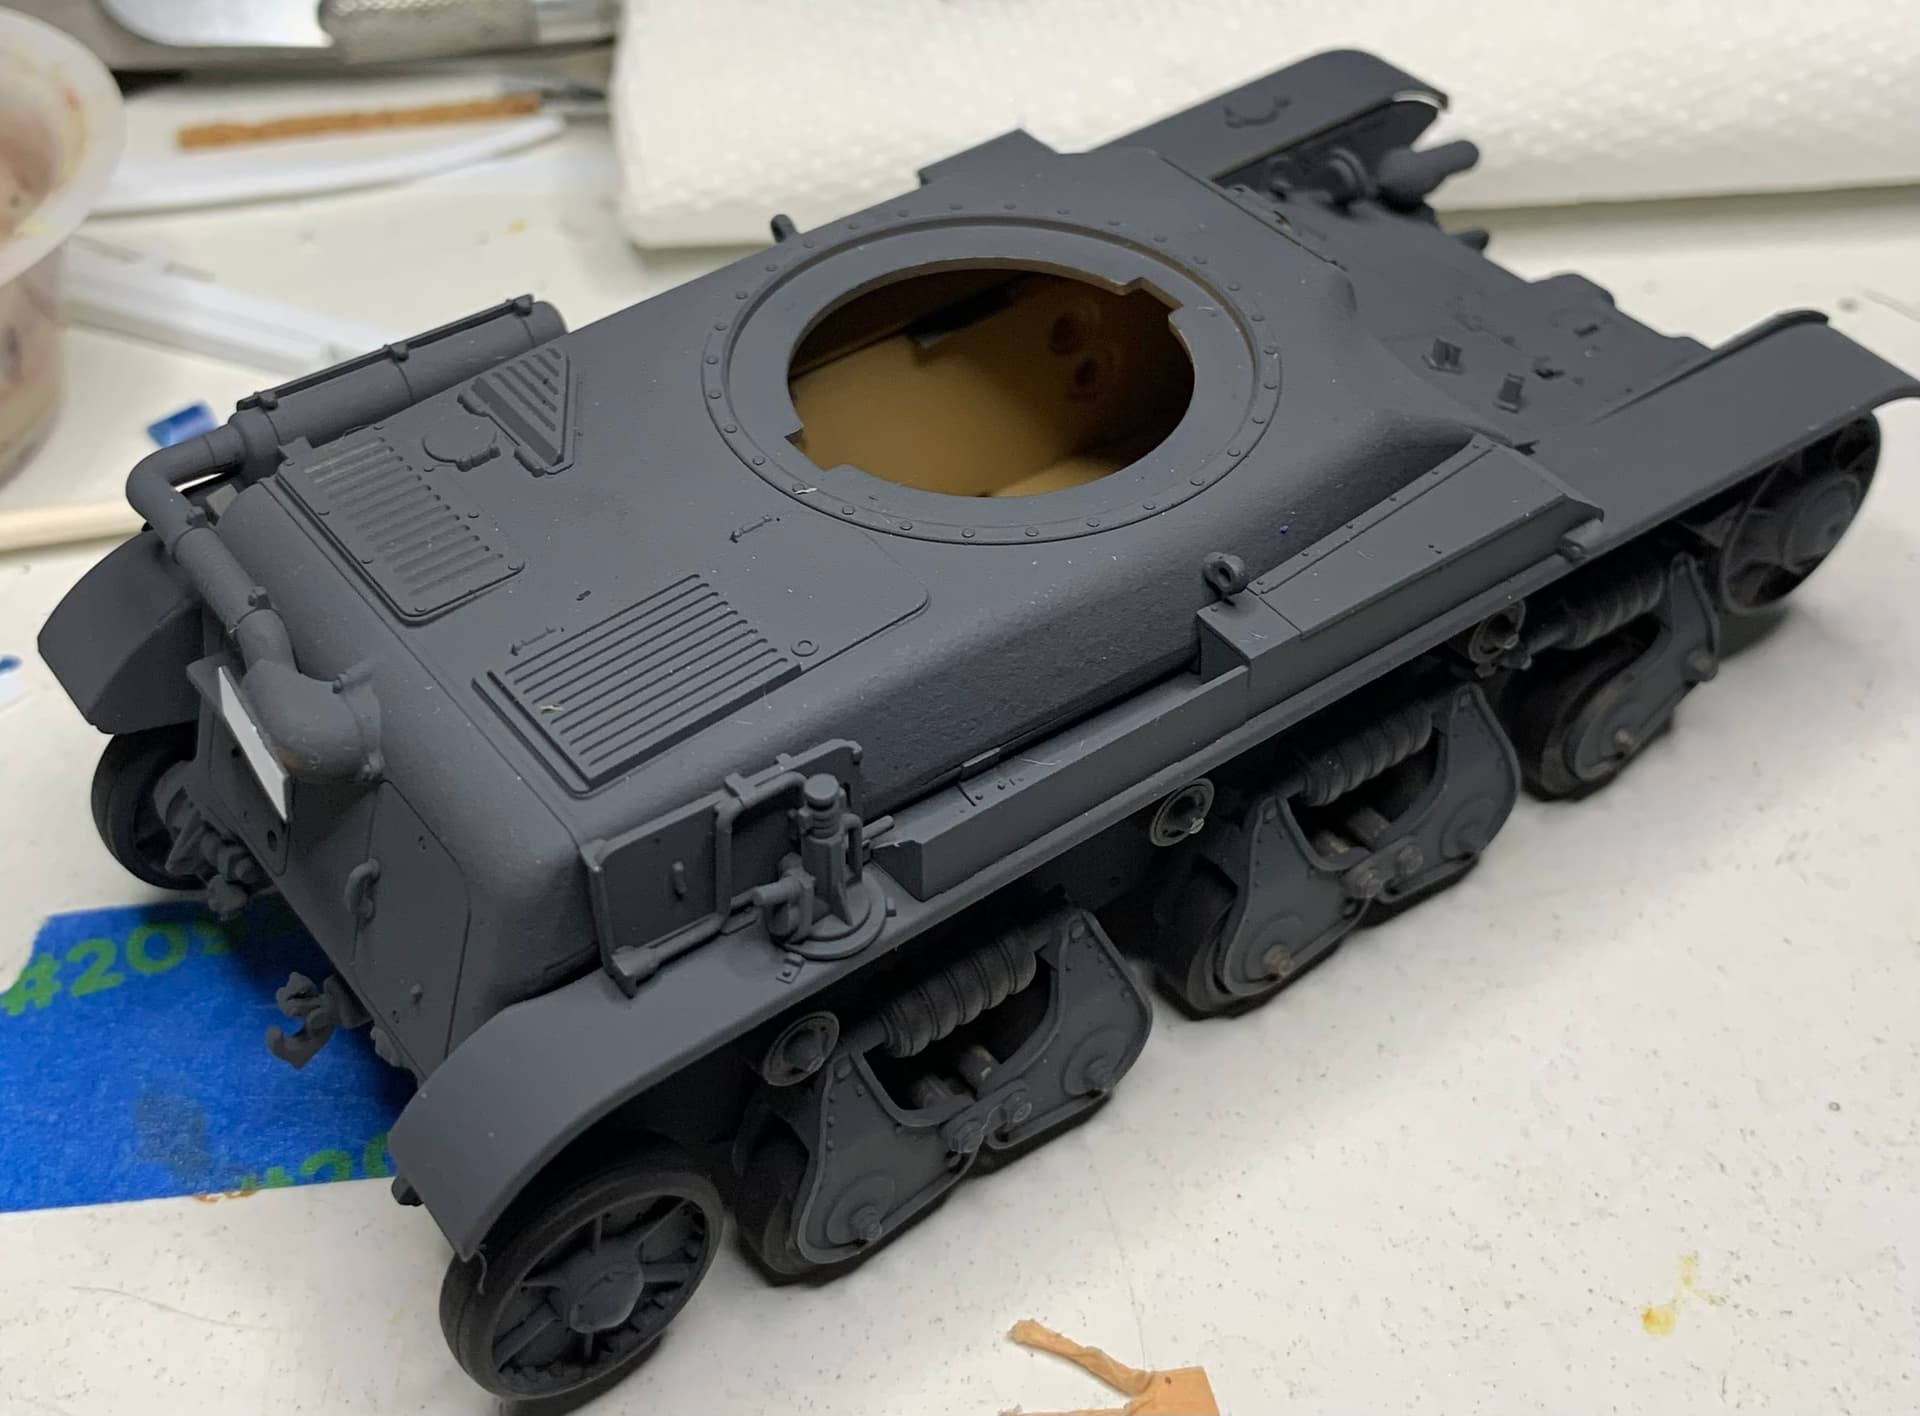
Not that every project is for a contest but I was trying to rush for this past Saturday’s contest and I stopped as I didn’t like the process and mistakes I was making. Judging on Saturday gave me new perspective on quality so I am glad I had stopped. I think I will be happier with the results going slower especially when it comes to track alignment. Here is where the R35 stands.
I see you have already attached the tools. I leave these off until they are painted and then install them. It seems easier to me as my eyes and increasingly shaky painting hand have less chance of messing up. You have no trouble this way?
I am using the Star decals Bulgarian decals, my tank will be 222 as Peter has 202. The only tool will be the jack and iron the rest are left off as they where not delivered or installed on the Bulgarian training vehicles. Right now the fenders are detachable so I can install the track, so painting shouldn’t be so bad.
And then the yellow. Several light coats to build up the colour. Got a bit more overspray than I wanted on the rest of the Mirage, but happy with the coverage on the tail.
Thanks Peter. I think I’ve finally cracked how to do yellow!
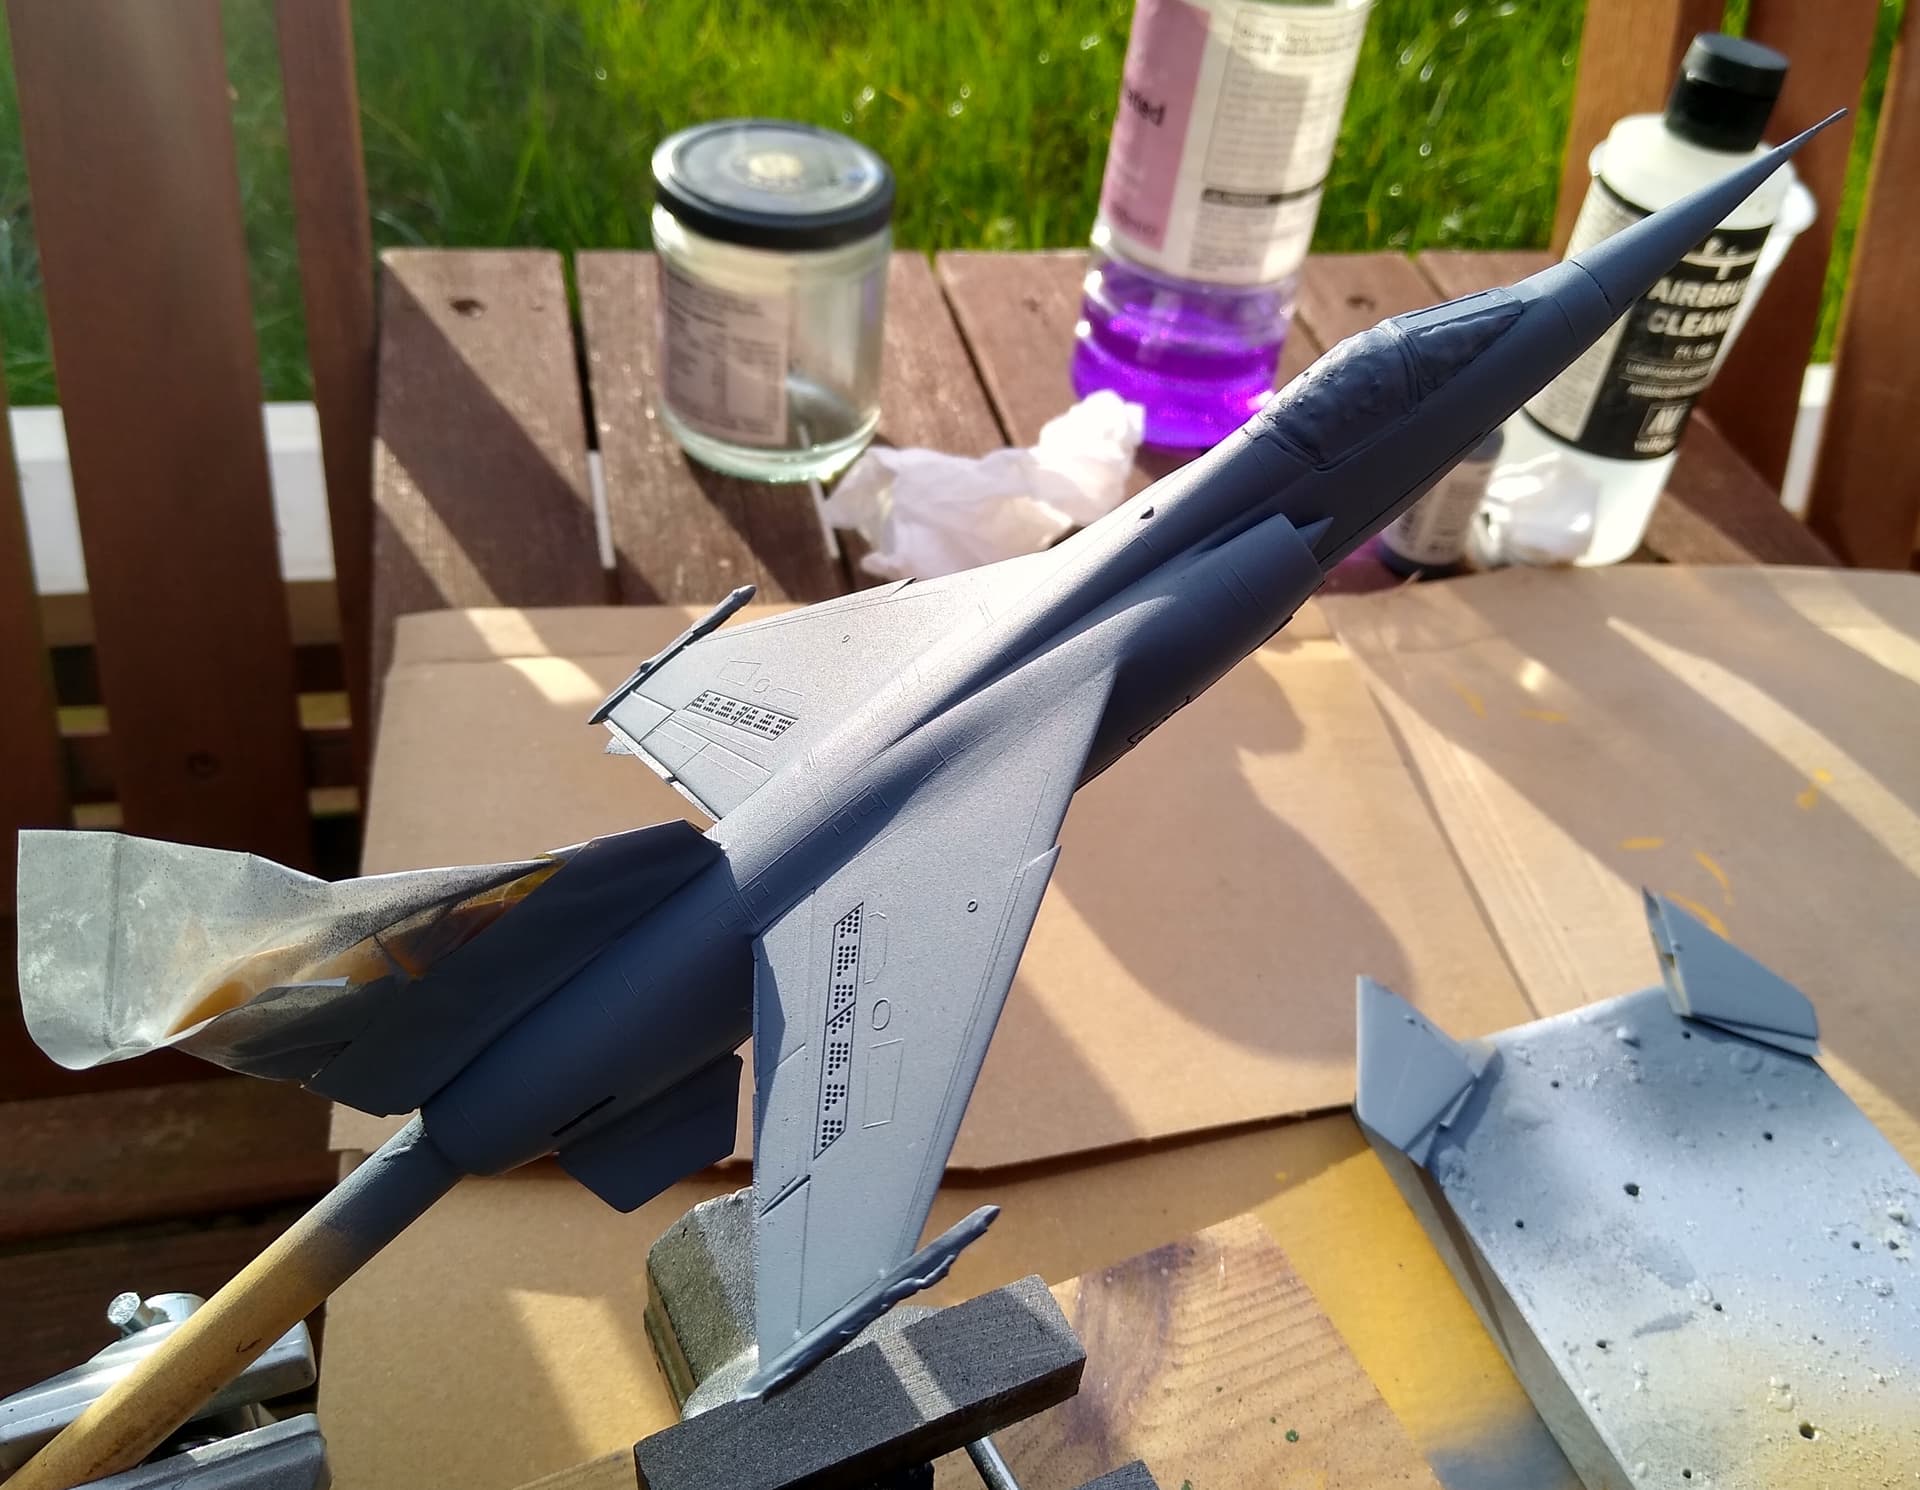
As I do all my airbrushing outside, I’ve taken advantage of the great weather we’ve had this weekend to get the rest painted up. Masking everything between colours was a task that took longer than expected.
I used Vallejo Modelair Aluminium for the undersides and Mirage blue for the uppers.
Few little touch ups to do, mostly where I got some paint bleed on the Magic missile rails, but looks good. Most importantly though, no paint bleed onto the yellow!
Just the radome and anti-glare panel to do in black and she’ll be ready for decals and final finishing. Don’t want to do too much in the way of weathering. As a Tigermeet presentation aircraft, I would imagine she would have been quite clean and spiffy for the occasion.
A trick I learned on this site, is when spraying masked areas, first spray the edge of the mask with the colour it is hiding. That way, any bleed is the same colour as under the mask. It also helps seal the edge when you apply the final colour over the mask and prevent any more bleed.
I did use that method, picked it up from here as well.
I think the problem on the rails was that the tape lifted in a few spots (and one spot I missed completely!). There’s not much area for the tape to stick to and it peeled back in a few places. Should be easy to sort out.
We’re off for a few days tomorrow, so it can wait till next weekend.
Thanks Karl.
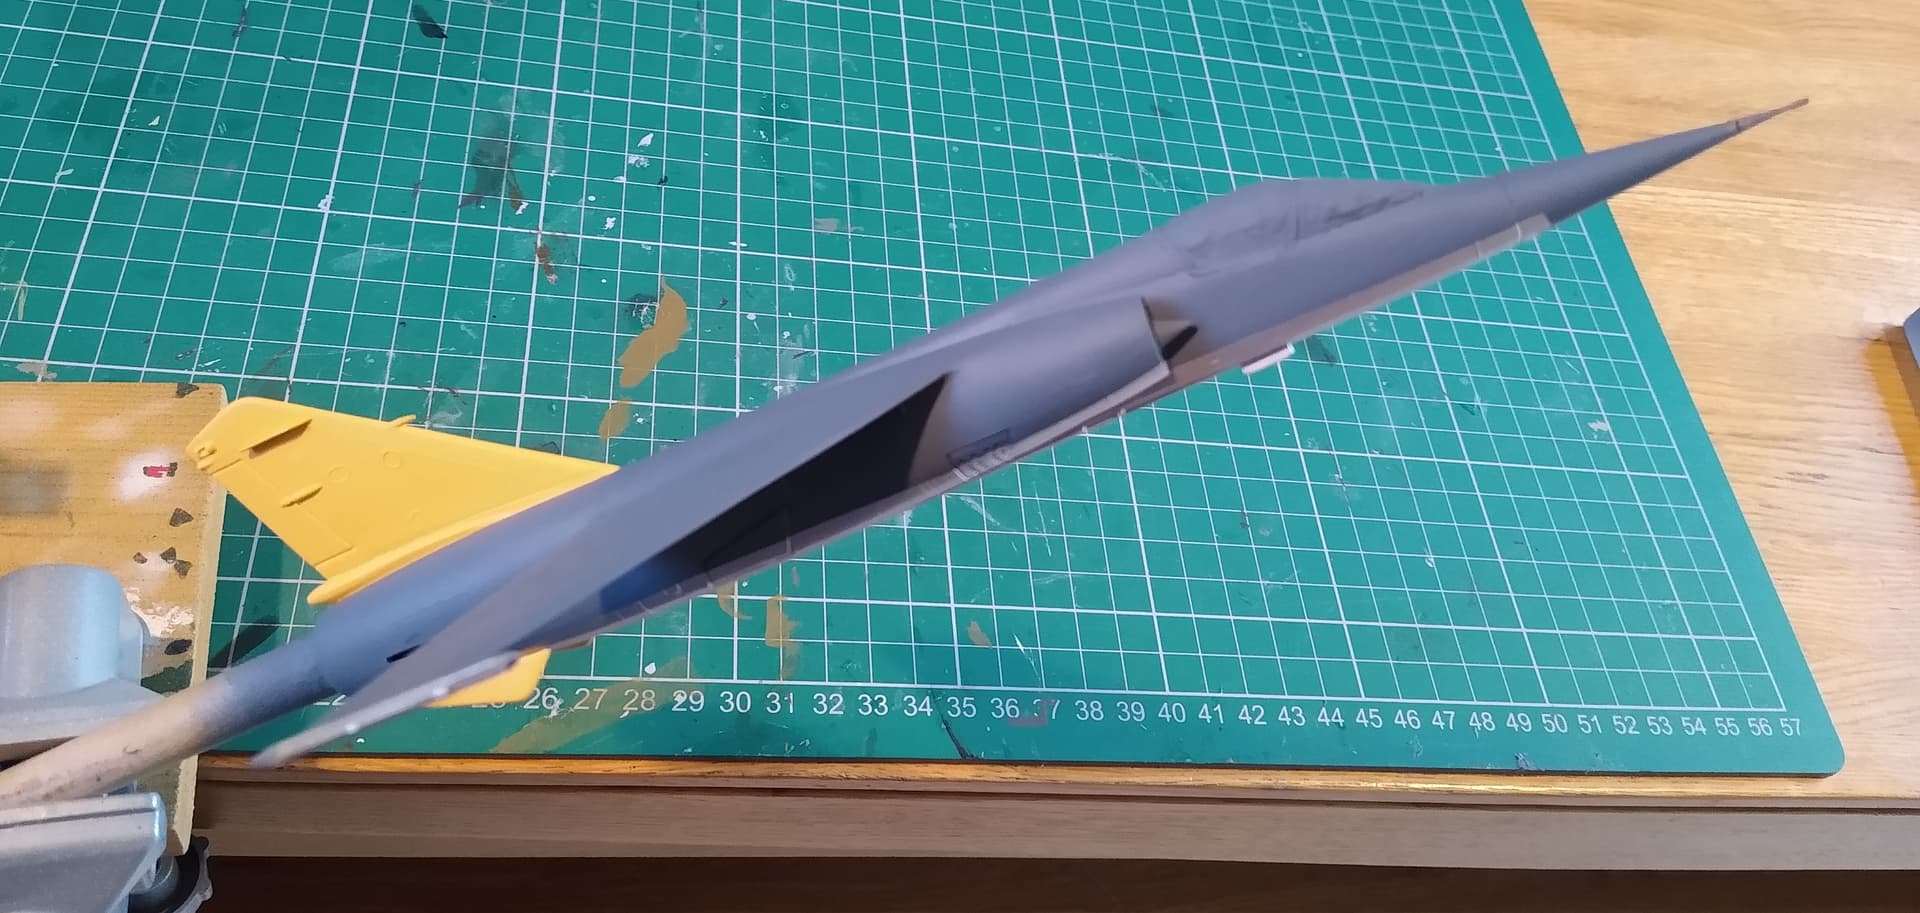
I agree, the blue and silver do suit the F1. First time I’ve ever built one and it’s a much more attractive aircraft than I thought it was. But then again, did Dassault ever build anything that wasn’t?
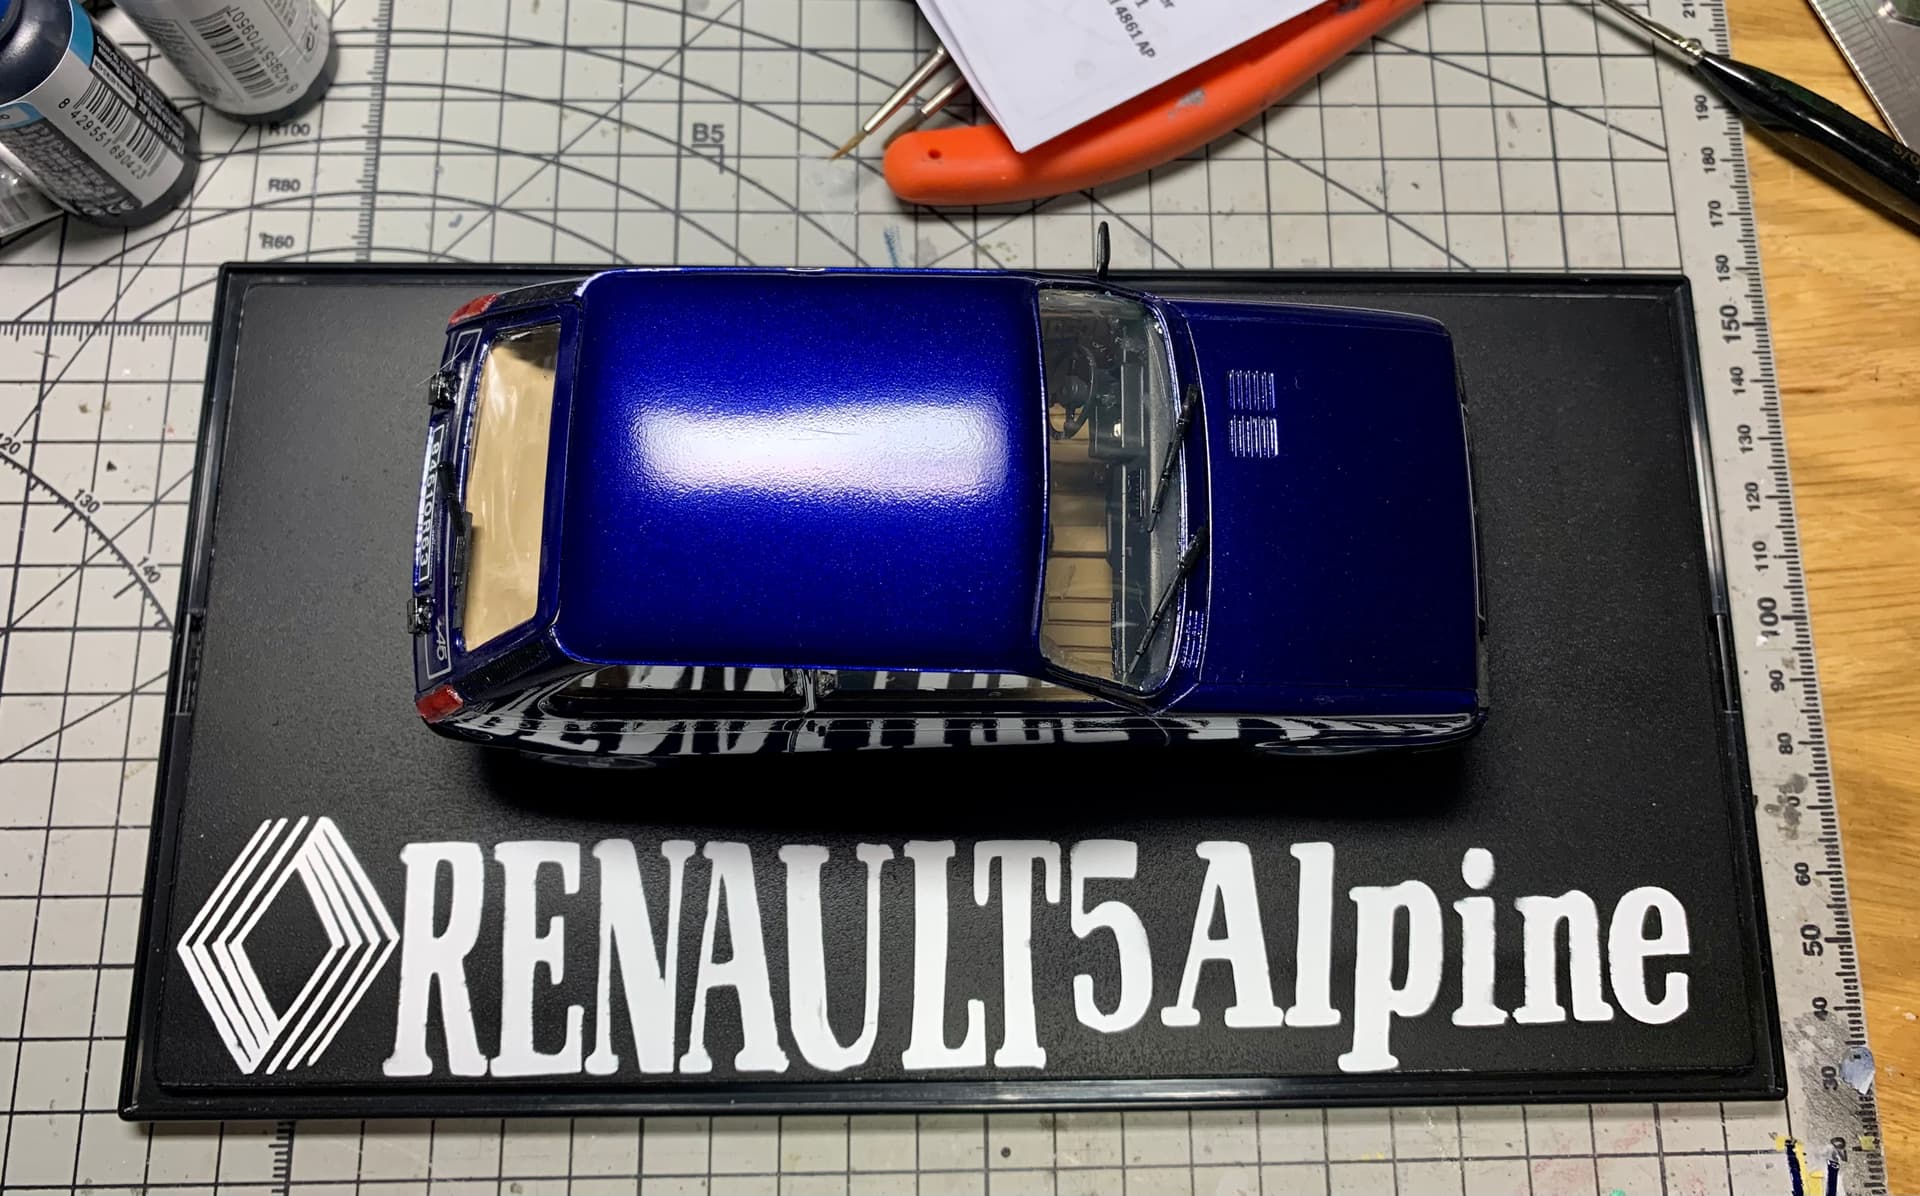
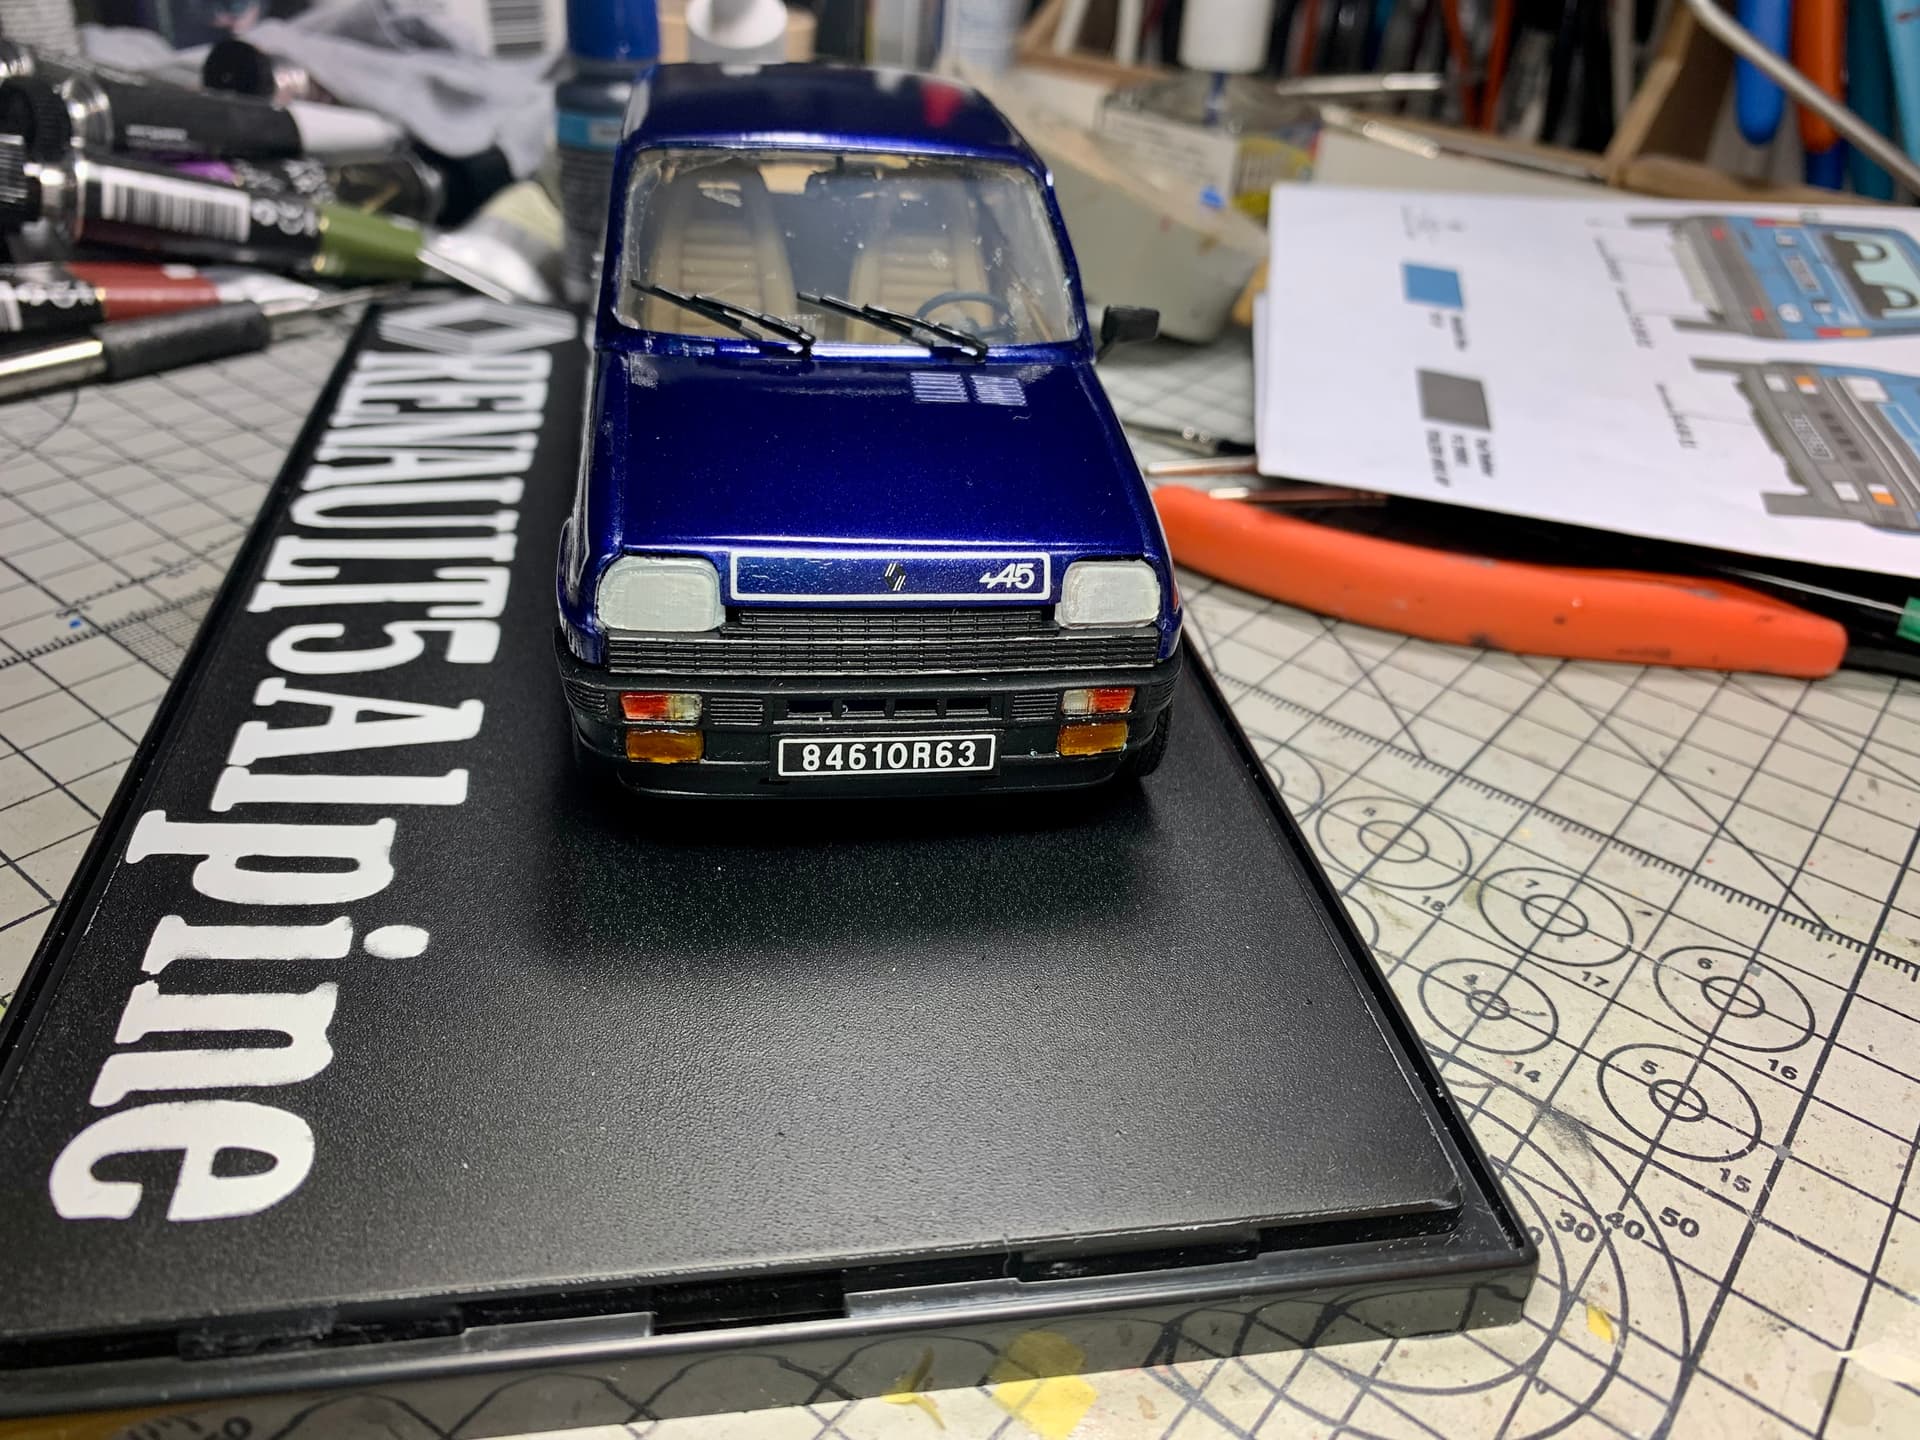
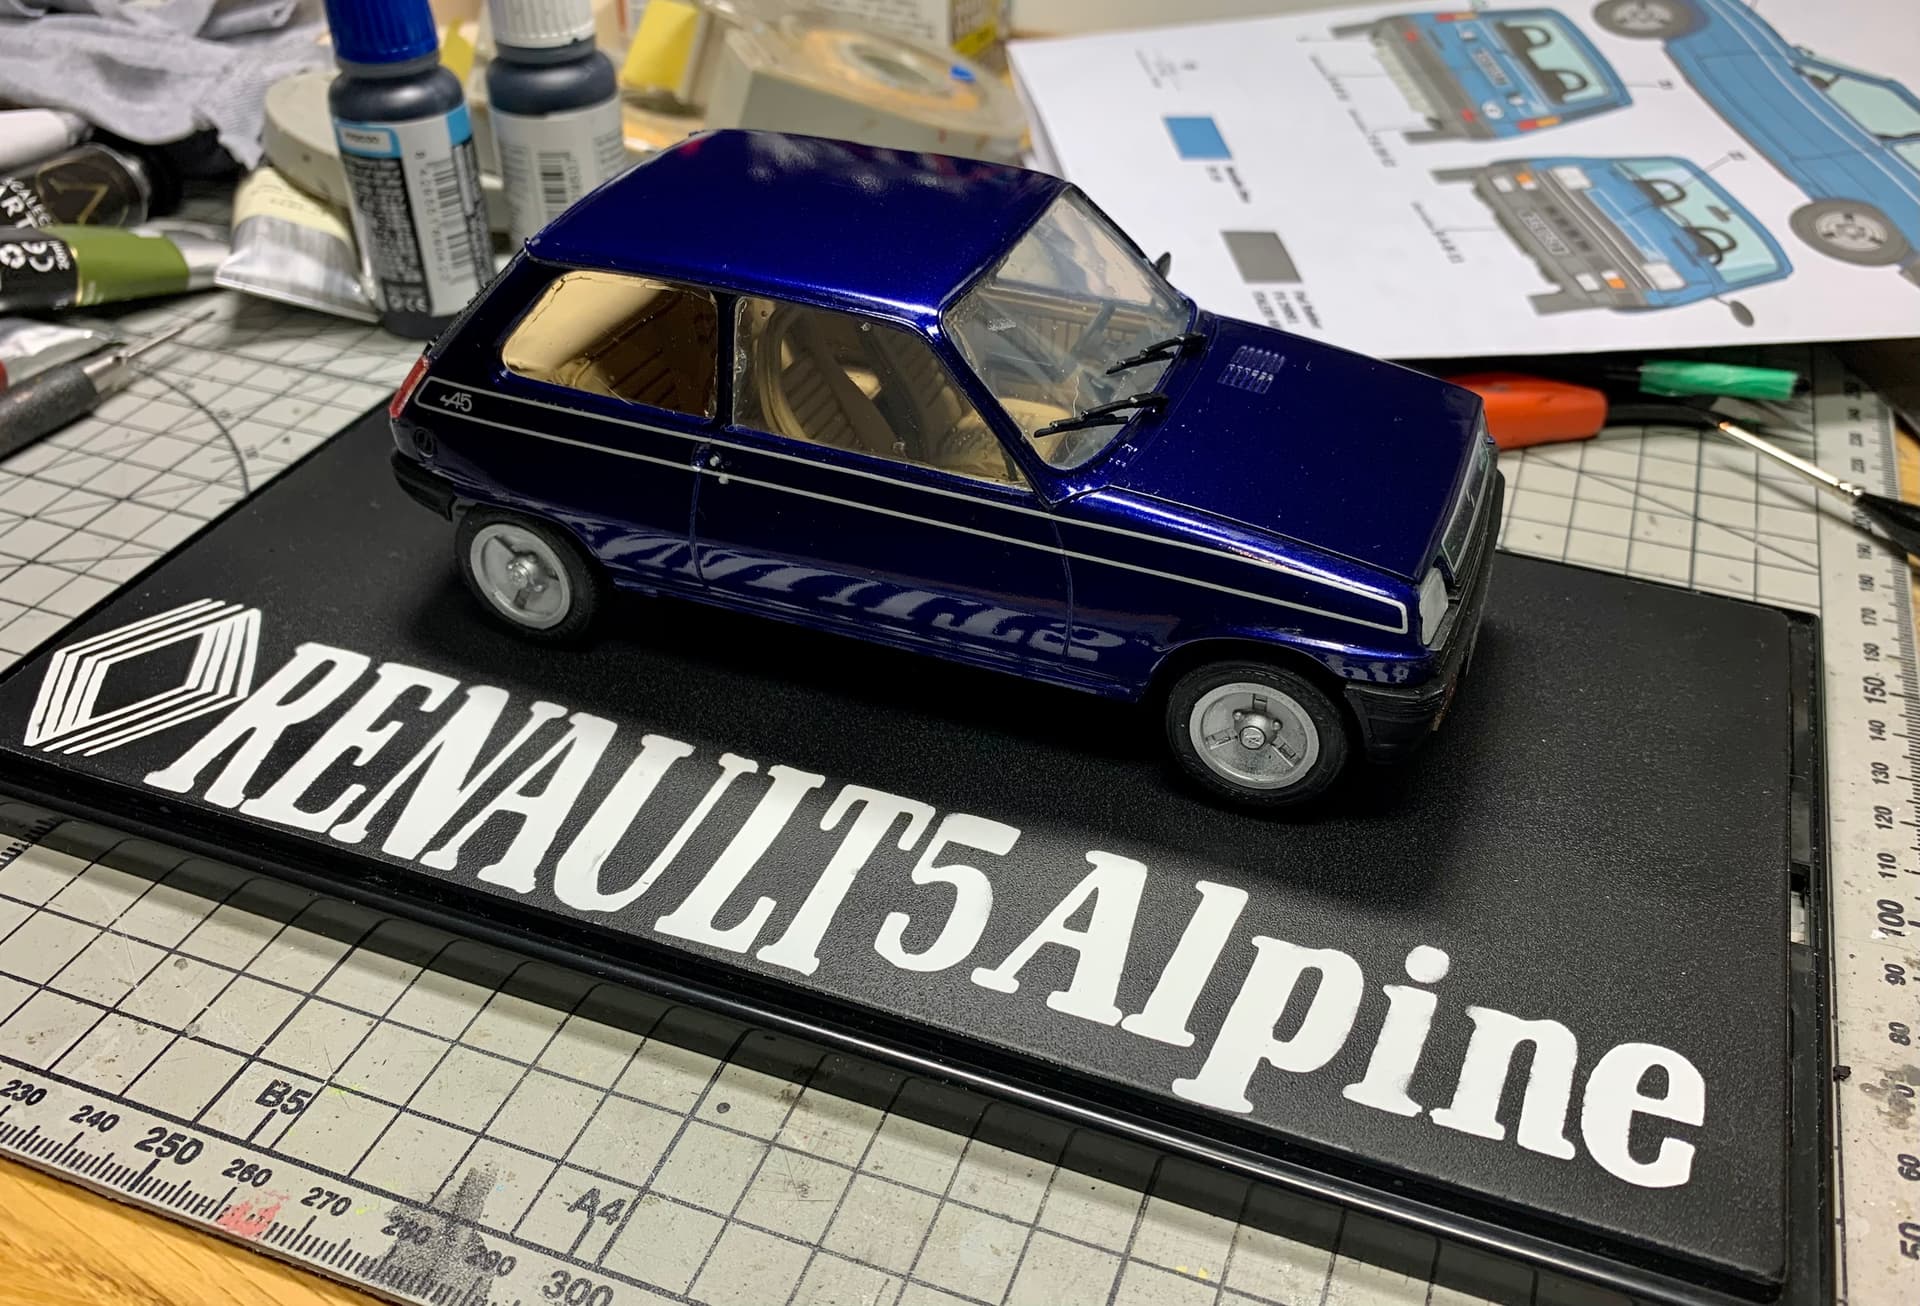
Once I sprayed on the first clear coat I left the body to sit for a few days before doing the decals. When they were dry I gave the body another clear coat and a few days to dry.
Then I moved on to polishing to give a nice, smooth and shiny finish. I use Novus plastic polish for this stage and I find this gives the bodywork some protection which is useful for the various final assemblies.
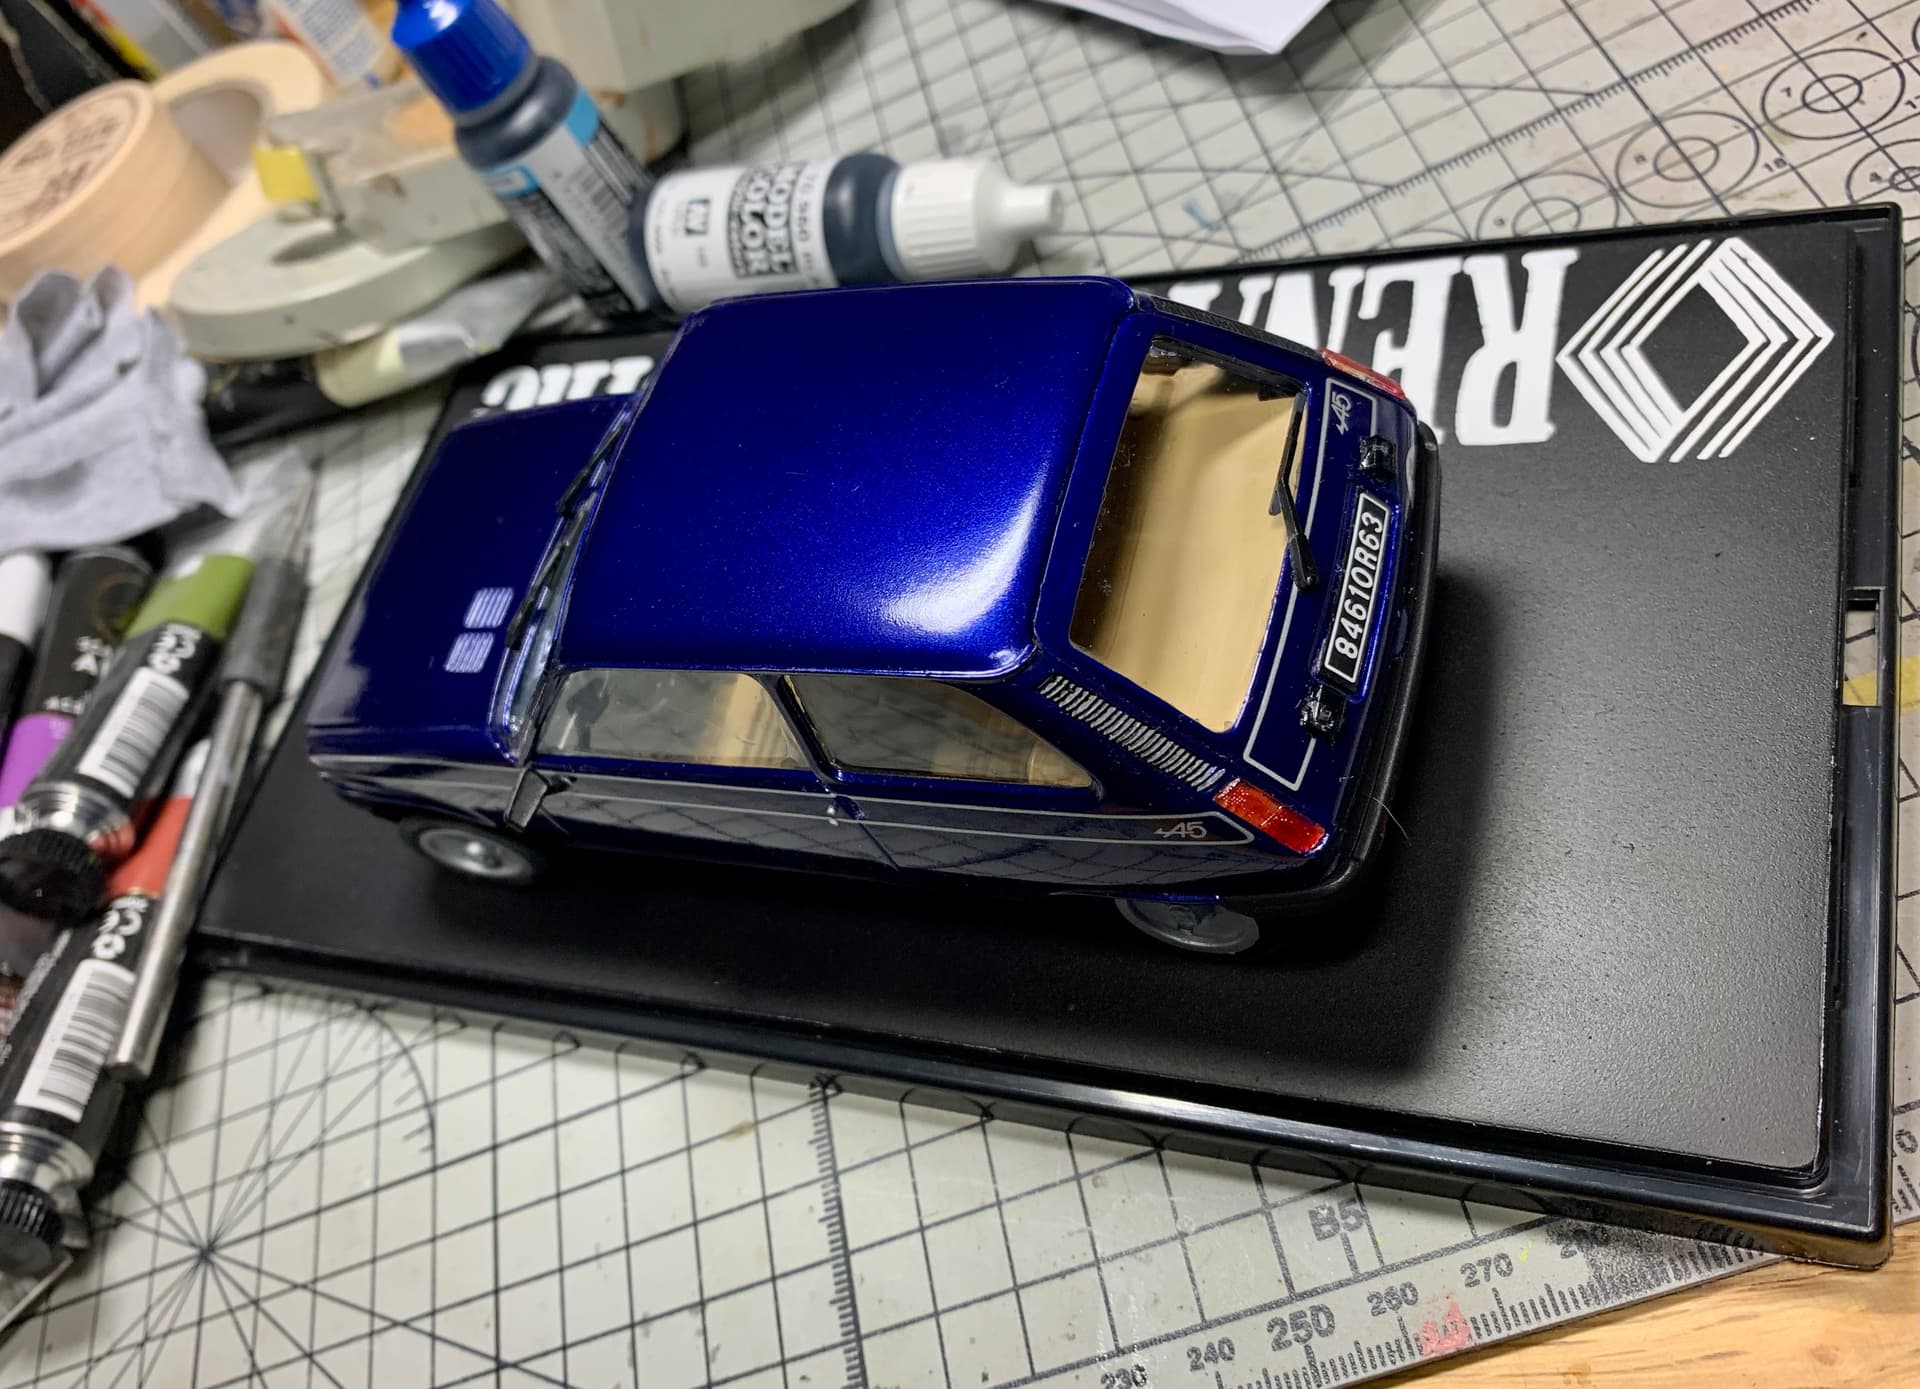
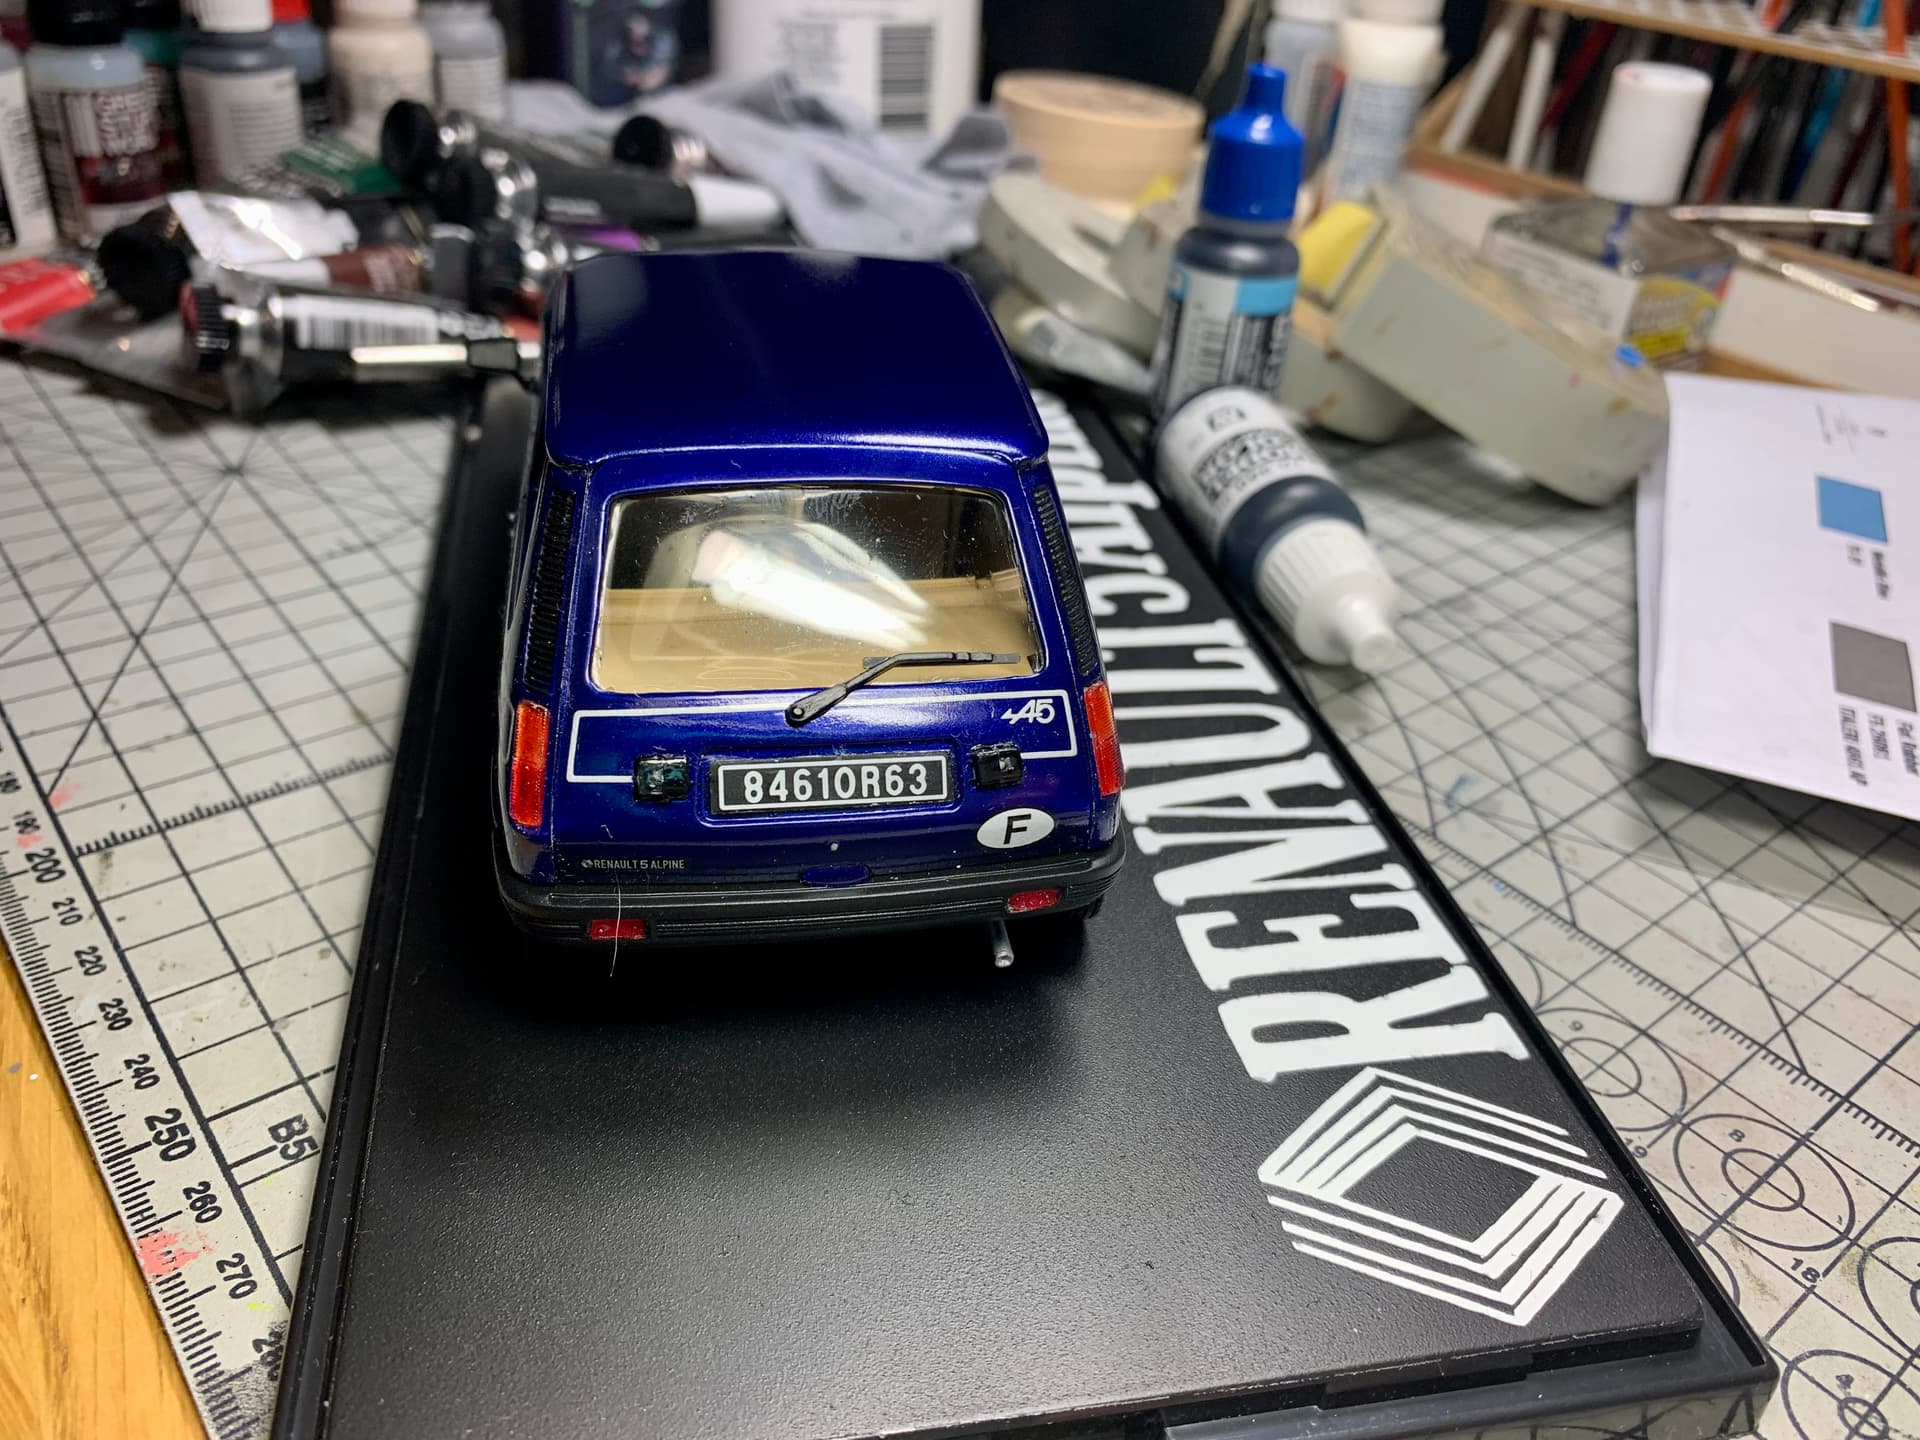
Both front and rear fenders were painted black and given a satin varnish before the lights were added- the clear lenses look ok but seem to be smaller than their location points on the fenders.
Next up was the windows. My scratch made windscreen went in with a bit of fuss and has a few blemishes but it’ll do.
Then I discovered another hilarious issue- no front driver or passenger windows! I thought I had mis-placed them but then I checked the sprue- nope not there. They are not in the instructions either. So they give you all the other glazing just not the front two !
Ah well, the side windows were simple shapes so I did myself up one for each side and glued them in place. Now it was time to mate up all the sub-assemblies.
The finishing touch was using a Cricut machine to make a mask of the car name for a small display case and that was it done.