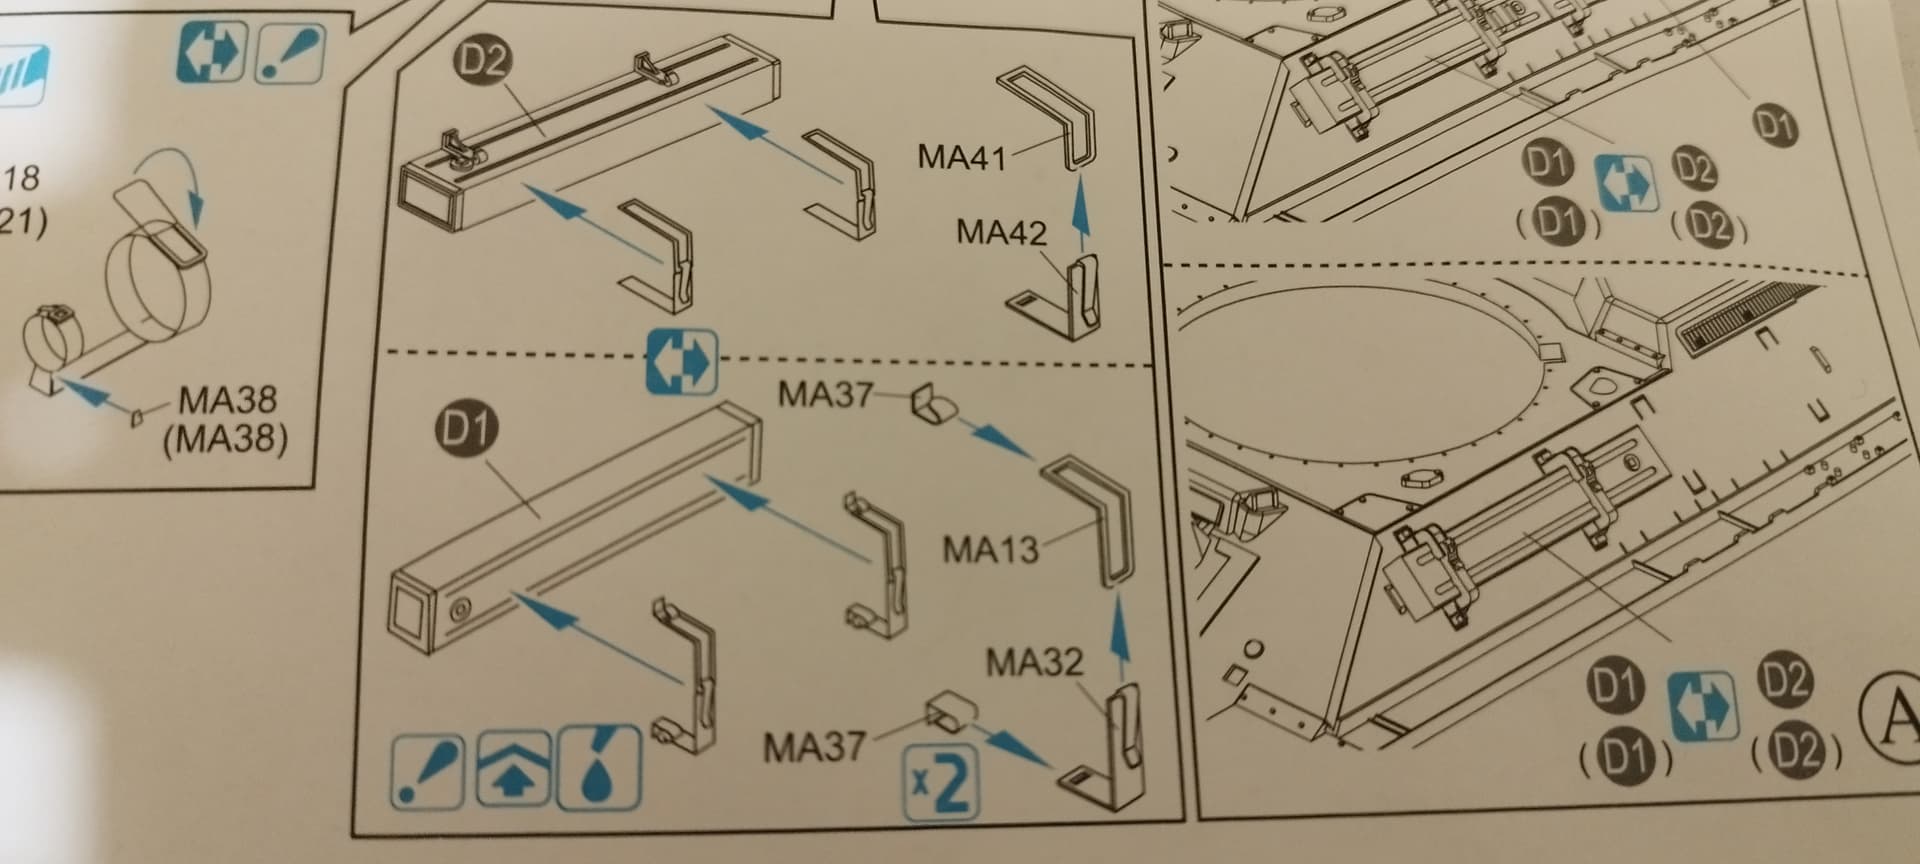
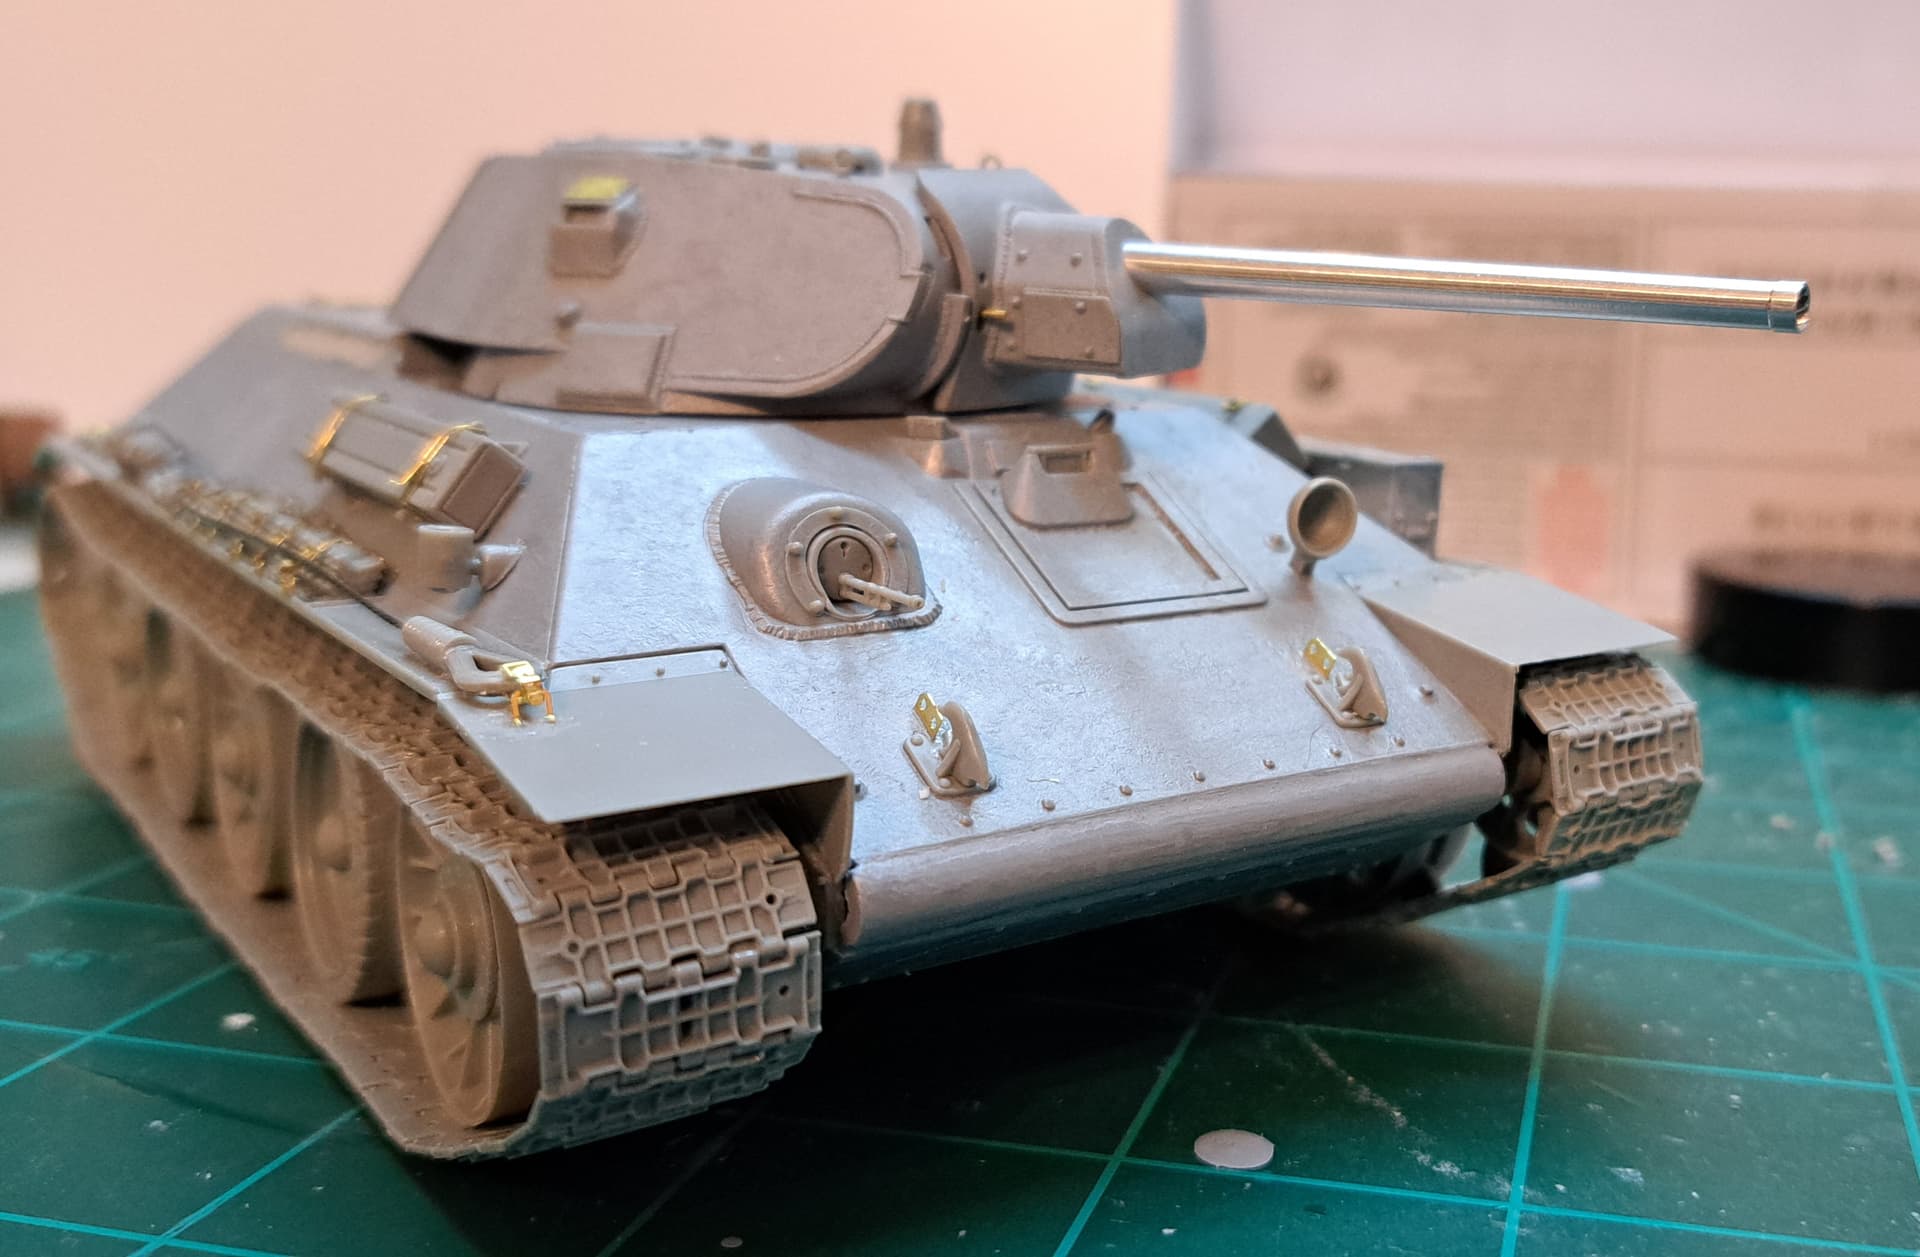
The instruction calls for using that MA37 in your position, with the wider side placed against the hull.
The other variant is for placing the the box with the thinner side on the hull, so that 2 boxes could be placed on each other. See the tank
. the early turret Dragon T-34s seem atrocious.
If you don’t care, sorry to have bothered, please enjoy your build.
2 Likes
Wow…you’re on point with detail on an unfinished model but at least now I can see what you’re talking about.
I don’t necessarily follow sequence when building.
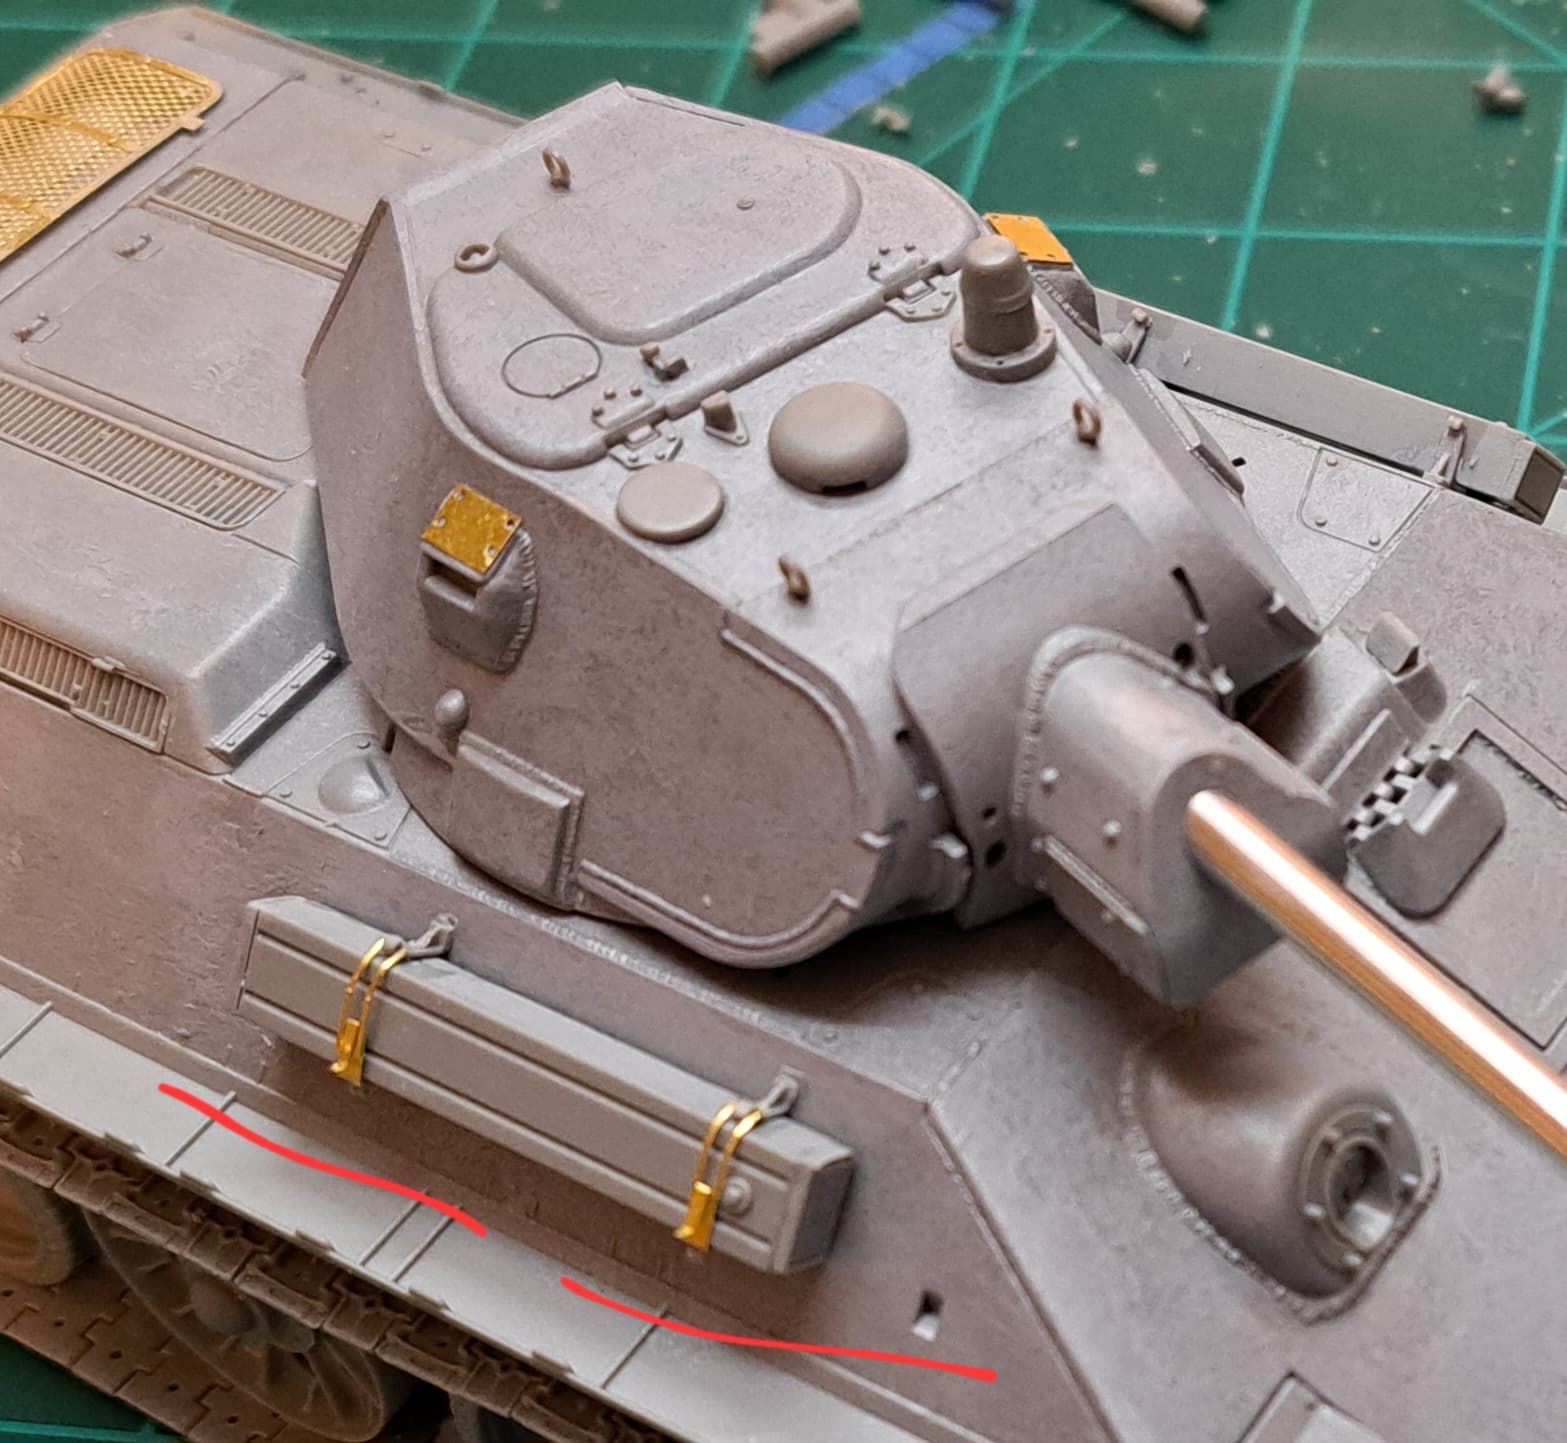
This T-34 will get machine guns, tow cables, headlight, antenna mount, ice cleats or whatever they are called and a few PE fiddly bits.
HTH
4 Likes
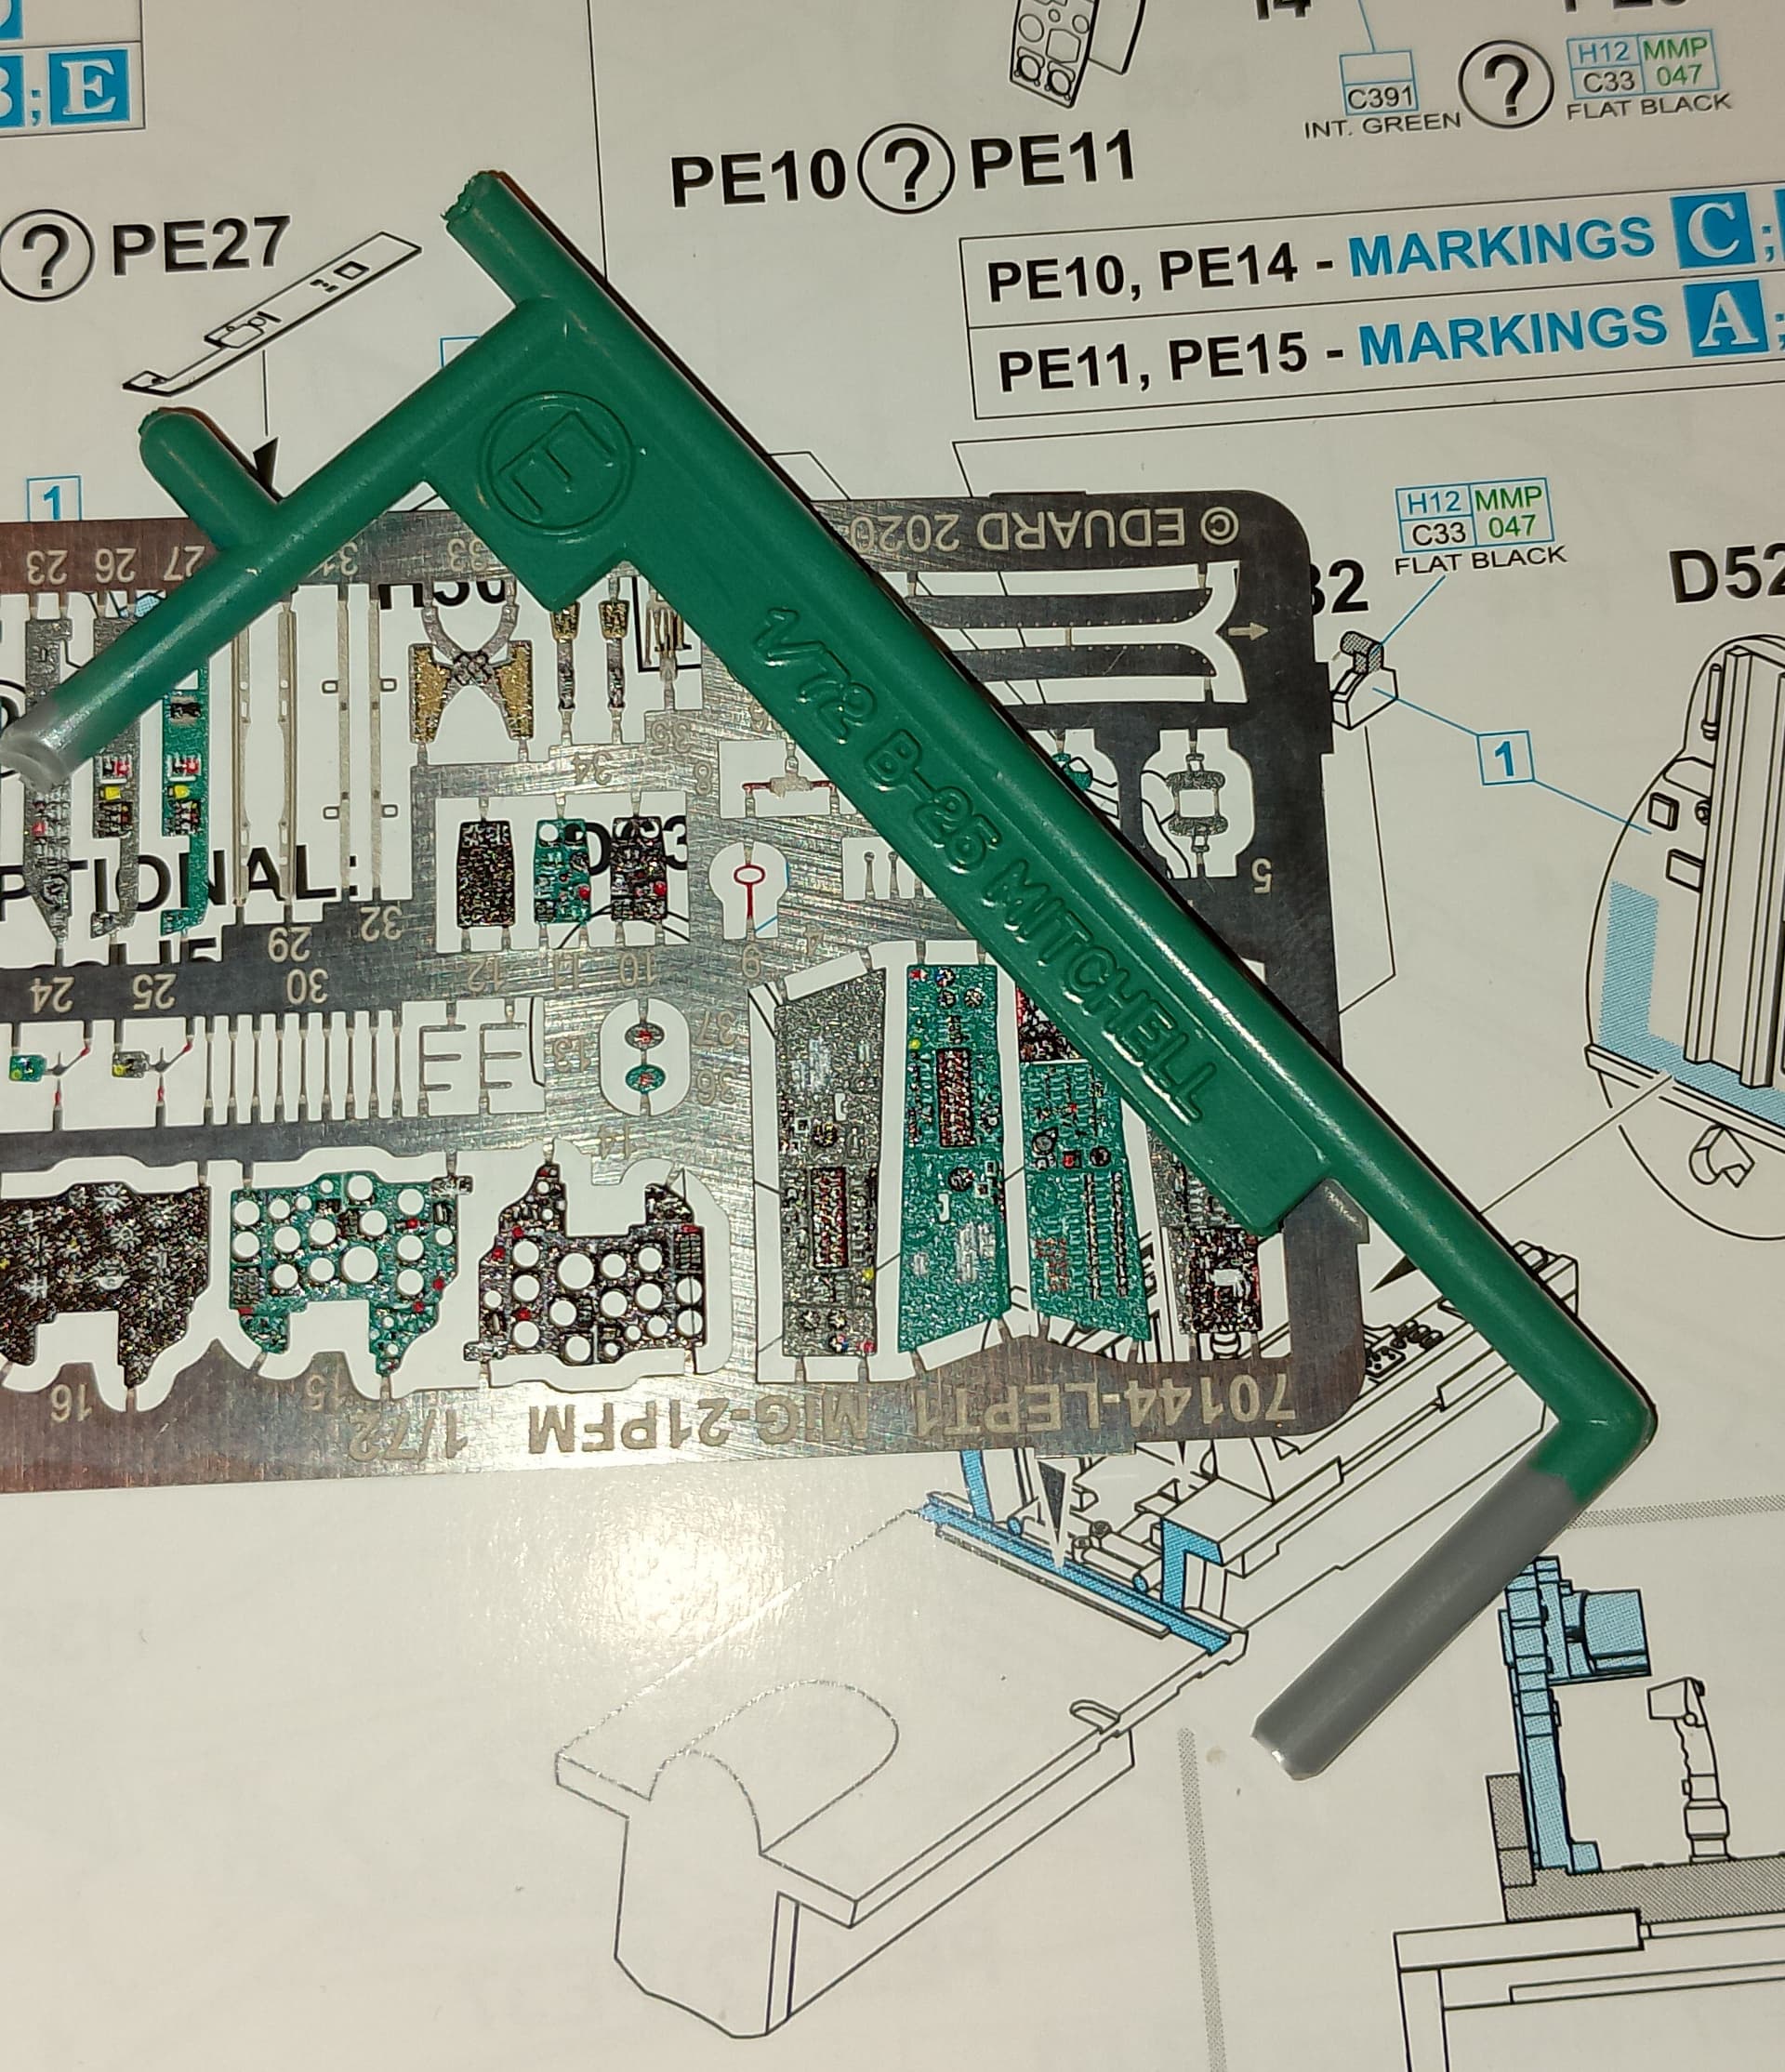
Had a spare few minutes to make a start on the Mig-21 tonight.
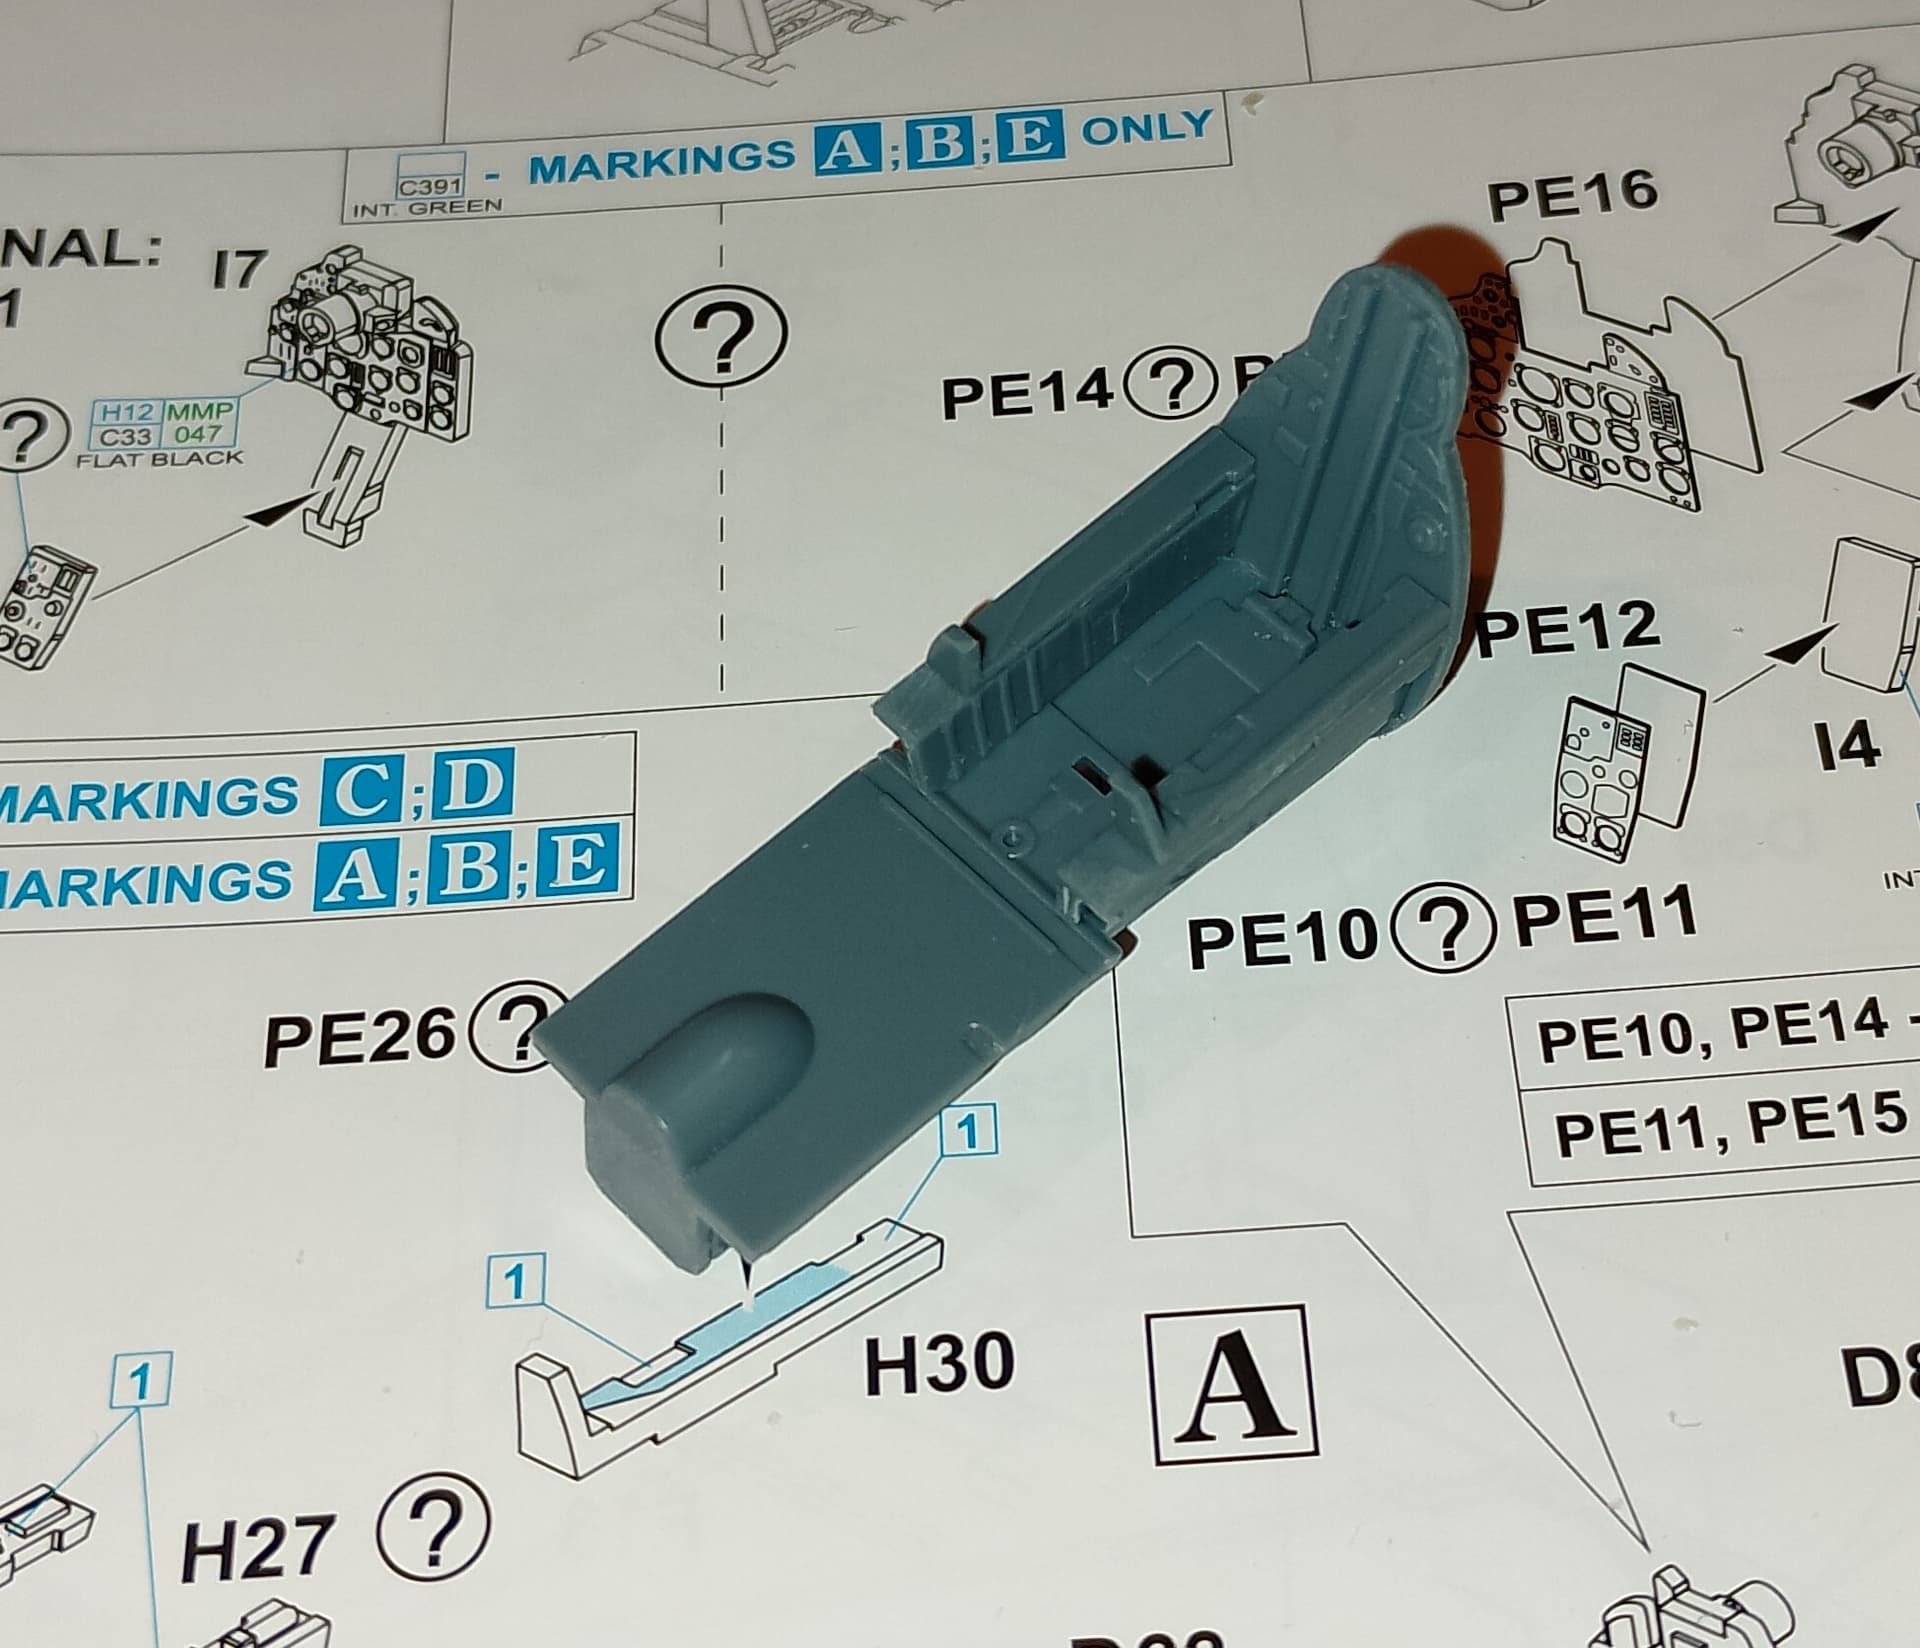
Started with the cockpit and nose wheel well. Quite a few parts, but it all goes together quickly and well. Everything lines up fine with care. You do however need to take note of part numbers on the sprue and instructions. Eduard do a few different versions of the Mig, so there are some parts for those. They also make sidewalls and consoles with moulded on detail or flat if you’re going to use the supplied etch parts. So, make sure you’re attaching the right part!
Talking about the etch, I have found that Revells 365 patina green is very close to the pre-painted etch. I have got a Vallejo turquoise somewhere I’ll try before I paint it. Just in case that’s closer.
One of the things I love about this kit is the sprue of Soviet ordnance. Eduard were more than generous here and I’ll have plenty for the spares box.
7 Likes
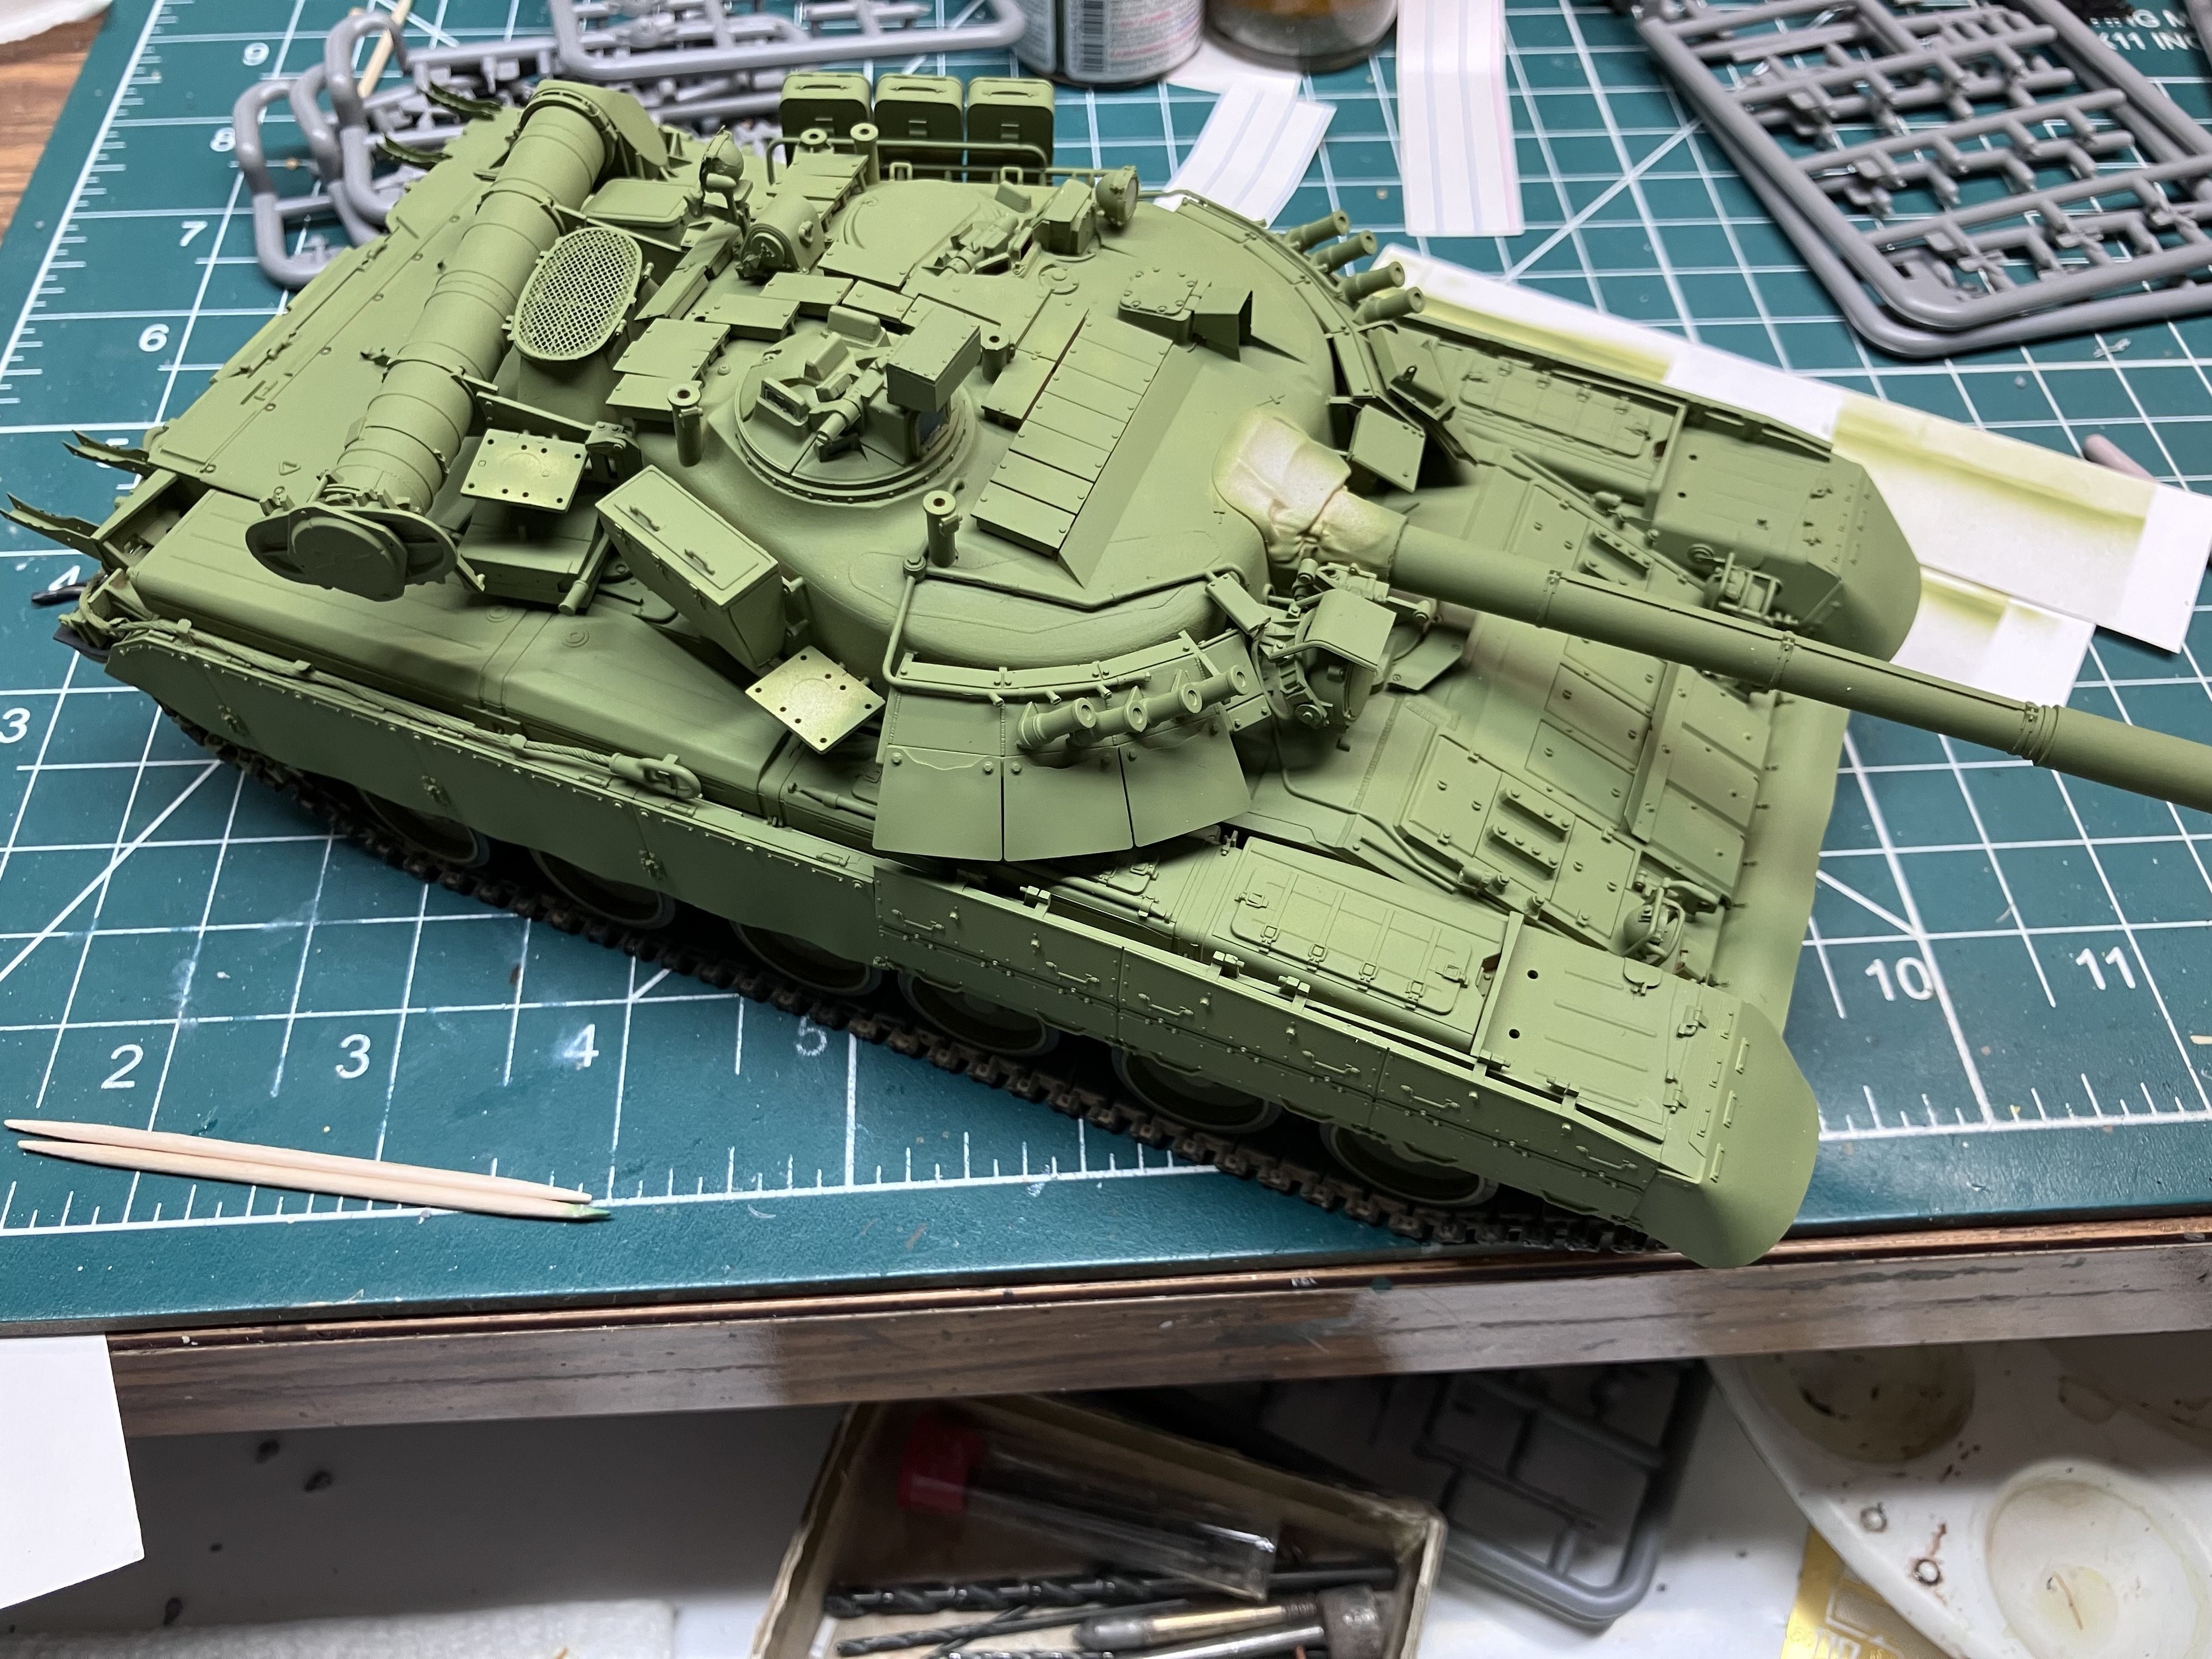
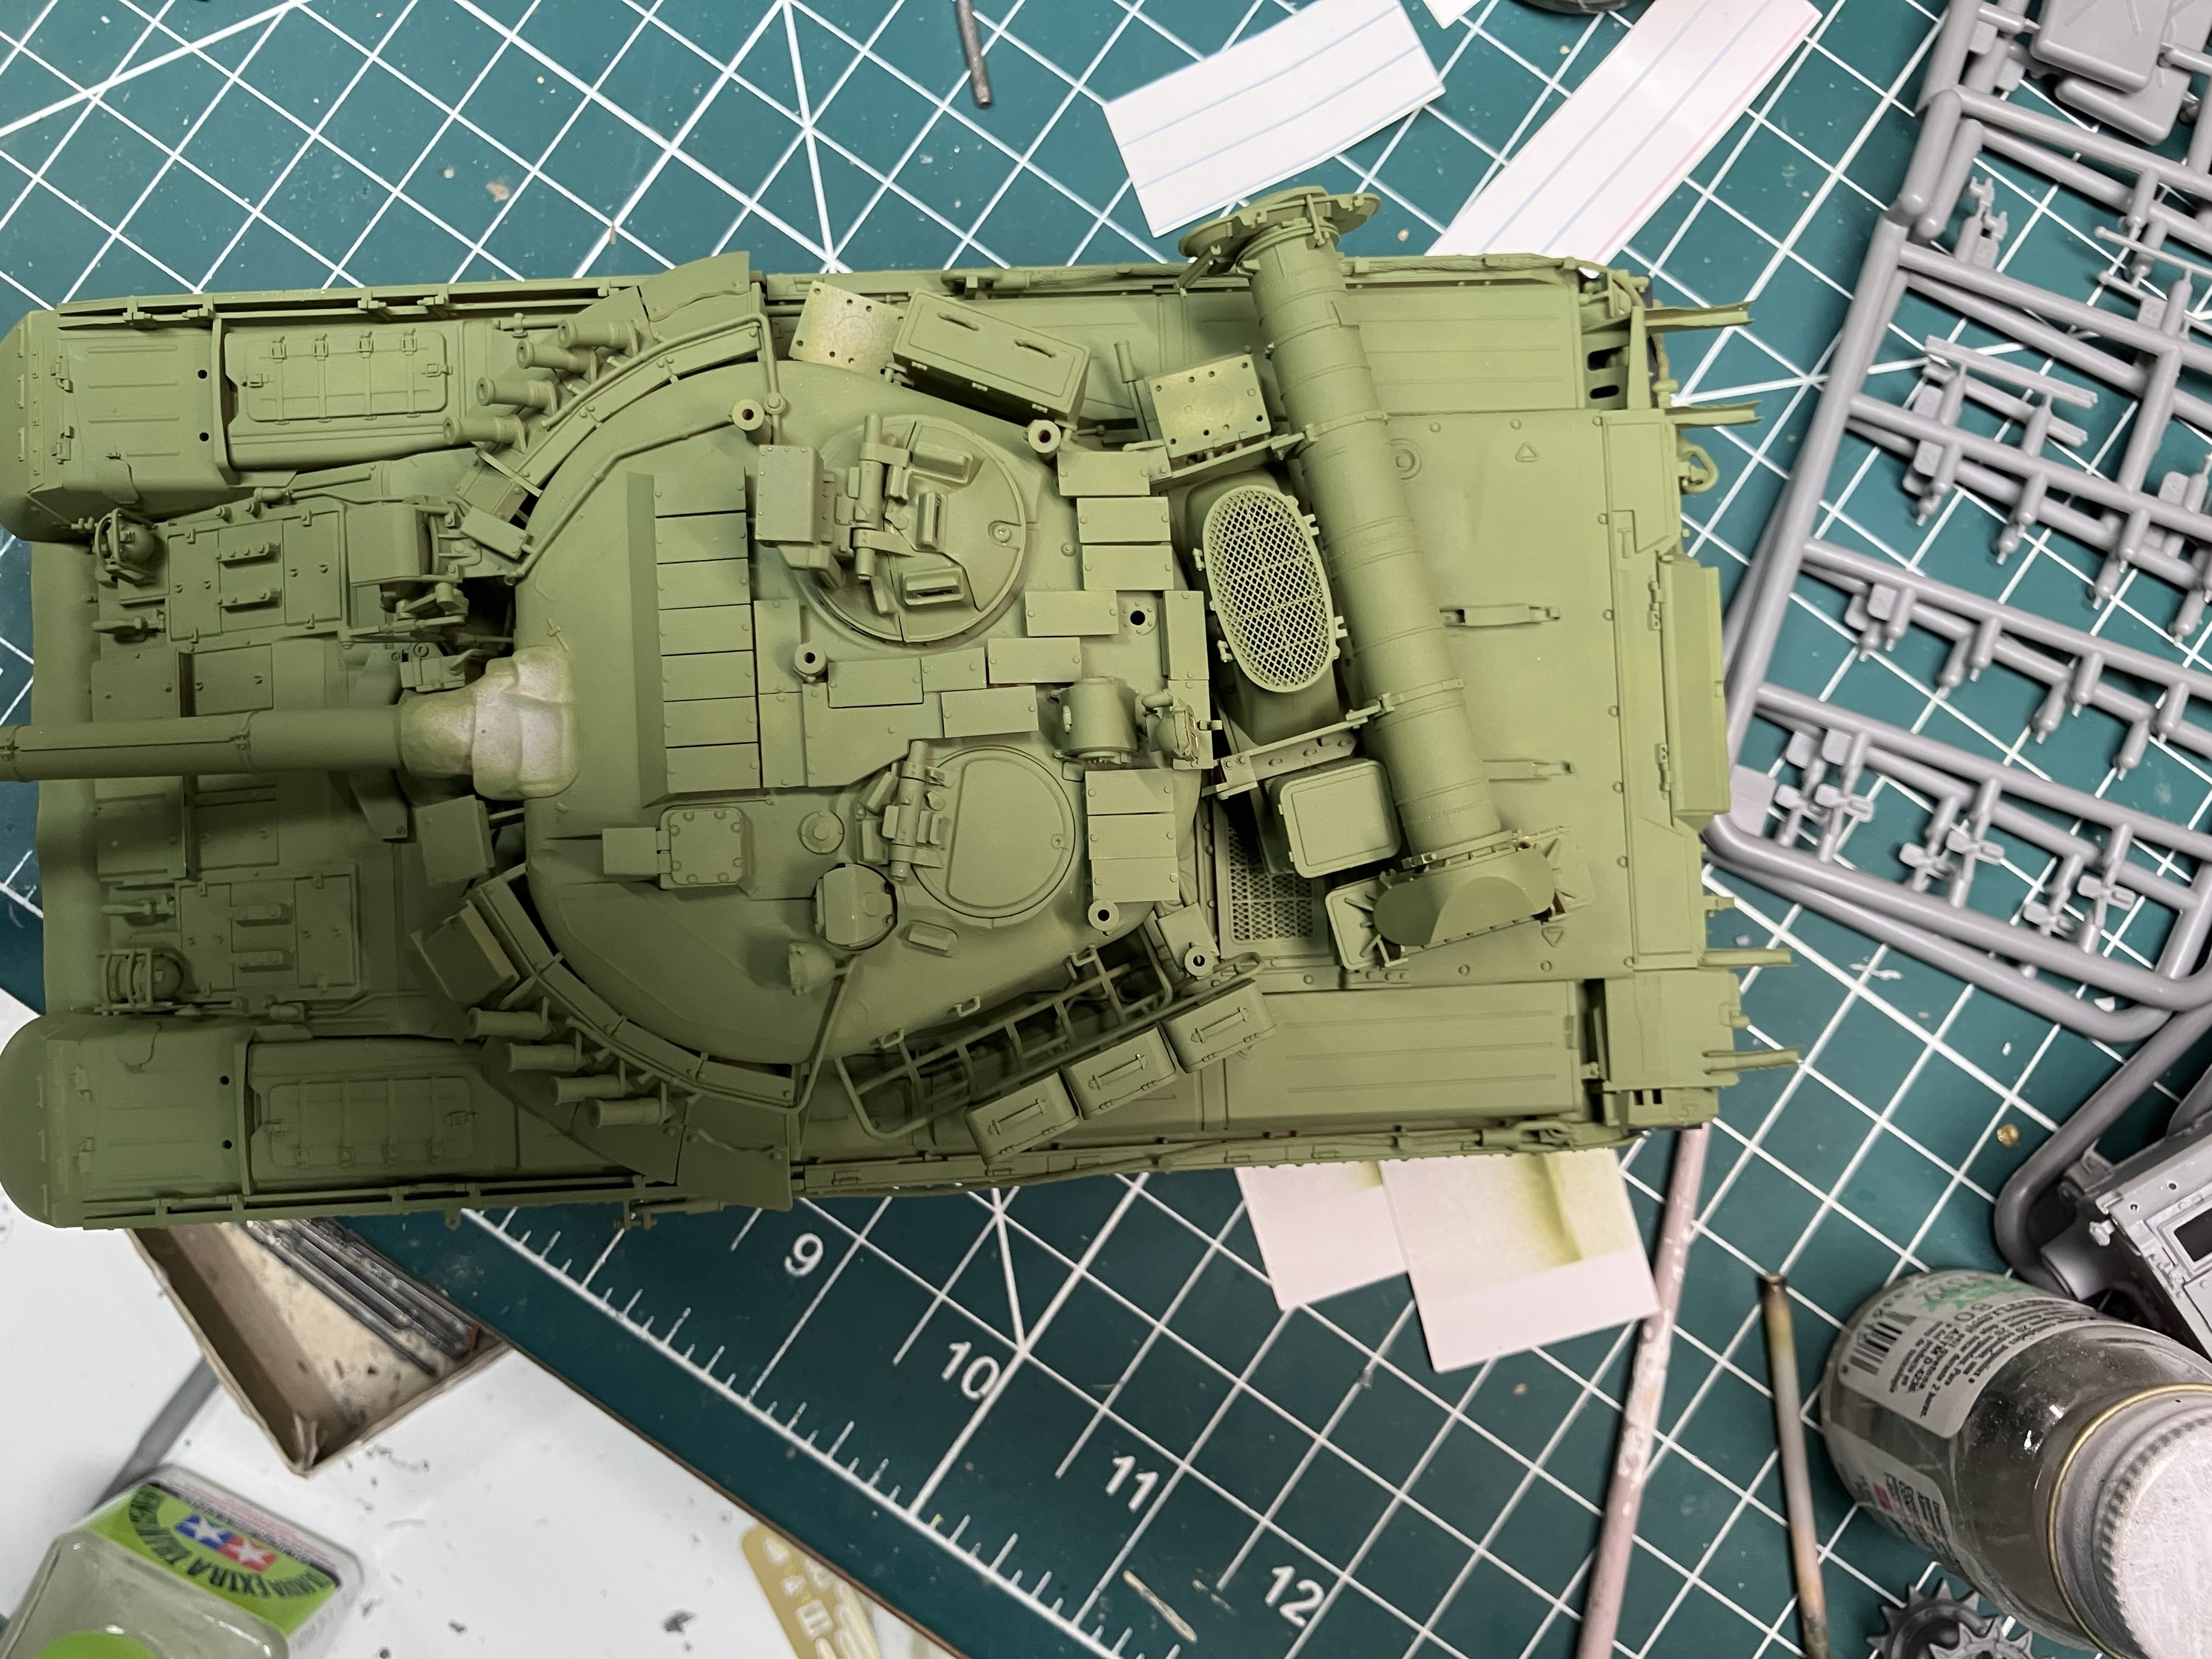
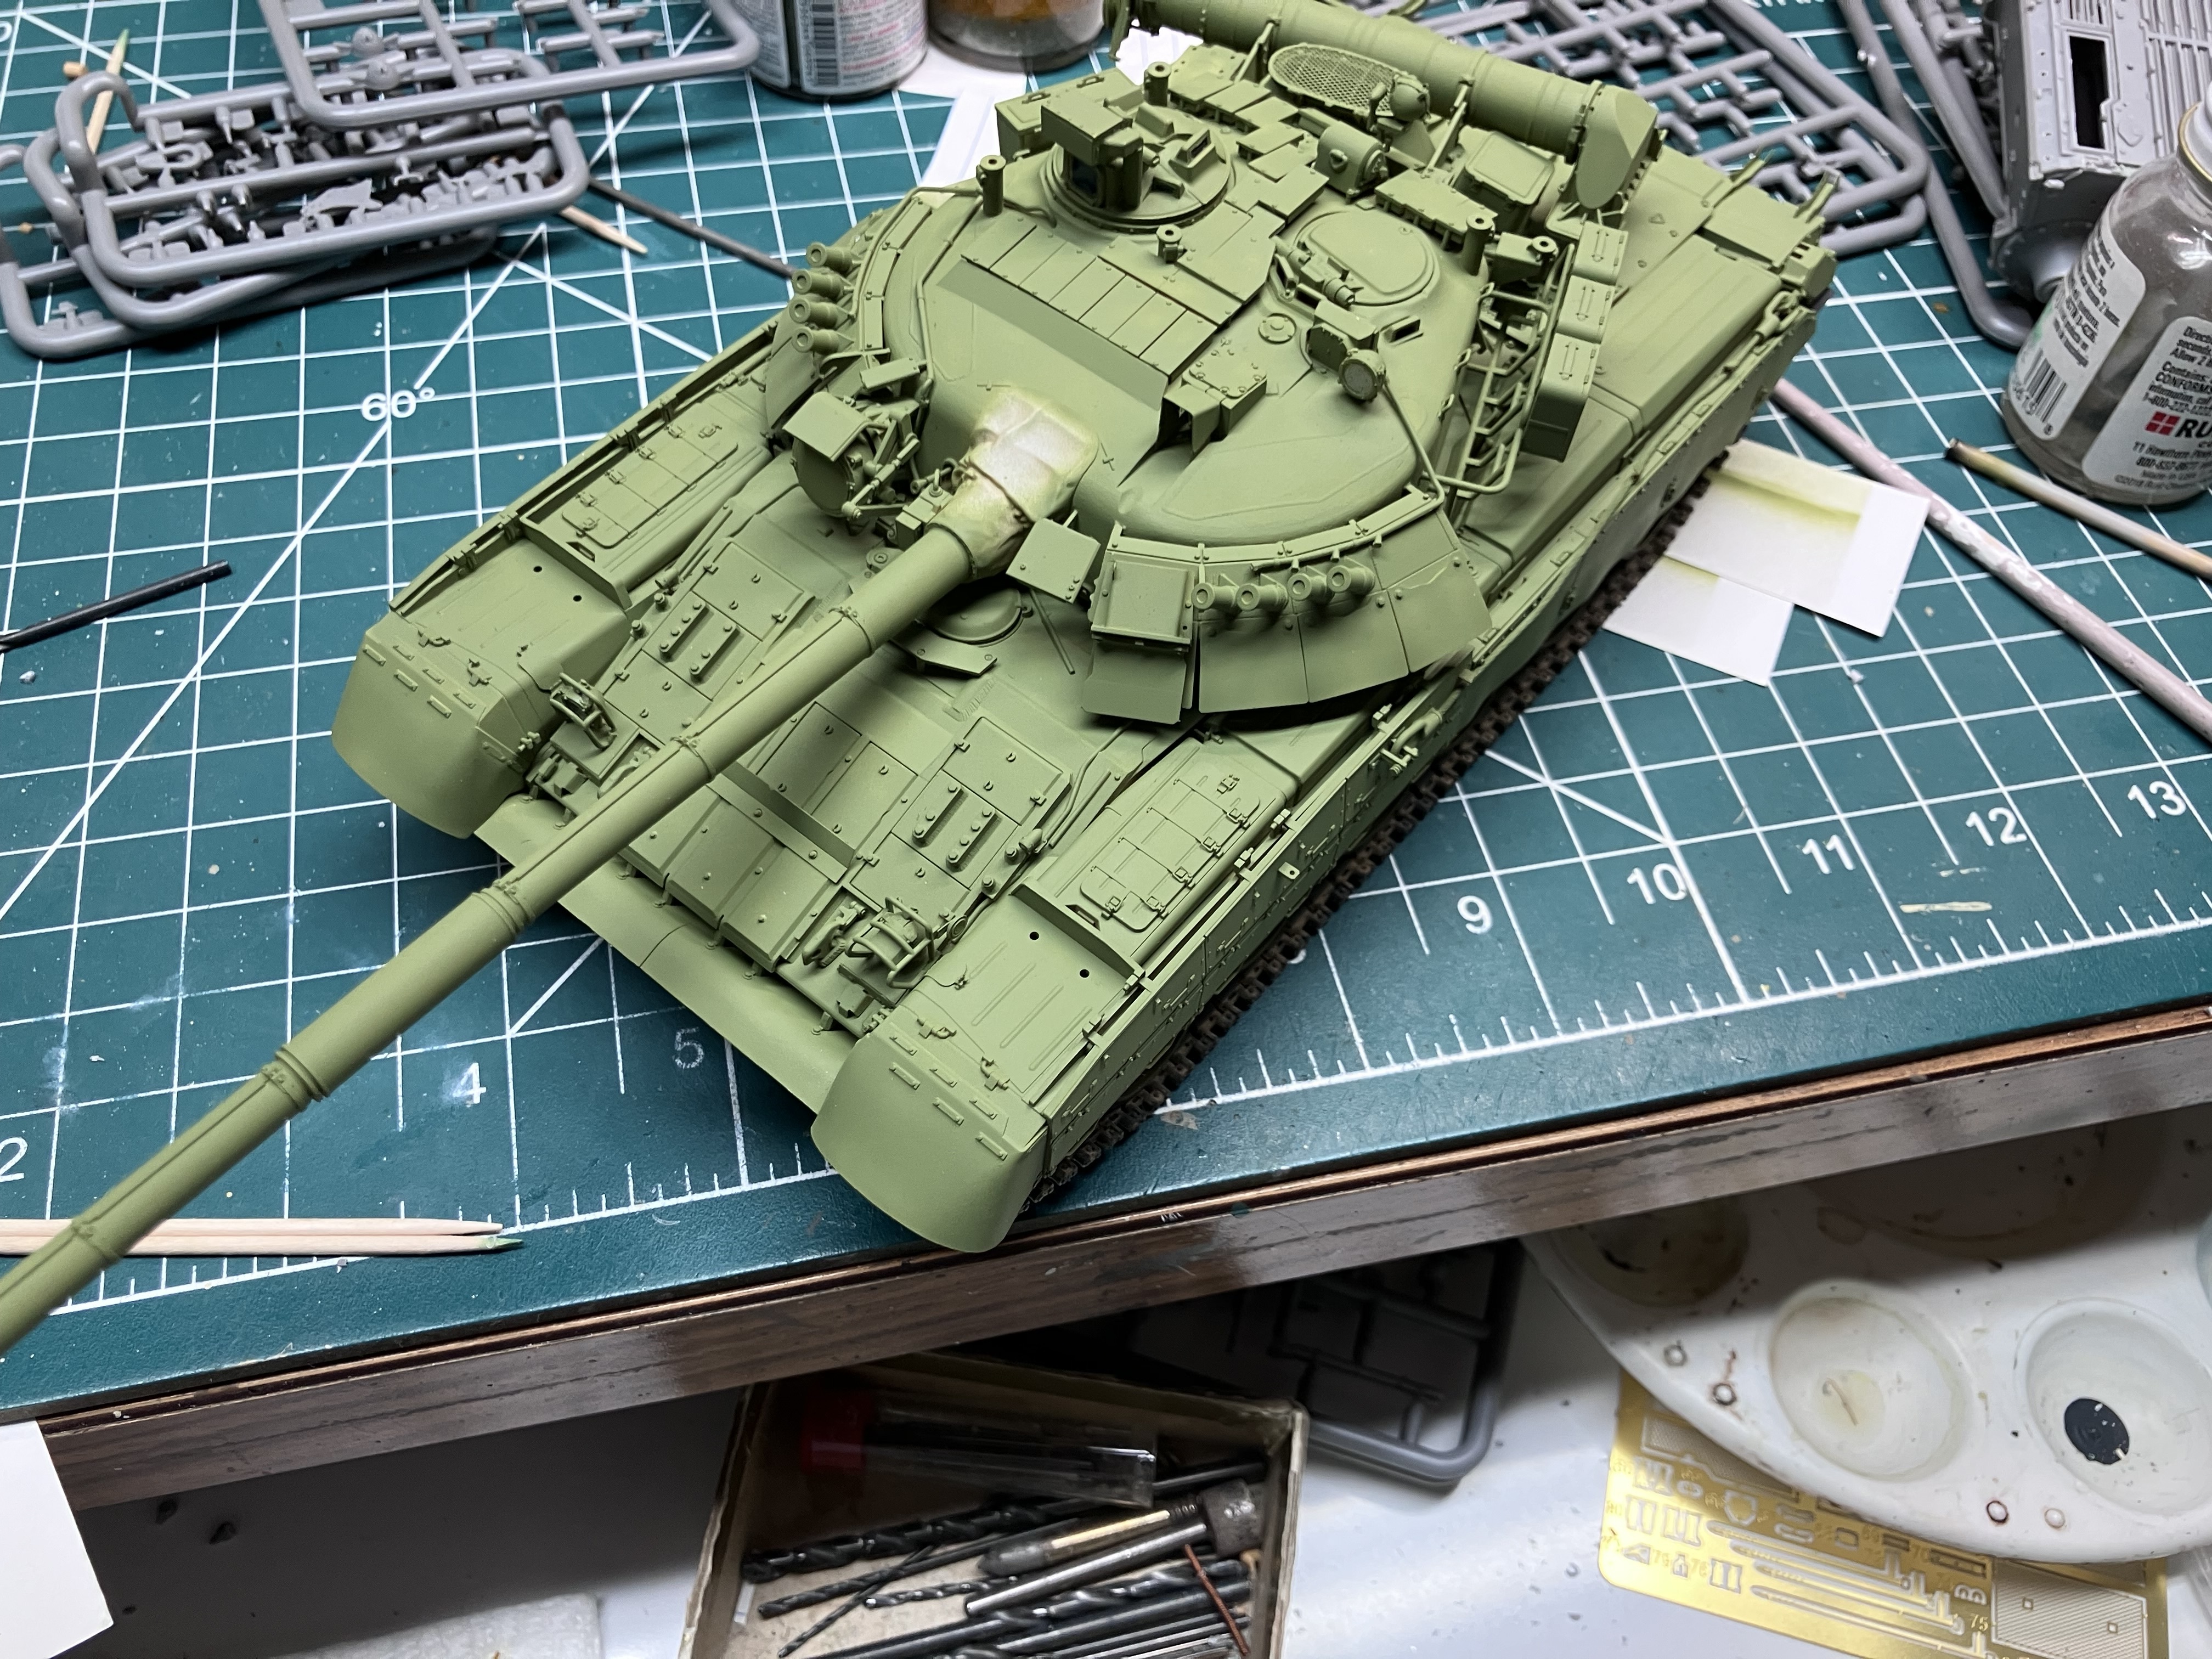
Got the base coat applied. Tamiya XF5 (green) with a healthy dose of XF3 (yellow). Next up will be the two camo colors. Leaning towards a light/pale green and black. Aiming for a session this afternoon. Thanks for looking.
[/grid]
18 Likes
Outstanding paint work. 
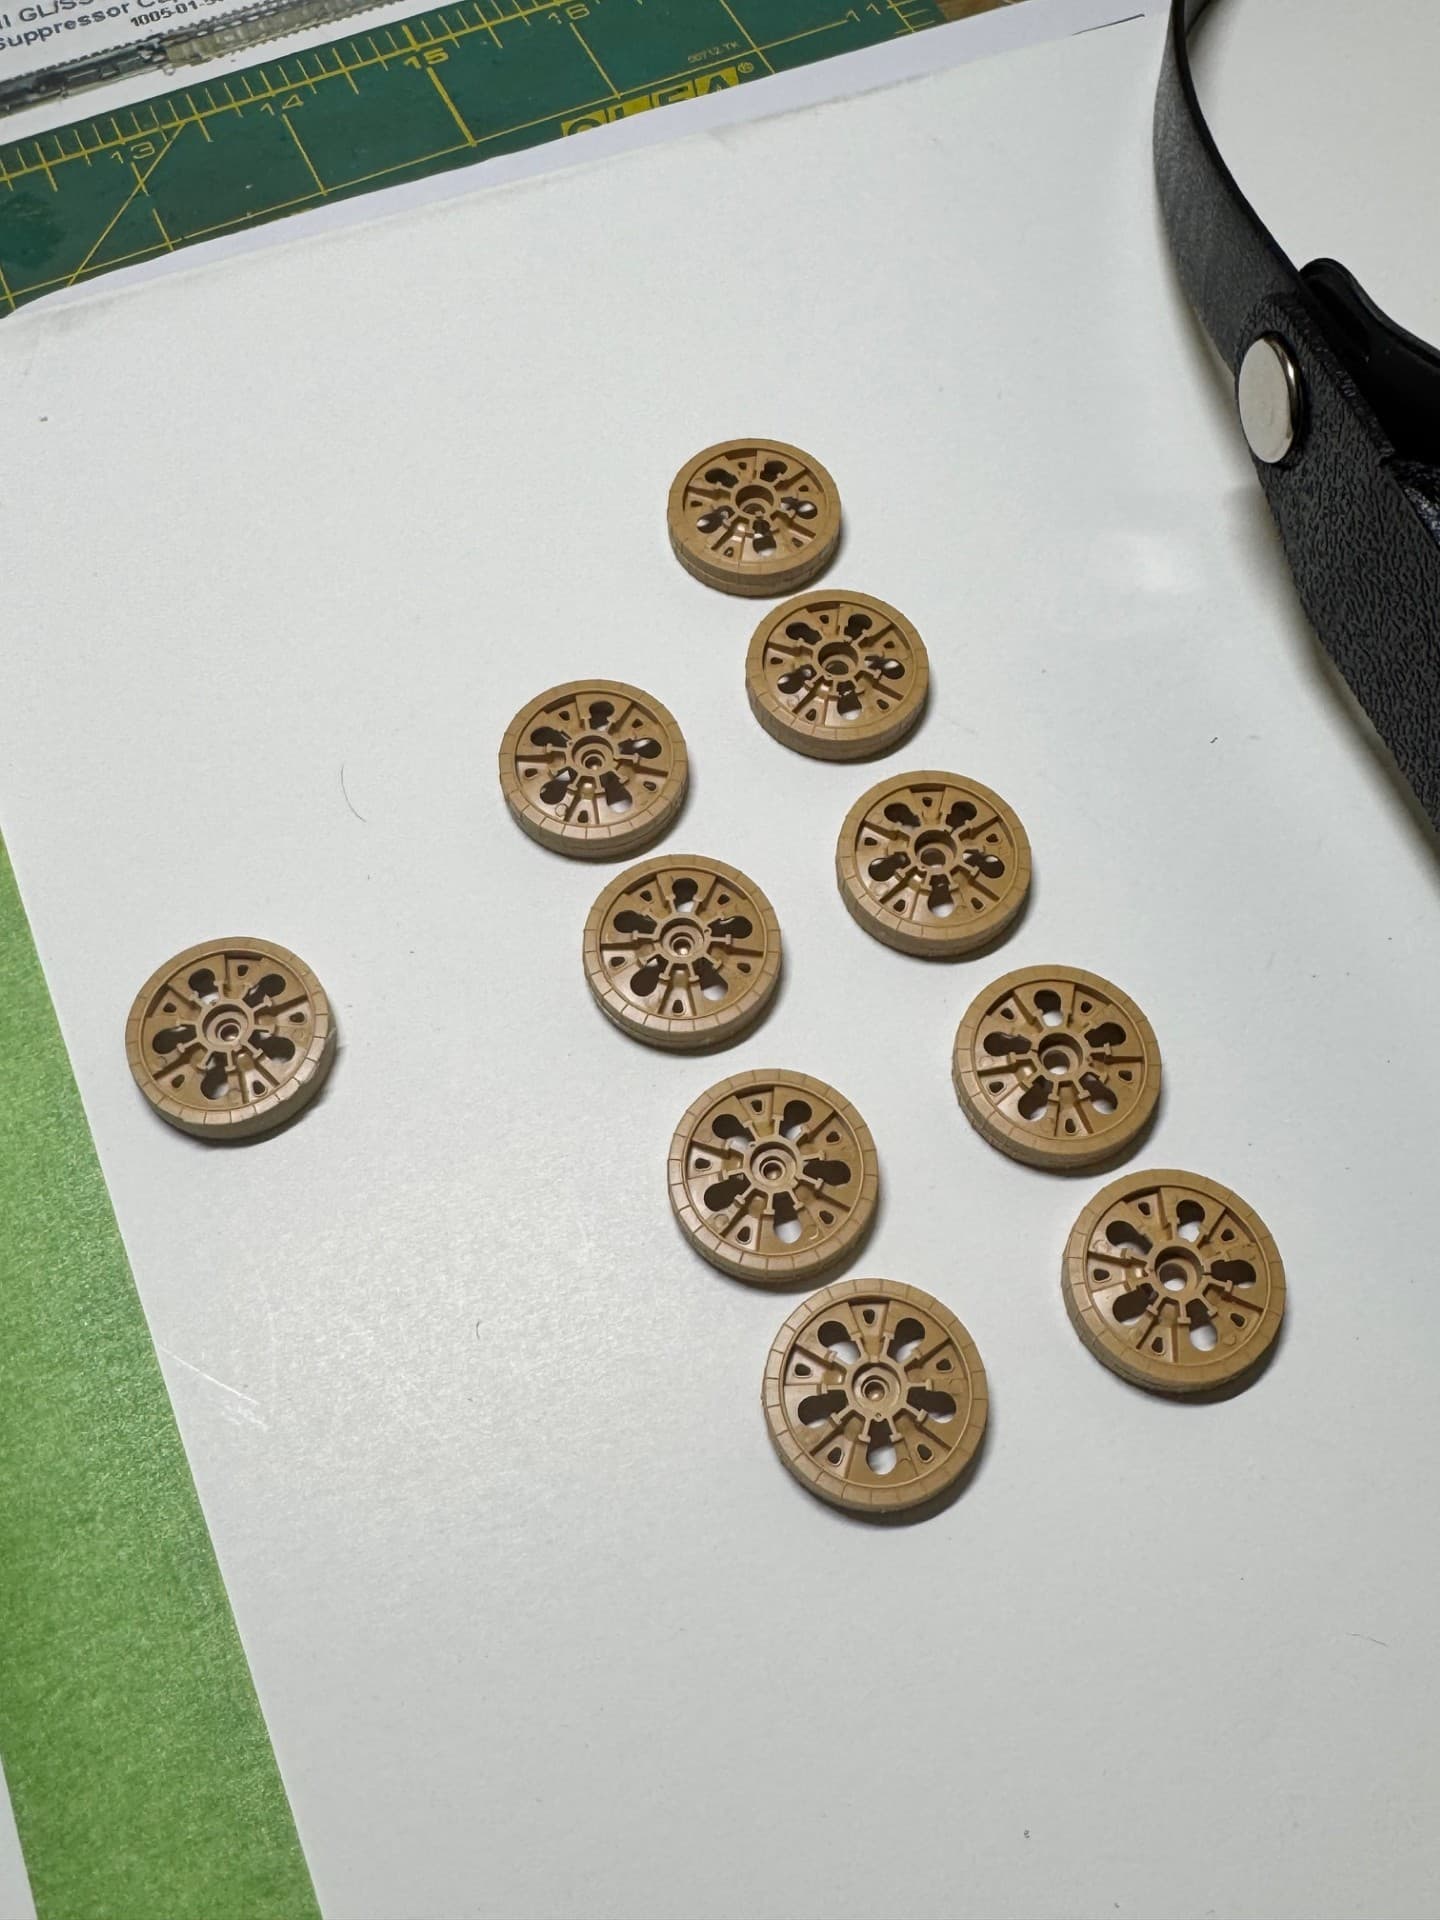
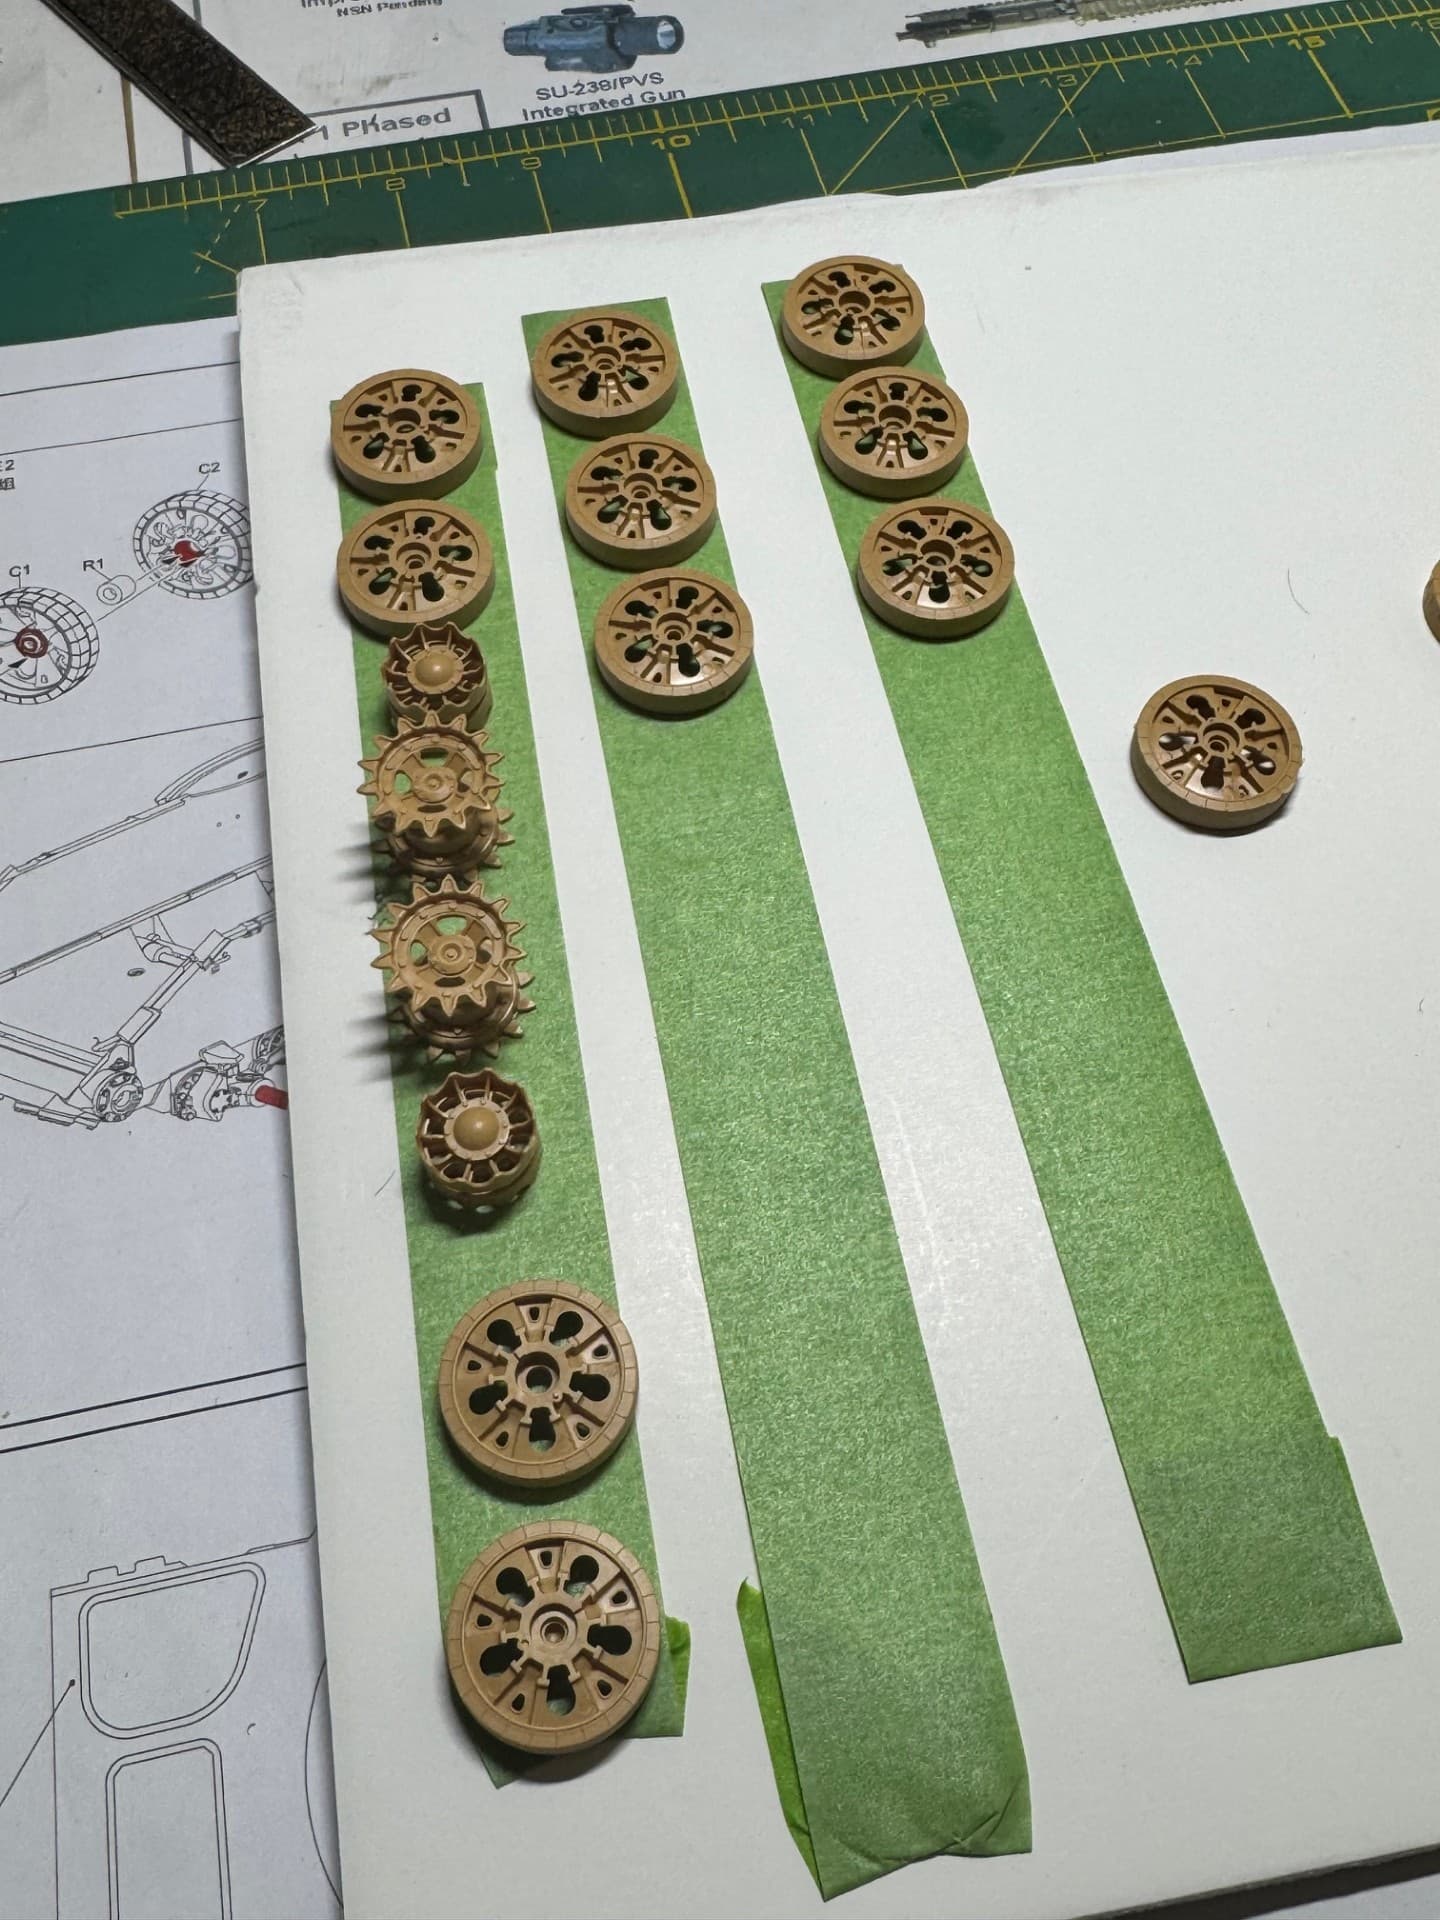
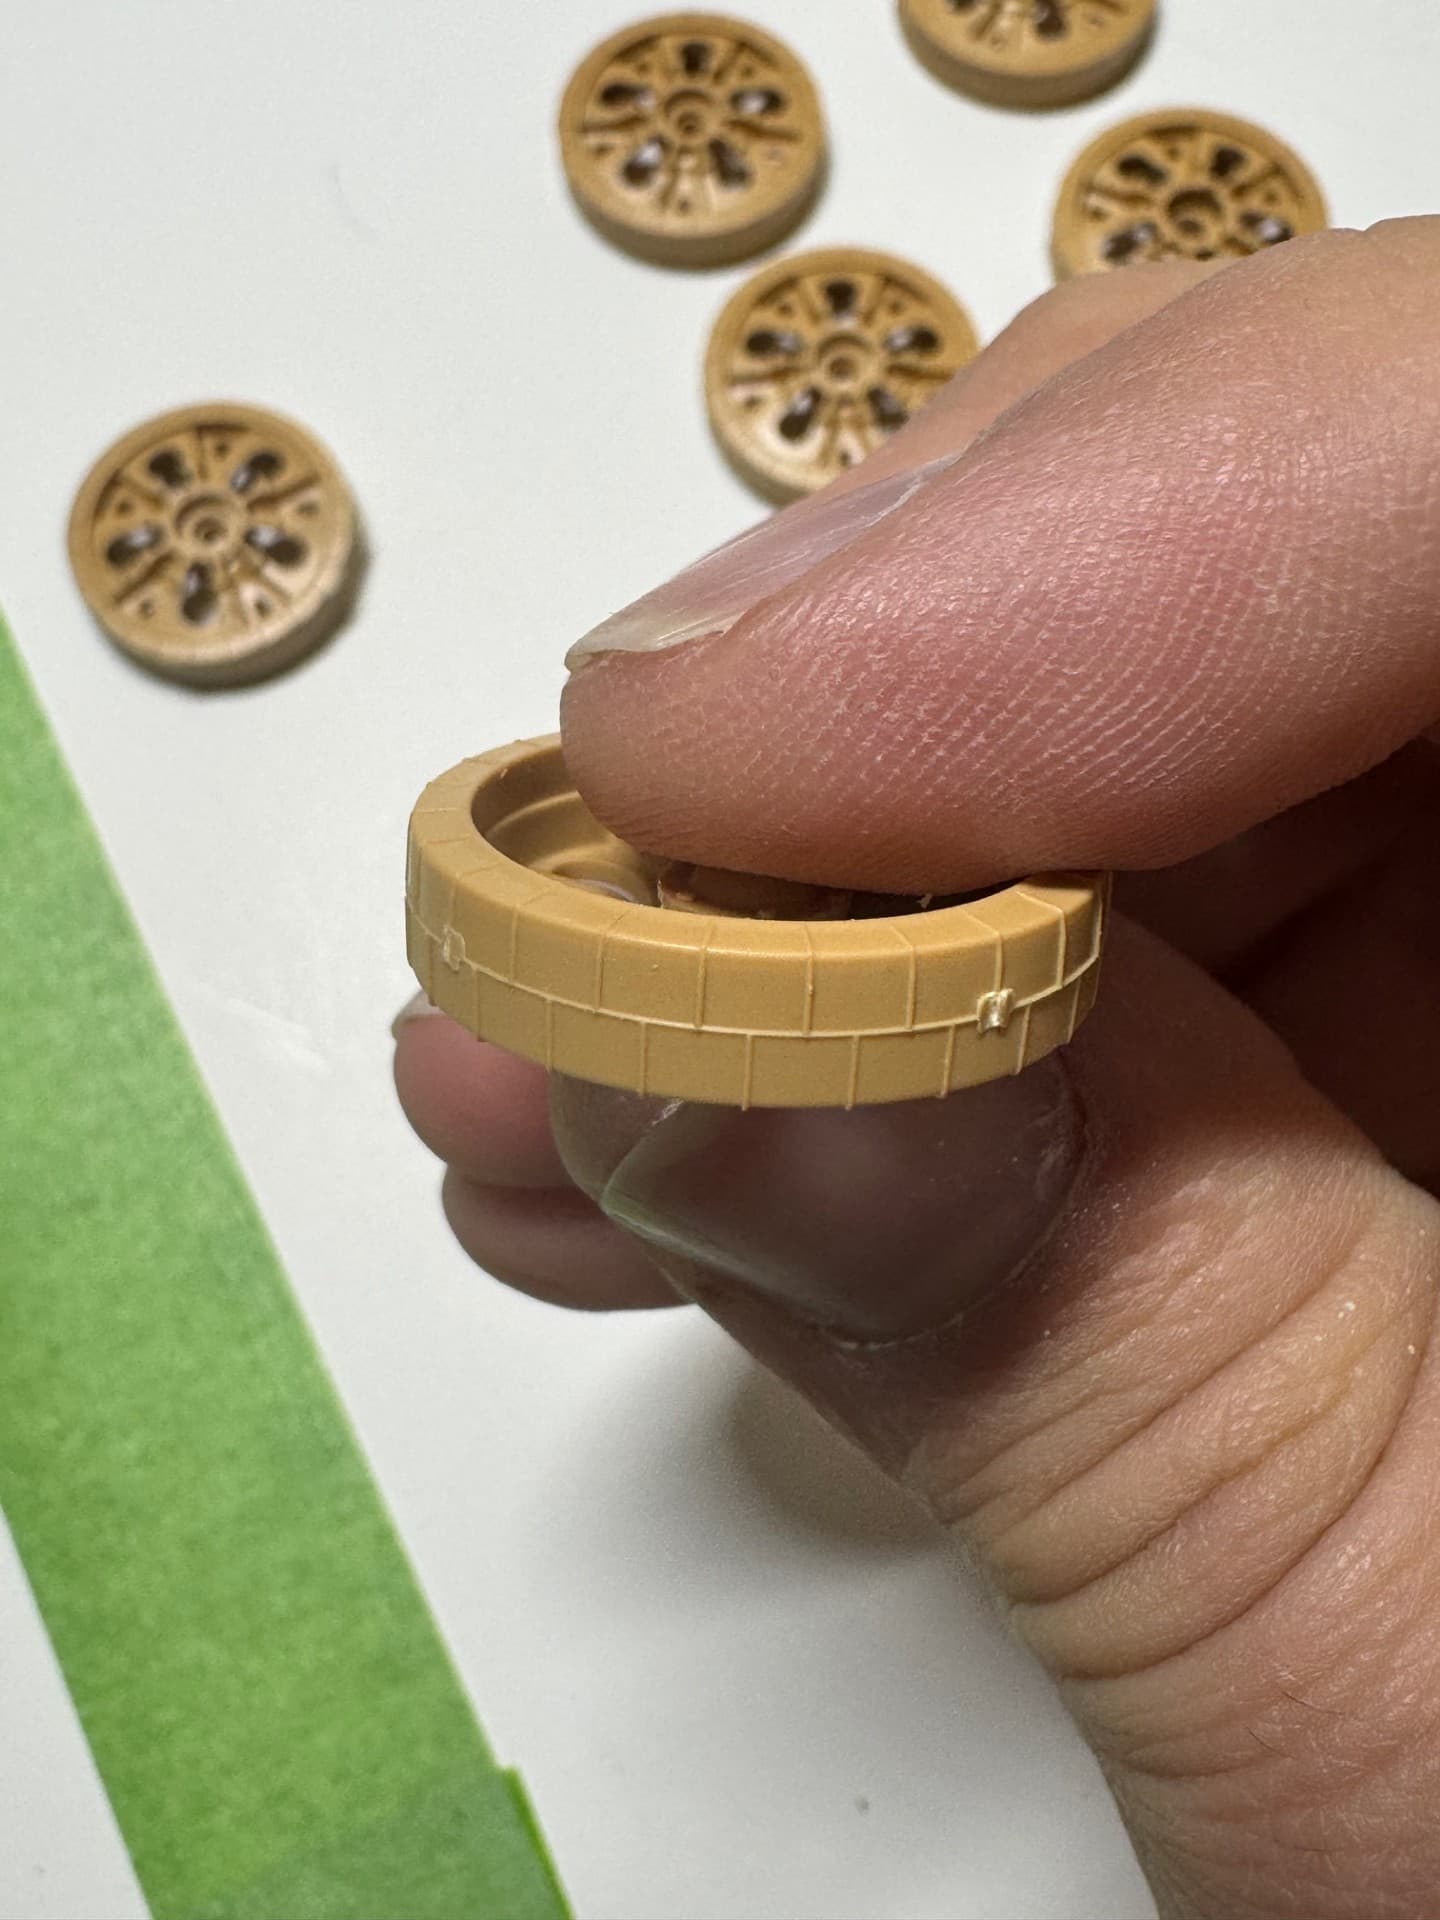
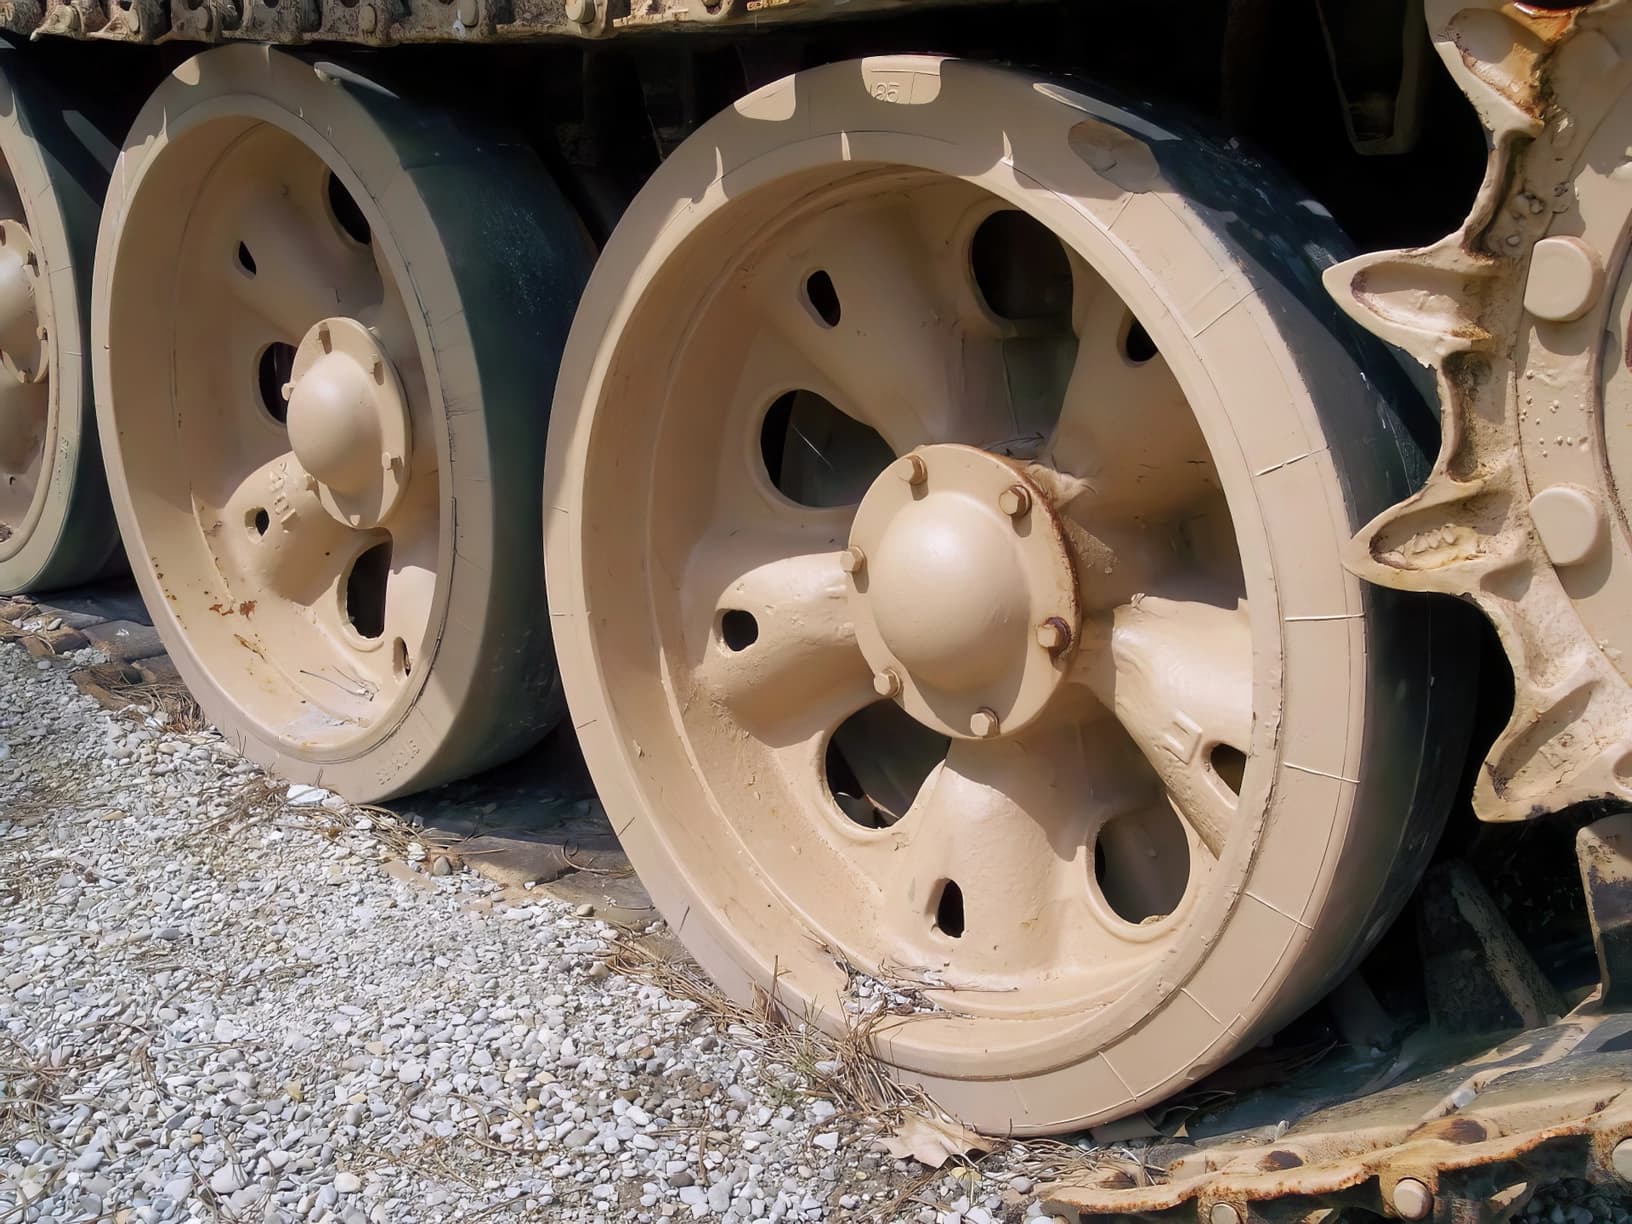
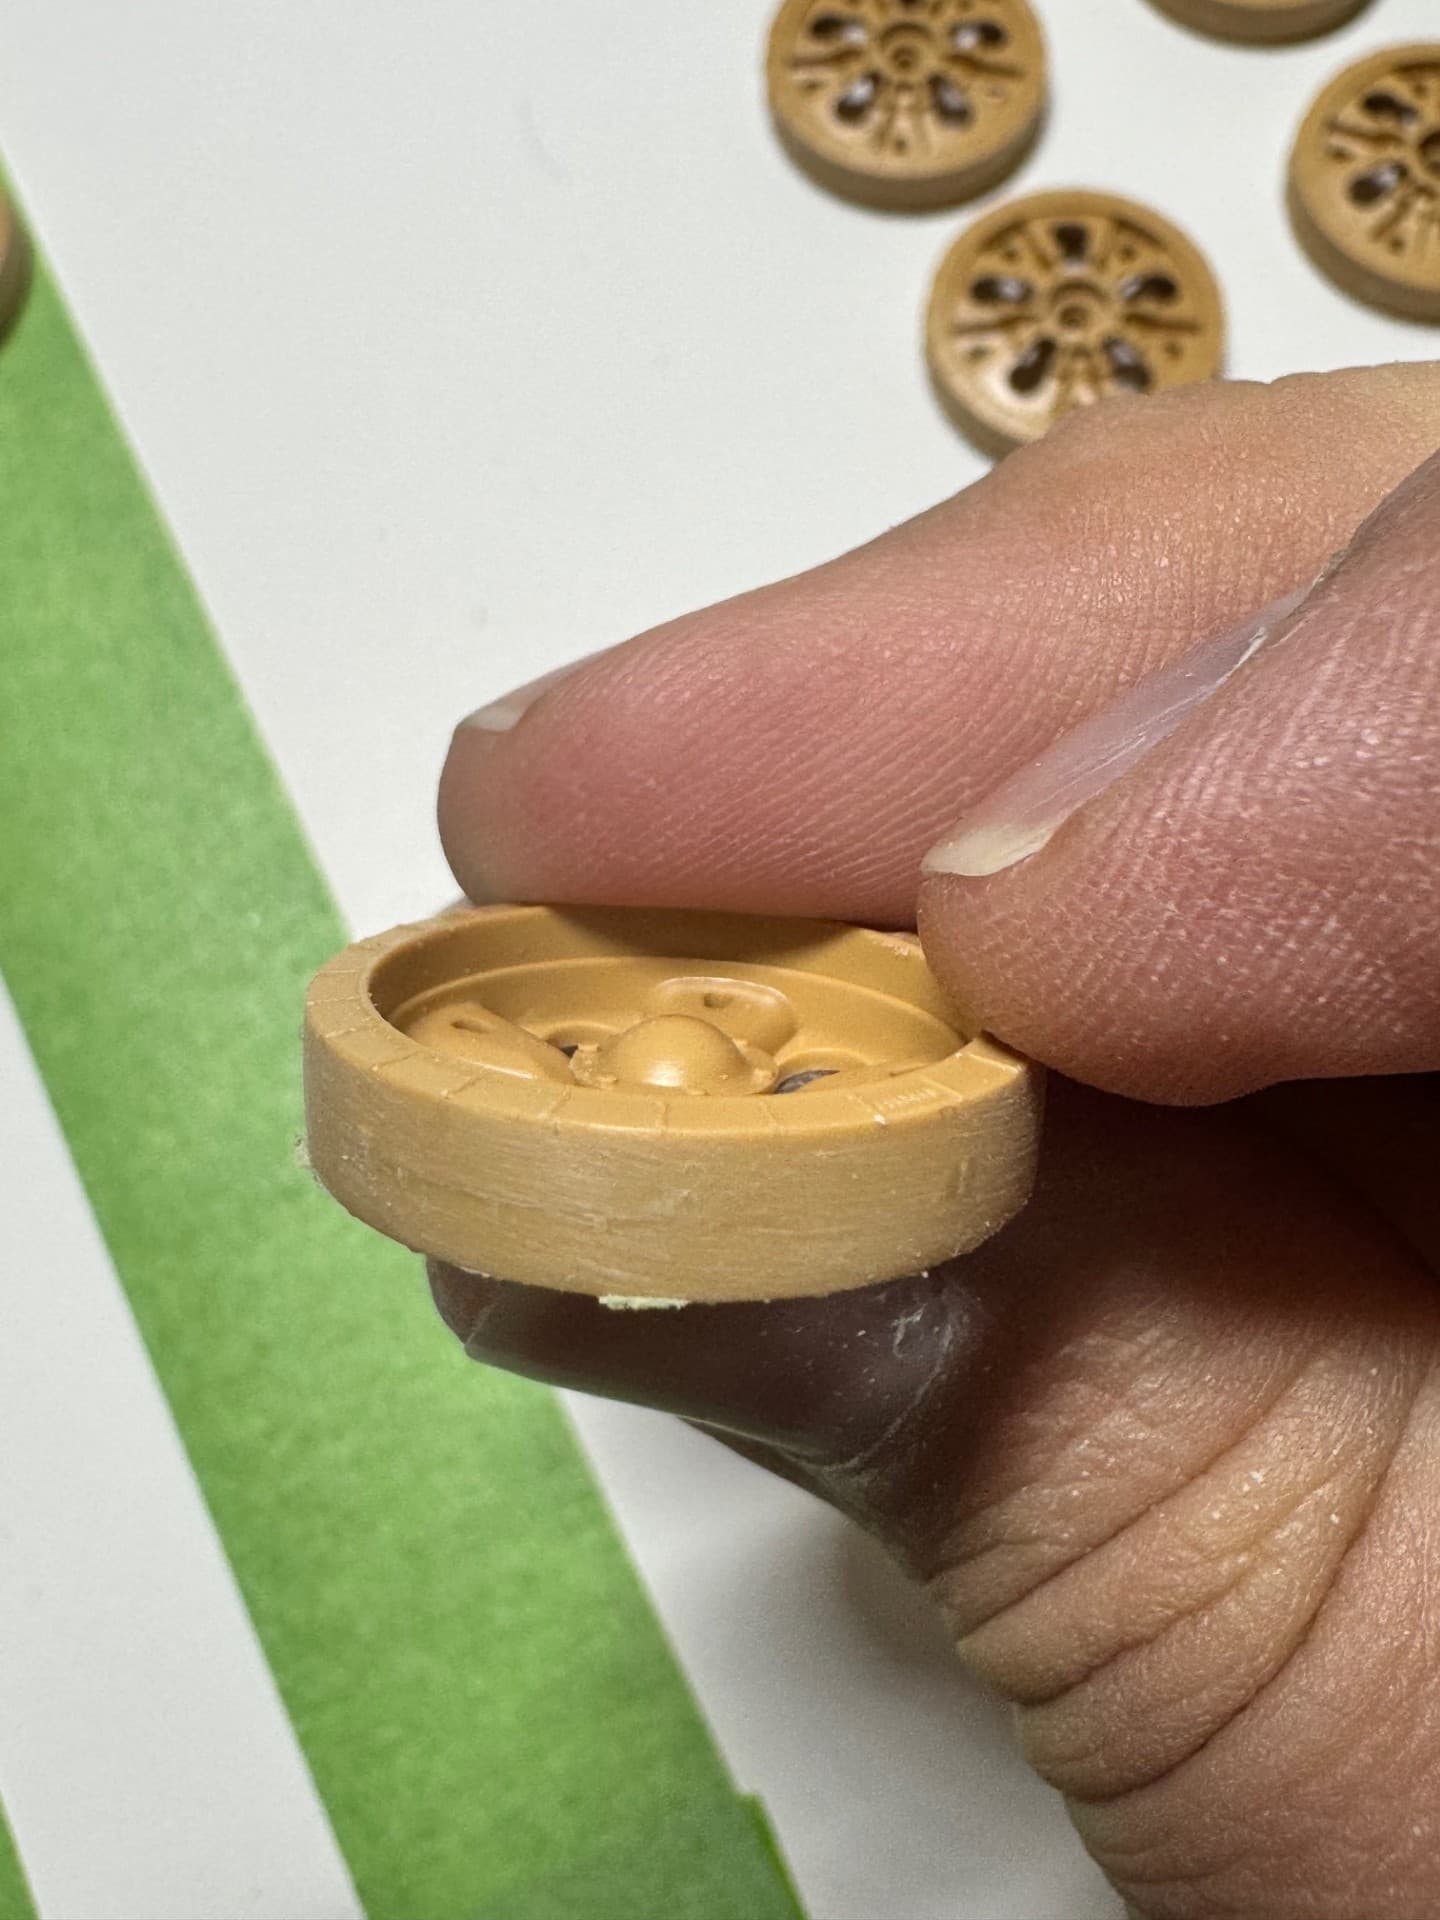
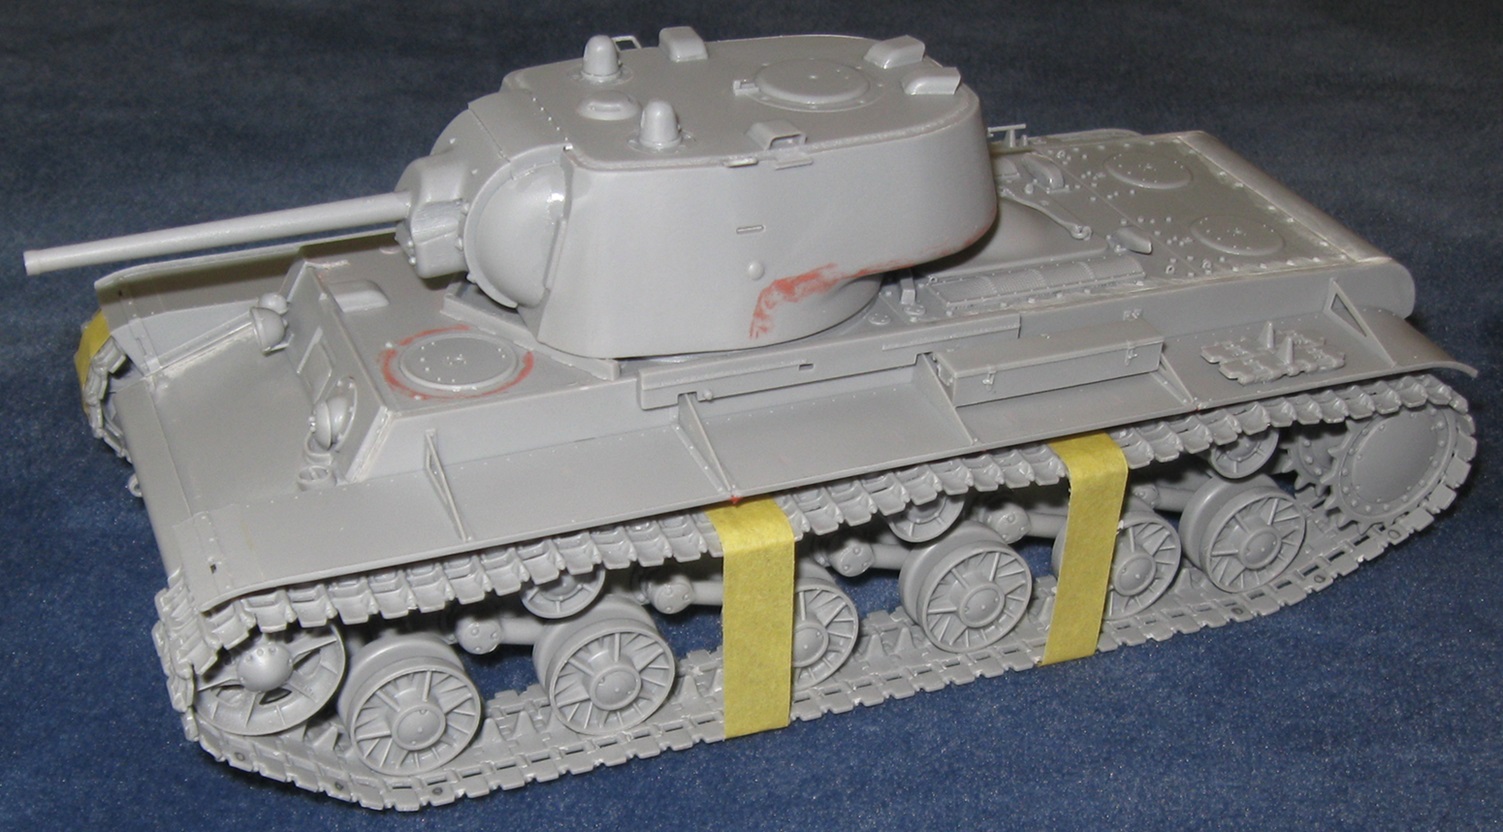
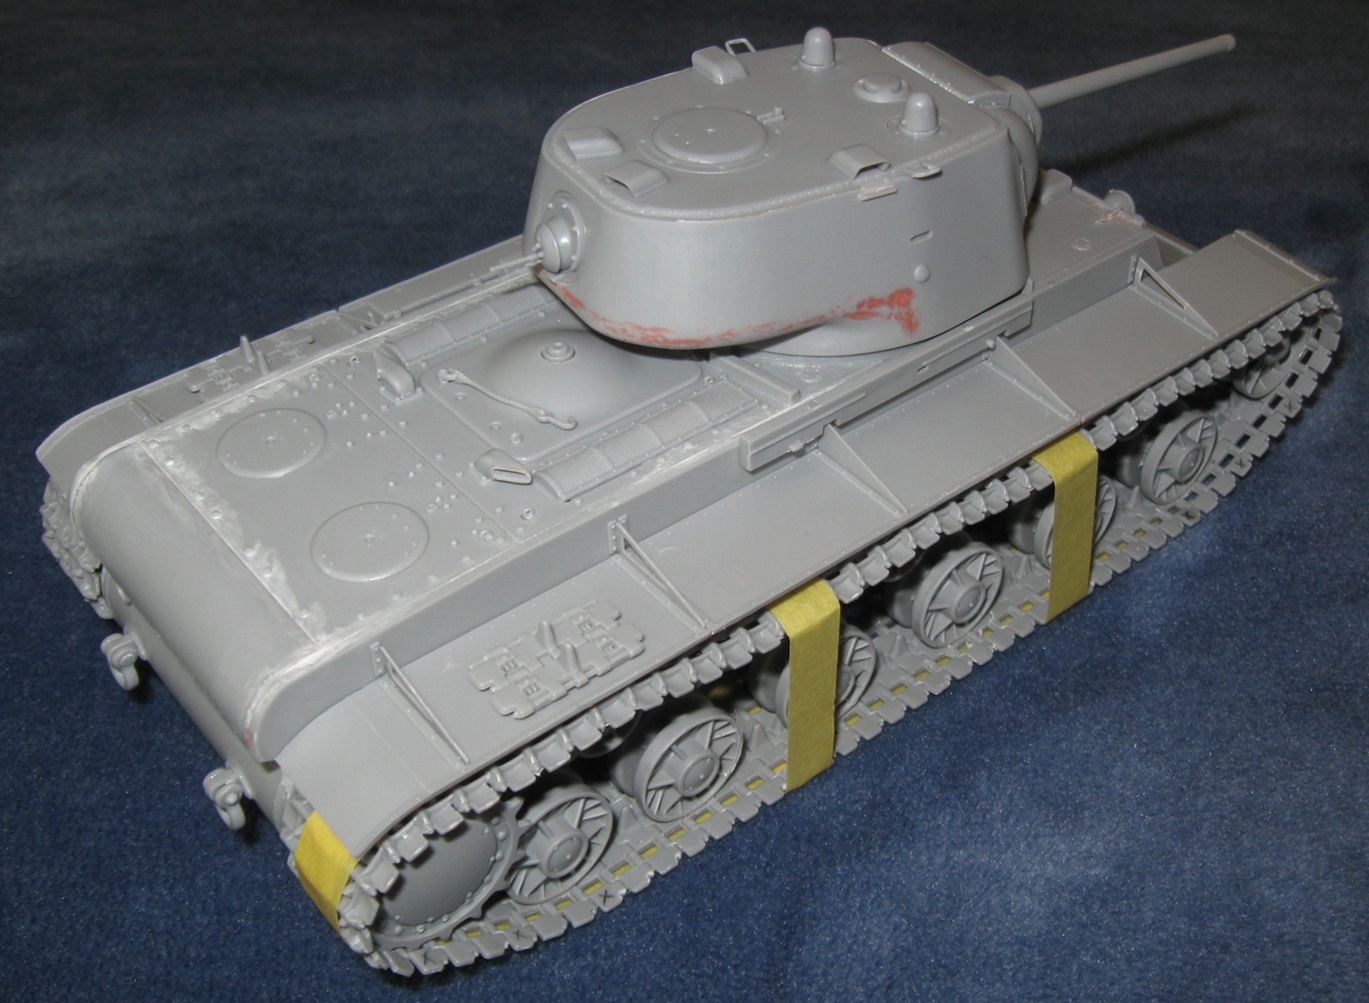
As for me, I started work on the road wheels.
The wheels have these mold seams, which are replicated a bit too heavy on the kit.
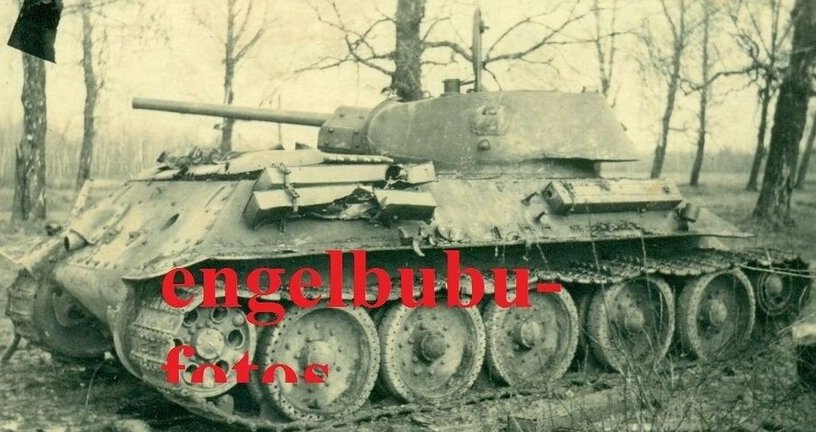
On the real vehicle.
I decided to sand these seams off on the contact side of the wheels and leave the sides intact.
I hope i did not overdo it on them, but i think that these seams are too much and should’ve been a little more subtle.
6 Likes
Joining with a Trumpeter KV-1 Model 1942 (actually 1941) Heavy Cast Turret as planned. Starting photo…
Parts are washed. Hoping to complete this one very quickly. Will probably start in the next day or three.
8 Likes
Yup. Pretty much SOP with the road wheels. Also looks like RFM got the ribs on the sidewalls right. Tamiya has them as grooves. Filling them with stretched sprue is fun.
3 Likes
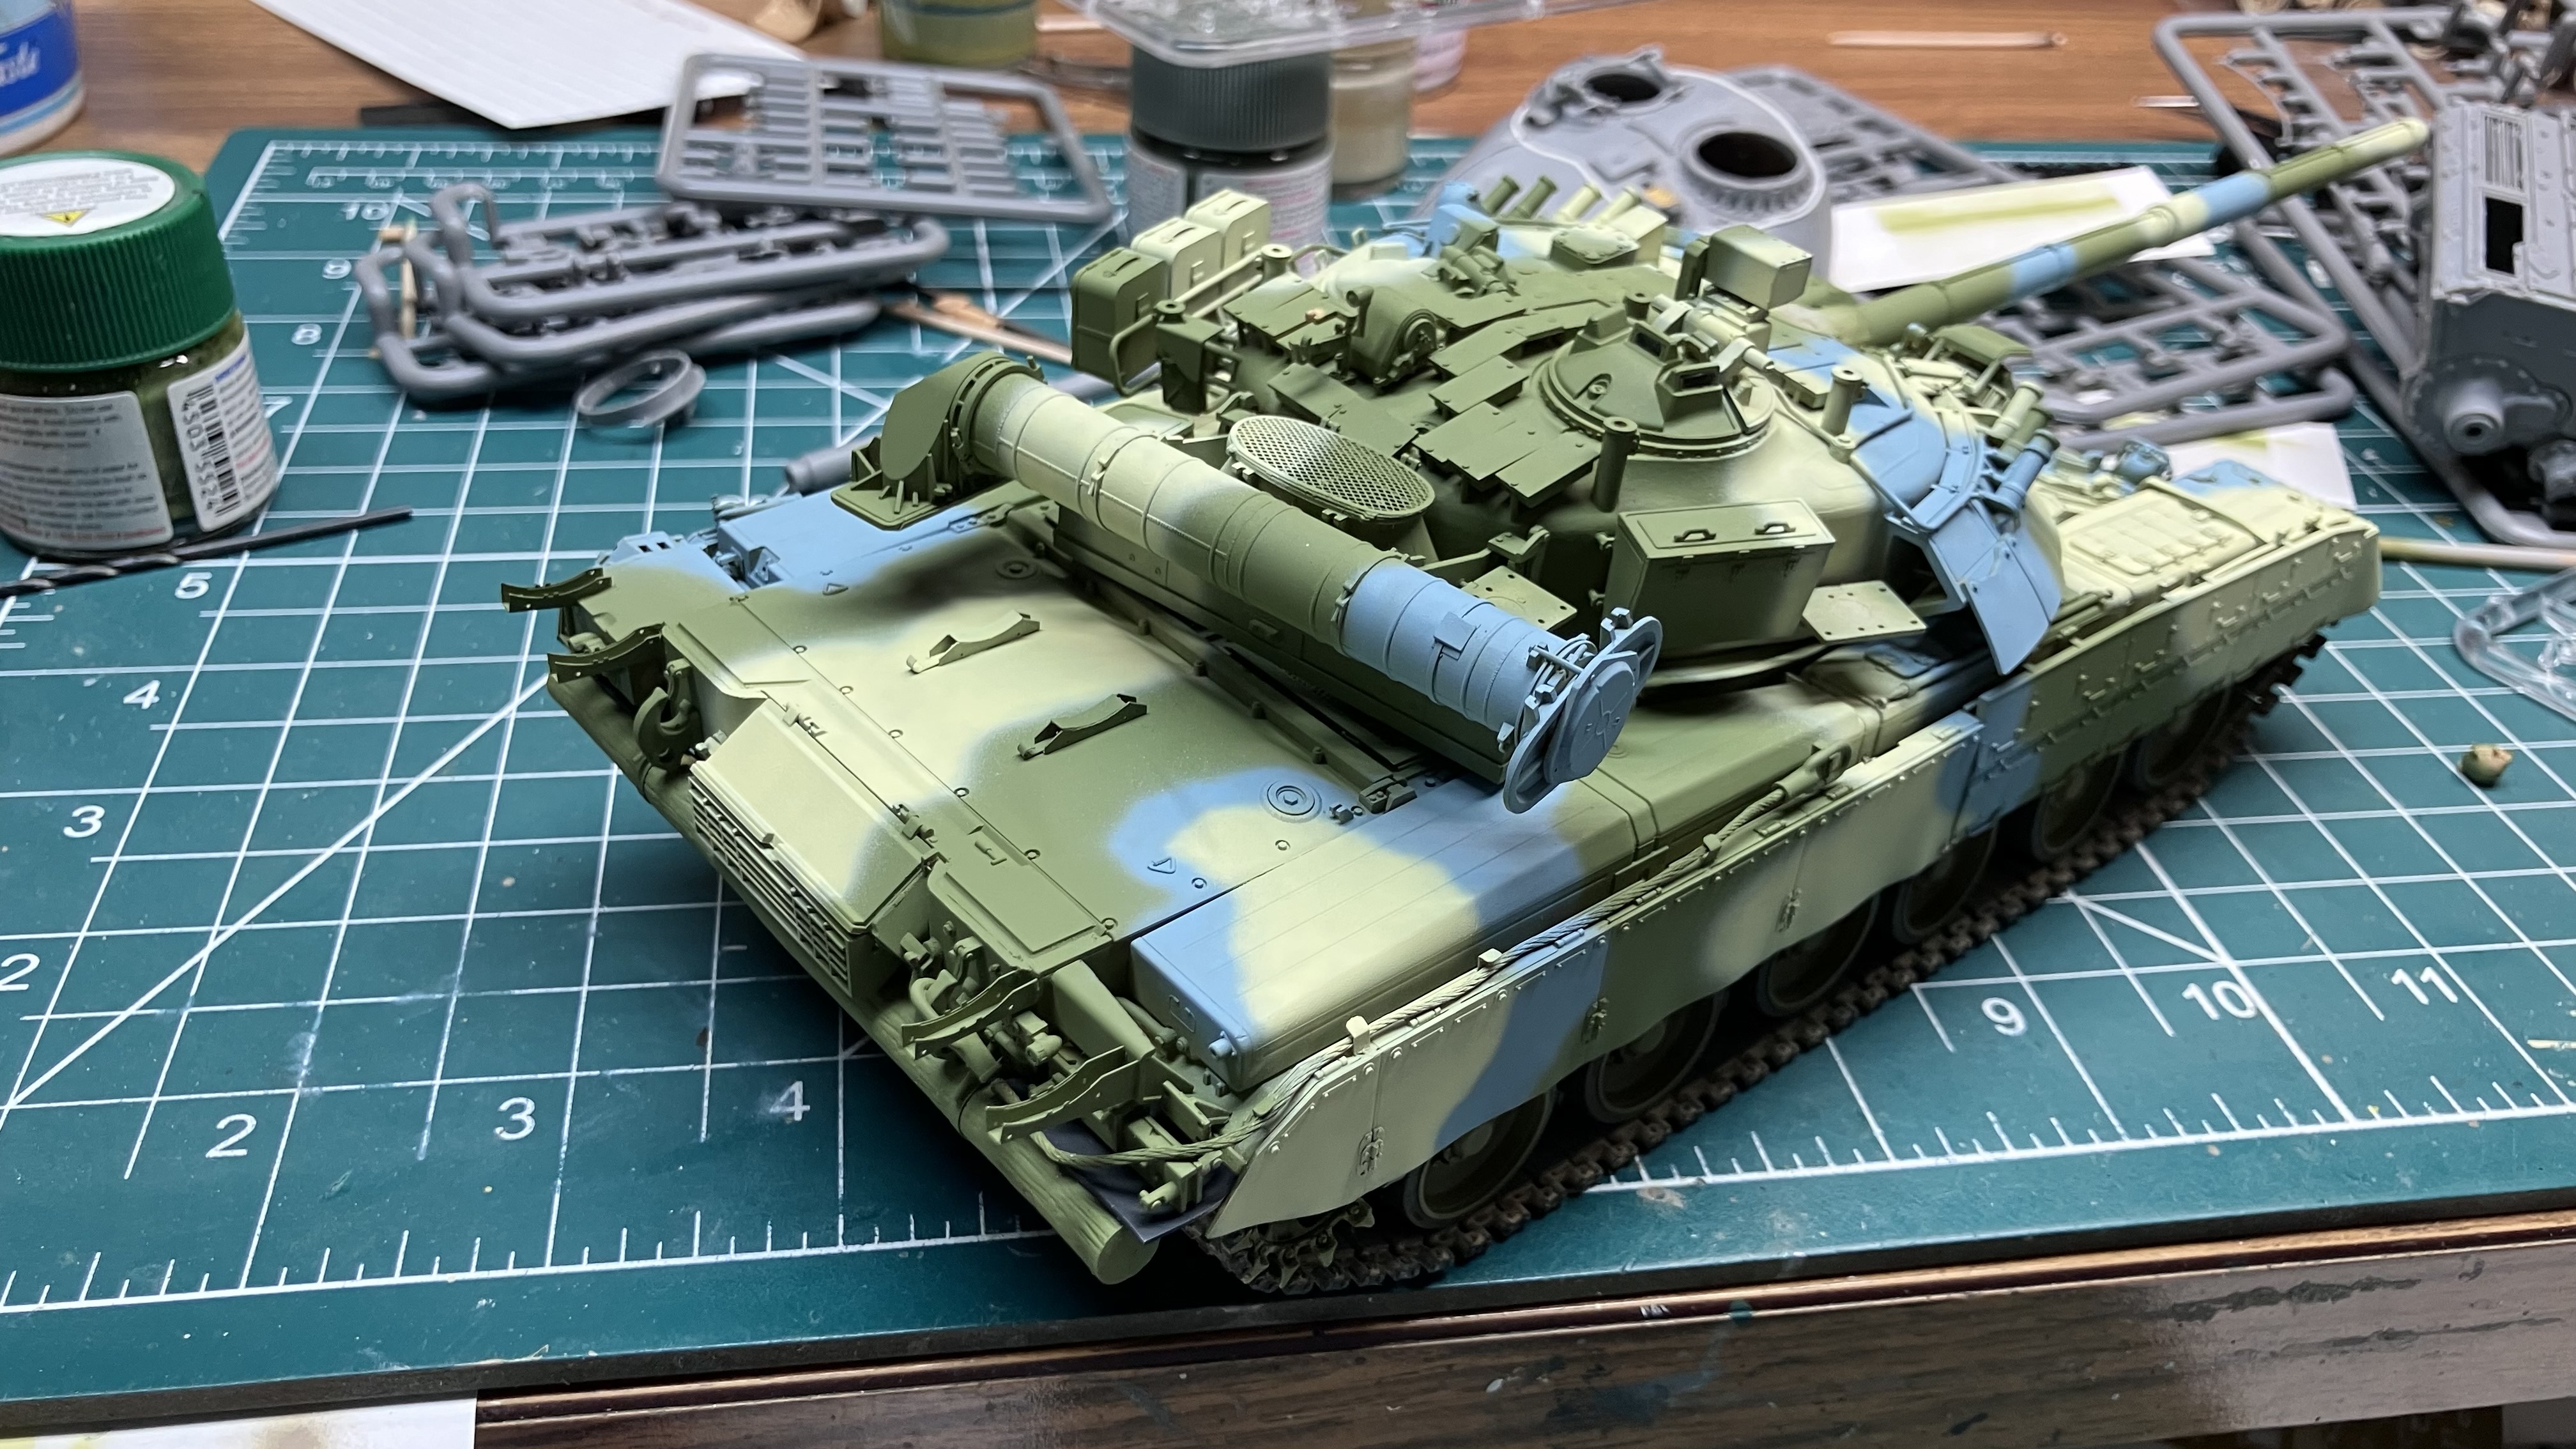
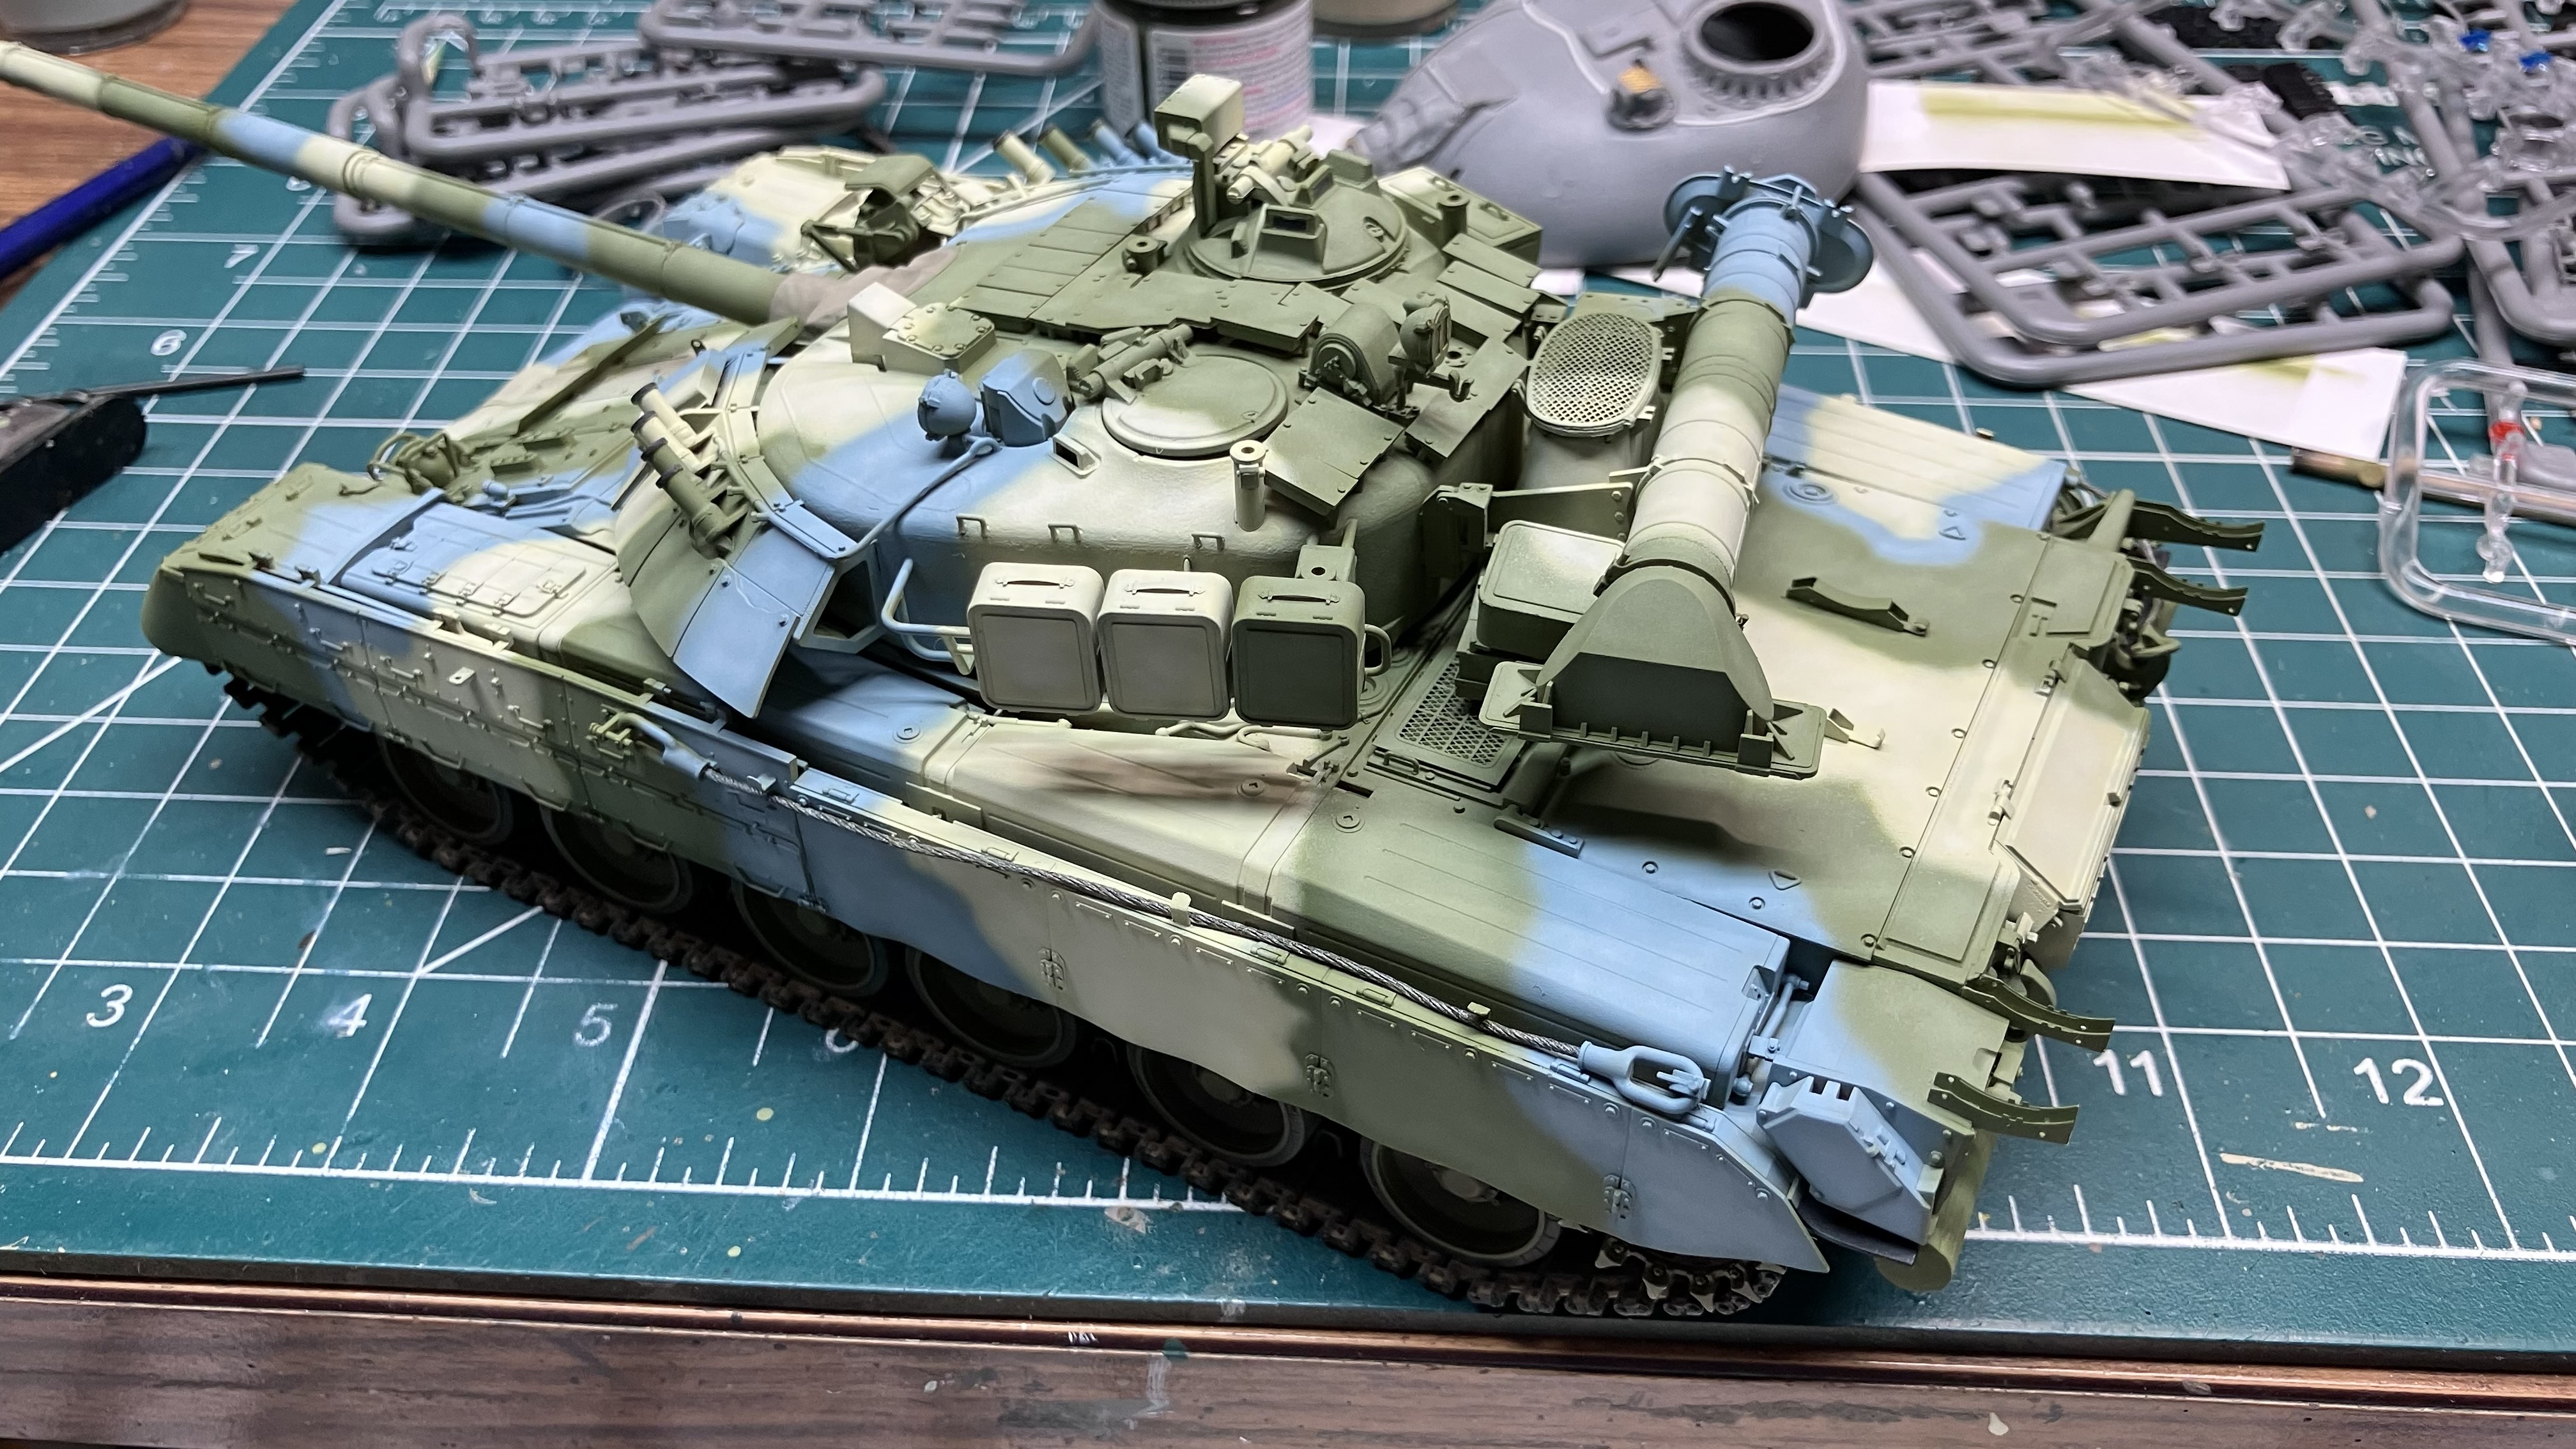
Got the camo colors down. Decided on bluegrey instead of black. Black would’ve given more contrast but it seemed so pedestrian. The bluegrey is more colorful and eye catching in my not so humble opinion. Thanks for looking. Need to touch up some overspray here and there.
18 Likes
Camo looks great ! I think the bluegrey was a good choice.
2 Likes
Beautiful looking camo- very eye catching.
1 Like
Cleaned up the overspray and faded the colors. Fading may not show well in the photos. Painted some of the details, tow cables, dust cover, etc. plan for tomorrow is to clear coat prior to initial weathering.
14 Likes
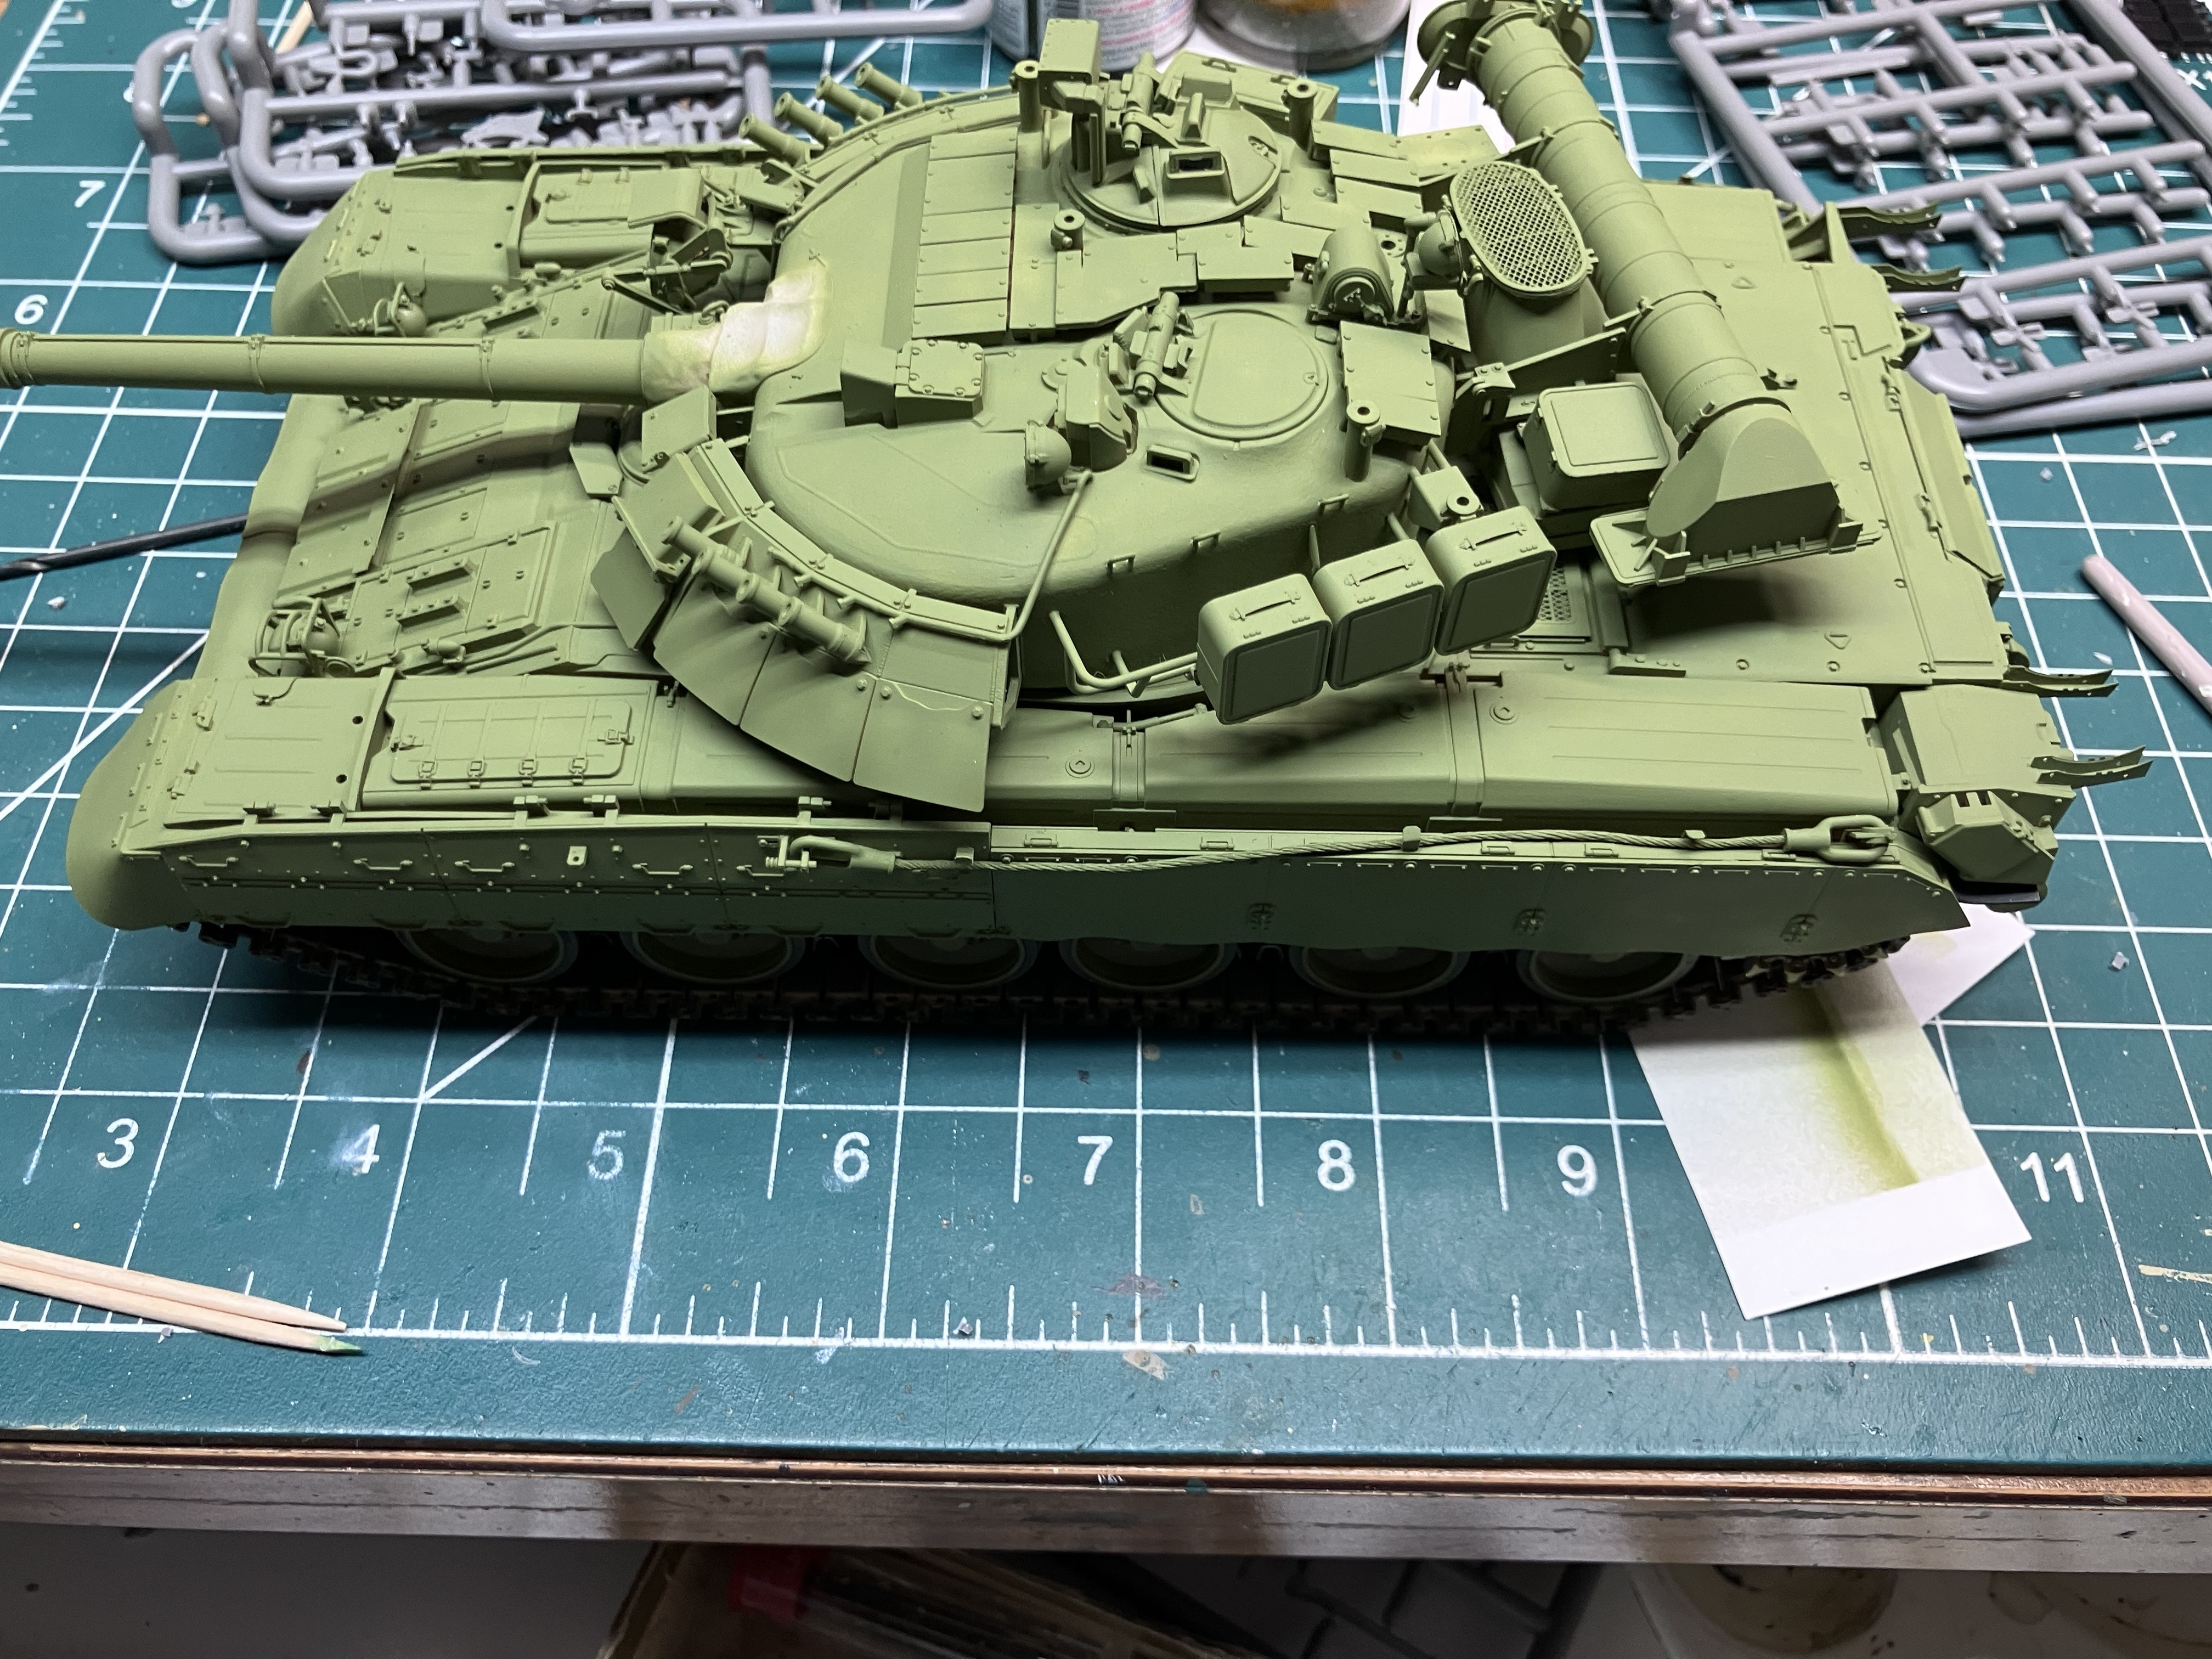
DV, the T-80U is looking fantastic!
3 Likes
I agree with Wade; yout T-80 build came out amazingly. 
2 Likes
Thanks. I really like the color combination. Once weathered it will be toned down and not look as stark. What little overspray that remains will also be blended and disappear.
2 Likes
Bit more work tonight.
Got the main undercarriage bay together. Some really nice detail here, should come out well with a wash.
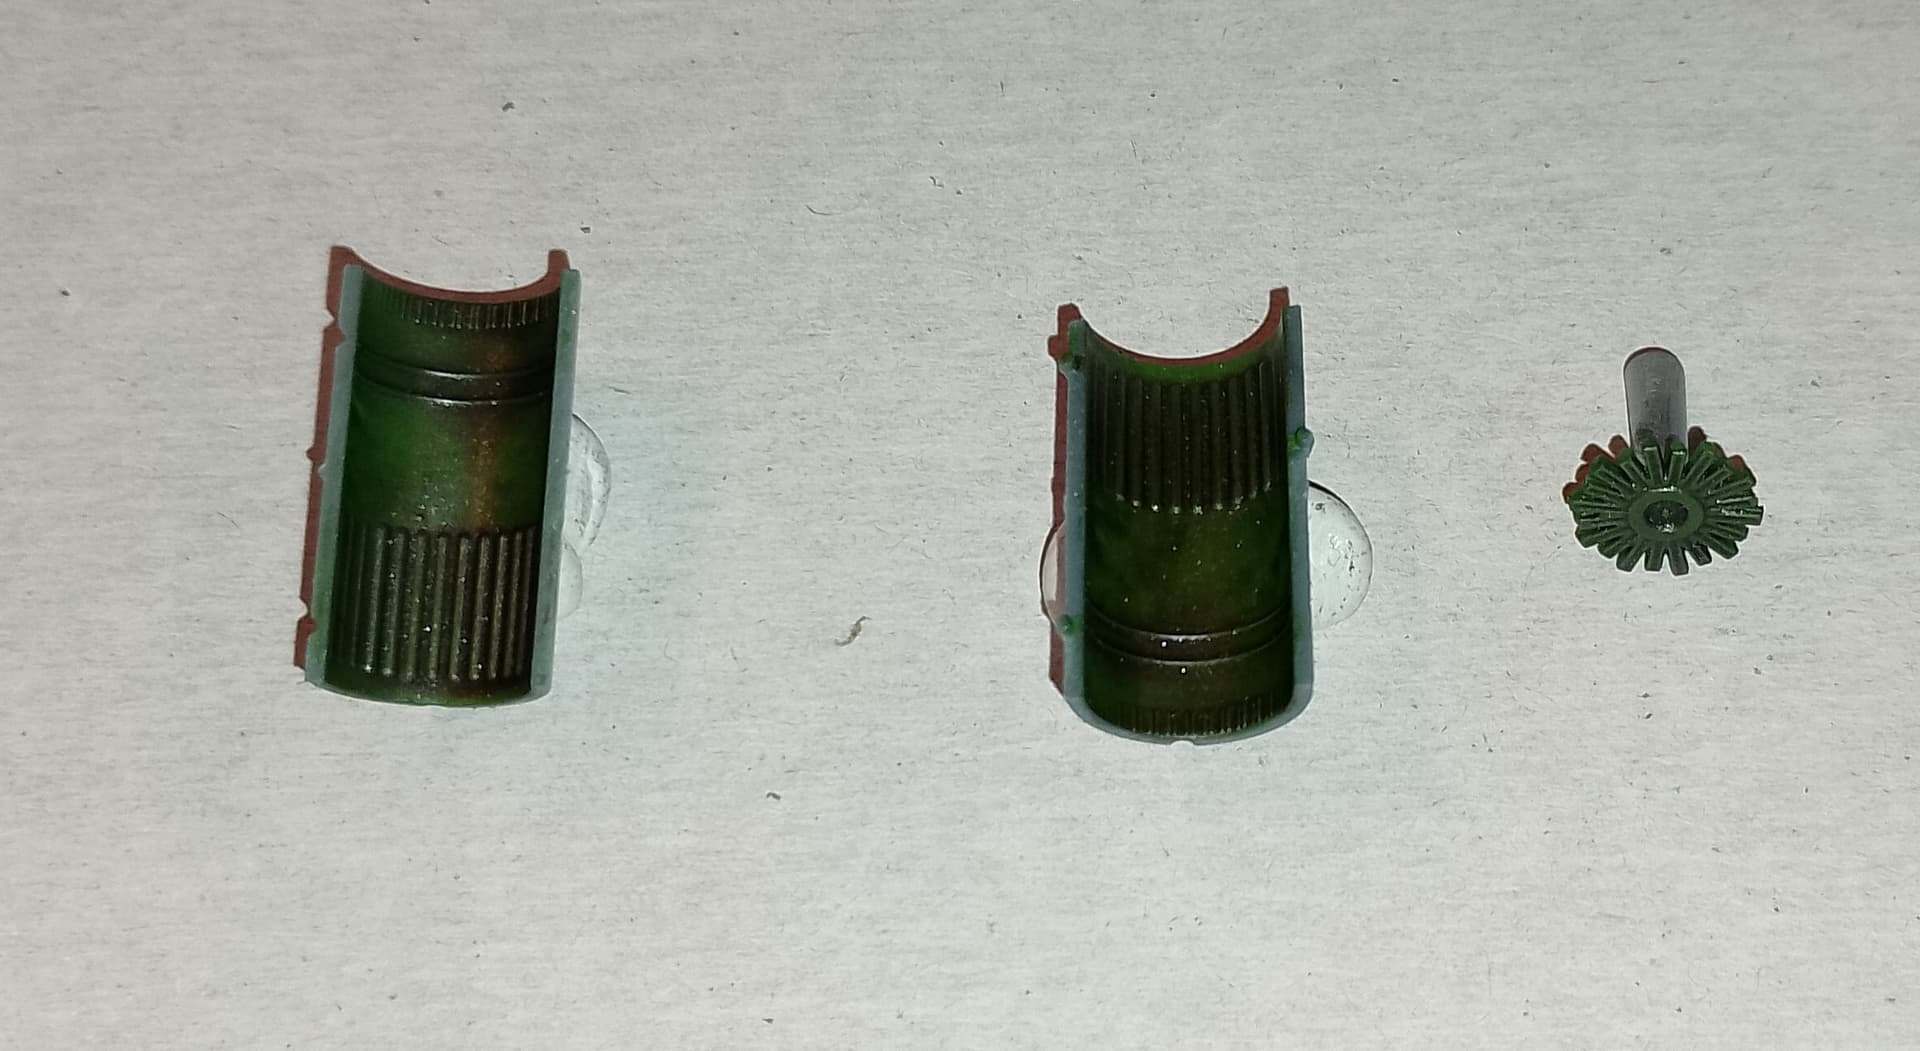
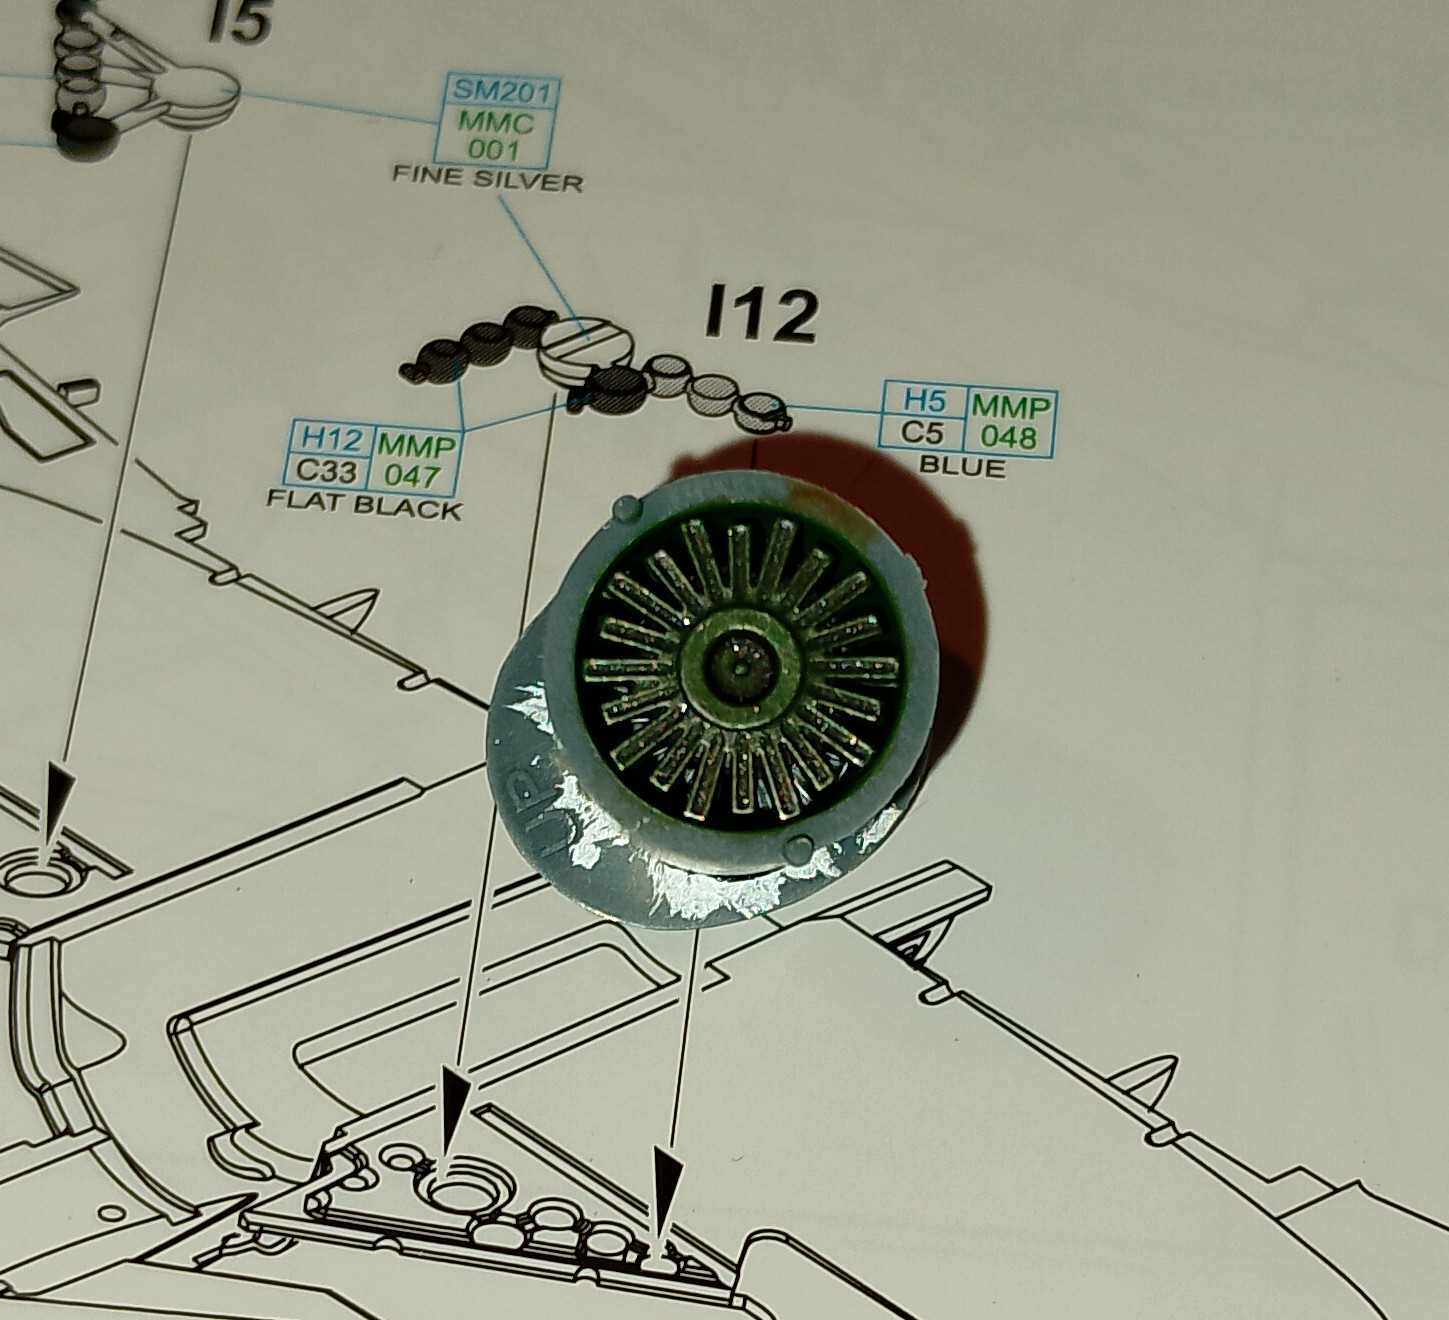
And made a start on the jet pipe. Felt weird painting it green. A a couple of washes should help make it look a bit grubby.
So far, I’m really enjoying this one.
4 Likes
Trumpeter KV-1 Model 1942 Heavy Cast Turret
8 Likes
That’s looking great.
Only managed a few minutes today as I’ve had to sort the back gate out after it nearly blew off it’s hinges in all the wind we’ve had recently. All fine now.
I gave the jet pipe a wash with Games Workshops Sepia and Nuln Oil. Then when they were dry, a light rub with some metallic pigment. Gives it a nice used look and still retains the green.
Also gave me some time to check the instructions again and found out that the VPAF and Egyptian aircraft need the cockpit painting light grey and those coloured etch parts. Can keep the green ones to dress up other Migs in the future.
6 Likes
Looks definitely nice after the washing!
2 Likes
Thanks Peter. Brings out the details nicely.
1 Like