If a punch set isn’t yet in your budget, this might be for you. 13:00 mark:

If a punch set isn’t yet in your budget, this might be for you. 13:00 mark:
I’d be interested to see how he places and cements them to the model. Even with a pointy toothpick there’s still going to be a large and irregular amount of cement applied.
KL
Did you watch the video? He uses canopy glue, not cement. While not exactly the same as canopy glue, I use simple PVA. Water soluble and entirely workable. Don’t like it? Wipe it off and start over.
Yes, I did, at least the part about the punched heads. I heard the canopy glue statement, and I guess I’m guilty of being too loose with the term “cement”; mea culpa. My point was that whether one is applying canopy glue or PVA or Tamiya cement or Testors cement “with a toothpick” as he states is going to give an inconsistent amount of liquid at each location and often in a quantity that can literally drown out the foil disk he’s attaching. It’s going to leave puddles of various sizes and shapes around the disk. (Canopy glue may dry clear but it doesn’t dry to zero thickness.) Sure, you can try things and remove the blobs you don’t like, but there’s only so much of that anyone will do before they say F this noise and skip the whole process.
Additionally - unless it was mentioned far afield from the 13 minute mark - I did not hear or see how he picked up and placed the punched disks on the model, regardless of the chemical he used to affix them.
KL
I don’t know what he uses. For small punched parts, whether metal or plastic - I simply use saliva on the end of a no. 11 blade.
I do not know how he does in the video, but for small parts I use Ultraglue (Gator Grip equivalent), which is acrylic glue. You put a tiny drop and press the part with a toothpick to keep it in place while cleaning any excess with a brush with water. Acrylic clear varnish should work the same.
For picking those tiny parts you can use either a wet toothpick or a wax pencil
I use this technique quite a lot, on plastic or metal parts and never had trouble with glue drowning out the rivet.
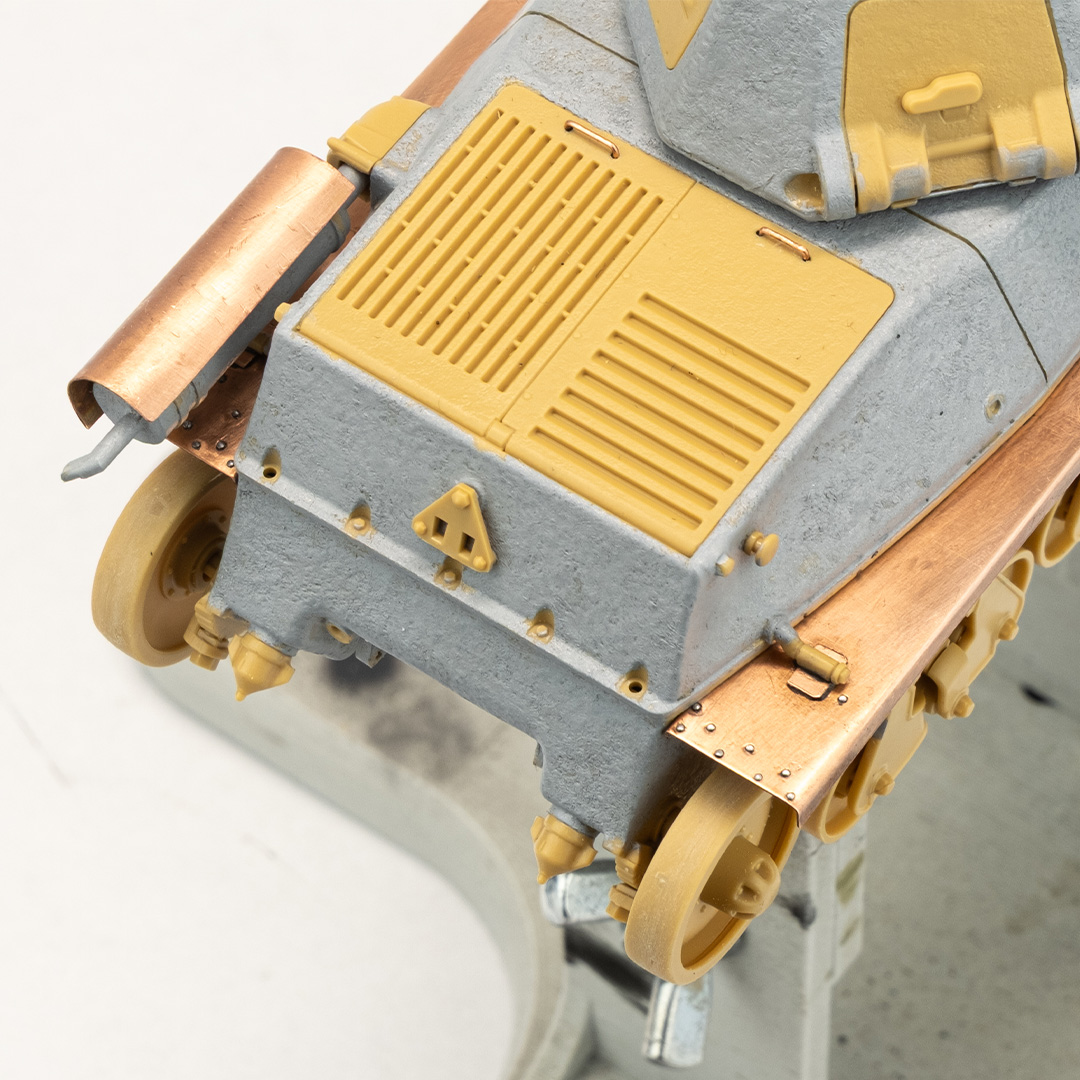
Couple of pics here of Tamiya’s H39 I’m working on, specifically on the replacement fenders. Just put down a small drop (using thin piece of wire I use to pick up small amounts of superglue), then place the rivet in place. I use either a tip of a scalpel to place them, or you can get a slightly damp toothpick/cocktail-stick (lick it!) and that works fine for picking them up.
Once its in place, I go over the superglue with a brush and a small amount of VMS superglue debonder that dissolves the excess, completely cleaning it up and leaving only the glue under the rivet. Also black superglue makes this so much easier as you can easily see when it’s clean.
Those rivets on the fenders were pretty much completely covered/submerged in blobs of superglue before cleaning them up.
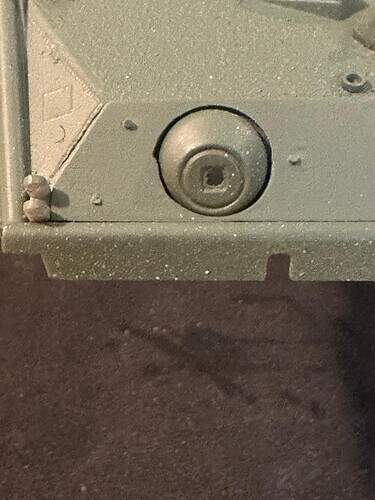
Here’s an example of when this technique is necessary. And unfortunately you see it every day:
There are bolt head, acorn nuts, and other sorts of hardware on the surface of the model. But you want to paint them some shade of metal, so you get out your finest paint brush and give it your best shot. What happens? More often than not it looks good from two feet away, but if you look more closely it looks like ass.
Other the metal color just touches the top surface of the hardware, neglecting the sides, or it spills out around the hardware, onto what should just be the surface of the model. In the second case pin washing might hide your sins, but I personally find a nice dark ring of wash around every single bolt head to be just a tad…unrealistic.
The fix is quite simple, in theory anyway:
Remove the bolt head. Make suitable substitutes, which are often better detailed anyway. Place your bolt heads onto a piece of blue tape. Paint the whole thing, being careful not to let paint settle near the bottom of the bolt. When dry, transfer your perfectly painted bolt to the surface of the model.
As luck would have it, I’ve started a motorcycle thread today that will require doing exactly the method I described.
I only watched the section you pointed at and that sequence seemed to generate circular heads.
Was there another sequence with hexagonal heads?
Nope. That’s just something I’ve learned to do over the years. Bolt heads often do need to be replaced, either because they’re too soft, or poorly done. In fact, in this review of the Orochi Bradley kit, the reviewer can’t understand why it’s necessary:
There are various sized bolt heads on the sides of sprue A (road wheel parts x 2) that you have to shave off the sprue and add to the spots that are called out for on the left side of the hull and the rear TOW reload hatch. I don’t understand what they were thinking because there are small circles where the bolt heads are to be applied. If they could mold the small circles, why not mold the bolt heads?
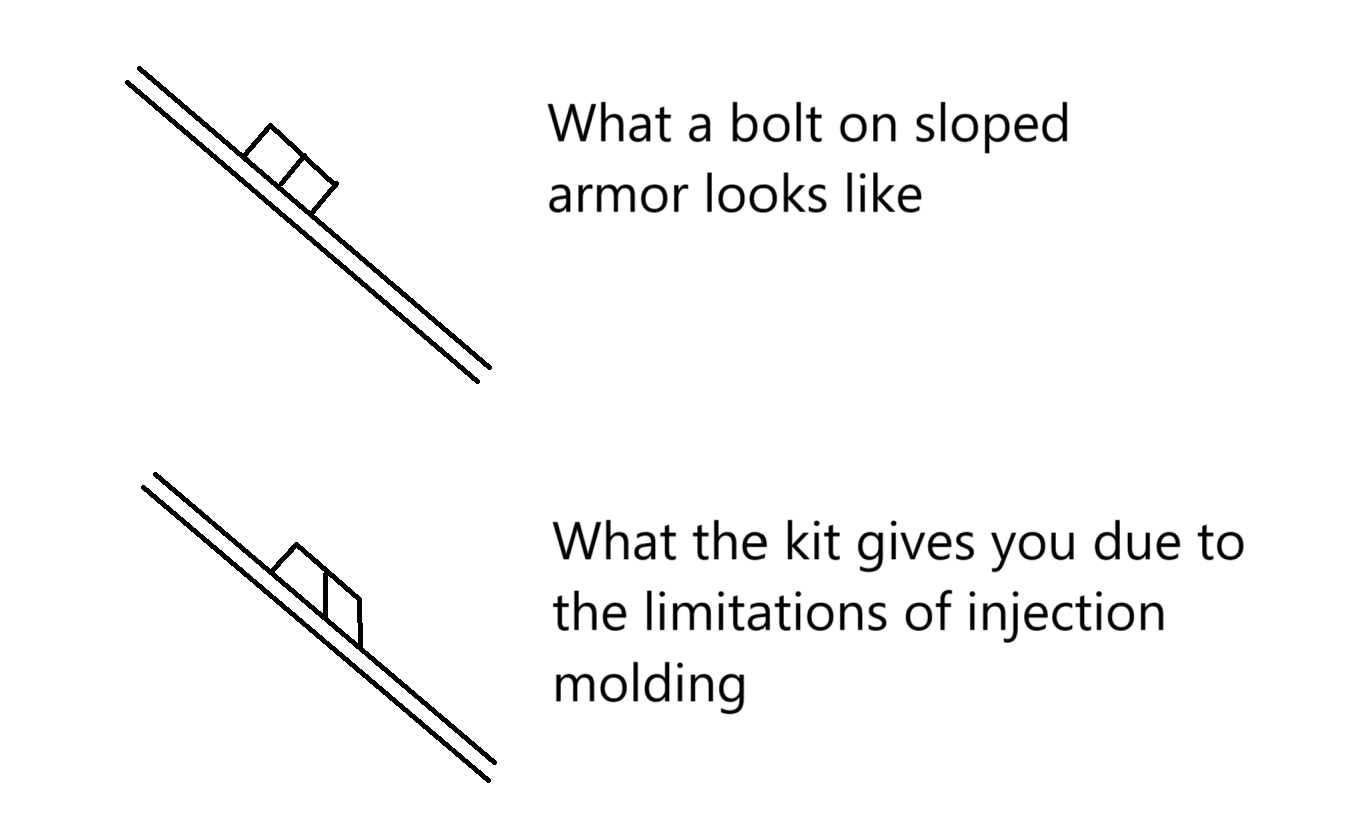
The answer is simple, Look at some of the Bradley kits where the bolts are cast on a sloped surface. The way the dies go together, you either have to have the bolts separate, or distort them so the piece can be pulled out. Here’s a good side view that may explain it:
This is why I often have to replace bolts that were already there. It may go unnoticed most of the time, but it is more correct.
But you replace them with hexagonal “somethings”?
Not somethings. Nuts. Bolts. Nut/bolt combos.
Over the decades I’ve done them a lot of different ways.
Of course the crappy Verlinden conversions all had a plate with various bolts on it you were supposed to shave off. I can still remember an IDF M48 build from the early 90’s where the guy didn’t know what it was so he just glued it to the front of the hull. A shame because otherwise it was a nice build. Of course Legend has supplied bolts that way too. But decades ago when I was really into casting, I’d always put a few tiny hex wrenches in the mold to make hex rod with the left over resin.
Now of course we have styrene hex rod, which I make good use of:
The wet knife blade technique works well for these. They’re so small they make my eyes hurt. If I want to do a row of them, I don’t try to make them the right size. I just make them all a little taller, and file them off to the same height later.
One more advantage to shaving off bolt heads and replacing them - take a look at Bradley side plates. Now there are indeed some OCD folks in the Army, but none so much that they’ll turn all the bolts heads the same way. I like to remove some of them and change their orientation, just like in real life.
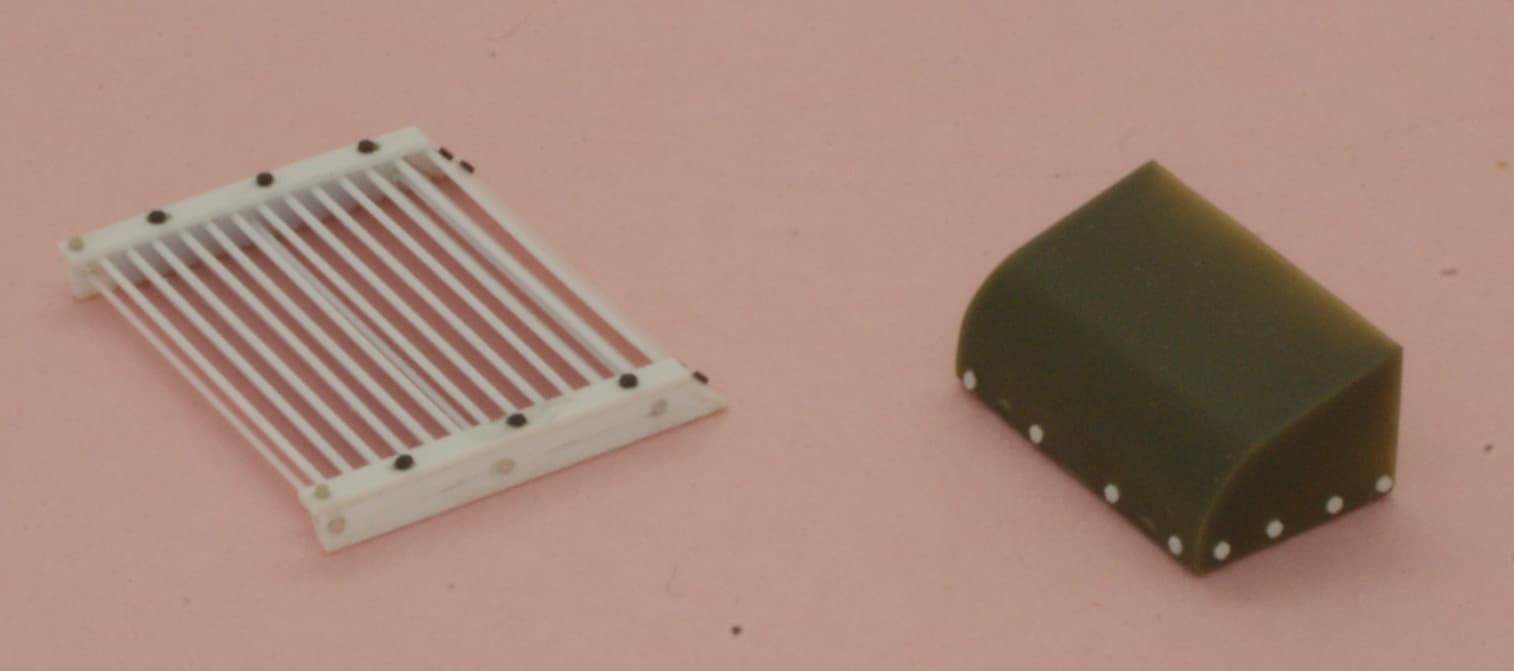
And then of course if I want nut on bolt detail for a project, I might sacrifice an entire set of road wheels:
Or just get the Meng ones you shave off, or even these very old school ones:
I’ve found a hex punch set to be an order of magnitude - or two - better than hex rod slicings. The negatives of hex rod are:
all of which are remedied with a punch set and styrene sheet.
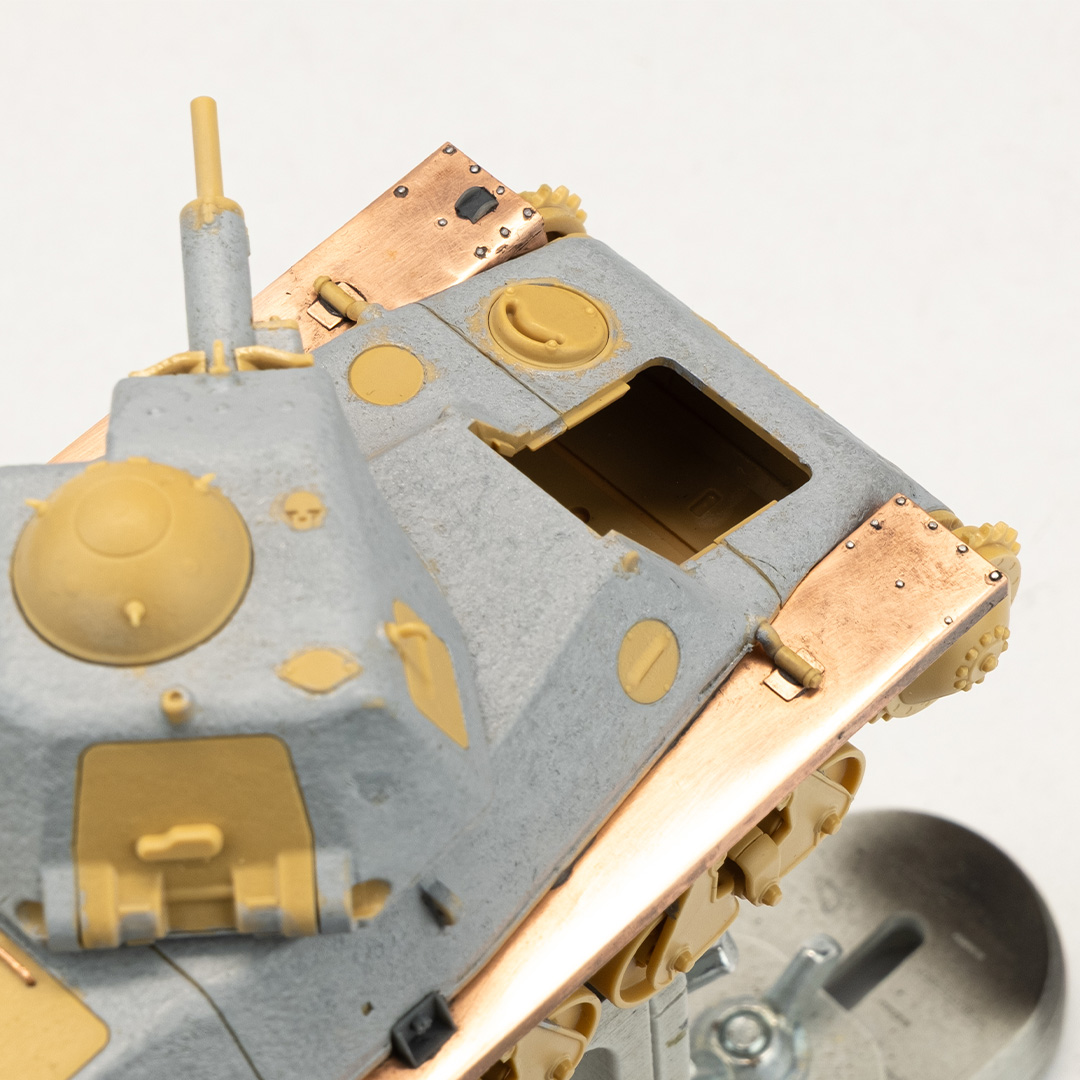
I used a combination of items here:
The white and black are hex punchings, the gray are MasterClub or Tichy items where I wanted a different size or a nut + screw end effect.
Applying punchings of styrene is incredibly easy: I put a drop of Testors liquid cement on a small piece of glass and use the tip of a brand new #11 blade to just stick the punching, touch it to the cement drop, and place it where needed. The cement adhesion pulls the punching off the blade. If it doesn’t you’ve either jammed in to hard or your blade tip is dull.
Metal things are a different matter. You can’t pick them up with a blade tip without leaving a mark and the adhesive (CA or PVA types) has different properties that complicate the application process. That’s what I was hoping the video would demonstrate.
I haven’t much need to represent bare metal fasteners so have only used metal punchings from thin stock, < 0.005 inch, for use as flathead rivets. For 0.005 or more thicknesses I use plastic as it is so much easier.
KL
I forgot to mention the other substantial benefit of having a punch set: Styrene punchings are such a great detail and time saver for filling knock-out pin recesses. Filling and heavy sanding is reduced to practically nothing in most cases. It’s often just a matter of some light work with 320 grit paper to get everything evened out.
KL