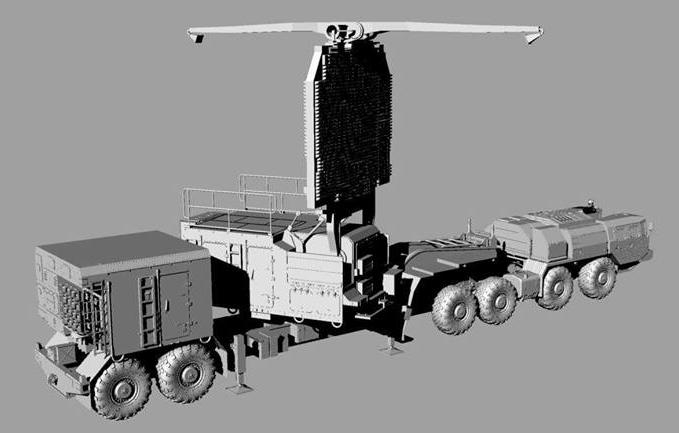
The really BIG Russian phased array radar (bigger than the Flap-Lid unit which is already offered by Trumpeter.)
Digital model and Digital rendering by Model Collect.
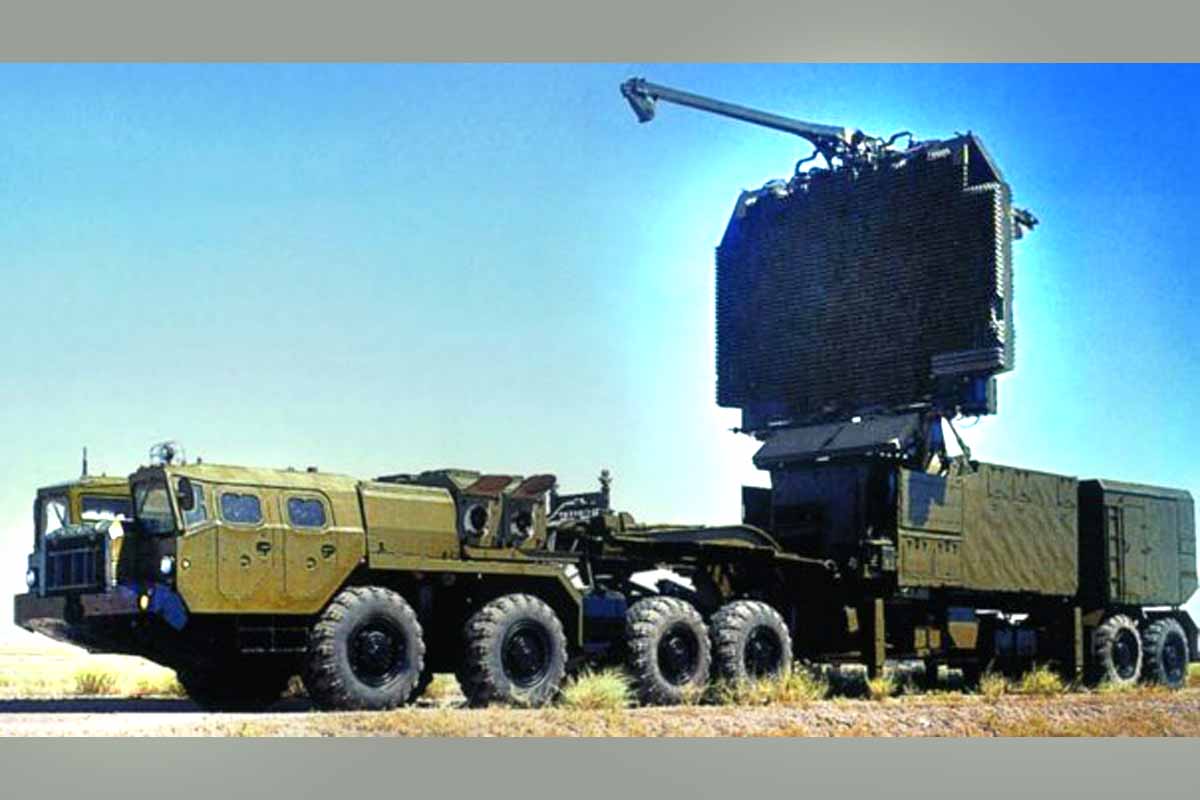
Photo by Model Collect.
I knew of this vehicle’s existence but could not help but ask "will someone offer this as a model in 1/35th?
The antenna/sensor unfolds on this radar unit in much the same way as the mirrors on the James Webb space telescope do. Also of note; even the trailer wheels are powered on this one as well. (I imagine by electric motor(s)??? For years the Russians have been big on powering their largest trailers by using a generator on the tractor and electric motors on the trailer.
This system is clearly two sided but the new phased array radars do not have to do a full 360 degrees of rotation to function or even move at all. If a group of radar emitters spots a potential target the software immediately (in nano-seconds) tells them “Hey, go back again and check that.”
Old fashioned radars would have to make at least 3 complete rotations to determine target speed and direction.
I’m thinking this unit, in operation, might simply oscillate back and forth perhaps 30 to 50 degrees and end up compiling an image of the entire 360 degree battle environment. (Much like the radar emitter in the nose of all modern day jet fighters, it just sweeps back and forth.)
F.Y.I. - The “attic” on the Flap-Lid radar unit contains LAN communications gear and two good sized electrical generators. This area just seems to be a multi-purpose, jack of all trades place, where there is room for any specialized equipment that might be pessary to a given vehicle application.
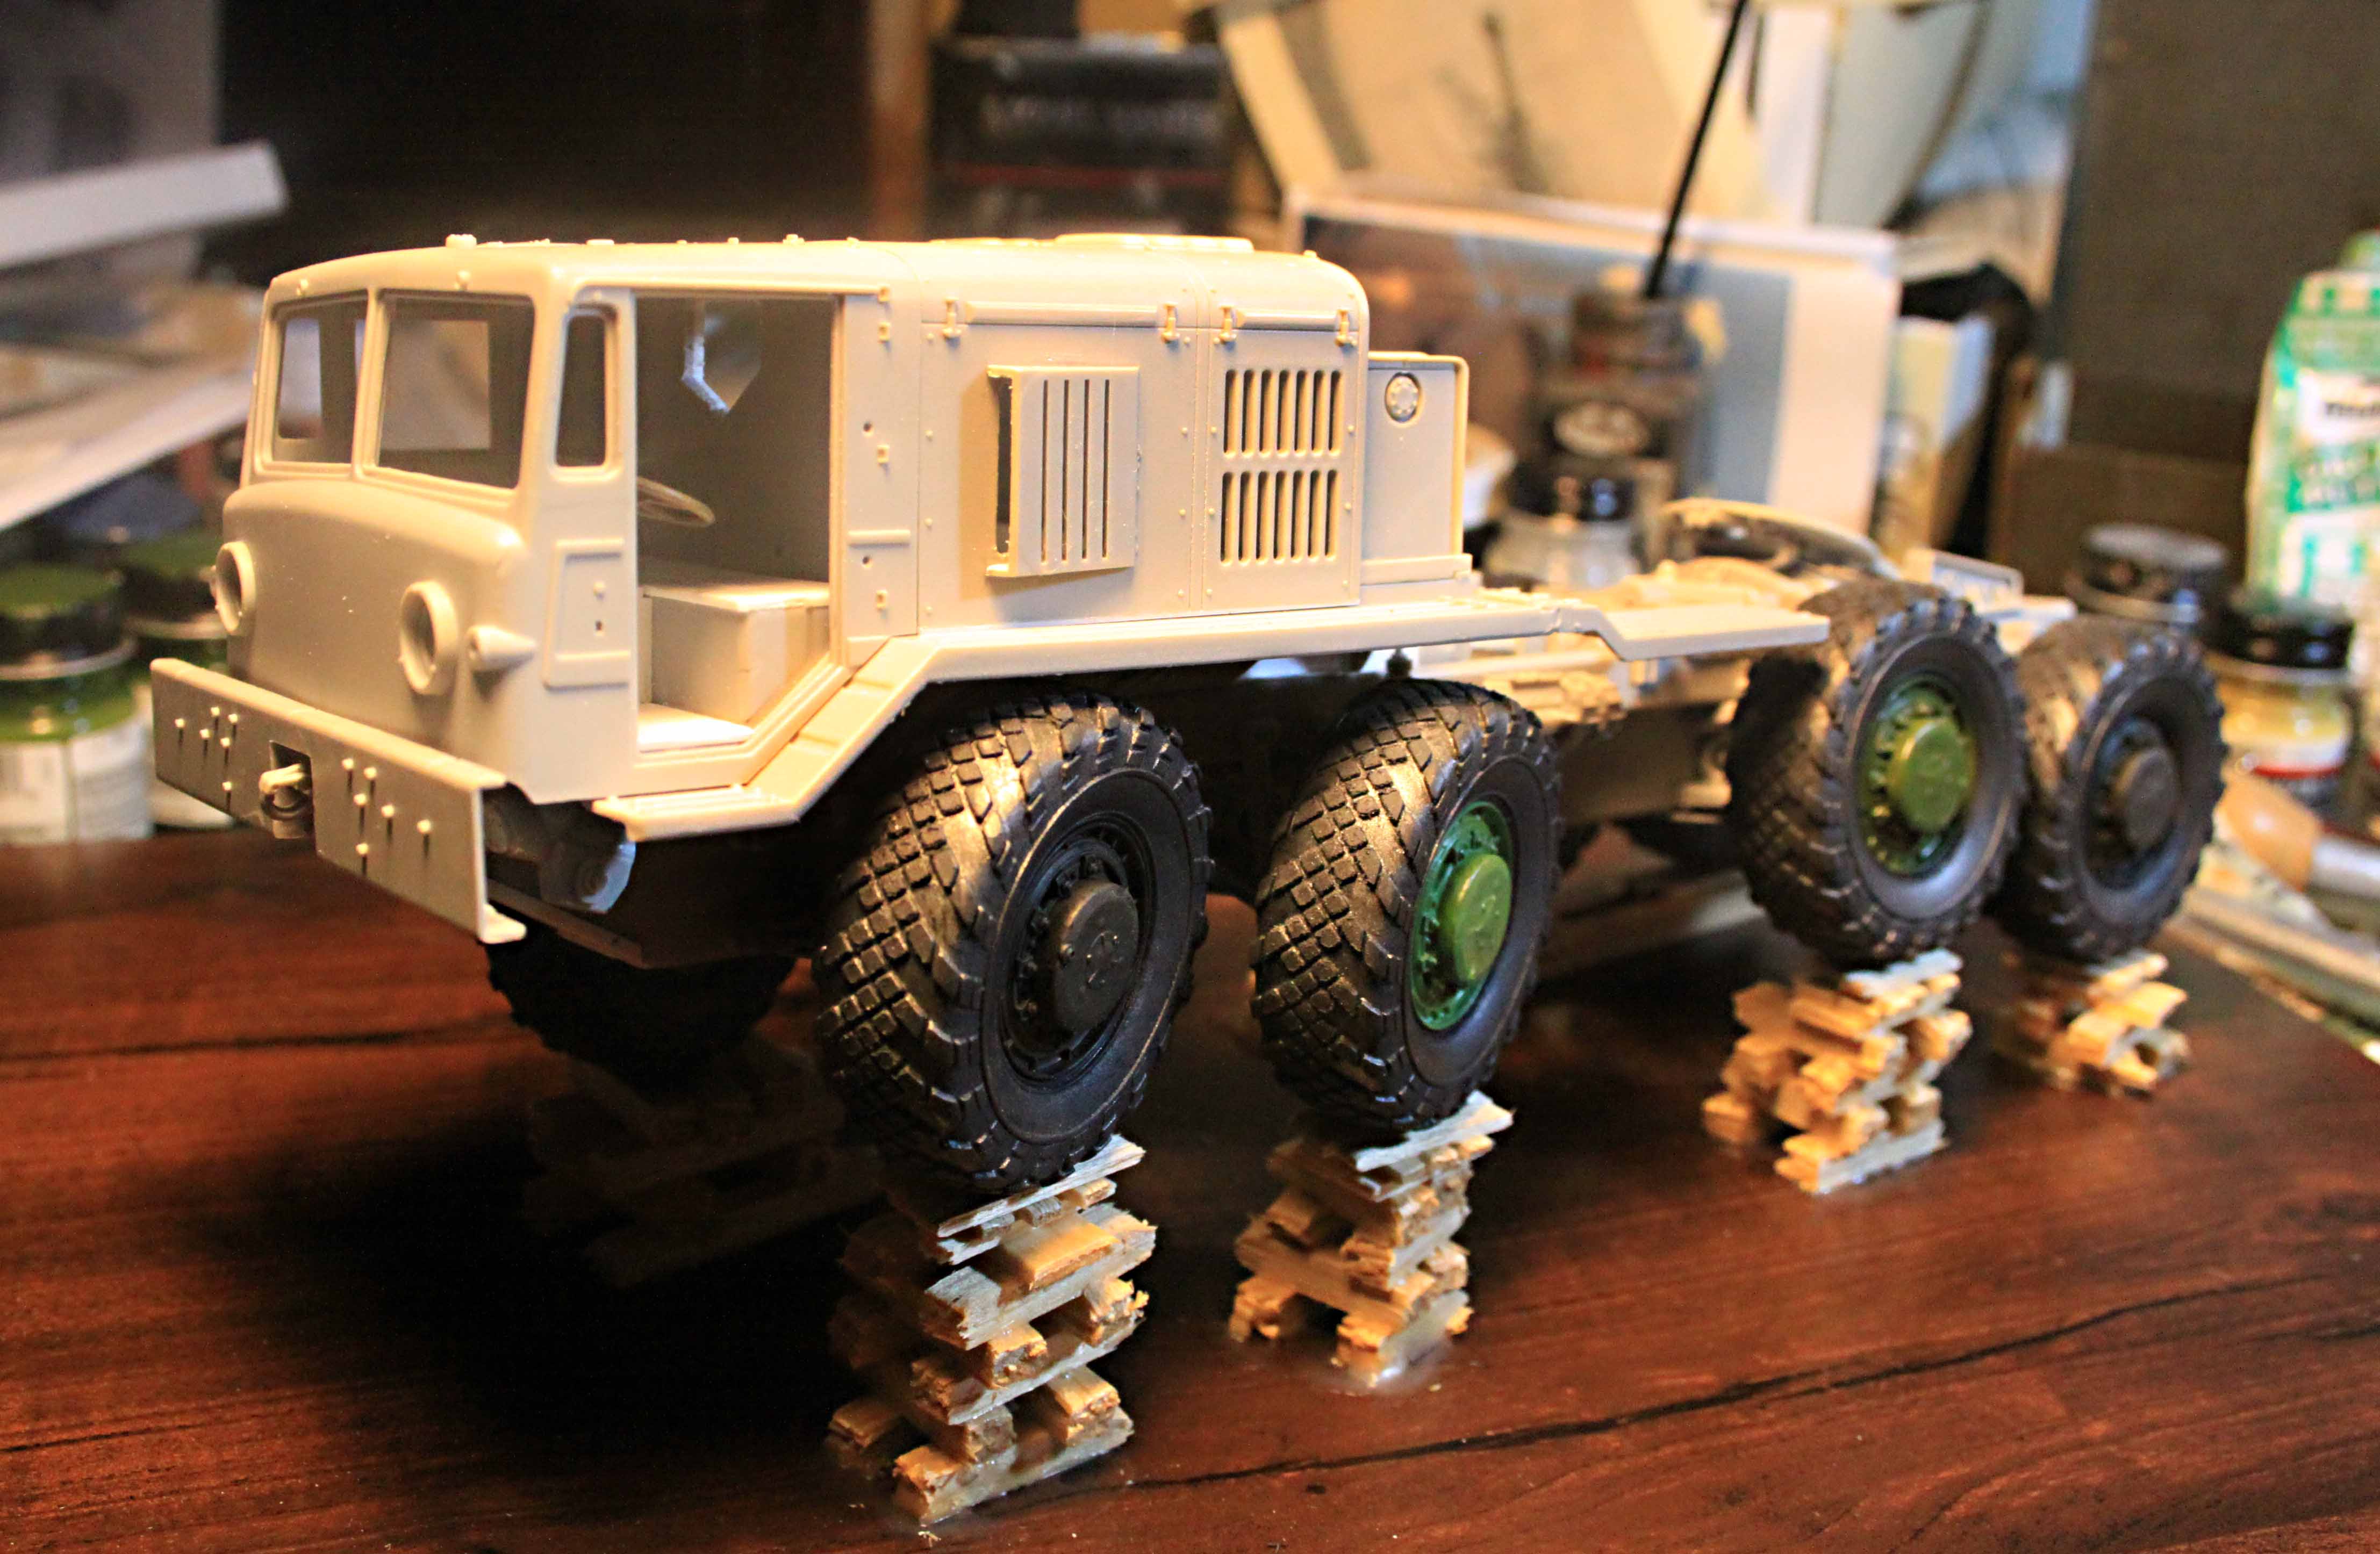
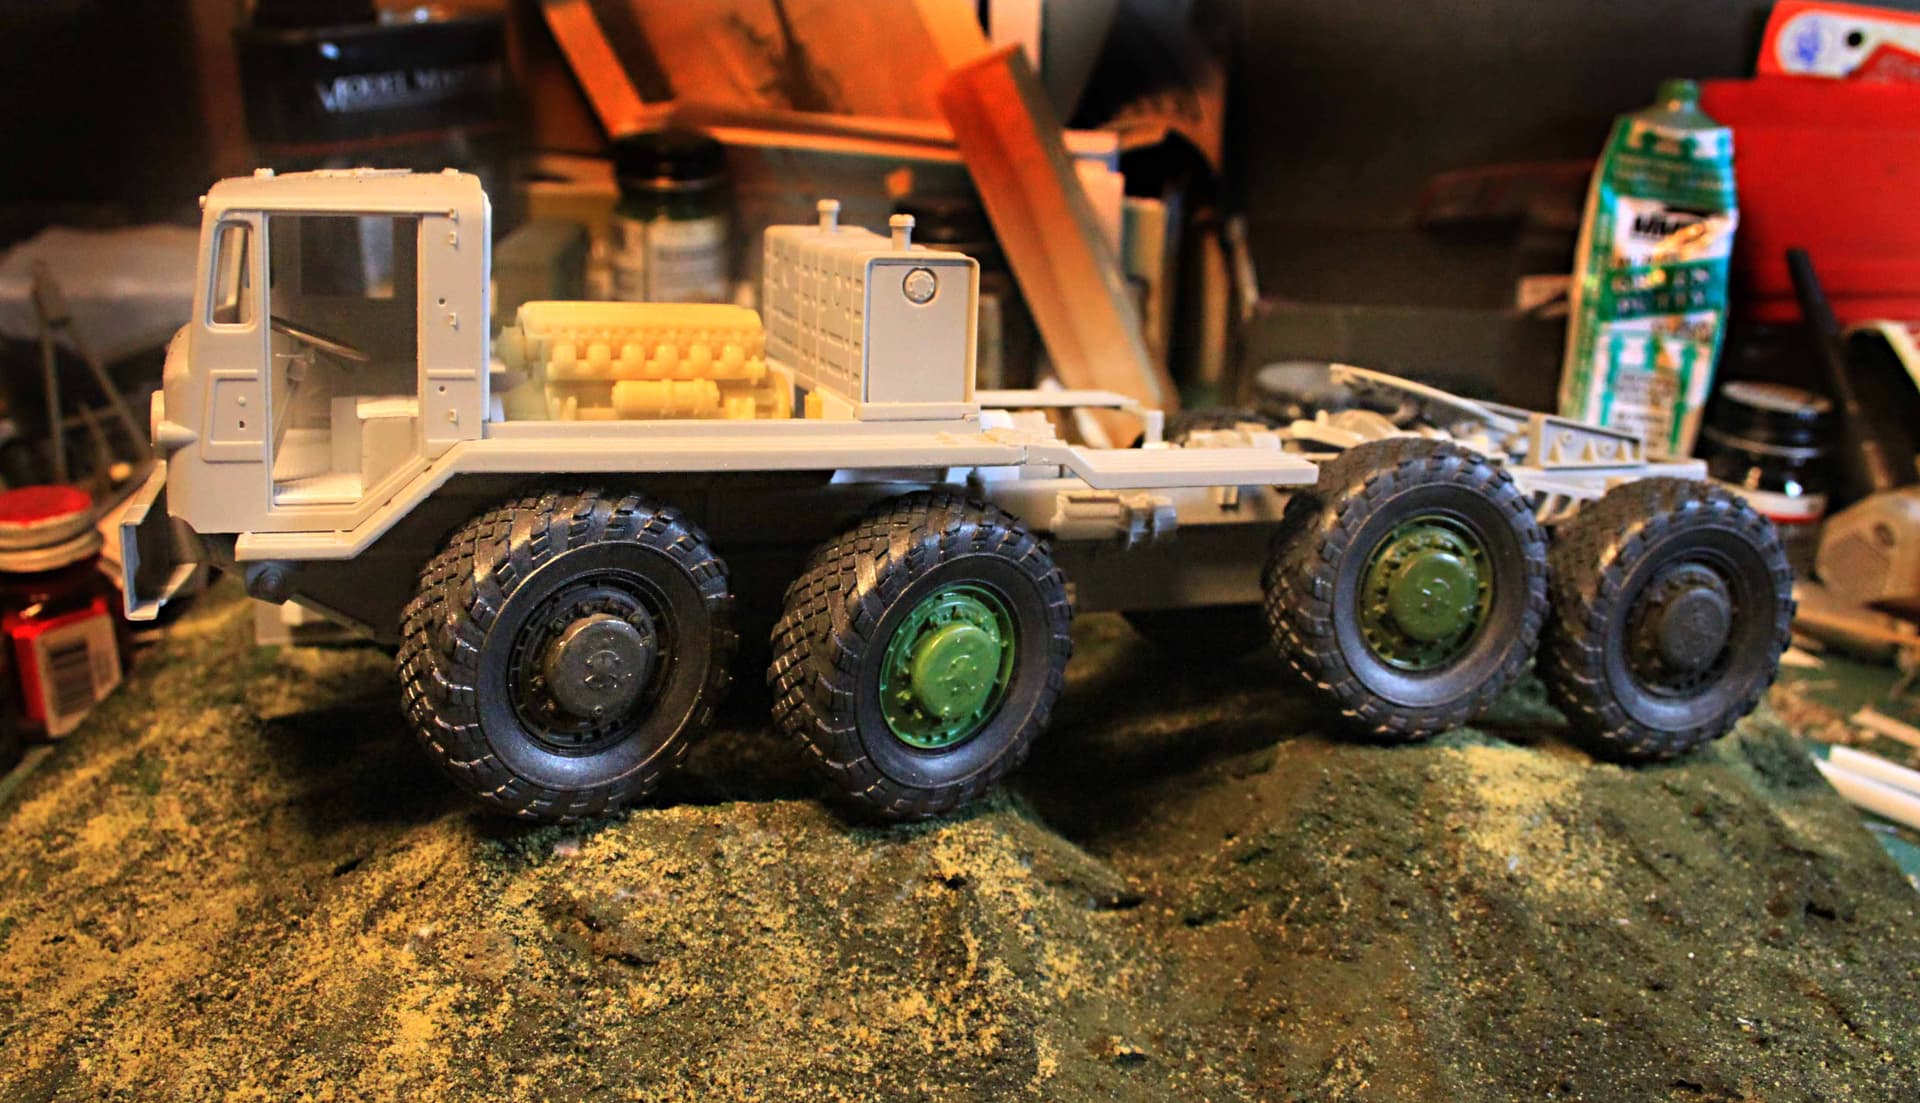
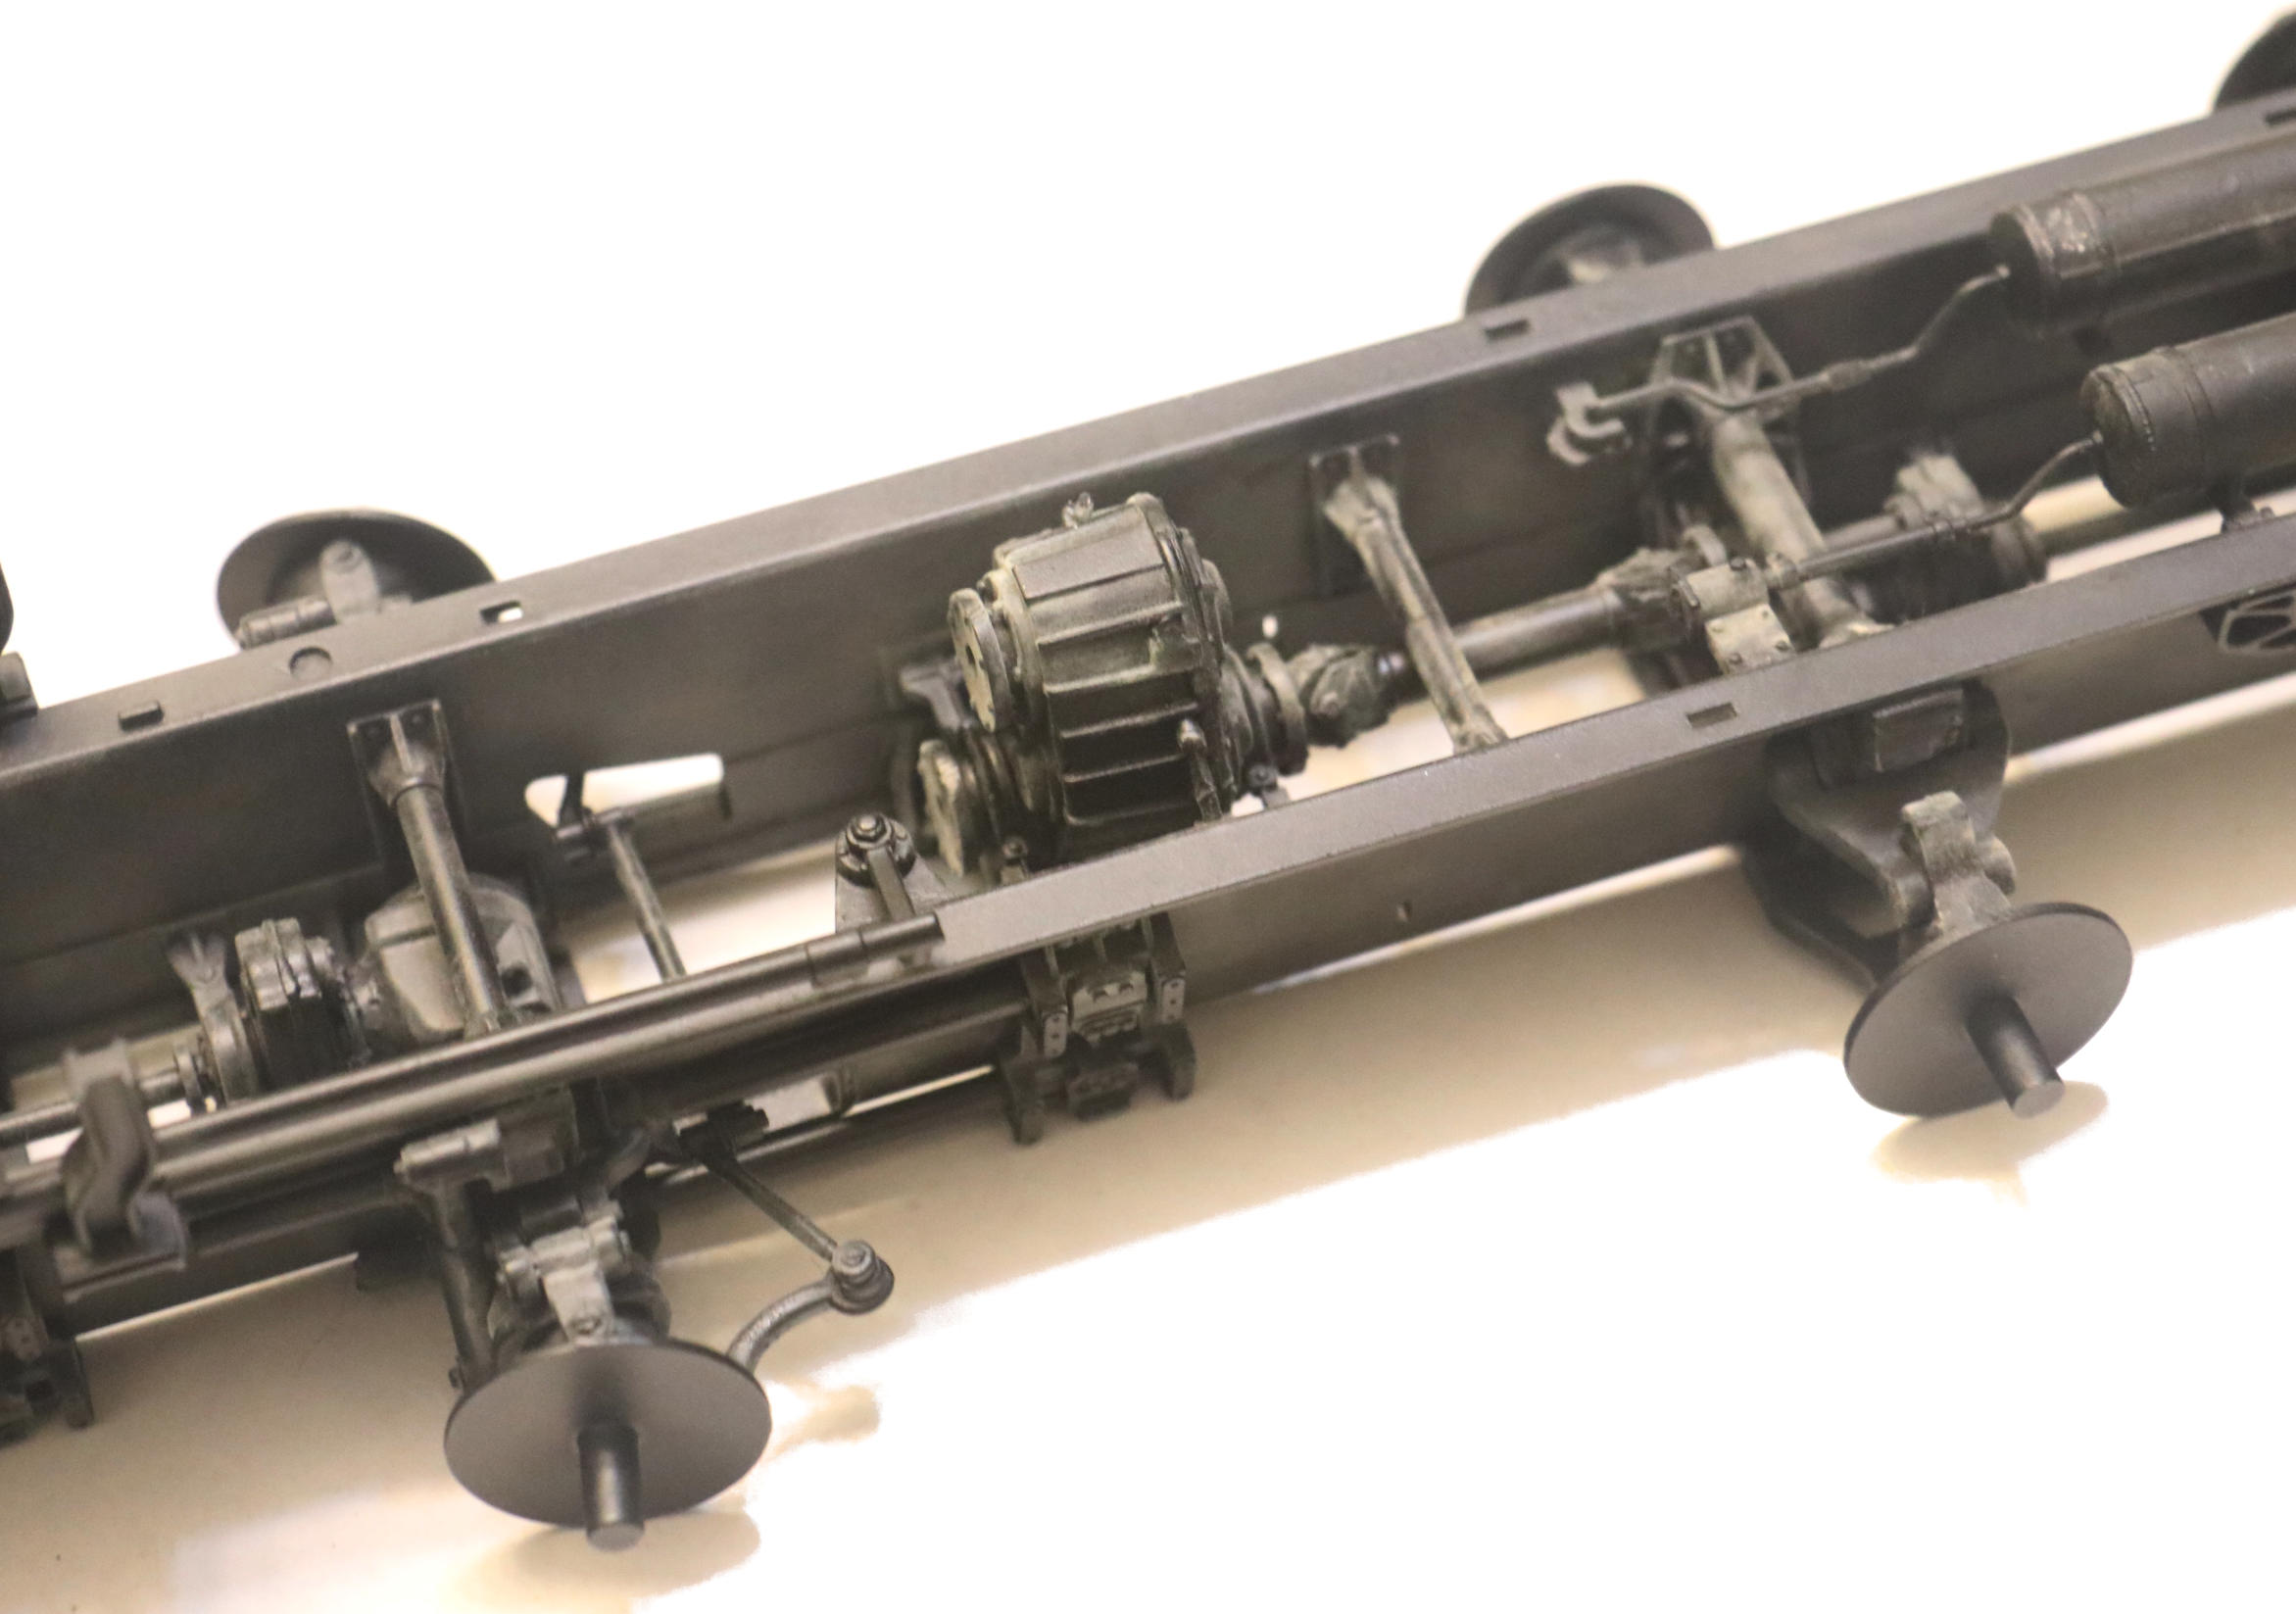
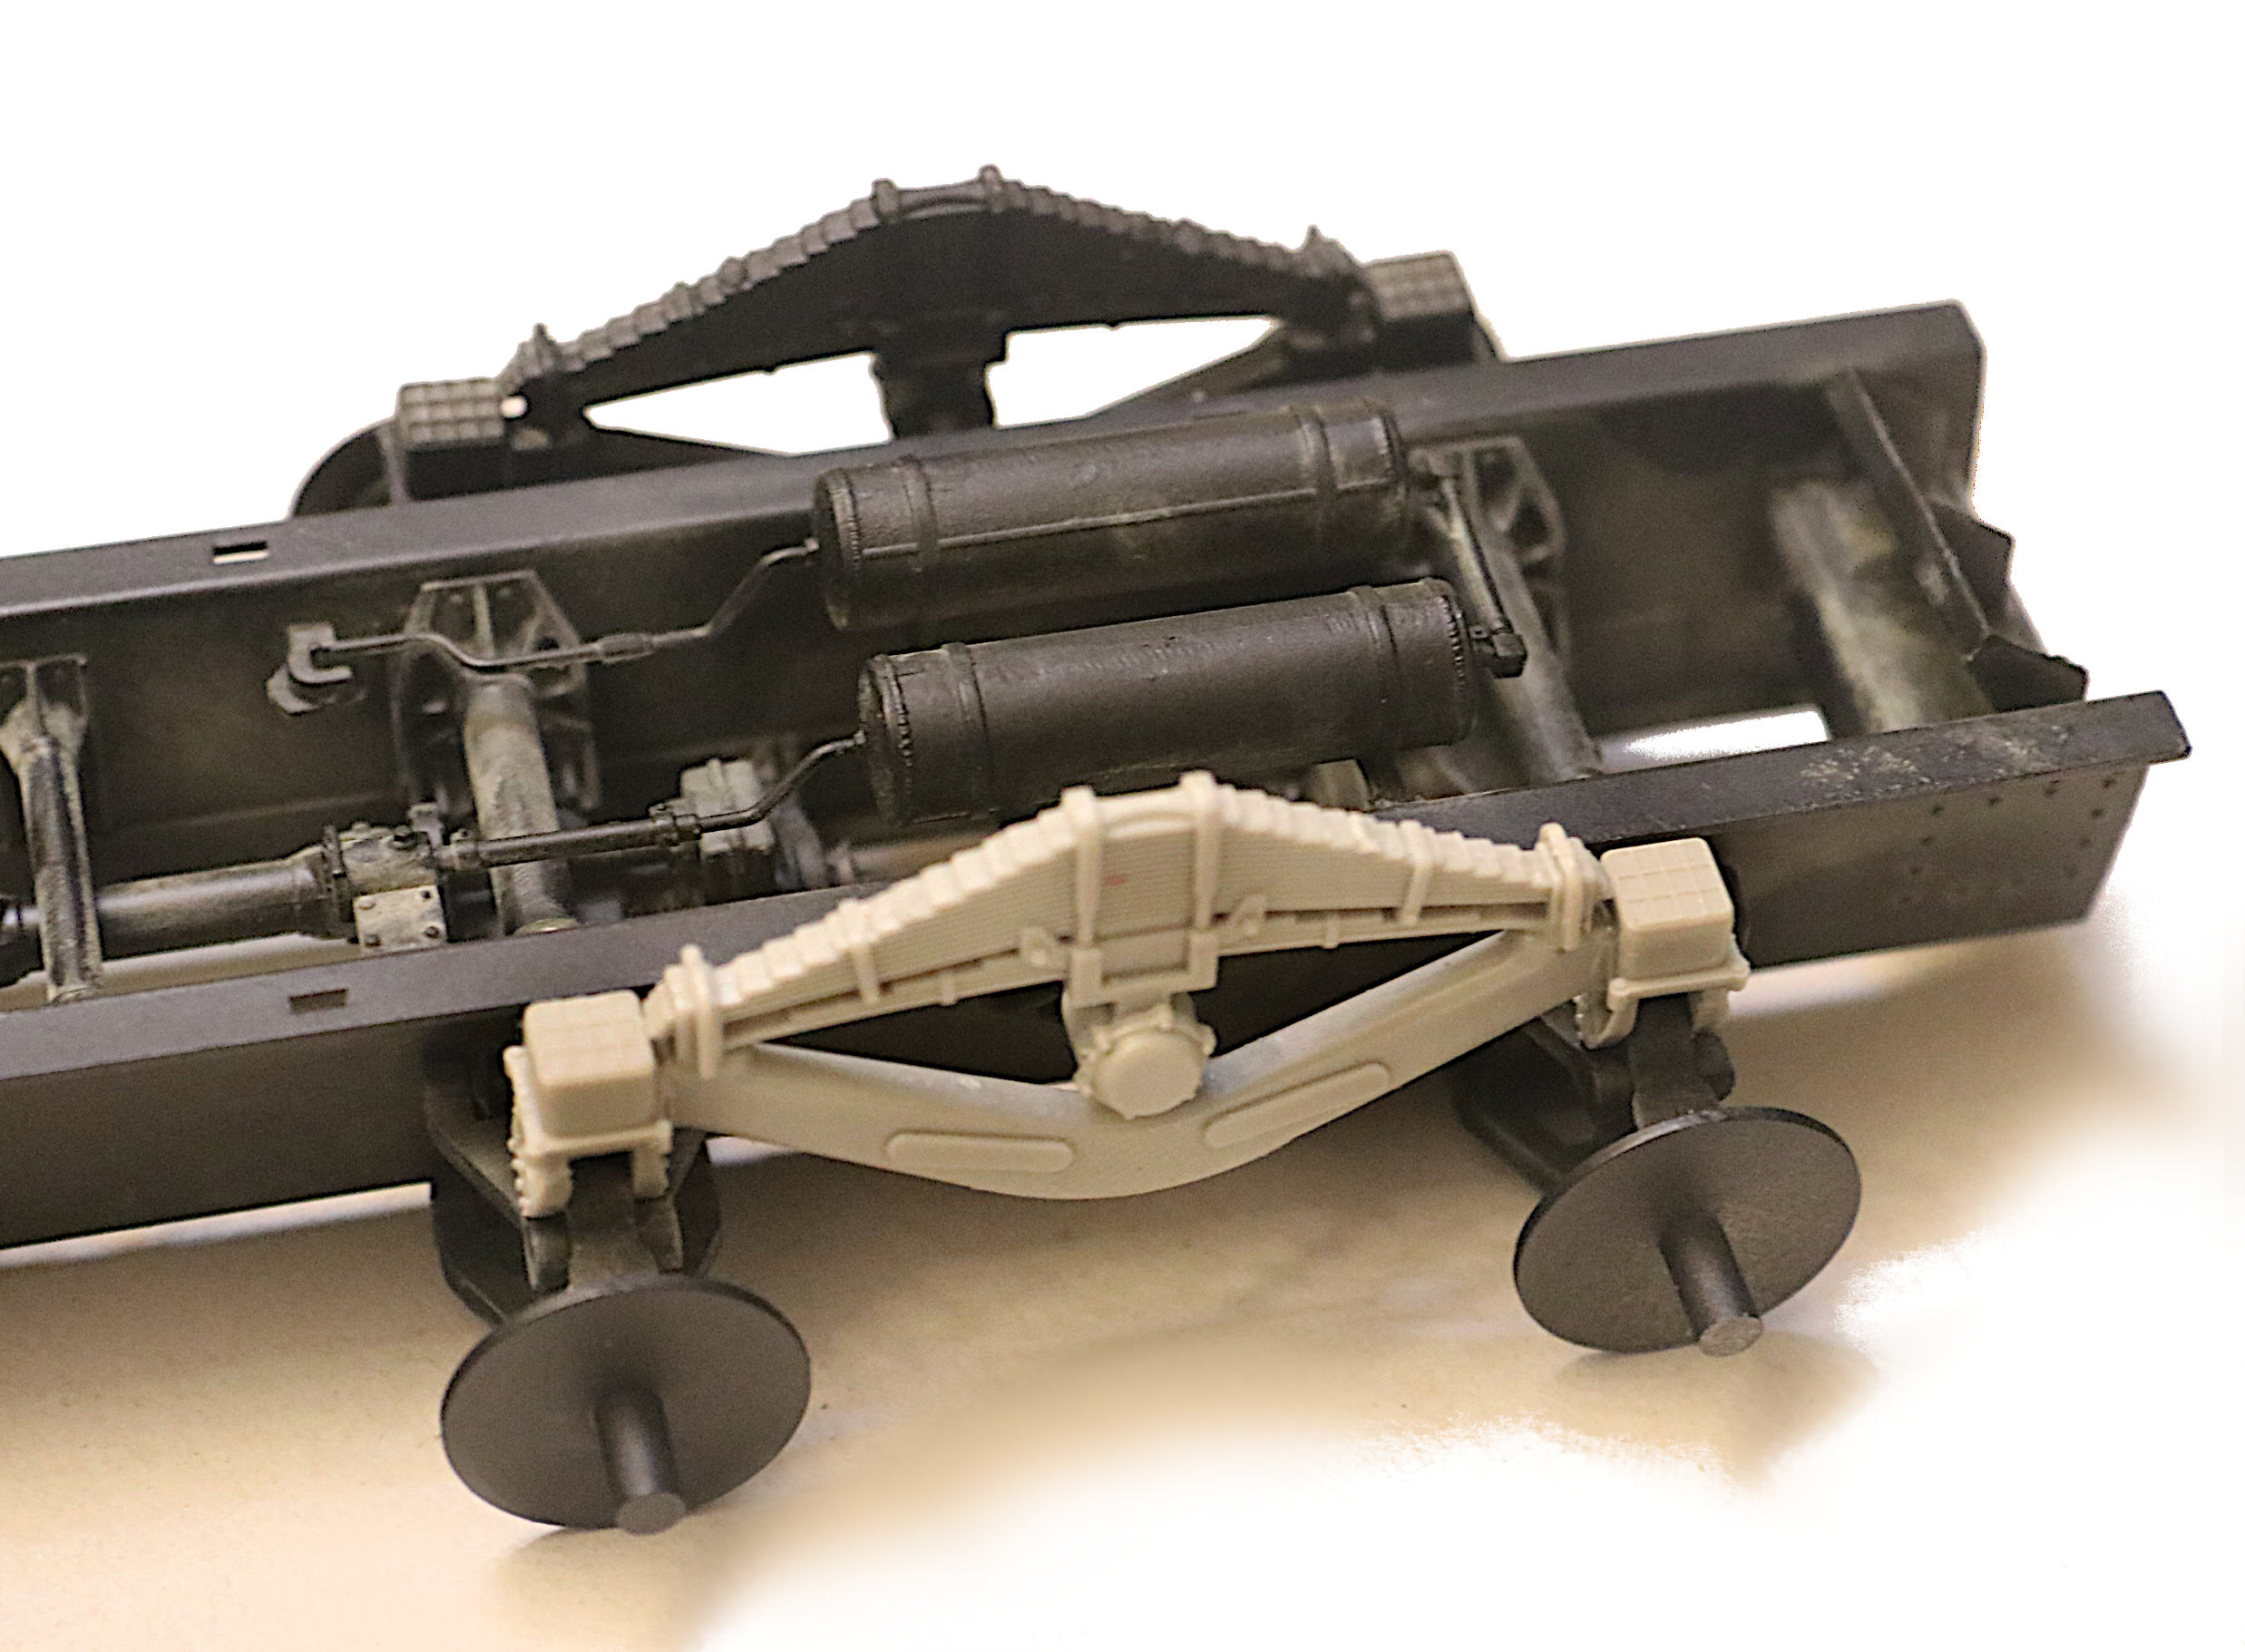
The suspension will remain “posable” until such time as you install the shock absorbers on the forward two axles (Part #B36 x 4) and the springs on the rear two axles. After that, if you do nothing else your vehicle will be in a “flat ground,” four-square (in this case eight square) standing, balanced (hopefully) level position with all eight wheels touching on a flat surface. (Model judges will, very correctly, can your model if you have even a single wheel “floating” up off the surface.)
On my 537 I chose to show the vehicle in a slightly more challenging orientation: (As if on an obstacle/training course.)
I set the suspension of each axle at various heights. I then built up cribbing to support the model wheels and later built the ground work up to match it.
My favorite groundwork material…
You sure put an awful lot of research into your modelling, great pictures and video’s! Those Russians make beautiful monsters…
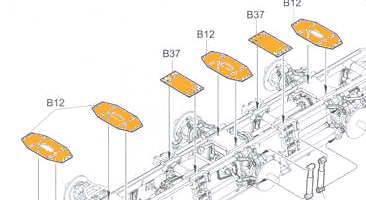
No really - use every caution when putting together the four front steering hubs. There are many left and right hand only parts and they are easy to get confused. Definitely don’t cut parts for more than one hub off the sprue at the same time.
Check part numbers three times (or more) and then glue only once!
p.s. And in the main drawing (step 6, page 9) they will show the complete chassis assembly upside down but then in the exploded detail drawings they will show the same parts right side up!
Don’t think that has not been the reason for some major confusion!
F.Y.I. - On the finished model, left and right side steering IS connected as you would expect on any car model. However, no effort is made to connect the steering between the first and second axles. This makes the steering posable but not really workable. Myself, I have no problem with that.
However in Step 7, page 10, you are told to attach part #WB 32. If you do this you will forever lock the first axle steering in the straight ahead position even if you had planned on posing your vehicle otherwise.
So be forewarned, just know you are making your final decision at this time. I chose to file off the pin that attaches the connecting rod to this steering arm so that there is no longer a connection at this point. - I can always glue it later.
When it comes time to install these underside skid plates be sure to give the mating surfaces a light sanding. There are some well hidden ejector pin marks located on them that also have some associated lite flash that could give you assembly trouble.
This just might be the ONLY flash you will ever experience on this entire kit!
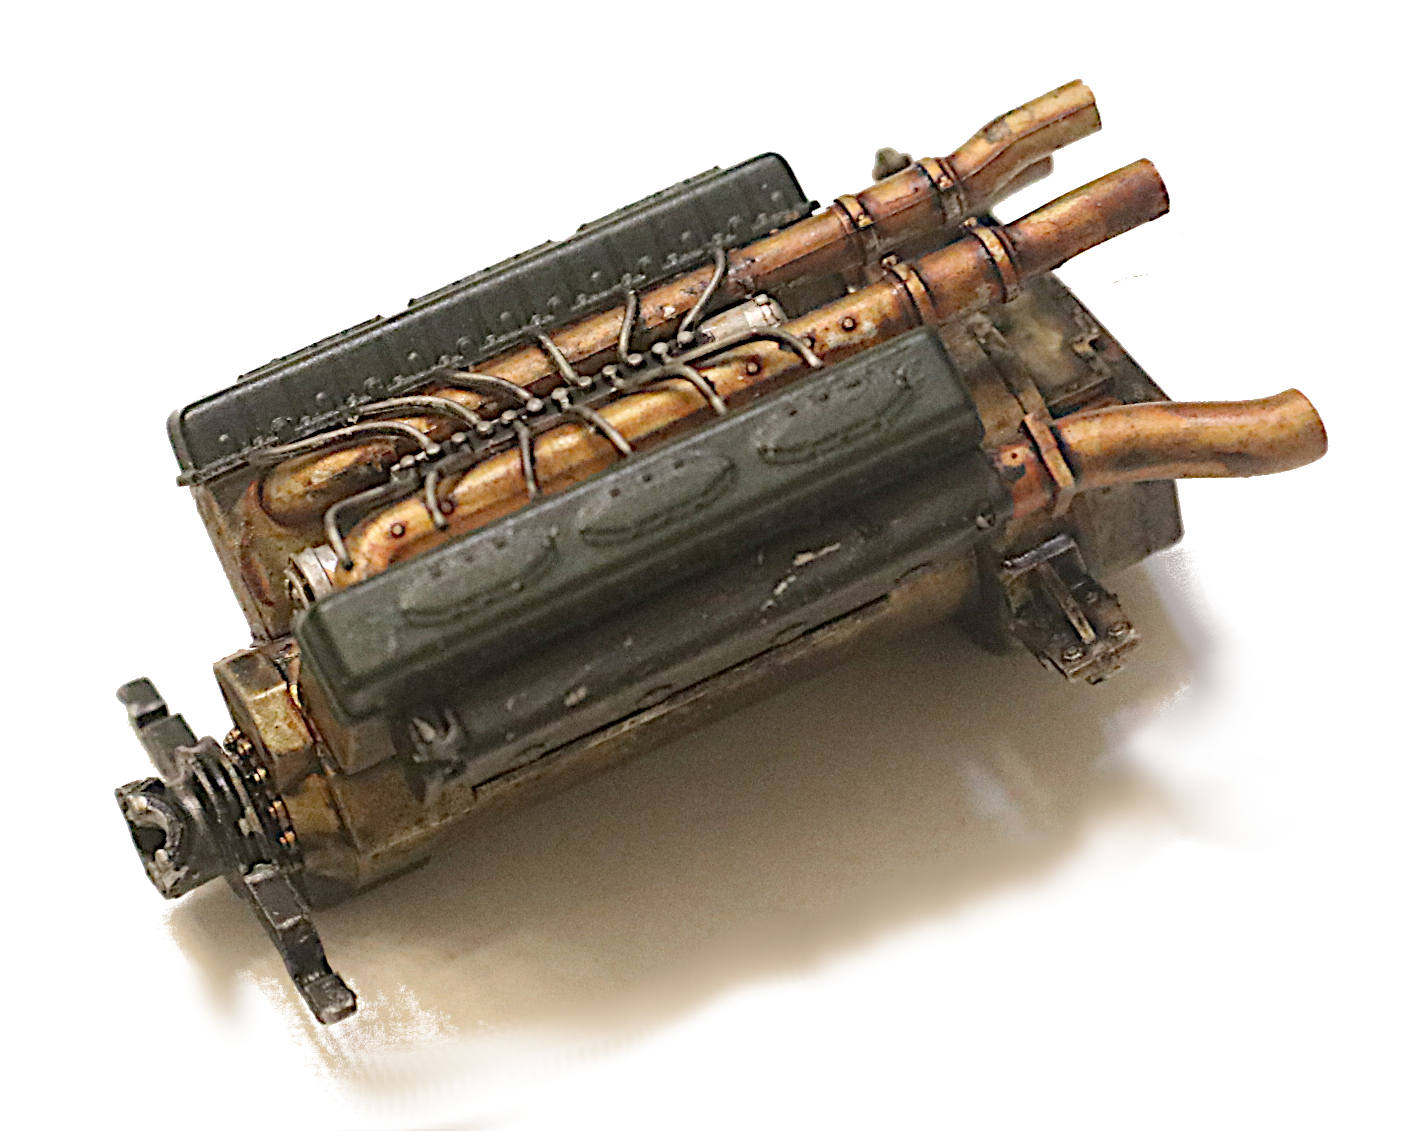
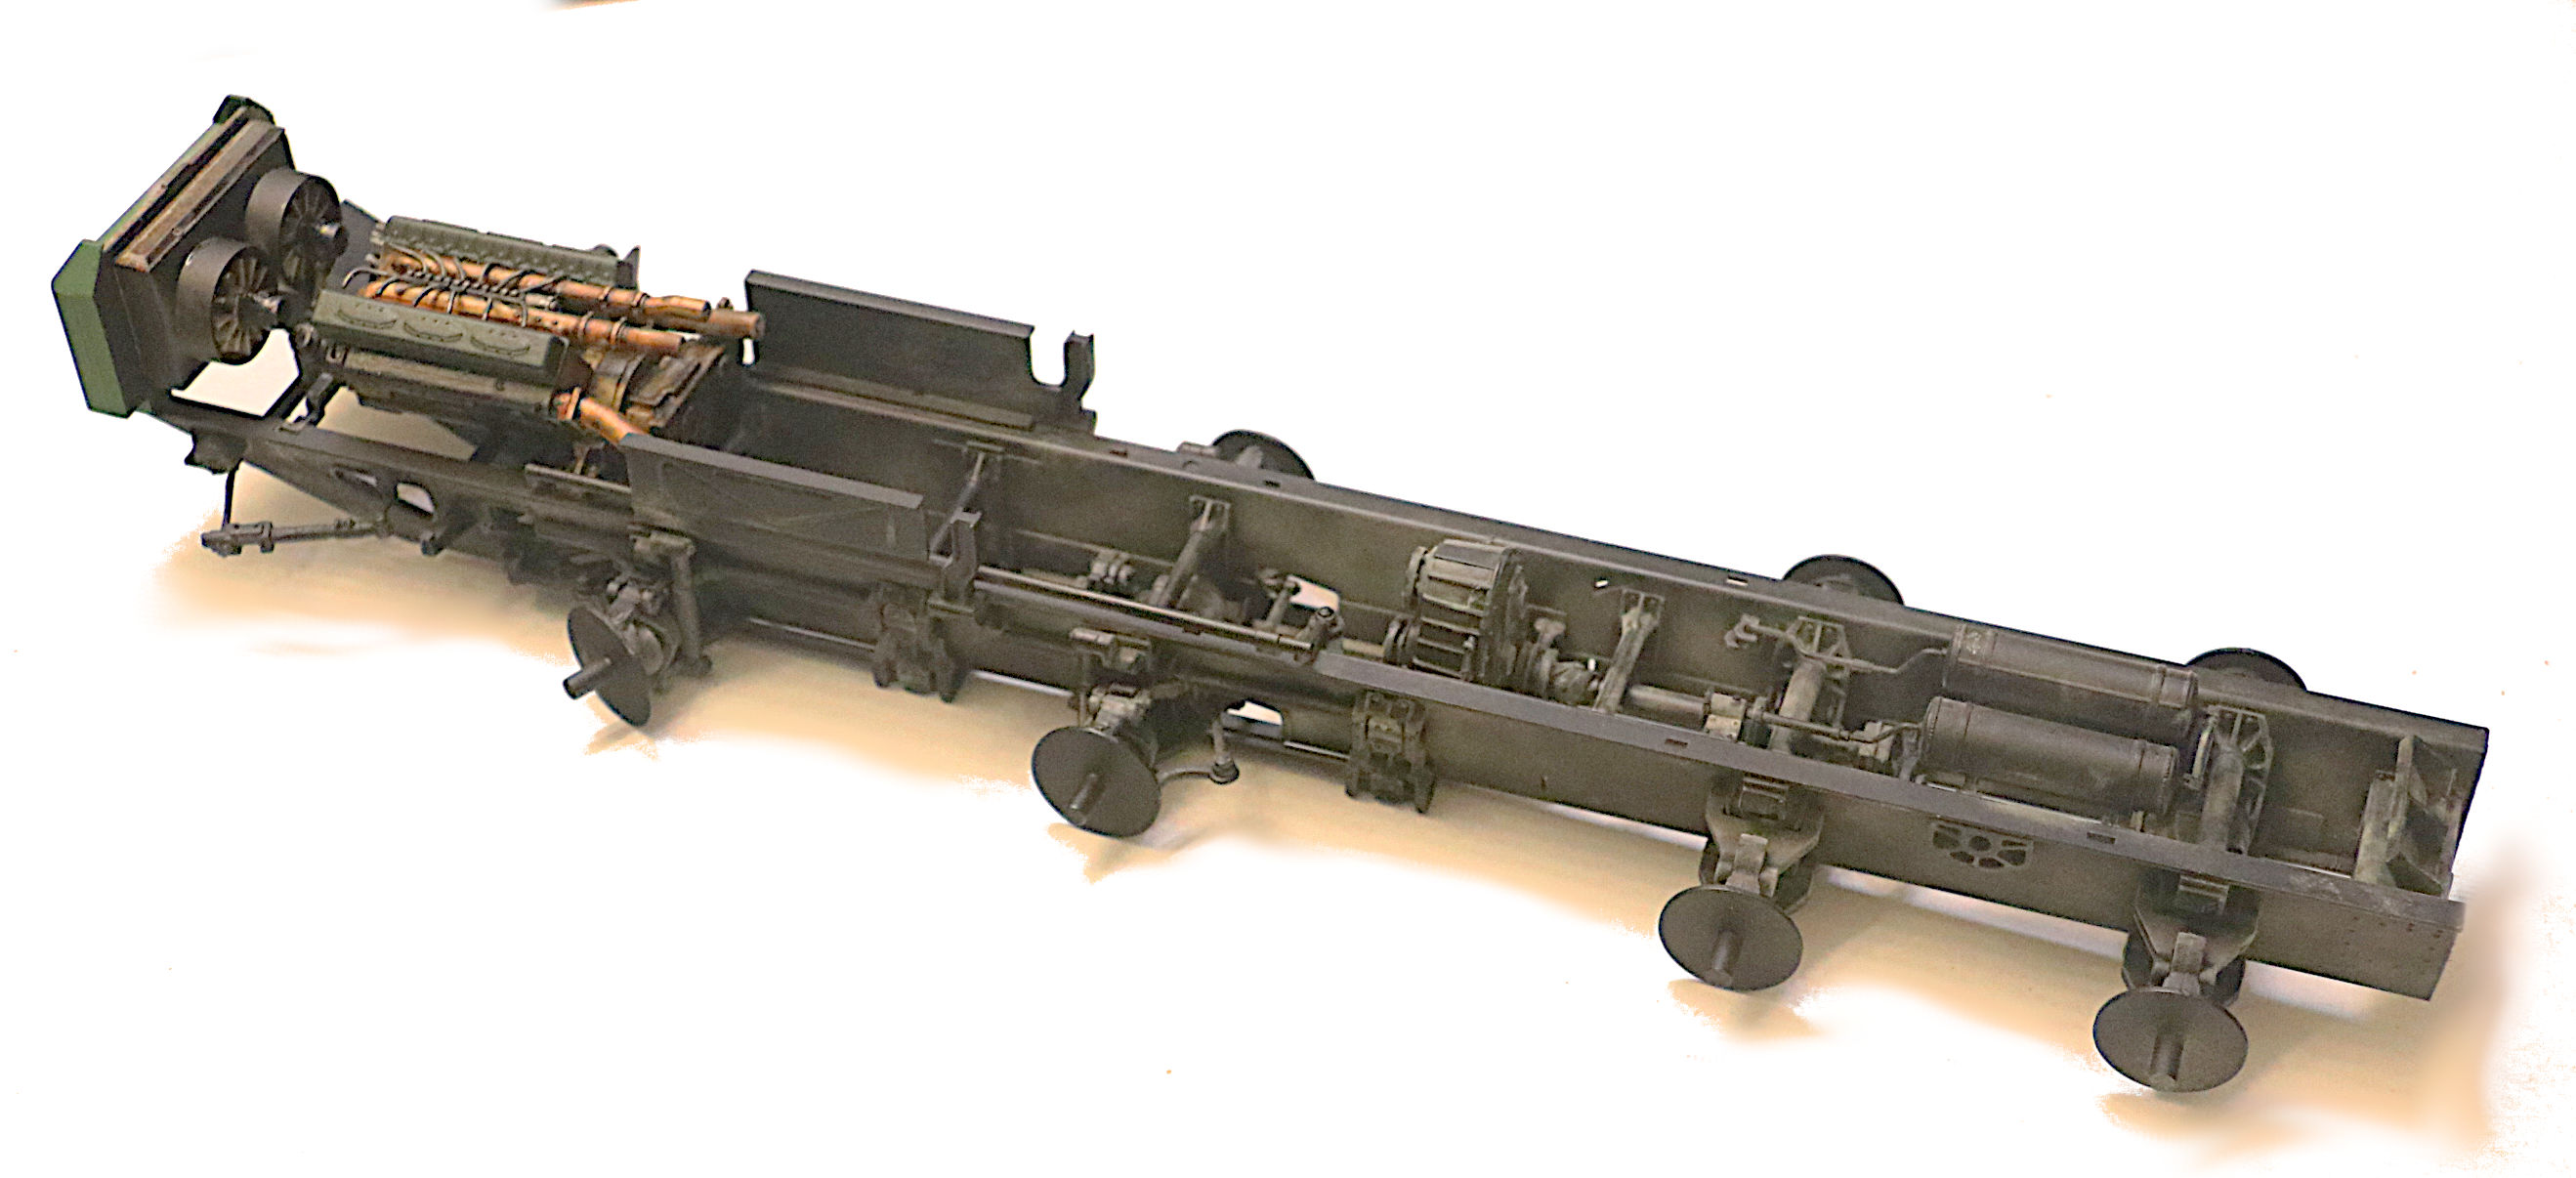
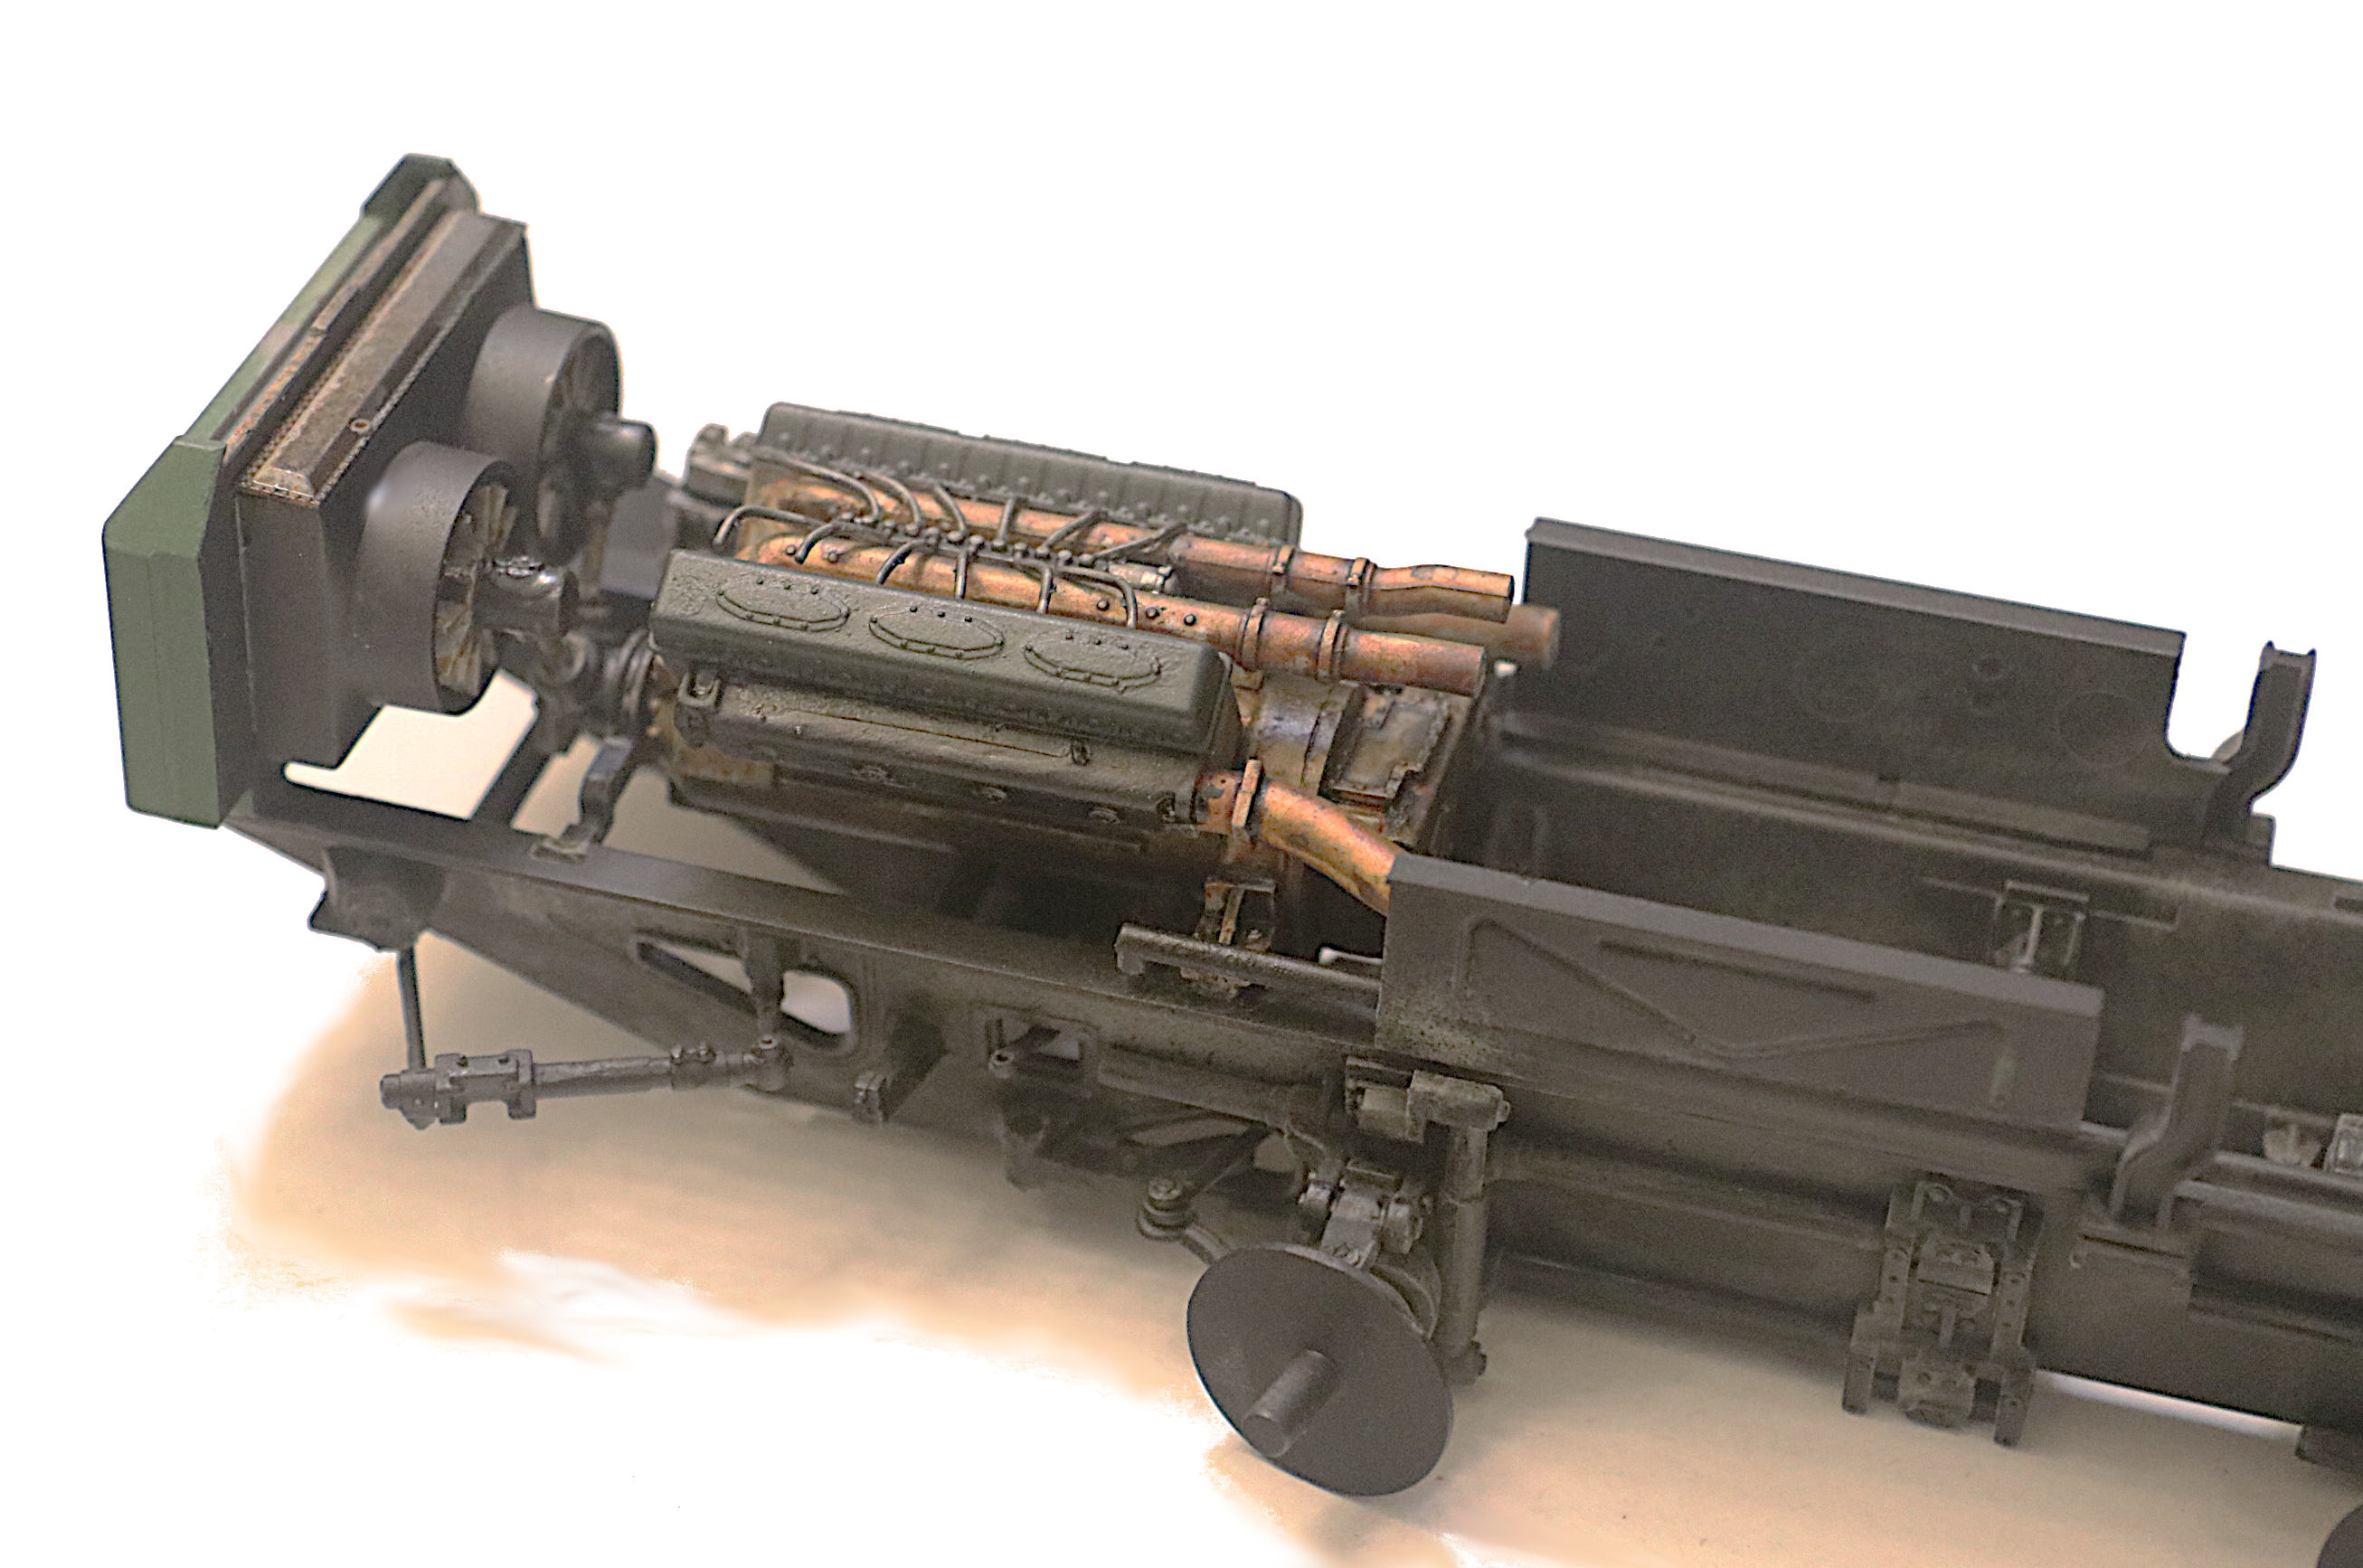
I have not forgotten about that engine. - I guess I am just so happy to even HAVE an engine after all those years of fighting with the old 537 Trumpeter kit!
Personally I think the Trumpeter engine is dang near BEAUTIFUL!
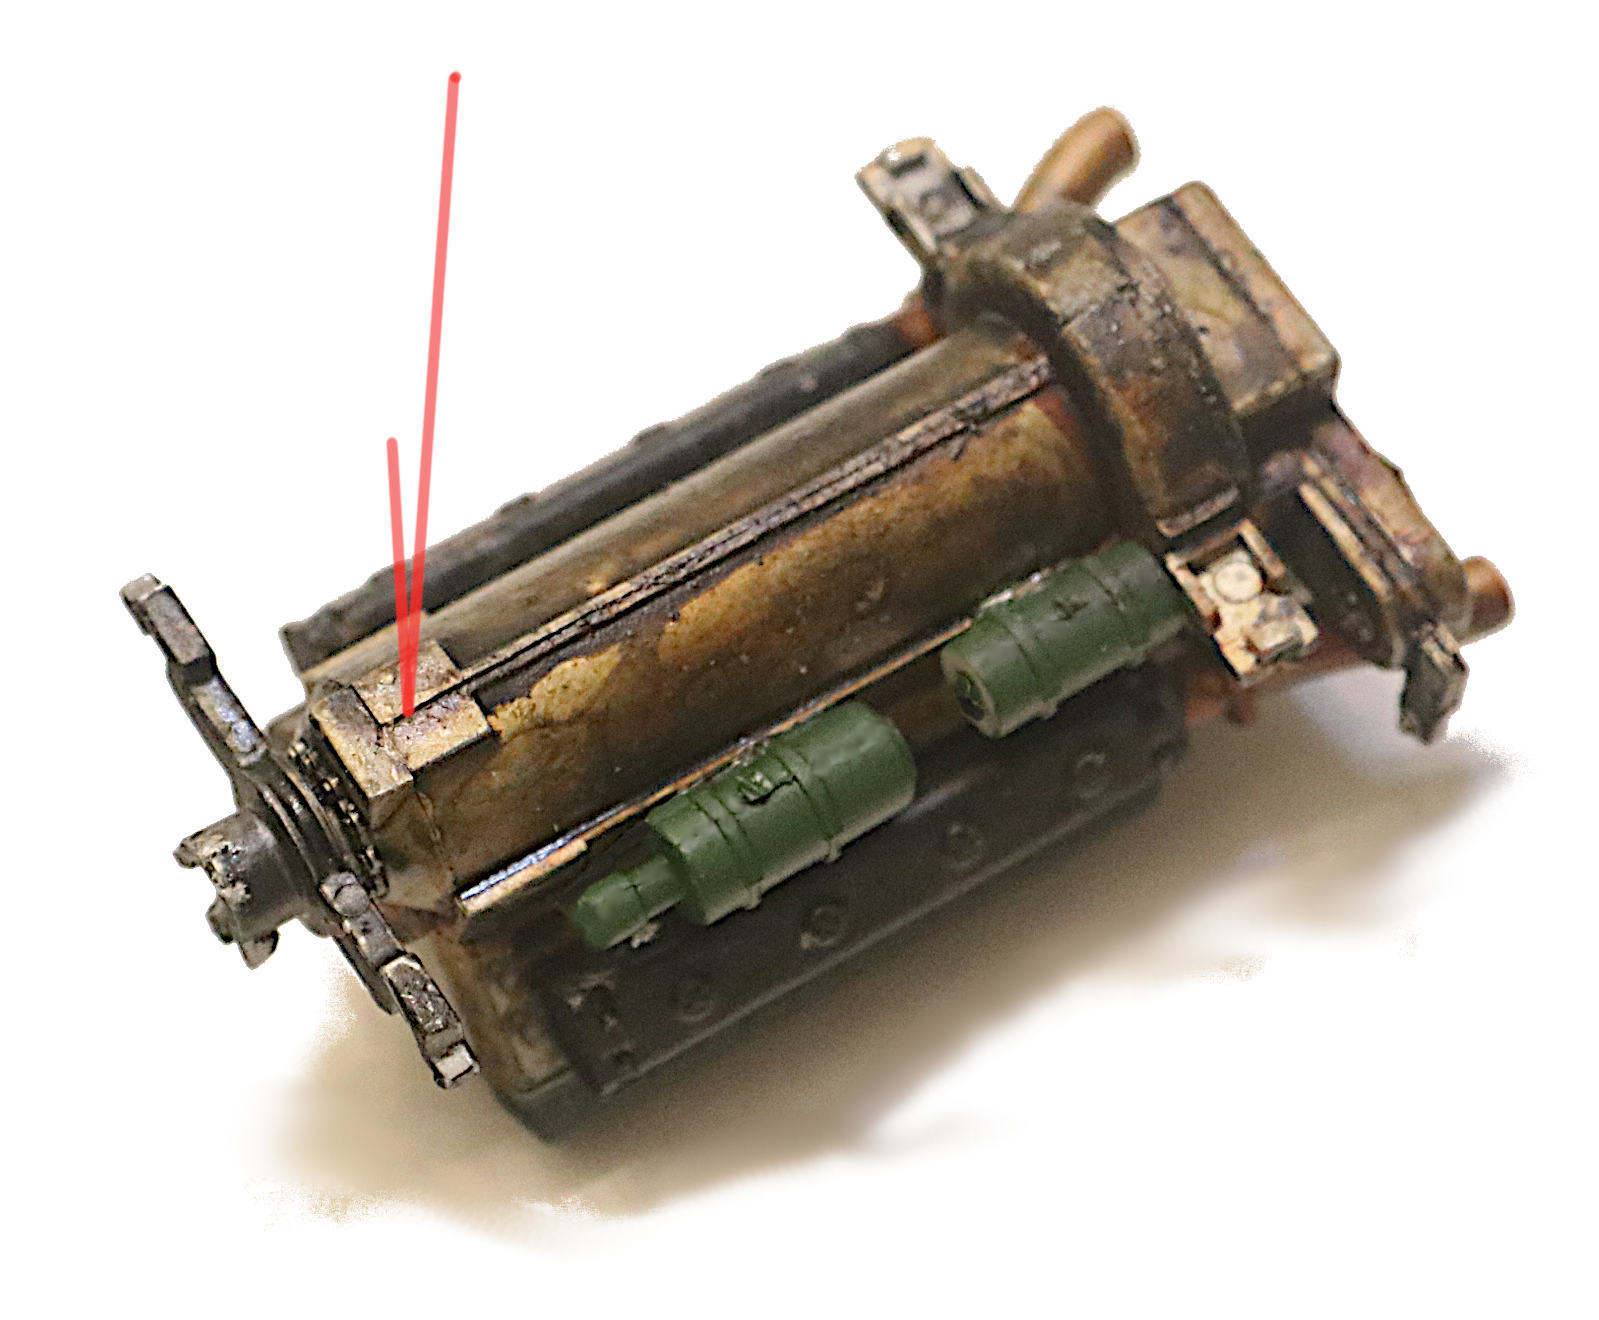
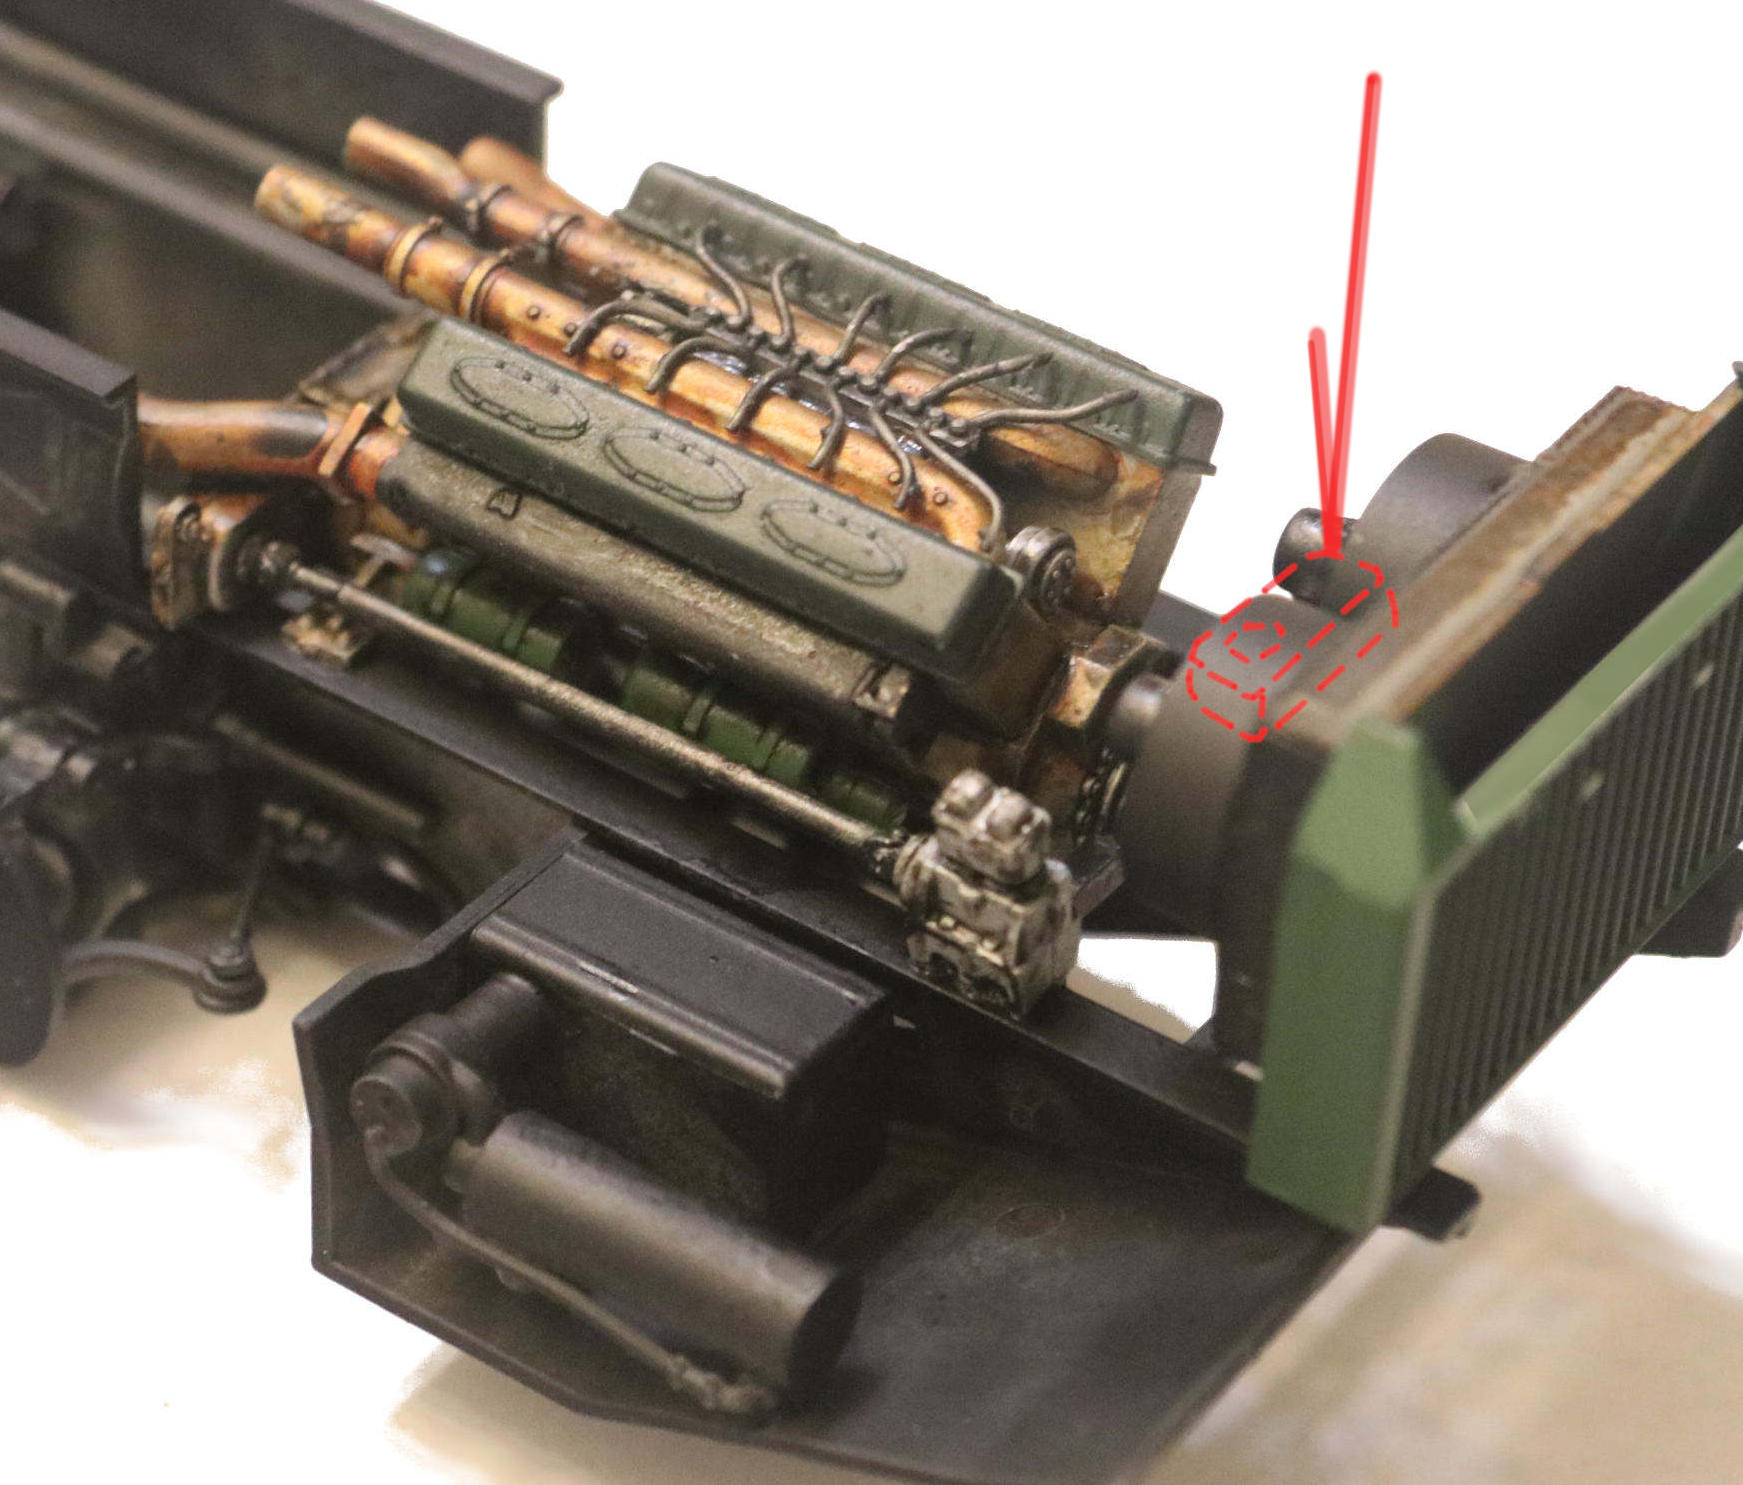
(One small criticism: there SHOULD be a turbo water pump and an oil sump located here on the bottom of the engine to keep everything nice and cool. Red Arrow.)
I am not totally sure as to the realism of my color choices here but still, I am liking the look of the engine very much: I went with overall silver for the engine block, then over washes of both Vallejo - Lite Rust and Citadel - Nuln Oil (Black) to properly dirty everything up.
Then finally Tamiya Dark British Green for the valve covers and Tamiya Luftwaffe Lite Green for some of the auxiliaries. (Rattle Can)
p.s. Just about time to paint the entire chassis black before installing that engine!
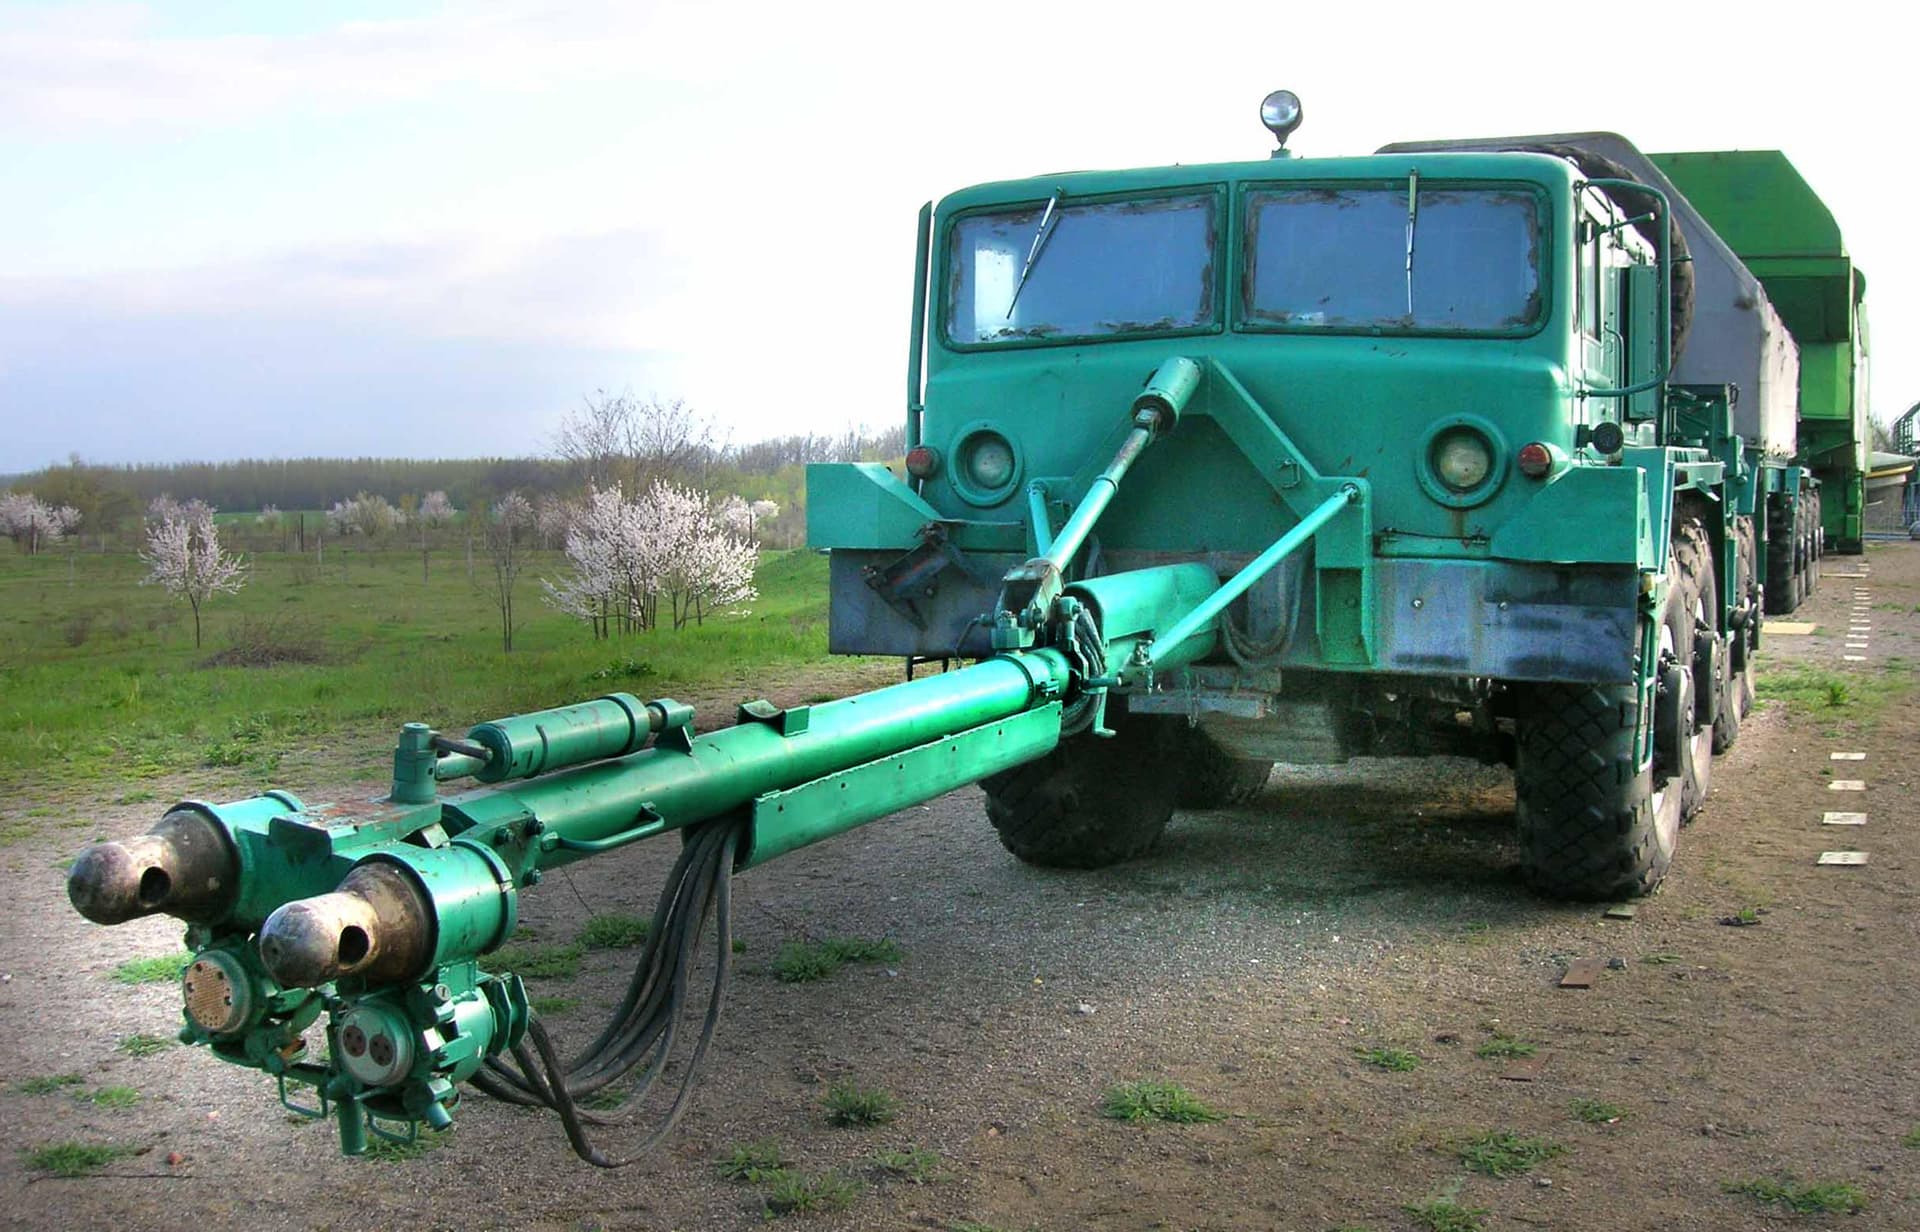
That long piece seen at the bottom of the photo above; that is a etched metal brake band off the Tamiya 20 ton, Gar-Wood winch that comes with the Dragon Wagon model kit. Earlier, I had bought a partly built DW model (on the cheap) in sad shape that the owner had gotten tired of working on. Bought it just for the many cool parts to be used elsewhere at some future date.
I will just drop this here as a point of reference, and a suggestion, for those demanding an even higher level of detail for this model OR the perfect starting place to provide an engine for those many MAZ-537 models out there that are missing an engine entirely (The set also includes those 4 big radiators as well!)
To use this engine, you just reverse the intake manifolds to face forward. (They are symmetrical and reversible on the real engine too.) Then mount those canister air cleaners/filters on the forward cab wall (for the 537) and you are well on your way! (All those tranny parts will go in your spares bin for a future build.)
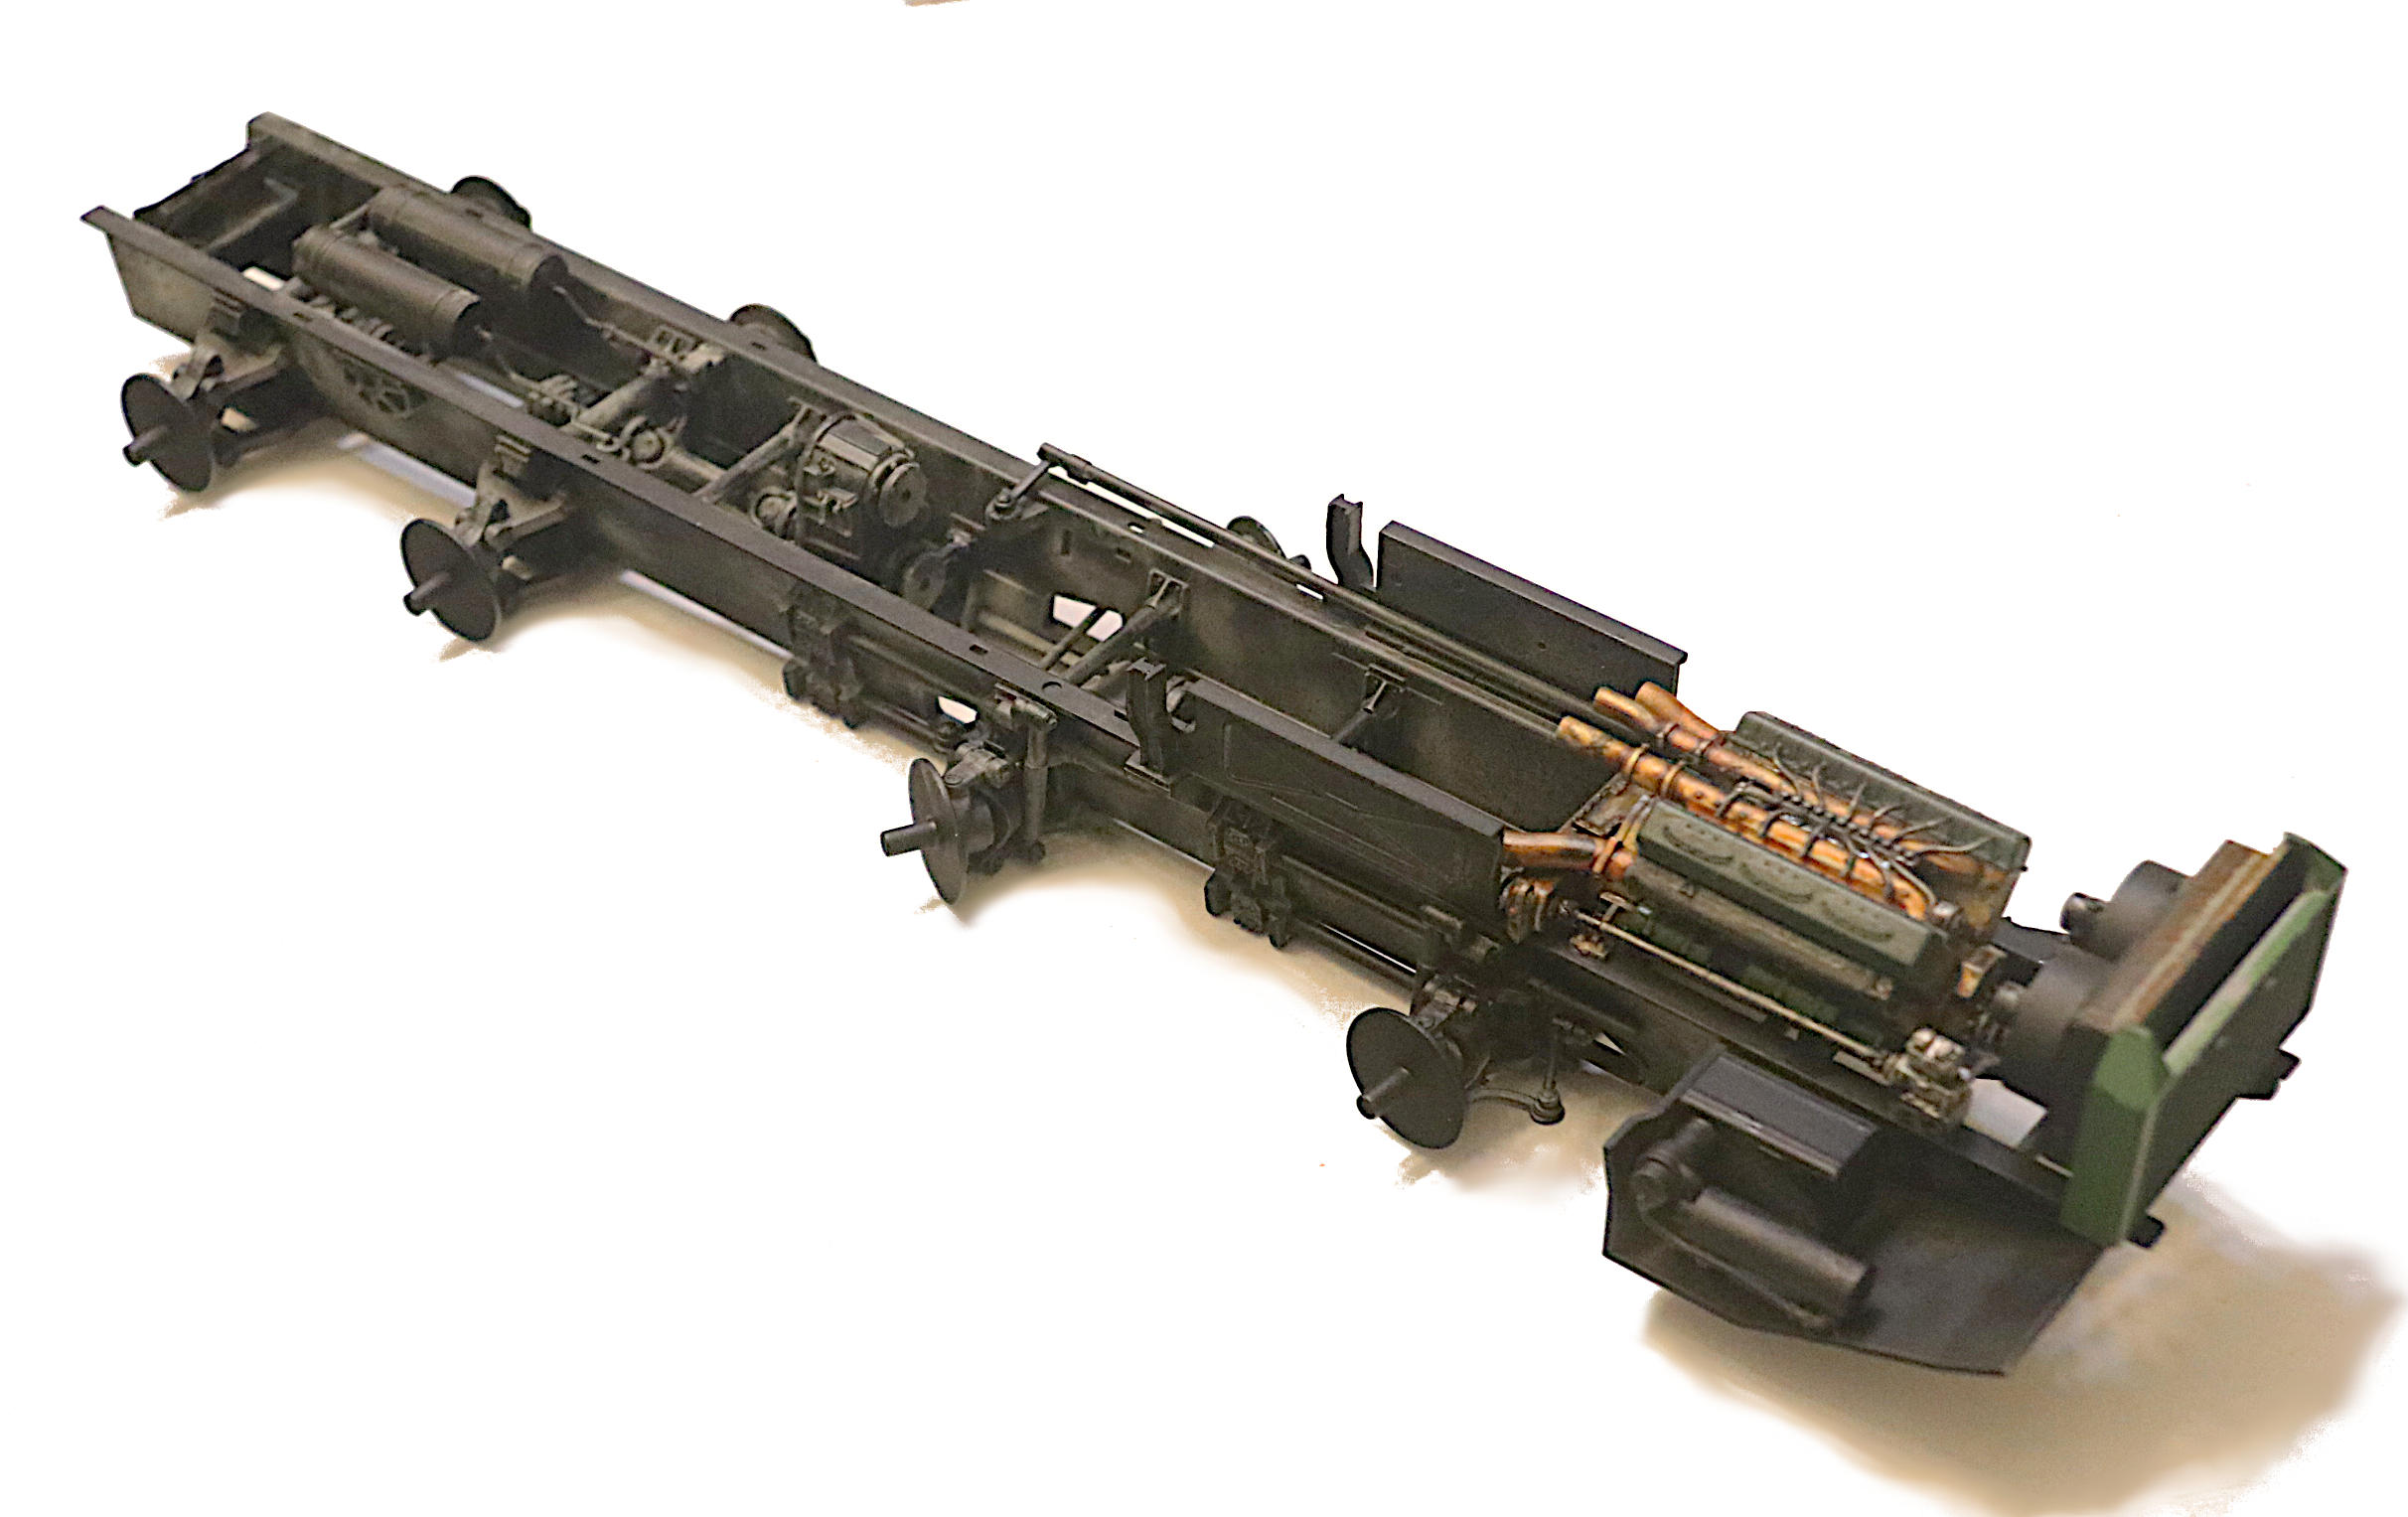
Took the plunge and went for the full Russian all black chassis. But then I hedged my bet by laying on some lite (so far) pastel “dust” to still bring out all that beautiful detail.
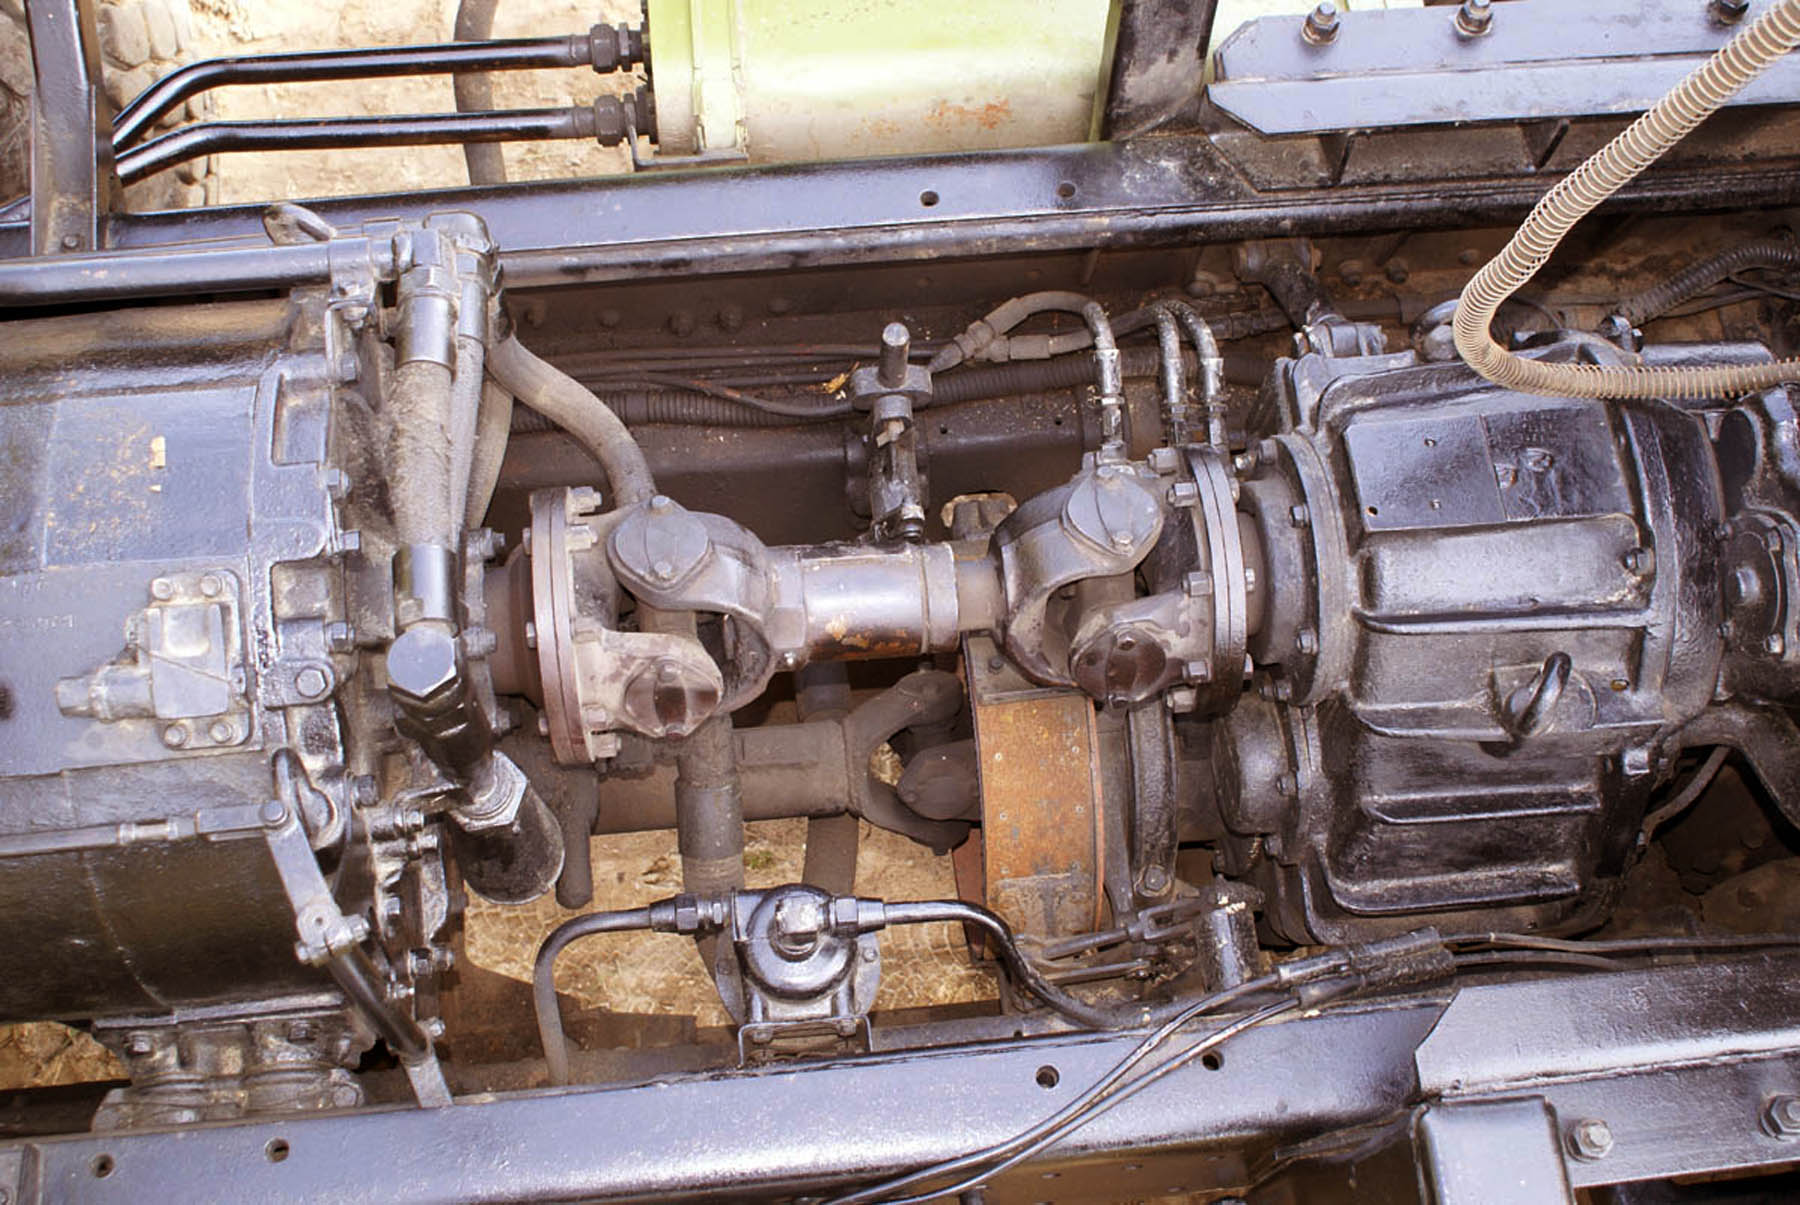
p.s. That little silver item located between the engine and the radiator on the right frame rail is a two cylinder air compressor used to supply air to the braking system.
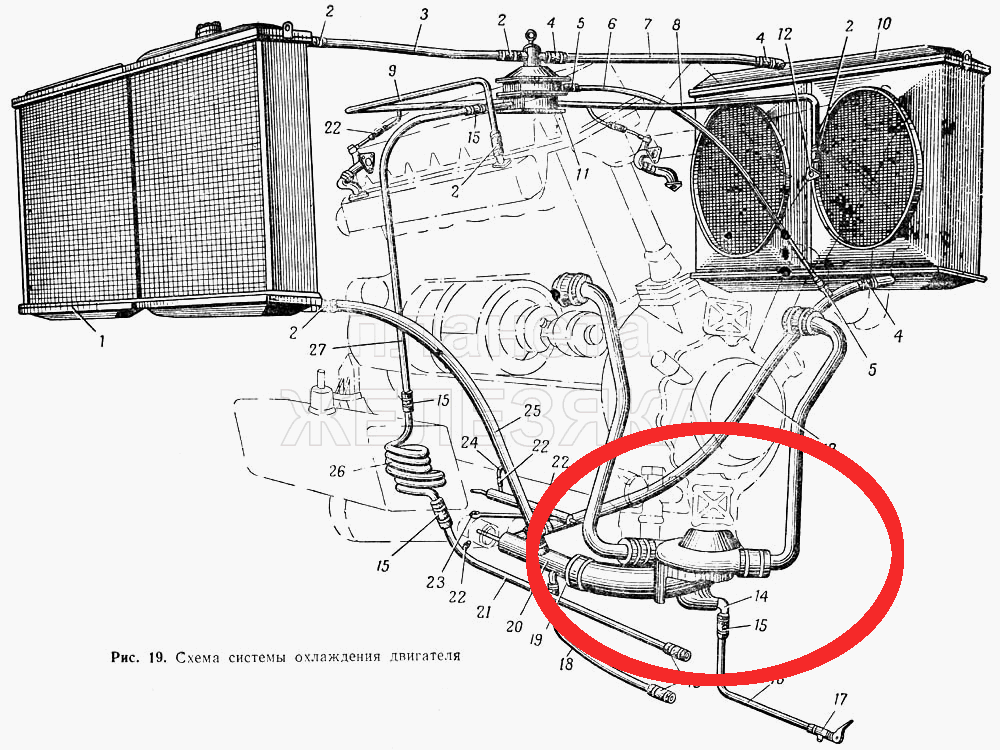
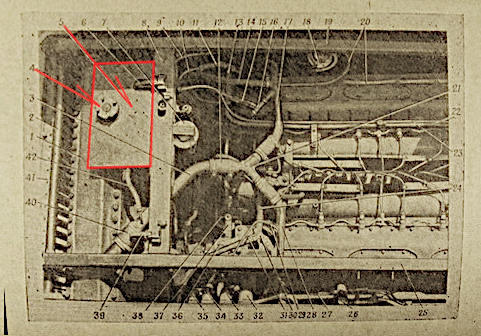
Above image is from the Russian Tech Manual - vehicle front is to the left.
Realistic looking “dust” turns any rich matte black into a much more viewable dark gray so the detail does not get lost in all that darkness. I use oil pastels to make this affect and the “tooth” of the matte paint holds on to the “dust” quite nicely.
(Old photographer’s trick that comes from years of photographing jet black circuit breakers in medium gray metal boxes with shinny silver bus bars. – That is one heck of an exposure range to try and accommodate back then using what were at the time modern films / no digital! – That’s twenty years spent in the marketing department working in the electrical industry for Square D Company/Groupe Schneider.)
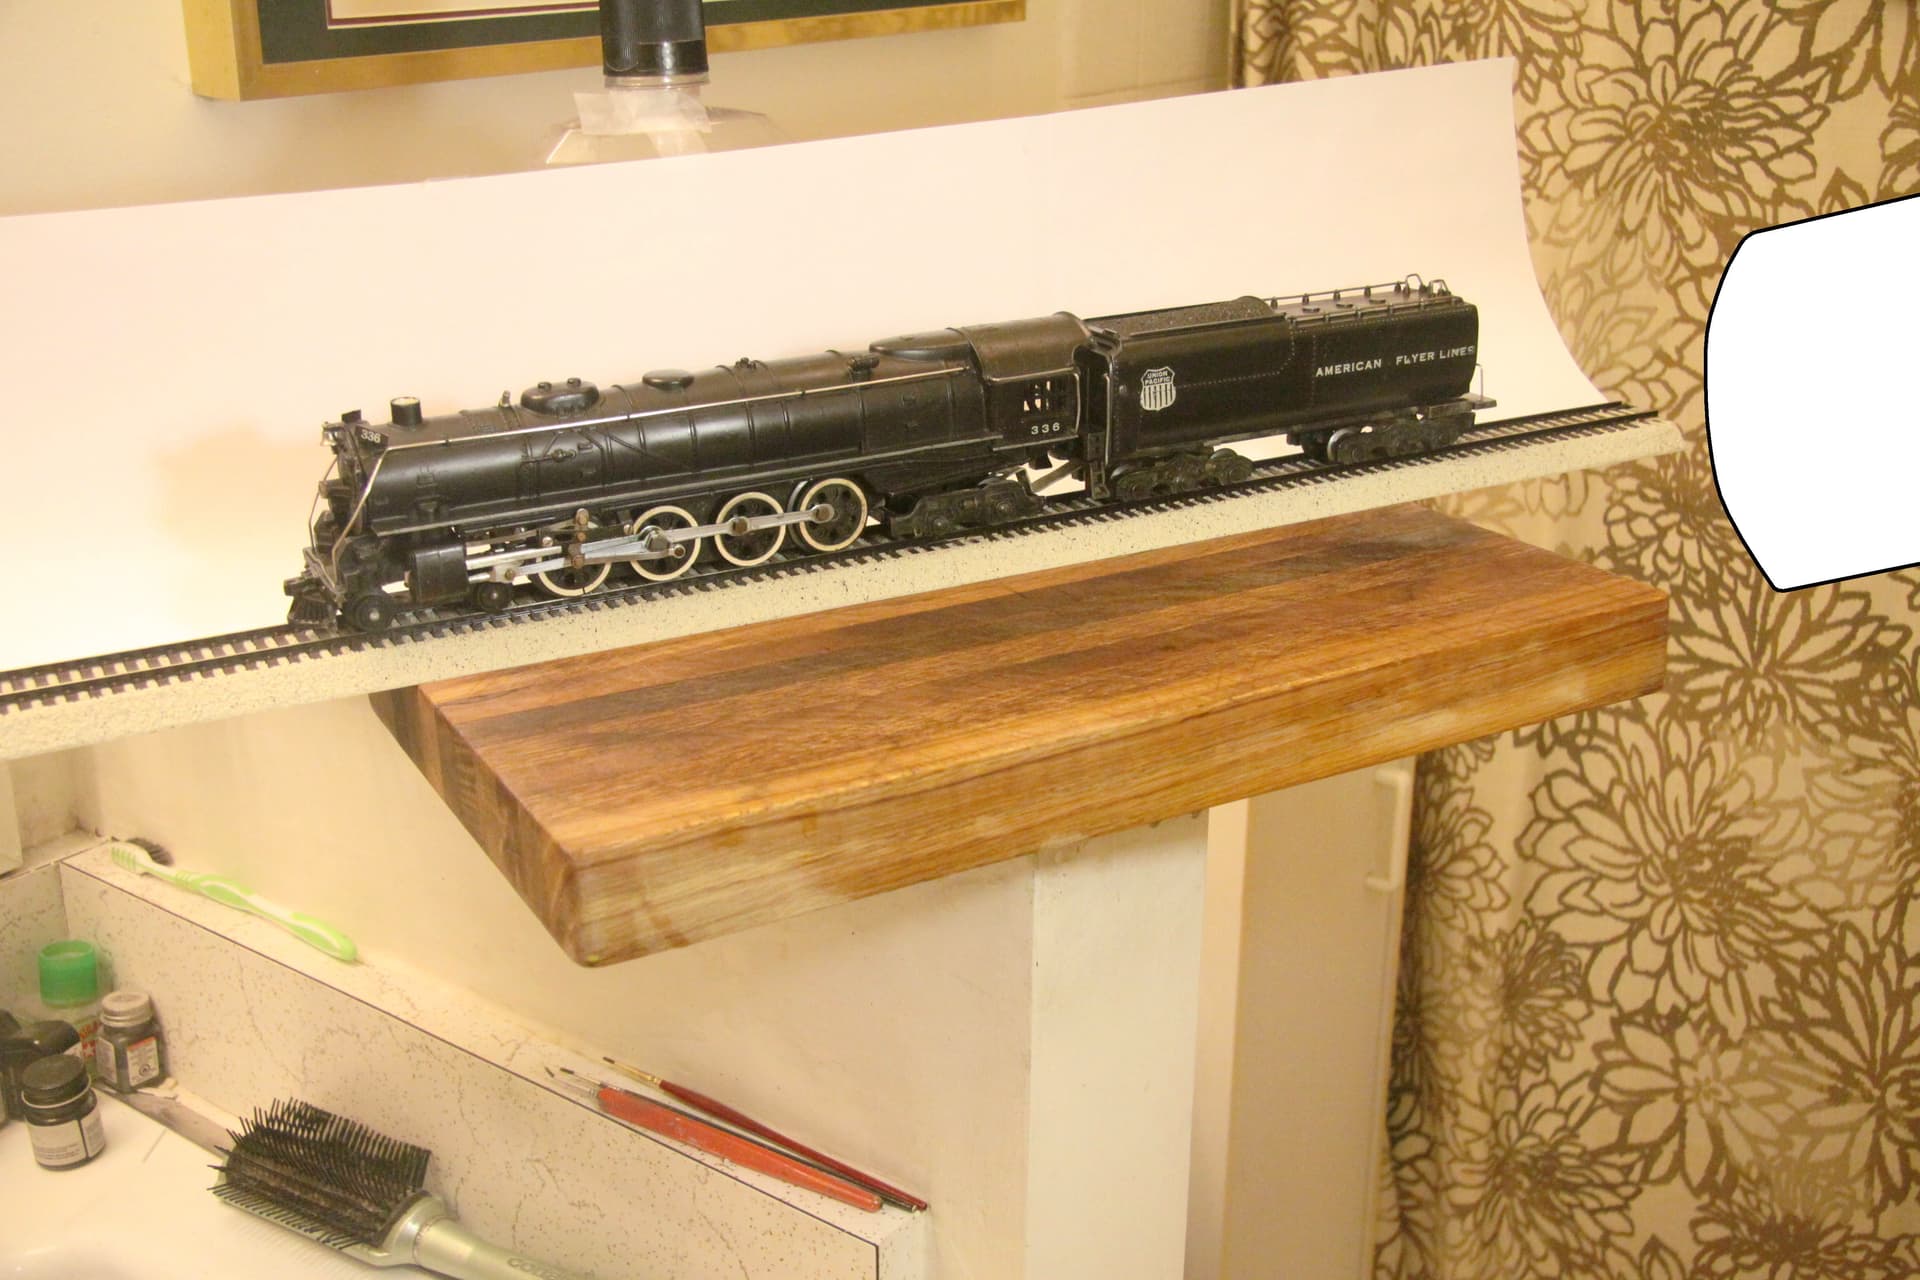
As a footnote: this is no specialized photo studio here or fancy lightbox. These photos were all taken in my bathroom on a white box sitting over the sink with nothing more than the lights from the make up mirror for illumination and occasionally a hand held desk lamp. Also this was all done using only a high end CONSUMER grade (not professional grade) but still a fully adjustable digital camera.
My little bathroom “photo studio” with a handheld desk lamp coming in from the right.
Typing paper for a background, held up by a bottle of mouthwash and the kitchen cutting board for a stage. Sink to the left. Shower curtain to the right. The entire small room is painted white so the whole thing becomes my “soft light box”. Six 60W LED make up lights (a mix of daylight and warm white) are mounted high up on the wall to the left in this photo.
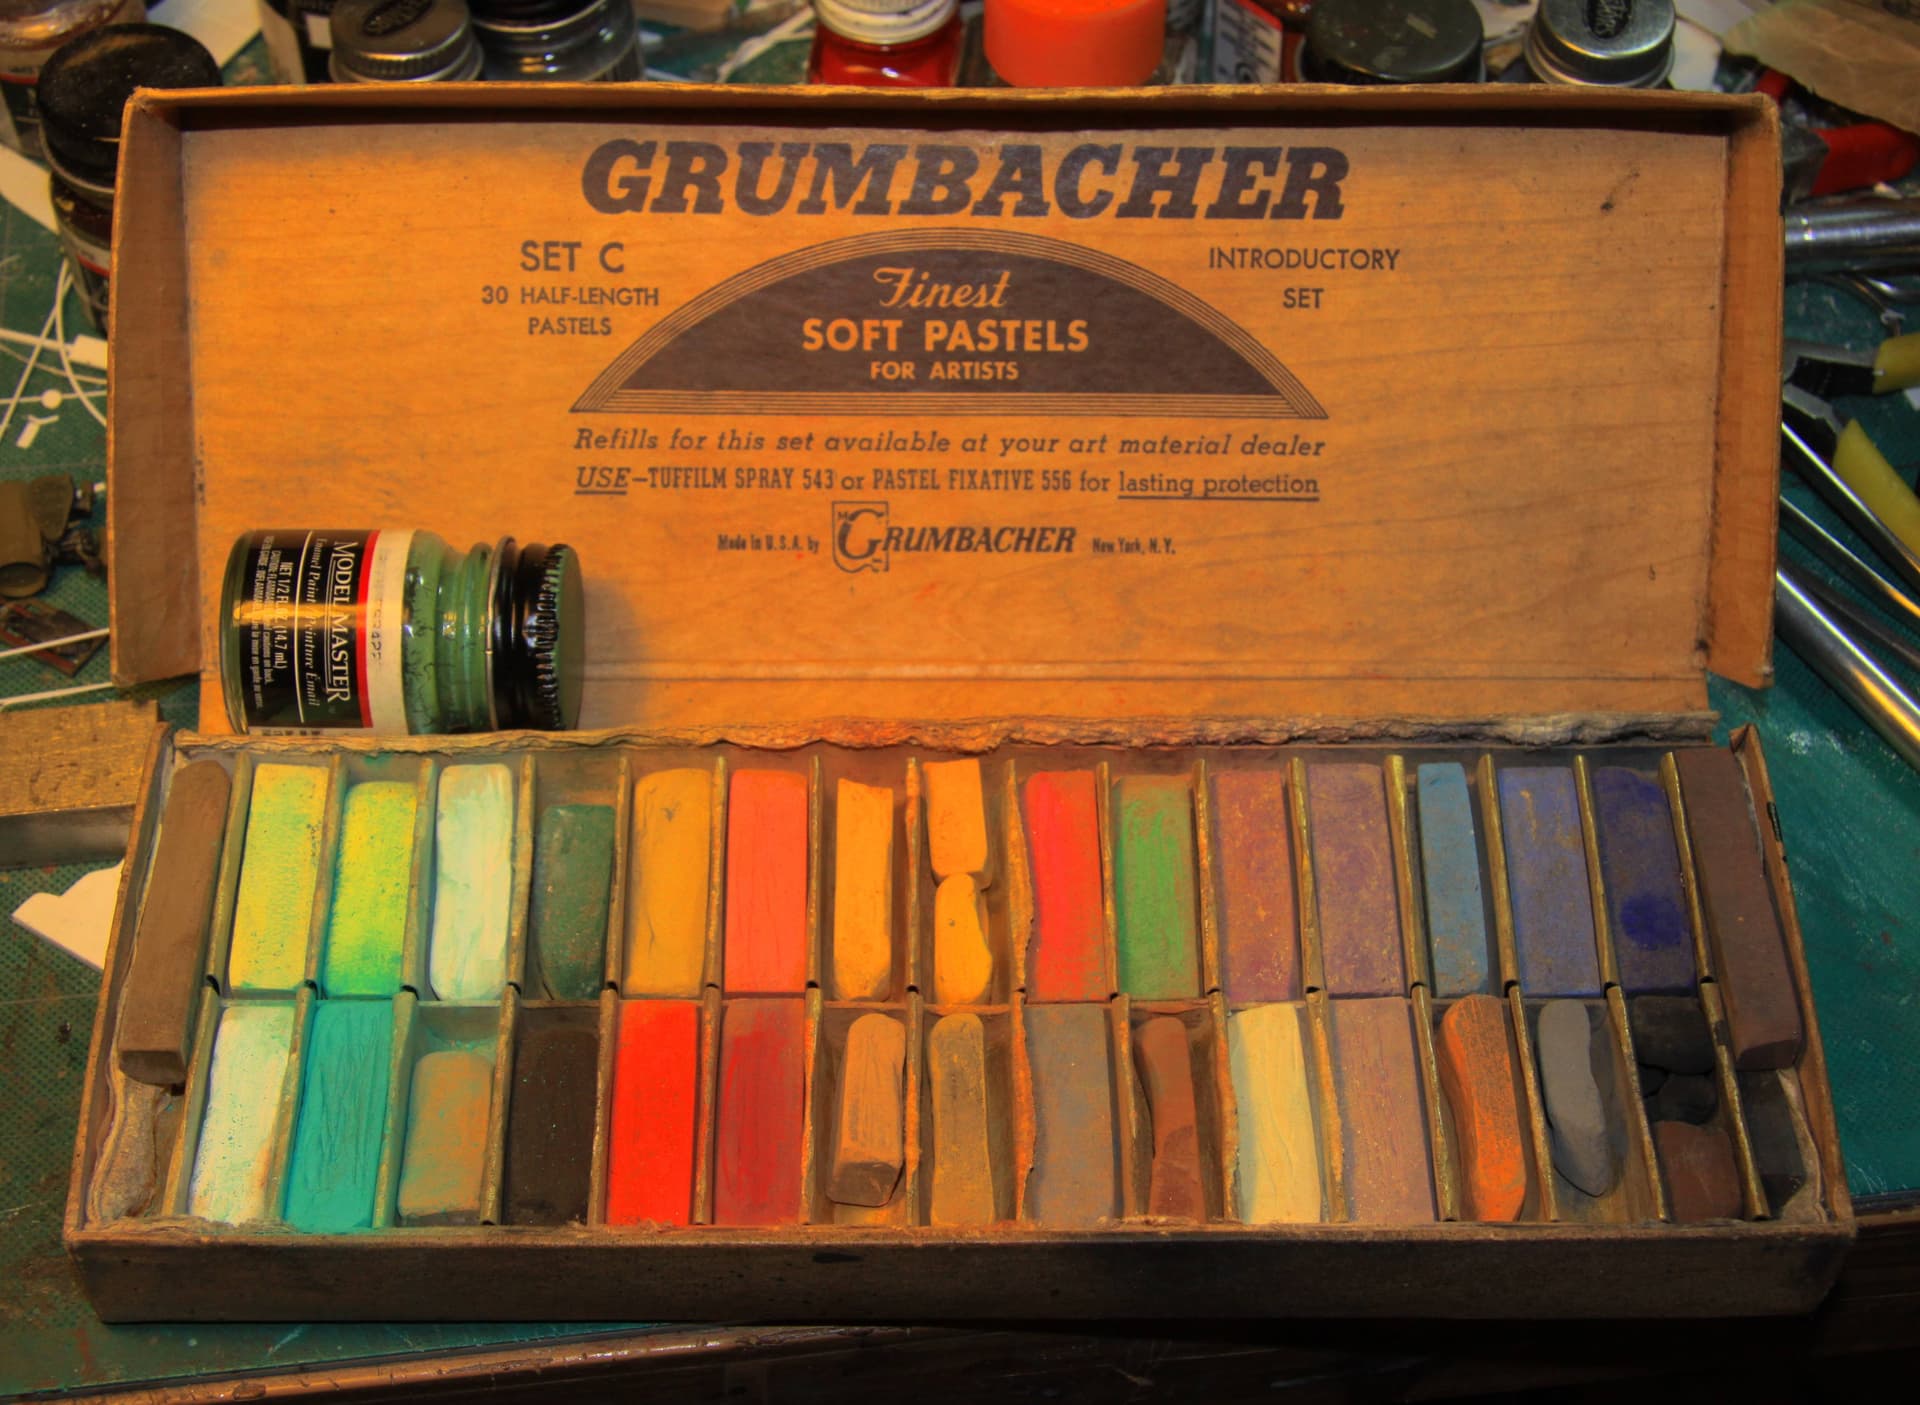
My set of soft oil pastels, used just for weathering, purchased some 35+ years ago and still going strong. (Exact same set still available right now on eBay.)
No comments here except to just follow the instructions . . . . that is unless you were planning on posing your model on uneven ground. Which in that case you will have to do some slight modifications to the rear 2 axles just as you would have already done for the front two.