Richard,
Great job on those brake drums. You’re getting to be quite the MFH master builder for sure.
joel
Richard,
Great job on those brake drums. You’re getting to be quite the MFH master builder for sure.
joel
Thanks again Joel .
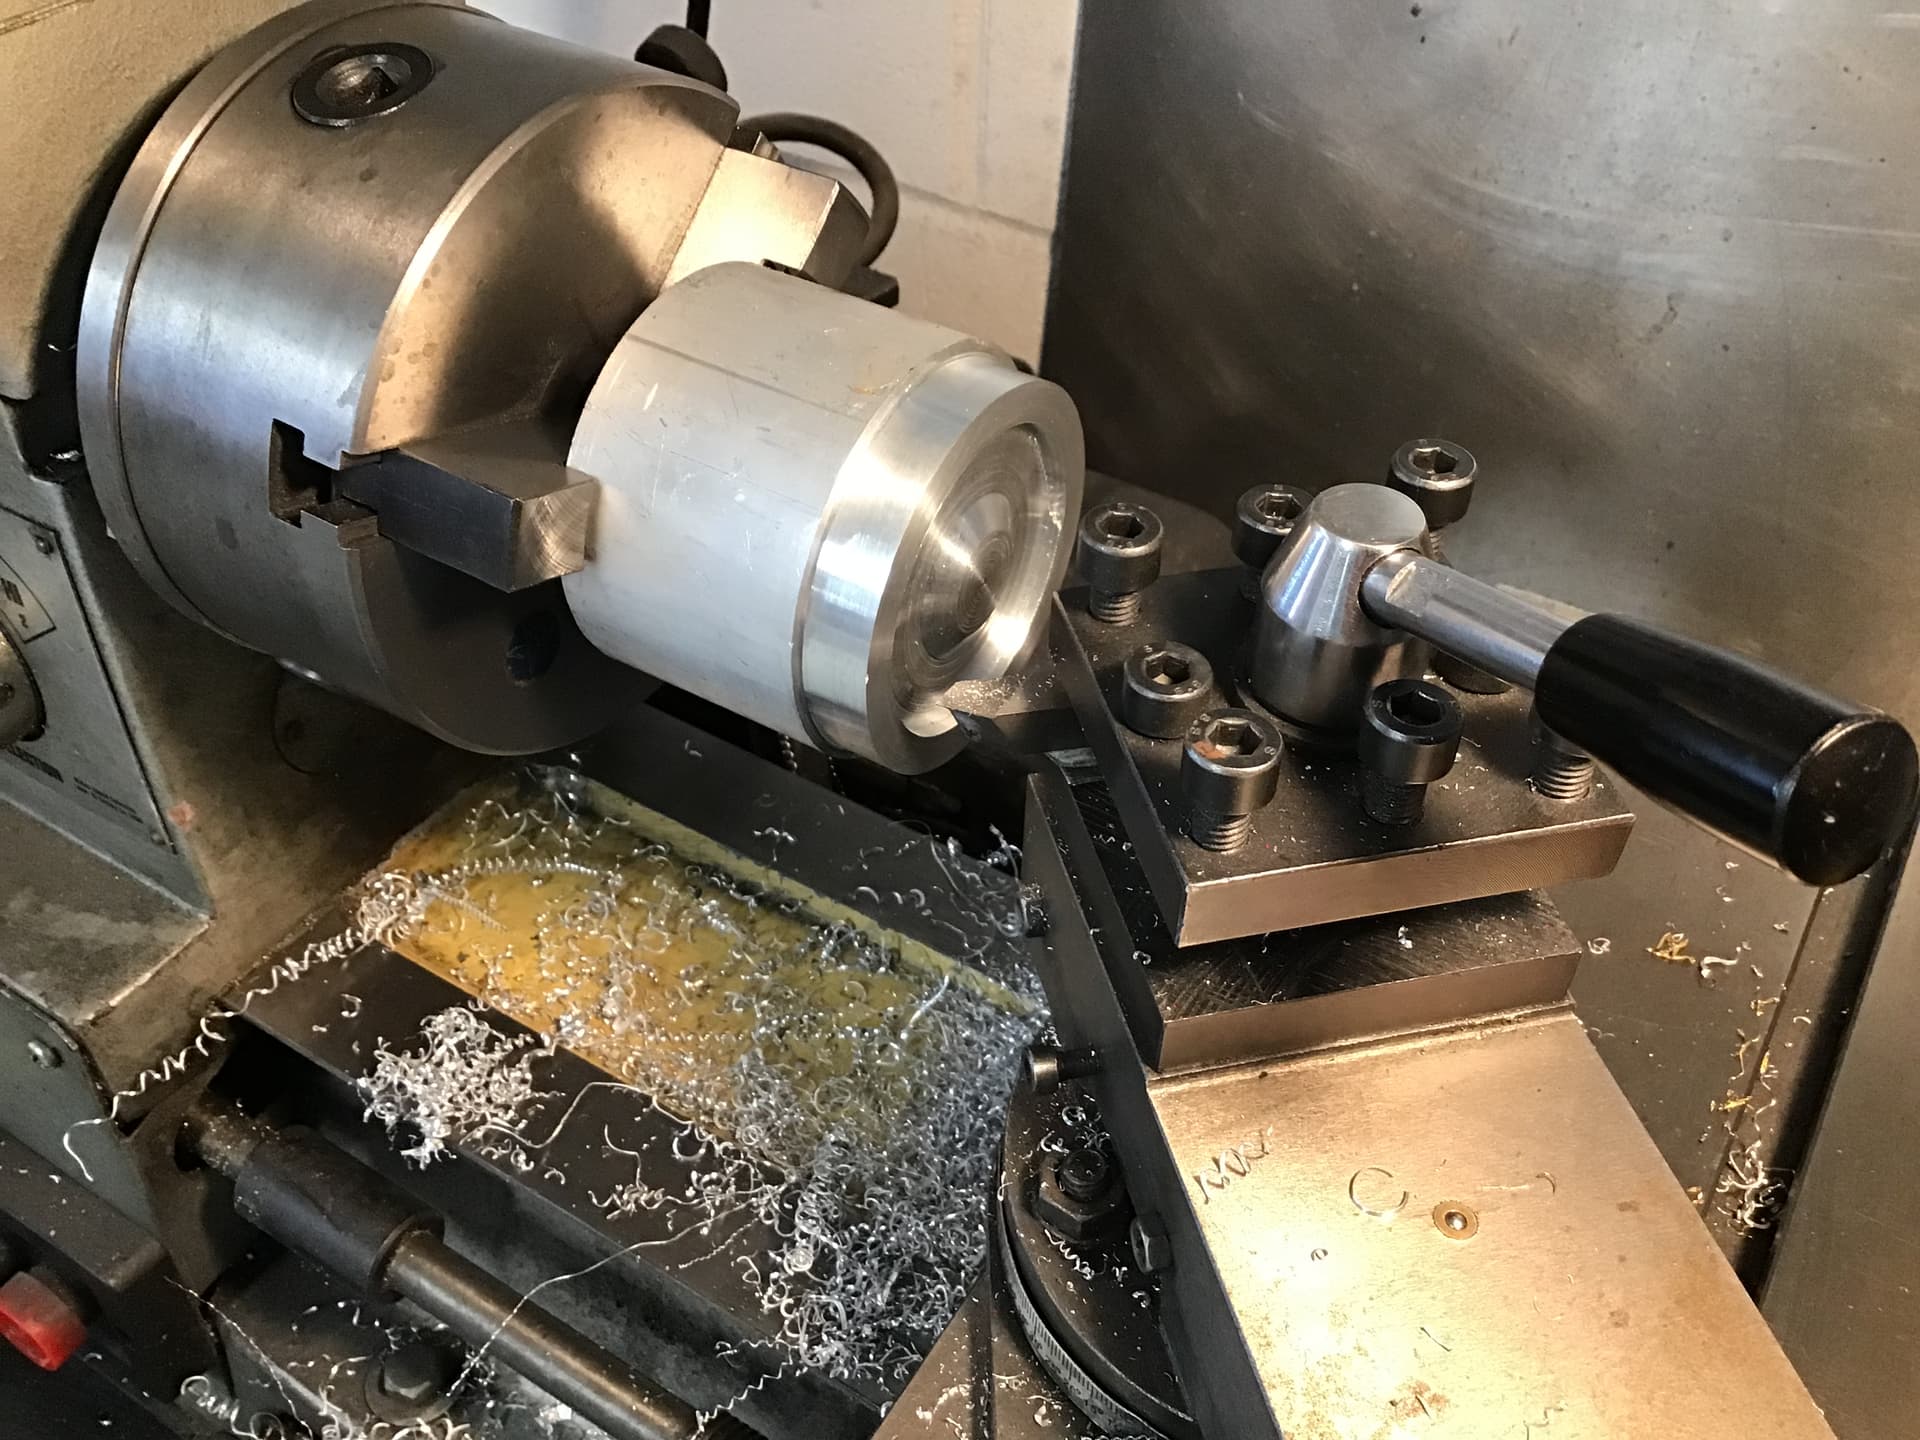
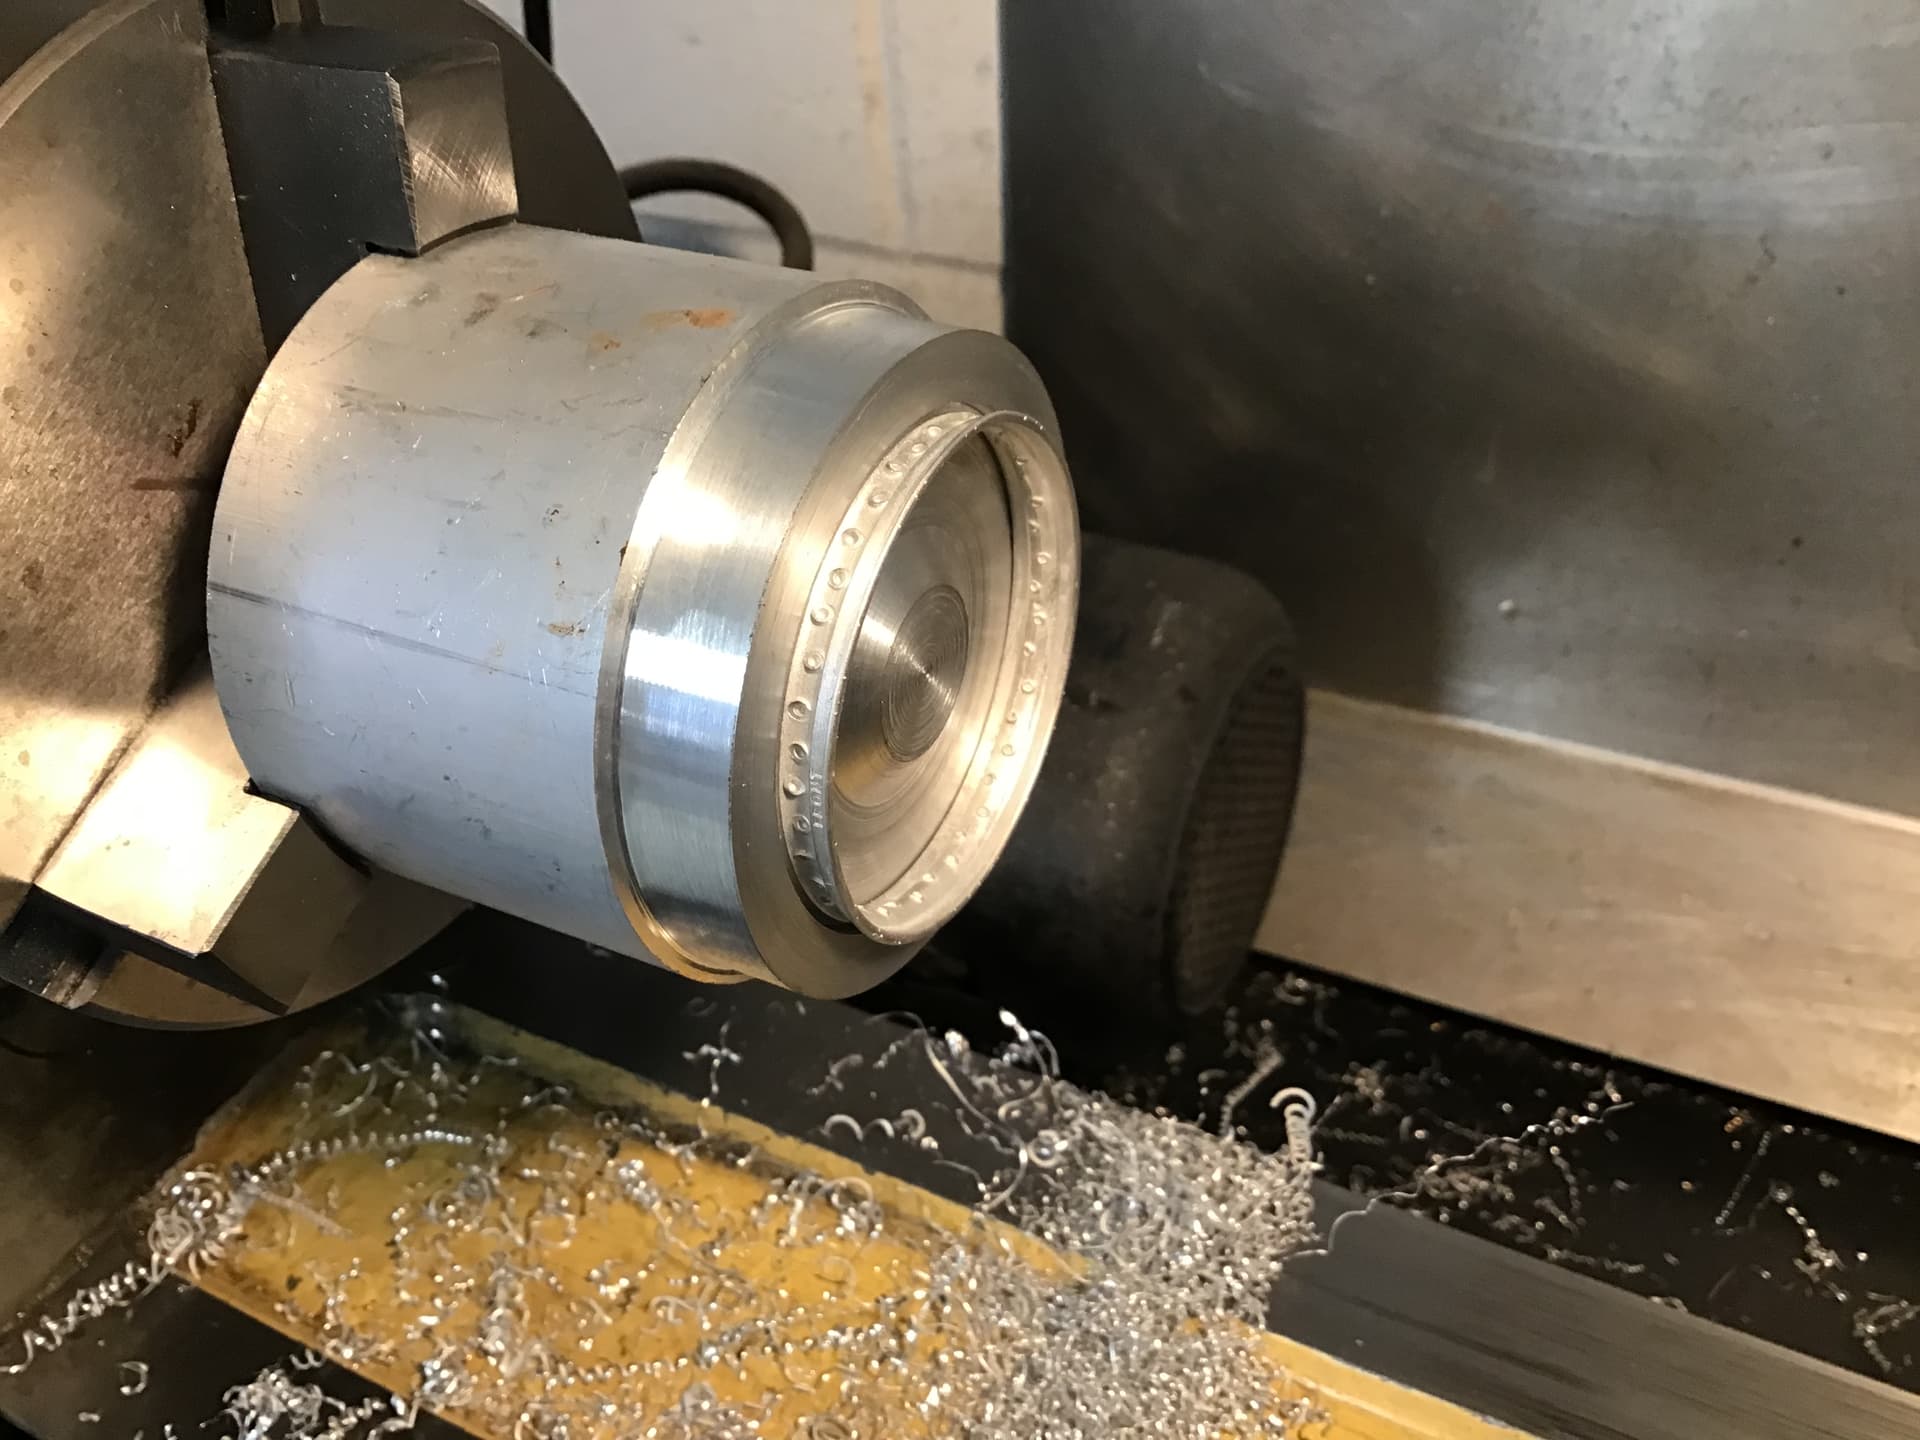
I took a few minutes and turned up a mandrel out of scrap aluminum round stock to hold the rims in order to clean up the surfaces prior to polishing. I didn’t dare simply chuck them up in the three jaw for fear of crushing the the soft white metal. The rims are a press fit in the mandrel but I will use double sided tape on the back as well . I will use various grades of sandpaper held in my fingers starting with 800 grit.
Richard,
Just amazing. Having a mini lath is a blessing for sure.
joel
This is so OTT Richard as I splutter with envy. I could have sent you me Ducati wheels if I knew you offered a full service workshop. I also like the detail of the coach line. Maybe some BMF gold would be an idea to achieve it.
cheers
Michael
Thanks Michael
I didn’t think of Bare Metal Foil but it sounds like it may indeed work . I have finally located some gold solid color decal on eBay and ordered but they are SLOW in shipping.
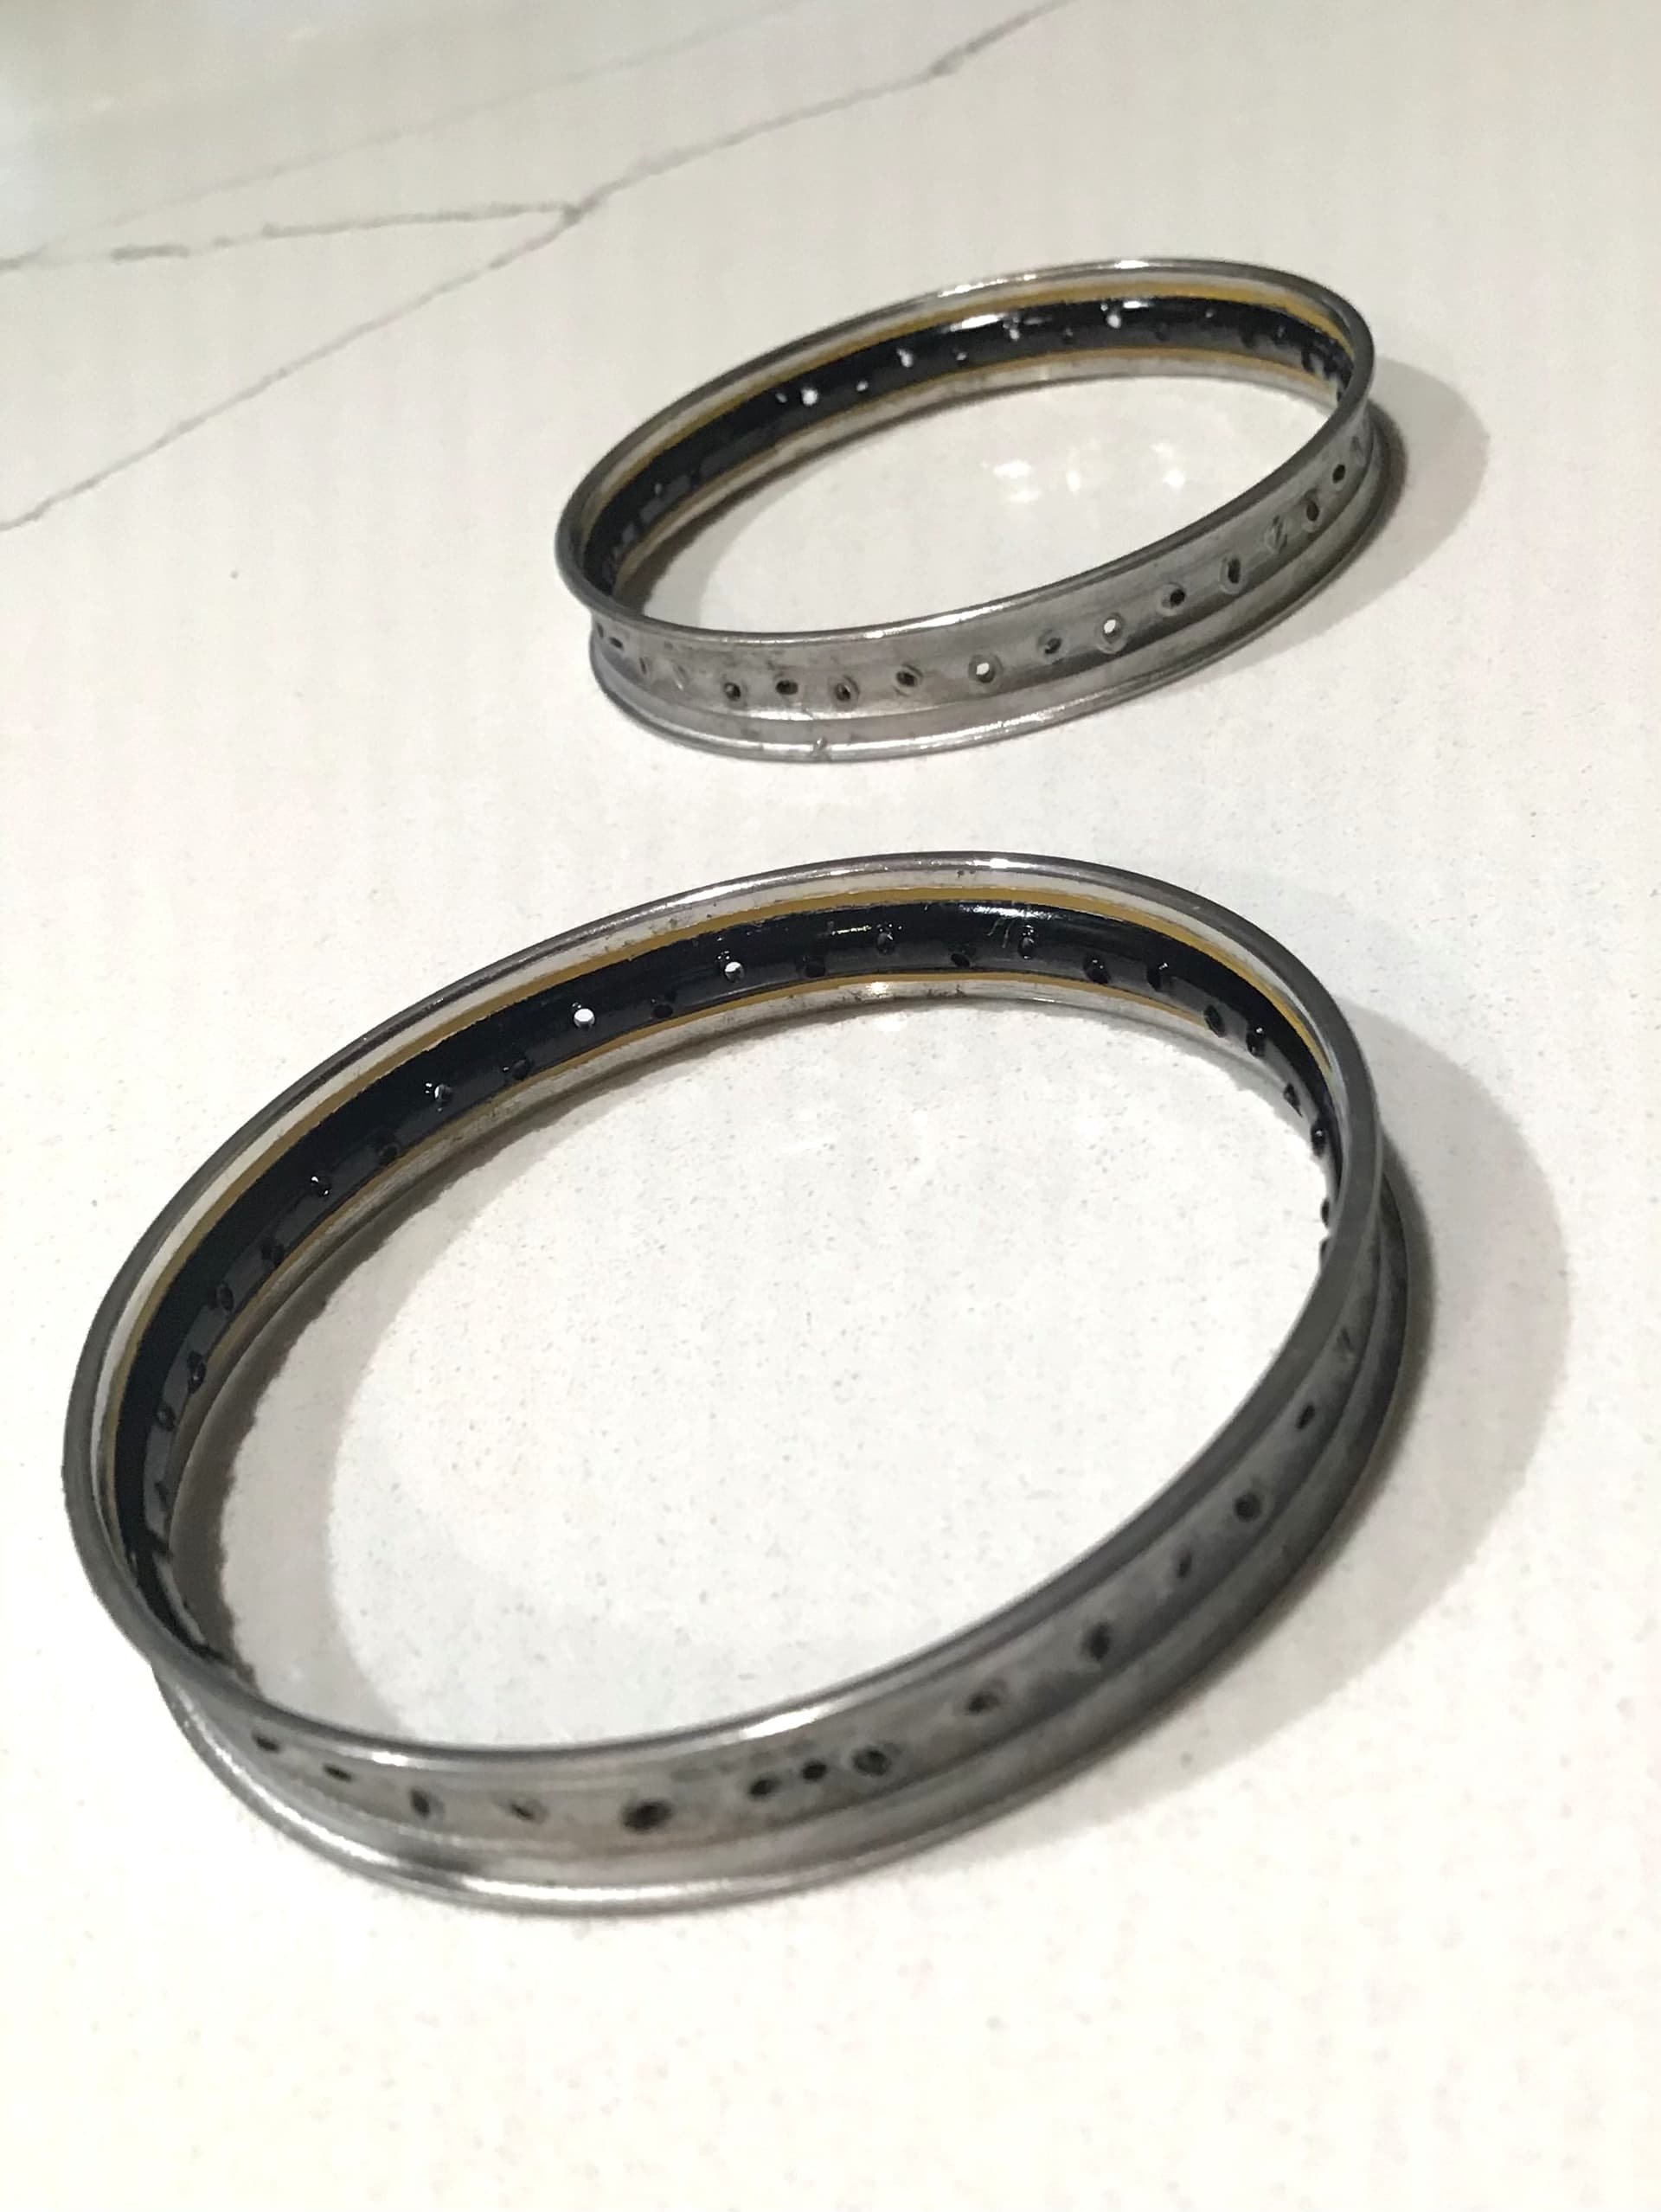
The rims have been polished, drilled, masked and centers primed . I will shoot the gloss black today if they don’t need a second go around with the primer.
Bench time interrupted again last week by the arrival of my 2nd granddaughter. My older daughter gave birth to a beautiful baby girl Zoe. A very difficult delivery requiring emergency surgery afterwards for my daughter but fortunately all is well and mother and daughter home and doing well in NYC . My wife is with them since delivery helping out - My job is dog sitting our dog and daughter’s dog and hopefully I will see all in person on Wednesday.
Gratefully counting my blessings. Even in this era in one of NYC’s best hospitals things can go awry. I am truly fortunate.
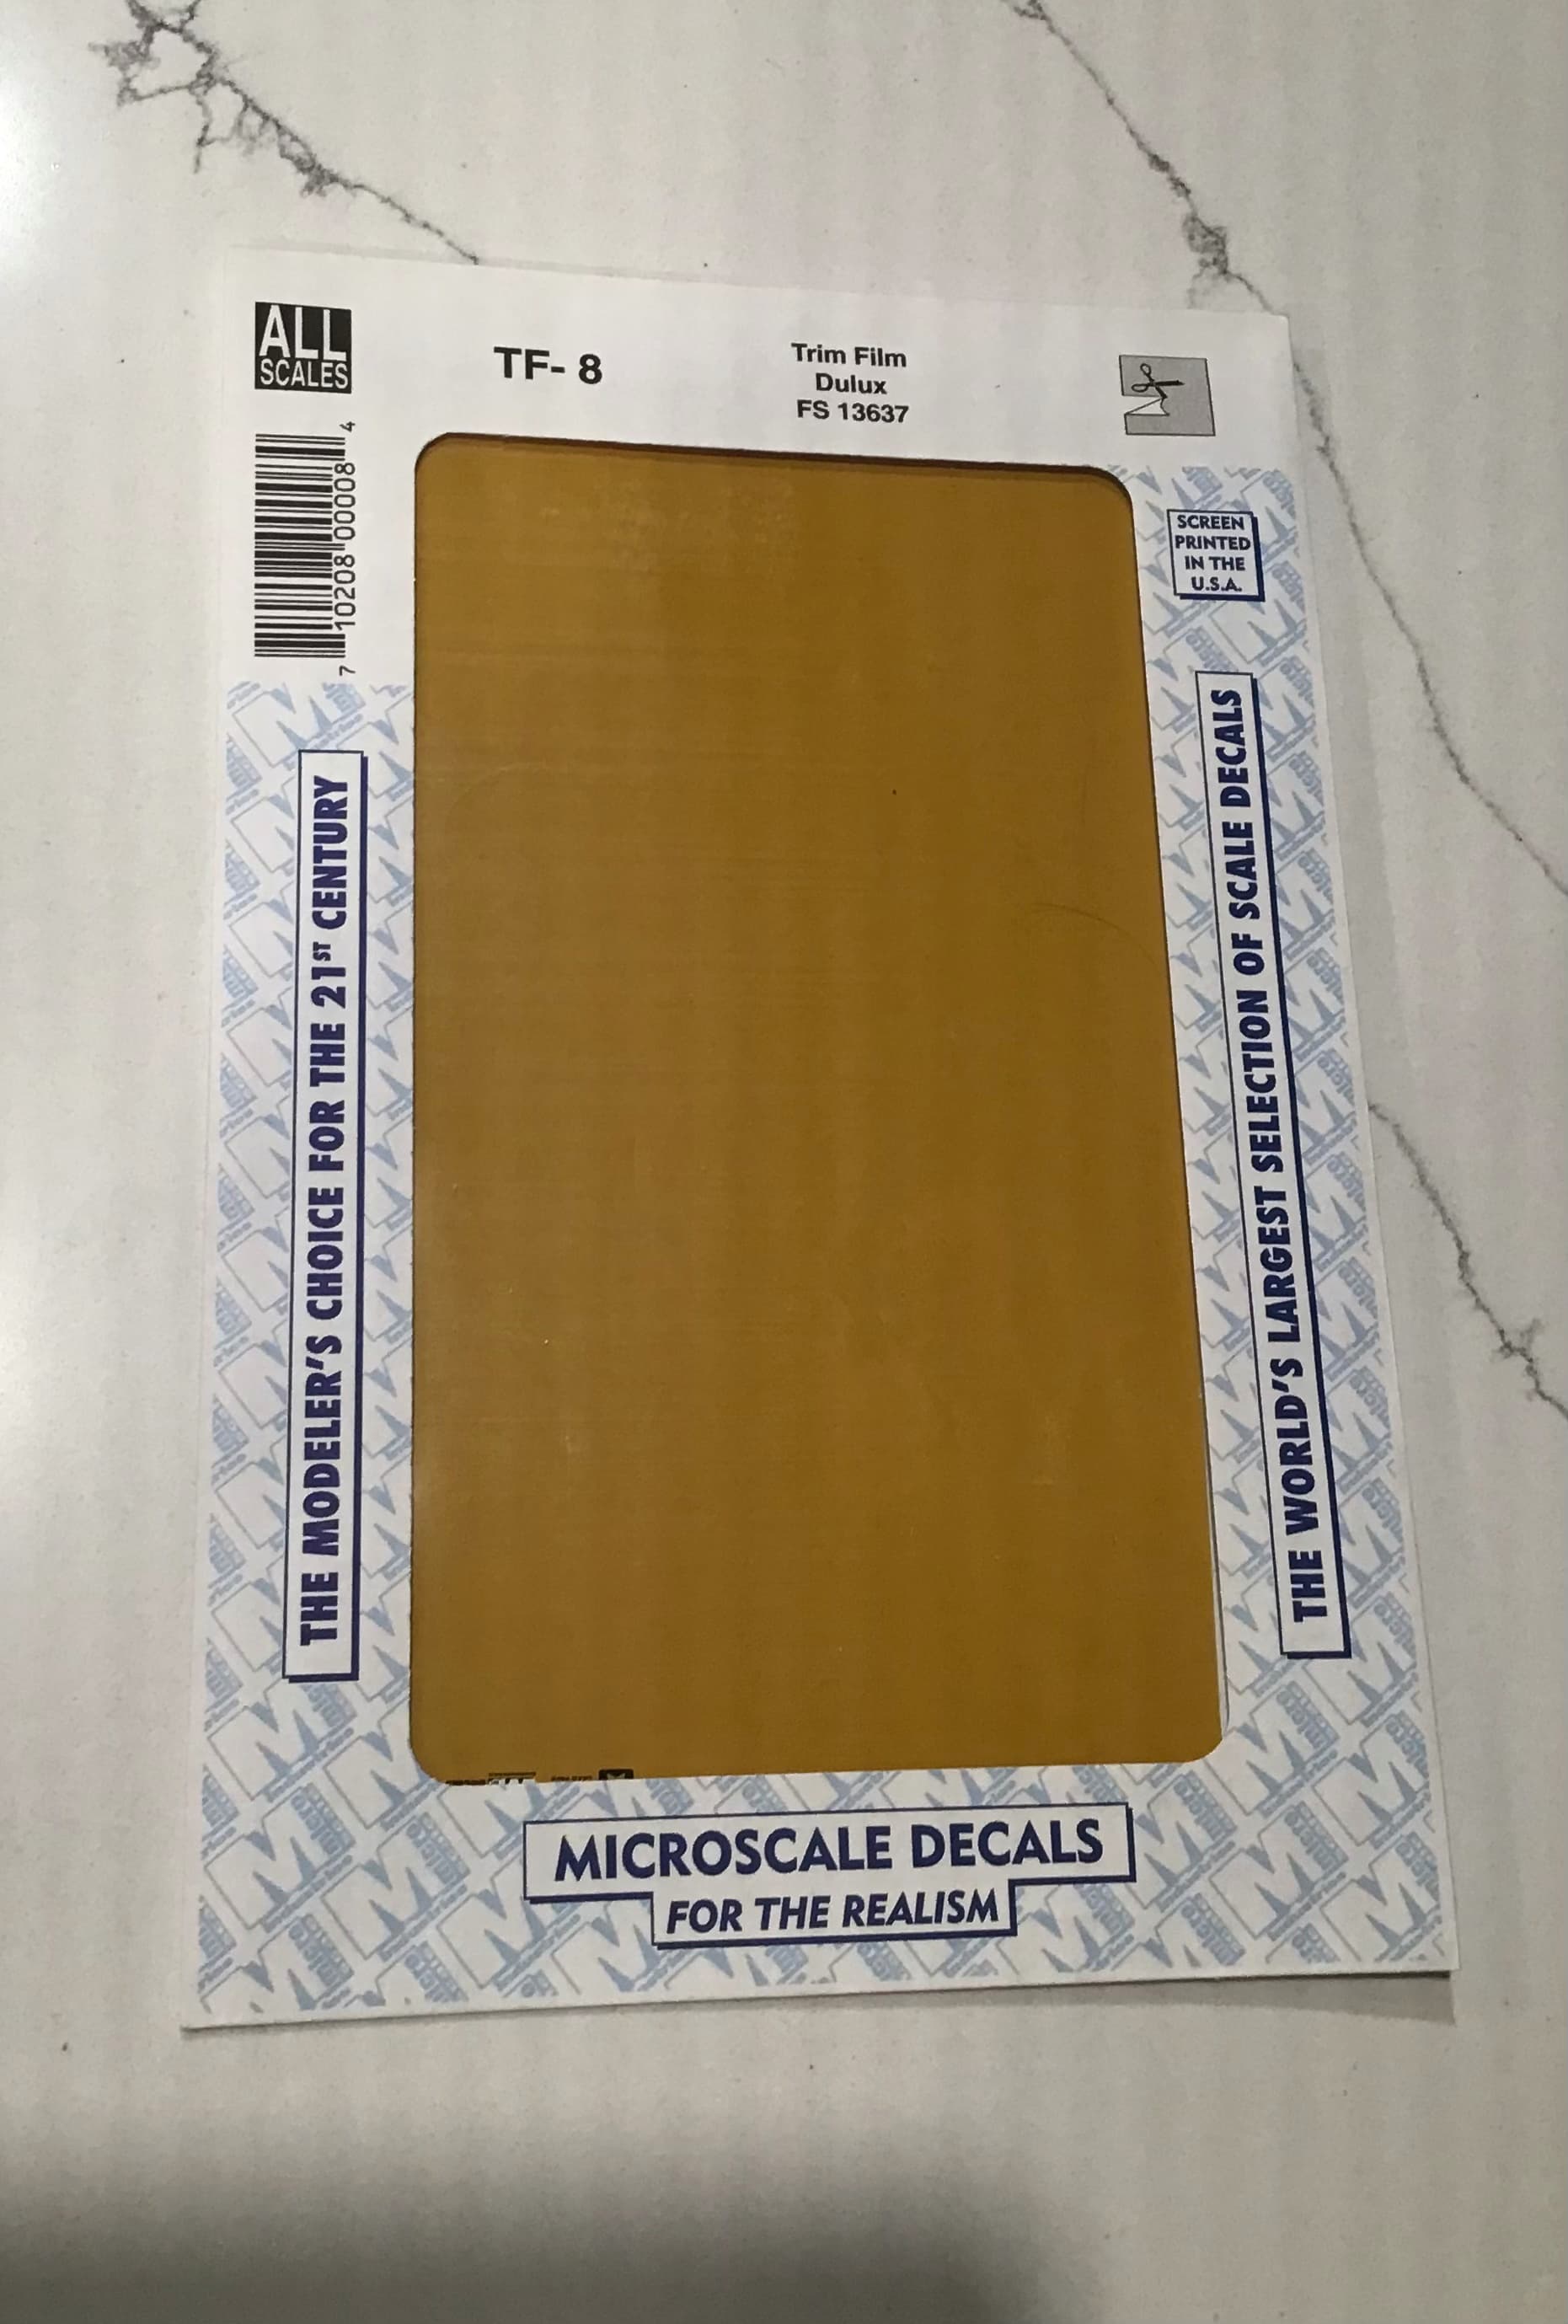
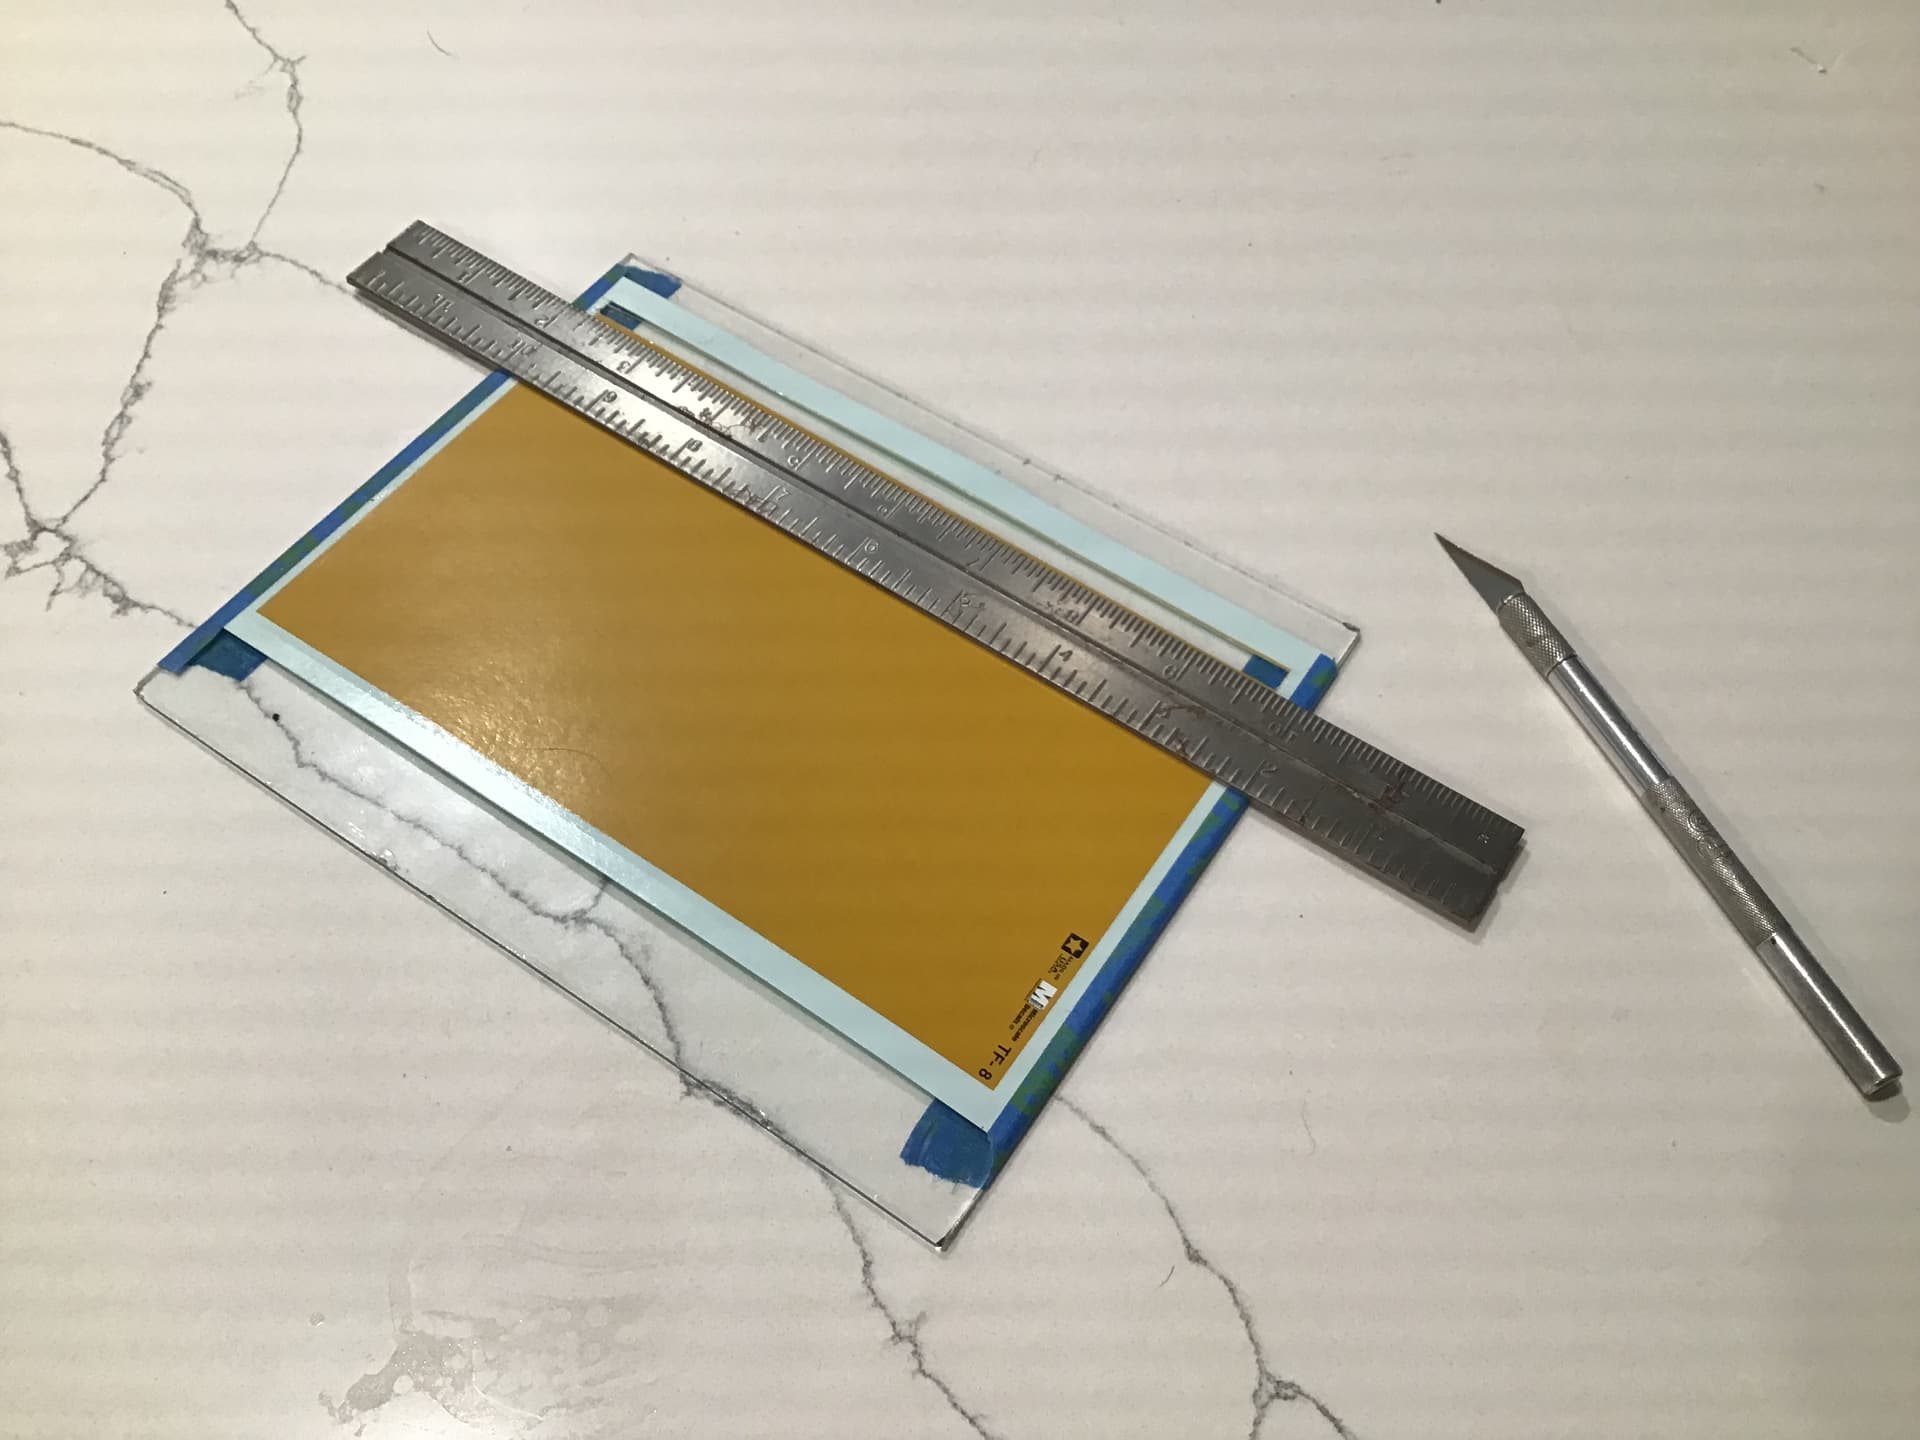
On the model front I found some gold solid color decal film on e Bay. I cut some strips as thin as I dared for the coach lining on the rims . I would have liked it thinner but when I did so the film just disintegrated when trying to remove it from backing - as it is it still came apart here and there . I am not 100% satisfied with the outcome but I will live with it . Small potatoes in light of what could have happened to my first born last week.
Rims are drilled and polished , centers primed and painted gloss black and gold coach lining decals
applied . Tomorrow I will shoot them with gloss clear to seal everything.
Thanks for looking - now go and hug those dear to you while you can !
Cheers - Richard
Hi Richard, congratulations on a second granddaughter and glad to hear the mother is all well. Nothing like a medical emergency to remind you of priorities in life.
From the pictures the pinstripe looks pretty good. Will definitely pass muster from the usual viewing distance.
cheers
Michael
Huge congratulations to you and your lovely family Richard, a blessing indeed and wonderful news that bub and mum are both doing well!
Loving your work updates on the bike, you just keep upping the detailing ante here every time I look.
Cheers, D
Grandpa,
So now it’s Grandpa X2 !! Congrats as we’re still hoping that our son and significant other one day will bless us with a Grandchild before we’re to old to really appreciate it.
So glad to here that your daughter and grandchild are doing fine at home. I’m sure that it was one of the scarcest things to have a birth have those unexpected medical issues. But your daughter is now fine, and that’s what really counts.
I trust that both dogs are also getting special treatment.
As for those rims with the Gold stripping. Come on now. each one looks amazing.
And like you my modeling time at the bench just gets less and less. My better half had shoulder replacement surgery yesterday and is due to come home today. She’s basically in a ton of pain, more so then the hip replacement, but trying to even eat with just one hand and the wrong one at that, so far hasn’t worked out very well. So I’l be nurse and care giver, and do all I can for her till she can start to manage for herself.
joel
Thanks Joel - getting old has it’s issues but mostly it’s better than the only alternative ! Hope your wife mends quickly and be careful with any opiate based pain meds .
Richard,
Thanks so much for your continued support. You know just how much it means to me.
Right now they have her on some pretty heavy pain killers: Morphine, and opiates just like her hip replacement, but they get her off of them ASAP.
joel
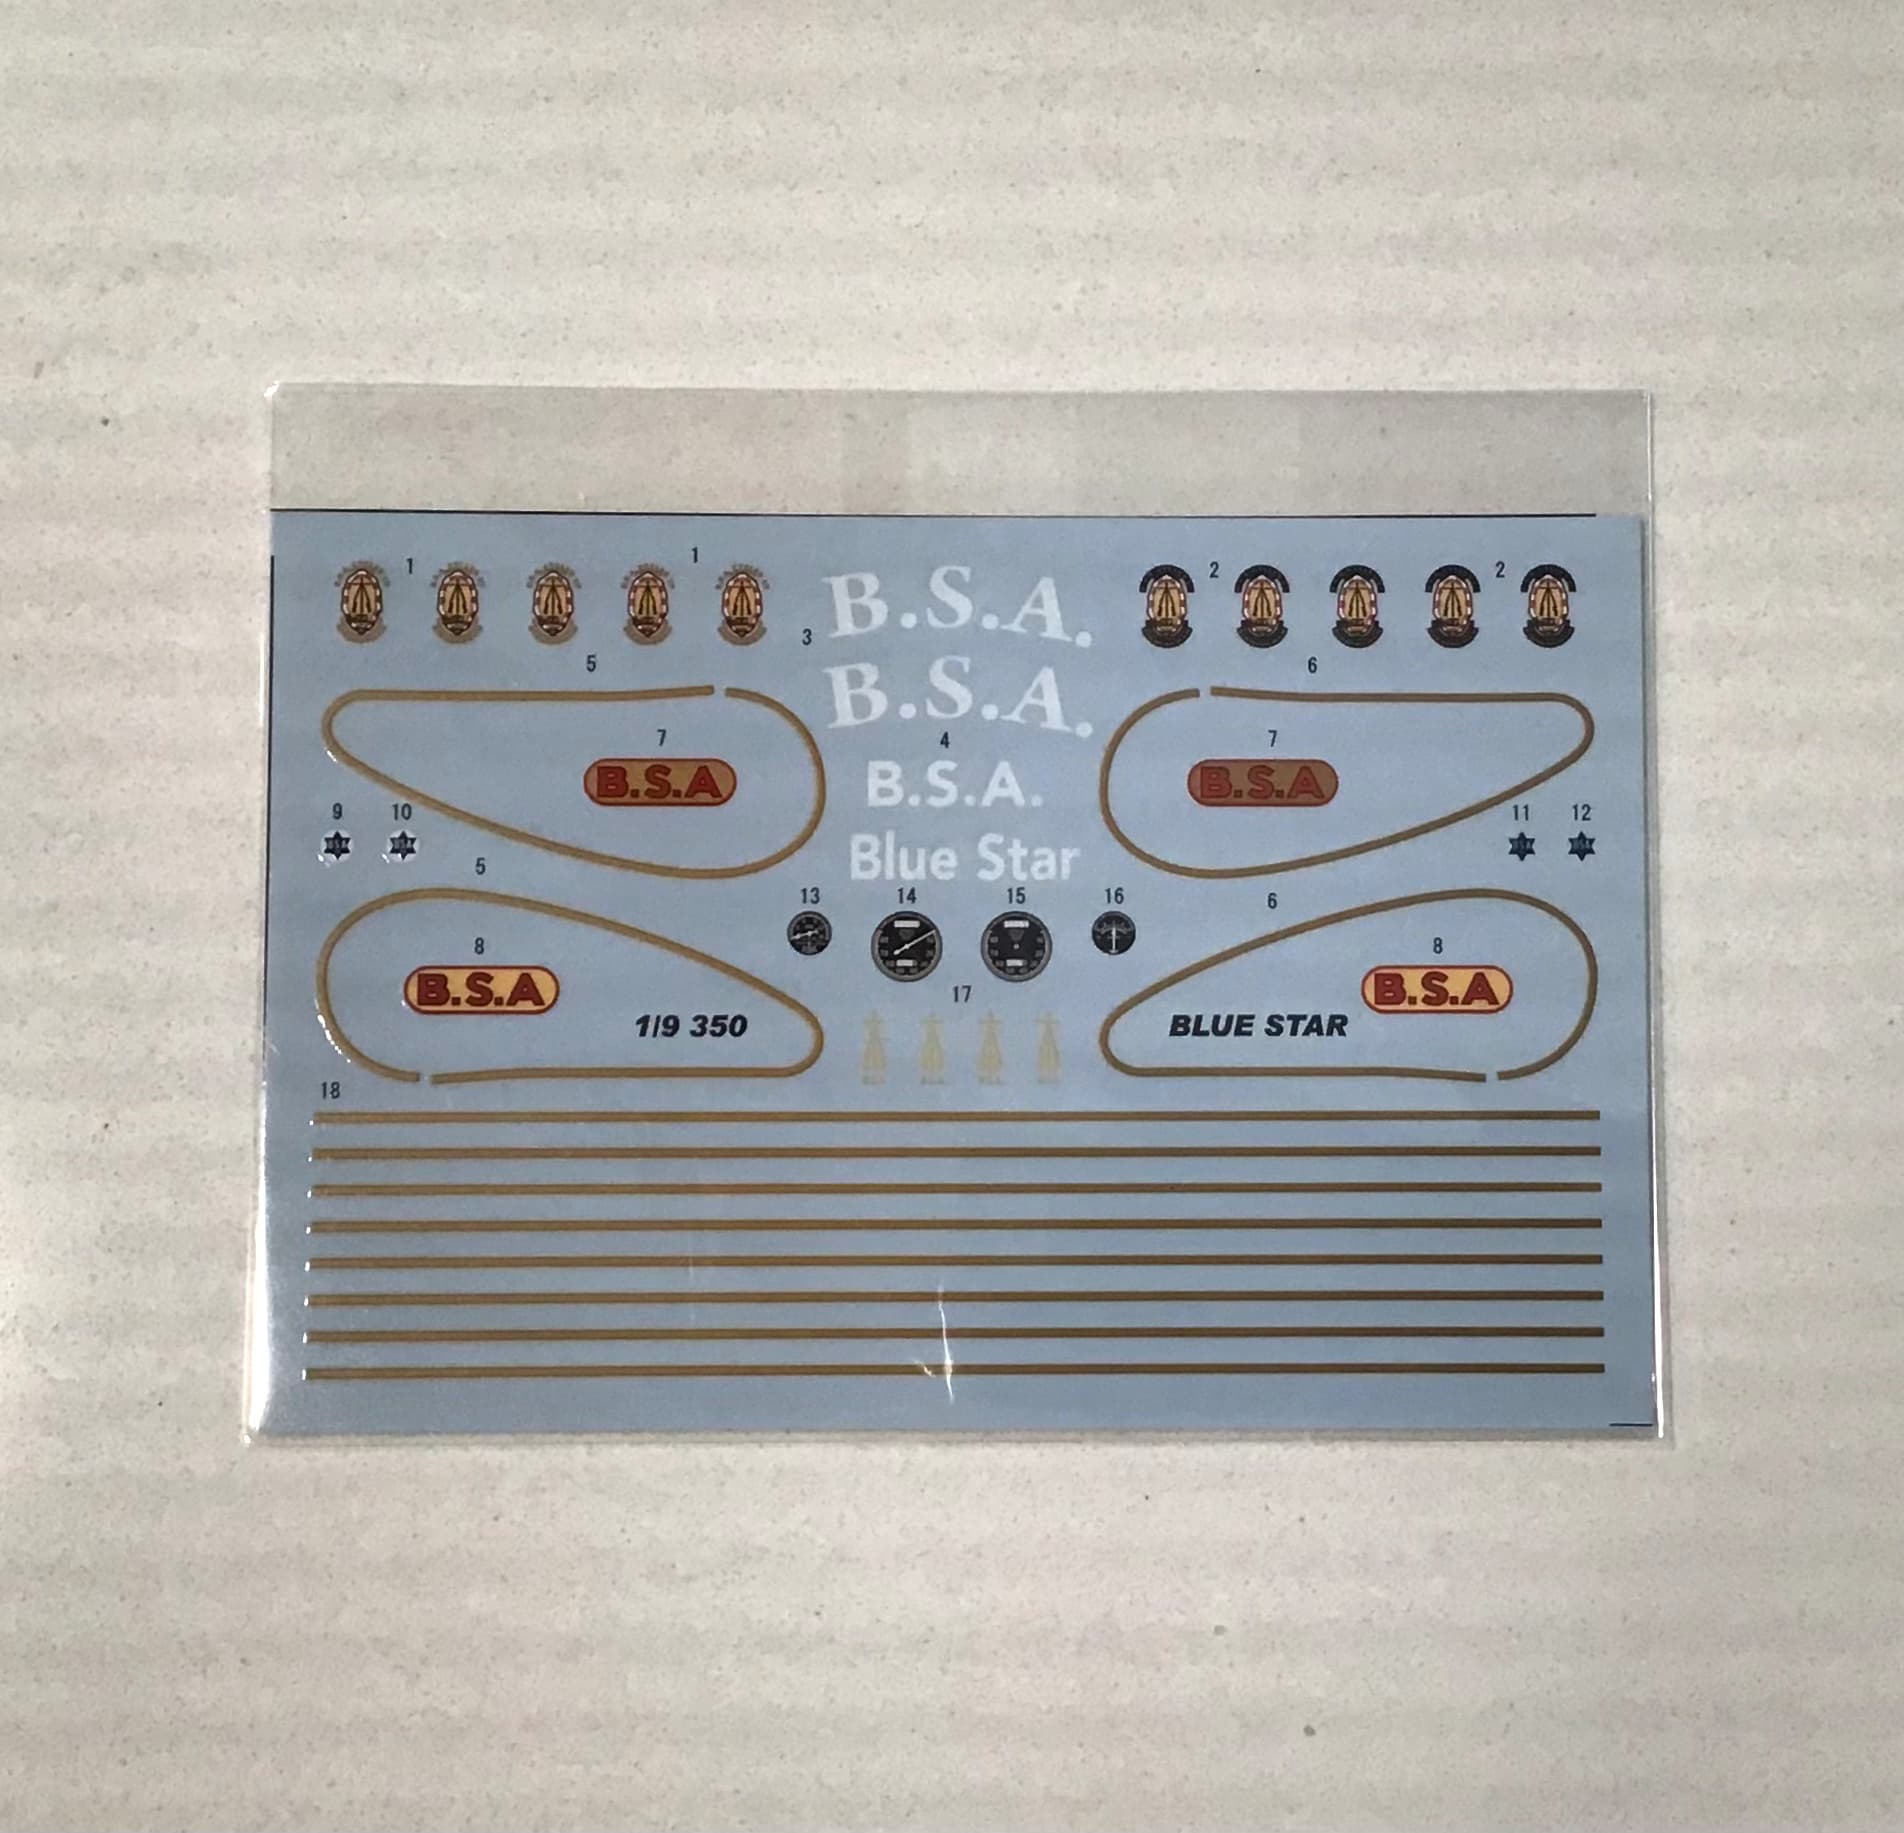
Two steps forward and one back - having resigned myself to living with the decal work on the rims I packed up the solid color decal sheet and went to put it away in the bottom of the kit box . MFH packages the decals and photo etch in the bottom of the box under a protective sheet of foam. In removing the kit decals from the box I studied them for the first time since receiving the kit and what do you know - gold stripe decals for the rims .
No mention of them in the instructions other than please use decals so and so as to personal preference.
Nowhere on the instructions does it show the correct painted rim centers or the gold coach lining .
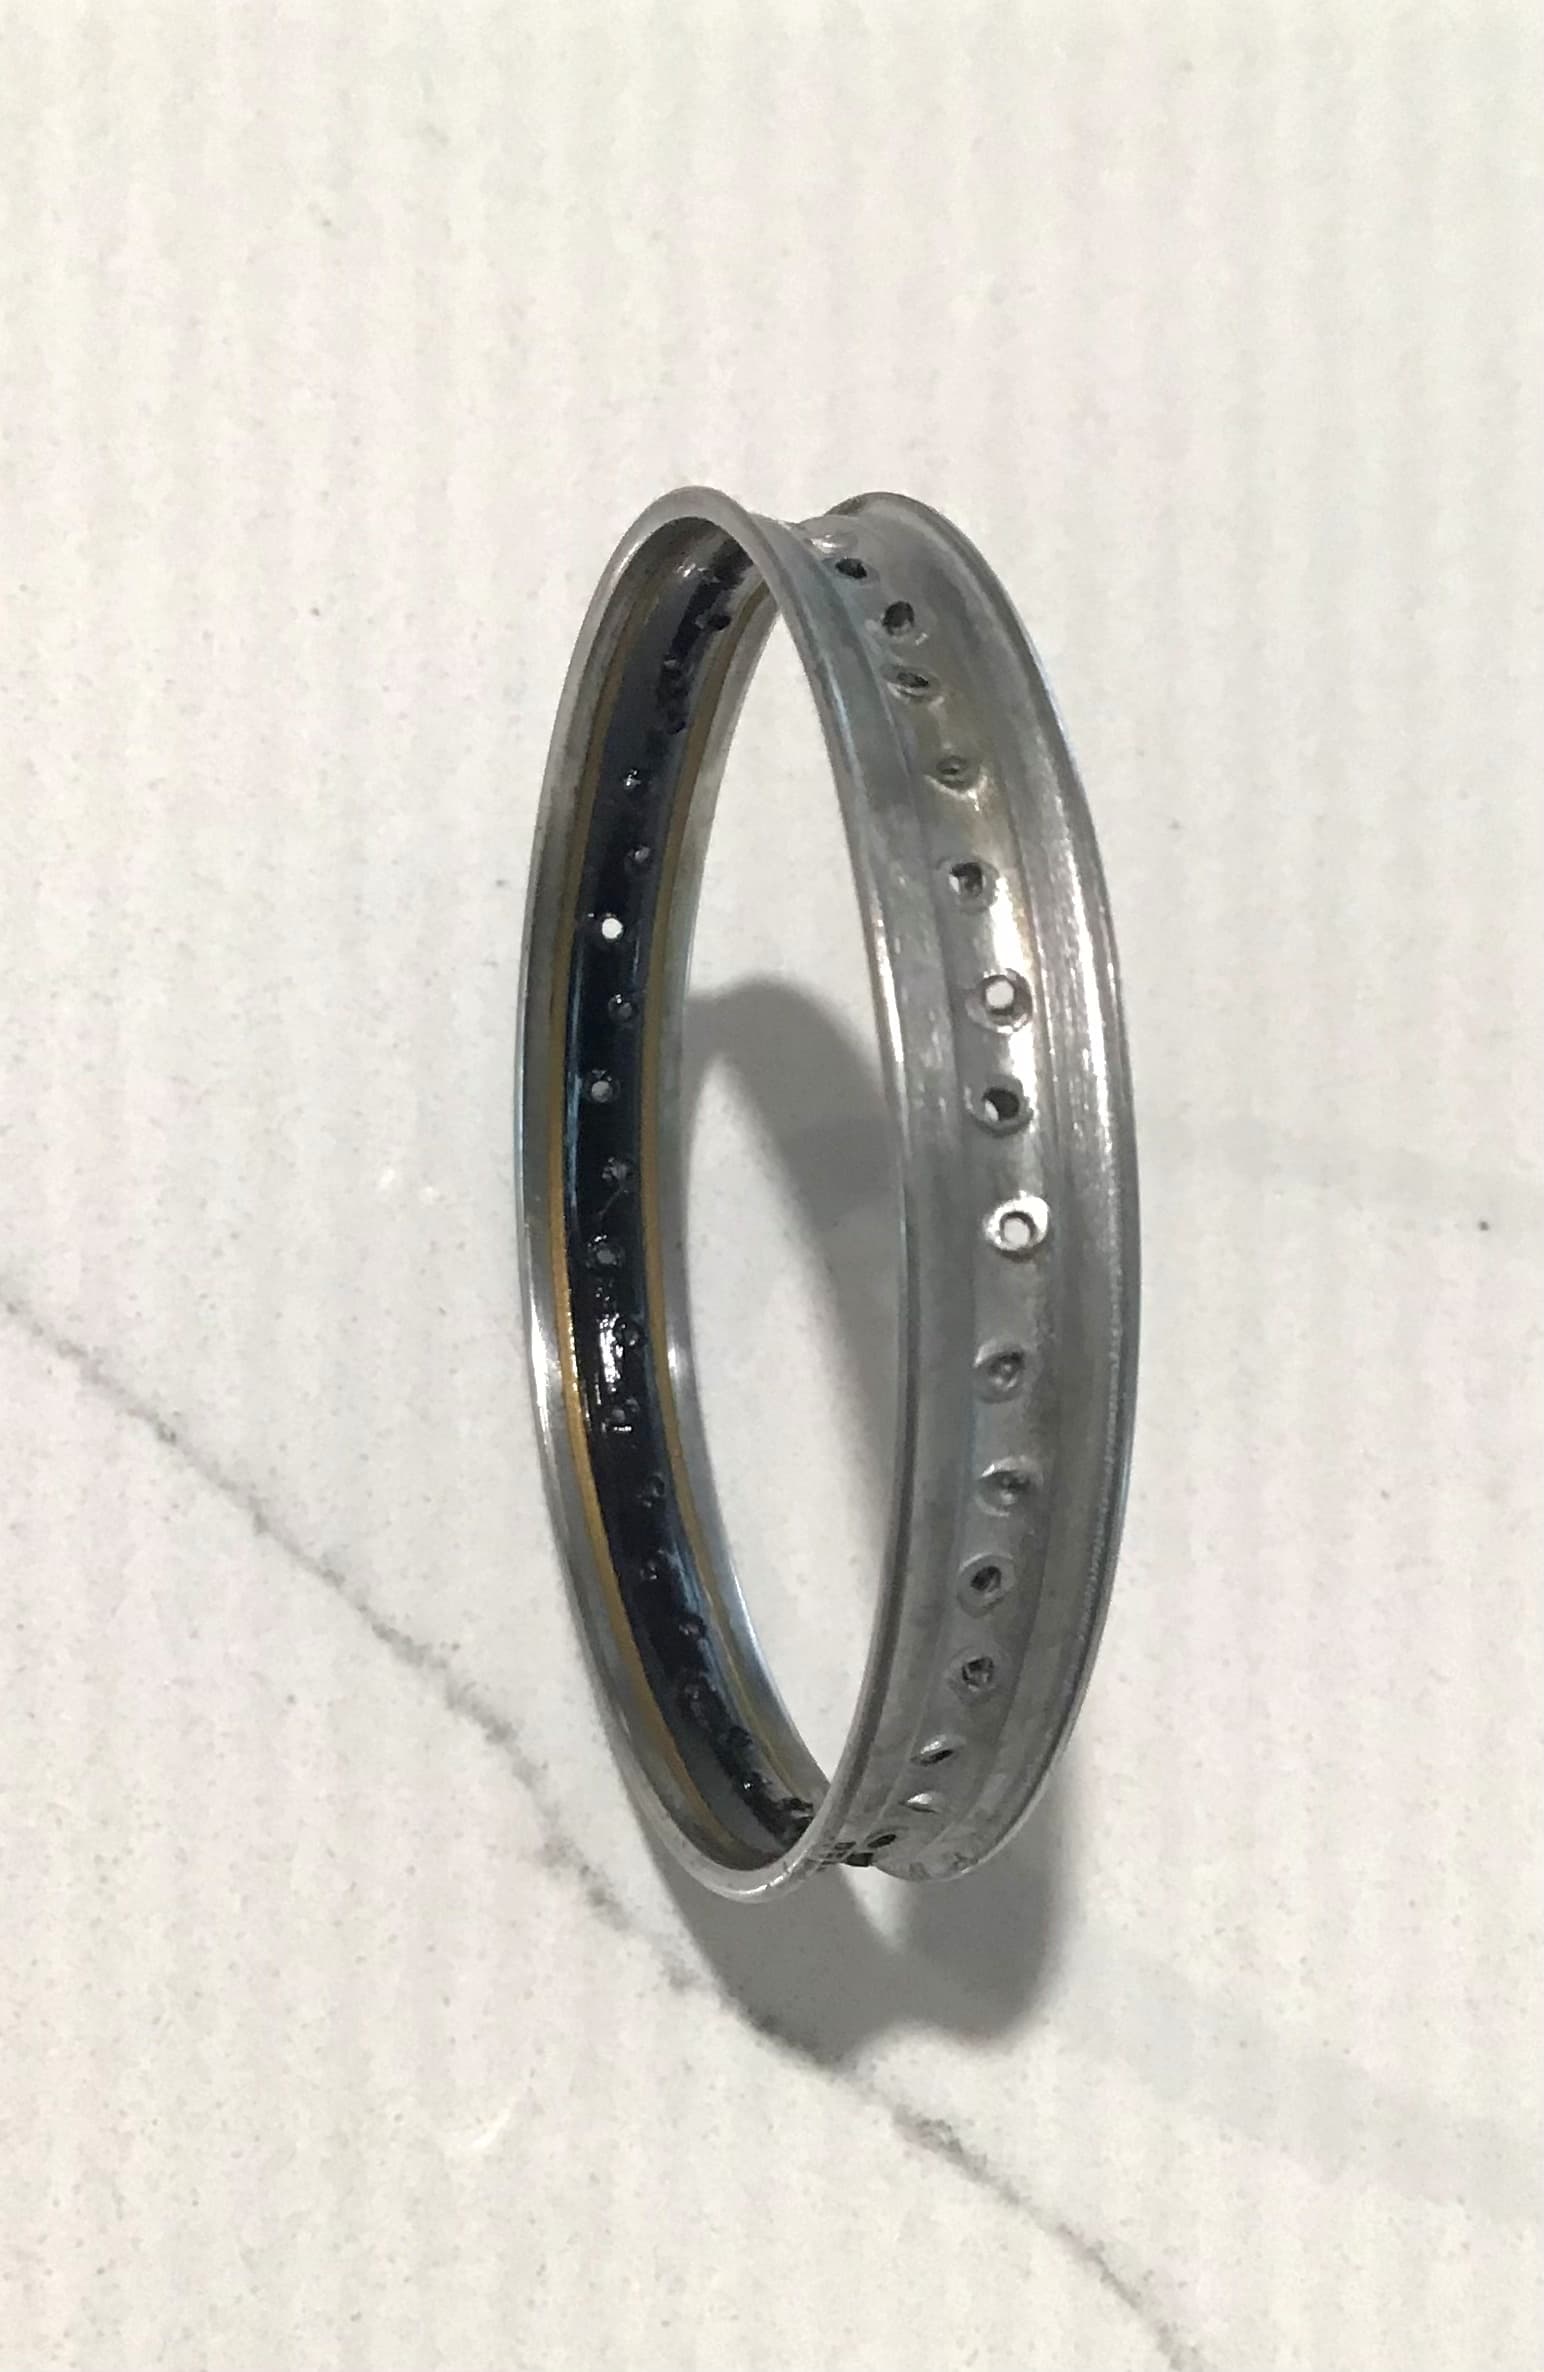
So I happily set to work and stripped the decals from the rims . Although they were over coated with clear acrylic gloss they came off easily after a liberal application of MicroSol and a chisel made from a sharpened toothpick.
Kit decals then applied to one wheel so far and they are MUCH BETTER! No ragged edges or sloppy seams.
I am much happier with the result .
That would make it too easy ![]()
Nice job by the way on the new pinstripes.
Richard,
Better late then never. the rims look darn good to me.
joel
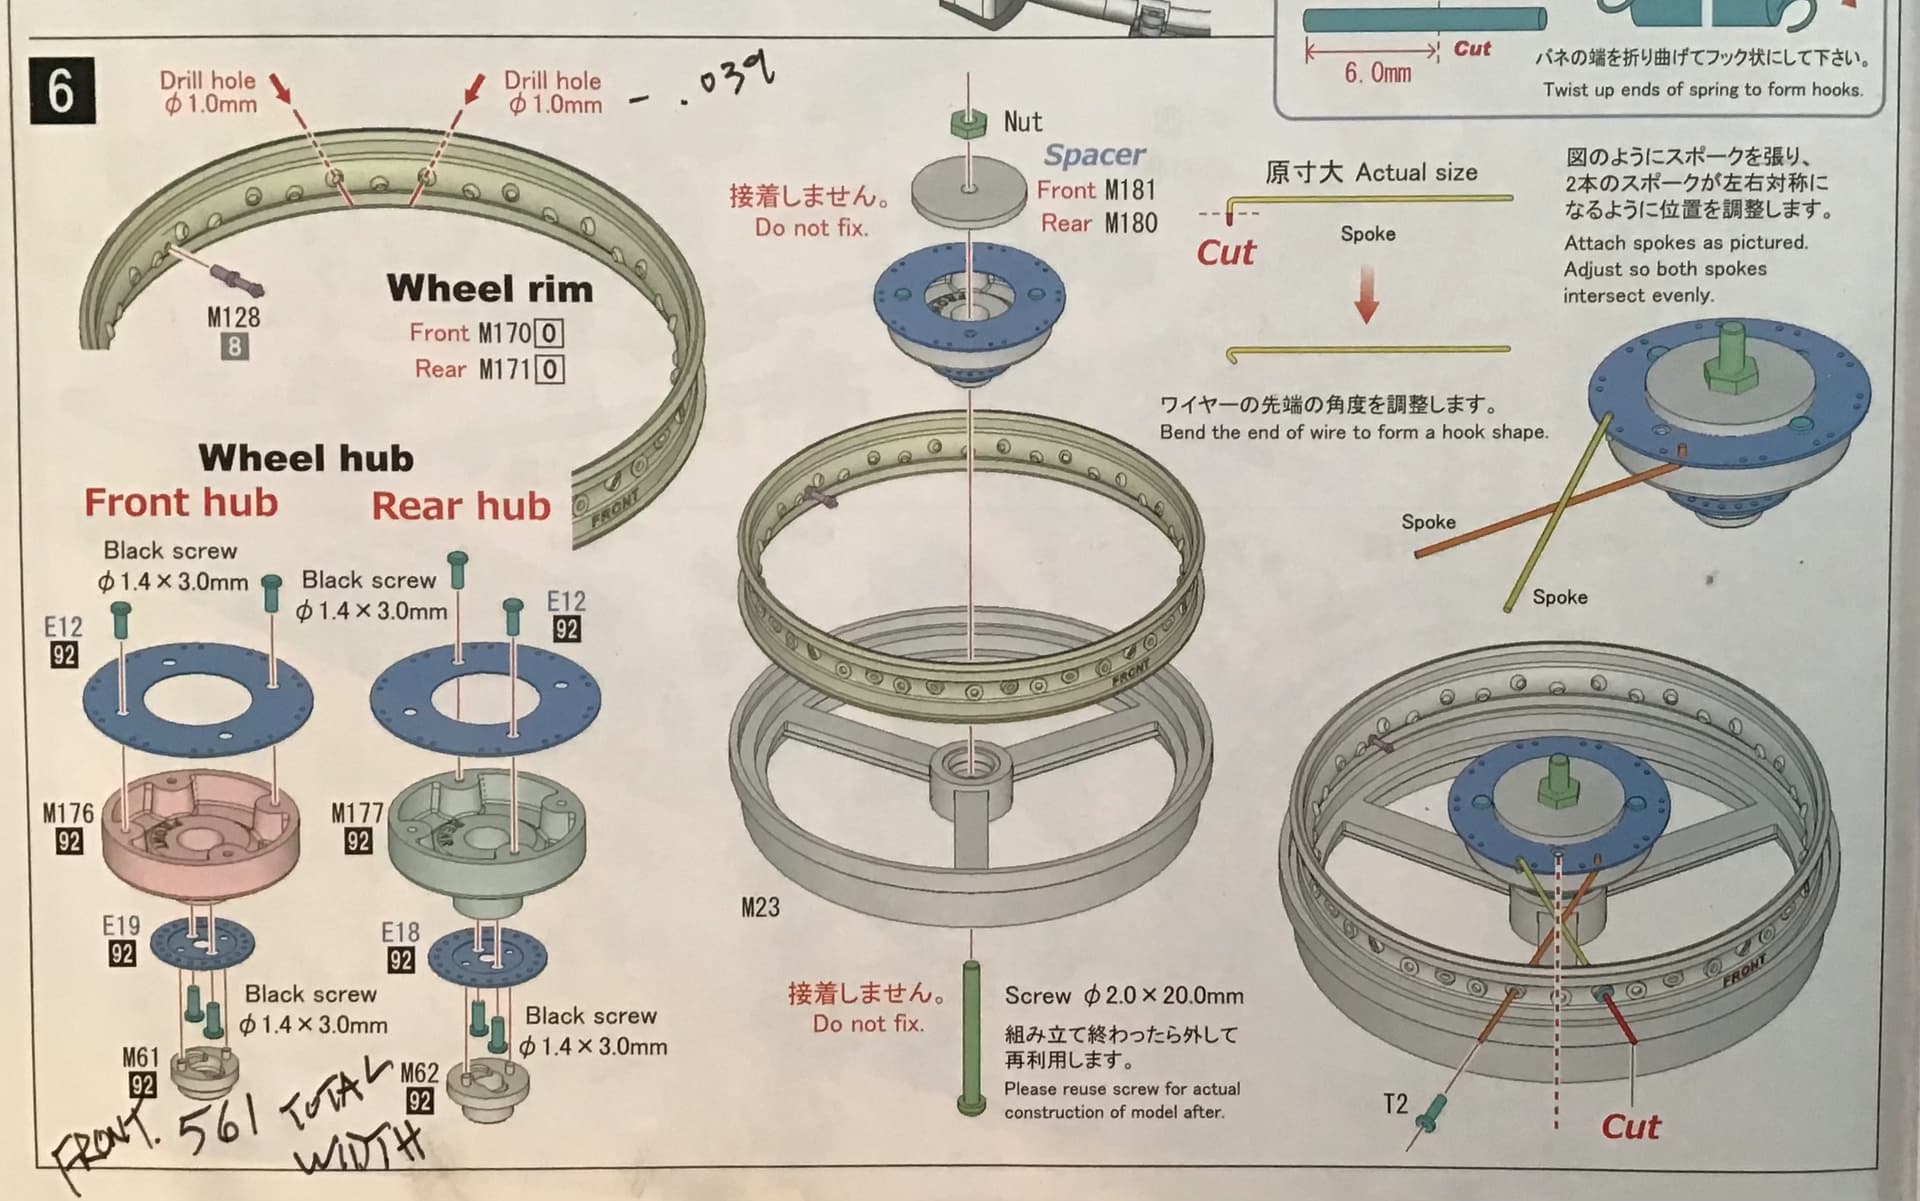
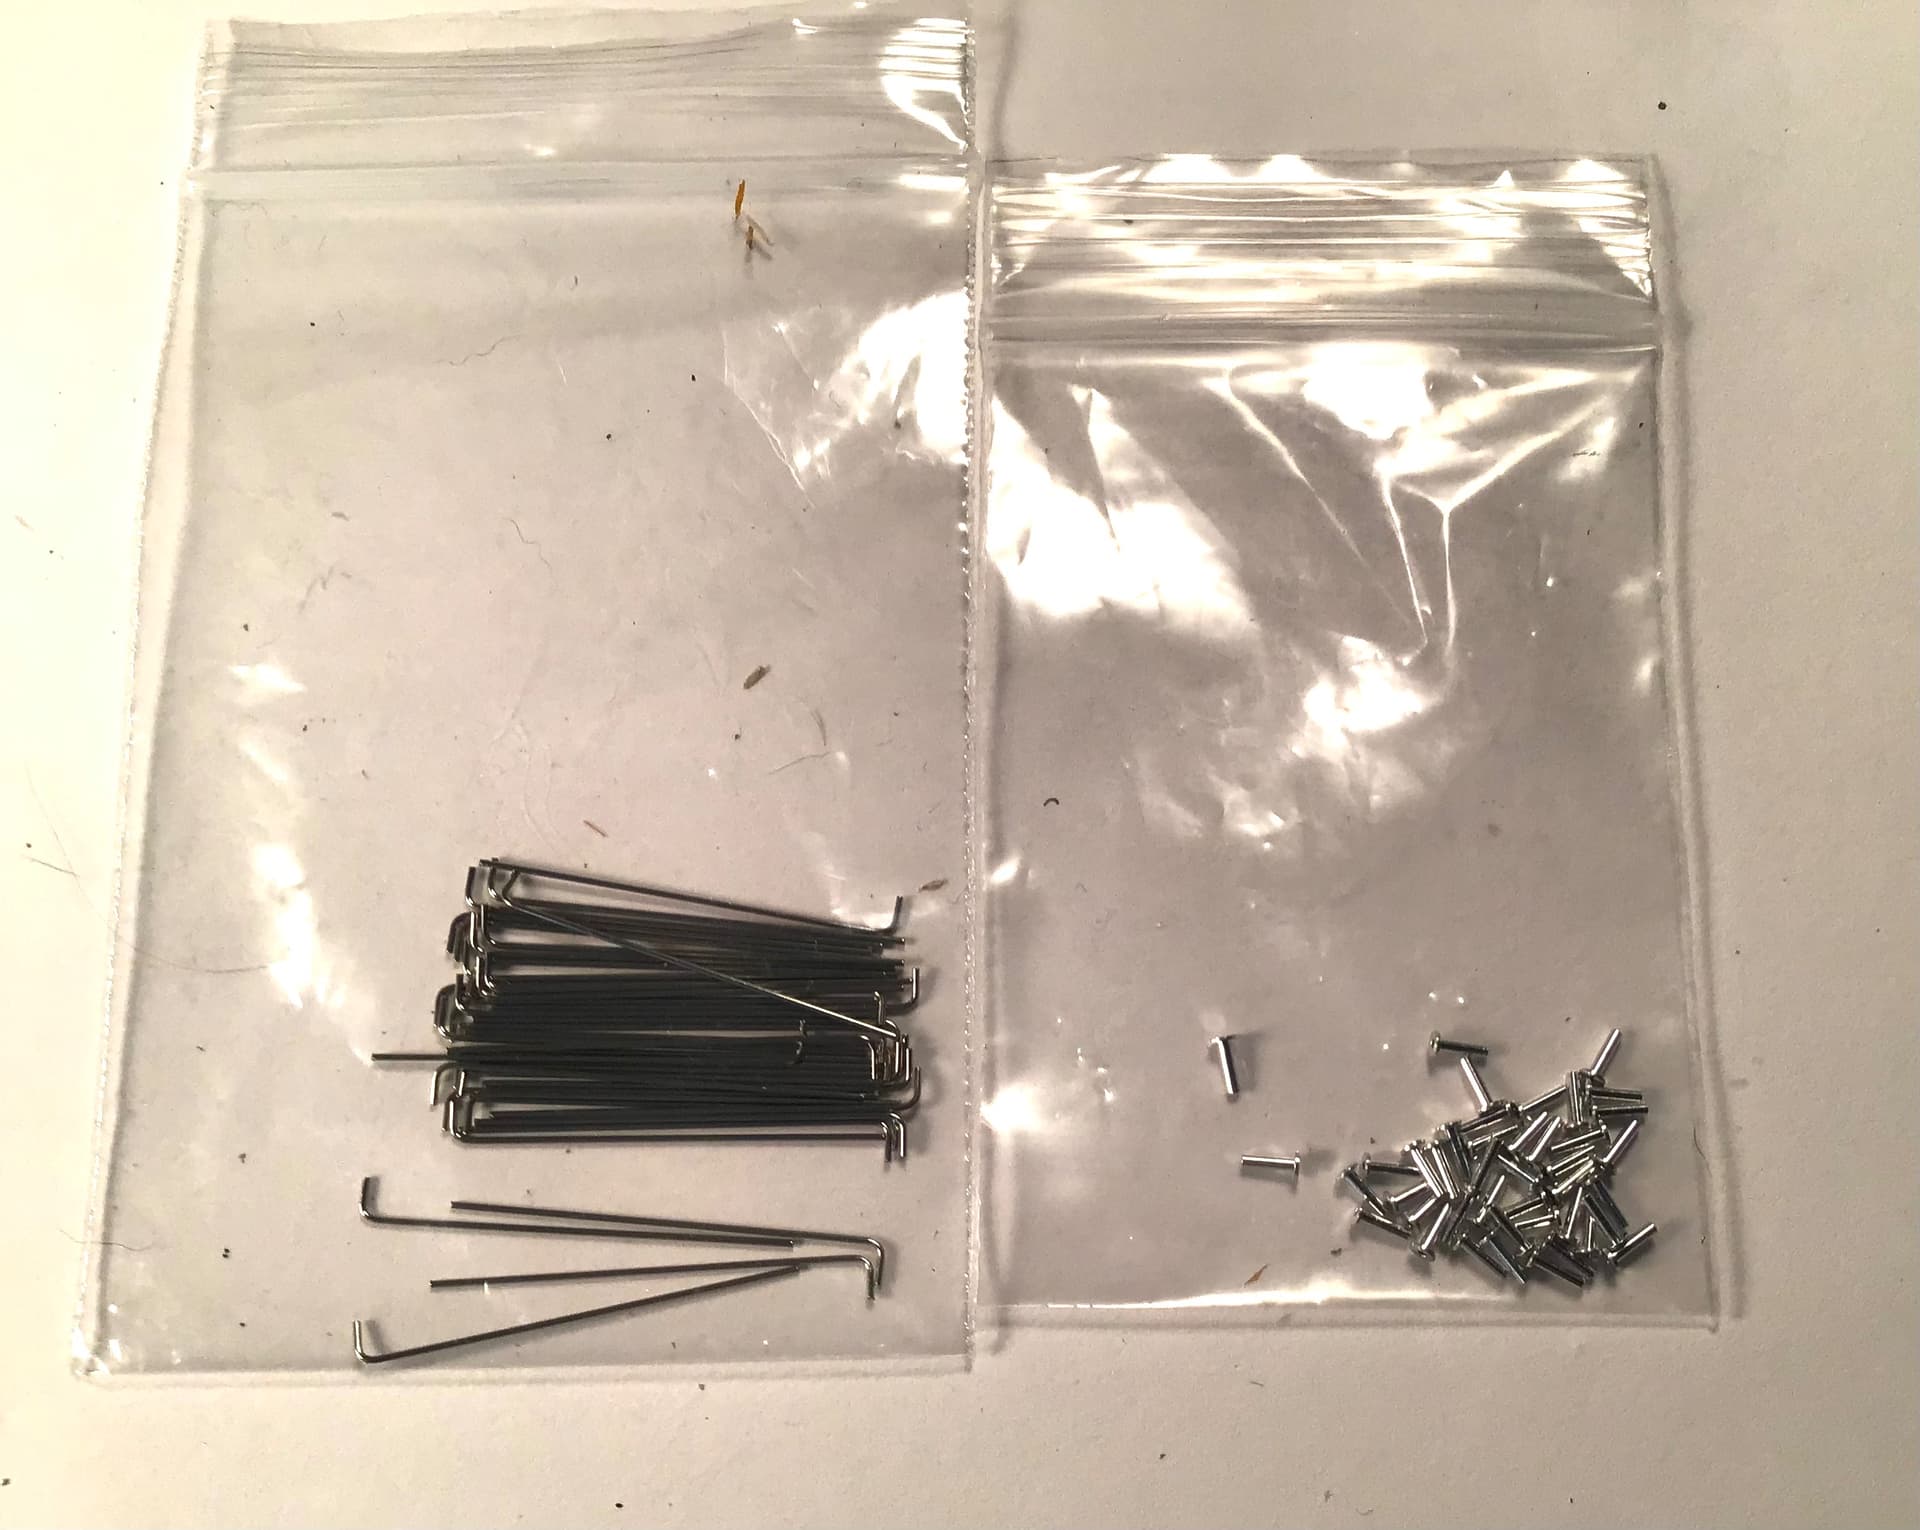
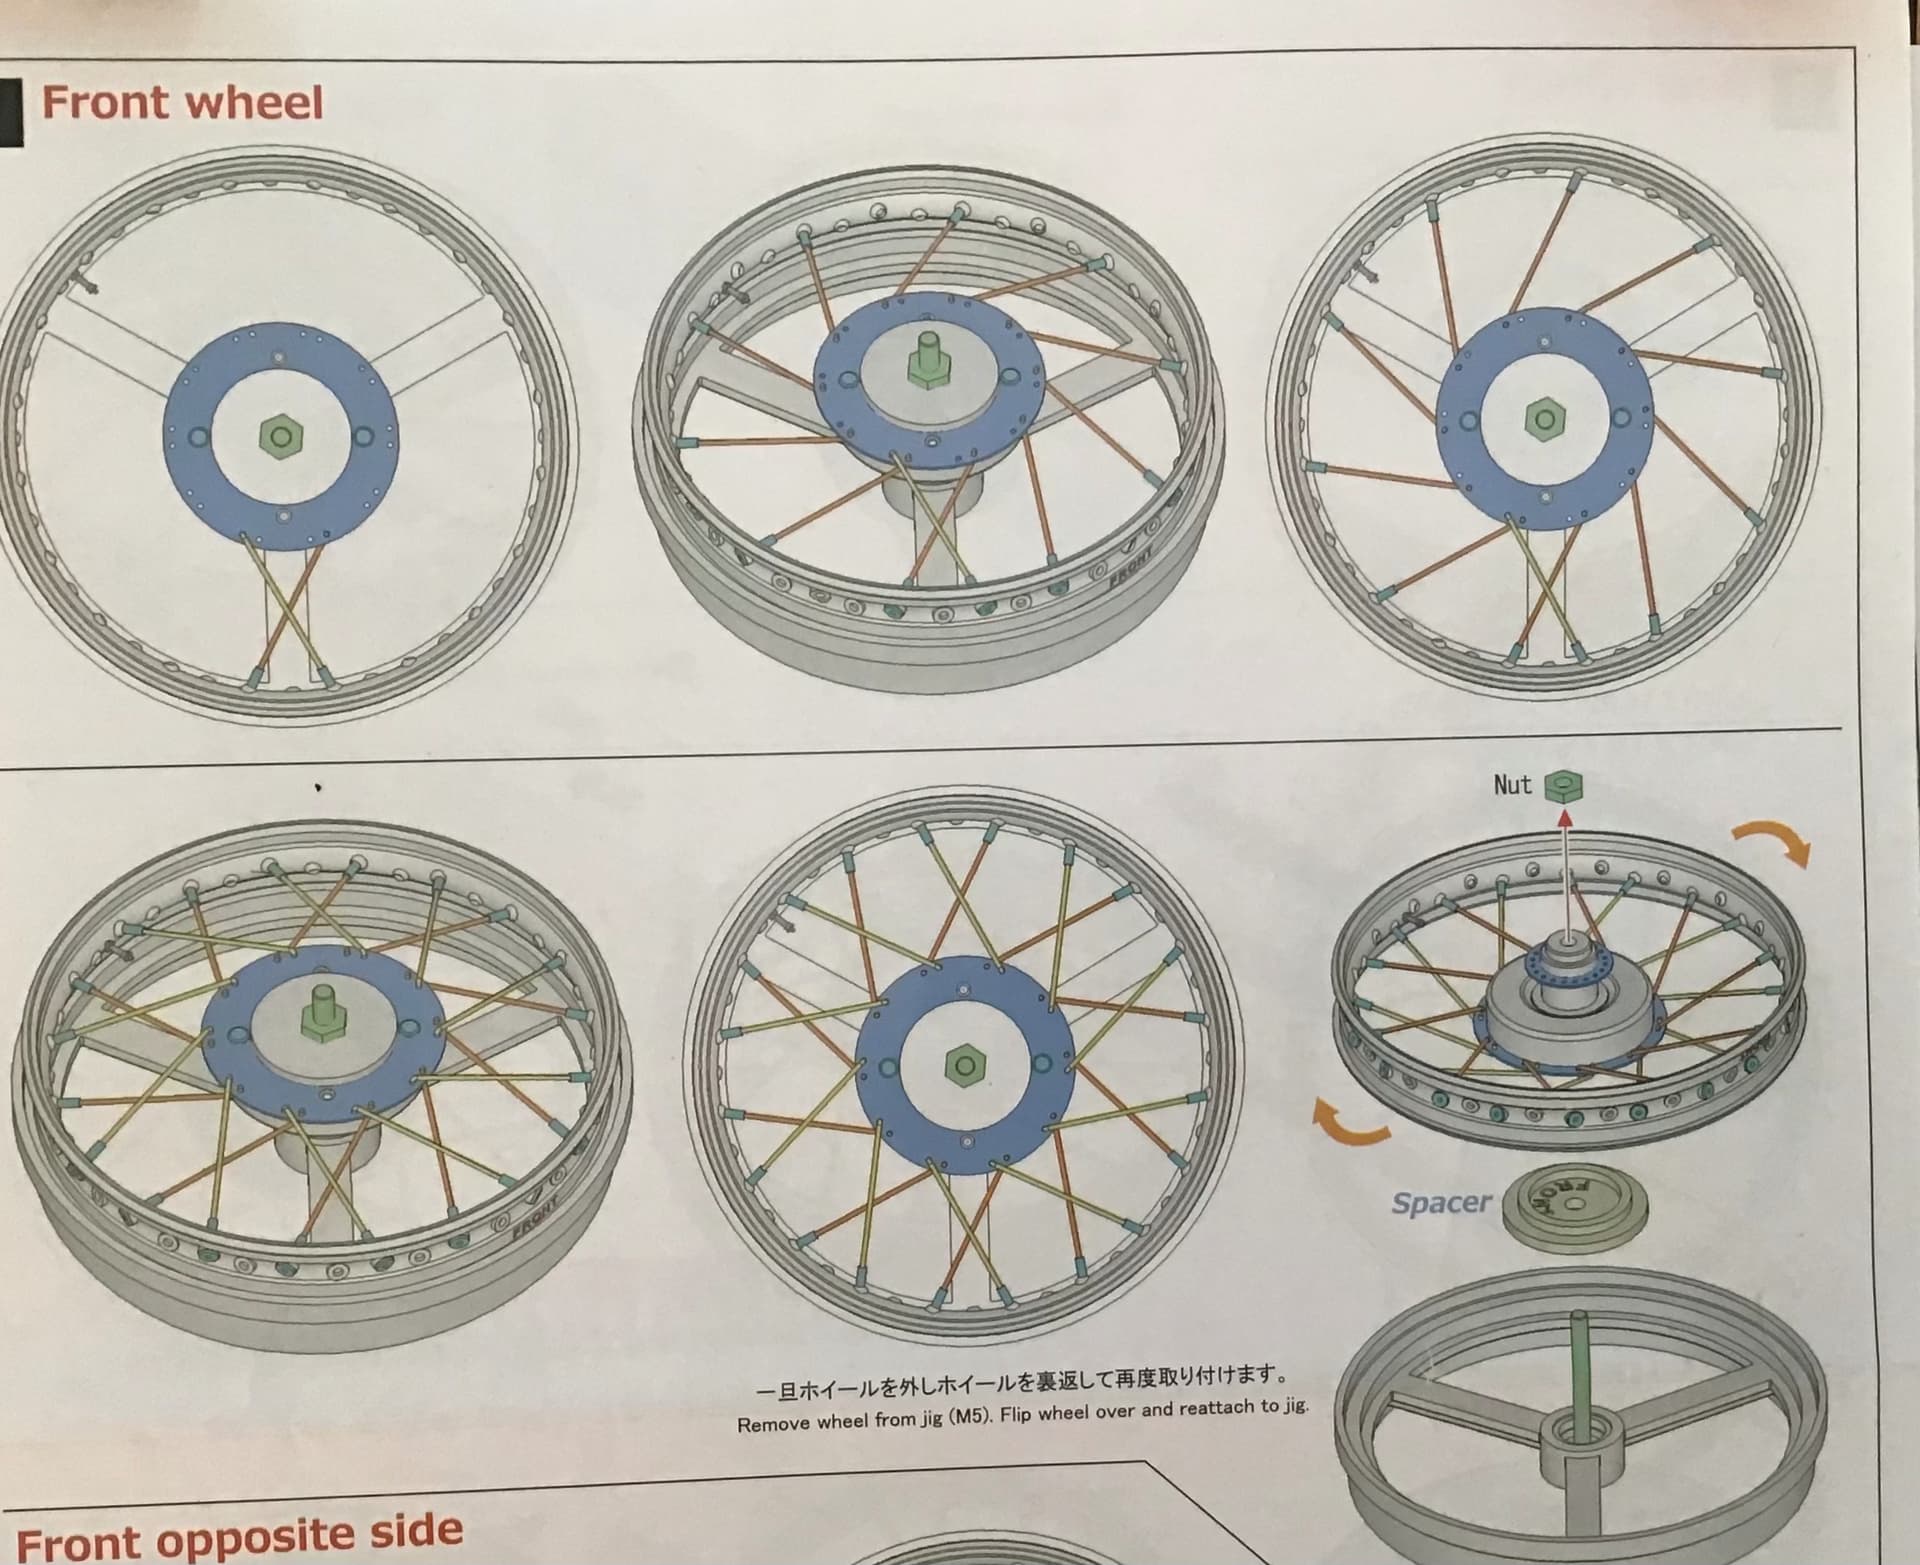
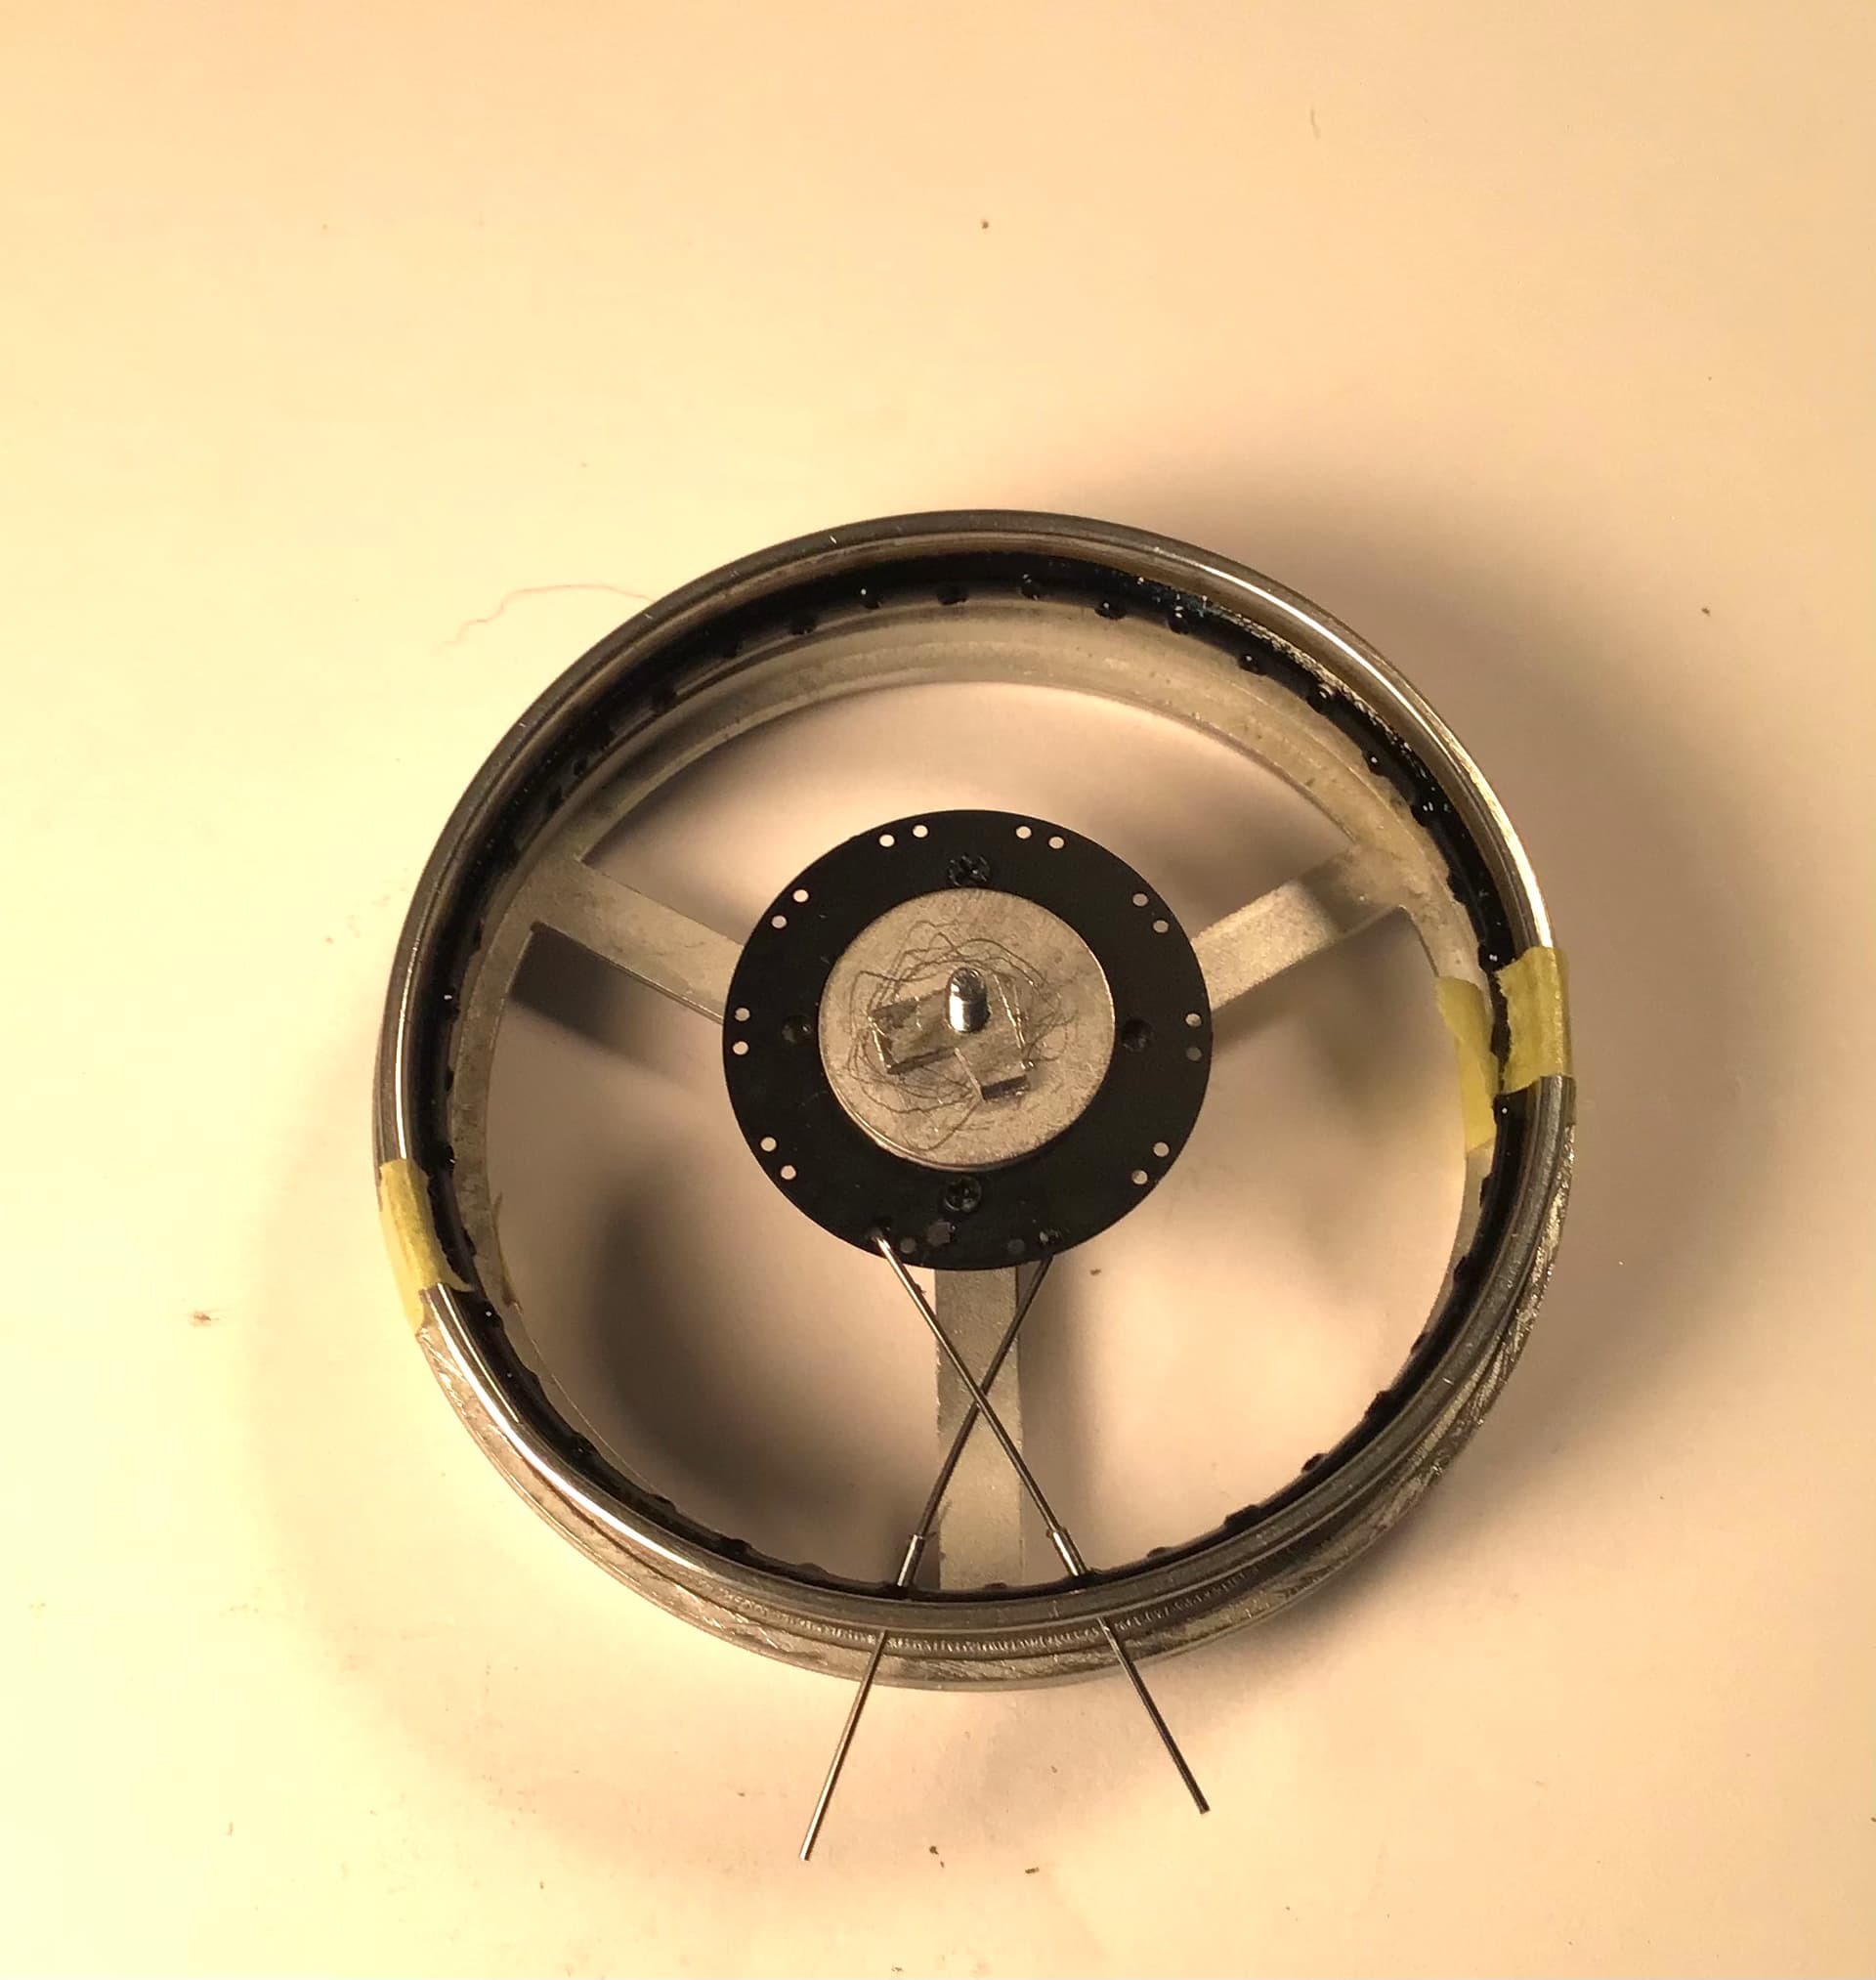
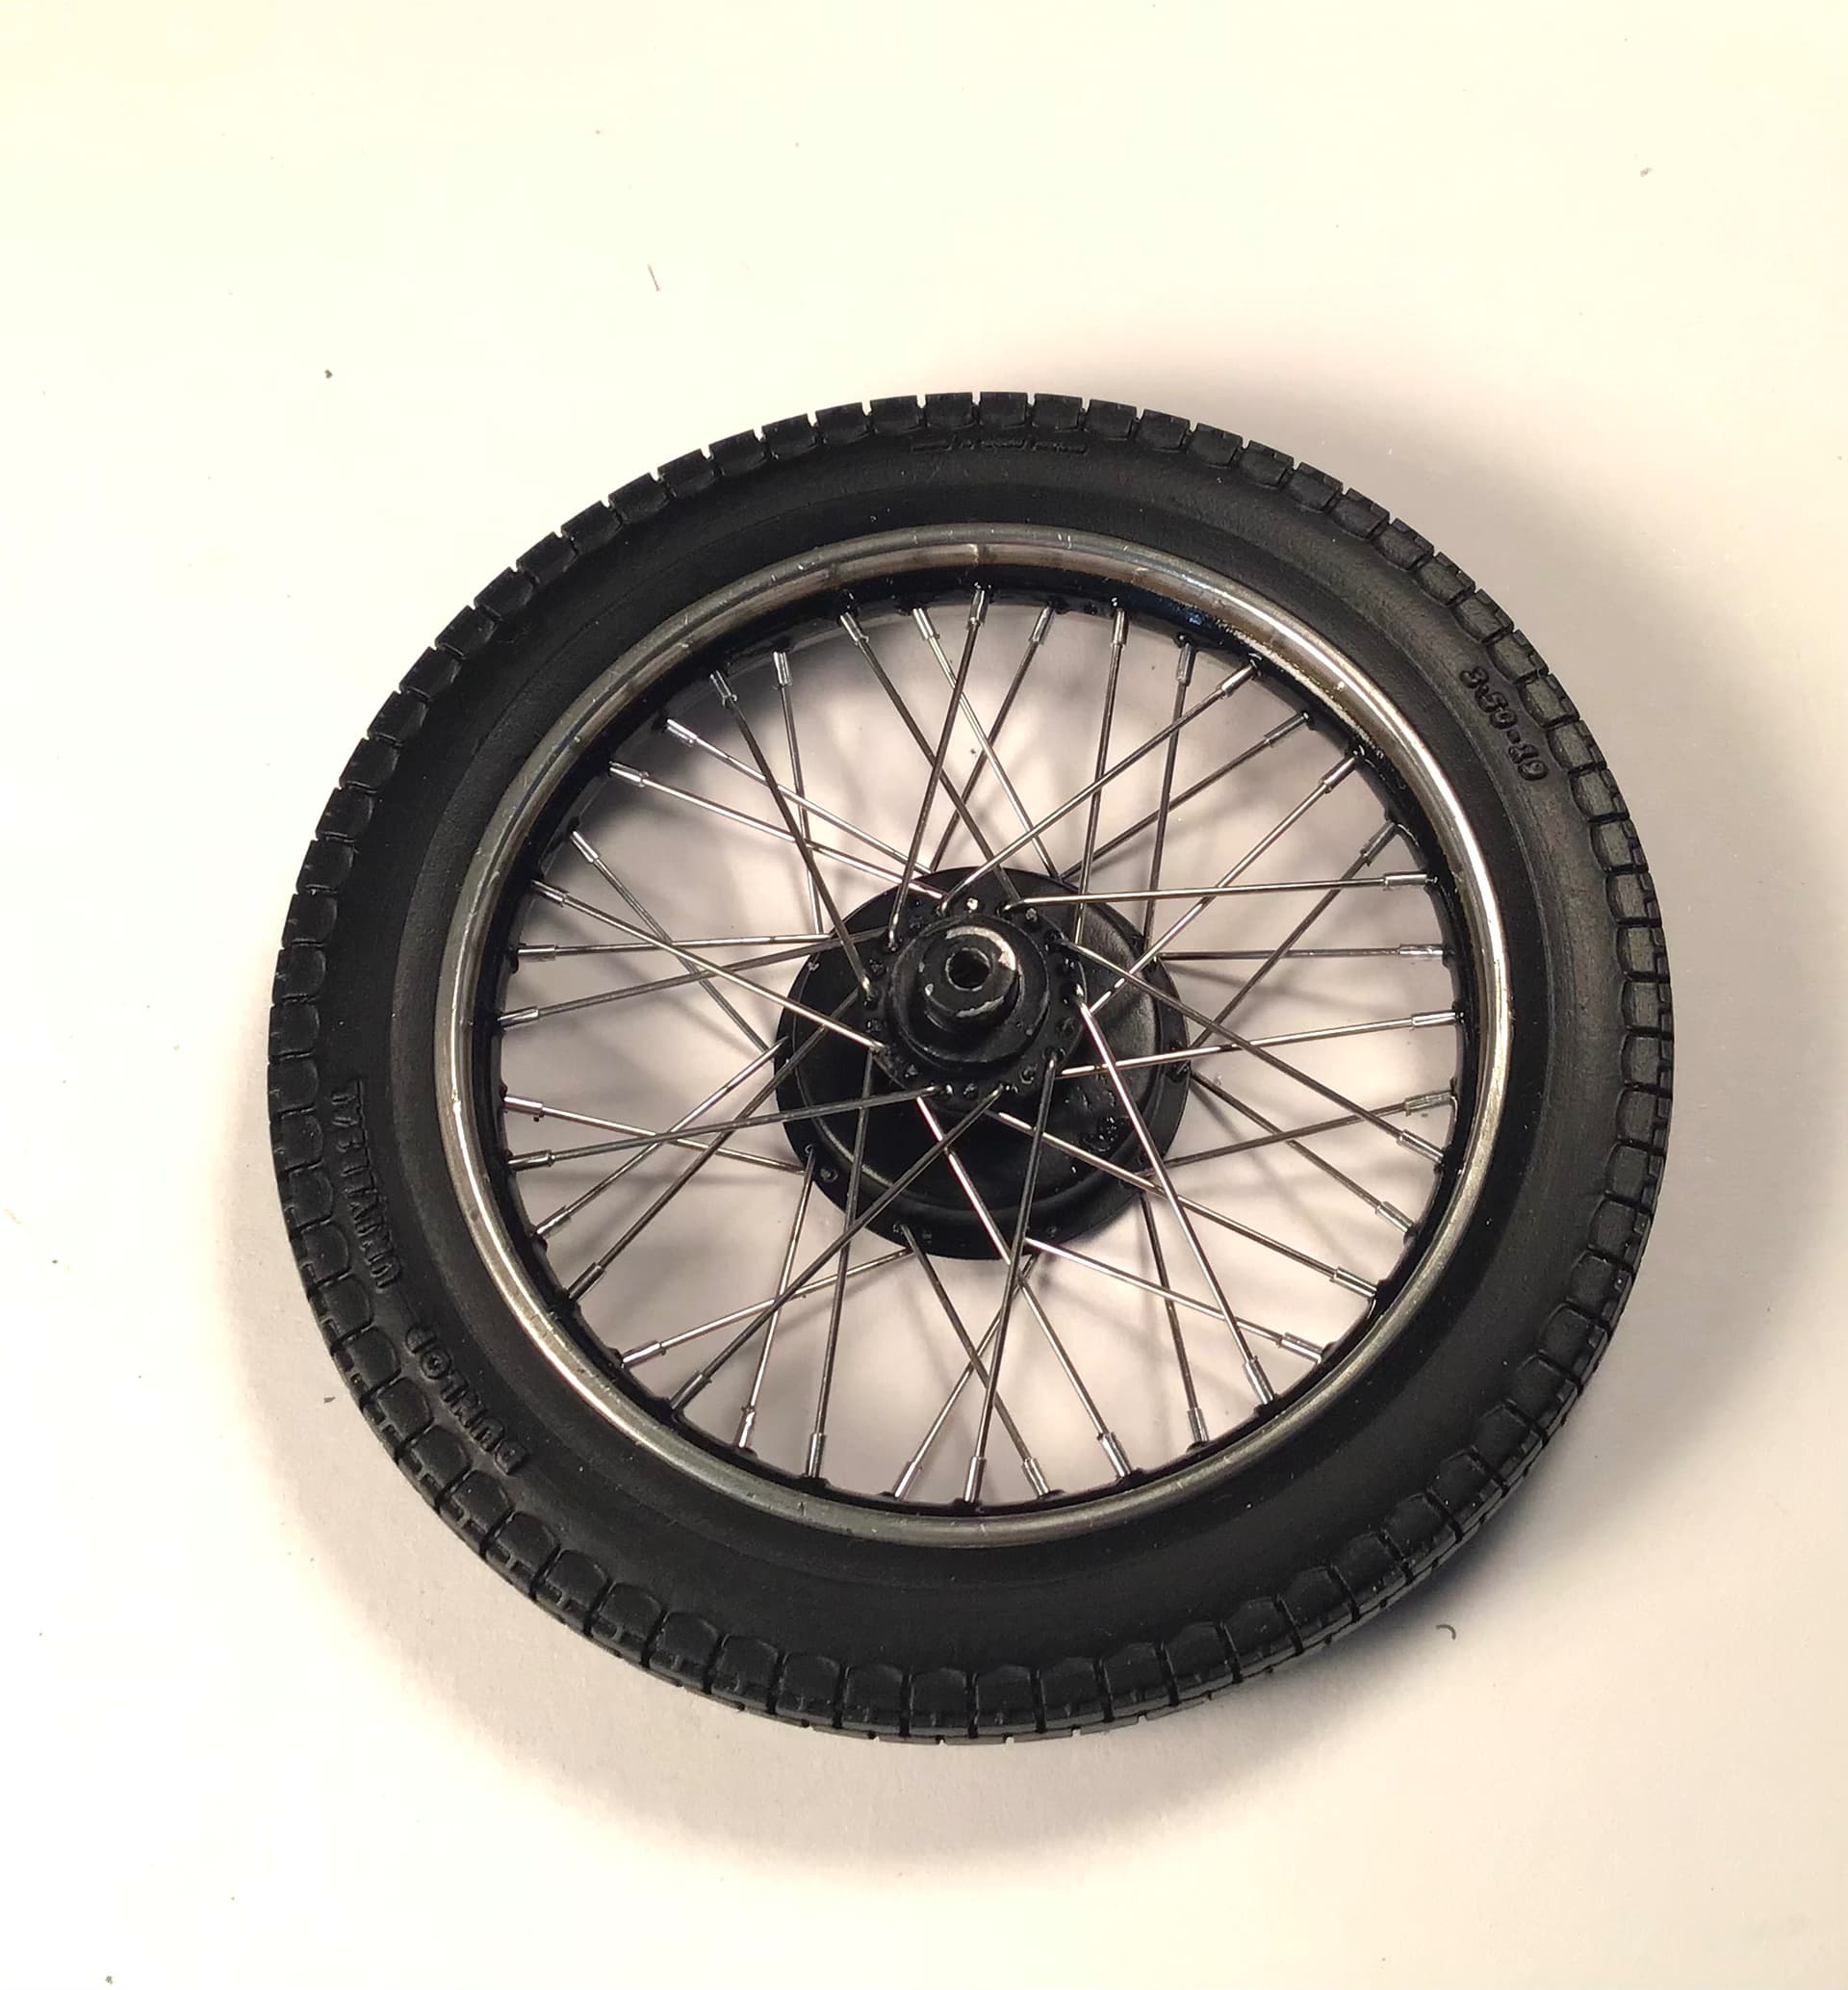
Wheel building has begun .
The fixture uses the screw and nut from the headstock/ fork assembly - the problem being I had cemented the nut in it’s recess in the lower fork yoke . I drilled a pilot hole in a piece of white metal sprue and turned the screw into it to tap threads.
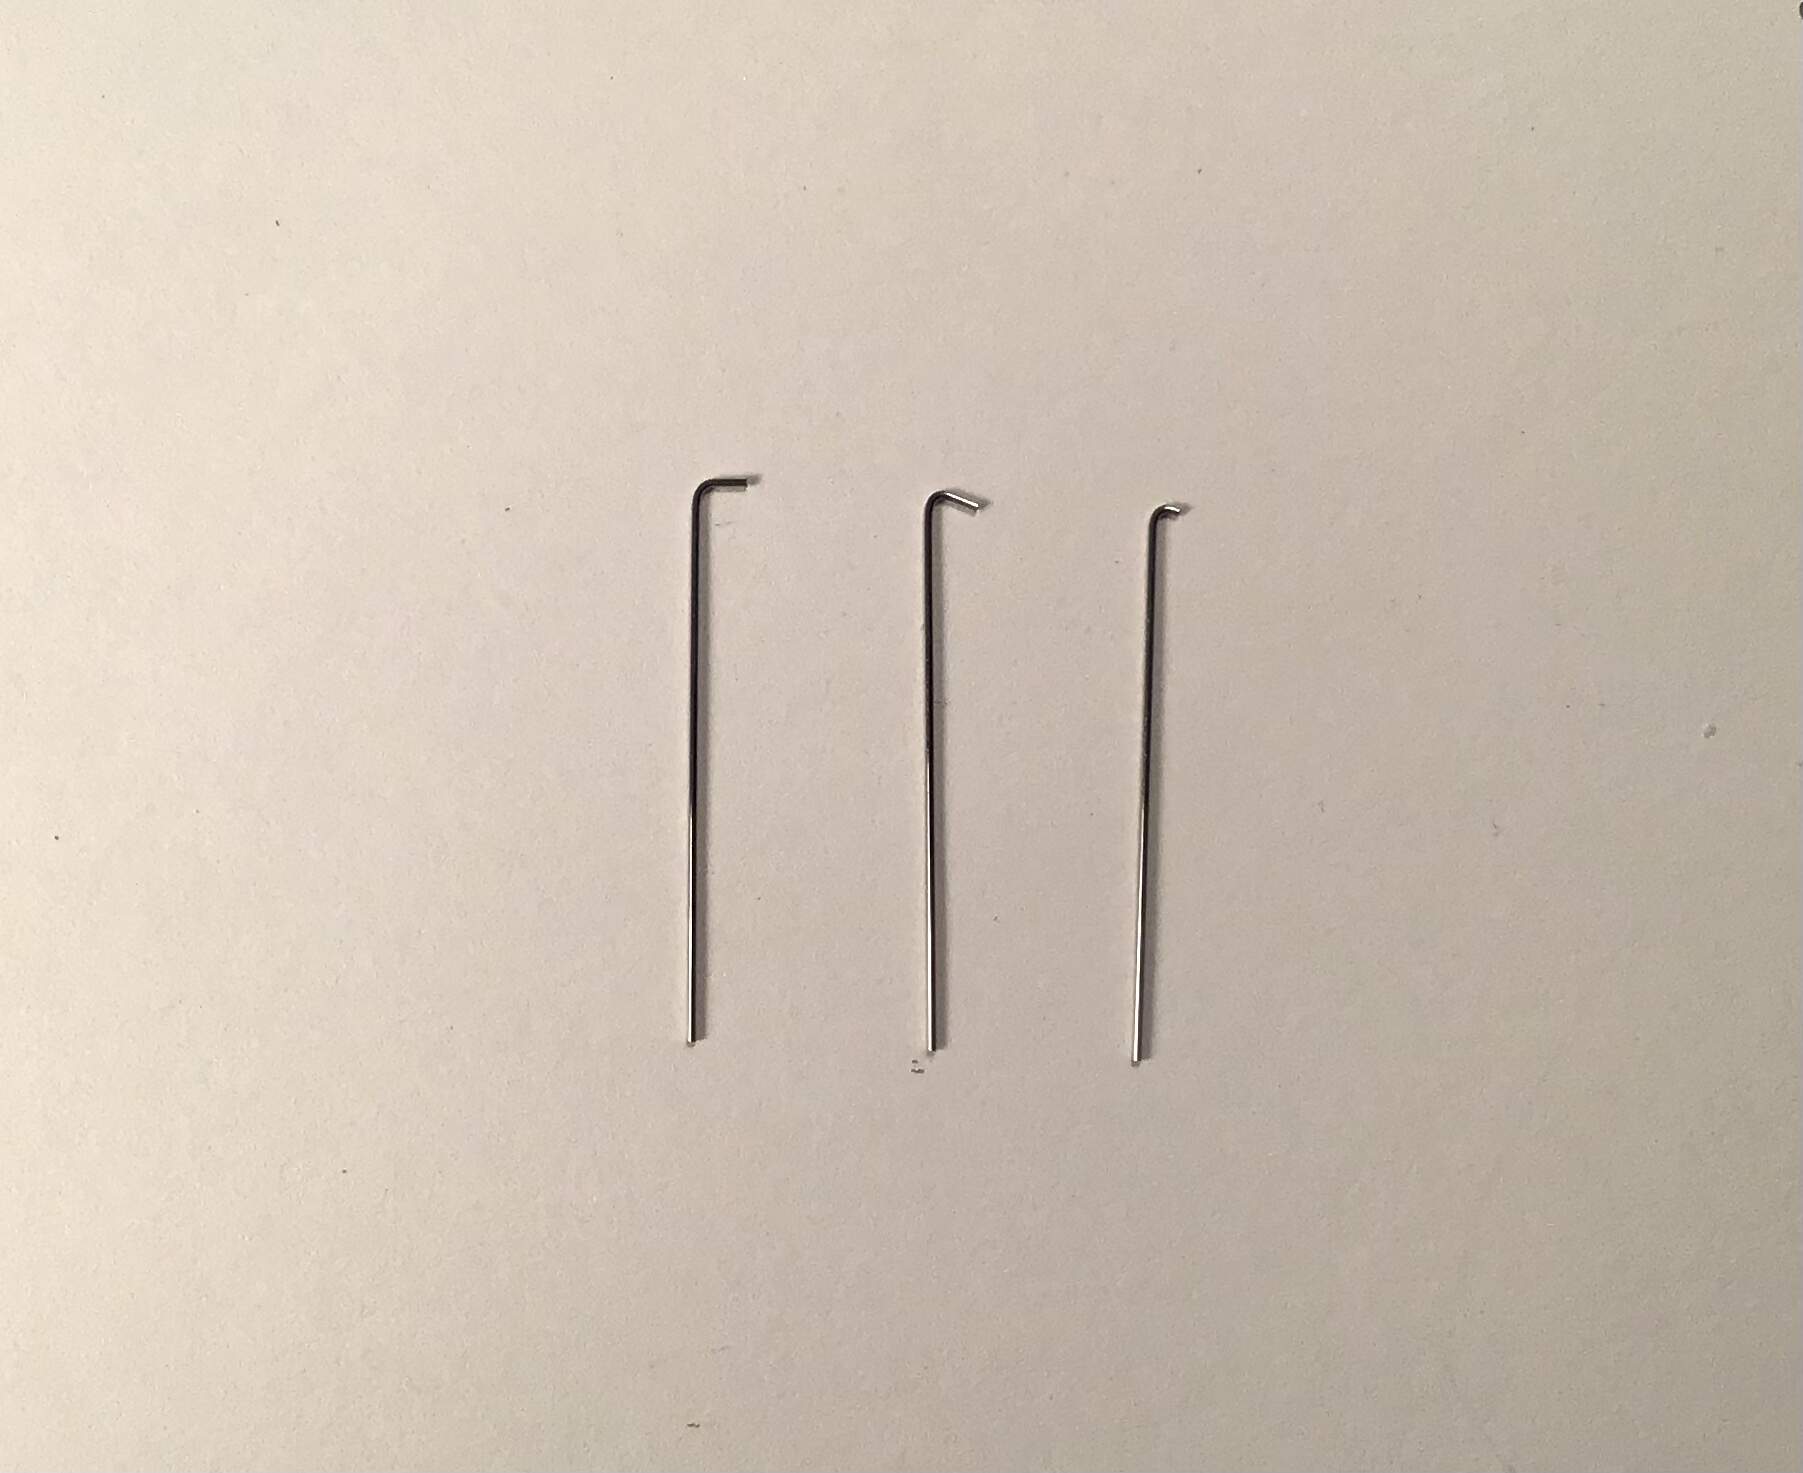
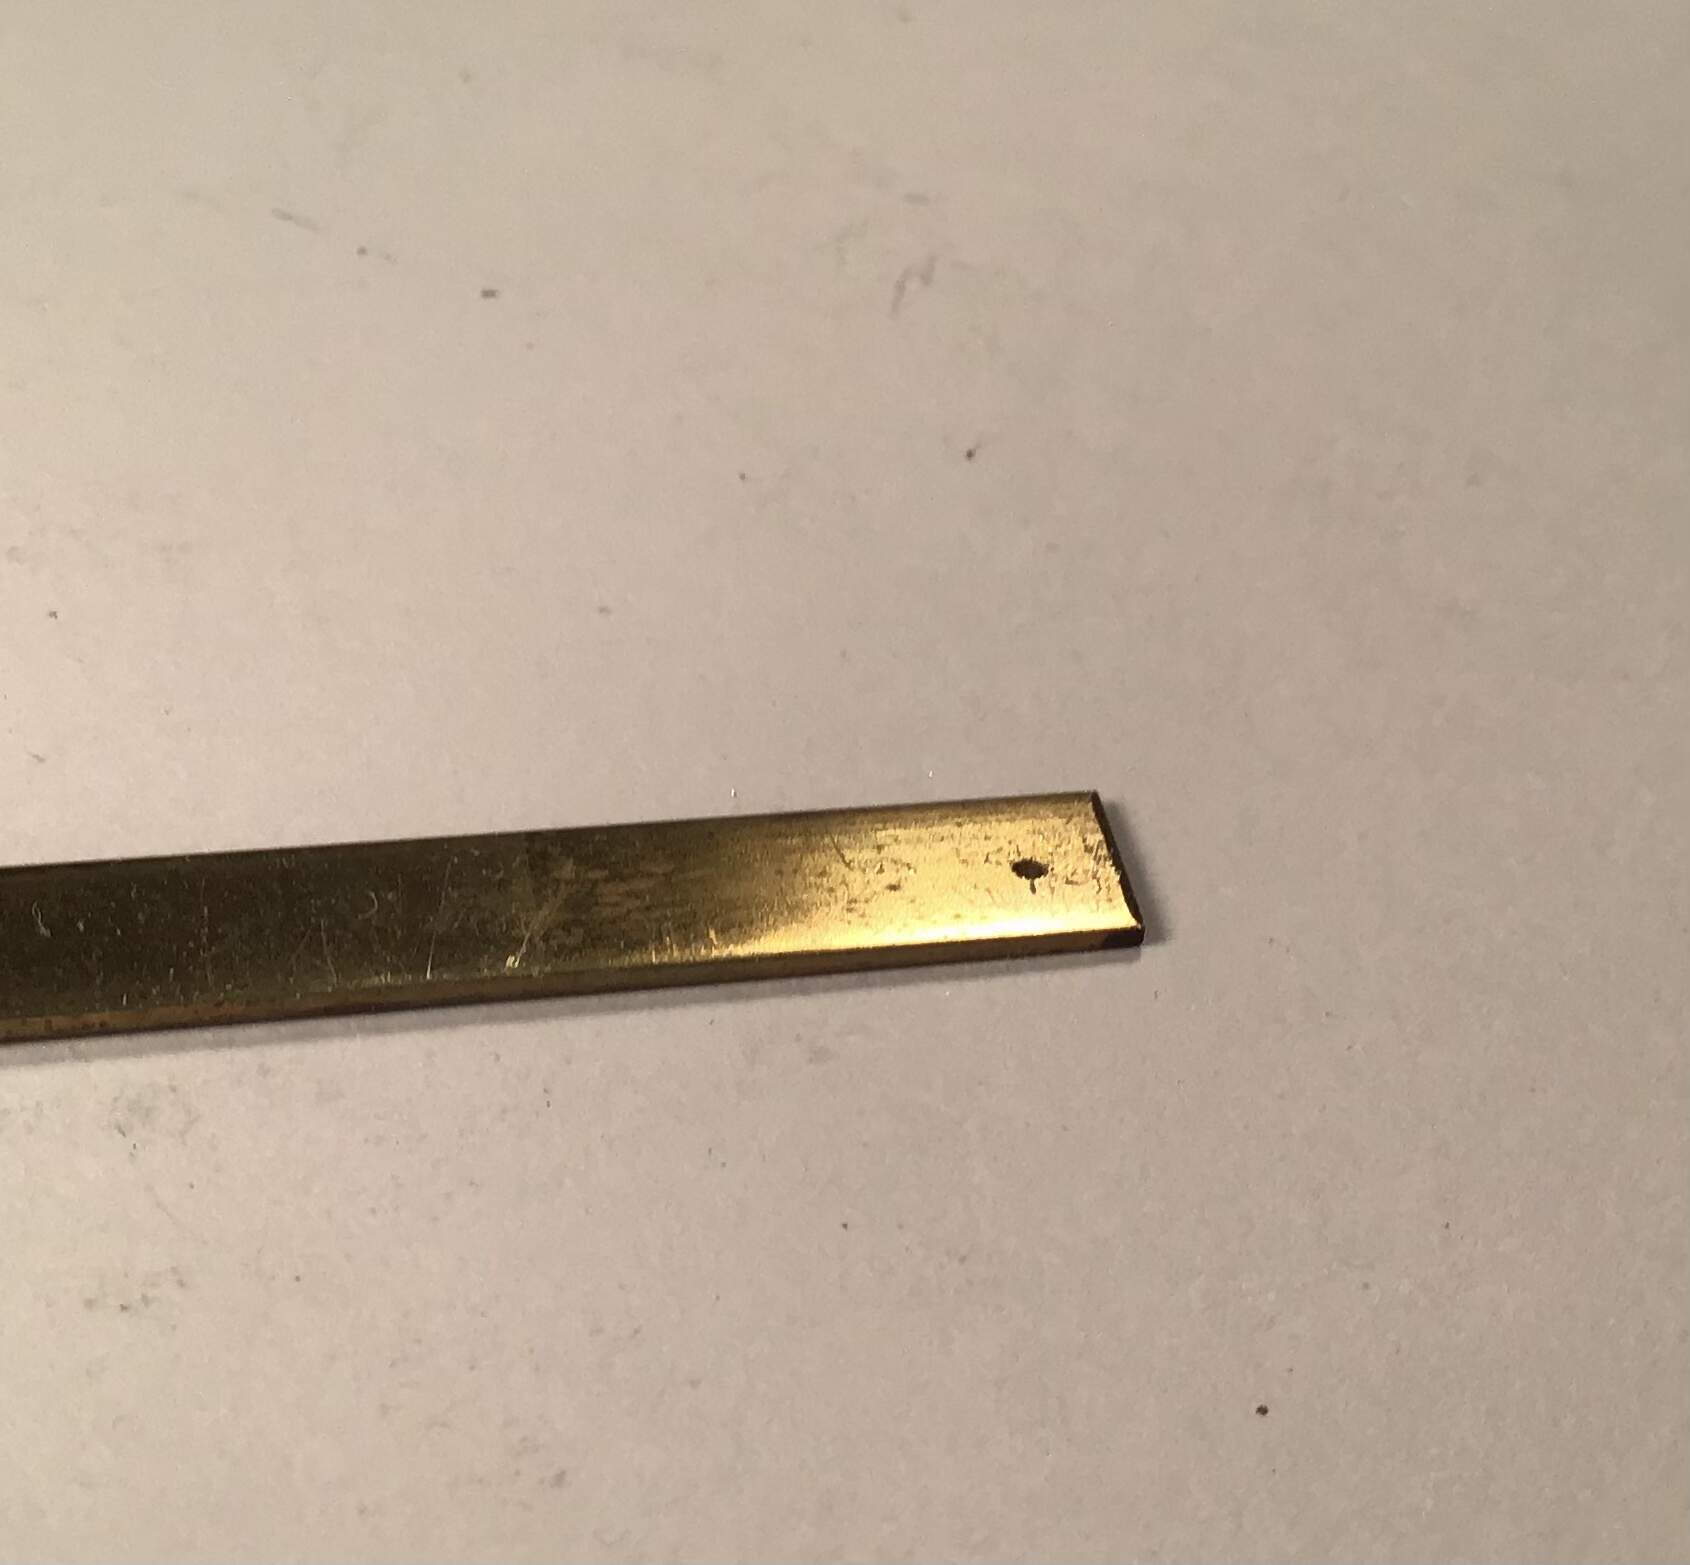
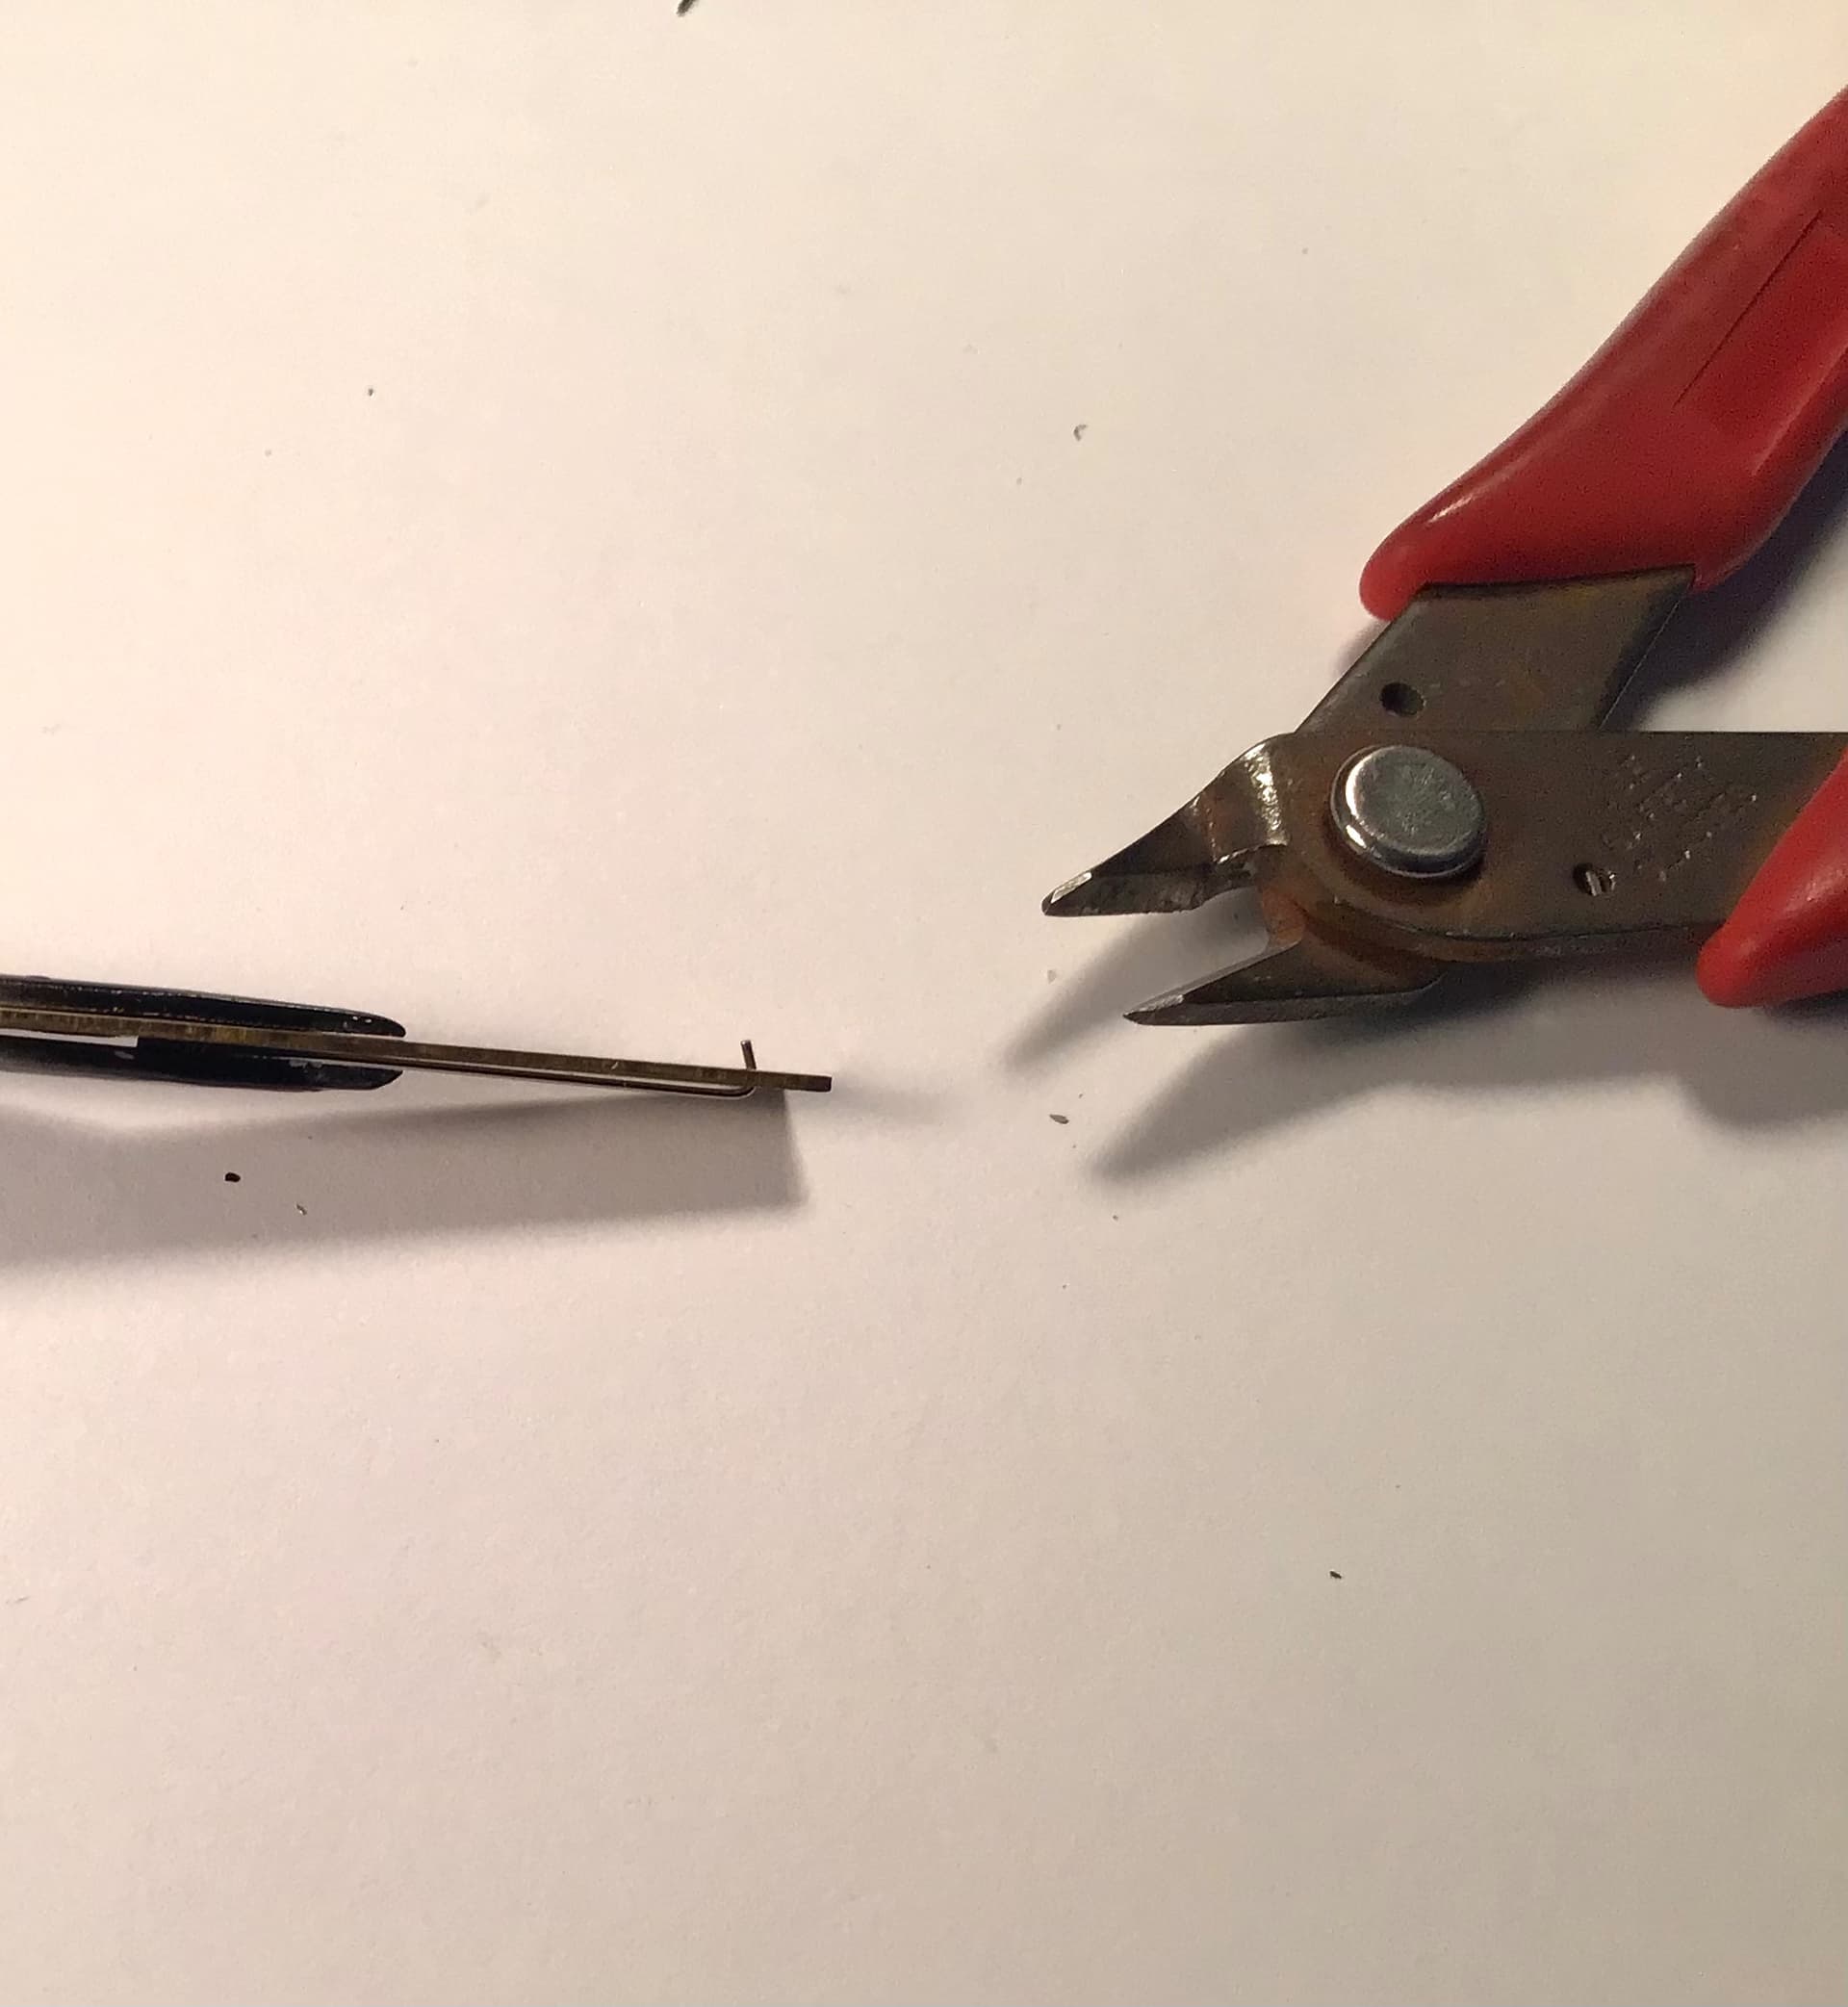
The spokes must be modified at the hub end . They are supplied with a 90 degree bend - this bend needs to be closed up a bit to form a hook and the leg needs shortening. I drilled a hole in a 1/16” thick piece of brass and inserted the short leg through and cut the leg with flush cutters.
Paint will need touch up from contact with fixture.
Thanks for looking- Richard
Richard,
The 1st wheel looks perfect. As usual, your machinist skills made replacing the screw a simple task. I wonder how many guys would need to find a replacement for that screw to proceed with the lacing of the wheels.
joel
Nice wheel! I had to build my wheels a couple of times because I didn’t notice that the MFH guide didn’t hold the hub on the same plane as the rims so they ended up slightly offset. As Joel said, I am sure the machinist in you would not have let that happen.
cheers
Michael
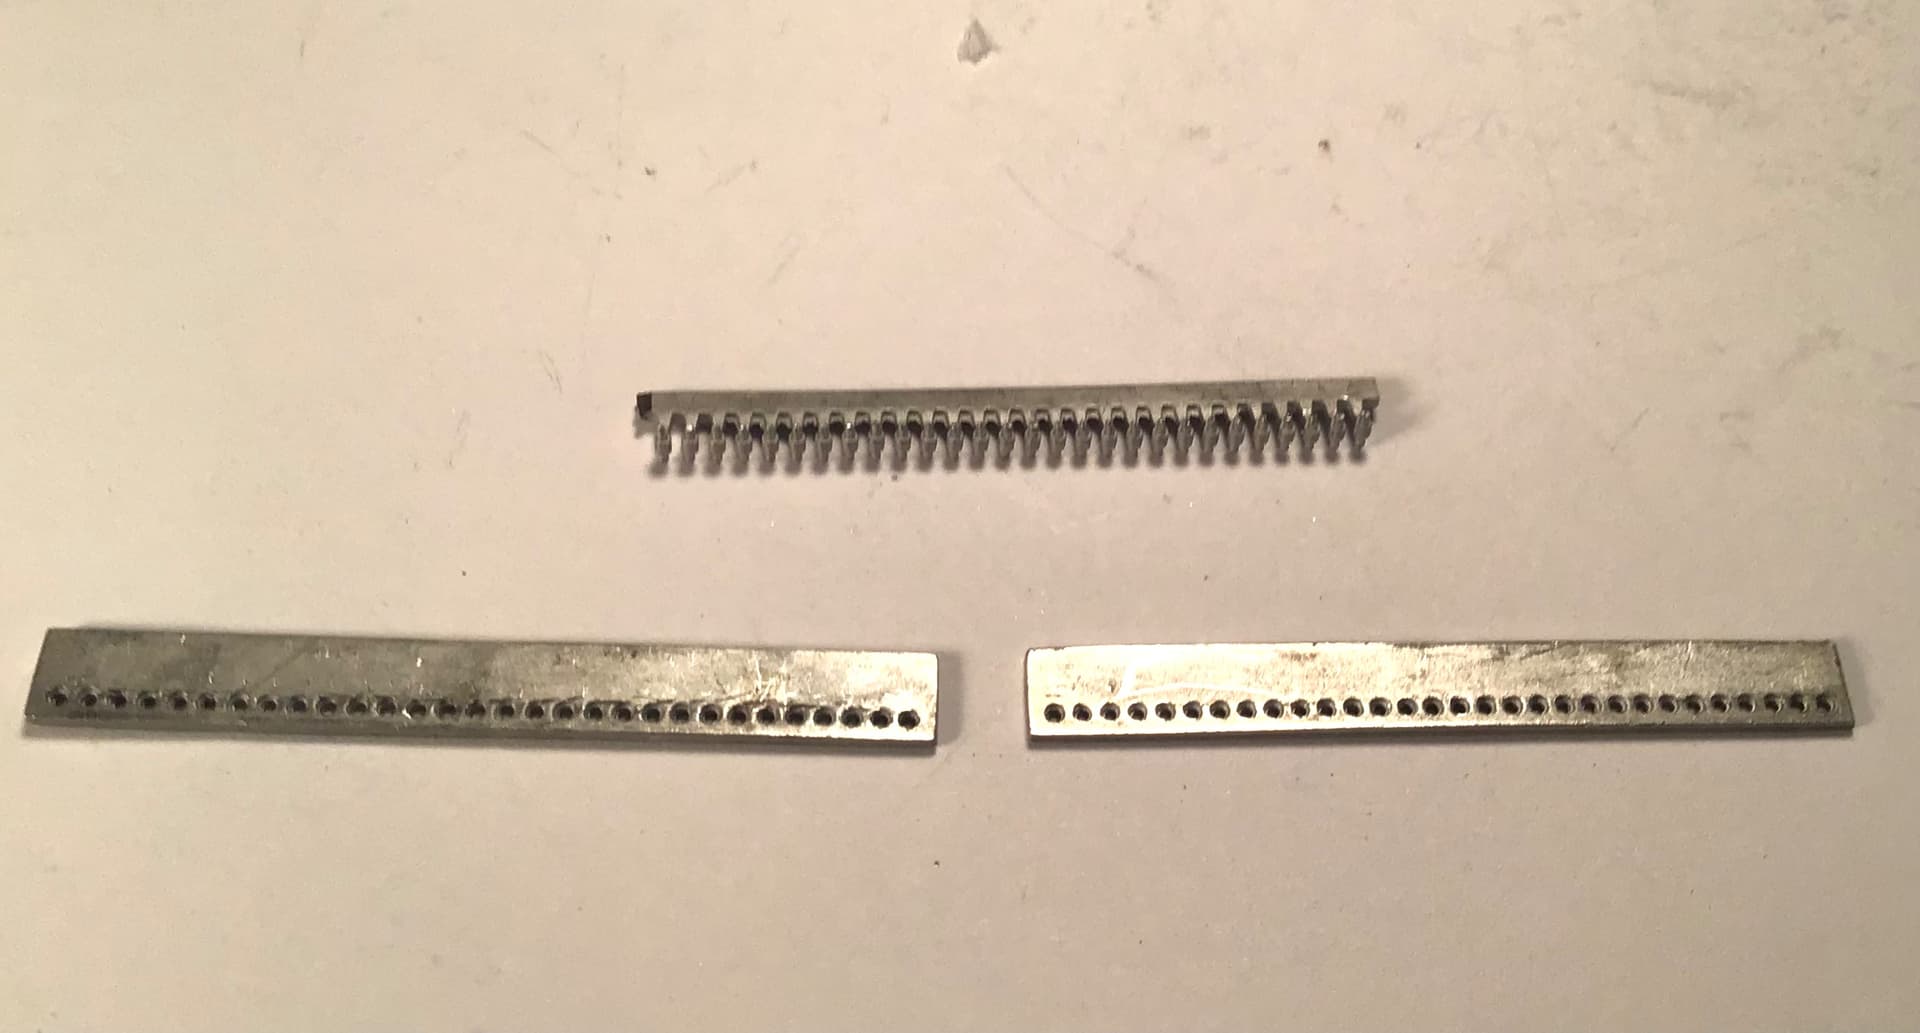
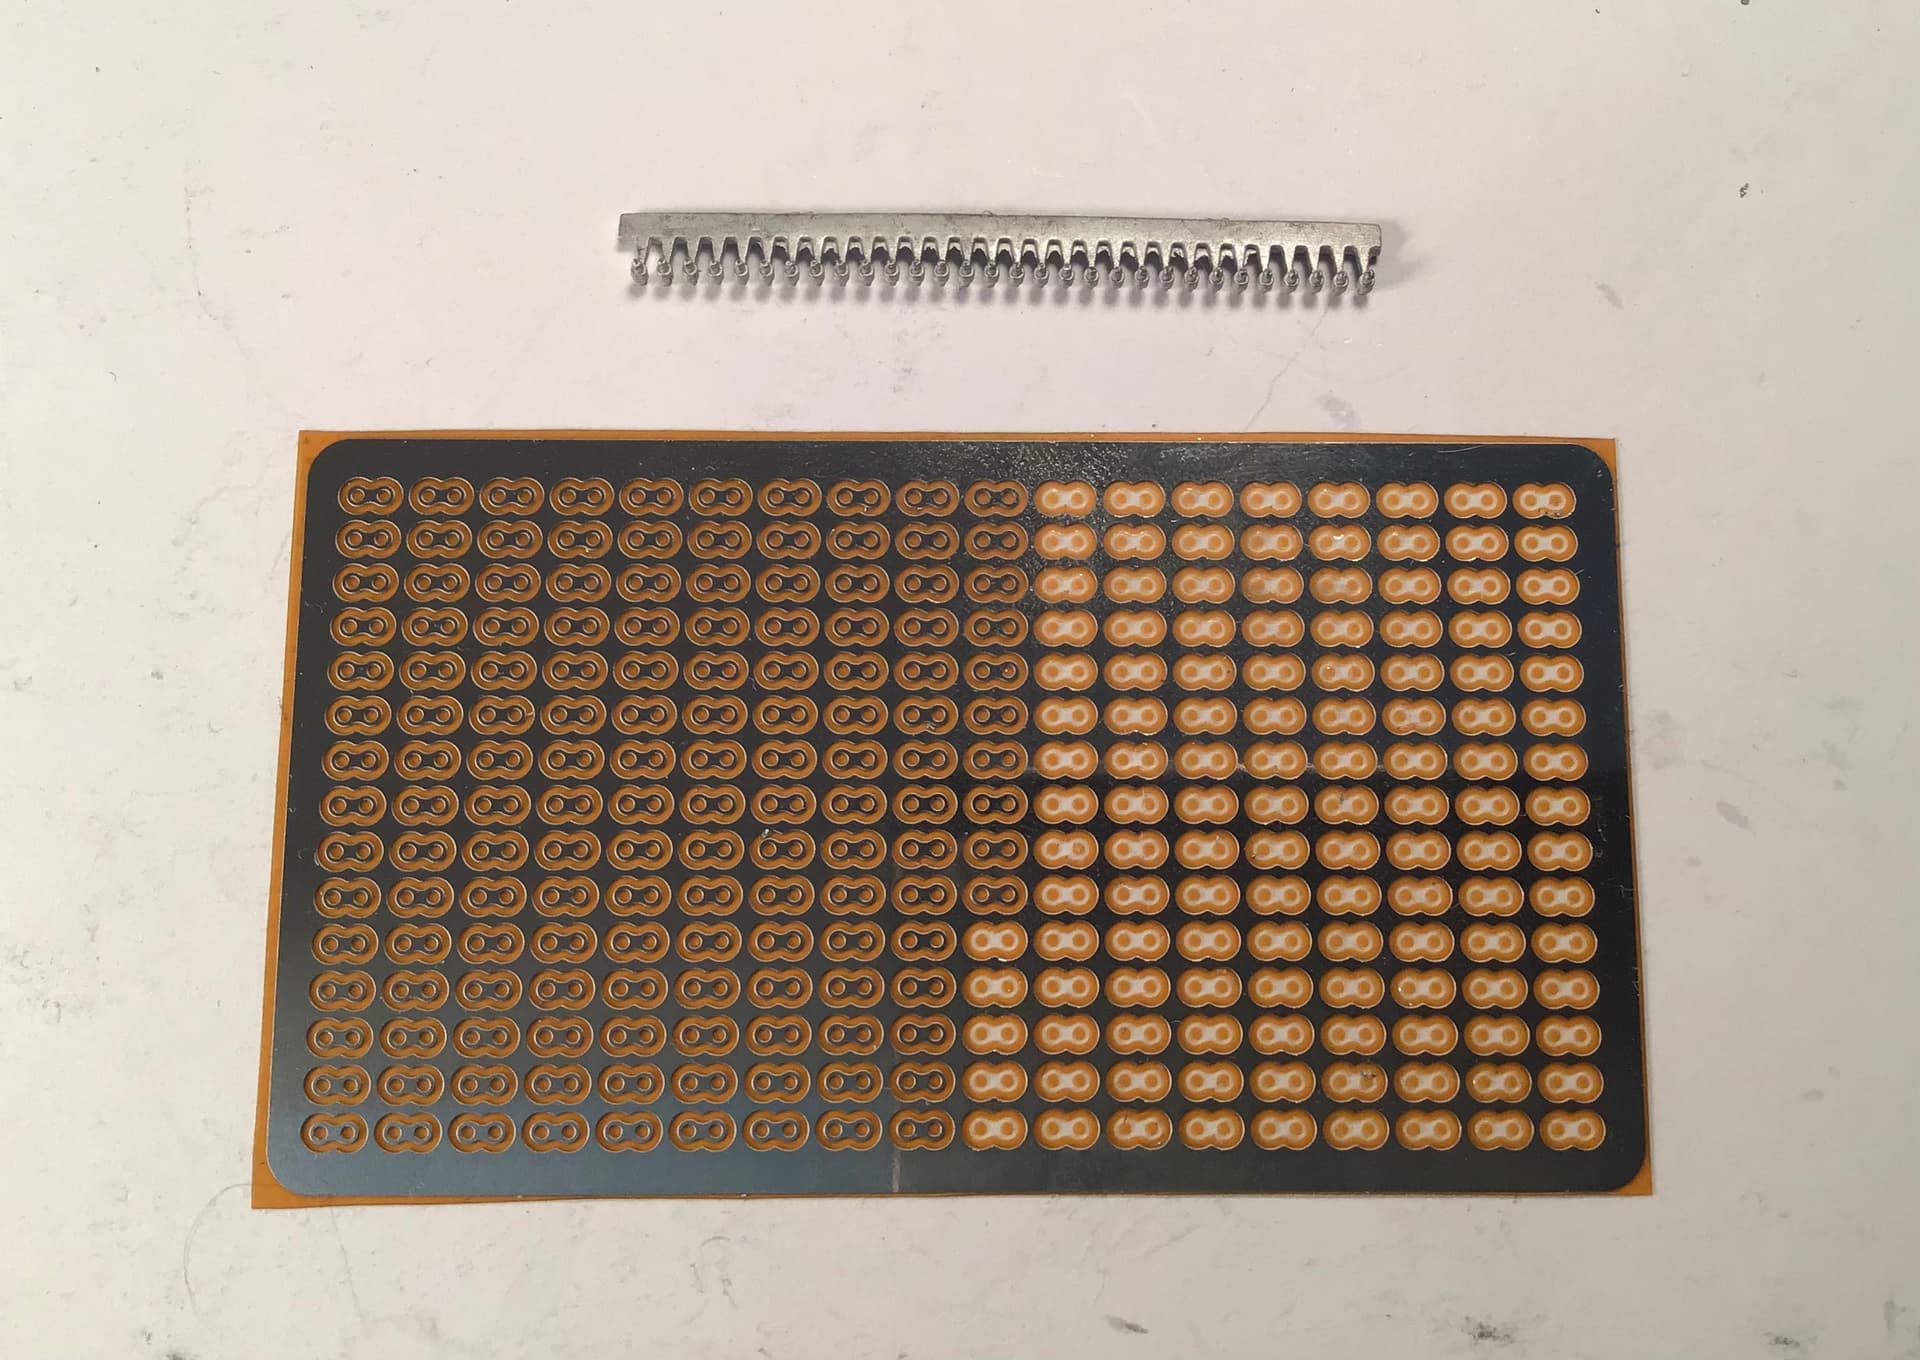
I’ve built up the final drive chain . The rollers are supplied in cast white metal on a sprue at the link spacing. Two white metal jigs are supplied with a row of holes that correspond to the link spacing.
The link plates are supplied as photo etch and mercifully they are free of the matrix so no cutting is involved to separate them.
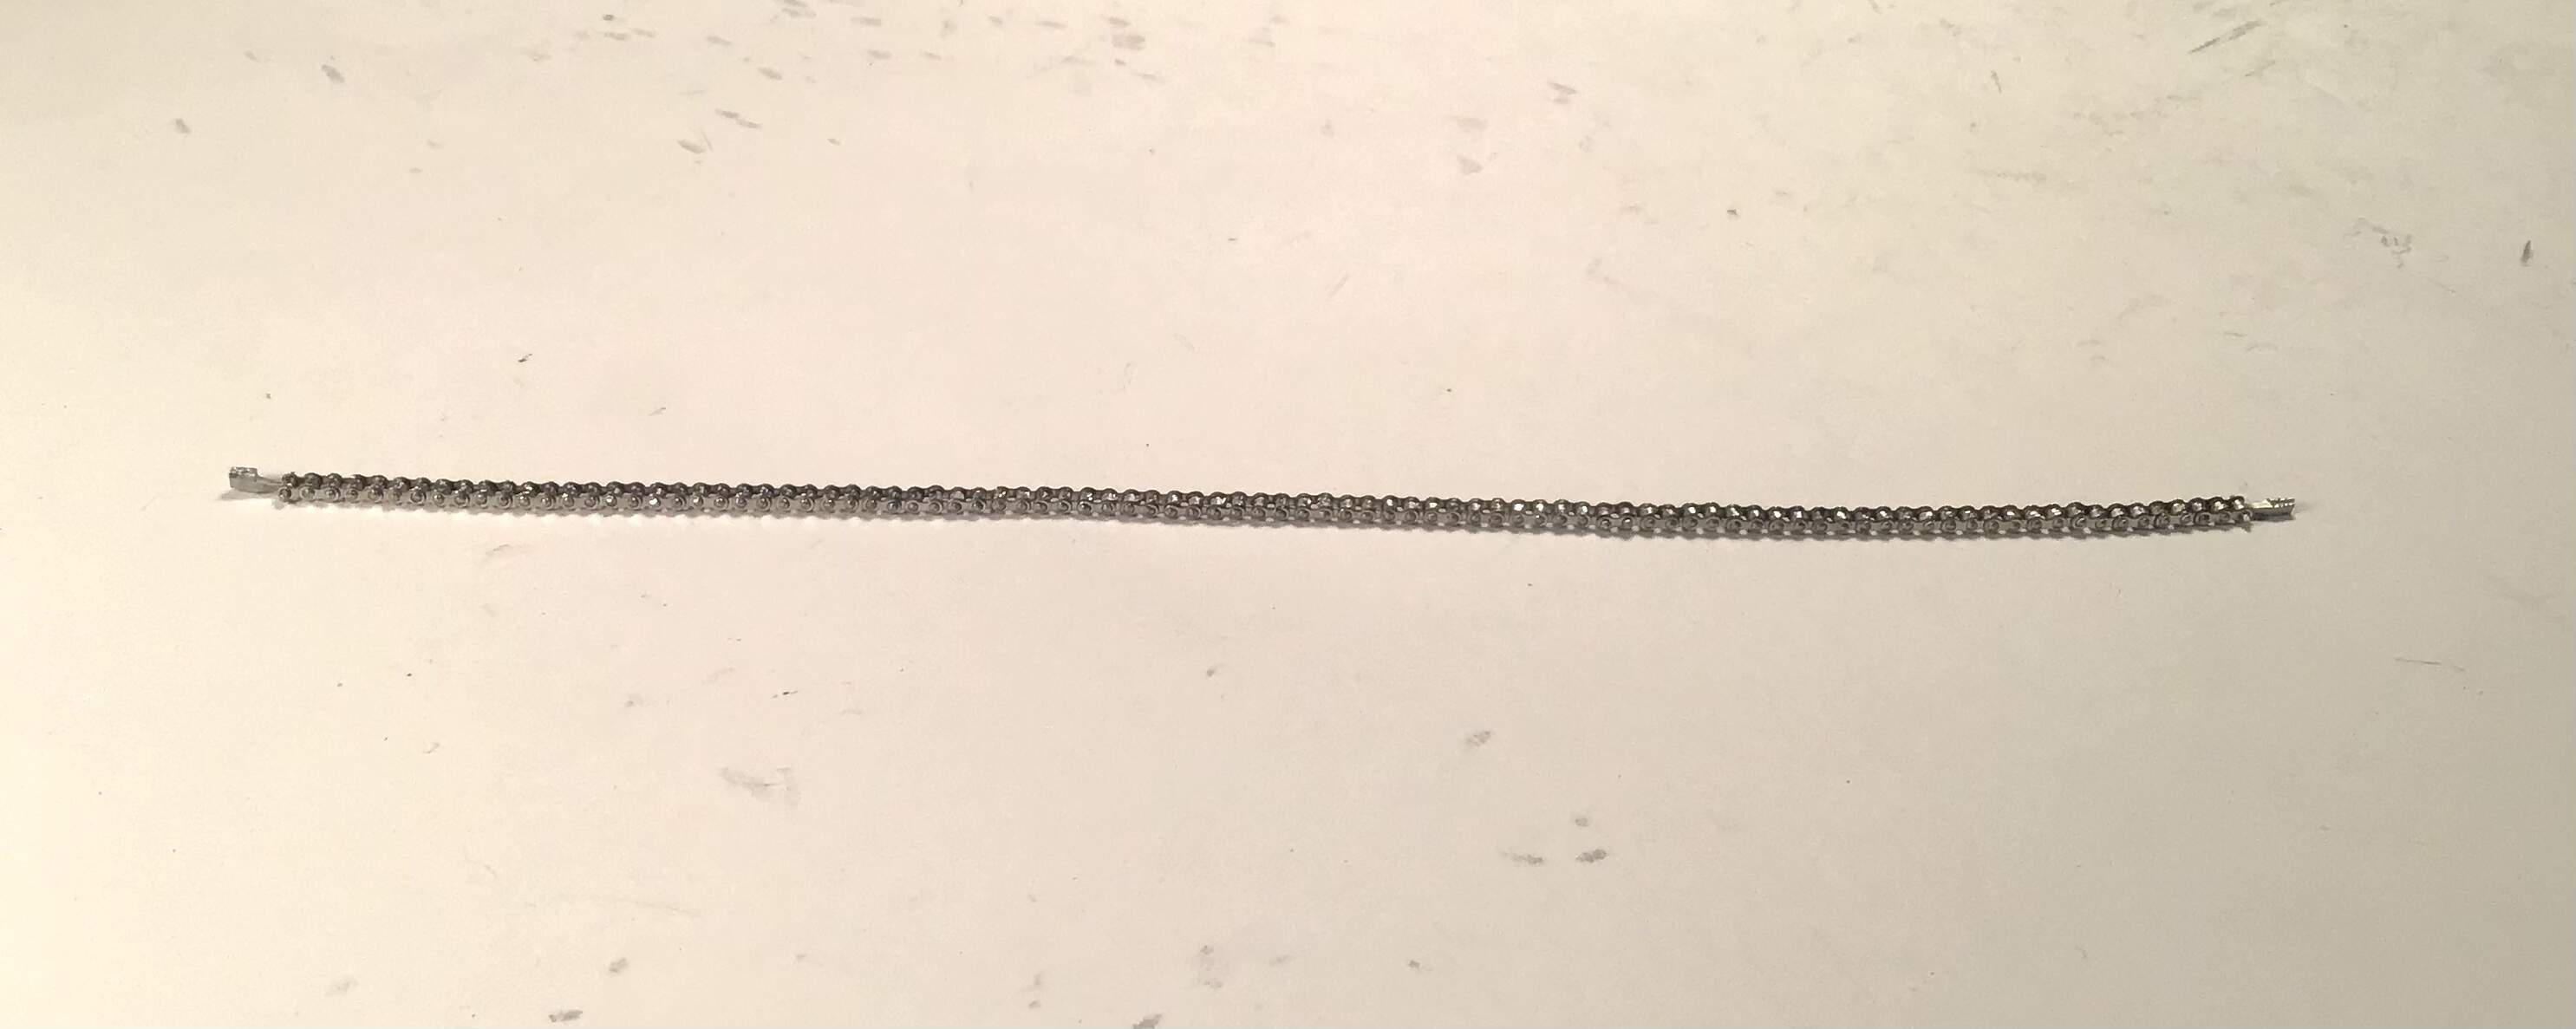
The plates are dropped over the rollers in one course then a second course is added connecting the previous links . The instructions indicate a snap fit but that was not the case . A 1/32” nail set worked perfectly as a rivet tool , peening over the white metal roller ends. A gentle push while turning the nail set produces very neat peened ends .
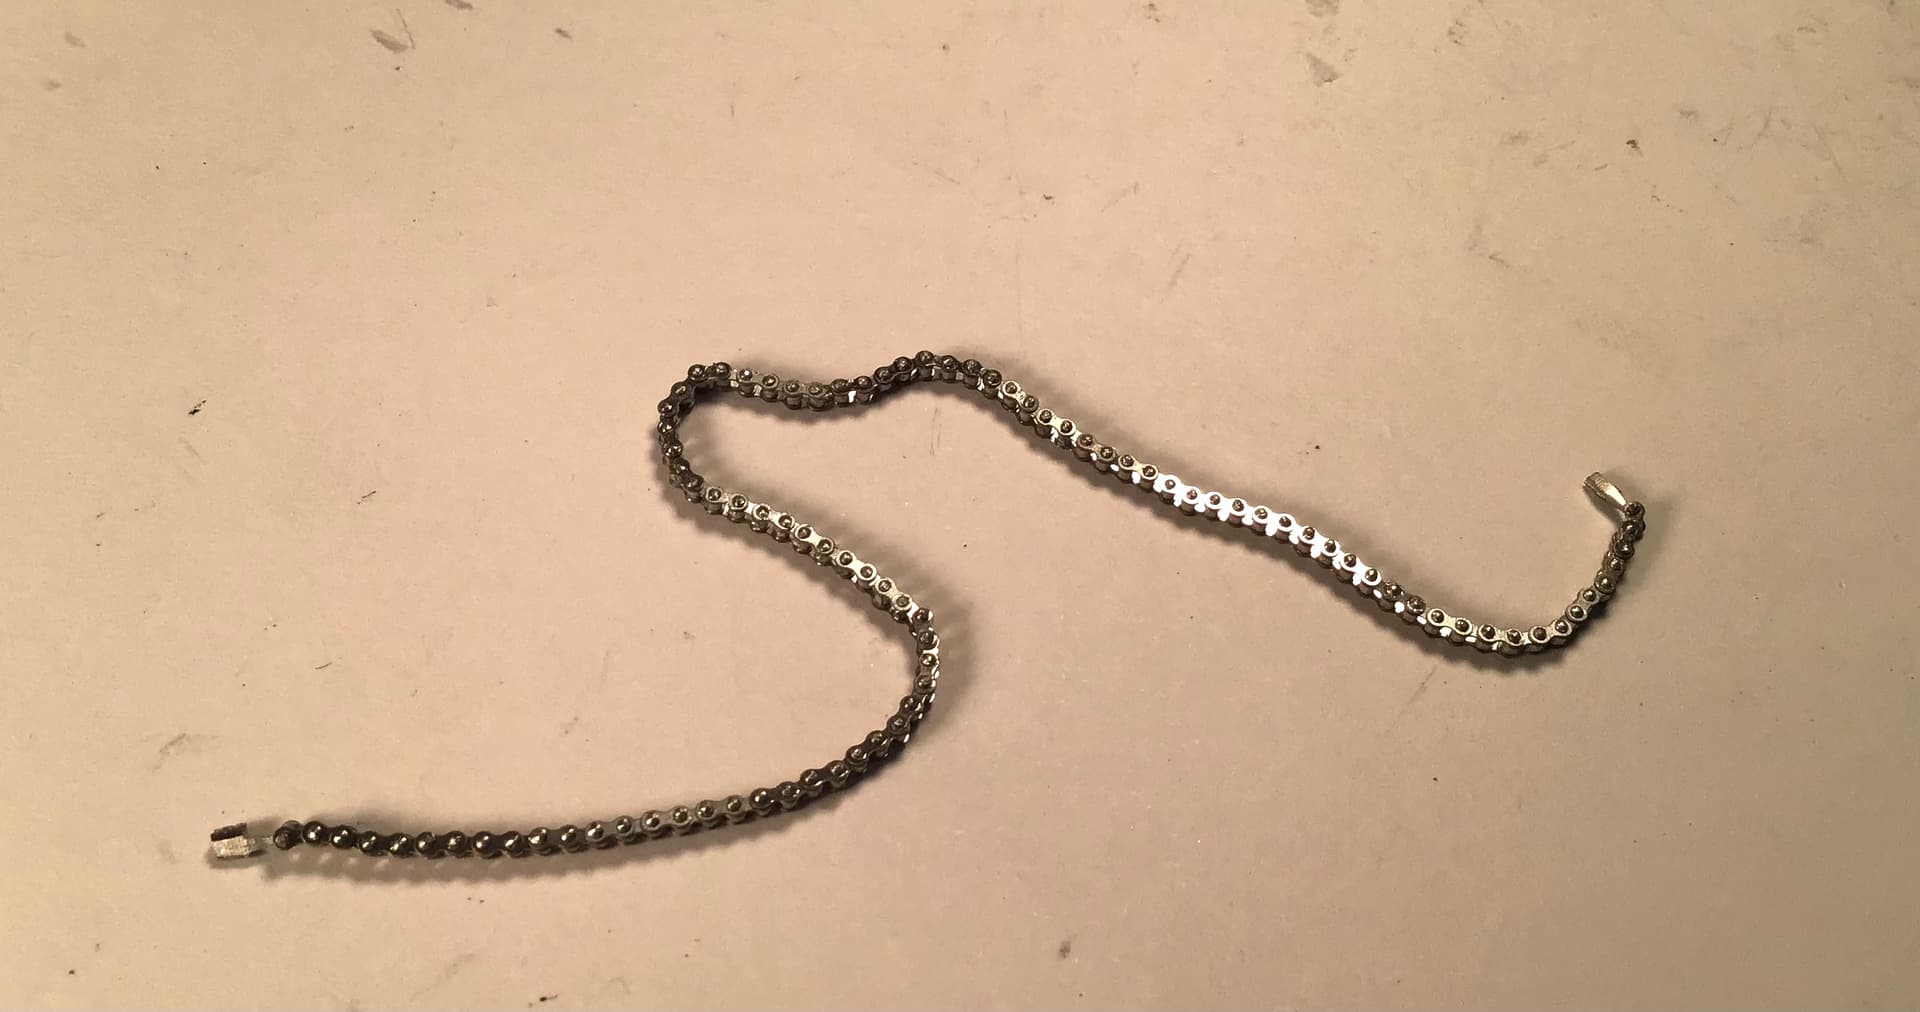
The chain is completely flexible.
I was dreading this but it actually went very smoothly- the only glitch was the expectation of a snap fit but peening with the nail set made it much better.
Thanks for looking - next post should see it up on wheels.
Cheers- Richard
I think the best part about this system was that there were no attachment points for the links. Trimming those out of traditional PE would have been a nightmare.
One thing to watch is the chain on the front sprocket. I don’t know if it left open on the BSA but on the Ducati is popped off if you rotated the wheel requiring the cover to be unstuck and reattached. Of course it took me two or three times to learn that.
cheers
Michael
Thanks for the heads-up Michael. On the BSA kit the wheels will not be able to rotate as the backing plates have two pins that engage the hub and of course the torque link to prevent the backing plates from rotating.
I don’t know if it is practical from a casting standpoint but I think it would have been better to attach the rollers to the sprue at their ends rather than the roller surface. Cutting them off would be much easier.