Well, based off what I’ve seen in a different thread… Figured another quick project would be nice. I’ll also be adding a couple more variants including the Alaska-type barrier and the shorter 6-foot barriers along with the different base variants I’ve seen.

3 Likes
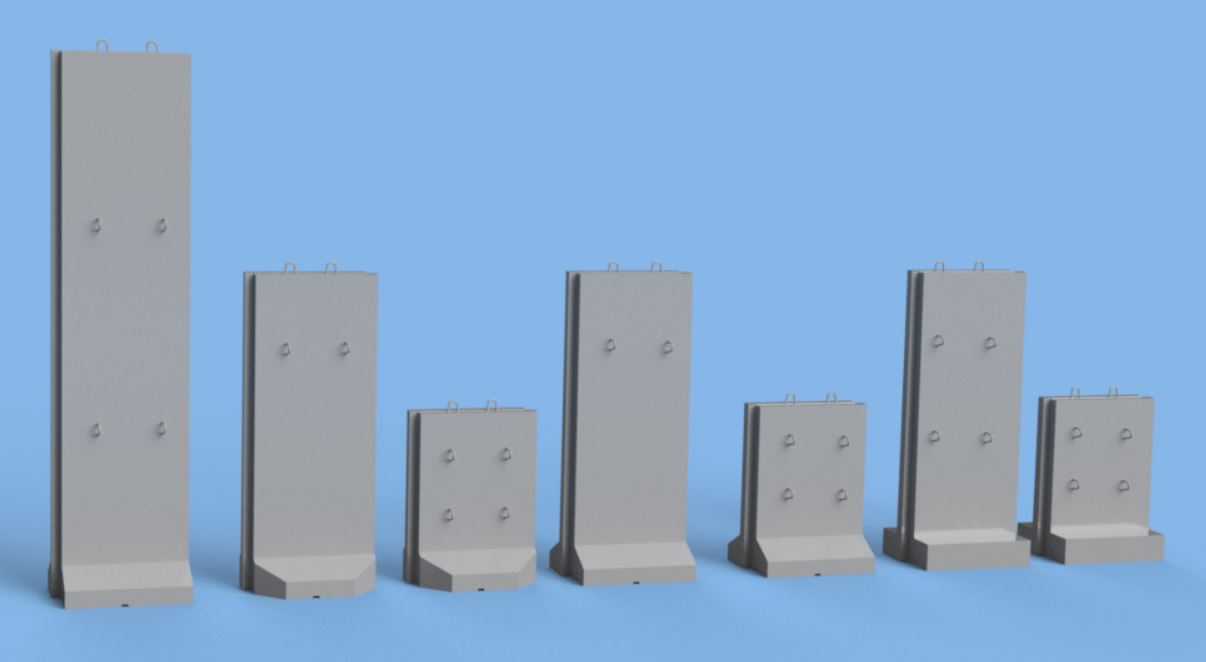
And the whole collection. From left to right is the 20ft Alaska T-Wall, Bremer Wall w/ angled base, 6ft angled wall, Bremer wall w/ square base, 6ft w/ square base, Texas T, 6ft Texas T.
5 Likes
Well unfortunately this is what happens when you: A) don’t put enough resin into the vat and B) forget to refill the resin level halfway through a bit print. Both of the tall Bremer Walls failed near the end. The short one succeeded though. It is too clean, no damage of the short but I’m not sure how to easily and efficiently apply that to the 3D model aside from just brute forcing it and extruding different shapes all over. Unfortunately that would take quite a long time.


2 Likes
The T-walls look good.
Thanks! I wanted to do a little experiment to see how they take to cutting and gouging and scraping to replicate damage. Granted it looked a little bit too geometrical but I think it takes it well. Left is the angled base T-wall without and “damage” and right is the square base with "damage.
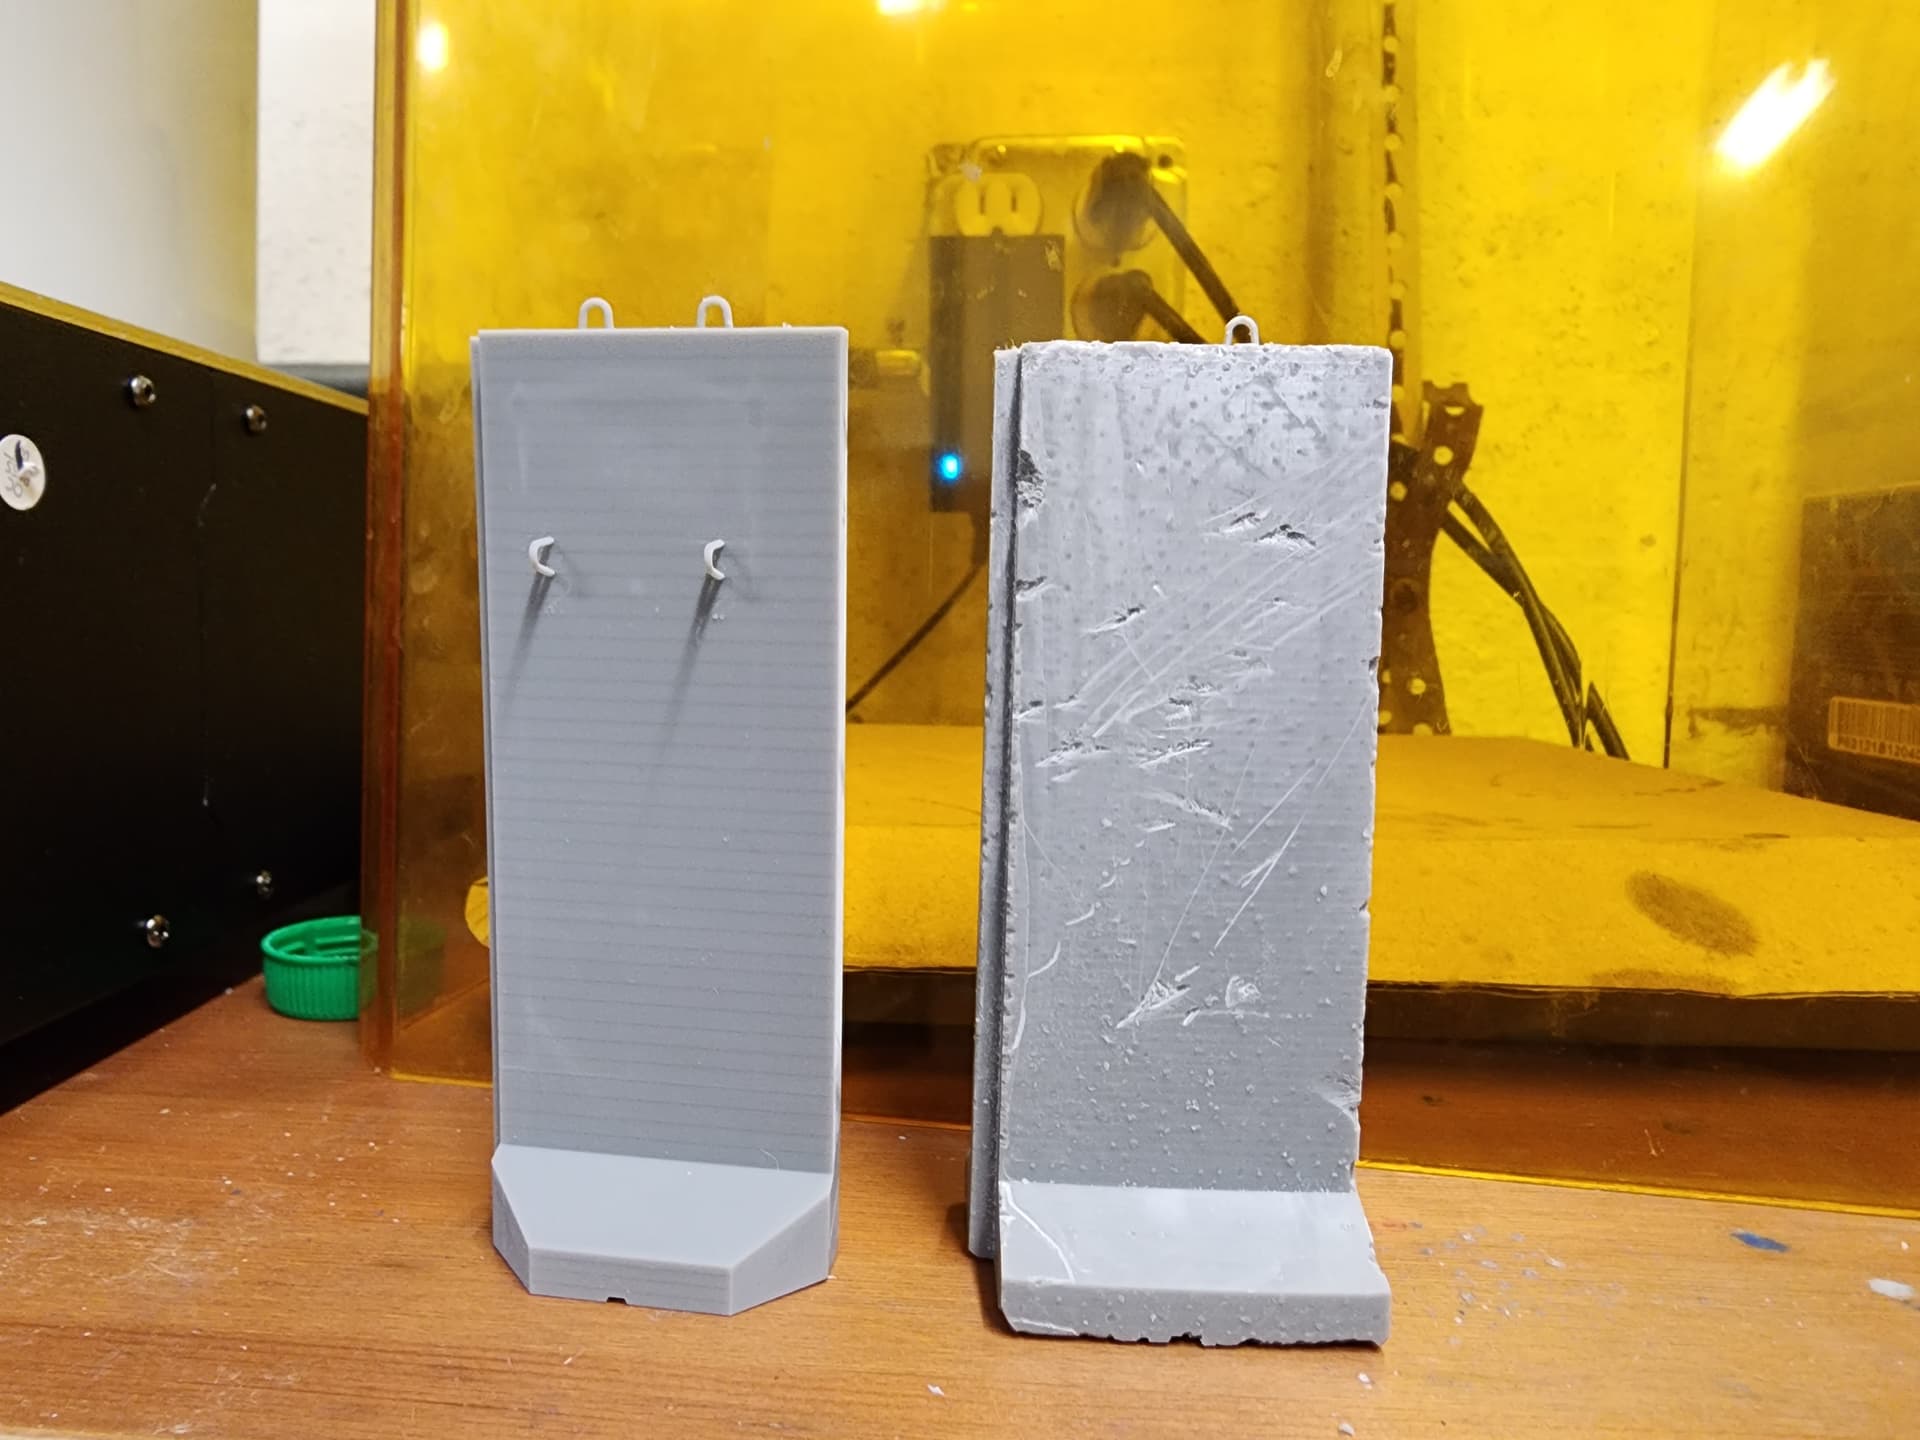
Just a note, I really just wanted to do to see how well it works. I just quickly dragged/pushed my Xacto across portions of the surface with the blade at a slight forward angle, just enough to get it chittering. That chipped the surface at intervals. If anyone orders these T-walls, I won’t be doing this. It takes a lot of time and I don’t know how they would want it to look.
But on the bright side they fit together well.

3 Likes
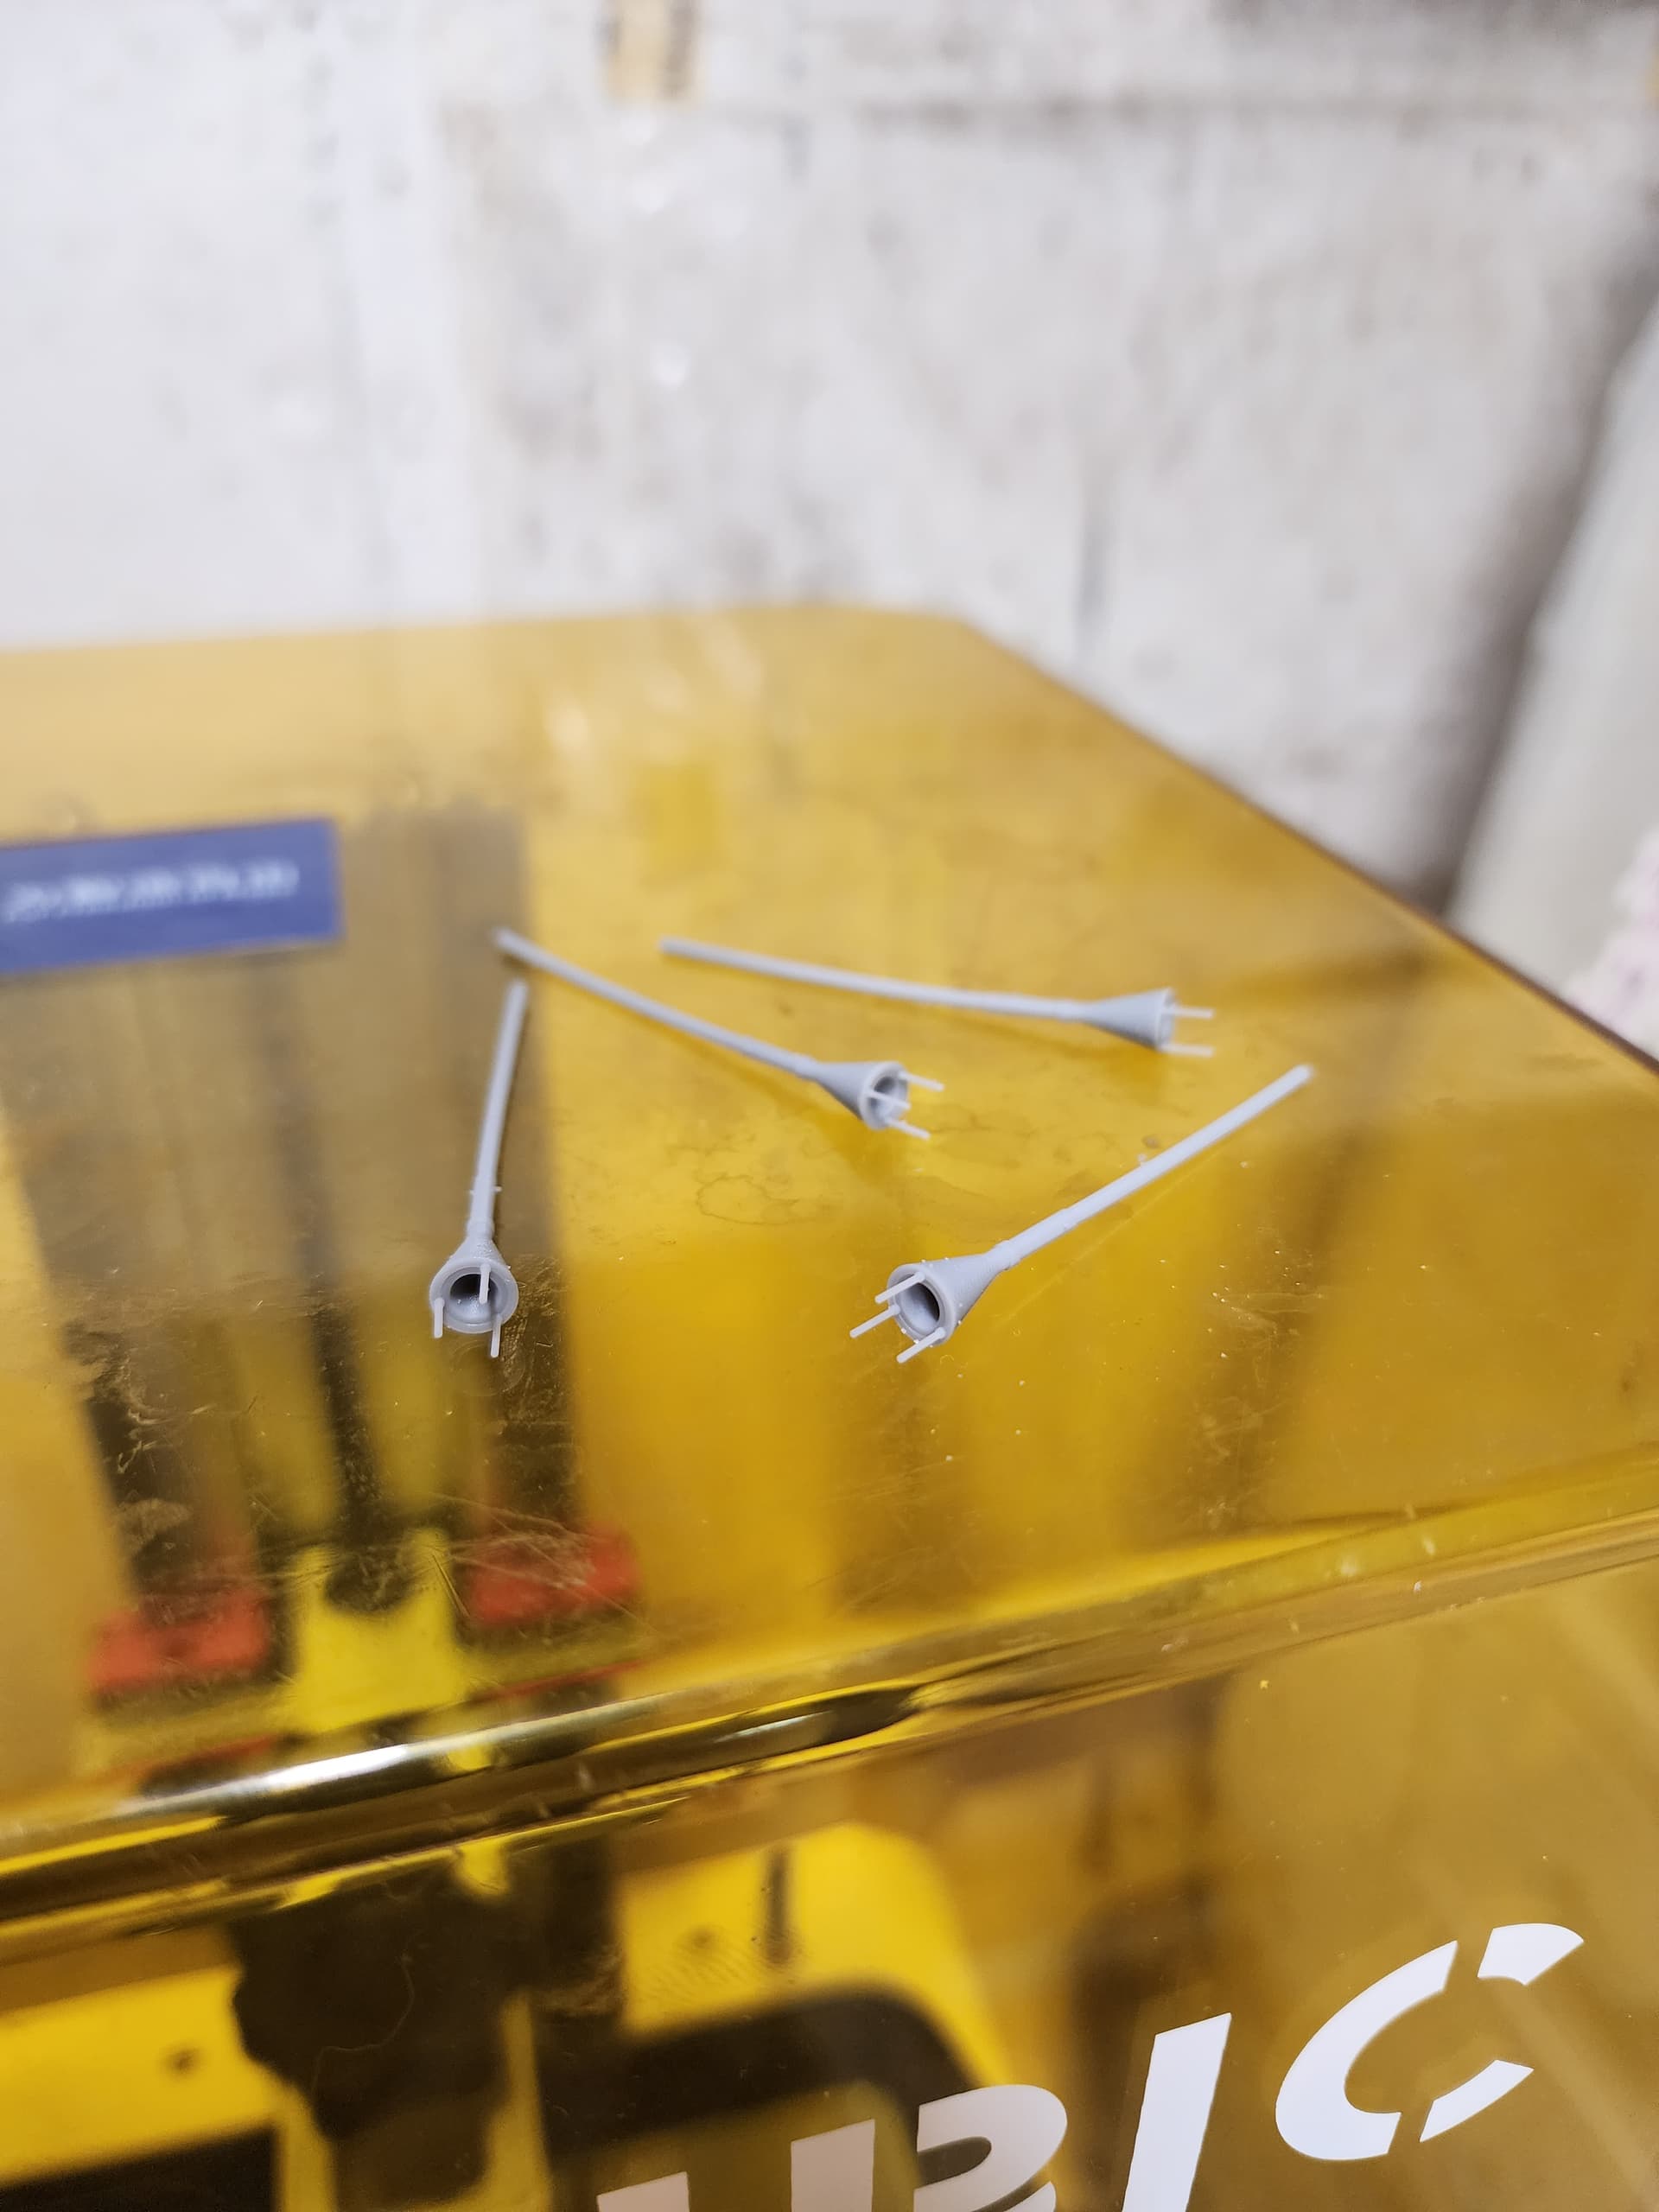
I almost forgot about these. Some Japanese Lunge Mines. The handles tend to warp a bit but it’s nothing that can’t be fixed with a good hot water bath and some straightening.
3 Likes
They look great.
Thank you. For anyone interested, they’re $10.00 for a set of 6.
But of the two ongoing projects I have going in parallel right now, one is the LTAS cab for Gino and the other is this. It’s nearly done, just a bit of a hiccup in detailing a small, but crucial, area.
1 Like
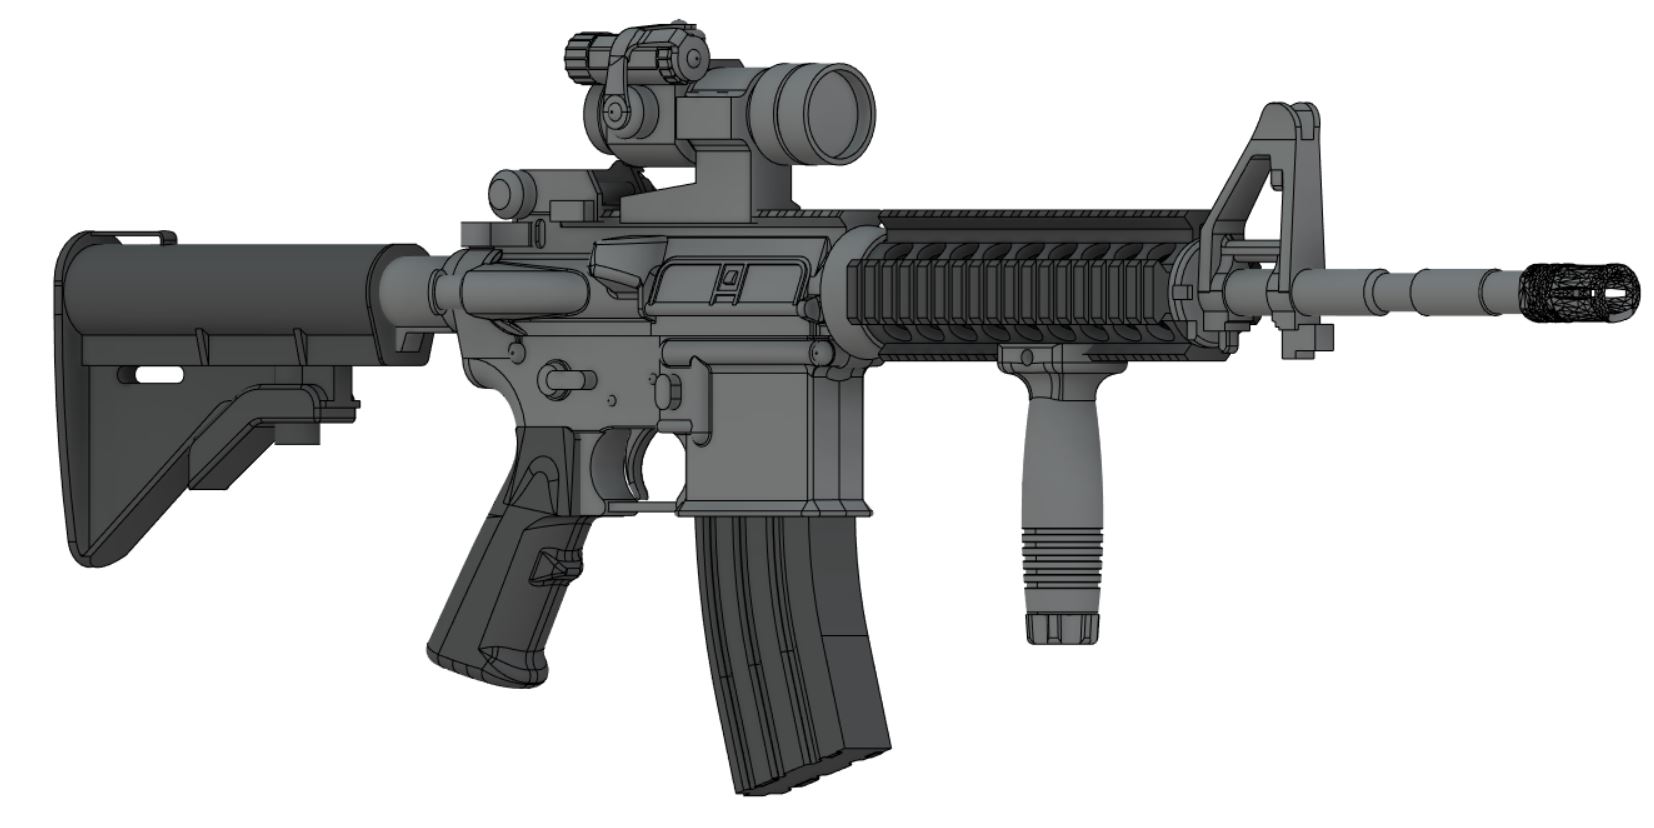
I forgot all about it but I did finish a CAR stock for the M4 and Mk 18 Mod 0 a while ago.

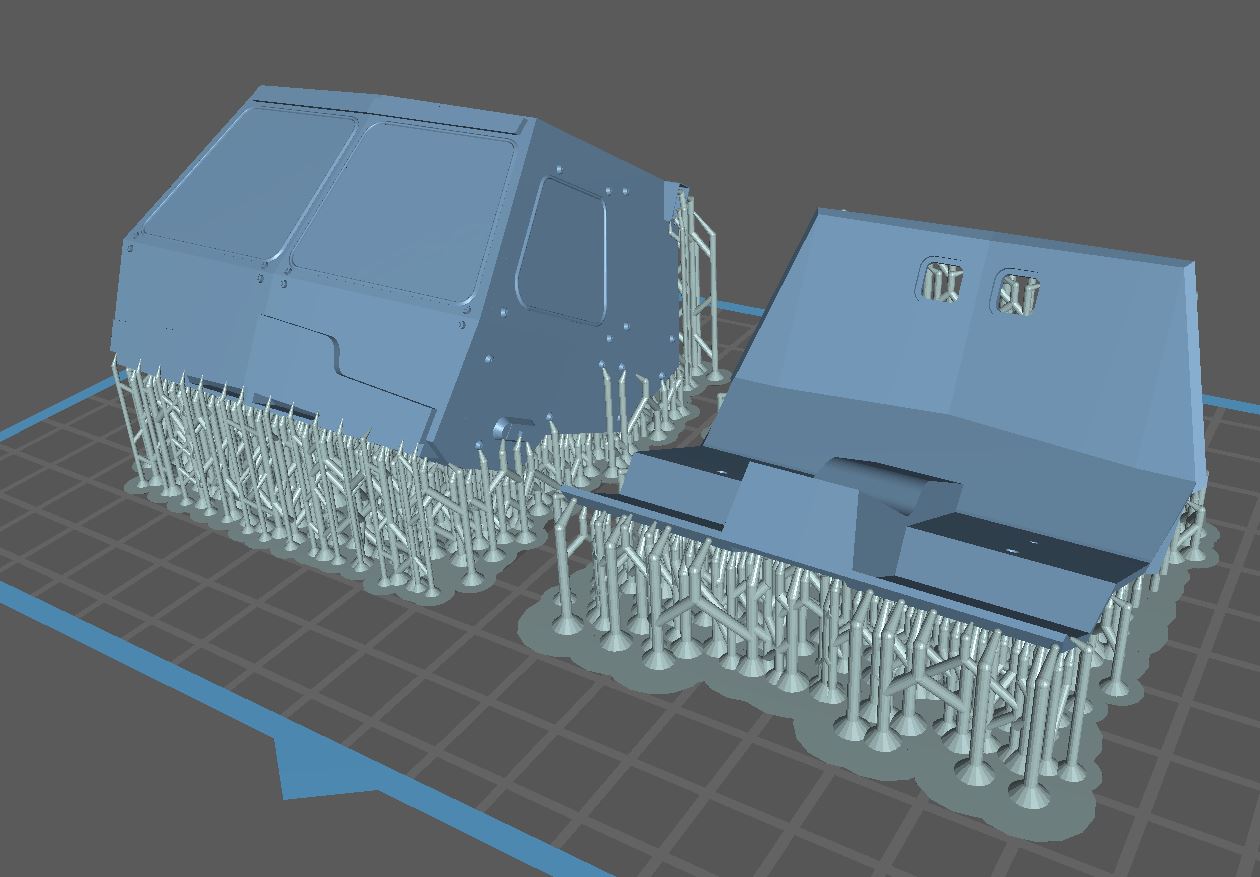
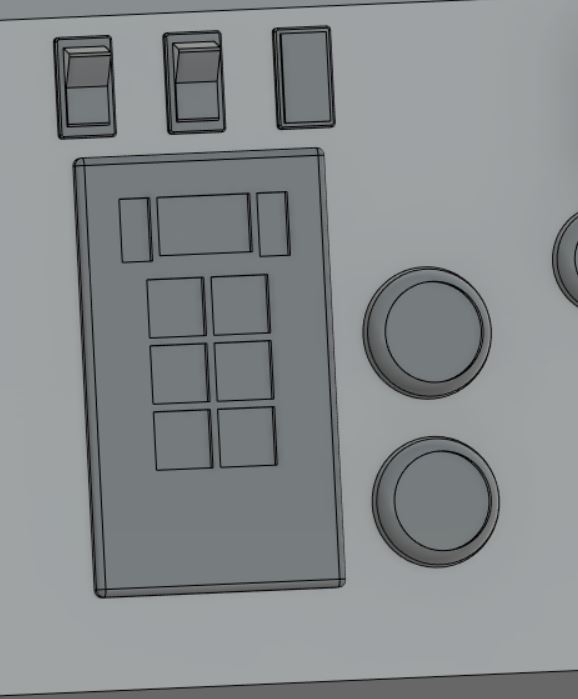
I haven’t posted any updates about the LTAS progress recently after updating Gino. Side window size has been adjusted. Window gaskets modeled. Bottom step and braided wire ropes added. Door handles started. Interior dashboard screw heads added. Next is detailing the rest of the dash. In the coming days, I will be conducting a test print to see if the cab fits onto the kit frame that Gino loaned to me.


2 Likes
Just so everyone who tracks this page is made aware, I slightly changed the title. Removed the “Looking for…” Just to try to make the title less cumbersome. I’m still always looking for suggestions and ideas.
1 Like
Man, everything is looking great. My wallet will be hurting soon.
2 Likes
I’ll definitely see what I can do to keep the cost down. Right now though, I’m running a test print to test the fit on the kit that you sent me. If everything fits correctly, I can continue without having to make large structural changes. Plus, I can test the seats to see if they fit into the locating holes. The windows are filled in just to keep the whole thing strong structurally while I work with the test. After everything is fit correctly they’ll be opened on final prints. I’ll need to get clear resin for the windows.
3 Likes
The LTAS dashboard is coming along pretty nicely.

And the radiator grille as well.
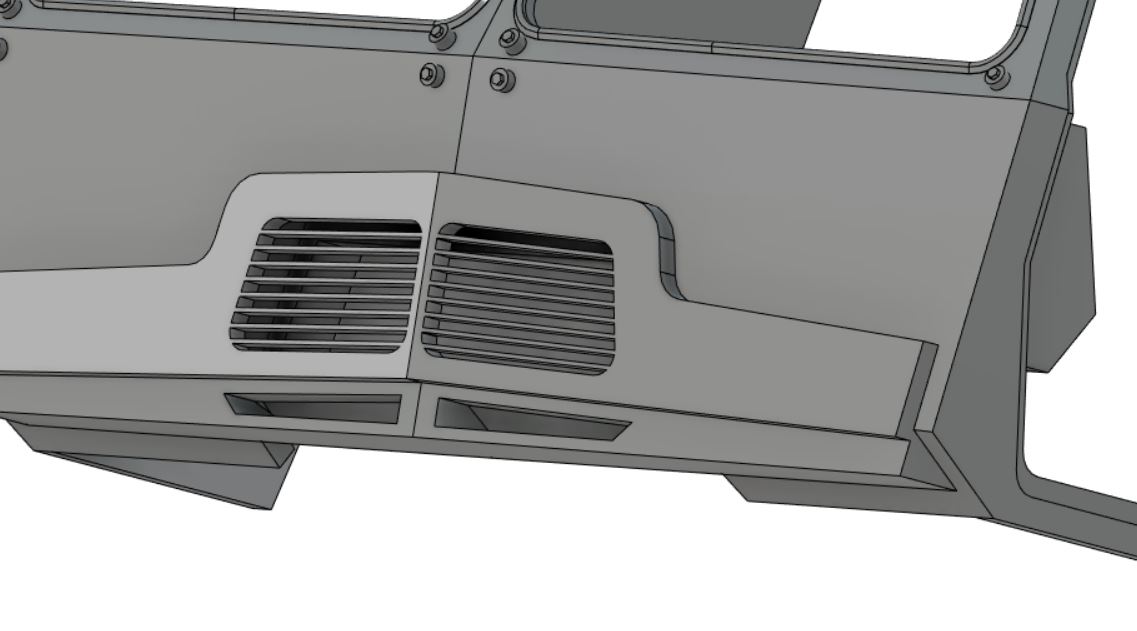
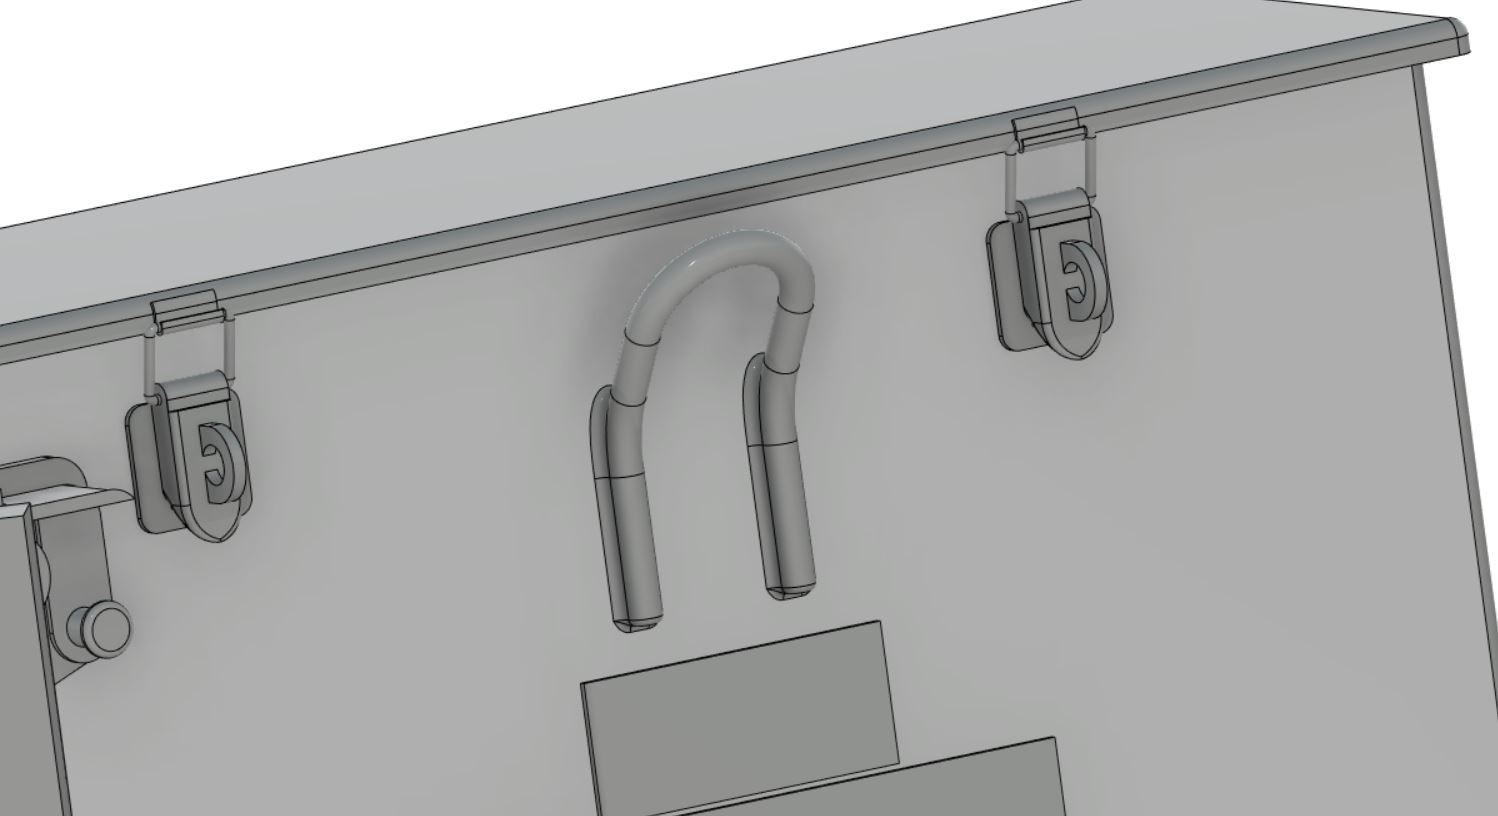
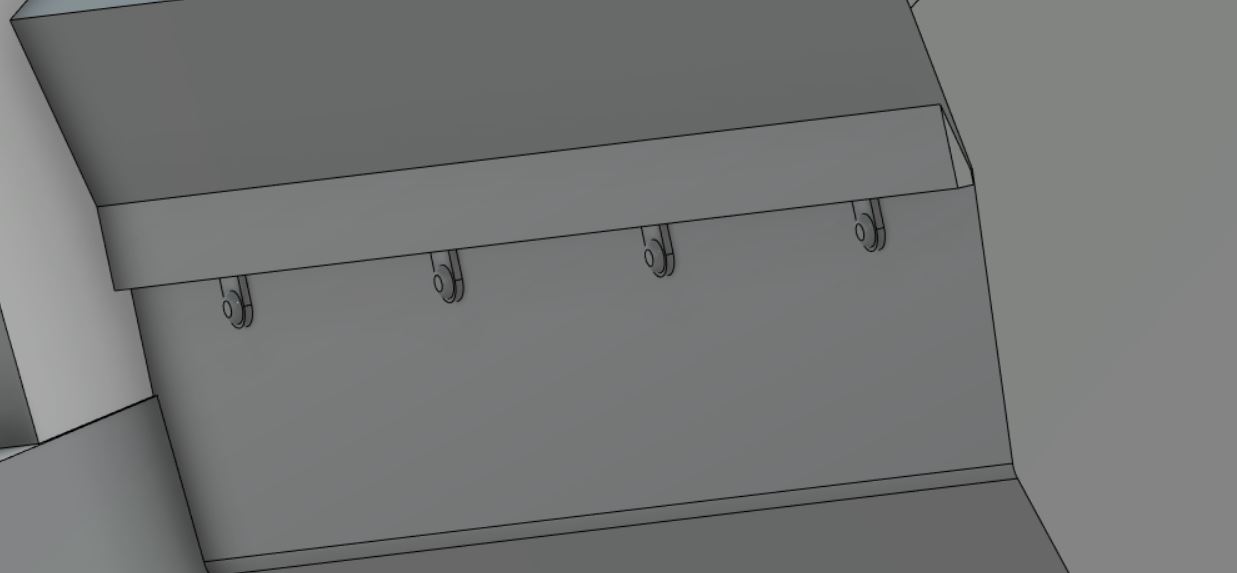
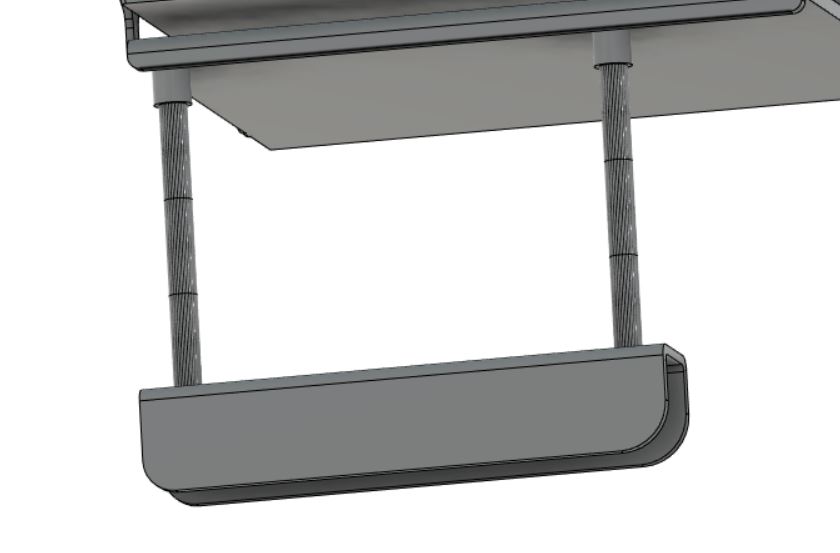
Also, a small detail underneath the side step. I’m not sure if it’s accurate, I’ve never seen any pictures underneath this step but the braided wire cable has to affix to the step somehow.

That large panel was looking a little dull so I just added some detail to it.
4 Likes
Coming along really nicely.
1 Like
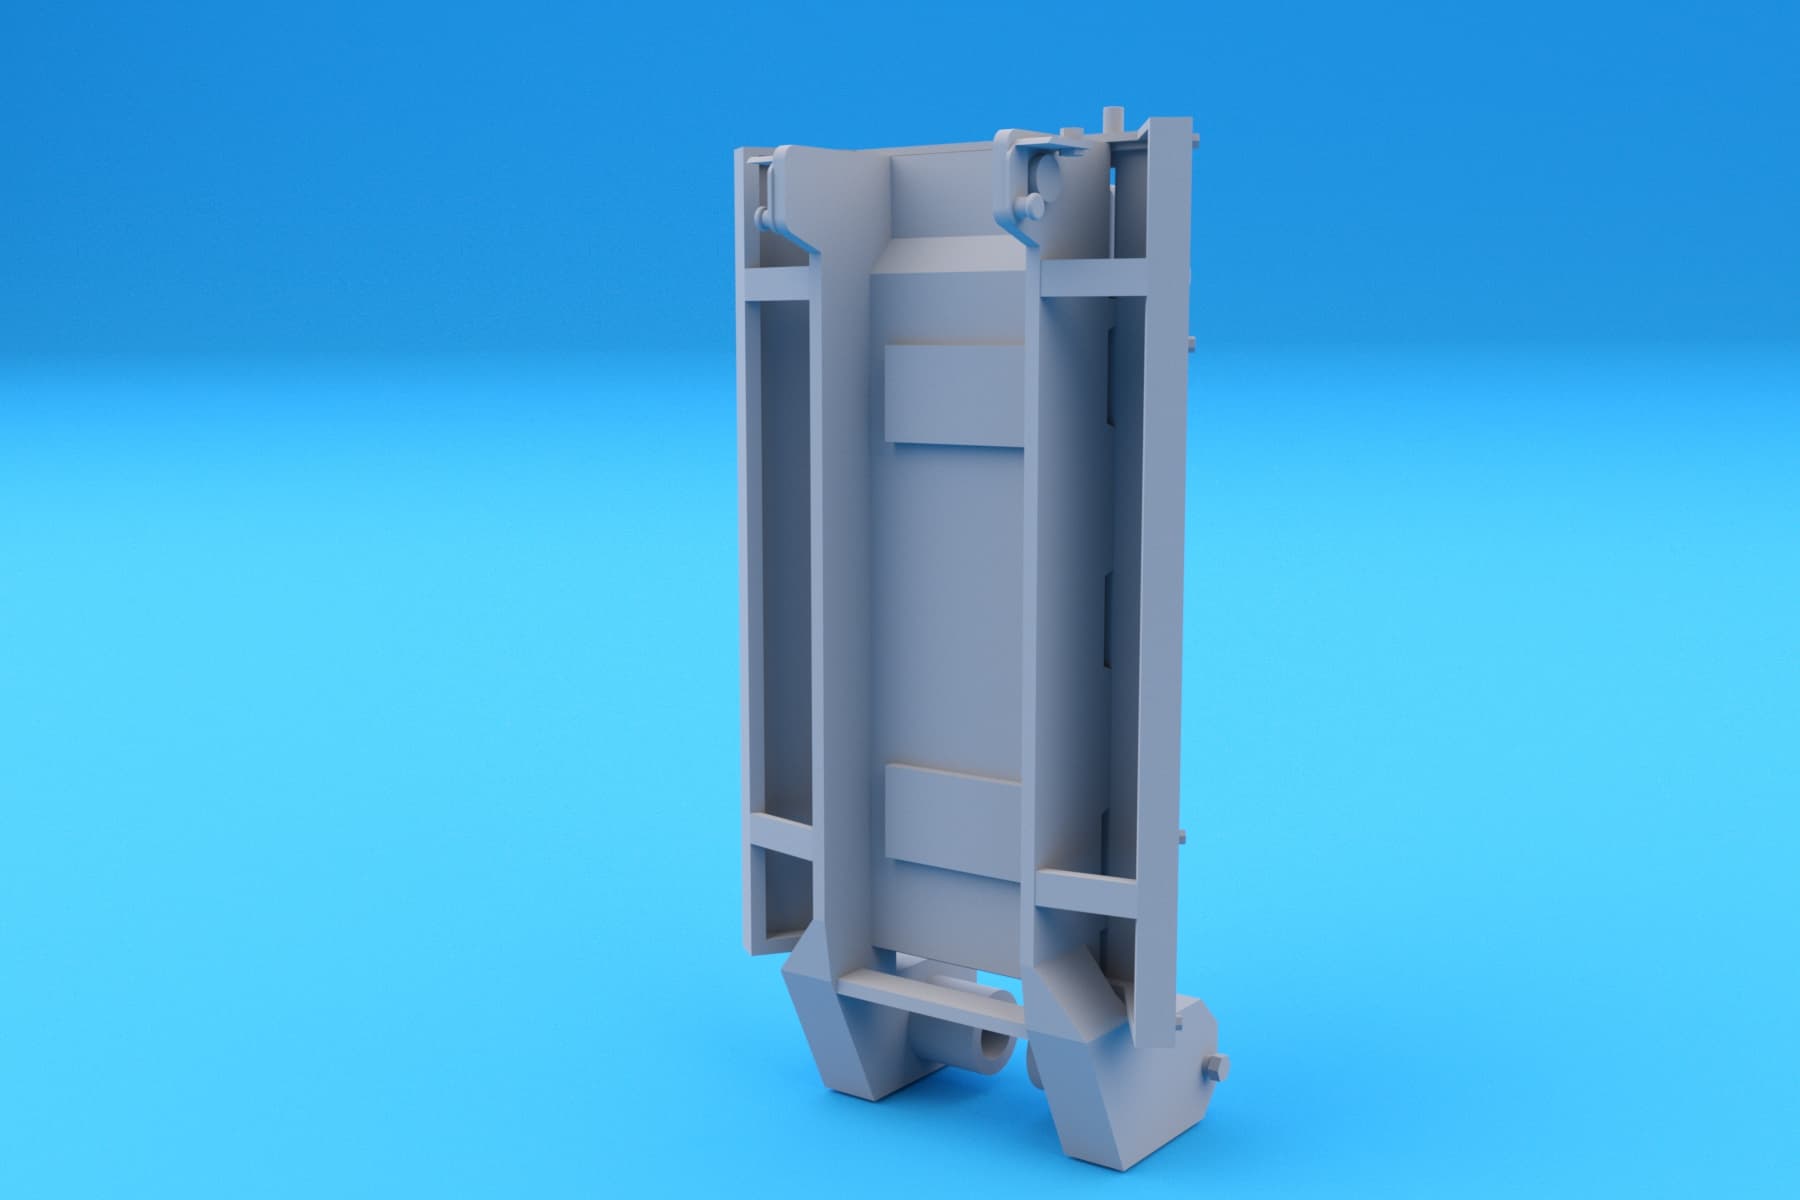
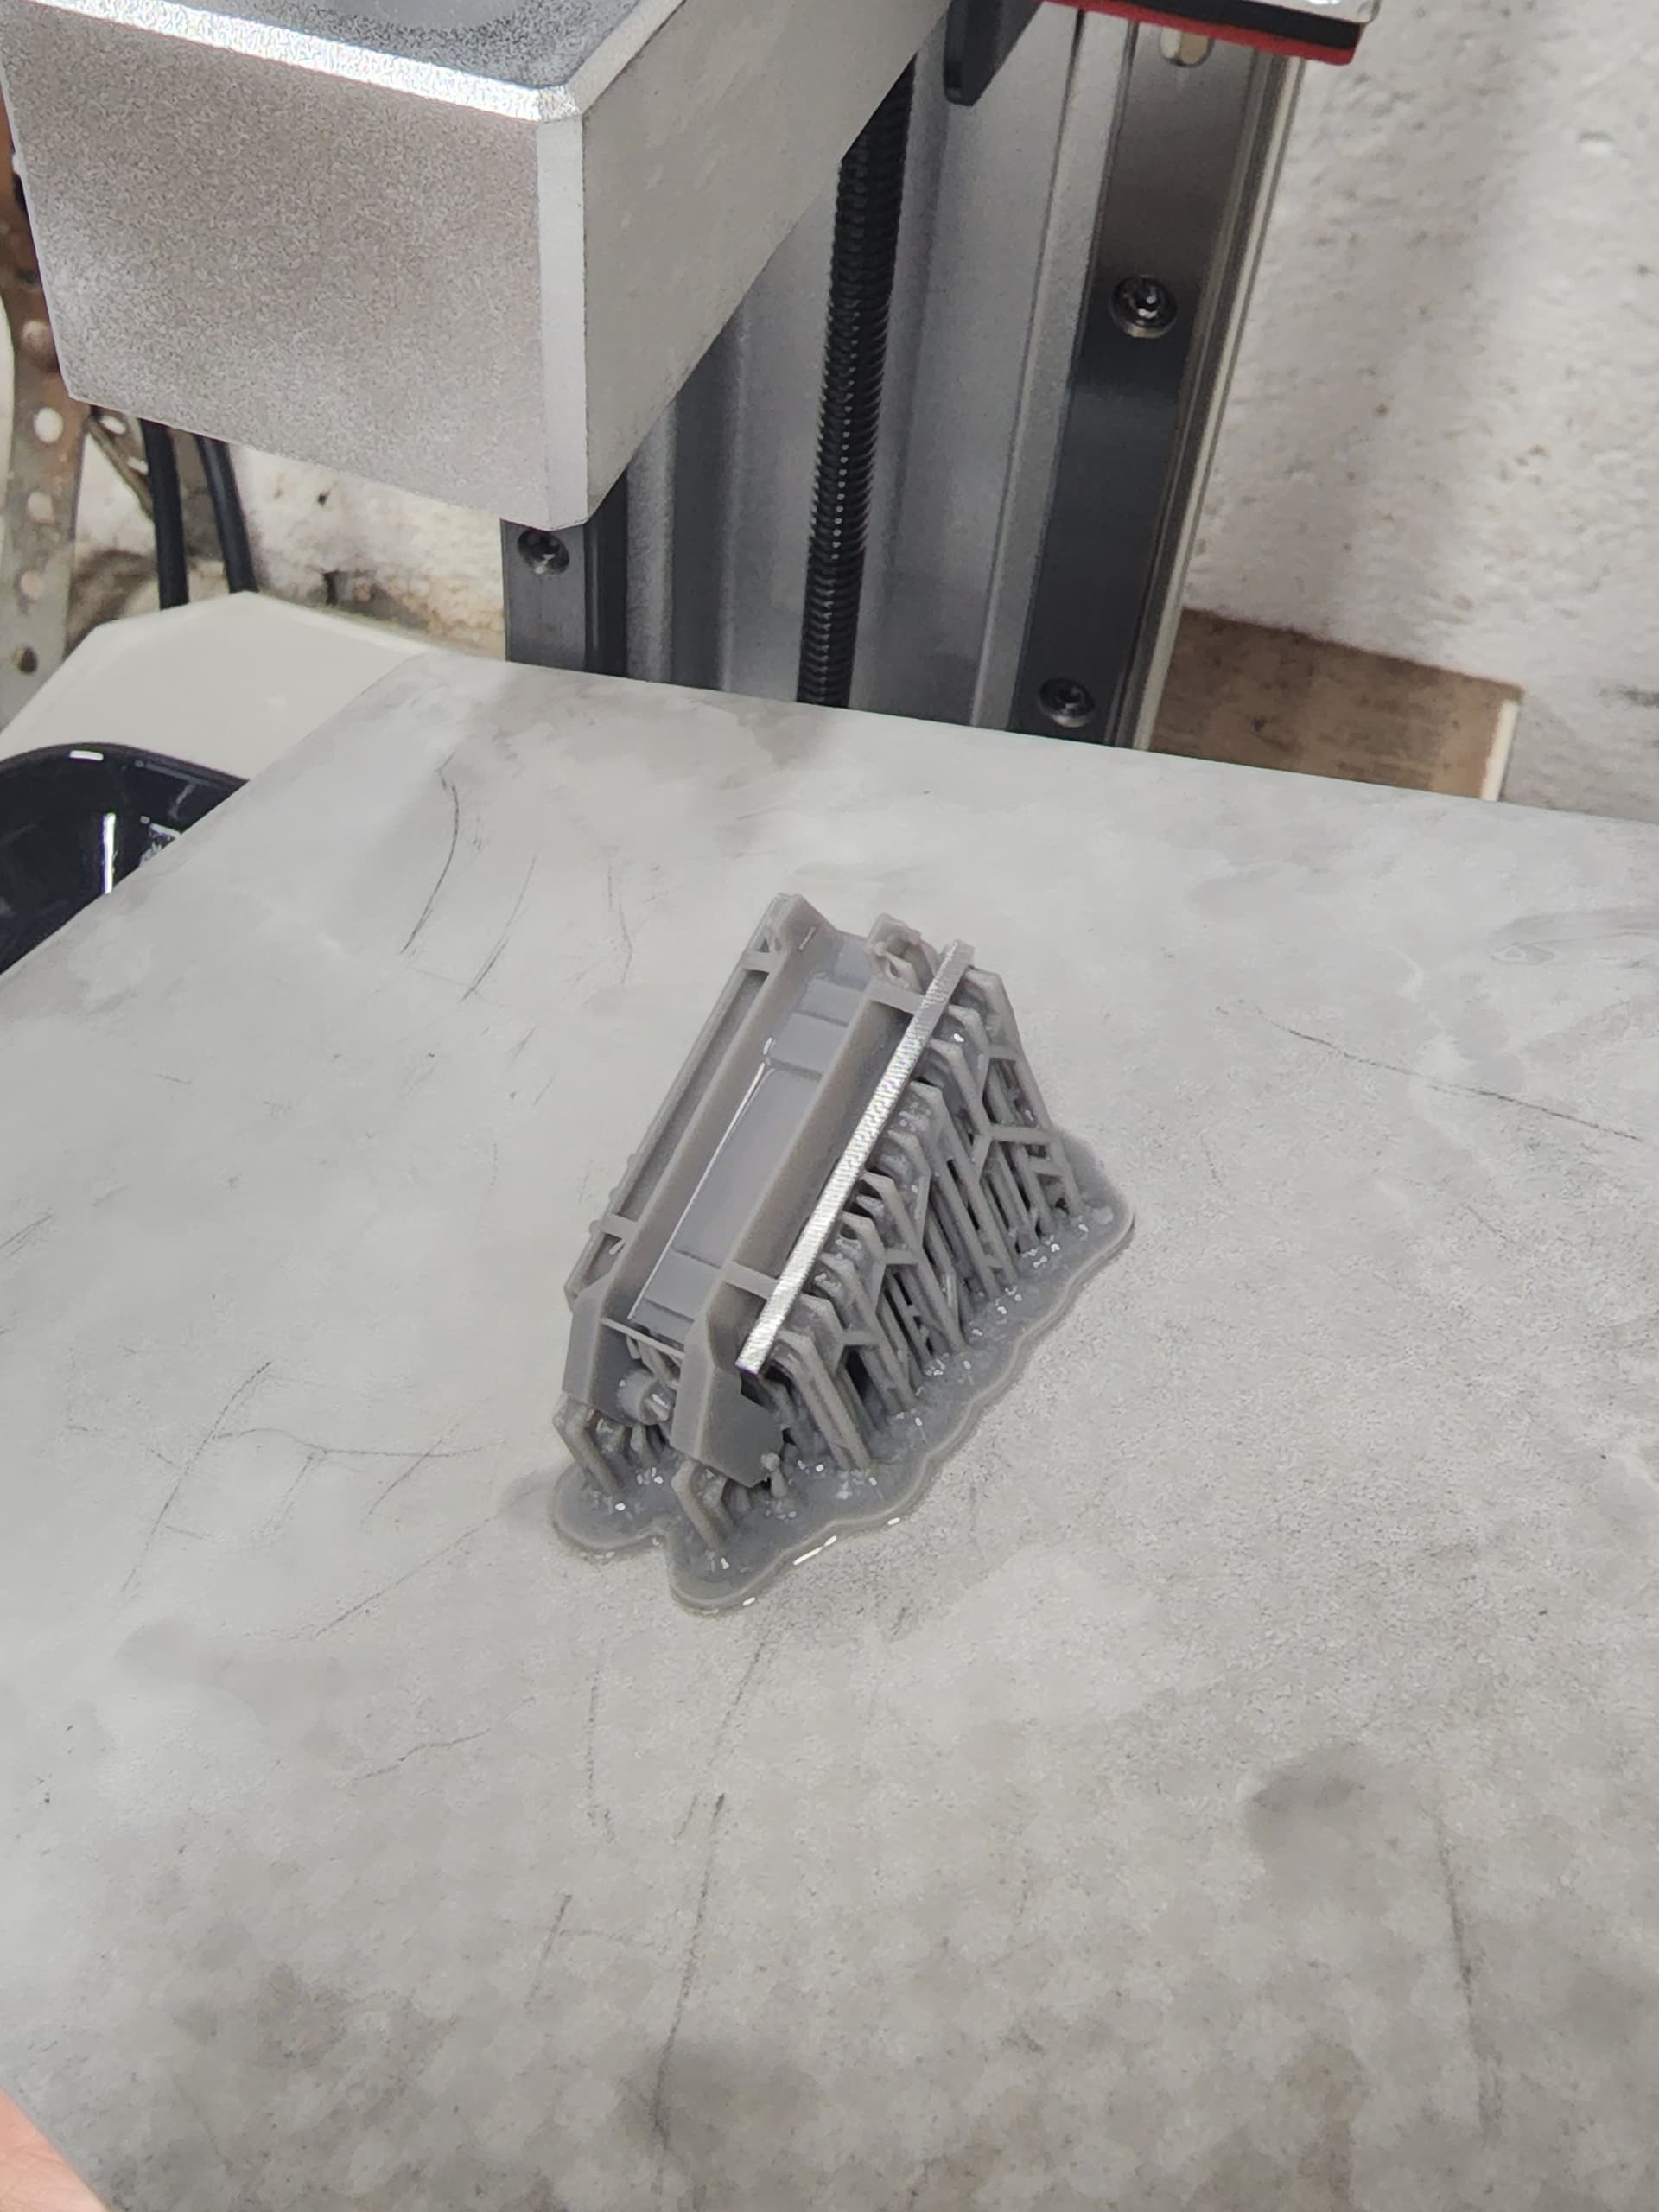
I teased this earlier, but I didn’t want to announce it until I knew it was finished, correct, and printable. Well now that it is, I’m more than happy to present the Cleared LAne Marking System or CLAMS. I have this modeled in 1/35 for the M60 but I do plan on doing the mount for the Abrams as well. I just can’t find any references to use for the Abrams mount aside from the old Dragon M1A1HA kit and a Concord book drawing. @18bravo @SableLiger I’ve seen you guys express interest in this before, any thoughts?
For a set of 1, consisting of 2 parts, the bracket mount and the CLAMS box, it’s $10.
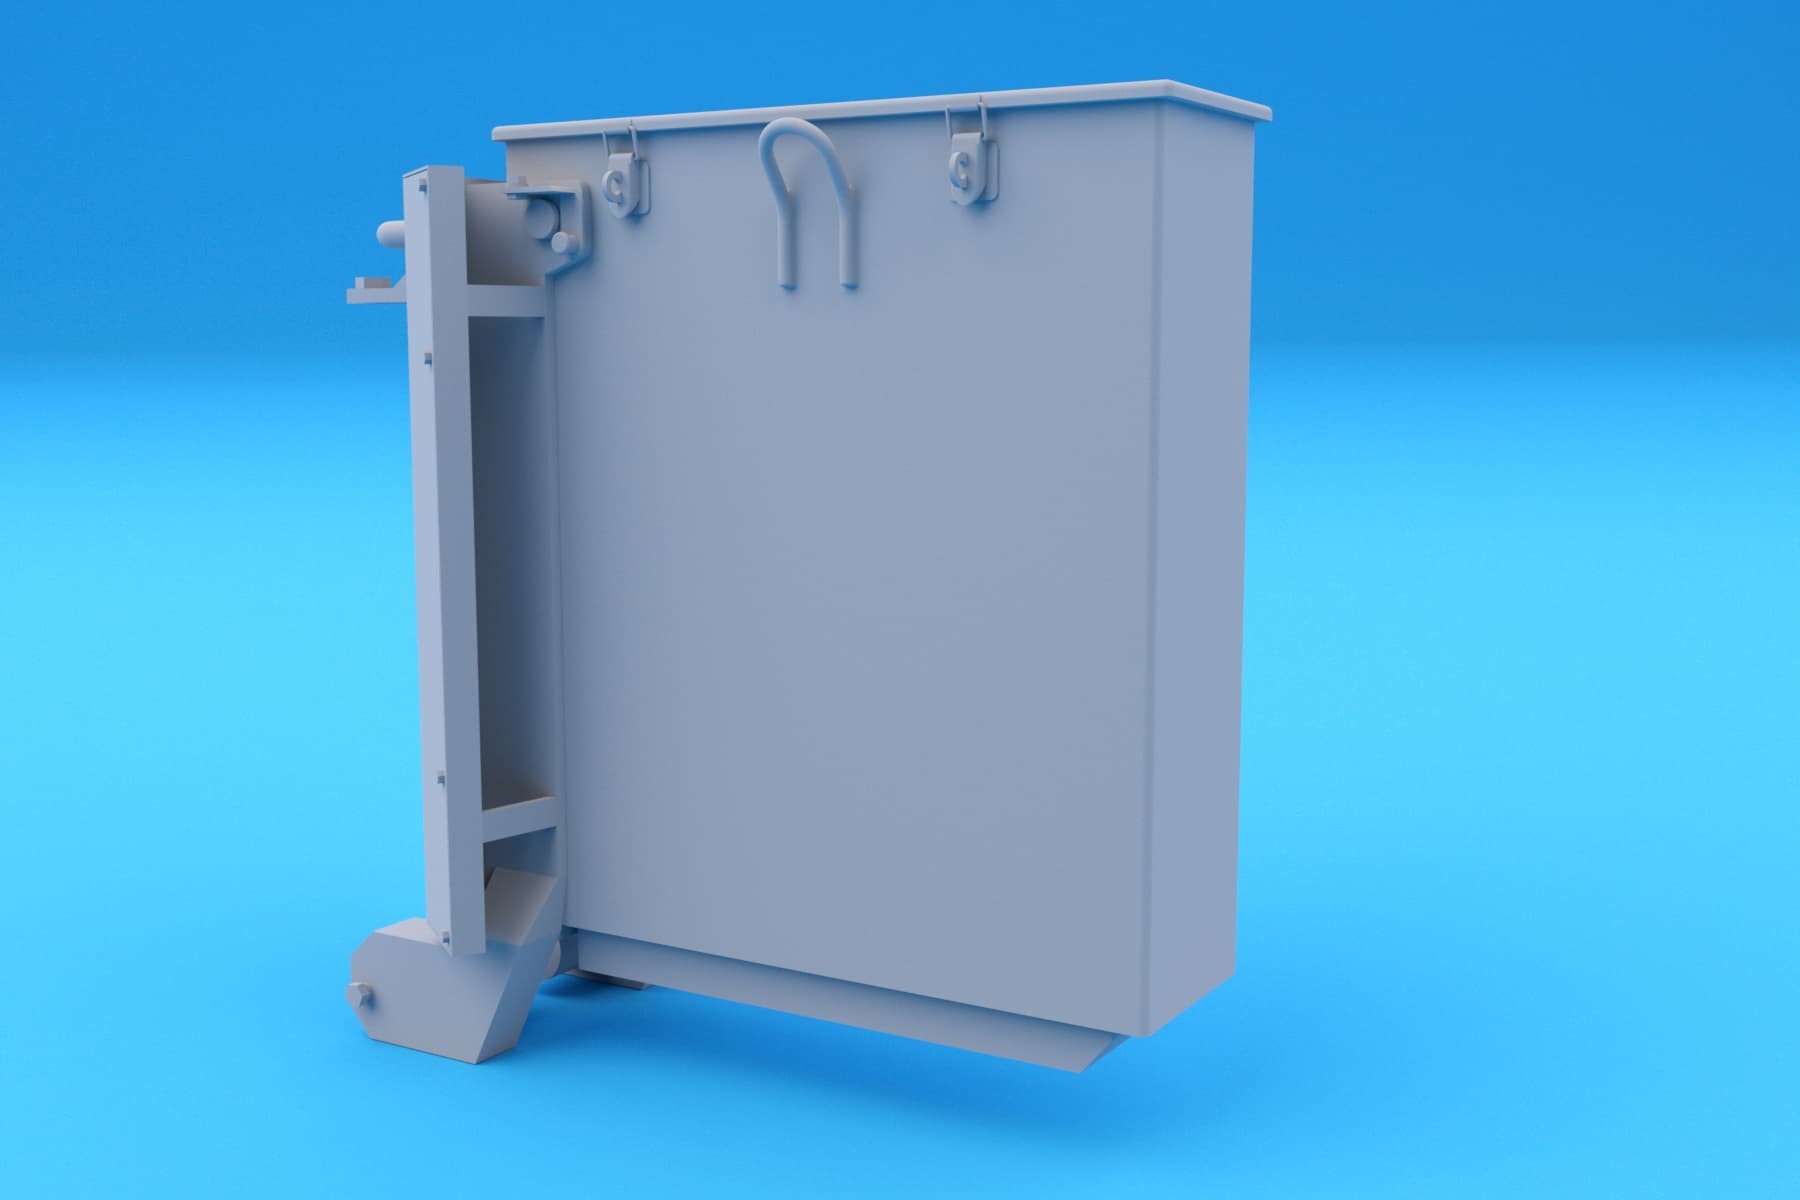

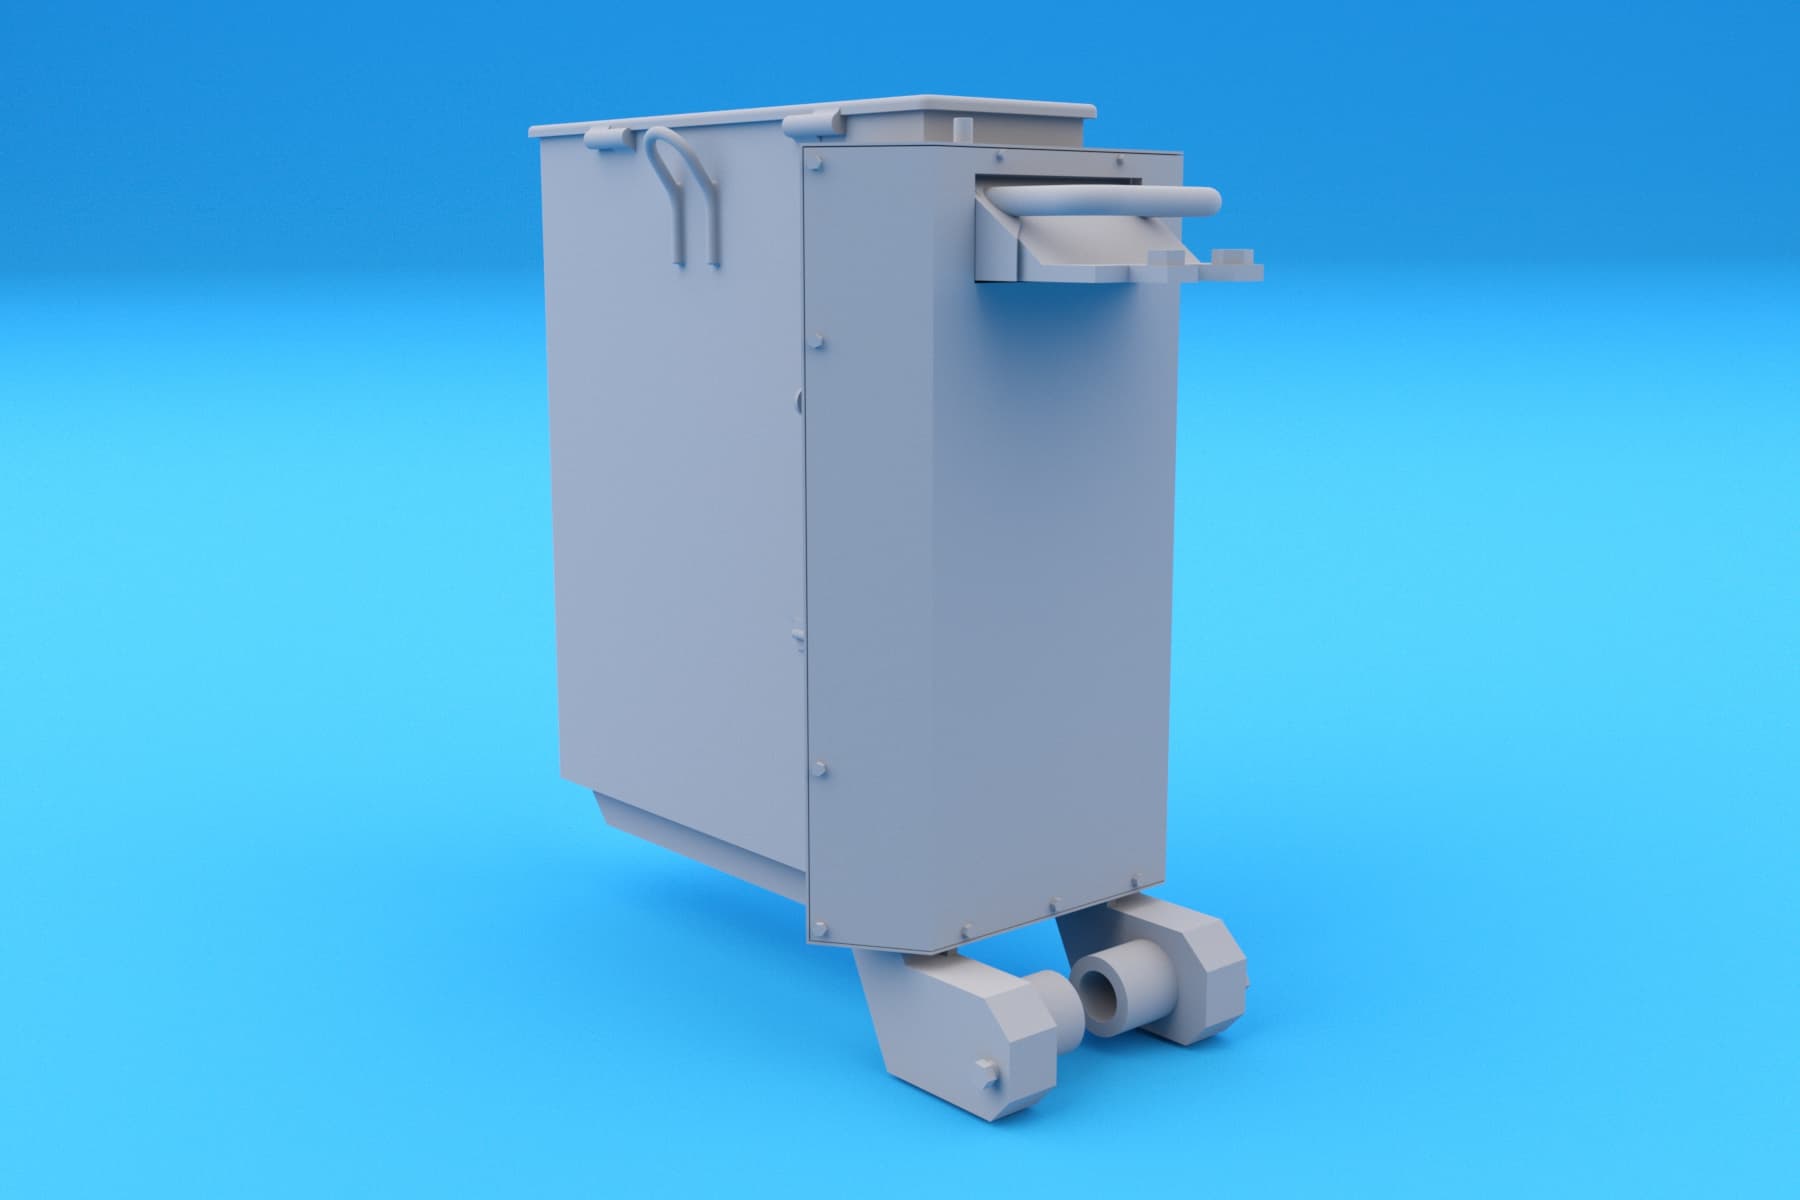
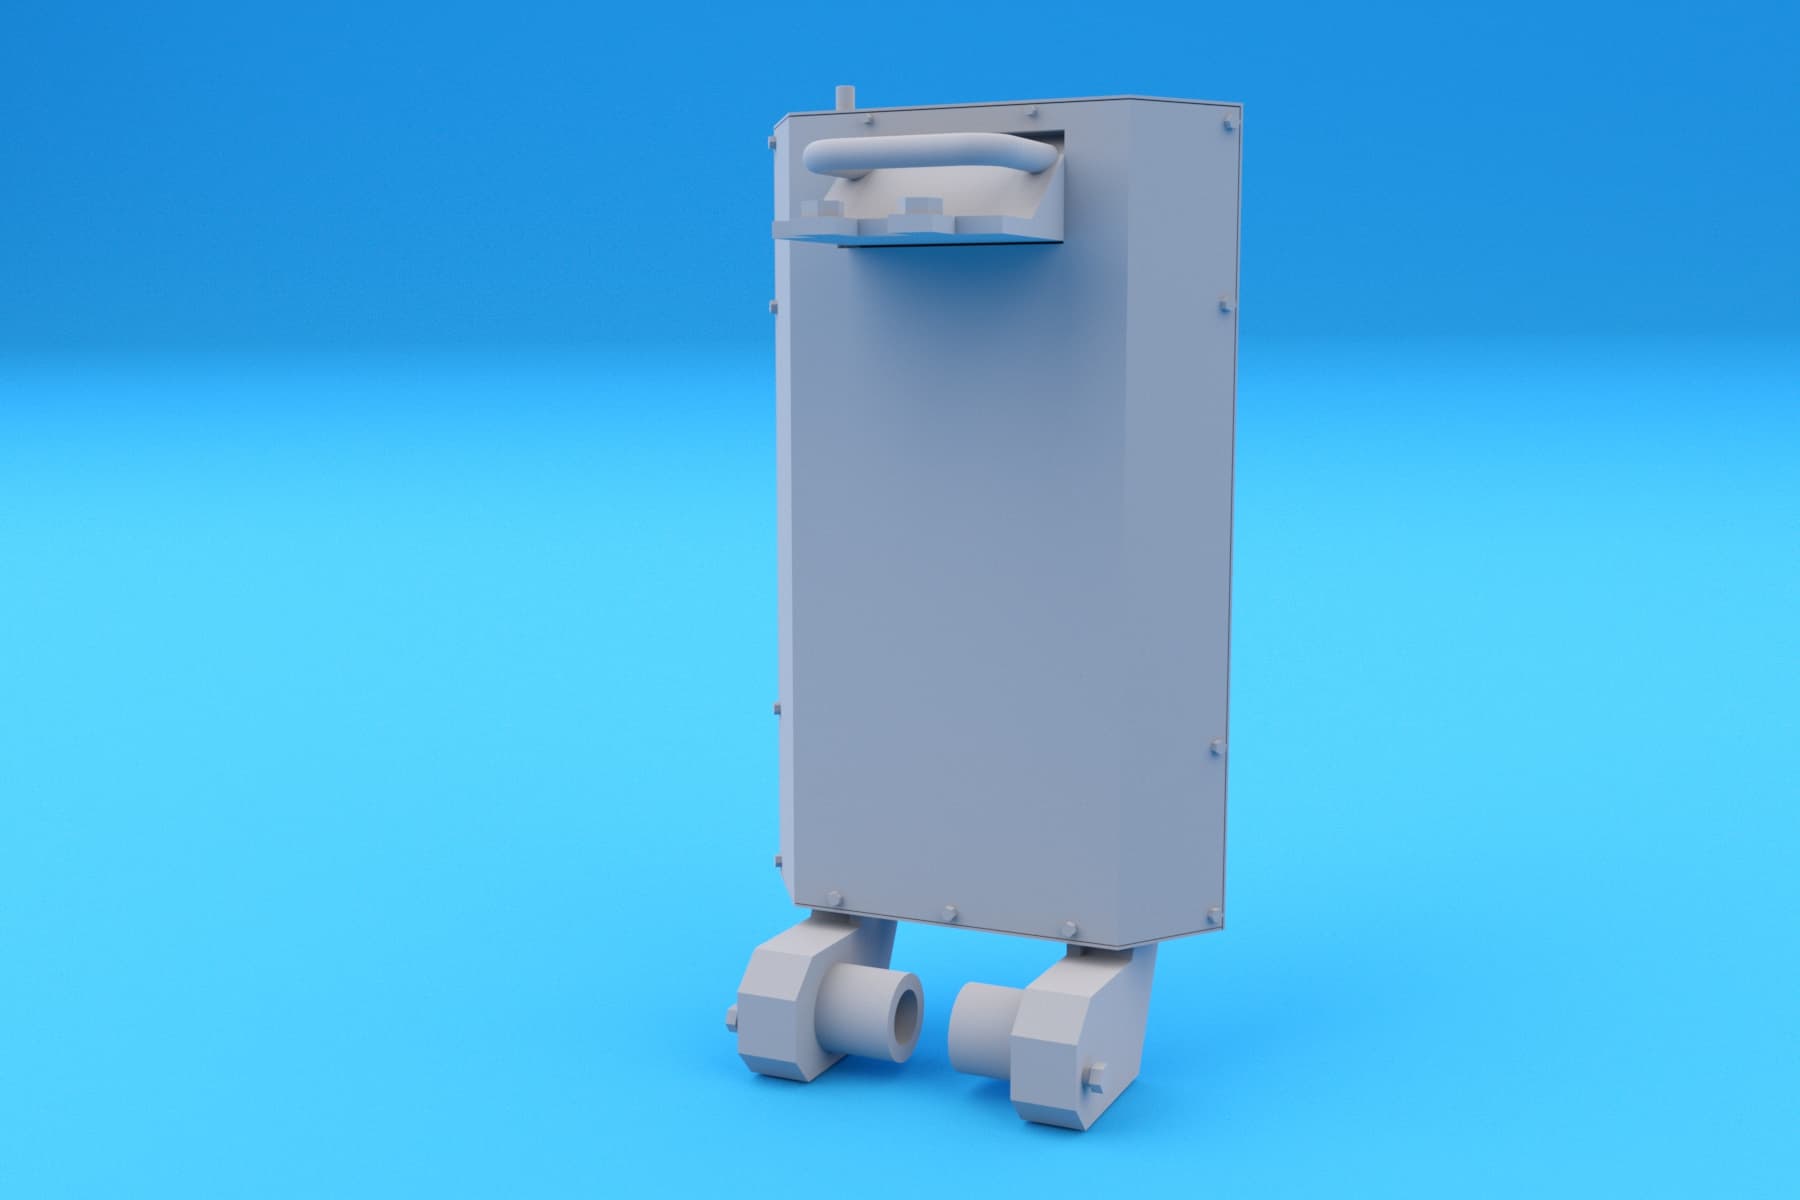

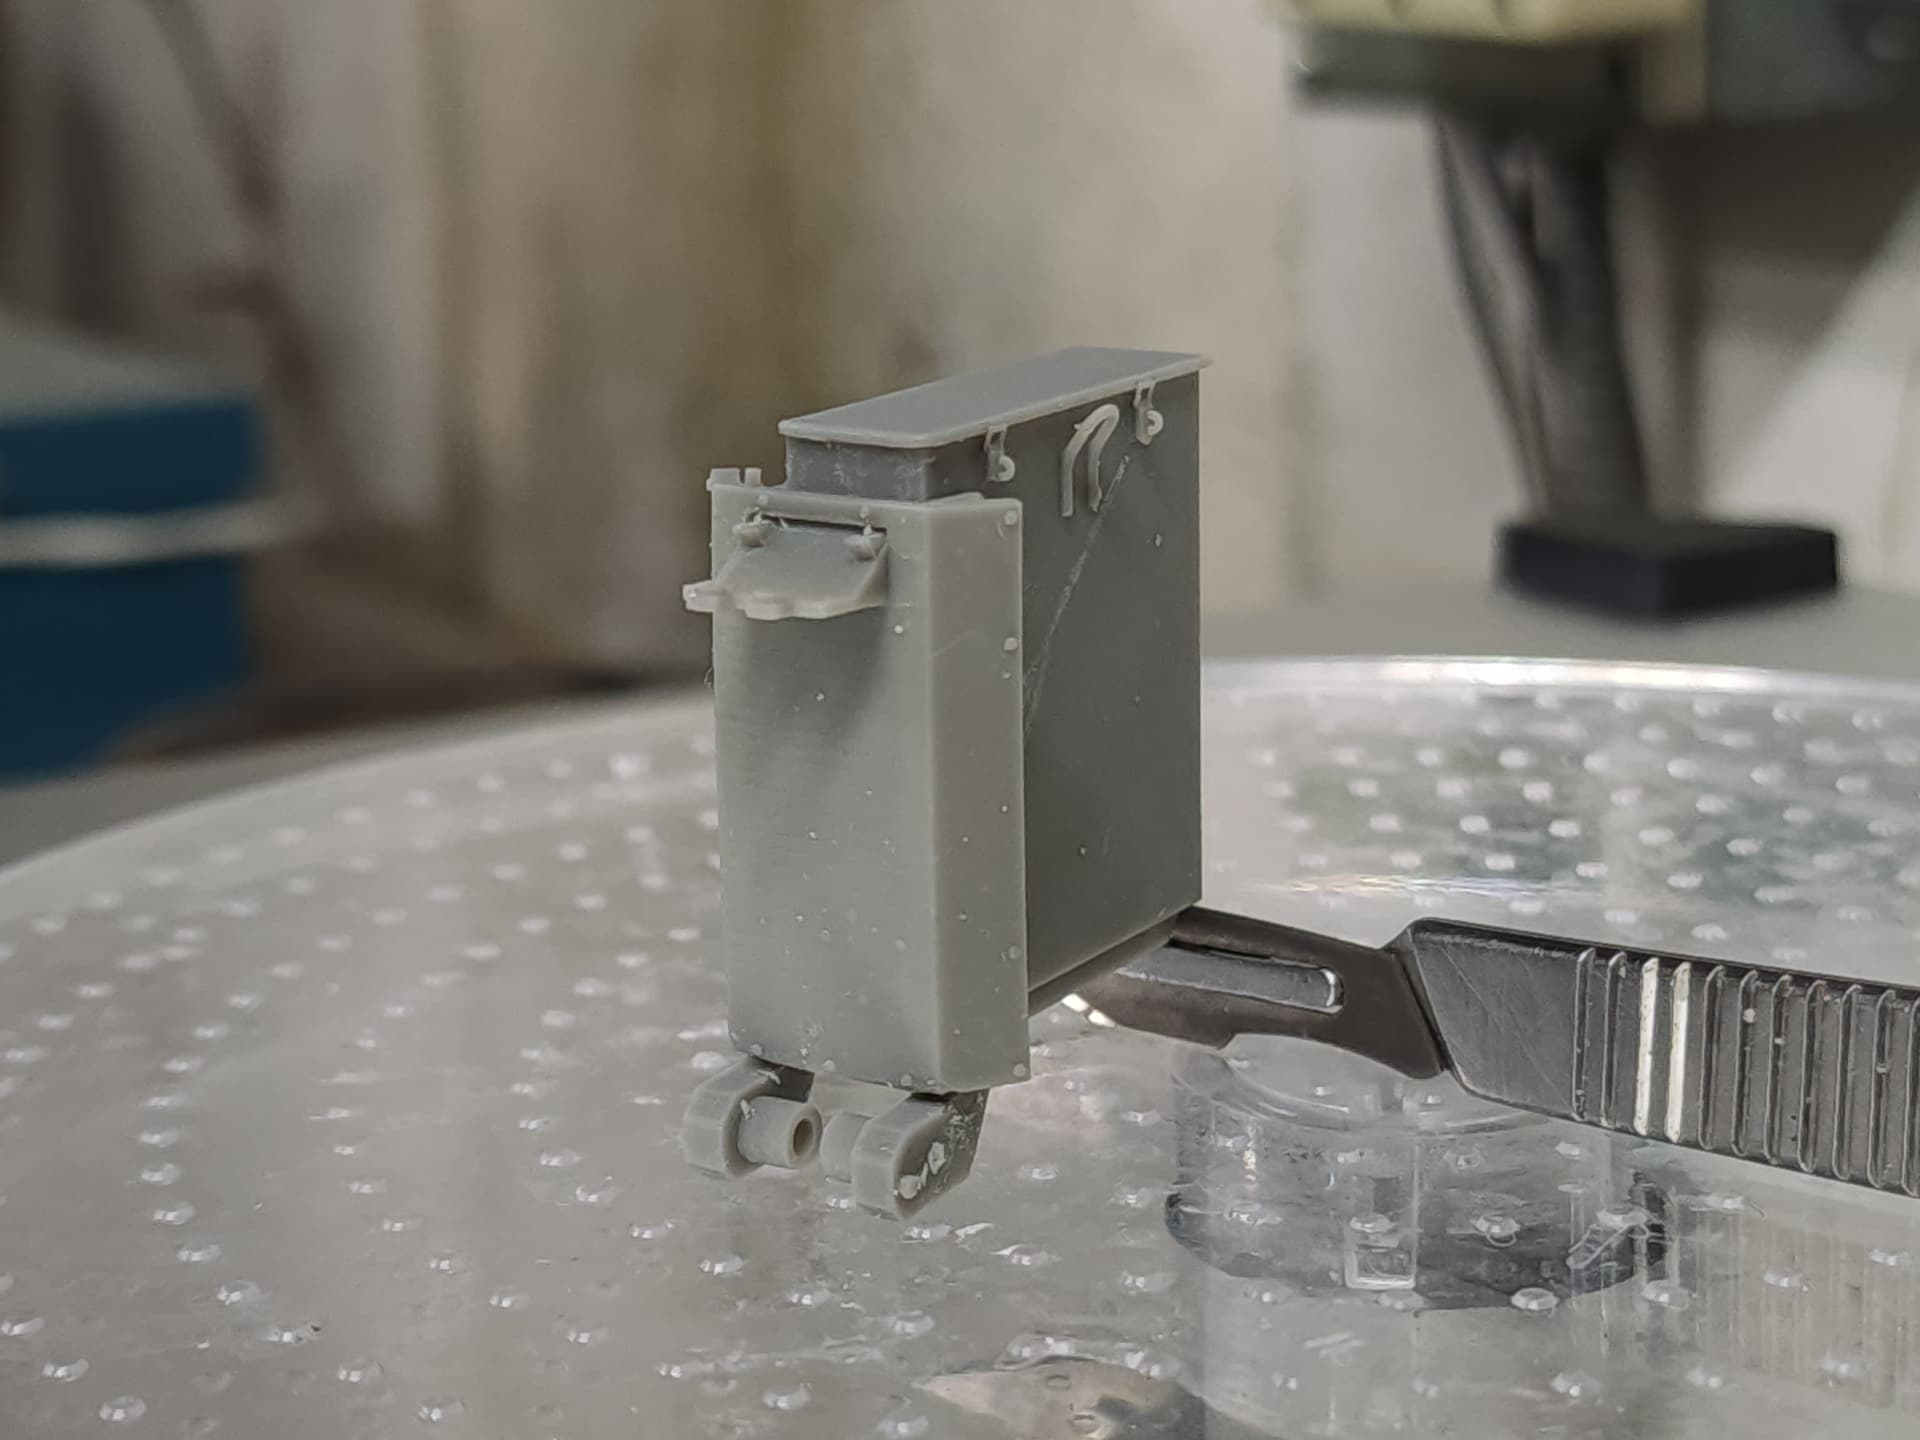
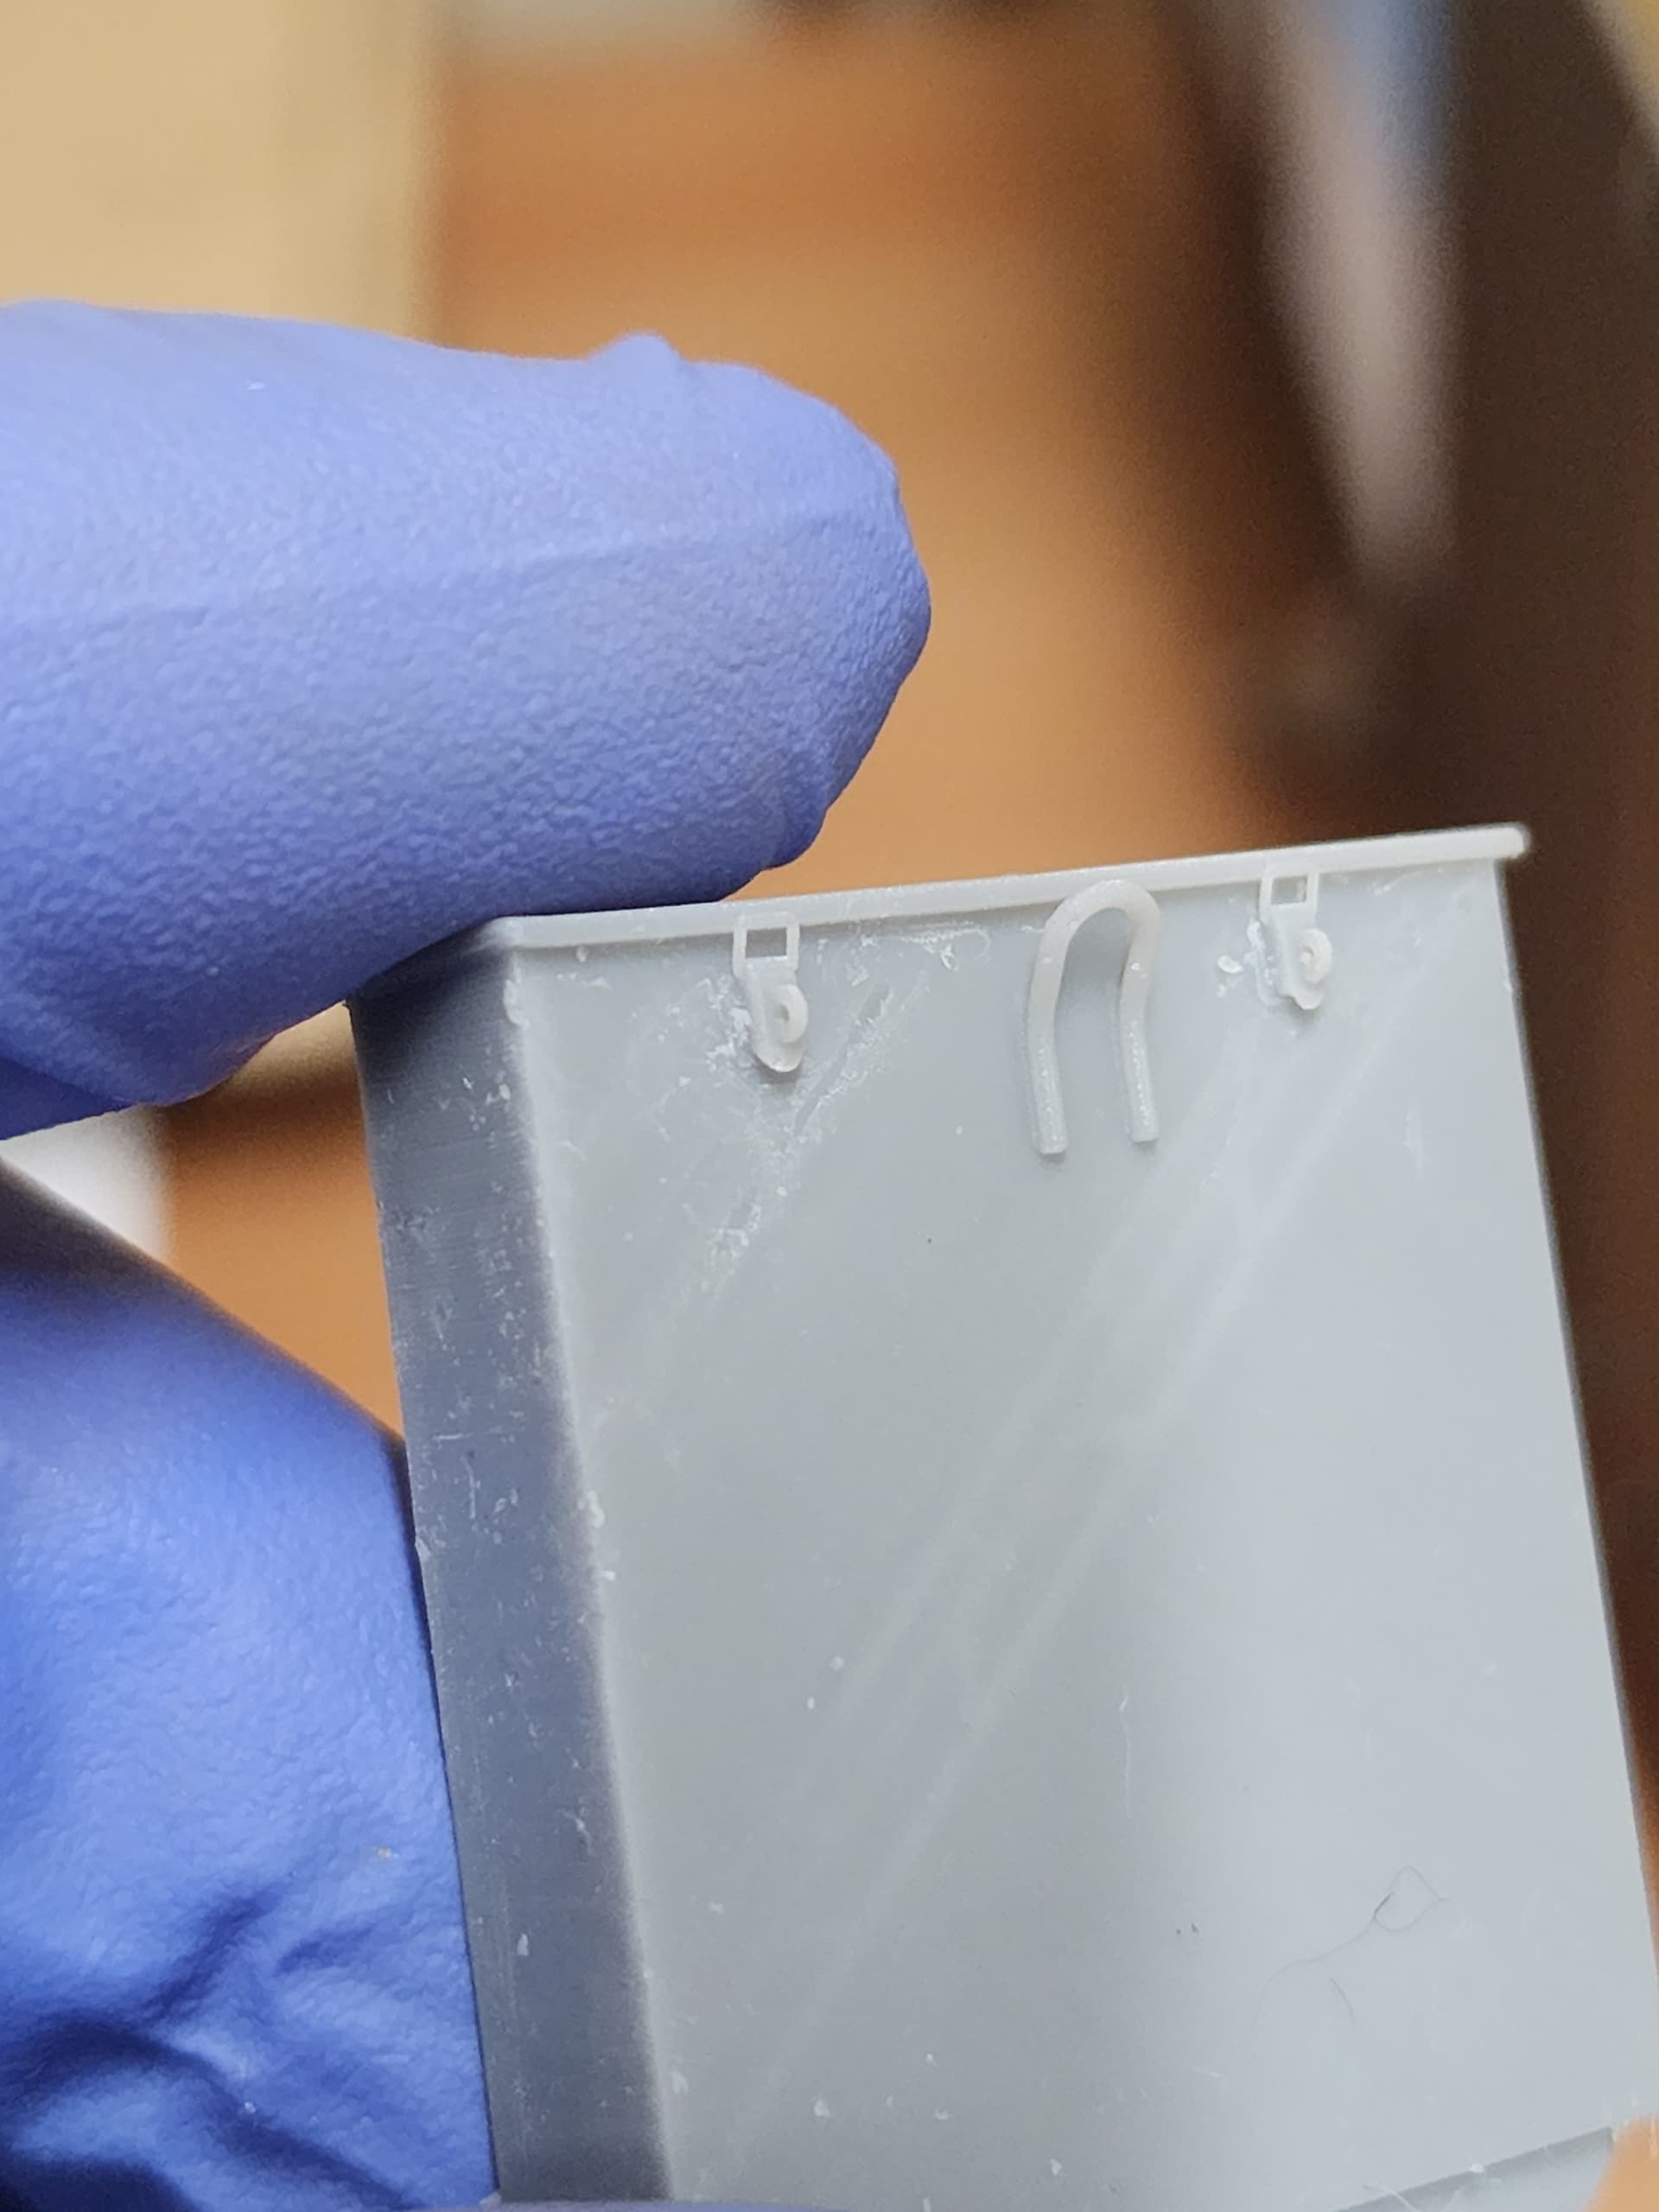
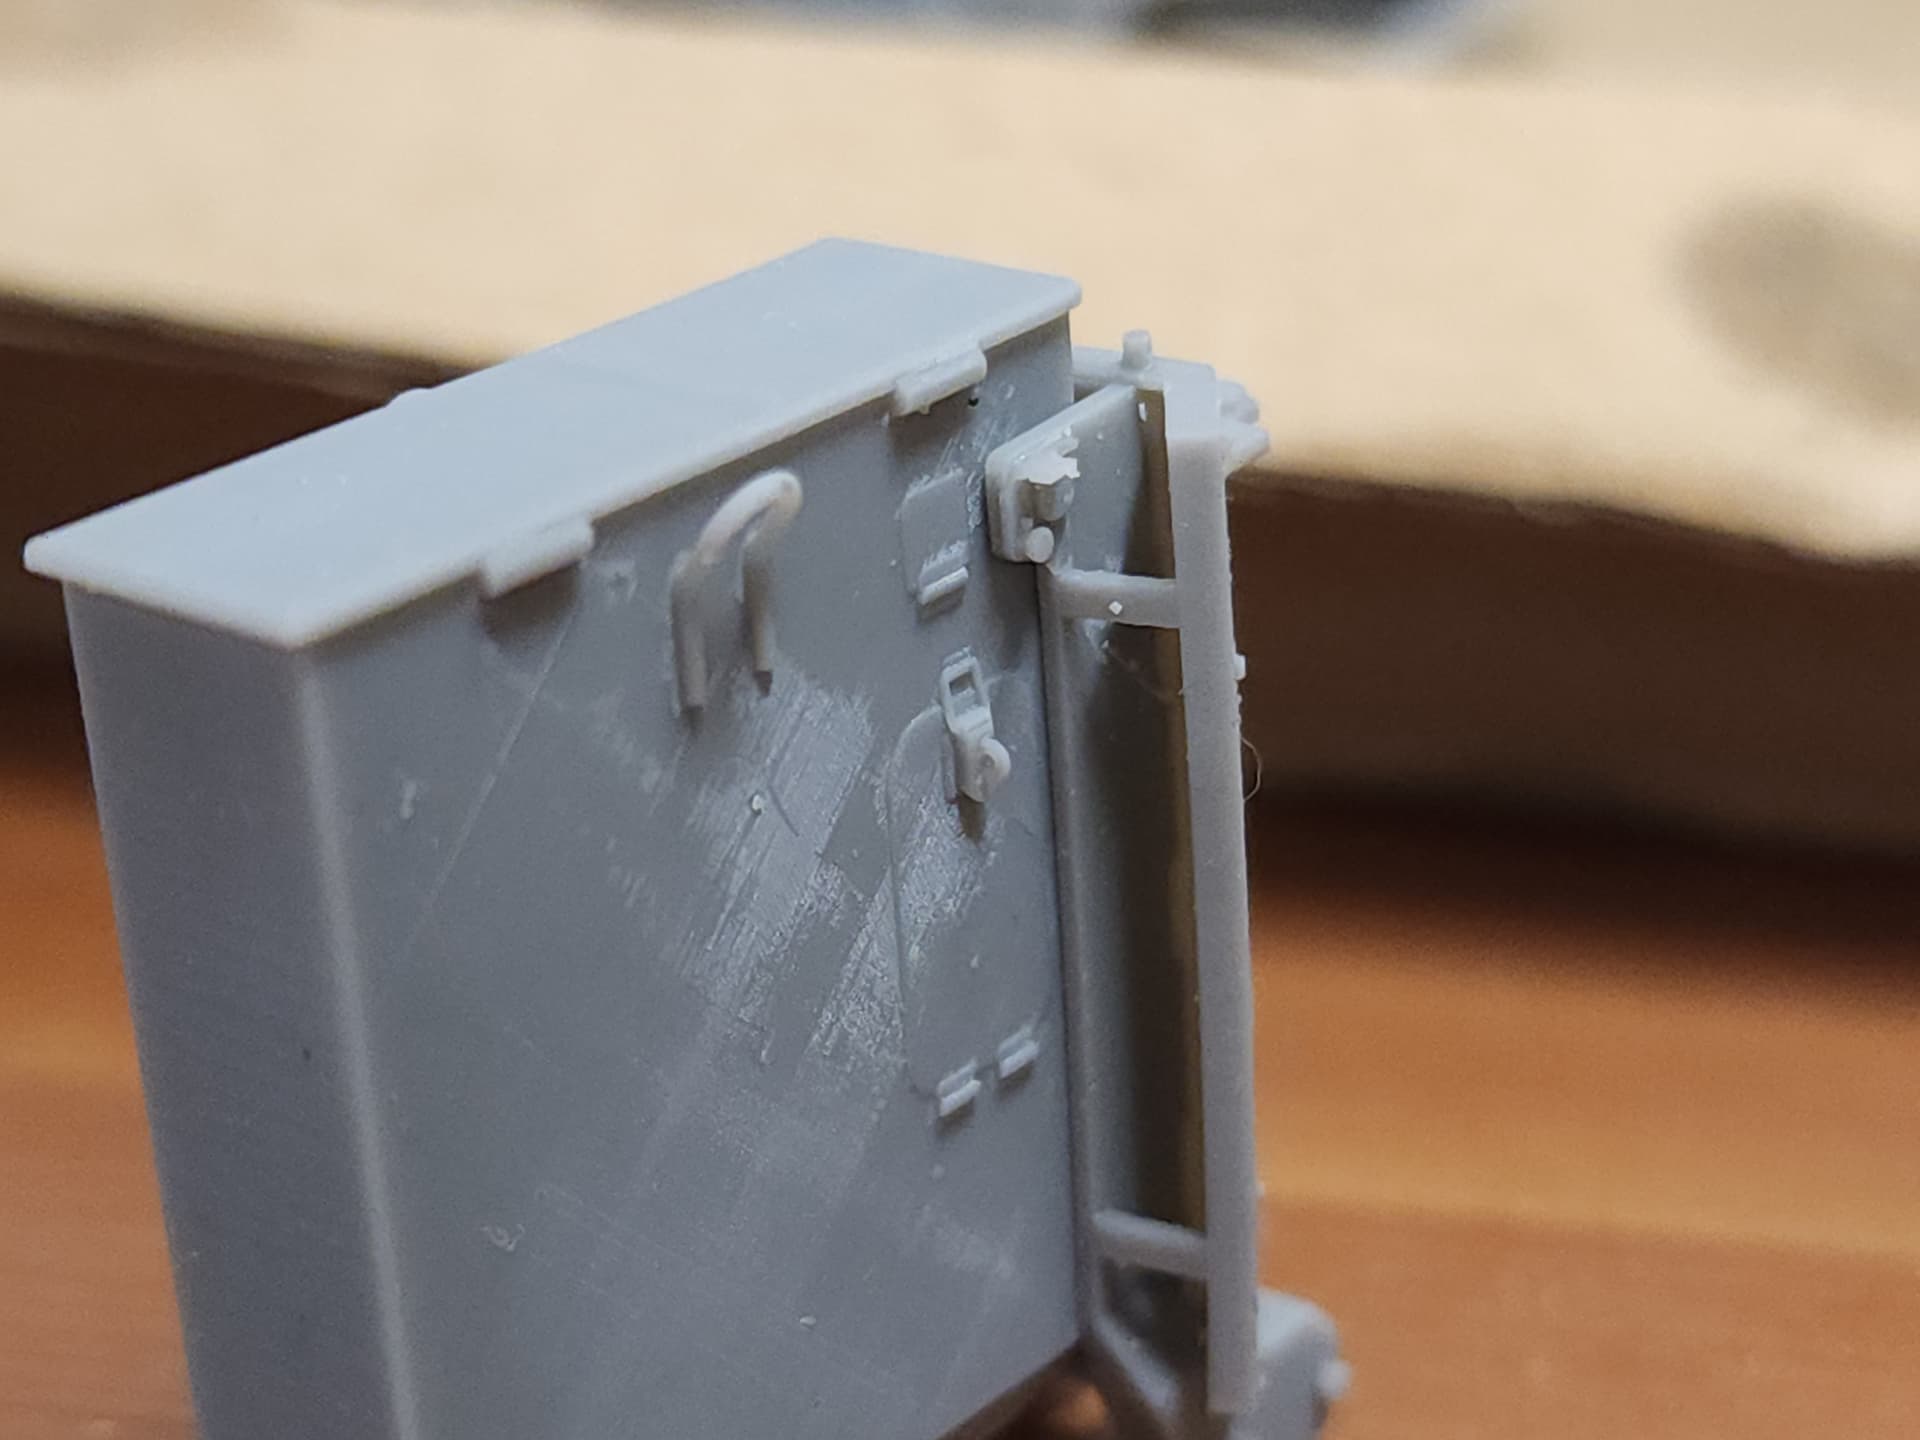
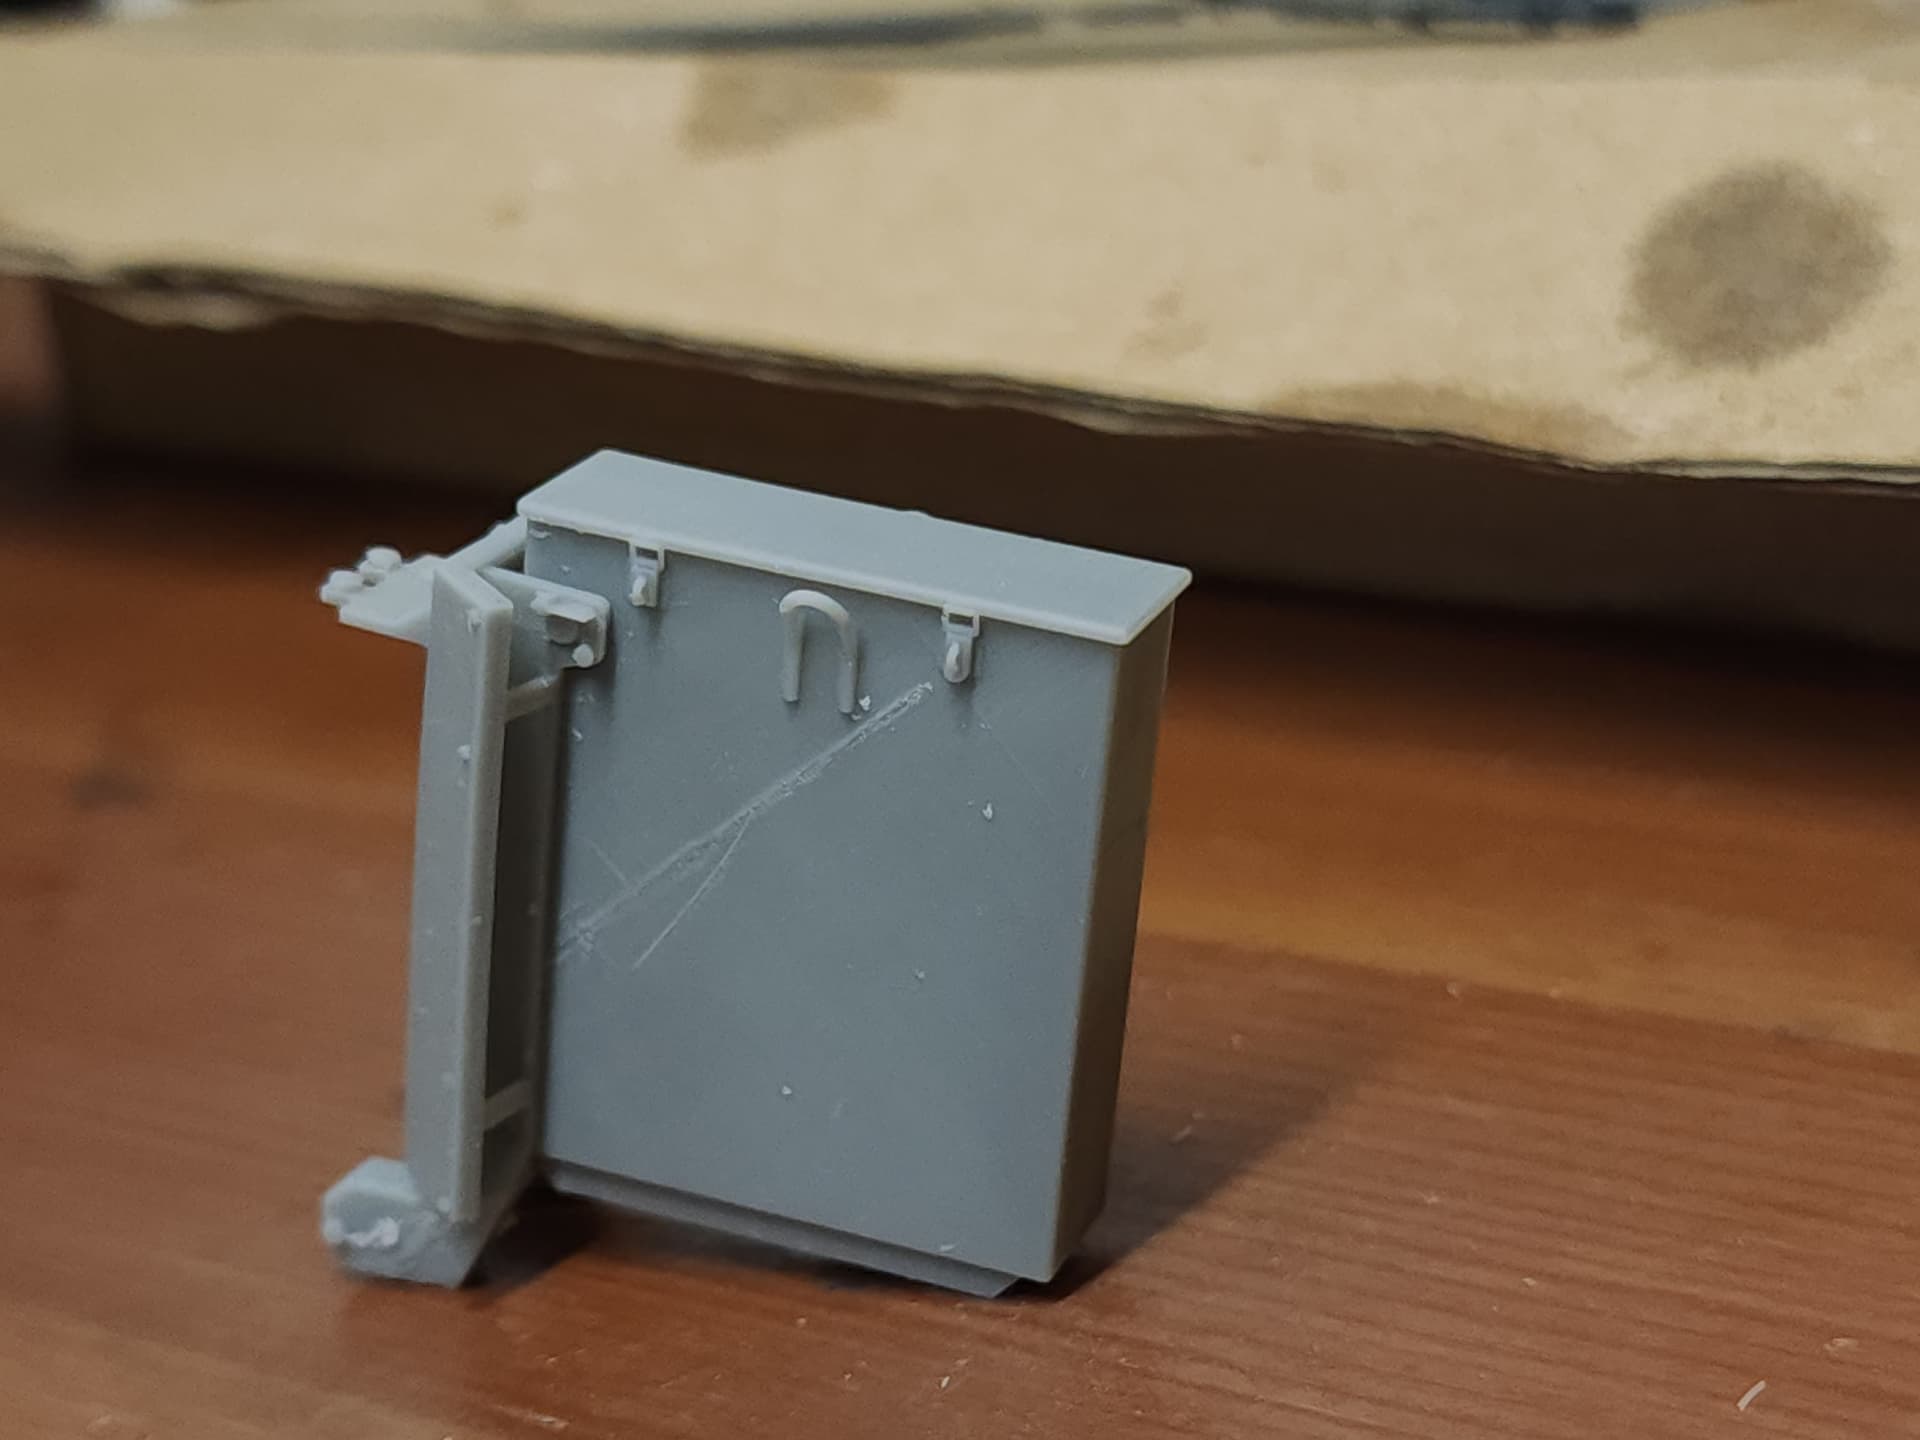
And here are some actual pictures of the CLAMS.


3 Likes
Oh yeah. That’s the missing pieces to my M60A1 RISE
Very nice. You beat me to it, Mike. Good work.
The TM for the CLAMS is
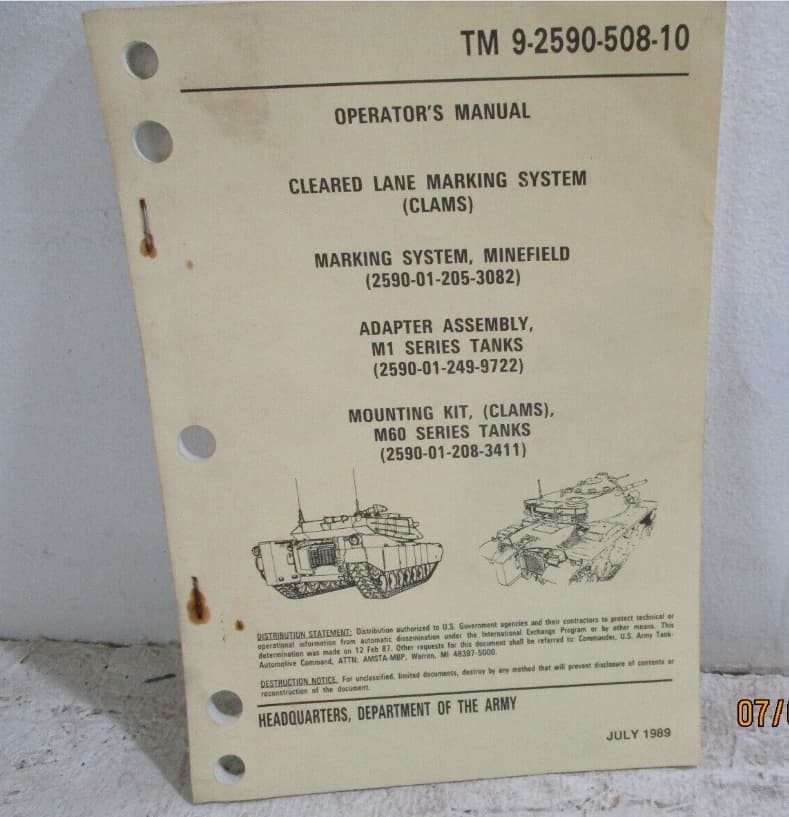
The NSN of the adapter is seen on the front page but I did not manage to source out any kind of drawings. Vodnik had posted a link to the manual in the old forums but it does not work though.
2 Likes

Thanks. This was a tough one with just barely enough information to finish it. The box itself was easy. The mounting bracket was tough.
Kinda need to know what it is first.