Outstanding work!
—mike
Outstanding work!
—mike
Looks Fantastic!
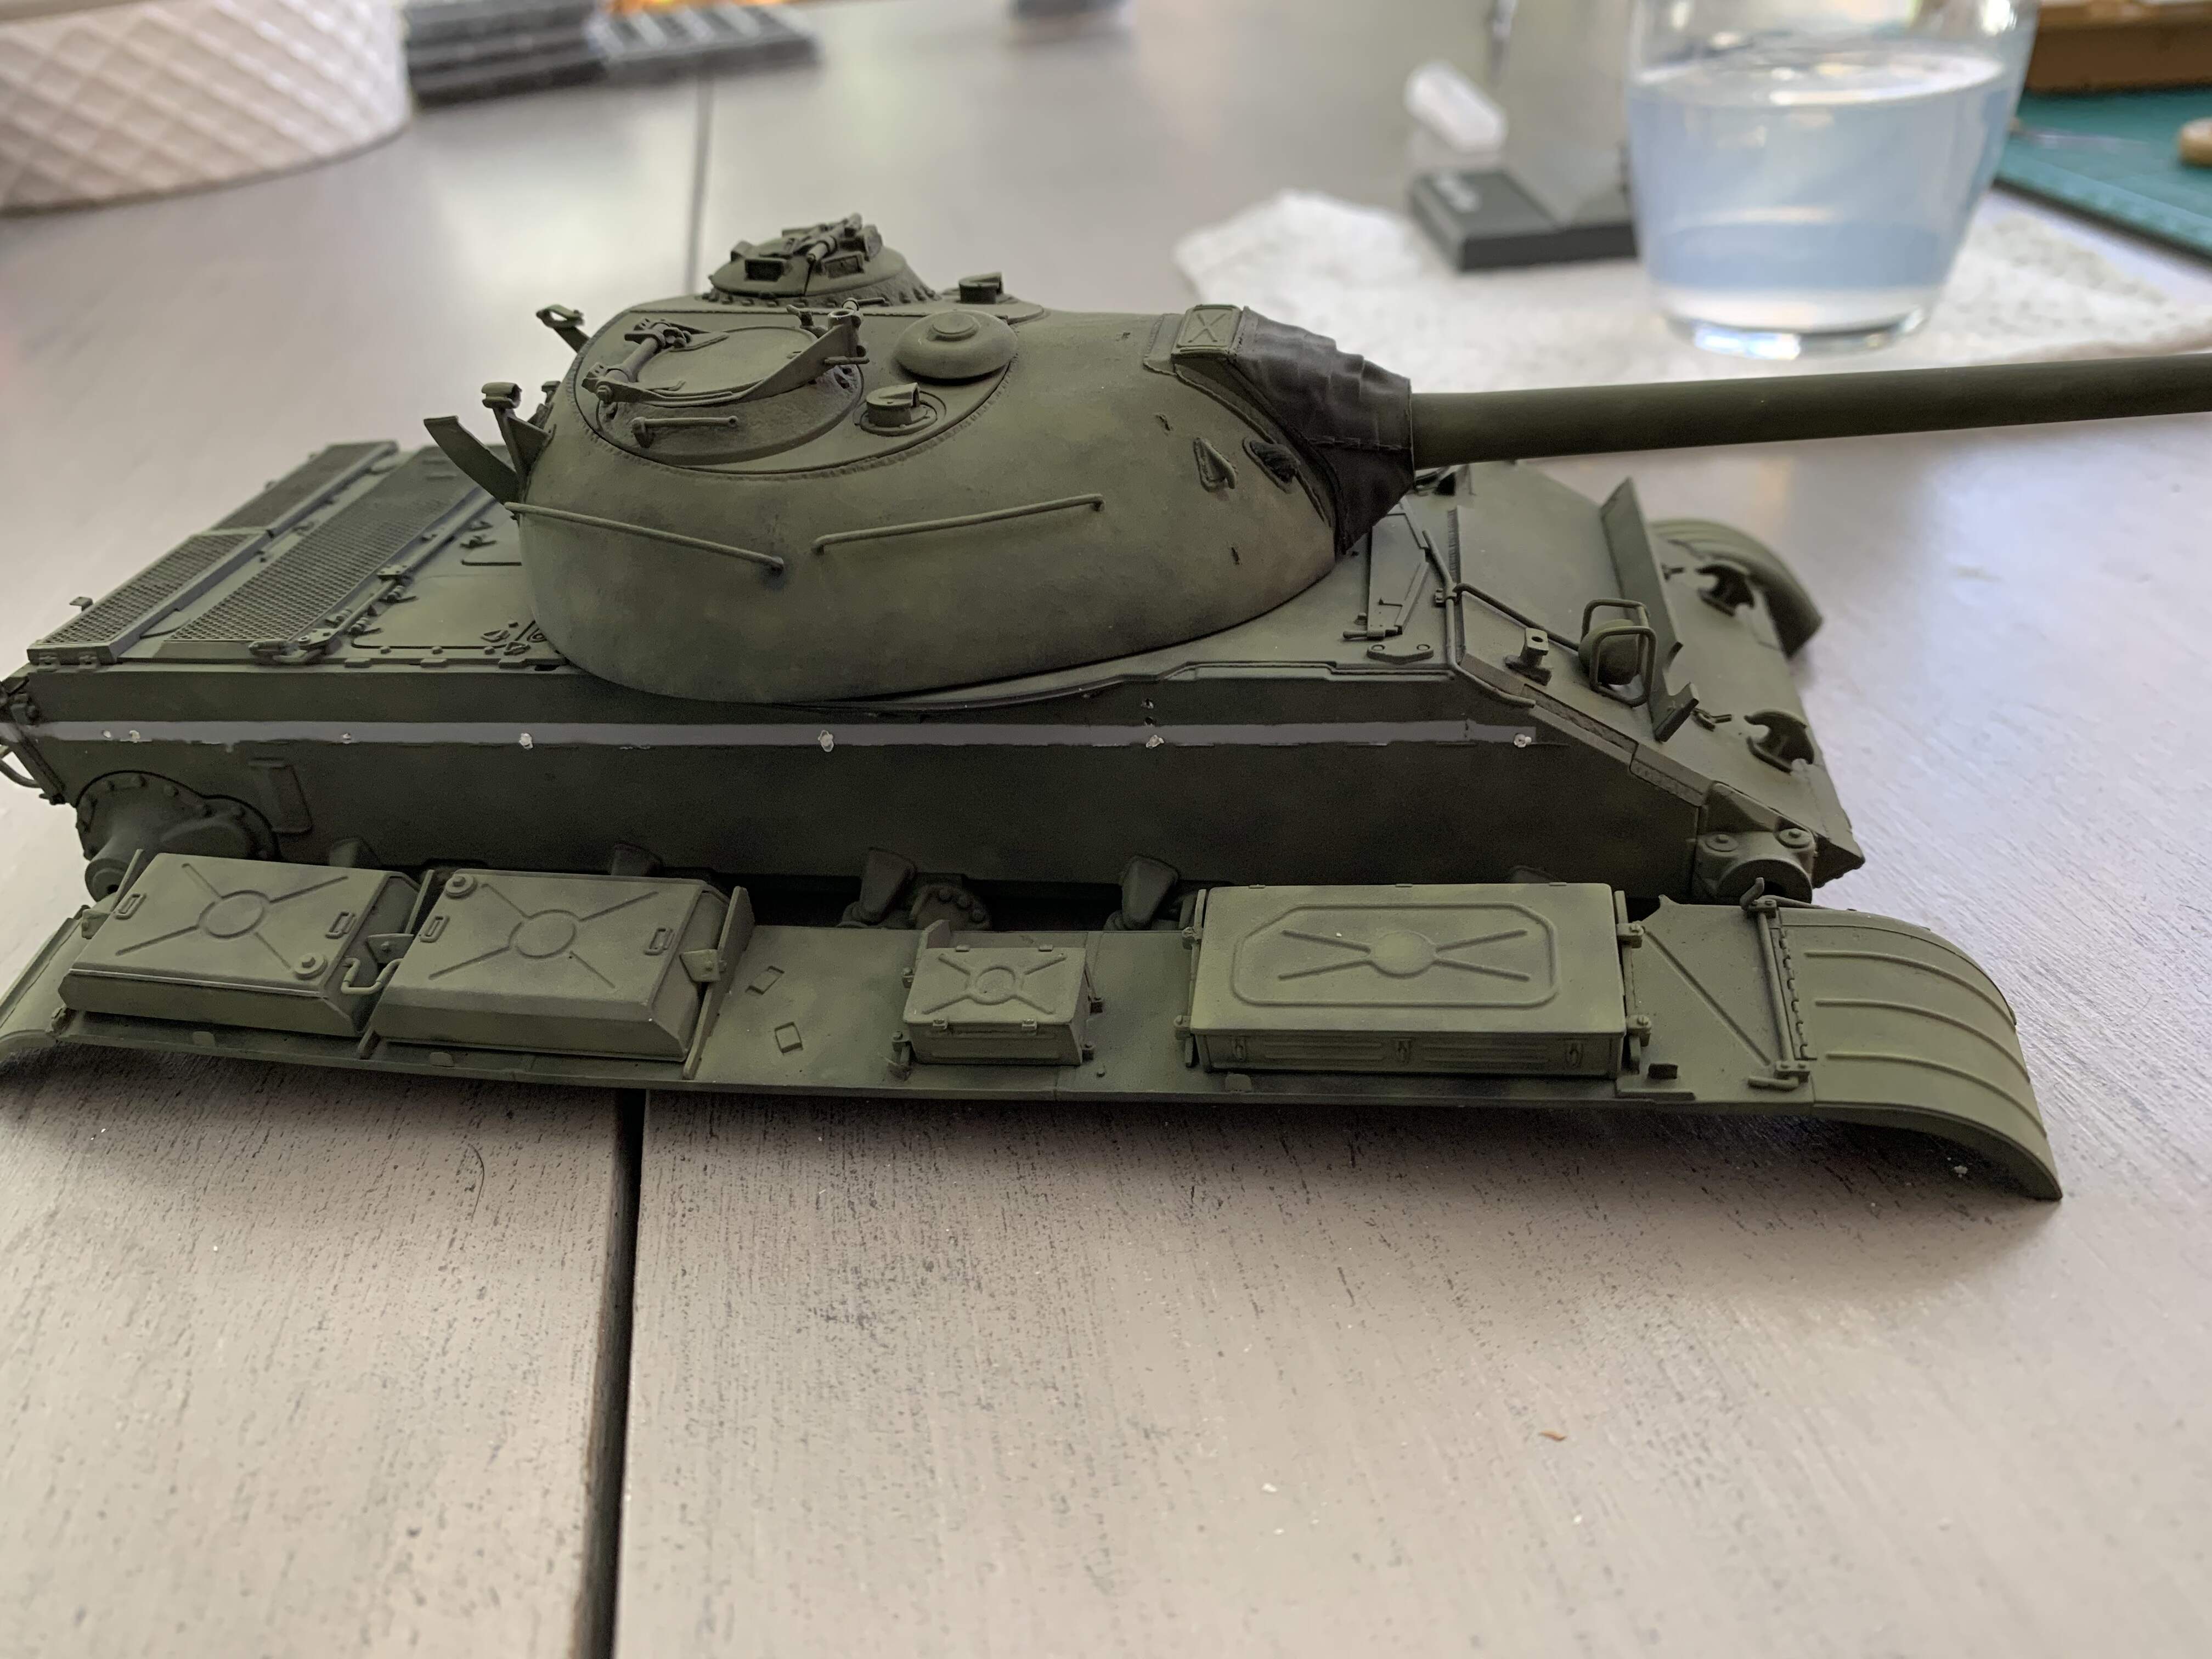
progress on the Pz III Ausf D - turret numbers on… now can start weathering
Nice job. Never thought of putting decals on while still on the sprue. Neat.
I am currently building the B version of this kit. Did you find parts of it to be unnecessarily fiddly? I also found the instructions to have a bit of the Dragon layout issue with some parts placement not being quite clear. I had an issue like that with the rear plate as it doesn’t say what line to square it up along, so if you pick the wrong spot it creates a minor alignment issue later on when attaching the engine deck subassembly. The instructions also directed me to build the road wheels in steps 13, 14, 15 (which is repeated twice, the first time involving completely different parts), and 16. One step directing me to build all the road wheels would have sufficed. I also can not see any difference between the sets using part Ad18 or the ones using part Ad19; they are exactly the same so why? I appreciate MiniArt providing us with these early marks of the Pz III but they do make me long for a SmartKit version. Can hardly wait to tackle the Bronco Ausf A.
yeah Miniart are bad for having parts dotted around all over the place. I didnt notice an issue with the rear plate. My biggest problem with Miniart are the wheels/axles - the alignment pins and attachments just arent big enough/strong enough… a pain but one I can live with to get the level of detail they give us
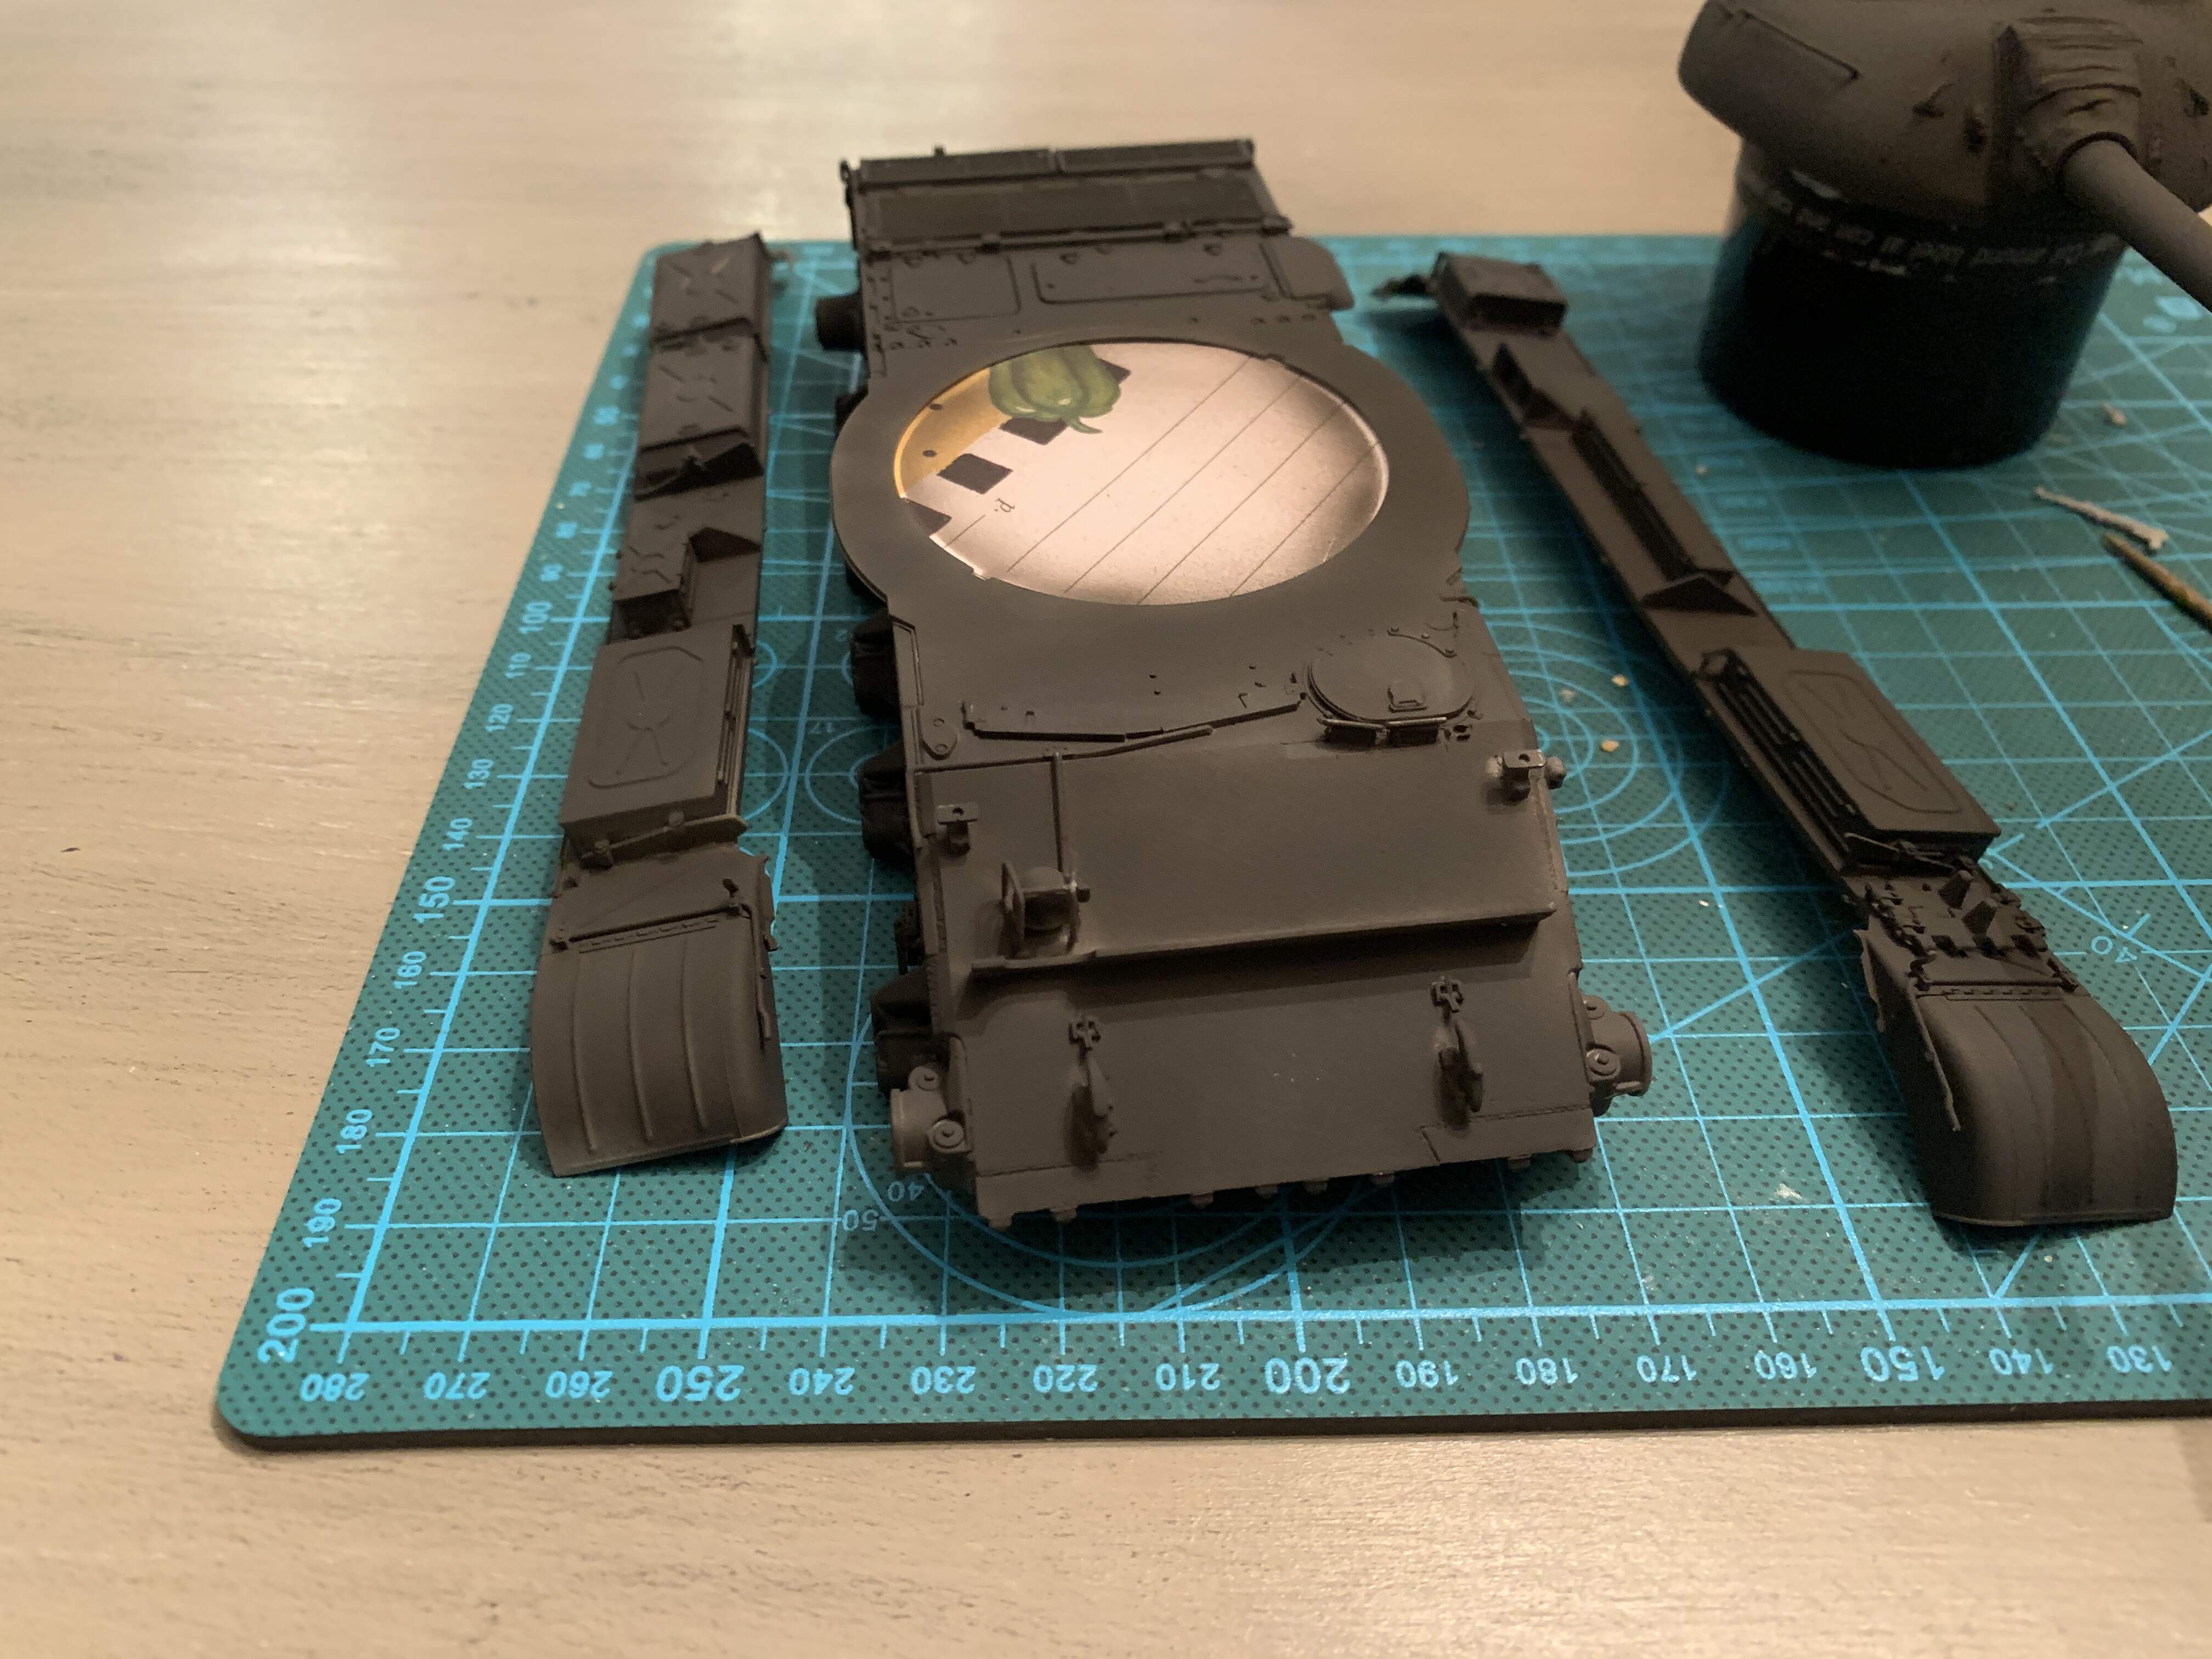
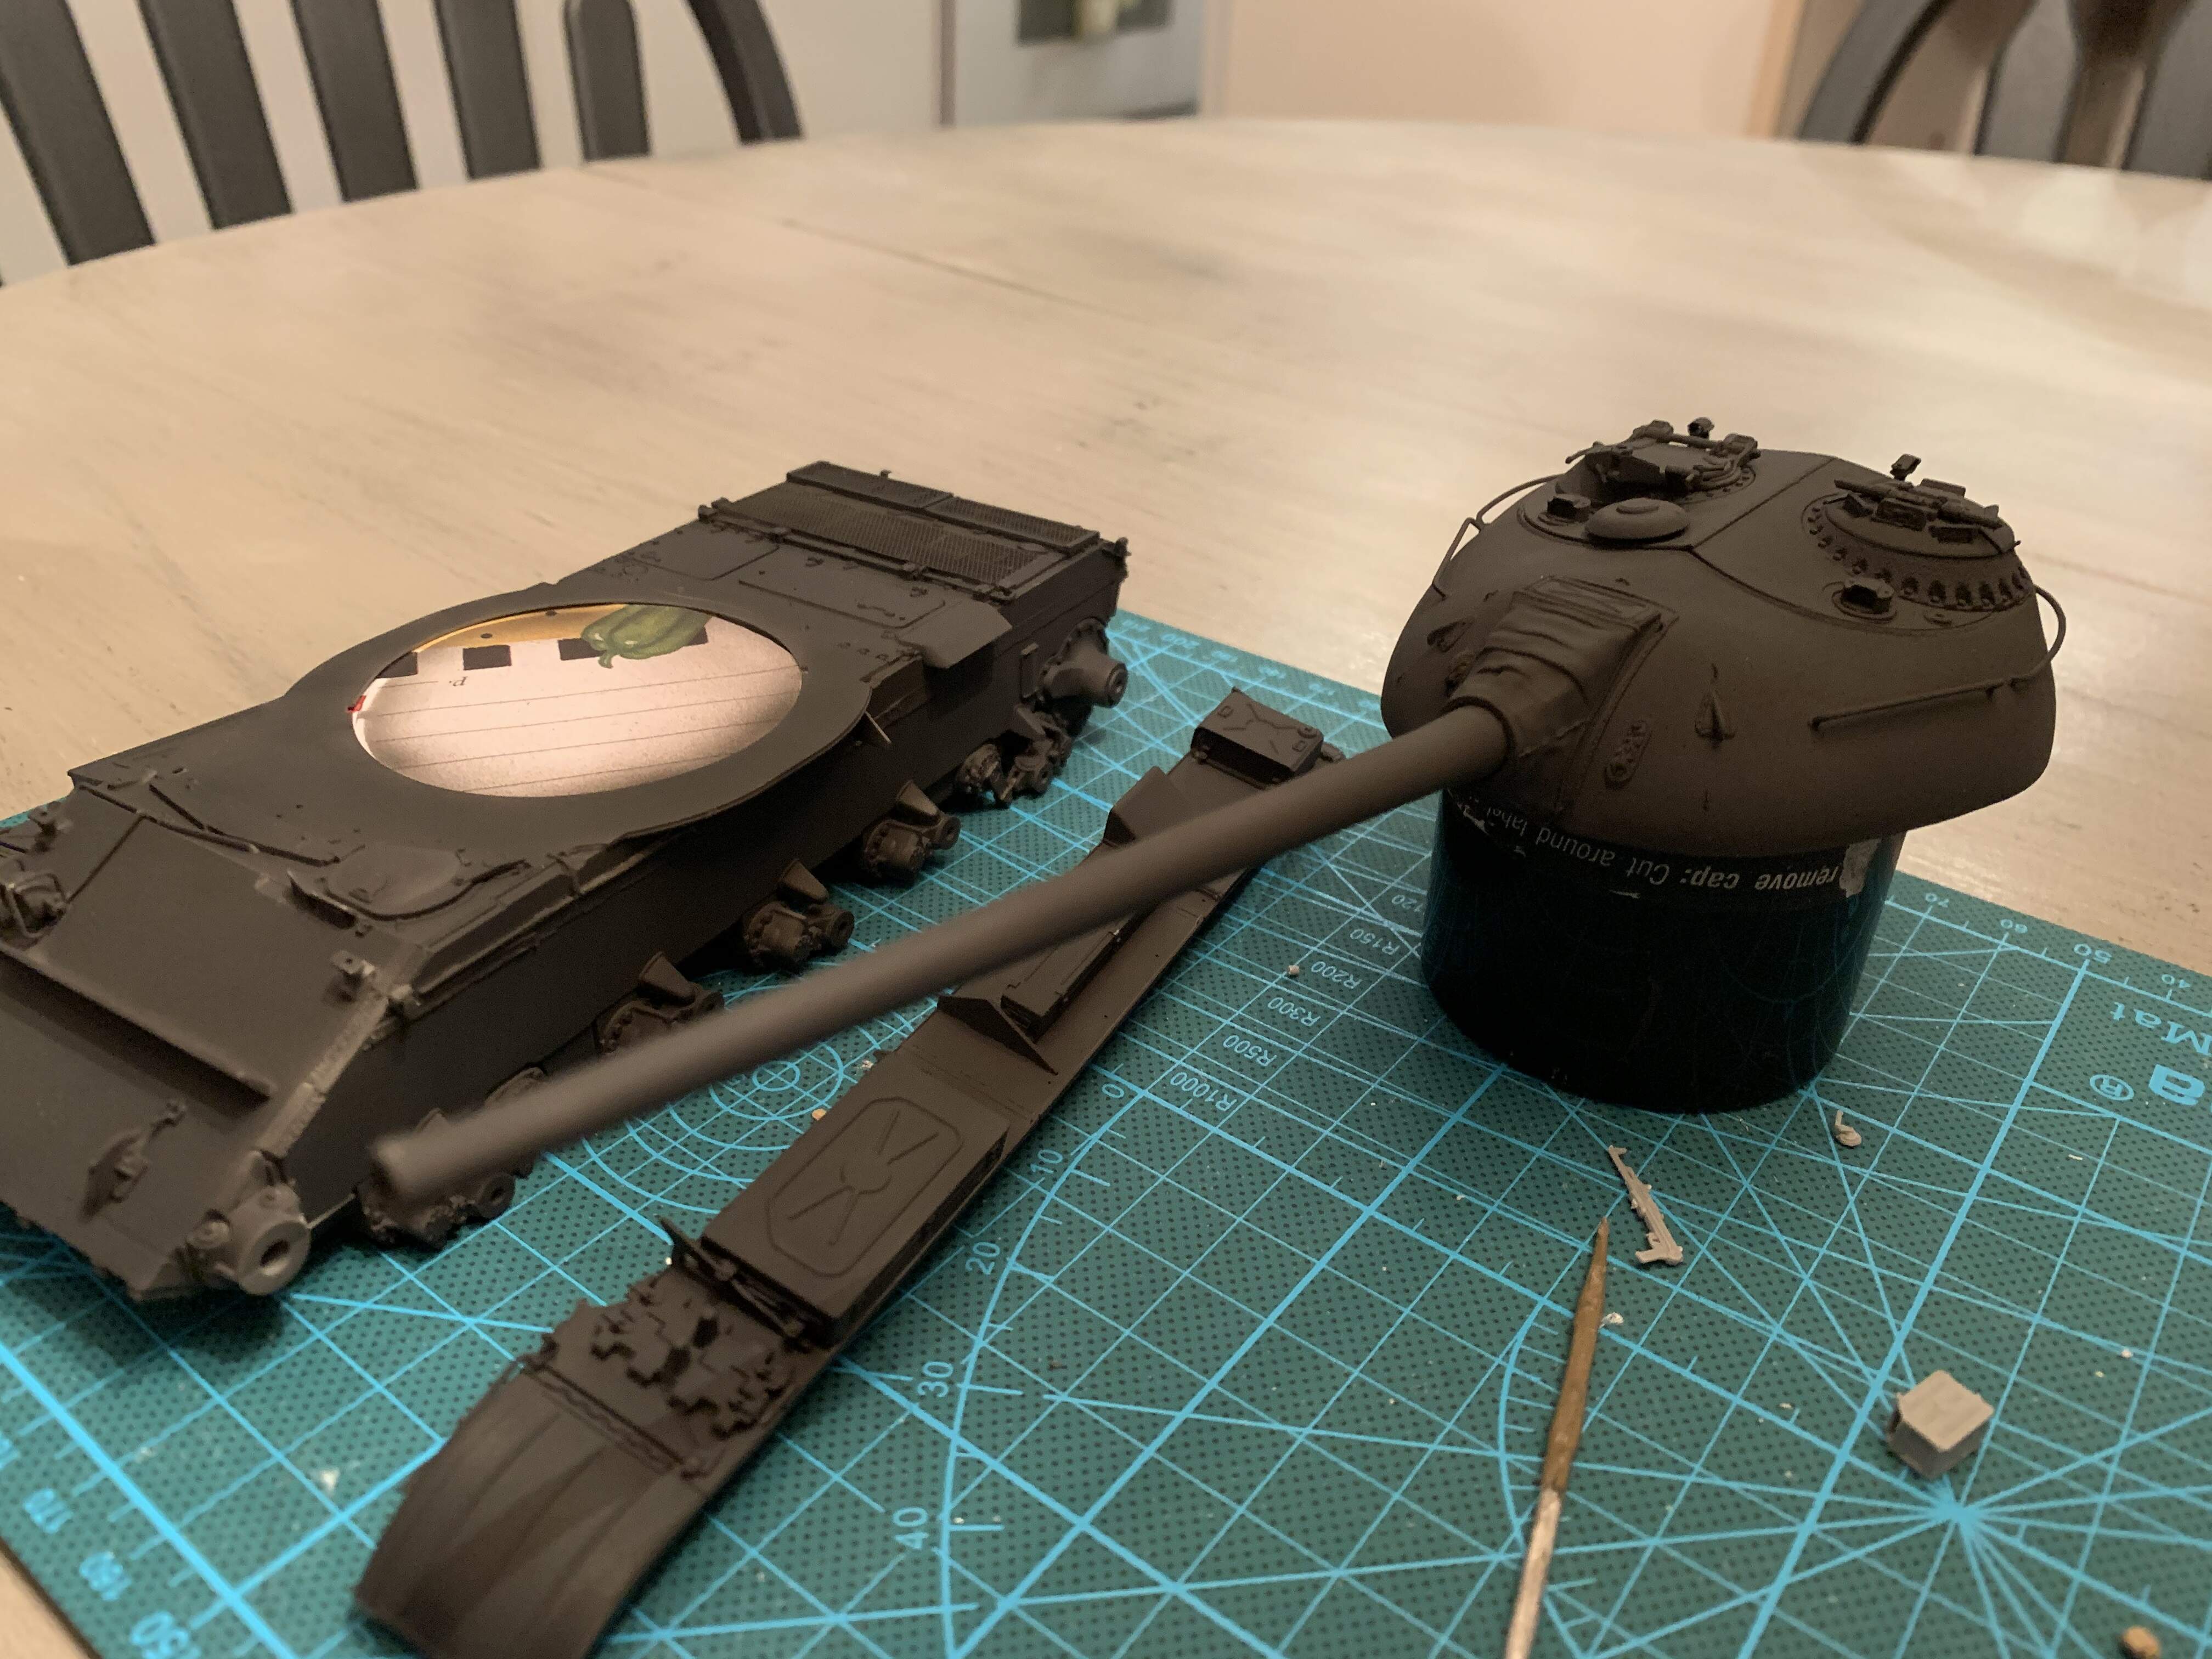
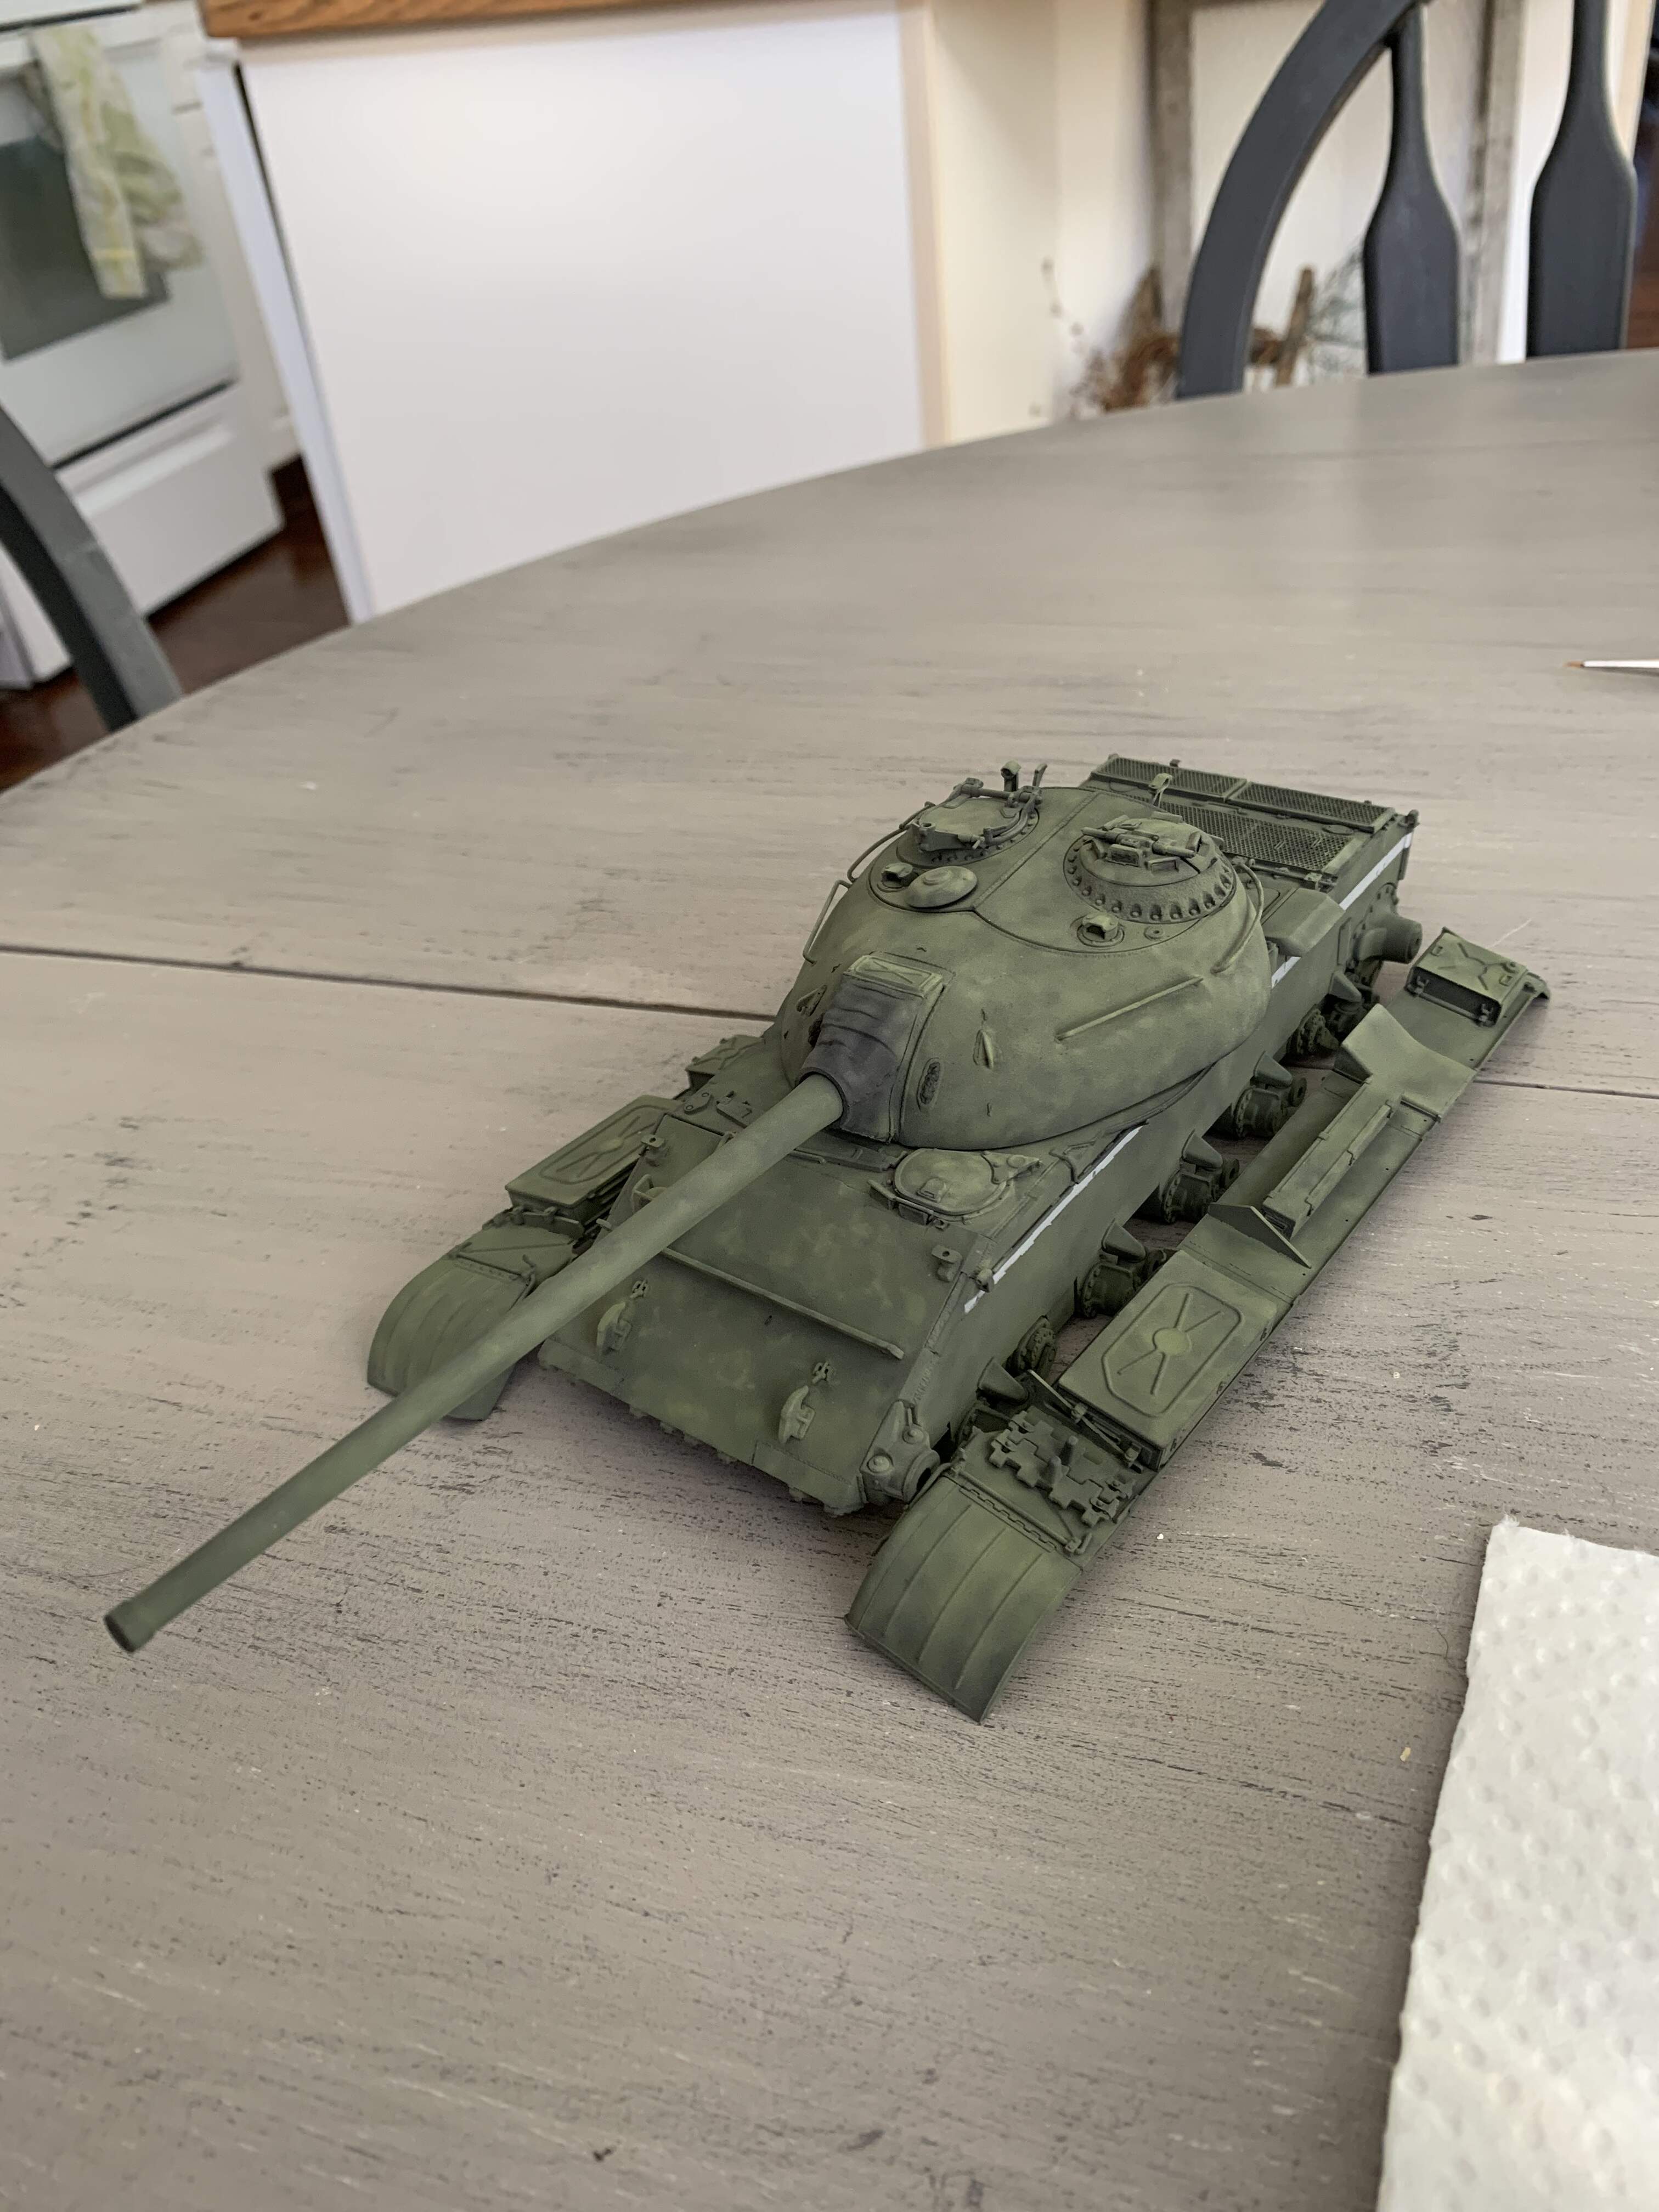
Got the T-54 primed today. Tomorrow’s goal is to shade the highlights on panel centres and such and then paint green on Tuesday to Wednesday
It’s been a while since my update.
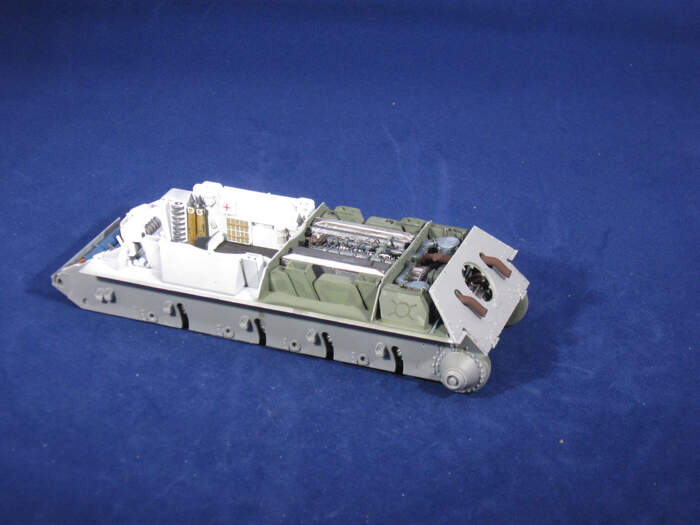
Flat coat sprayed, Washes added to the interior as well as some mud and pigments.
Petro, that interior looks great!
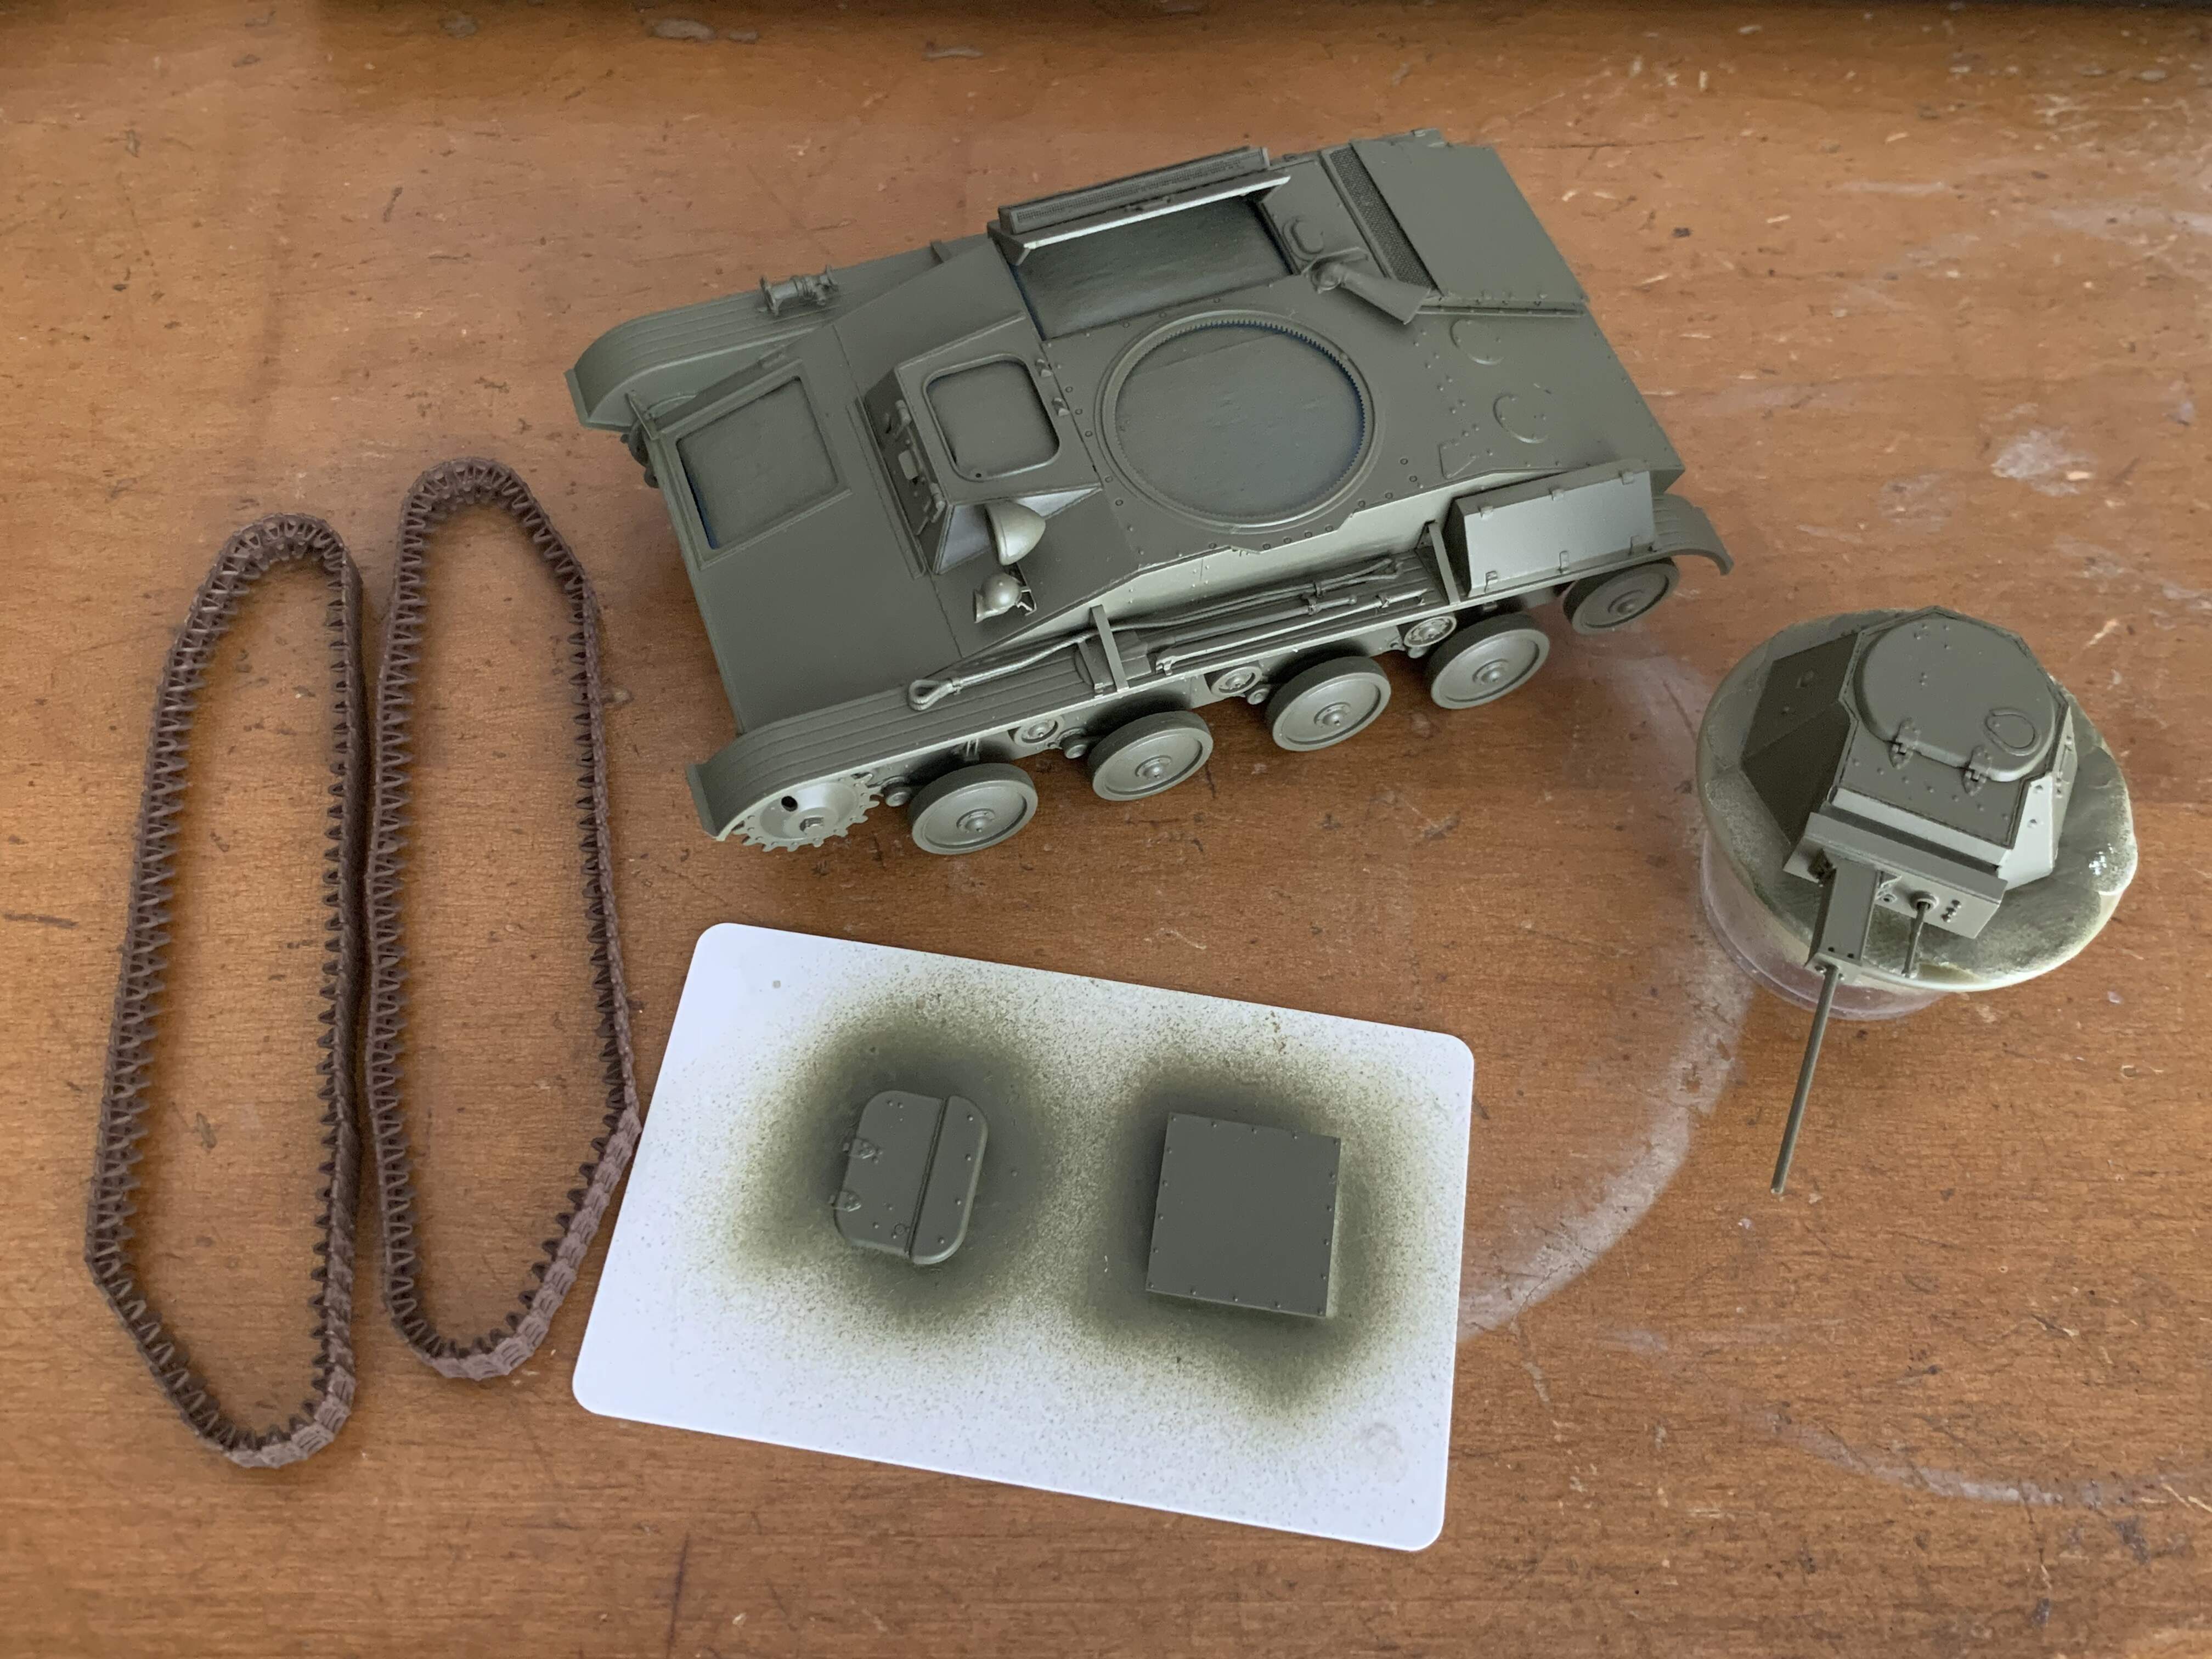
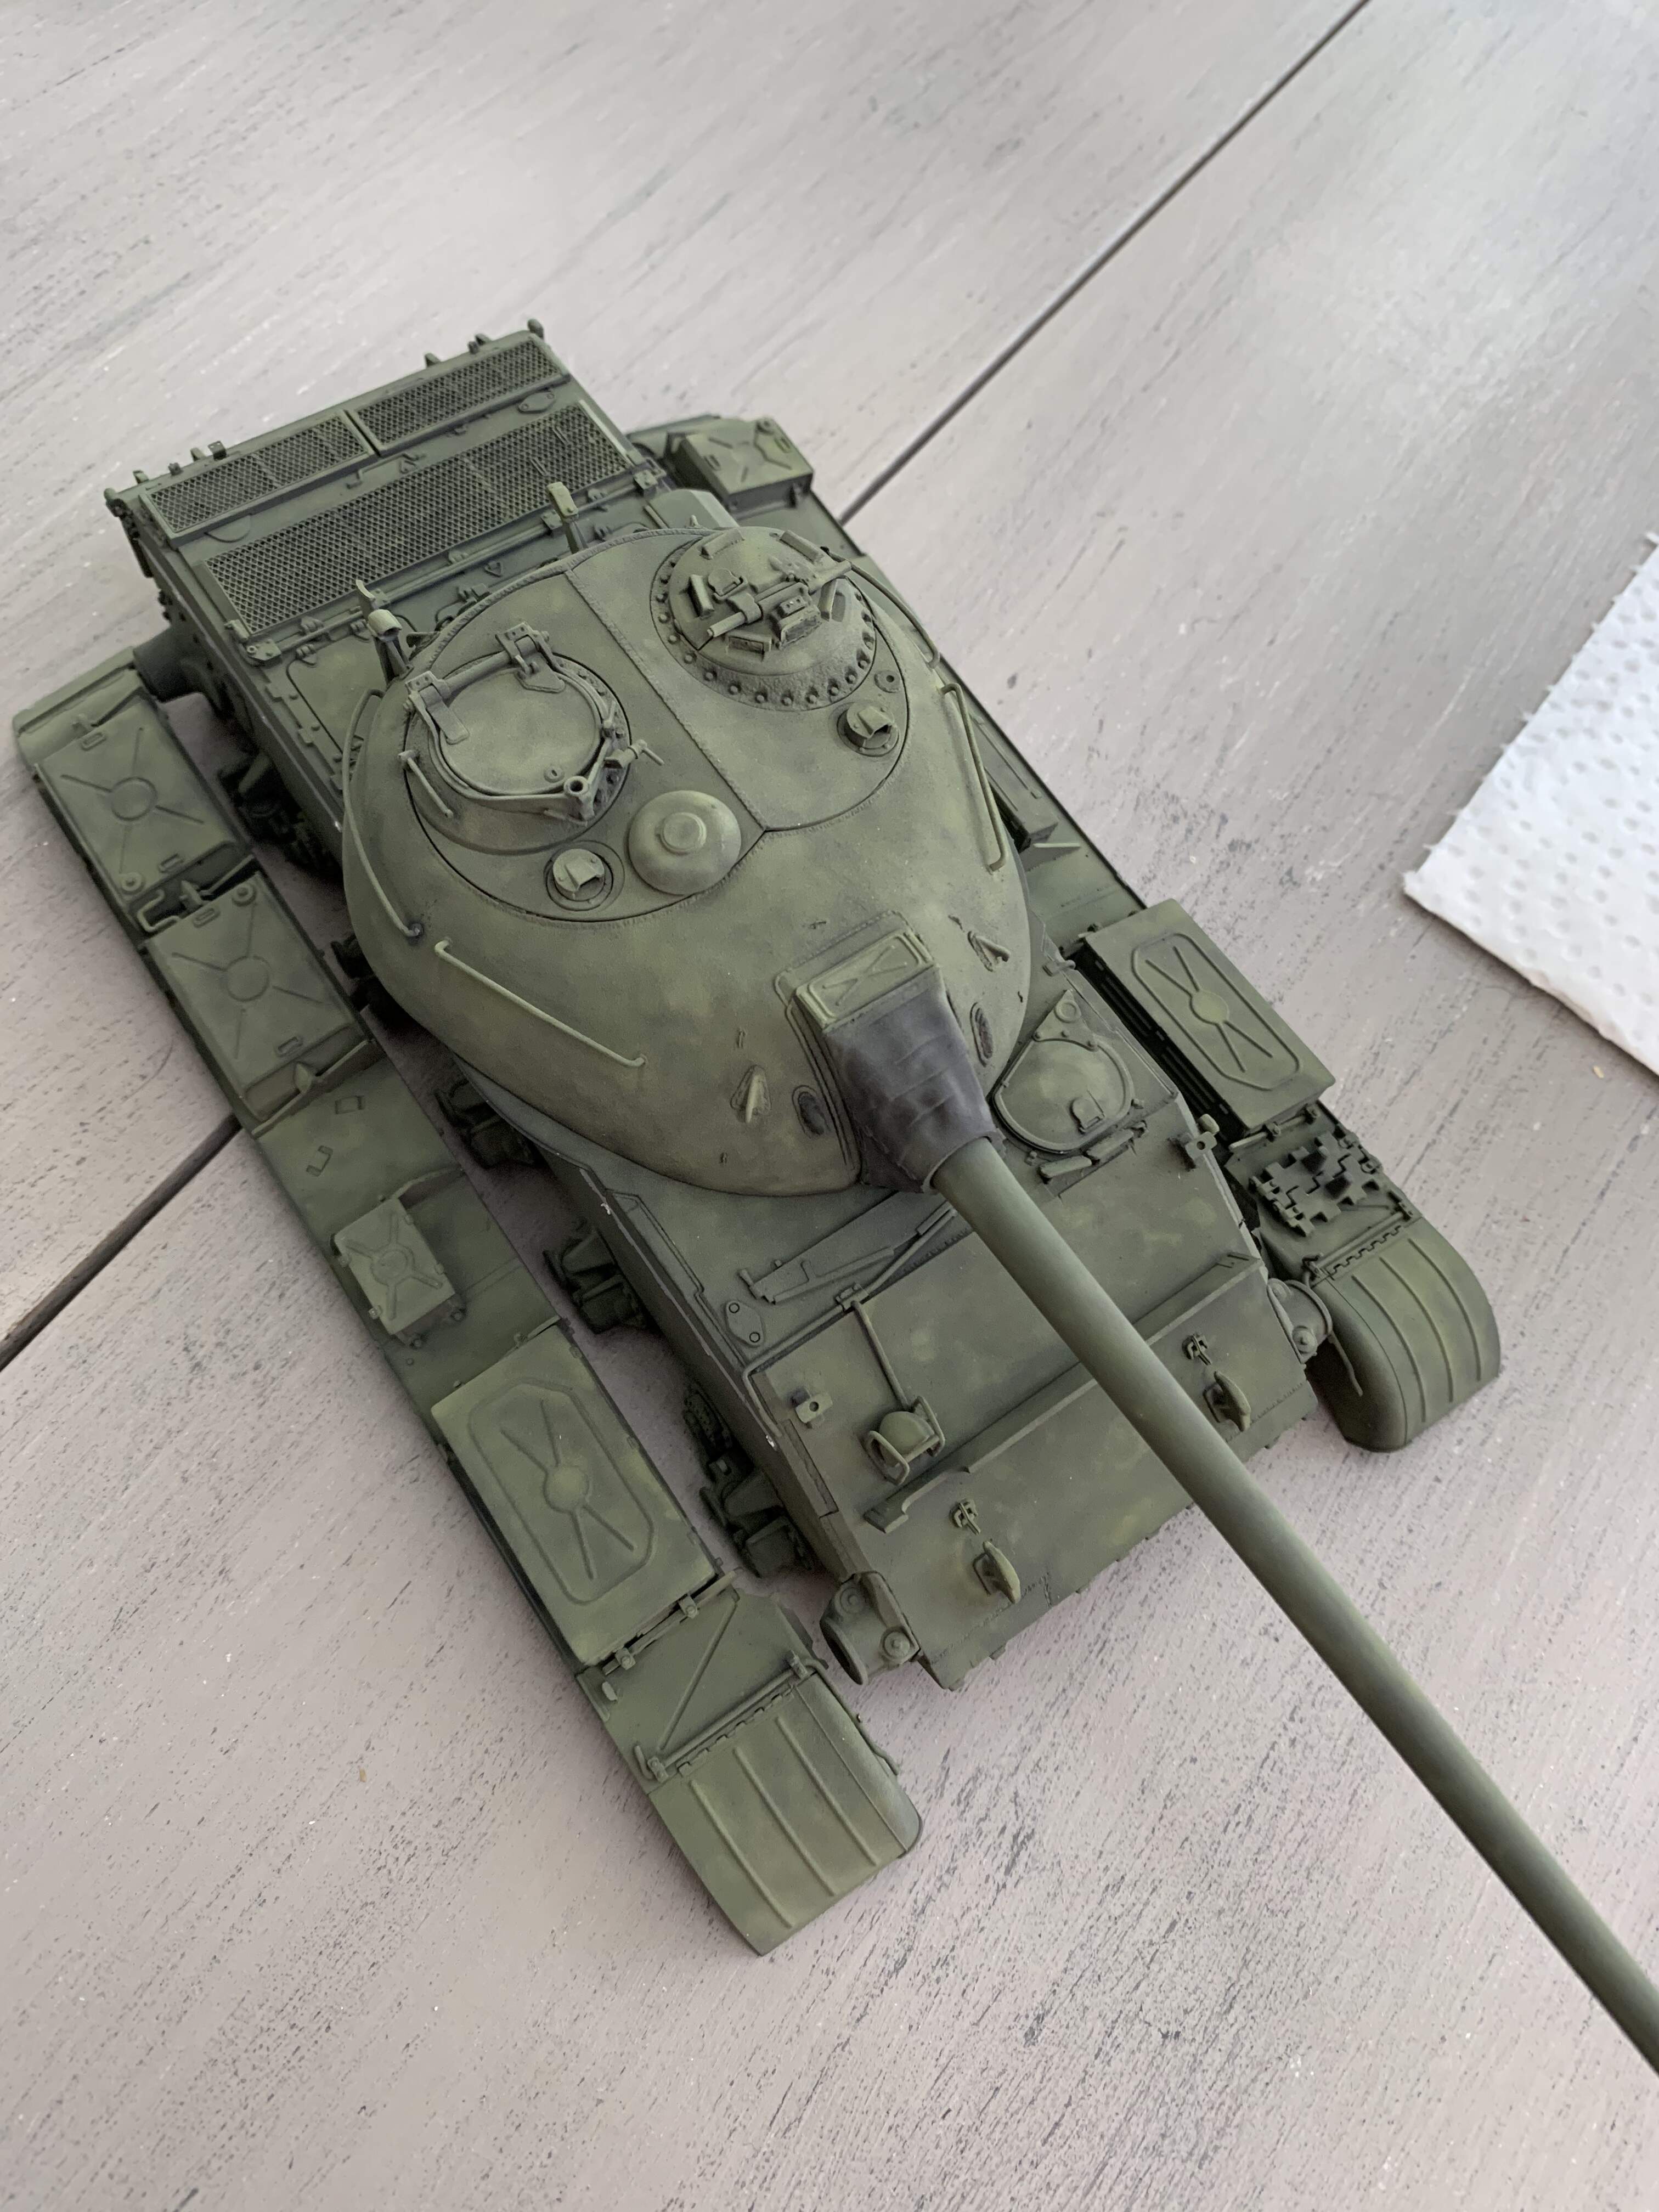
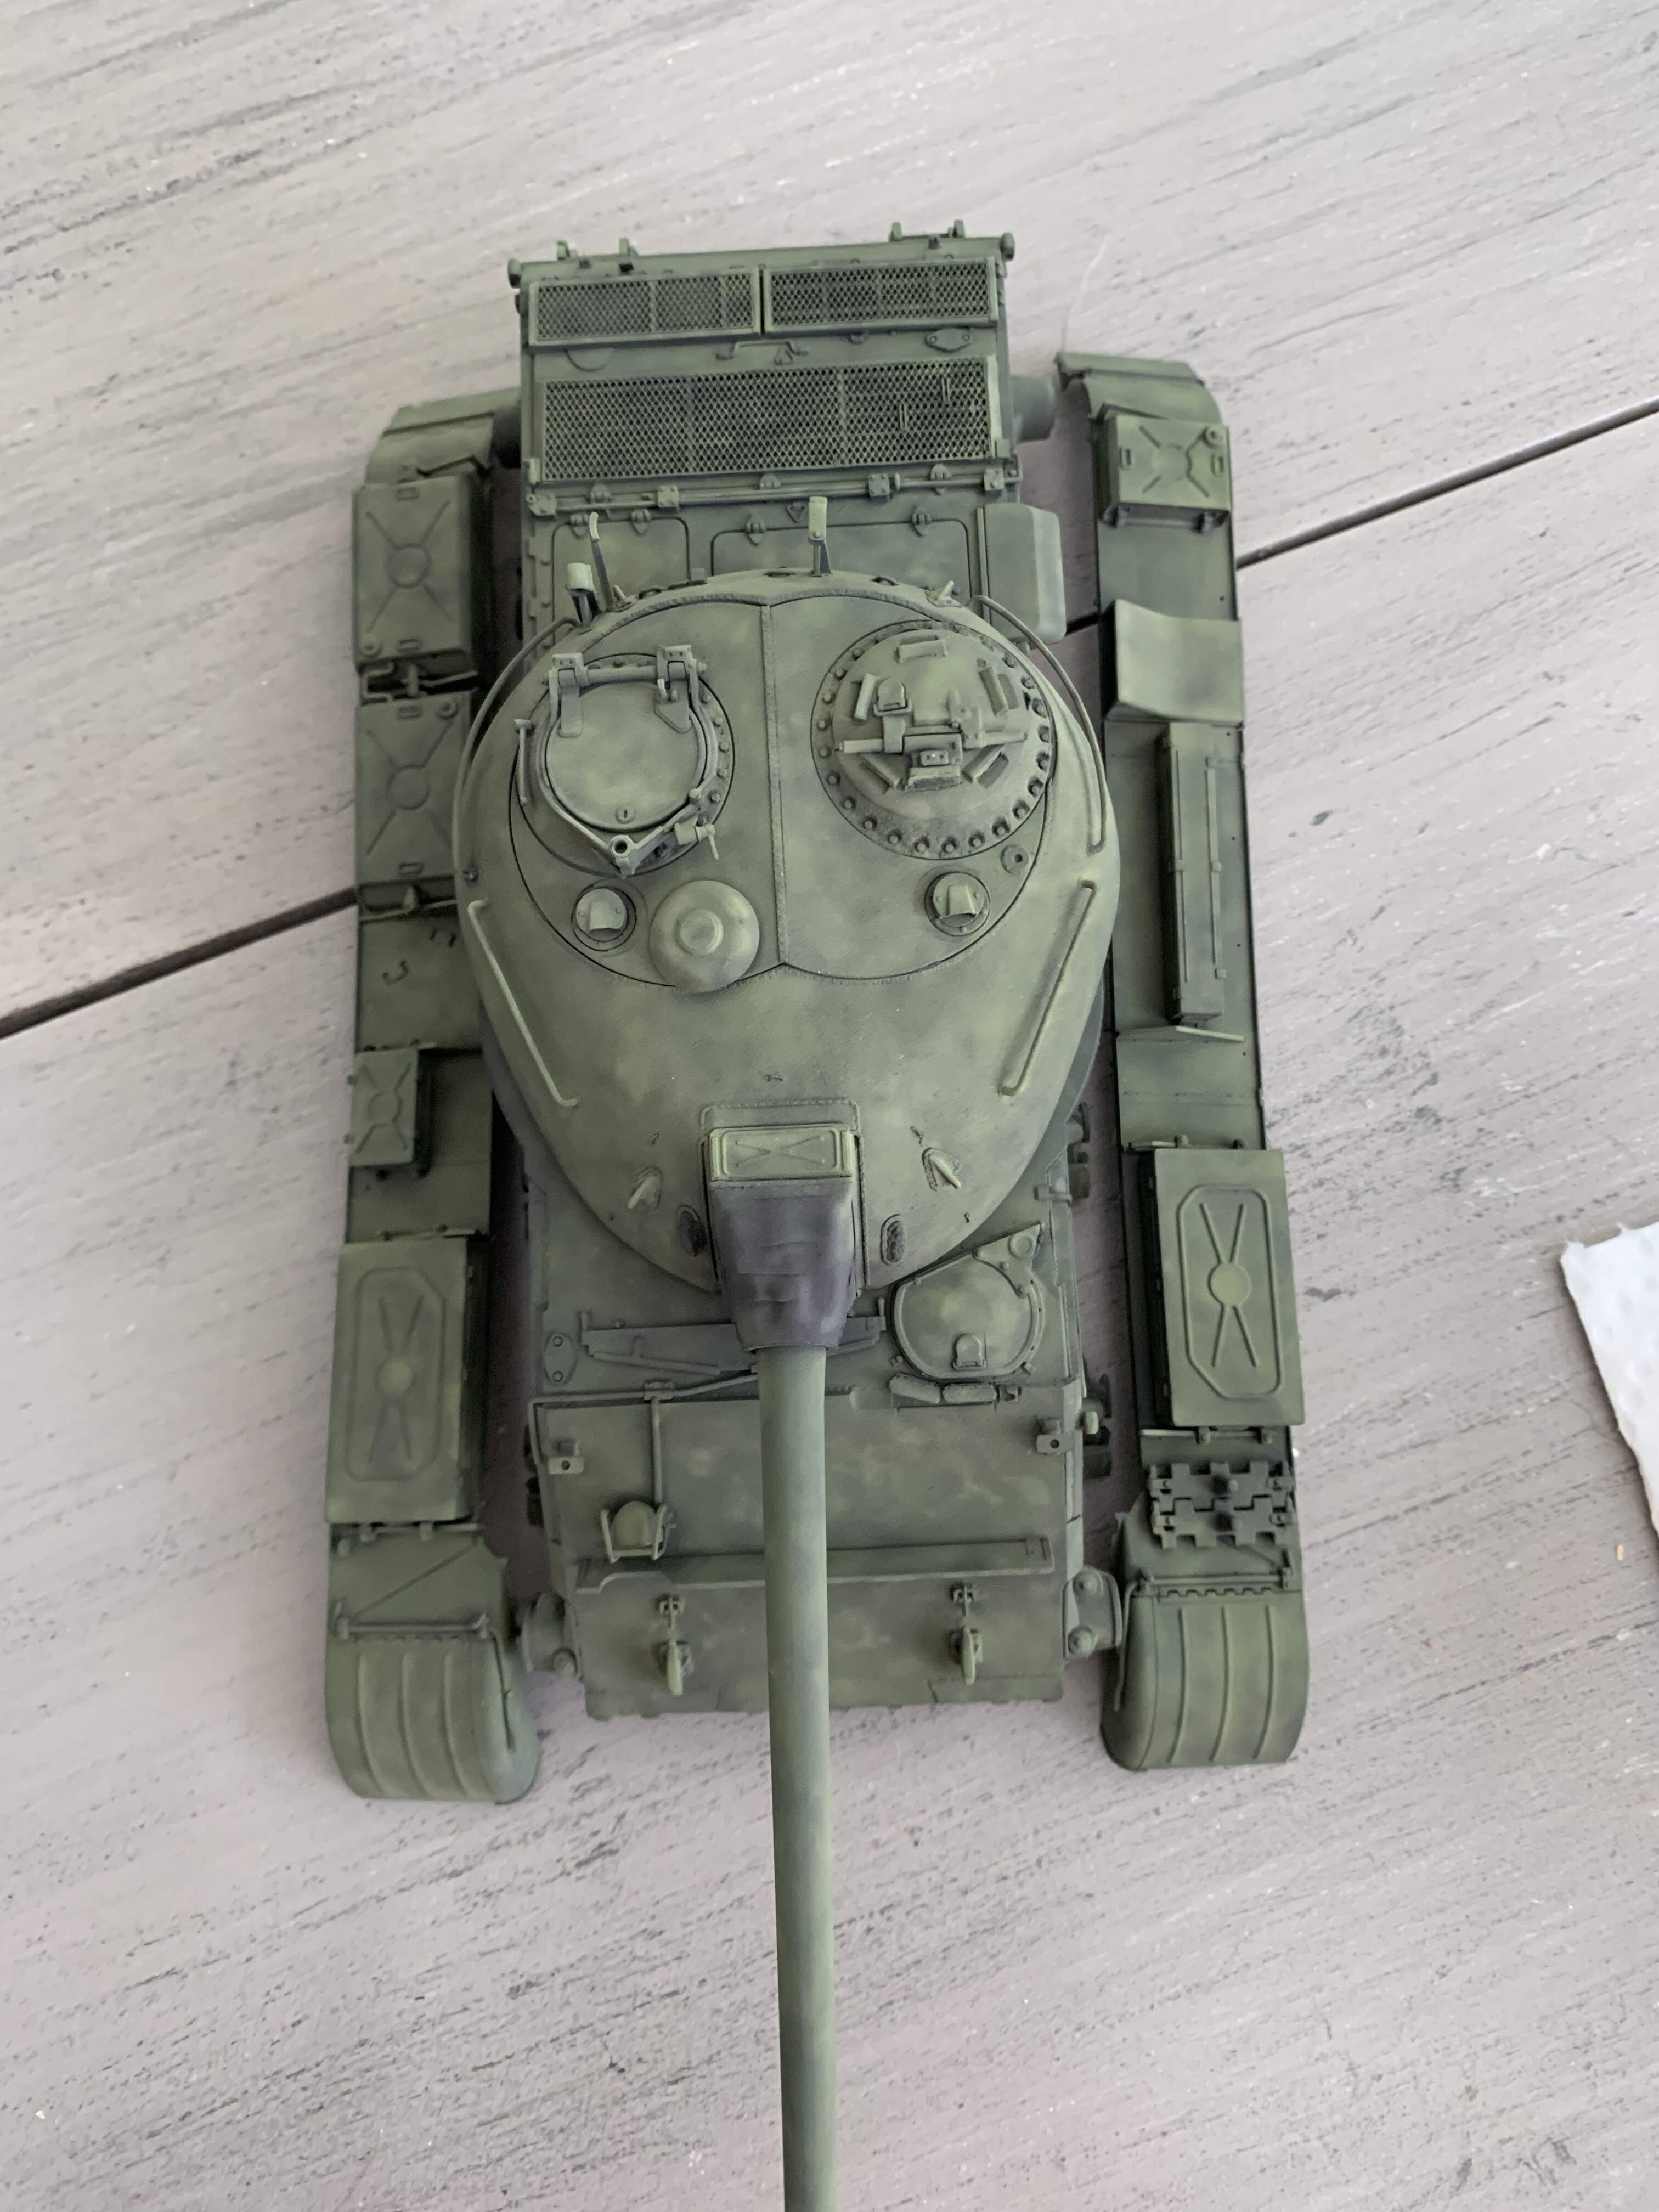
I have a small update on my T-60, I have glued the top of the hull permanently. I also applied primer both on the tank and the tracks. I used Vallejo’s Olive Drab and AK Interactive’s Track primers respectively. I have AK Interactive’s Real Color 4BO on the way which I’ll apply as the base color. Here’s how it looks so far.
Thanks.
Of course it looks different then I imagined but I can say I am quite pleased with the results.
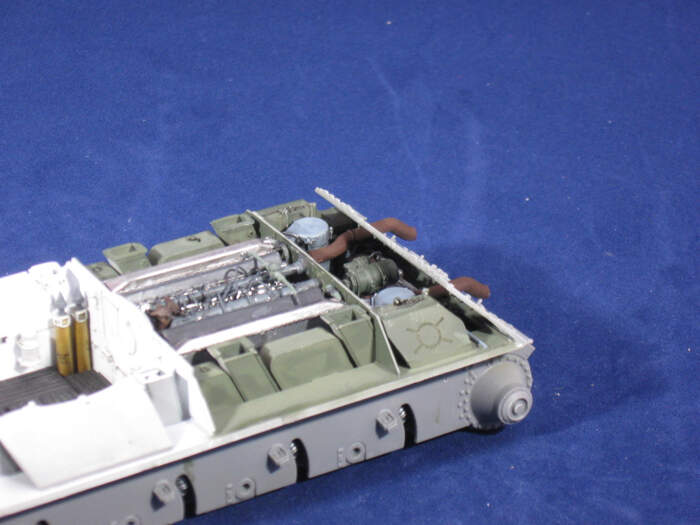
I’m just hoping the exhaust pipe lines up with out breaking of the manifold when it comes time to add the top.
I thought you were finished with yours.
At least now your updates will be easier to find for reference.
How was adding the idler arms? The plans show that there should be some locating marks for the correct position, but I am not seeing them.
I thought I read that there are not really any extra track links, so I am nervous about adding them relight now.
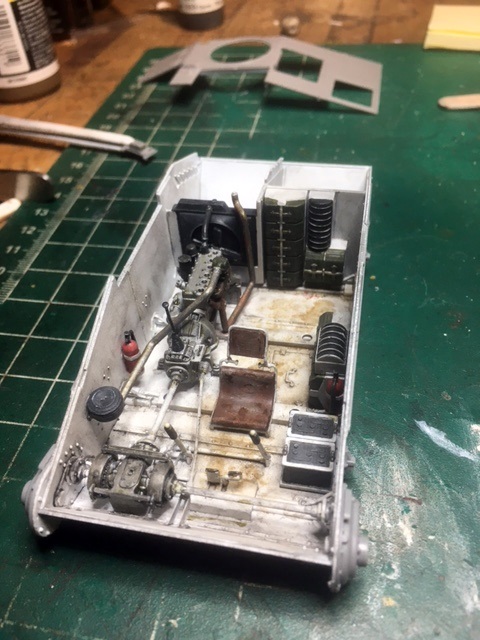
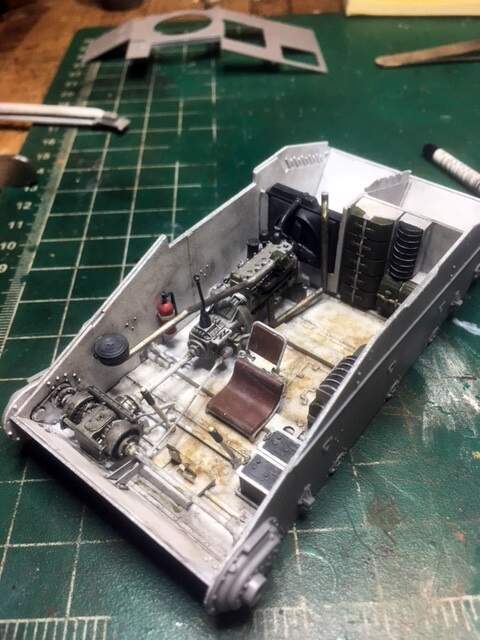
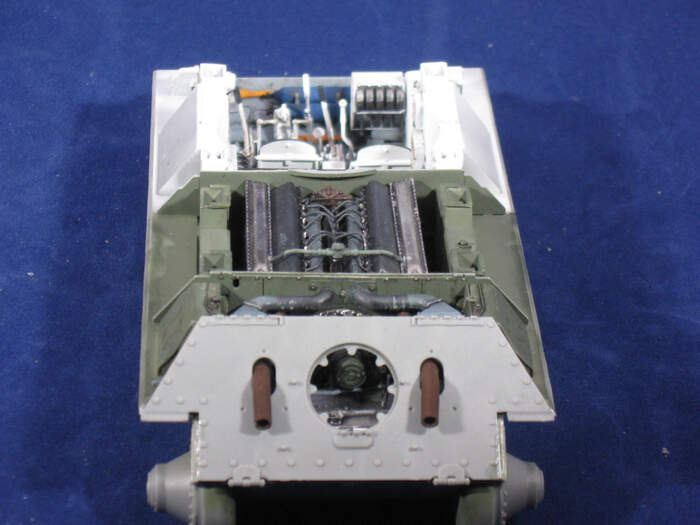
The hull of the T-34 is done. The front compartment is nice. The transmission compartment is pretty nice. I had a couple of alignment issues that mostly don’t show up. The exhaust is a little bent for some unknown reason but I think I can straighten that when I get the covers on. The engine compartment - well, I did not line up the intakes correctly with the firewall between the engine and transmission compartment. And it was a little too late to fix it when I realized, so that part of the interior will get covered up.
It is, nonetheless, very cool. It’s pretty slow going because I spend a lot of time dryfitting, painting, glueing, adjusting, waiting for glue to dry before doing more.
So far I only have one thing I don’t like about the kit - the number of different sprues I have to touch to build certain things. Right now I’m working on the hull glacis and I think every part is on a different sprue. If I had more space where I could spread out all the sprues that wouldn’t be an issue.
There is a fair bit of clamping and pressing to get things to stick together correctly but in the end it all lines up perfectly.
I picked up the Soviet tram and I guess it will be an interior kit too and although I said I wasn’t going to do one of those soon, I don’t think I’m going to wait very long to start on it…
Looking great! The fit of these kits is really nice but as you’ve stated fiddly and very slow! The good news is it makes other kits feel very manageable.
Keep up the good work!
The T-54/T-55 really does just scream “I’m a tank,” doesn’t it? Nice!
It really does! I’m shocked how wide it is with the tracks, it’s a monster for what was considered a medium tank (even though around that time the concept of heavy vs medium was giving way to main battle tank)
looks great!
Cheers!
L
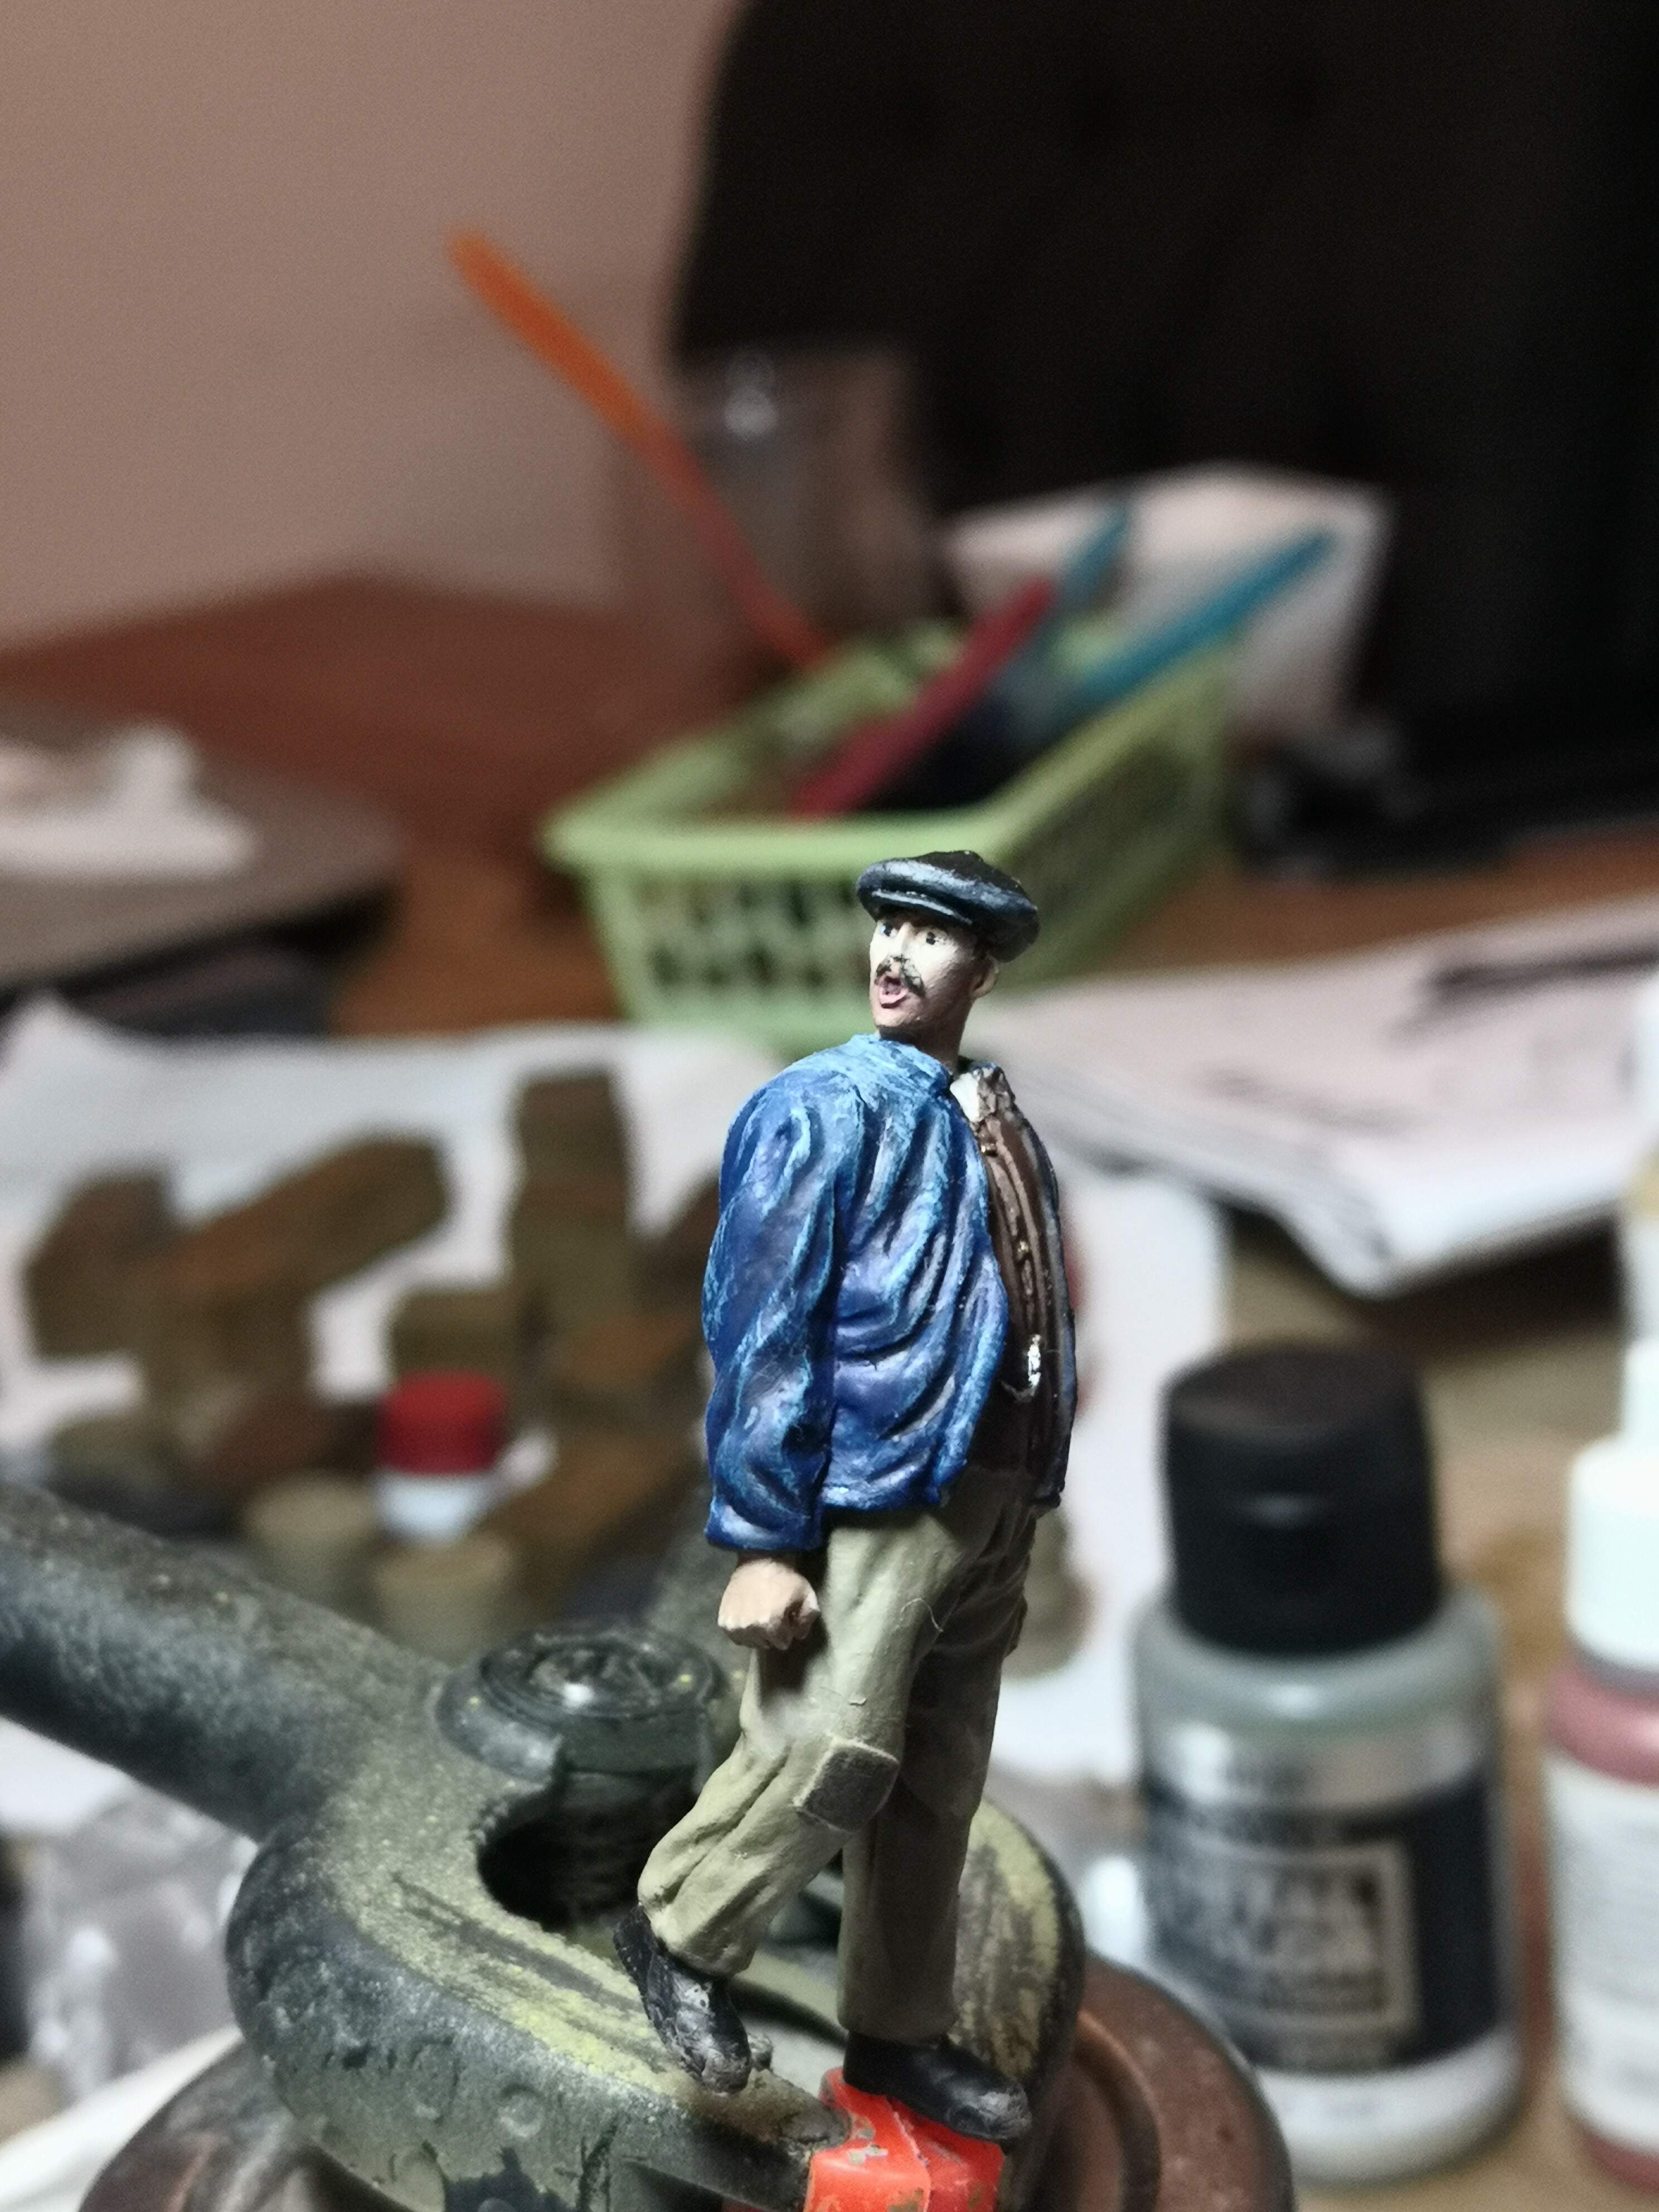
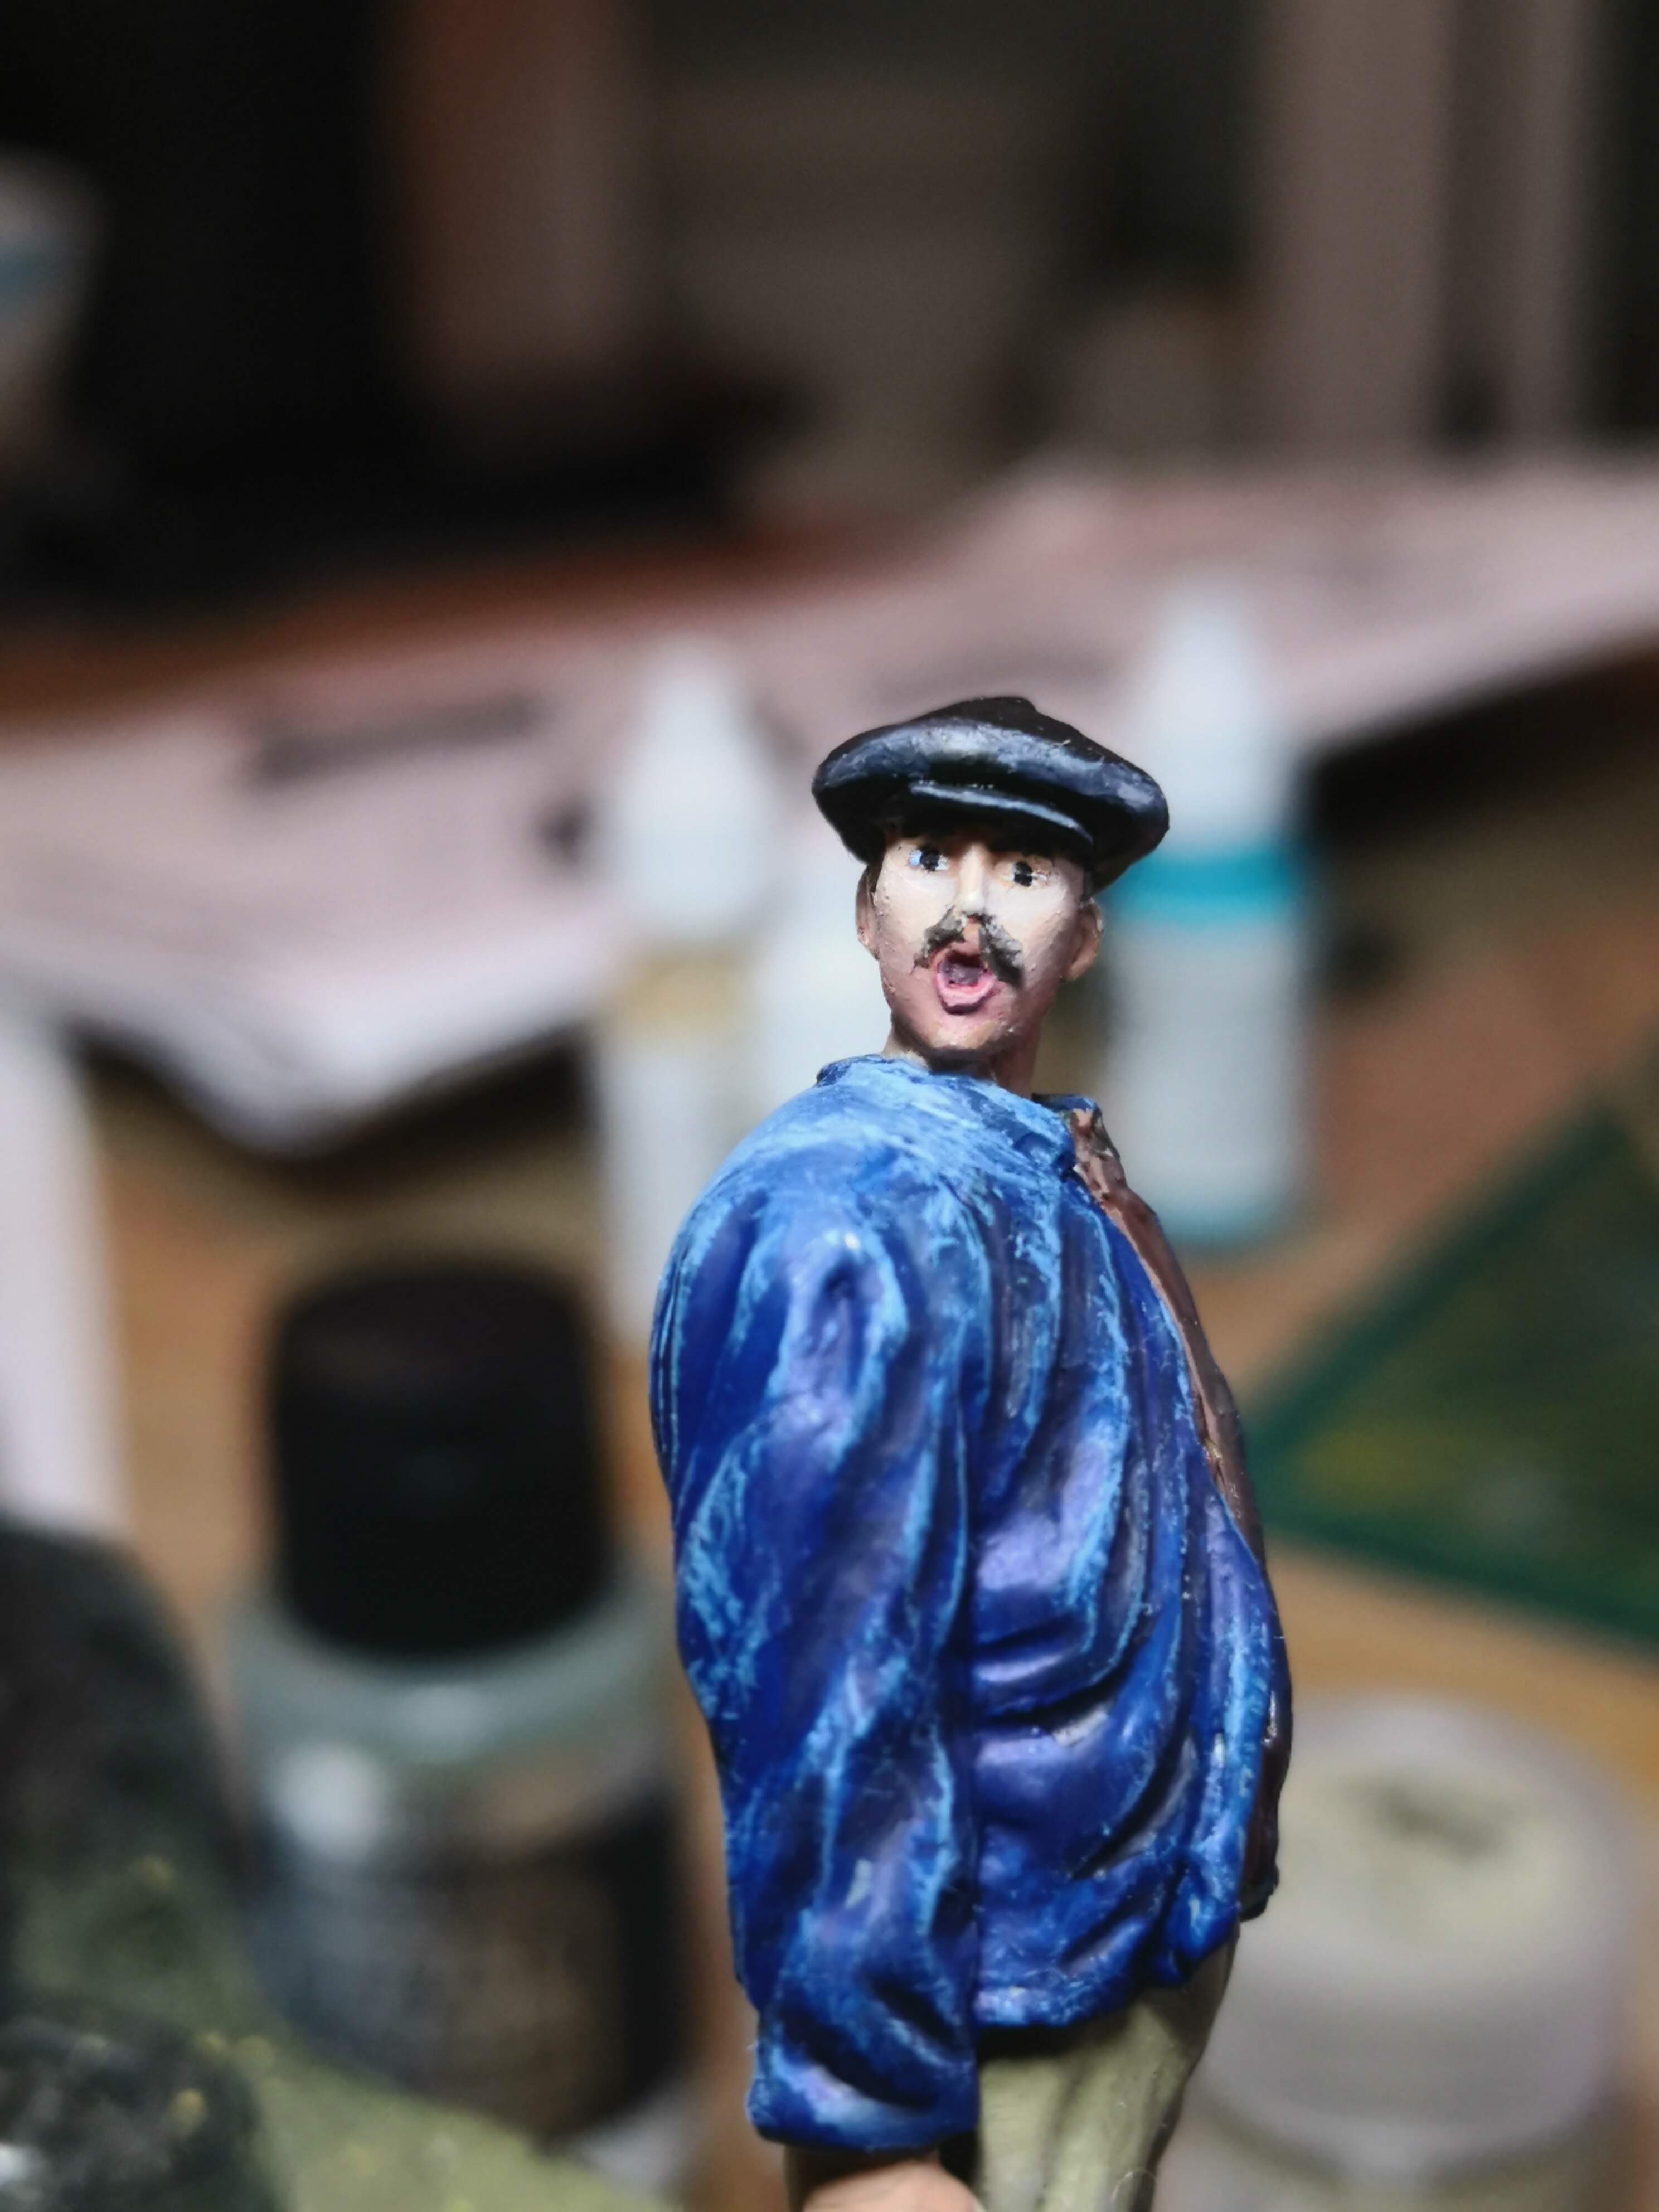
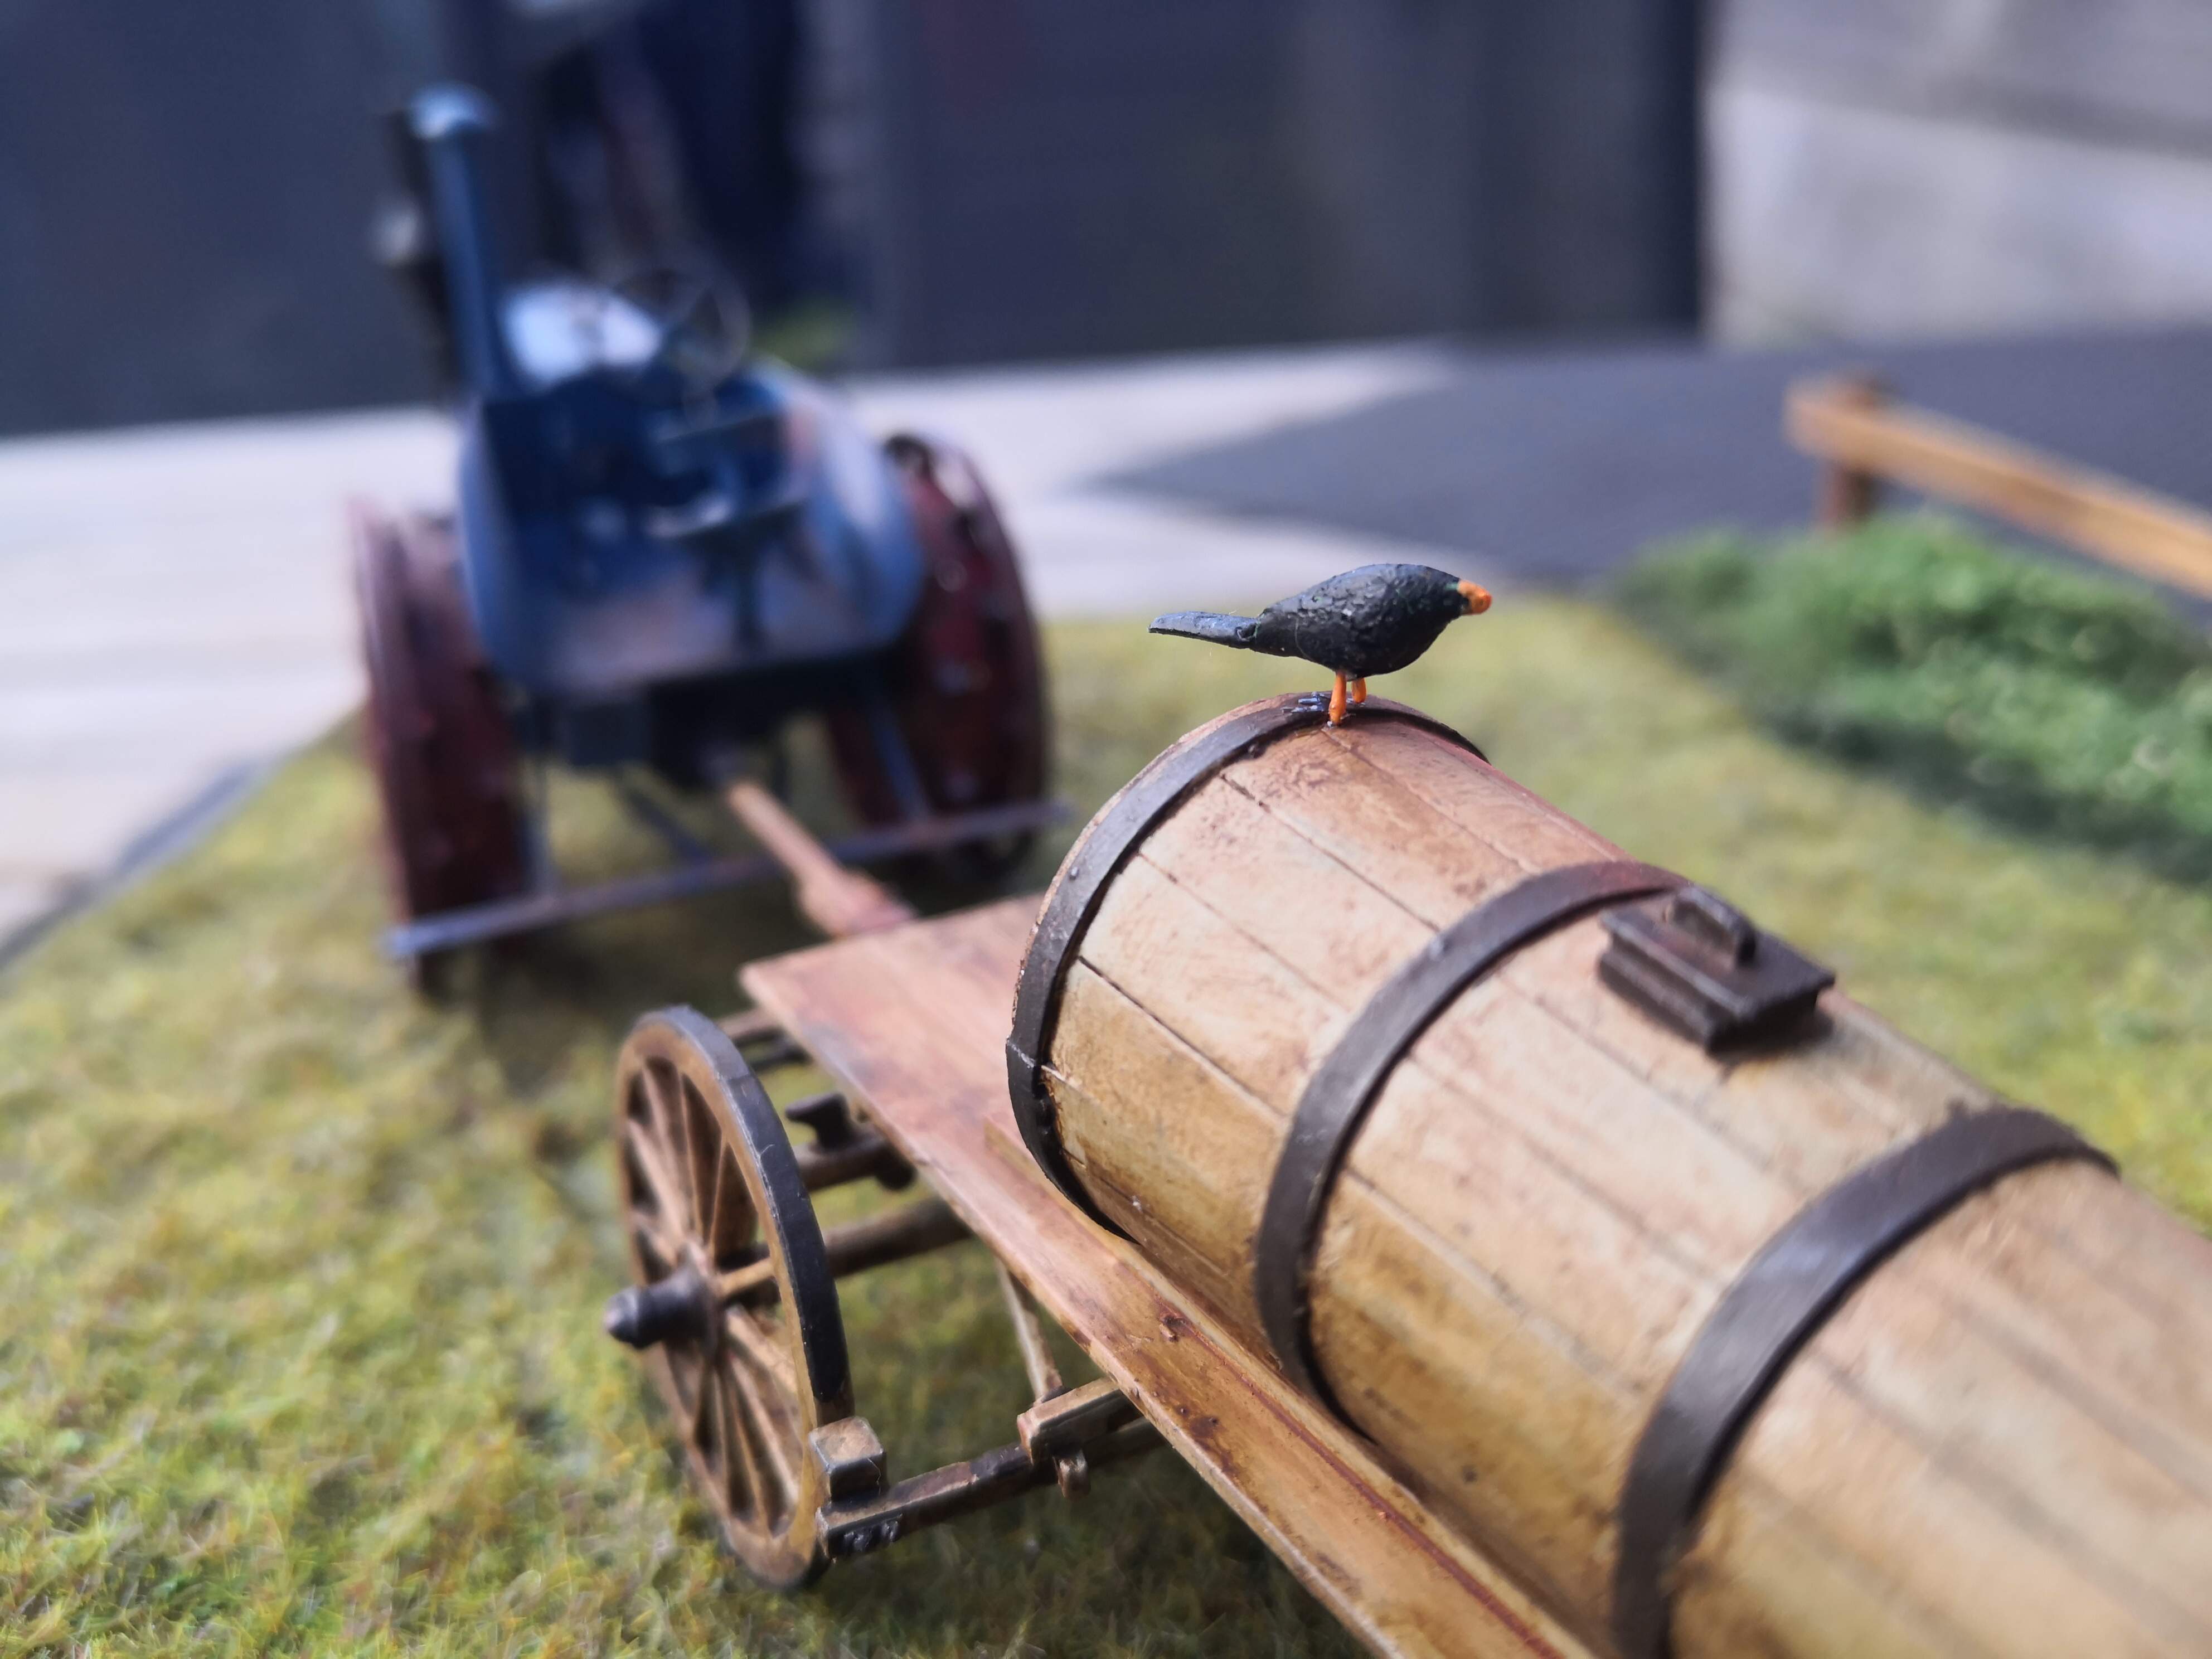
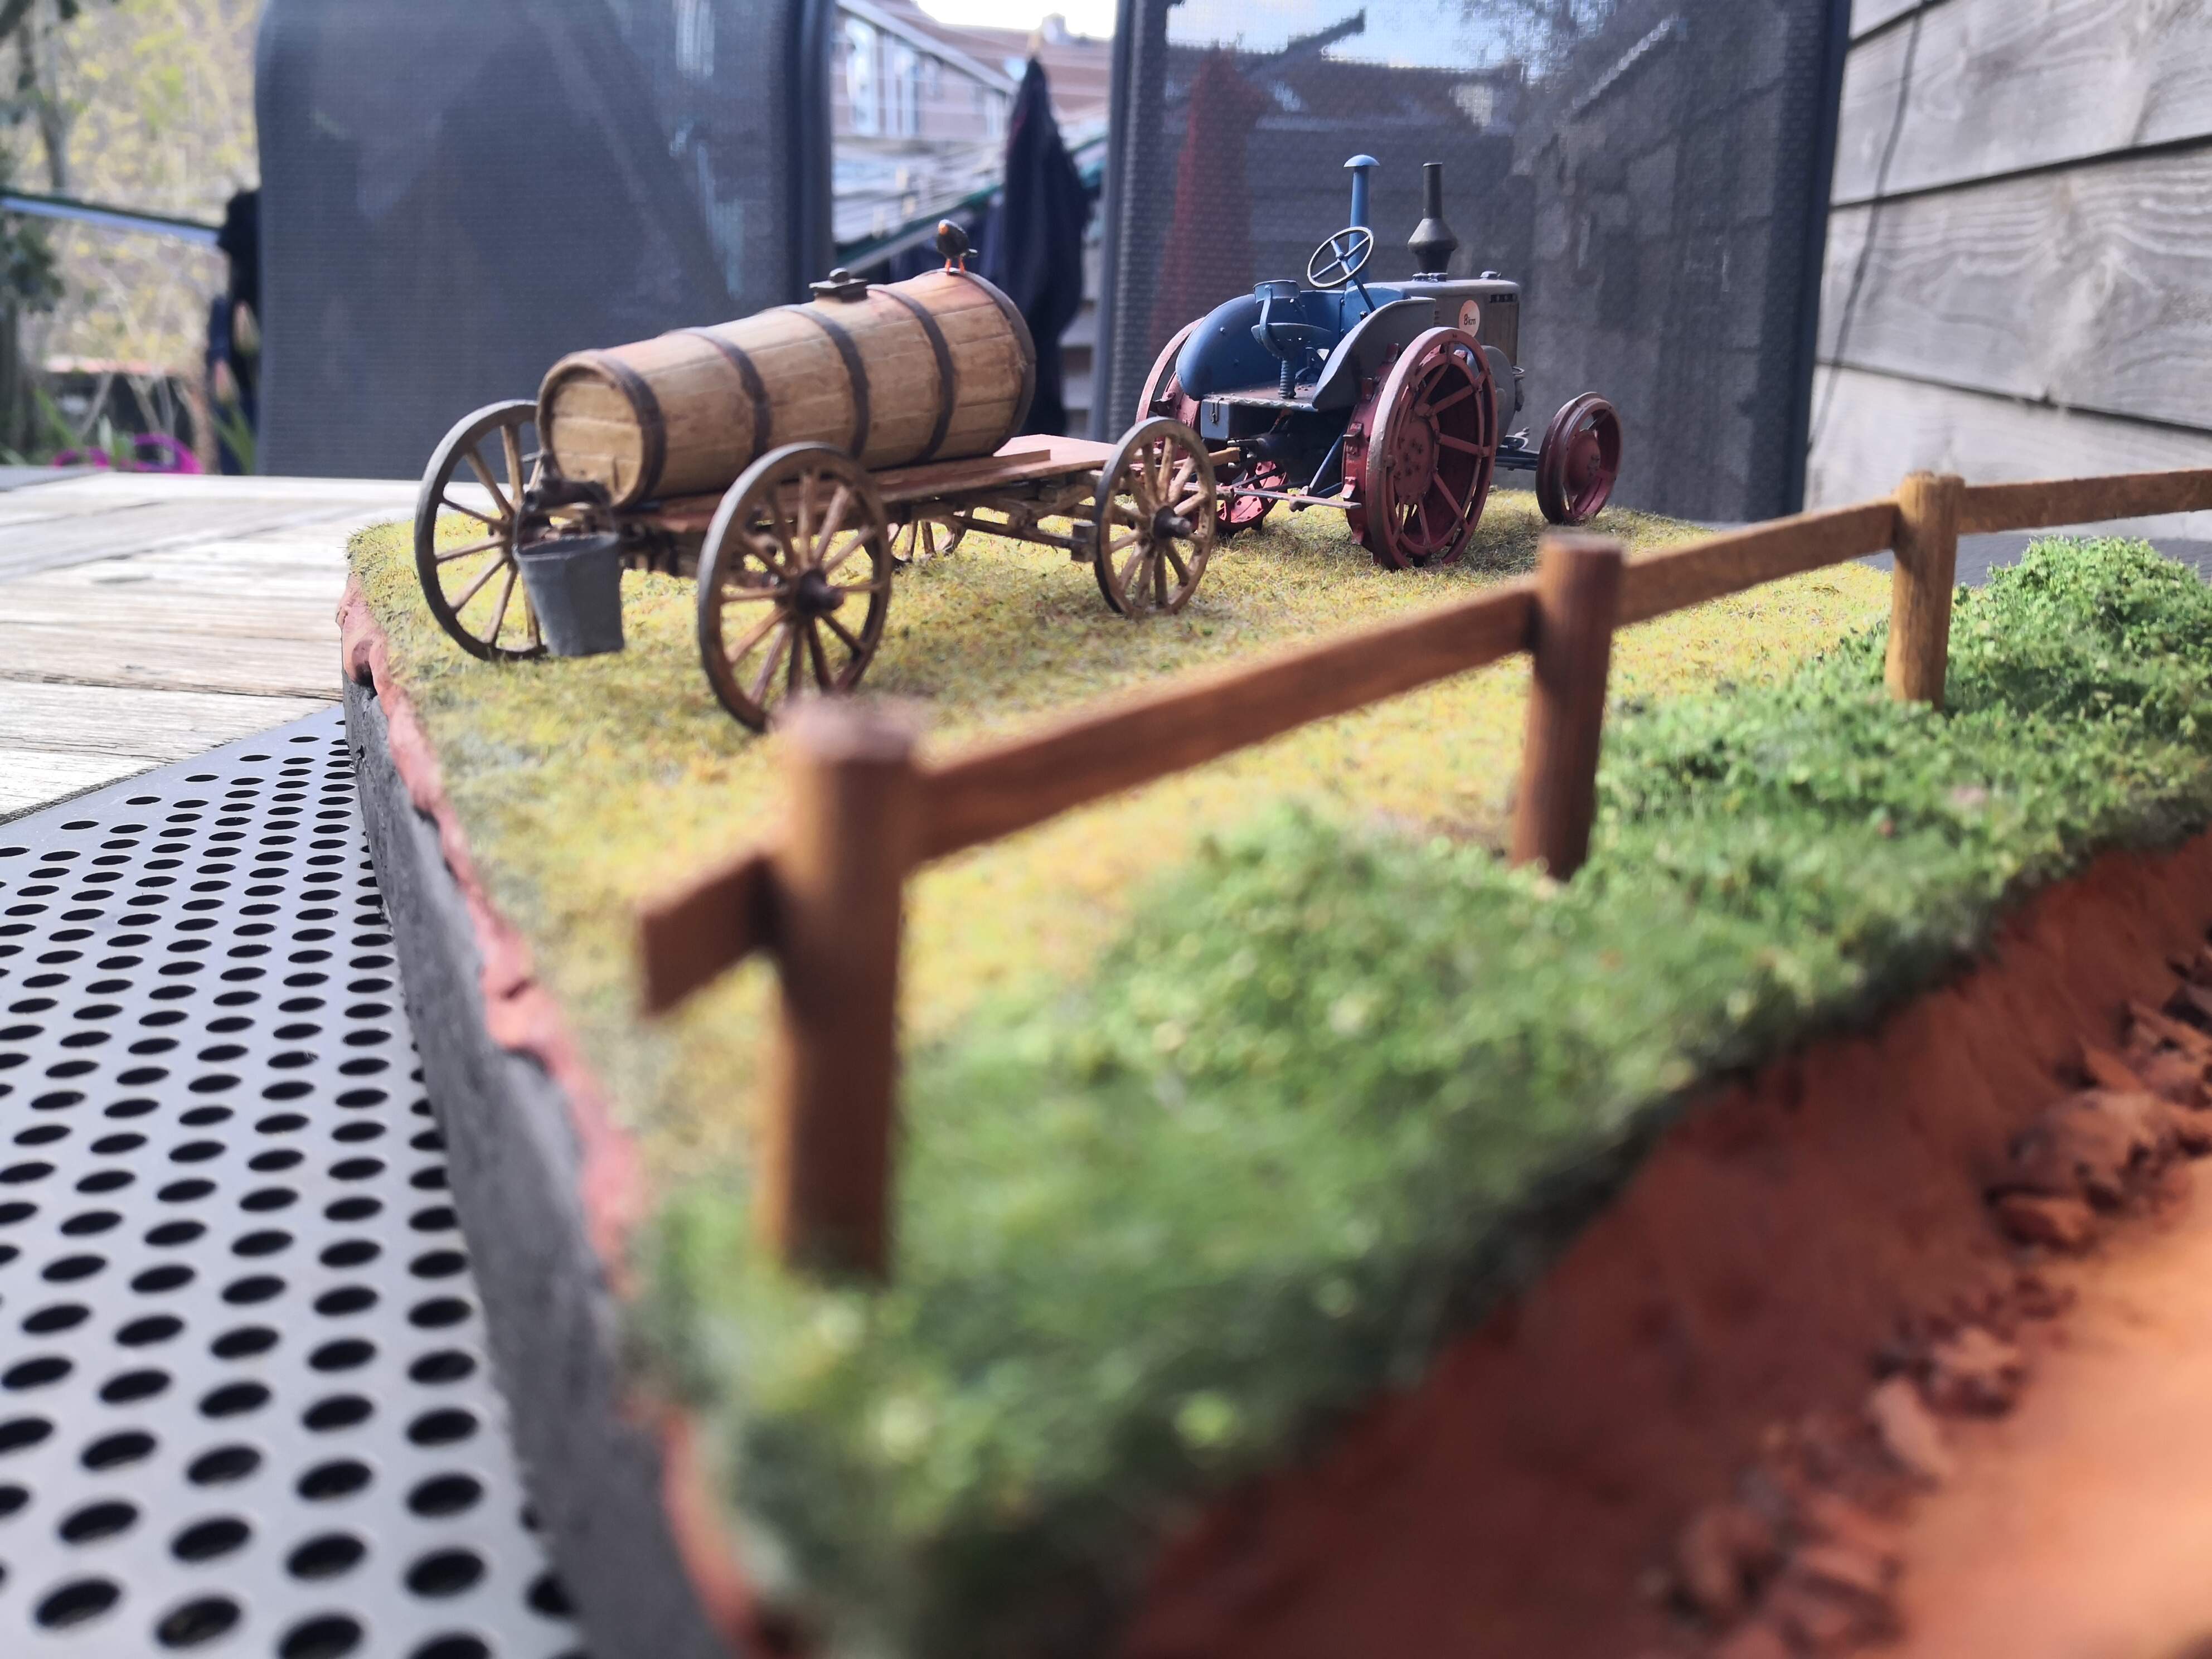
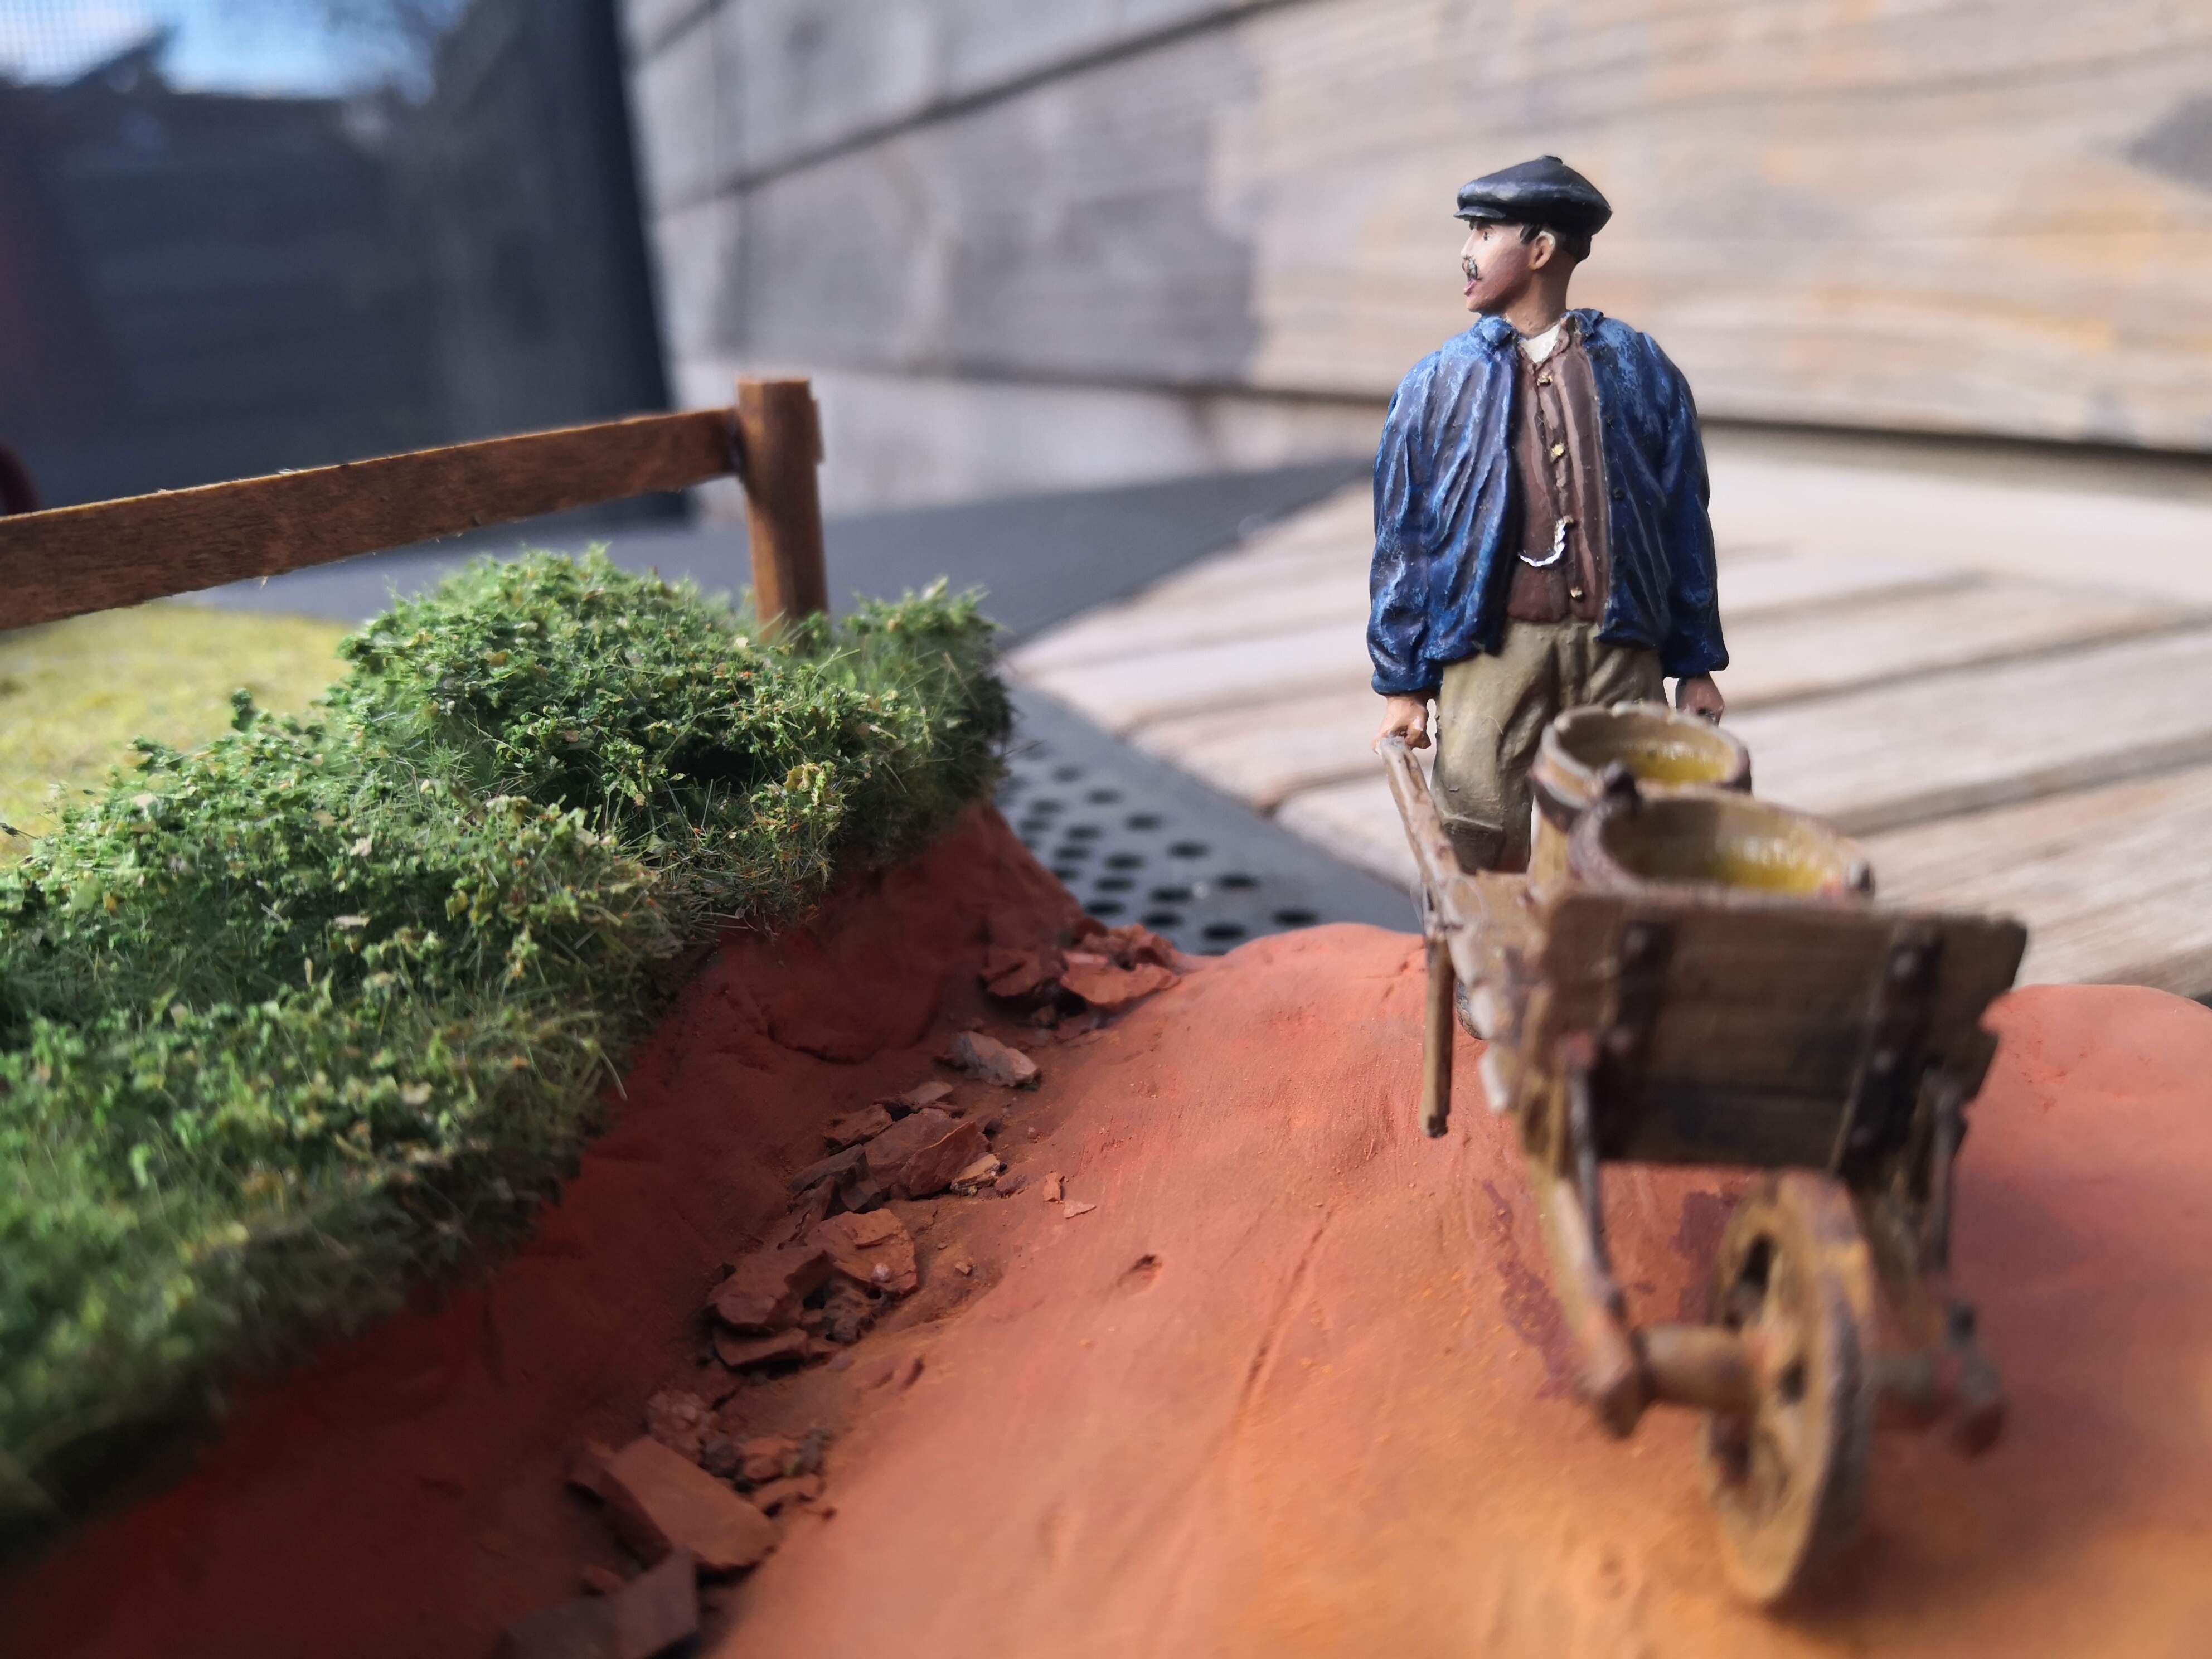
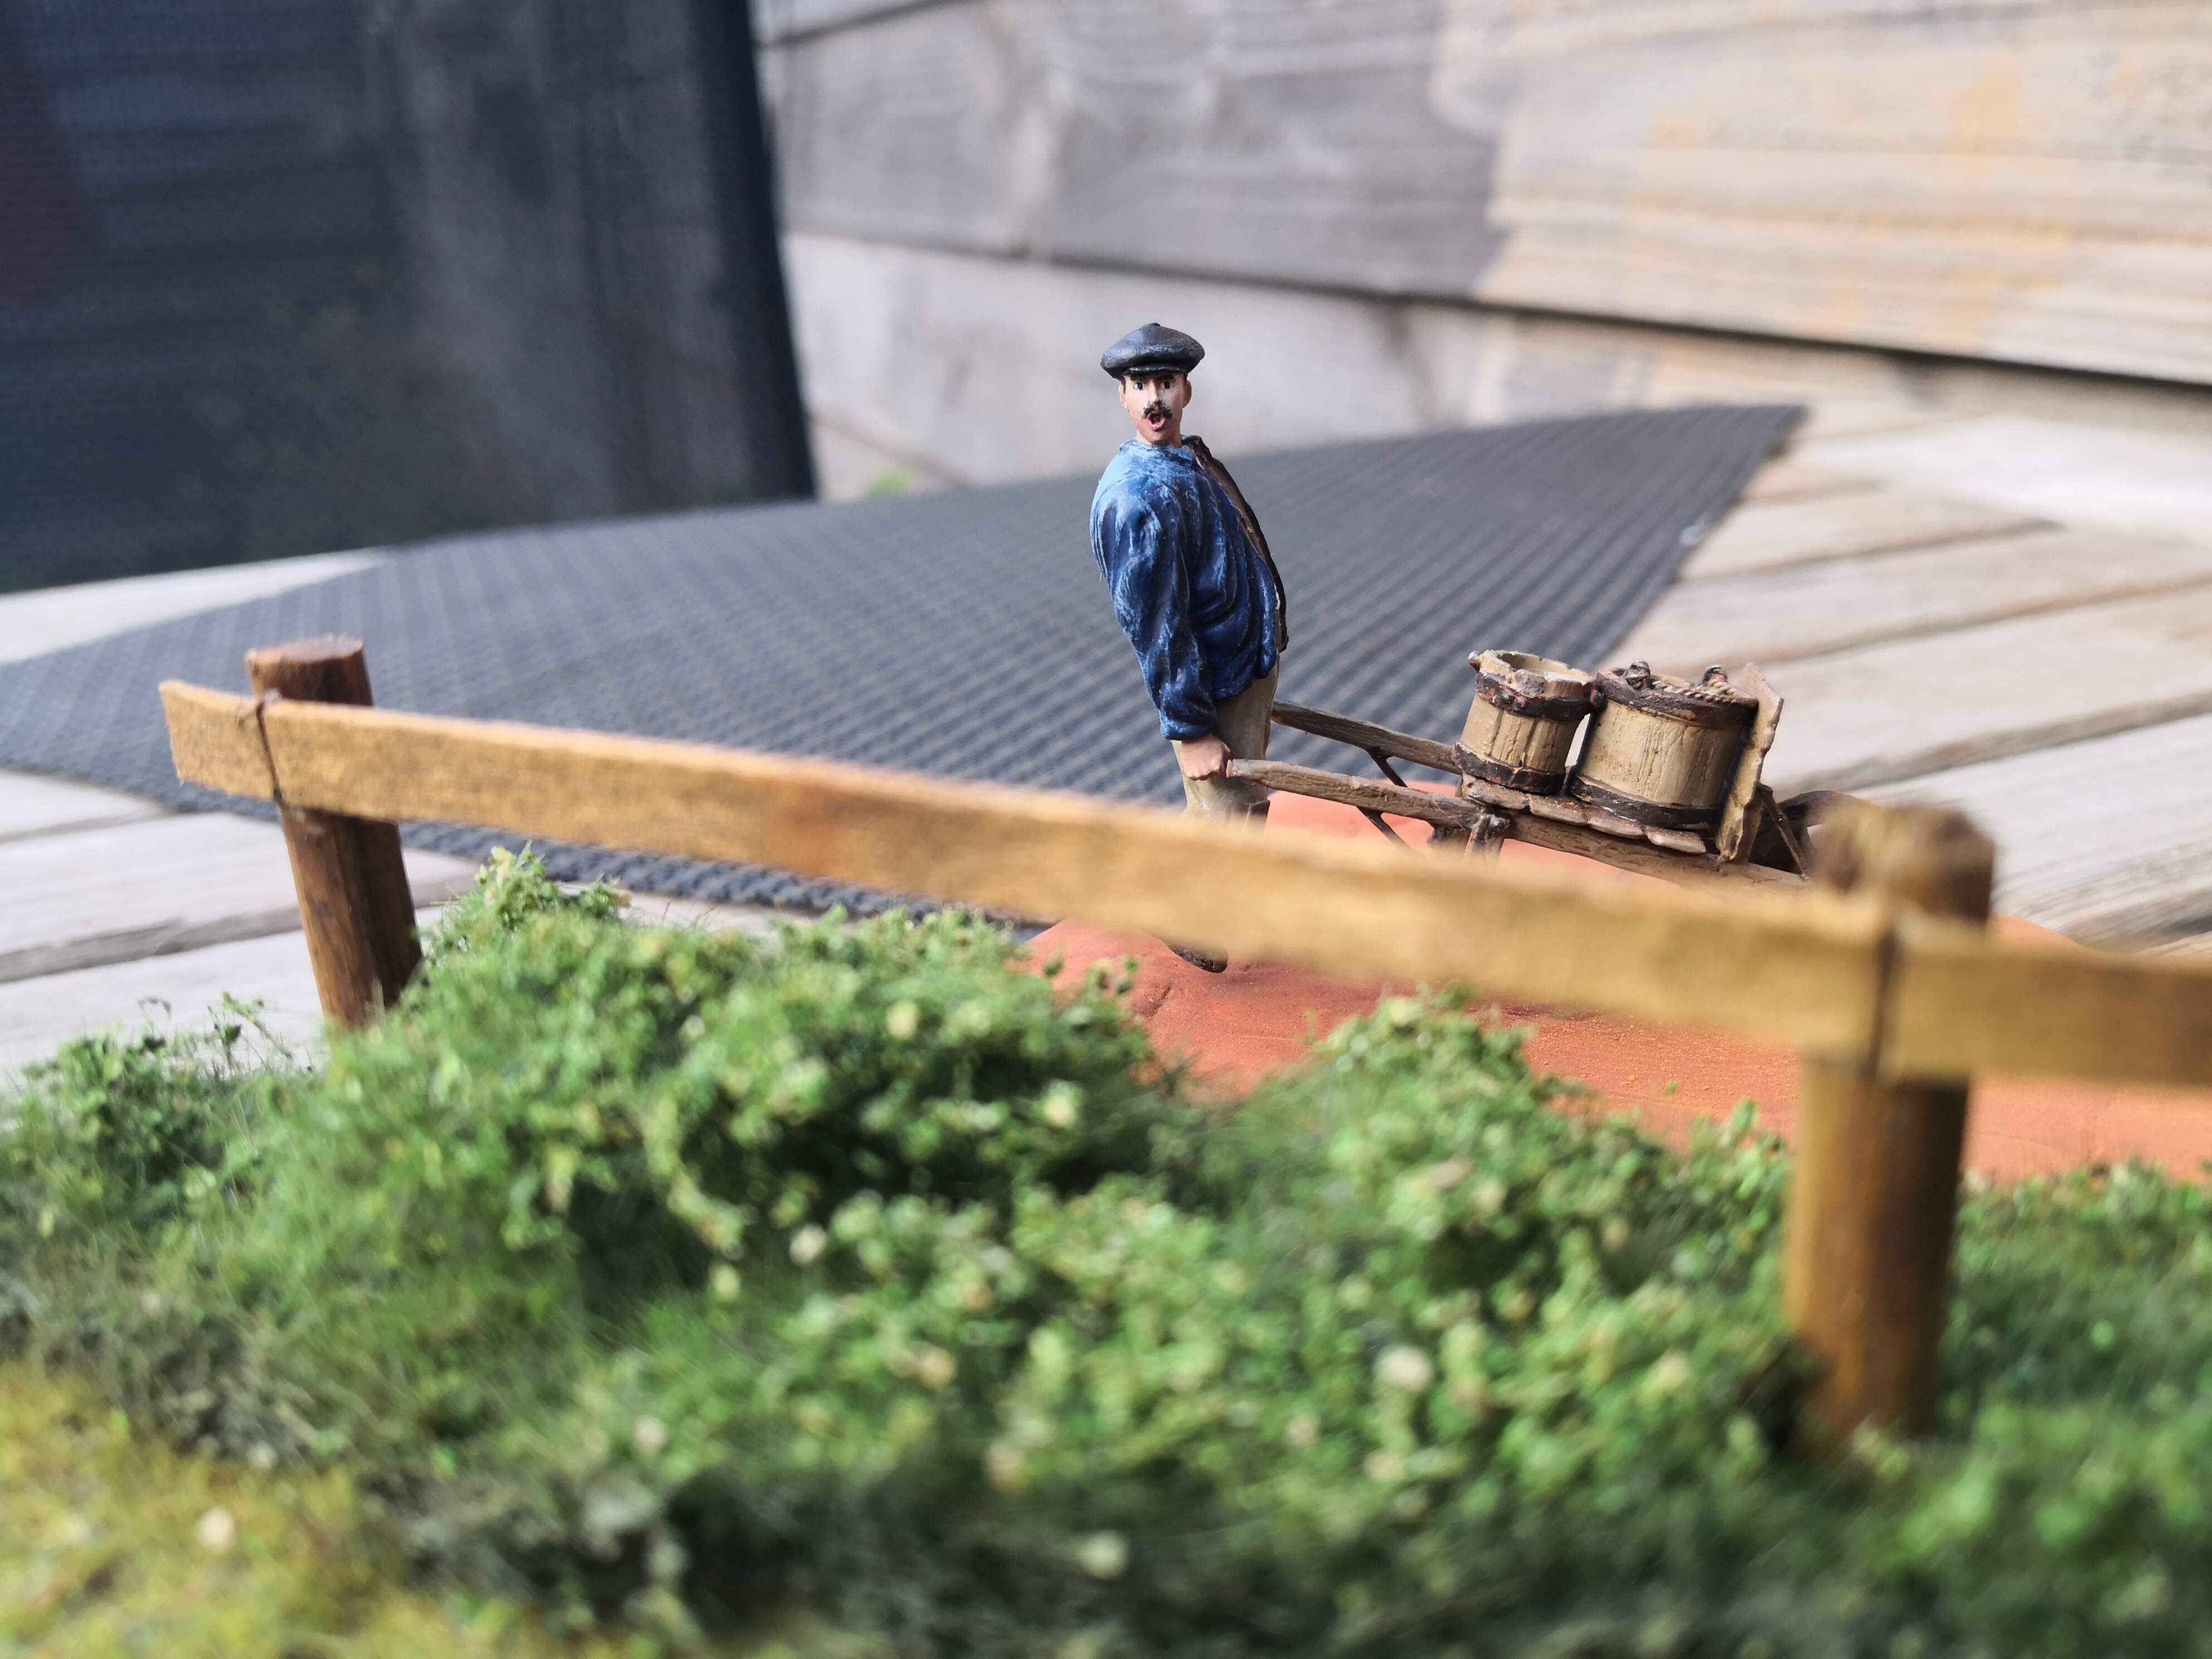
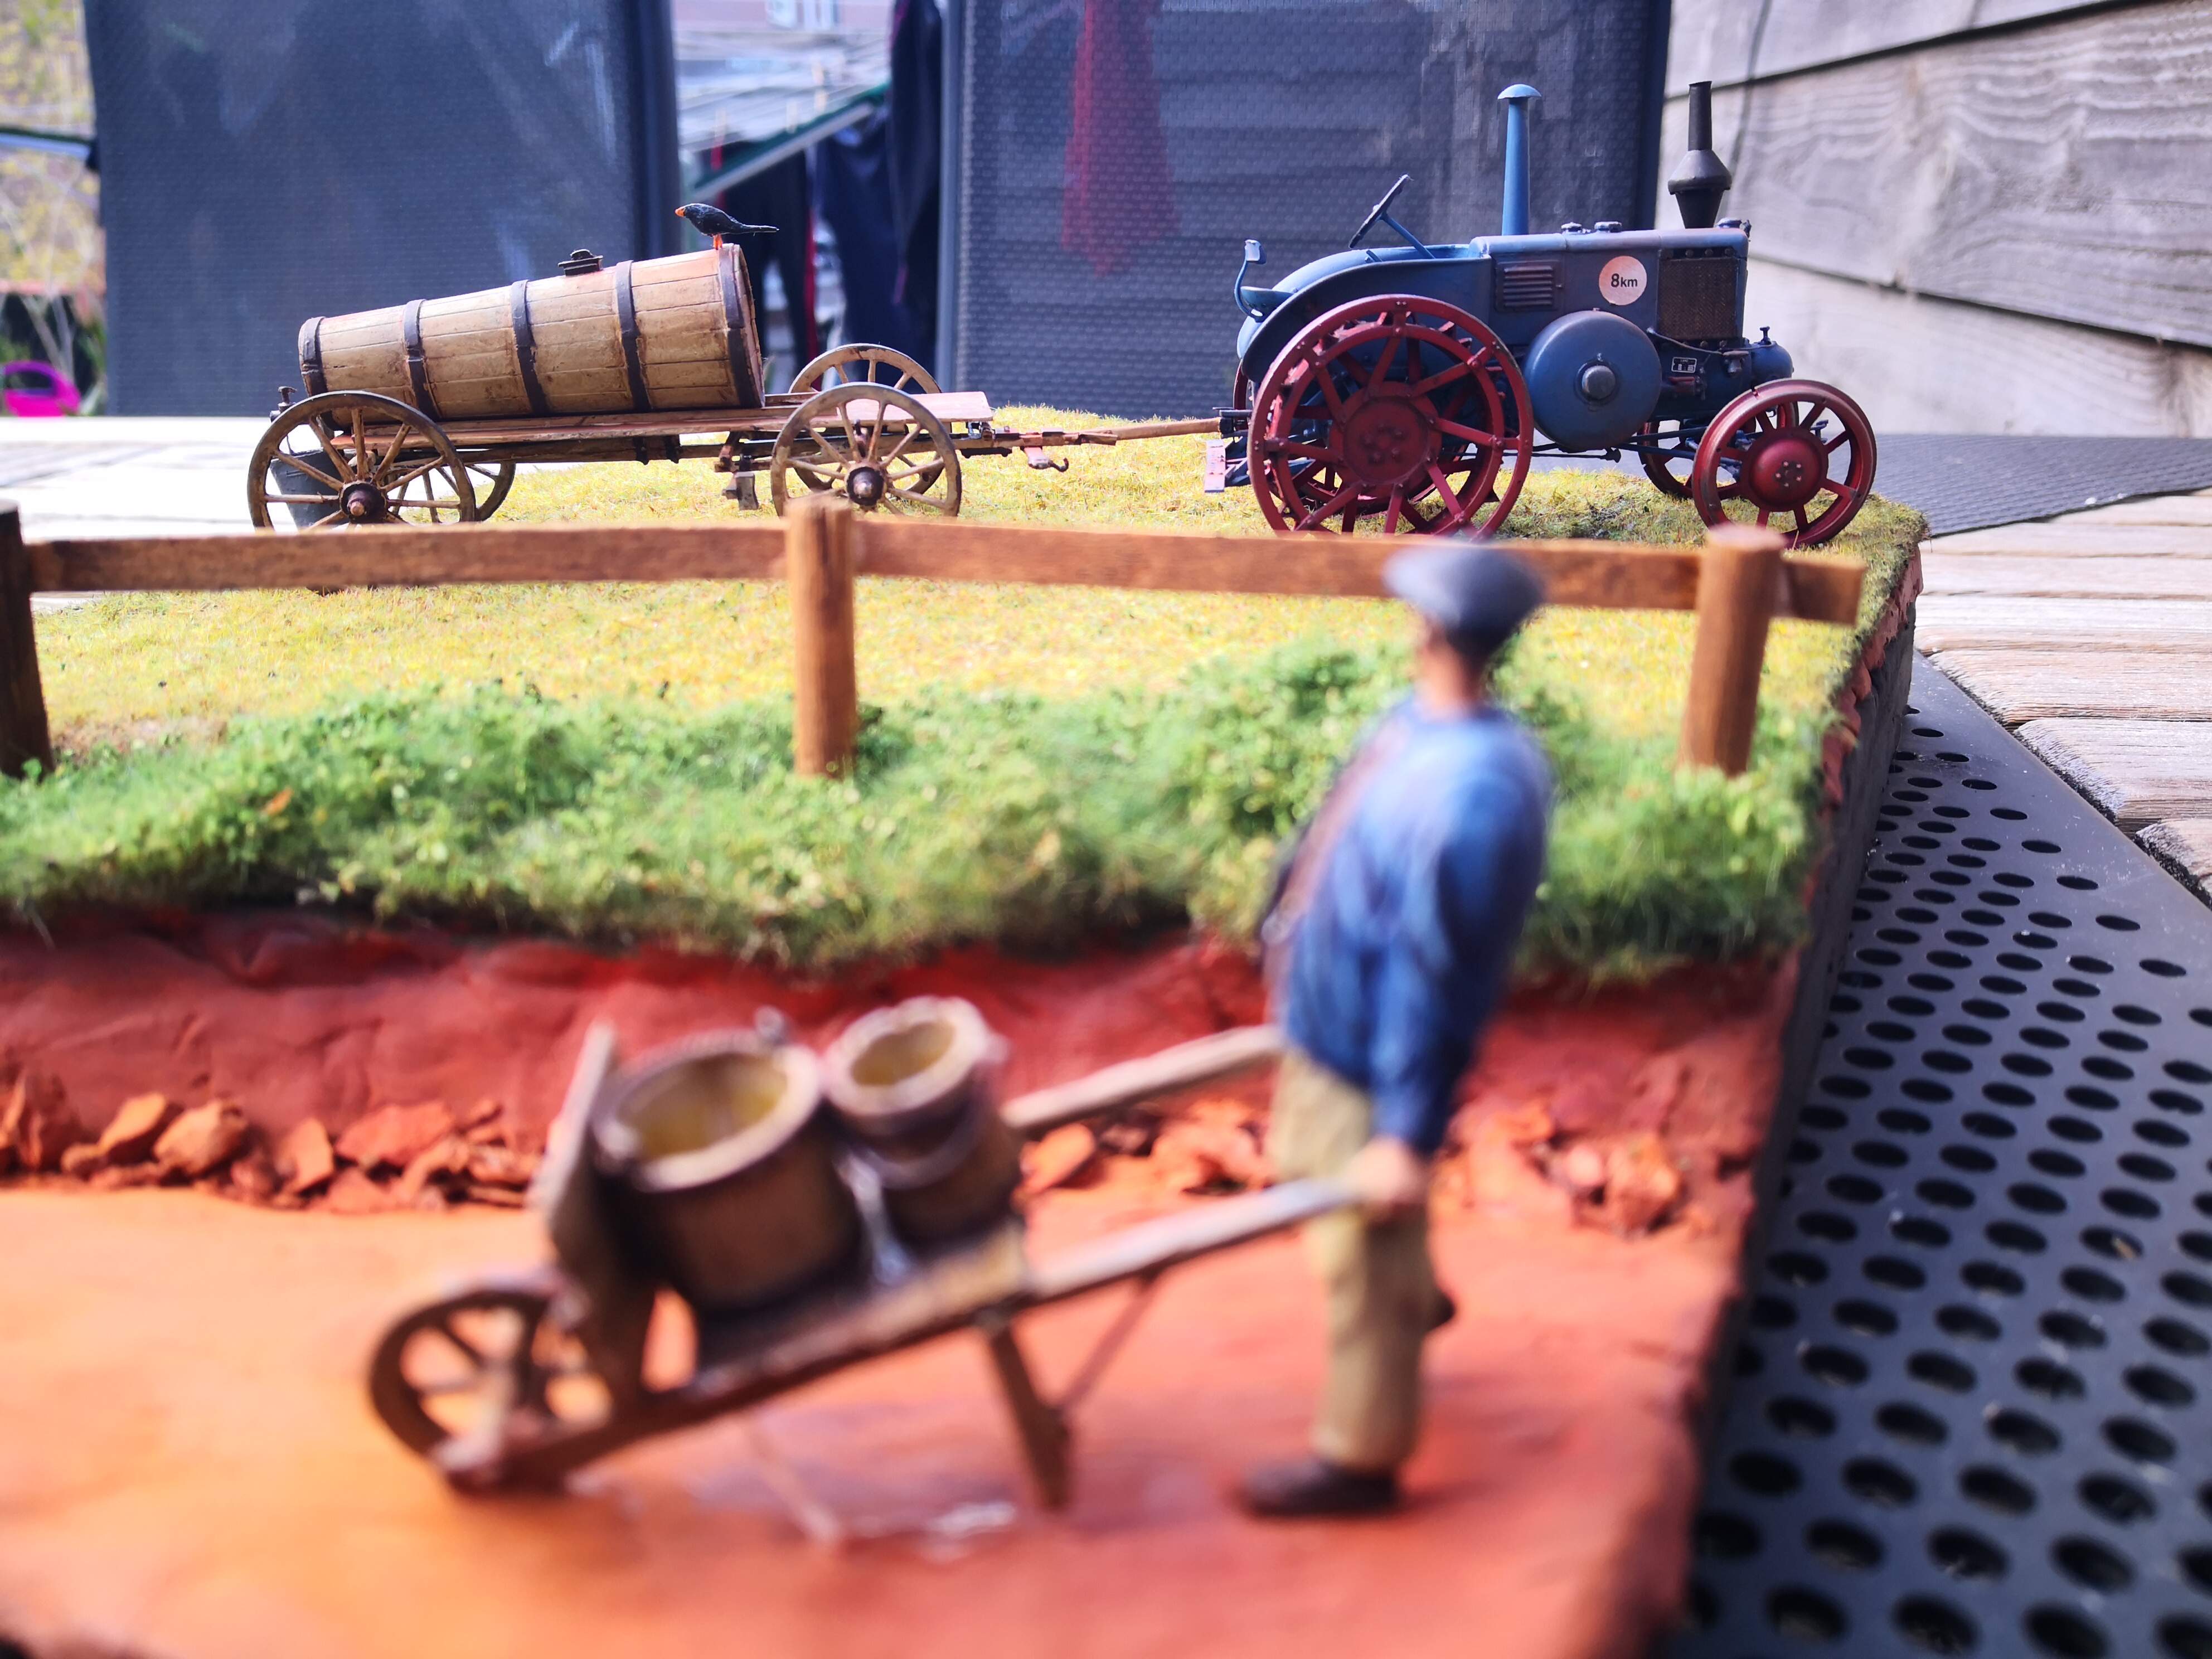
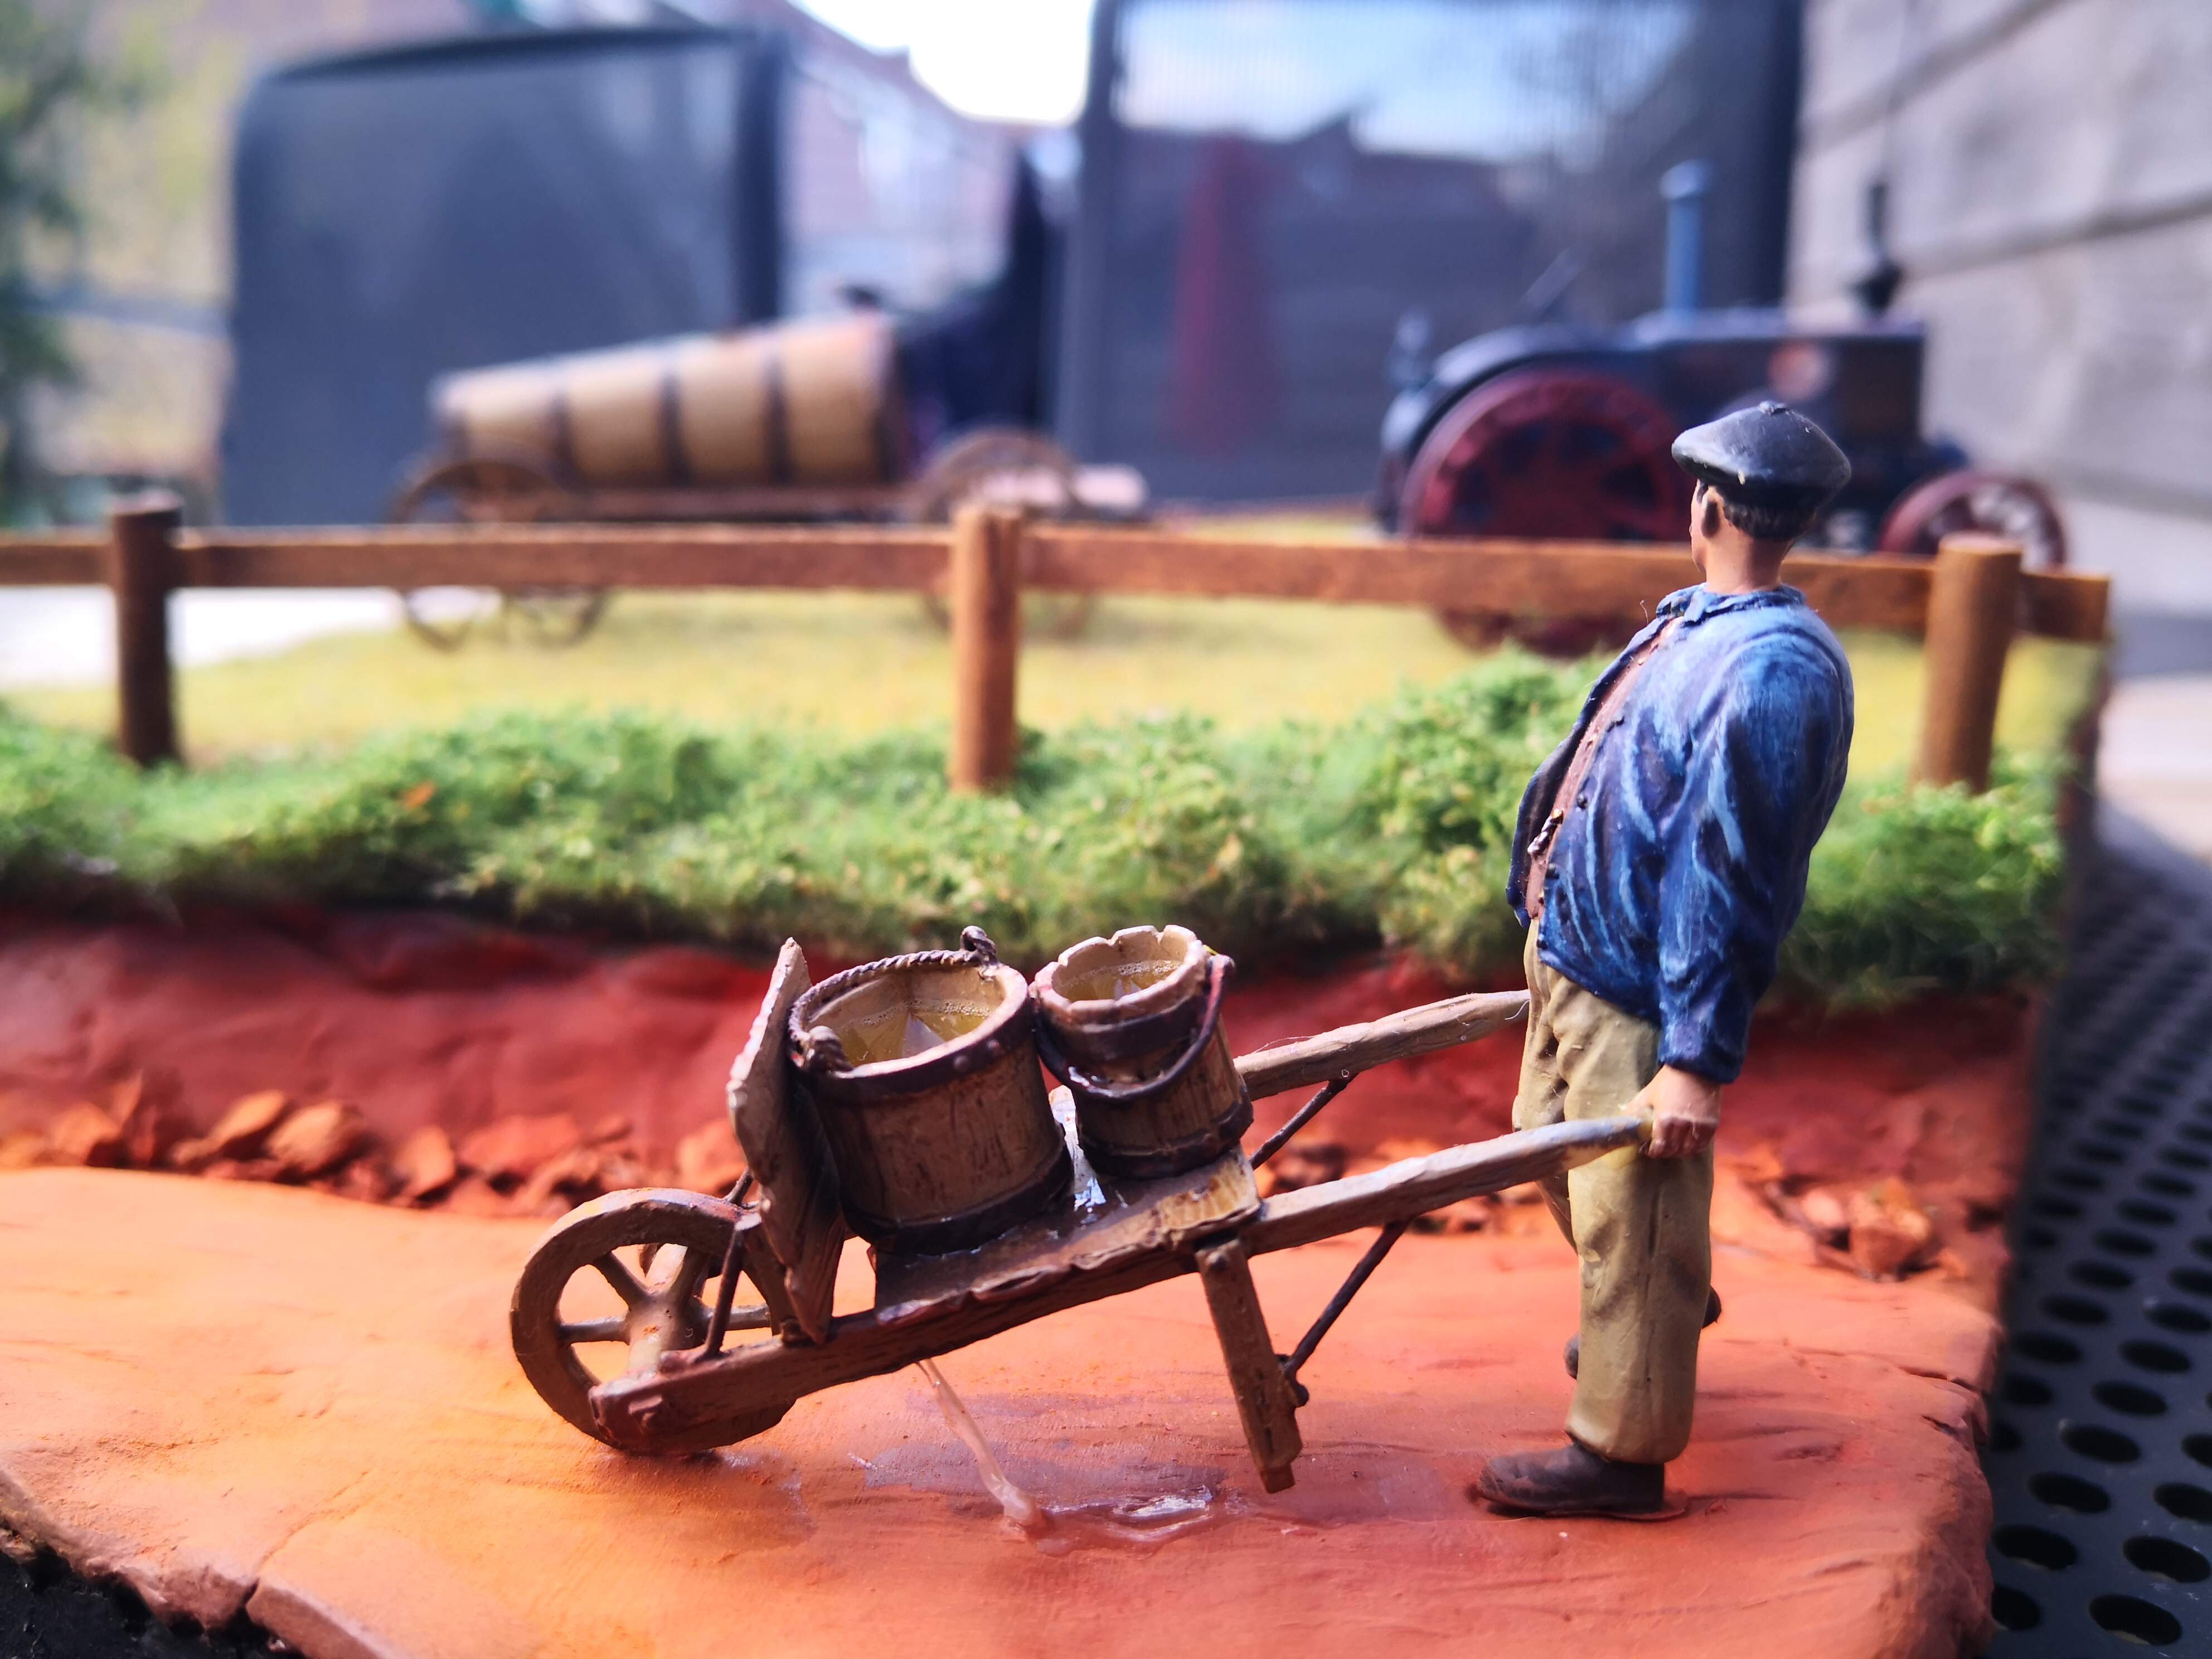
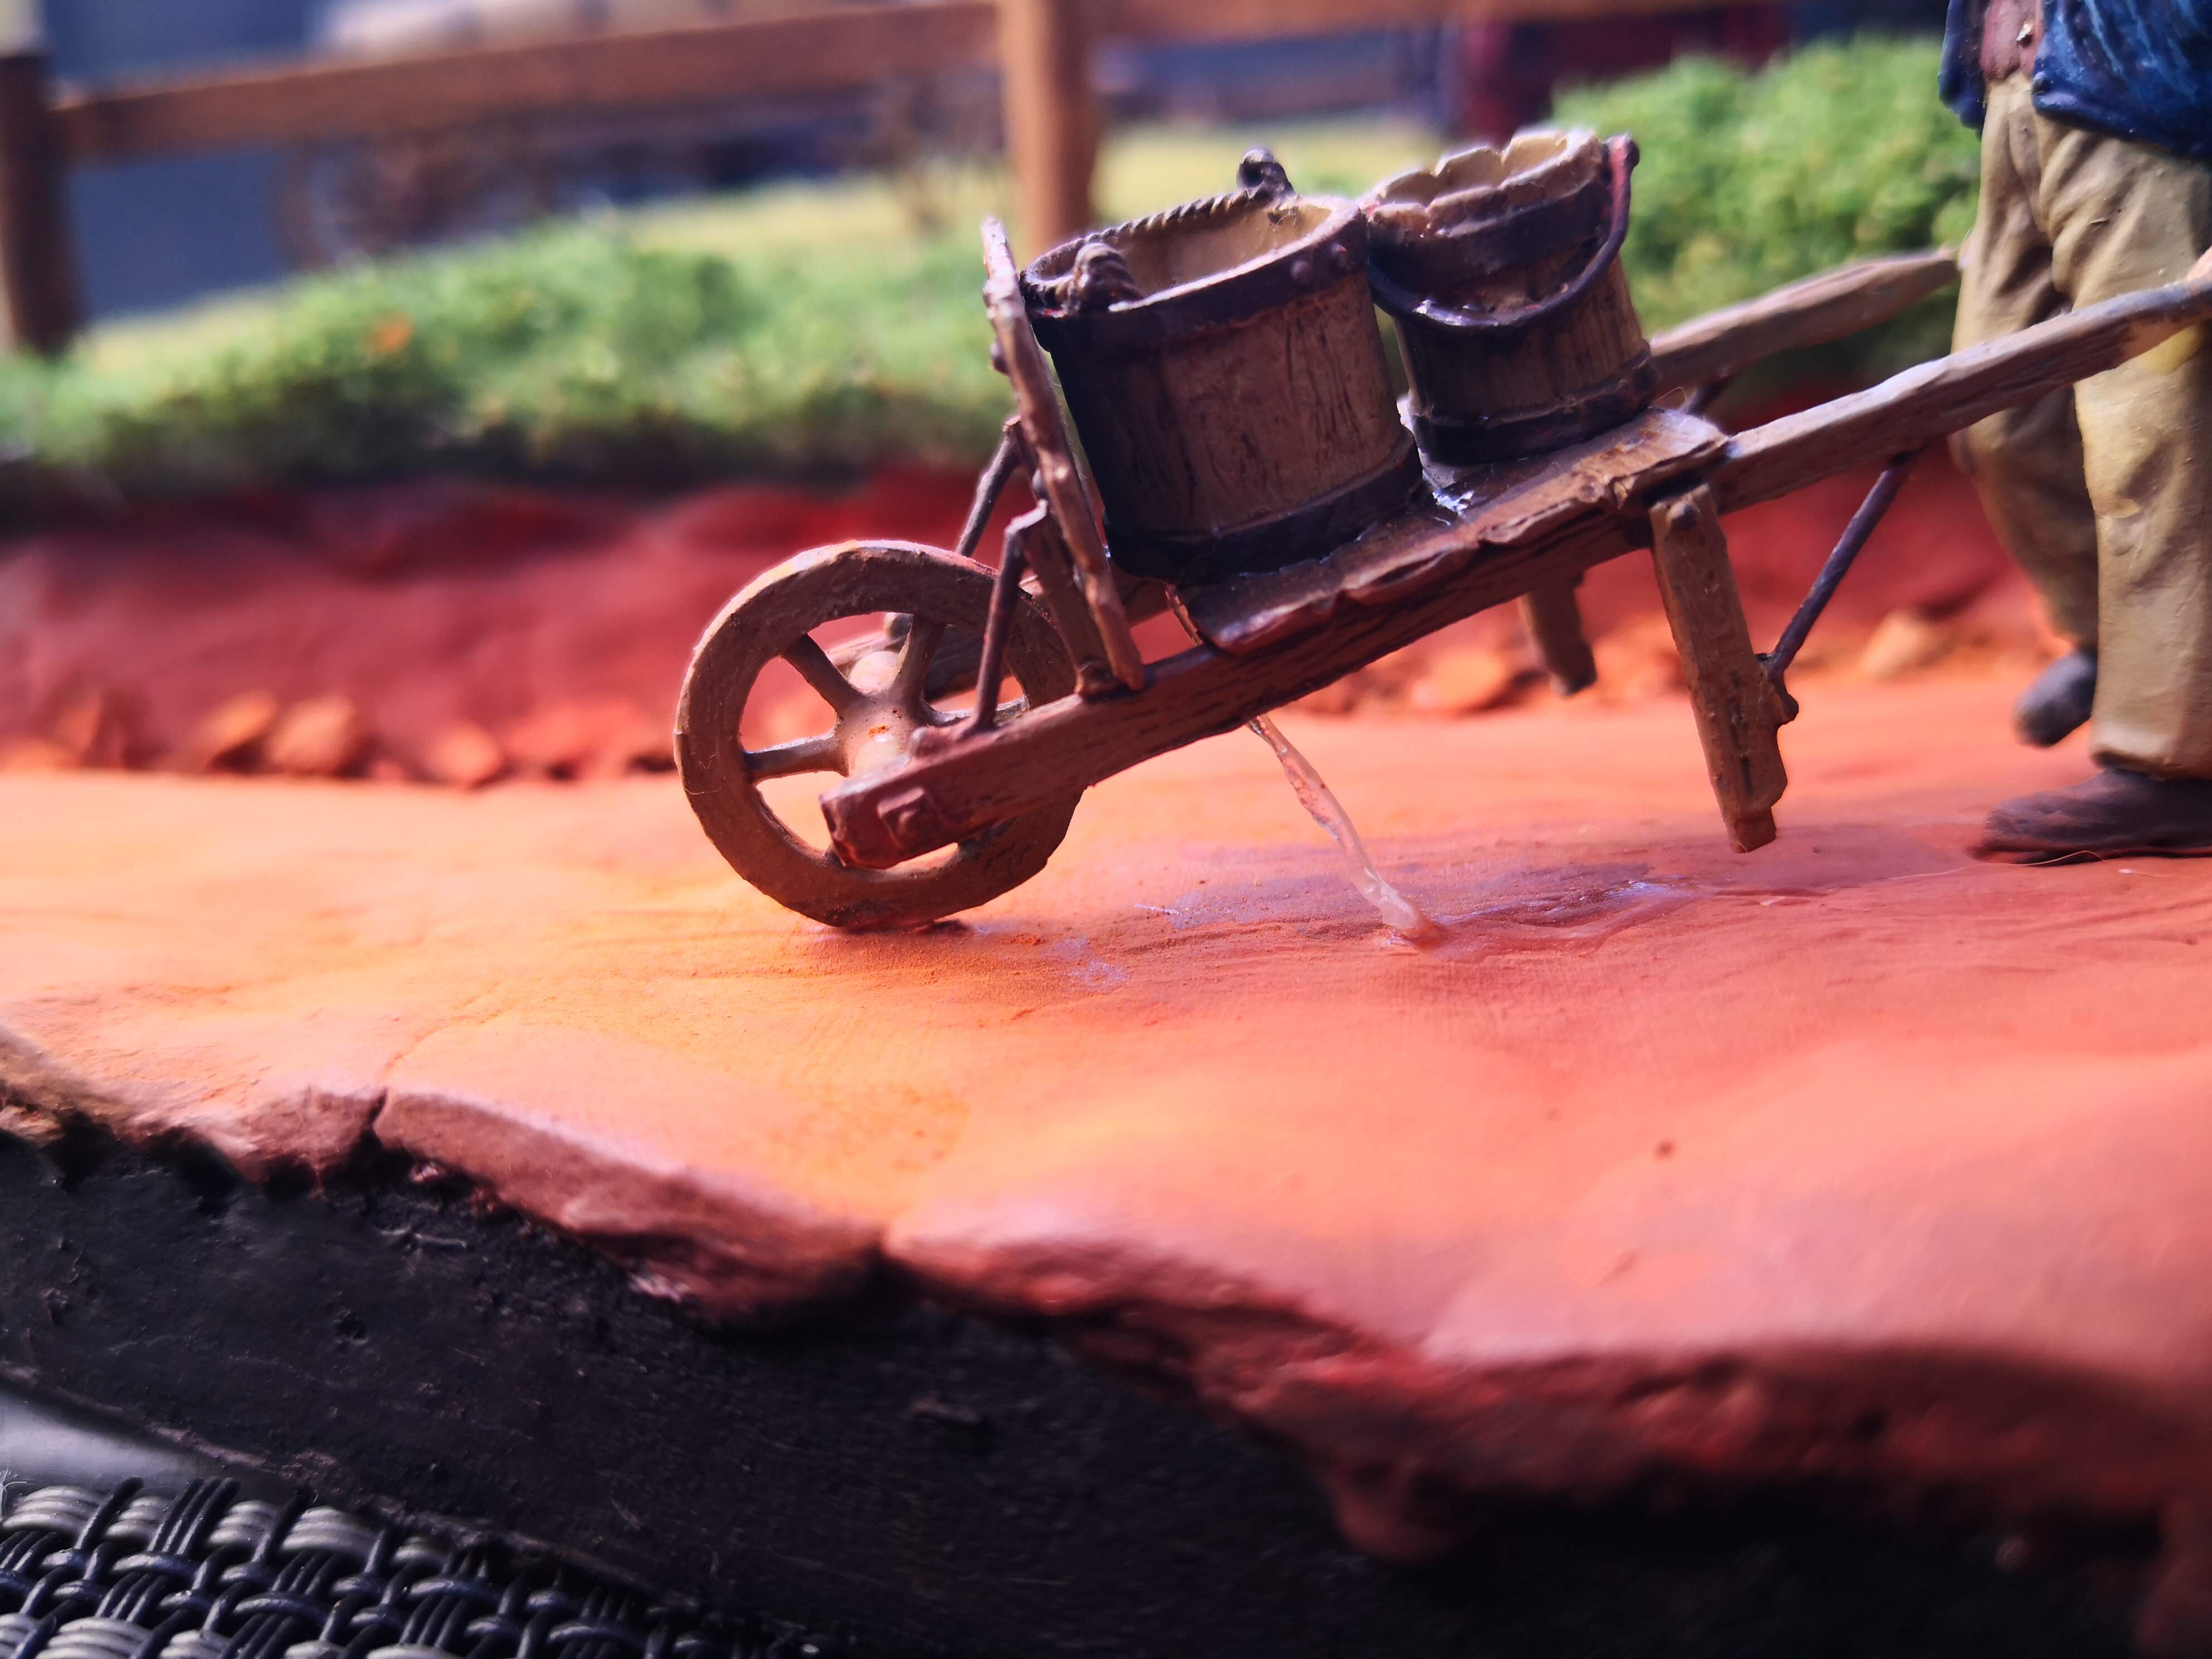
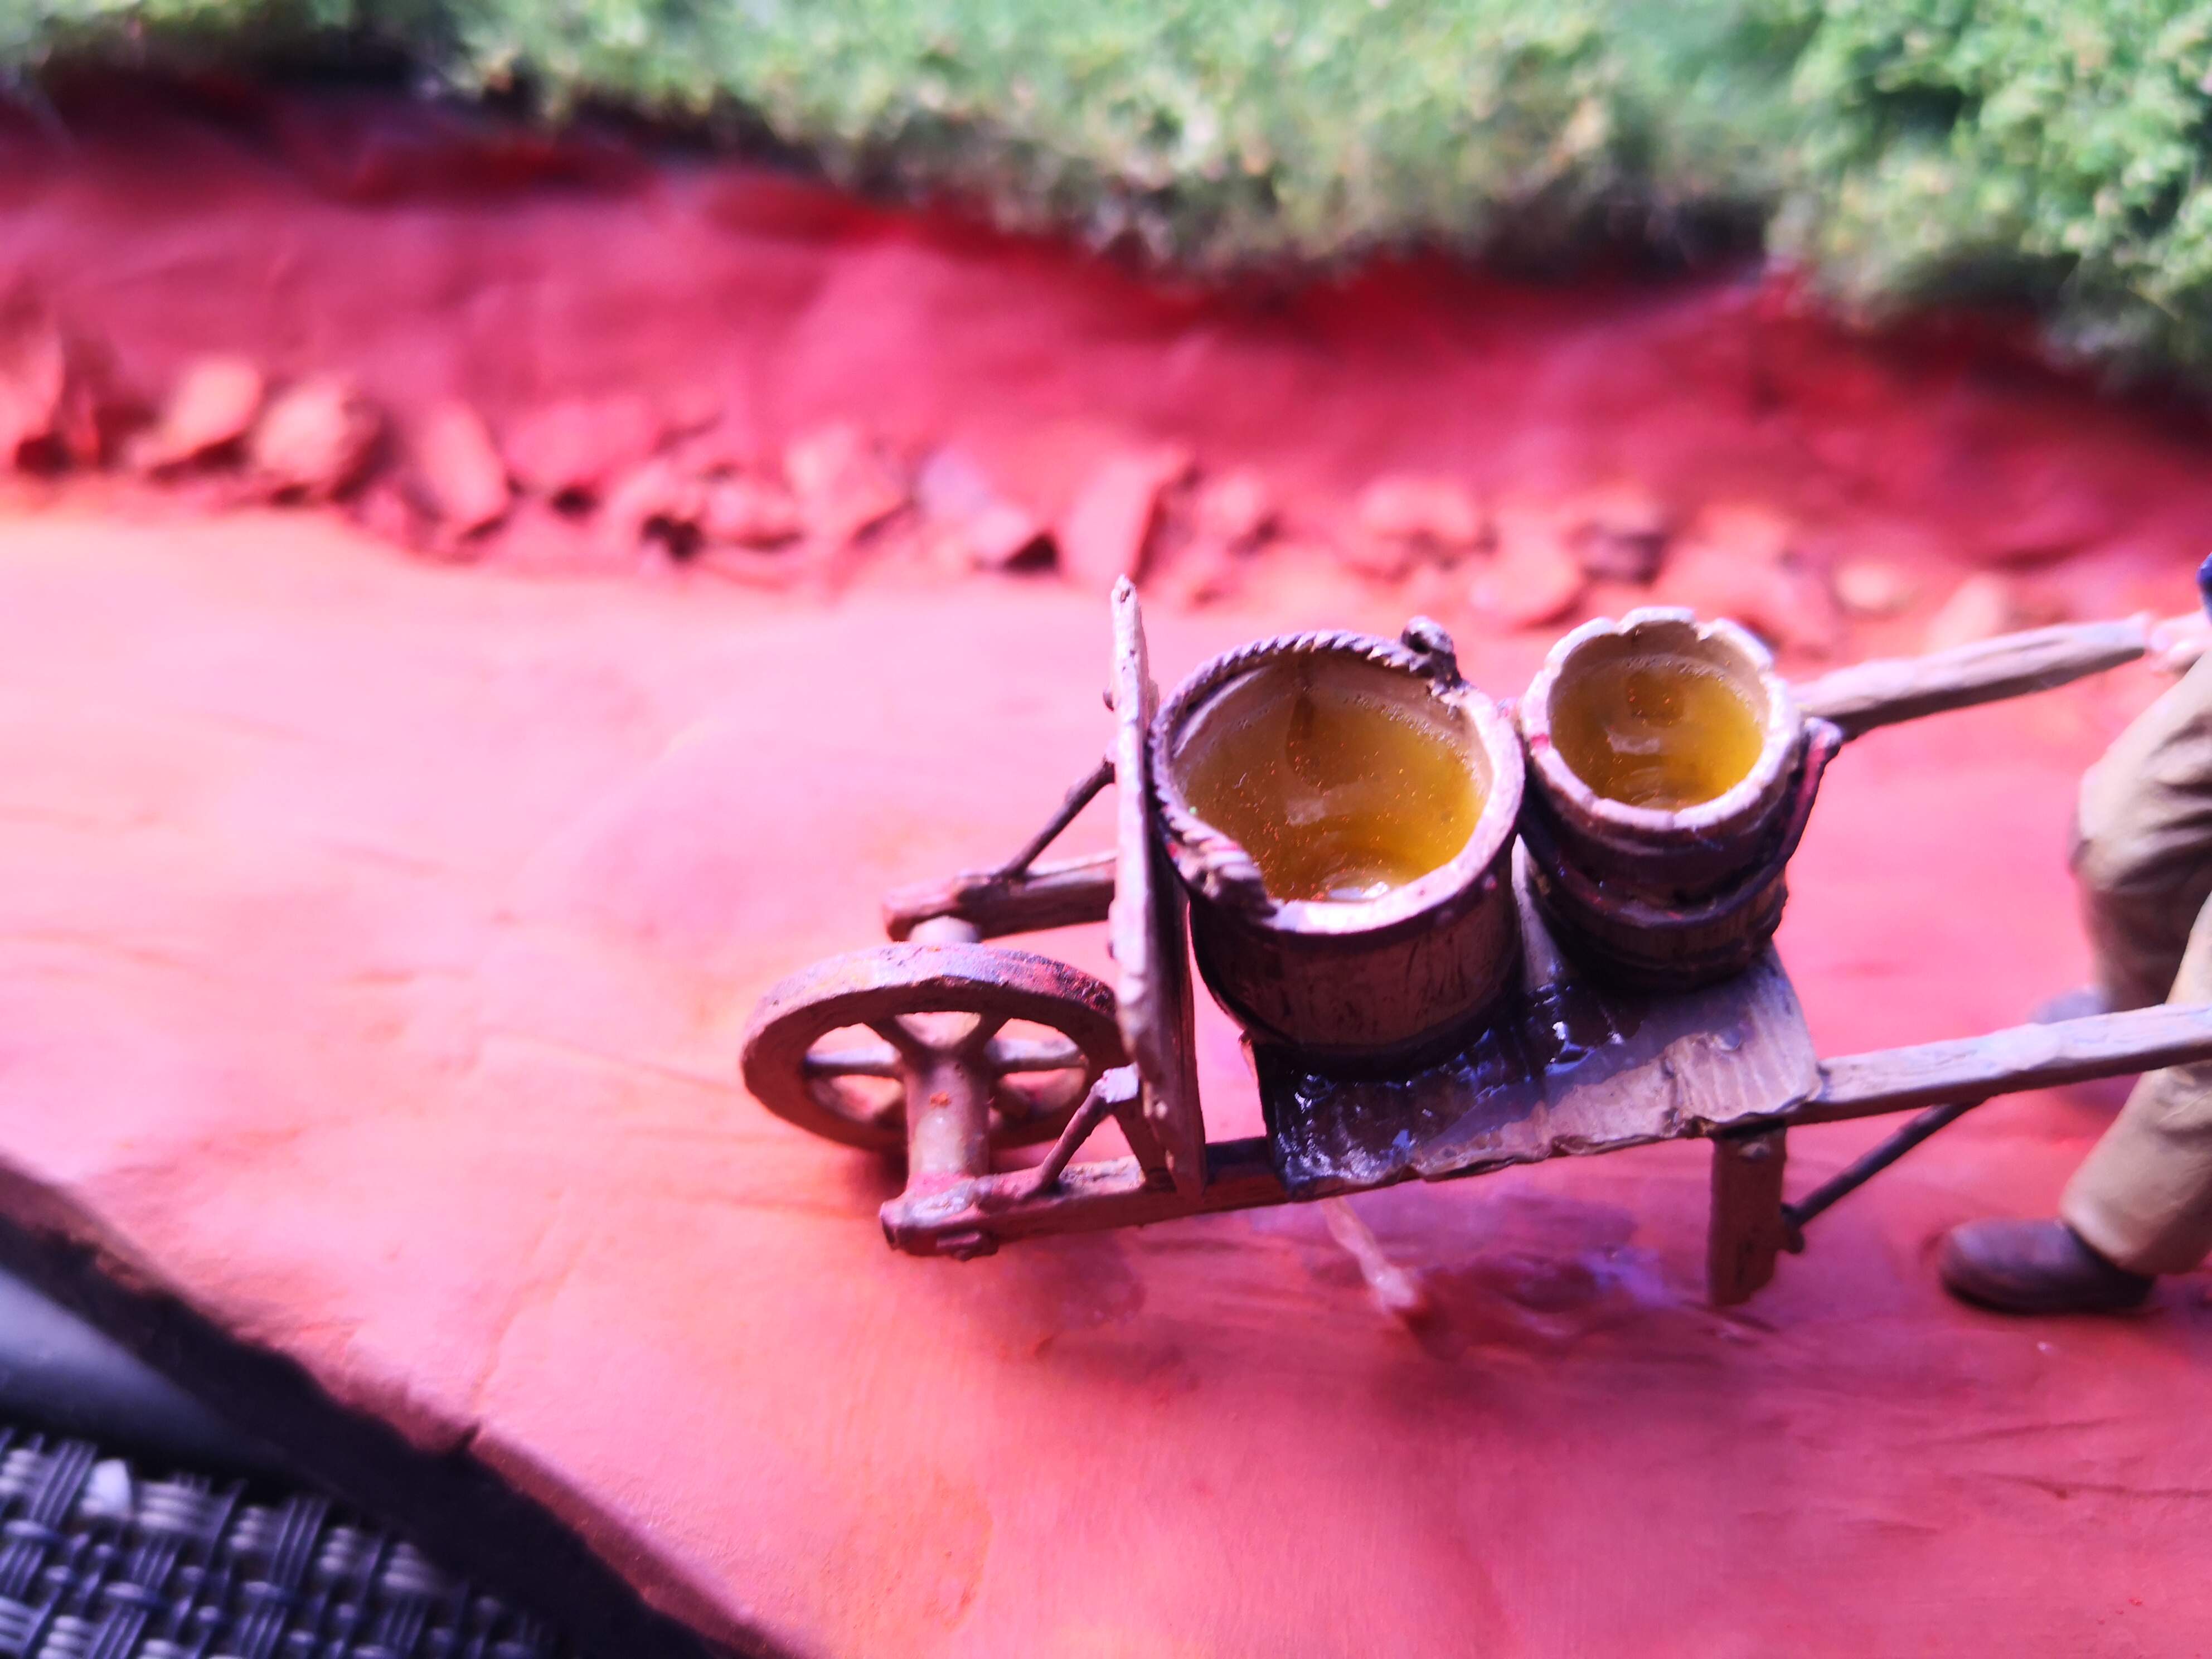
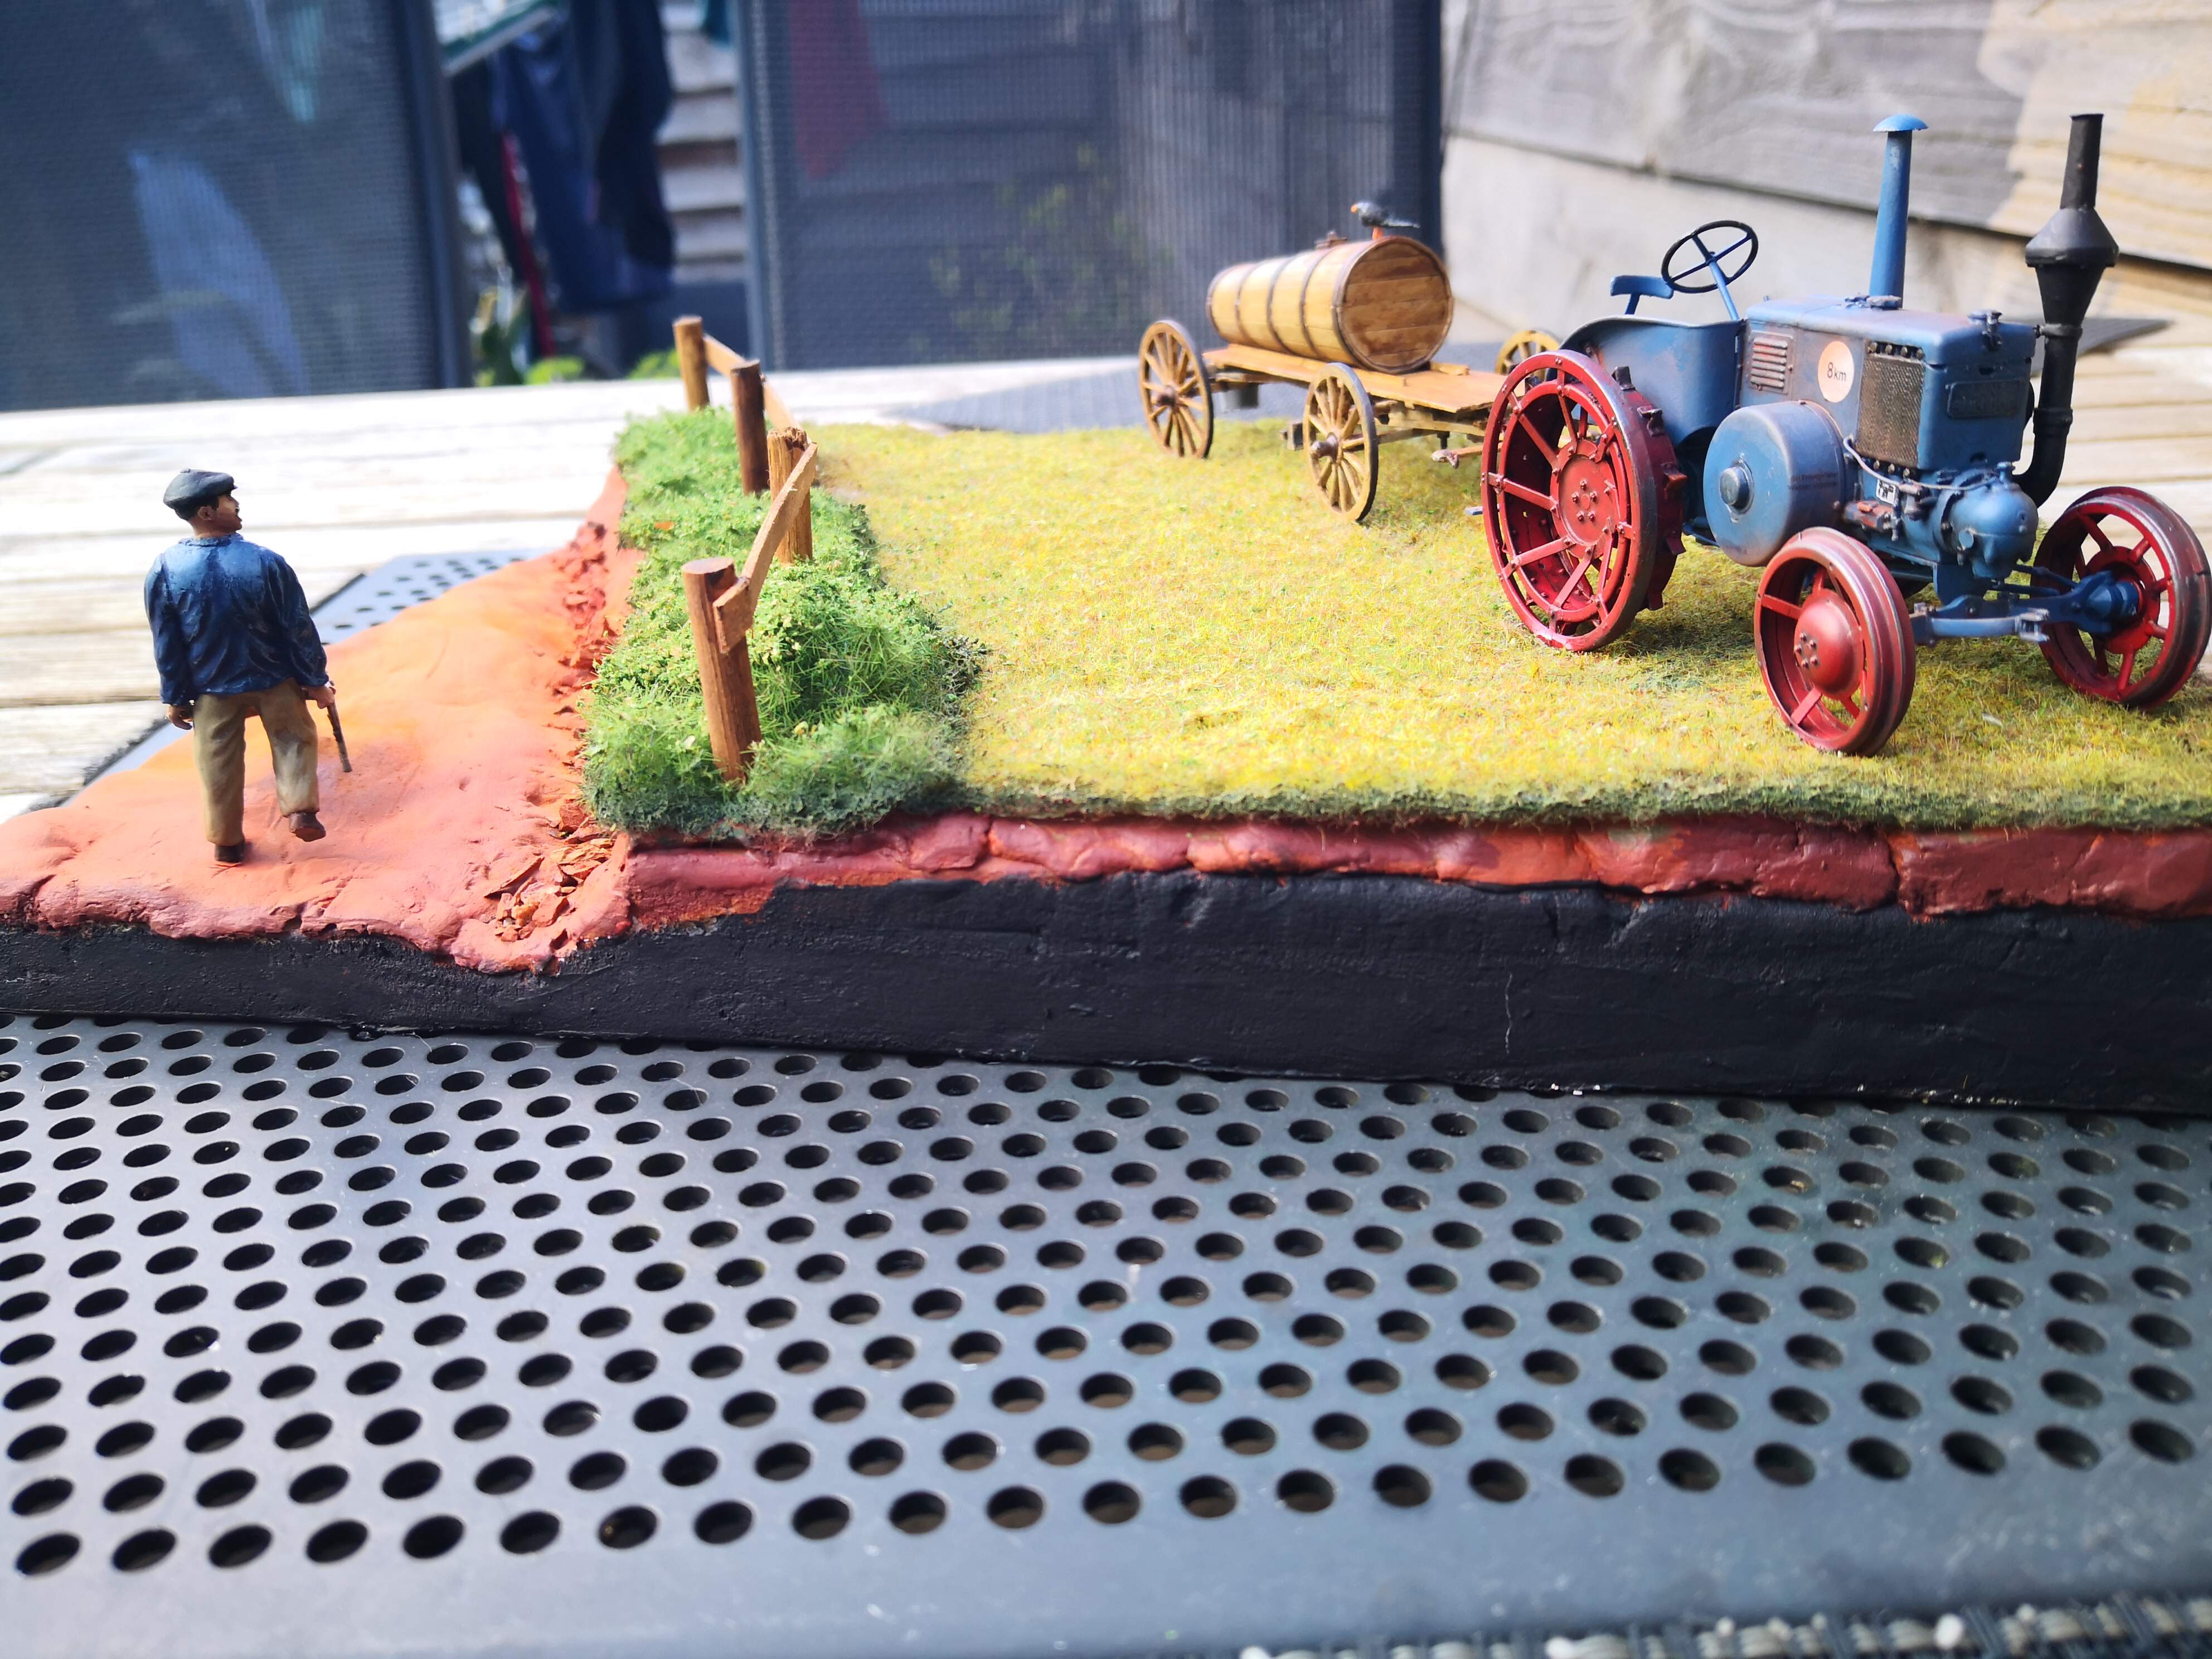
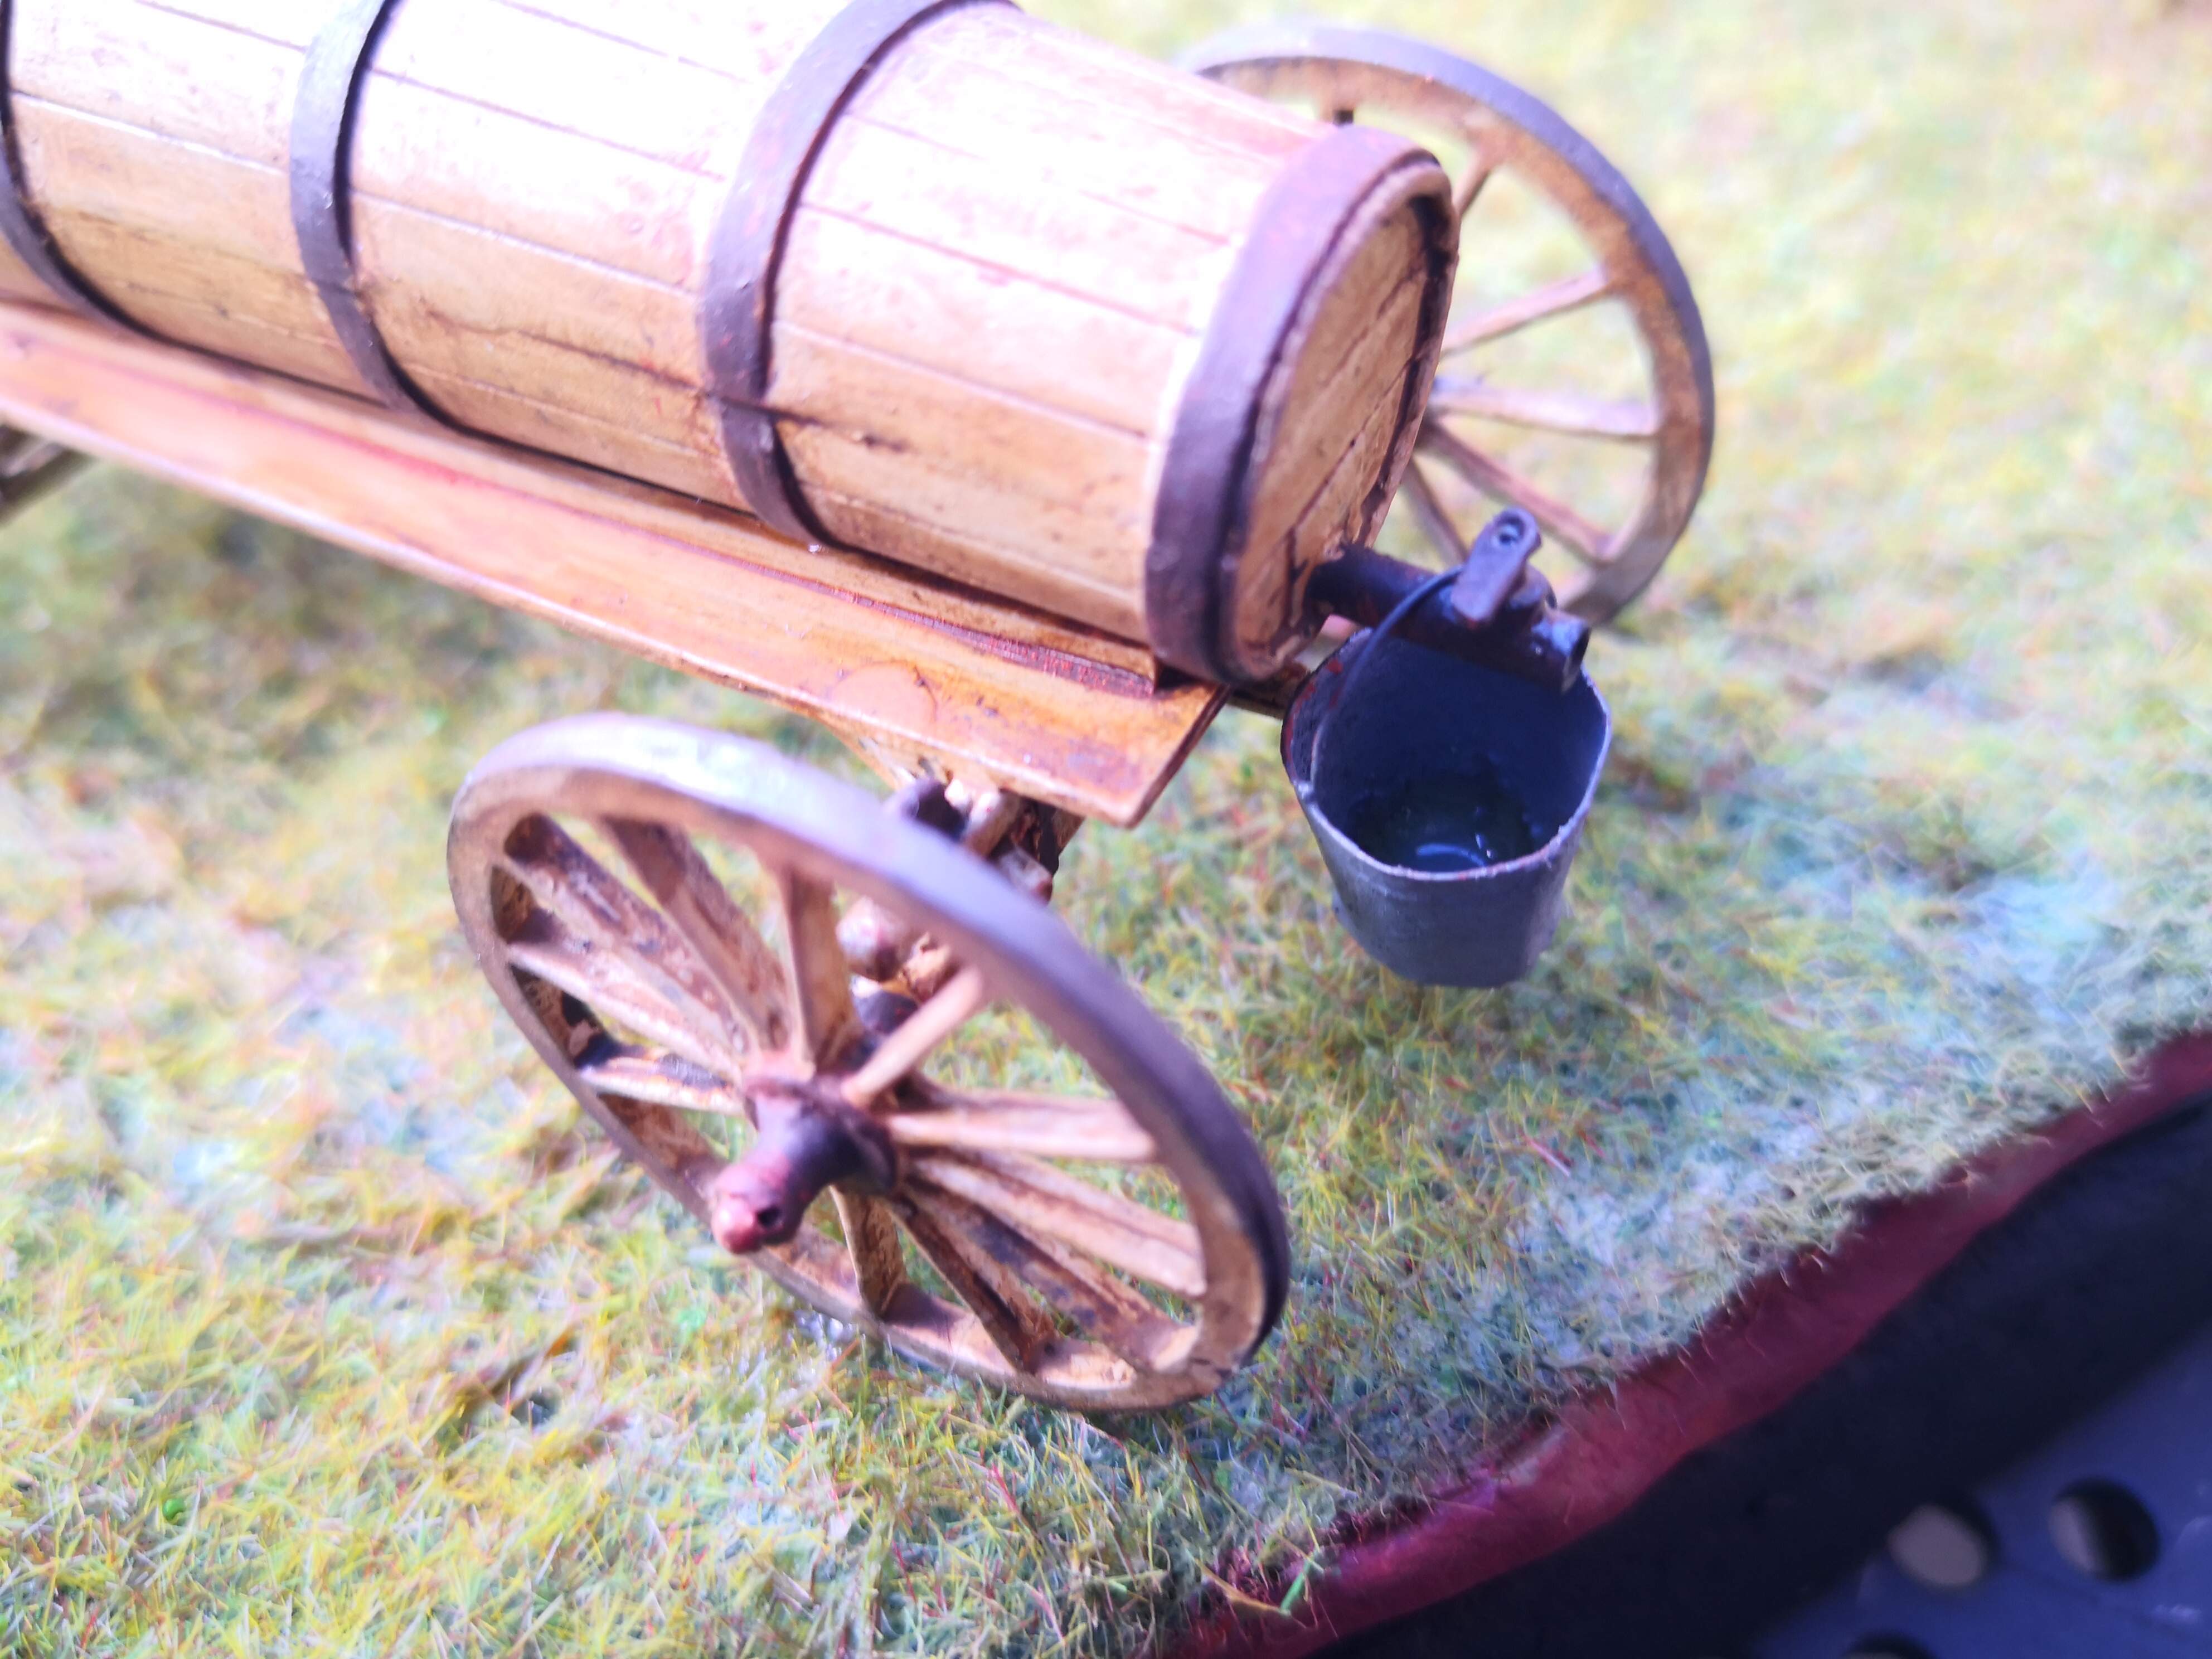
And finished! This was a fun little diorama 30x24 cm) to build! I tried some techniques and they turned out remarkably well.
Enjoy the pictures and thank you for watching…
Do I get a medal now?
Very nicely done. Nice change to Tanks , Tanks and more Tanks !! … although … I do love tanks lol
Excellent. I think I saw something go back that looked like figuring out how to do medals. If we get a method for doing it, you will get a medal!