That looks really great. I need to get back to mine. I’m trying to focus and get a couple of things done. I have too many things going at once right now.
1 Like
I hear ya! It was very rainy here today so it gave me the day to paint this one up.
Anyone know want the mantlet dust cover material was? I’m guessing canvas? I’m trying to figure out a good color. Miniart calls out dark green but I want to use it for a bit of color variation, I was thinking something like khaki, maybe buff or flat earth.
Hi,
The new paint scheme is way more realistic than the patchy was earlier.
About the dust cover: it was canvas, surely. Depending in the age of the vehicle, the color might be closer to green (or nature canvas) or very faded, almost grey color. There are some pretty real vehicles in walkaround photos, they would be good references surely.
http://mhrfweb.makett.org/MHRFWEB/?page_id=539
Tamás
Thanks! And thanks for your comments earlier, it really motivated me to redo this and be better this time around. I used the same technique but much more refined. Still did a patchy black basing but made the patches smaller and less erratic and then went heavier on the blending. My goal is have very subtle color variation
Thanks for the photos. Looks like a khaki or khaki drab would work well!
nice T54… and nice use of the black tonal variation. I am going to start my T-54 (for the T-54 campaign of course) and would love to be able to get such a great finish…
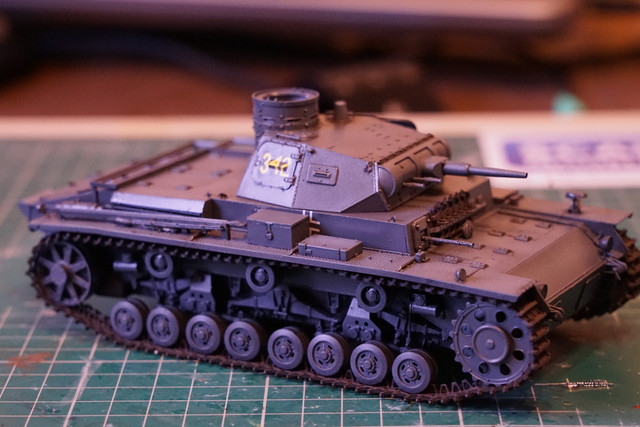
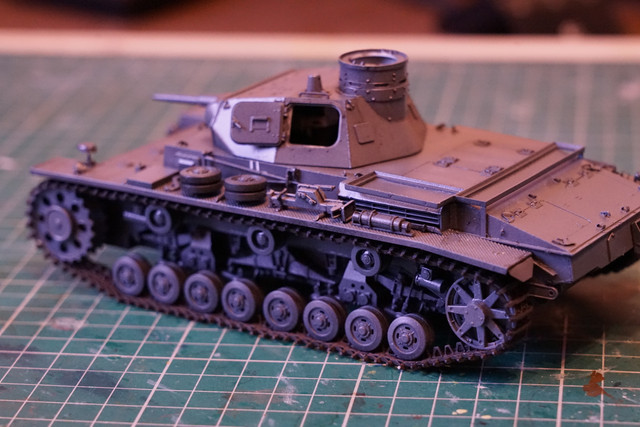
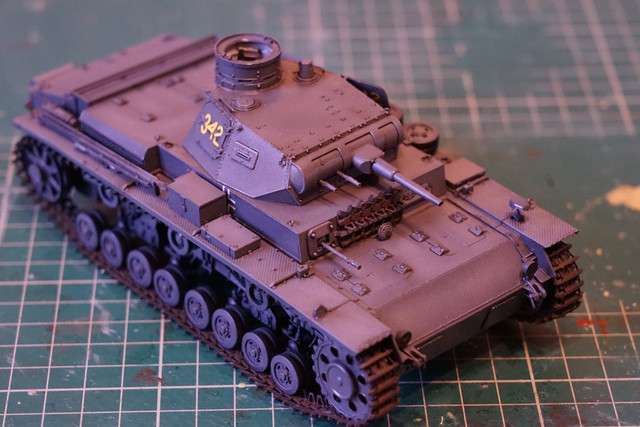
the Pz III is getting close - found I had not made enough track lengths for the front armour so just finished a short one (ran out of track) that needs painting before it can all be added, and still need to finish the painting of the wooden crates (probably next weekend) and matt the grey down… photos tomorrow as today the tracks went on!!!
Looking forward to pictures of the panzer III!
I hope the tonal variation comes through in the photos, it was hard to capture it well on my phone camera. The technique is actually pretty easy once you get the hang of it.
yeah, have done it on a Sherman, wonder how well black works with sand colour schemes or if it should be dark brown variation… may try it on the Wespe and T-34/D30
My understanding is this works equally well on any scheme, though I’ve also heard of people using non black base coats. If you haven’t already check out Doog models black basing. He has multiple videos of black basing from monotone light and dark colors to camo and other stuff. Really good videos
1 Like
thanks - added him to my watch list
1 Like
No problem, there is on in particular he does a sand and dark brown camo, I think that one might be particularly useful
I a
So learnt from Doog’s videos. As I understood he 8nvented the technique for airplanes where the (salty) air among other factors results the patchy look. Also the planes have smaller panels than the tanks typically.
So what I came up was black primer, than paint the middle of indi panels and once it is done, overspray the whole model with very light coat of the base color. That unifies the surfaces a bit and decreases the effect.
No doubt, it would hardly work on multi-color camos. That is the next step on the endless road…
1 Like
Use a dark brown as black will be too stark of a contrast. Art lest that’s the way I do it and I’ve done a tone of nono schemes using this technique.
1 Like
more work on the Pz III Ausf D - tracks on, more small parts on, found out I had only made 4/5 track runs for the frontal armour, 5th made (not as long as it should be) so needs painting… Not going for heavily weathered so matt varnish on body and the wooden boxes to finish

5 Likes
Thought it about time I showed some progress on the AEC. Interior painted now. Not much can be seen through the hatches, so I did not go to great lengths on stuff that is just a shape at the back of the area of vision:
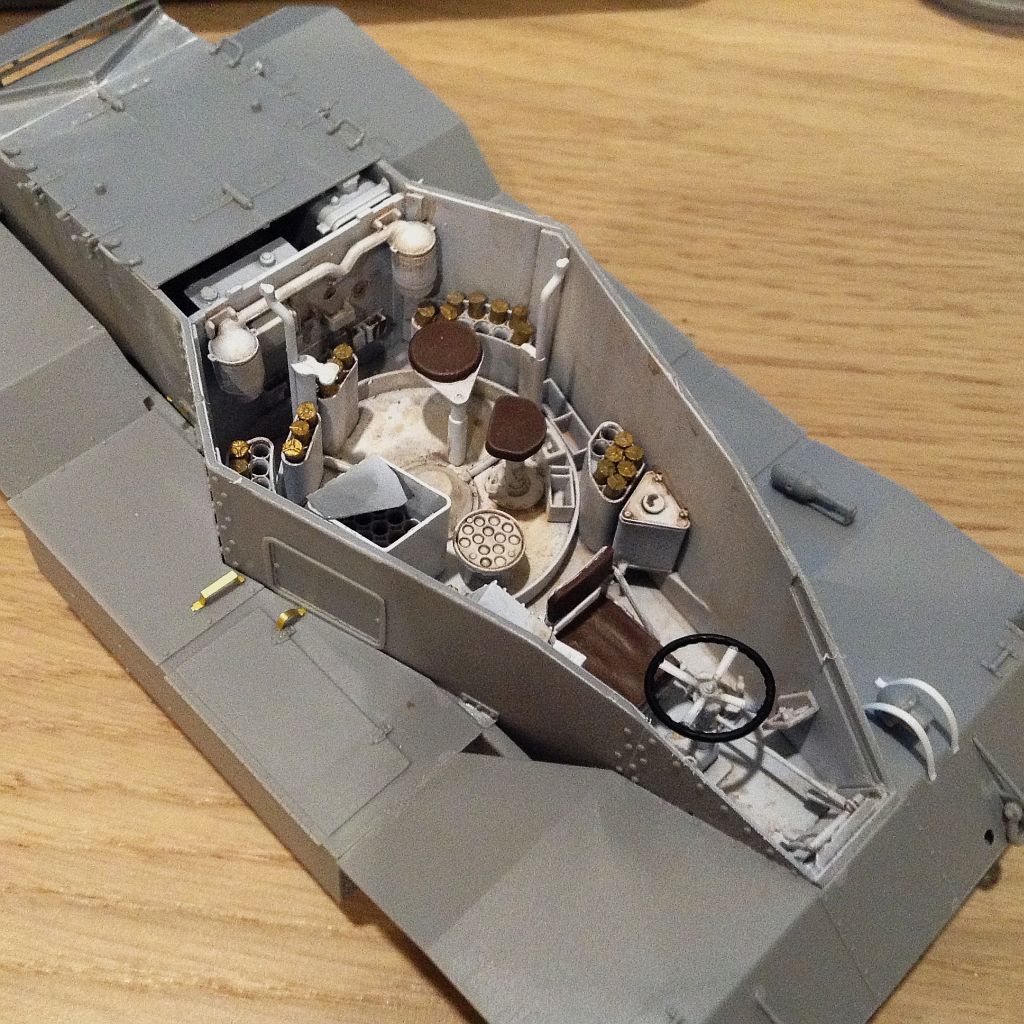
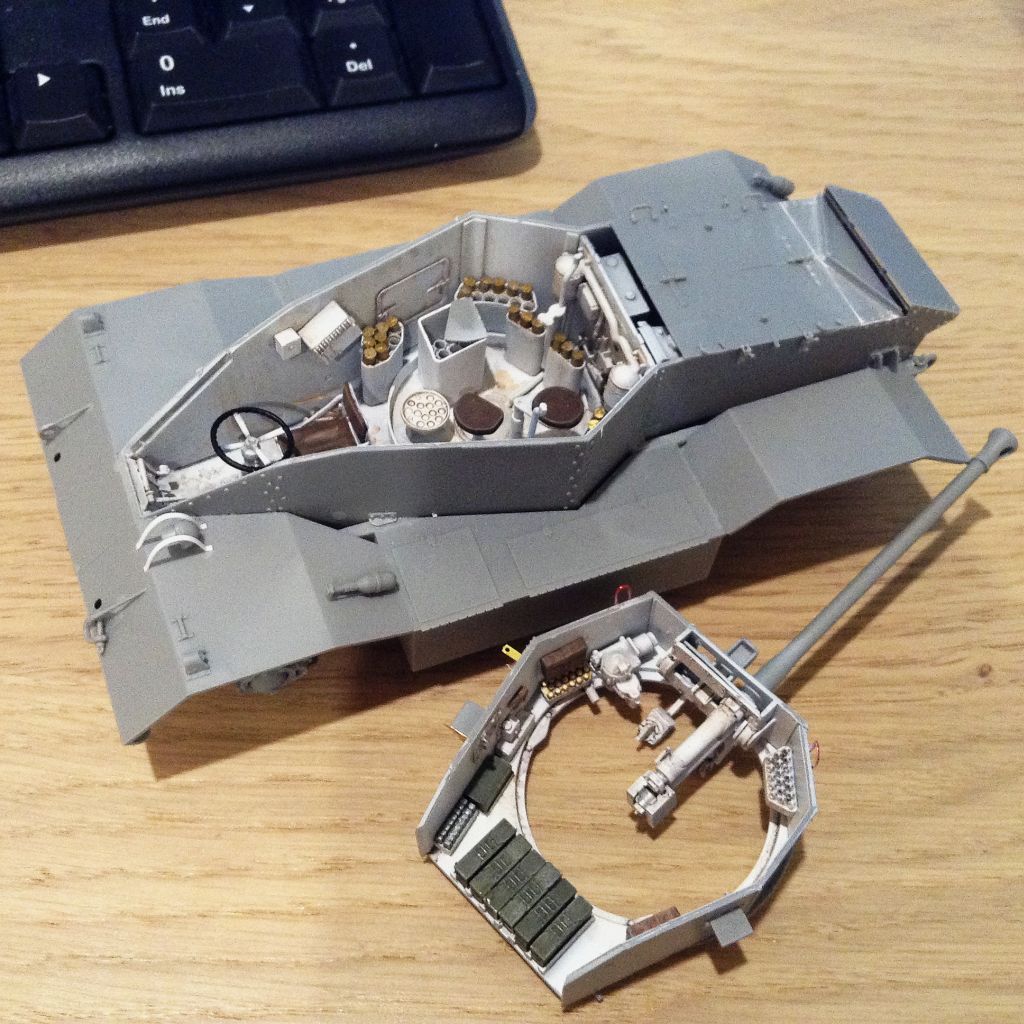
I am so glad that it is at this stage. I have broken so many pieces during construction and painting. Such brittle parts. There is a fine line between scale thickness and enough strength to hold together, and Miniart stepped over the line on this one.
Even the etch parts are sometimes unusable and some of the etch is just not practical - example the light guards. So thin that if you just breath on them and they deform, hence the styrene replacements in the pic…
6 Likes
I am a bit dubious on the interior layout being correct, especially the turret. I could not find any interior stowage diagrams for the Mark 3, but some of this appears to be Mark 1 stuff, which had a different turret (it used one off a Valentine). Miniart does the Mark 1 as well as Mark 2 in addition to the 3.
There is the rack on the left of the MG ammunition boxes - Thompson Machine gun magazines, but no ‘Tommy Gun’ in the turret (or even a Sten Gun as a personal weapon) where the Thompson was actually fitted in the Mark 1.
The kit comes with the twin Vickers K Gun mount for the turret roof, but I have seen no pics of that fitted (especially pics on the training vehicle that is depicted on the box art which with it fitted!). There are few pics of the Mark 3 in operational service and none with the Vickers shown. The only reference to it is in a Wikipedia article stating it was a ‘later modification’… I will therefore not be adding it.
It is such a massive vehicle, with those huge between fender stowage boxes, that it is crying out for additional stowage loaded on top. The handful of operational pics do show them loaded up somewhat.
I can’t speak to the accuracy, but it looks awesome. I’m about to get to the exterior of my T-34 and I imagine I’ll replace the grab handles and the tie downs with wire. The parts like that in the interior have been delicate but so far I’ve only broken one I think (and one was broken on the sprue IIRC), but still, I’ll plan for wire replacements.
1 Like
I don’t know what happened with my kit but I was super uneasy about the grab handles too so to fragile parts elsewhere. However for some reason the grab handles have taken abuse. I’ve bumped them a few times and they have held steady
1 Like
Looks good to me, Peter. Although kit manufacturers probably have to guess quite a lot sometimes on interiors.
In any case you did a great job on it! 
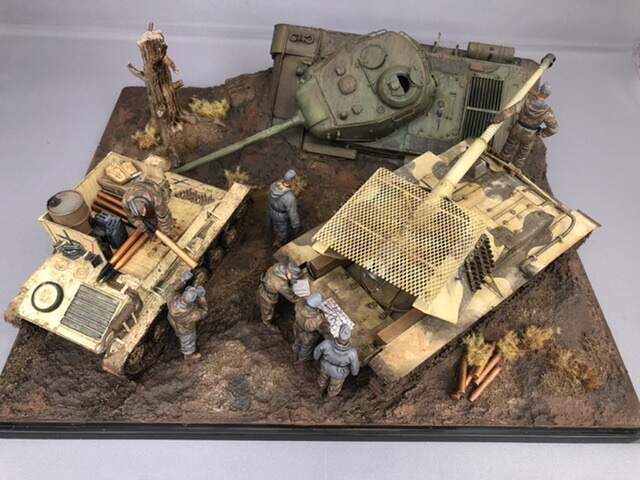
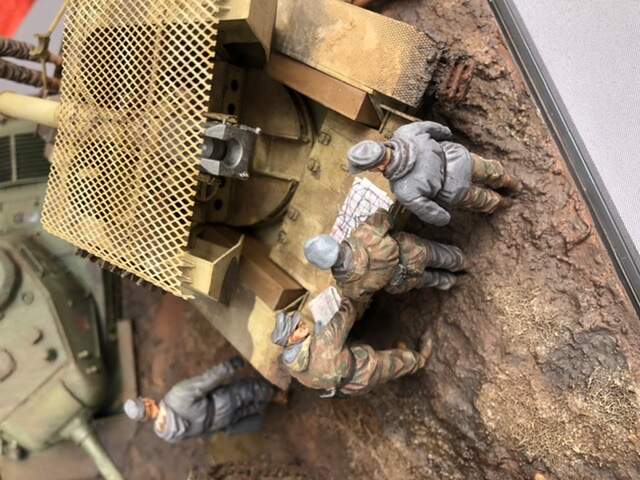
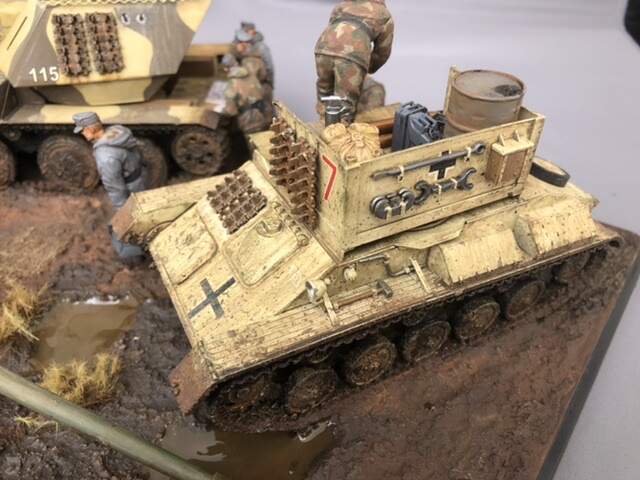
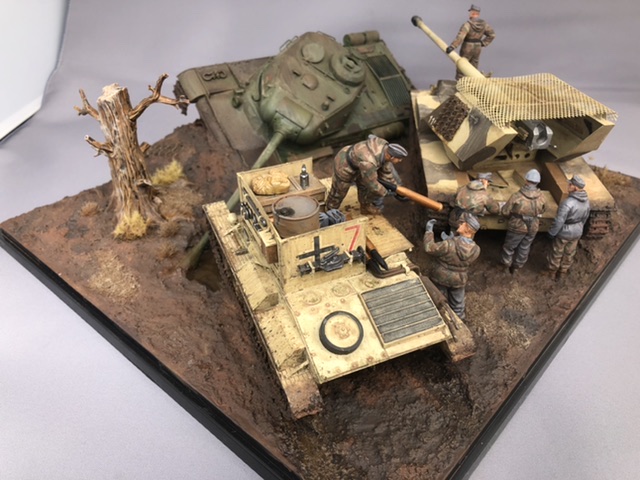
I have now finally finished my diorama and included the miniart figures and the converted T-40 tank. Quite satisfied although there are always things I want to do differently next time.
In any case my final entry for this campaign. 


15 Likes
Excellent Jesper. Usually a lot of vehicles on a small base looks odd, but this layout is very believable - Resupply of a tank hunter using an enemy vehicle for cover is a good story line.
Groundwork is very well done, it really looks like wet, goopy mud.
Just one thing, and I hate to mention it, but the jack block tray on the munitionspanzer is upside down…, the block sits on the tray and the triangles are supports to hold the tray horizontal.
2 Likes
Really digging this. Curious, what is the tank hunter? I don’t recall off the top of my head a vehicle that resembles this one? I like the look of it
1 Like