Woah. That is one complex assembly.
Good job! You did it.
Frenchy thanks a lot. Just what I needed. The PDF has lots of information.
bruce
Not much progress. I have health issues that slow down the work!!
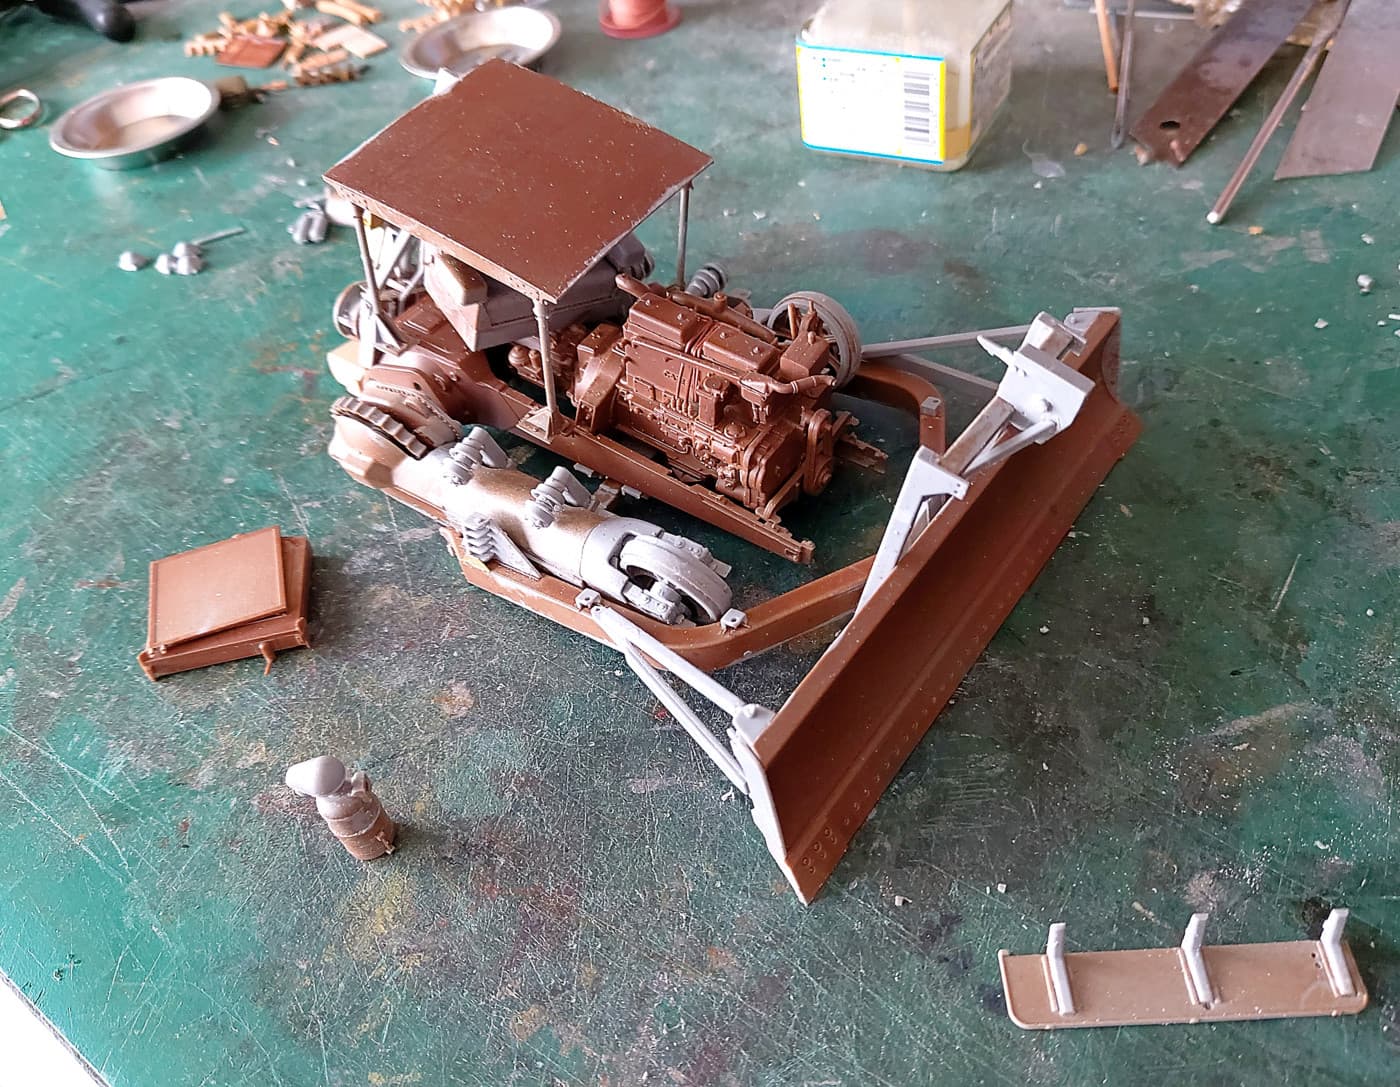
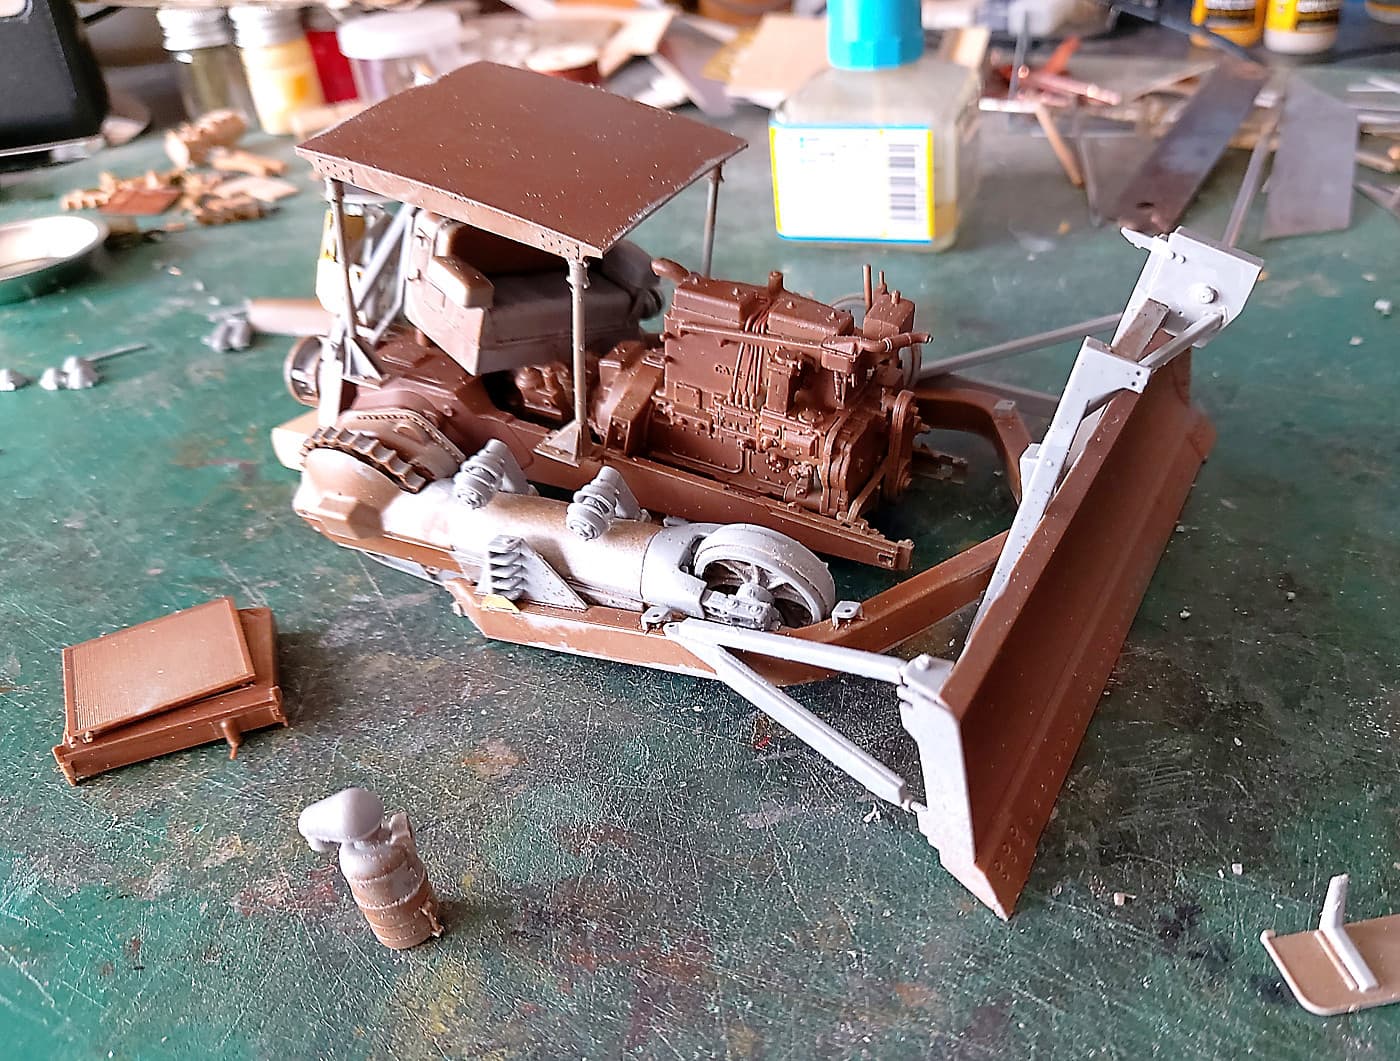
I think I have all the sub assemblies that need to be done before painting. So next step is more priming. Then some hair spray and then the cat yellow. That will be fun. I doubt the yellow will cover the primer so I may put on an off white then the yellow. We shall see.
Despite its reputation and small parts it has been a fun build so far.
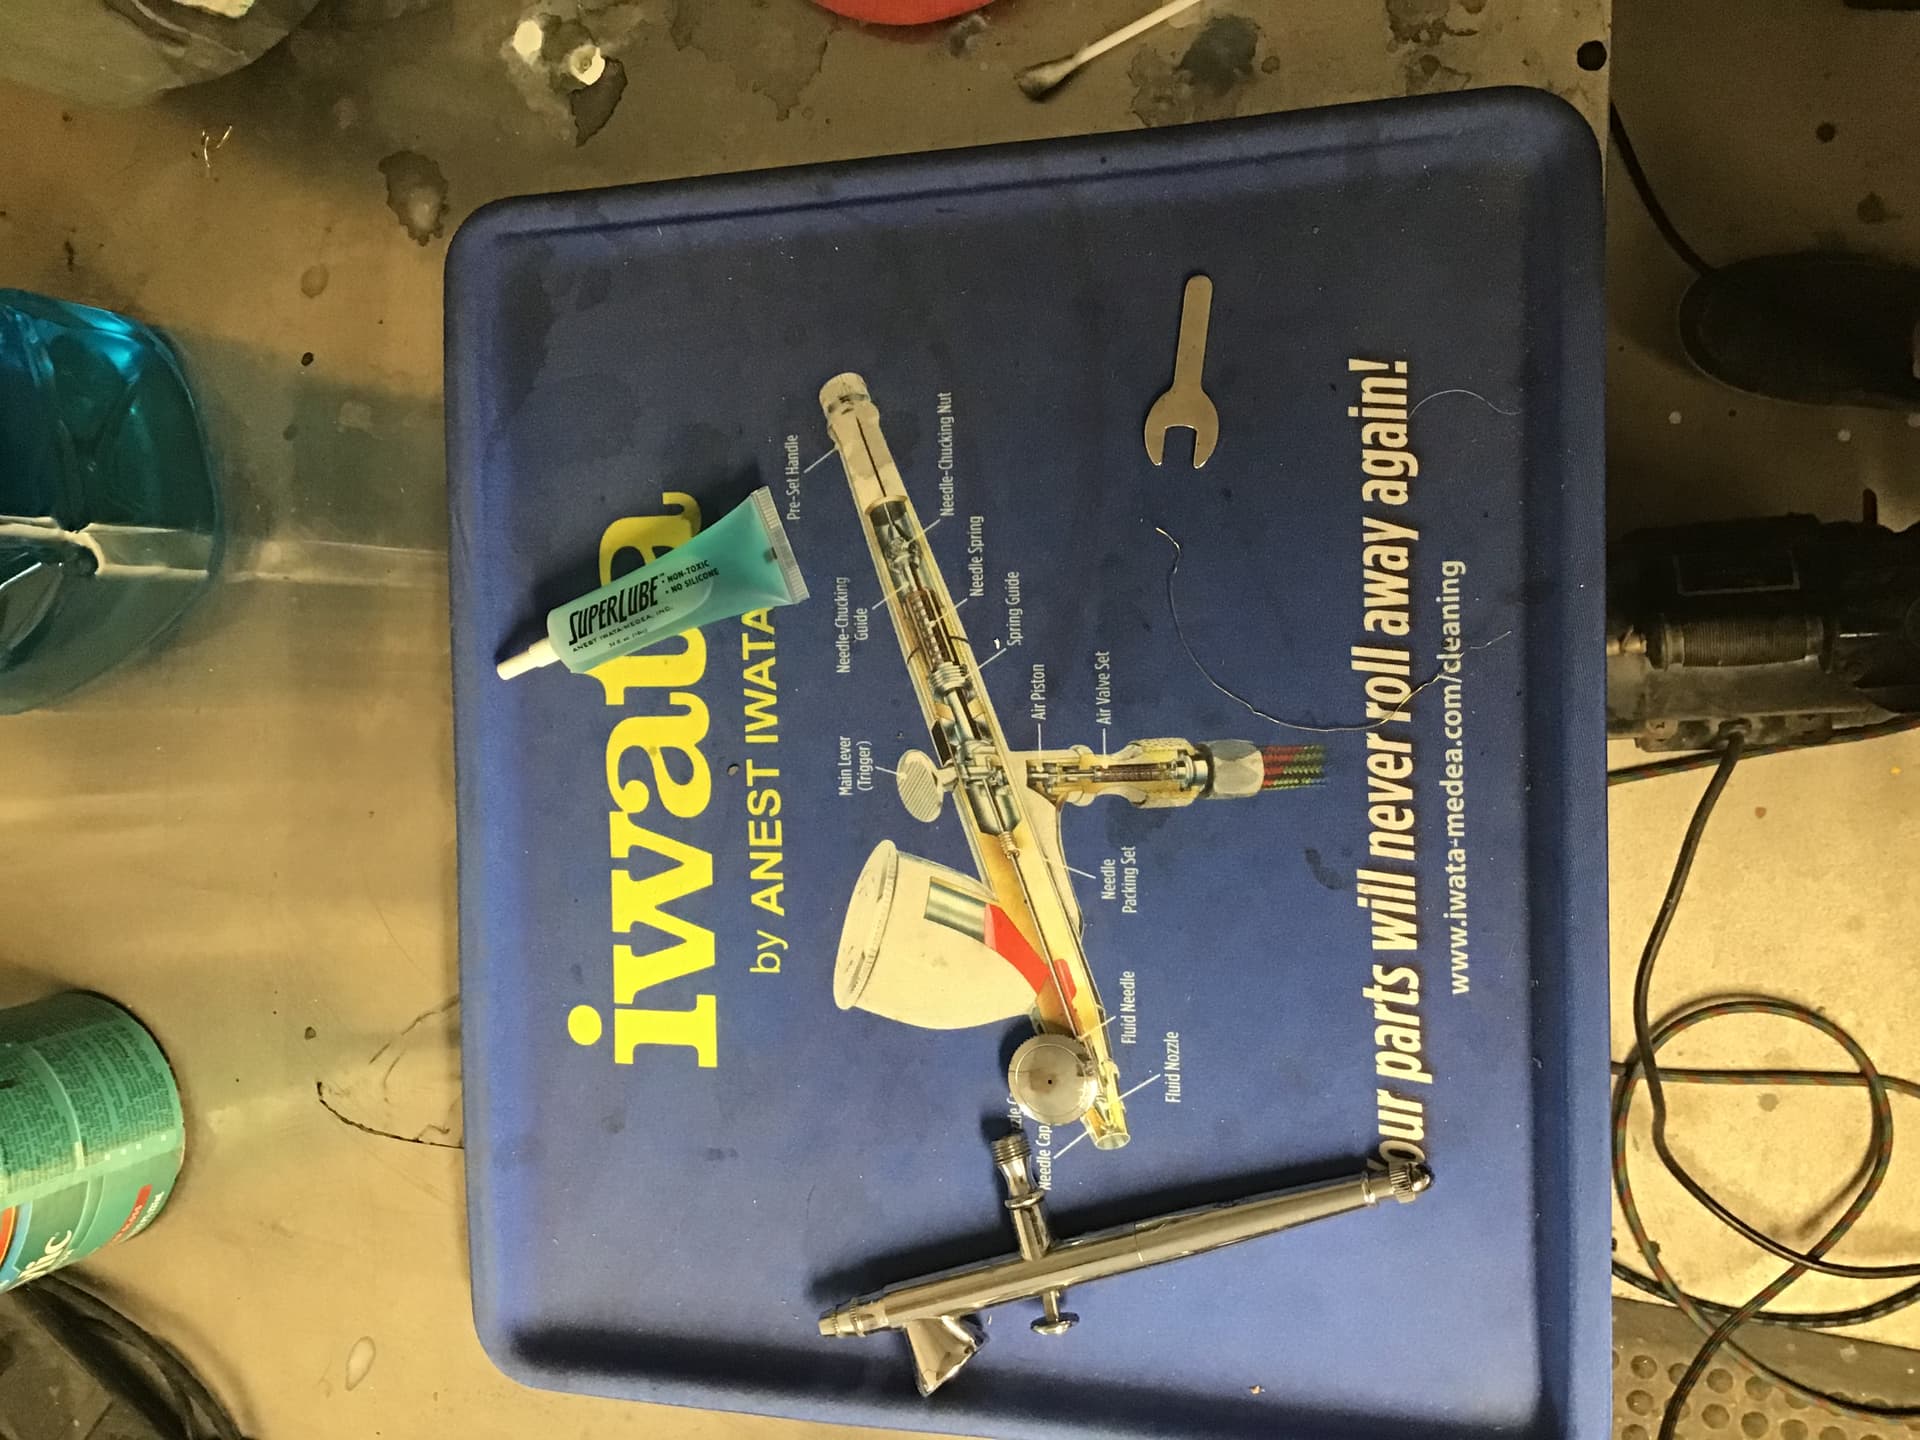
I’m off now to have a stern talk with my airbrush.
bruce
7 Likes
Yeah don’t let that airbrush blow you off – it’s looking so good Bruce, slow & steady wins the race 
Airbrush had the last laugh. I finished priming and dropped the airgun into my ultrasonic cleaner. (The cleaner does a great job. Worth every penny). When I turned it off to fish the parts out the trigger/air valve dropped out. Now an ultrasonic cleaner was smart enough to disassemble the airbrush but it took me an hour to put it back together. By then I wasn’t in the mood for the top coats. FWIW the spring in the air valve dropped out. Trying to put it together I dropped the spring on the floor. I have carpet floors. Yeah I know. Well I found the spring and dropped it again!! Then with great care I tried to reinsert the spring again. Yup, zinnngggg. Back onto the carpet. At least I found it. Three times! It’s back together again. I tested it. It seems ok. So I will see when I load the paint in it.
bruce
2 Likes
1 Like
Bruce: 3 Carpet Monster: 0
Match report under challenge by the IACM [International Association of Carpet Monsters] for absence of Referee & Line officials. Carpet Monster to be fined for lack of pile. 
1 Like
Try one of these lipped rubber mats Bruce . Do all disassembly and assembly on the mat . I also wire all trigger parts and nozzles, etc together with fine SOFT brass wire before placing in the ultrasonic cleaner . HTH
2 Likes
The sad thing is that the airbrush behaved itself while painting!! It was just one of those days. Best left alone and come back at it another time.
All being well I’ll do some colour today. So watch this space.
bruce
3 Likes
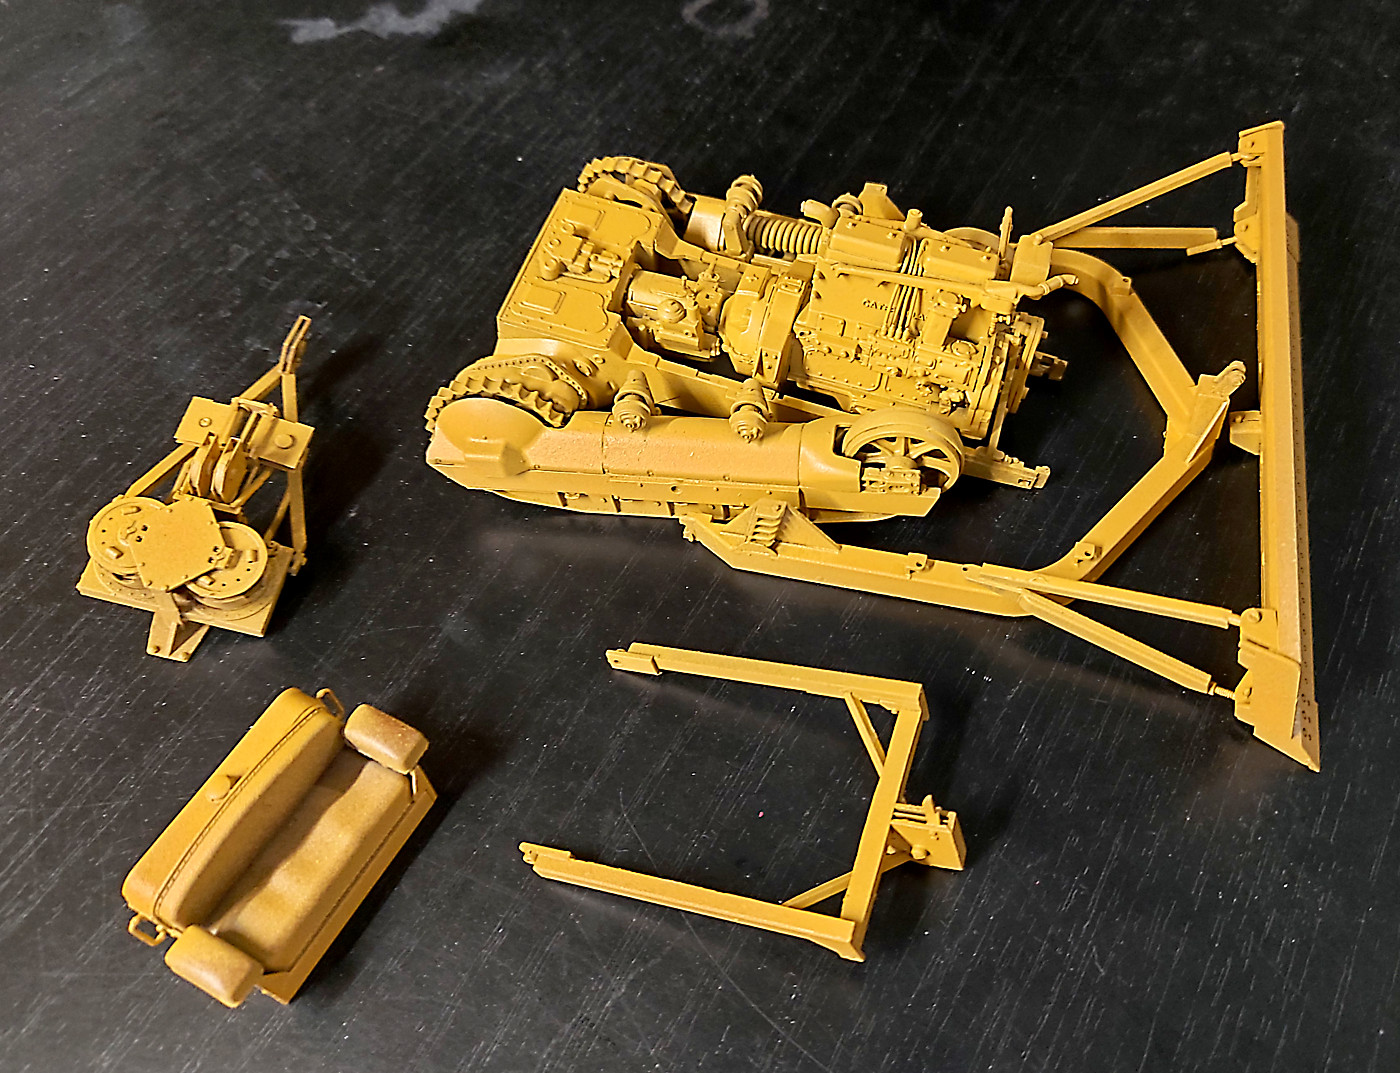
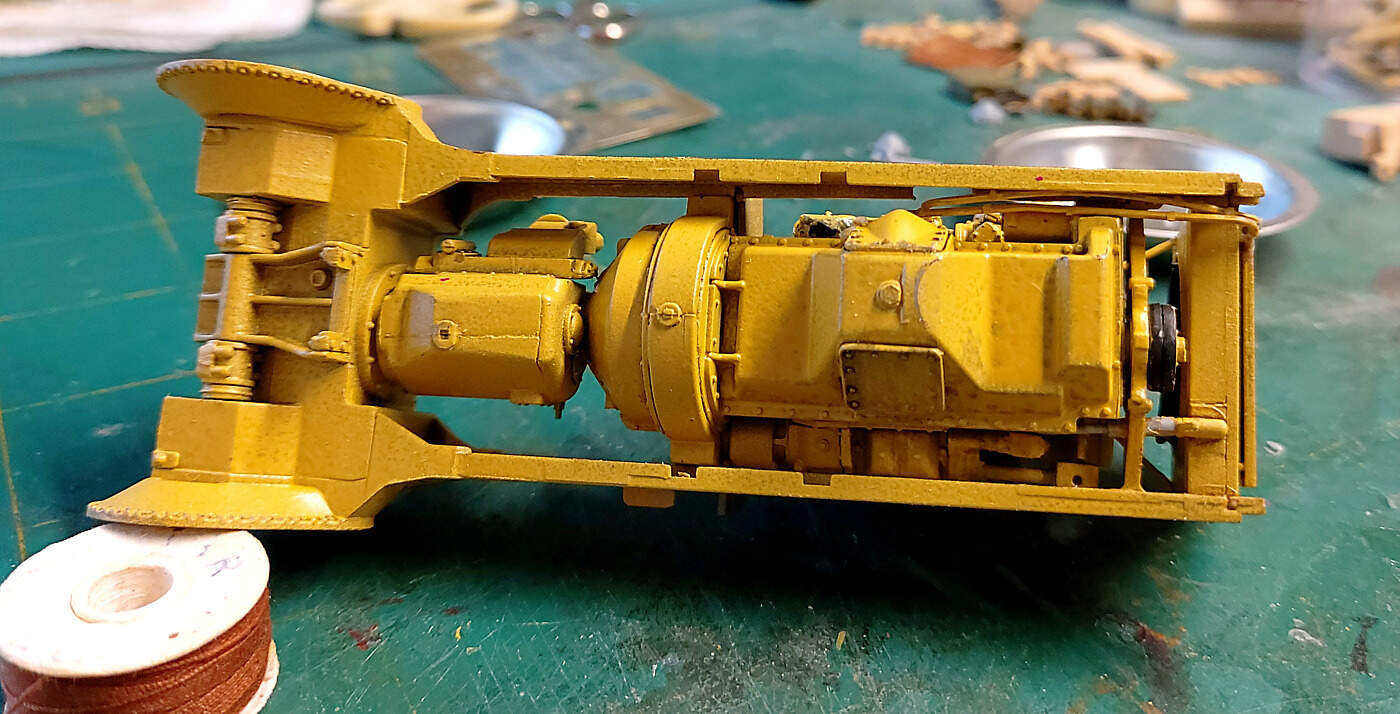
OK some colour. I use Mig Ammo Gold Yellow. (A Mig-0125). It looks close enough for me to Cat yellow.
I had an oxide brown primer and it took almost 1/2 a bottle of yellow to cover the primer. (Hair spray in between).
My air gun fell to bits yesterday in the ultra sonic cleaner. I put it back together but for some reason the air valve is very tight. So it was hard to control the paint/air flow. The paint is a bit transparent in places but that wont matter once the weathering is done.
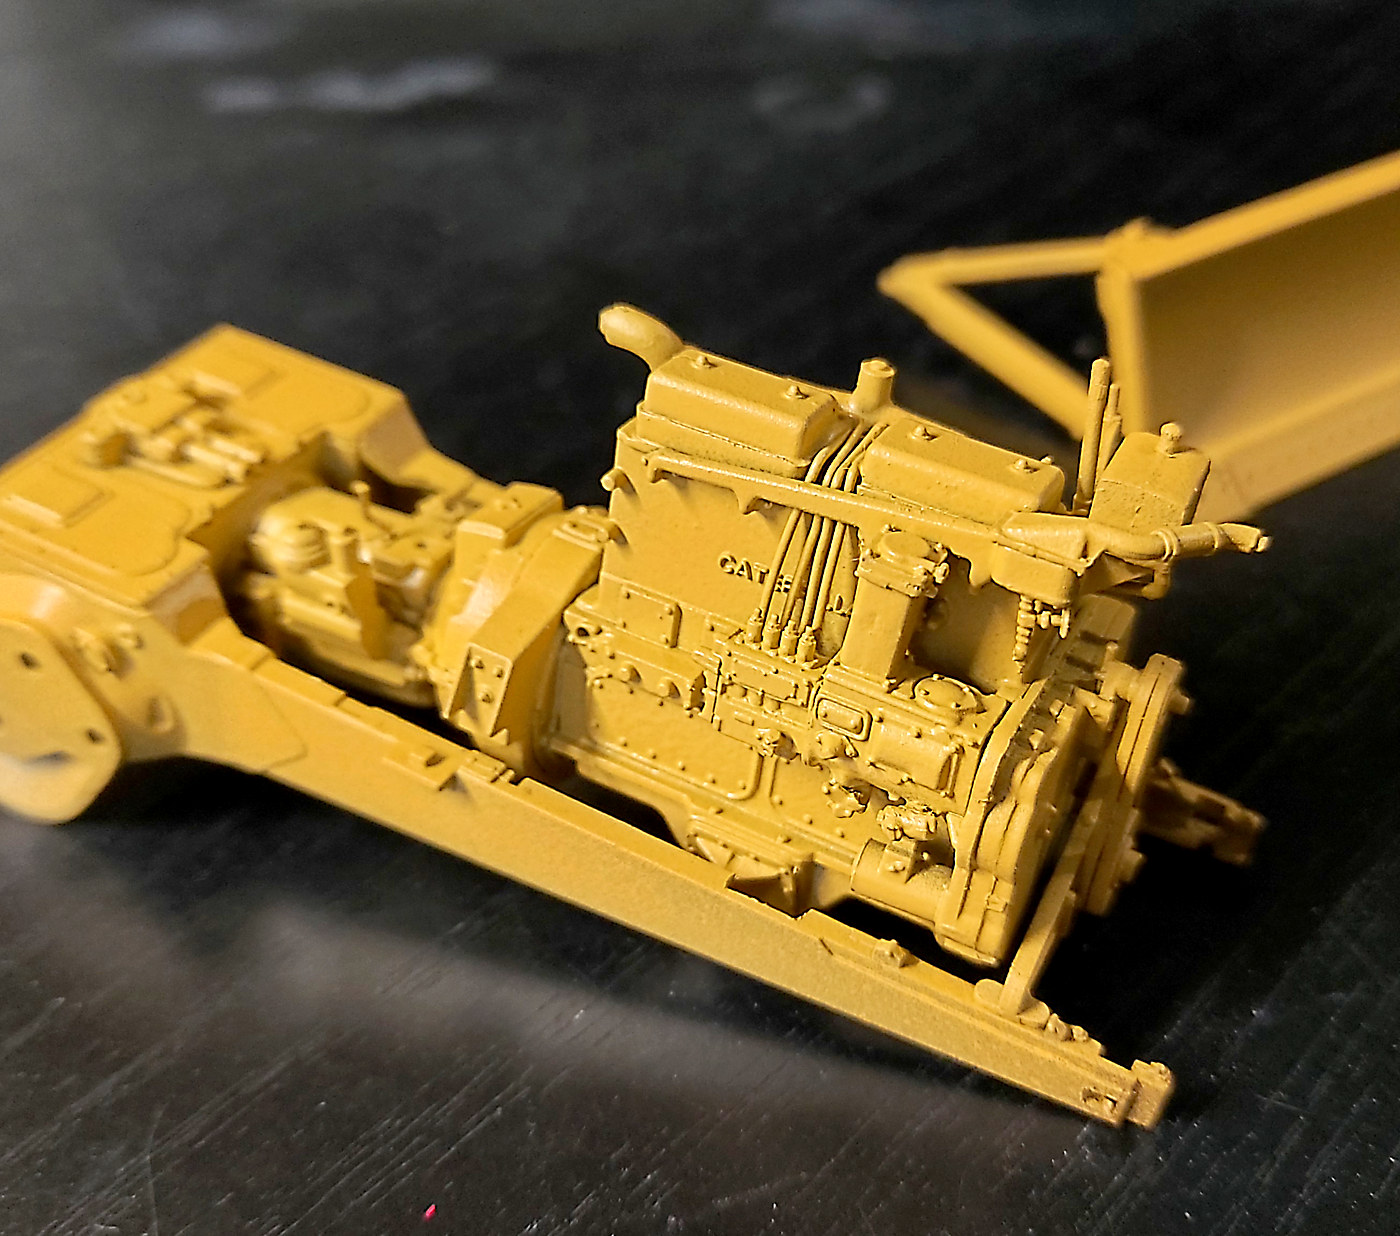
The engine itself it a work of art.
bruce!

9 Likes
 Oh, it’s on now!.. and it’s looking great!
—mike
1 Like
I am keen about the weathering. Always had this kit on my mind the moment it first hit the market. Price and a lot of started projects prevented me from obtaining it. I think I have to reconsider… 
The color looks great and the detail is just incredible Bruce. Very nice job. I have one of these but have never started it because of all the little parts. You’re a braver soul than me. The model looks incredible and it will be outstanding once all together. You can really see that big spring now that it’s yellow!
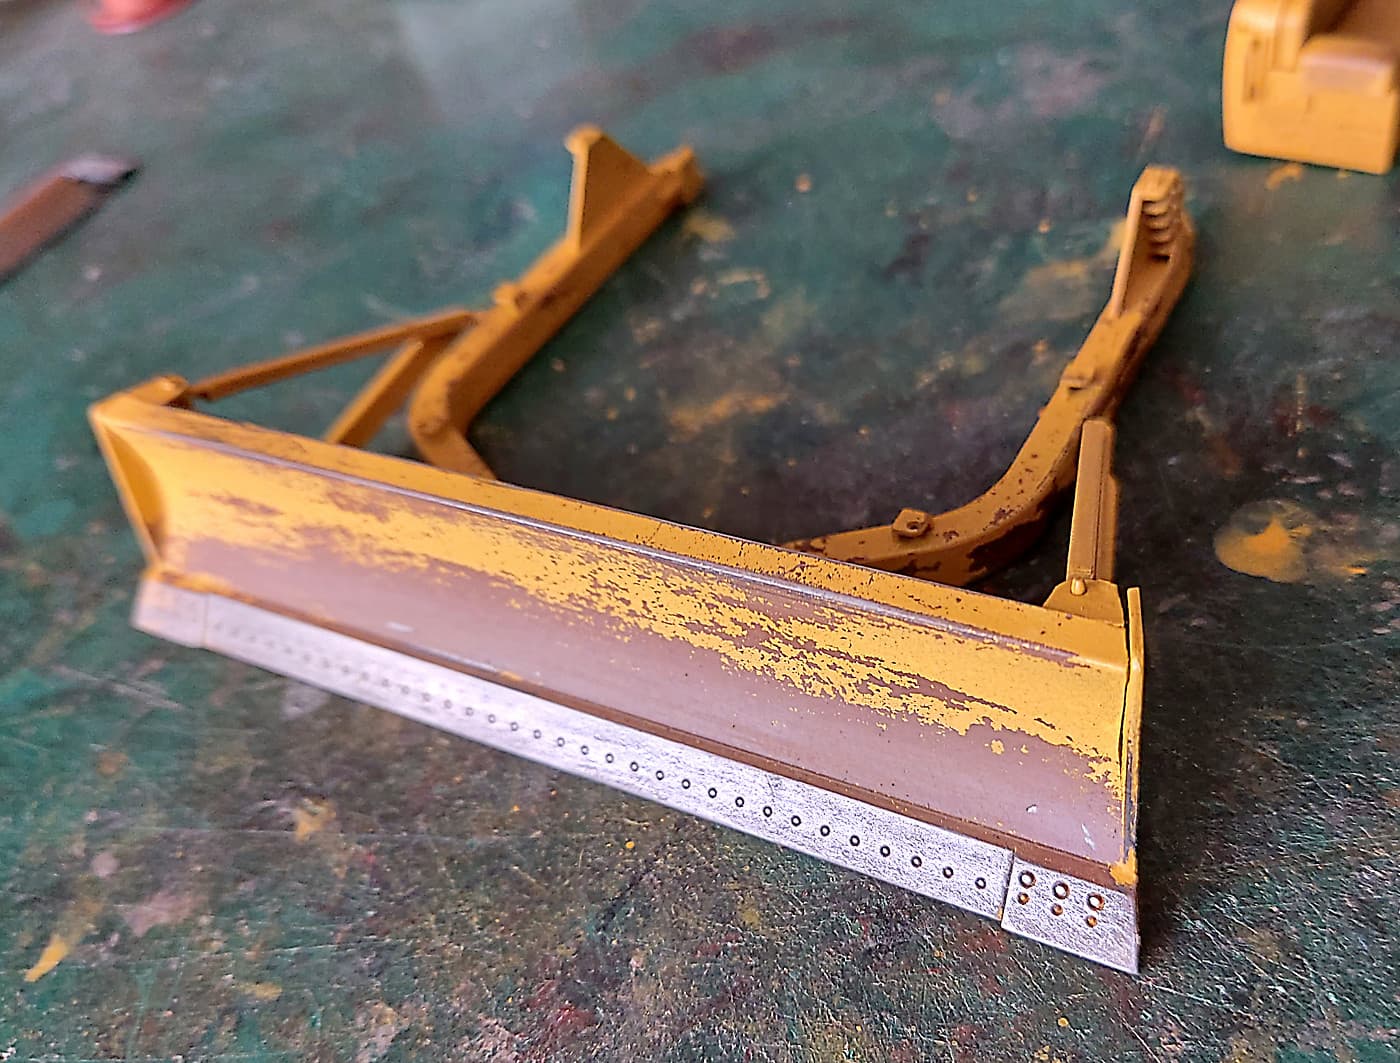
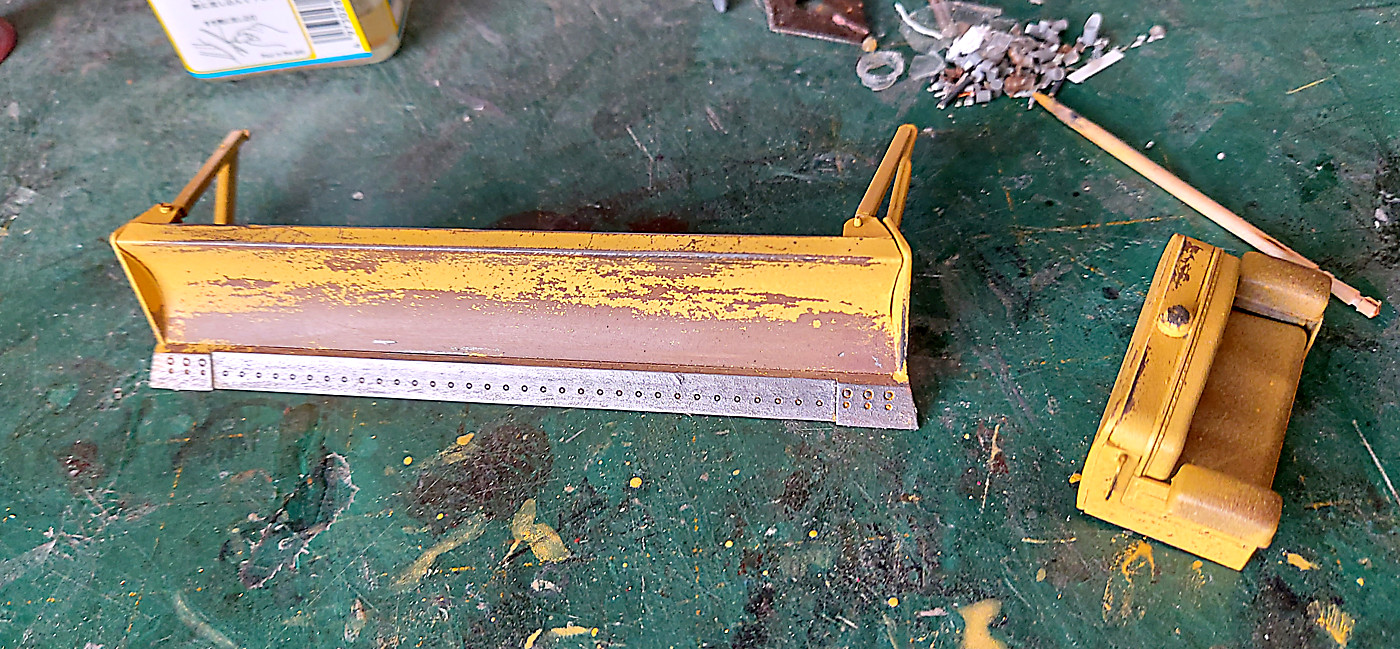
Busy with my other hobby, wife, so not much done yet. Chipped the blade and used graphite on the leading edge.
I was going to beat the heck out of this dozer and make it look abandoned. But somehow I think I’ll now just do it as a used dozer.
bruce
8 Likes
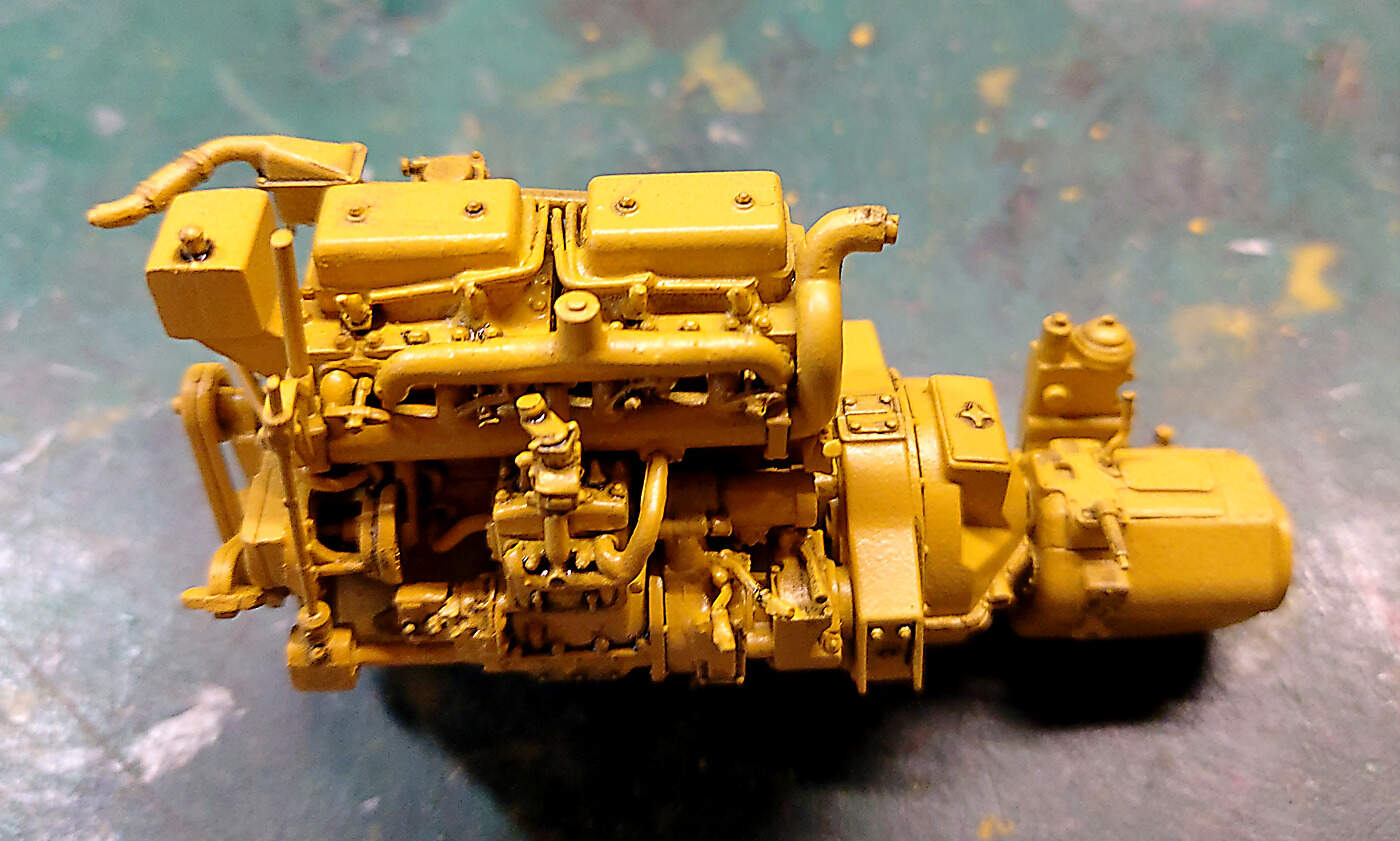
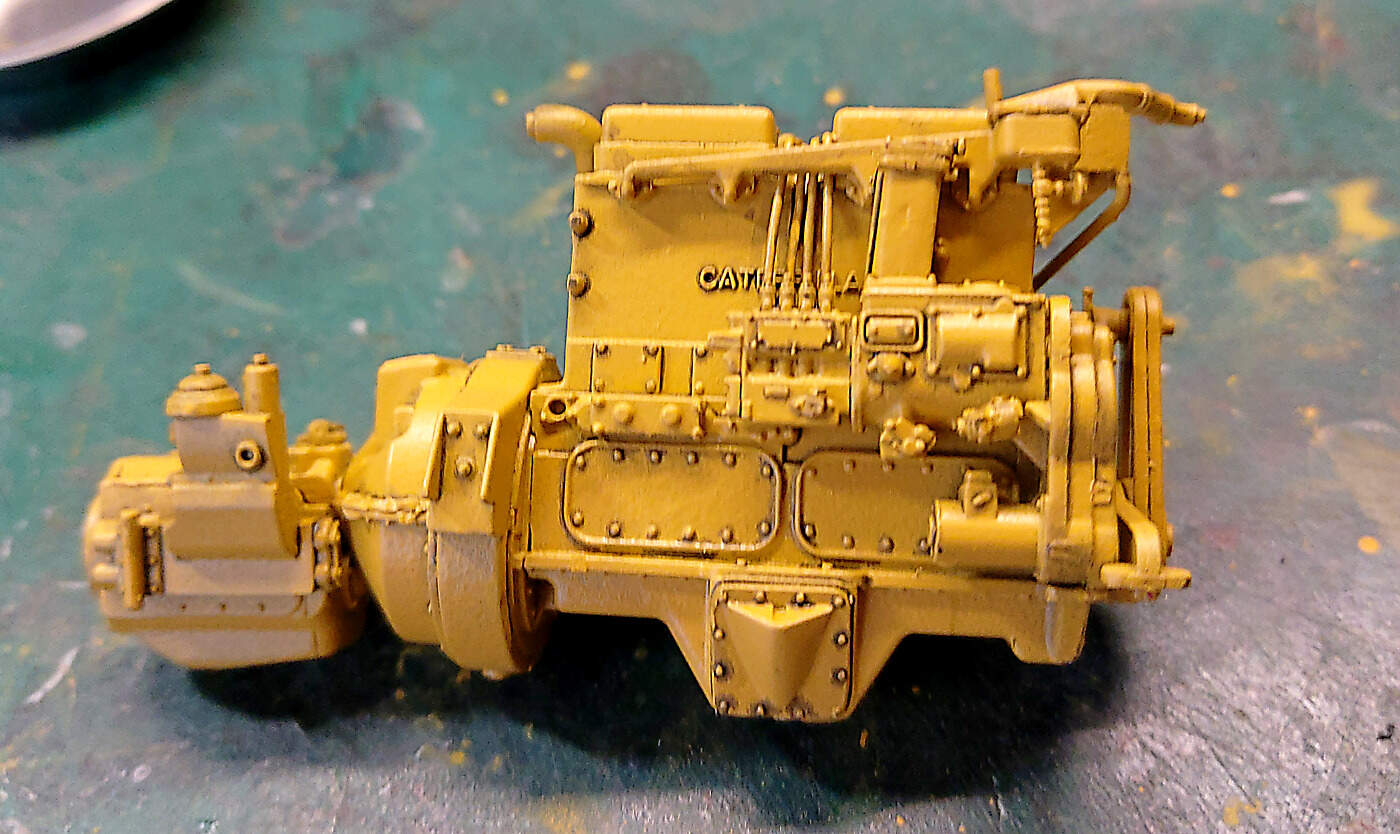
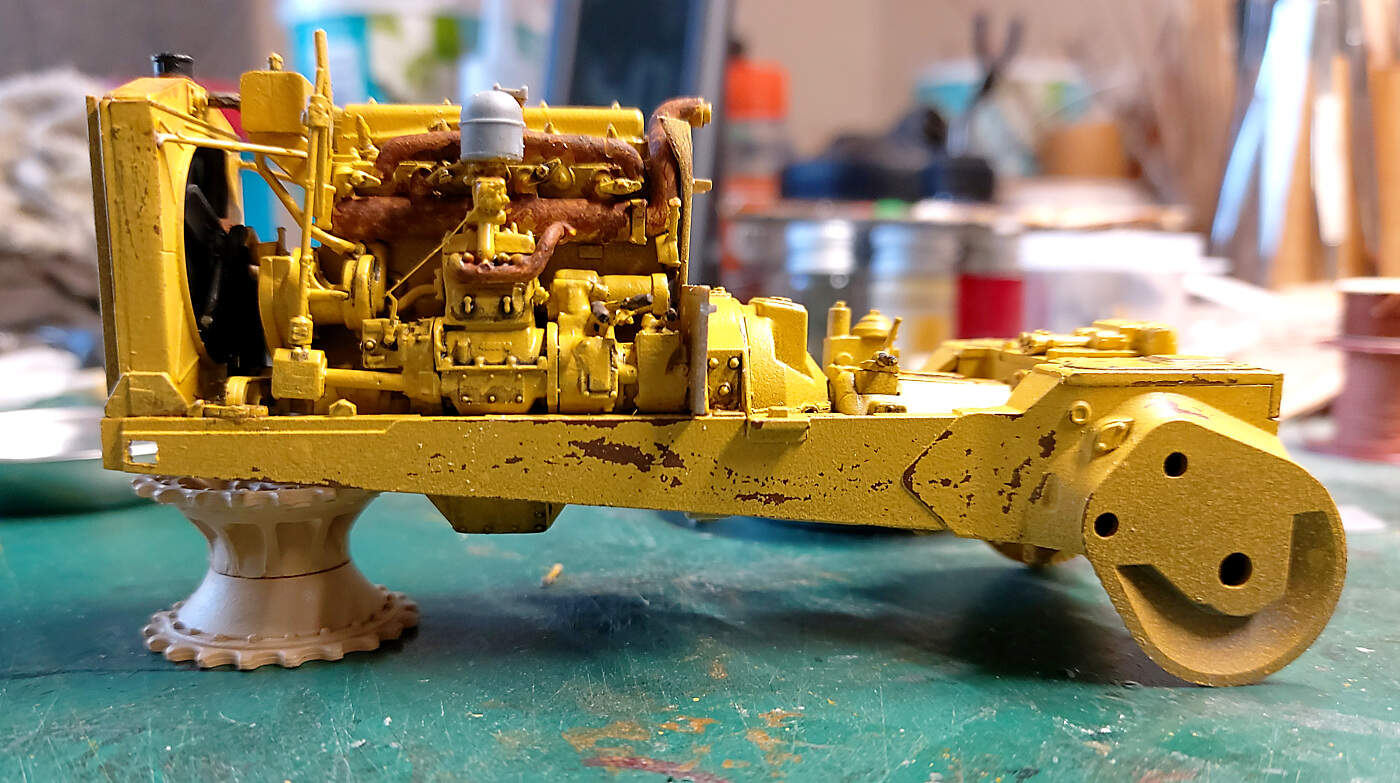
The engine. It’s a great model in itself. Painted and a bit of pin wash. Sorry about the crappy images.
Next step is painting the manifold etc.
bruce
7 Likes
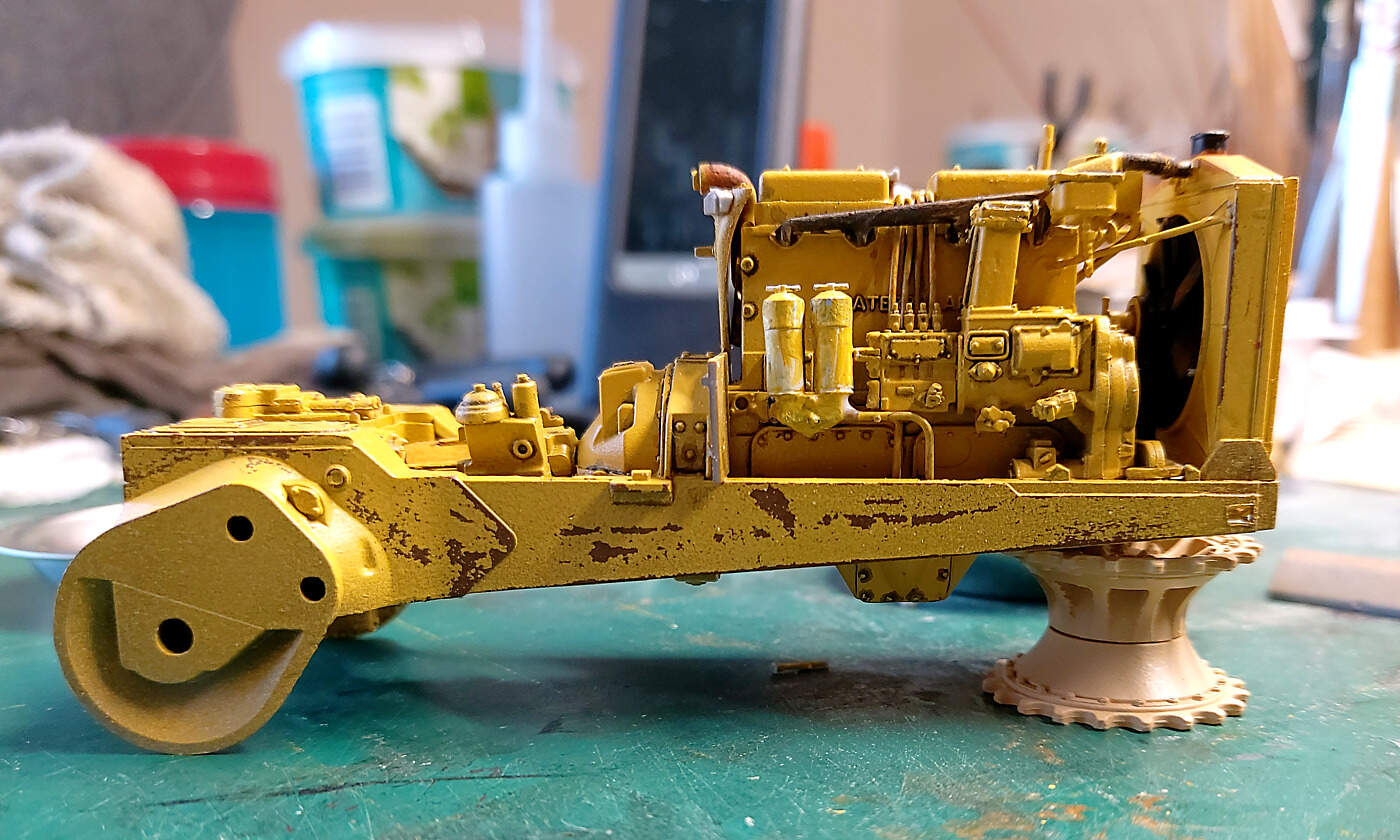
A couple more.
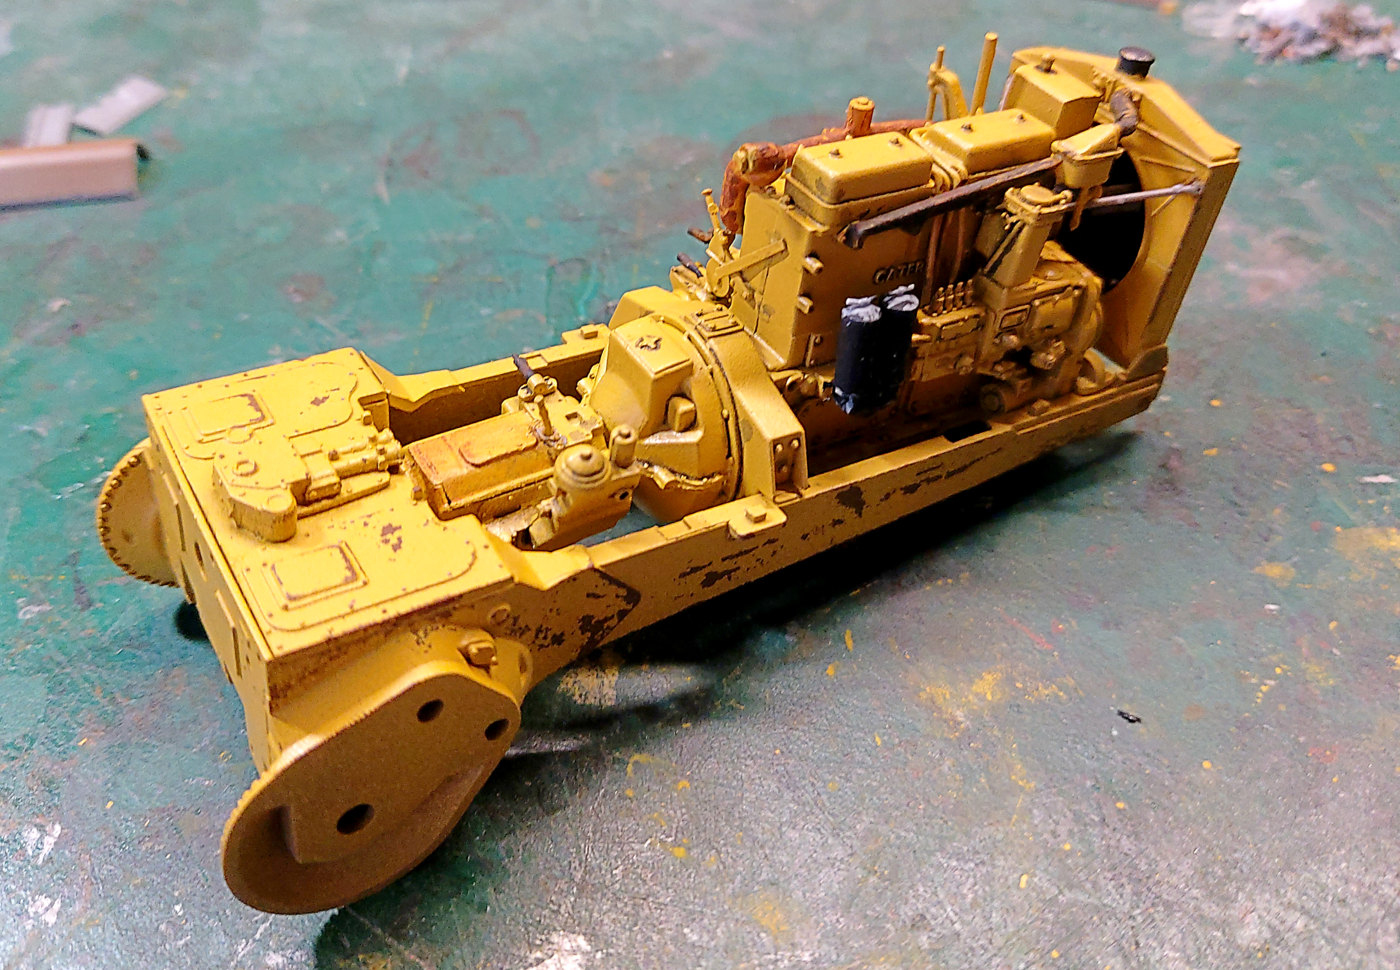
Dry fit of radiator and engine onto the chassis.
Again sorry about the crappy phone photos.
The second image show two lines that have to lineup with the filters and the cooler. Wish me luck!!
bruce

5 Likes
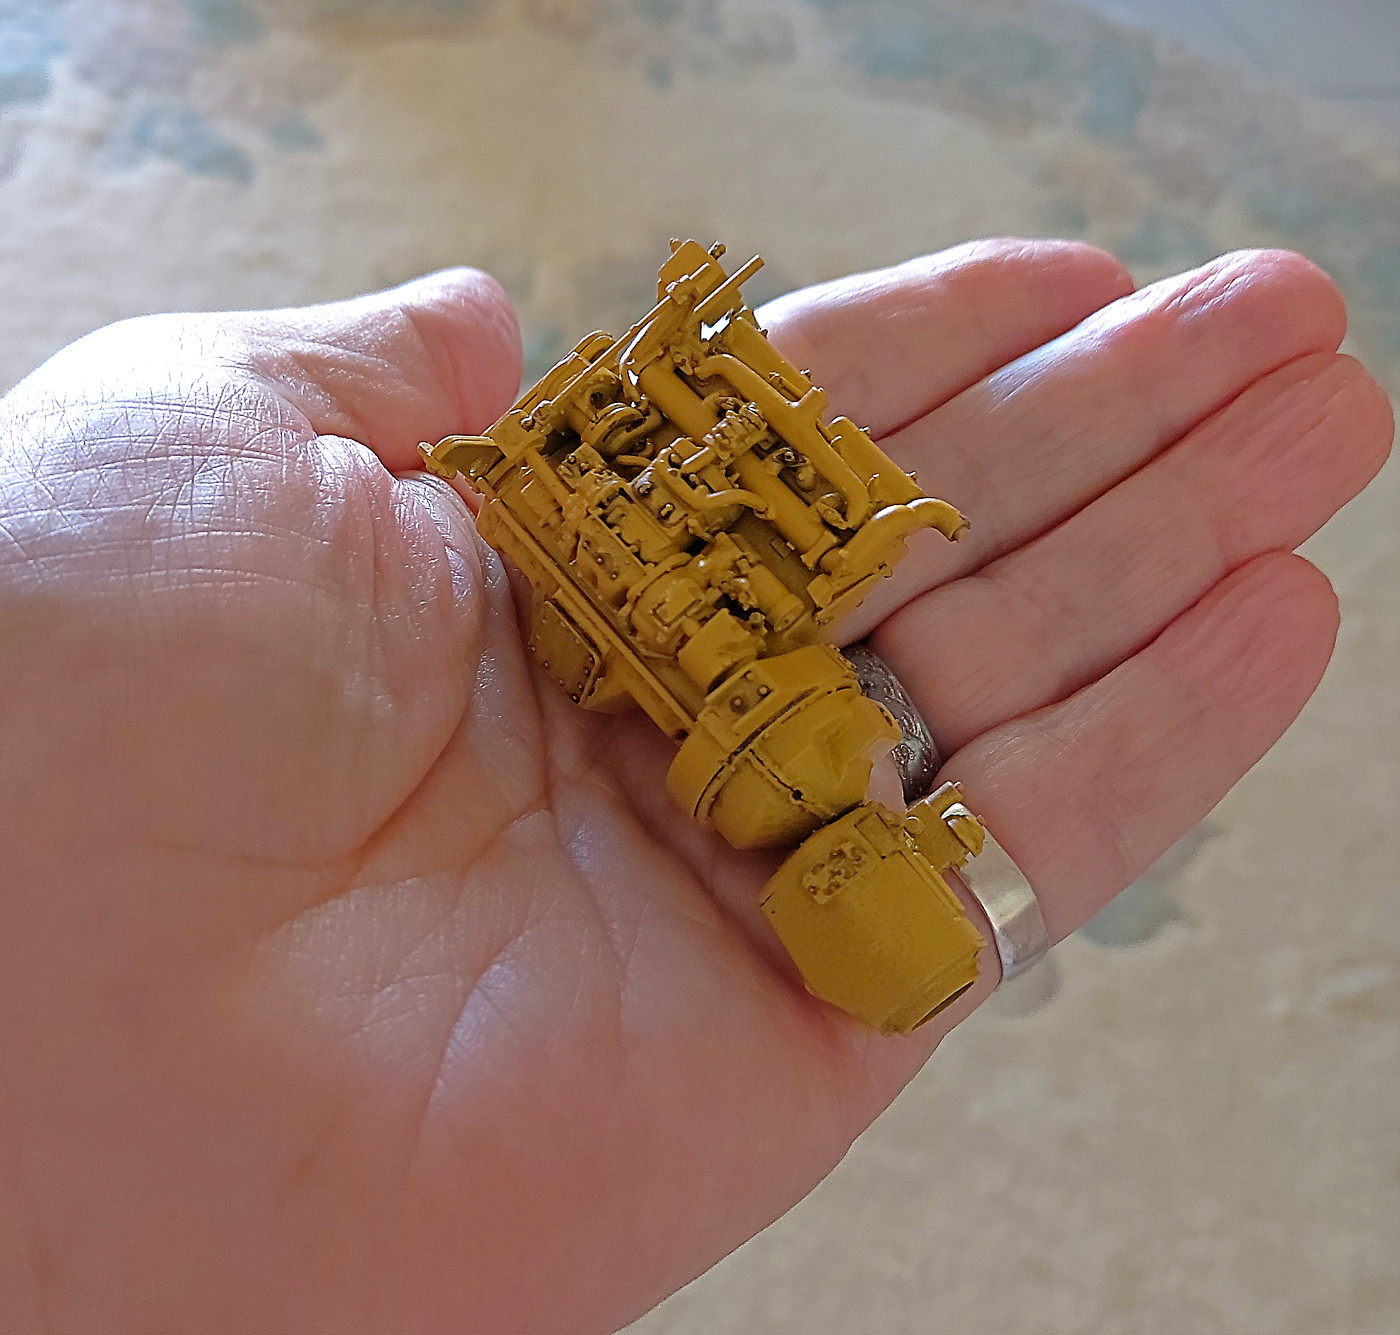
Small stuff on the engine. The red arrow points to a PE part. Linkage on the pony motor. About the size of a large hair!! How they ever make them is beyond me. How folks put them on is amazing. I got very very lucky with this one. Went on first try after an eternity of “will I or wont I?” Next step are the oil cooling lines underneath.
It’s a shame to dirty it up. But hey diesel engines are dirty oily things. Aren’t they?
I’m tempted to buy another of these kits just for the engine.
bruce

6 Likes
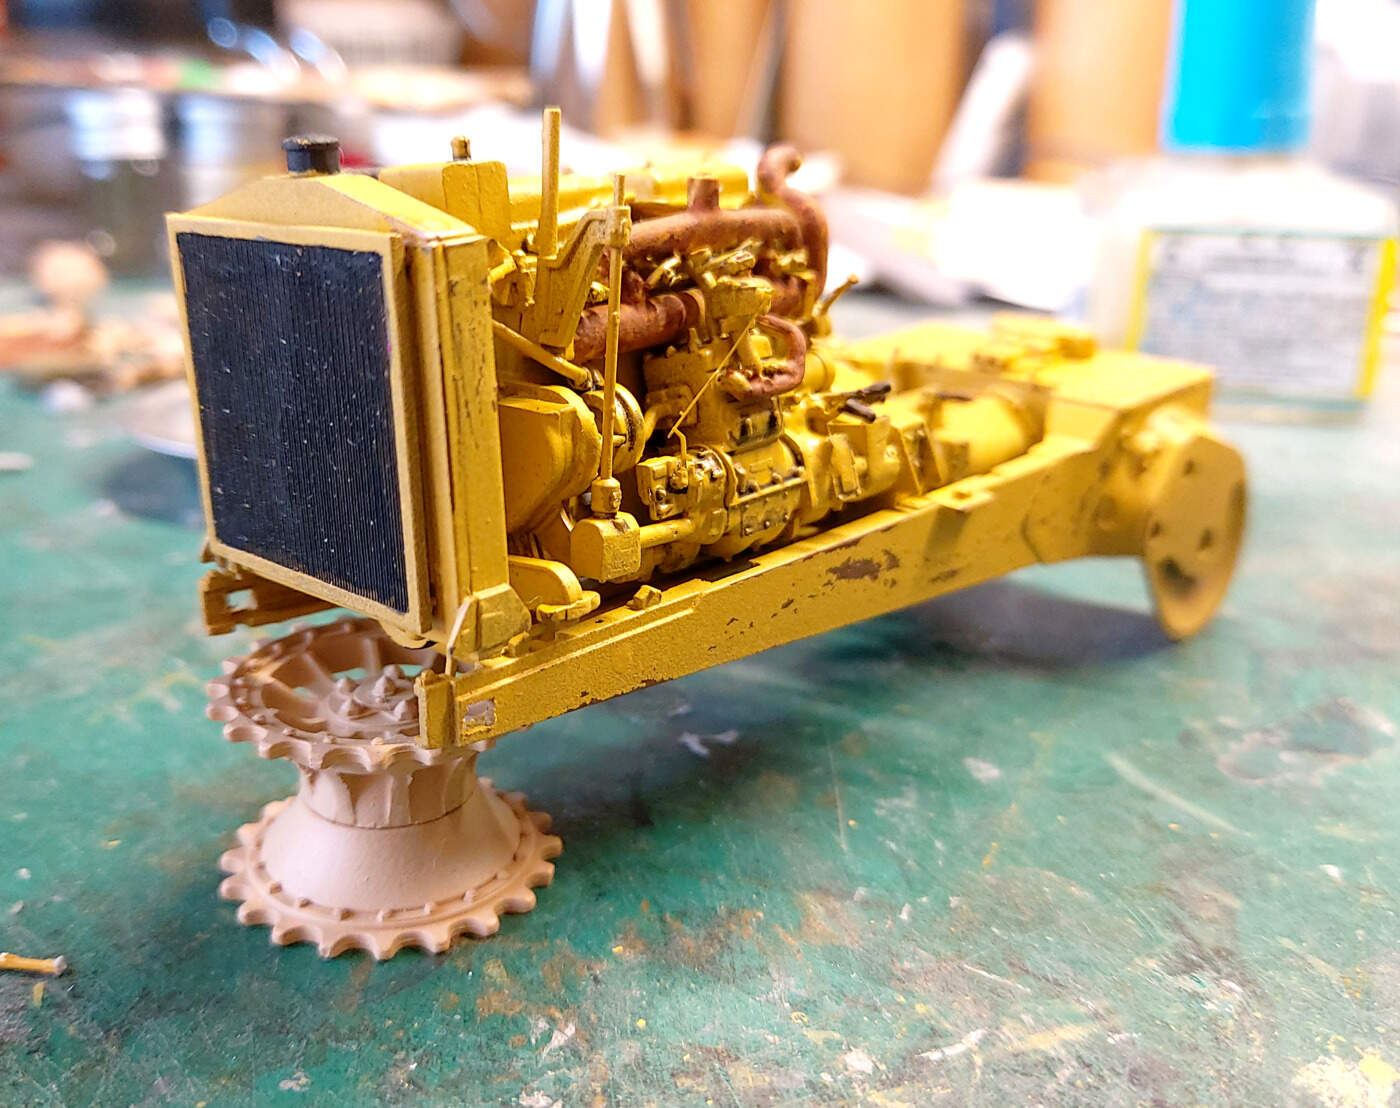
Couple more images. I’ve just noticed the amount the radiator is leaning forward. Hmmmmmm. But not to worry. I checked and it’s the camera lens distortion. Pheww!
Note the oil lines underneath. They are both very fine plastic pieces. But they line up perfectly.
A few more parts to paint and weather.
It has been a fun build. Many negative reviews on the web but I haven’t found any real issues. YET.
Lots of small parts but the engine alone is worth it. I’m thinking of getting another kit and building just the engine for display. Crazy?
bruce
5 Likes