Hi all - something out of my comfort zone.
I largely model aircraft so not certain if this belongs in Armor or Automotive so mods feel free to move
it .
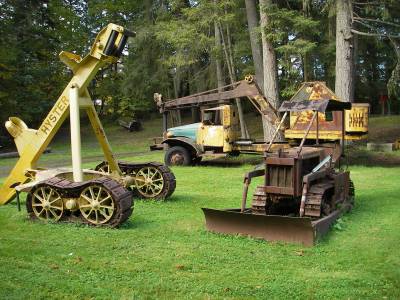
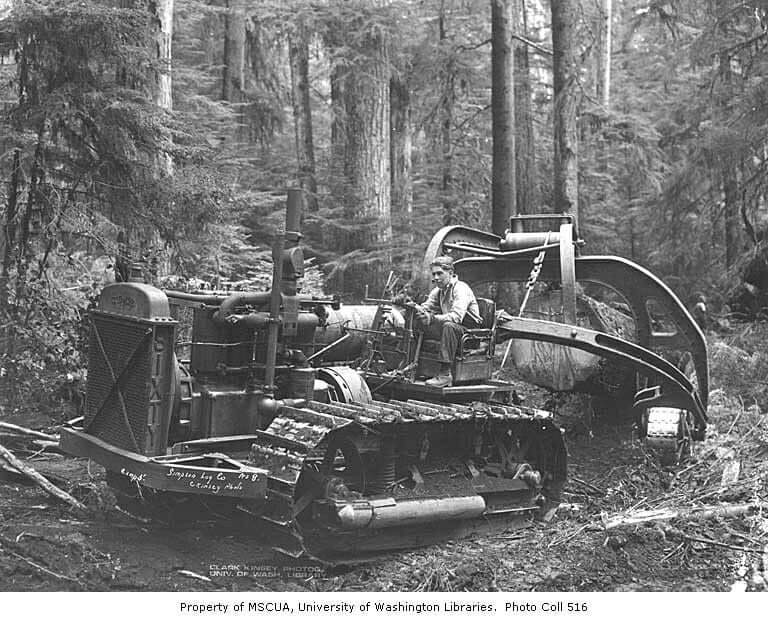
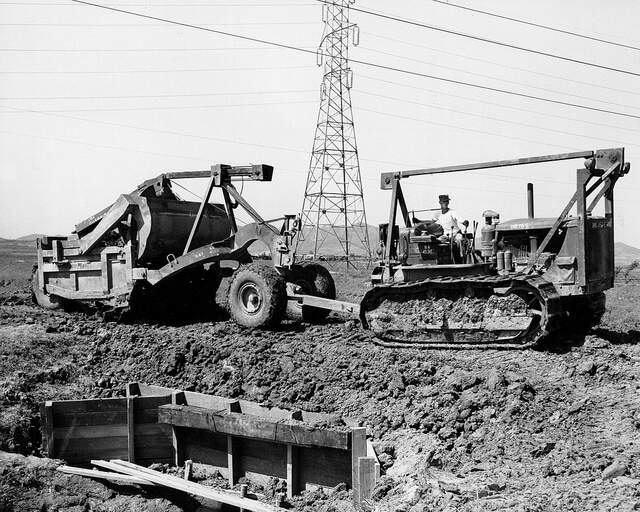
I started the Miniart D7 with cable blade a few years ago and then shelved it after building most of the base machine . Picking it up again I want to make a logging machine with a tracked arch for skidding
( dragging) logs . To that end I purchased a second kit with the needed towing winch .
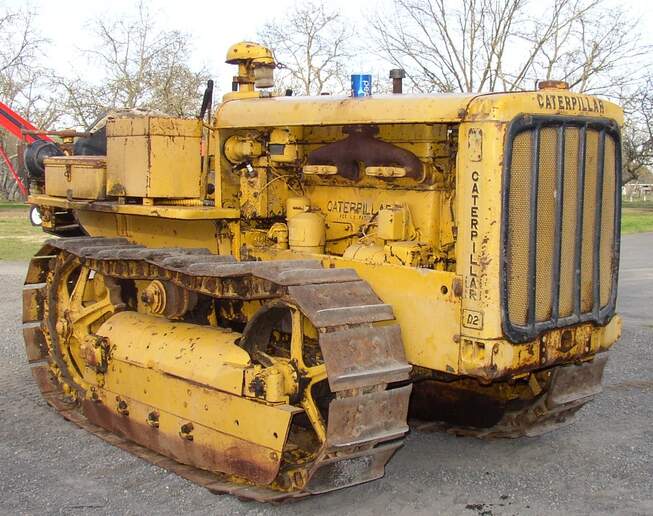
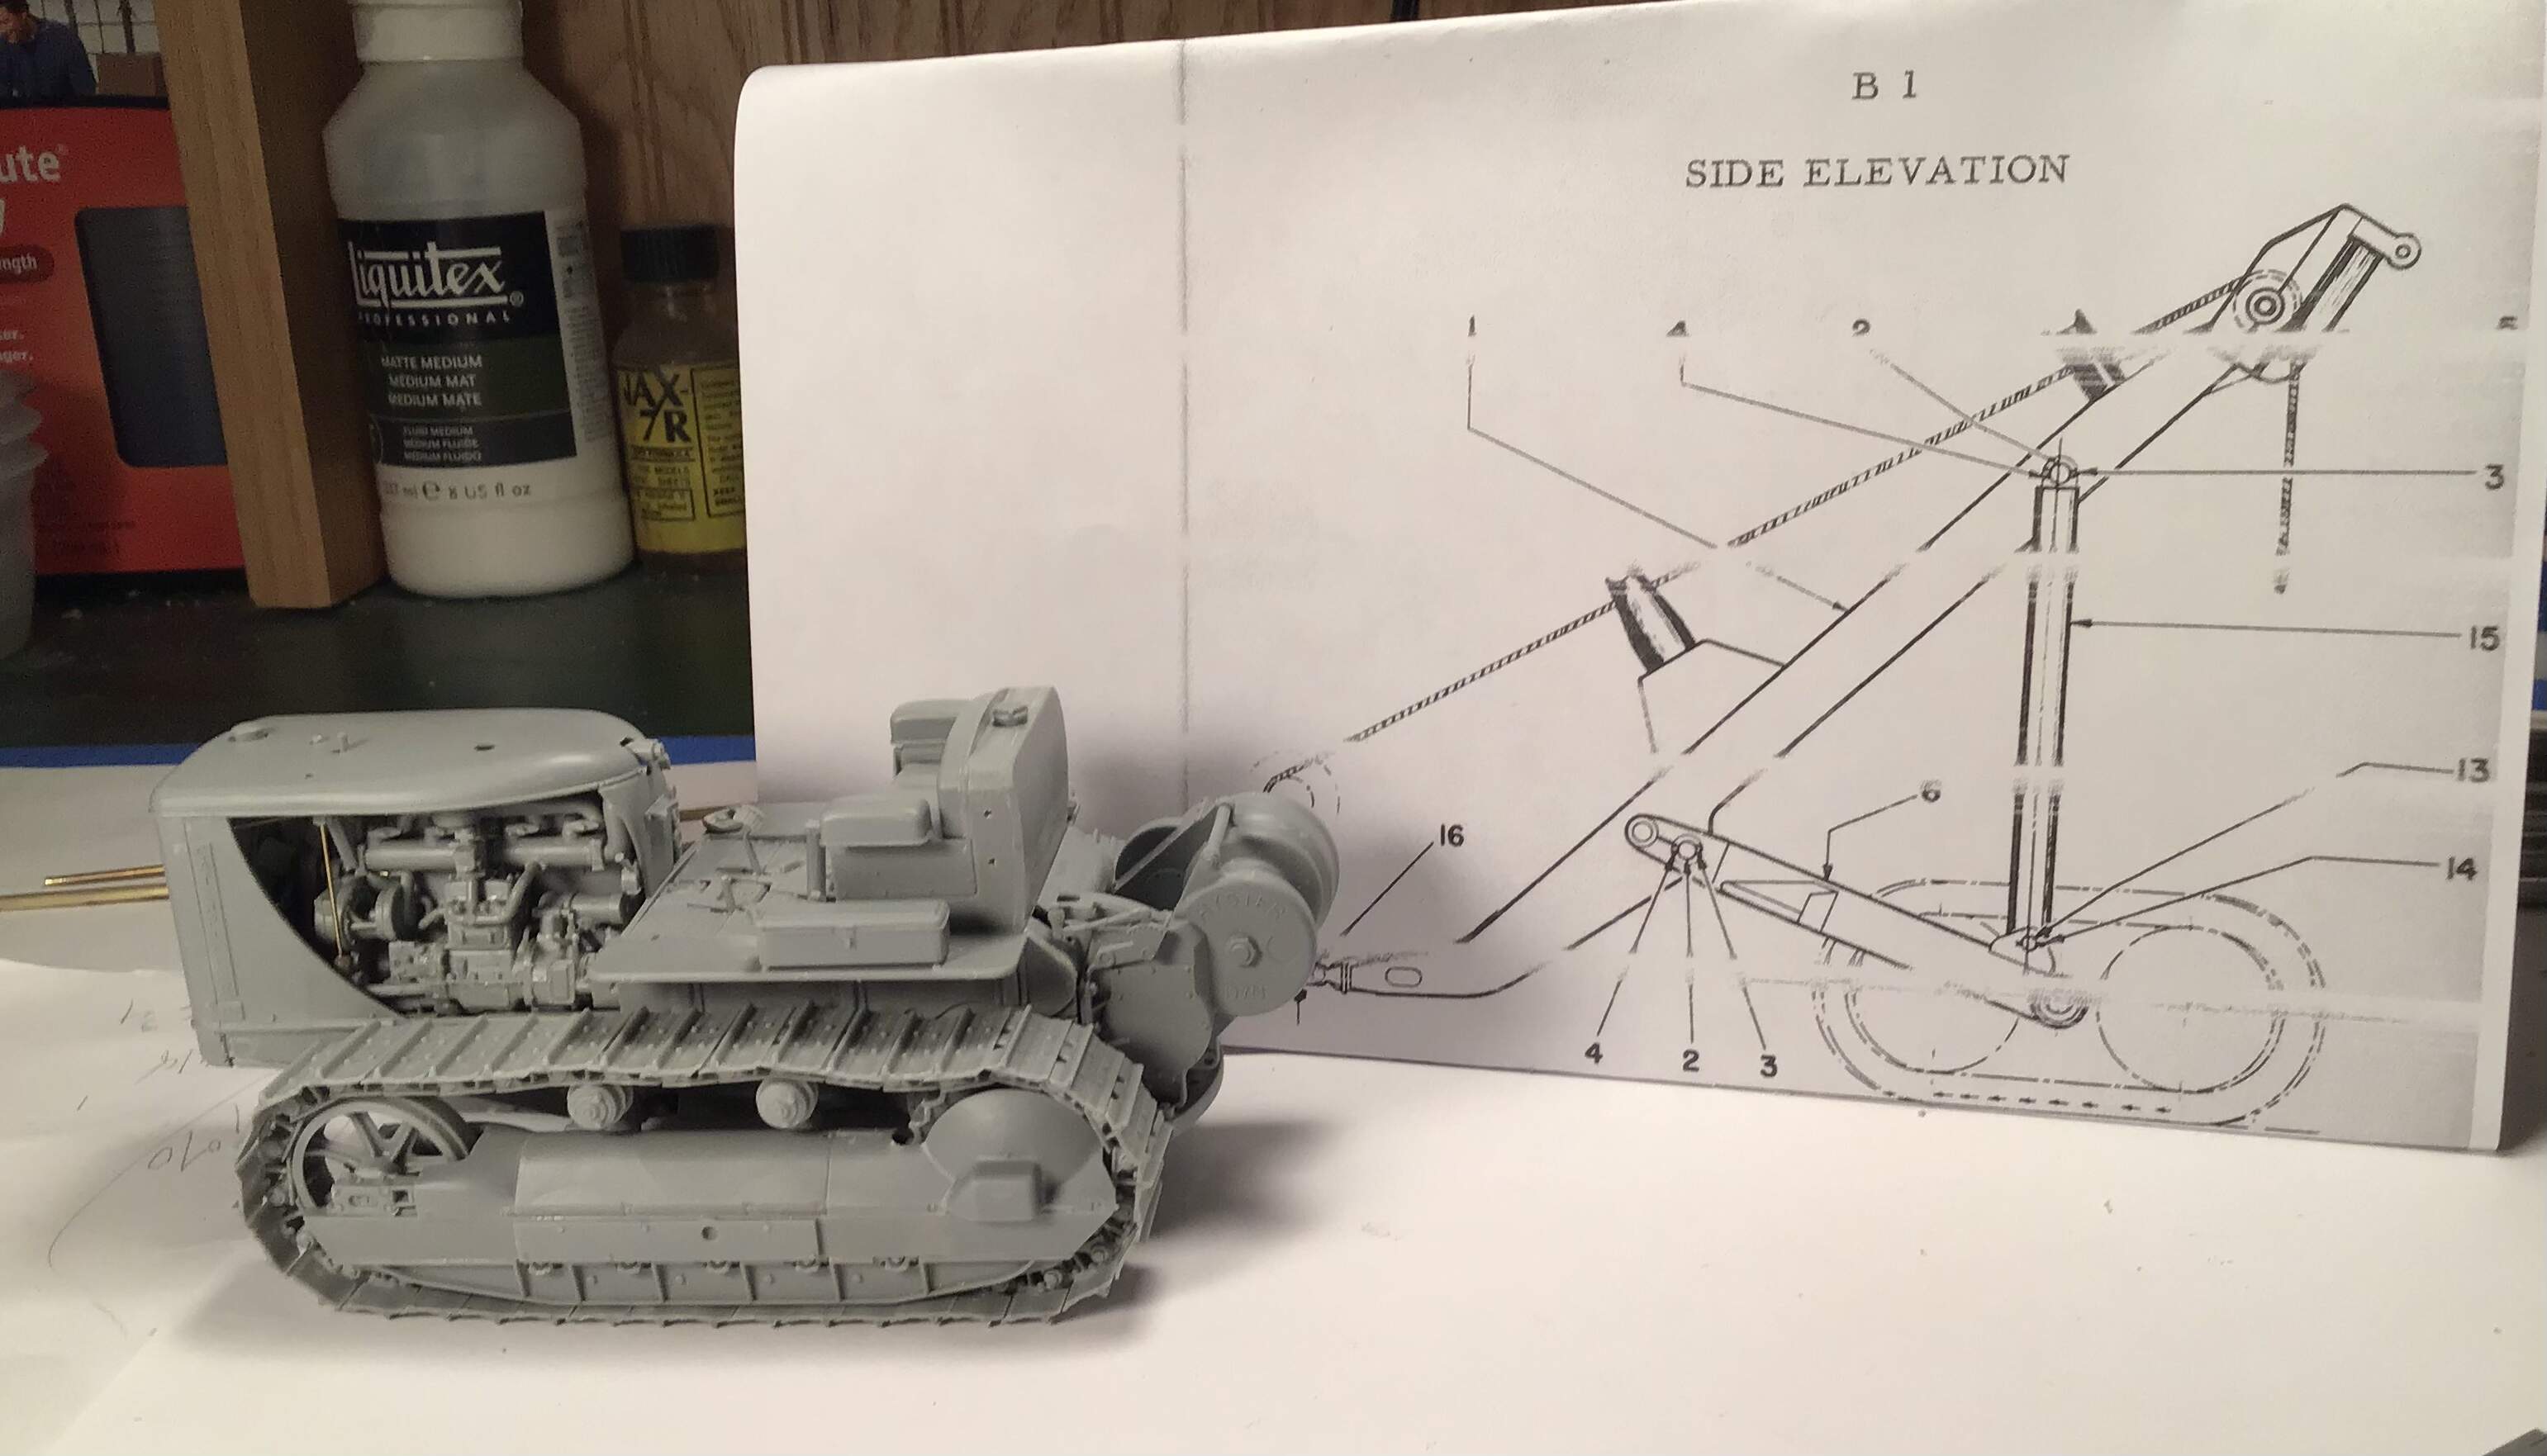
I plan on leaving the blade off - a “ wheel cat “ in logger’s terms apparently a machine dedicated to skidding logs . I want to scratch an arched roof like this one -
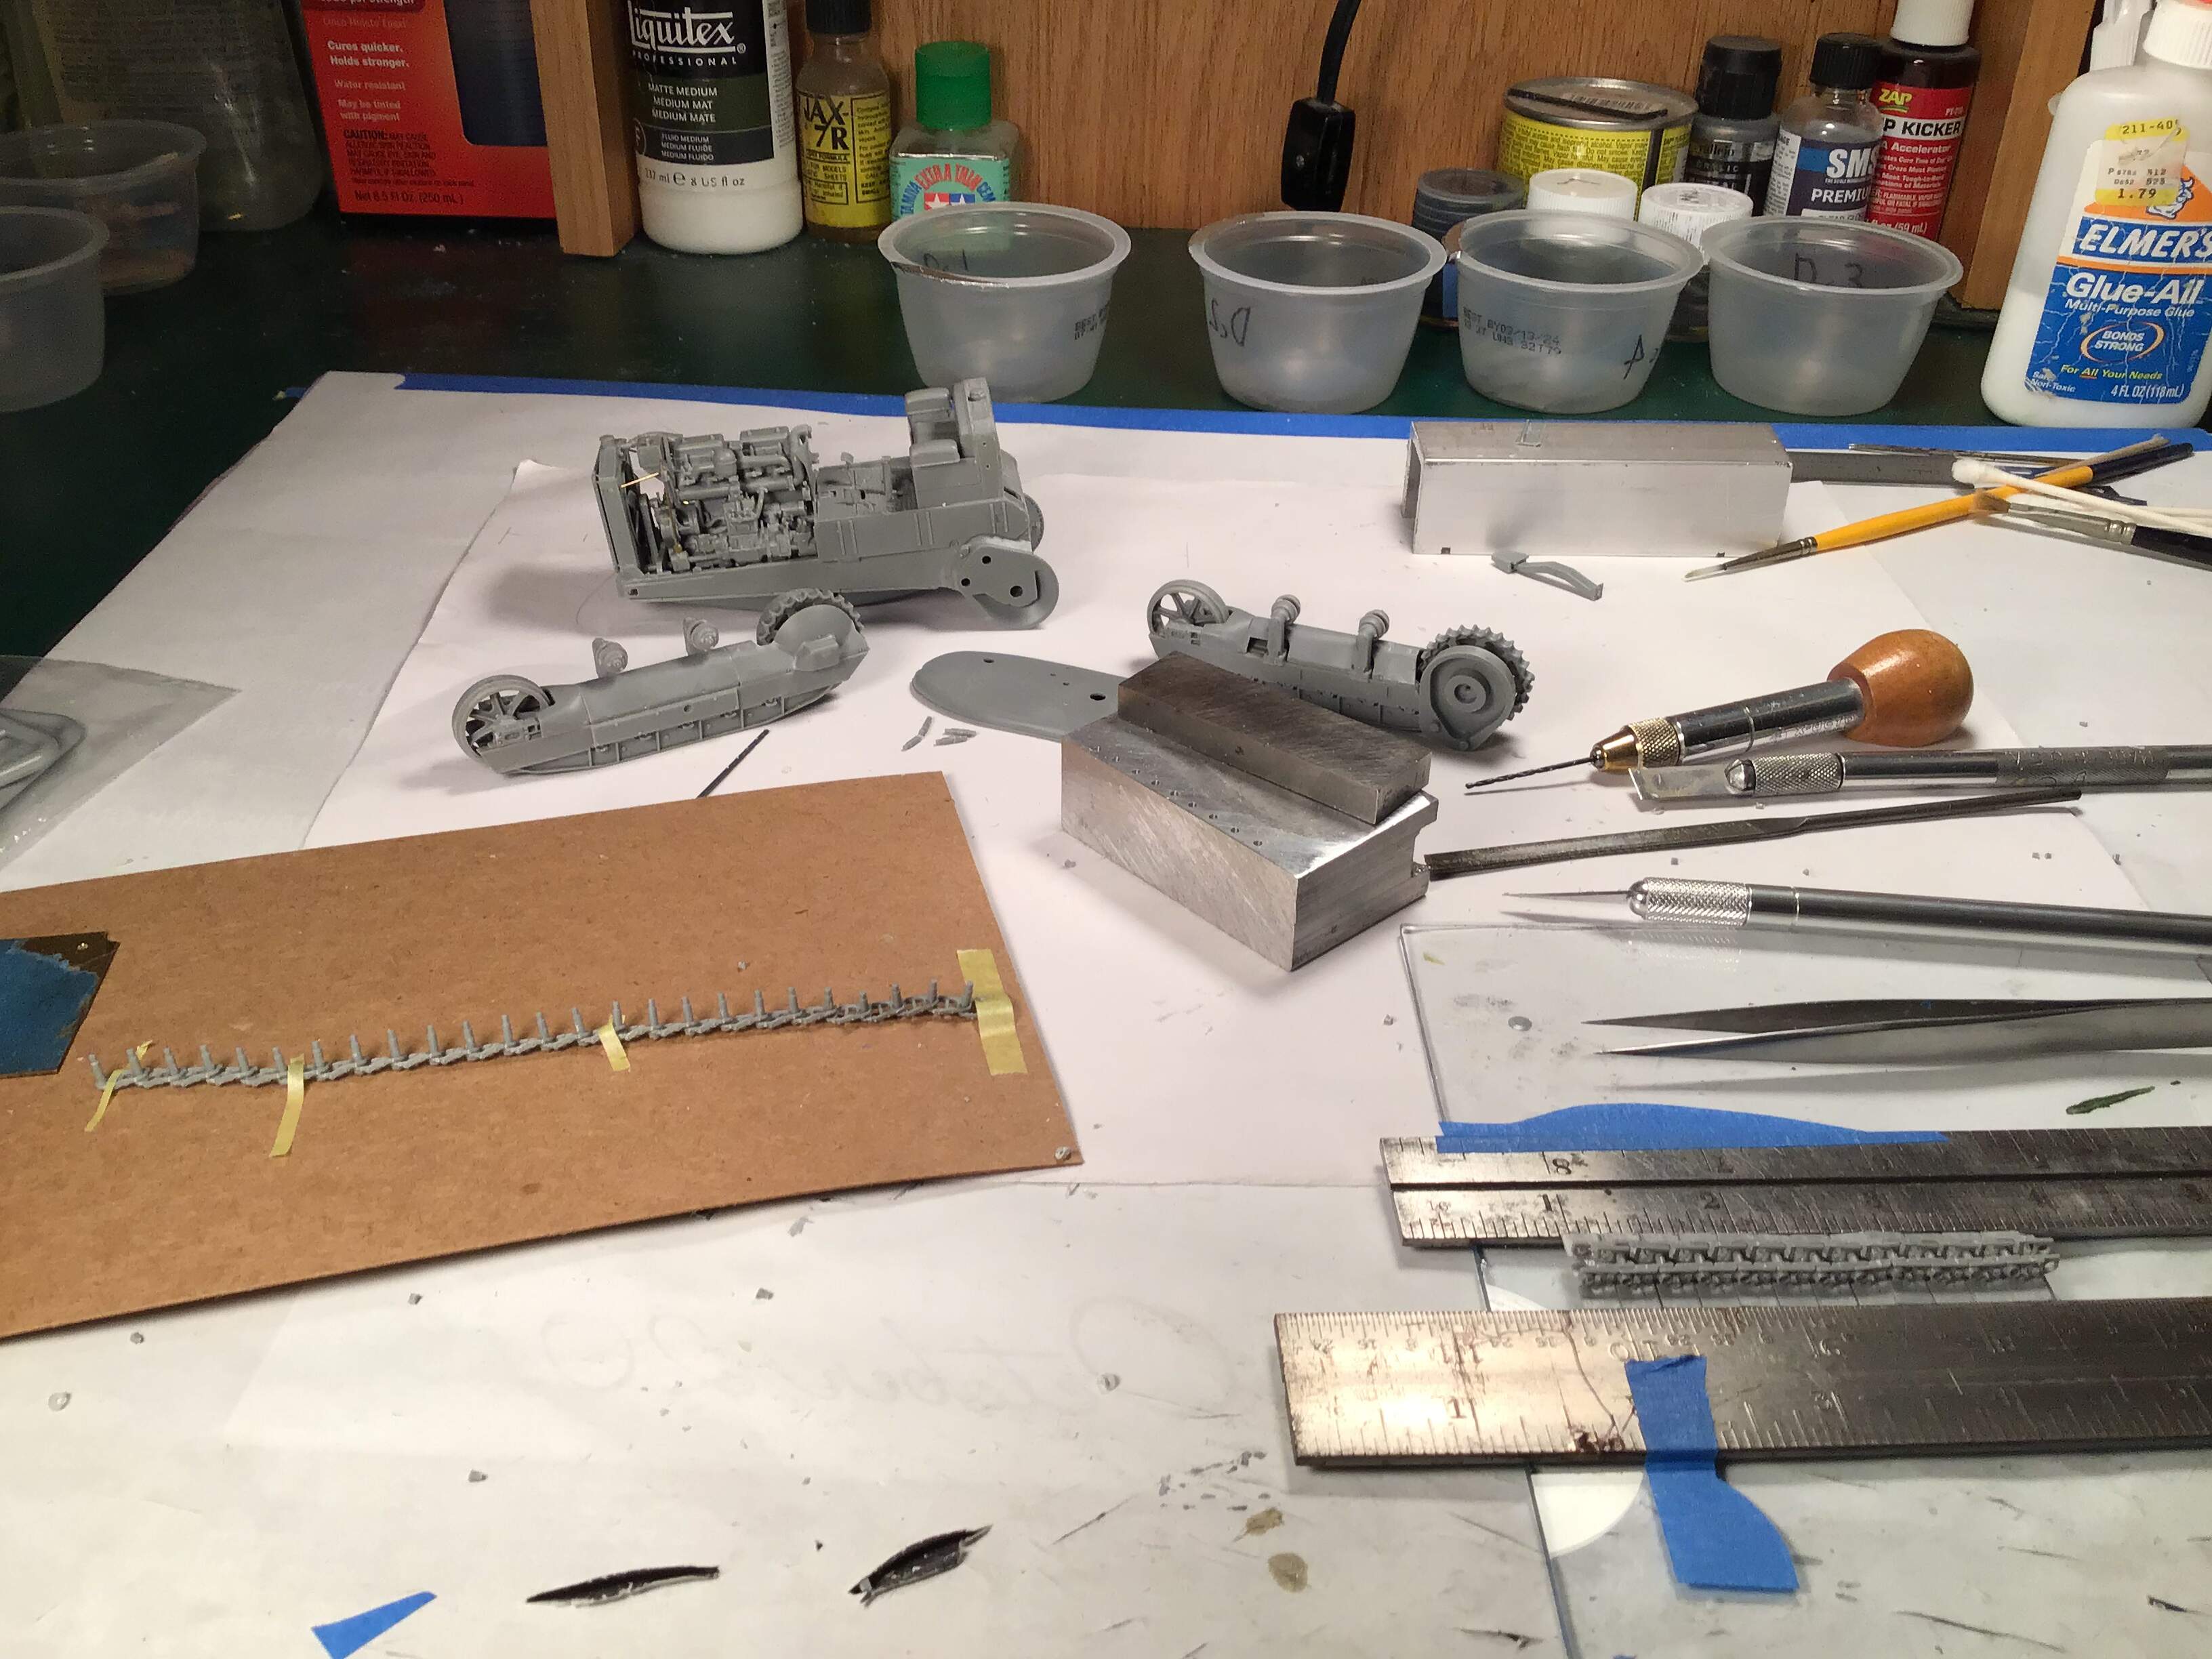
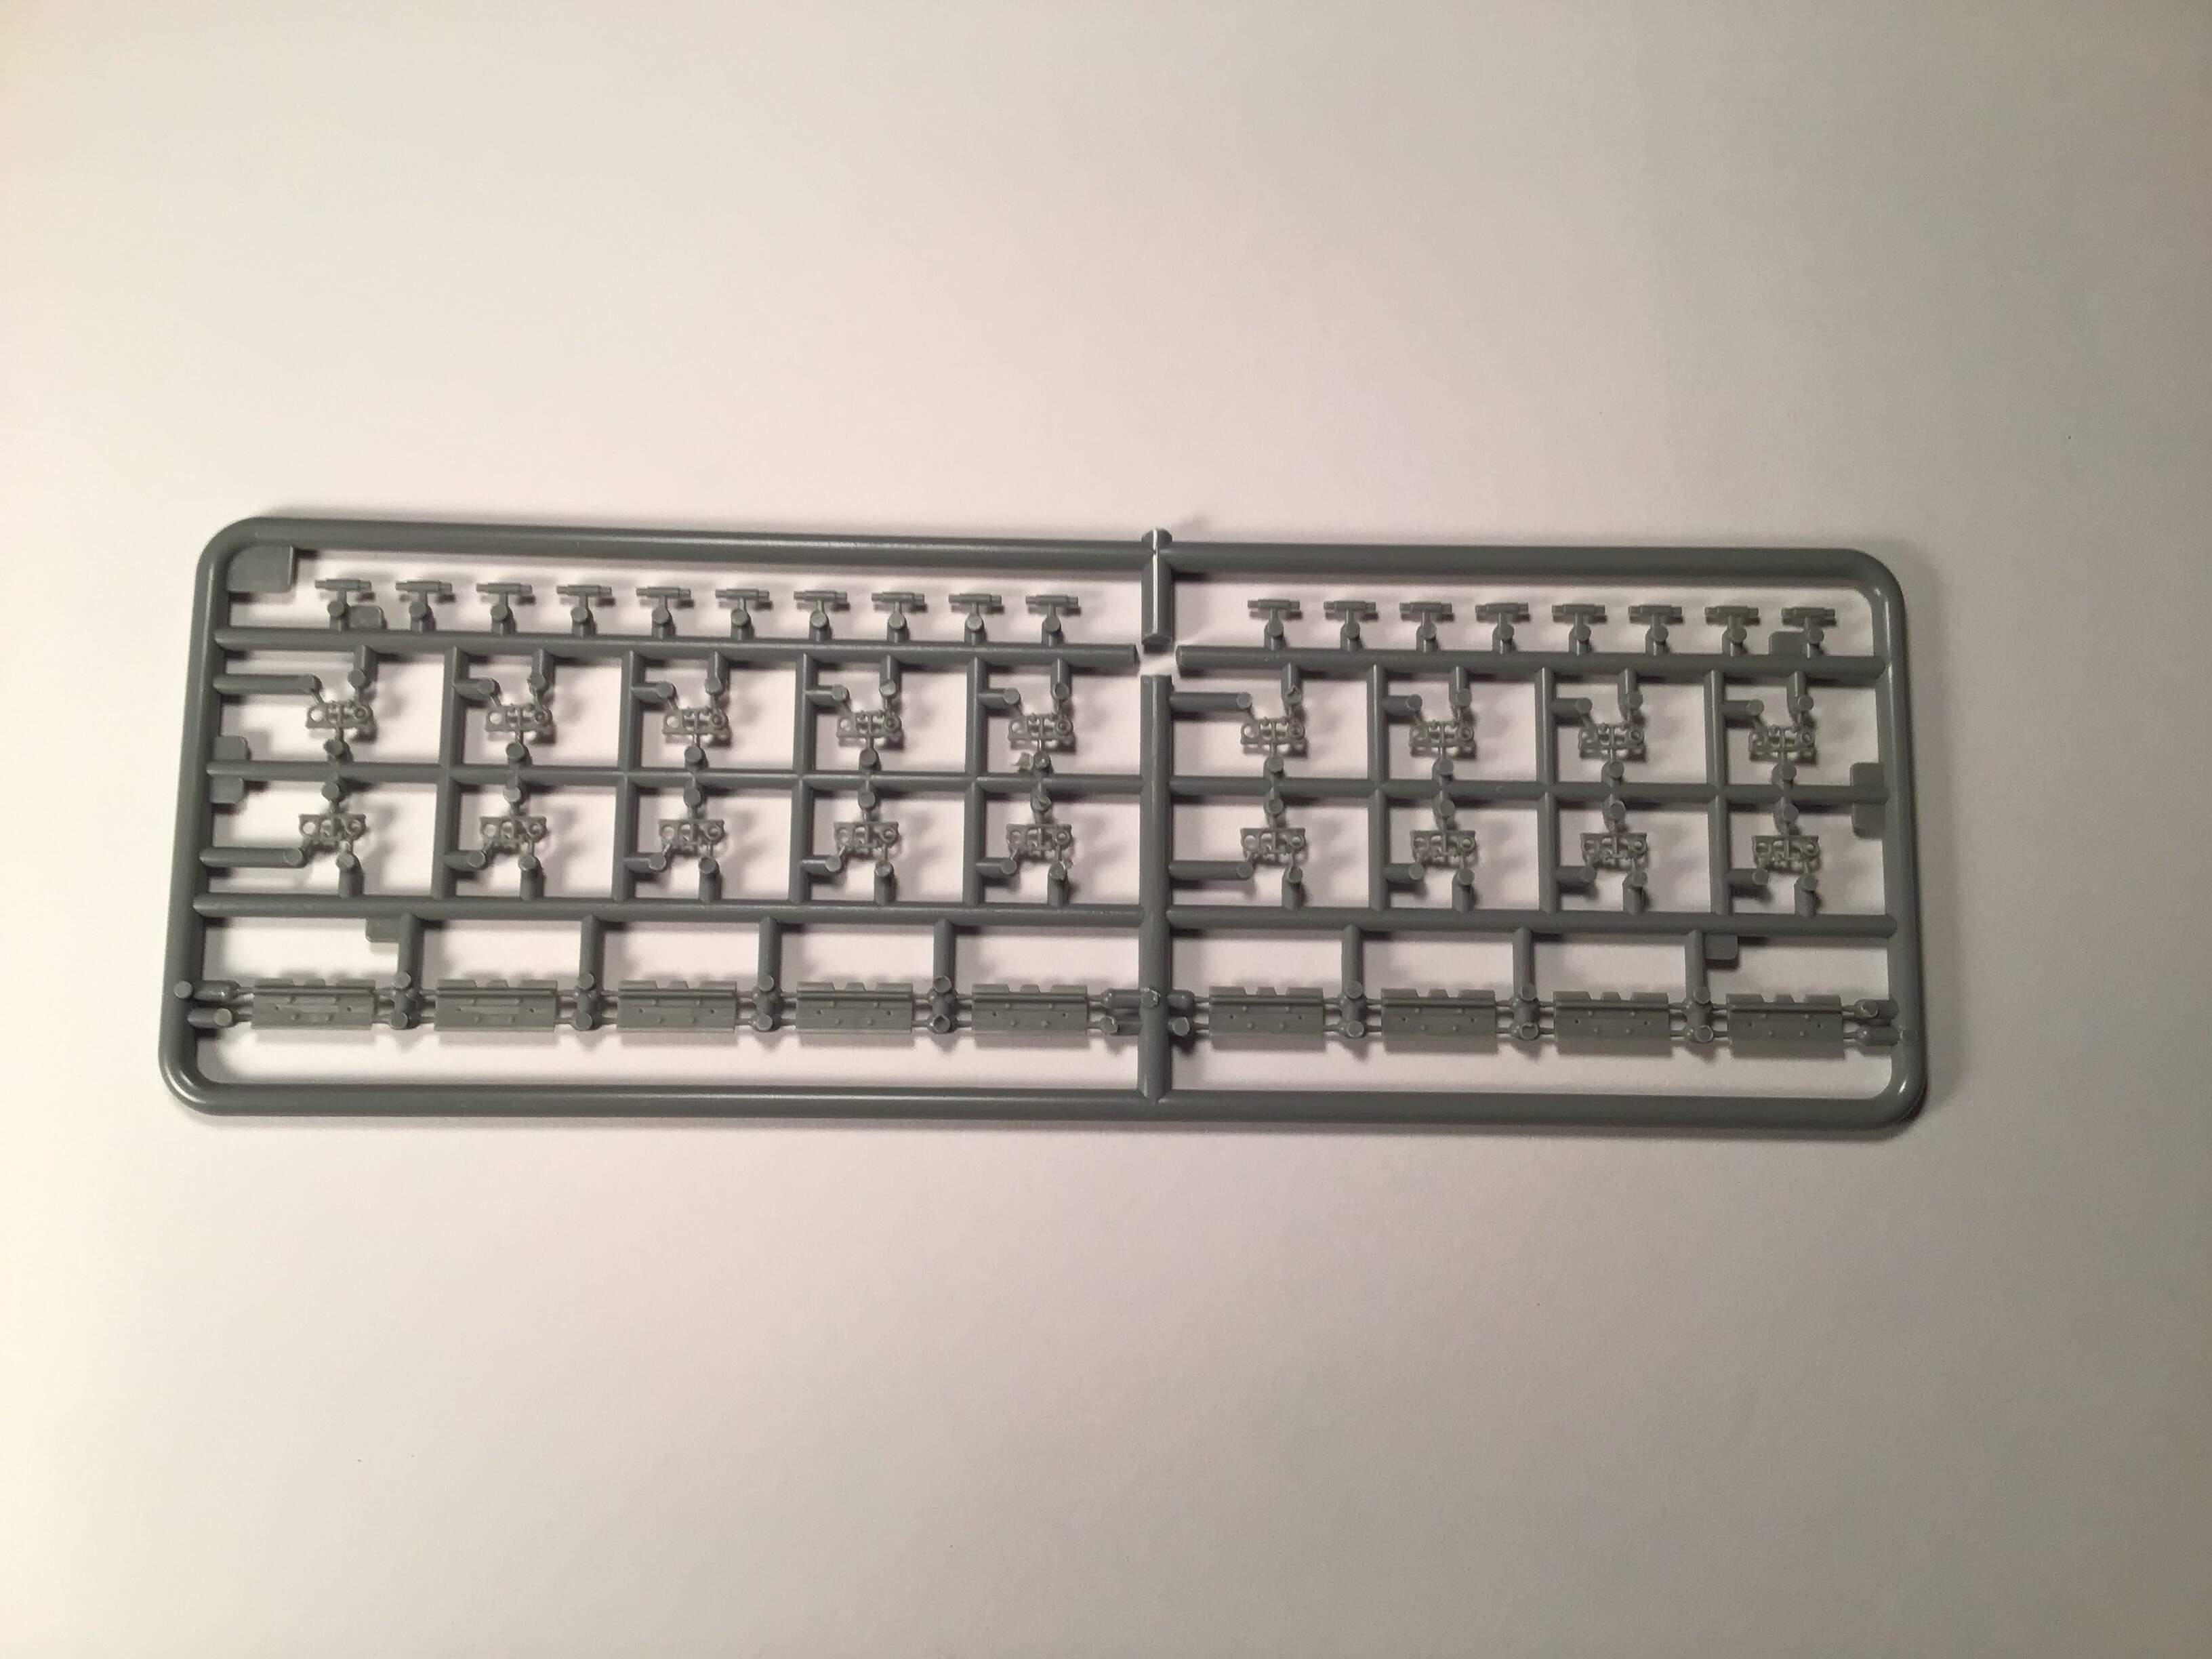
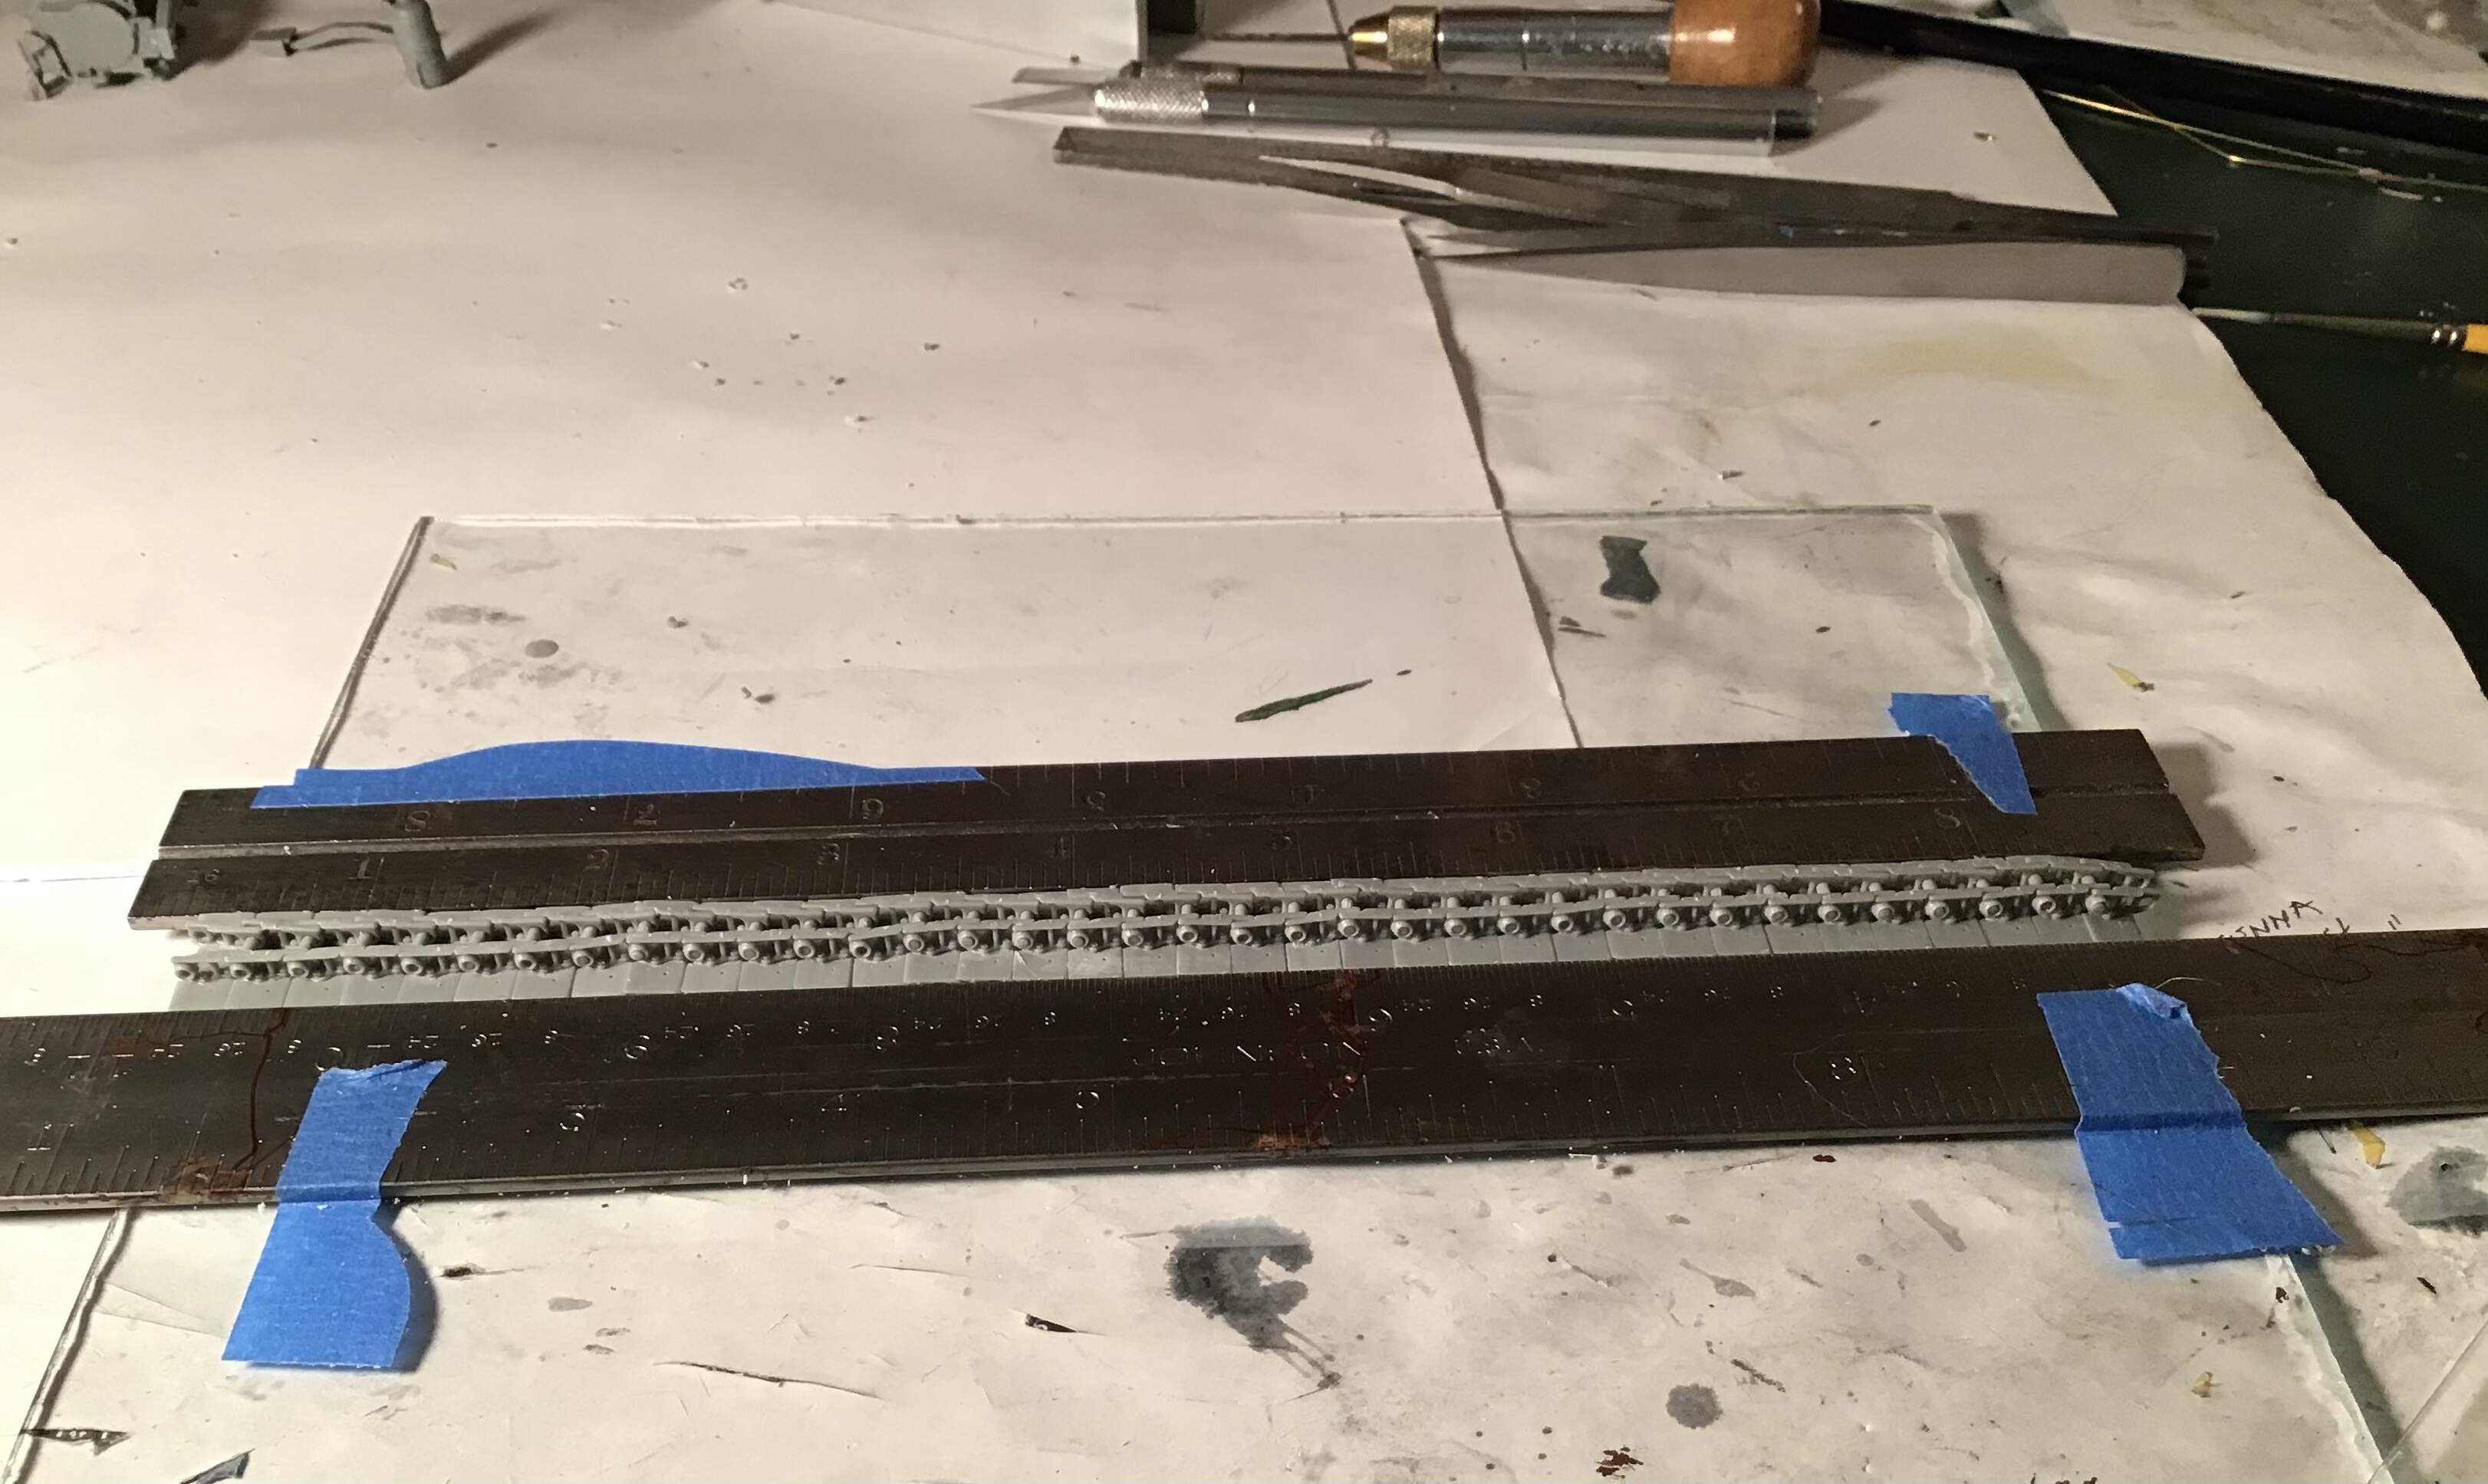
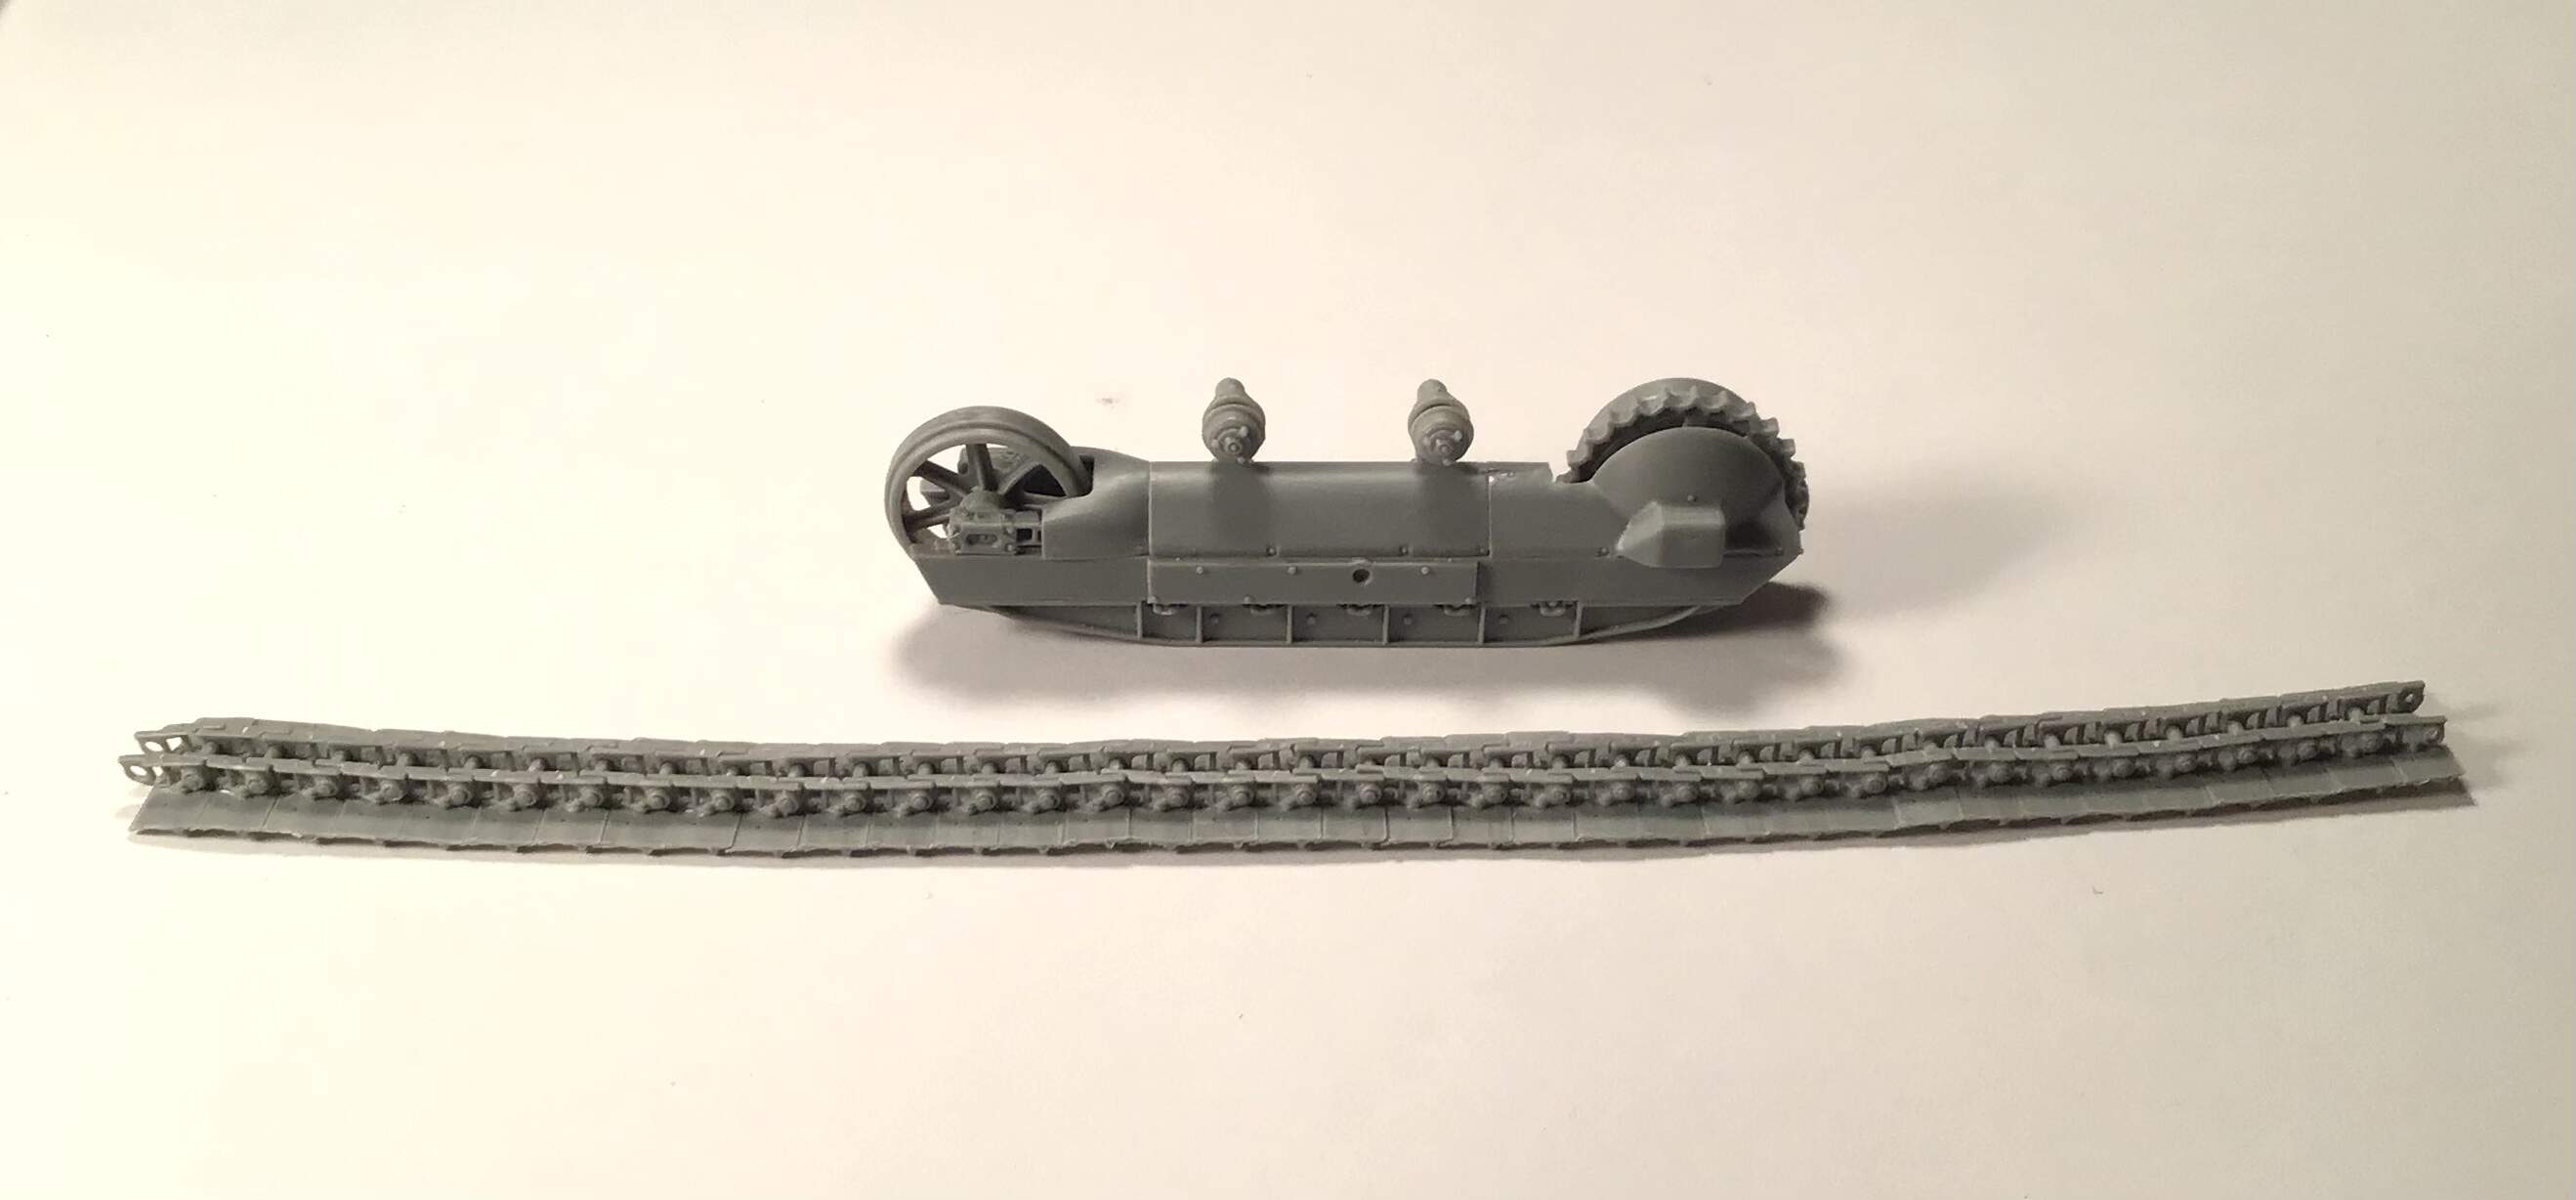
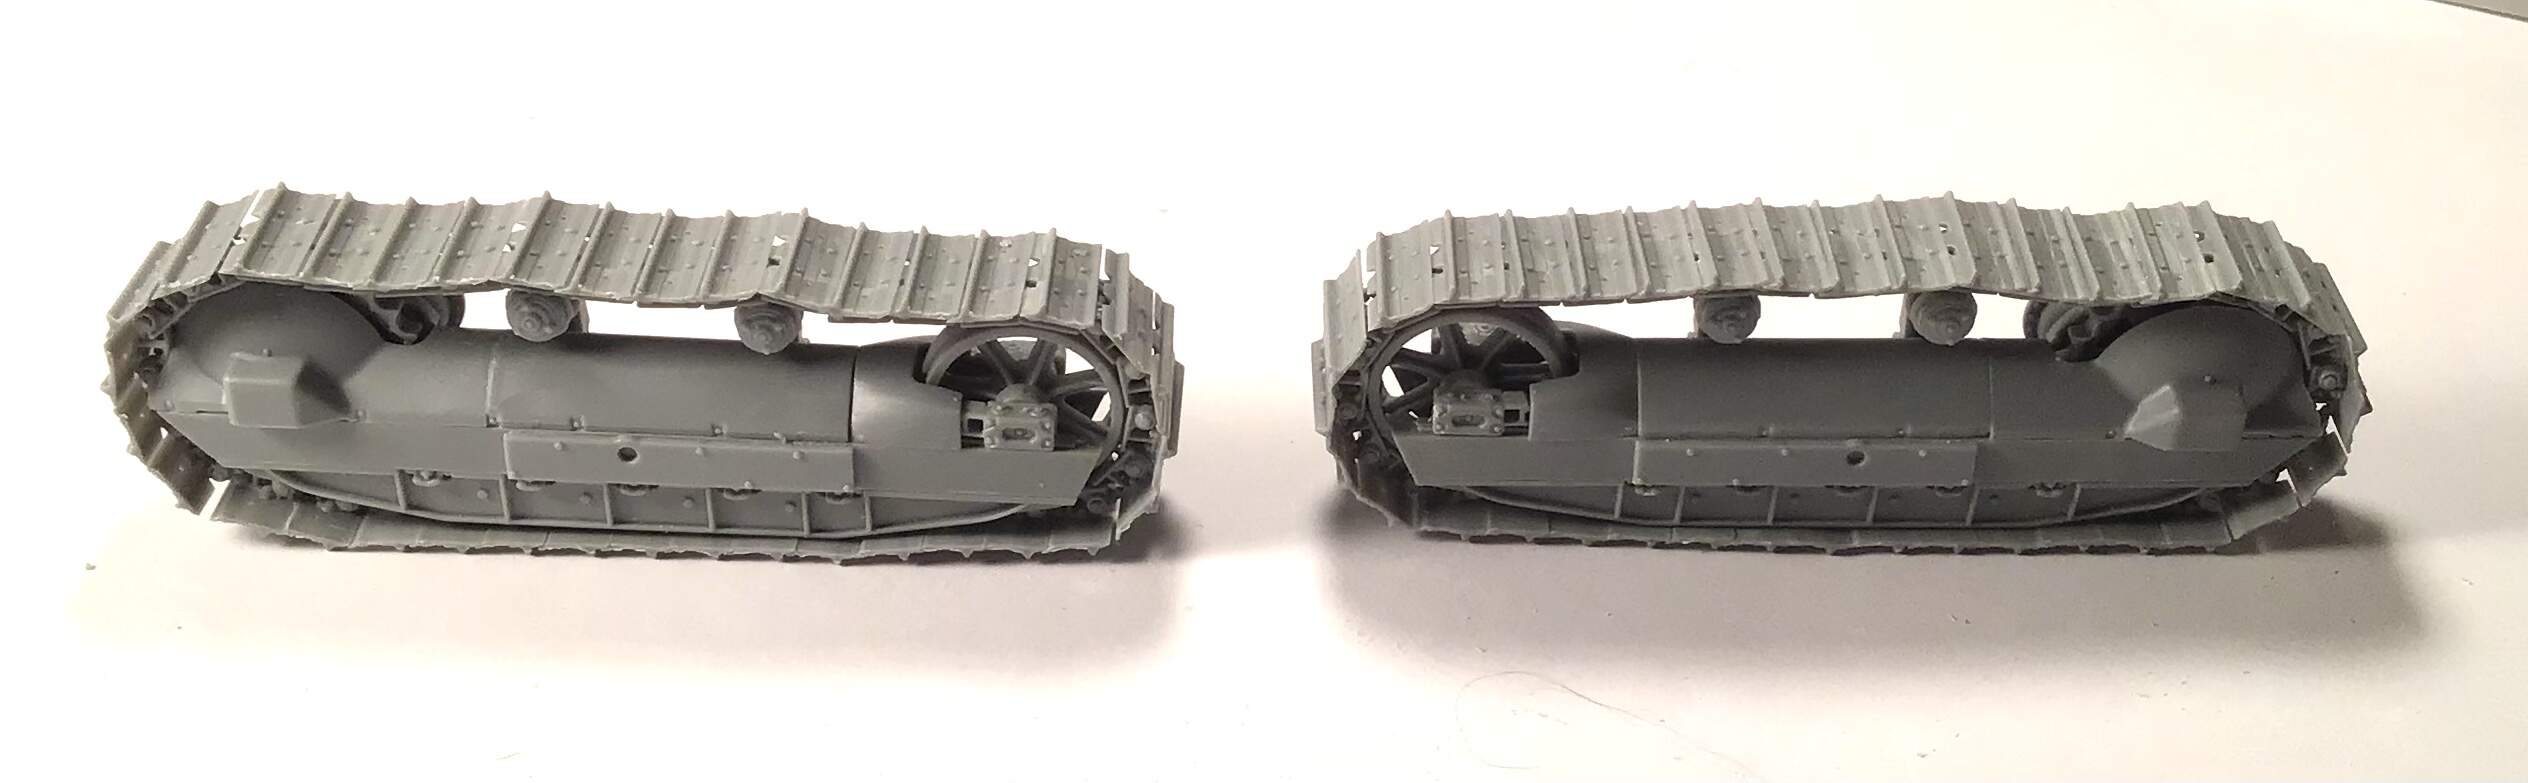
I’ve built up one set of tracks - each link is made up of 4 pieces . Track shoe , two guides and a pin . 36 links per side so one set is 144 pieces. Don’t know how you armor guys do this on a regular basis. It is supposed to be fun , right ?
Miniart gives you 8 of these sprues .
Twice the amount of pins you will need but no spares for the other components. I think someone goofed when laying out the sprues.
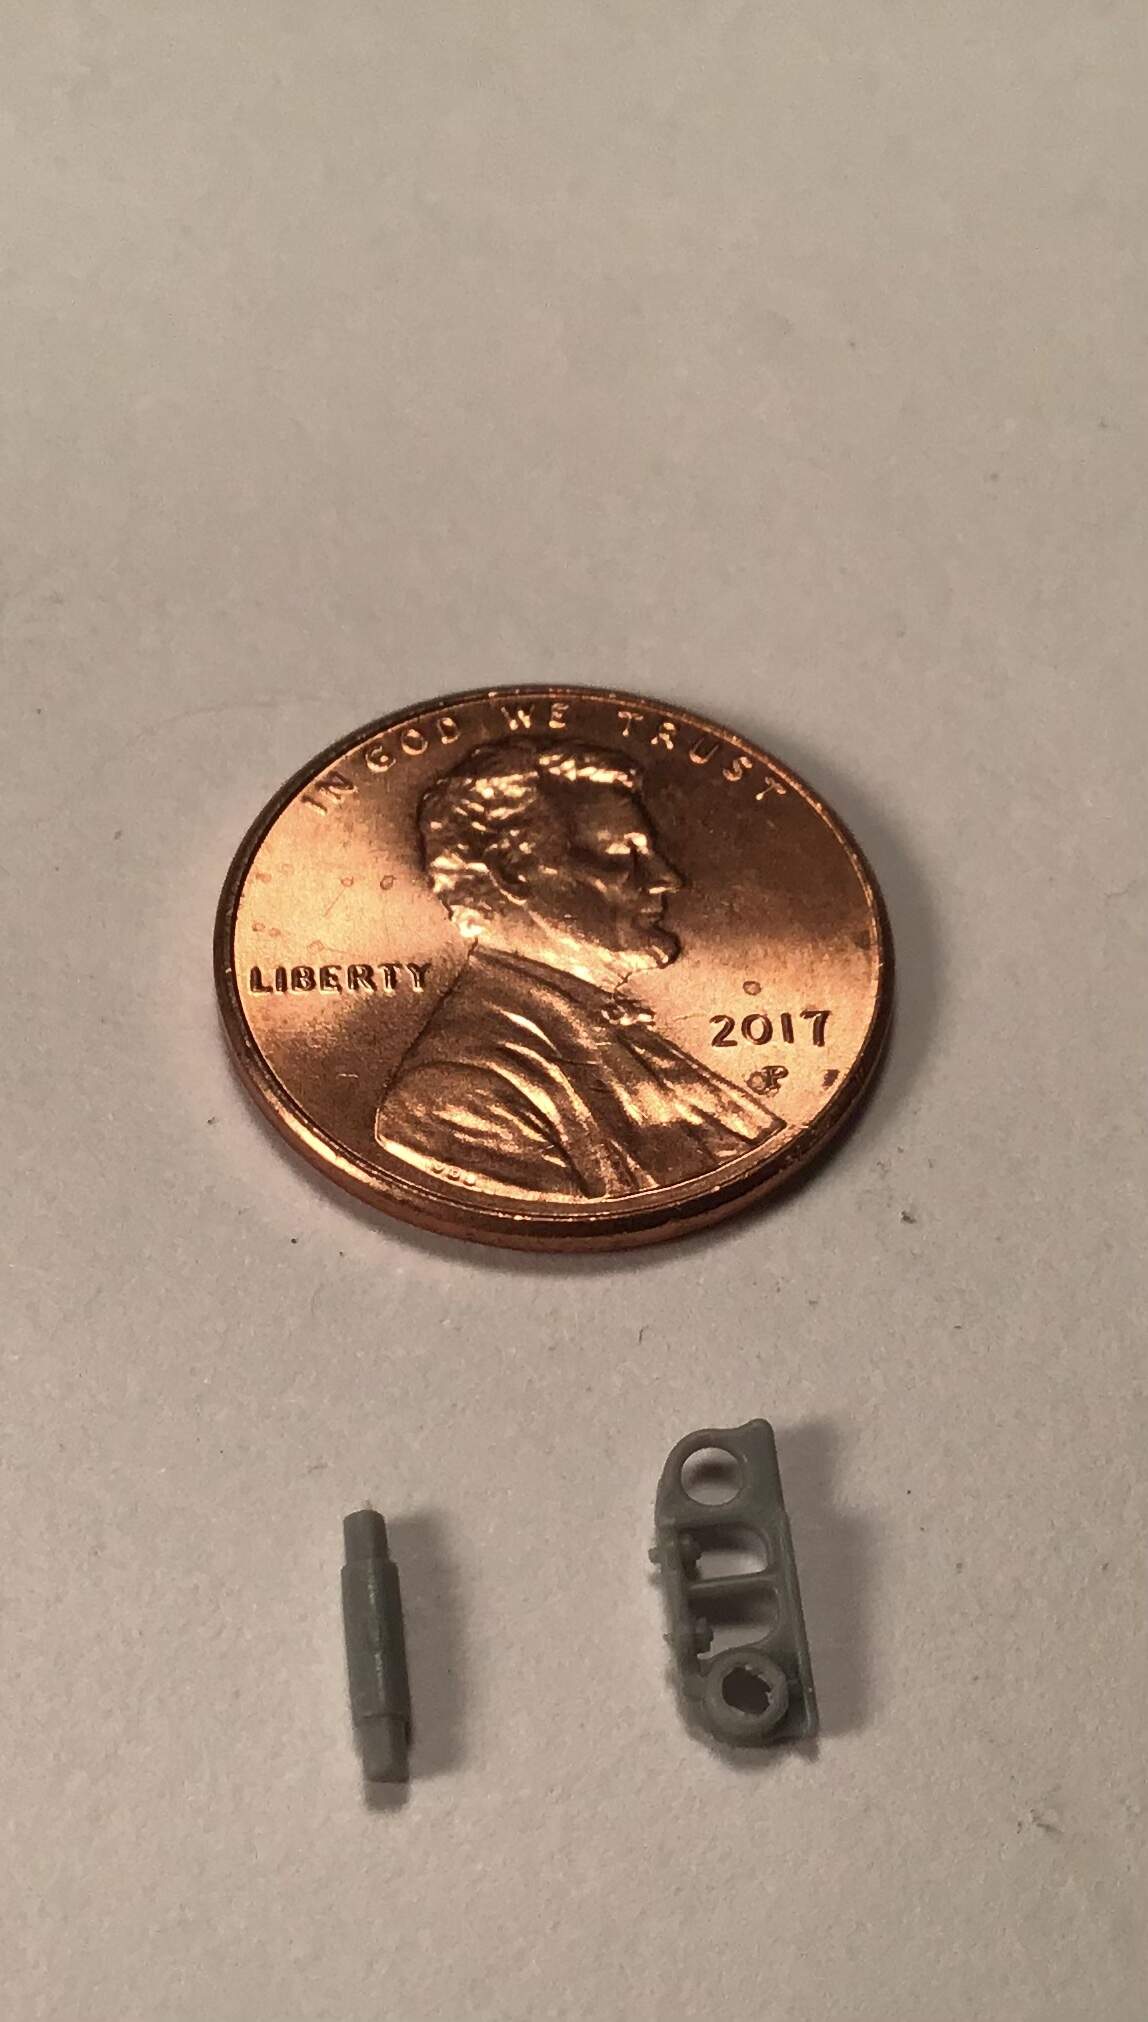
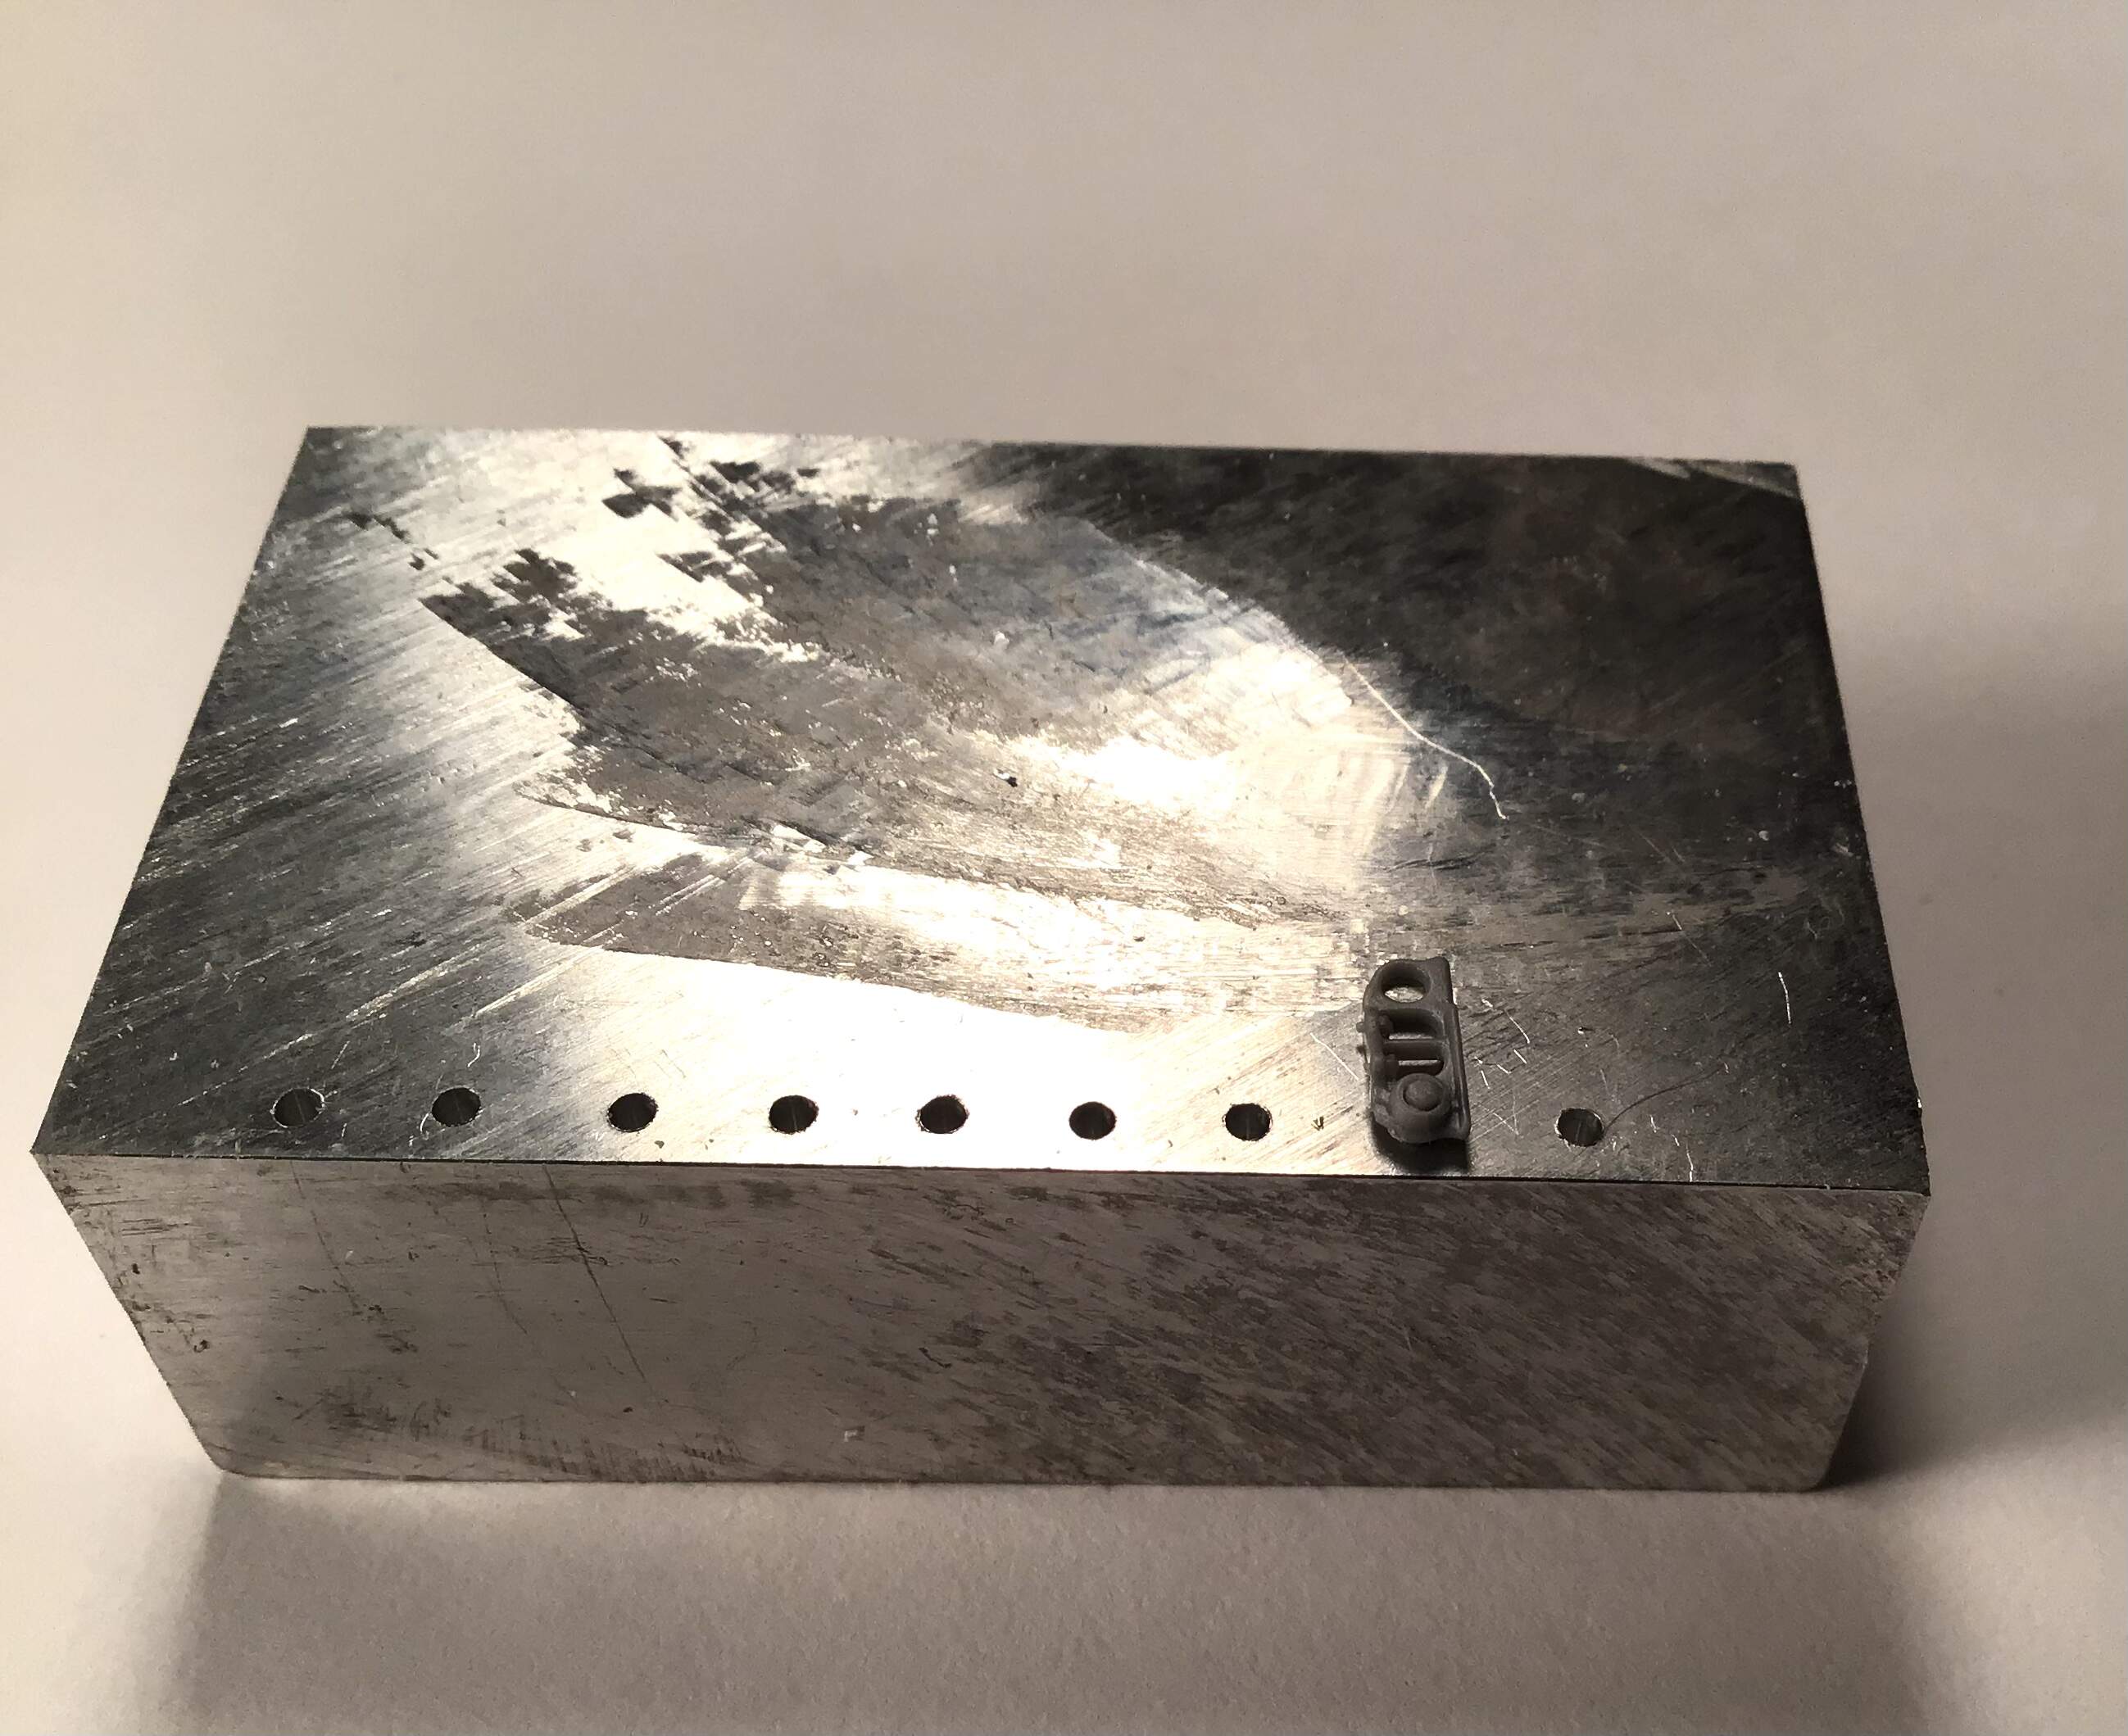
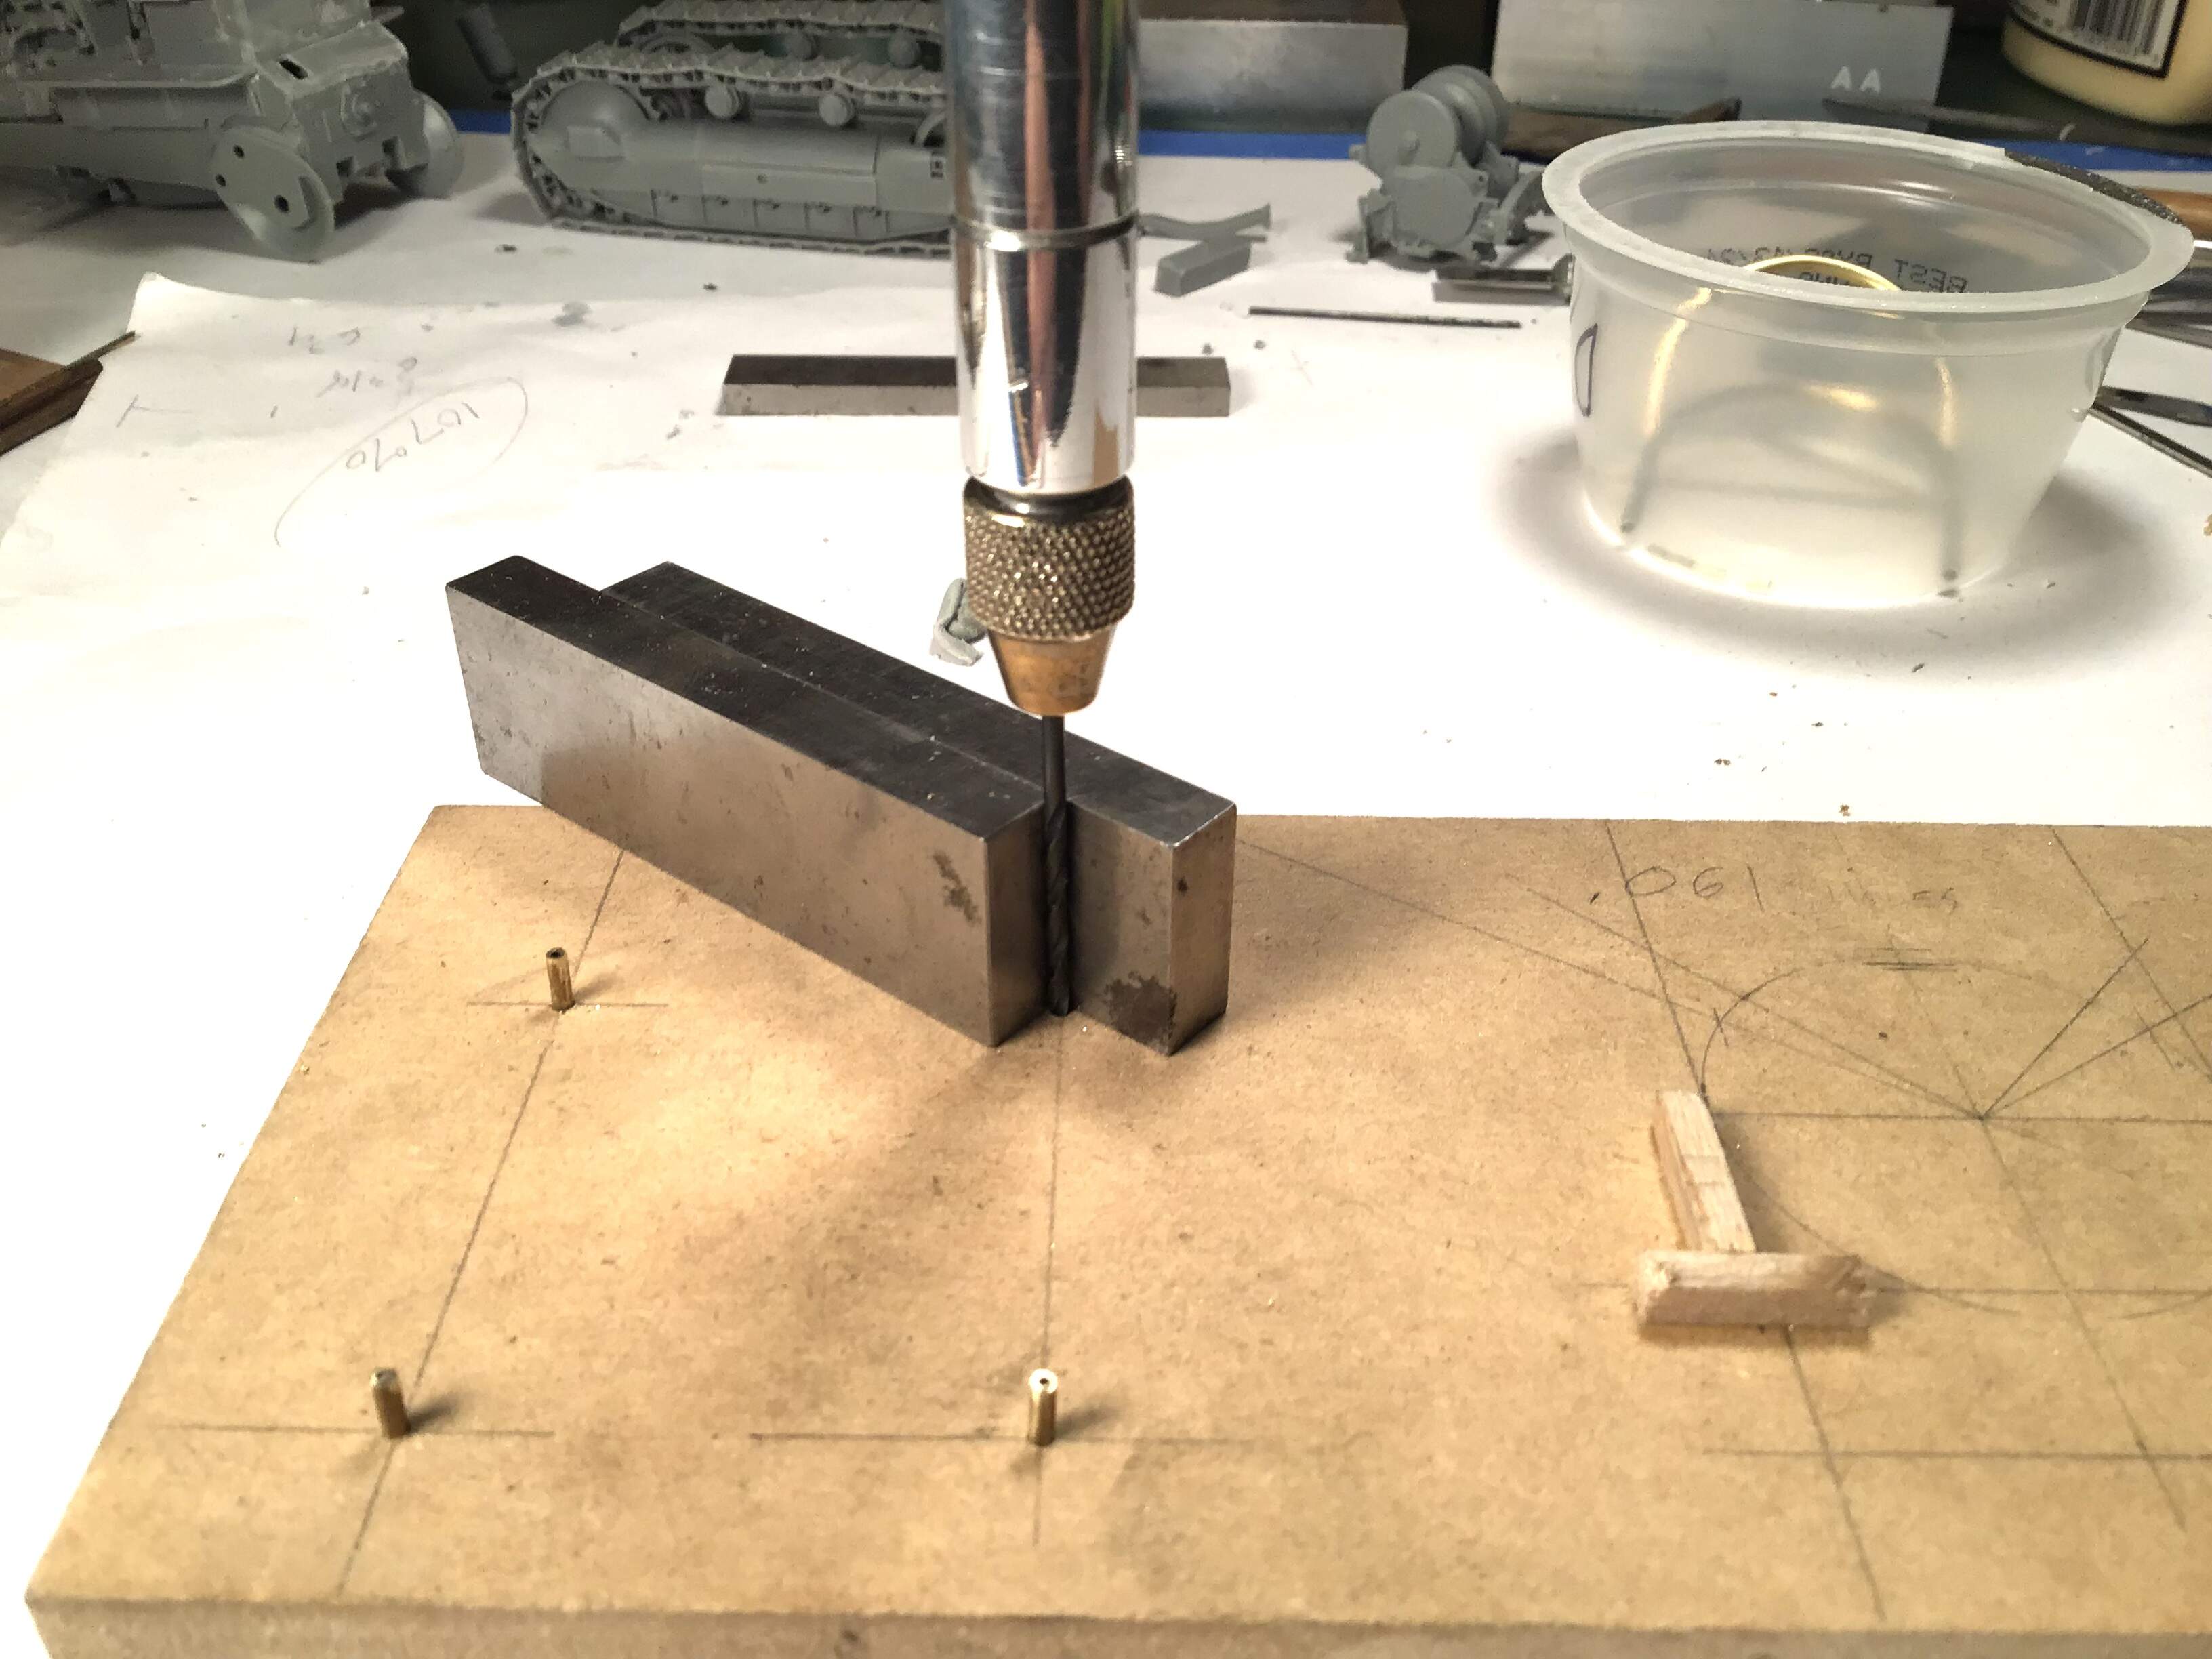
Here is where I outsmarted myself - thinking the pins should be perpendicular to the guides I made a jig out of scrap of aluminum by boring holes of the correct depth so the guides lay flat on the block when placed on the pin . 36 assemblies made and only when I started to glue the guide to the track shoe did I see that the pin was not parallel to the edge of the shoe . A little careful bending of each guide fixed it .
I am going to have to install the tracks around the undercarriage cementing here and there in order for them to look right and worry about painting later.
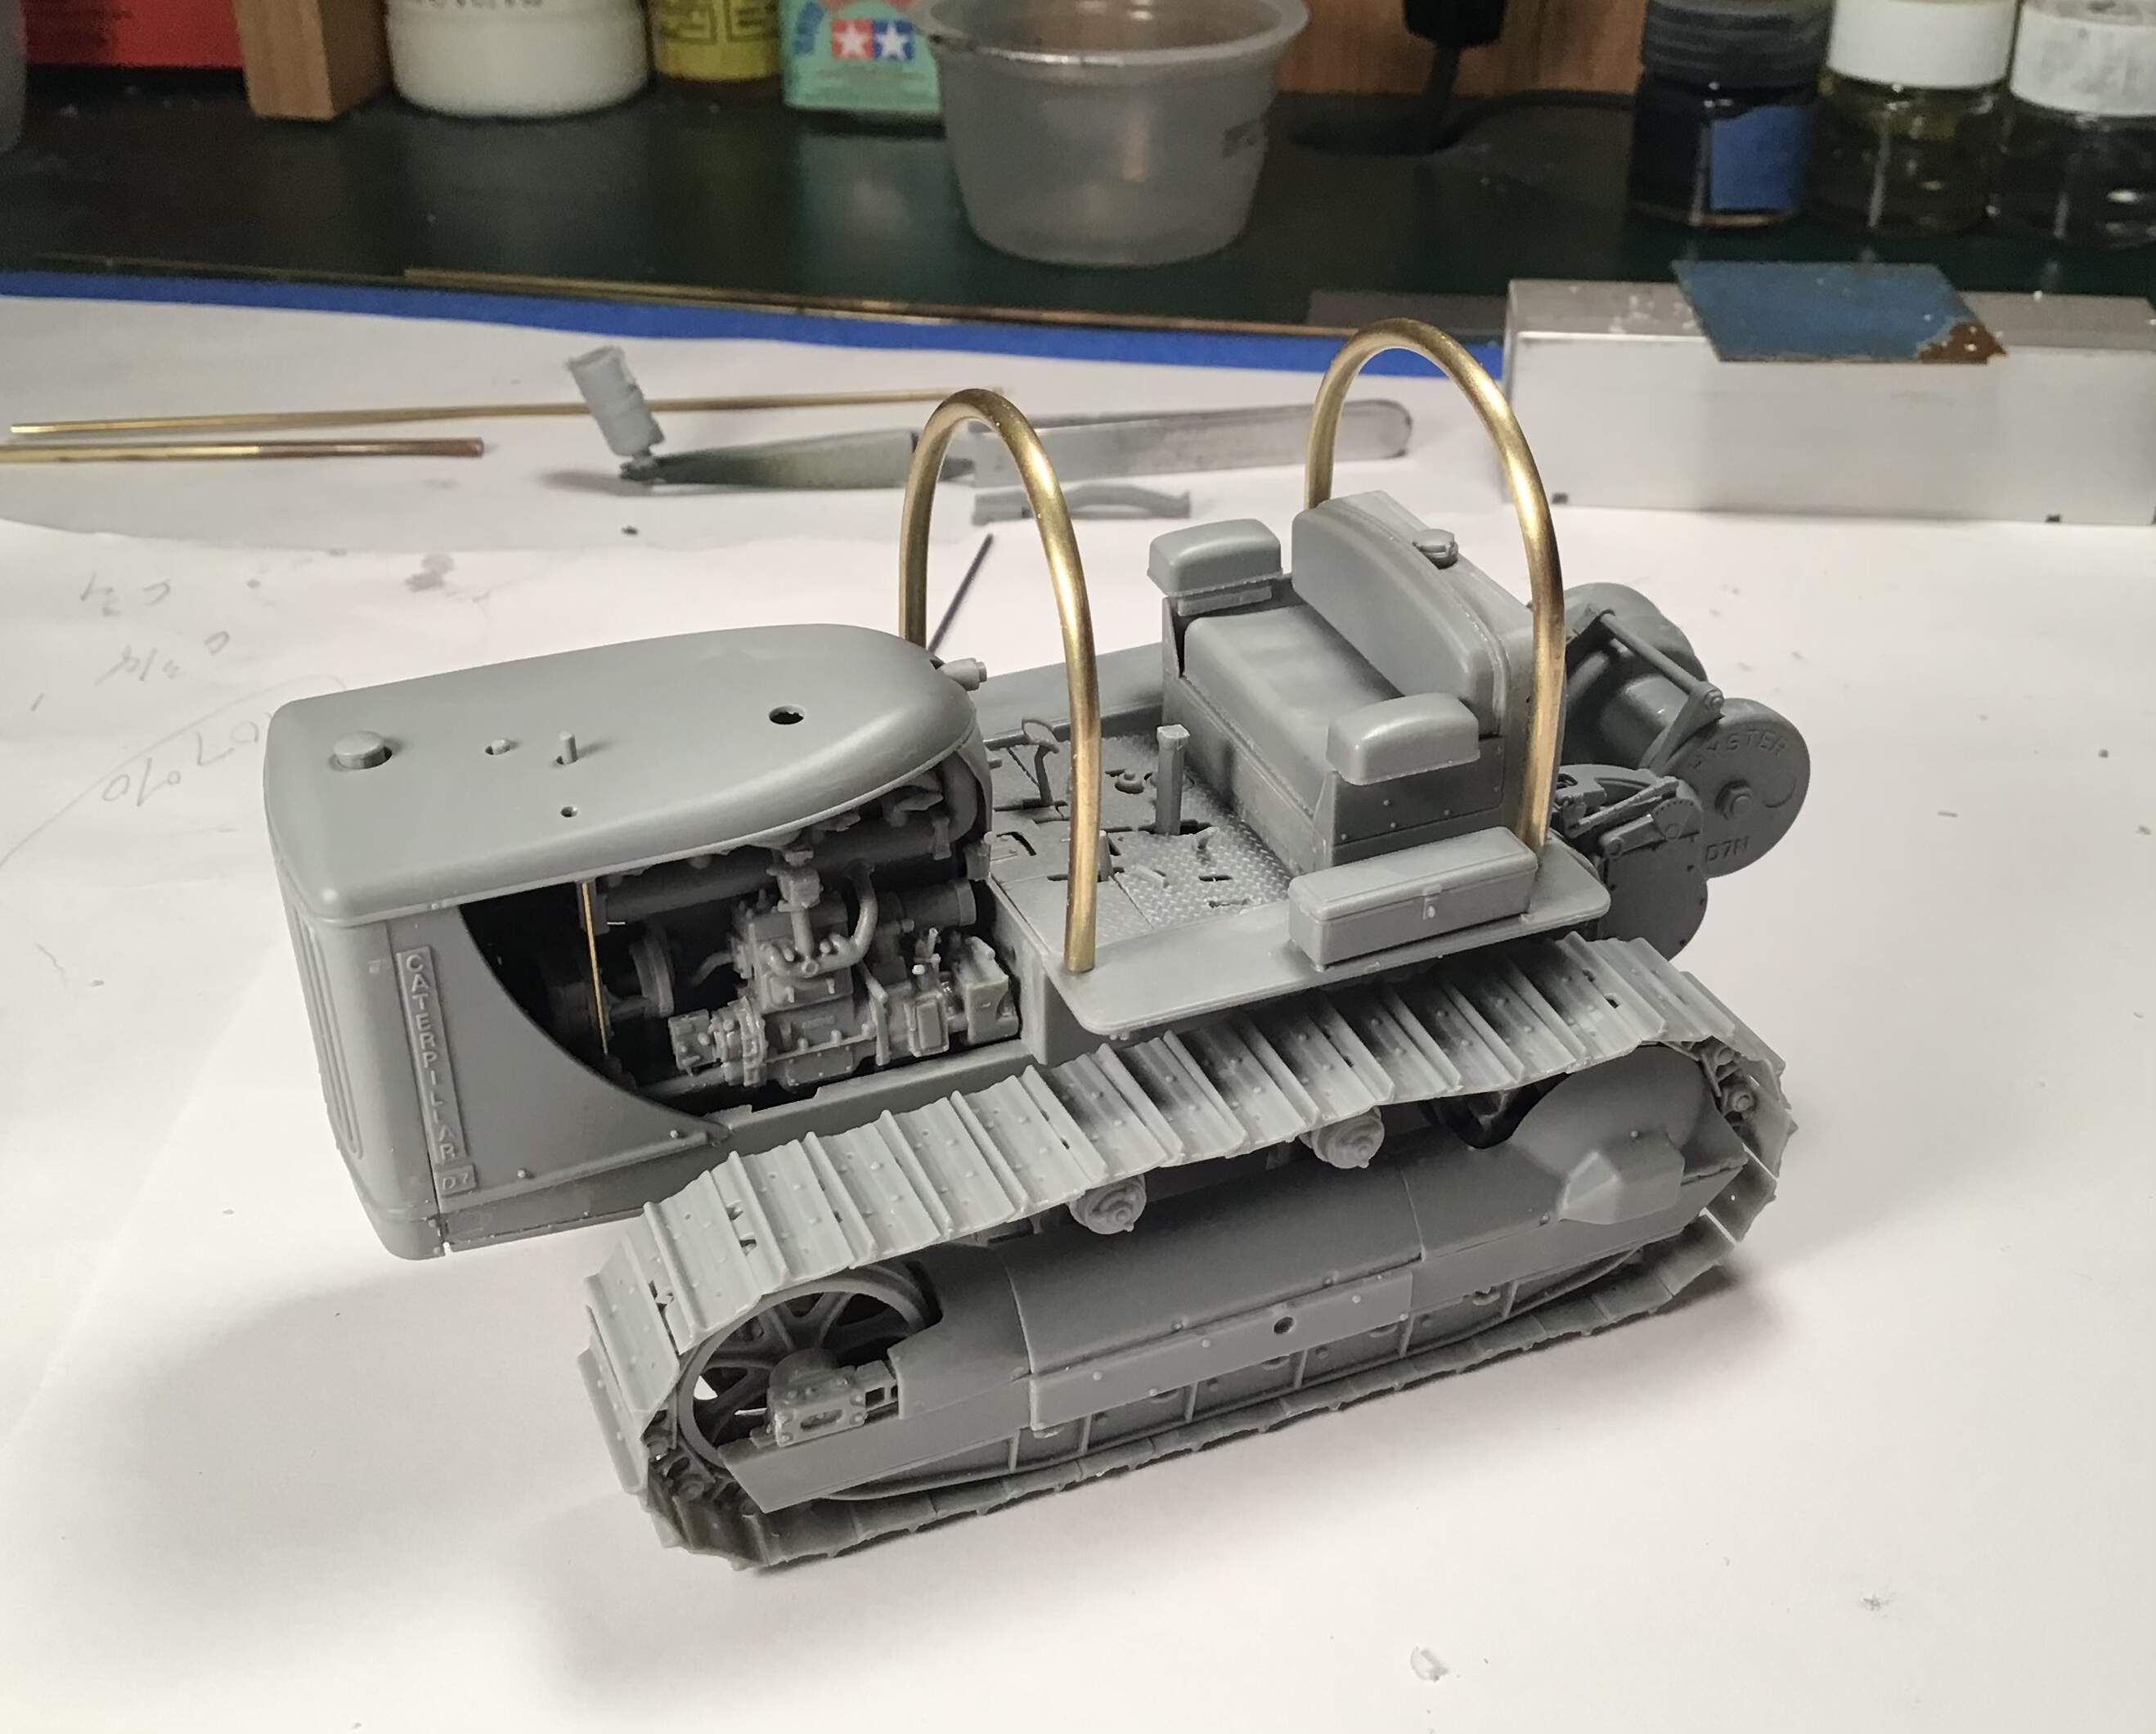
I’ve also built up the winch …
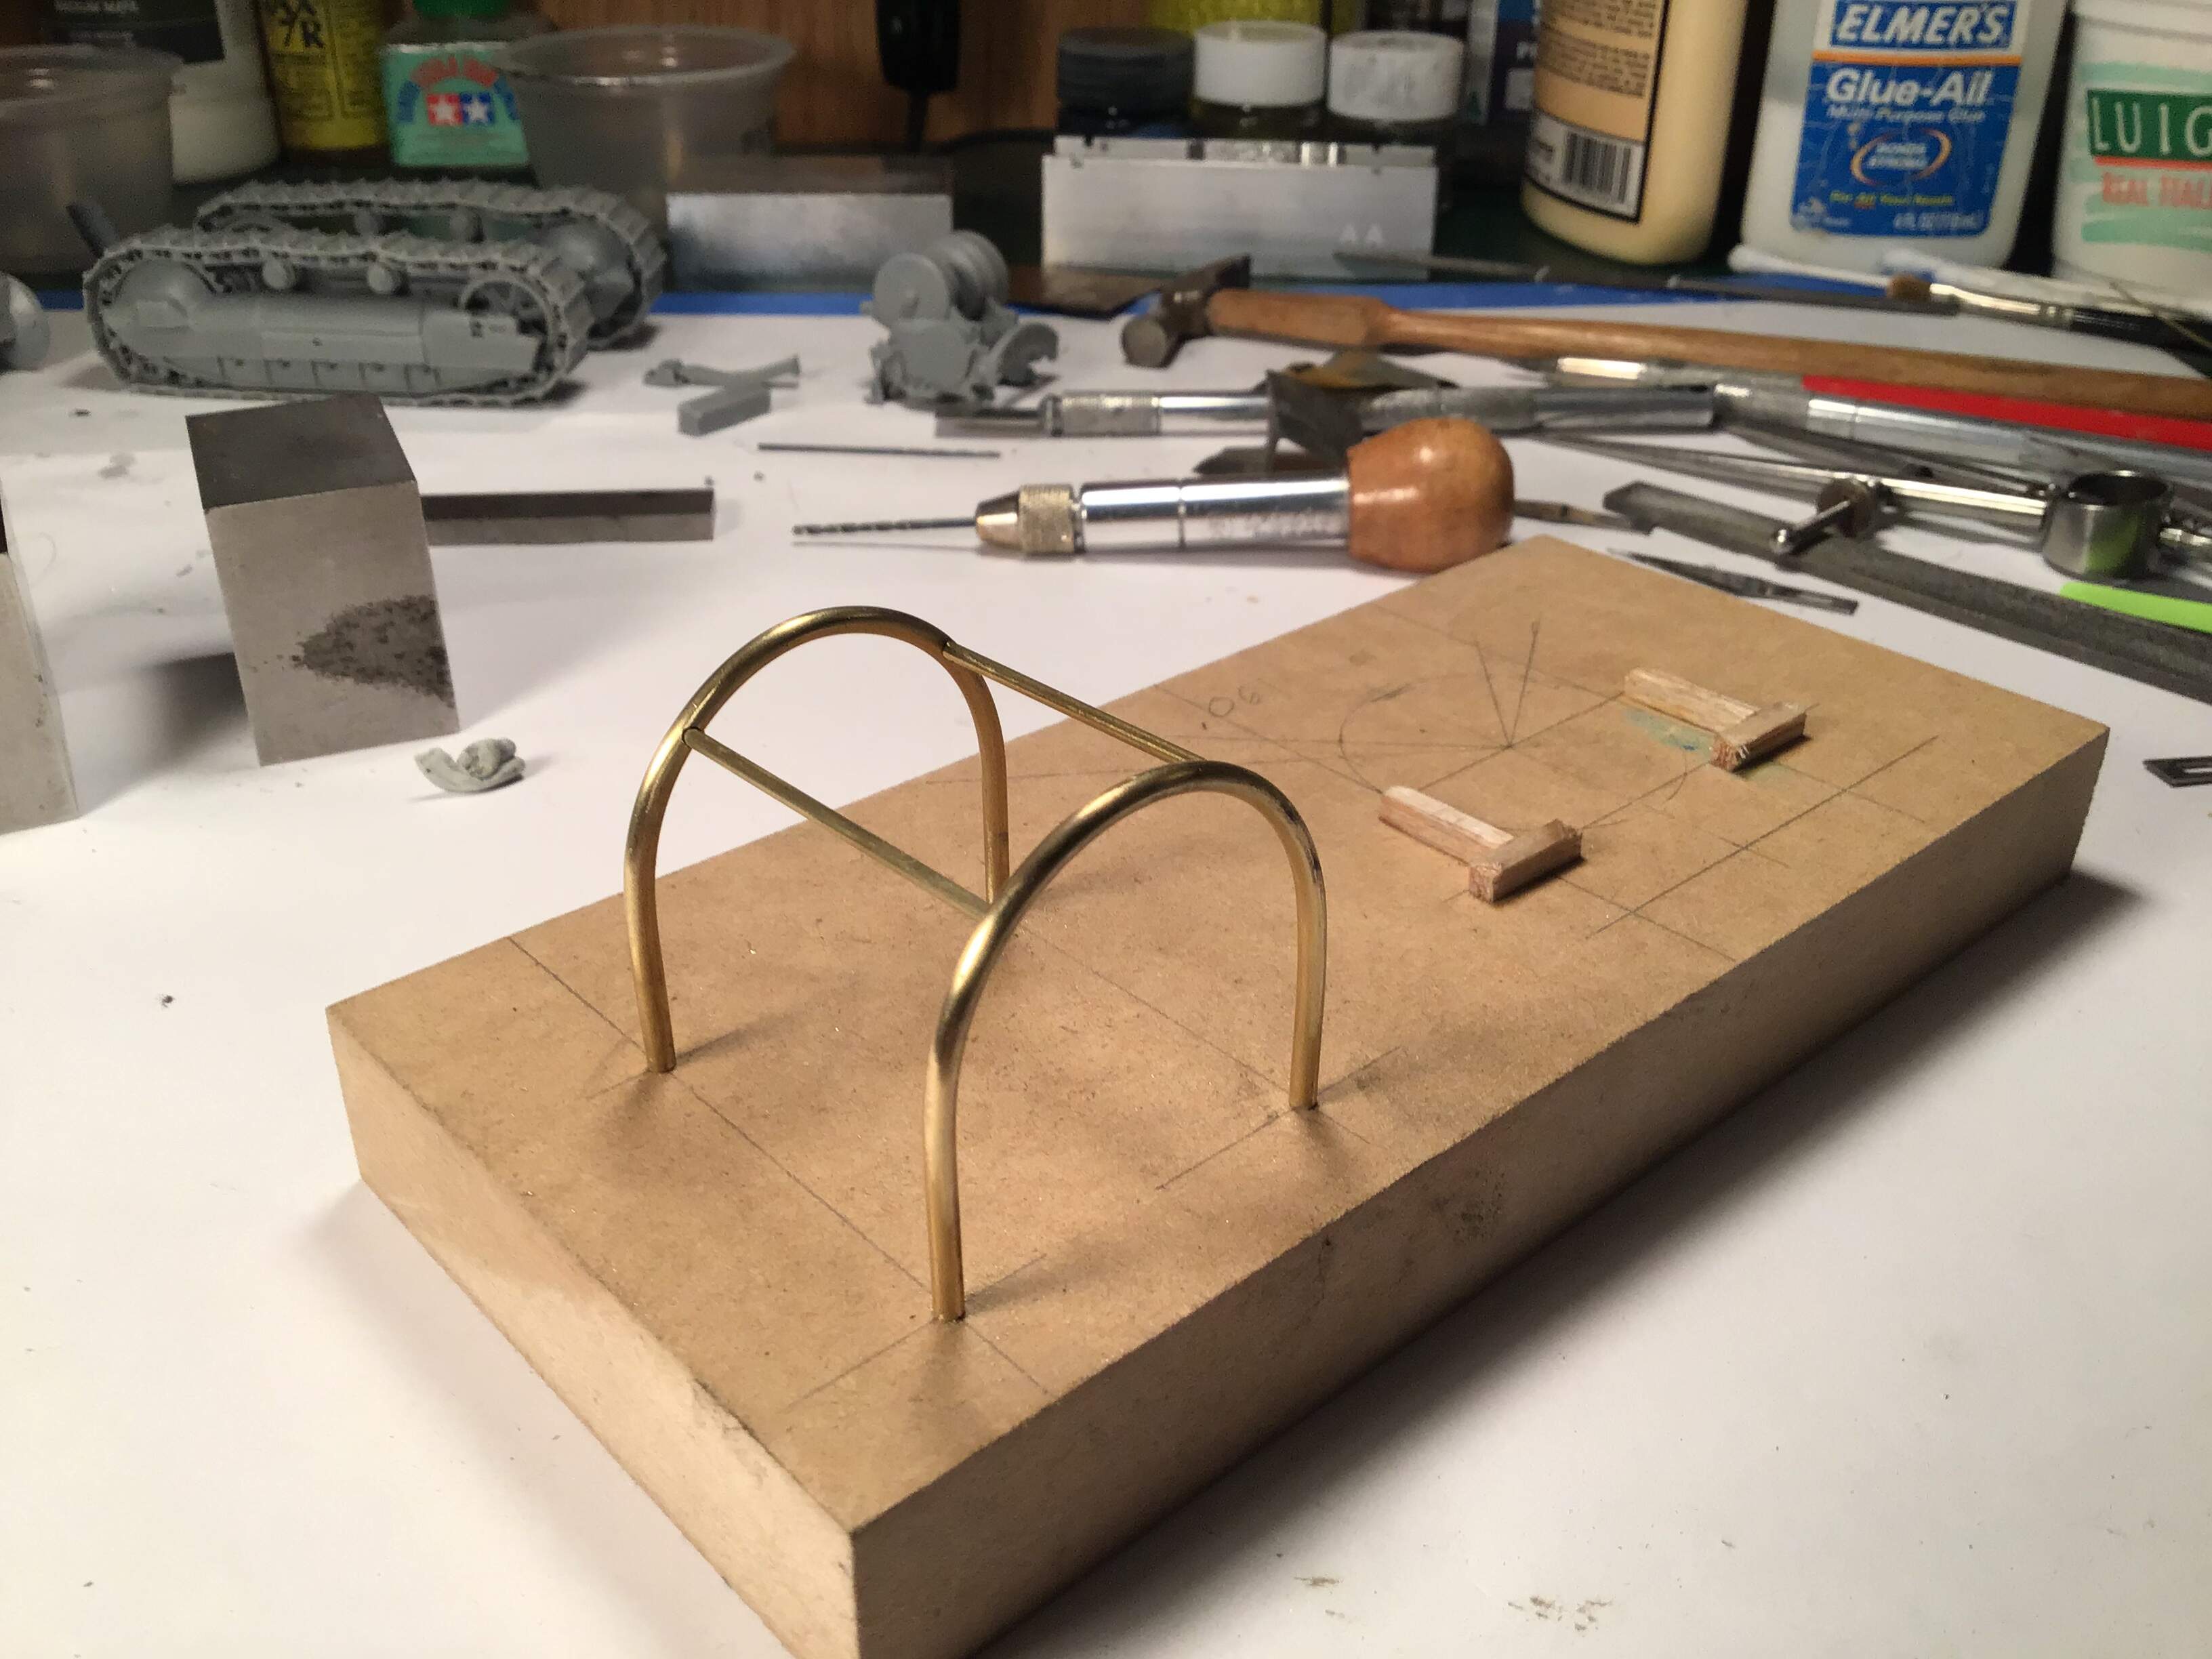
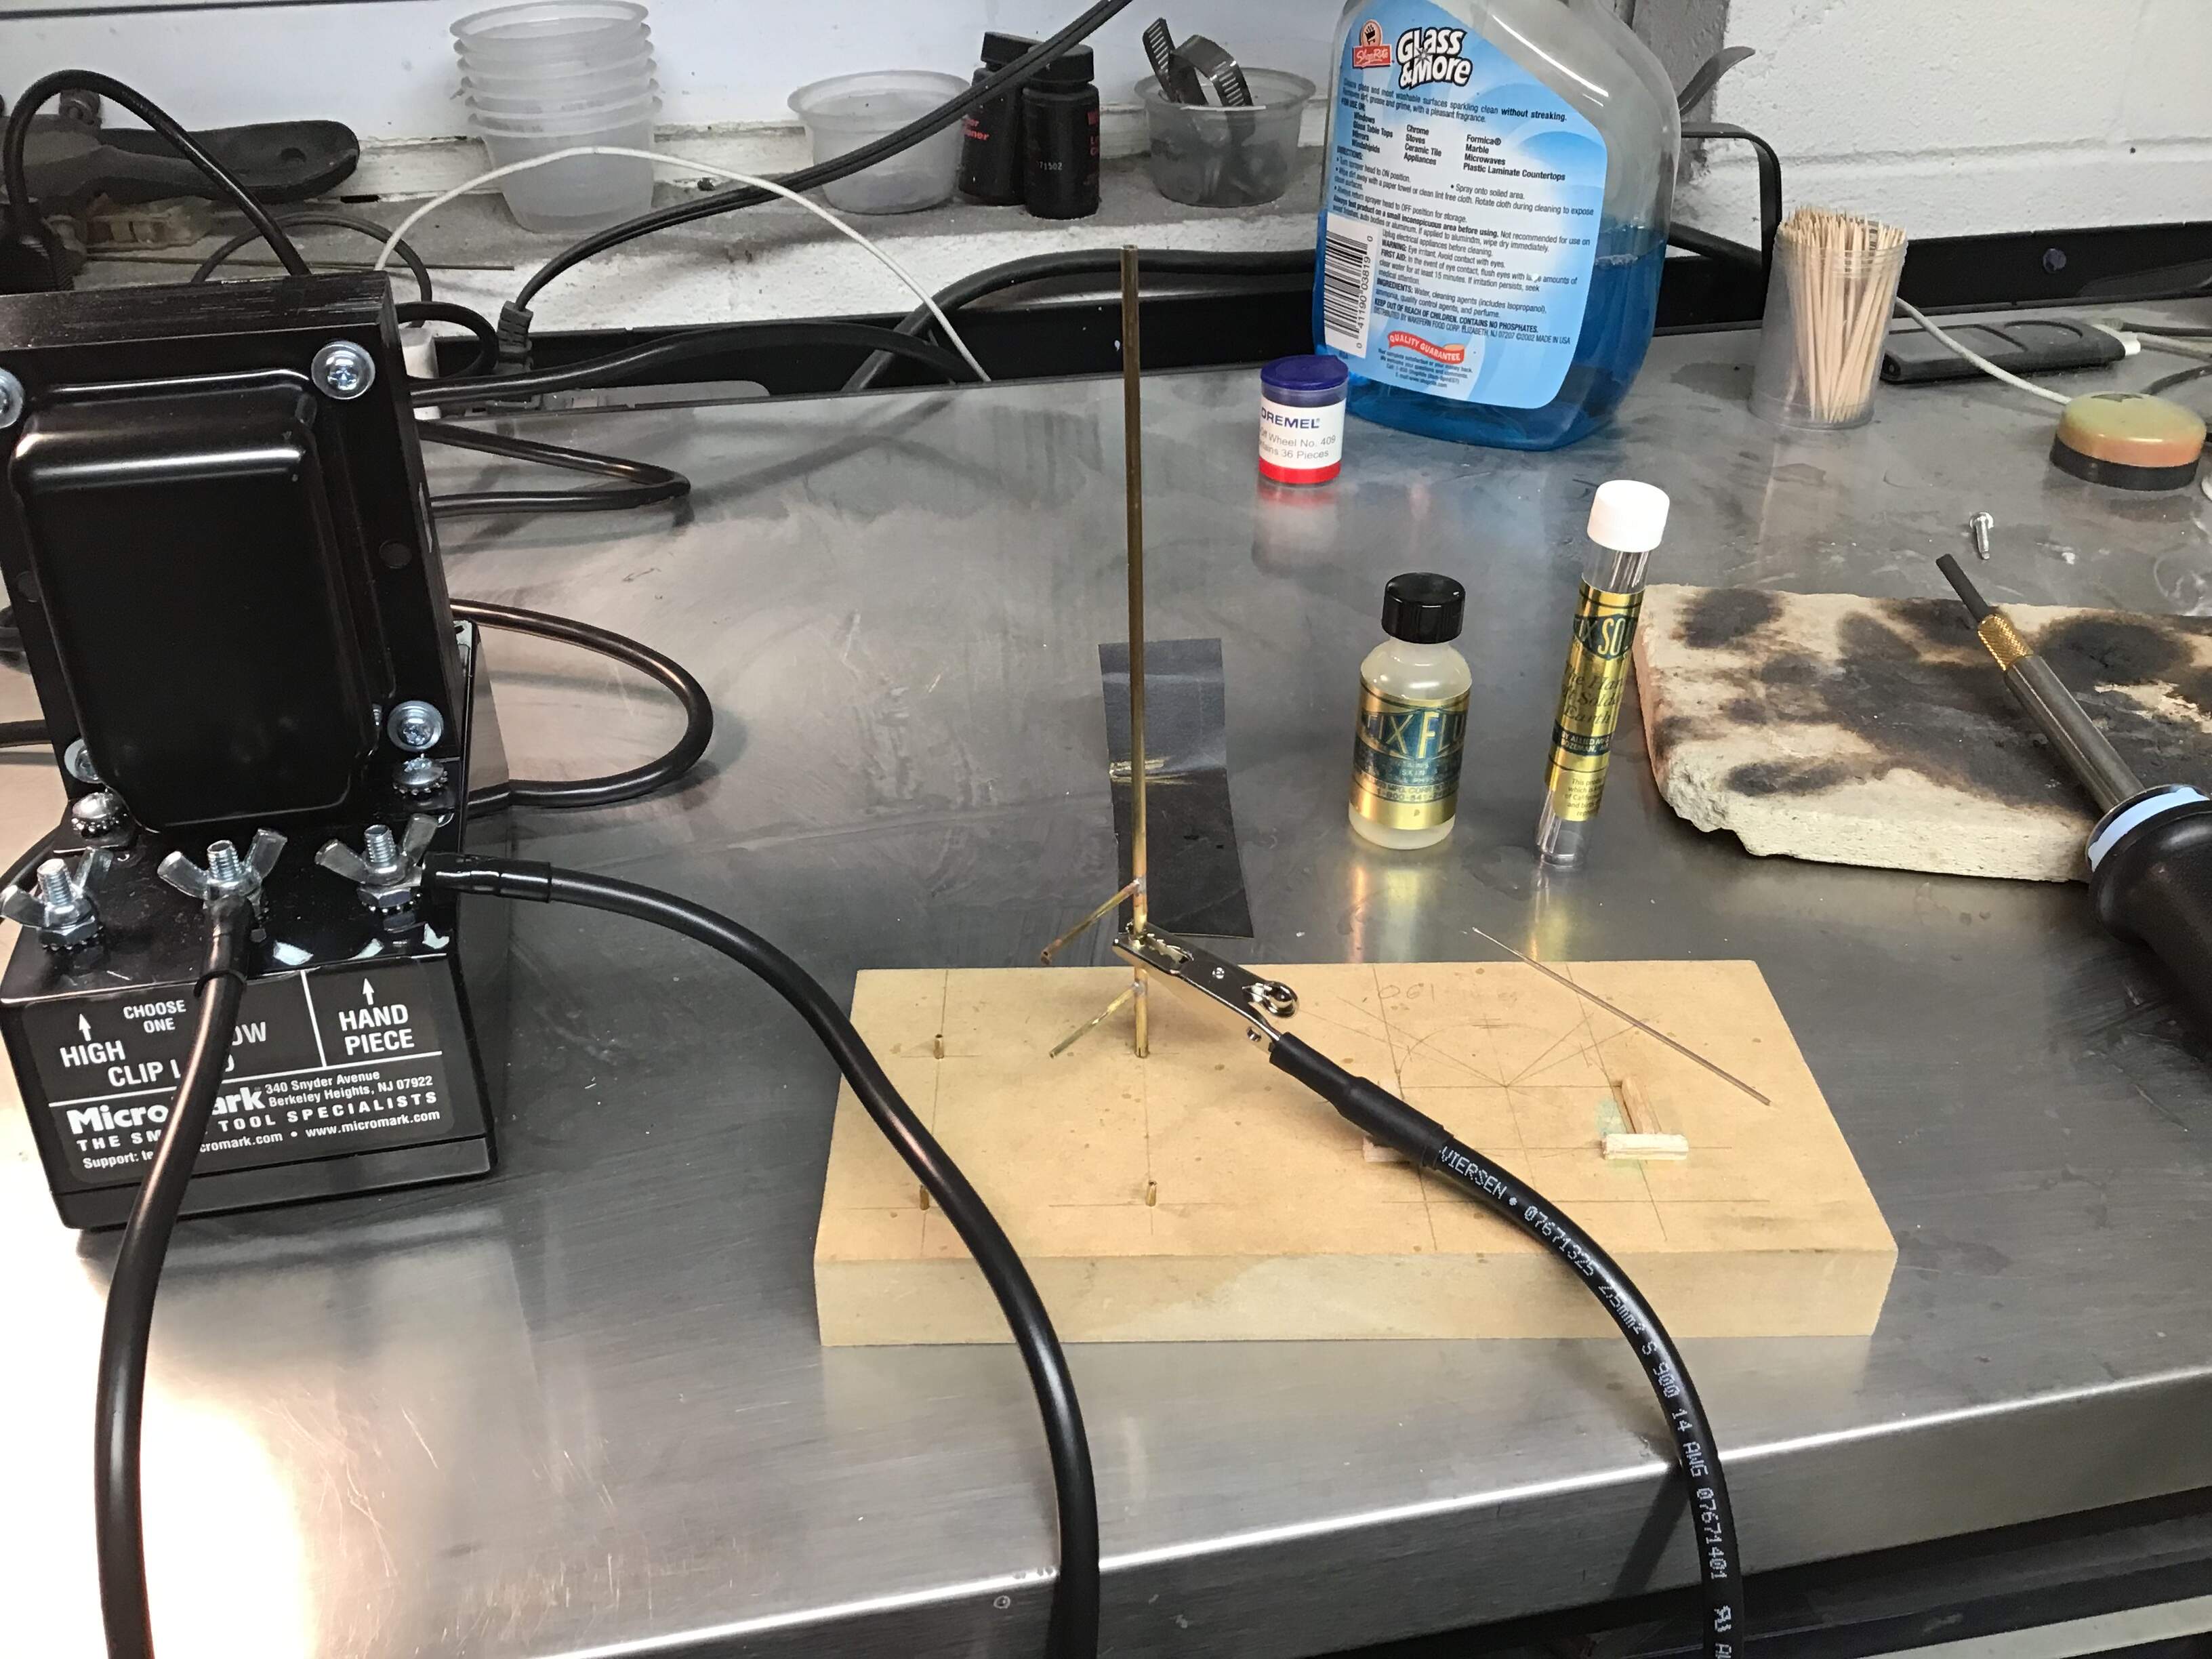
I’ve ordered a resistance soldering outfit for assembling the roof system.
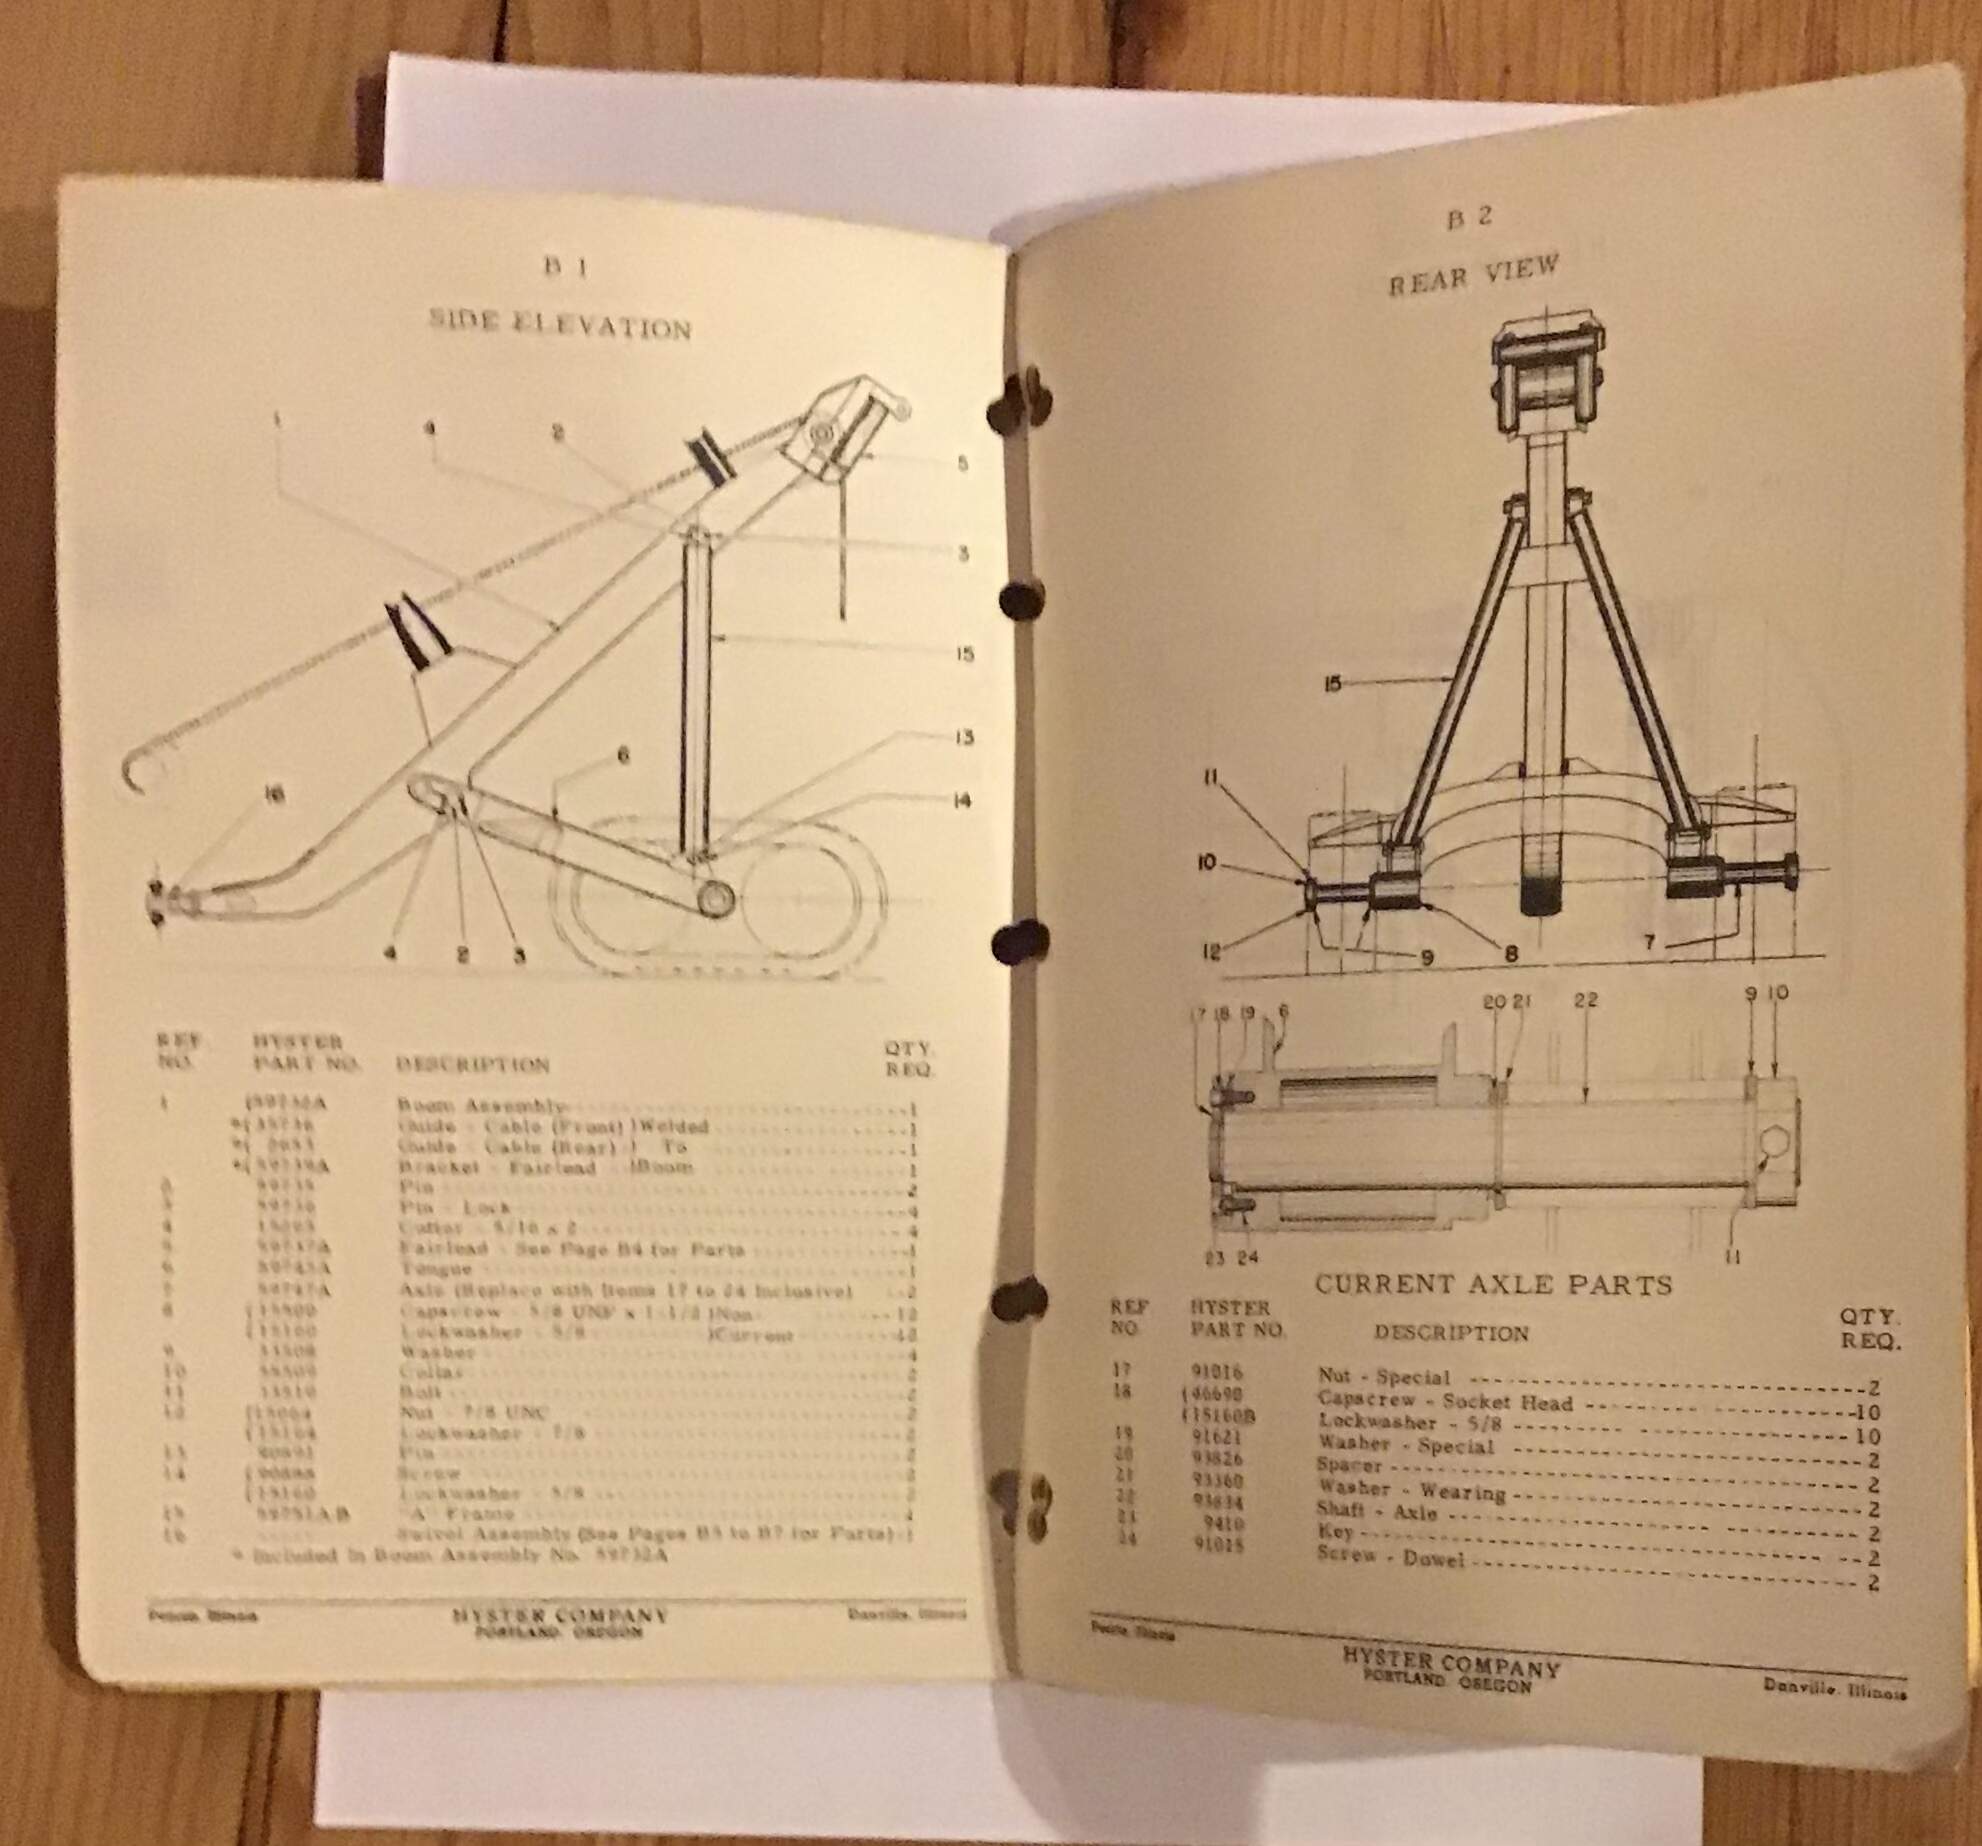
Using the dimensions listed in the Hyster arch parts booklet I calculated what they would be in 1/35 scale then measured the size of the drawings in the booklet and calculated the needed percentage to enlarge the drawings . I will be building most of the structure in sheet styrene. I plan on making a master for one wheel ( there are eight on the logging arch ) and one track link and cast all in resin .
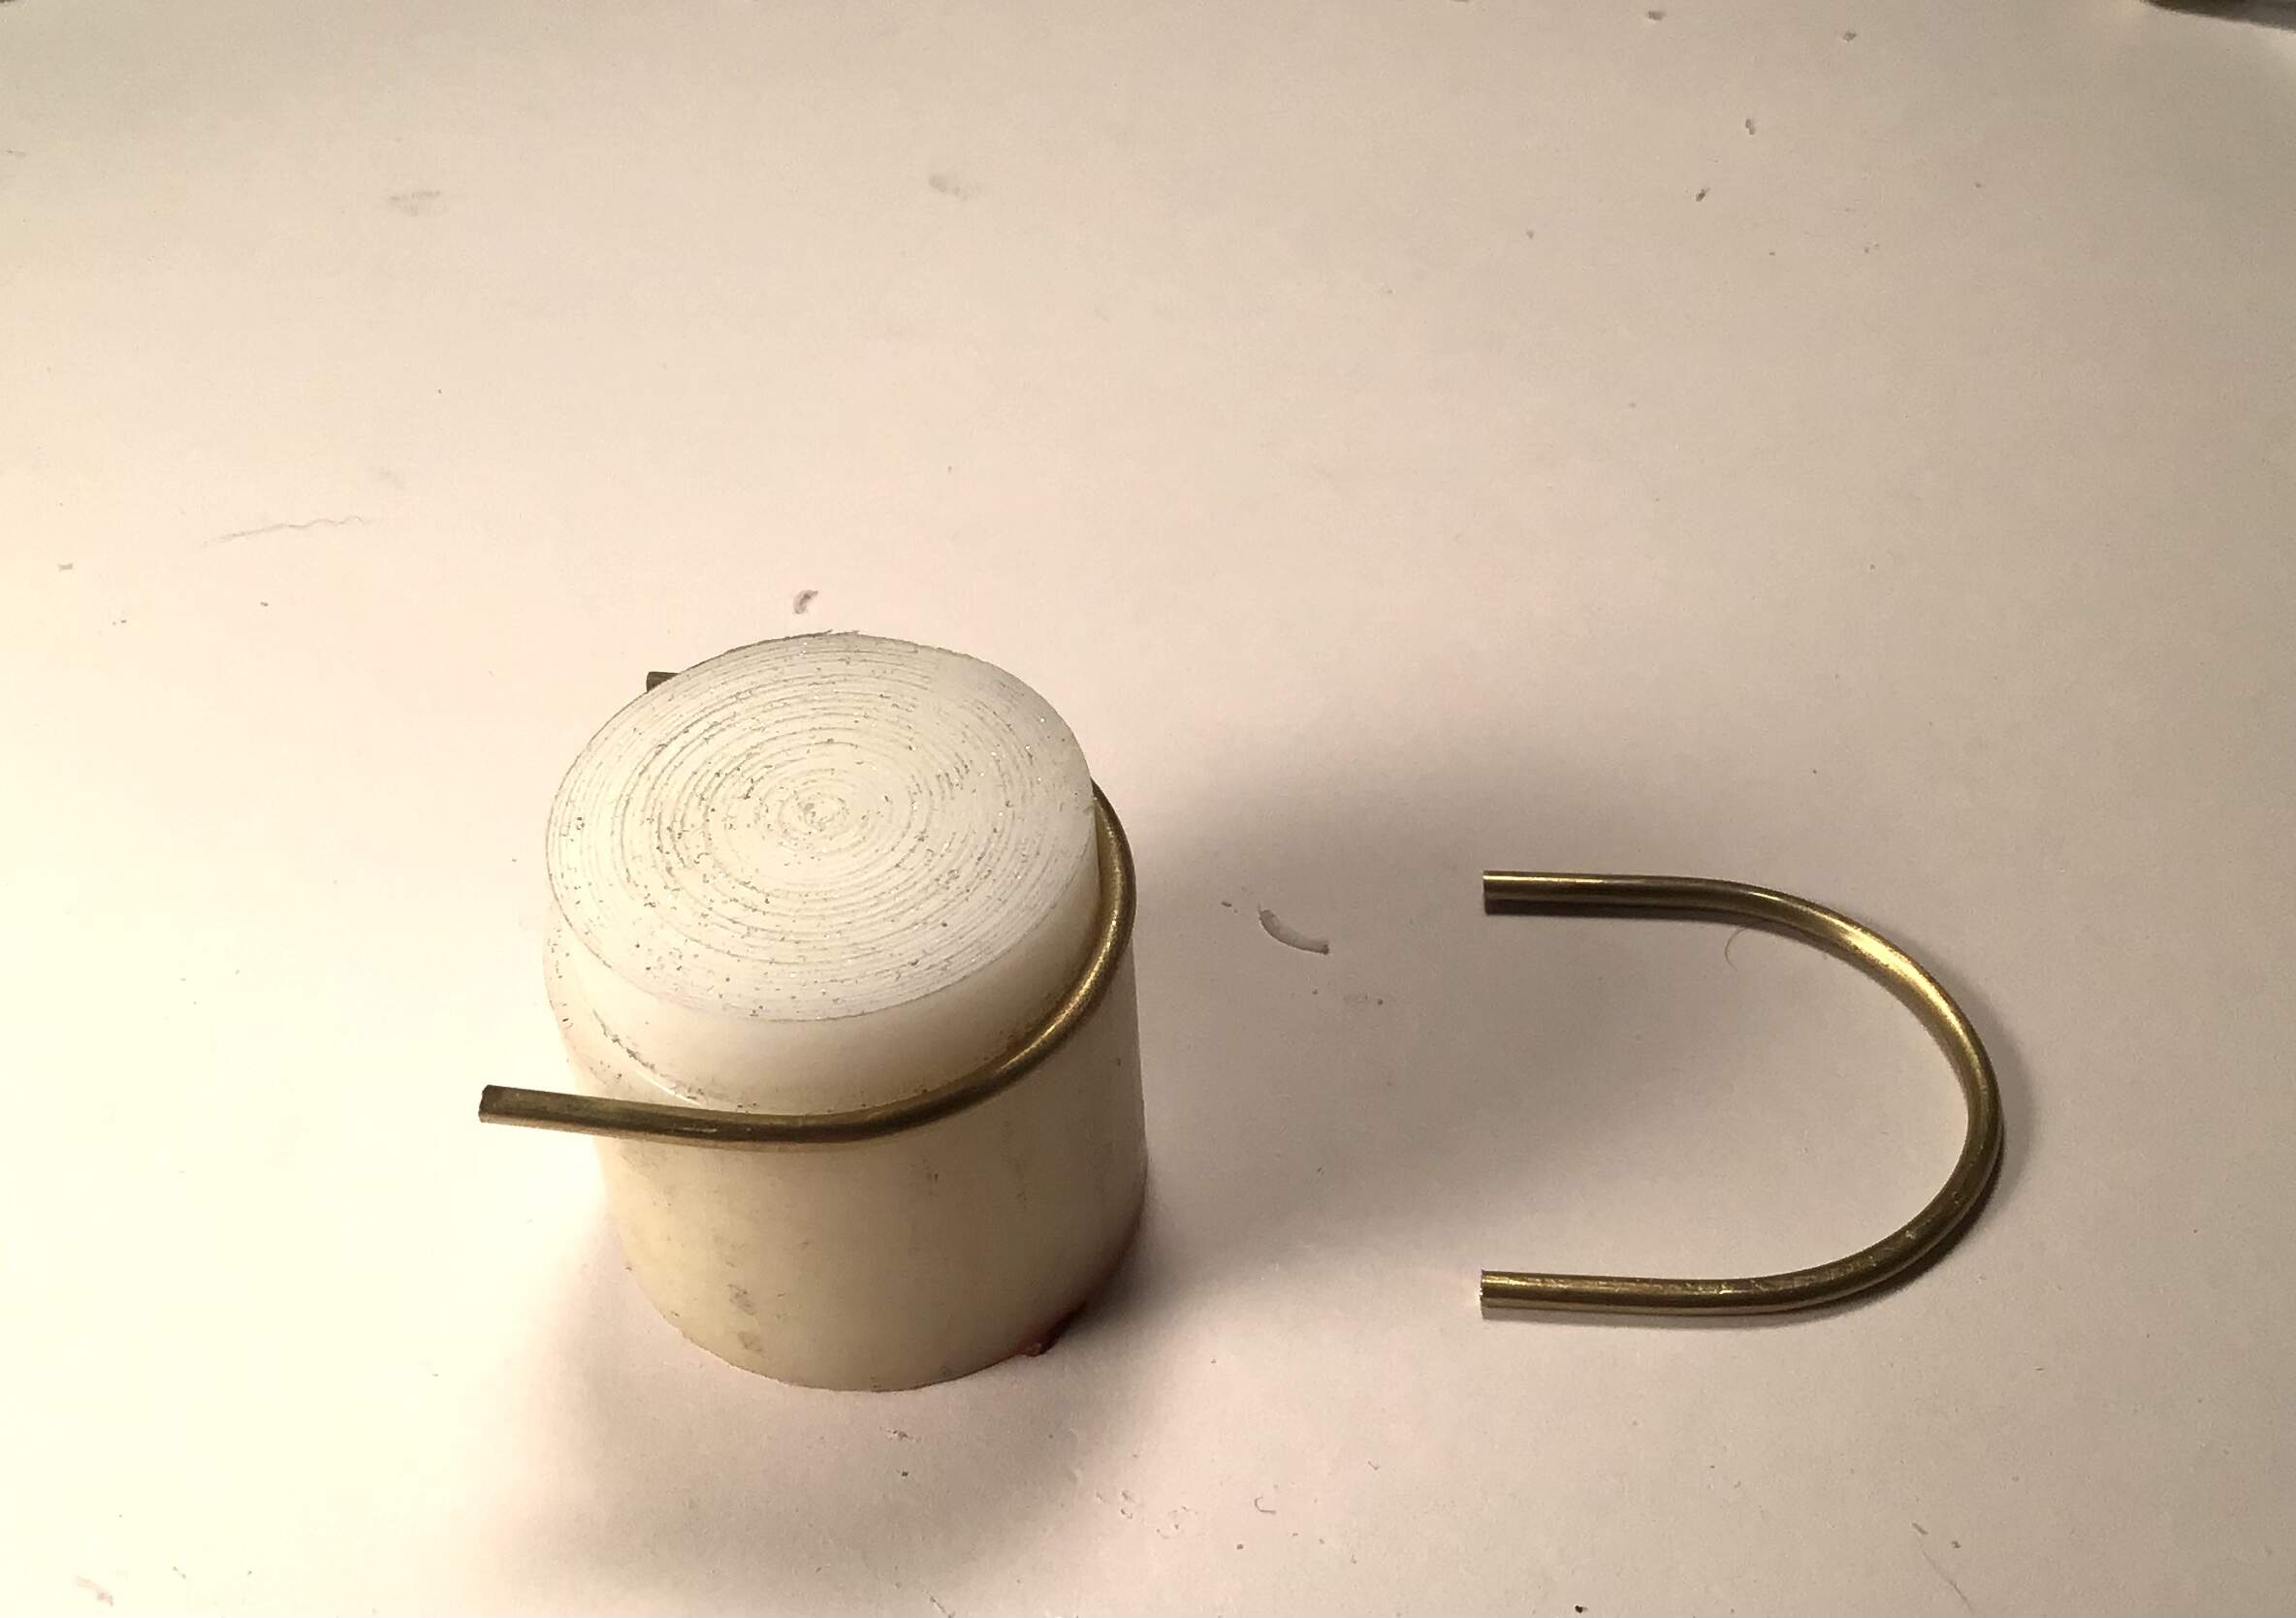
…and also hold components in place for soldering… a little trick to use when boring by hand with pin vise is to hold two machinist blocks to form a corner, thus insuring the bore is square .
The resistance soldering unit arrived today - looks pretty straightforward but will experiment with it a bit on some scraps
of brass - more to follow.
Cheers- RT
The variables you “play” with when resistance soldering
is time and current. The current through the resistance
is regulated by the voltage.
Burning holes in some scrap metal is a good way to figure
out the needed voltage for a specific combination.
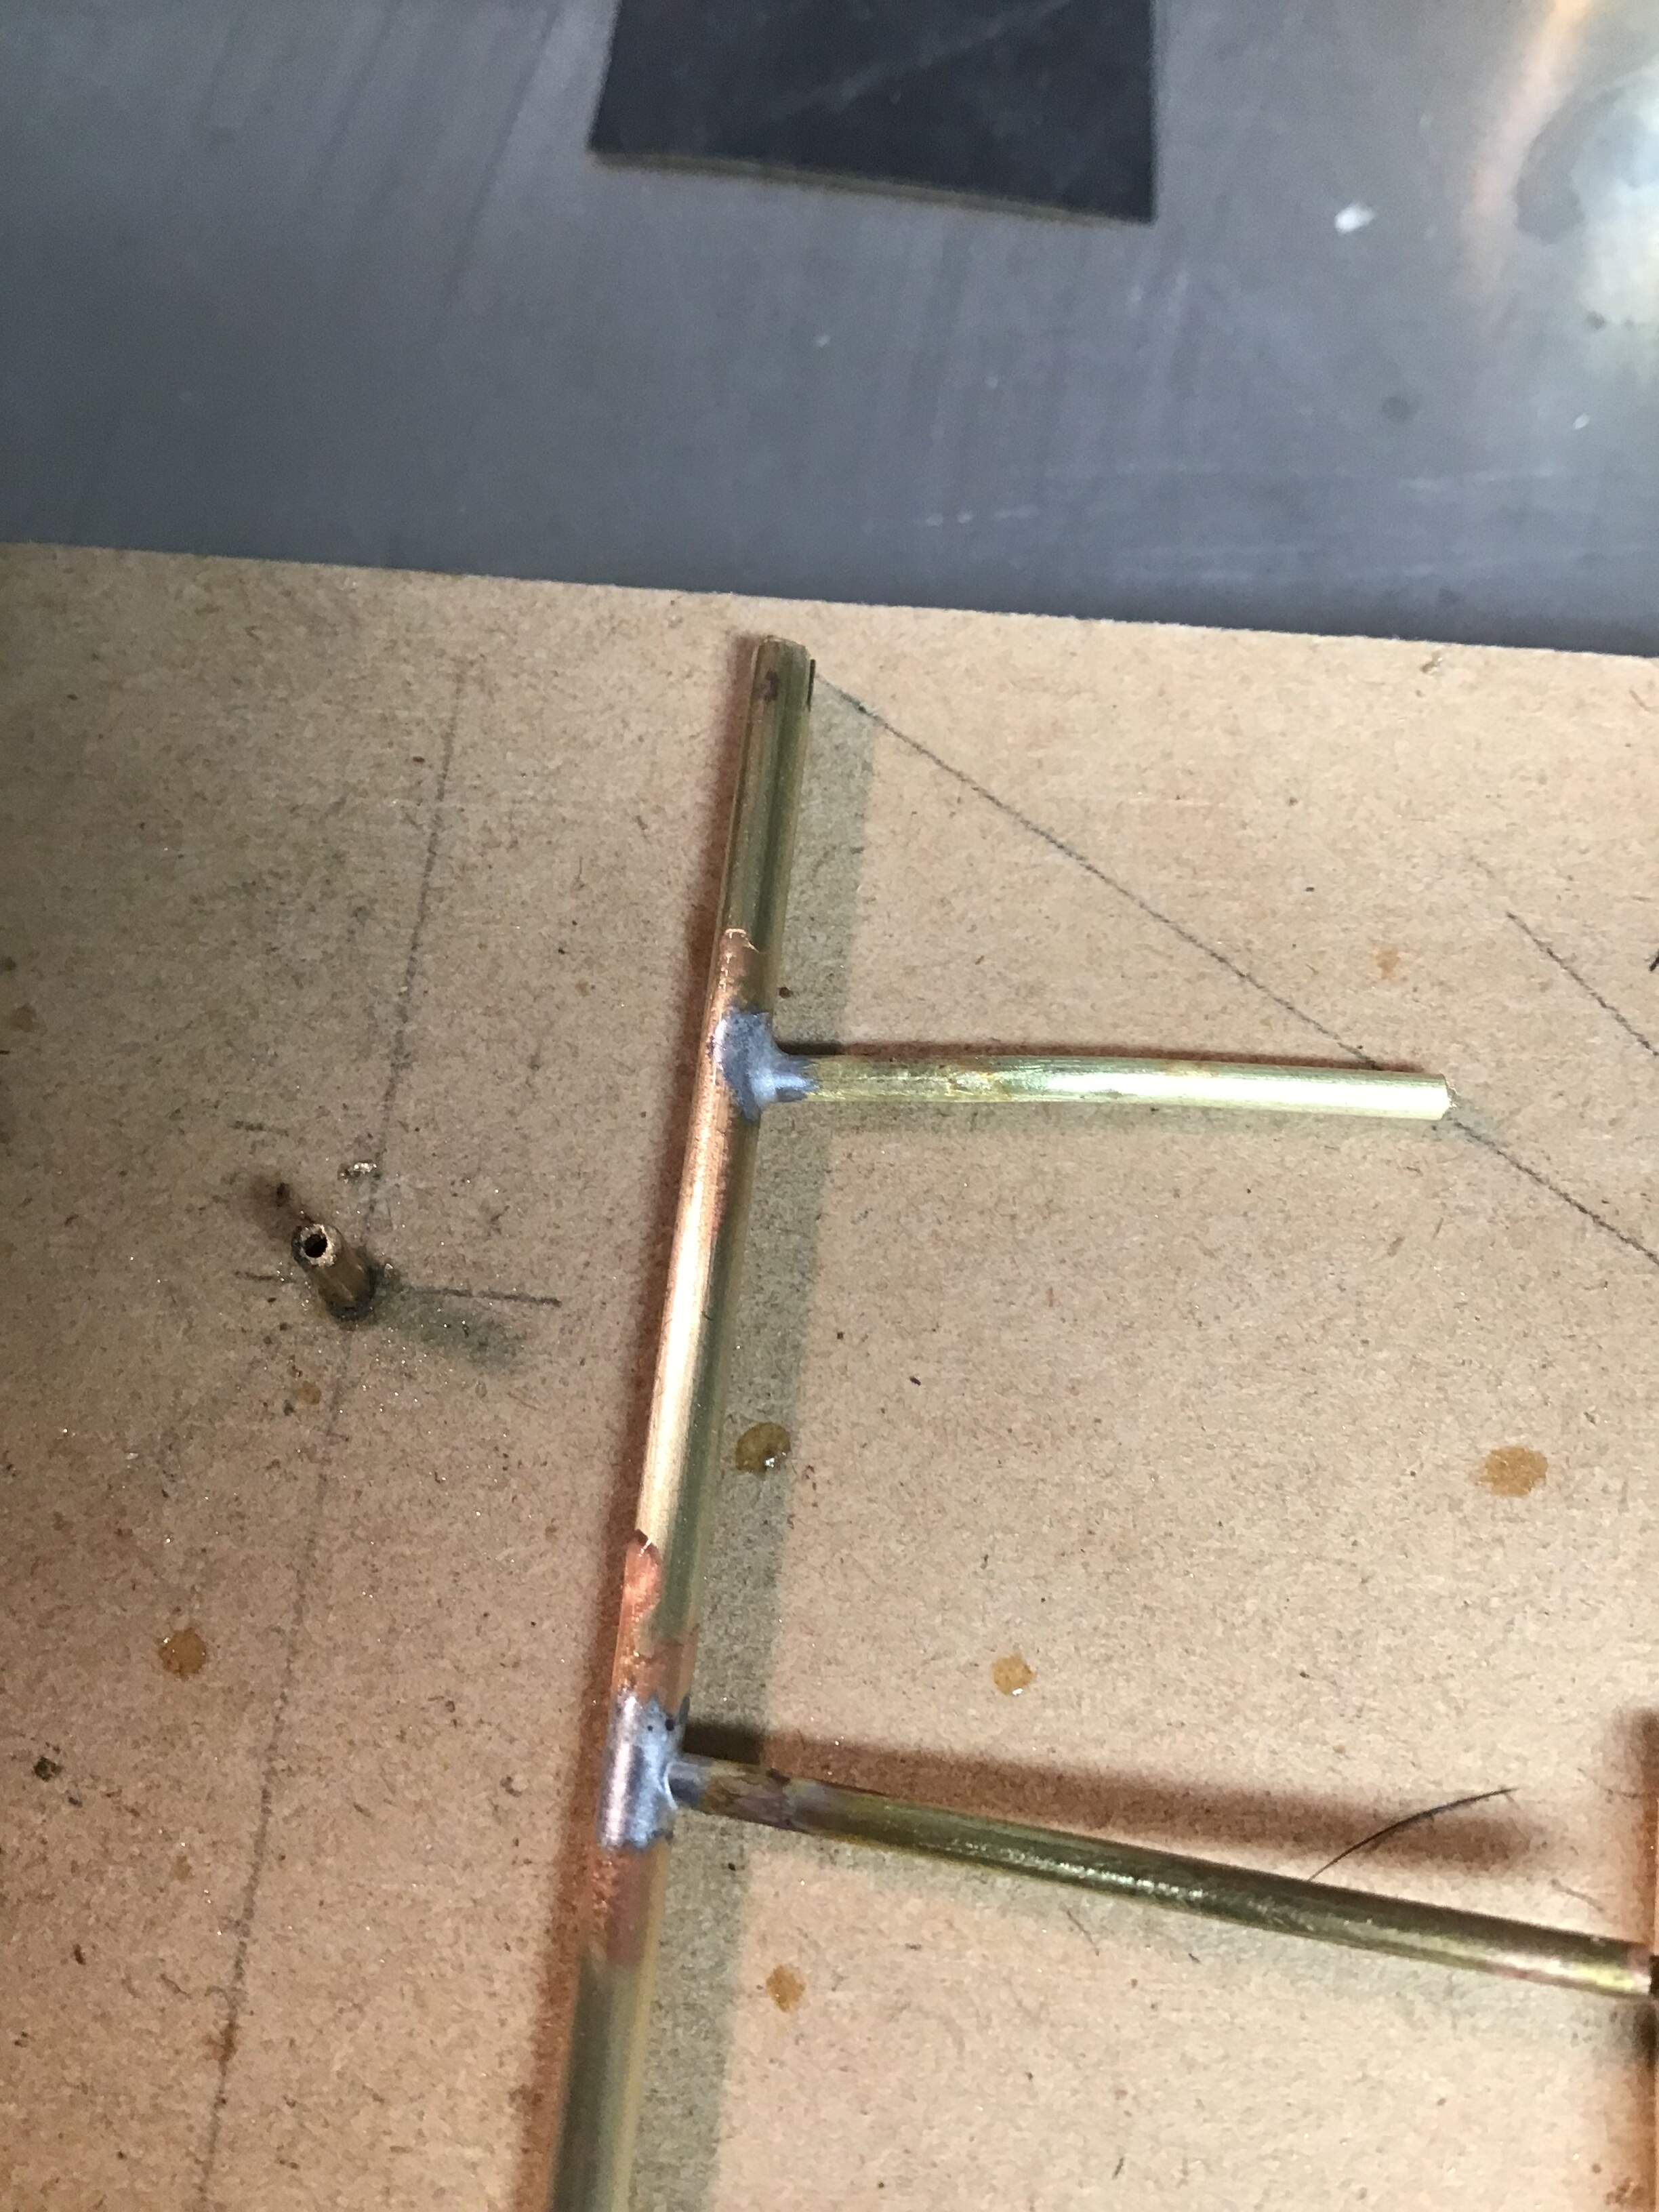
Begun to explore the resistance soldering - it couldn’t be easier. Instantaneous localized heat at the joint and it doesn’t effect previous joints so far as I have found. I made up a test sample using the same materials as in the roof system , first one joint - let it cool for a few minutes then the other .
I bought two types of solder along with the unit . This test was with Tix. I think it will benefit to use a decent small artist brush to apply the flux as it will more easily control the area that the solder adheres to . This is the lowest price unit from Micro Mark . No incremental variation in current - only high or low , selected by which post you choose for the clip . This test was low power and as stated heating was instantaneous.
Michael - Just a dumb carpenter by trade . I do some machining- self taught. Machining is one of those subjects that the more you learn the more you realize how much you don’t know . To paraphrase my late father in law , “ what I know about machining wouldn’t amount to a pimple on a real machinist’s a _ _ ! I come by whatever skills I may possess by my father and grandfather - both of them master loftsmen and wooden boat builders .
Thanks for the compliment and interest . I admire your soft skin projects as well .
Cheers- Richard
Richard, I had a somewhat similar upbringing ~ except today I only own a tiny little Austrian built Unimat. (Sort of the Shopsmith of jeweler’s lathes.)
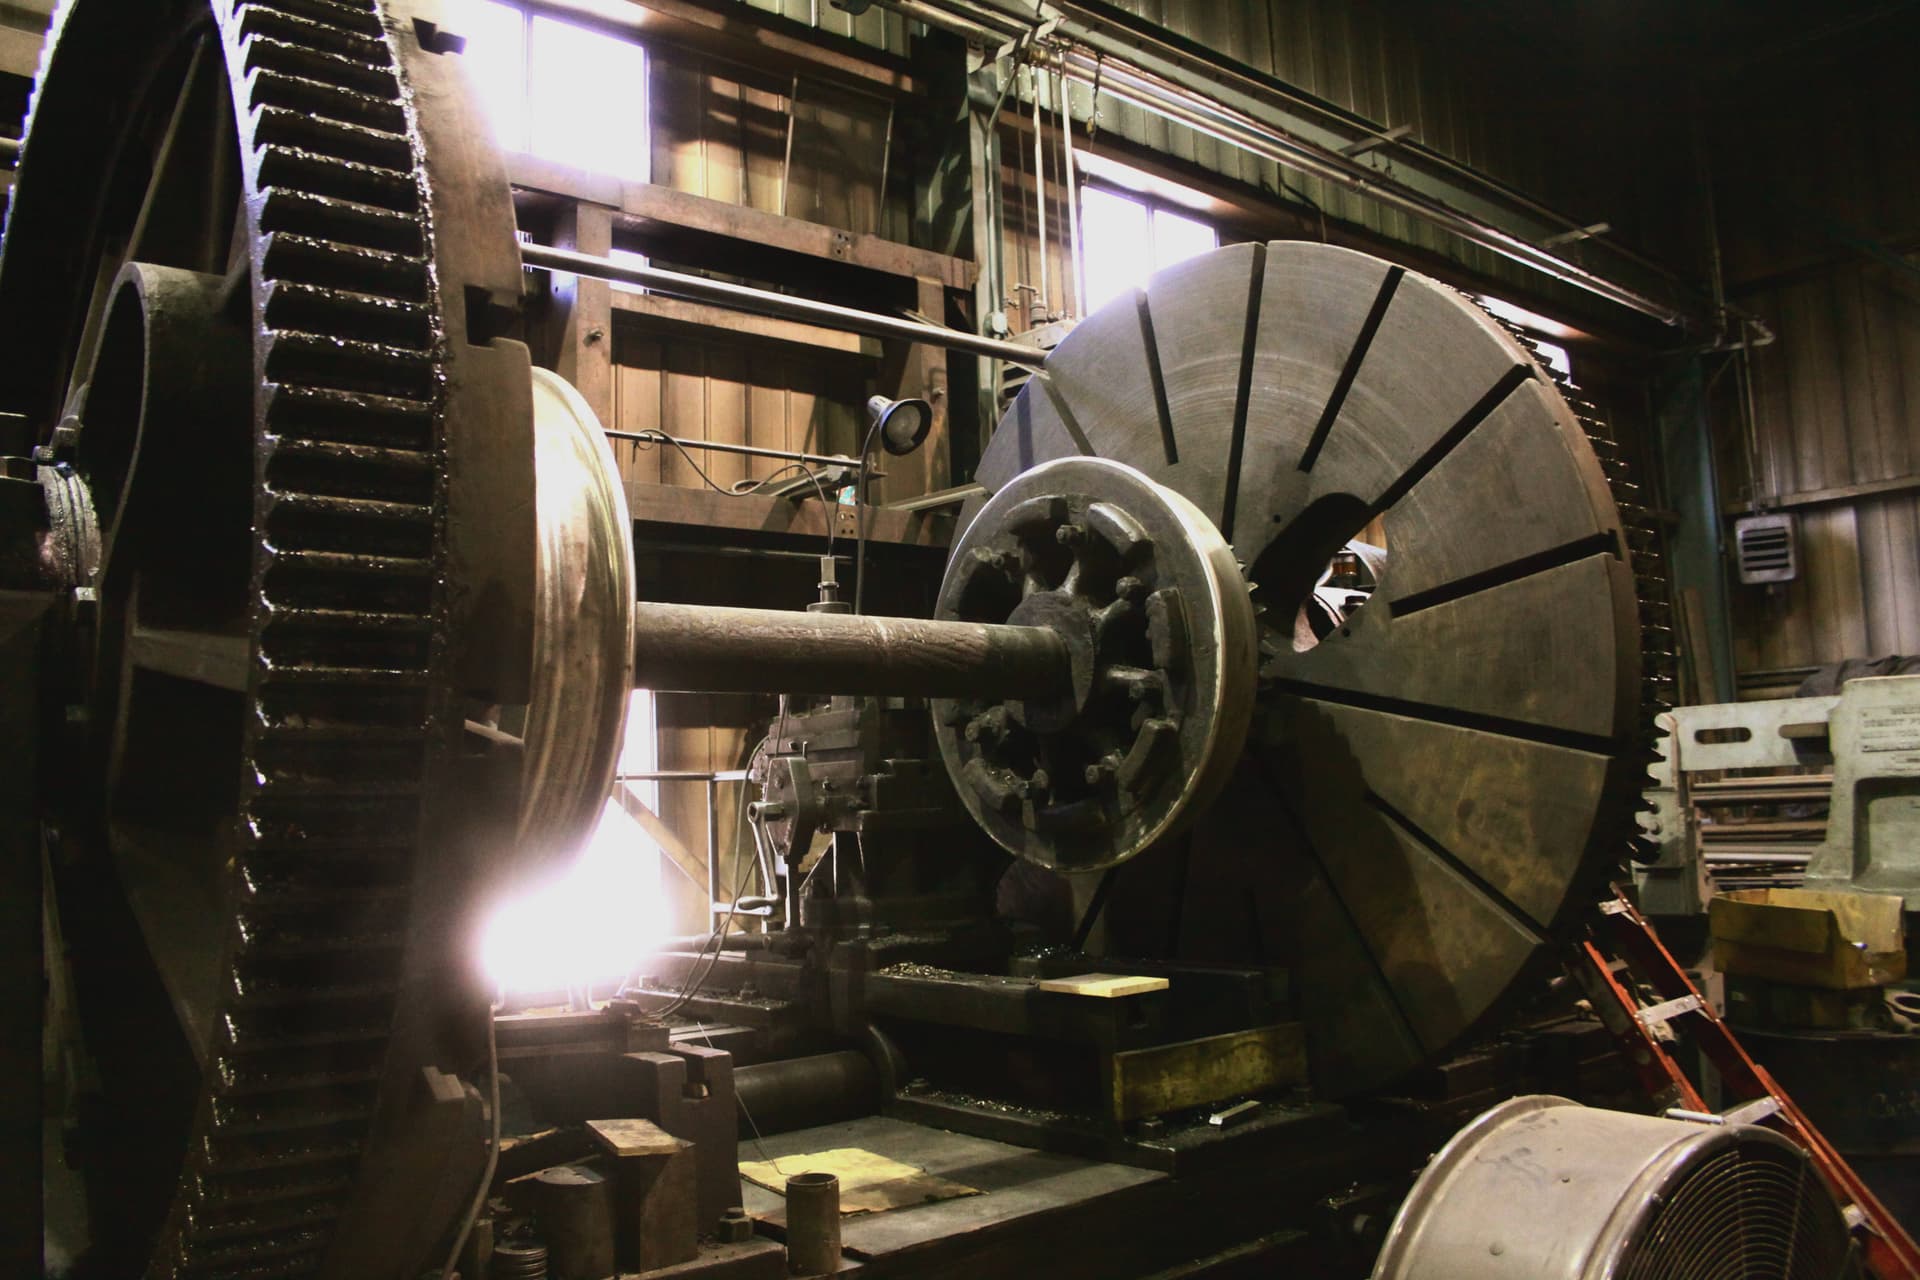
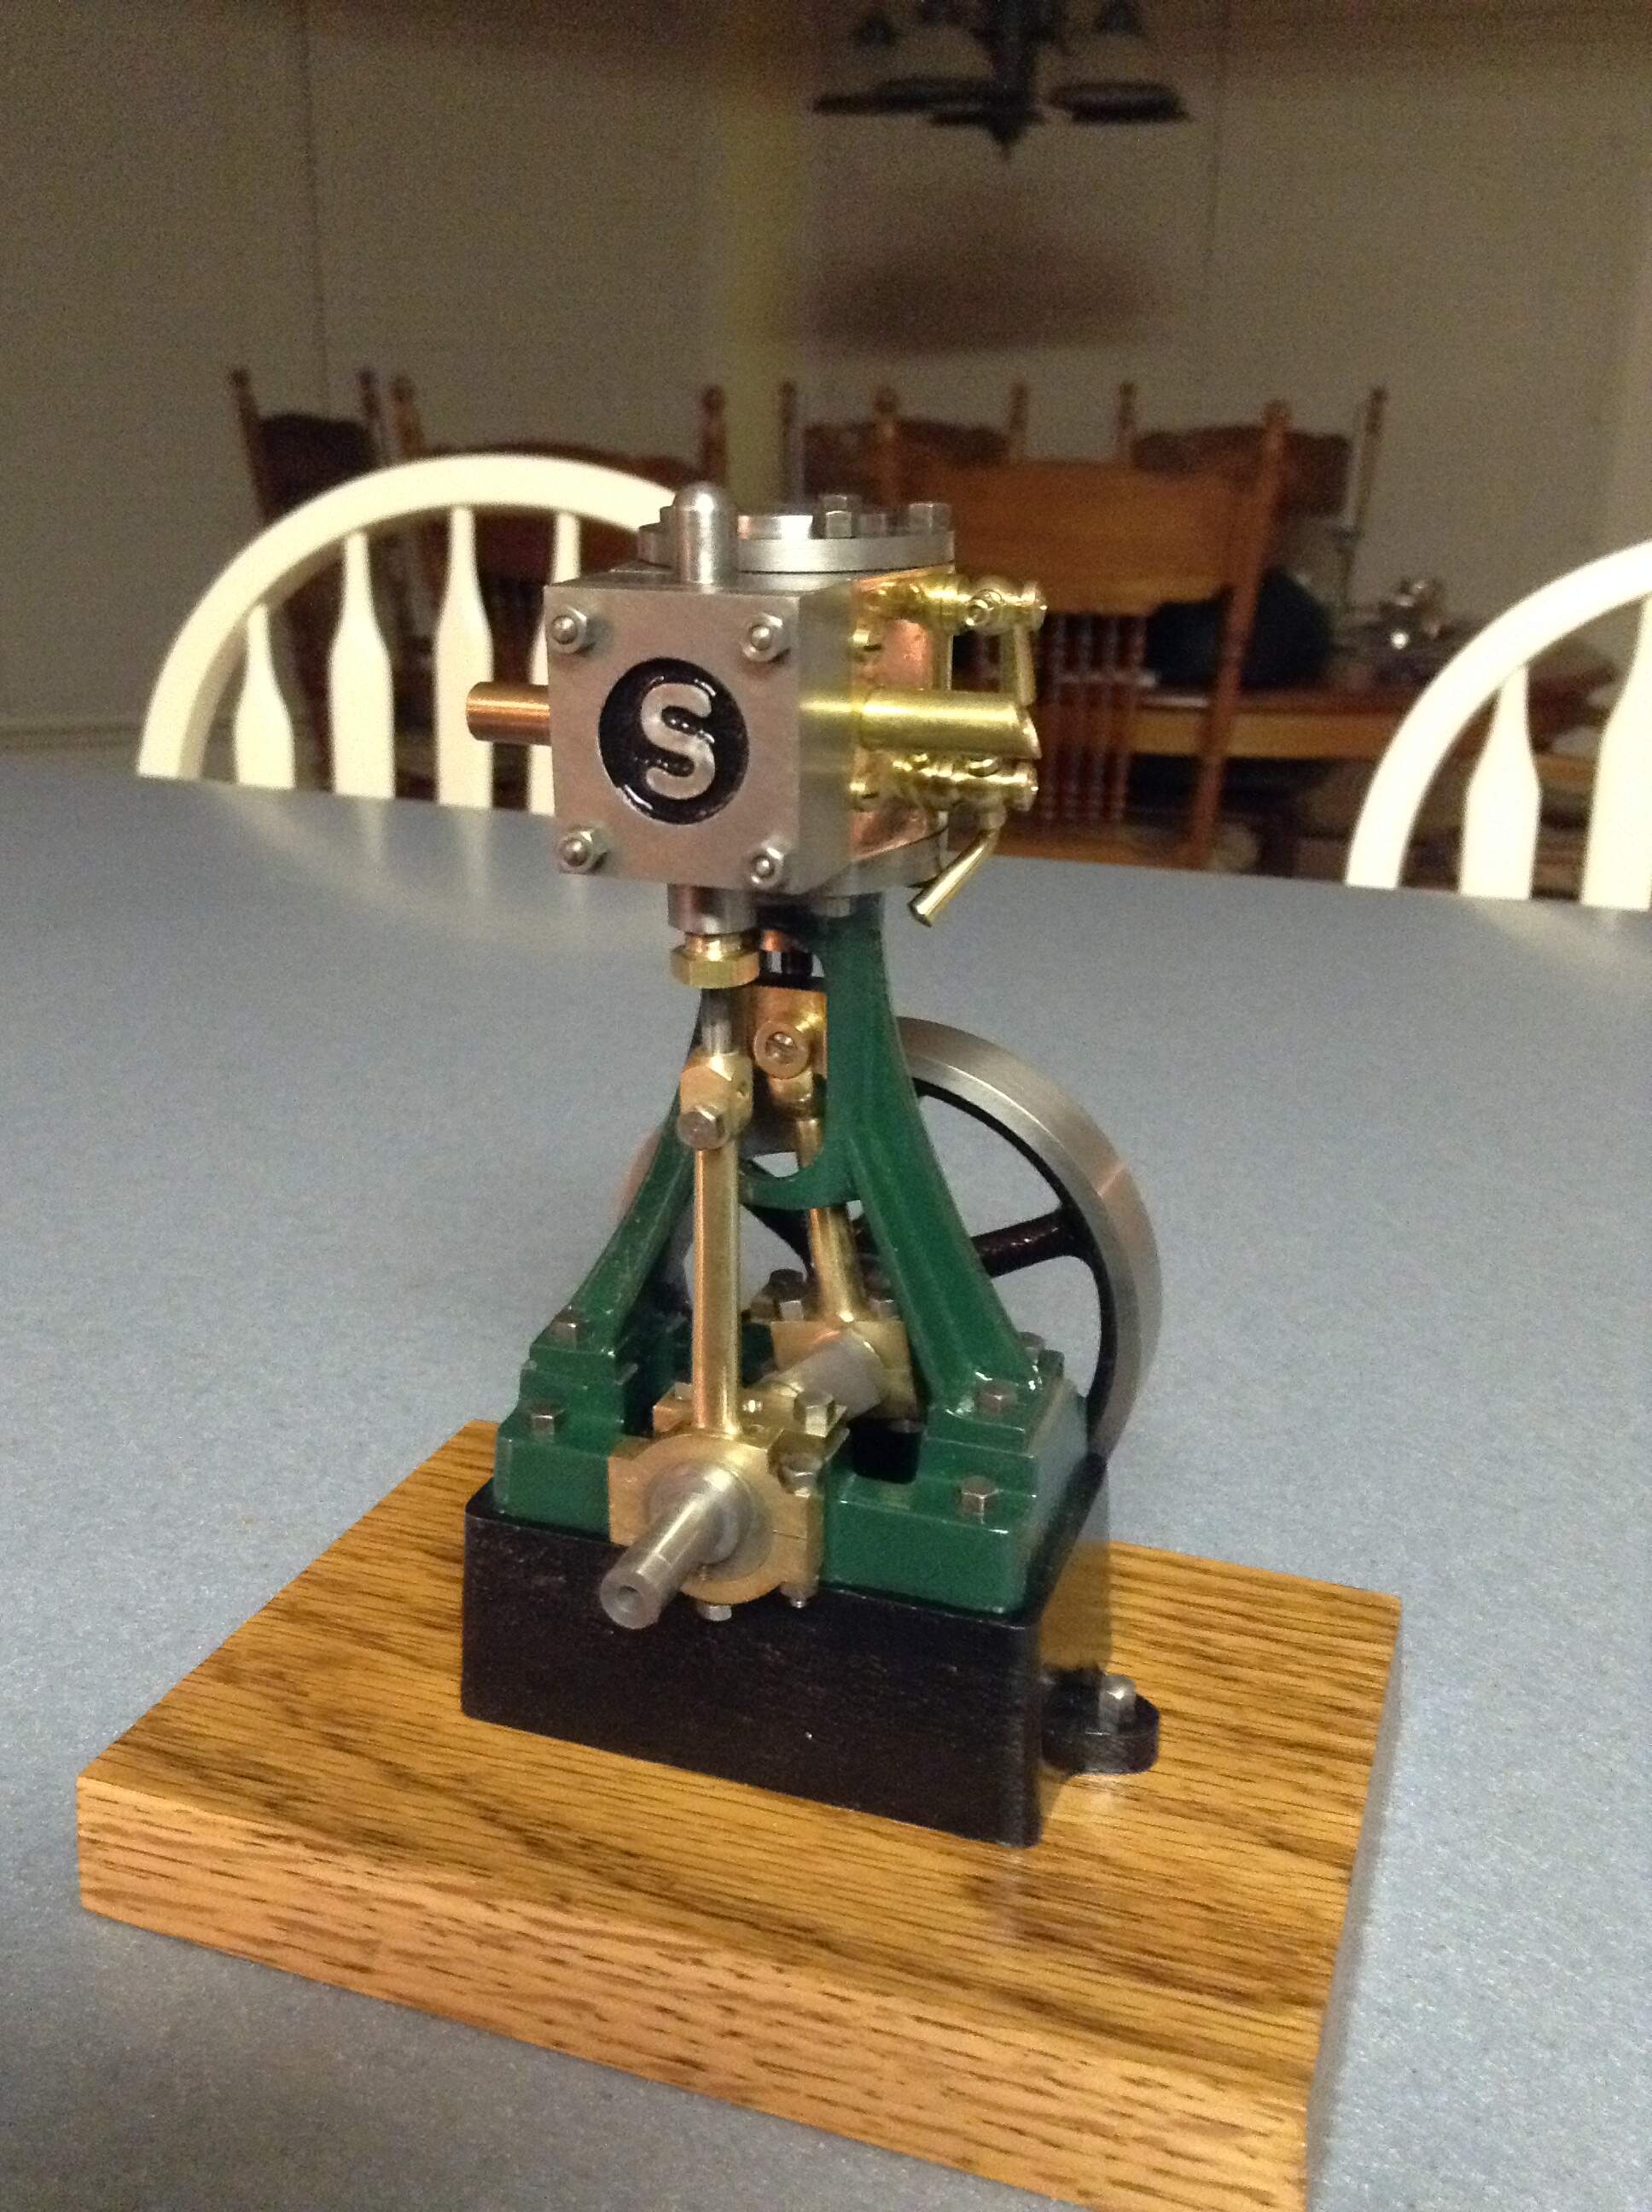
That is some serious machinery. I like railroad stuff too - had a few different layouts in my younger days . I like all things mechanical and nothing ticks all the boxes for mechanical fascination more than a steam locomotive. Here is one my early machining projects built from raw castings and metal stock . Stuart 10 V steam engine . While I have a vertical boiler kit ( yet to be built) I only run the engine on compressed air. Steam is pretty messy .
One of the axioms of this type of work seems to be thus - If a component being machined requires 10 operations you will screw it up on the 9th if you are lucky , 10th if you are not …
Cheers- RT