@Hwa-rang - Thanks Jesper !
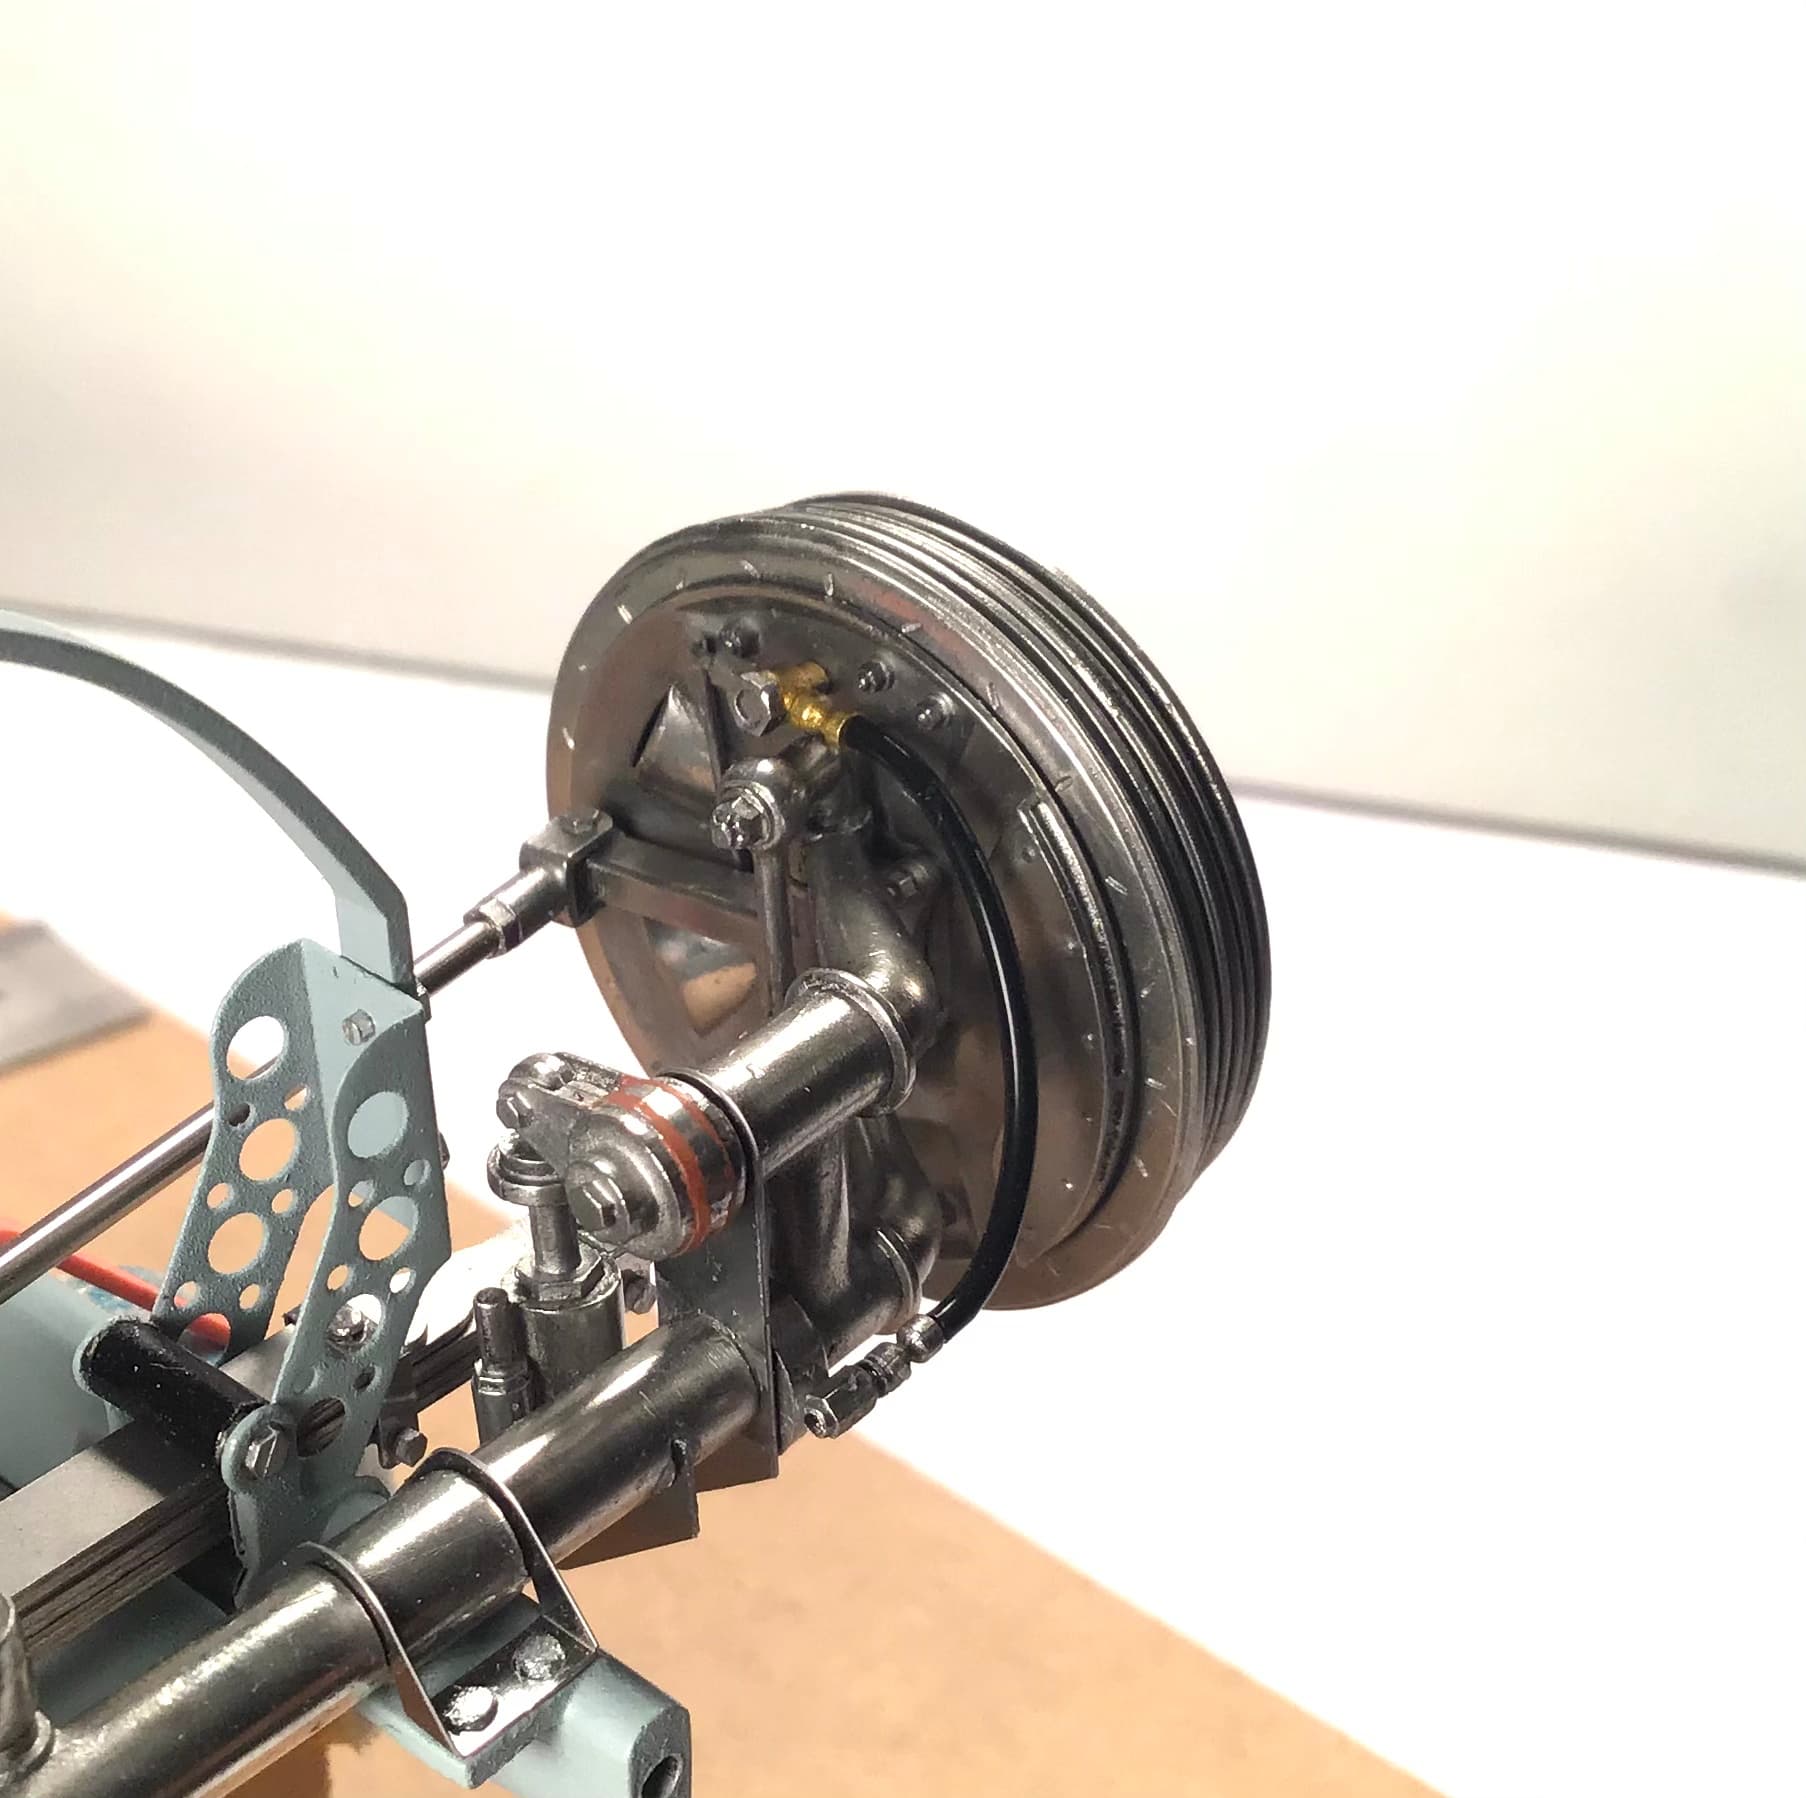
Chipping away at the brake lines - front wheels done .
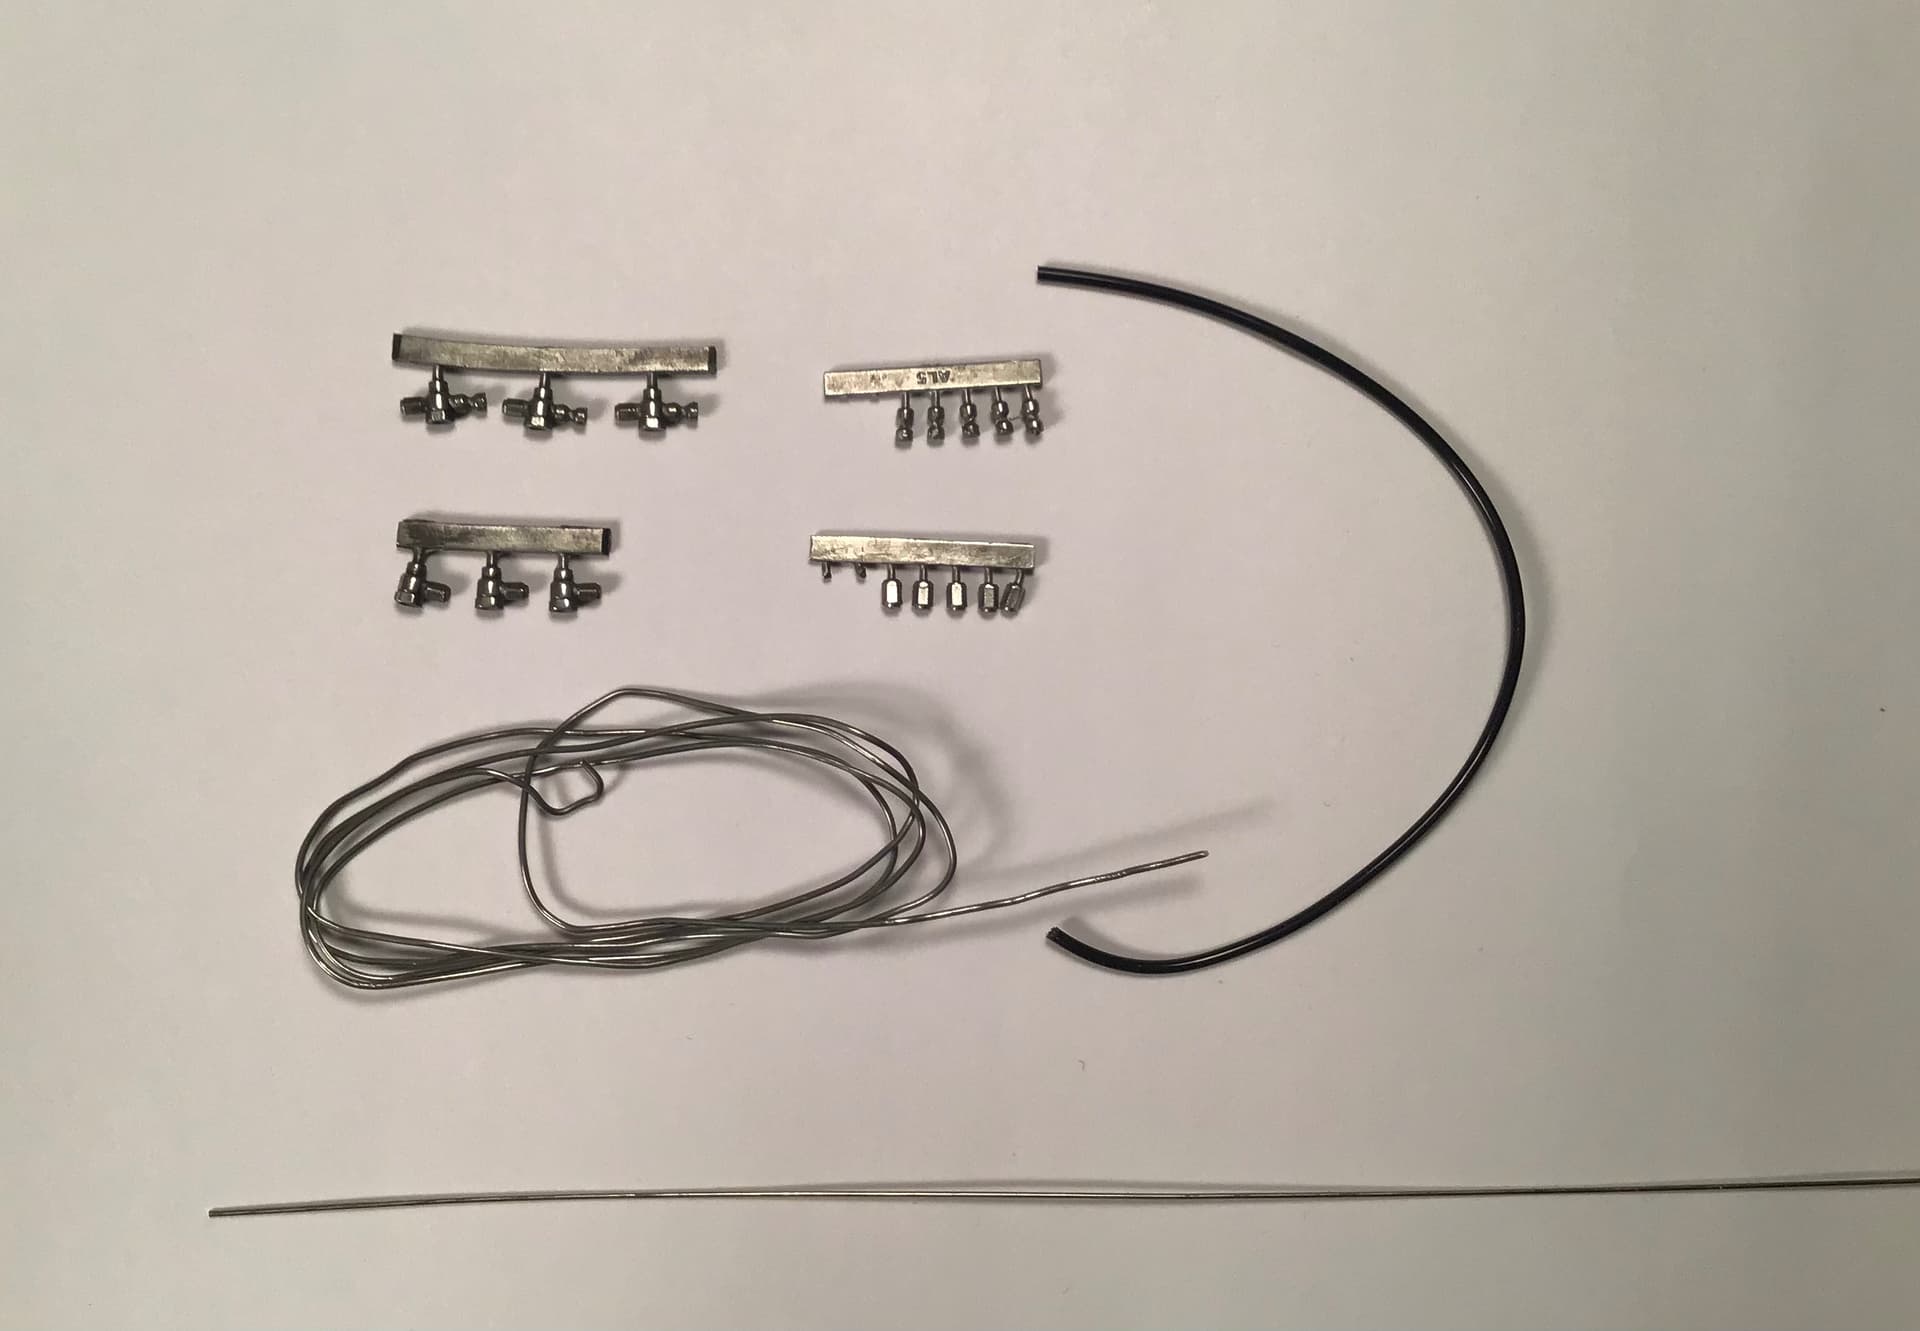
MFH gives you white metal fittings , vinyl tube for the flex hose , fine solder for the hard pipe brake lines and nickel silver wire for stubs to connect the vinyl tubing to the fittings . White metal fittings polished up and banjo sections painted brass color.
Richard,
Truly amazing detail by MFH, and just as amazing work by you from prep to polish, to assembly, to the final finished brakes as seen in your pics.
@Joel_W - Thanks Joel for all your interest - you need one of these kits ! @cosimodo - Thanks Michael - I’m anxious to see more of your Ducati build .
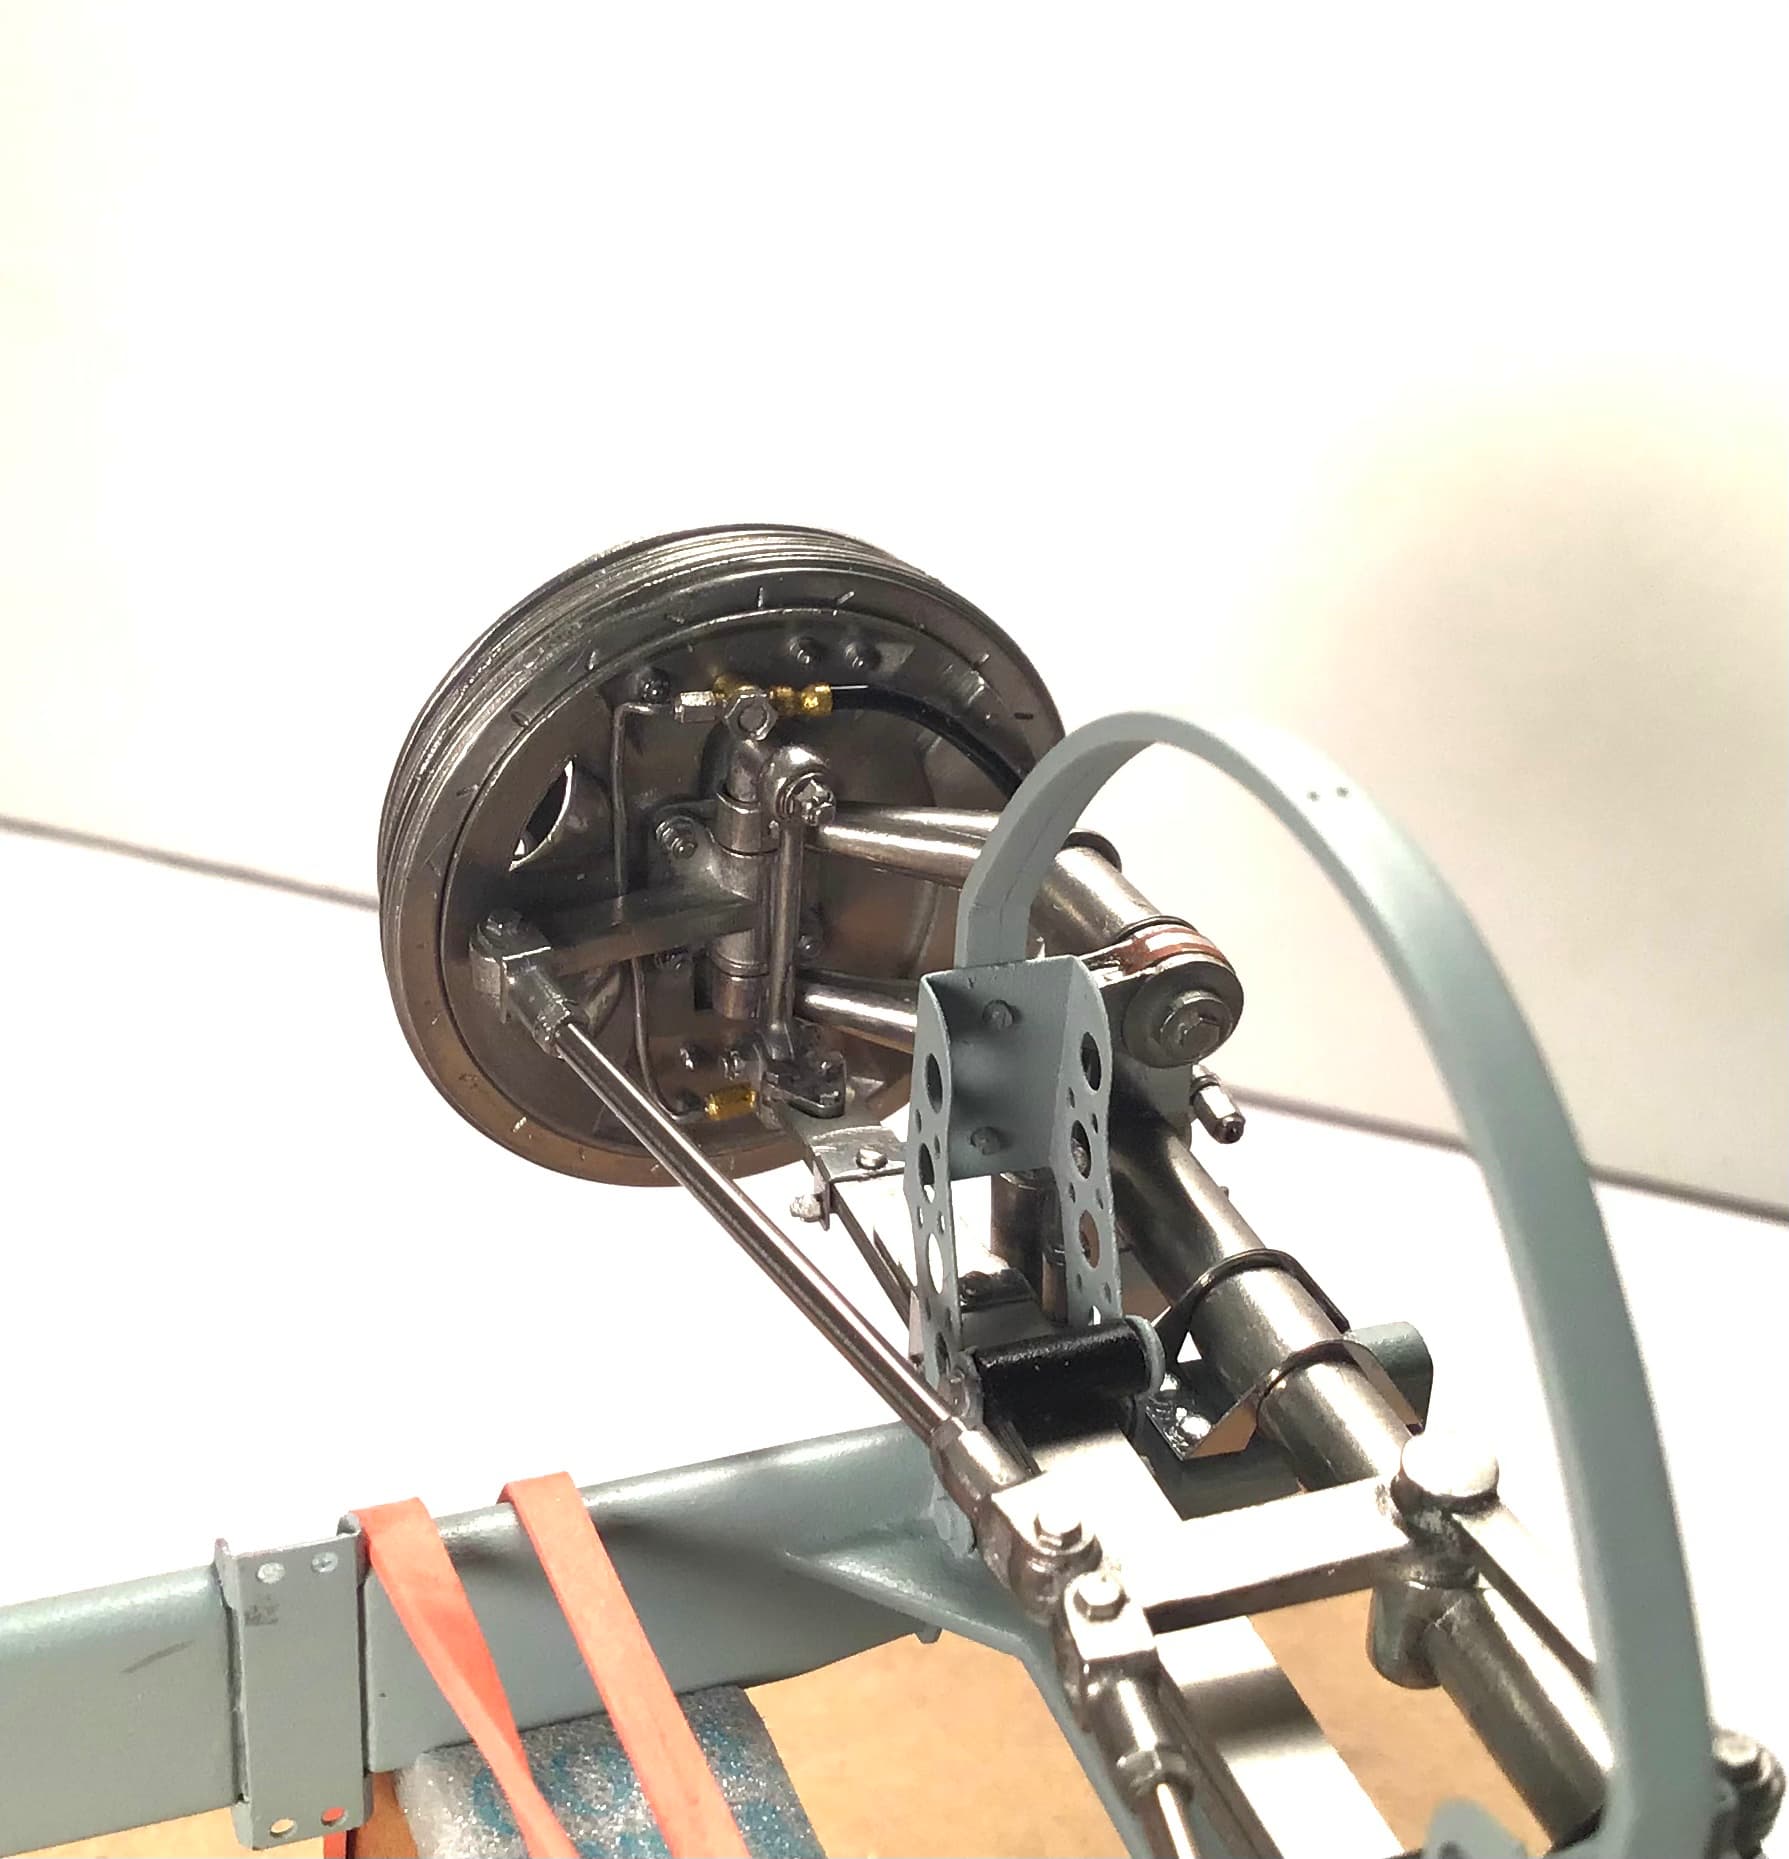
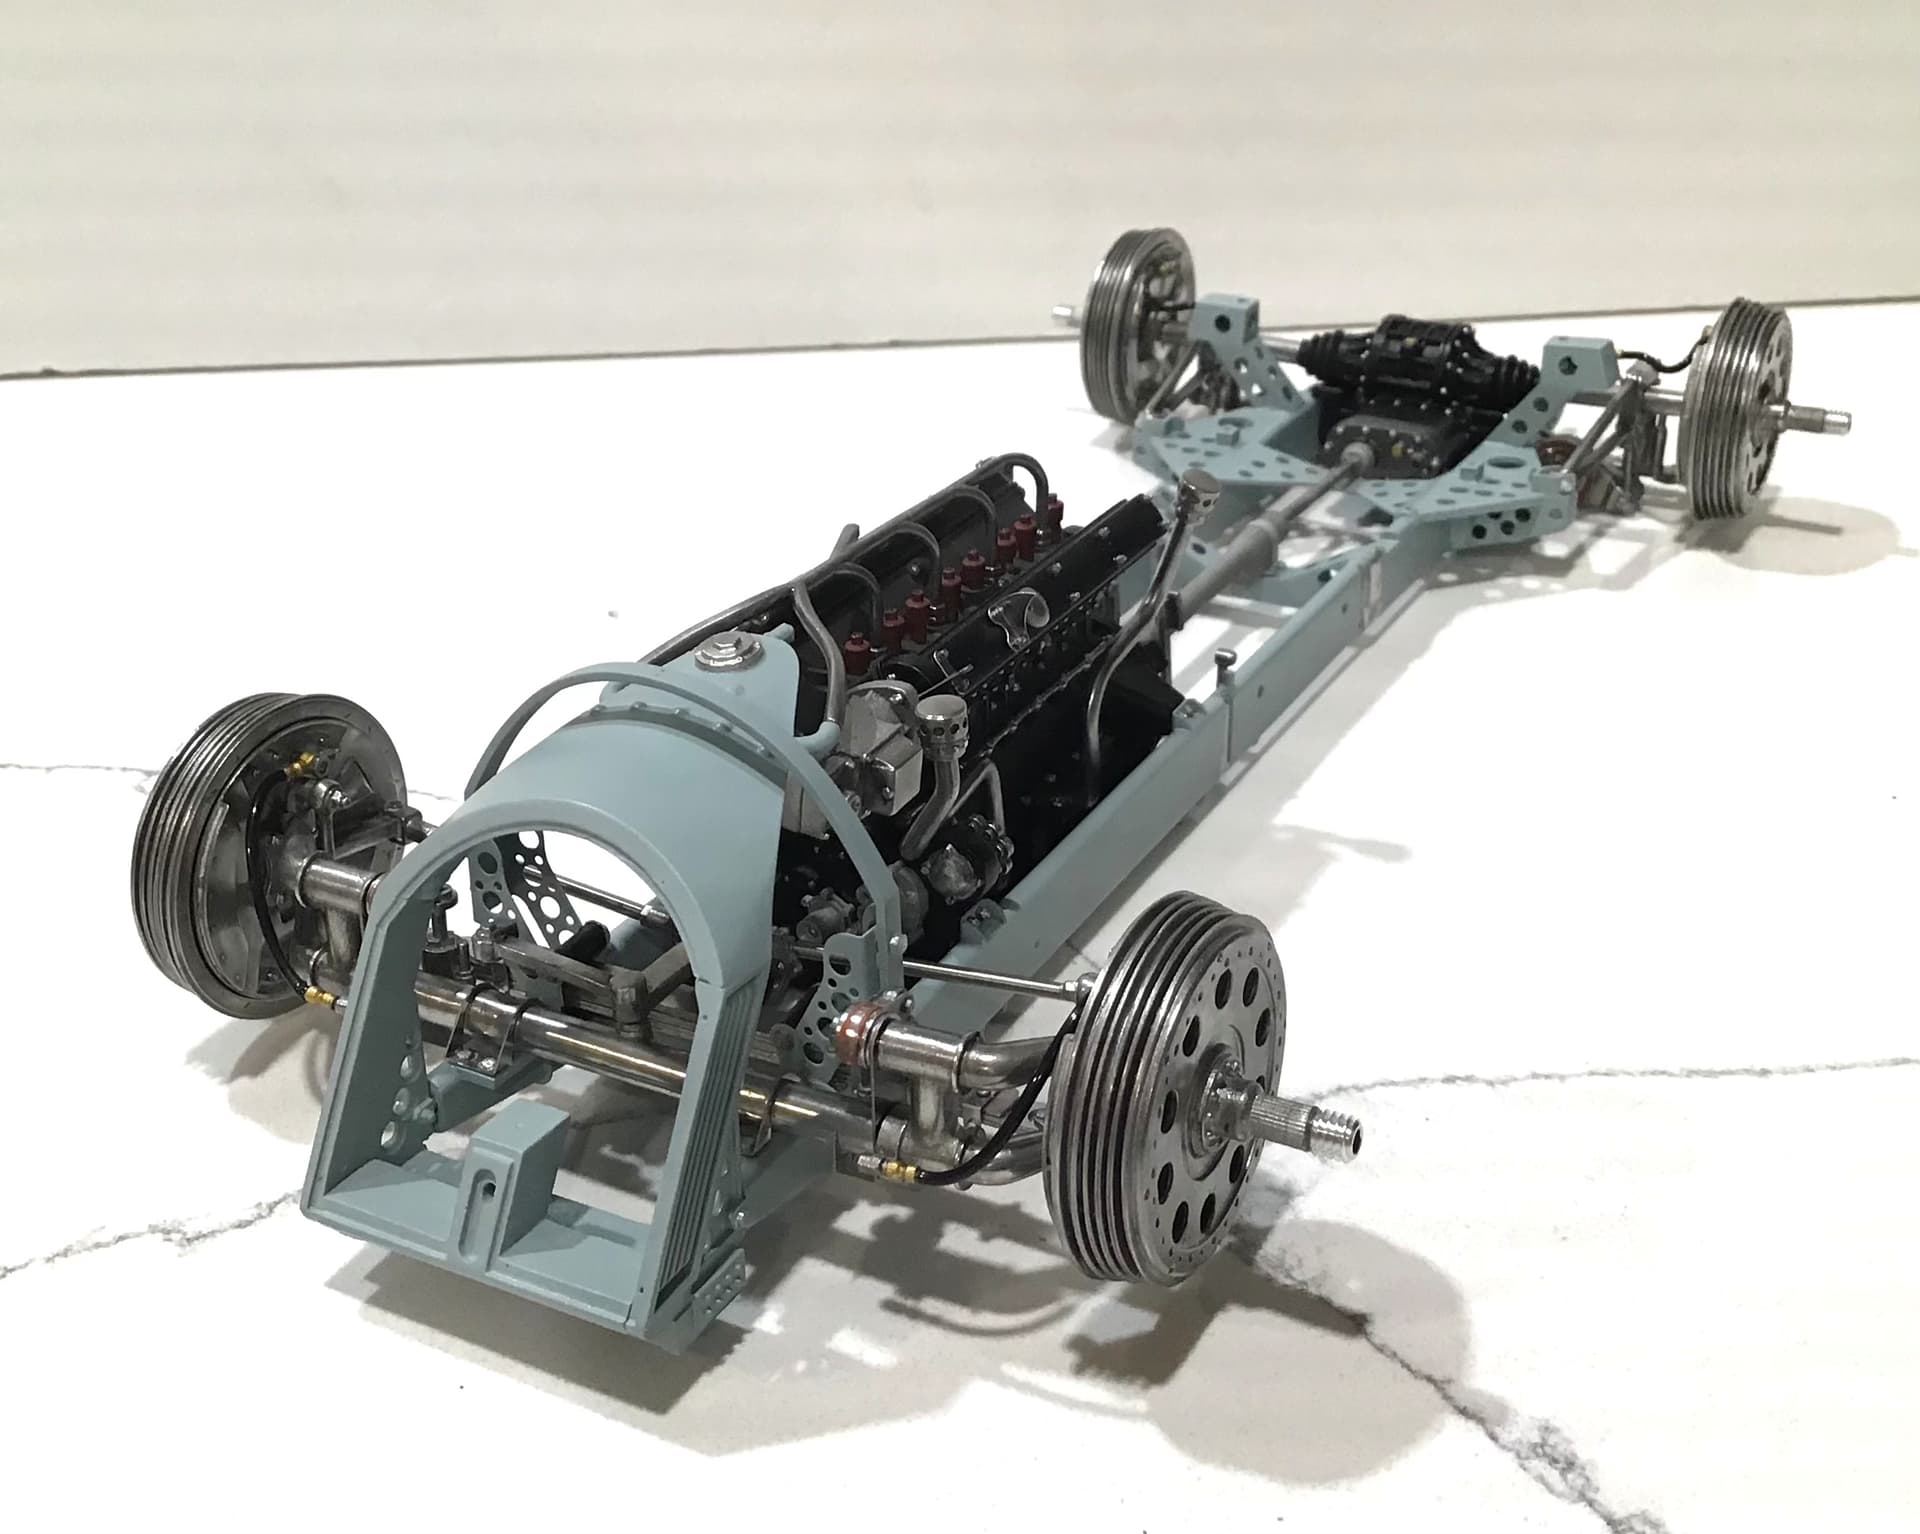
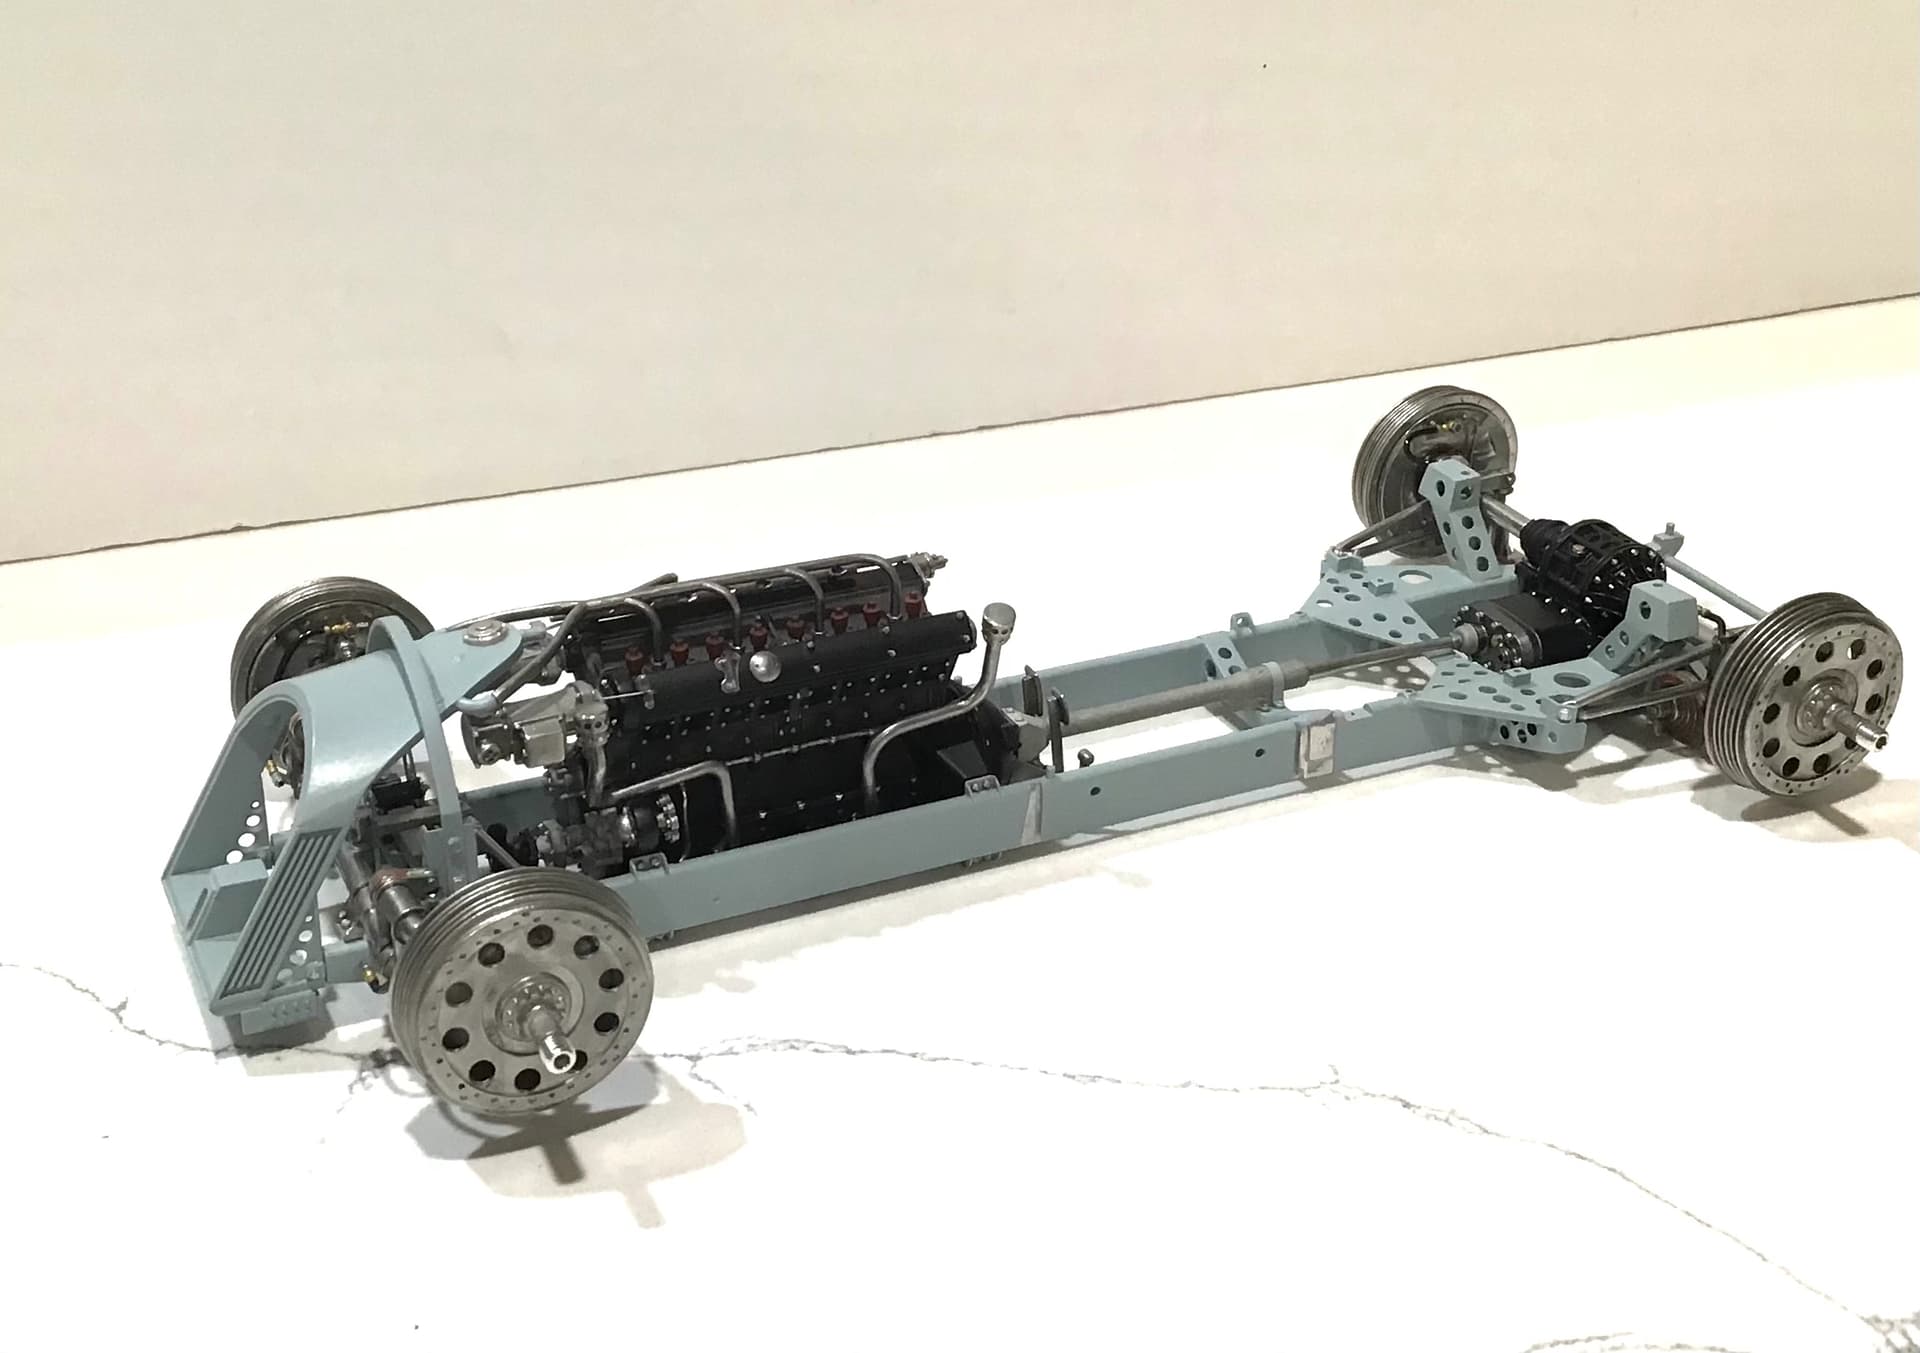
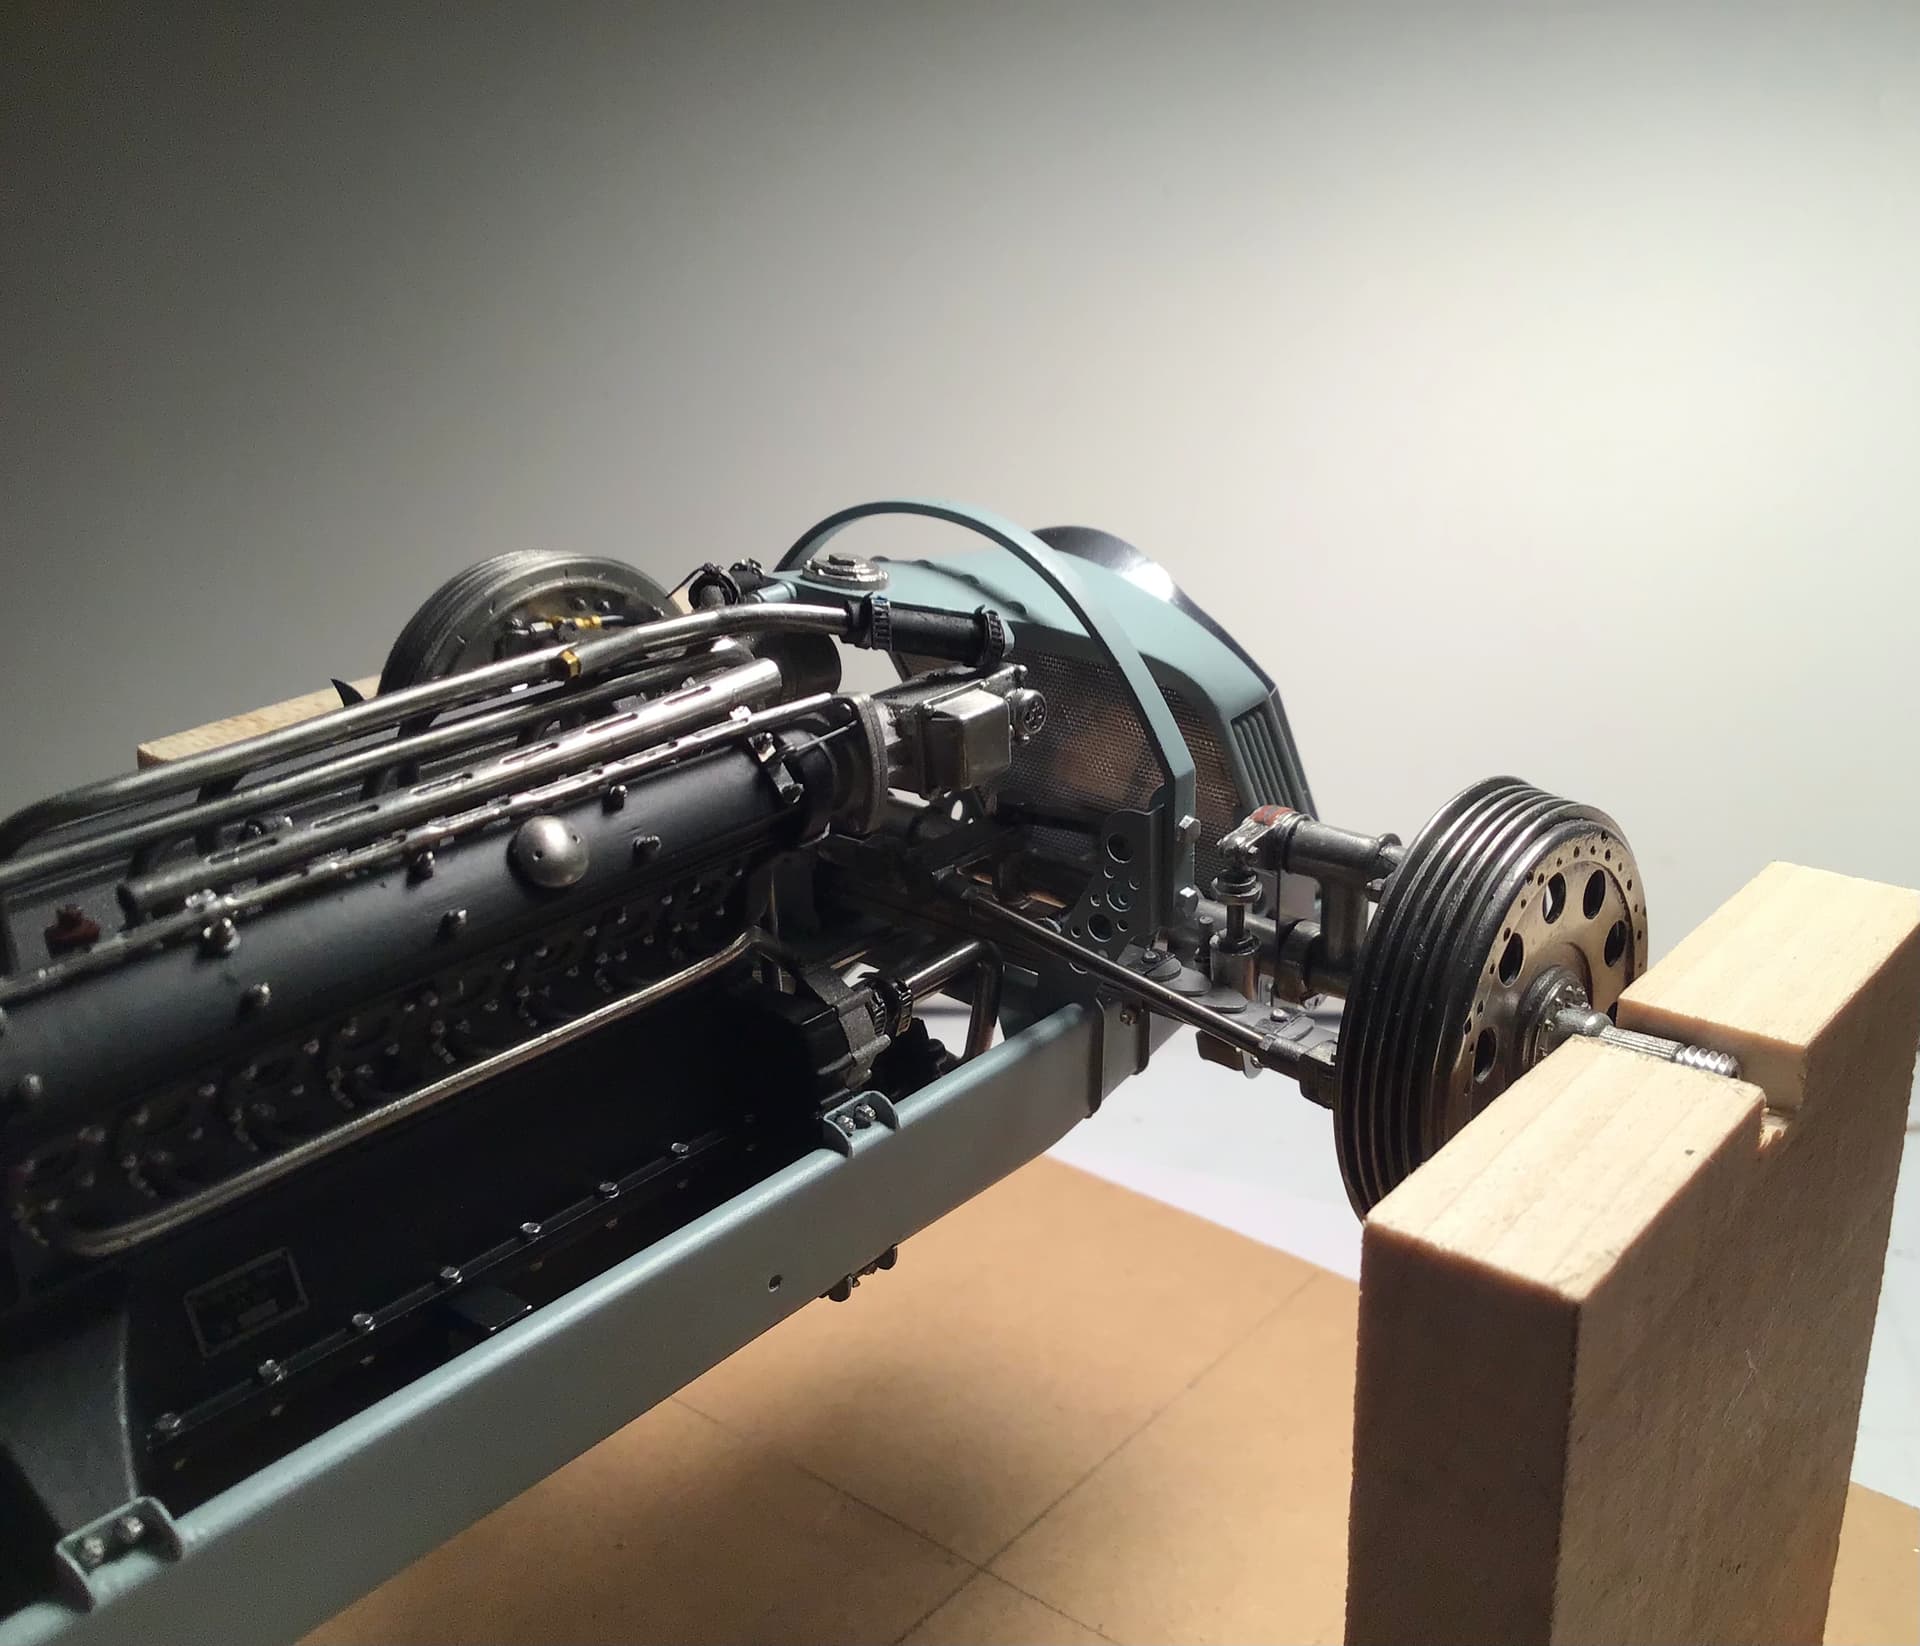
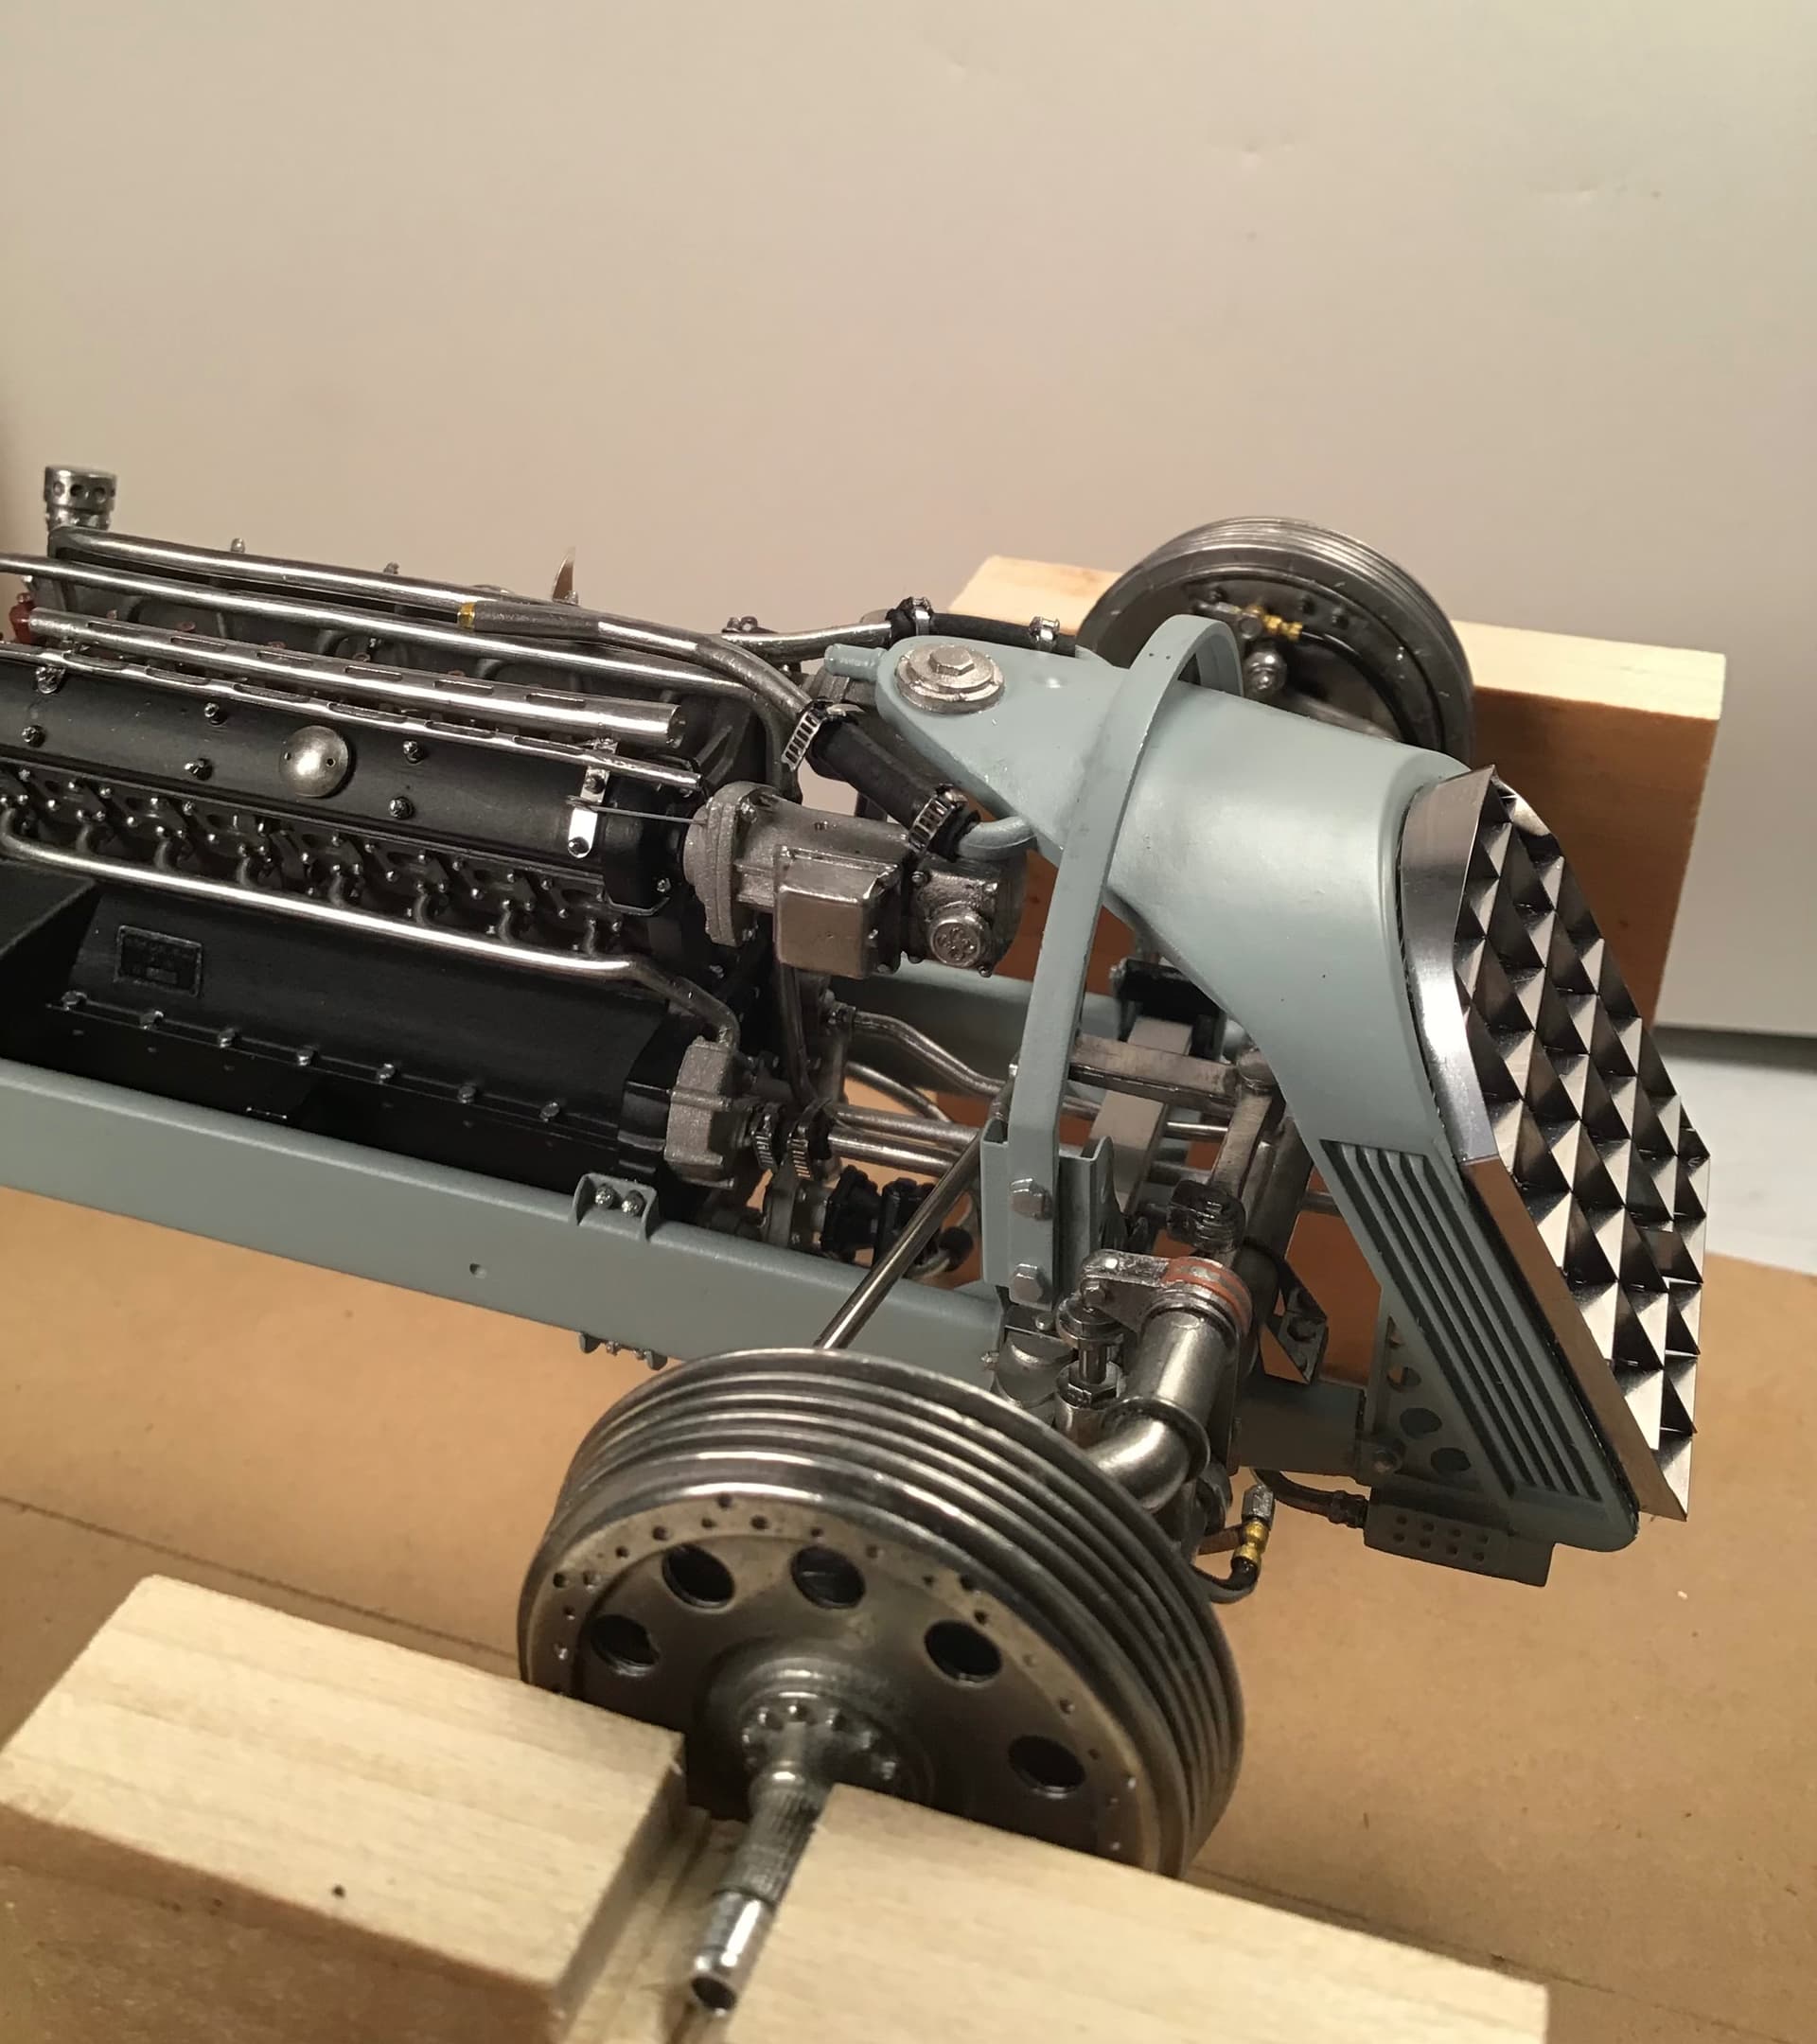
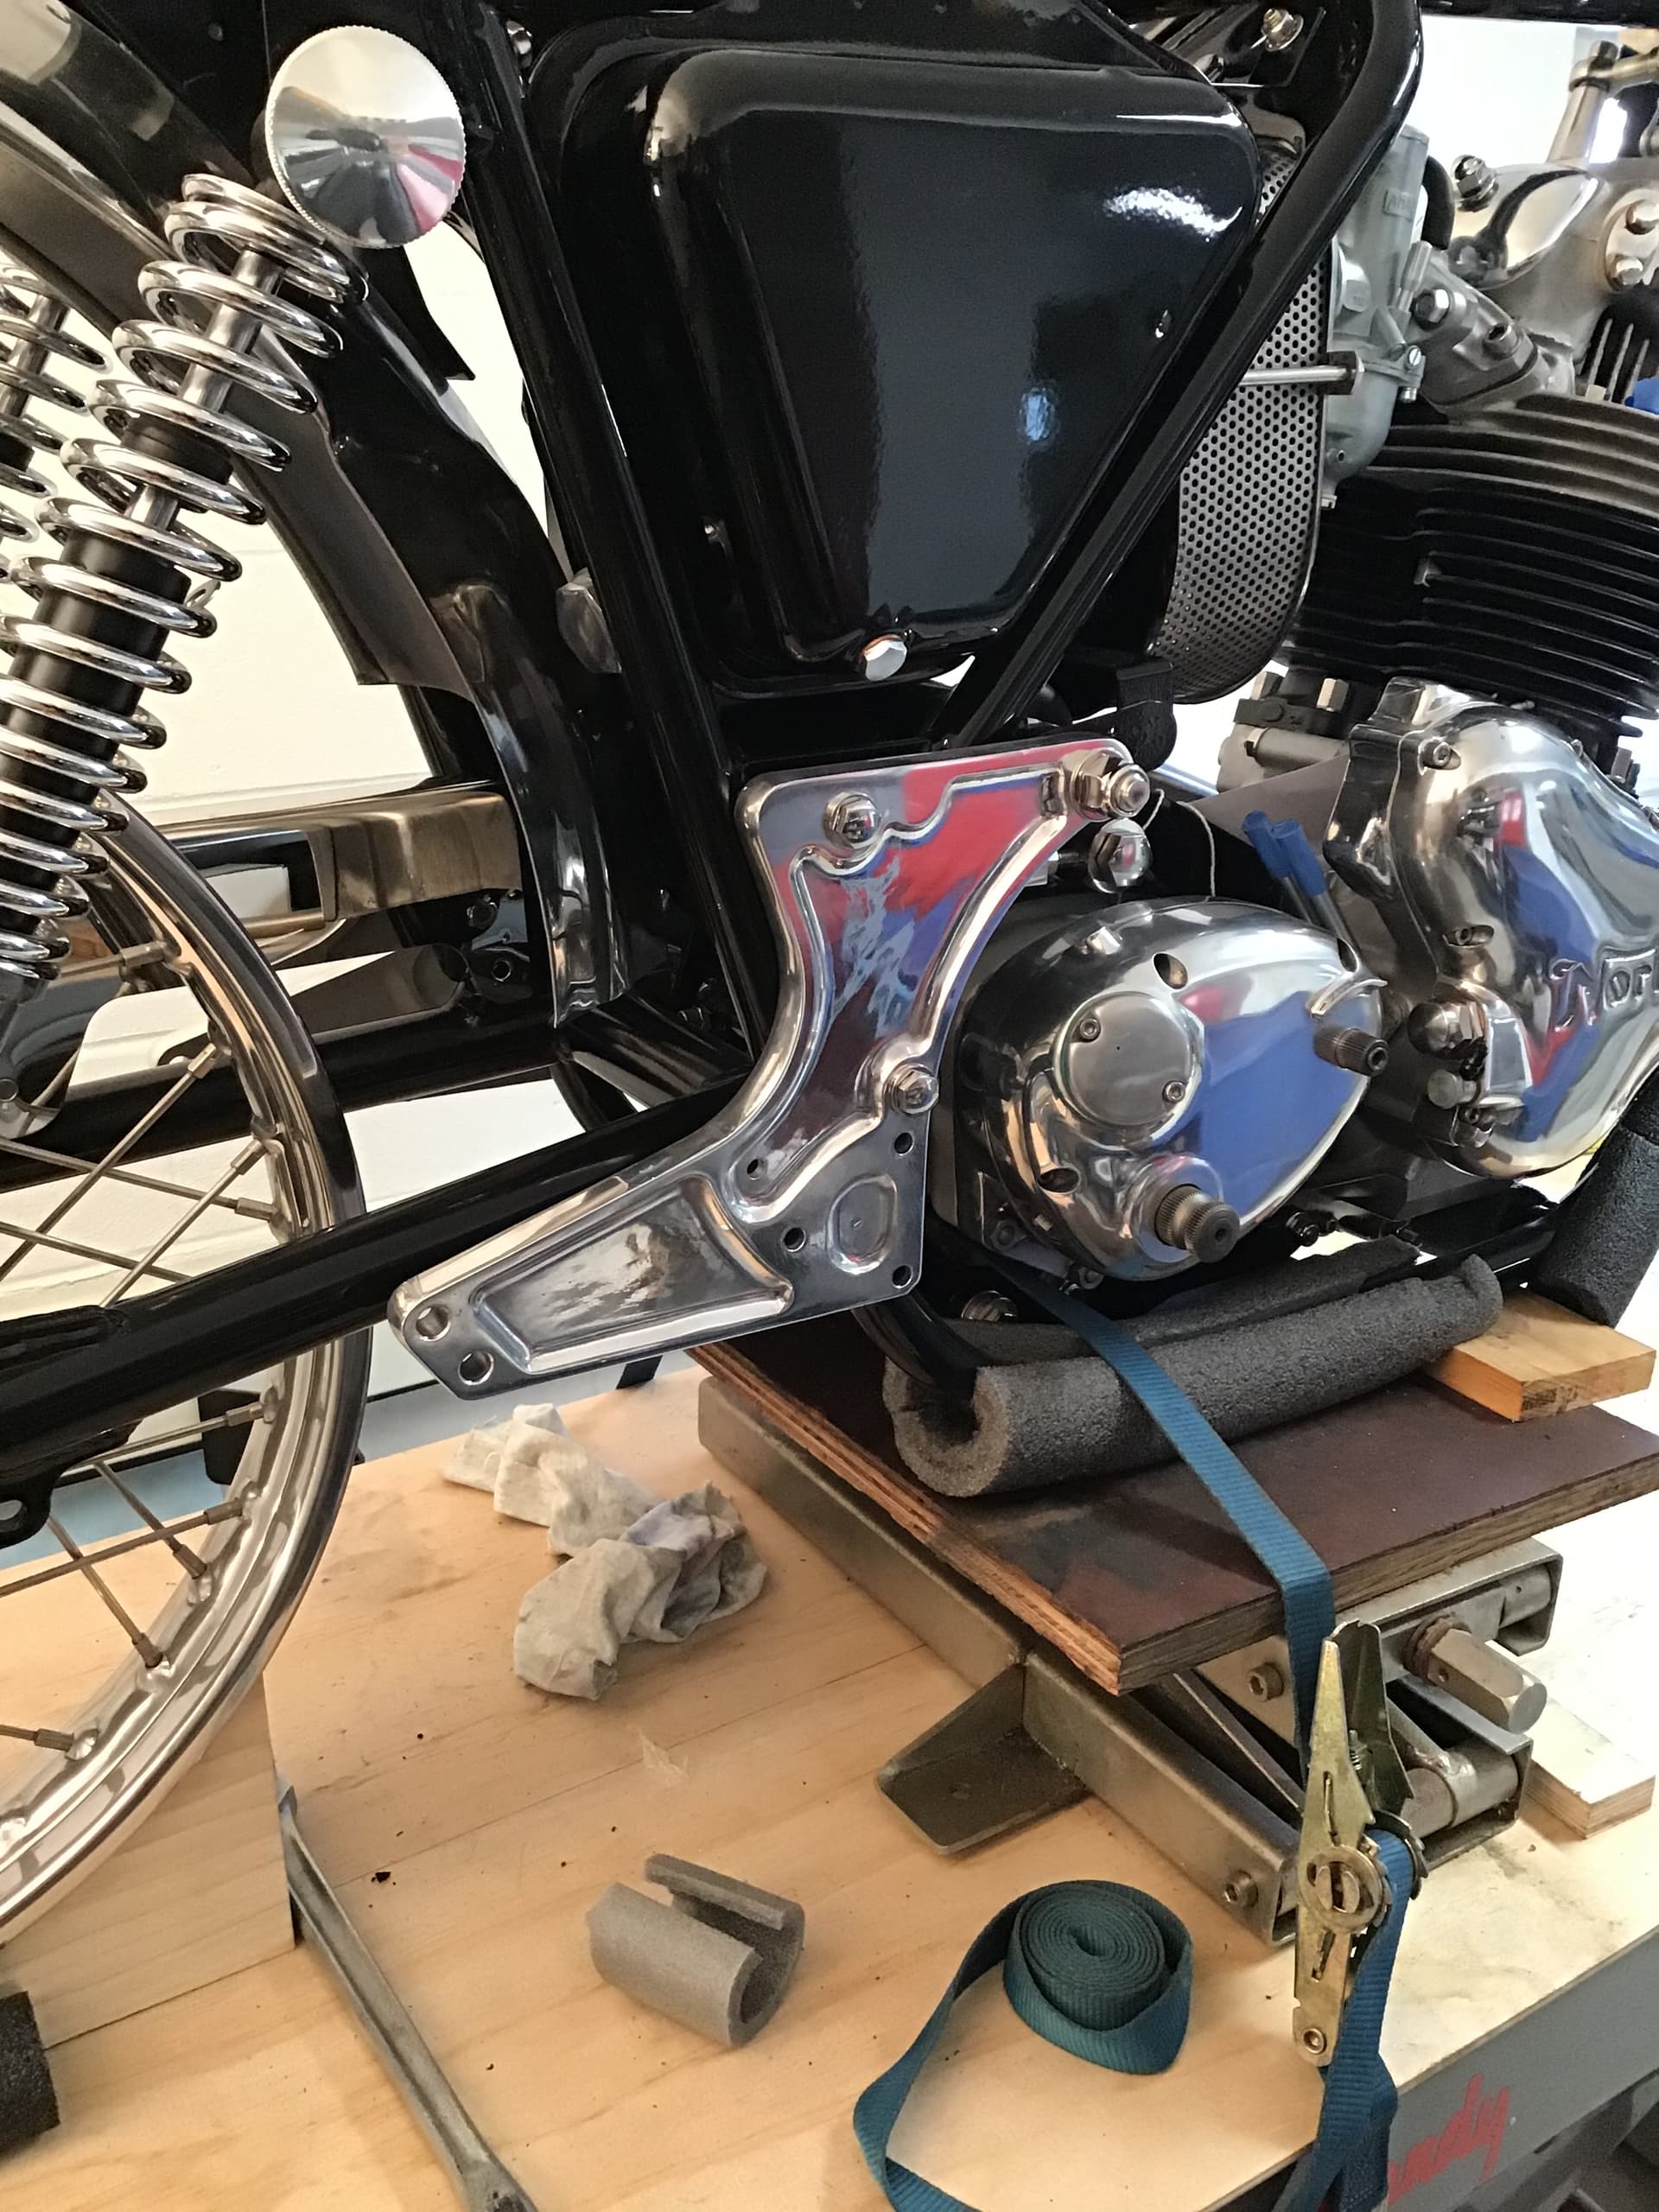
Major milestone today - engine in chassis and drive line completed. Brake lines at all four corners .
Radiator tank dry fitted . Kudos to MFH for the way it all comes together. Coolant manifold on top of engine needed only a little tweaking to meet up with the inlet pipes on the tank . MFH supplies heat shrink tubing that goes over the coolant pipe connections and photo etch hose clamps as well !
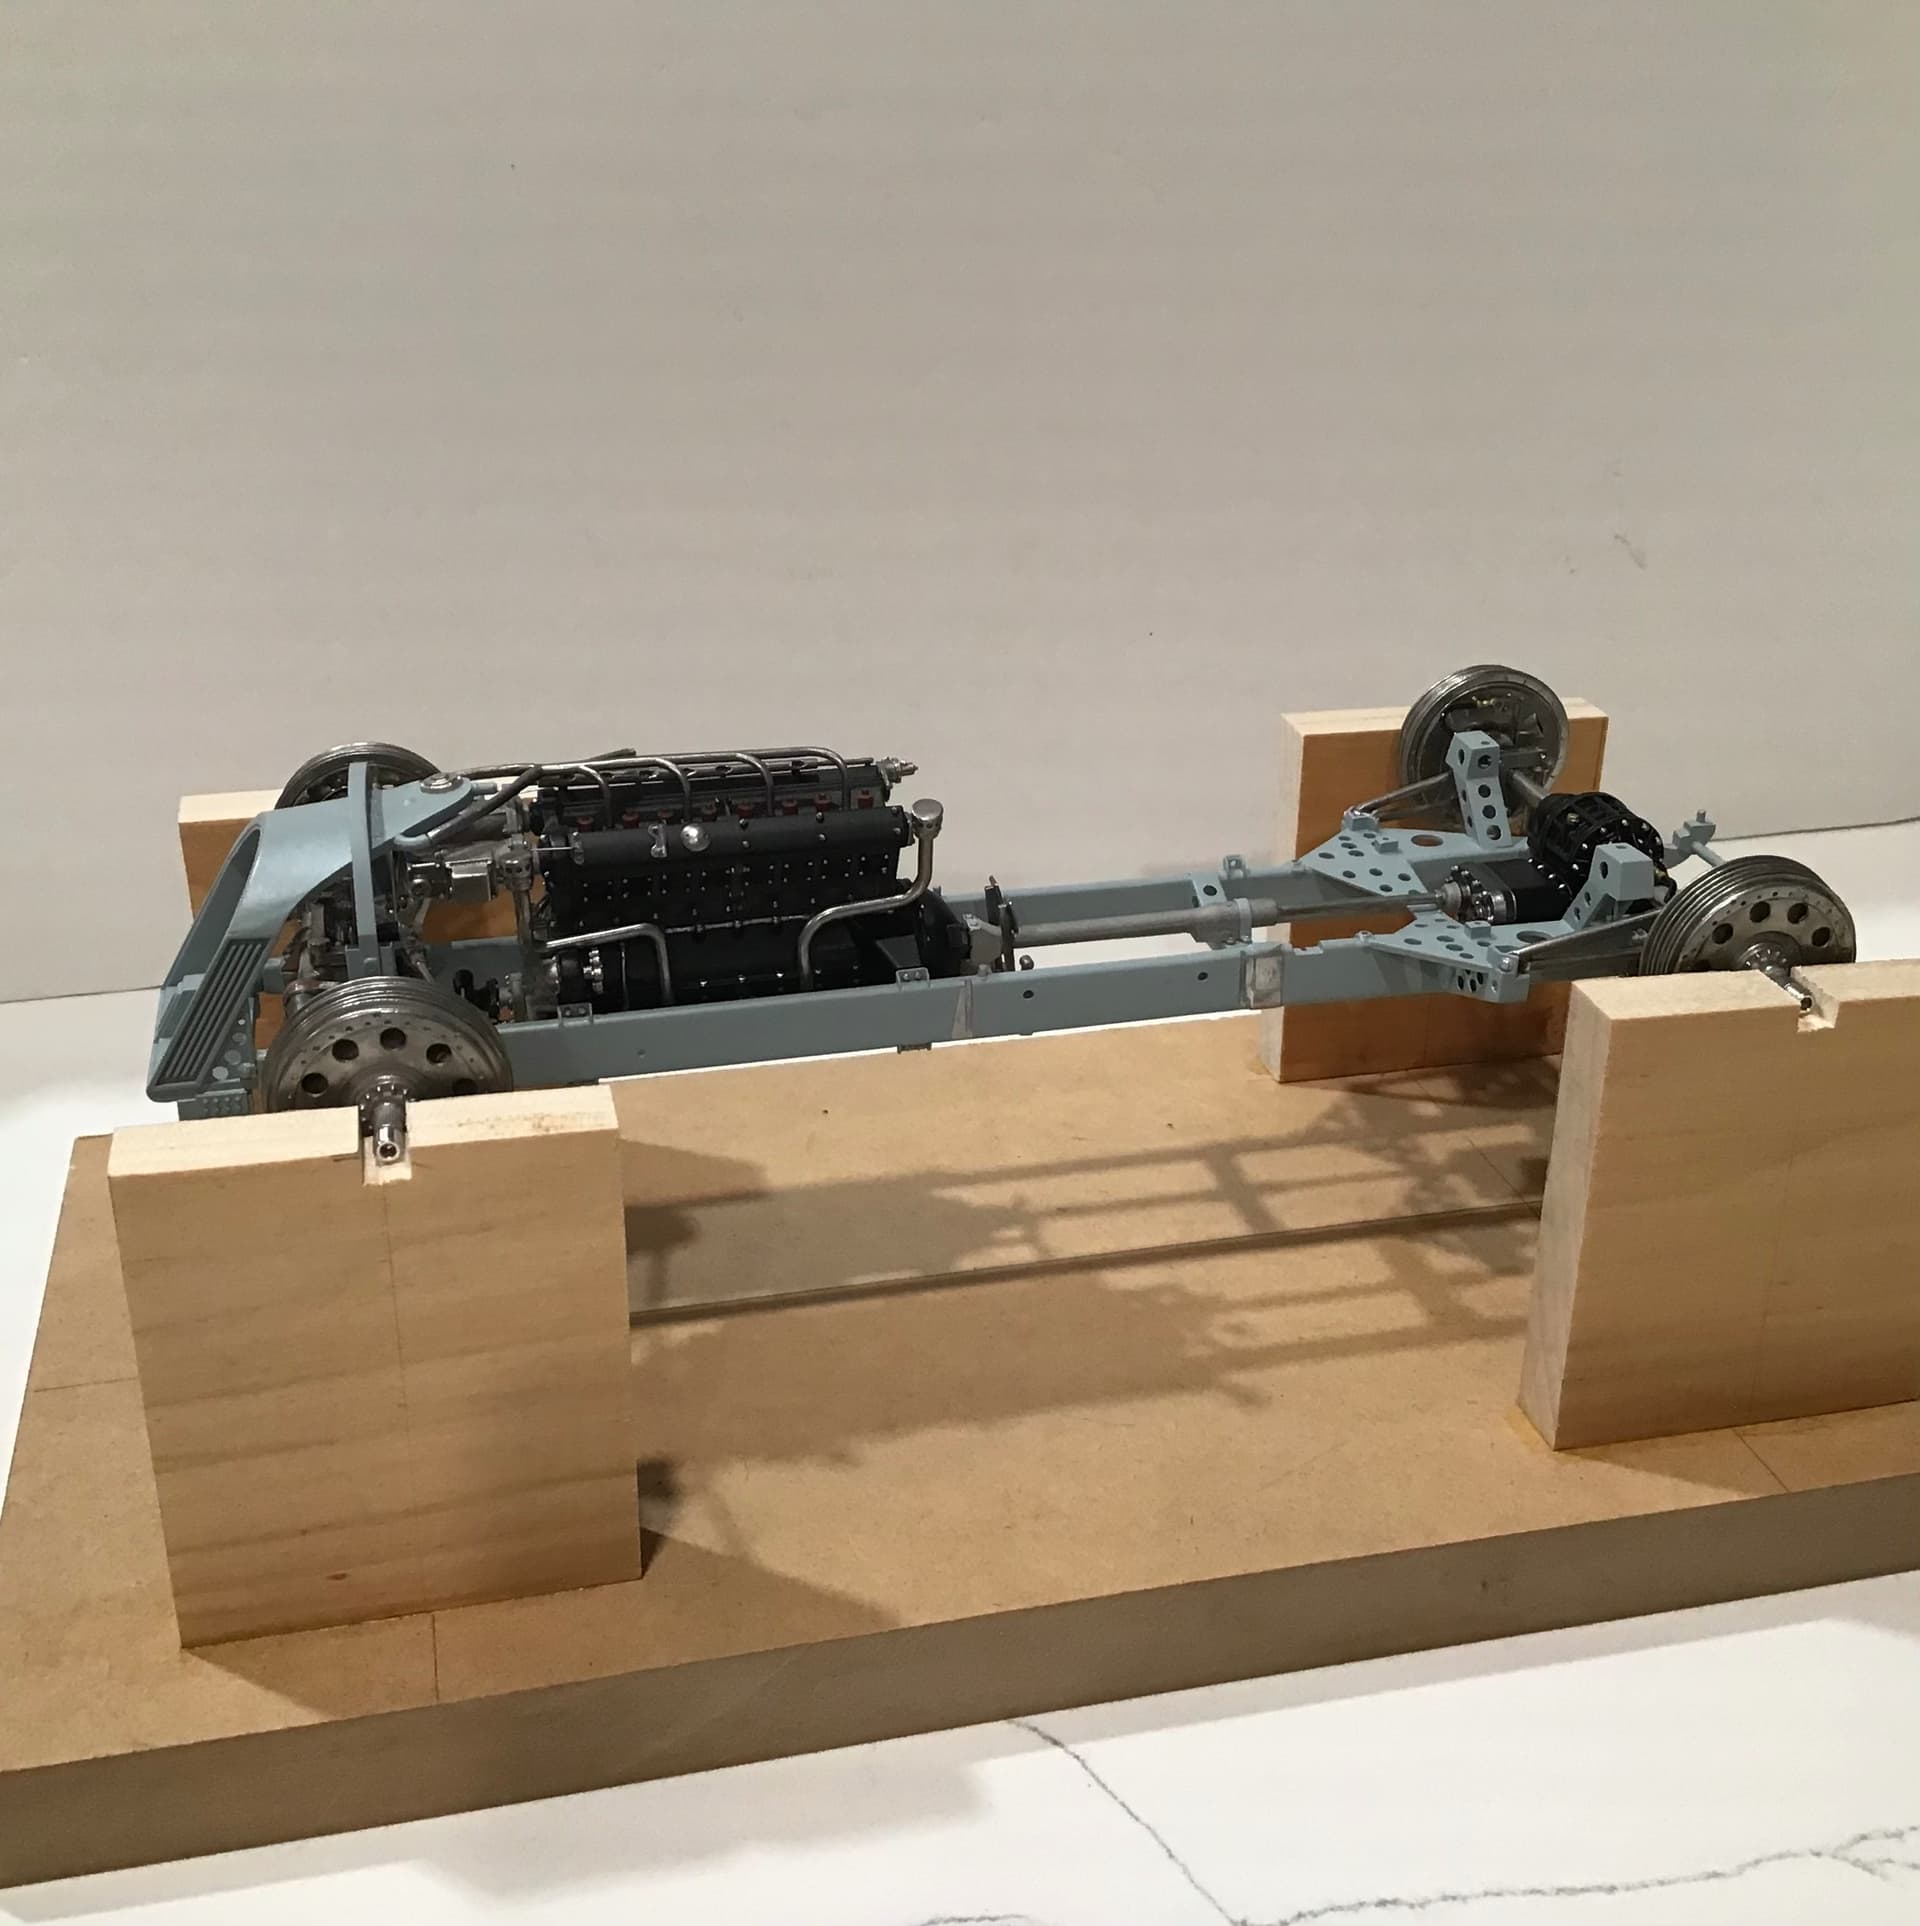
I made yet another base ( # 3 ! ) to support the model by the hubs as the previous one interfered with the engine .
This one should be high enough so that work can be done on the underside with the model inverted.
Love the continued ingenuity for creating various cradles for your build. When you’re finished just pop them in the mail for when I get around to mine.
I think the polished metal adds the most impact. Much better than painted. I bought some Blue Magic and it transforms what I thought was not a bad job in polishing up the white metal on the Ducati - just a whole other level. Speaking of the Ducati - paint arrived yesterday so I’m in business. I have updated the blog.
As for enjoying the kit - when I see what you’ve achieved I am not surprised but I think that is the beauty of the MFH kits. It gives the chance to see how these simpler cars were constructed and gives you whole other level of satisfaction of building something spectacular. Looking forward to more updates.
Richard,
Your continued progress on a MFH kit is just amazing. You’re making better progress then I on a plastic model. I guess I should just go stand in the corner. I’m guessing that you actually work on the kit just about every day, and with your skillset the work level is just top of the chart.
As for the new cradle another winner. Sure seems that you invented a new modeling hobby.
Getting ready to get slammed by the North Easterner coming up the coast. Strange that we’re prepping for 12+ inches, and you guys in NJ will be getting less. Usually it’s the other way around.
@cosimodo -Thanks again Michael.
I will put a post together regarding the polishing of the parts with things I learned from polishing 1/1 scale stuff .
Sending a PM regarding bases.
Cheers- Richard
Thanks buddy…
As I said before, this kit has renewed the modeling mojo in spades . I put in a few hours every day on it - it is addicting. I now wish I had logged my time but paperwork is not my thing- I get enough of that with my carpentry business even though I do as little of that as possible these days. If we can count the time I spent working alongside my father as a boy I’ve been at it for 60 years now . Enough is enough LOL .
Getting ready for the next big snow and blow here at the Jersey shore . I am even more sick of storms , snow and flooding than I am of working !
Cheers- Richard
Richard,
Believe me, I know the feeling only all to well.
According to my wife, I’ve become allergic to any form of work including around the house. I started working PT when I was 16 with a paper route, and didn’t stop till I was 70. Way to long if you ask me.
The storm has now morphed into a full blown blizzard over the Island with massive snow totals of more then 12 inches as of early this morning, and an est of 2 ft by the end of it here in Sunny Selden. Far east end is even worse off. Winds approaching 50+ mph gusts. Sounds more like what you guys experience on the NJ Shore.
I’m thrilled that you found your elixir to fill your modeling Mojo tanks. I for one love to follow your builds, and now that you’ve come over to the Dark side (cars), and entered the mystic world of MFH multi media kits, you’ll never be able to leave it.
Spent a few hours at the model bench yesterday while waiting for the snow to stop . Looks like 18” to 24”, 23 degrees or so , 30 mph wind - lots of drifts. Then it was time to start digging out befor the temps plummeted.
13 degrees this morning.
Ugh !
Richard,
Same here. Gotta grab a few picks before the snow really starts to melt in high gear from the sun. I can’t find a spot along my driveway less then 12 inches and most areas are more.
I braved the conditions yesterday as well, and using my super Toro snow blower that I named: The Big Red 1, showed the snow just who was the boss!! Not me for sure, it was the Big Red 1 doing it’s thing. The massive and super heavy stuff that the plows left in front of my driveway that holds a full 6 cars in a L was slow going. Still need to do the street from my driveway/mailbox down to the end of my property. That’s a job for this morning.
Finished up the radiator. Four photo etch pieces for the radiator - front and back for the engine coolant and front and back for the oil cooler which is the rectangular box under the main radiator. The louvers on the front are built up out of interlocking photo etch pieces as well.
MFH provides heat shrink tubing for the flexible hose connections. It seemed a little risky to heat it up in situ so I pre shrunk it a little at a time to a sliding fit on brass rod the same diameter as the piece it would actually install on. I then cemented it in place at assembly with medium CA. The hose clamps are photo etch stainless and it was a big mistake to try and fit them after all had been assembled - they are very hard and stiff . I had to anneal
them with a torch to make them workable and then preformed them around the shank of a drill bit the same diameter as the hose , then carefully open them up enough to get them around the hose in place . They then needed cementing with CA . All this would have been much easier before the piping was assembled. The heat shrink tubing also looked a little shiny so it had to be painted flat black.
Richard,
The radiator looks better then the real one. One would never guess in a million years that this is your 1st MFH kit. Your skill level is right up there with the best of them.
The hose clamps came out perfect. I can’t tell them from the real ones I’ve used for years on end.
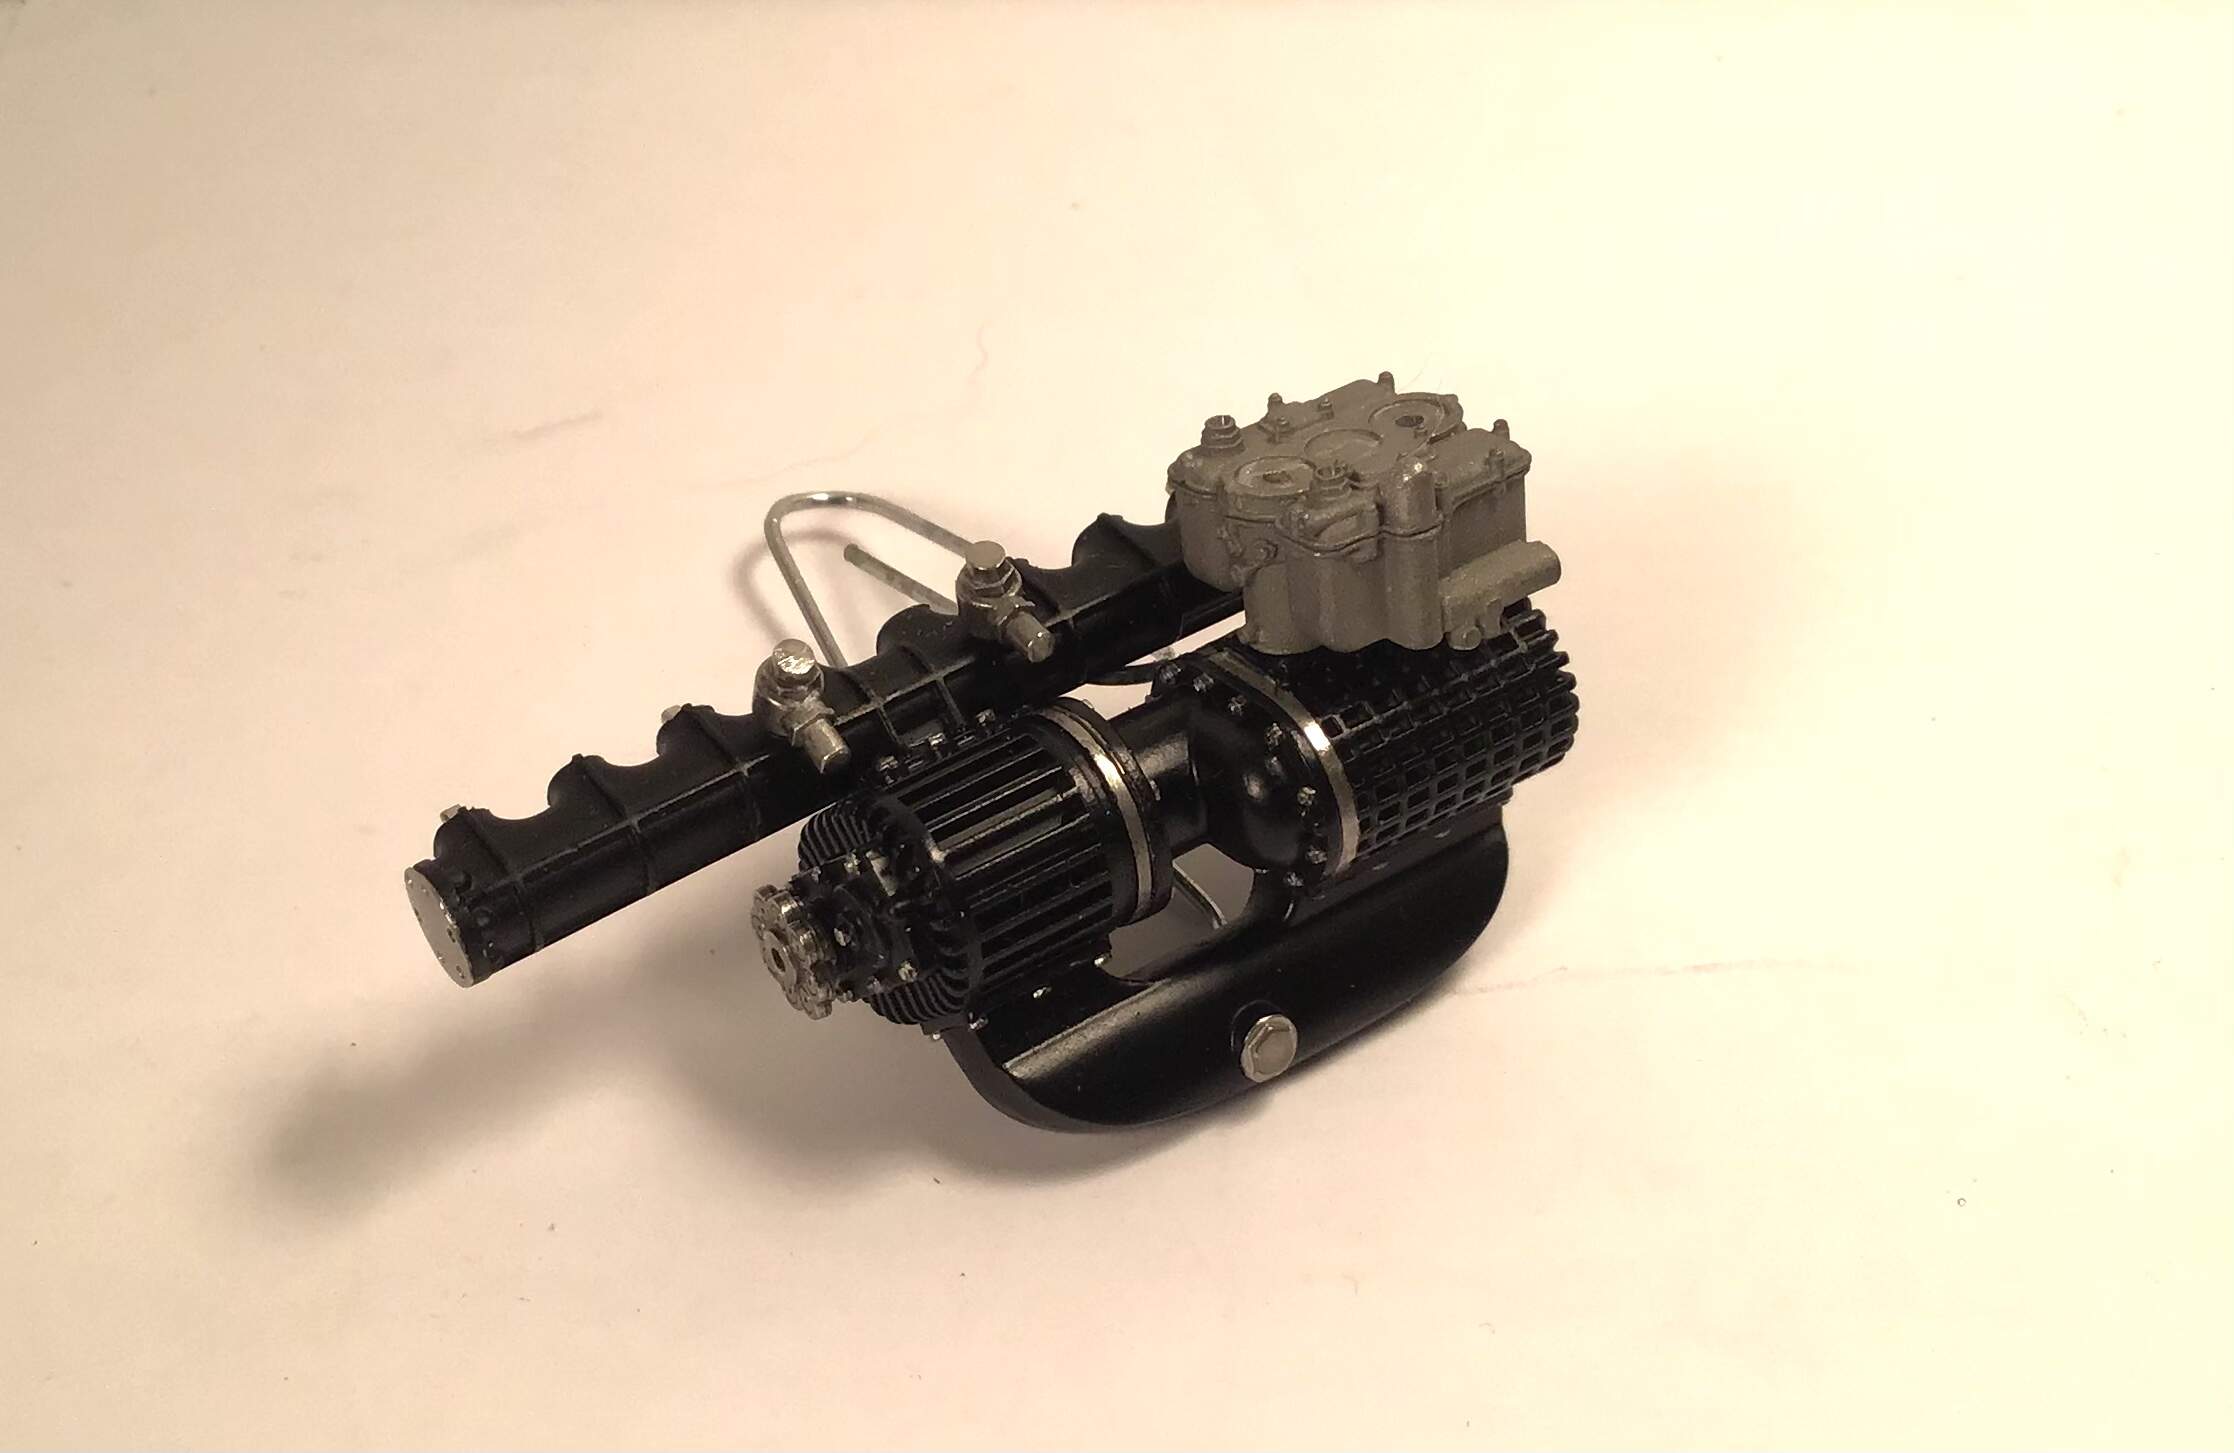
The Turbo Charger is really coming along quite nicely.
Thanks Joel -
I just finished this bit up and had to share it right away - MFH detail to the max - check out the butterfly
linkage / spring on the carburetor… linkage doesn’t actually work but it sure looks like it would . Linkage is one piece of etch - the spring slides over it and then a tiny tab is bent over to retain it - held on to the carb by two tiny rivets … amazing and it all just falls together.
Richard,
I completely agree +1. The turbo is in it’s own model world. As you said, the throttle spring and assembly looks like it should work. Then throw in how you finished each different type of metal for realism, and one just can’t tell for sure if it’s real or just an impostor.
joel
Thanks again Joel & Jesper - very flattering coming from you guys who do such nice work yourselves.
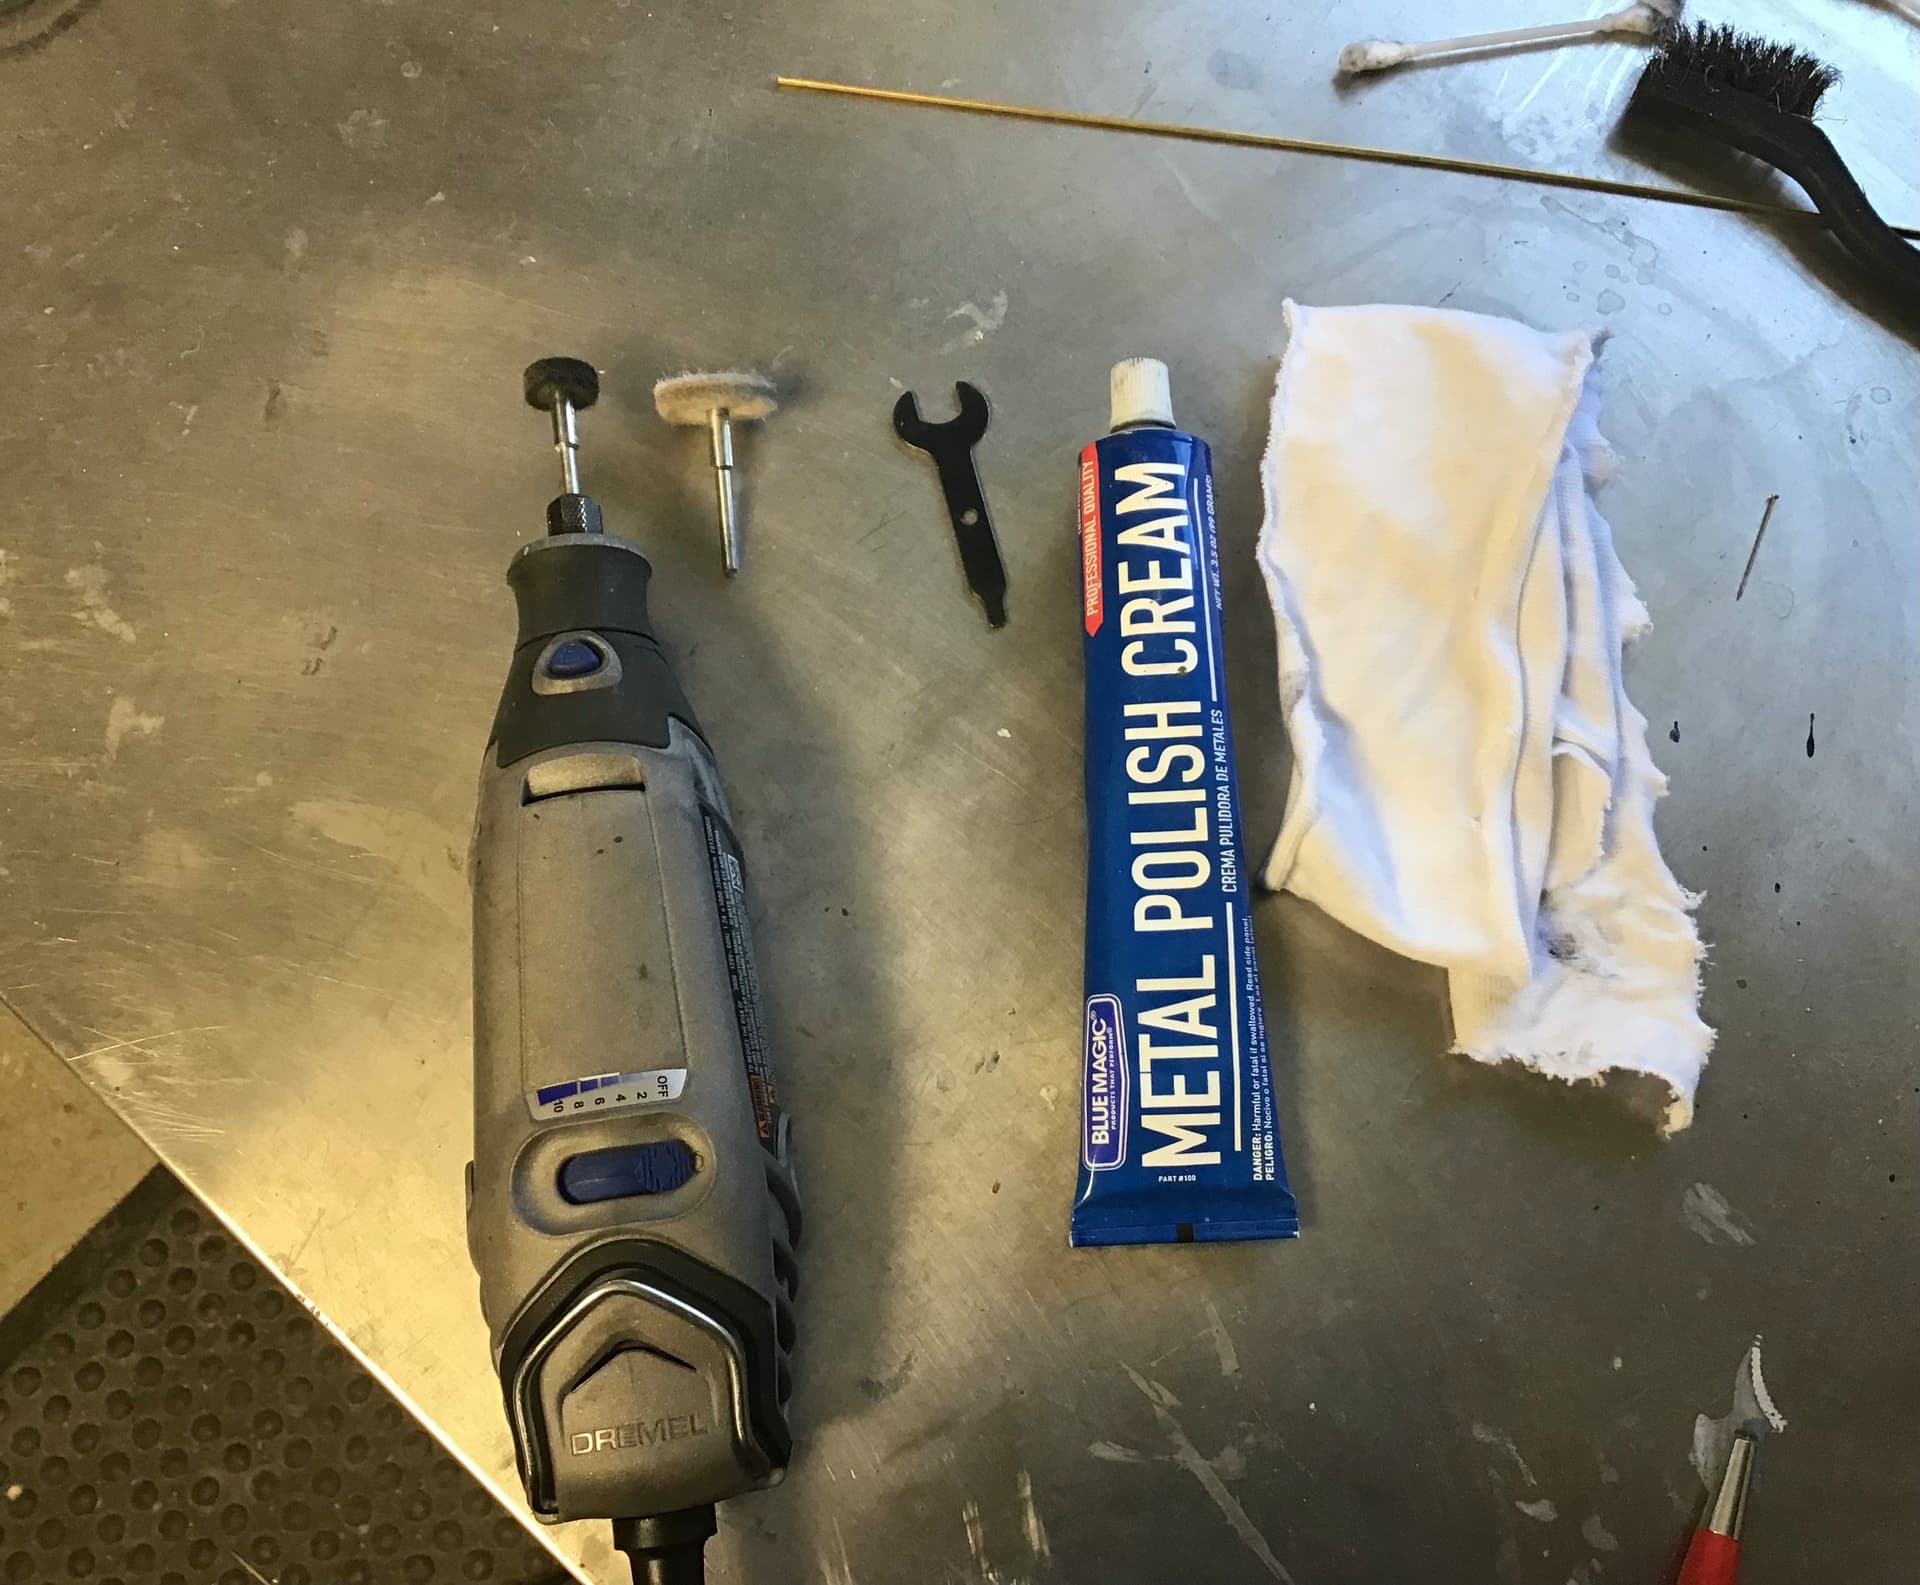
Just a little post here to share some things I’ve learned polishing 1/1 scale pieces on my bike builds .
Working on sandcast aluminum rough work can be done with files with chalk rubbed in the file to help keep it
clear . Frequent clearing of the file by carding and recharging with chalk IS A MUST ! If you get lax on this then it is only a matter of time until you score your work with a piece of swarf stuck in the file . I then wet sand with silicone carbide papers with progressively finer grit in a tub of soapy water ( Dawn dish detergent is great ! )
Buffing is done on a home made rig cobbled together from an old bench grinder . A purpose made buffer has extended shafts to give more room for the workpiece.
I use Tripoli compound on the sewn felt wheel first and finish with white rouge on the loose cotton flap wheel .
The loose cotton flap is the bad boy - it wants to rip everything from your hands and put it into orbit.
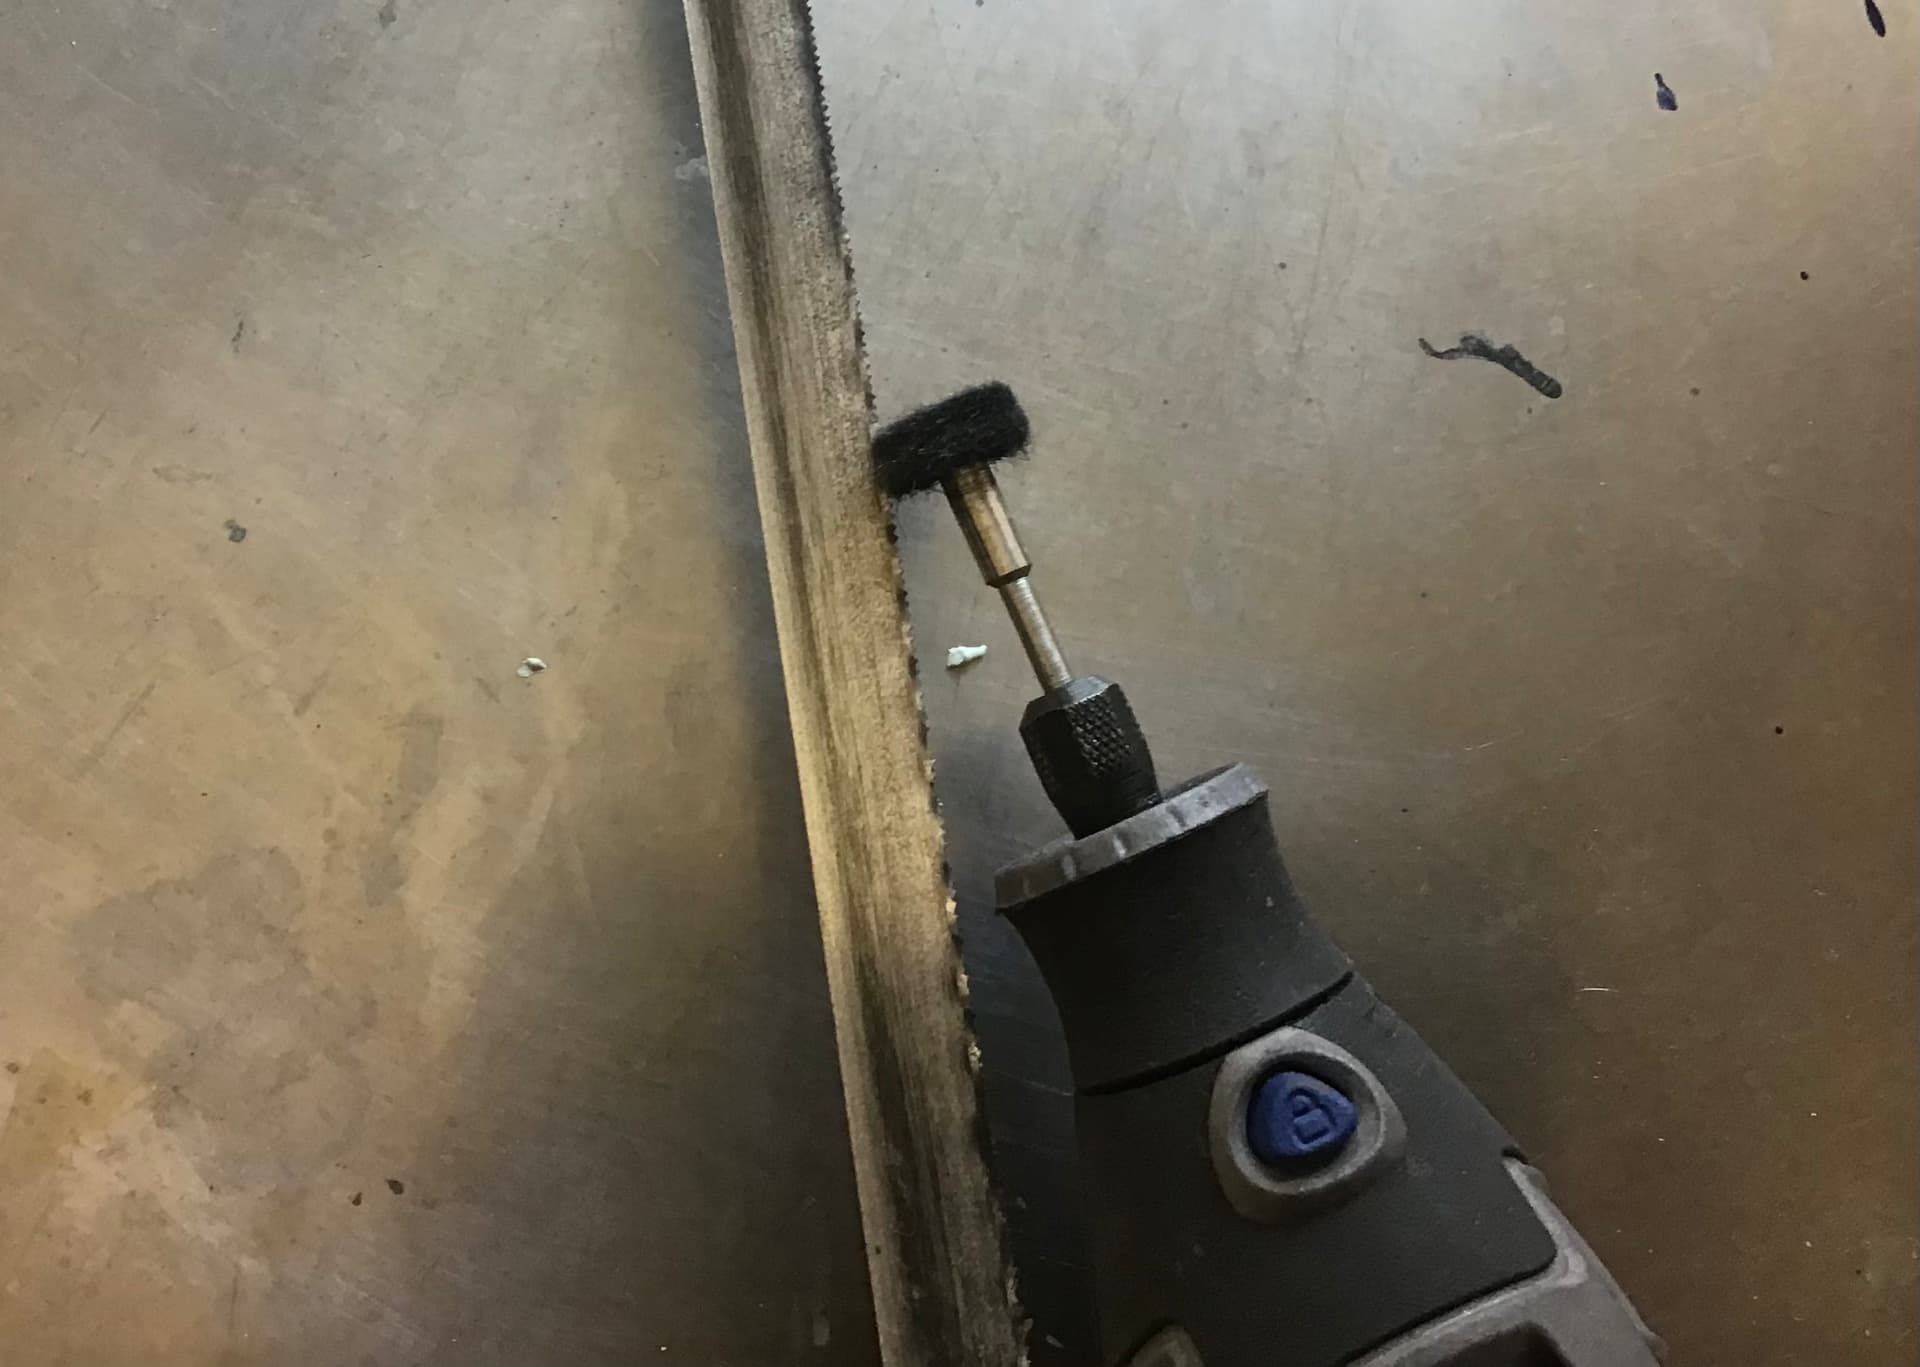
On top of the buffer can be seen the rake . This is held against the wheel to clear out old compound and oxidation.
Here is what can be accomplished with this simple setup and some elbow grease …
Z plates , gearbox outer cover and timing cover on 1972 Norton Commando.
So as this relates to model work -
I use a variable speed Dremel at low rpm - high speeds can melt the white metal . I use two felt wheels . One for the initial polishing with Blue Magic.
After initial polishing wipe off part with a clean rag as much as possible and then change to the clean felt wheel for final finish. Dremel actually offers a tiny loose cotton wheel but I haven’t tried it because I think it to risky for these soft metal parts.
After final polish I place the parts in a small jar with Acetone for a bit and then scrub with a toothbrush and fiberglass bristle pen if needed to remove any remaining residue from polishing.
Lastly apply a coat of clear gloss lacquer.