Definitely following along on this one RT, fascinated by these kits and the different skill set required to work with the metal parts. Best of luck with the build, TALLY HO!!
Thanks all for the interest.
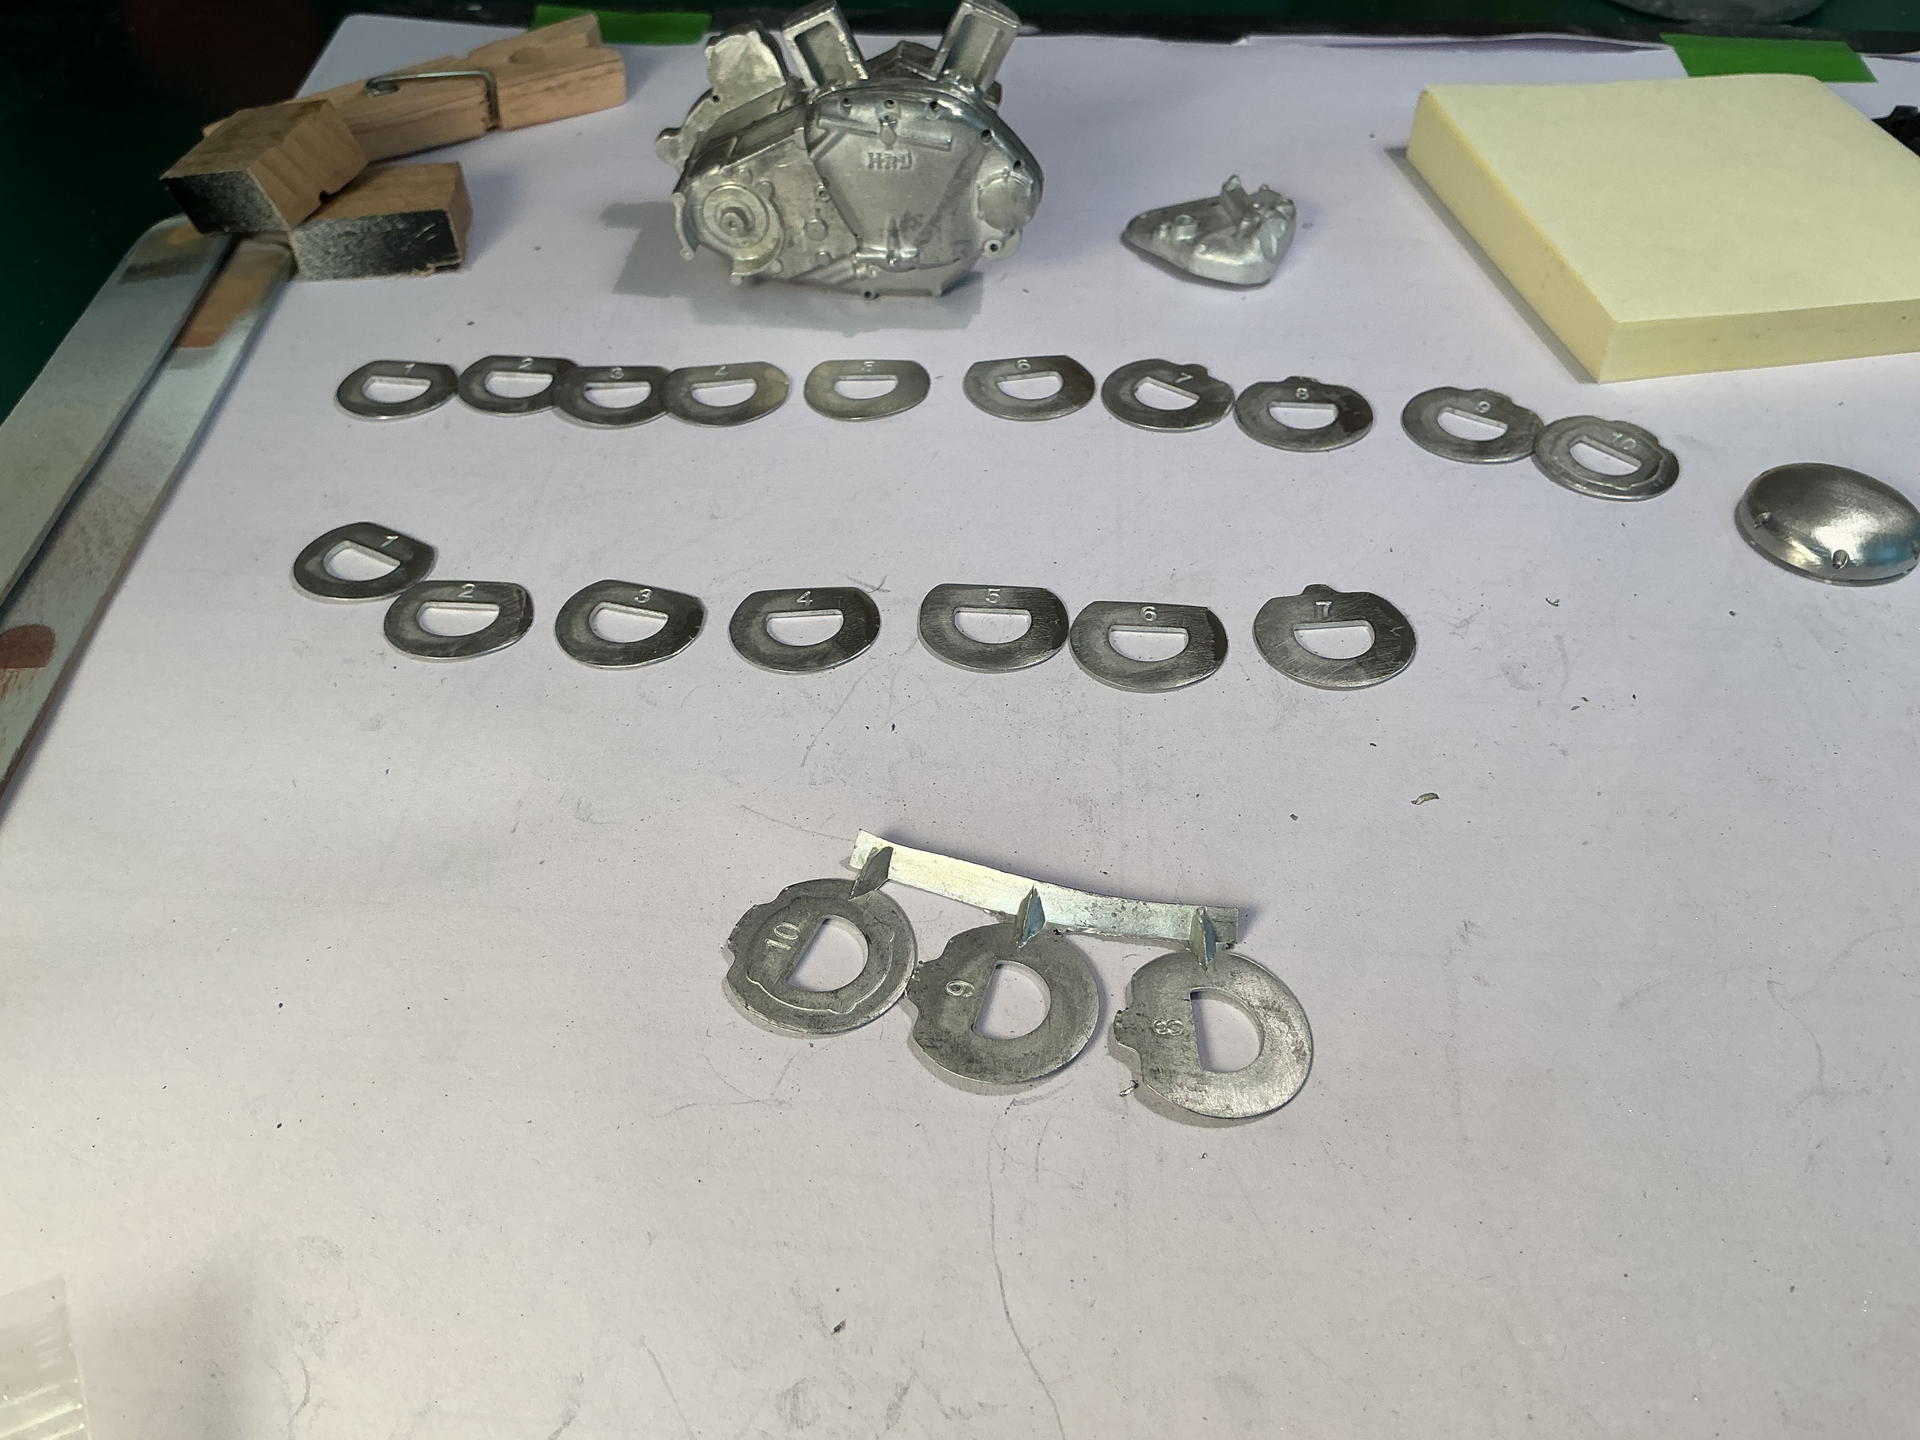
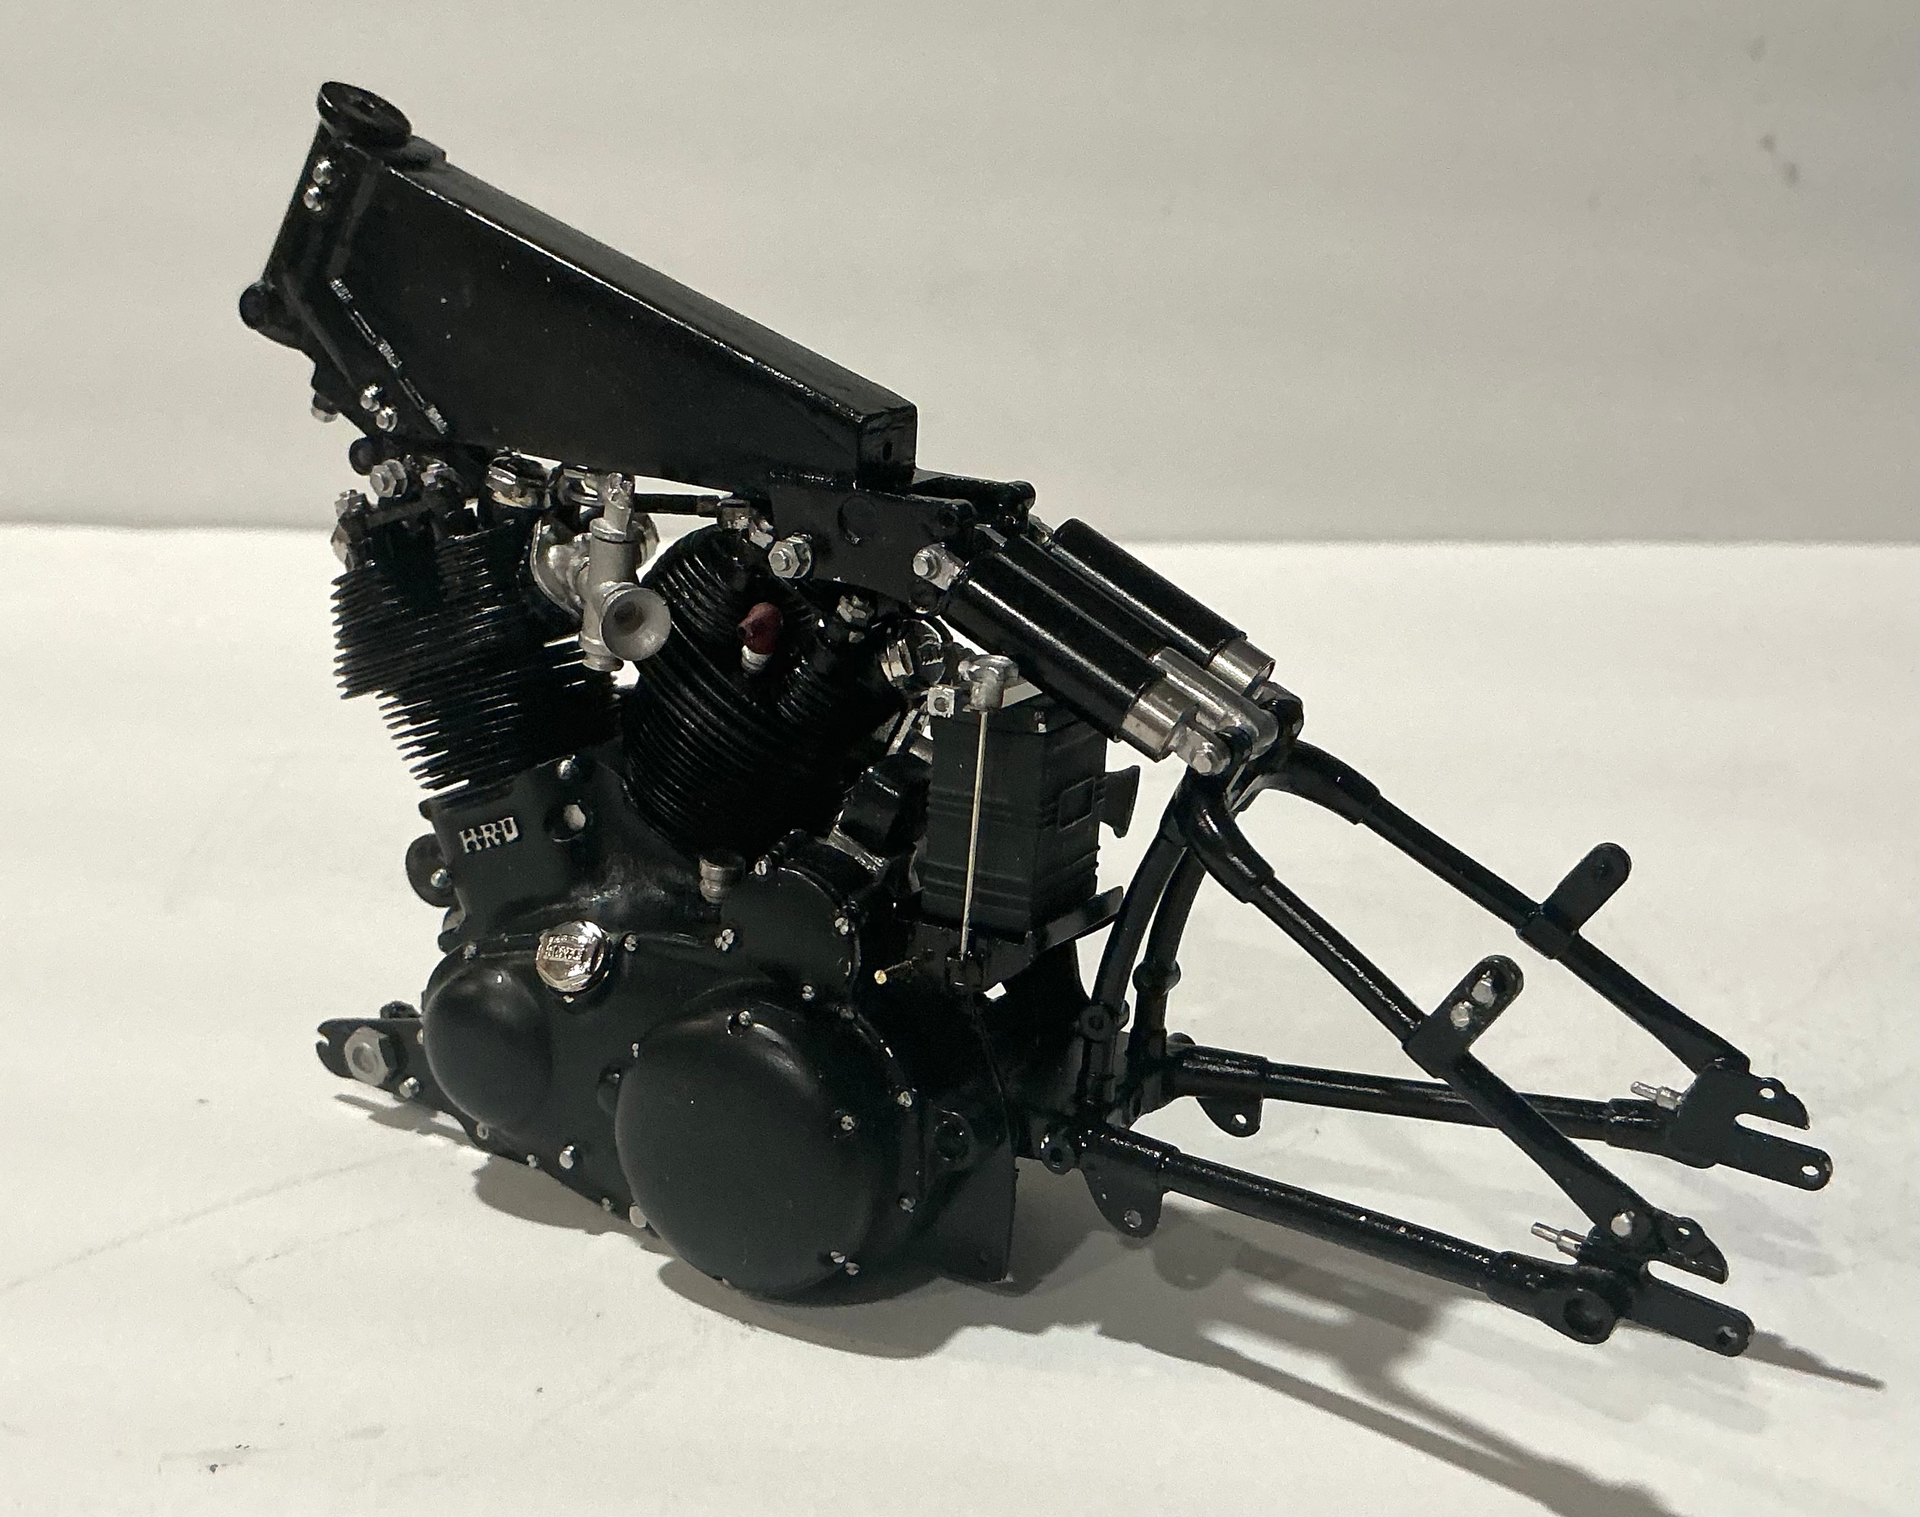
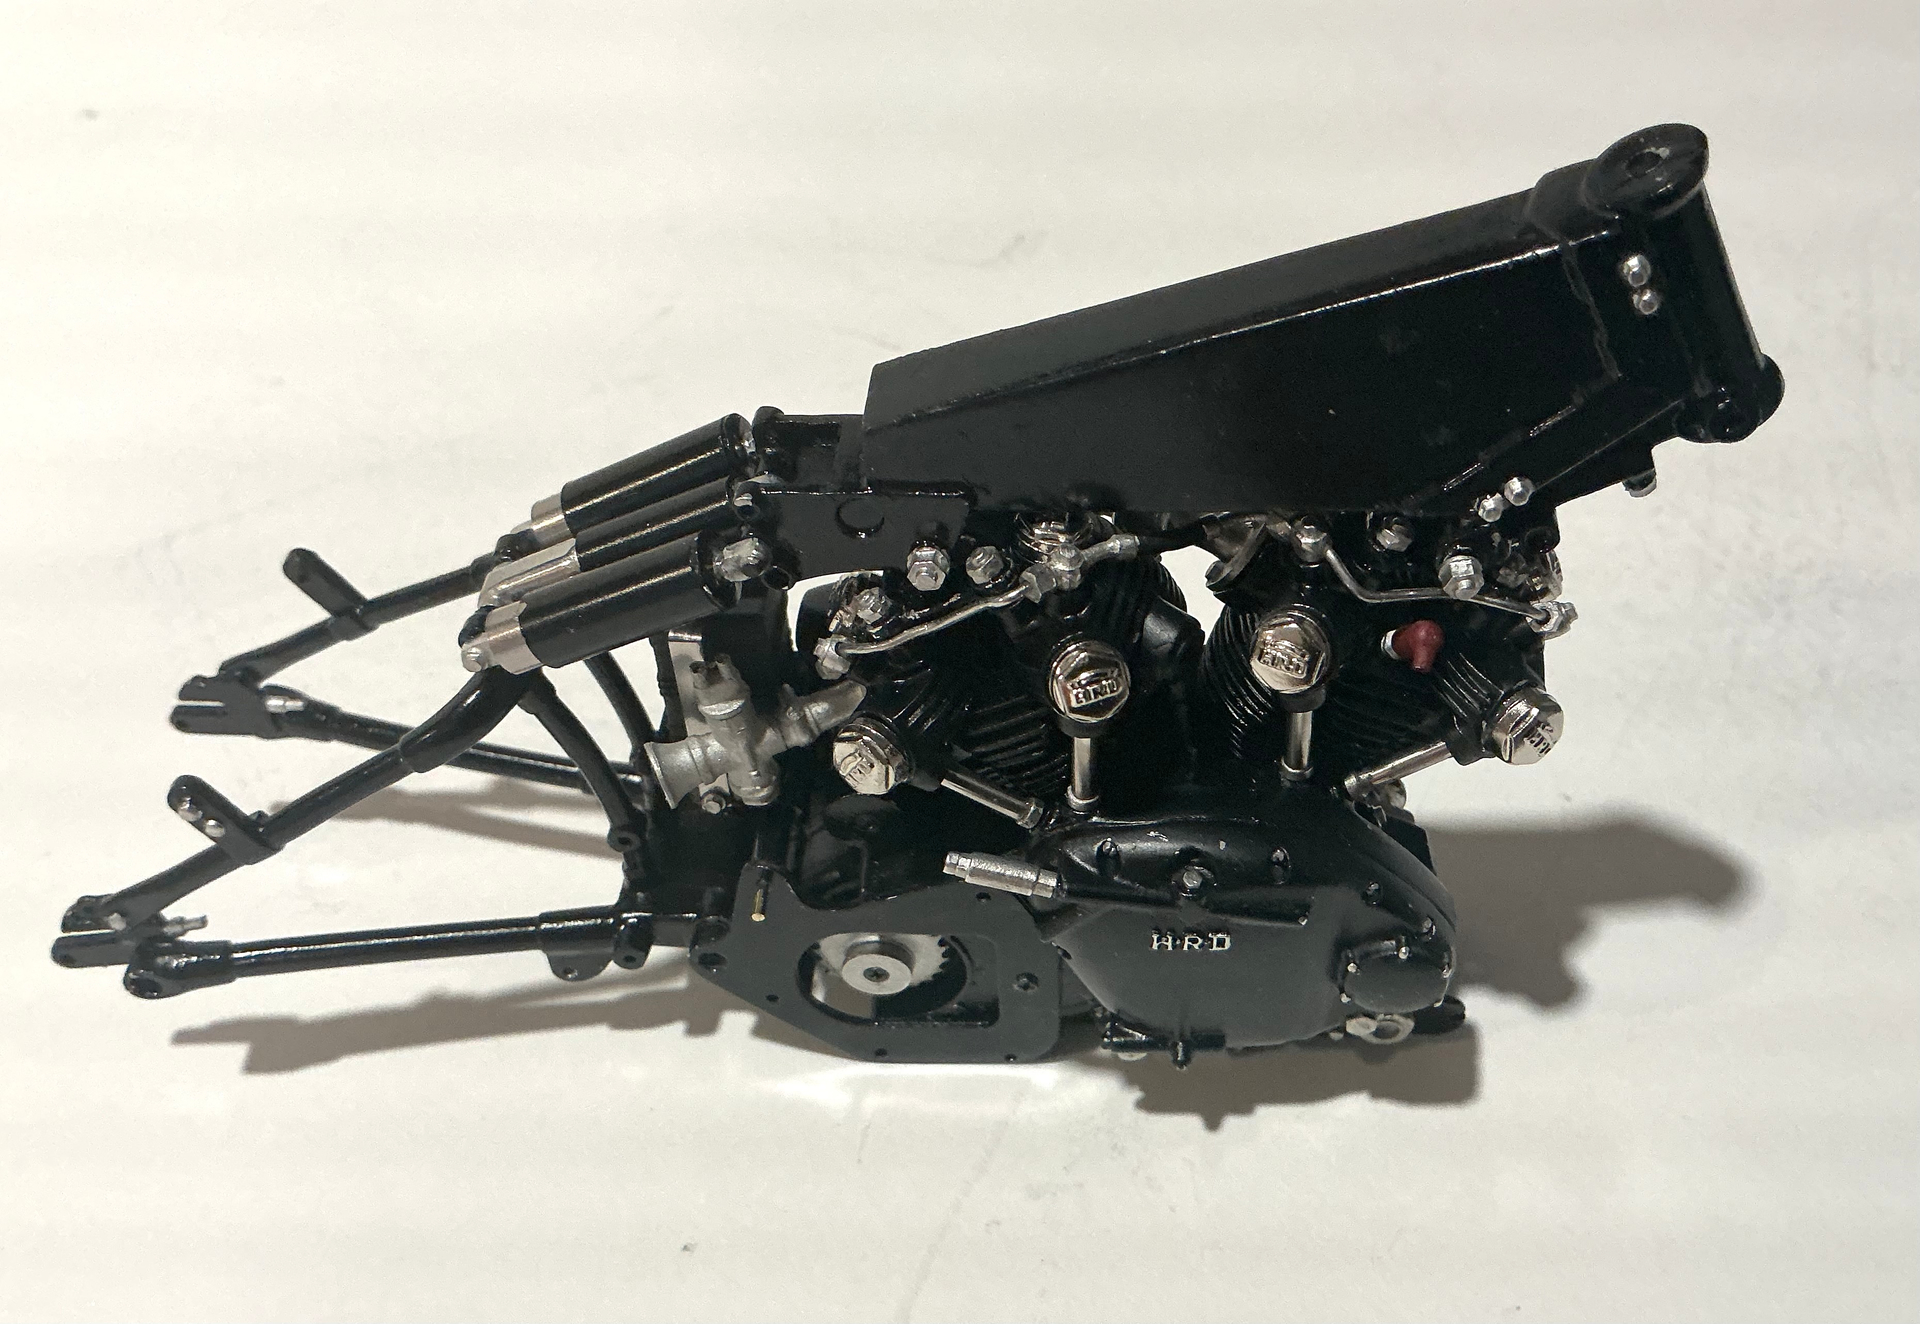
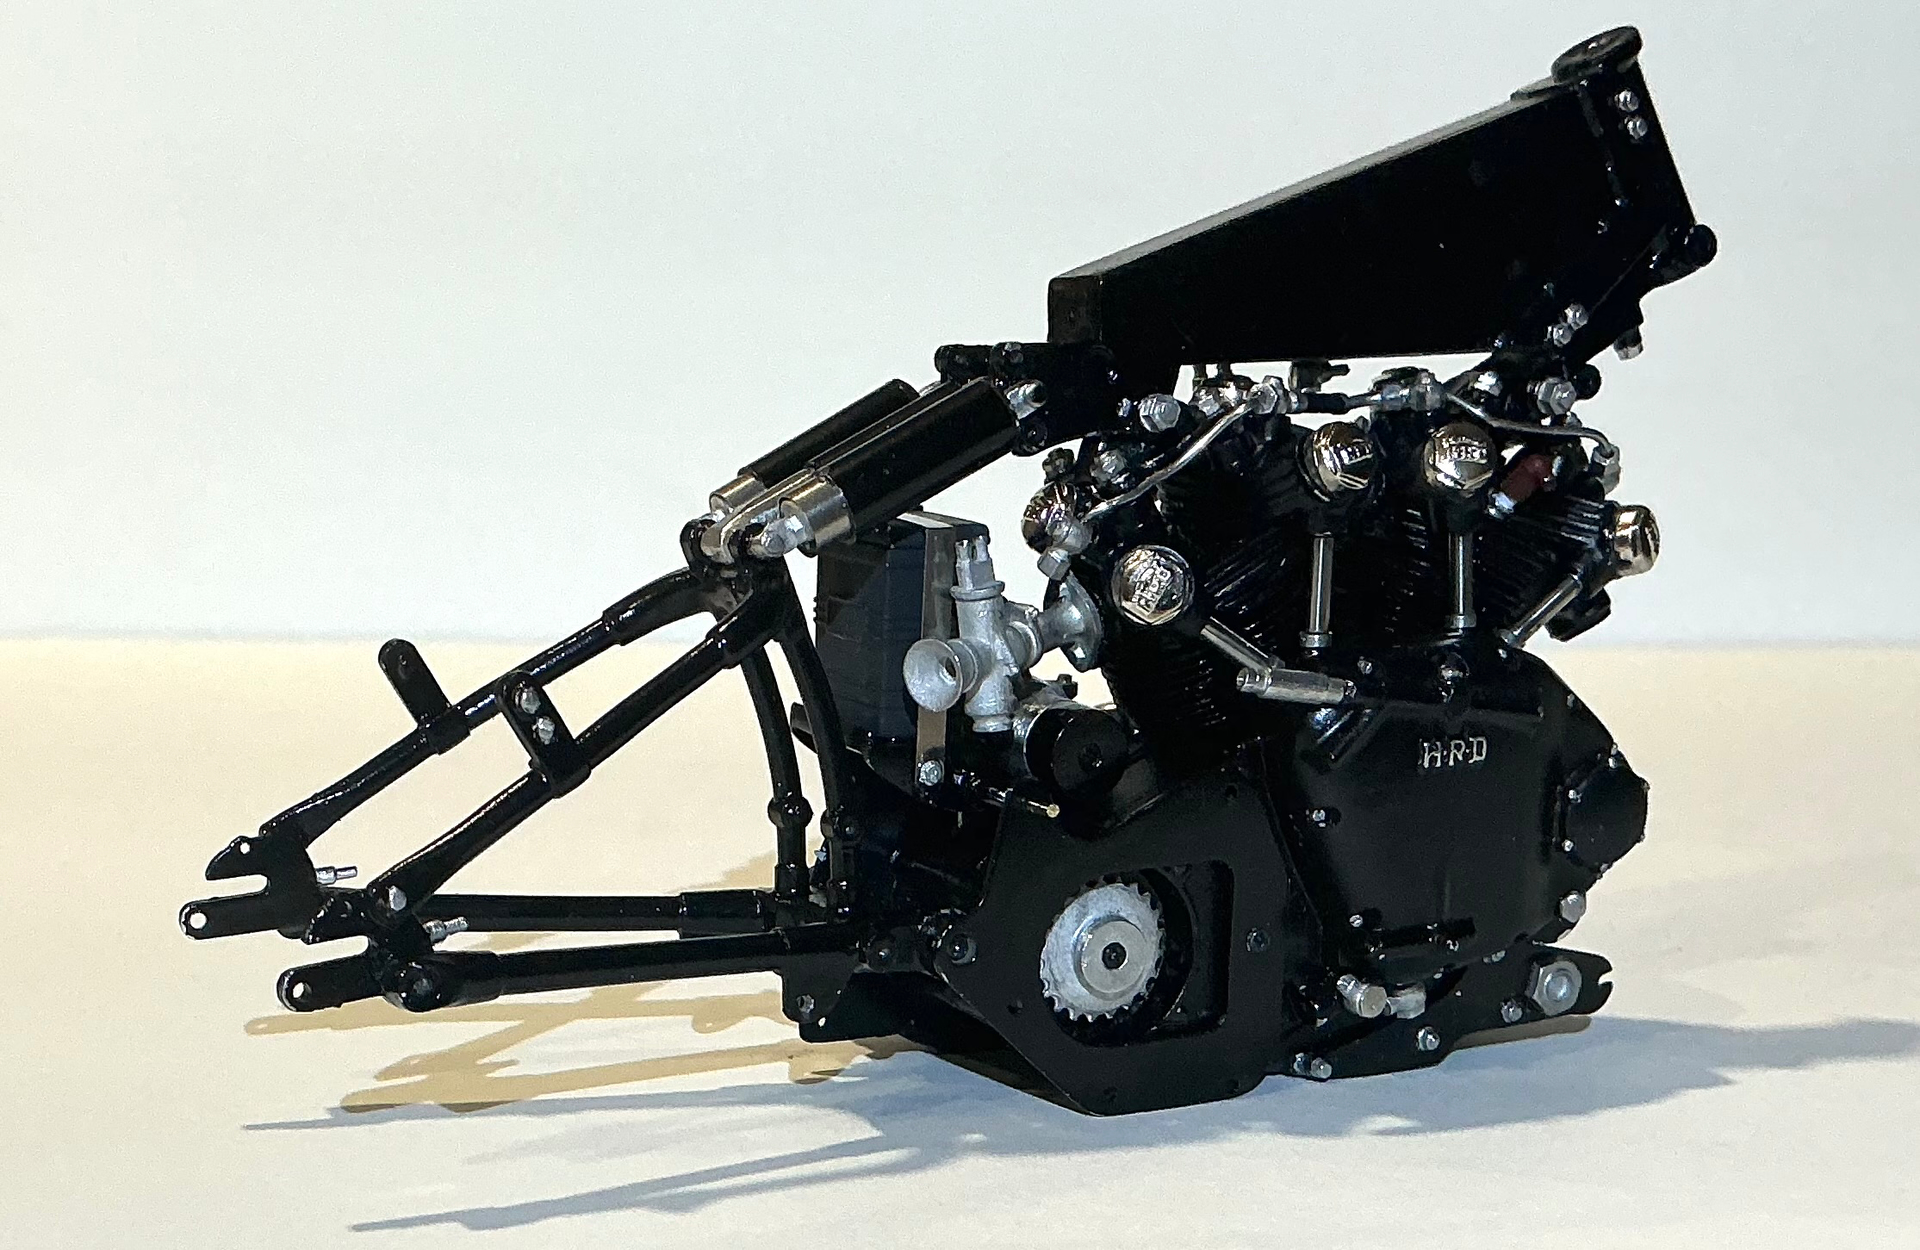
Here we can see the individual fins for the
cylinders - numbered one through ten for each cylinder. All need careful removal of the sprue gates.
The “D” shaped cylinders that they stack on needs careful dressing as it is a hair large .
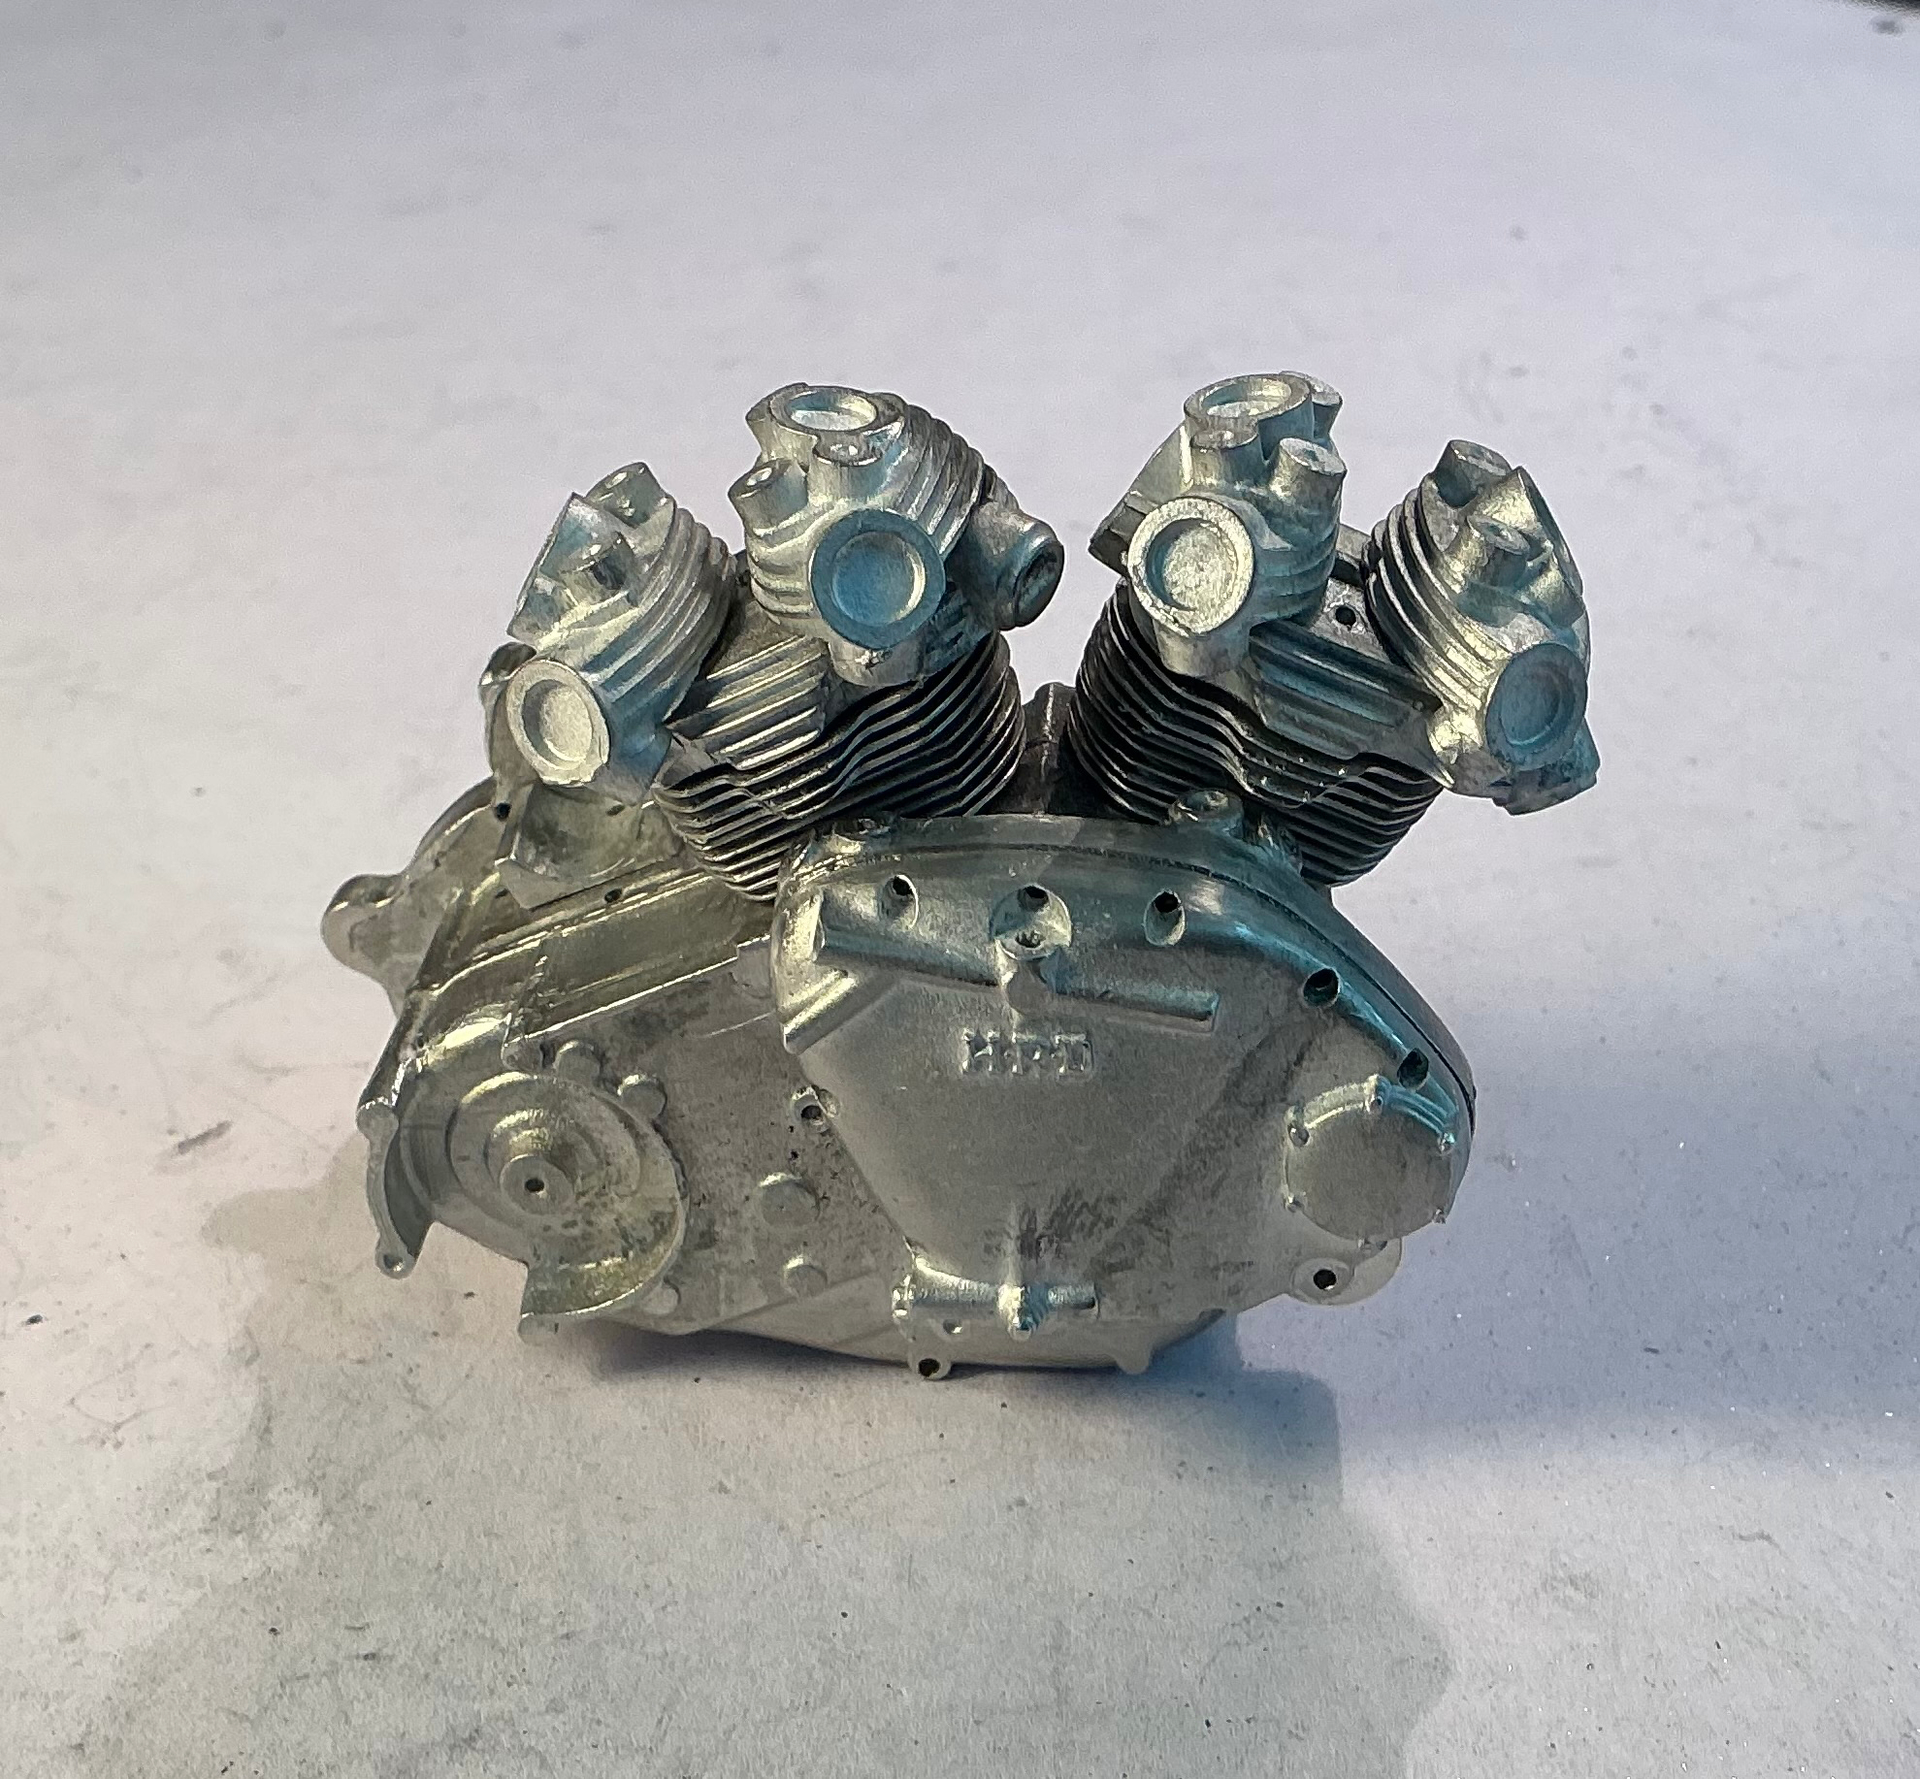
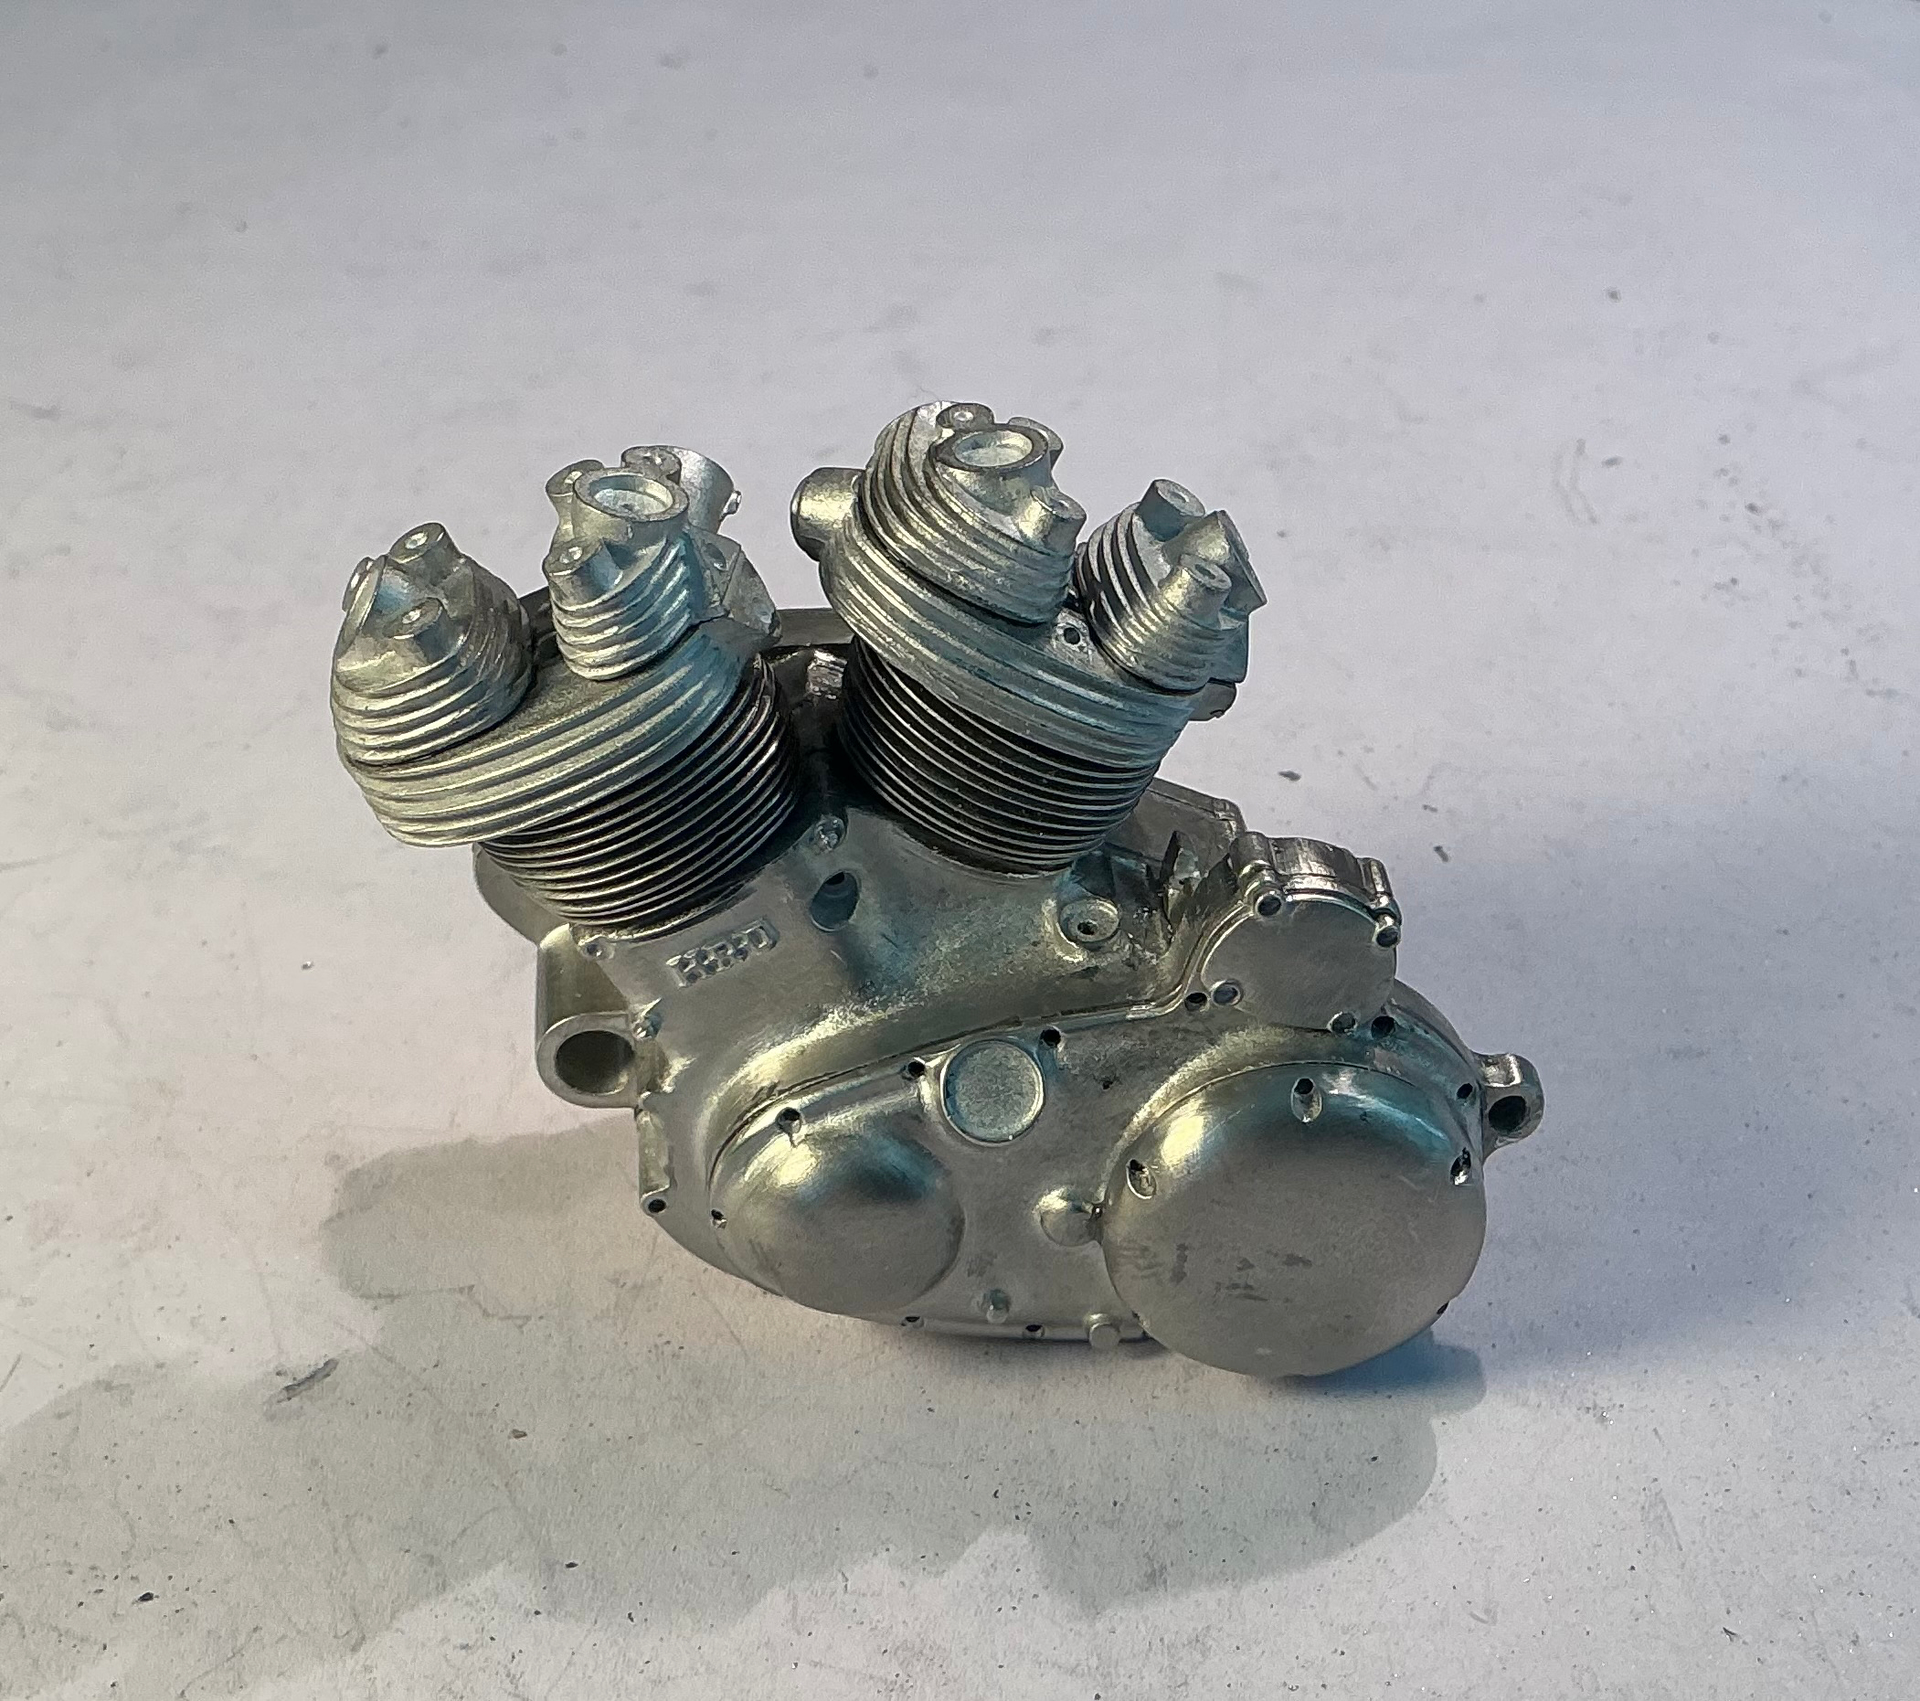
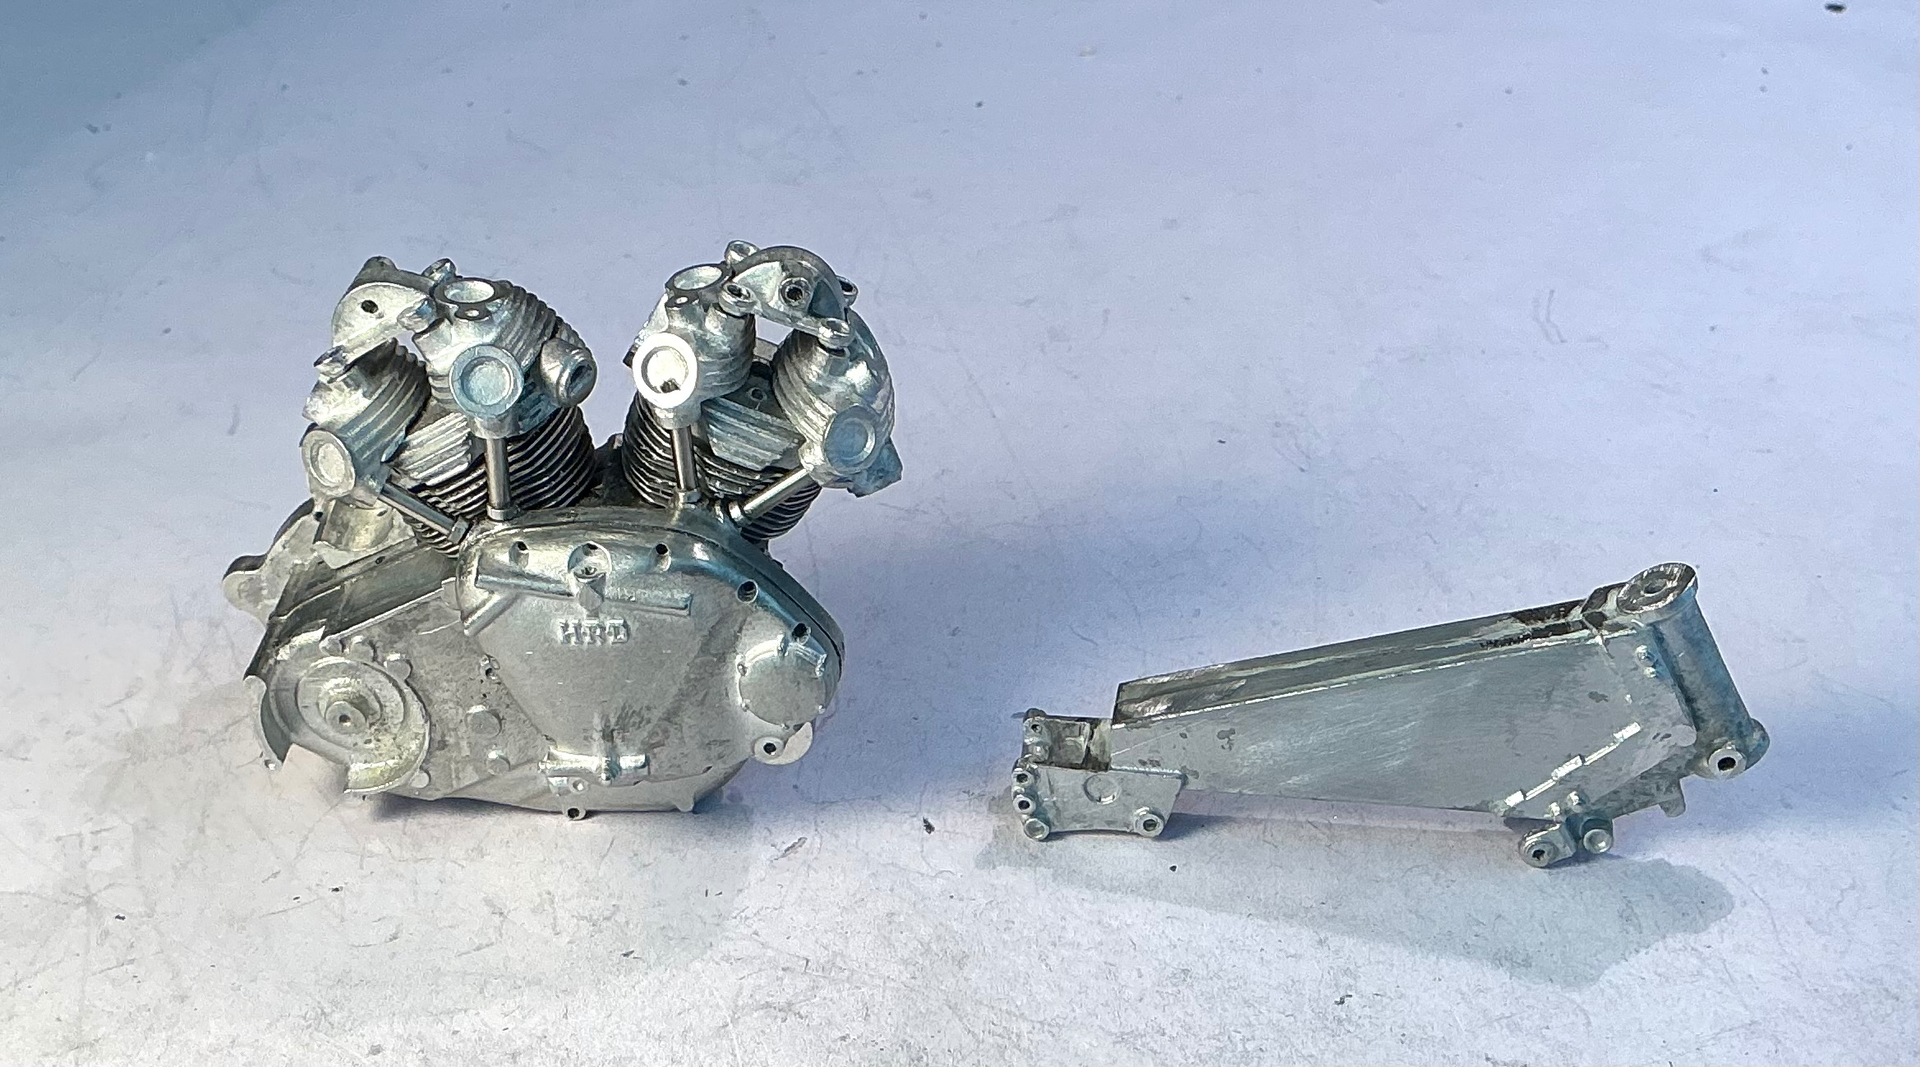
Here is the engine with cylinder fins , cylinder heads and rocker boxes. The heads are held on with tiny screws as the heads will need to be removed after painting to entrap the pushrod tubes in between the heads and timing chest .
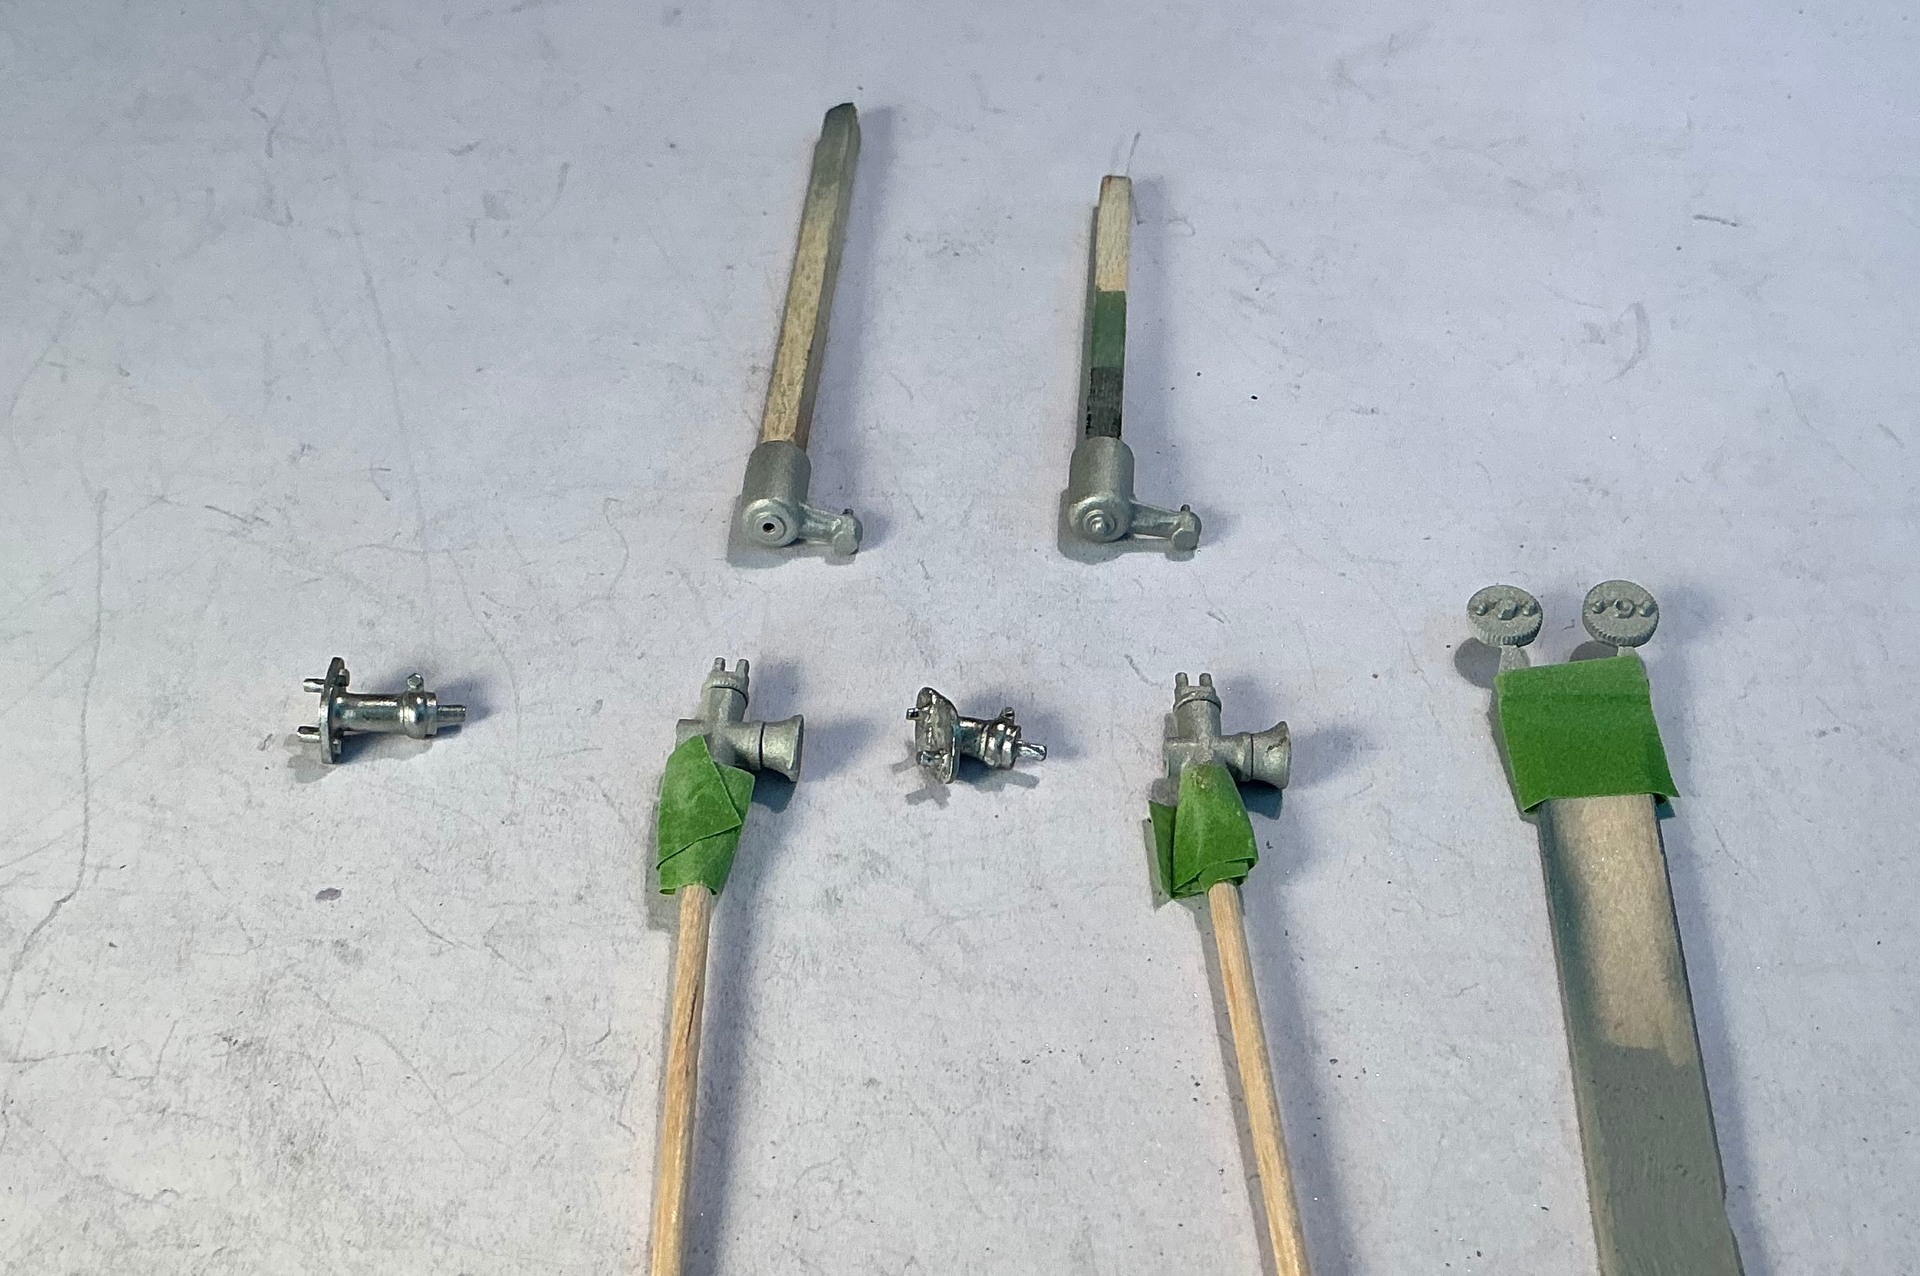
Here are the Amal Standard carburetors with their remote float bowls and intake stubs . The stubs were polished up with a fiberglass bristle pen and the carburetors and float bowls were soda blasted.
One of the beauties of working with white metal is the variety of finishes that can be made.
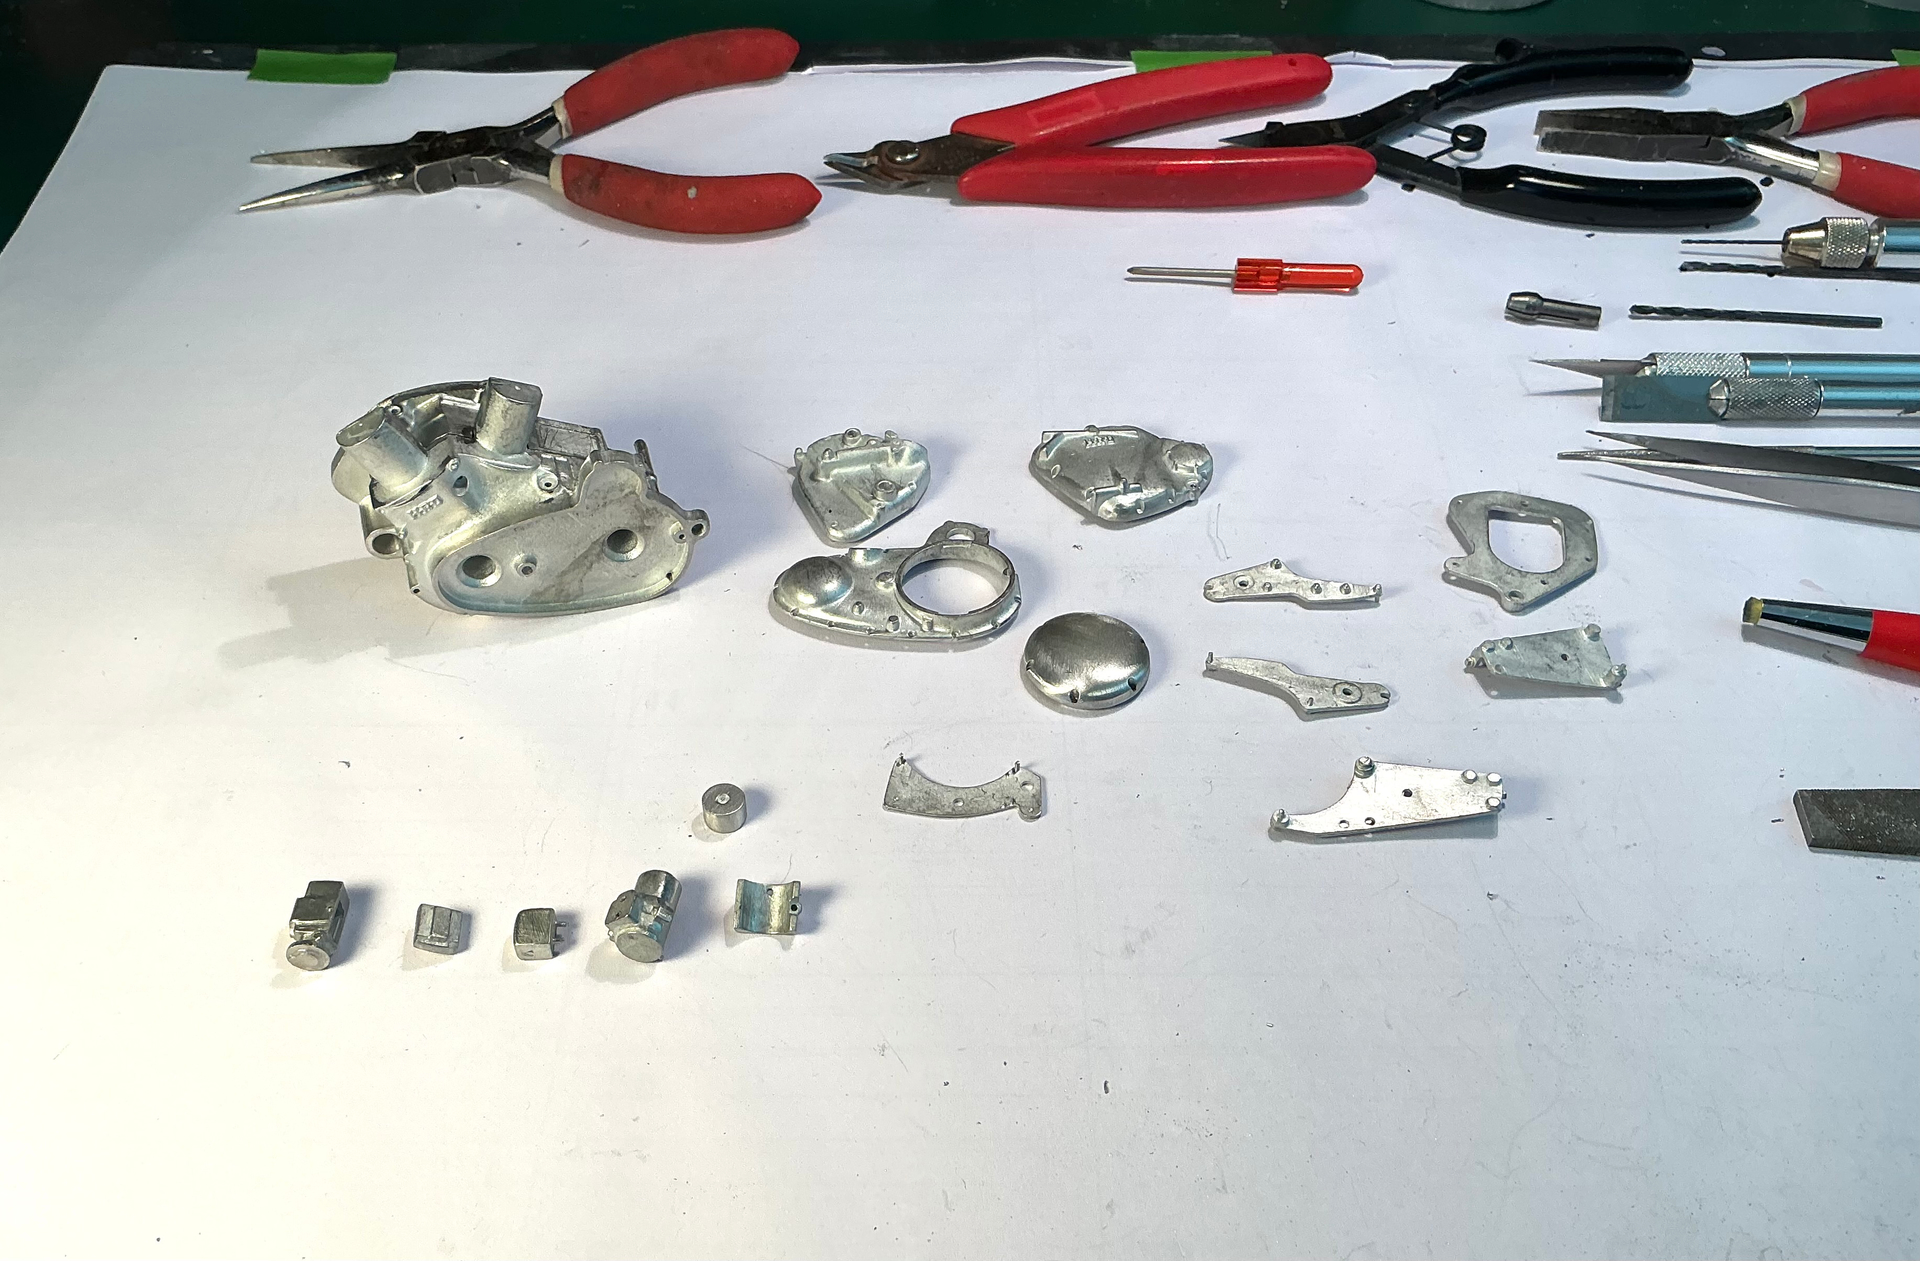
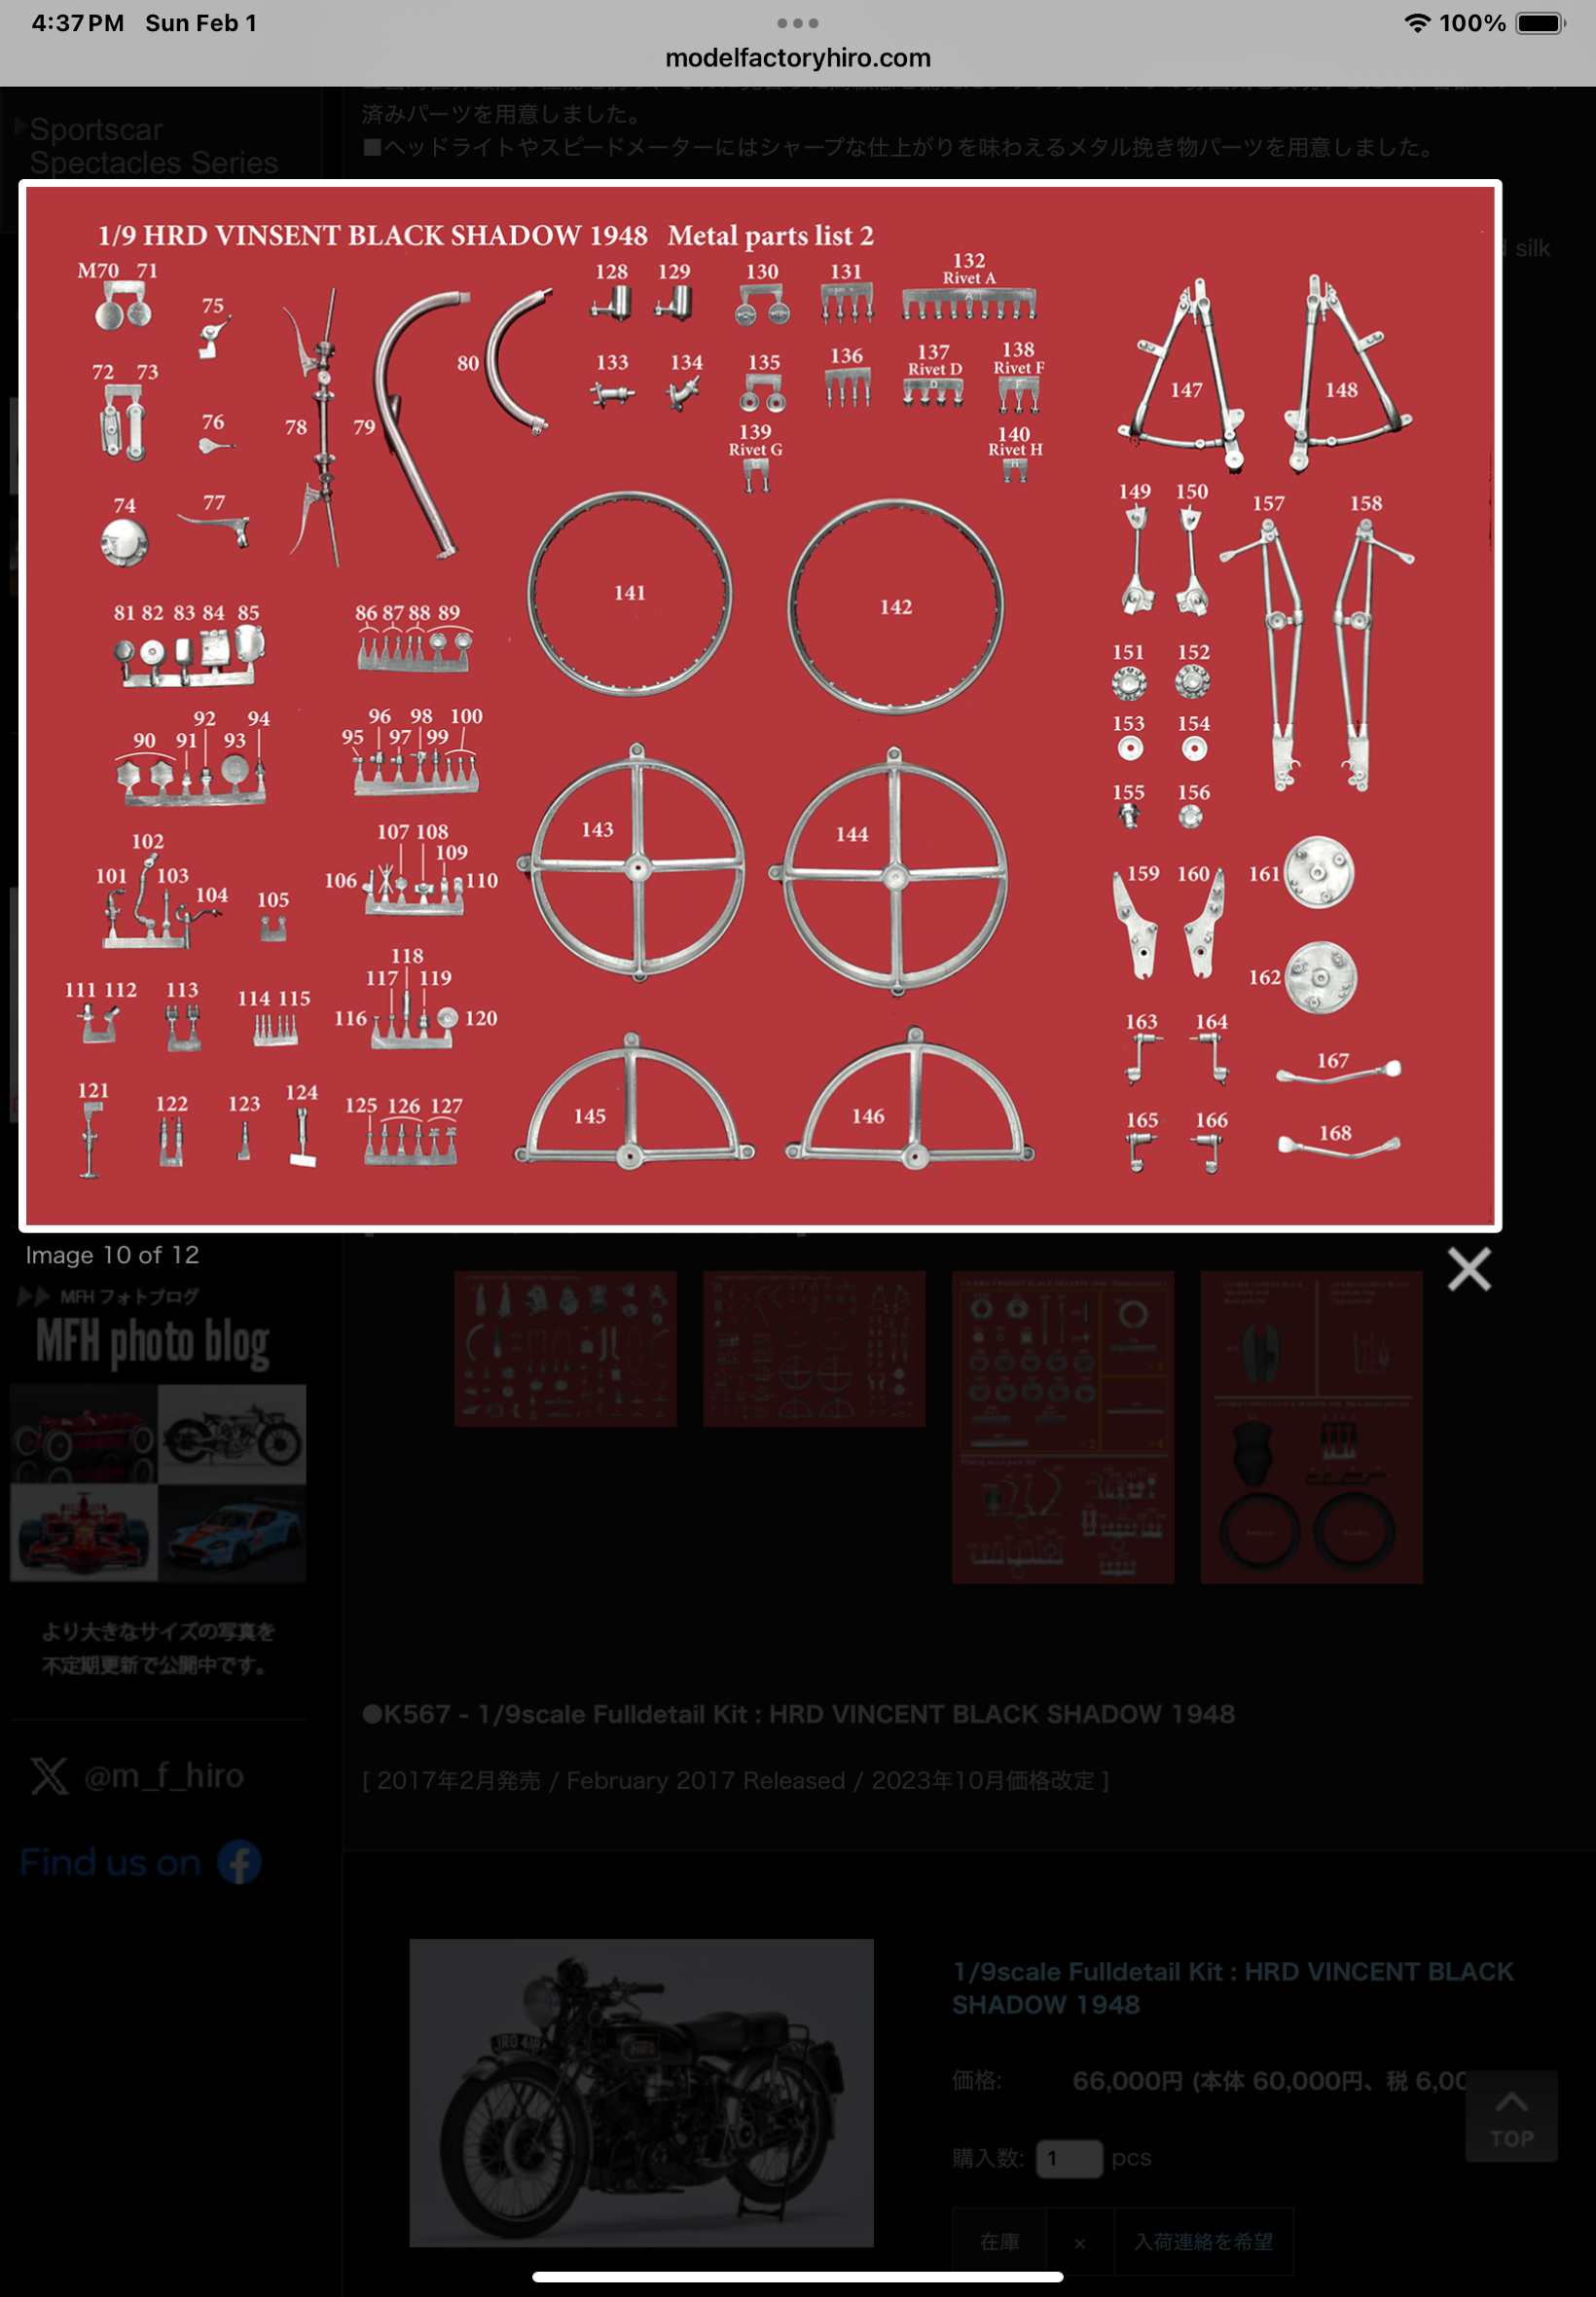
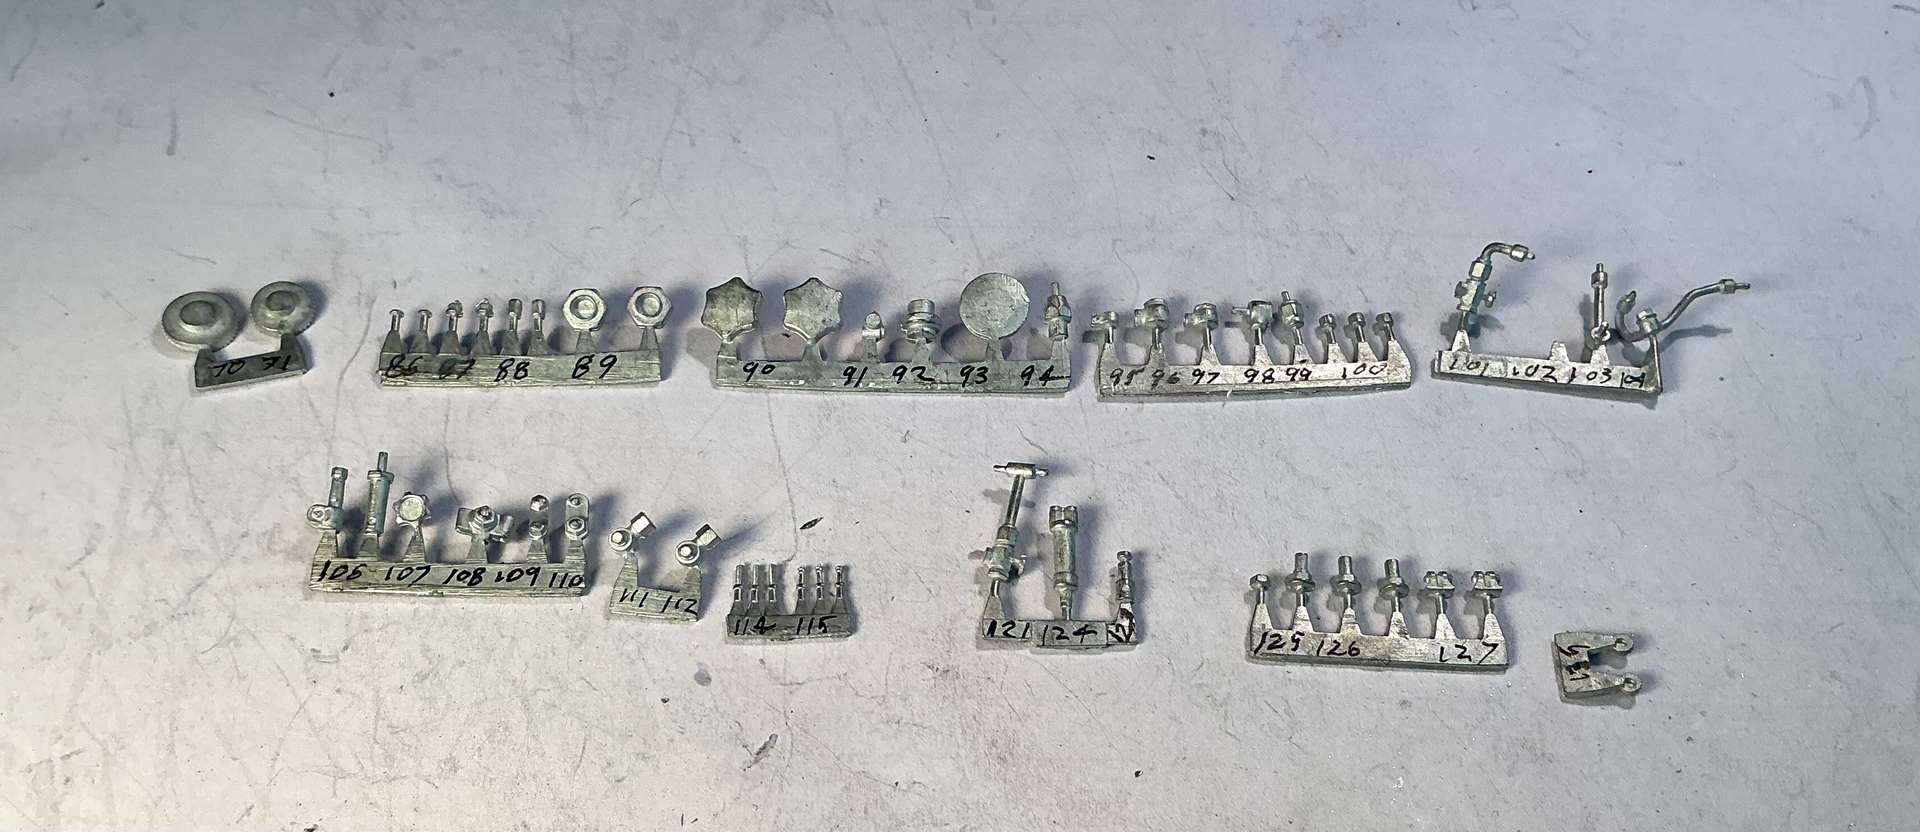
While the instructions call out part numbers most of the cast components are supplied unmarked . The MFH website supplies keys with photos of the parts numbered to cross reference.
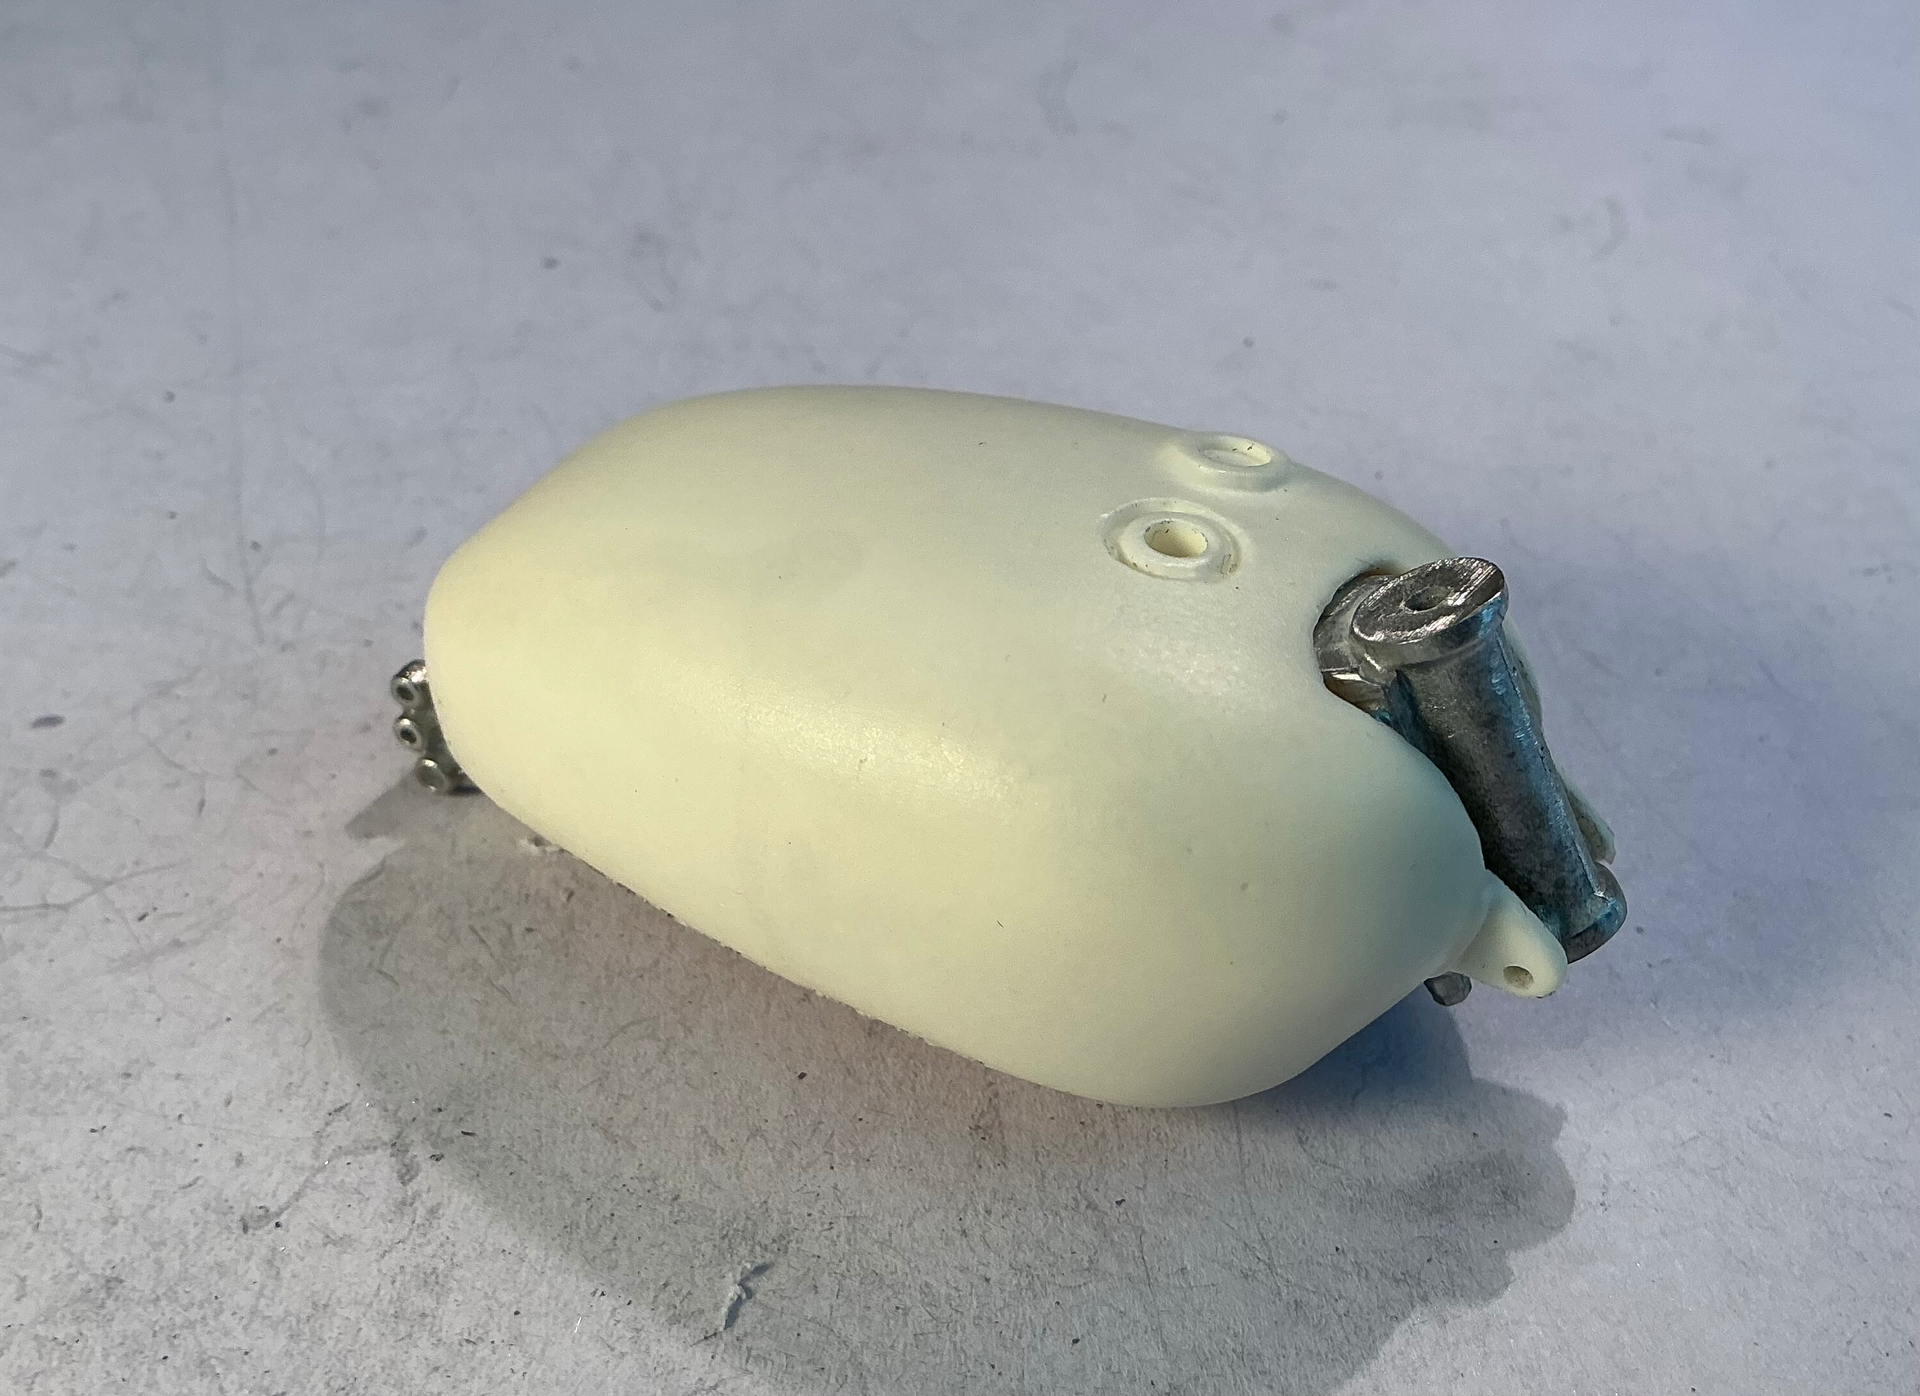
The slab sided box structure built around the frame spine is the oil tank . The saddle type fuel tank has two fillers - the center one is for oil and the left is for fuel.
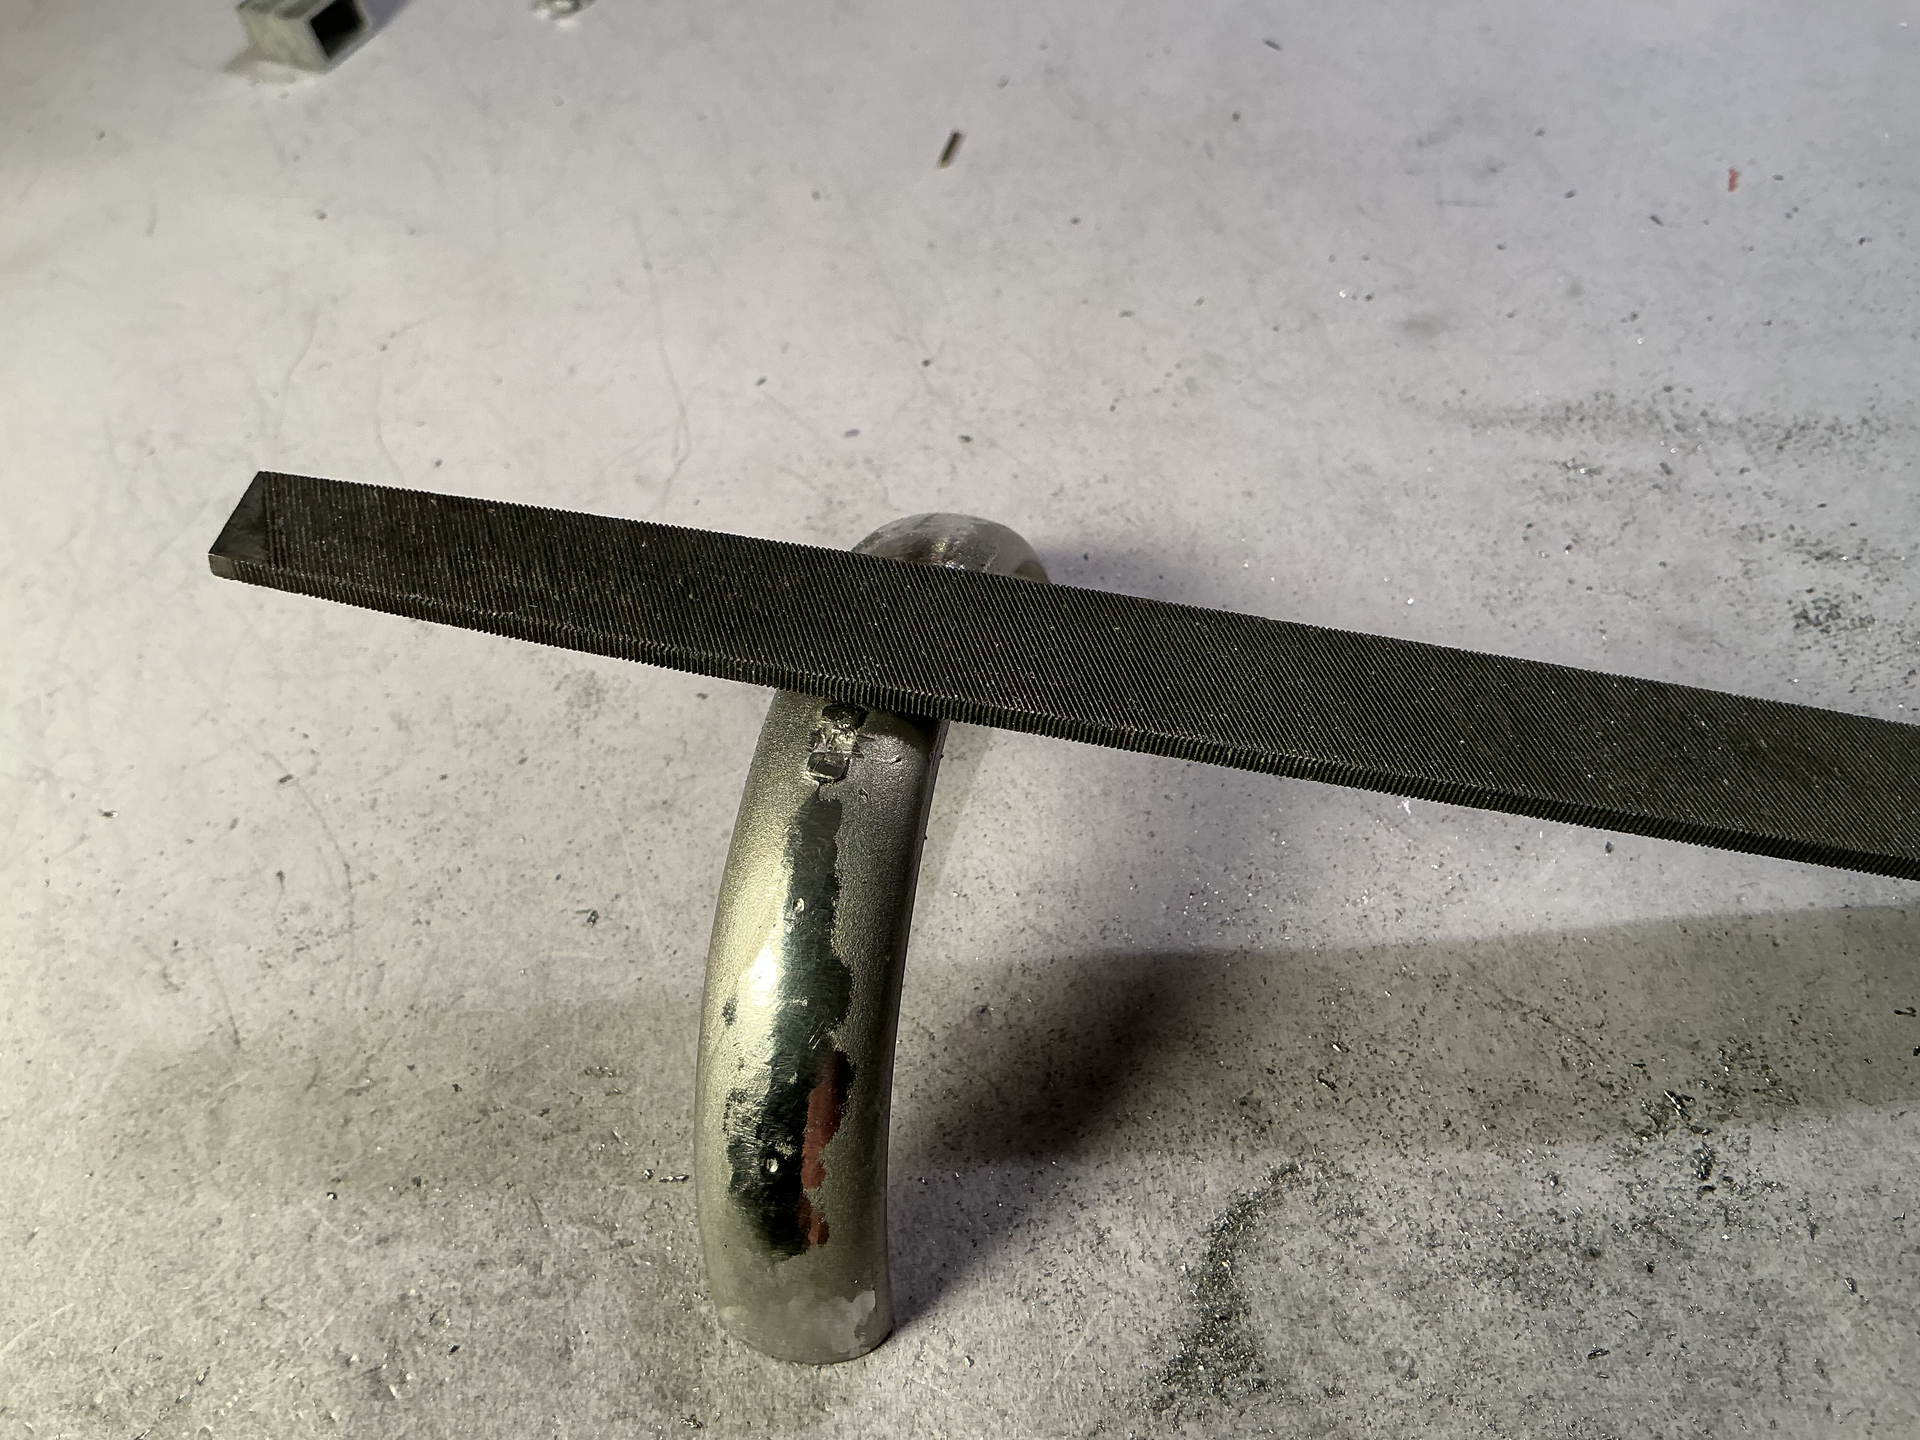
First step is knocking down the mold parting line and high spots by very lightly traversing with a single cut file. It is important to keep the file clear of swarf so as not to gall the workpiece.
Richard those polished fenders look spectacular. Excellent work on the whole kit. You are certainly worthy of owning and building these high end kits! I know other guys who have plenty of money and very little skill.
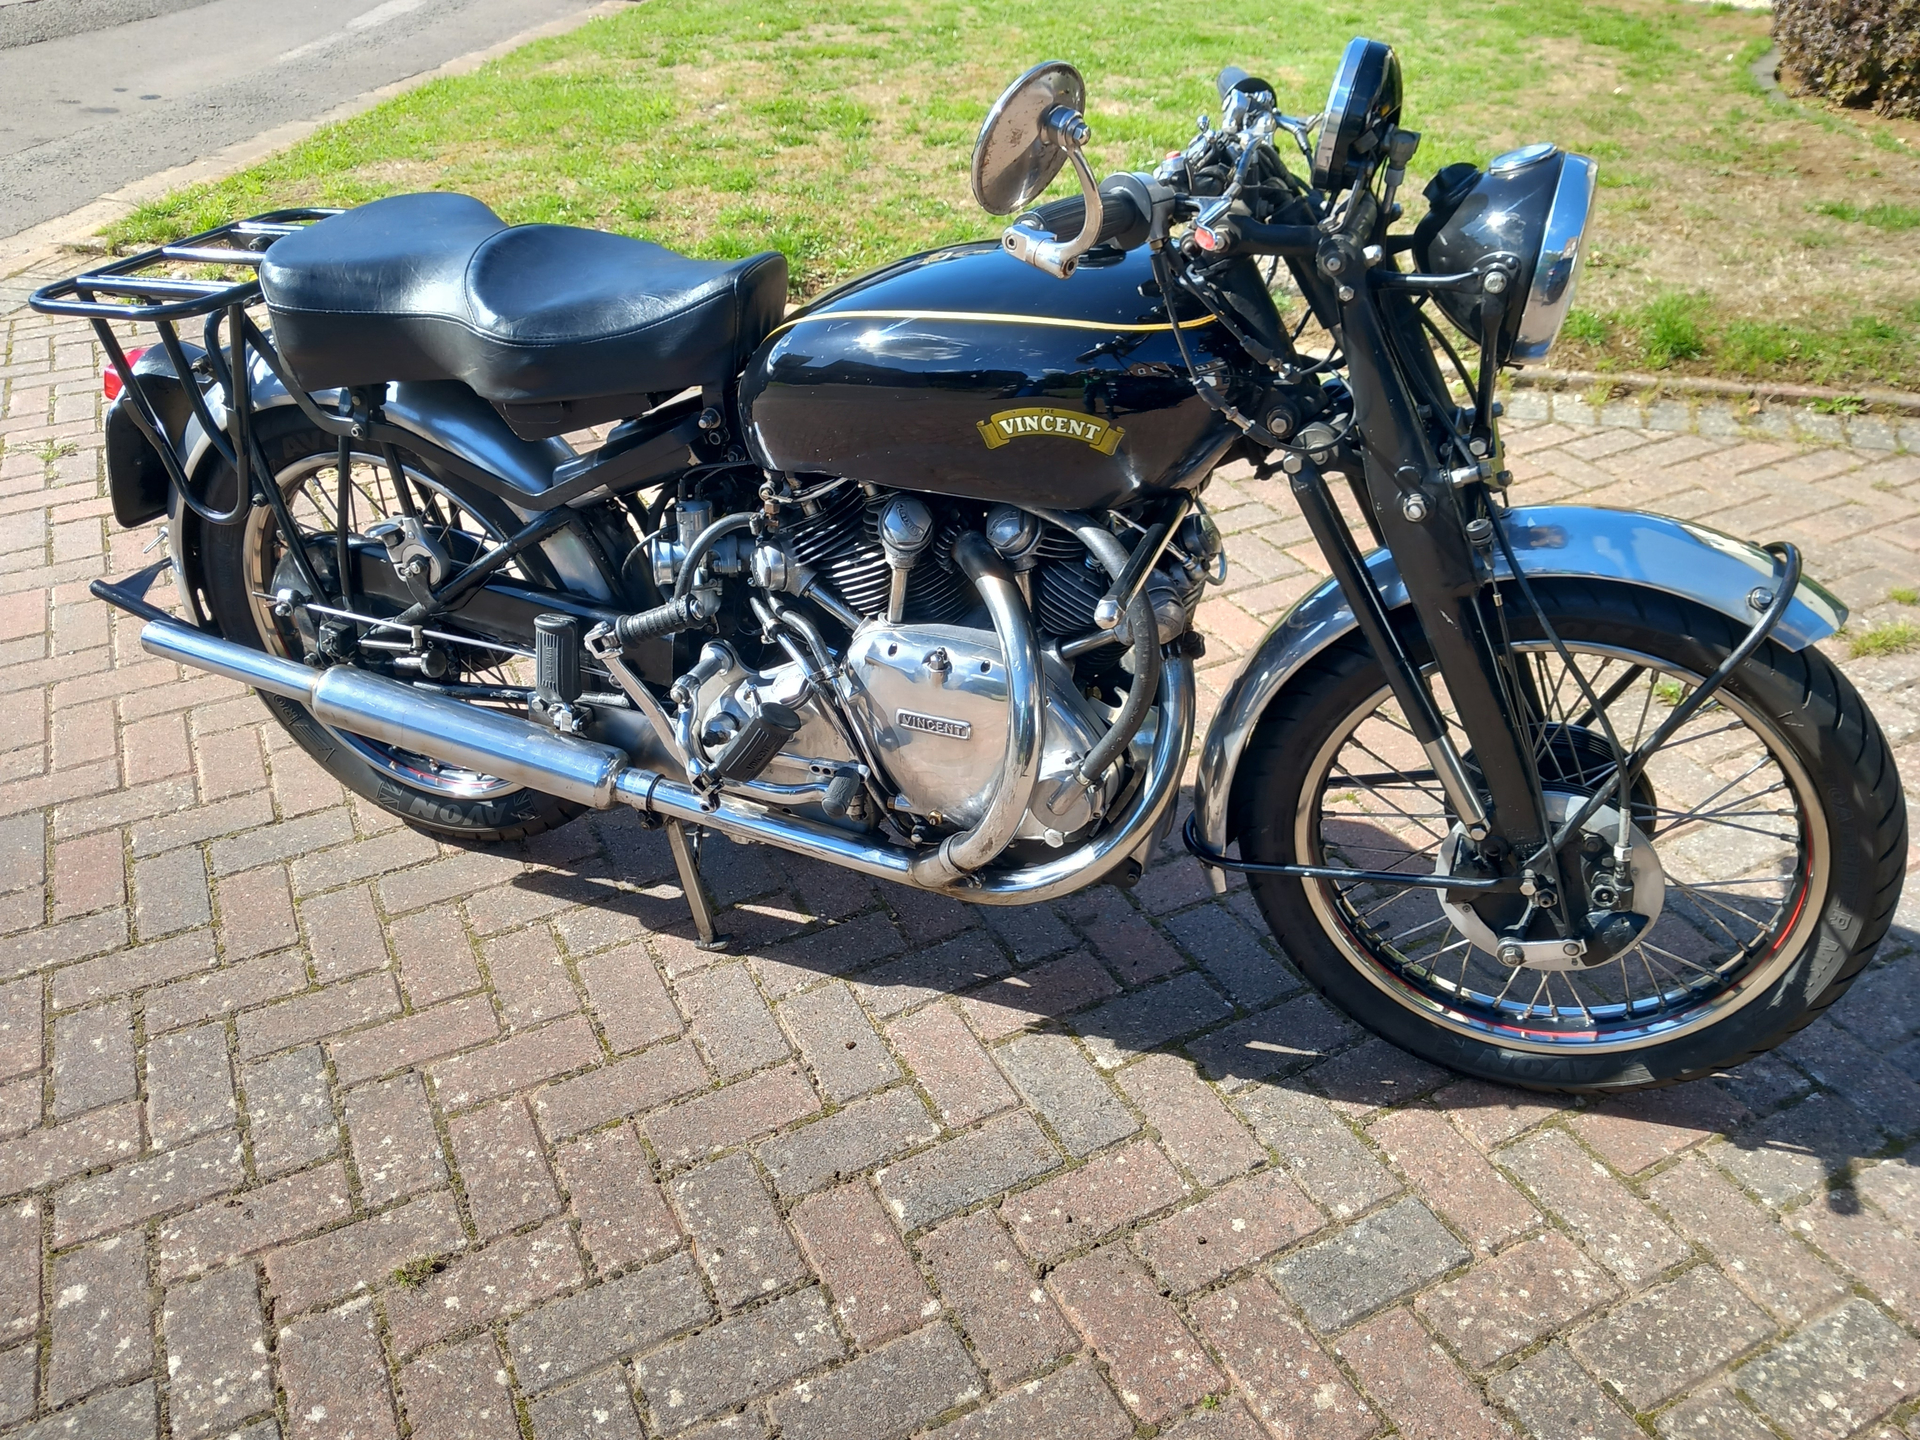
Wish the mudguards on my real one (1951 Rapide) in the garage looked that good! Seriously though, if you have any queries about finishing or parts you don’t recognise, ask and I’ll try to help (I have a copy of Jacqui Bickerstaffe’s “Original Vincent”). The subject of this kit is a comparatively rare beast, a “B” Shadow, the majority of Shadows are “C”s because the model year 1949 introduced the “Girdraulic” forks replacing the earlier Bramptons seen here, but parts shortages led to some being built with Bramptons alongside the Girdraulics.
Ref the carbs, the front carbs on Shadows were brass bodied, but Amal painted them all silver so you need a sort of satin silver finish.
Thanks for the input - I recall that you have a Vincent from an earlier conversation as we both have Nortons. I was considering finishing this one with unpainted engine and calling it a Rapide because the white metal can really look good . I am at a crossroads now as priming will start soon. We’ll see..
I opted for the soda blast finish on the carb bodies and float bowls as it looks just like the pot metal on my Amal 276 Standard carb on my ES2. Do you have Amal Standards on your Rapide ? I believe some dislike them because they consider them a fire hazard. Thoughts?
Feel free to post pics of your Rapide here - I know I would love to see it and I’m sure others would as well.
Nice looking trio. The 99 is going to be good when it’s finished.
My Rapide did have the original carbs on it when I got it. But after I’d rebuilt the engine and found out how non-standard it was, including heads ported and bored out to 32mm, I decided to go with 32mm Amal 932 Concentrics. This improved the economy and starting no end (I think half the petrol was leaking out of the old carbs). The only real difference between a Rapide and a Shadow is compression, 6.8:1 and 7.3:1 on the Shadow, and the carbs, 1 1/16” on the Rap, 1 1/8” on the Shadow. To my mind this wouldn’t represent the difference in performance, 45bhp/110mph for the Rapide, 55bhp/125mph for the Shadow. I have heard some Rapides were faster than Shadows, it depended on the build, which my experience fitting a new oil pump suggests selective assembly. I suspect the “best” ones became Shadows. As I mentioned above, the front carb on Shadows was cast in brass, then painted. If you decide to build it as a Rapide, it shouldn’t have the 5” speedo, but mine has one anyway and it seems to be a popular upgrade on Rapides. Also the Shadow has ribbed cast brake drums, the Rapide doesn’t, but once again mine has been upgraded and also has Lightning type back plates (stronger). Overall, I suspect my Rapide would be a bit quicker than a standard Shadow, as it’s running 9:1 compression and Carillo rods.
Just beautiful - I am envious ! Thanks for sharing. If you are interested I have a blog going on Access Norton for the Dommie project. The build was put on hold because of the cost increases due to tariffs.
I am ready to build the wheels and would like to use Devon rims but they are expensive- even more so now with the tariffs .
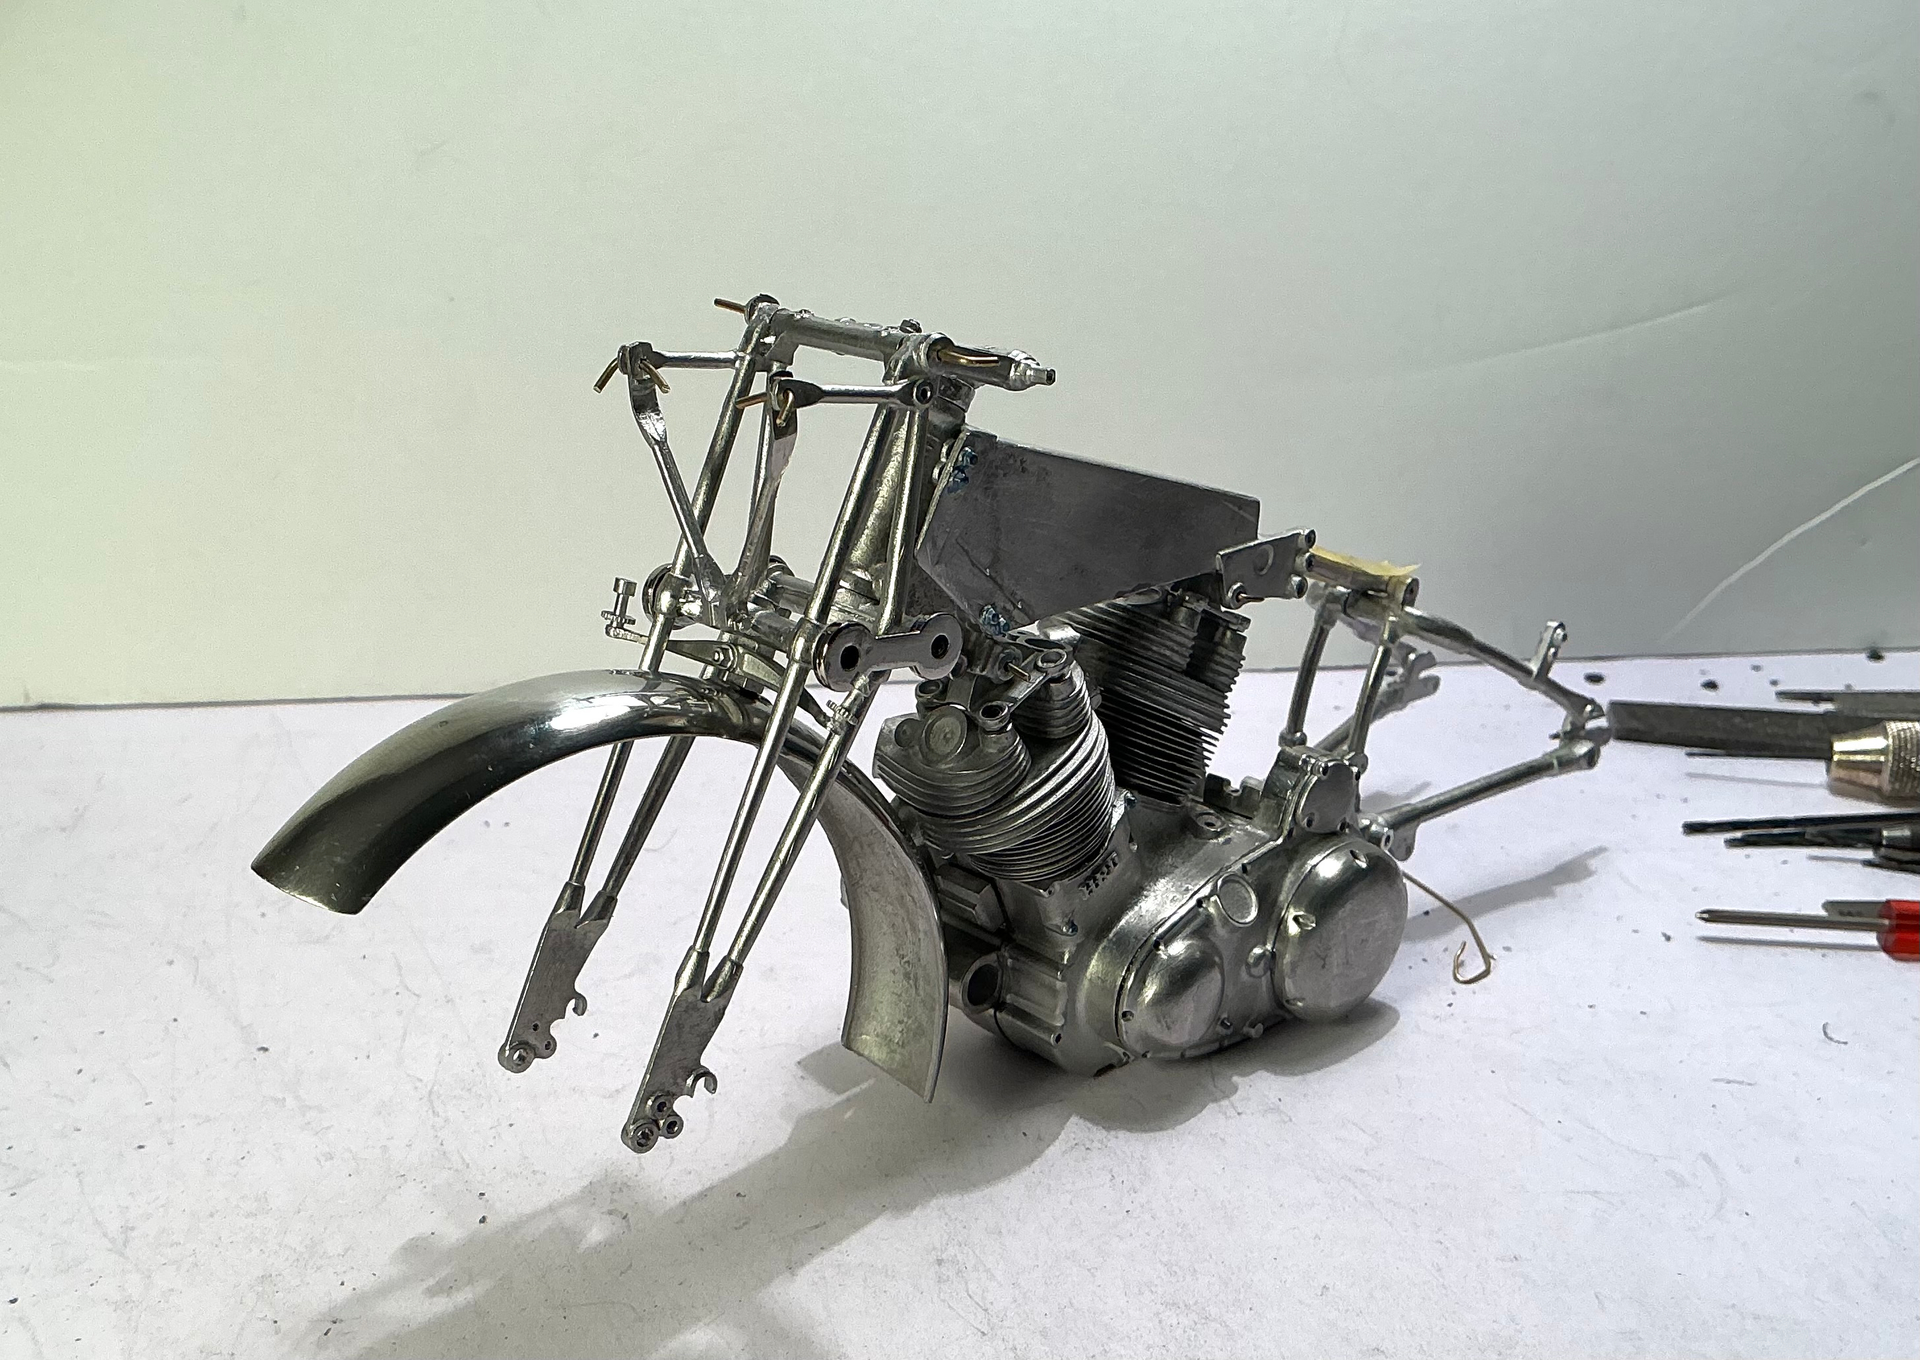
Progress on the Vincent build . Engine and most of the chassis together and in paint. Yet to do on the engine are remote float bowls on the carbs , some oil piping and fuel piping.