Hi all,
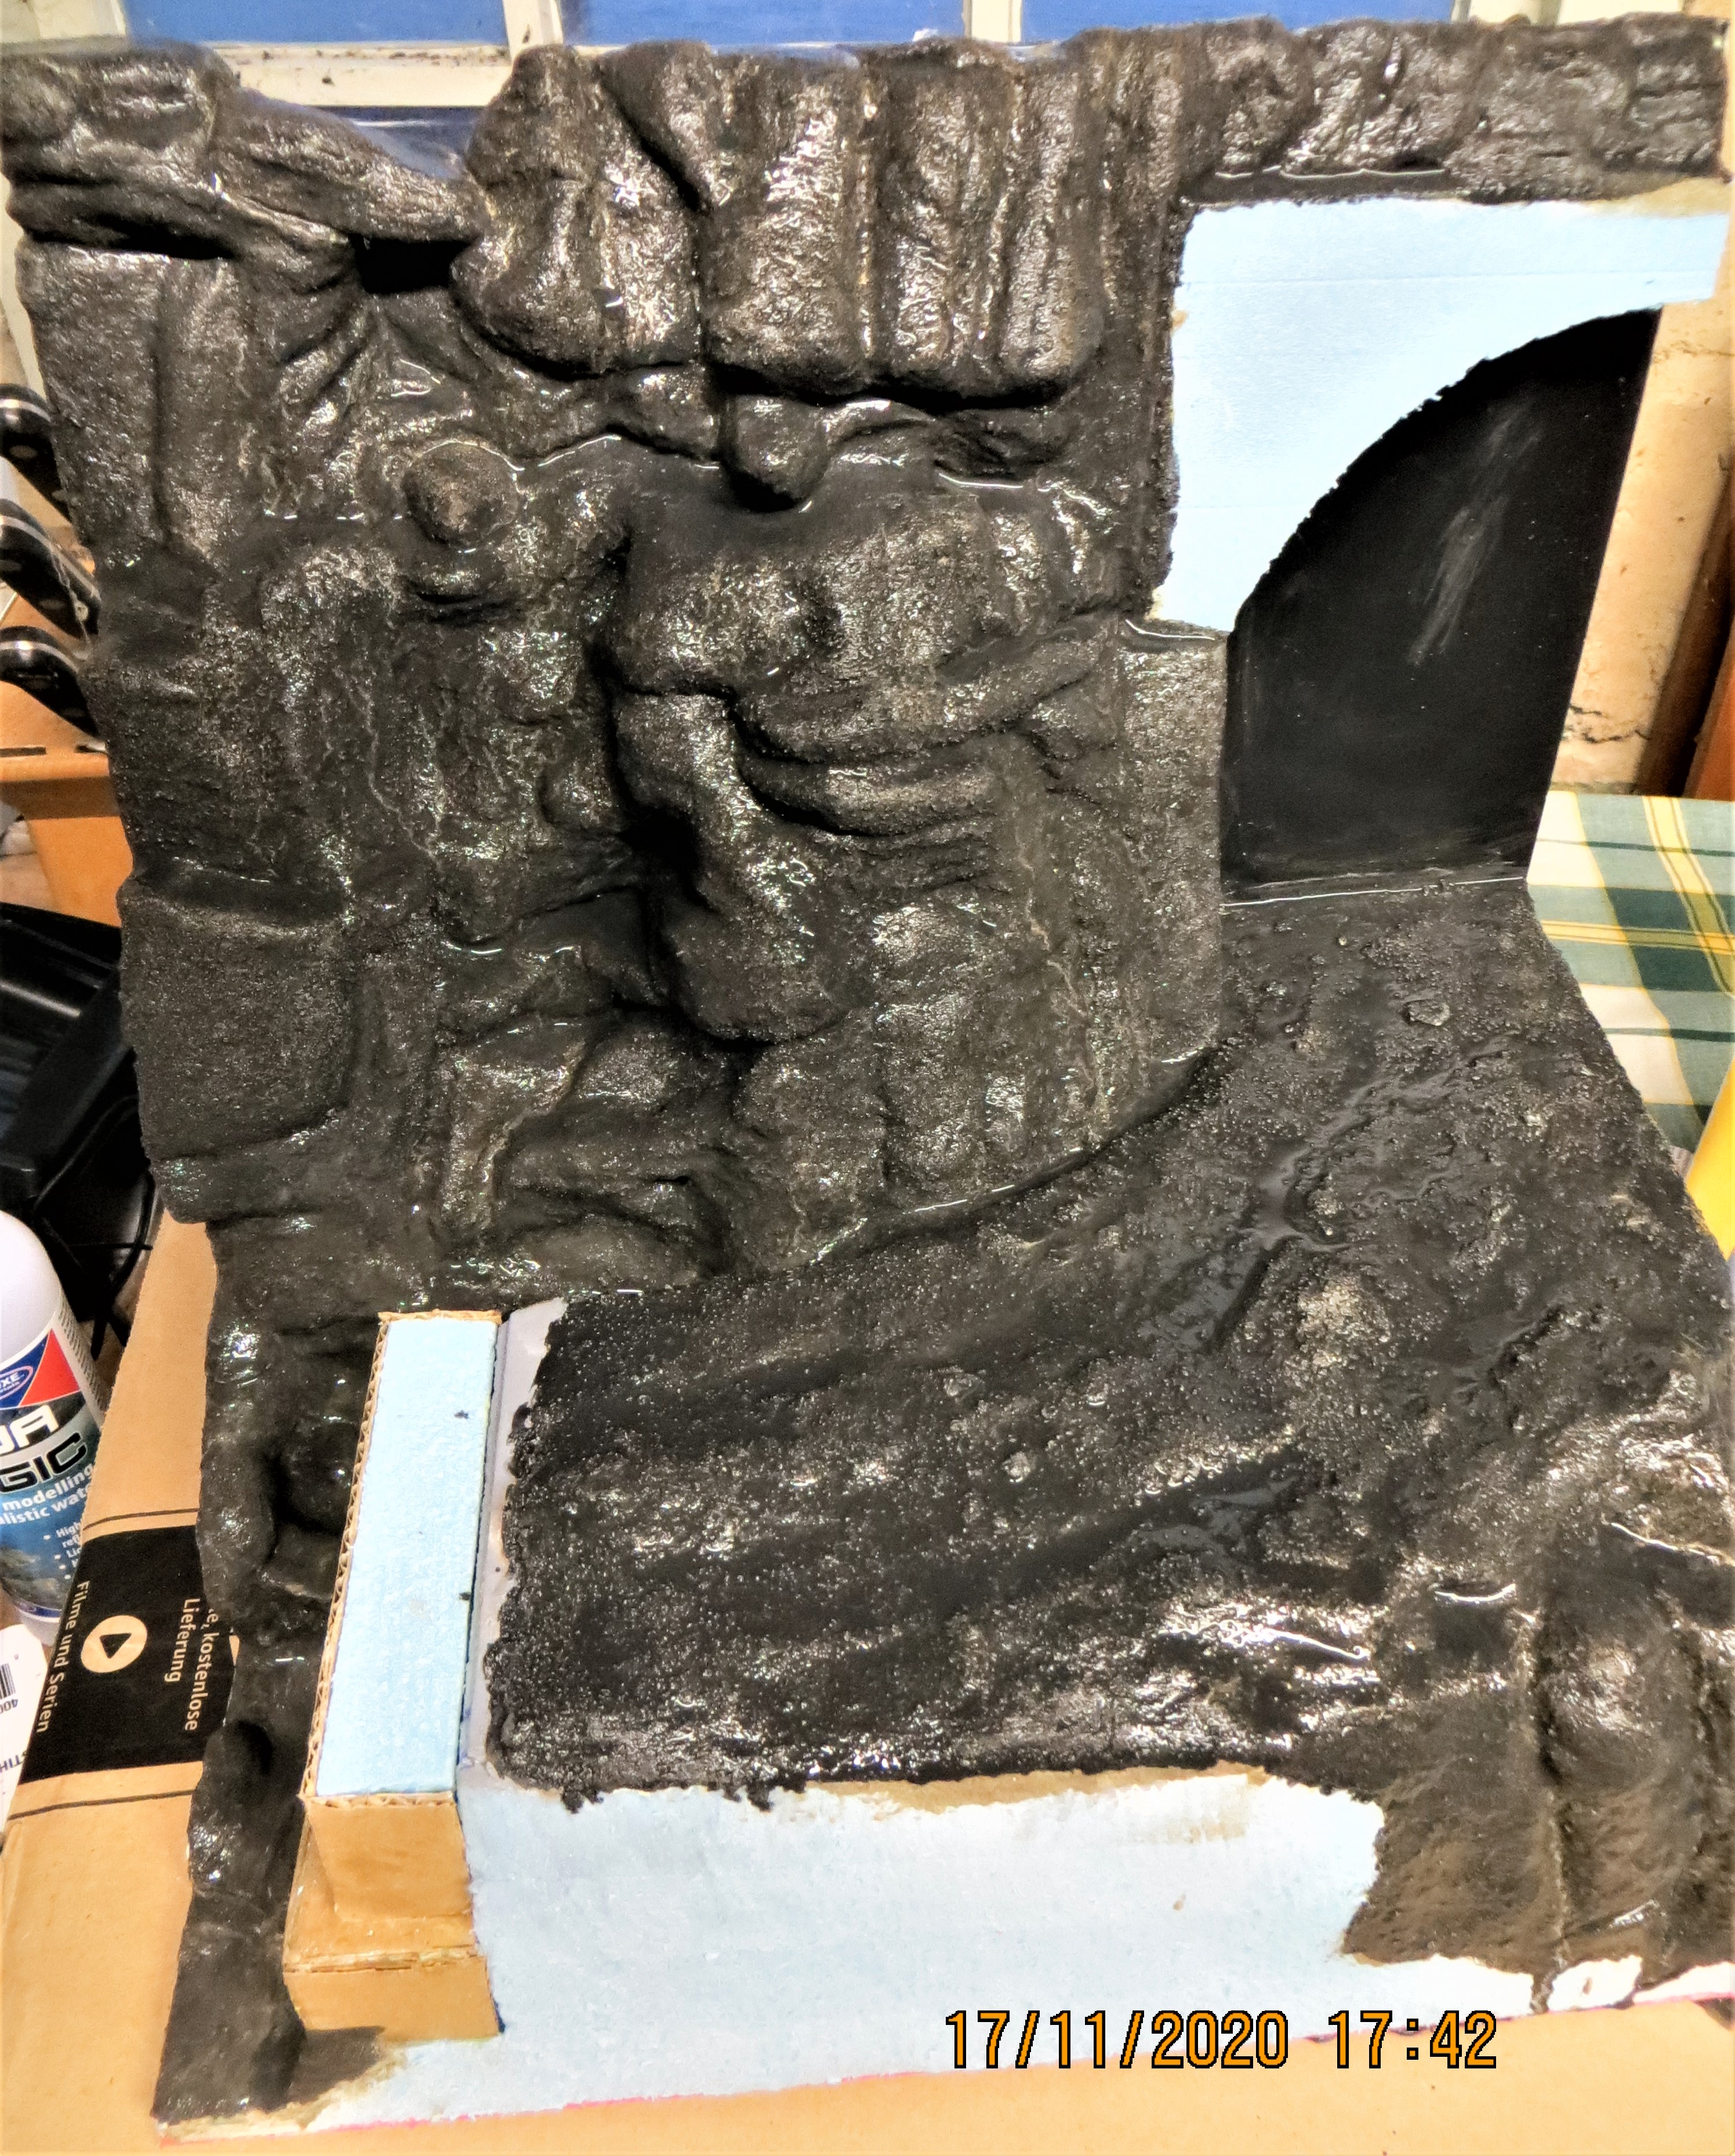
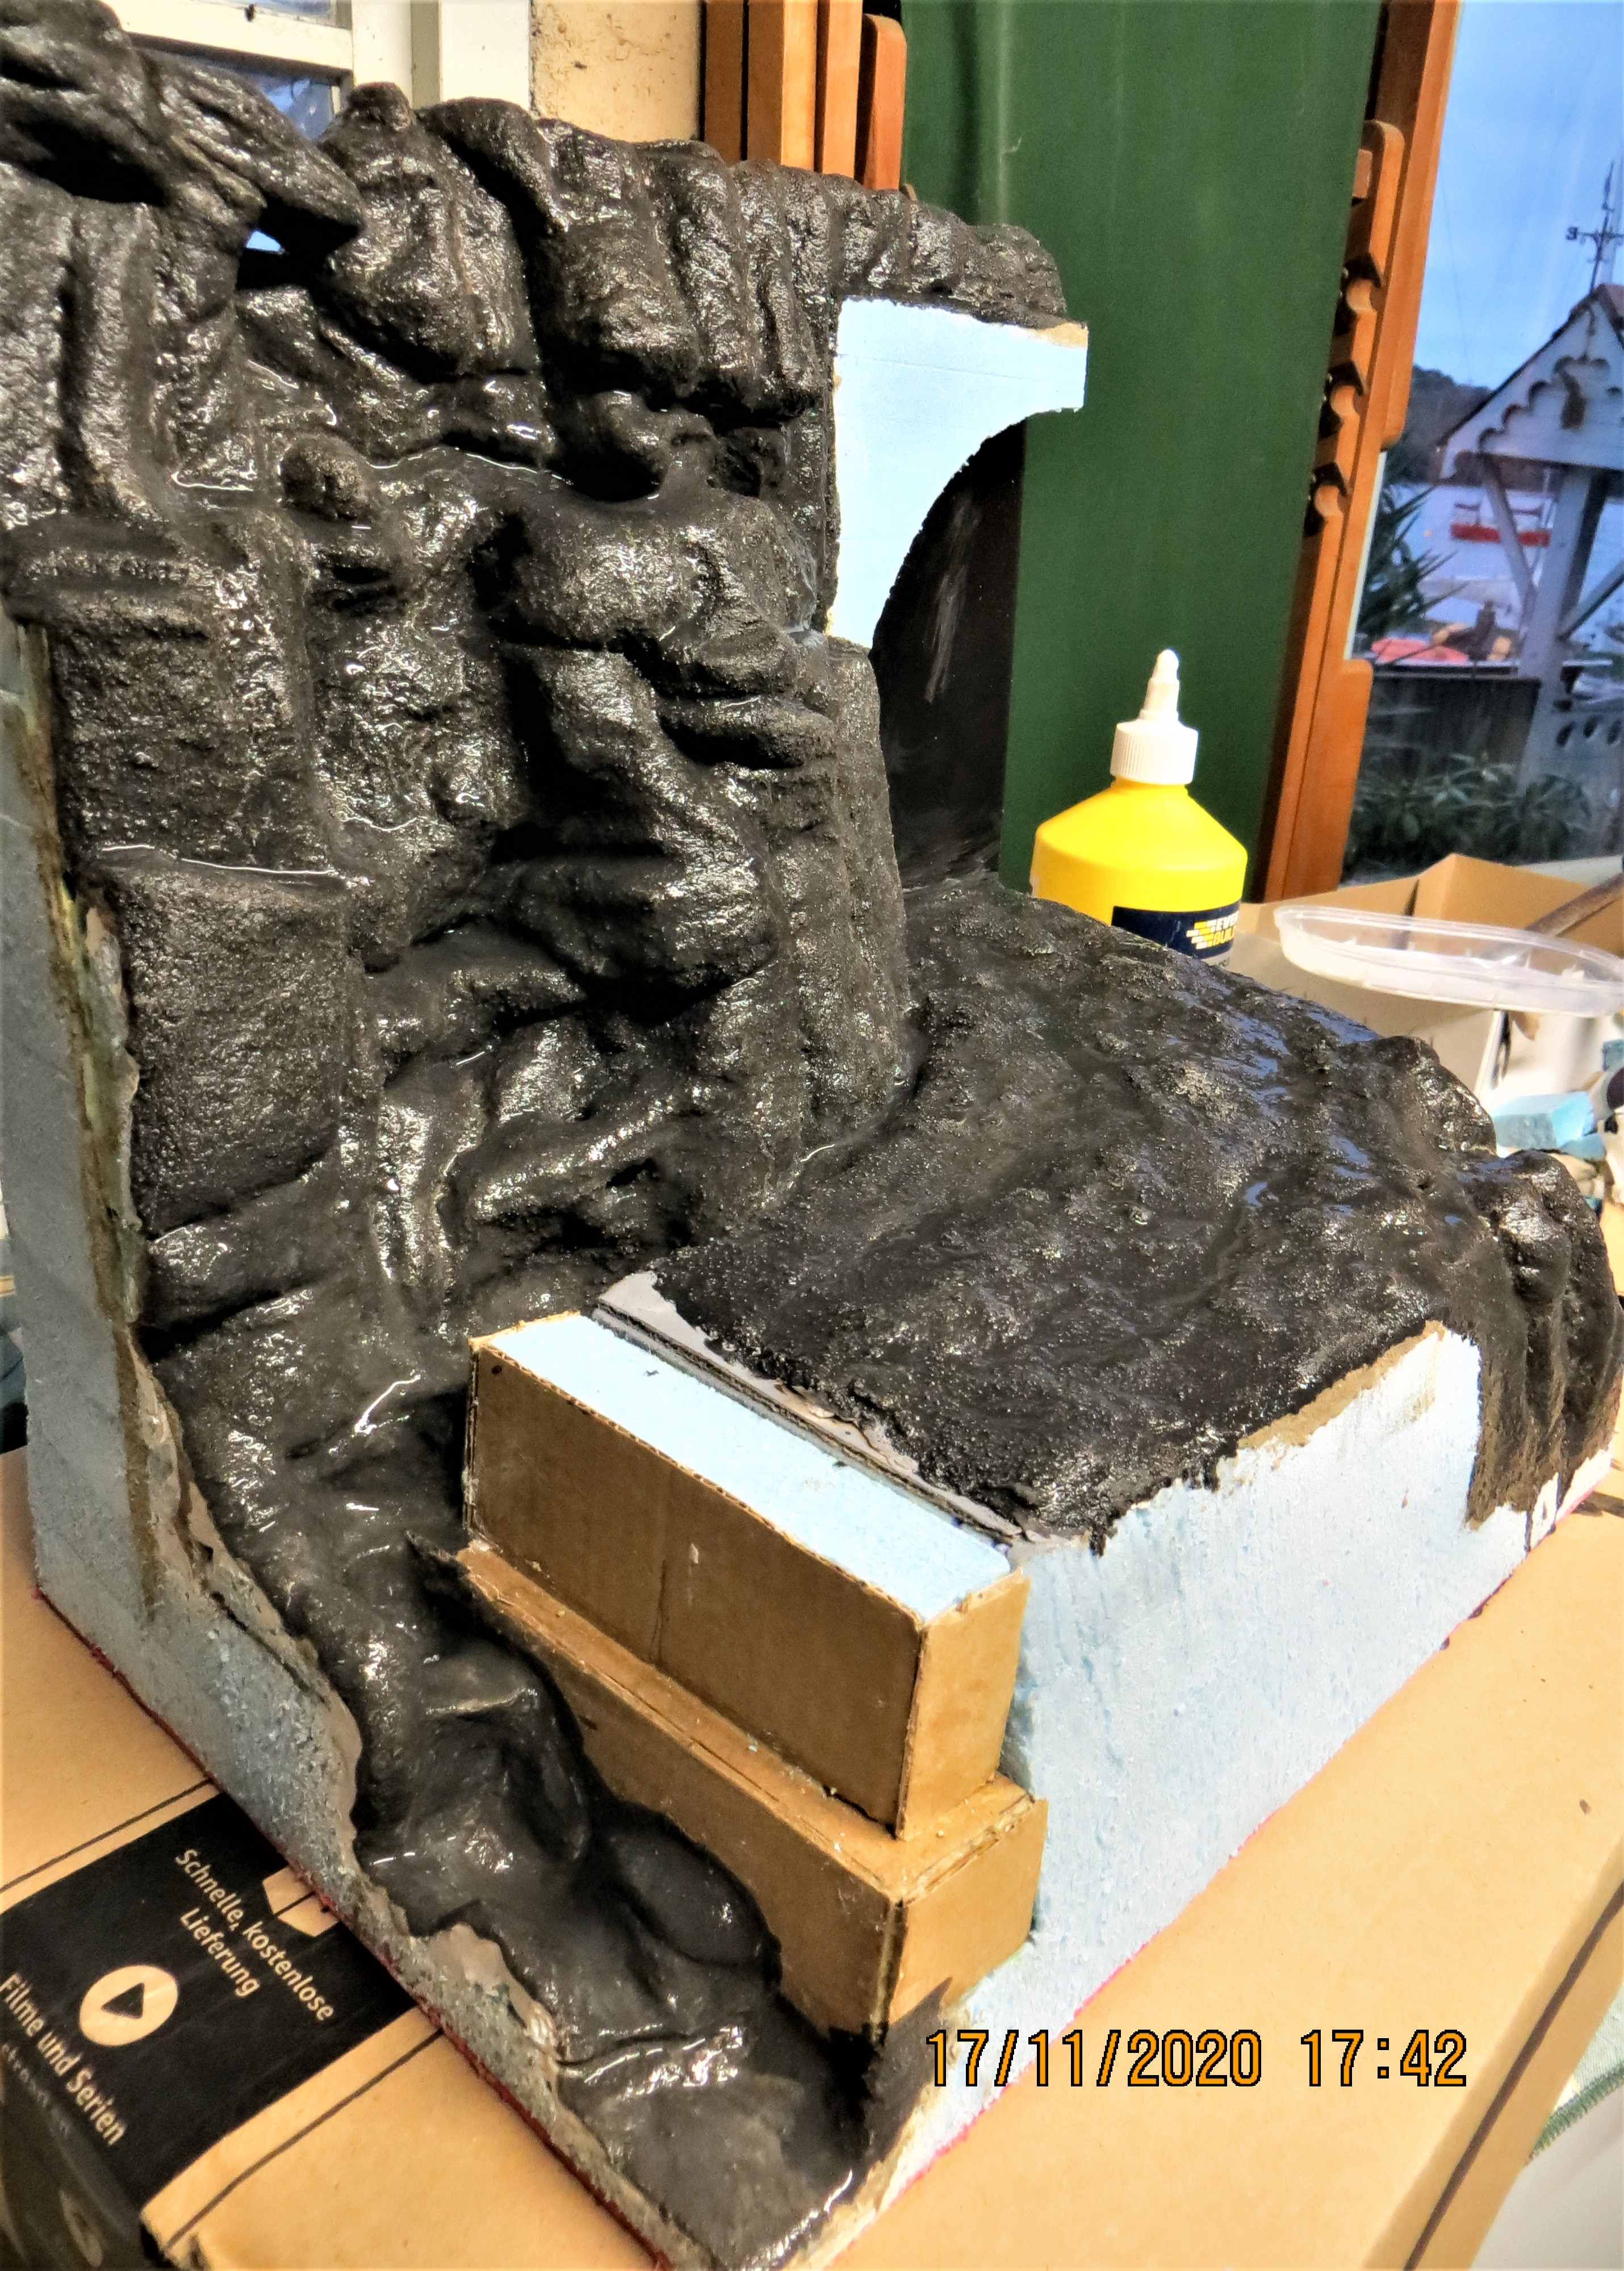
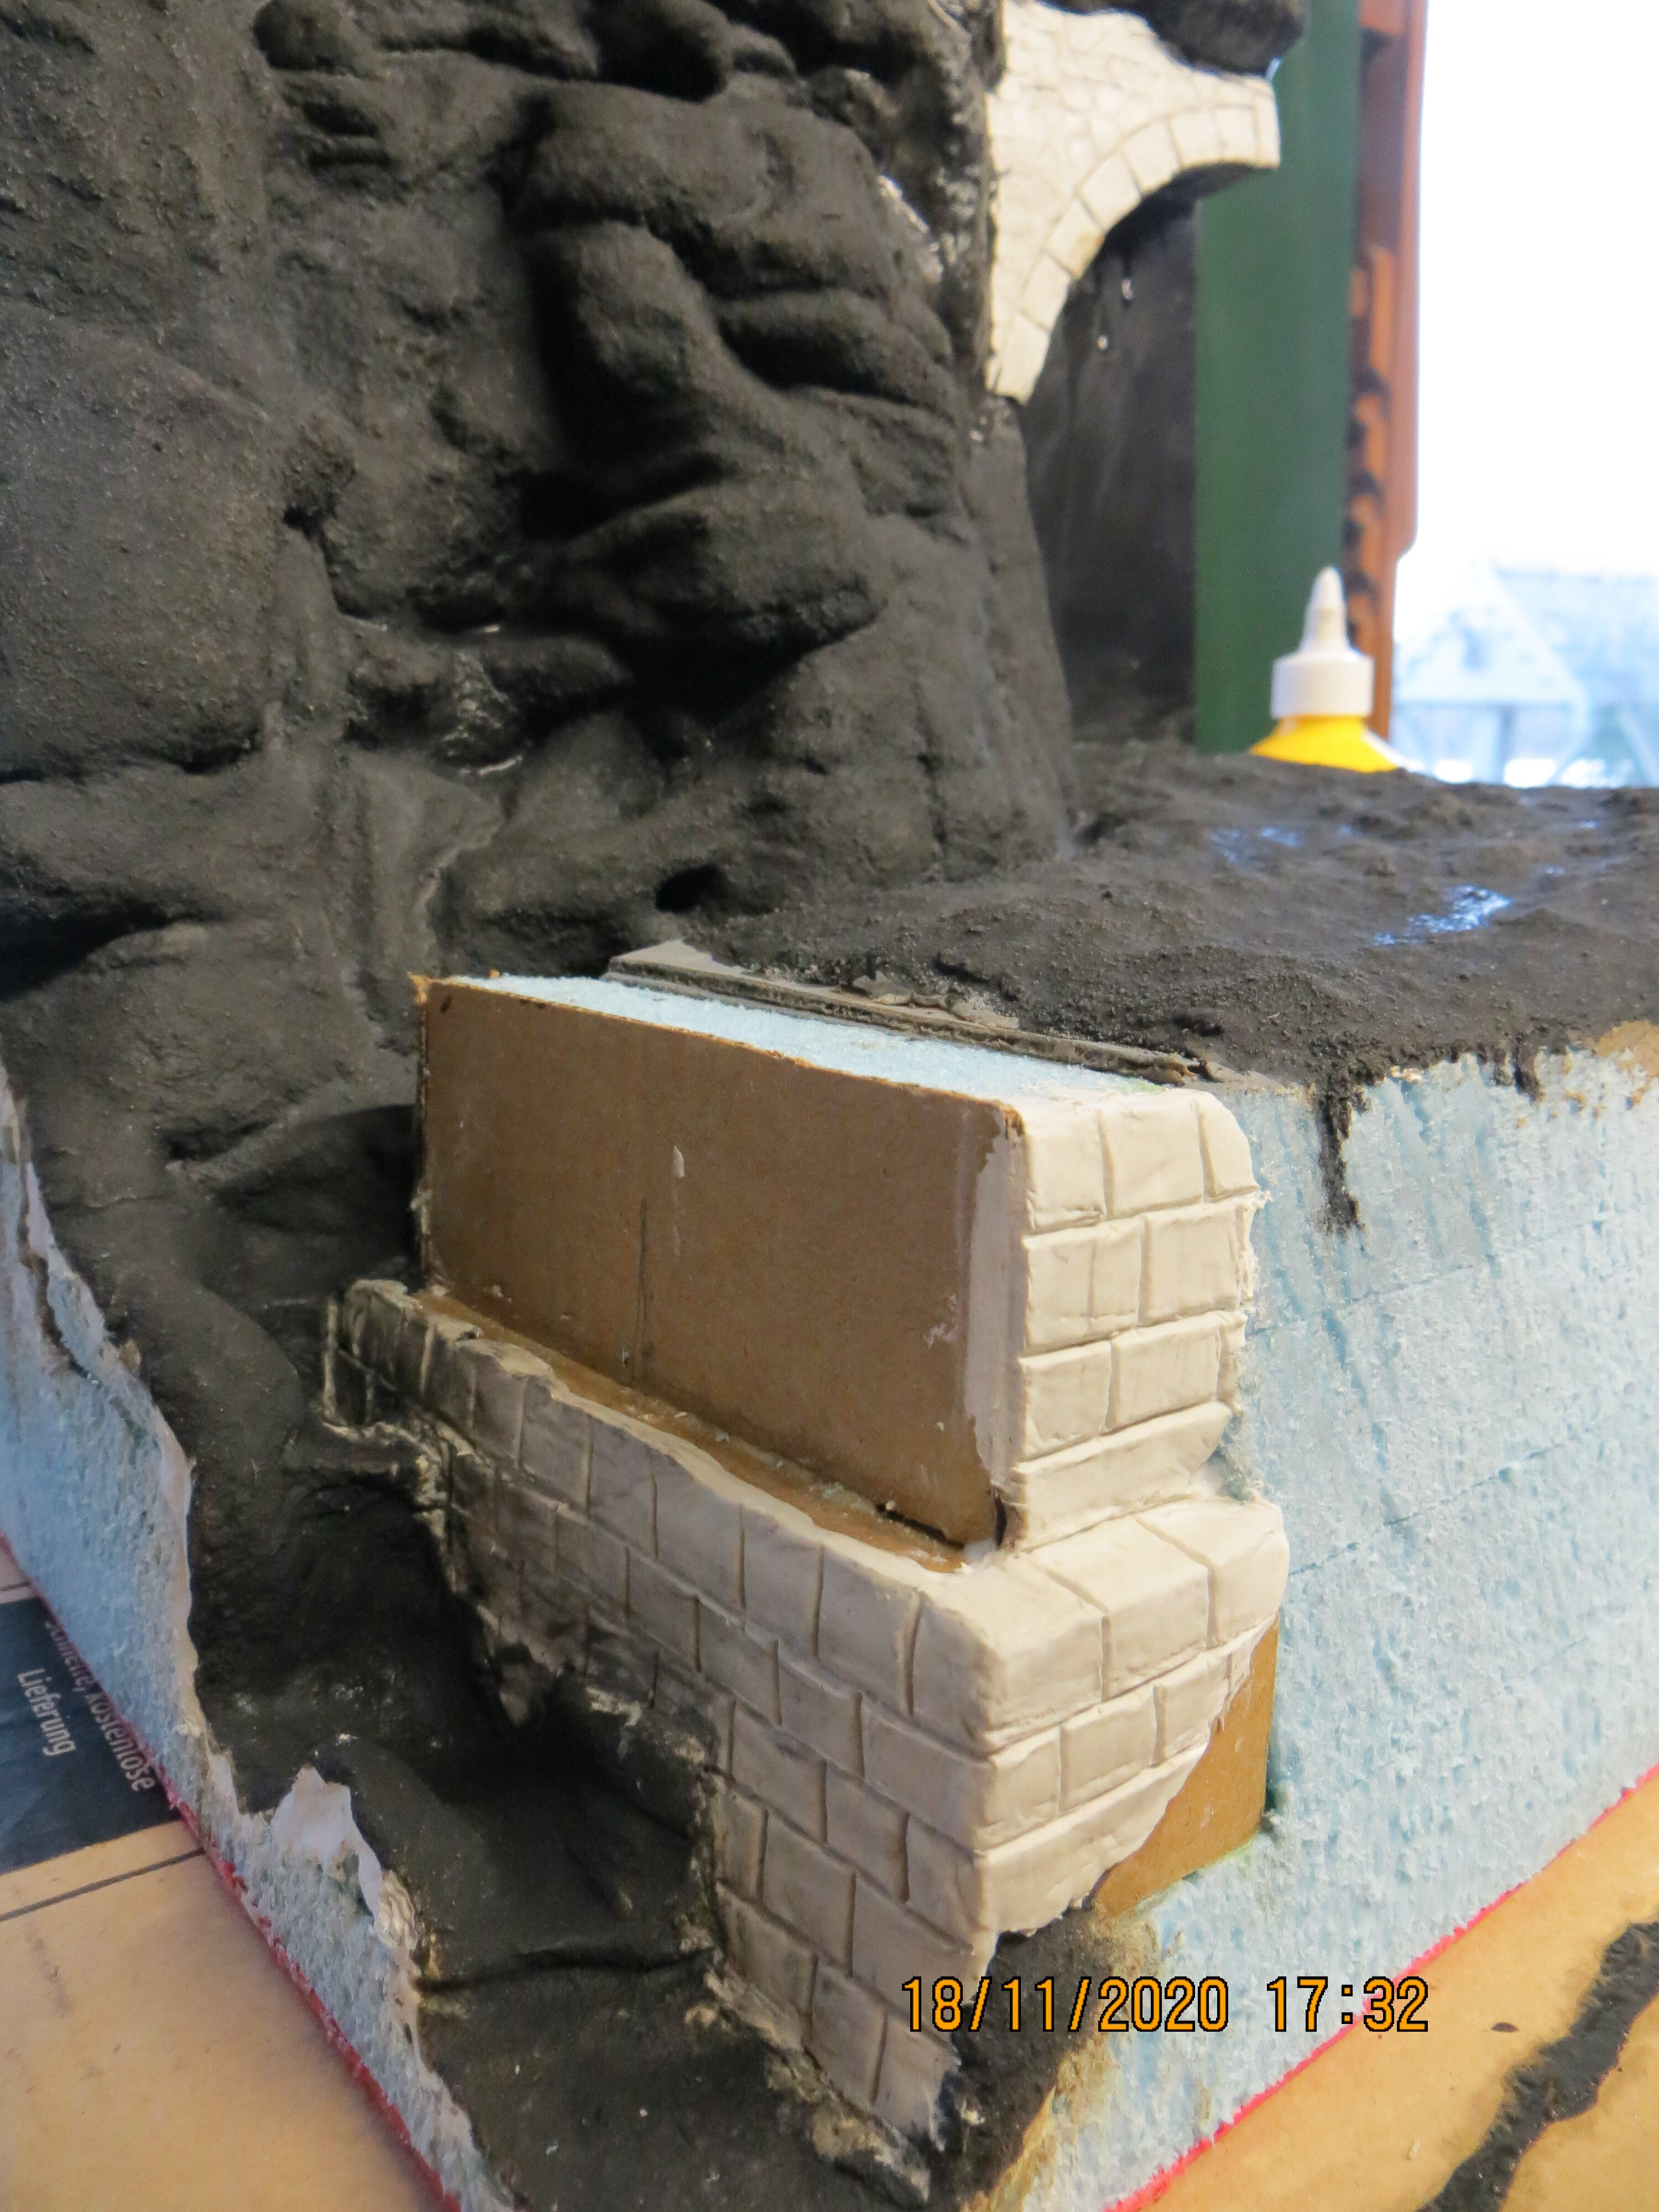
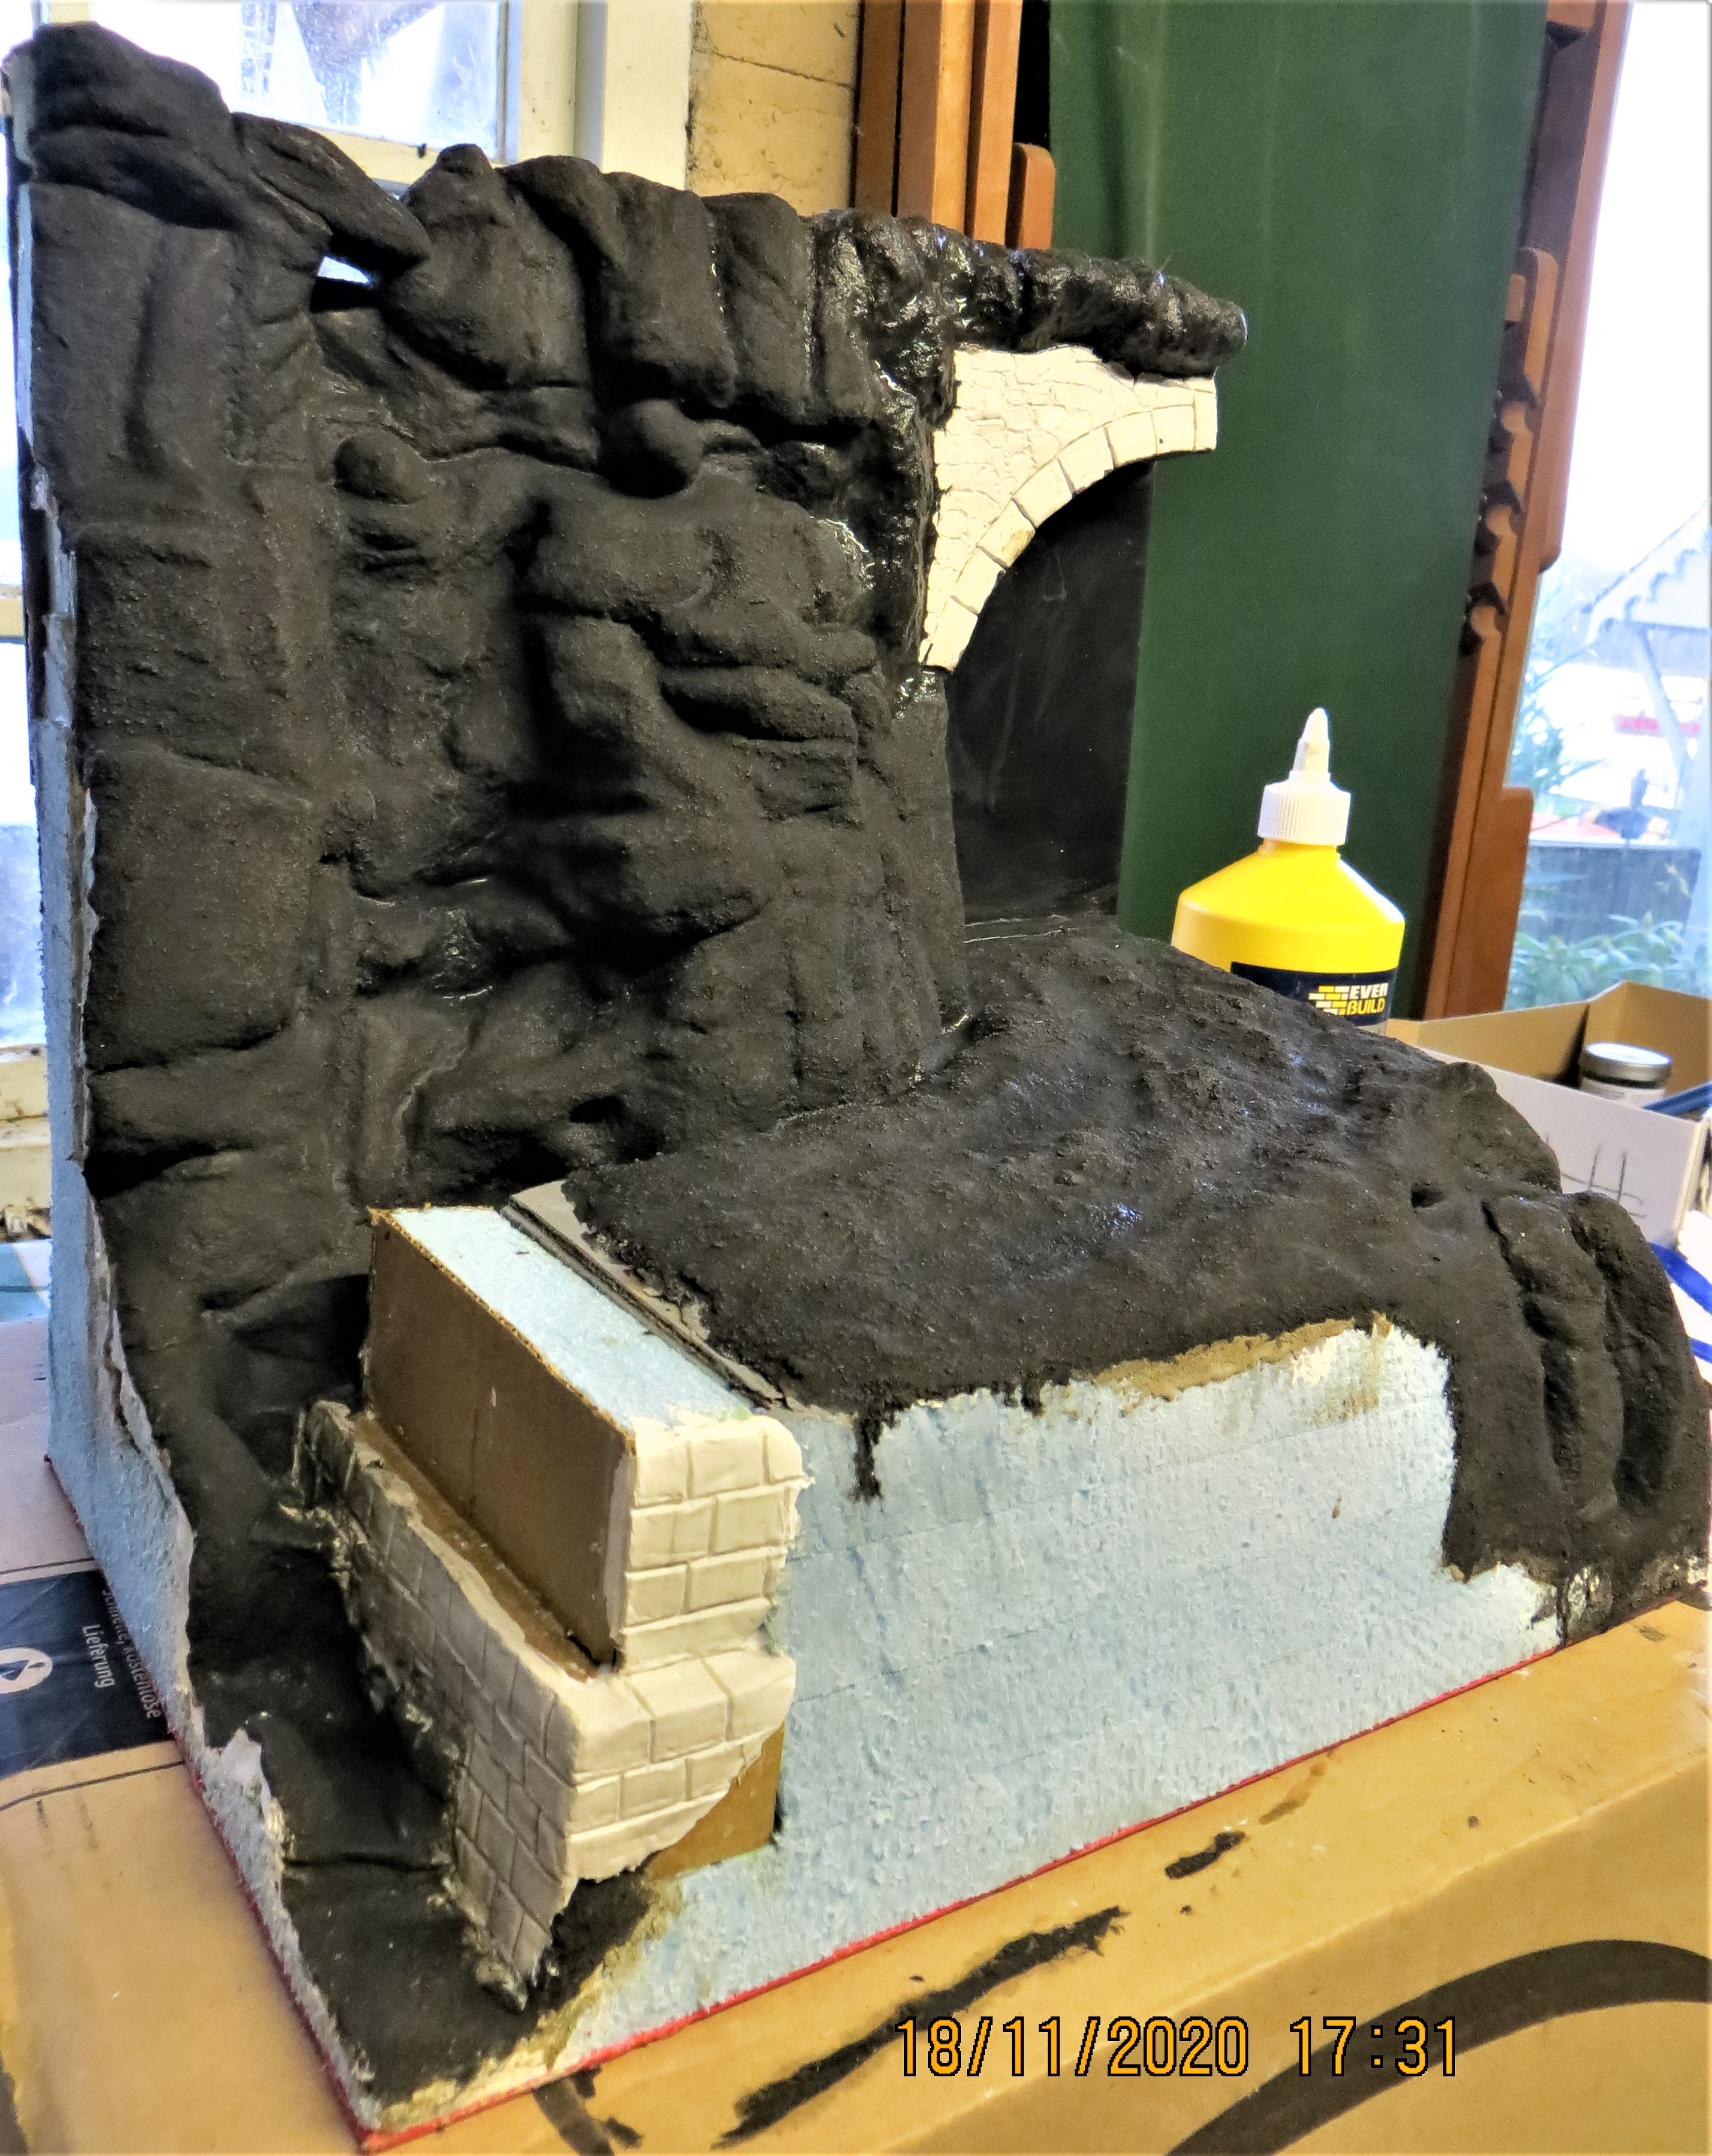
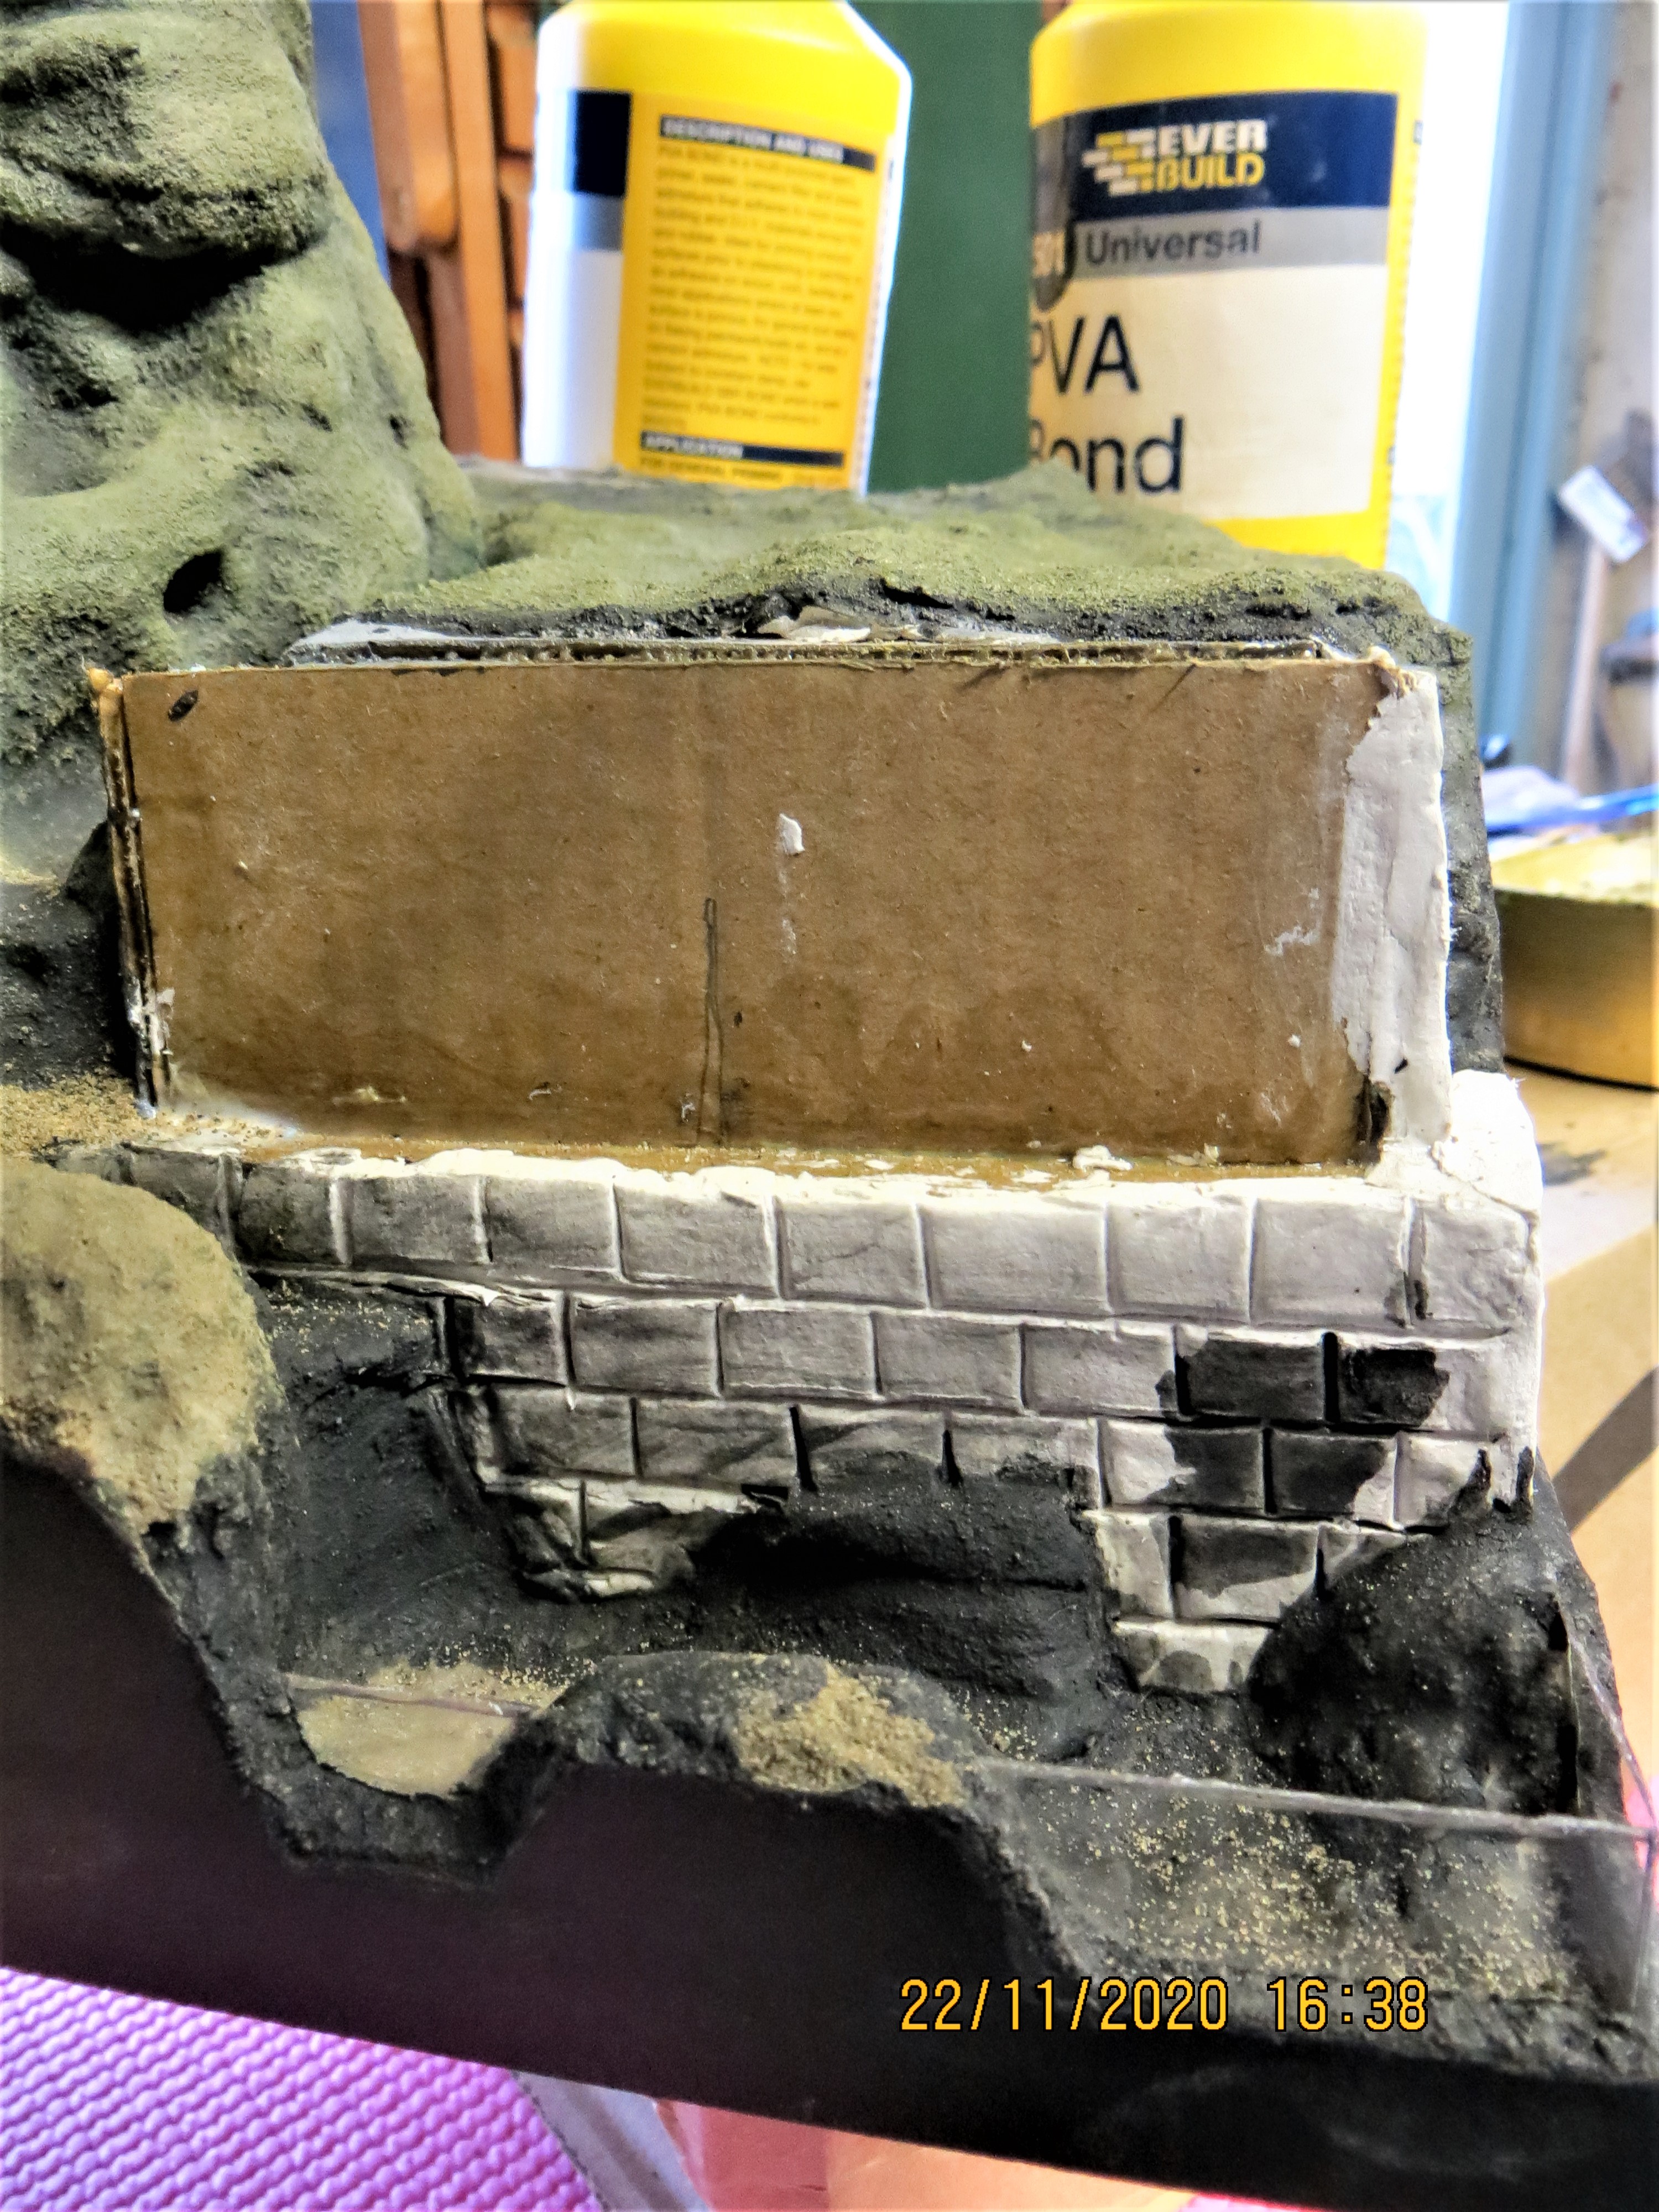
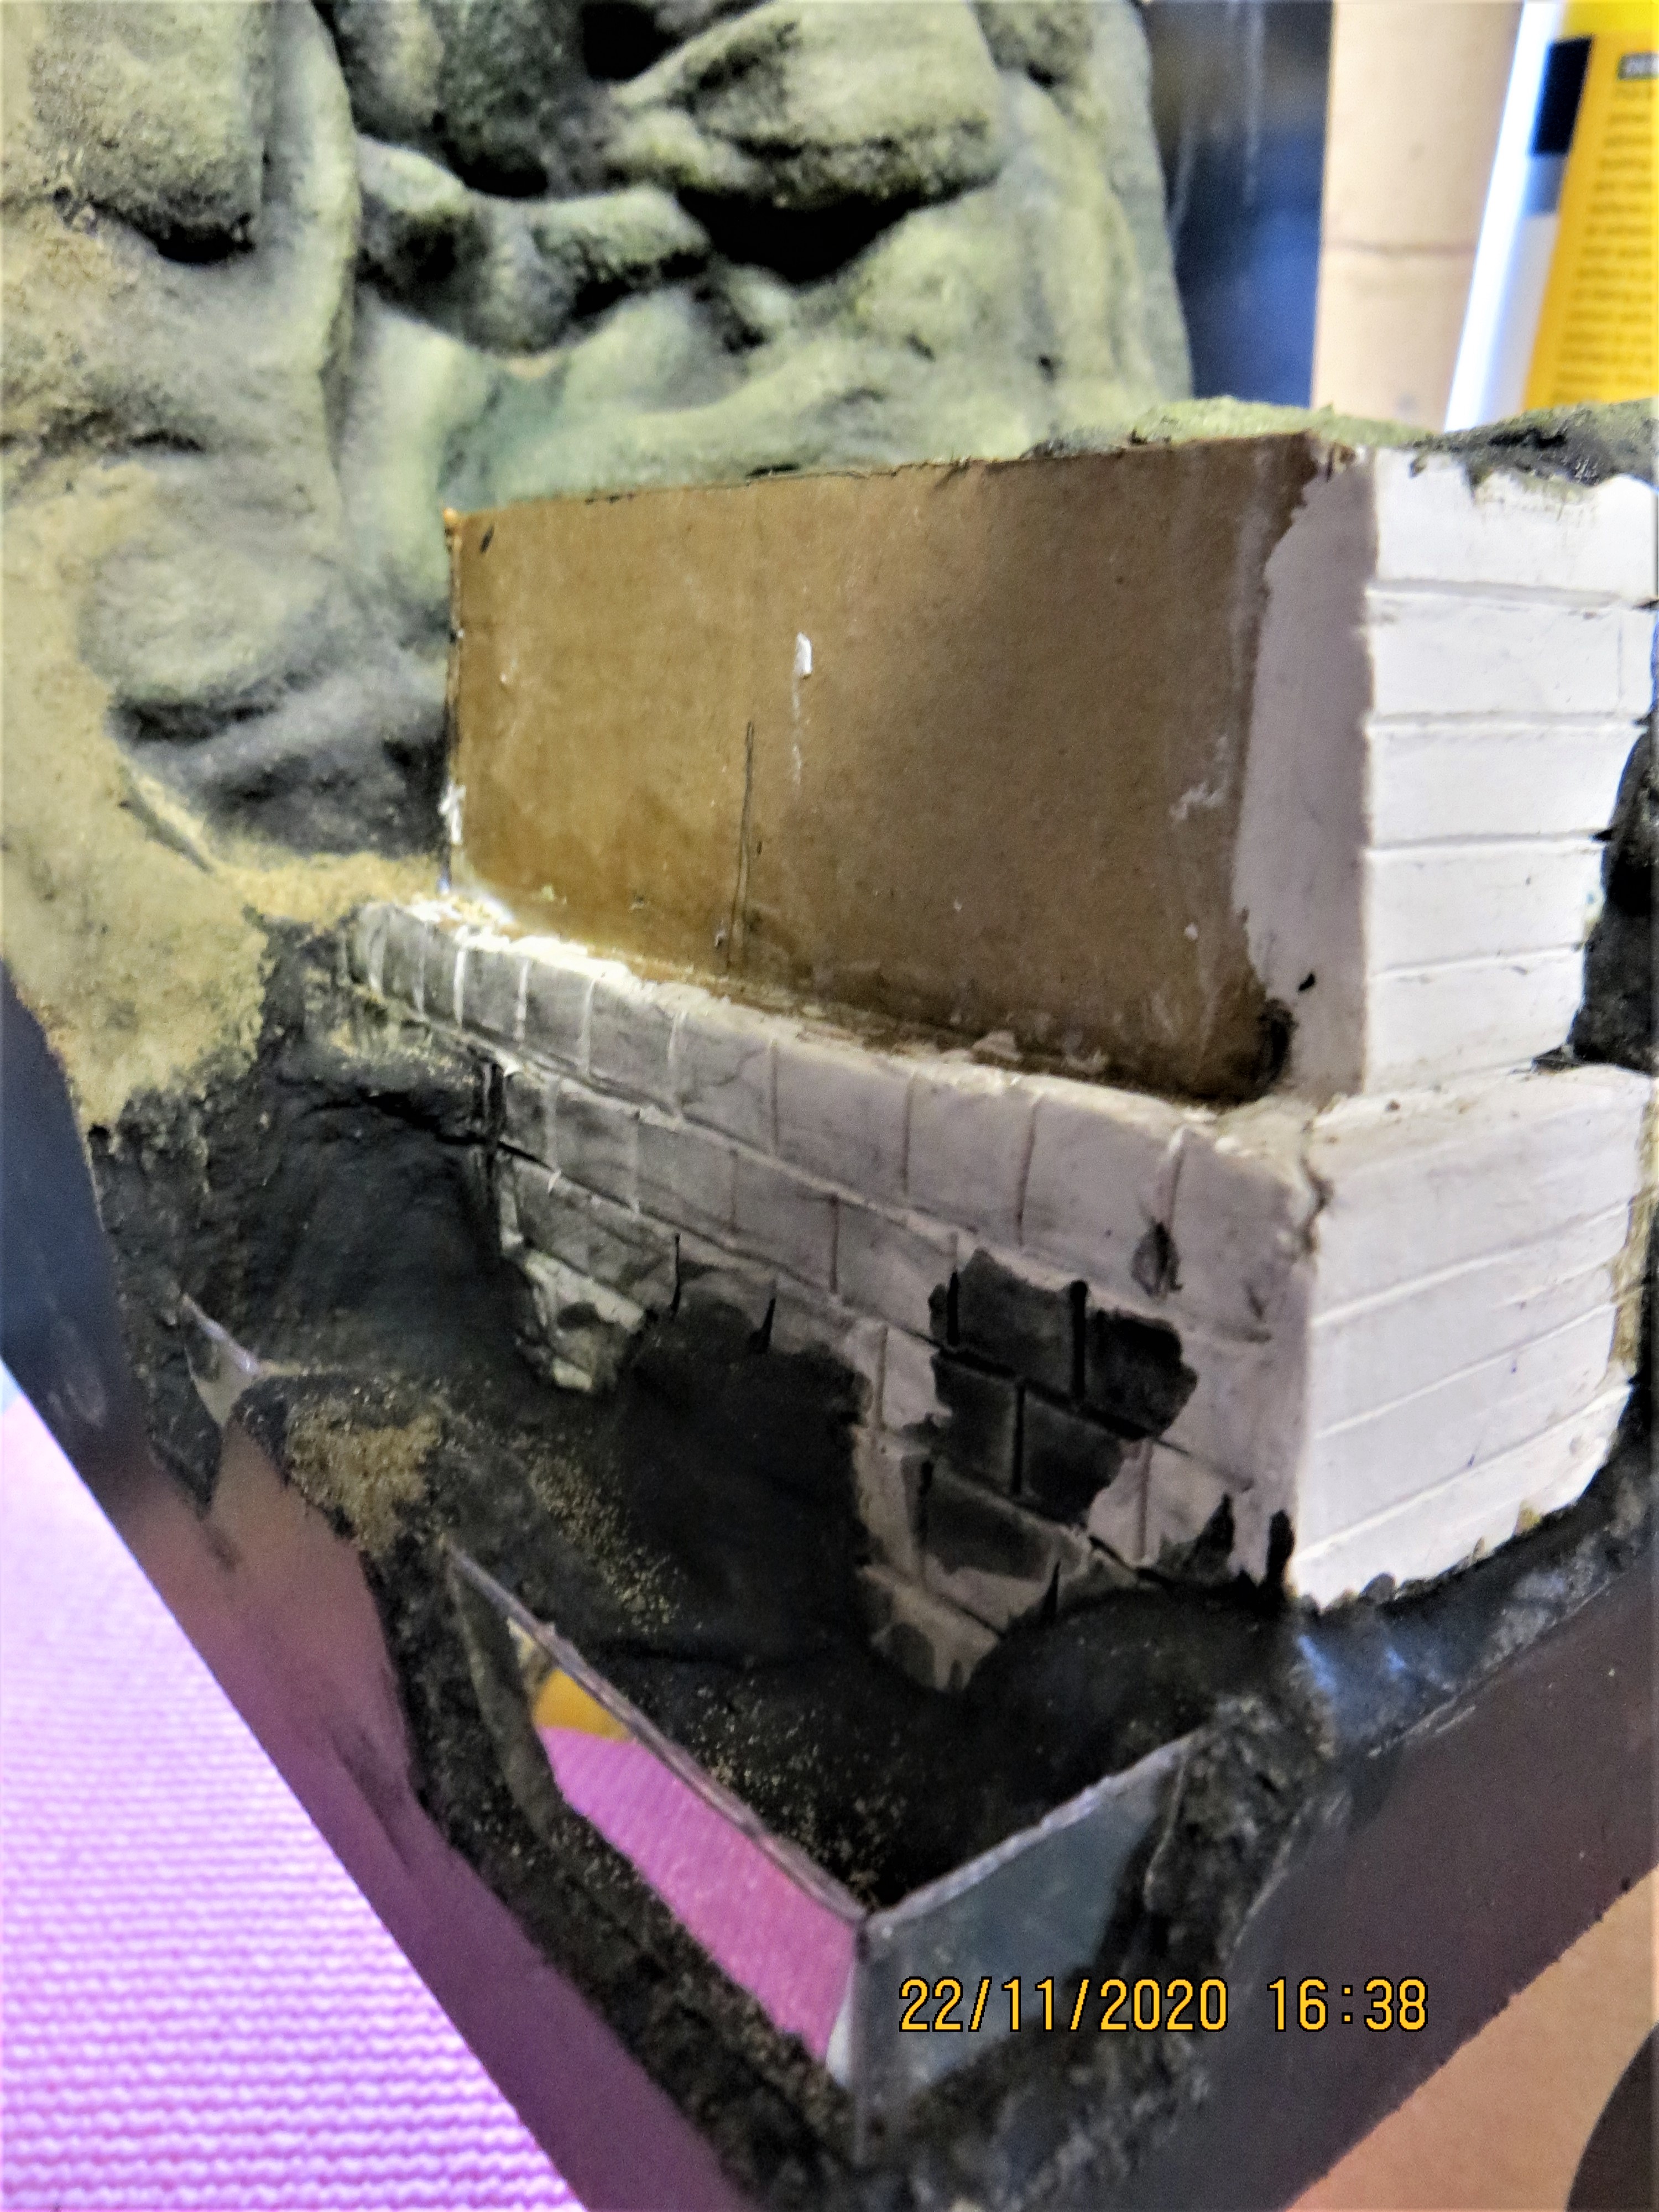
I have managed to sculpt the rockface at the front right corner, and the stream that runs under the partial bridge that will be seen at the front left.
Have also roughed out in card the support for the bridge and, hopefully, tomorrow I’ll sculpt the stonework, though the bridge won’t be added until I’ve done the water as it will no doubt get in the way of my stubby fingers and end up broken, 
 .
.
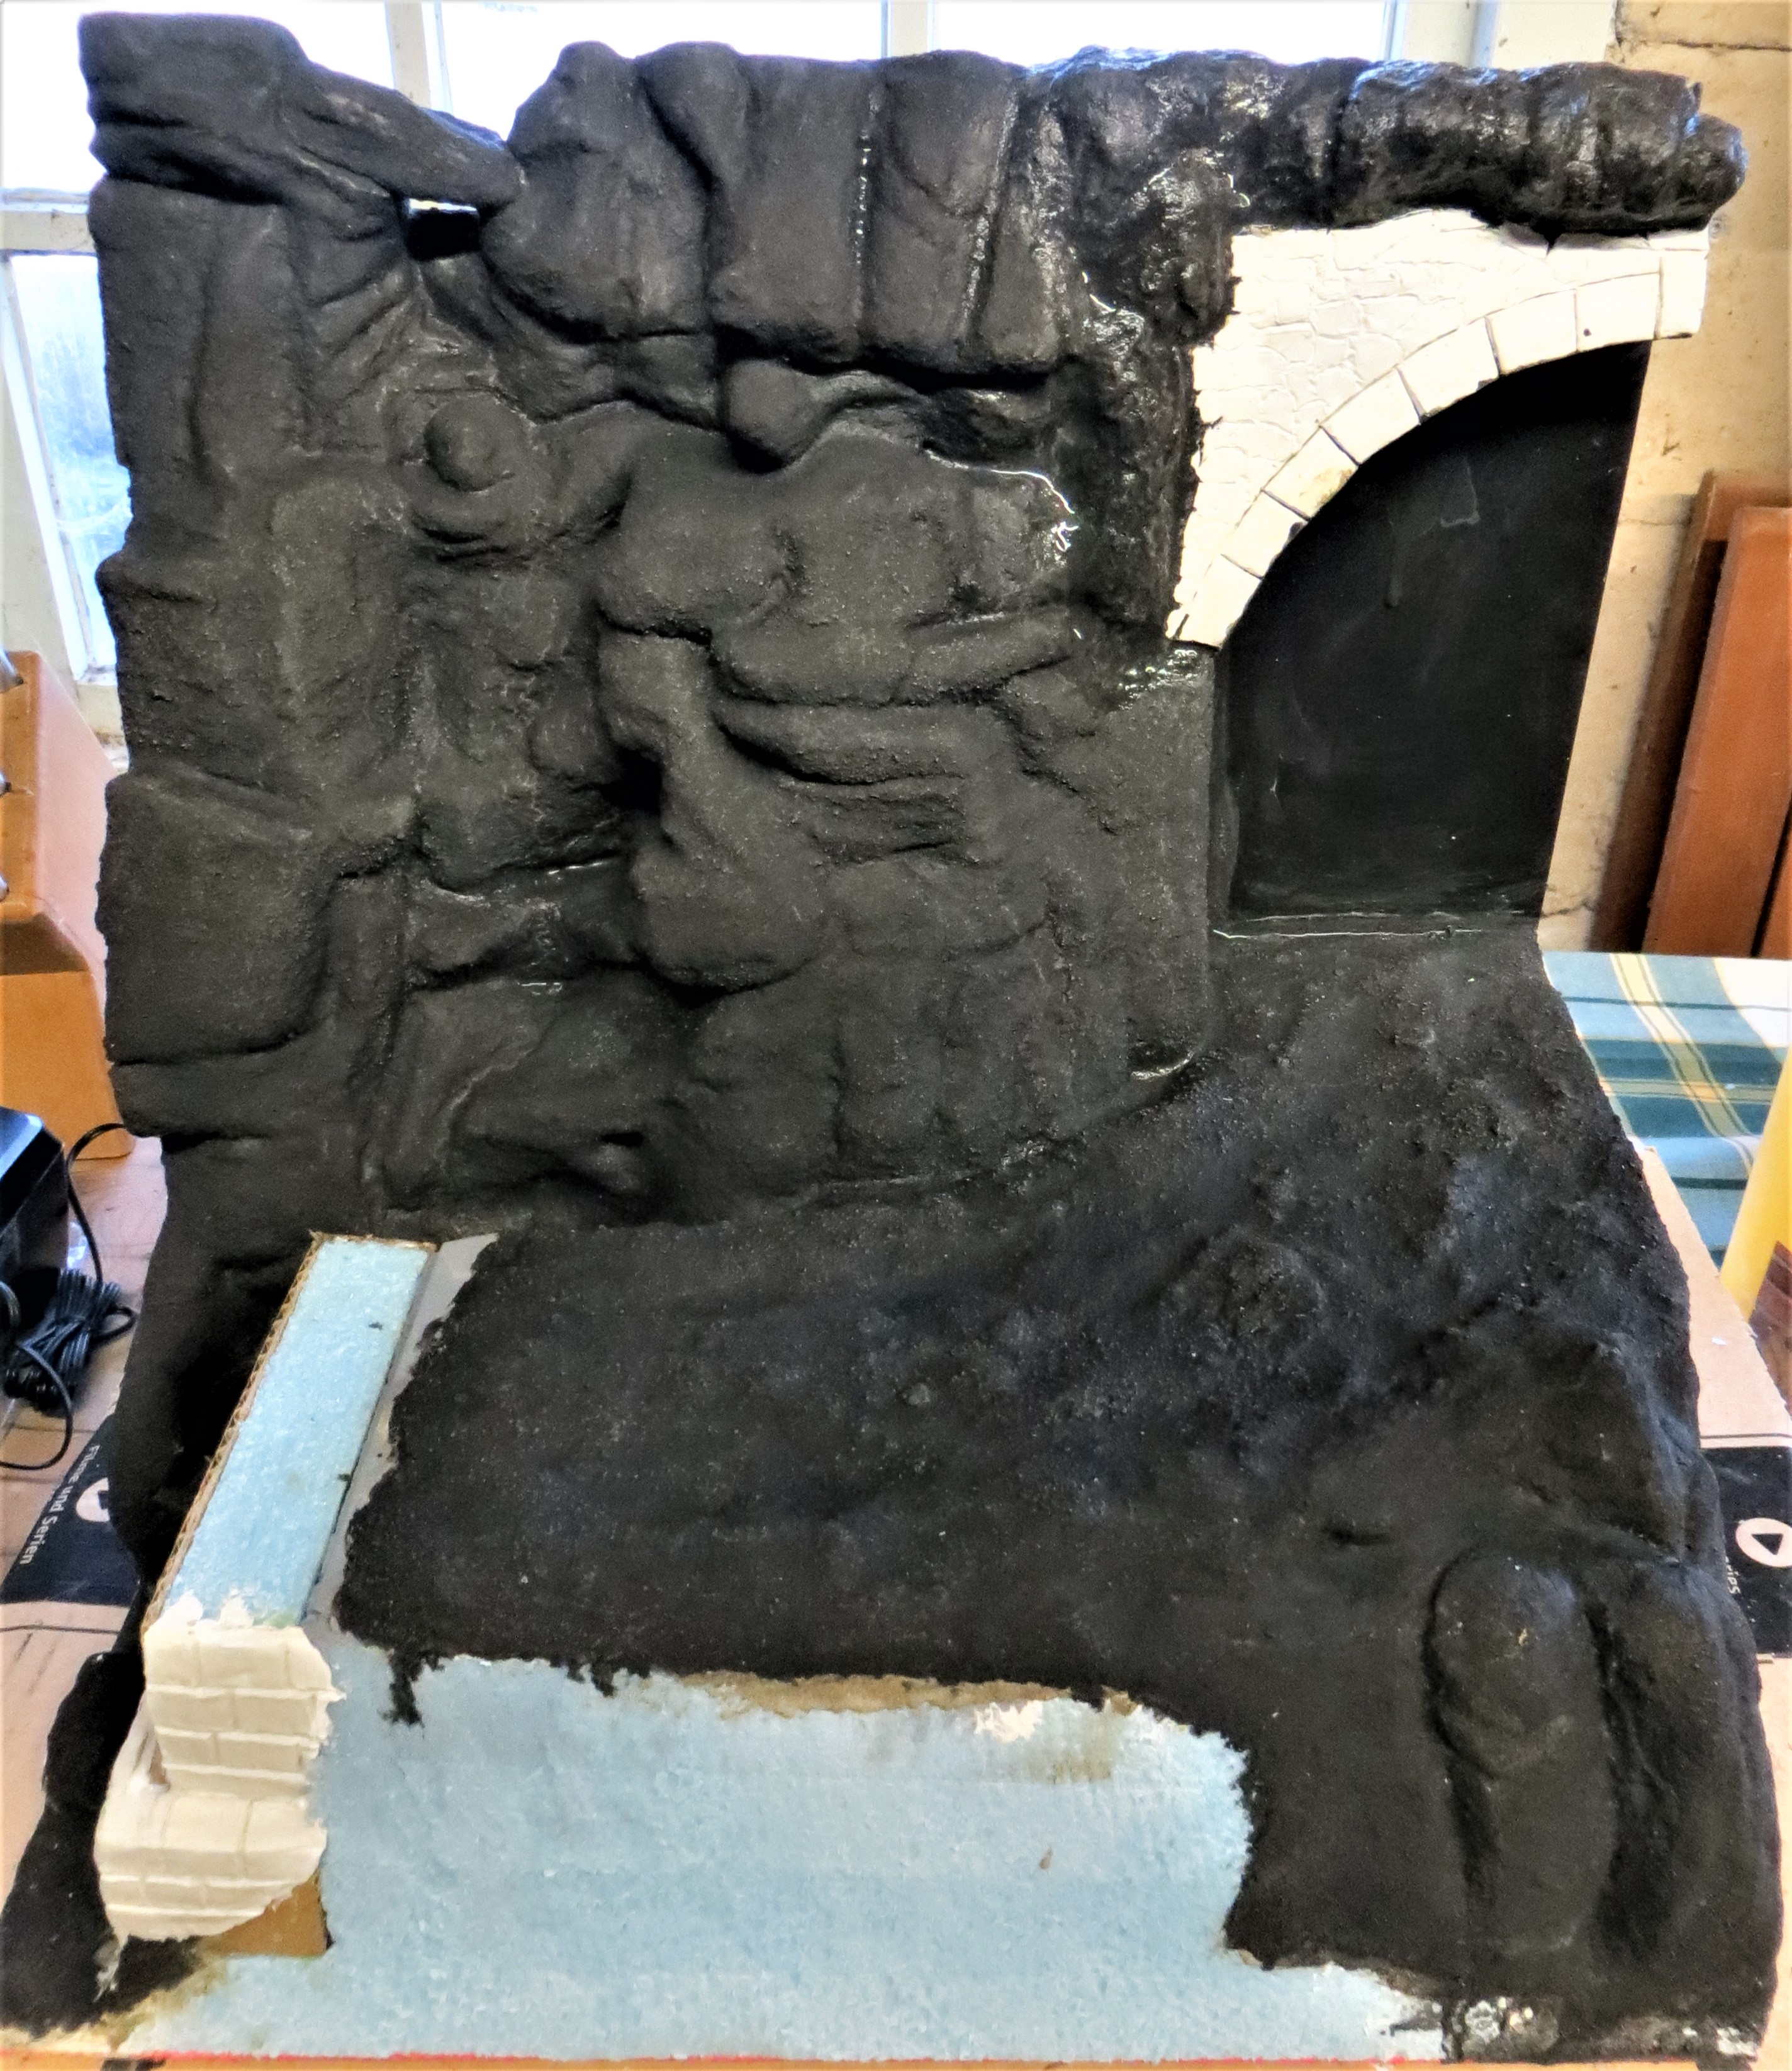
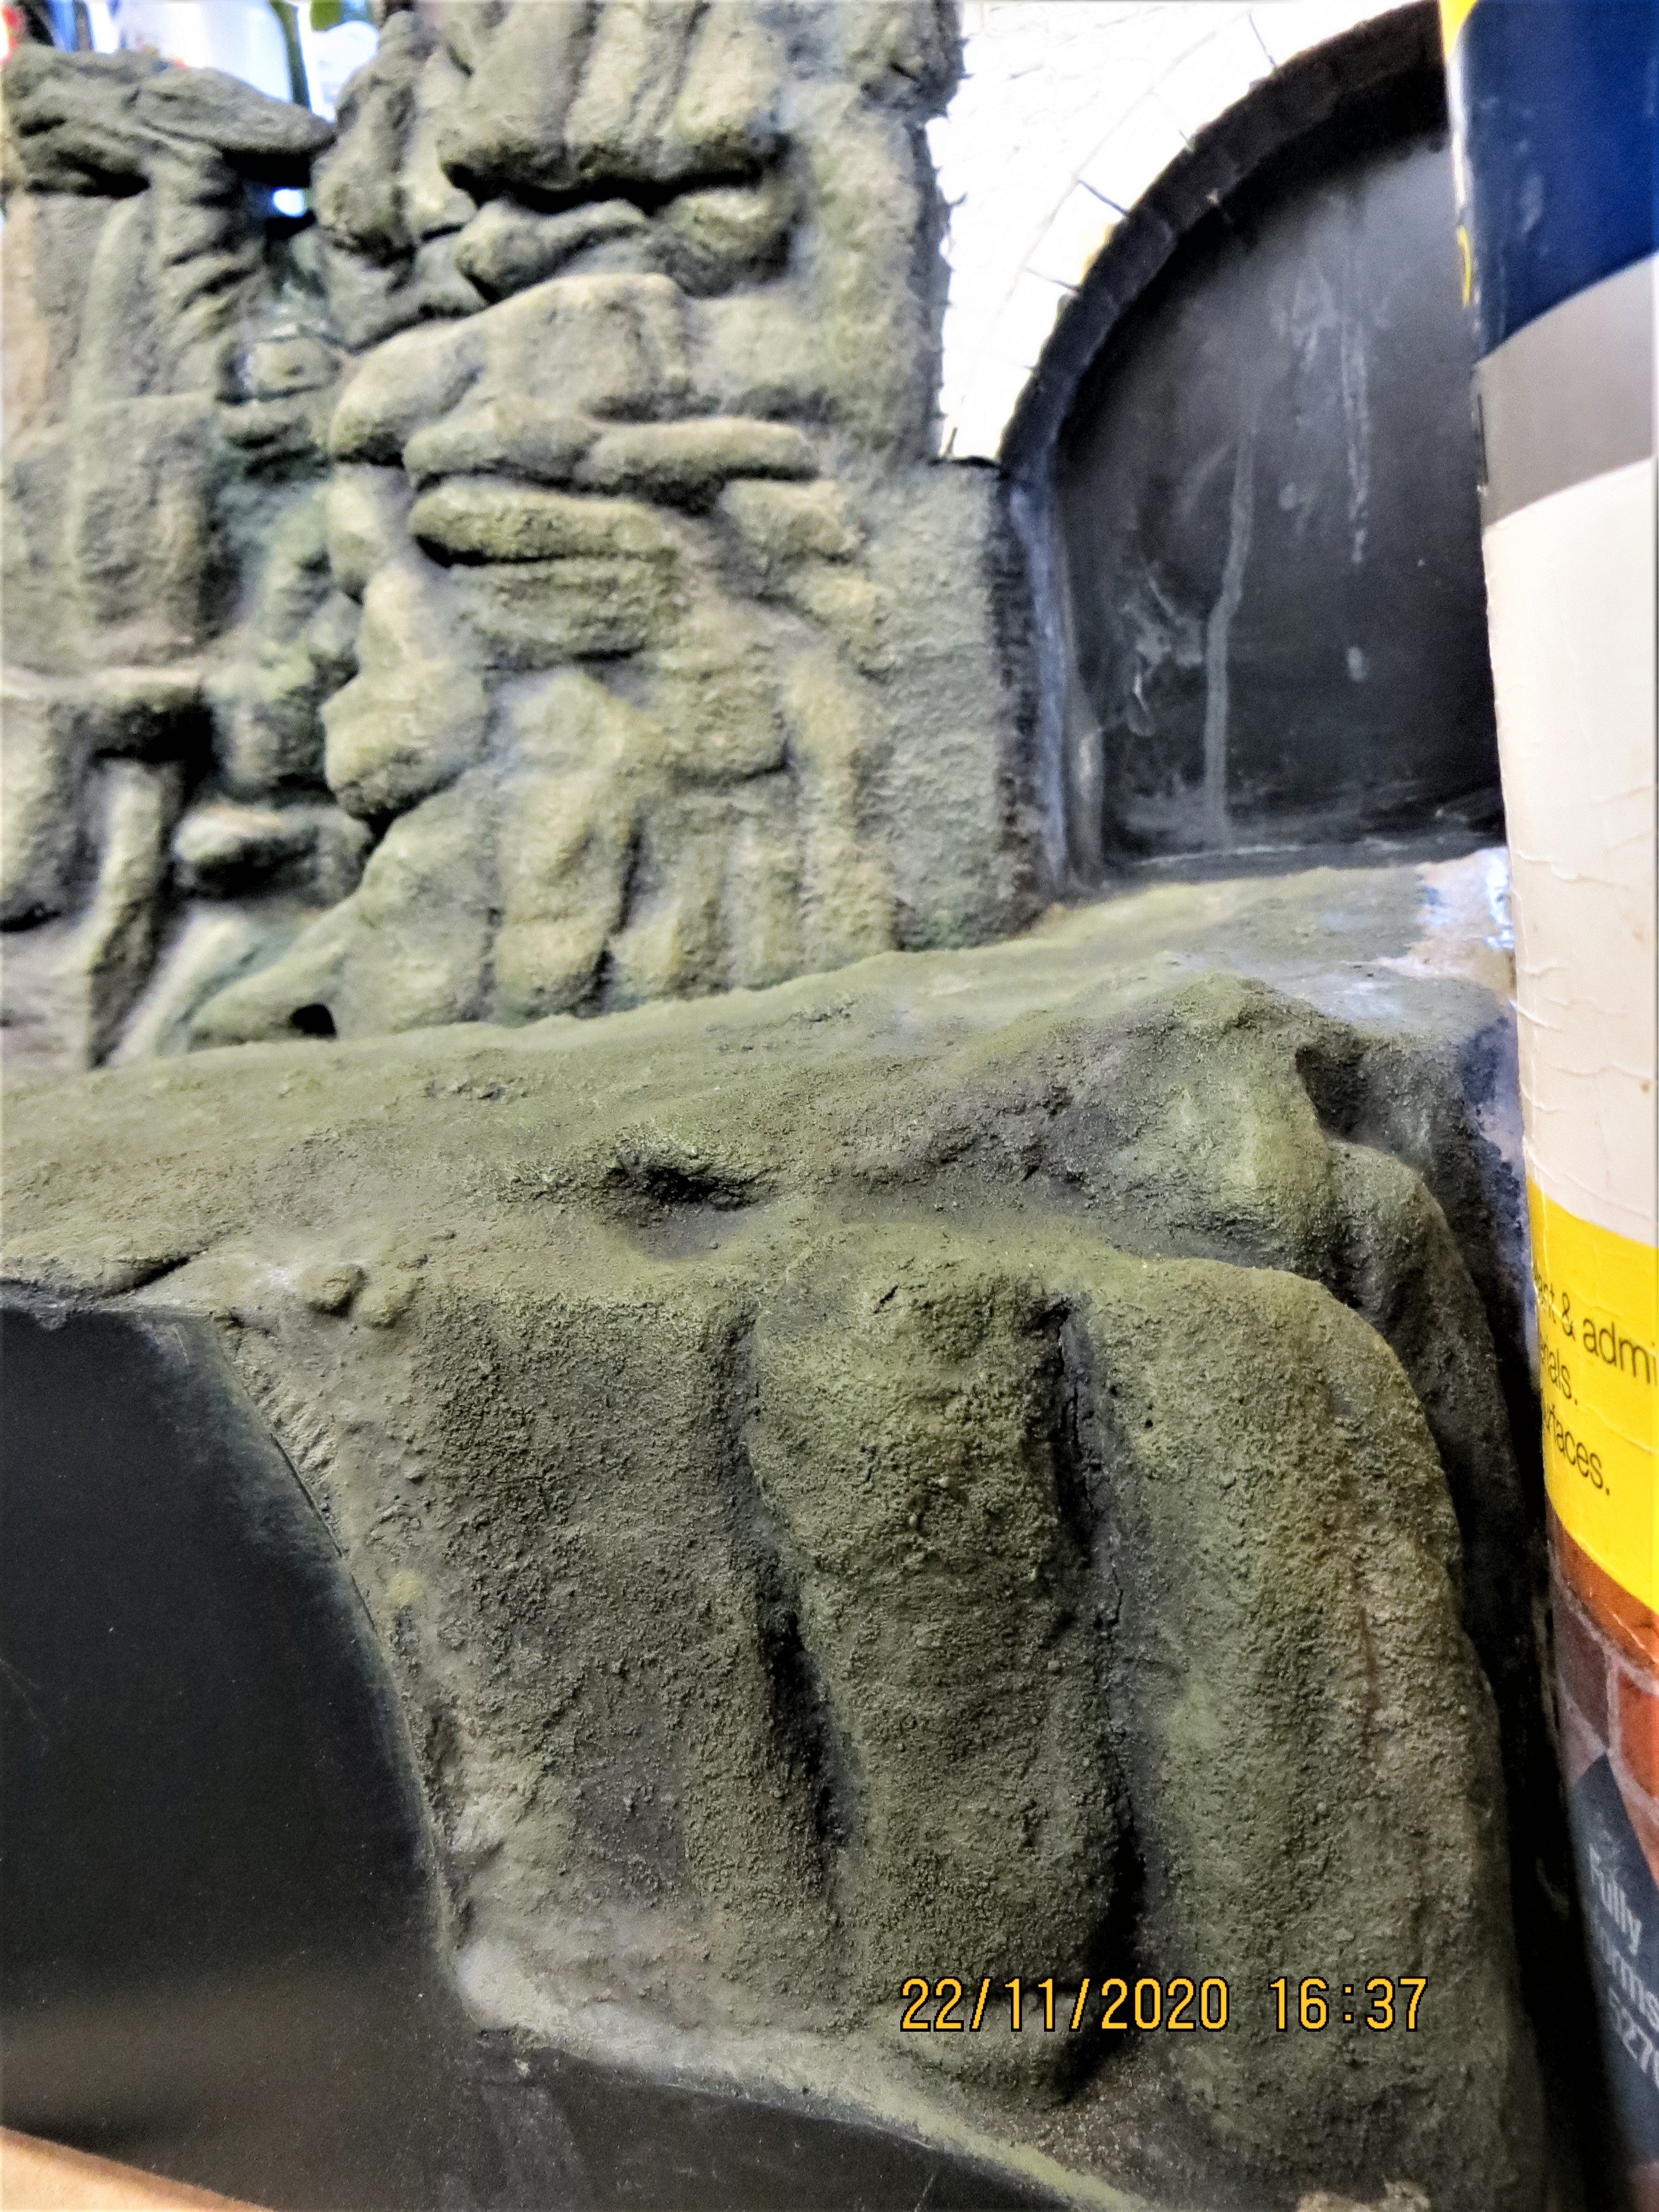
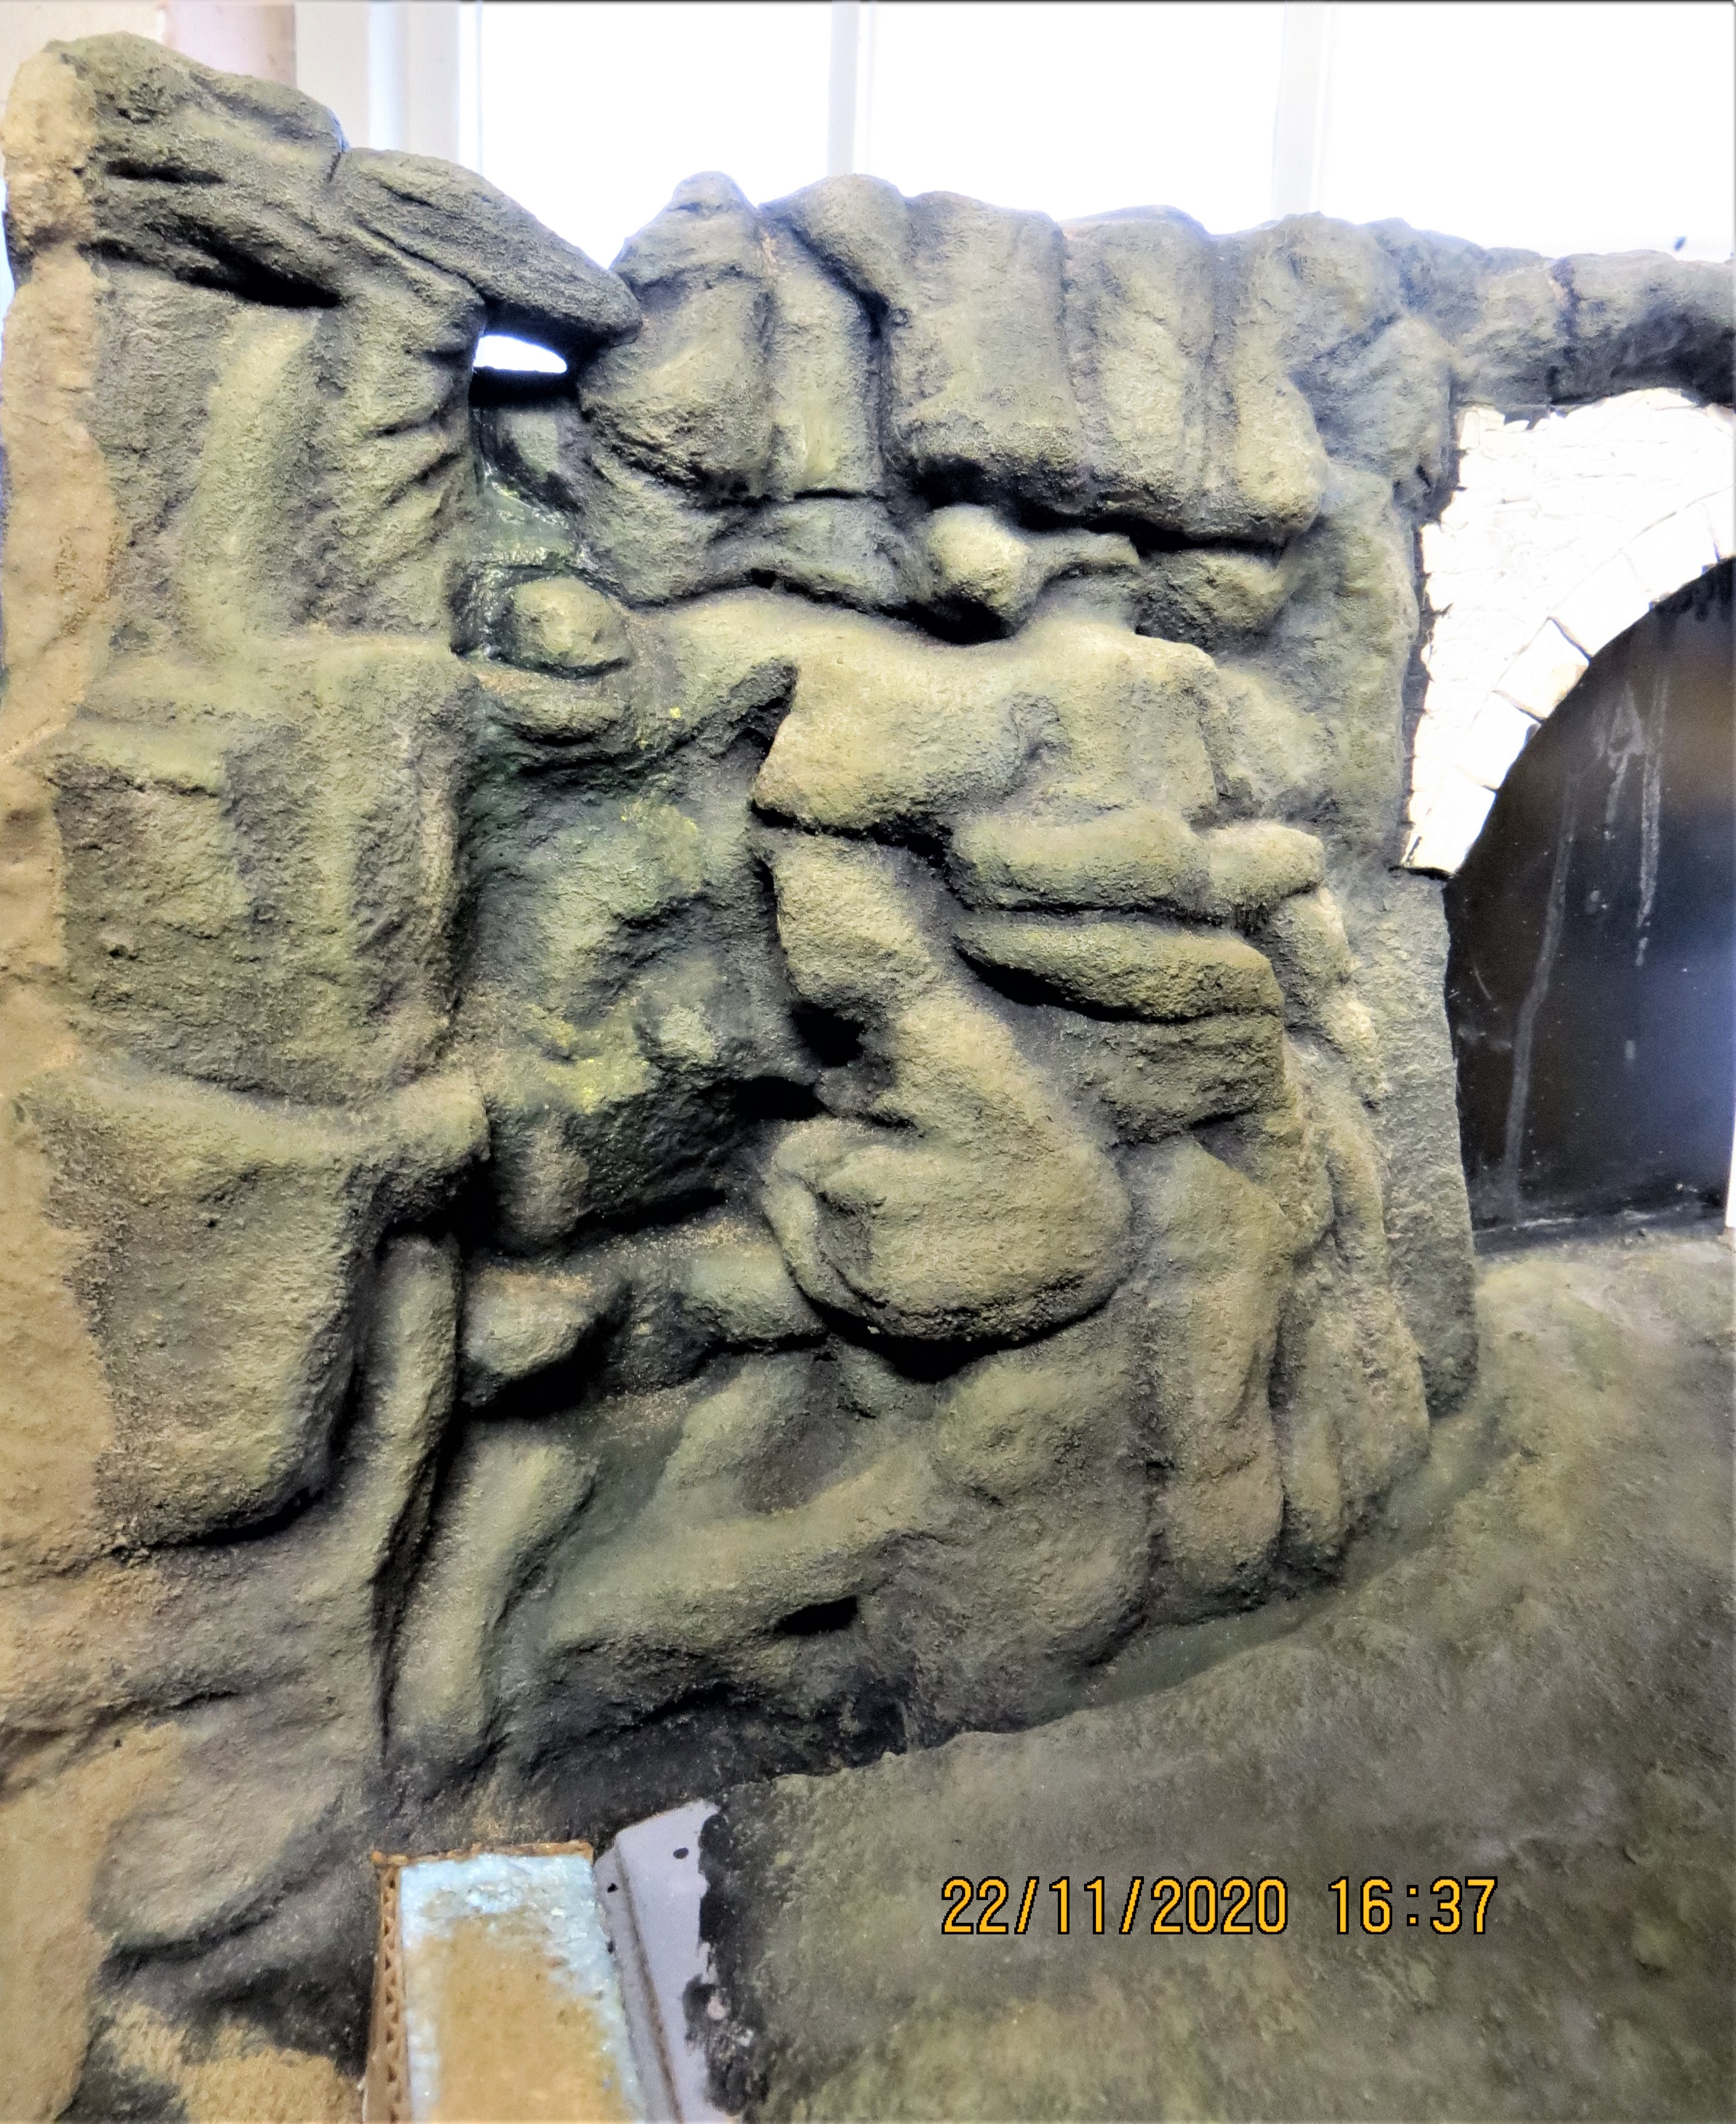
I have given the rocks a thin wash of diluted black emulsion paint prior to starting the real painting, I’m hoping this will help emphasise the depth of cracks and crevisses. It looks a bit naff at the moment as the paint is still wet, but hopefully will look better in the morning when dry, , it also gets rid of Erwin’s sunrise,  .
.
Cheers,  ,
,
G
3 Likes
The makings of another epic. Im now imagining the water cascading and all the growth and foliage that brings with it … more please Sir lol
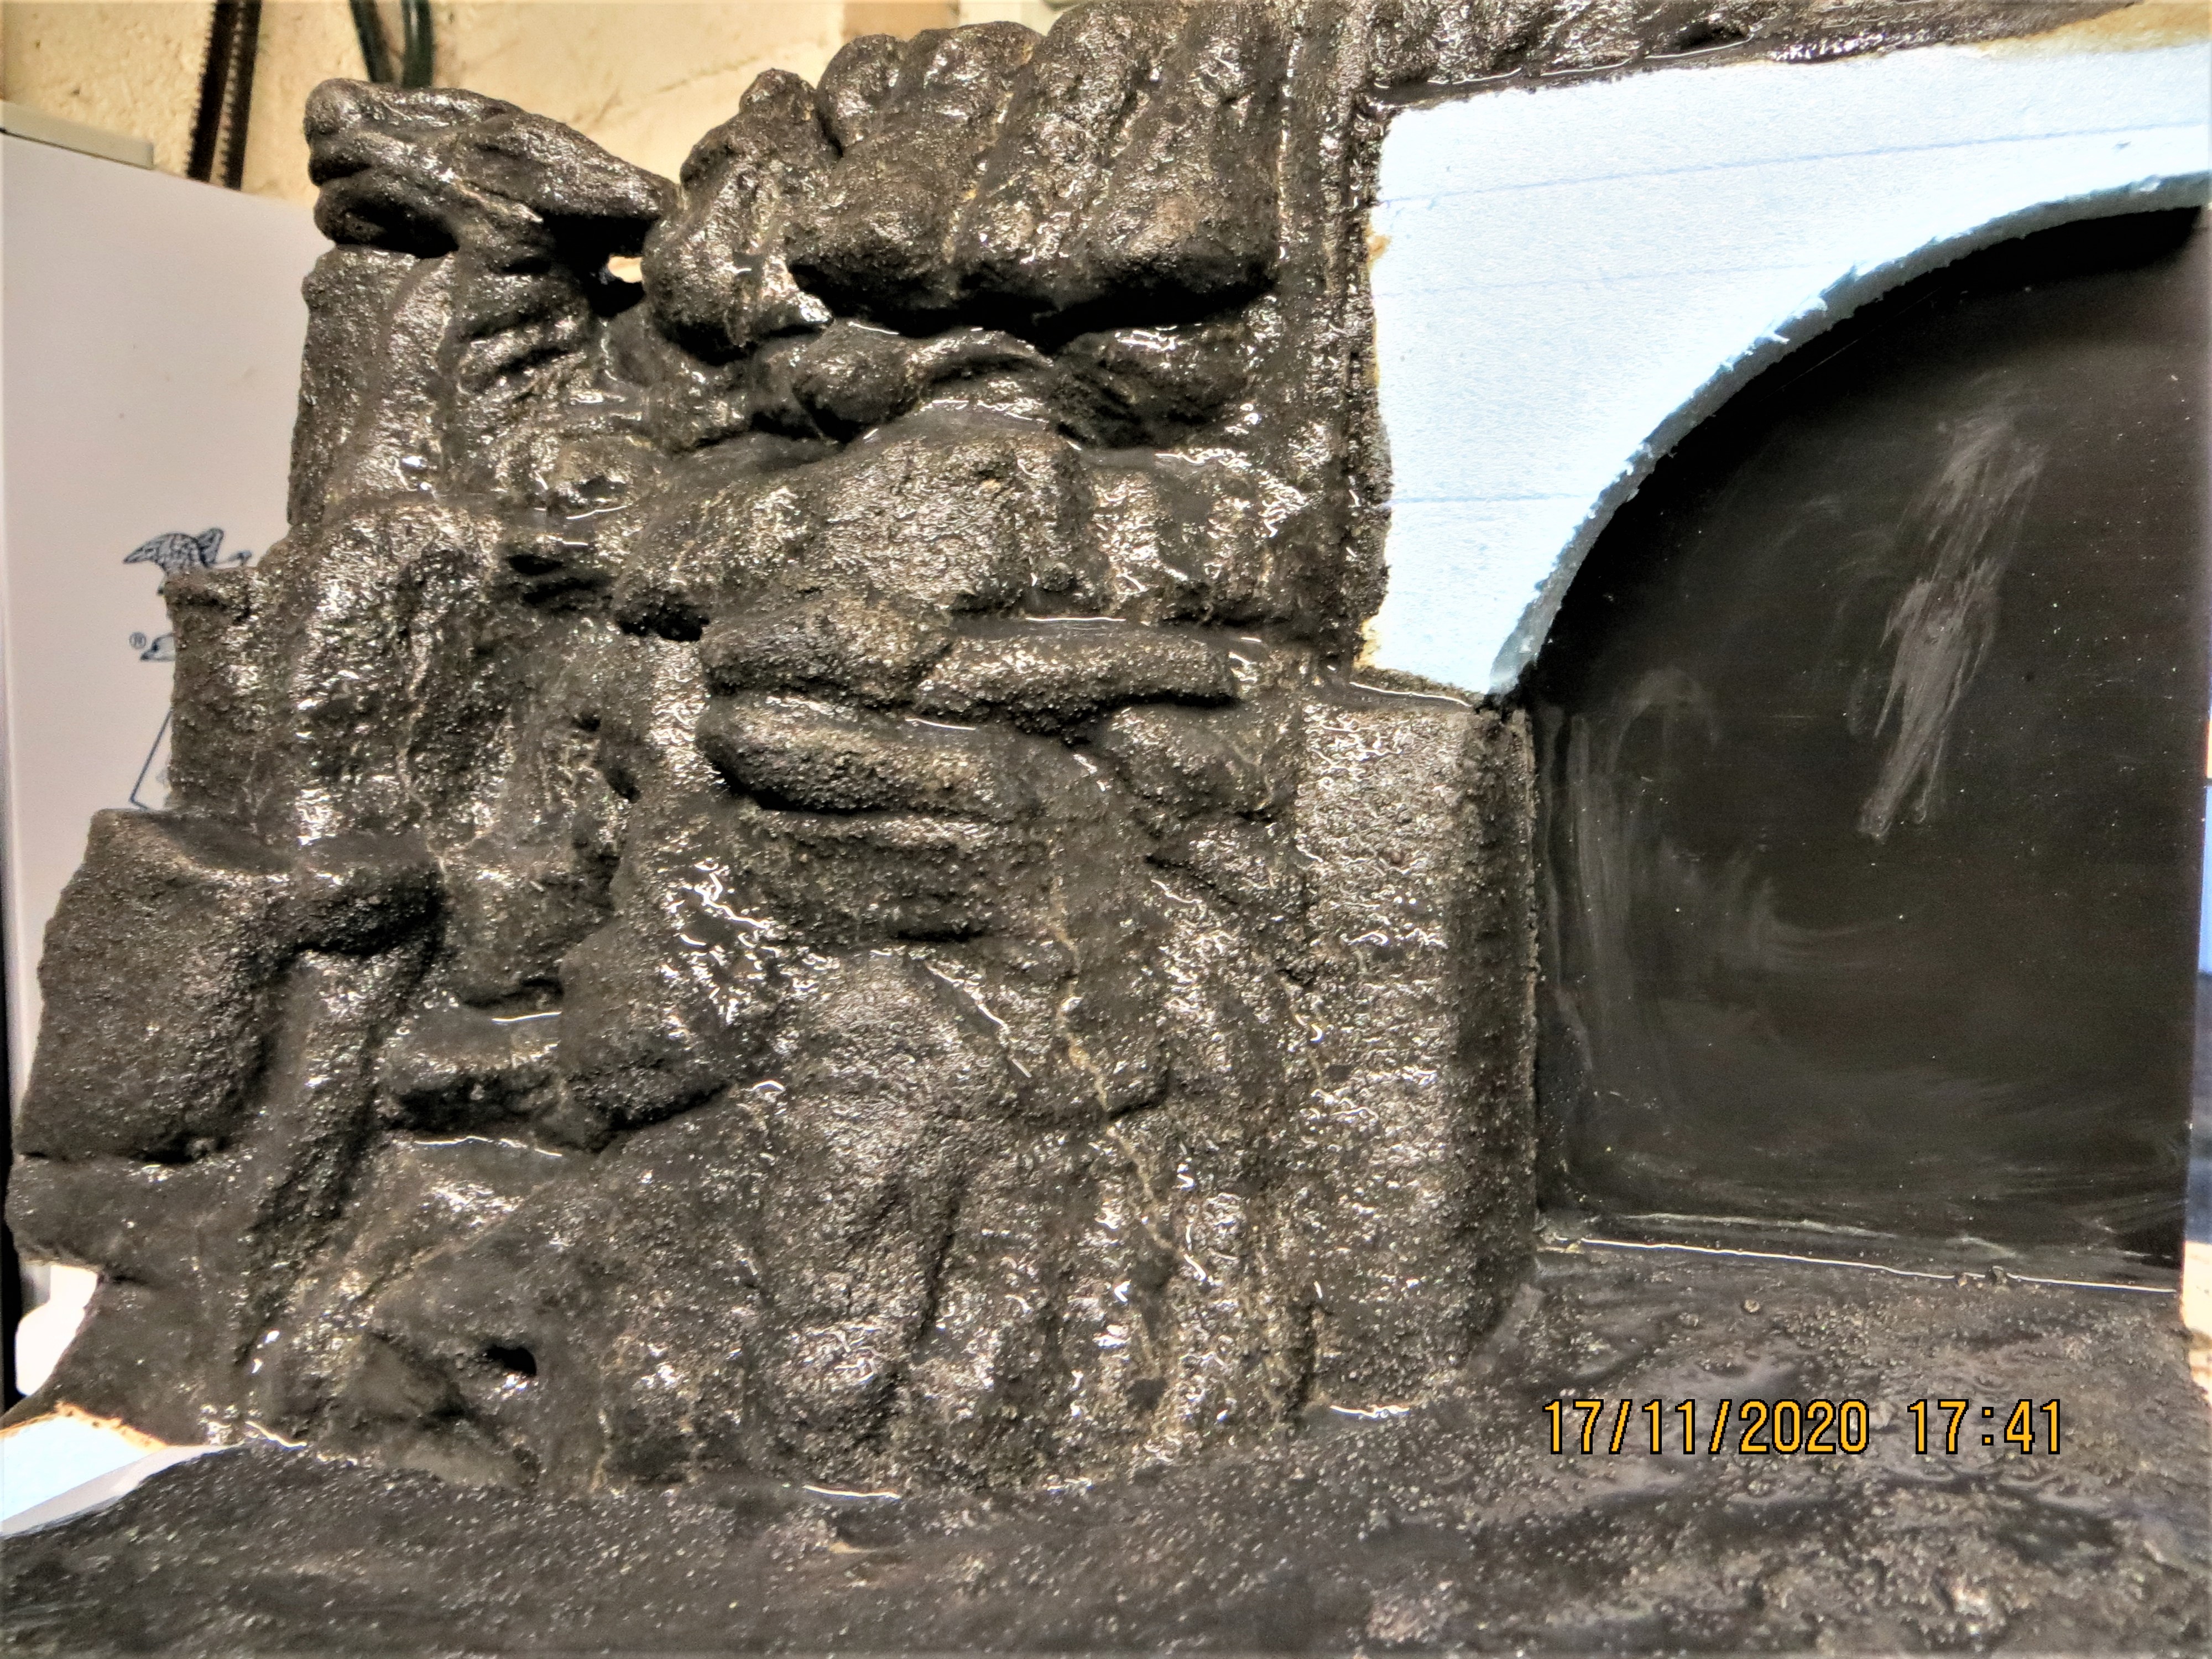
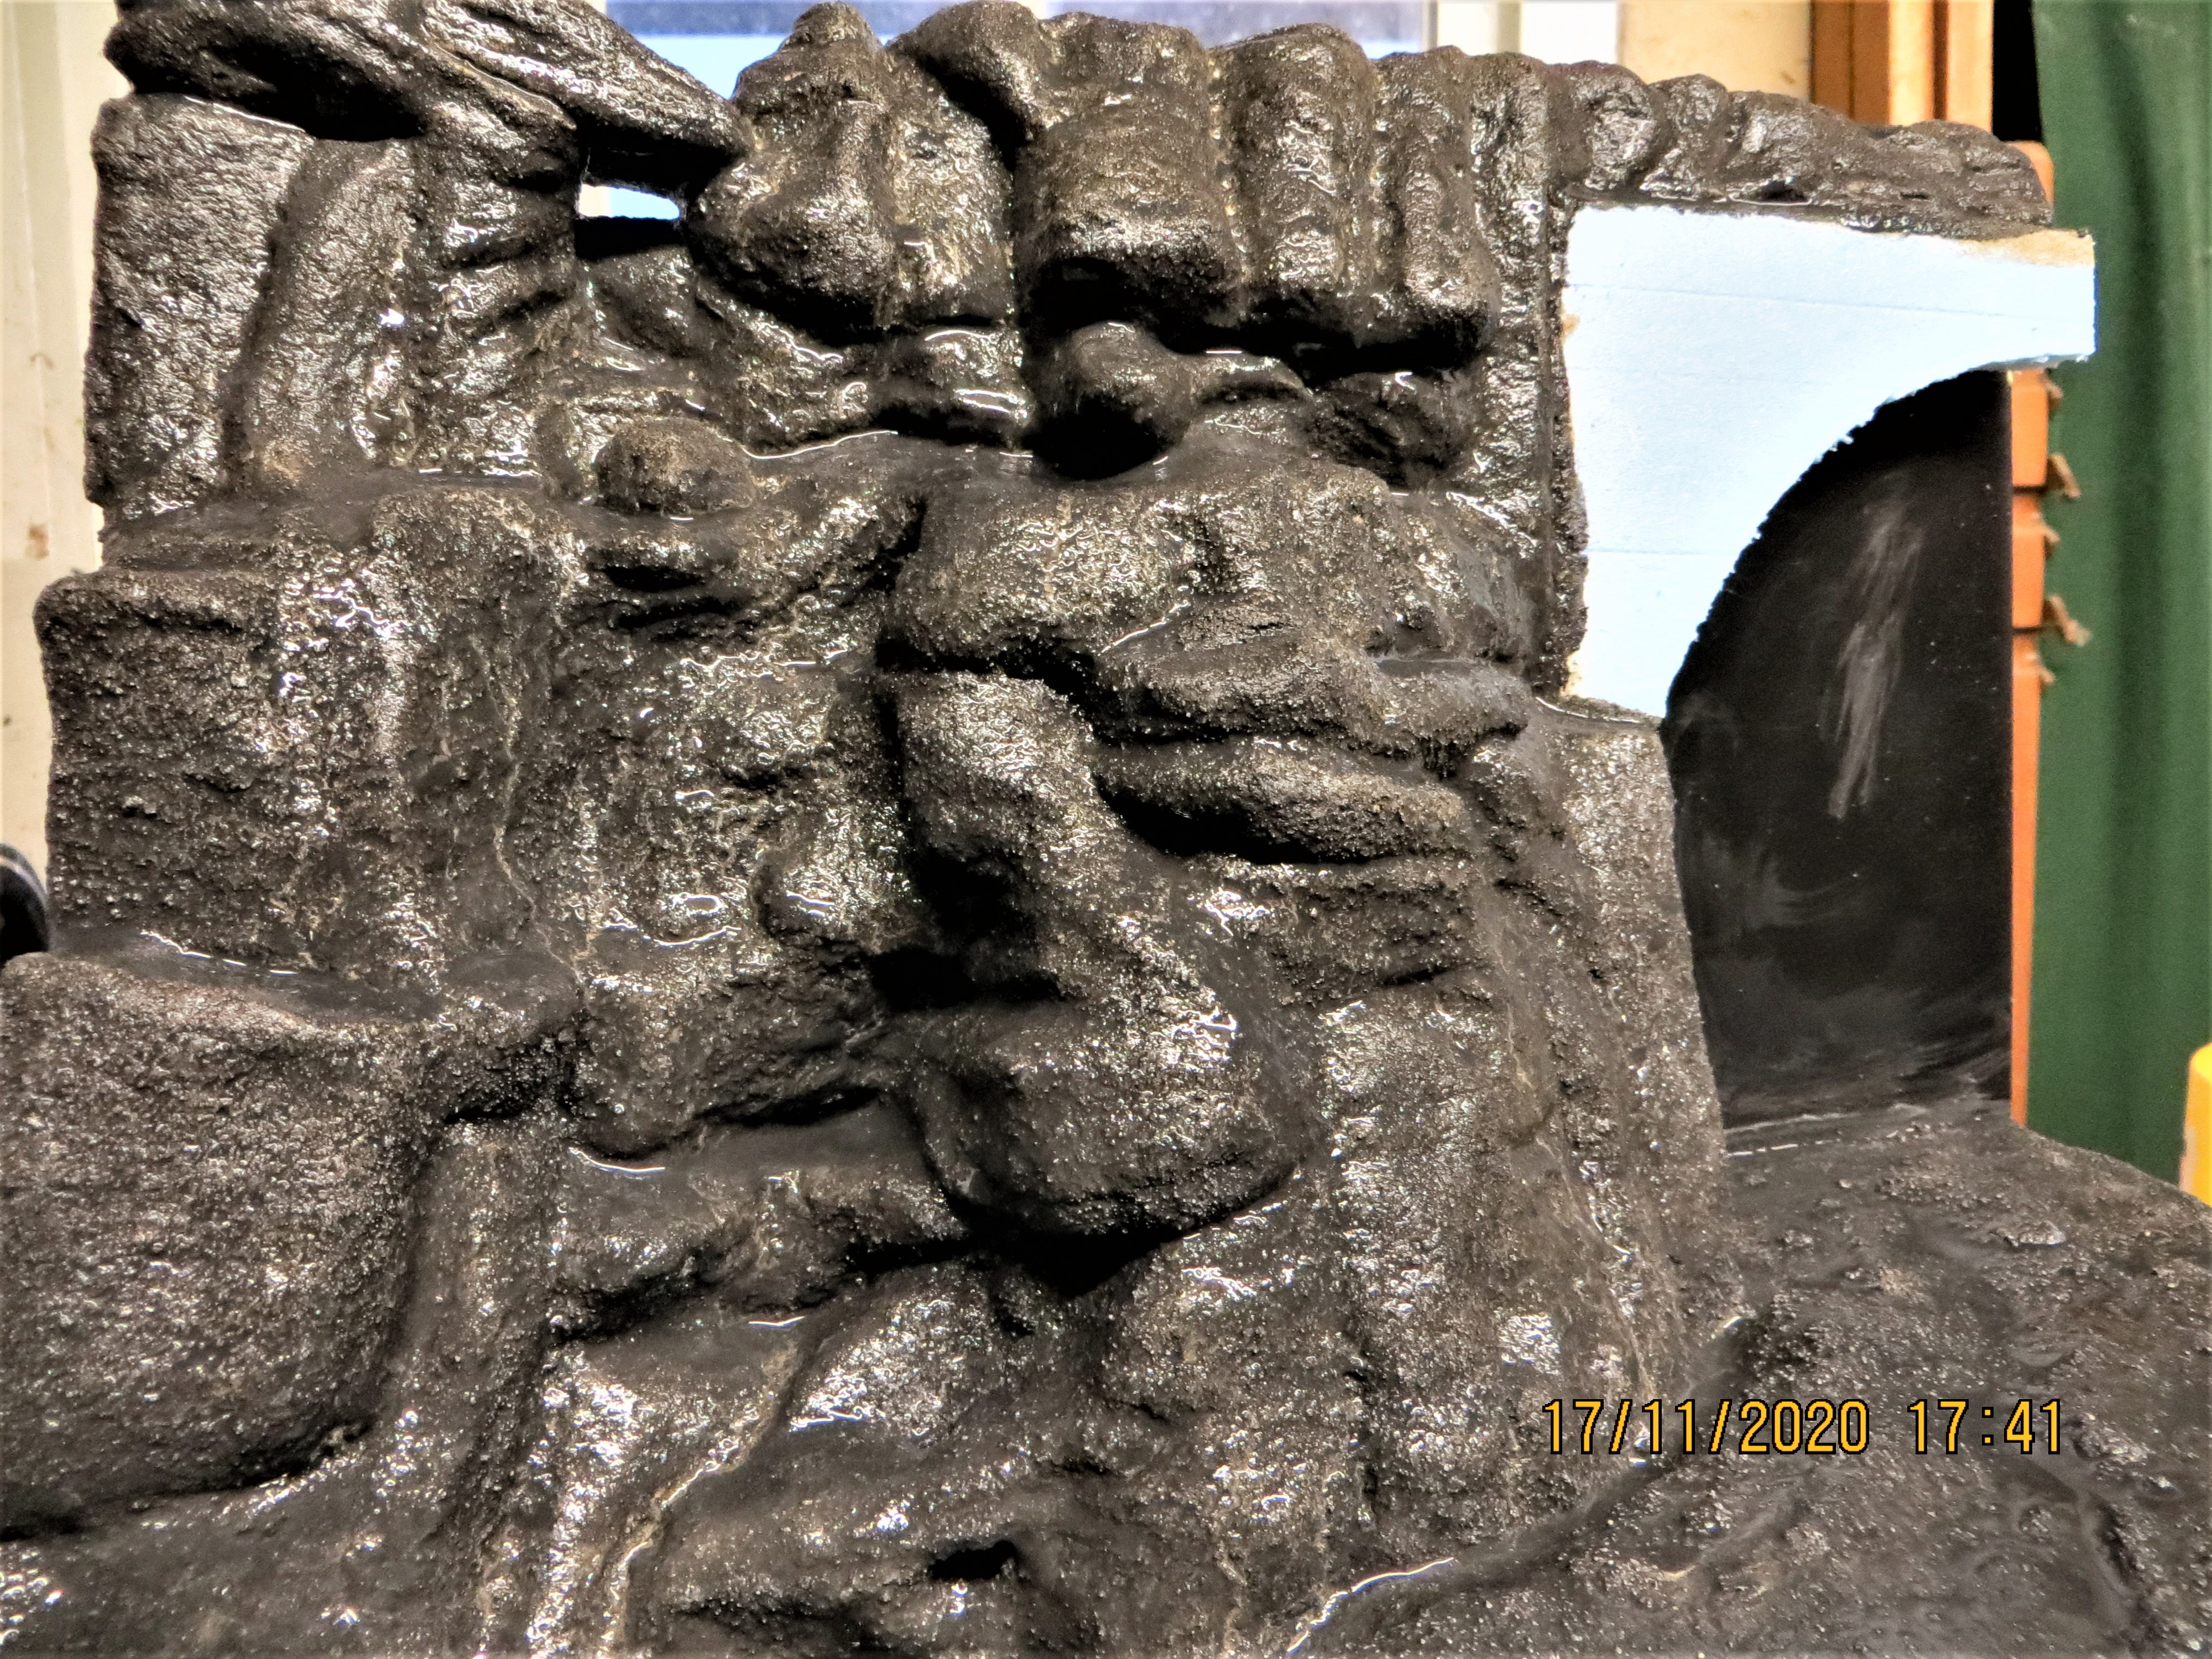
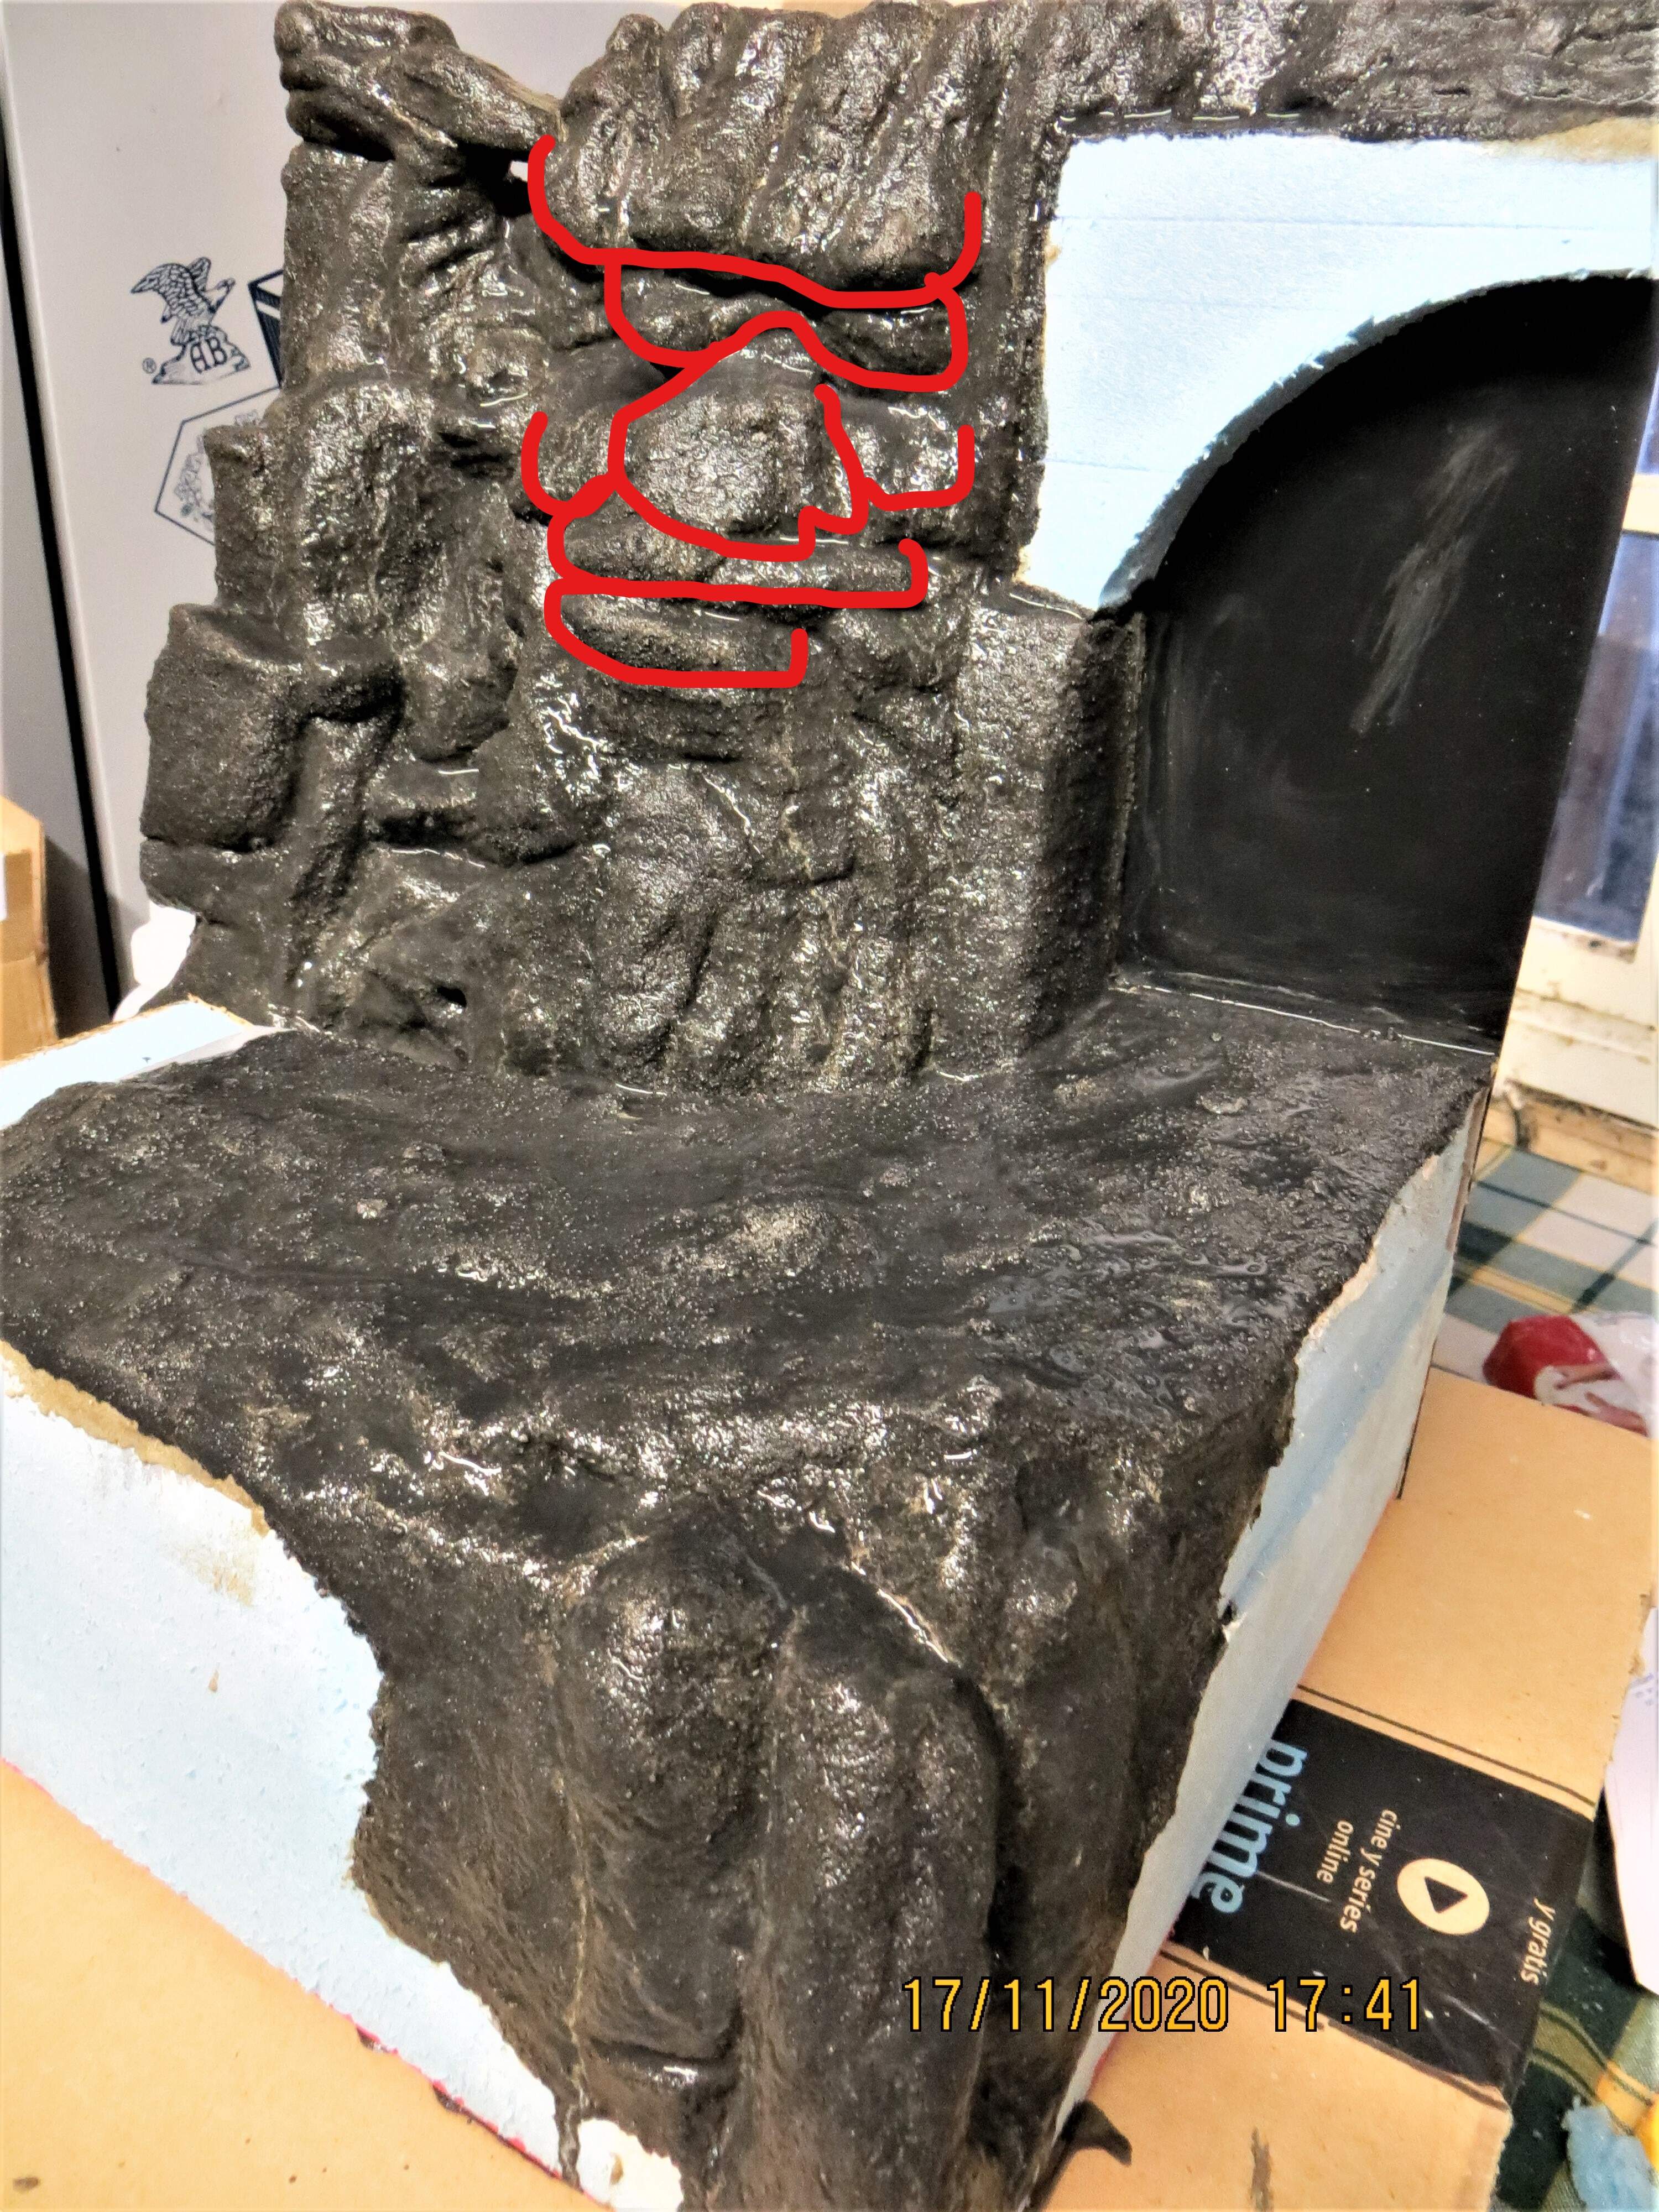
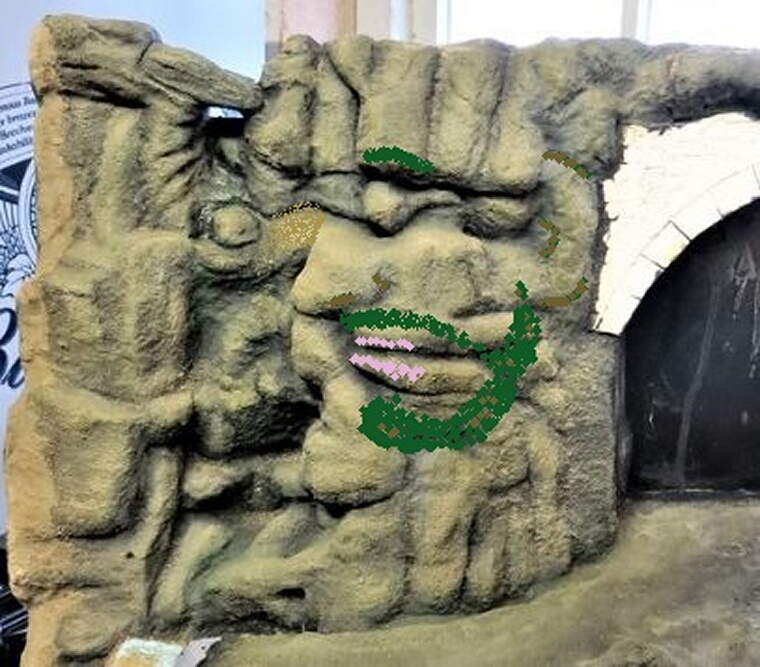
Intresting to watch your cliffside escapade develope, if you have a moment I’d like to ask a few questions: explain breifly the “A4” demensions for the dio, what are the physical measurements? What are you coating the styrofoam with, you mentioned DAS then later cement powder and white glue, are these the same mixture? How well does it adhere to the base structure? Is it heavy, does it chip or crack when cured? Finally, and I hope you won’t think I’m being cheeky (is that the right word?), have you noticed the old man’s face in the rock wall adjacent to the tunnel arch? It’s actually kinda cool if unintentional. 
1 Like
Hi John,
Thank your for your feedback and continued support, they’re both much appreciated,  .
.
lol @ more, you must be a sucker for punishment, must be all those years sat in a Chieftain on the plains of west germany in the winter, .
Cheers, ,
G
Hi Terry,
The A4 dimension was an idea I adopted from a forum contributor, basically all his models were displayed on a base with a footprint the same size an A4 sheet of paper, i.e. 8-1/4" x 11-3/4" (210mm x 297mm). He used this limitation for ease of transit when displaying his models at shows, I use it as I don’t have the storage room, .
DAS, is a modelling clay, I’d say it has a consistency similar to that of marzipan. It’s extremely easy to work with using wetted fingers or sculpting type tools and, imho, it is ‘cleaner’ than plaster type products…I tend to end up with more plaster on me than on the base. The clay hardens on exposure to air without any need for baking and can then be scribed or carved. Allegedly it’s the top modelling clay since 1963.
It’s normally fairly light as groundwork as it’s being used in relatively thin layers, 2mm-5mm, on my builds. It adheres quite well to textured surfaces such as the foam, not so sure about smooth ones, but either way I always apply it over a thin layer of PVA glue to be certain of adhesion. In my limited experience it doesn’t crack or readily chip under normal handling.
I use the white glue and cement powder to give a waterproof finish as I’m going to be using acrylic products, it also helps give a gritty appearance to the rockface.
If by old man you mean the area highlighted in red below, then yes, I had spotted it, but it was totally unintentional, maybe a subconscious self portrait, .
Hope that answers some of your questions, but if any clarification is needed please feel free to ask, .
Cheers, ,
G
3 Likes
Hi all,
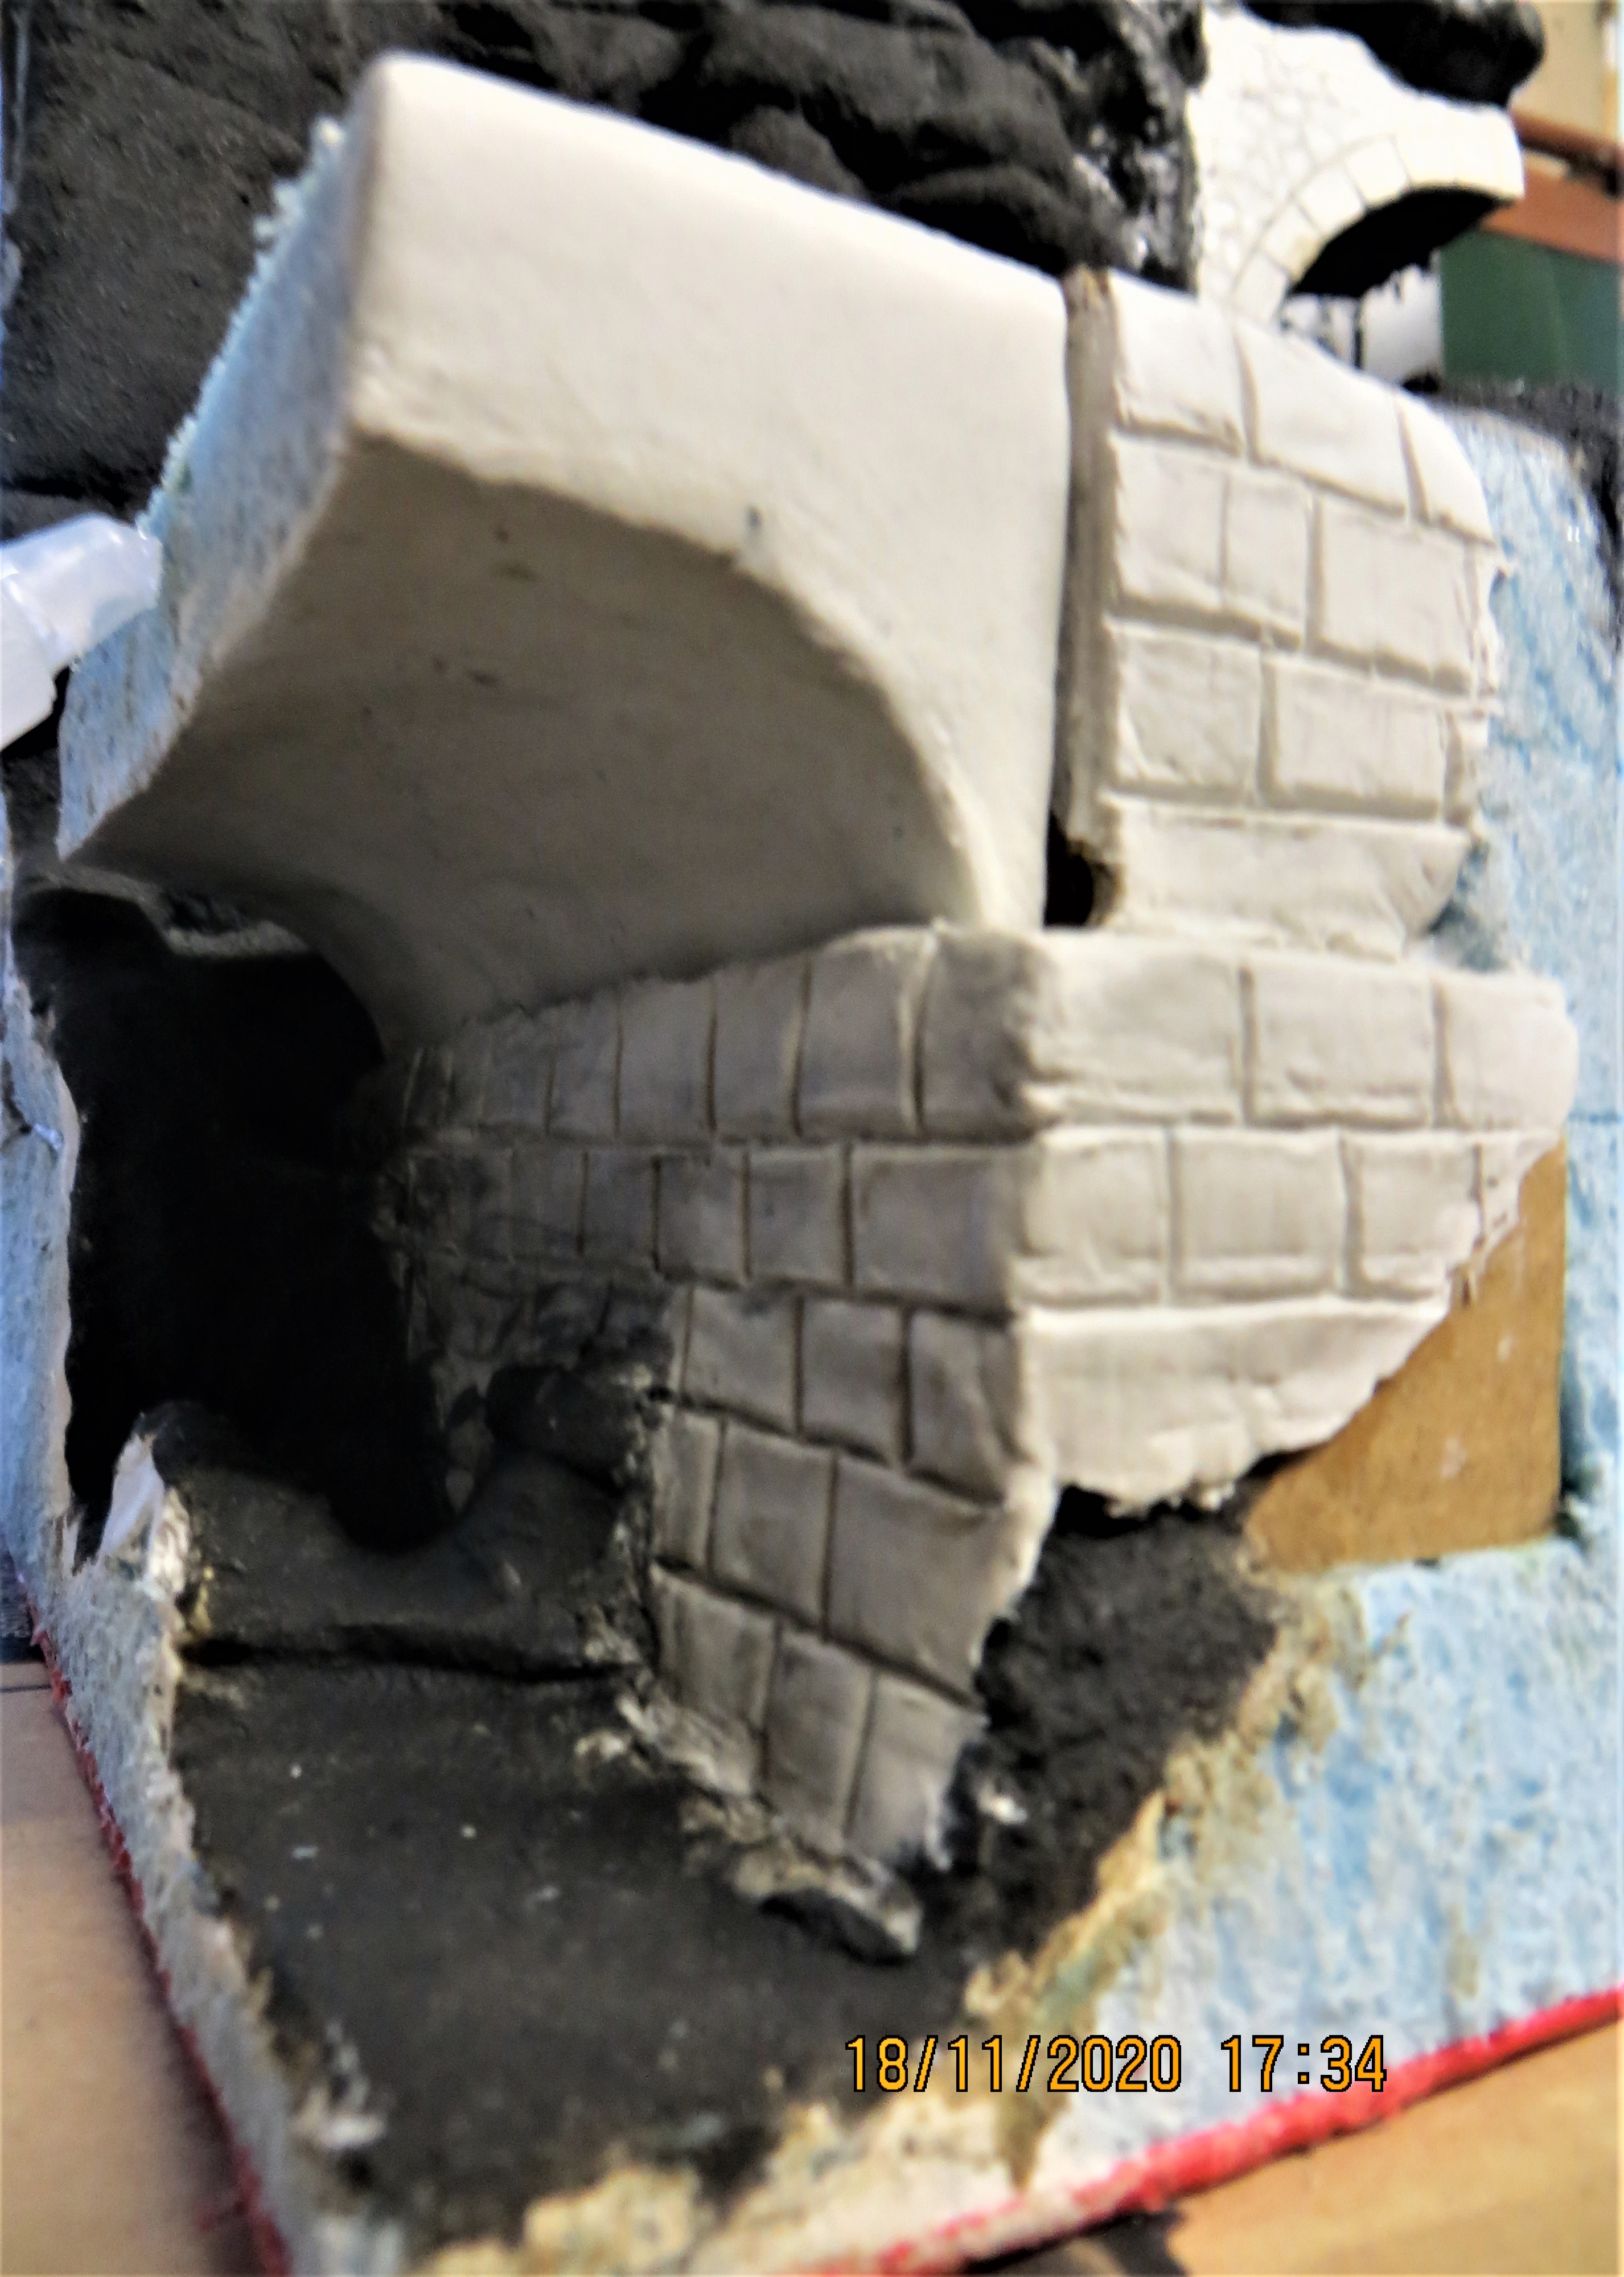
A bit more progress, started to rough out the stonework to the bridge support and the tunnel mouth whilst the DAS is still wet, once dry I’ll better scribe and shape the stones.
I’ve also started to form the arch of the bridge but, as mentioned previously,this won’t be added until the water is finished.
Cheers, ,
G
5 Likes
Continued amazing attention to the smallest detail. You can tell each different aspect will all gel into a seamless Dio…
1 Like
once more nice progress… Always nice, such a cameo performance 
Did you figure out what colour you will make the rocks?
Aw & I thought this was your take on the er trumpeted addition to Mount Rushmore. Bummer, I guess we’ll just have to settle for another masterpiece instead – looking great 
Hi John,
Thank you for your continued positive support, much appreciated, .
Cheers, ,
G
Hi Erwin,
Thank you for the positive feedback, .
Not sure about the colour, having never been to Italy I’ve tried googling the Apennines and it would appear that they comprise different rock types, so could be greyish, could be more yellowish. Not sure if there is anyone here that might be able to suggest a colour that is most dominant for such an area?
Cheers, ,
G
Hi Tim,
Thank you for the thumbs-up, , and for reminding me of that darned face in the rocks, as you’ll see in the next post it’s become even more apparent, gggrrrrr,  .
.
Cheers, ,
G
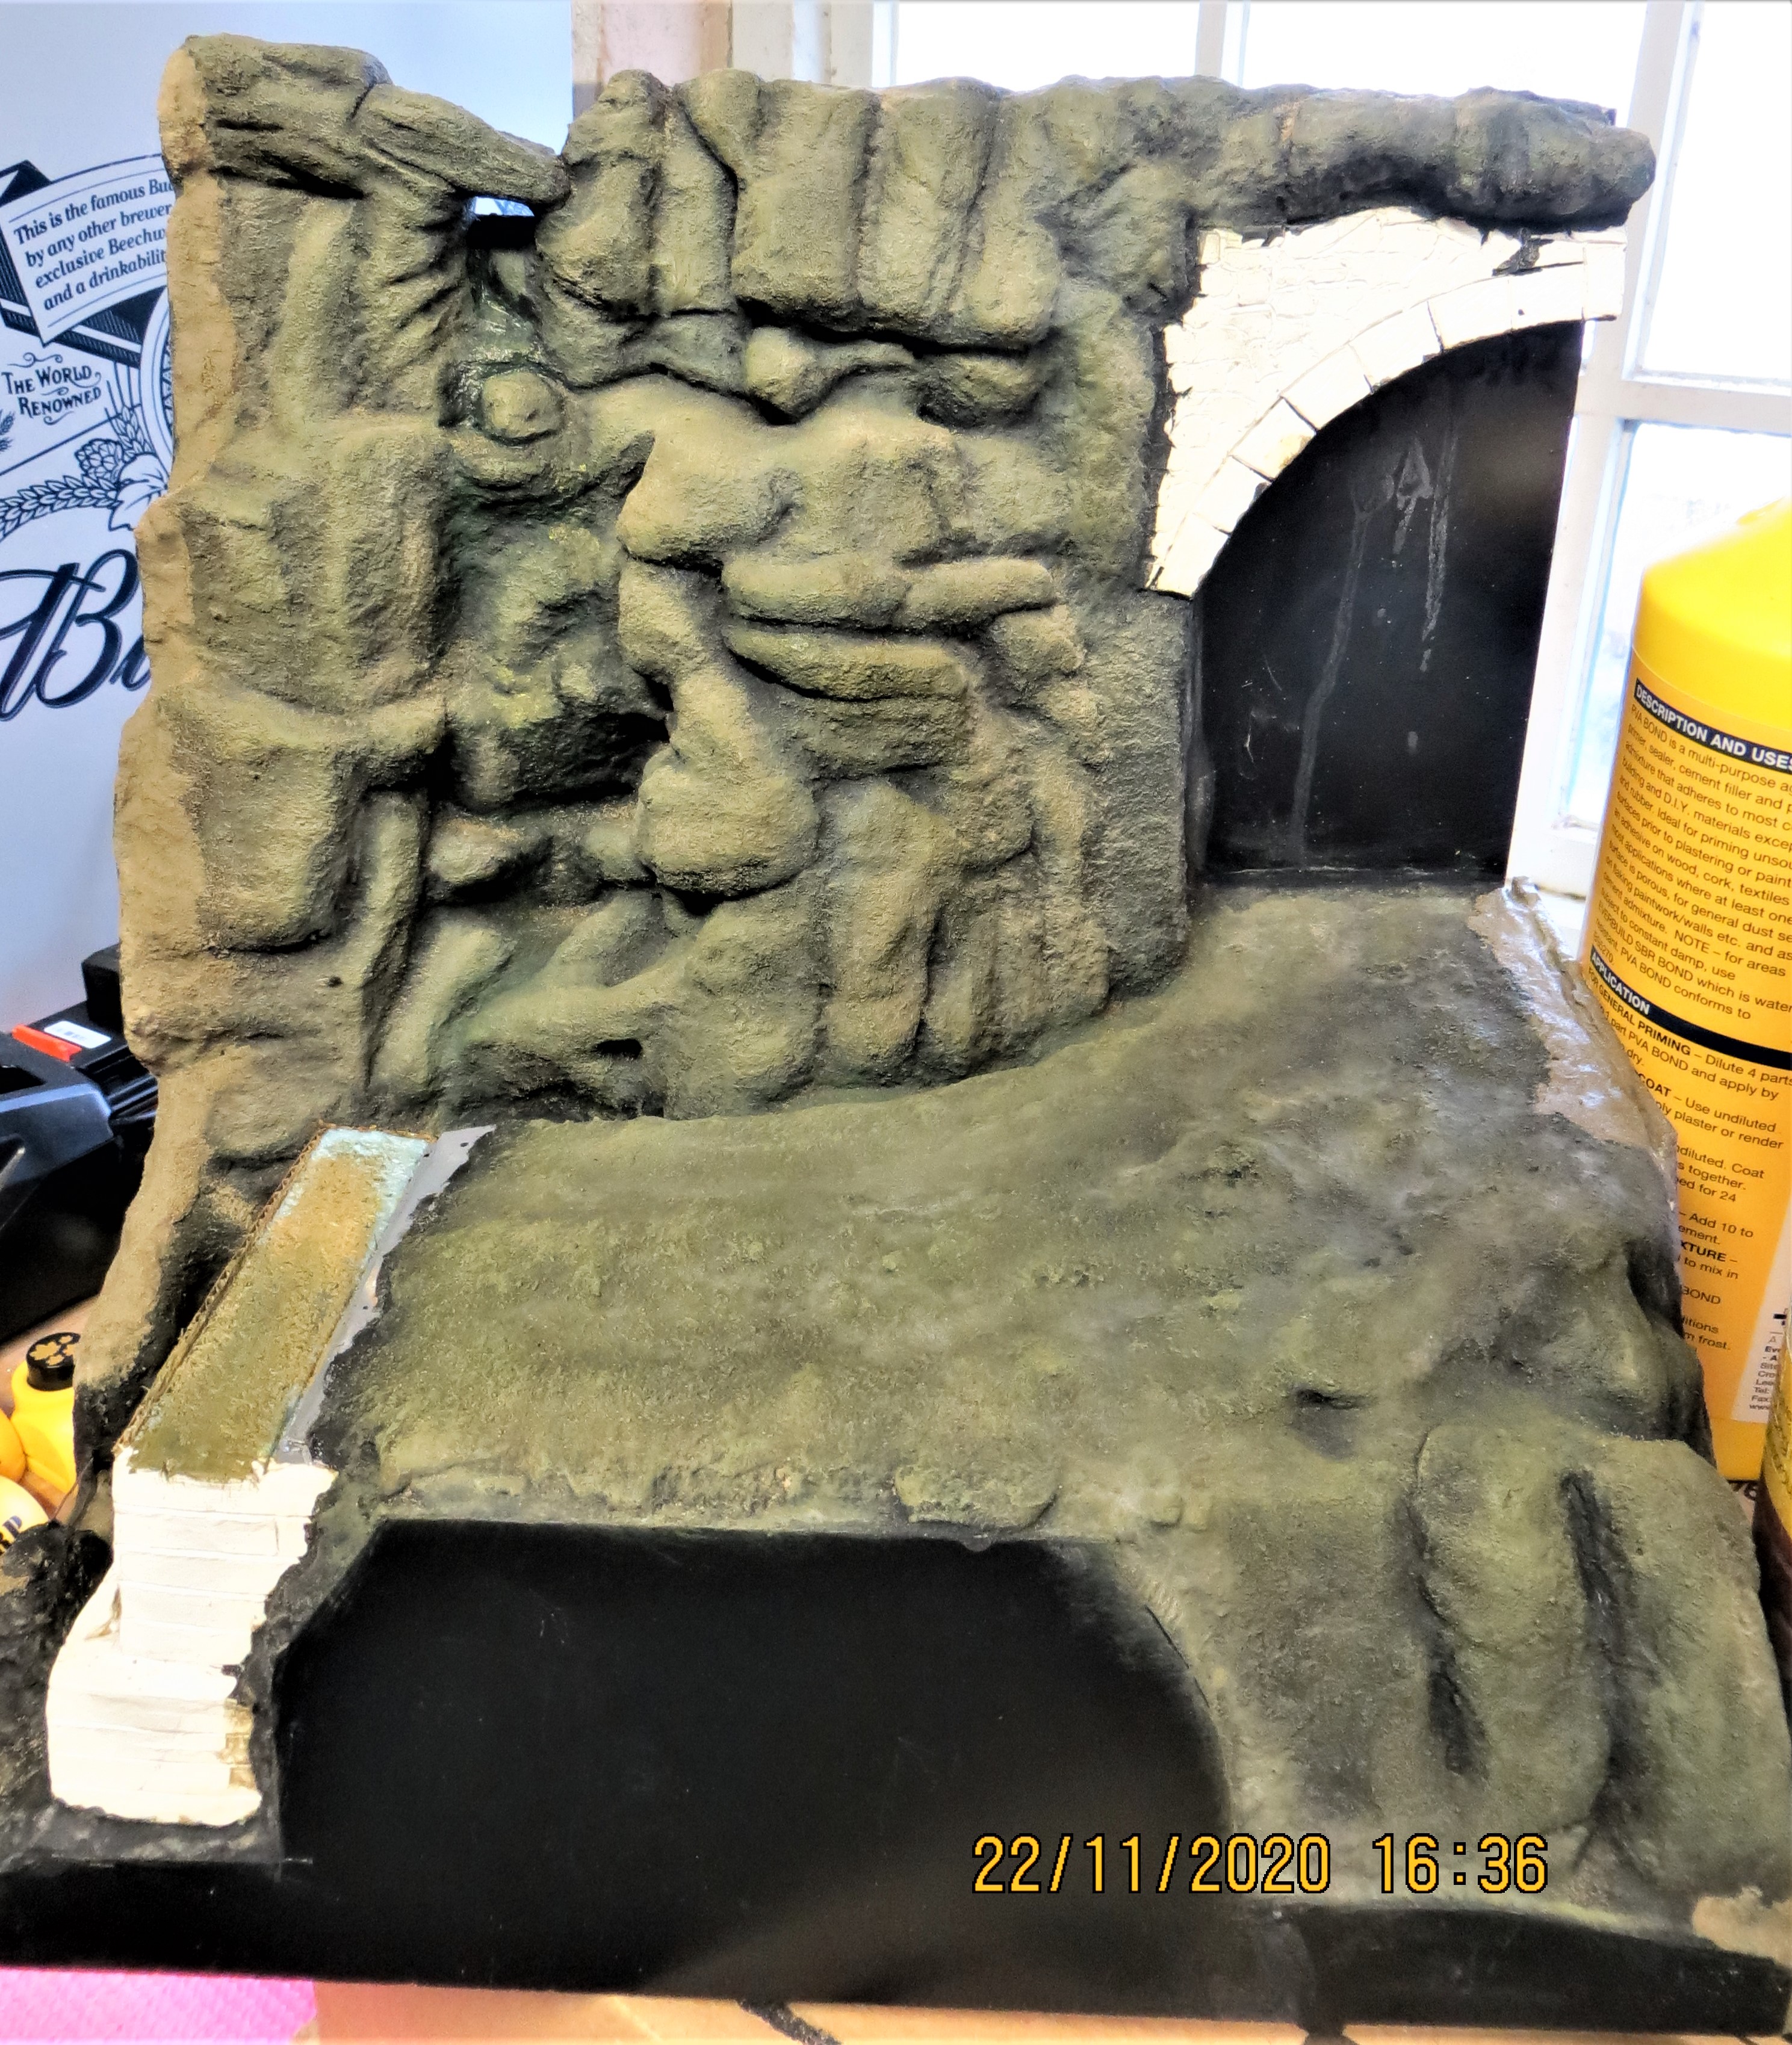
Hi all,
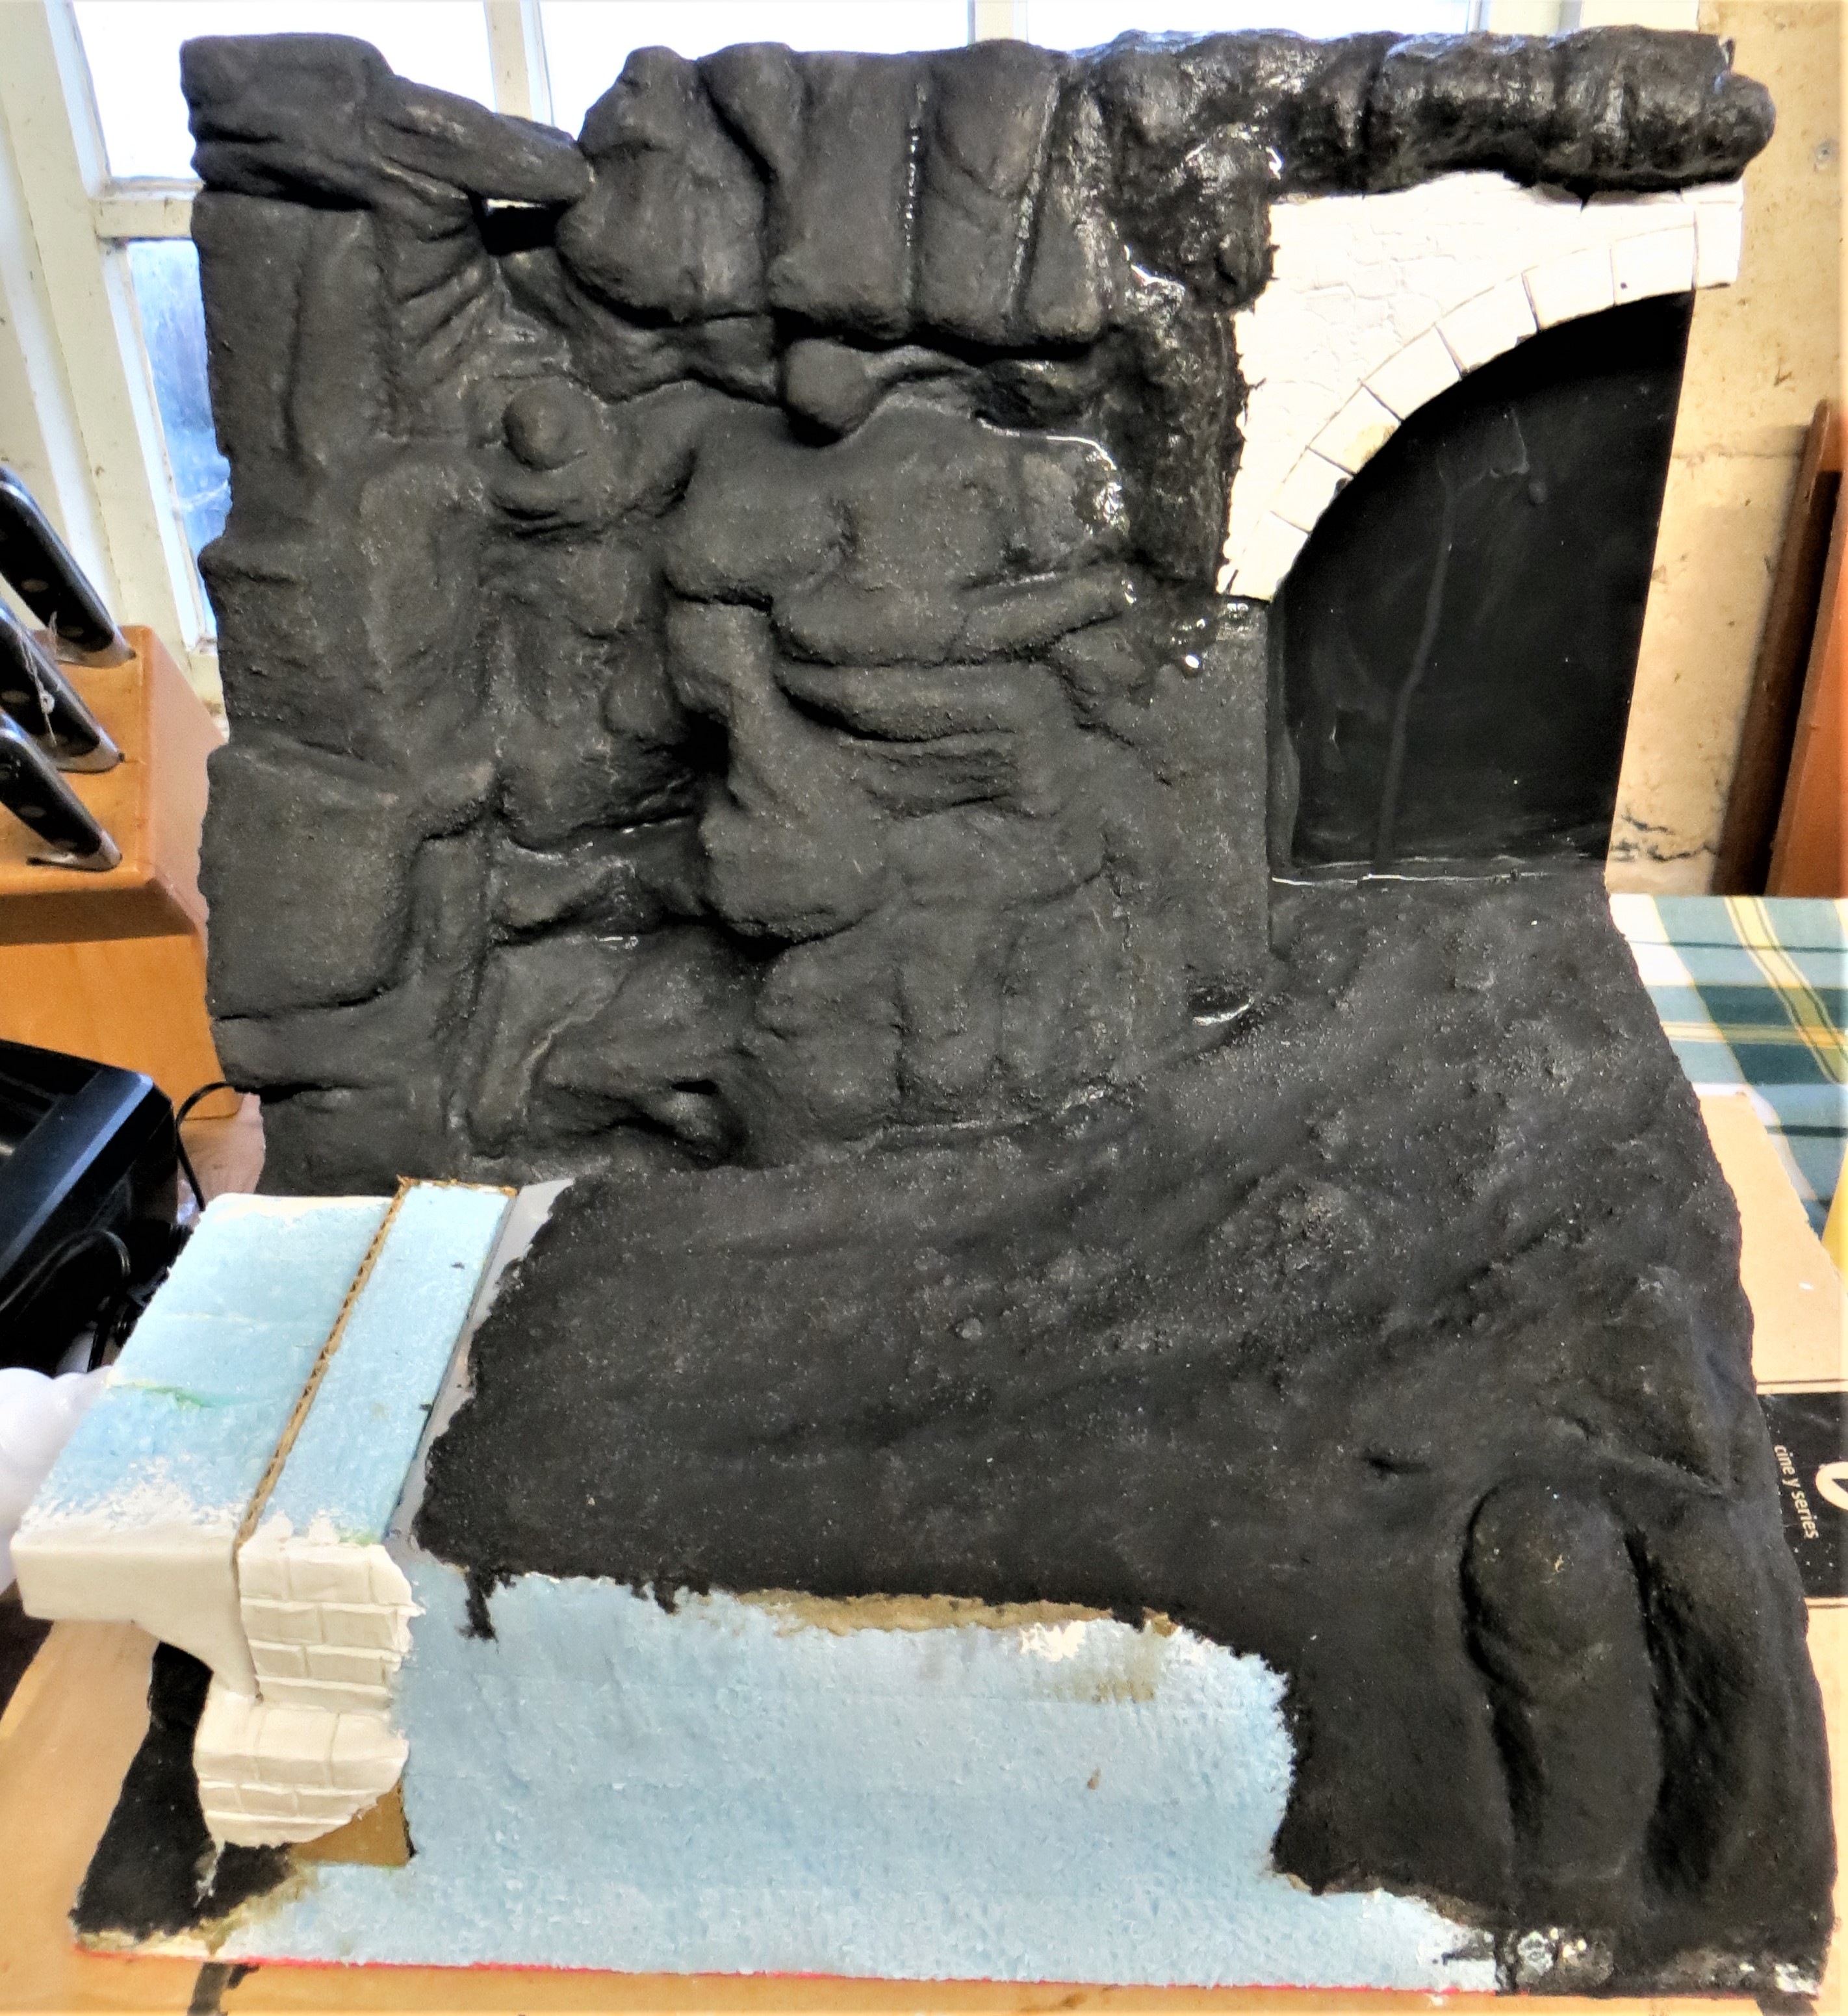
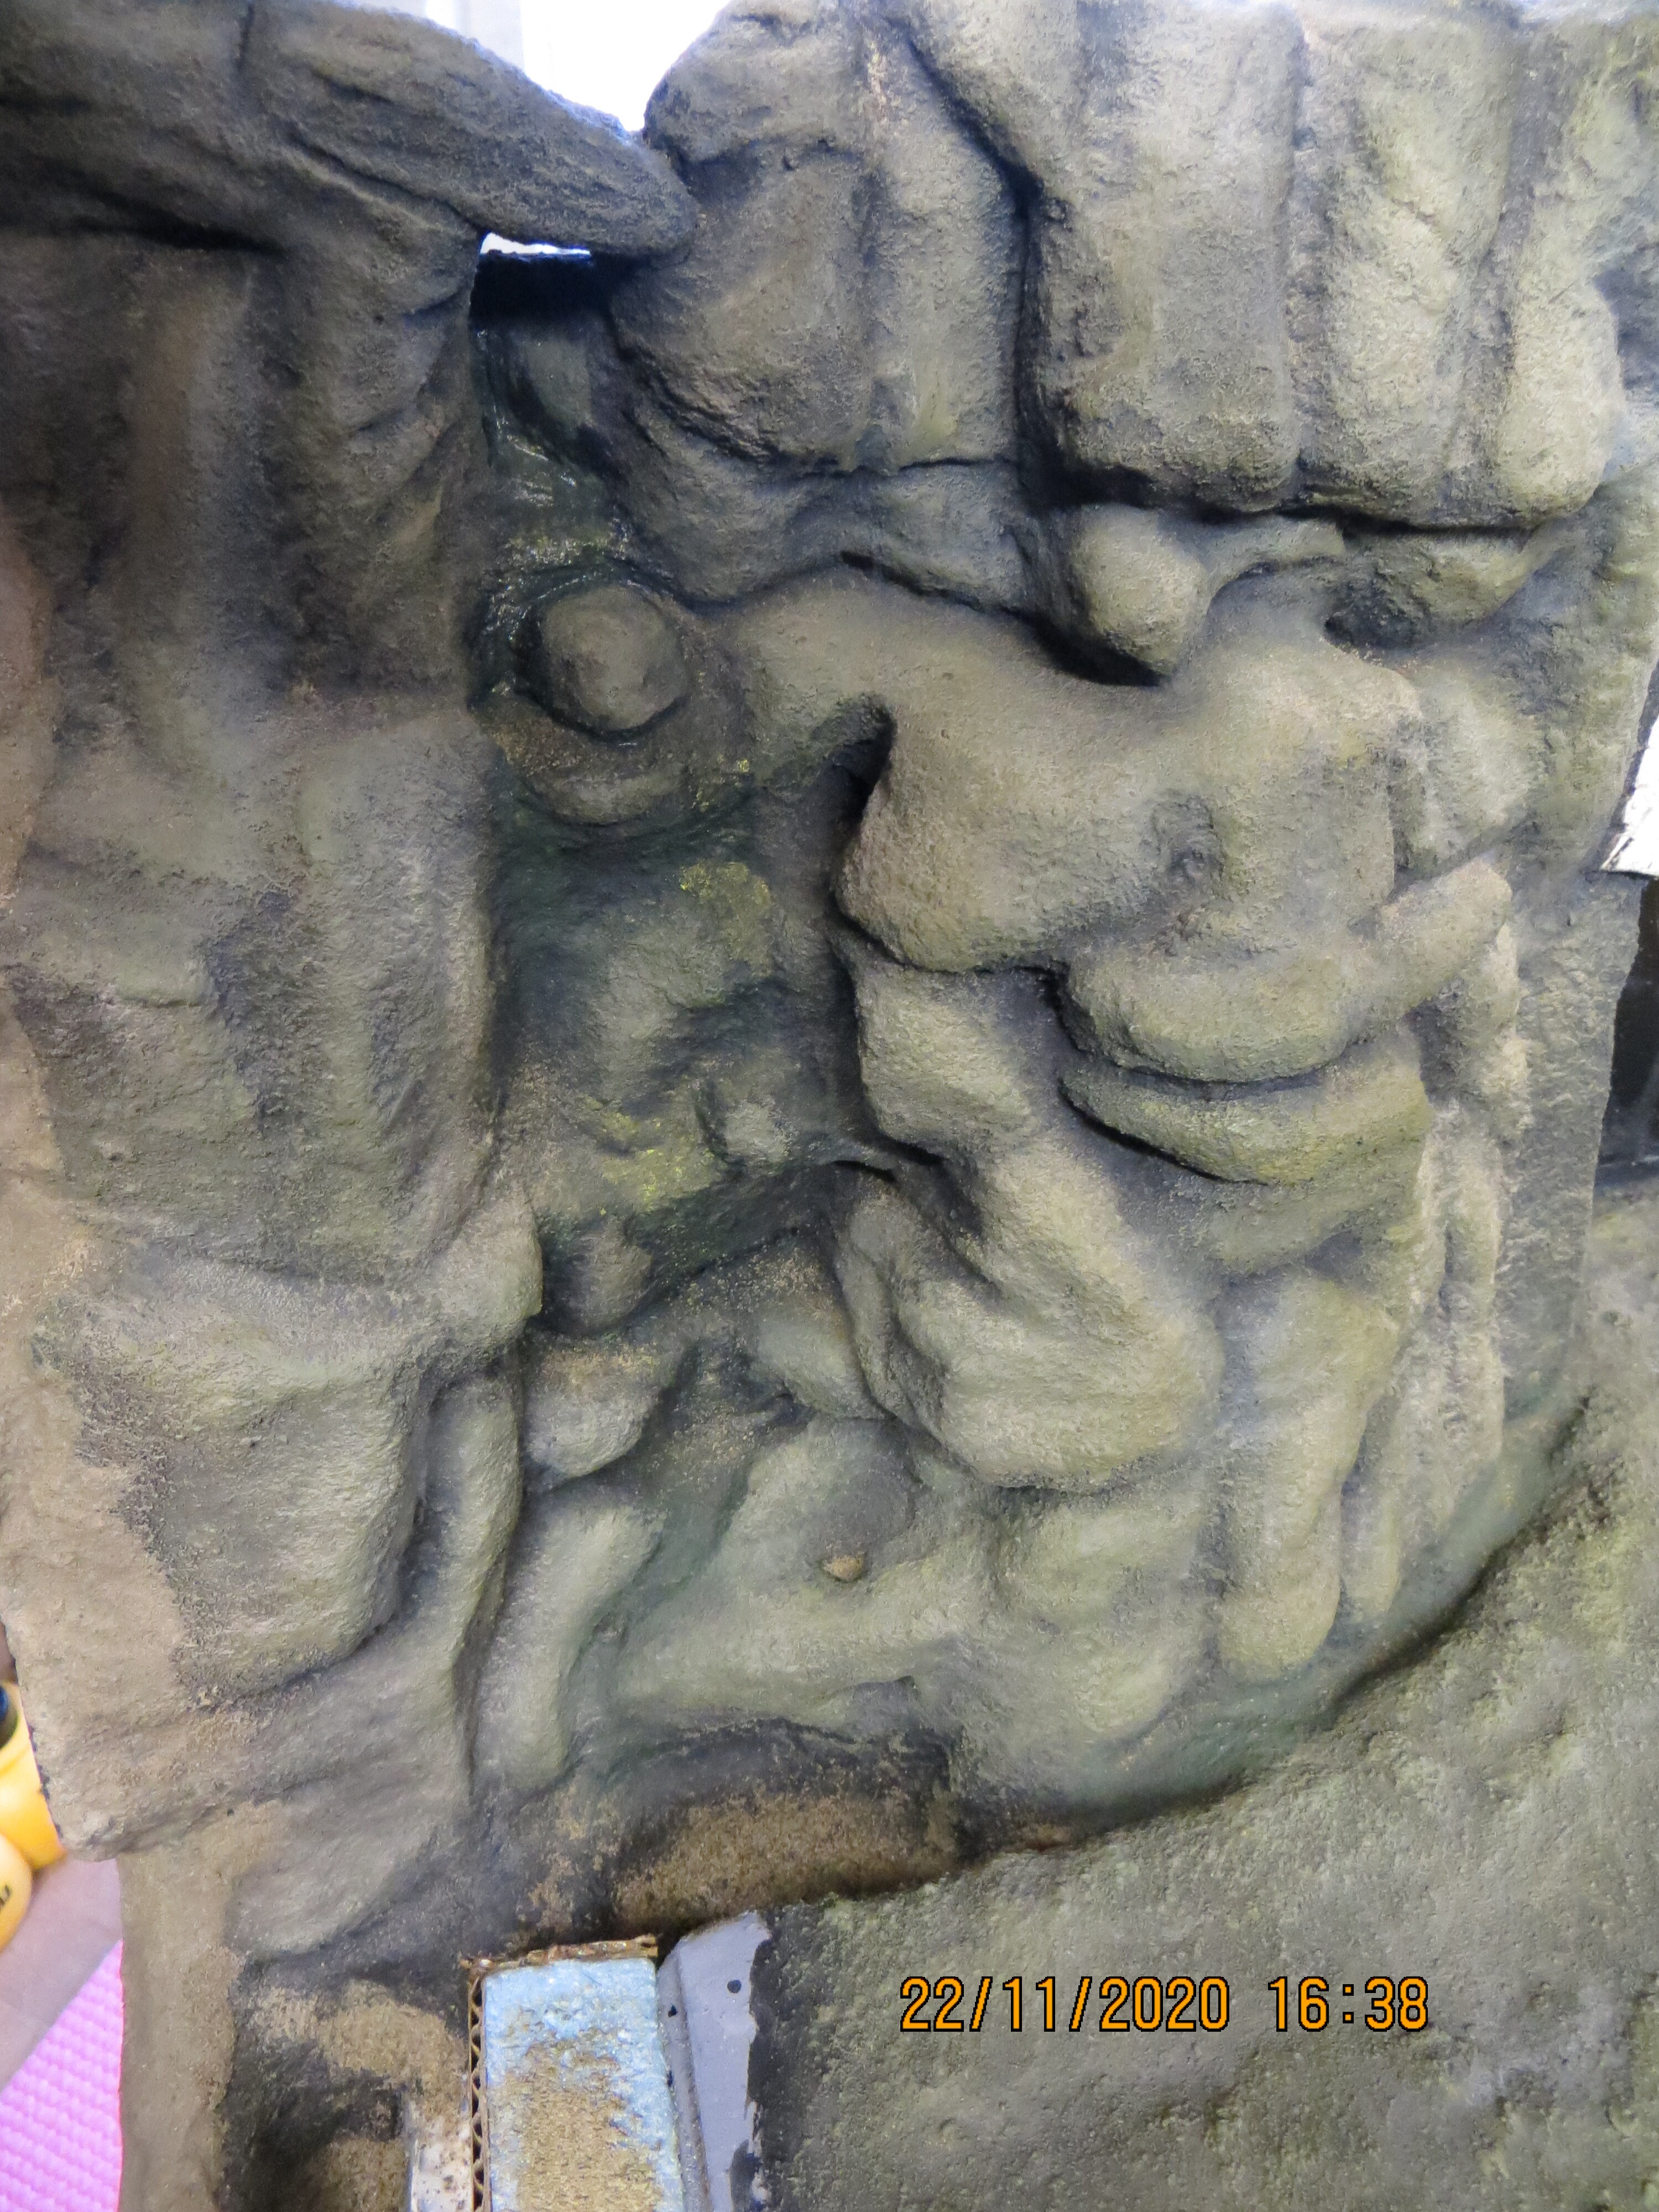
Been a busy weekend, so no great advances other than a bit of base colour contrast added. This is simply a dusting of cement powder to soften things before I start painting proper.
As you can see it’s made that darned unintentional ‘face’ even more obvious,  , so I’m going to have to make some changes to obviate the flippin’ thing before I end up throwing the whole thing in the bin, gggrrrrr, !
Cheers, ,
G
3 Likes
Although saying that G, I think some sensibly positioned foliage later on would hide it and make it disappear.
According to Britannica, the composition of the Apenines are as follows:
The rocks are mostly shales, sandstones, and limestones, while igneous rocks (such as the ophiolites of the northern Apennines, the remains of an older oceanic crust) are scarce.
So light colors indeed are the way forward…
LOL!, I was glad to see you’ve begun highlighting your rock face (no pun intended). There’s no need to scrap your dio but it may be prudent to spackle in some surface material and fill some of the offending crevaces.The bridge and tunnel masonry turned out well. I sympathize with your frustration but you are the sculptor and it’s your world so there’s no challenge here you can’t overcome. Maybe some sharper angles/edges would acheive a more natural appearance. There are any number of ways to continue. May the Force be with you!
I just think some foliage would solve the problem…

9 Likes
Hi John,
That’s the soldier in you coming out, let’s hide it with camouflage, .
Cheers, ,
G
2 Likes
Hi Erwin,
Thanks for the feedback regarding type of stone, I’ll go with ‘yellowish’ for a sort of sandstone hue.
Cheers, ,
G
1 Like