She’s looking like a tank!
5 Likes
Yikes! Blue tack to the rescue! Looking really good. Cant wait to crack mine open
1 Like

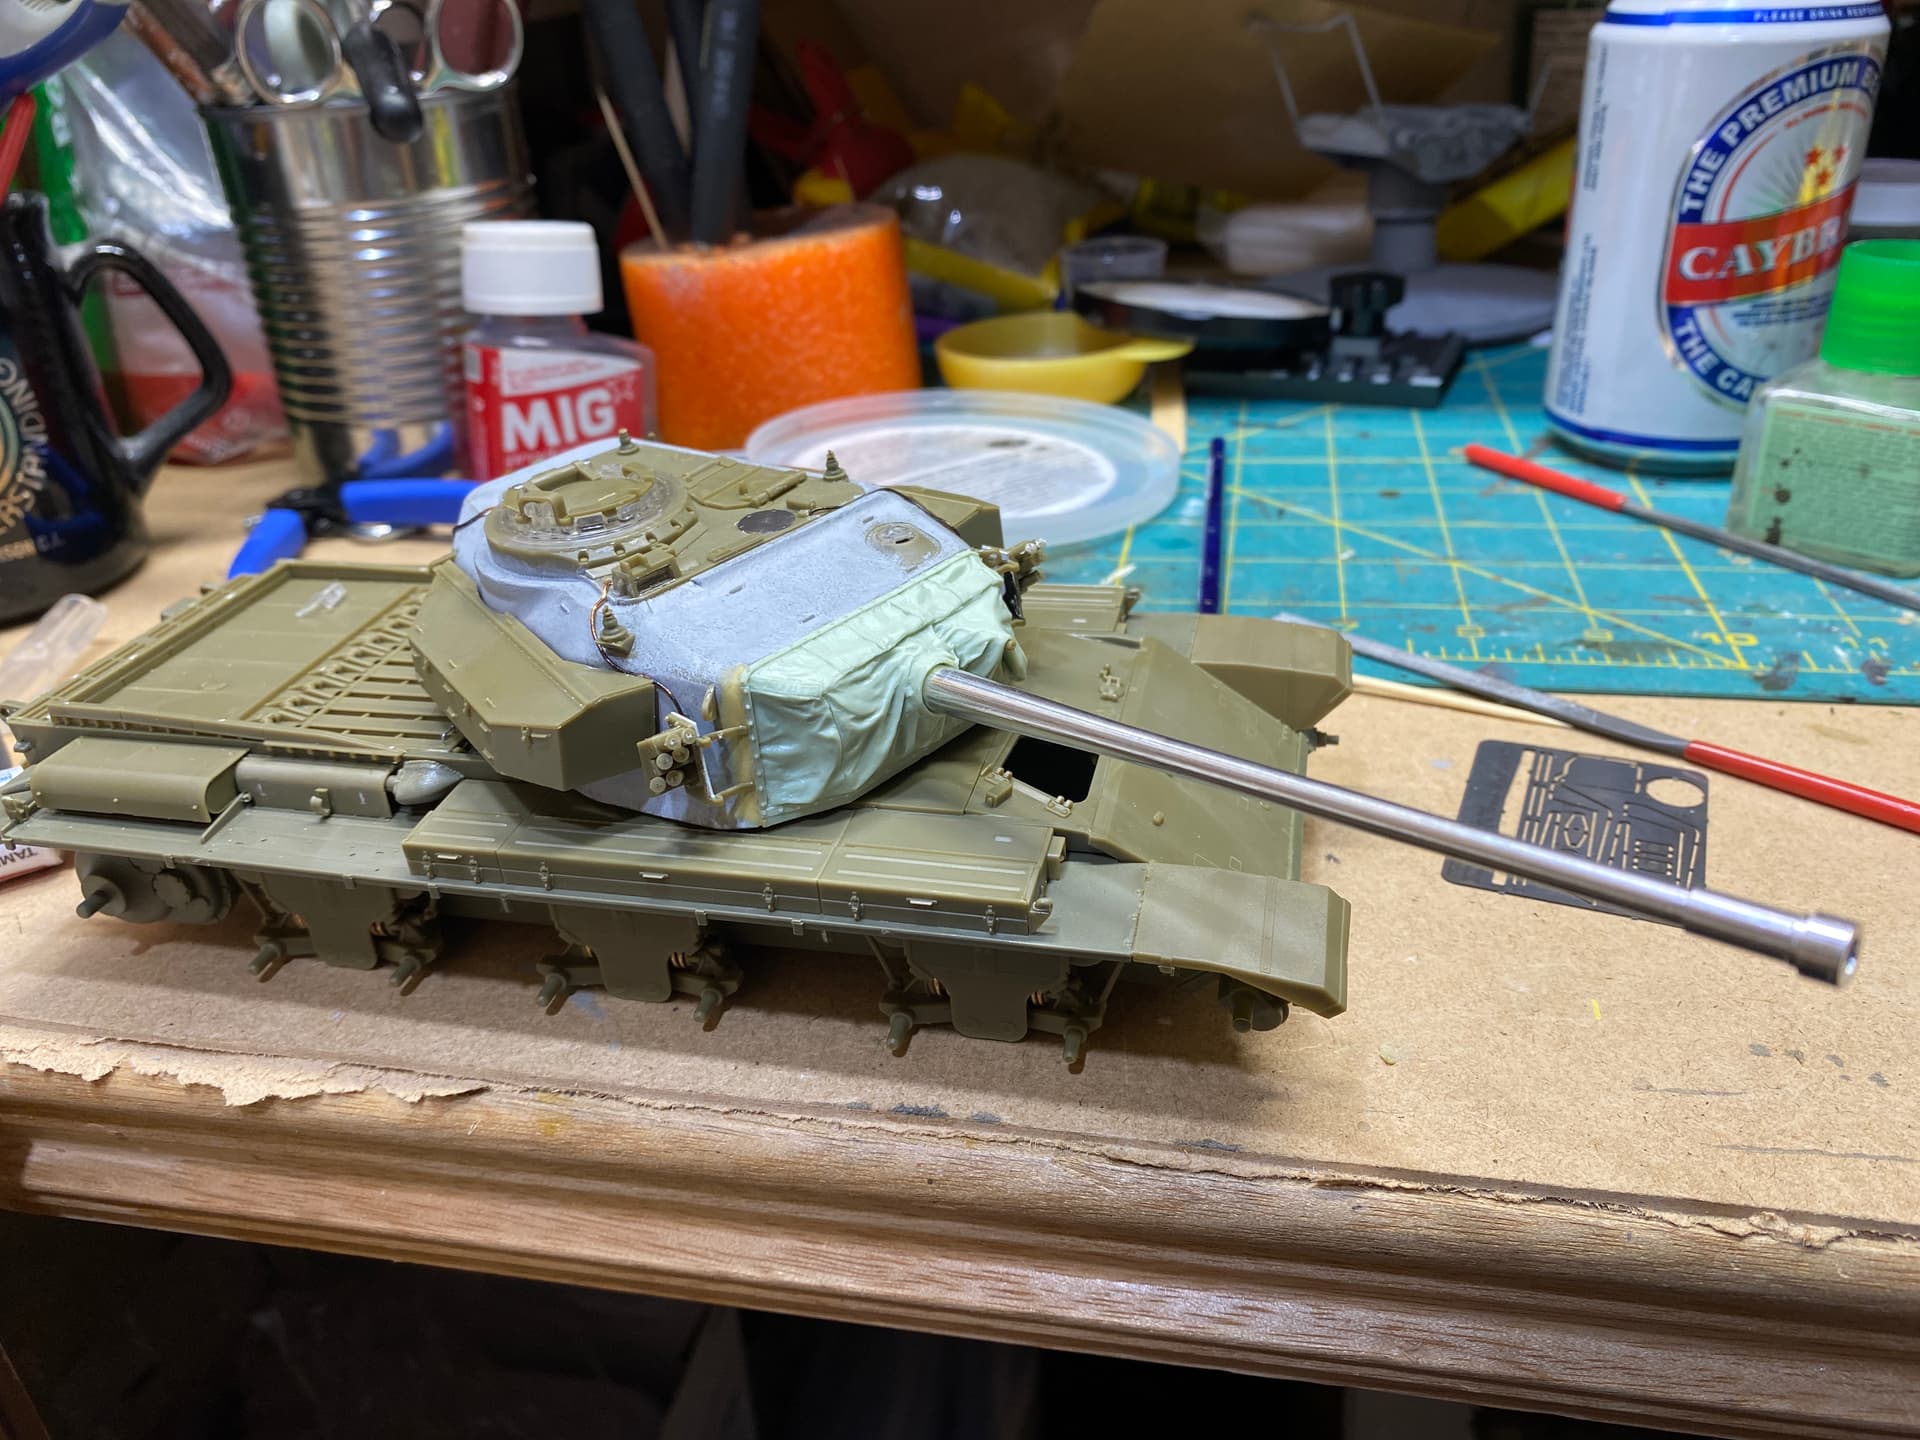
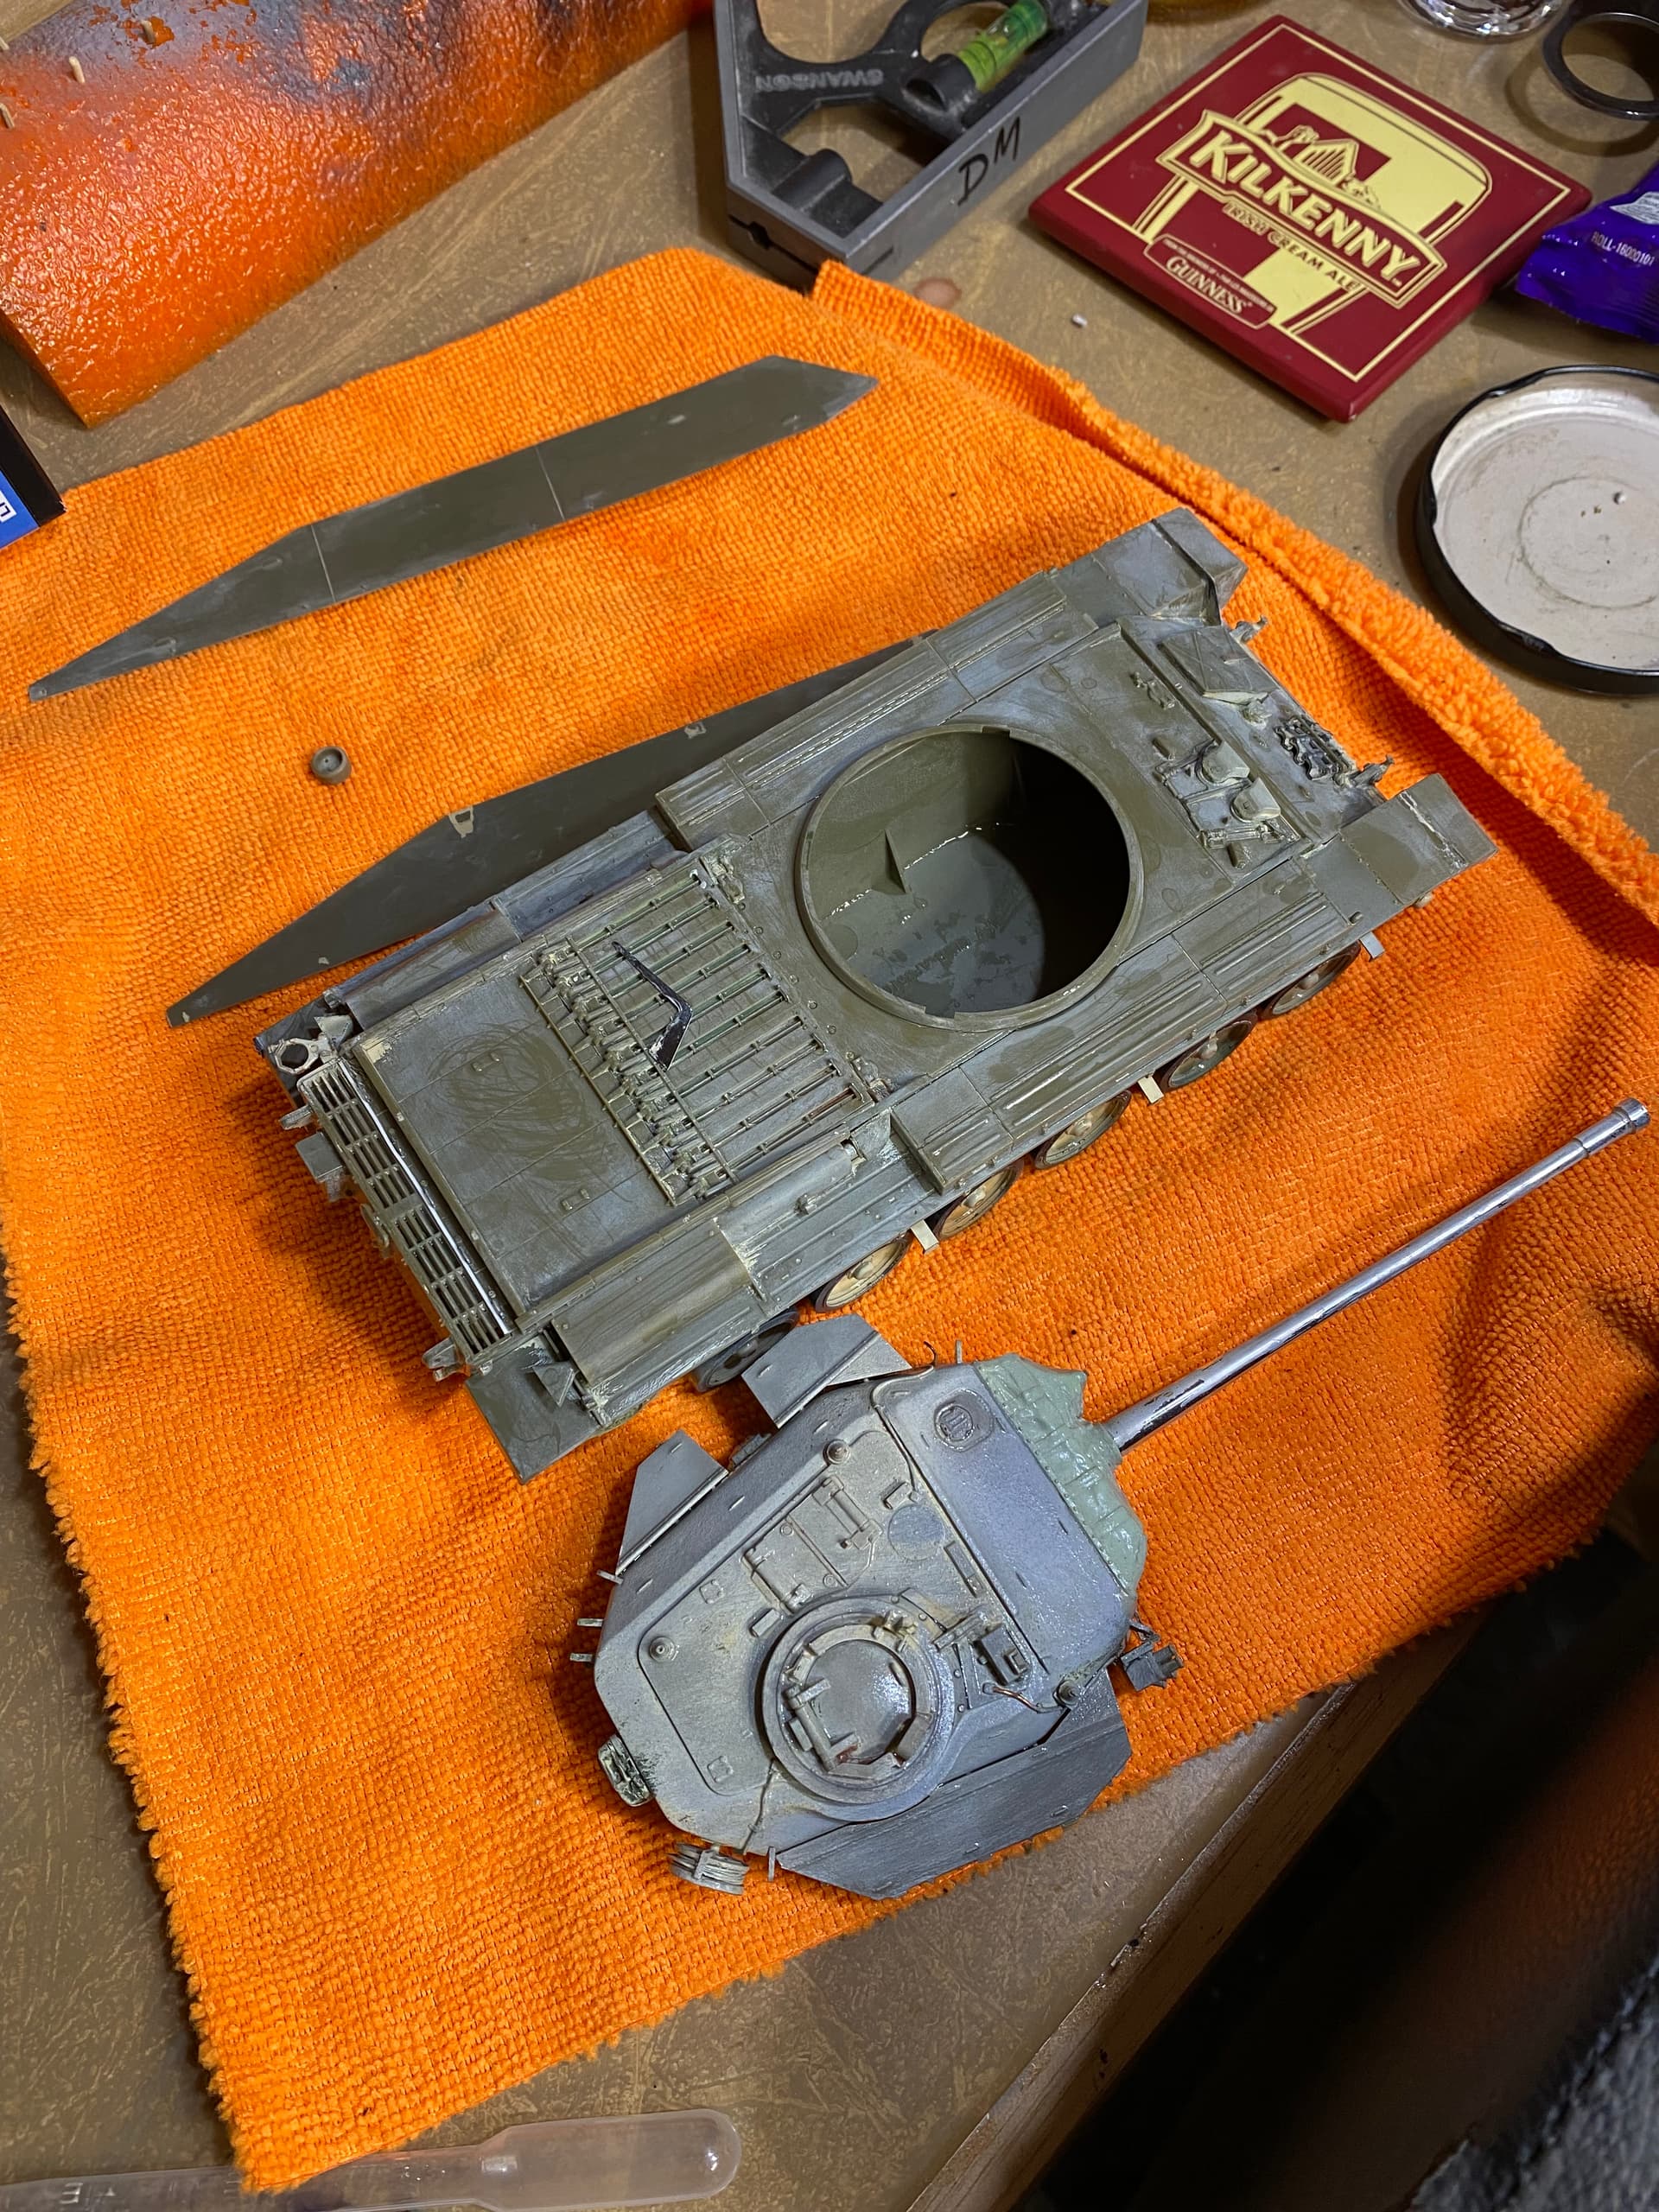
Got some paint down on the hull today. Tomorrow I’ll start masking which should be…interesting. We’ll see how many bits I manage to dismember (I’m looking at you engine deck grab handles.
Also… what can I say about these wheels?
Oh I know, they’re utter crap. For what is otherwise a very nicely engineered kit, this vinyl outer rim/tire things are a complete embarrassment and AFV Club should feel ashamed.
I could almost get behind them if they were only the rubber tire, but they also incorporate part of the rim.
Nothing I do can get paint to stick to these things. Even the CA I used to mate them to the styrene part of the wheel has come away from every single one of them.
I know Panzer Art does a set, but I don’t know that I want to drop $40 on them as they’ll be mostly covered by the side skirts anyway. As such, I’ll tidy them up as best I can and continue to hope that the champion of that particular design decision gets his Willy caught in his trews…
1 Like
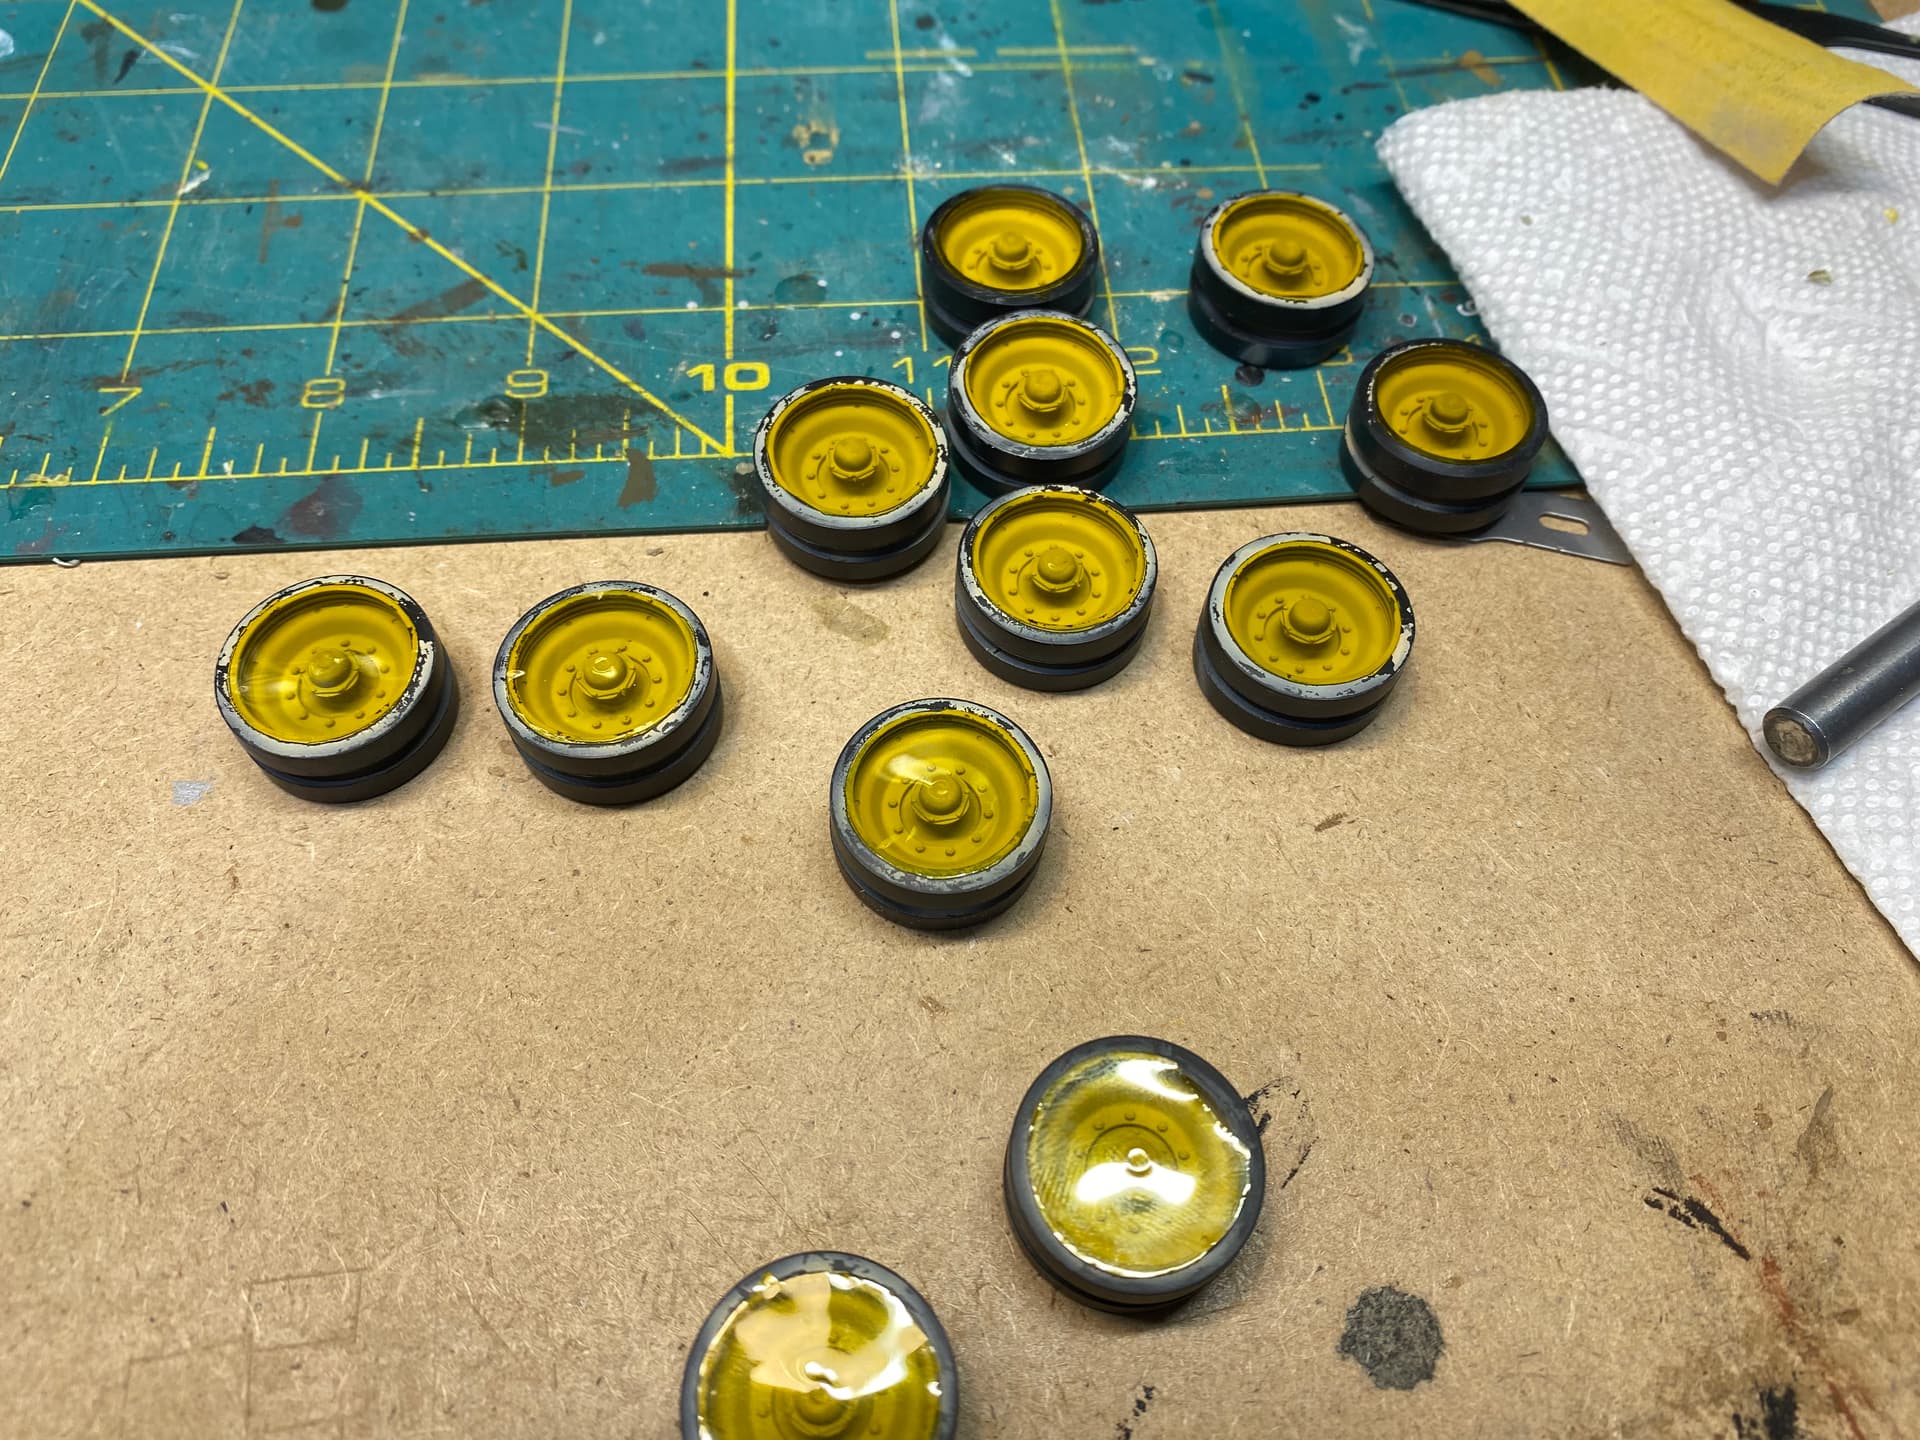
Here’s how I dealt with the rubber. I only painted the rim and left the rest bare rubber. I used an acrylic flat so as to avoid the possibility of petroleum based solvents eating the rubber. After the flat coat I weathered the rubber with dust colored pigments but did not spray any kind of fixative. Once the pigments are on they actually look pretty decent. Good luck.
1 Like
Thanks. That’s kind of the decision I’d reached too. Though I didn’t think about the acrylic part which is a good idea. I’ll have to make sure I get my harry stick sharpened for the touch up process.
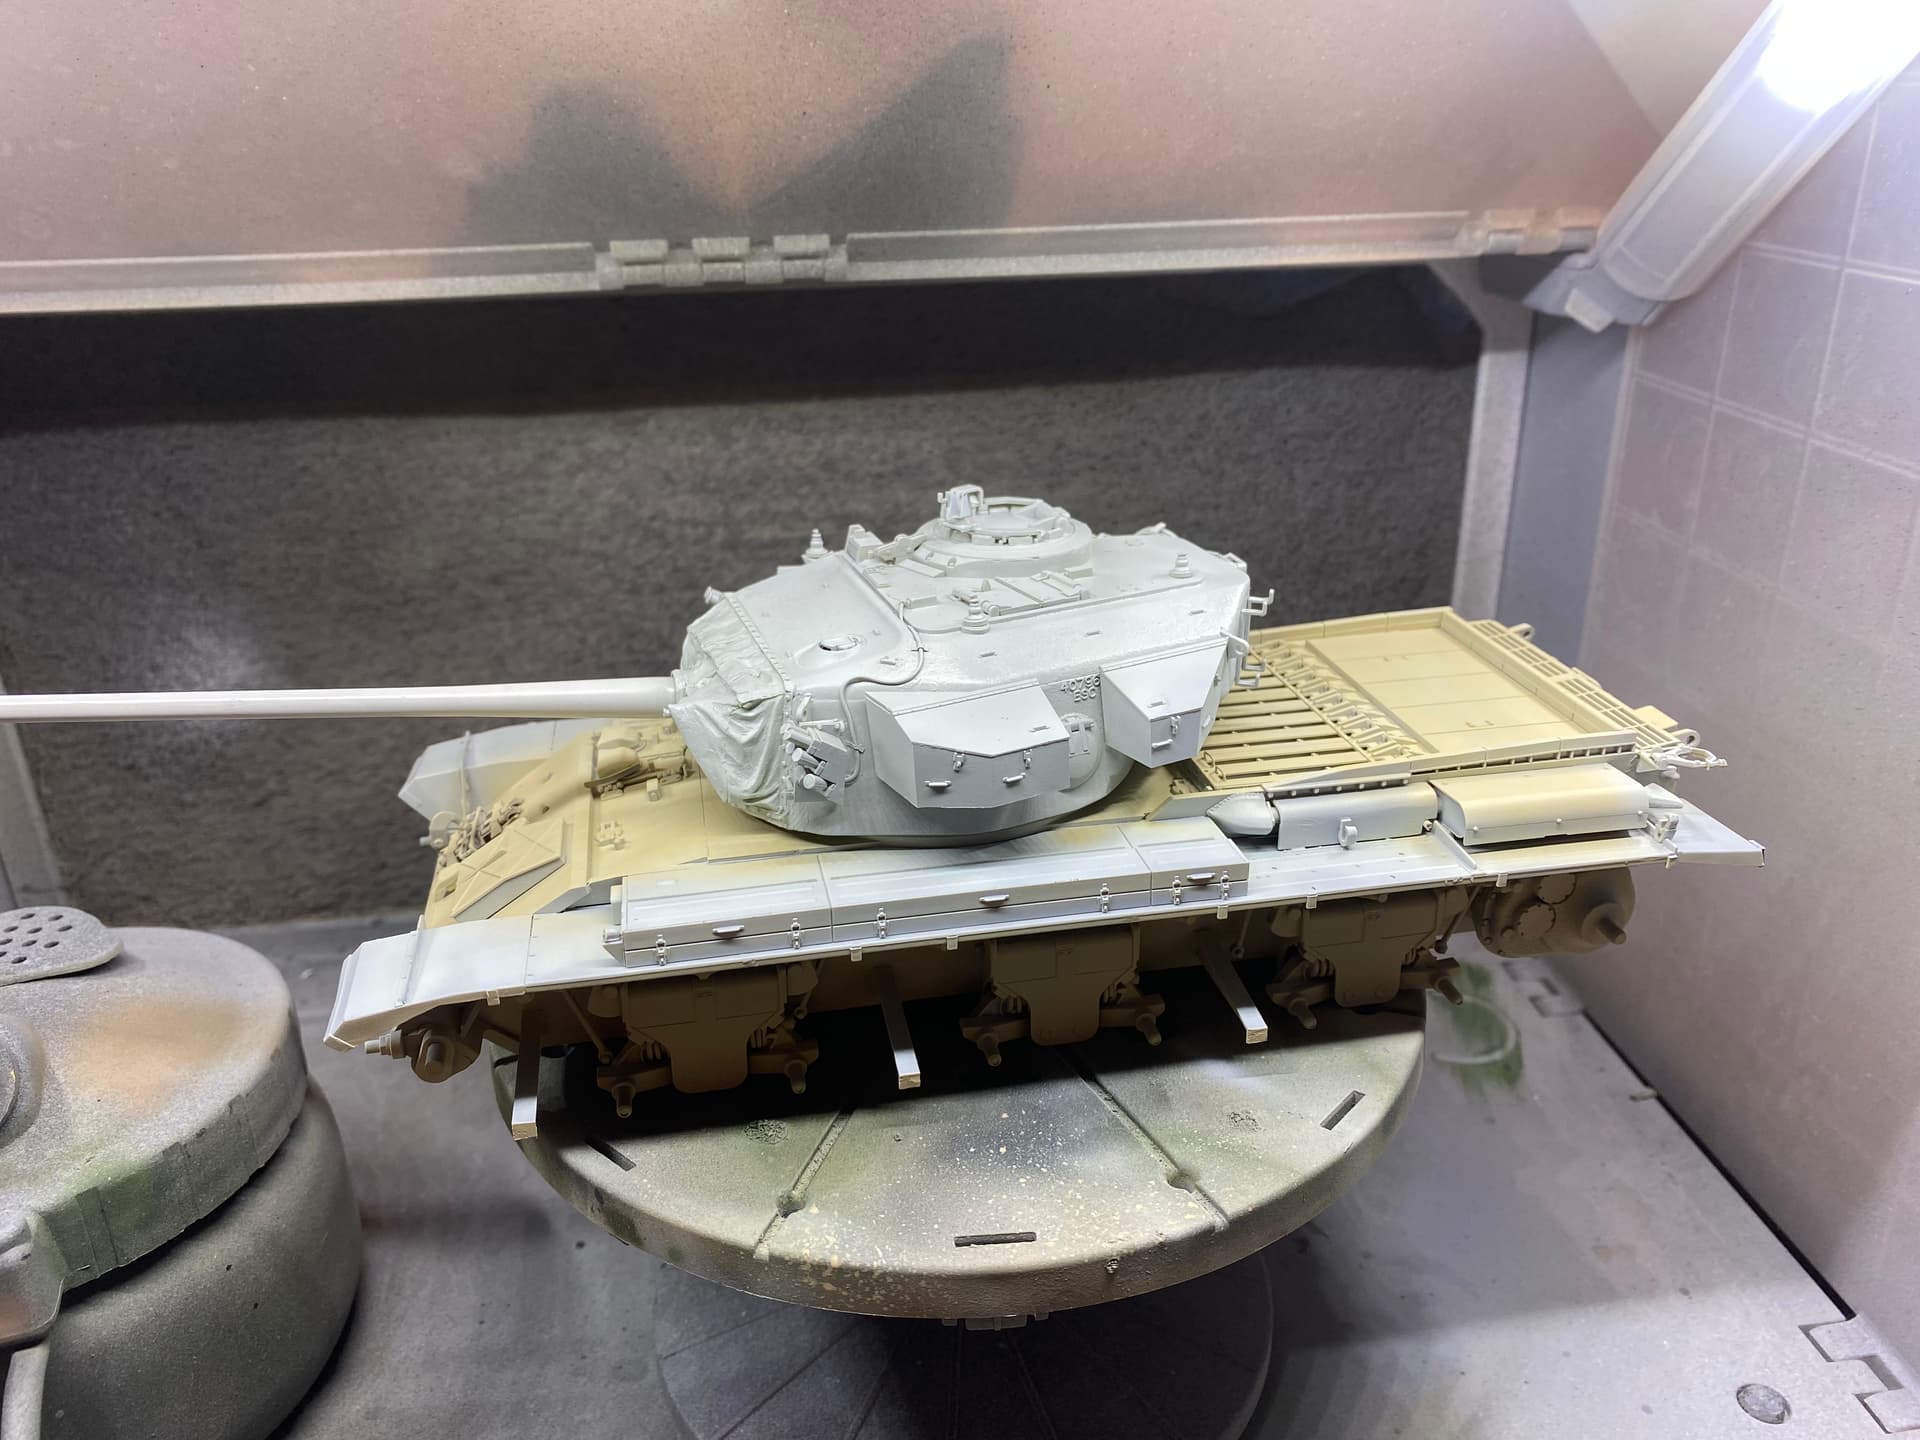
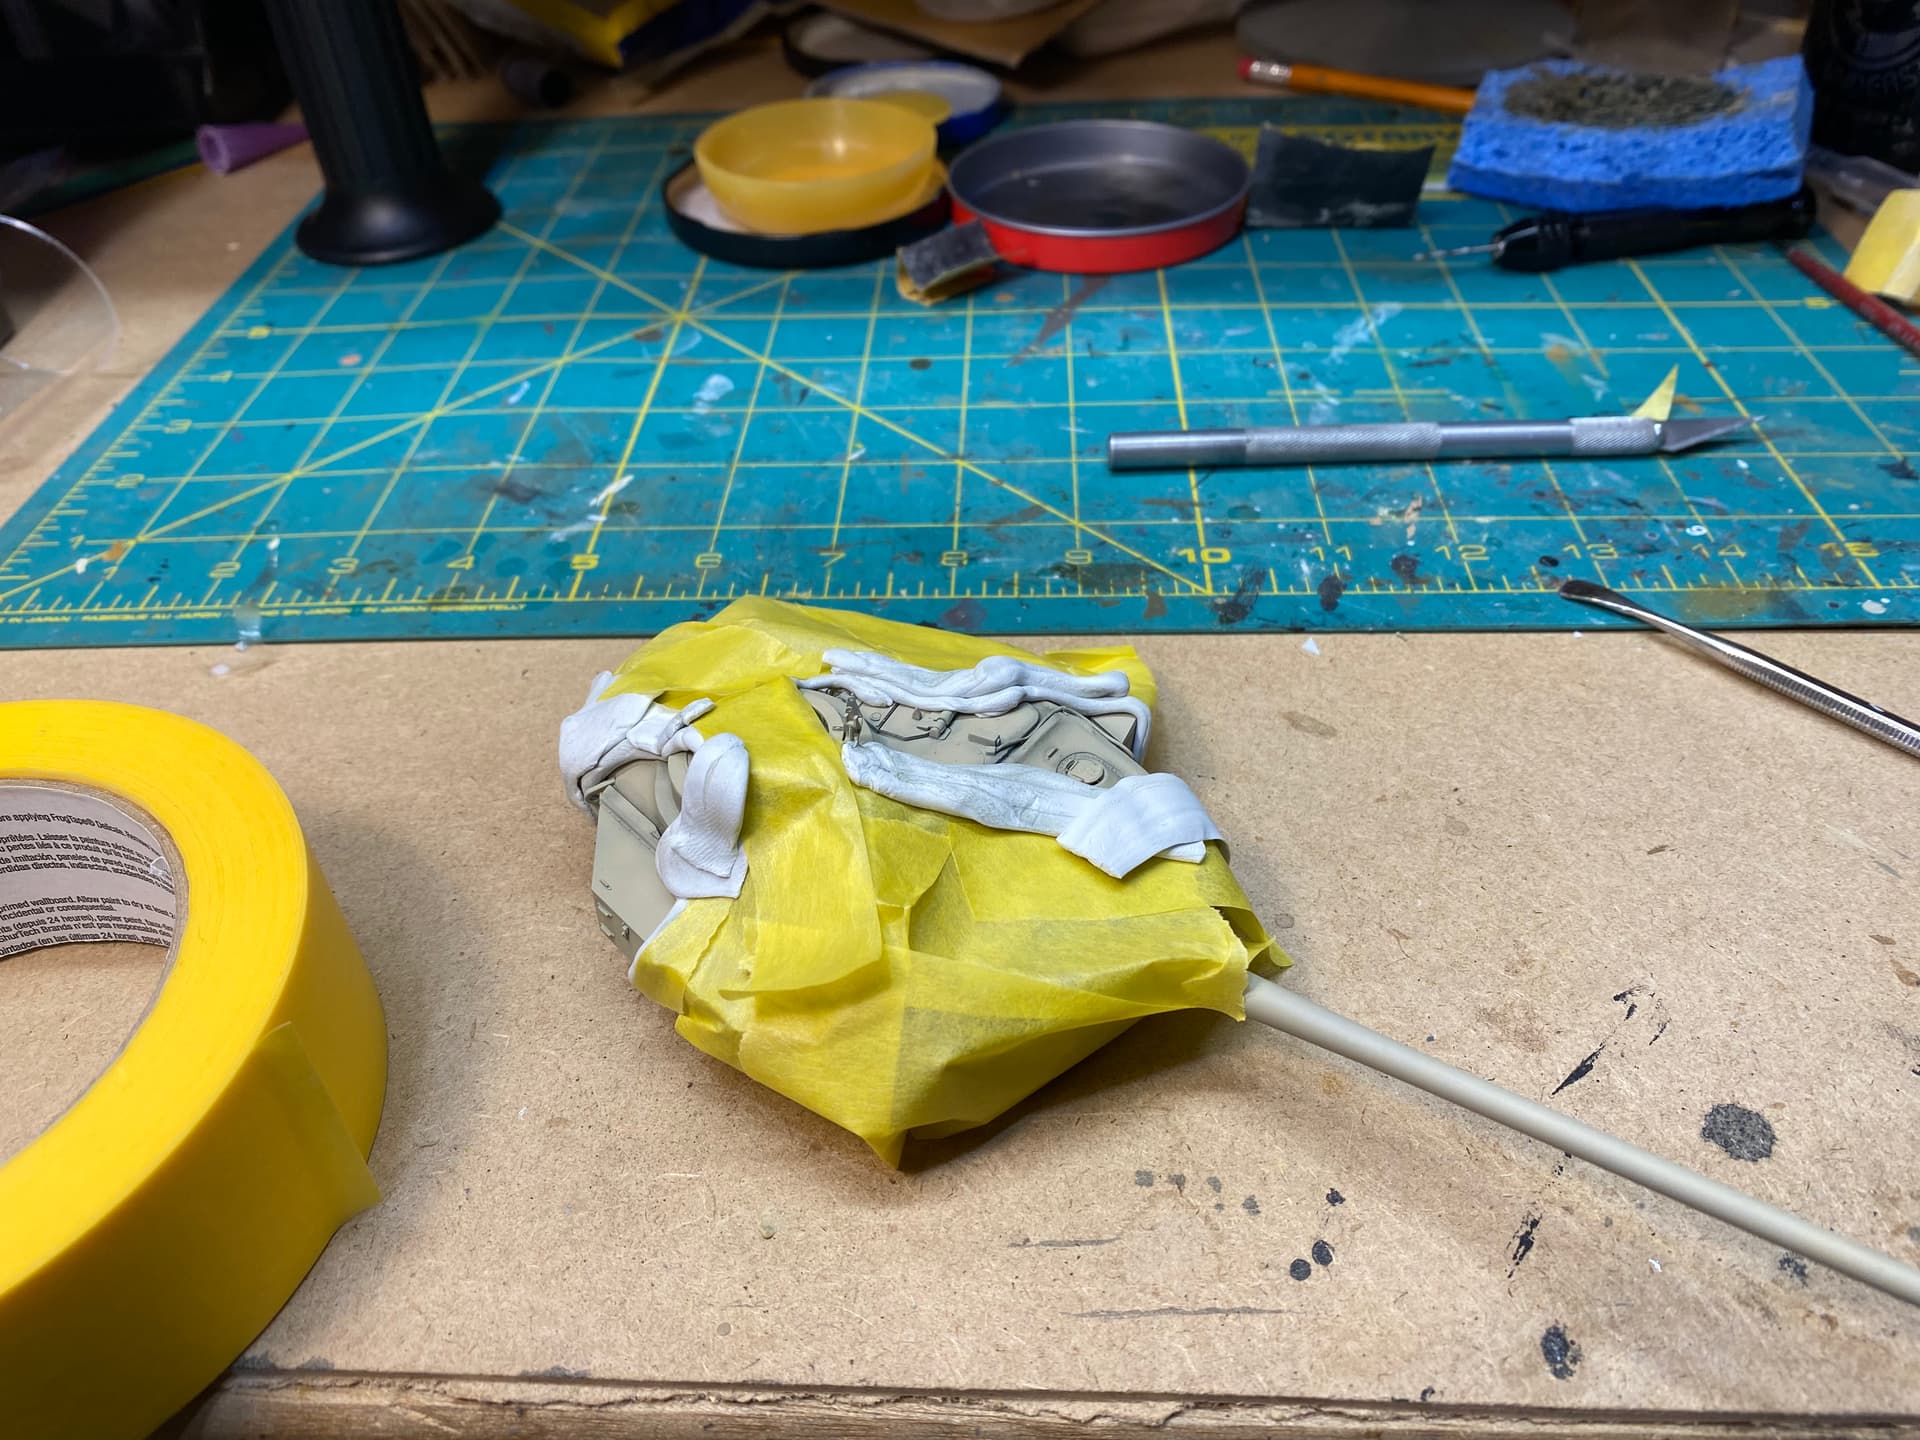
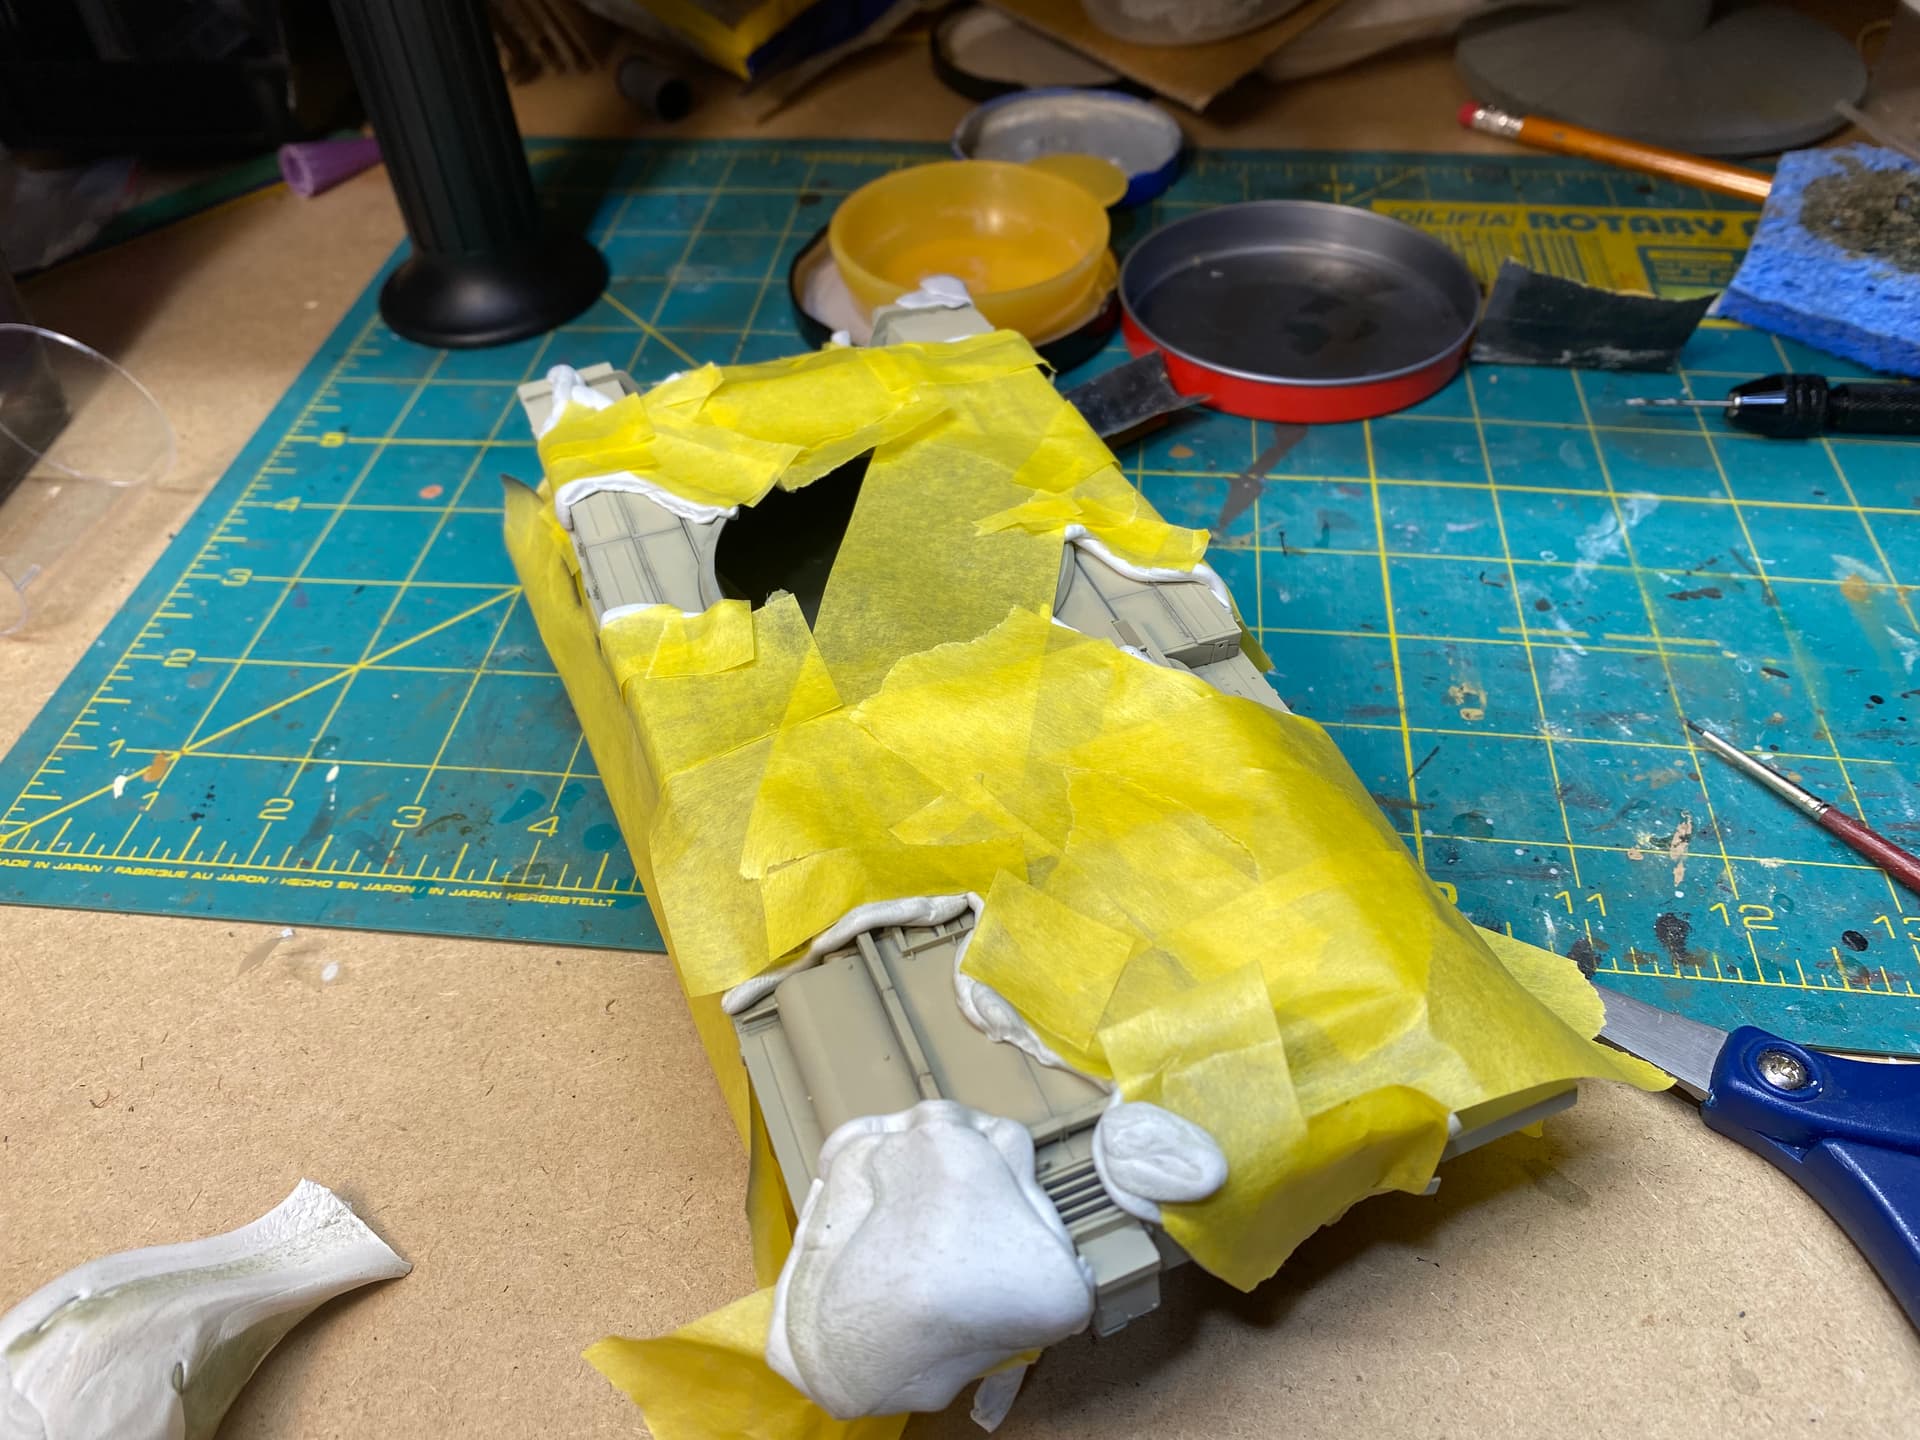
So…. Masking not nearly as clean as I’d hoped.
Not a huge deal, just going to require some cleanup. Ok a lot of clean up but it’s totally salvageable.
I’m not completely happy with the green tone either so that might get some tweaking.
On the plus side, only broke off two handles from the engine deck and one of the smoke launchers which is an easy fix.
2 Likes
We are own harshest critics too often. I think it looks great. Hard to comment on the green from my limited experience and not seeing it in person but the masking looks great! The small areas of bleed through will probably blend with weathering
That’s her good side 
Bleed I can work with, but there’s a few spots where I ended up with some weird sharp angles stuff. I’m gonna leave it be for a few days and then come back at it and make a decision. Worst case it goes in the dip and I start over.
1 Like
I always find that’s a good call. With me-262 as you saw I was ready to burn it down, but after a few days I was ready to try again
And into the dip it goes
So after waiting a whole what… 5 hours, I decided that a clean(ish) slate is the way to go. The more I thought about it, the more I realized how much less work this will be in the end for a better finish.
It’ll also give me a chance to come up with some better colour tones, especially the green which I really was t happy with.
It’s still going back in it’s box for a while though.
So taking a cue from @Mead93 for not throwing things across the room and @iwatajim for some technique, out came the blu-tac and the tape.
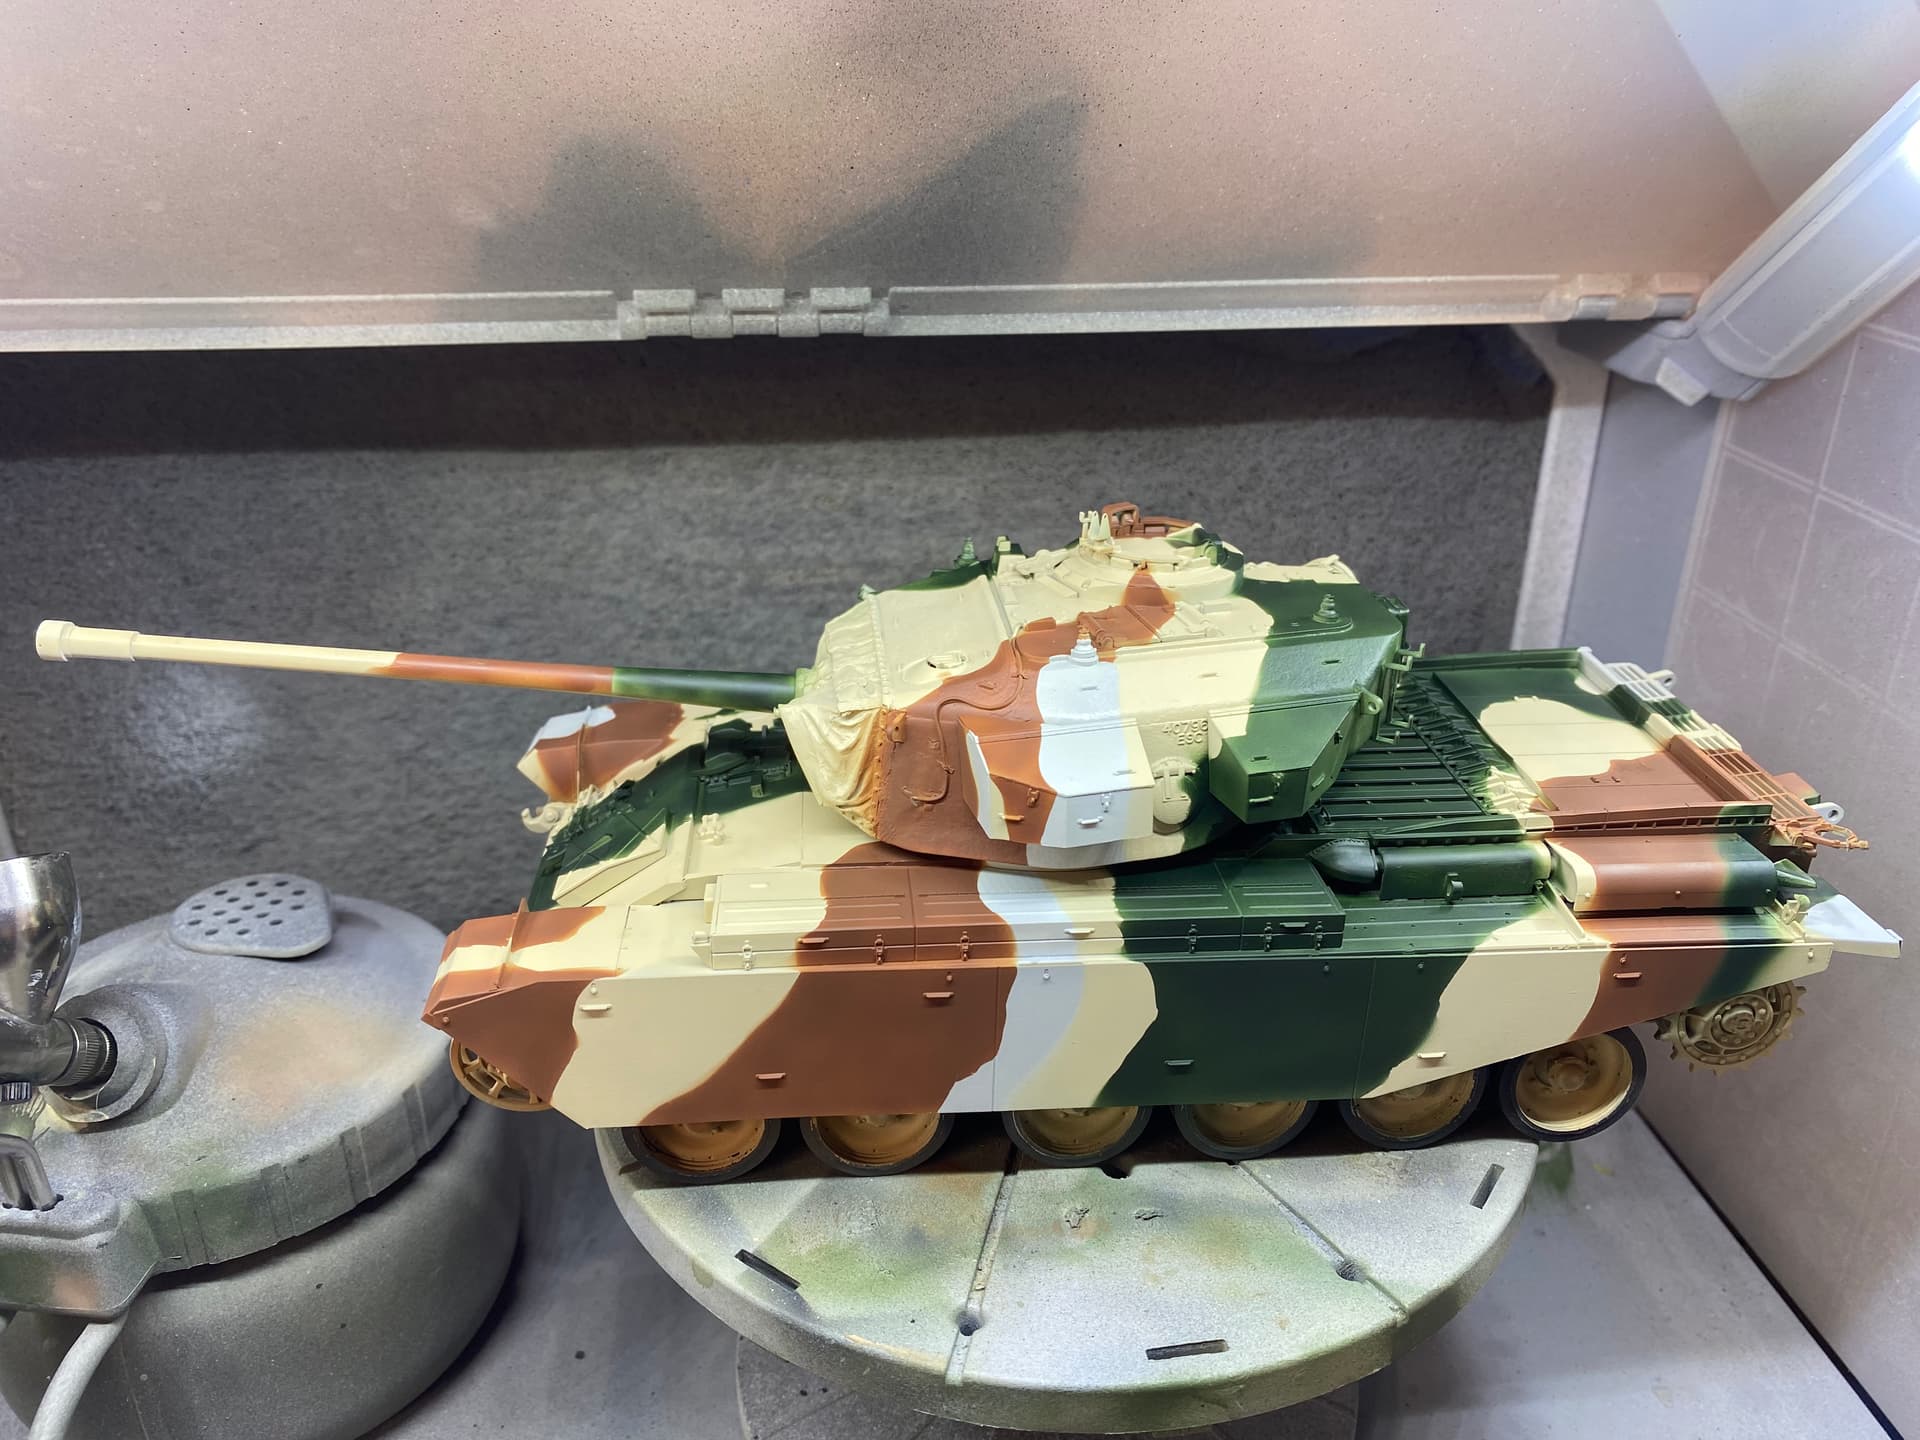
Paint is on…

Annnd the big reveal!
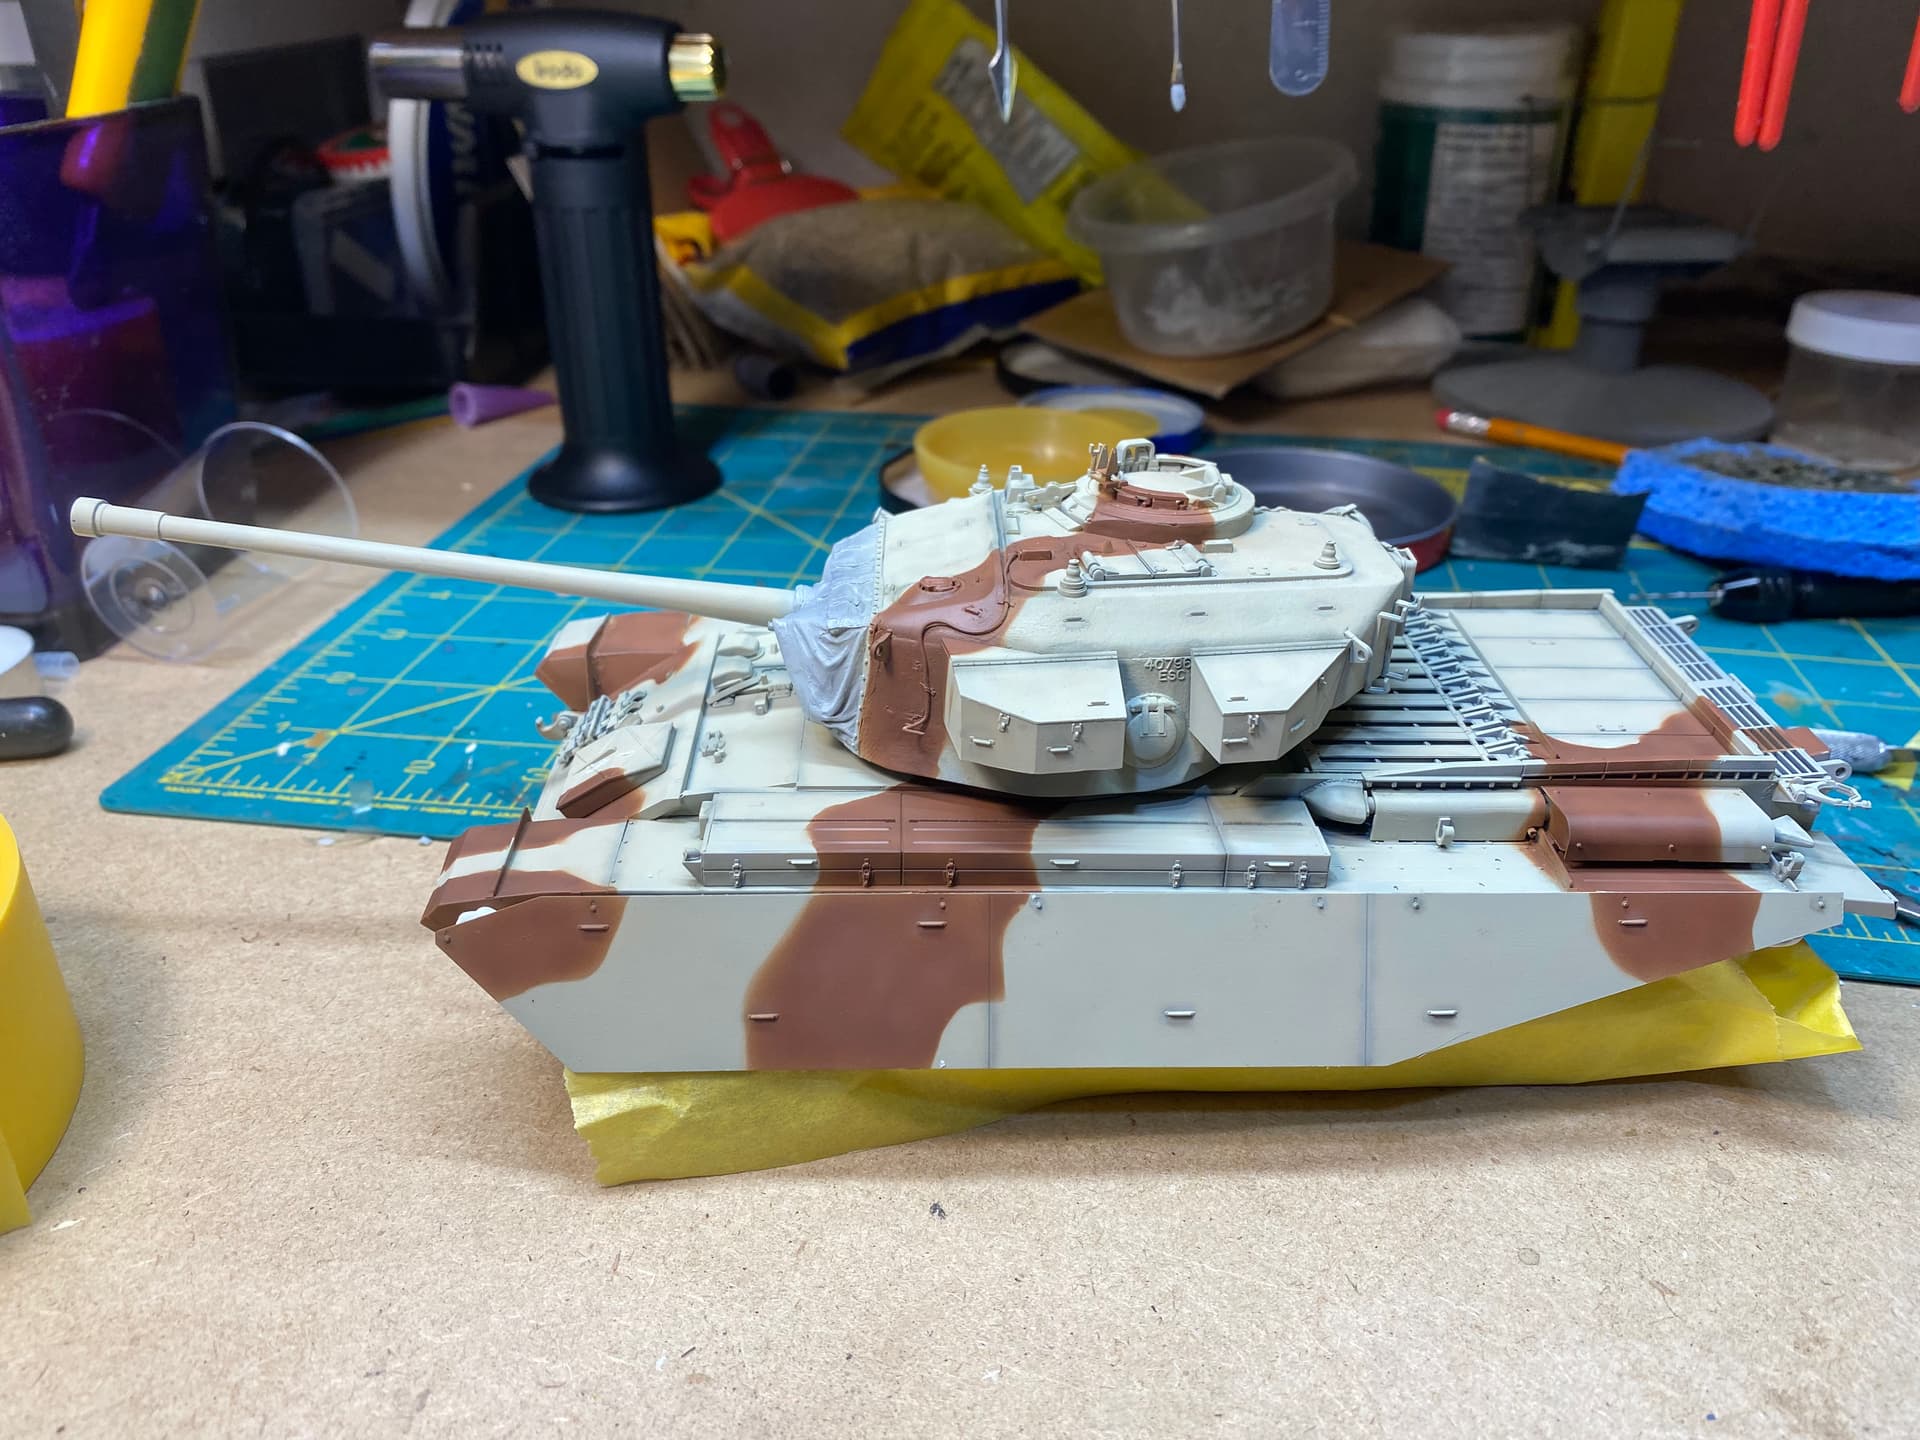
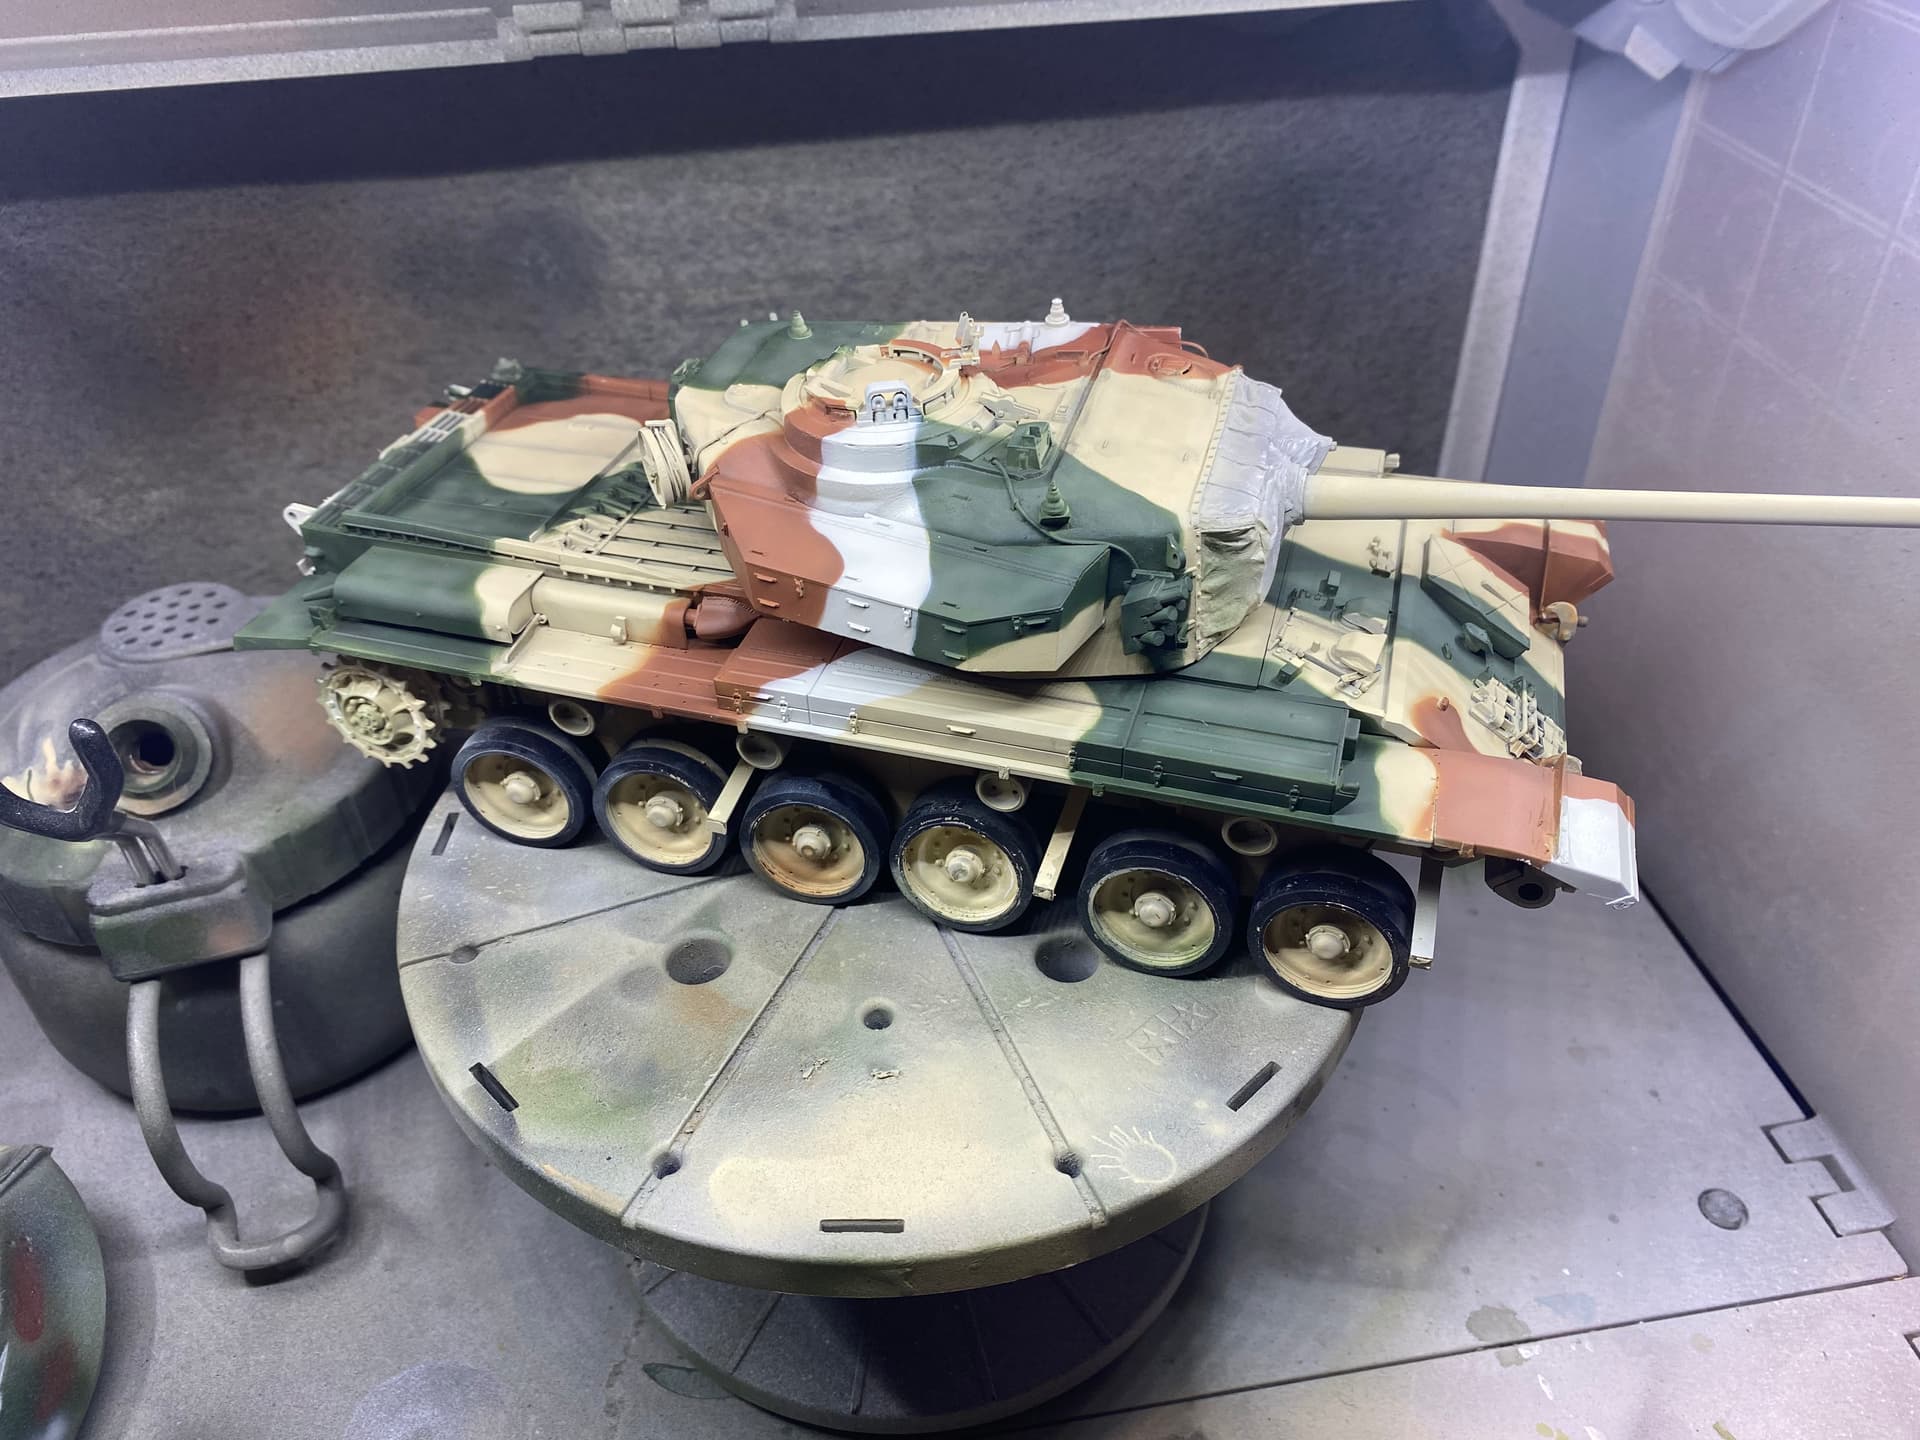
Still obviously didn’t get the blu-tac down quite firmly enough in places, but man am I getting better results than I was before with just the masking putty. Also played with the sand and red-brown colours a little and am much happier with the tone.
Too bad this isn’t a desert build because the scheme is quite nice as it is.
I’ll let this set up for a day or so and then mask out for the green. Fingers crossed. 
4 Likes
Really liking how this is now starting to look with that brown on Don. Looks great and I also do the blue tac and masking tape on most of mine when I do a cam scheme… or play doh … and as long as its not pressed on to hard, I dont usually suffer any bits left on once I peel it off.
1 Like
Looking great! Can’t wait to see more colours on it.
Your wish is my command @iwatajim!
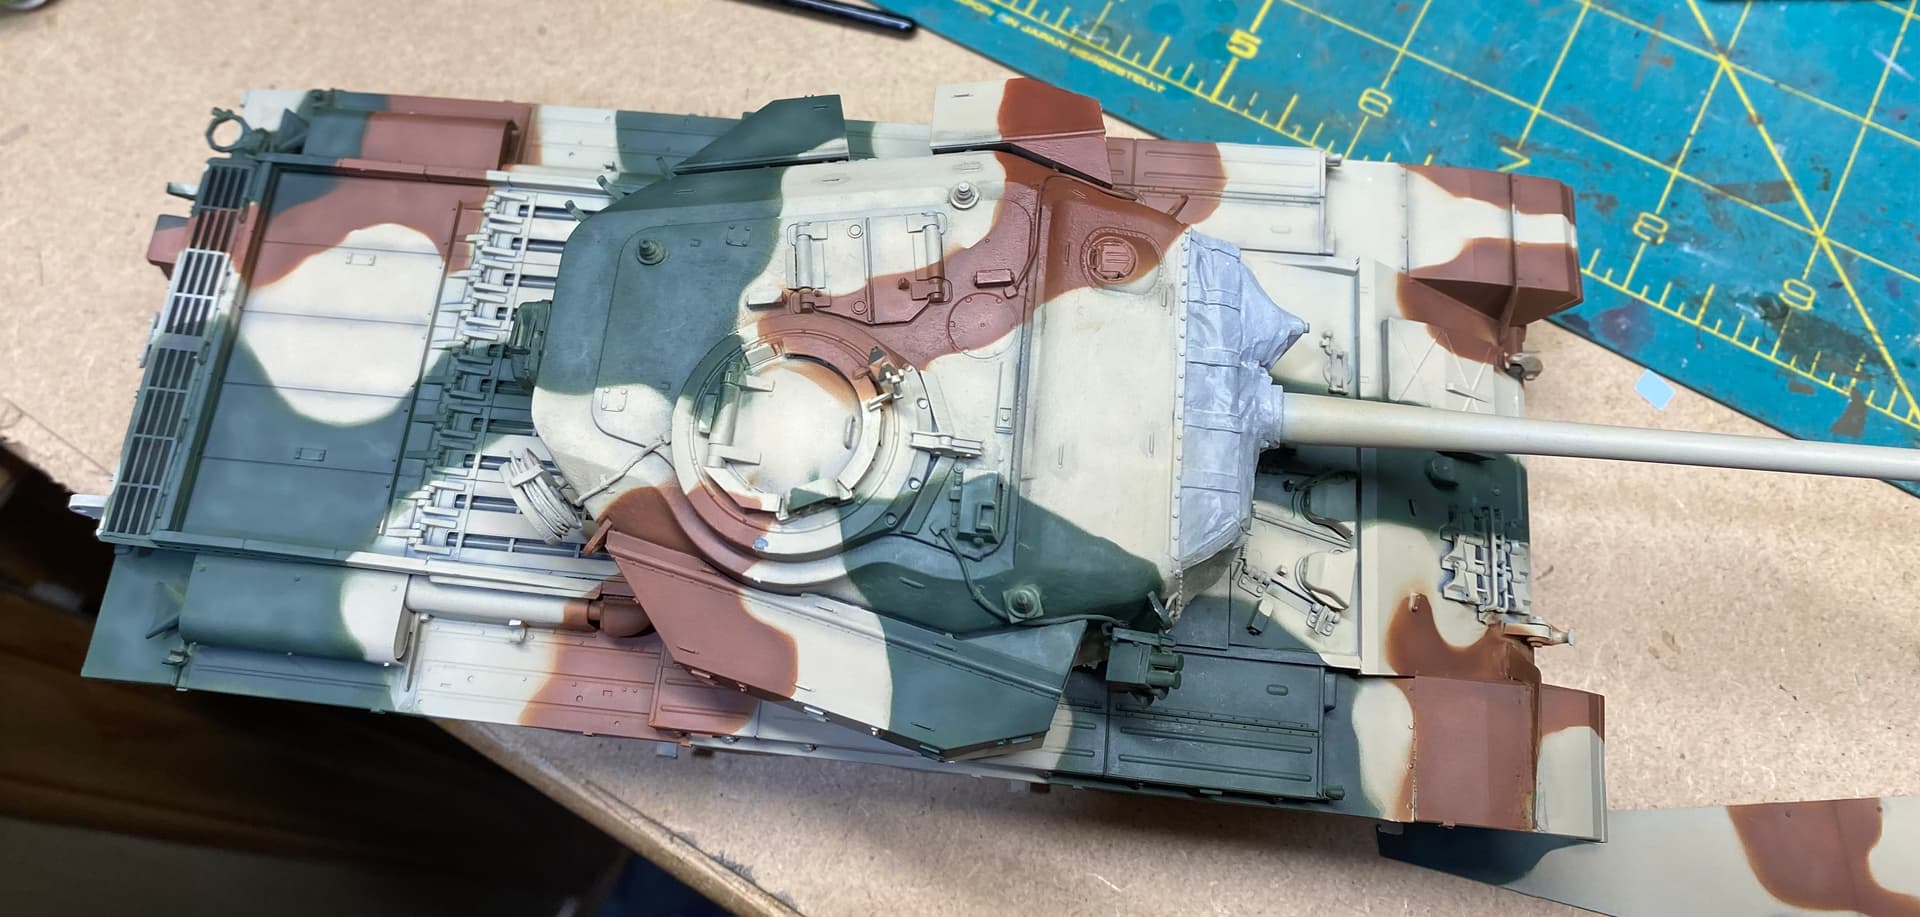
Green looks much better now. The IJN Green that was supposed to be the closest colour match I could find was far too vibrant once it was on the tank.
I cut it with varying amounts of Field Grey as I worked through the highlights finally adding some Deck Tan. I don’t know how historically accurate it is (or any of the colours for that matter) but they’re all looking good in combination.
Need to add the odd patches of light grey next and I think I’m going to make the mantlet cover khaki/canvas just for some colour variation. Then some touch ups on the running gear and we’ll be good to move onto markings I think.
6 Likes
Gotta say Don, that looks great. I love the colouring on that. Very unique and rarely seen … You have really cracked this one 
2 Likes
I like it a lot Don, will be interesting to see what colour you choose for the grey.
1 Like
Looks fantastic Don! Good for you for doing it over.
1 Like
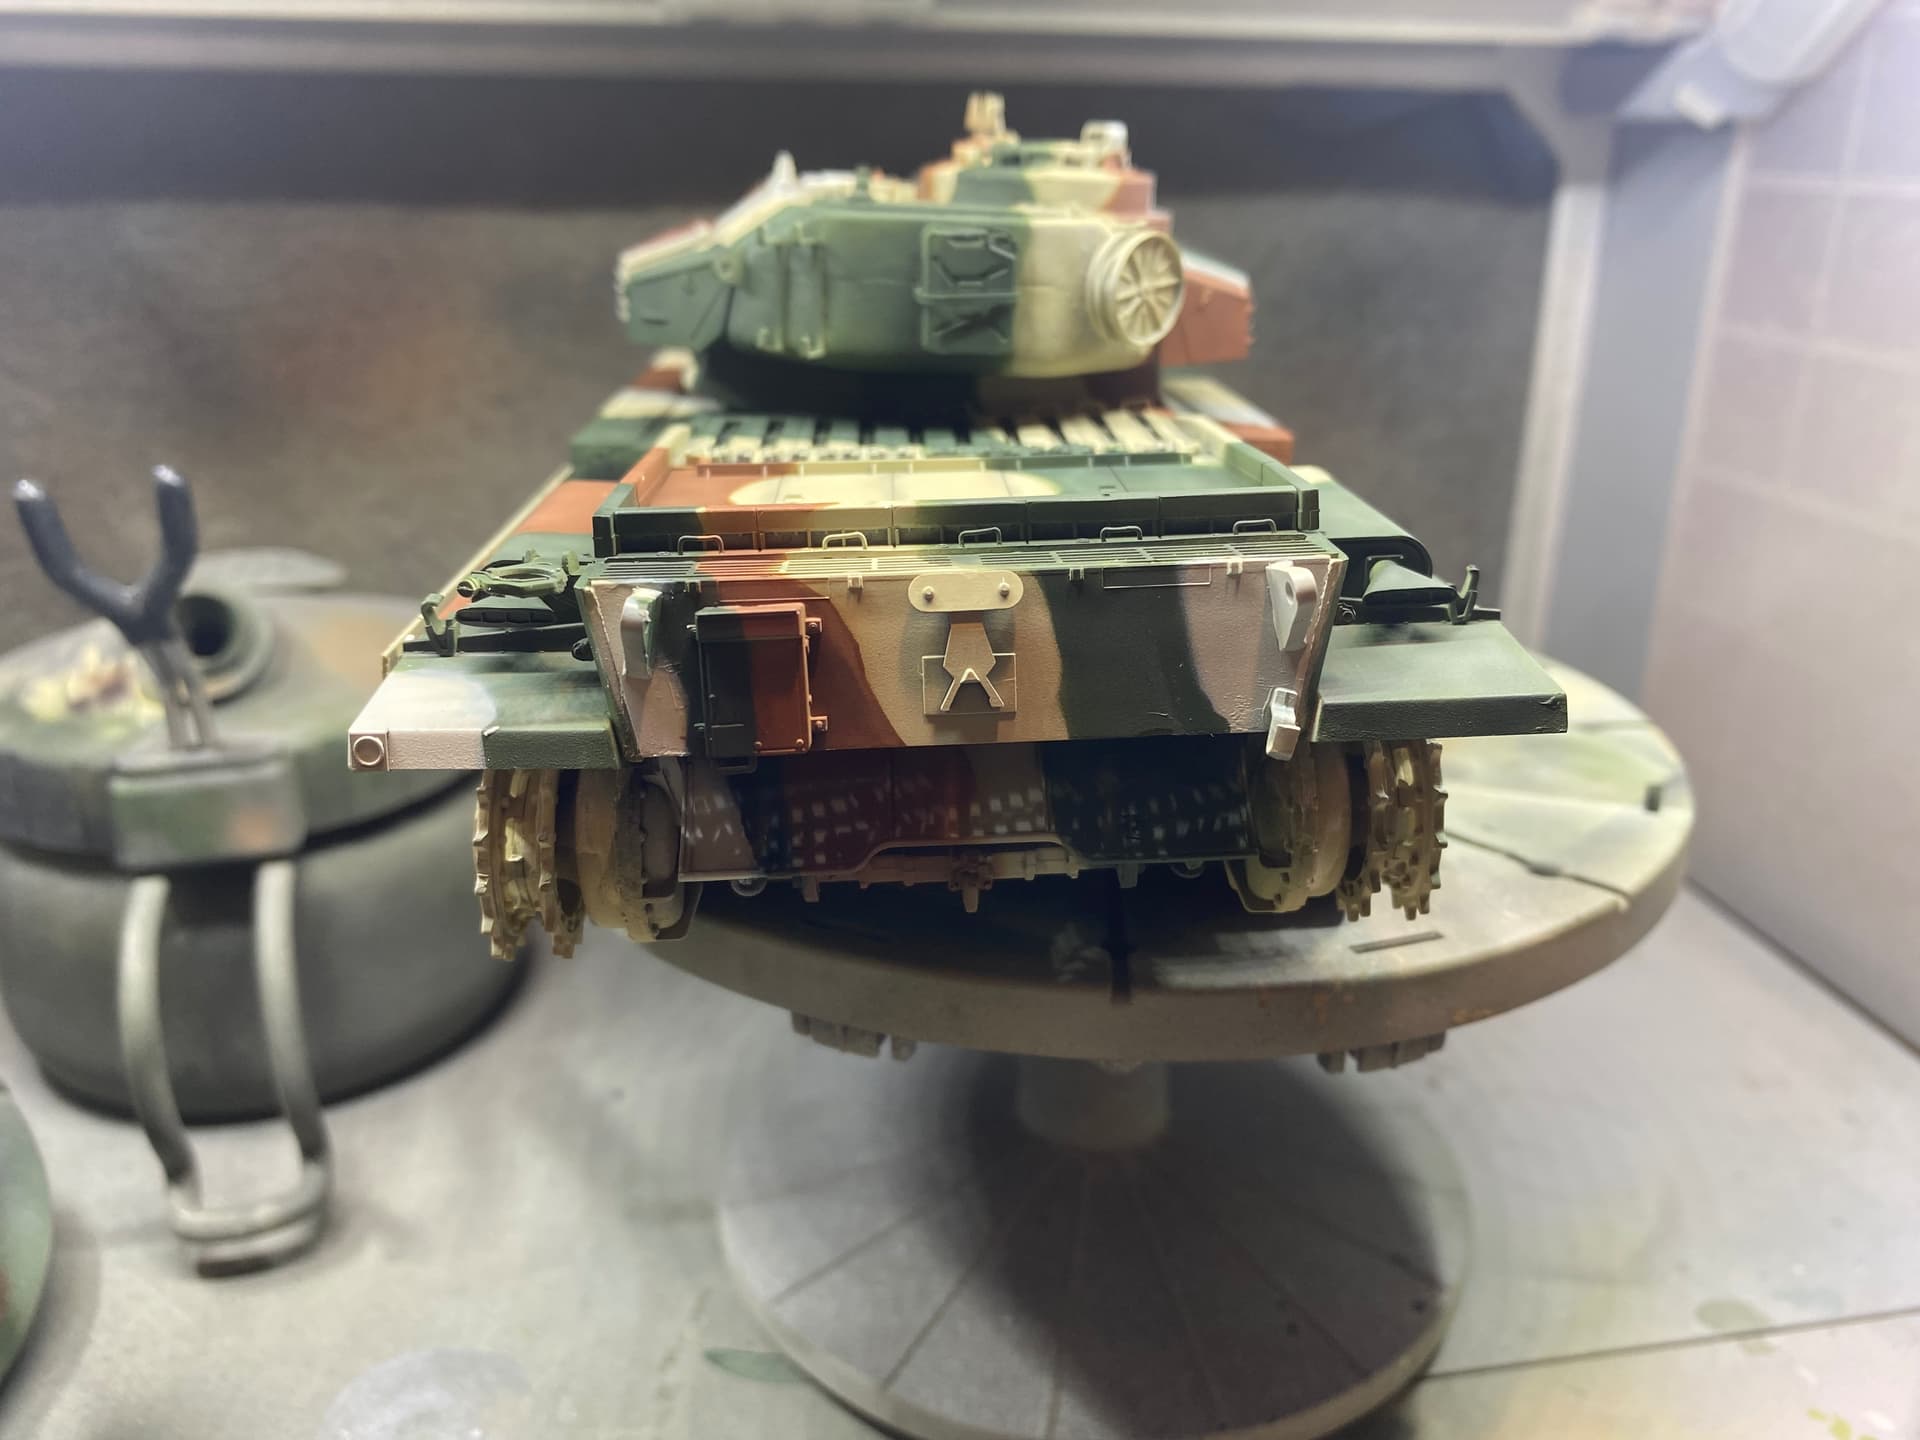
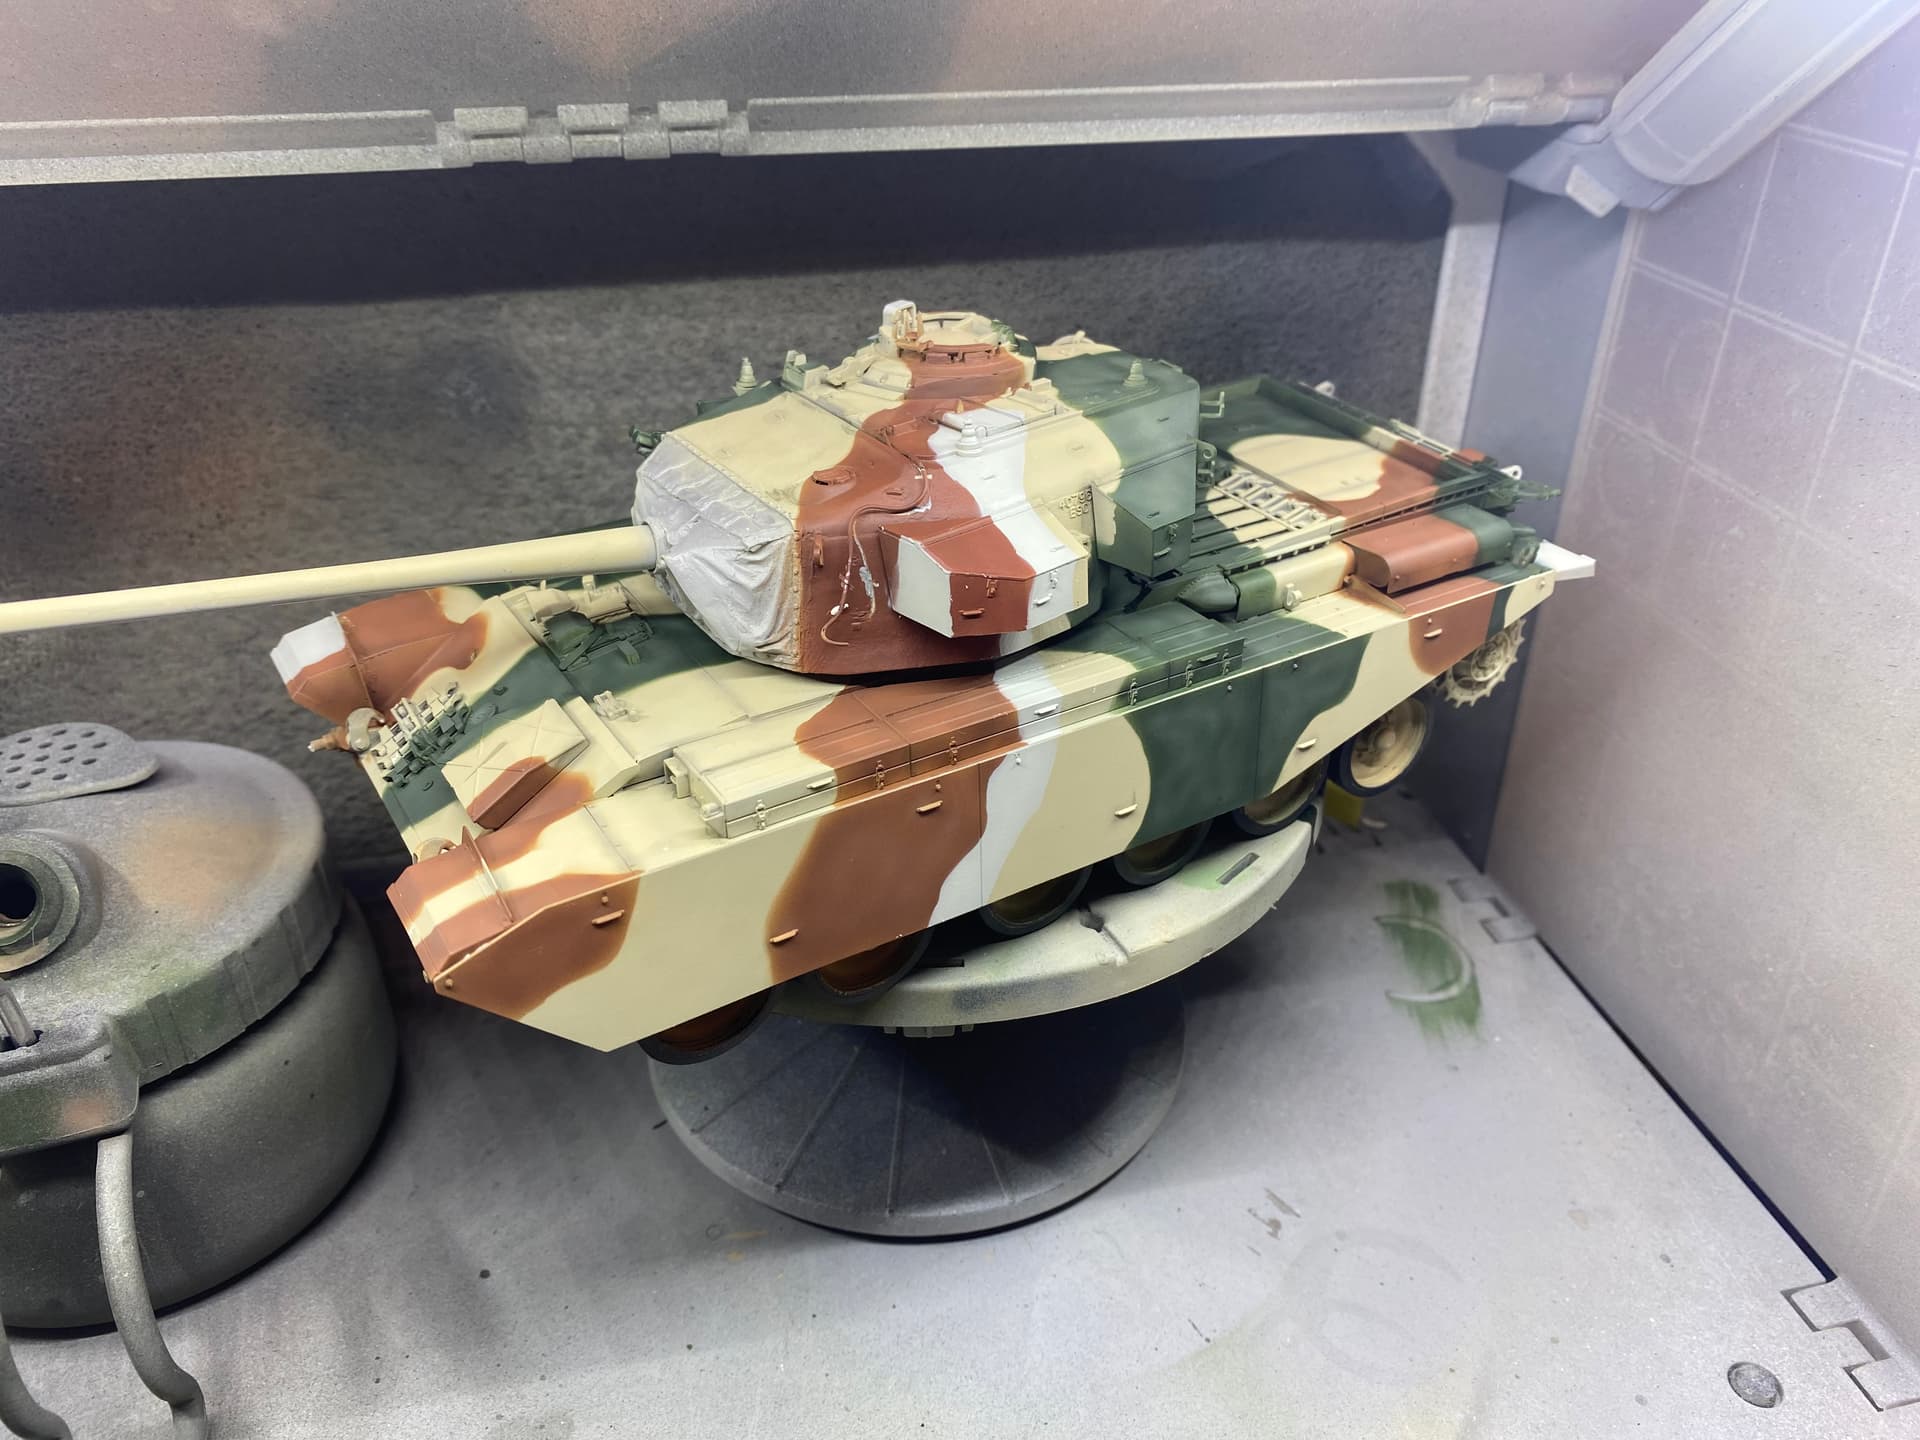
Grey is down.
Mostly IDF Duck Egg Blue with some darker grey to bring it back out of the blue spectrum.
I think it looks the part.
Need to make one final pass with the sand colour to clean up some edges, and then the mantlet cover and green/brown/black on the barrel.
Sadly with all the on/off masking I’ve managed to lose a headlight, the cover for the gunner’s periscope and ripped of the port side smoke discharger. The smoke I can fix, but the other two parts are gone forever.
6 Likes
Brilliant! Yeah, I find an inventory is needed after each demasking, I’ve found small parts deeply embedded in blutac blobs before. Looking great.
1 Like